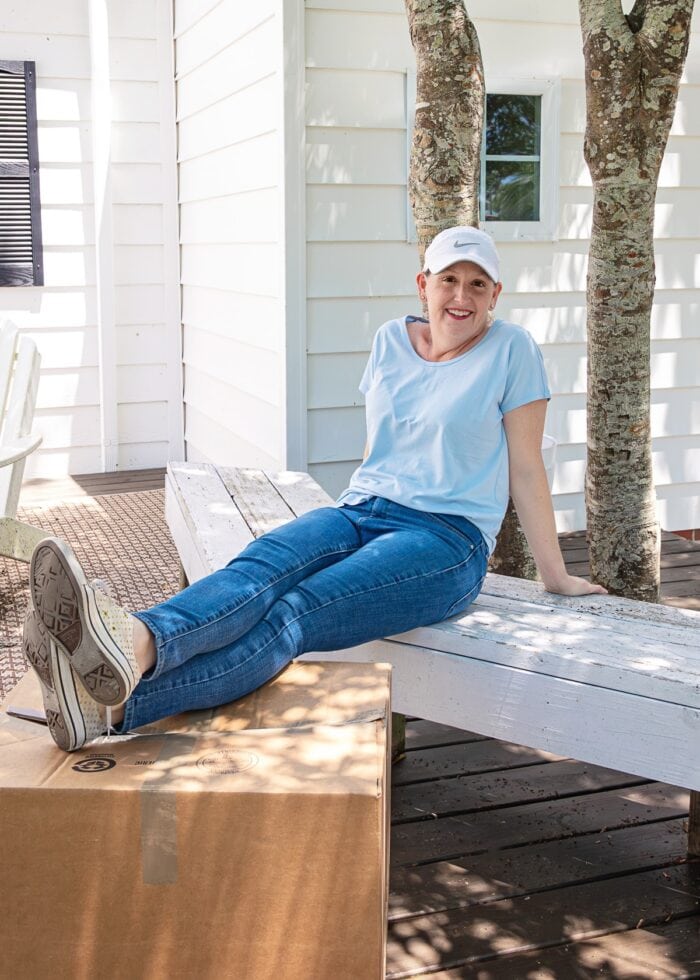
Our Camp Lejeune Watson Home | The Final Tour
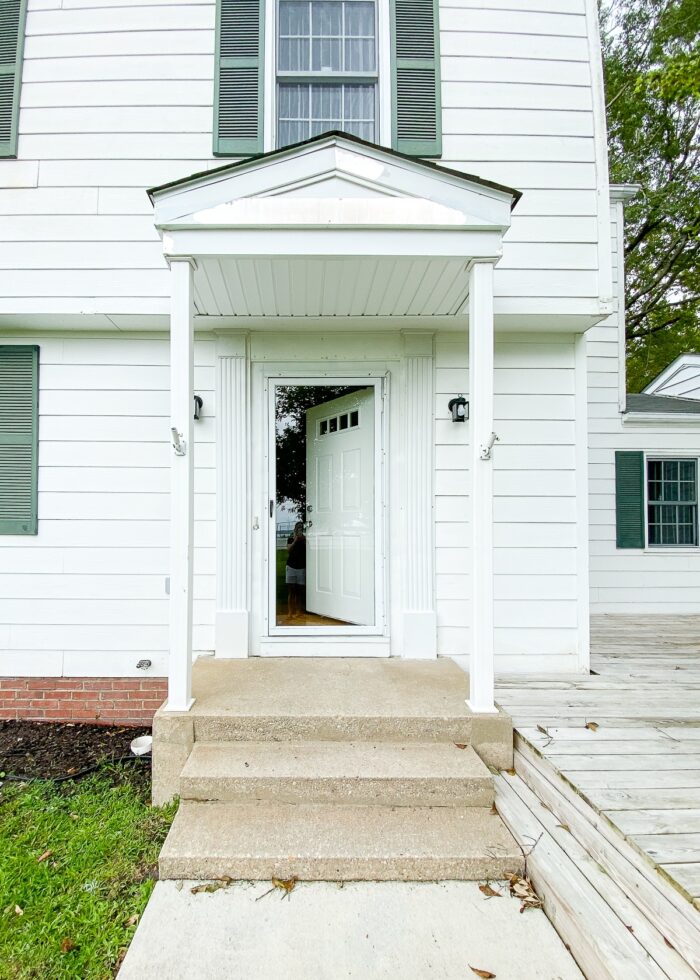
In the Summer of 2022, my family moved into one of the iconic two-story homes (Watson floor plan) in Paradise Point aboard Marine Corps Base Camp Lejeune, NC. I was immediately smitten with the high ceilings, wood trim, original pine floors (upstairs and down!) and the large layout. To say I had plans for this house would be an understatement; and I started making it our own before our moving truck even pulled into the driveway.
When we moved out of this home two years later (Summer 2024), almost every single surface had been given the “Megan touch.” I took on ambitious makeovers, experimental DIY solutions, and really pushed the boundaries of what you can, can’t, and shouldn’t do in a rental home.
All this time later, looking back at everything we did to this house is pretty humbling. I can’t believe how much we changed in such a short span of time. (And if I’m being honest, it’s no wonder this house will forever go down as the one that burned me out.) That said, I’m so very proud of this home; and my only regret is that we didn’t get enough time to really enjoy it all.
Today, I’m (finally!) closing out the Camp Lejeune chapter here on the blog, giving one last look at this entire house, recapping all the projects we did, and sharing some final reflections as I go. Let’s get to it!

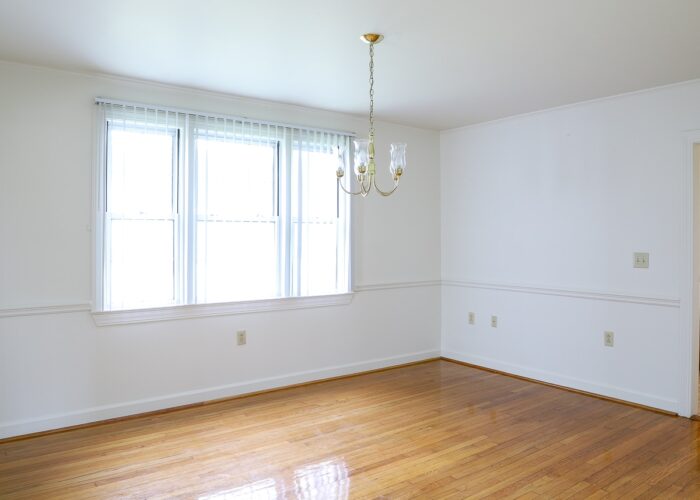
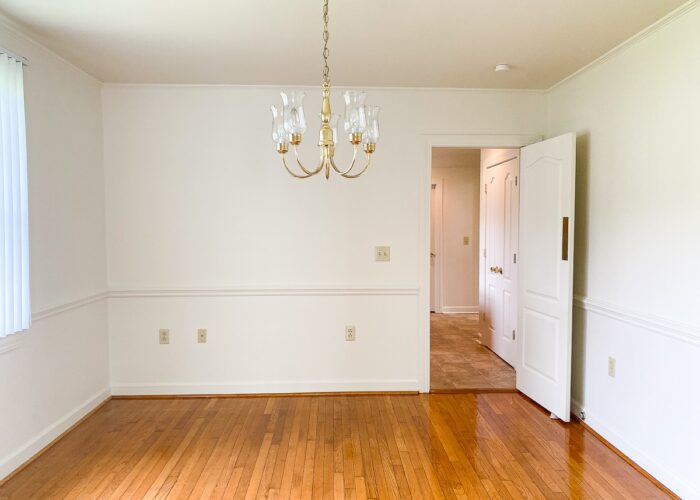
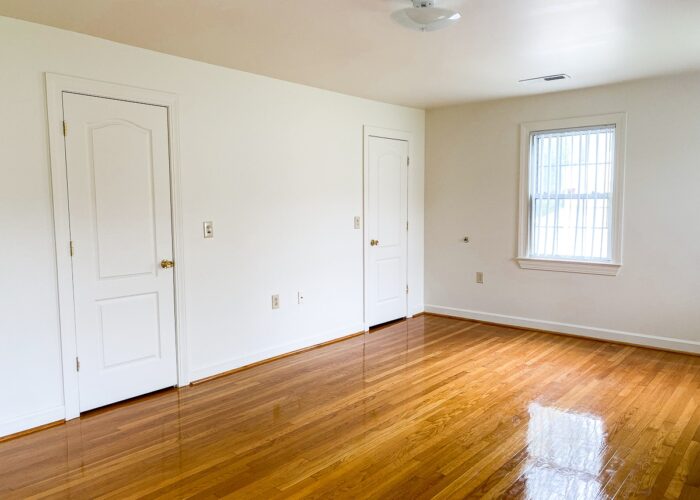
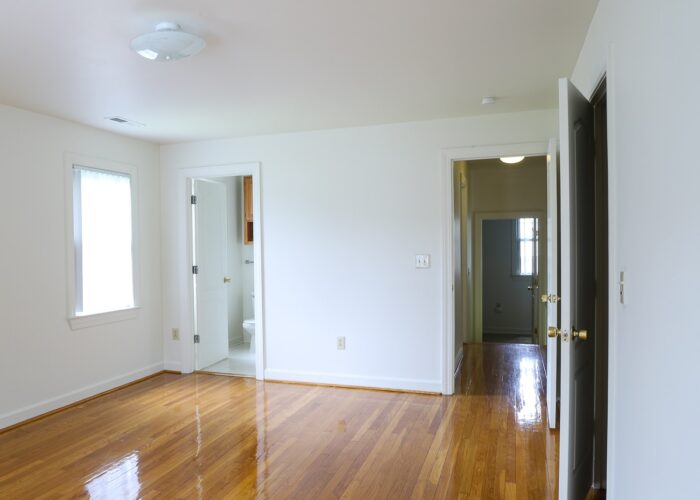
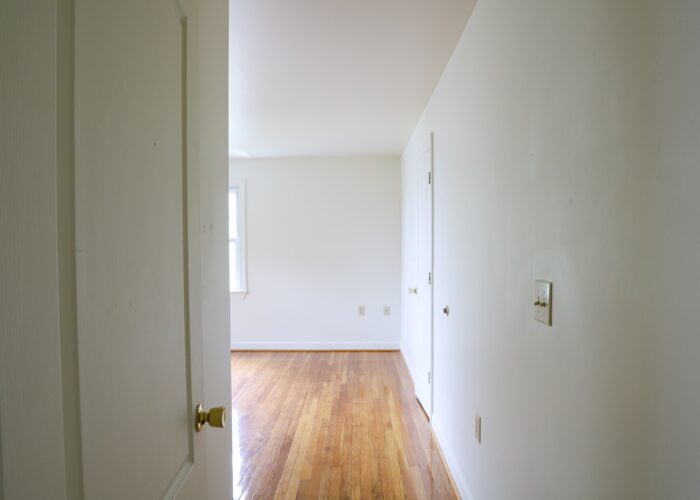
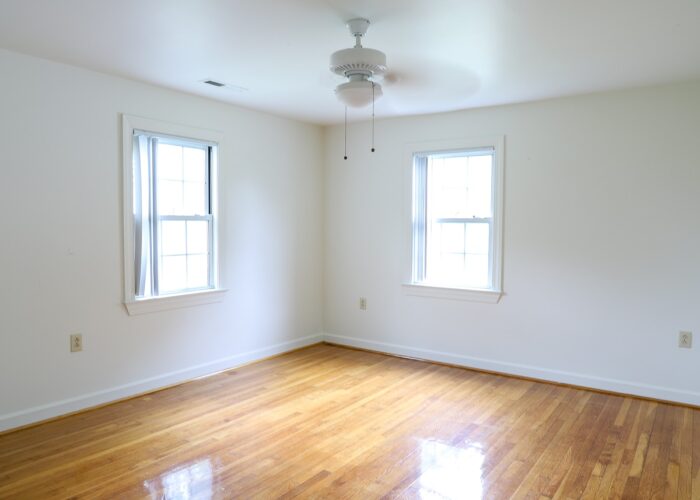
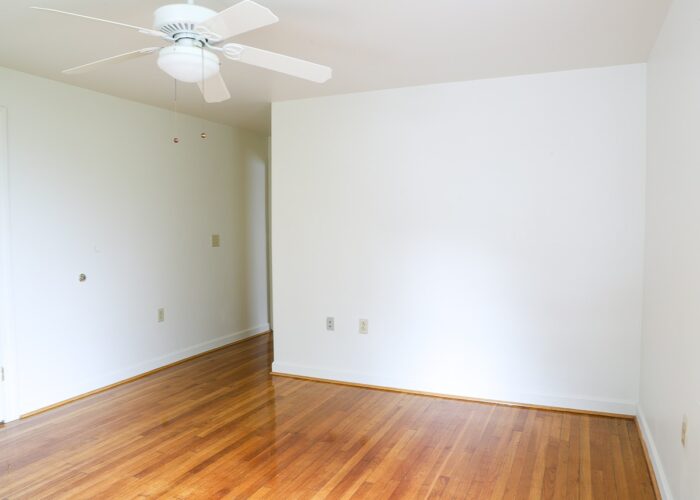
Before
I’ve sprinkled many of the before photos throughout this post for easy reference. But if you’d like to see the entire empty house in more detail, refer to my Before Tour here: The Watson 2-Story Home on Camp Lejeune | An Empty Home Tour
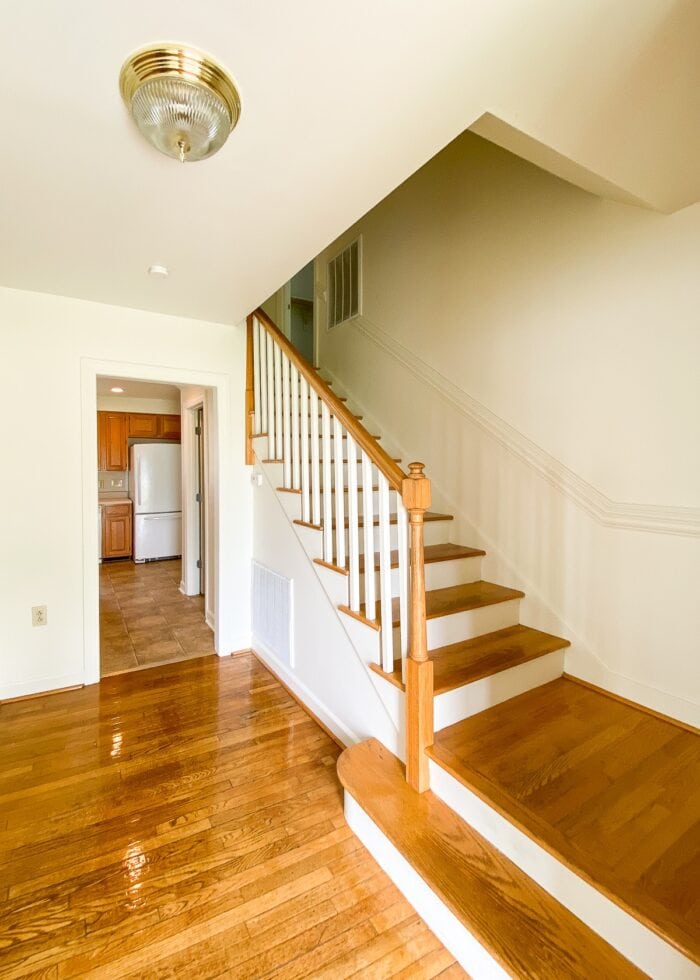
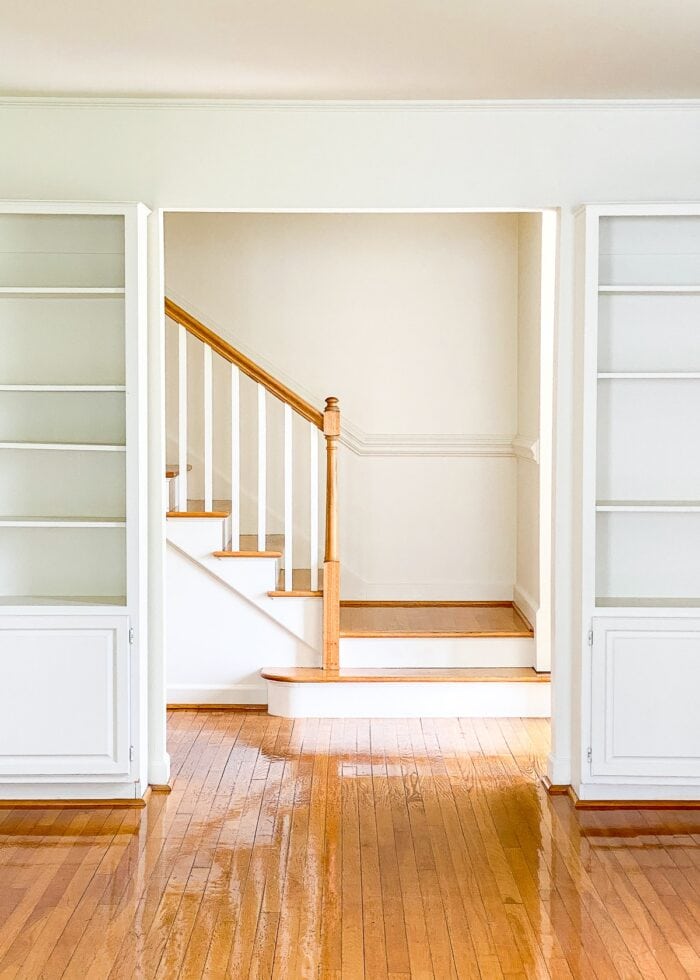
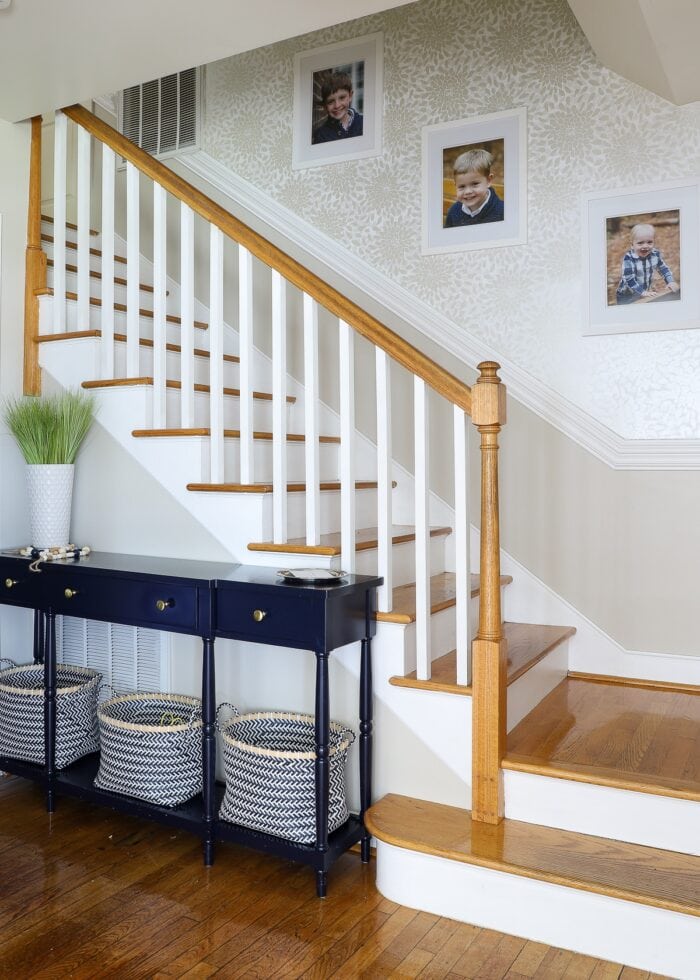
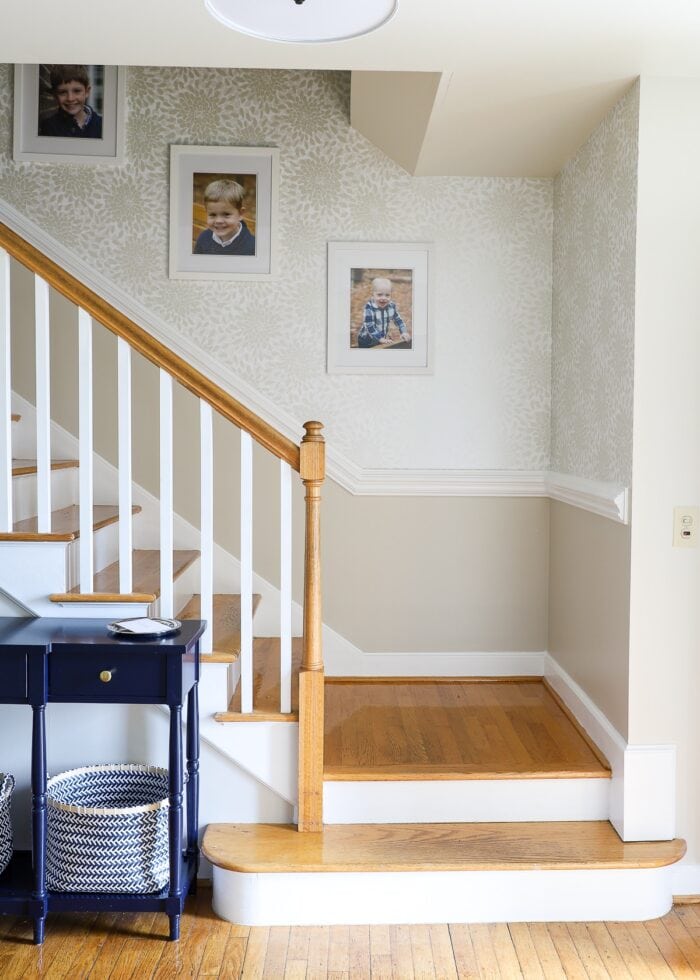
The Foyer
The foyer is the very first space we tackled because I had a crystal clear vision for this staircase before we were even handed the keys.
Beyond painting the walls Edgecomb Grey and all the trim, spindles, treads, and closet doors bright white, installing the Toss the Bouquet paper was one of the most daring yet gratifying wallpaper installations I’ve ever done.
Complete with a new light fixture and minimal furniture, this foyer was equally show-stopping and stylishly subtle; and it was the perfect way to invite guests into our home.
- Wallpapering a Stairwell | Tips You Need to Know!
- What You Need To Know About Changing Light Fixtures In Your Rental
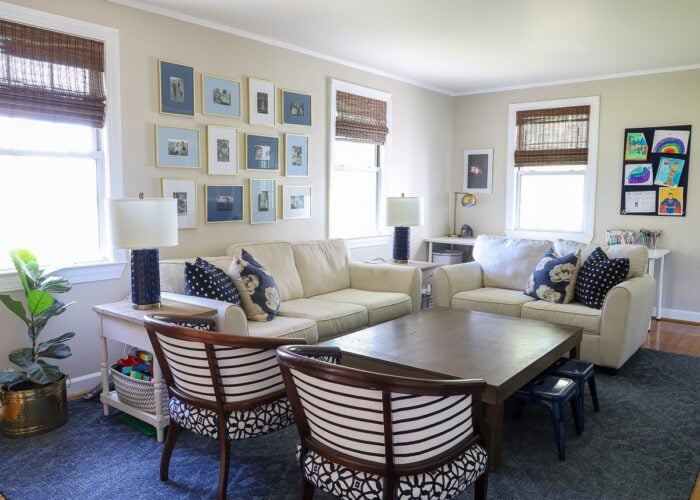
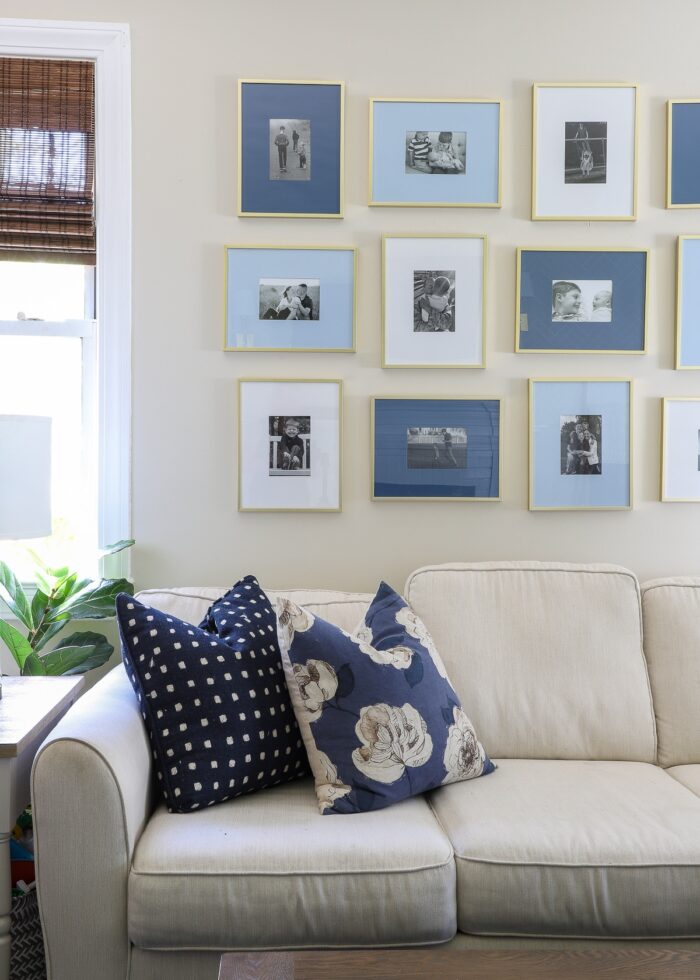
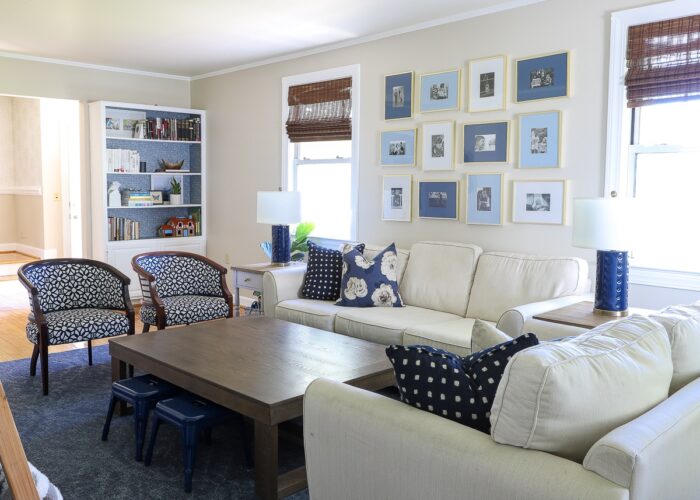
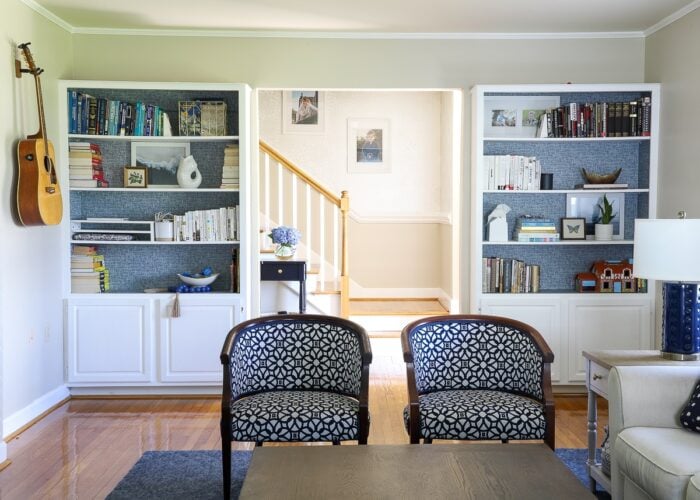
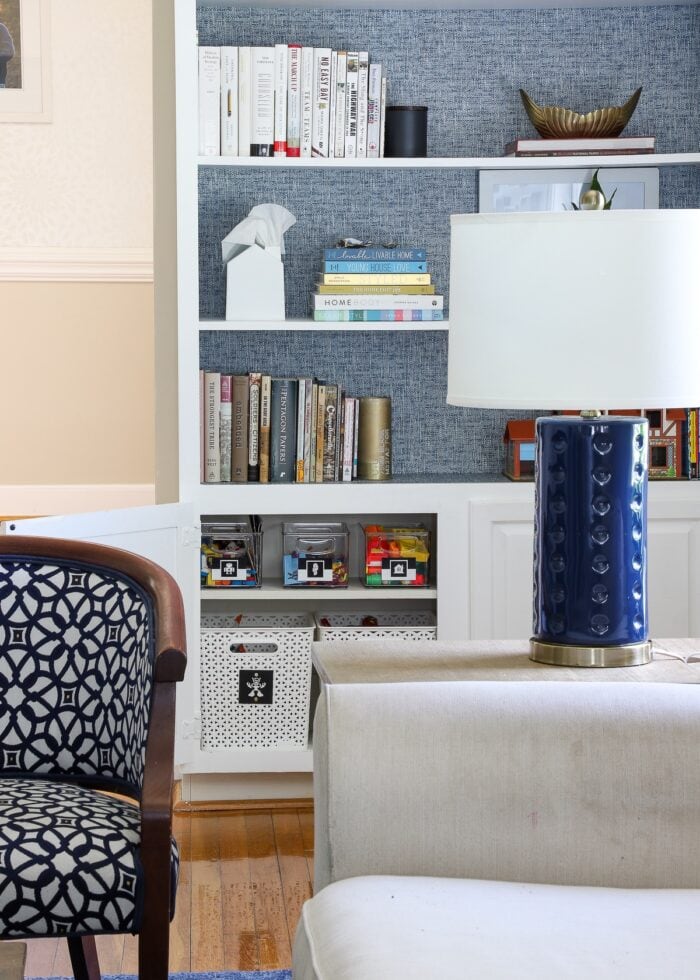
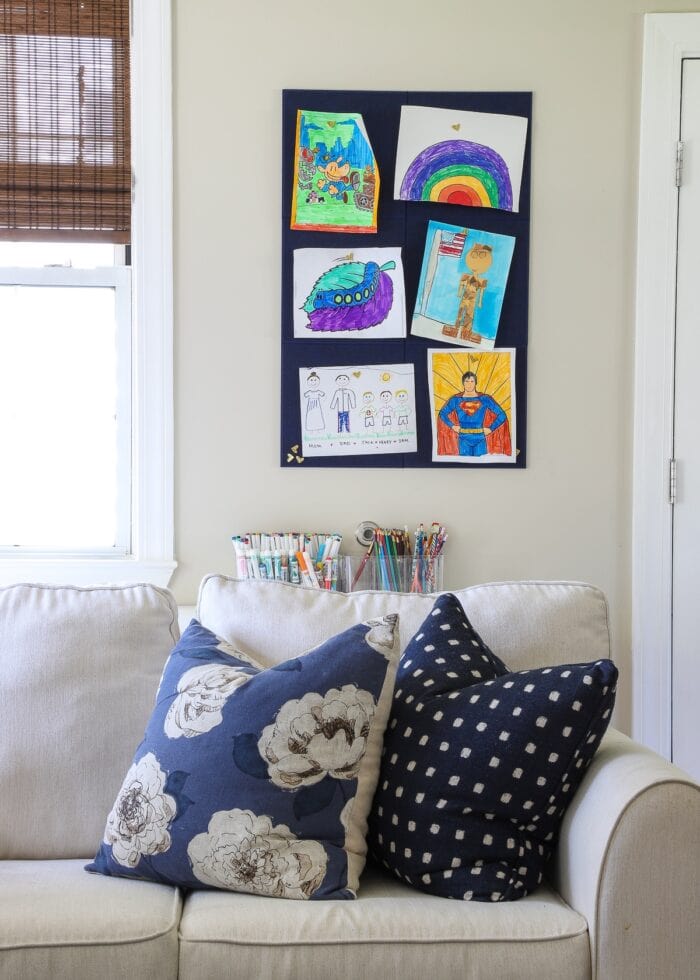
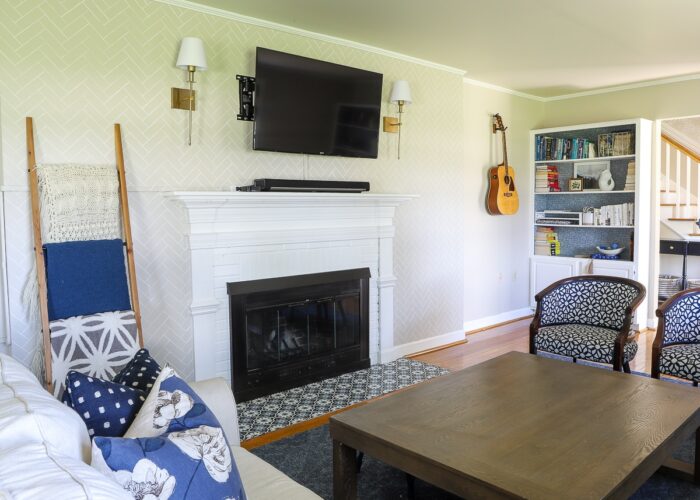
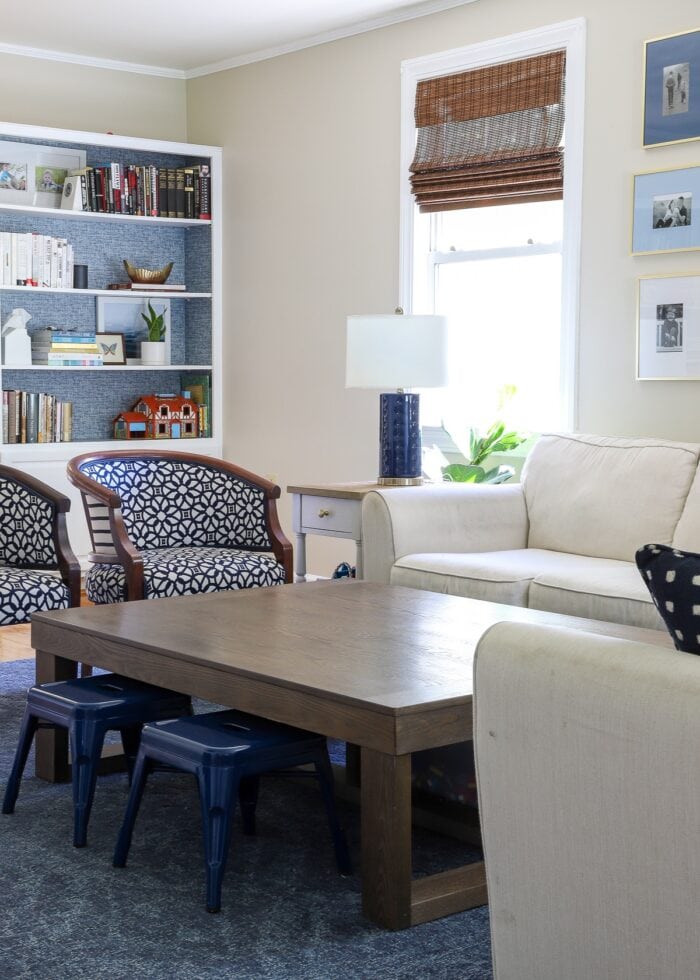
The Family Room
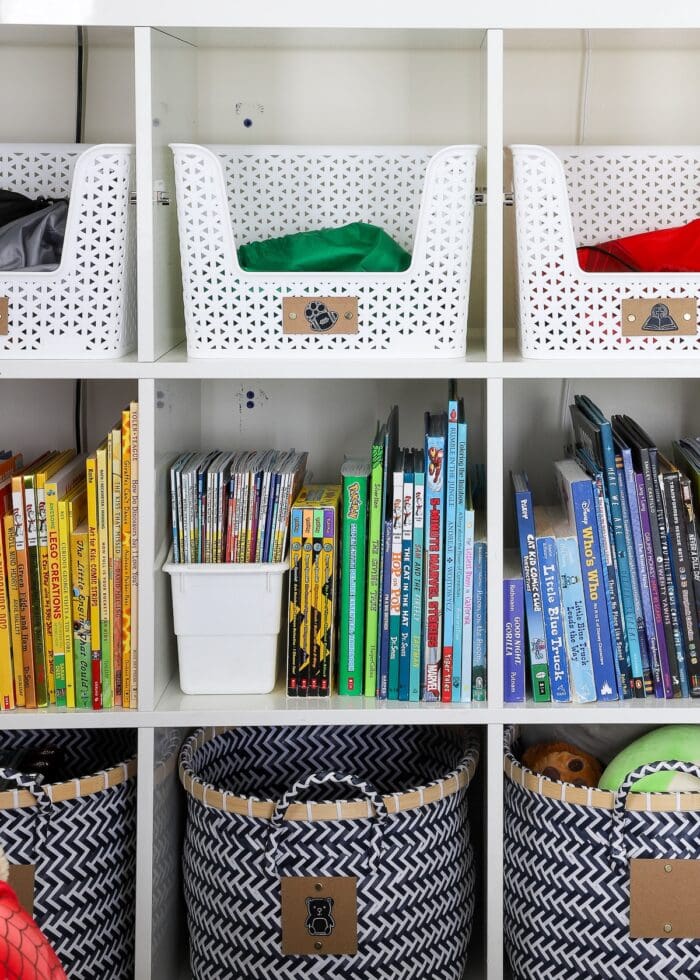
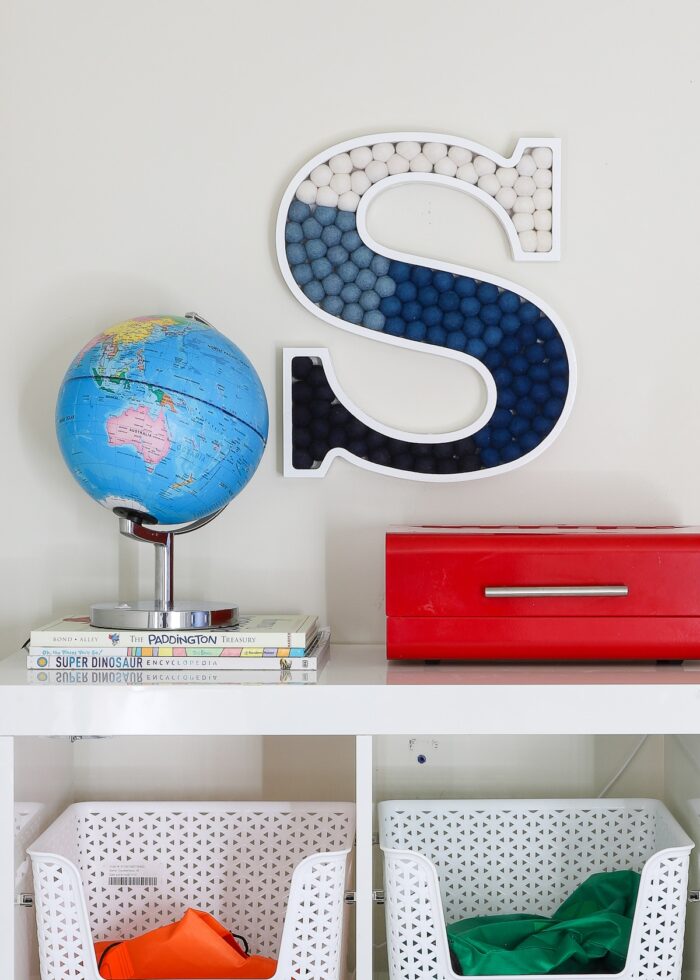
The family room, right off the foyer, was a huge room (25′ long!) that served multiple purposes: family room, play room, and kids’ art space.
This room didn’t come together in a straight line from start to finish. Rather it was a series of isolated projects, over the entire span of two years, that ultimately brought it to a cohesive completion.
I have a tendency to over-think our main family spaces (and ultimately get them wrong), but this is a room that ended up the perfect balance of functional for our family yet stylish enough to host guests and parties!
- Final Reveal: Revealing Our Cozy Family Room (That I Finally Got Right!)
- The Rugs We Purchased for Our New Home (& Why)
- Stylish Large Coffee Tables (That Are Affordable Too!)
- How to Remove Vertical Blinds | It’s Easier Than You Think
- Installing Your Own Blinds or Shades | It’s Easier Than You Think!
- How to Wallpaper the Back of a Bookcase | Step-by-Step
- How to Style Bookshelves (When You Actually Need Them to Hold Stuff)
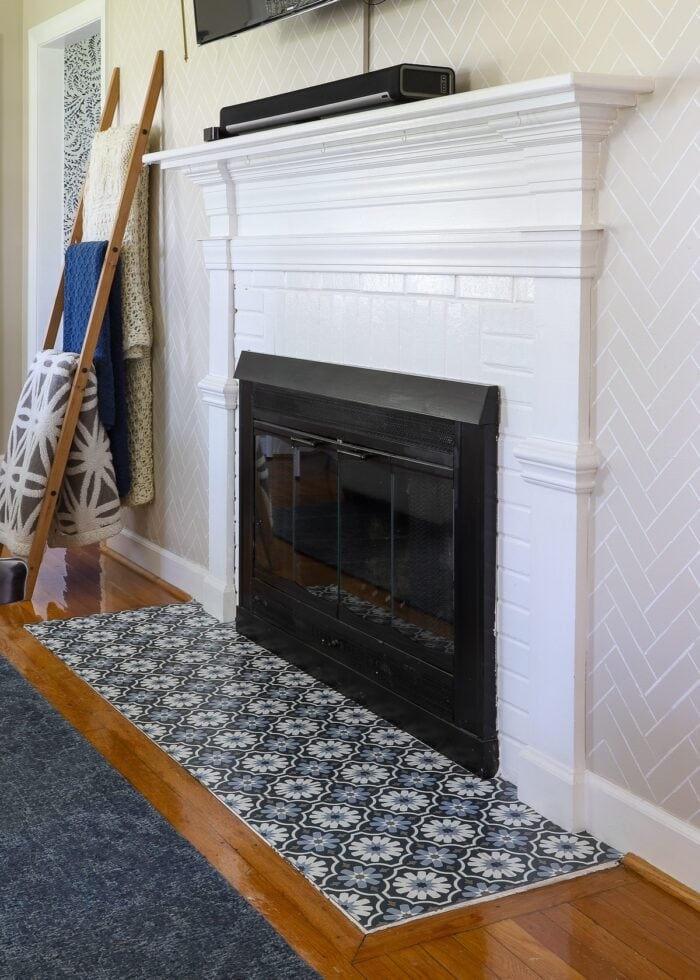
- Renter Friendly Fireplace Makeover with Peel & Stick Tiles
- Look for Less: How to Stencil a Wall to Look Like Wallpaper
- How to Hide TV Wires Above a Fireplace (When You Can’t Go Through the Wall)
- Renter Friendly Wall Sconces | Without Hard Wiring or Puck Lights!
- No Playroom? Try These Toy Storage Ideas for the Living Room
- How to Make Your Own Printable Toy Bin Labels (With Template!)
- How to Set Up a Kids Art Station | 10 Essentials to Include
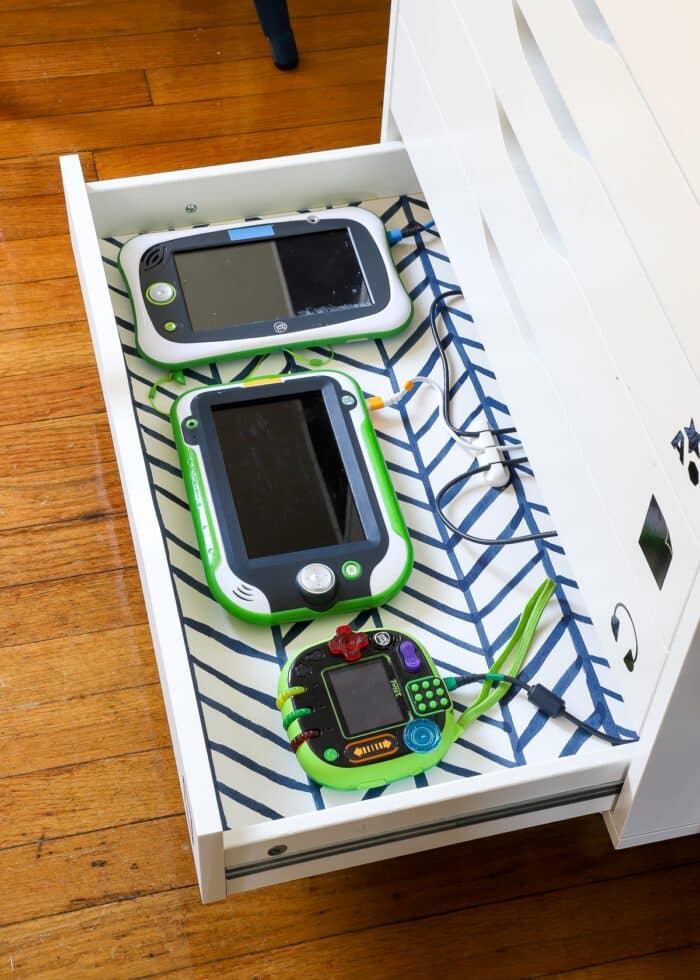
- DIY Charging Station In a Drawer | Easy 1-Hour Project!
- The Best Way to Line Drawers & Shelves with Pretty Paper


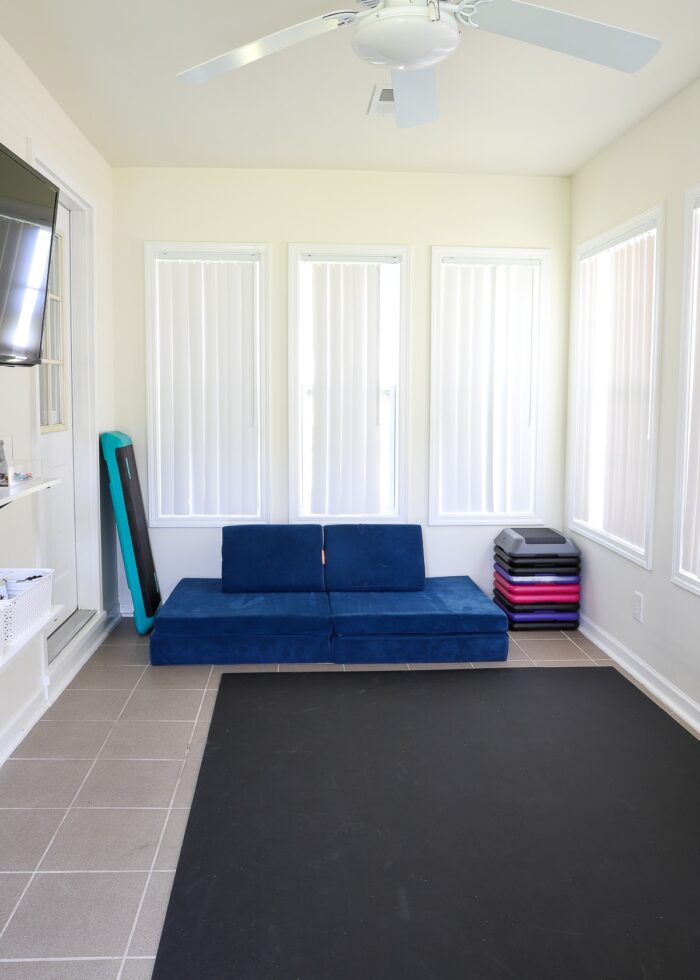
The Carolina Room
Right off the family room (and also connected to the dining room through another door) is a space I haven’t shown here at all (except for the original before tour!): the Carolina room. This room didn’t really get a “decorative” makeover by my usual standards. But it became one of the most-used rooms in our home, thanks to some simple yet really smart choices!
We opted to use this room as a workout room + video game/tv watching space. And you better bet, we all used it pretty much every single day!
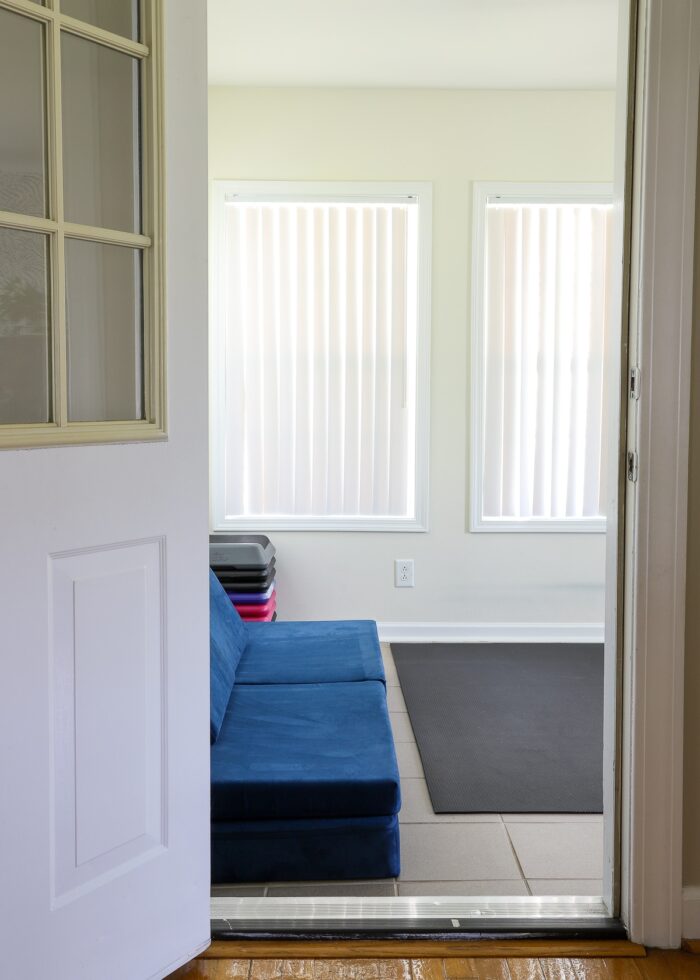
The “usual” setup for this space was our large exercise mat on the center of the floor, with our weights and other equipment along the short sides of the room.
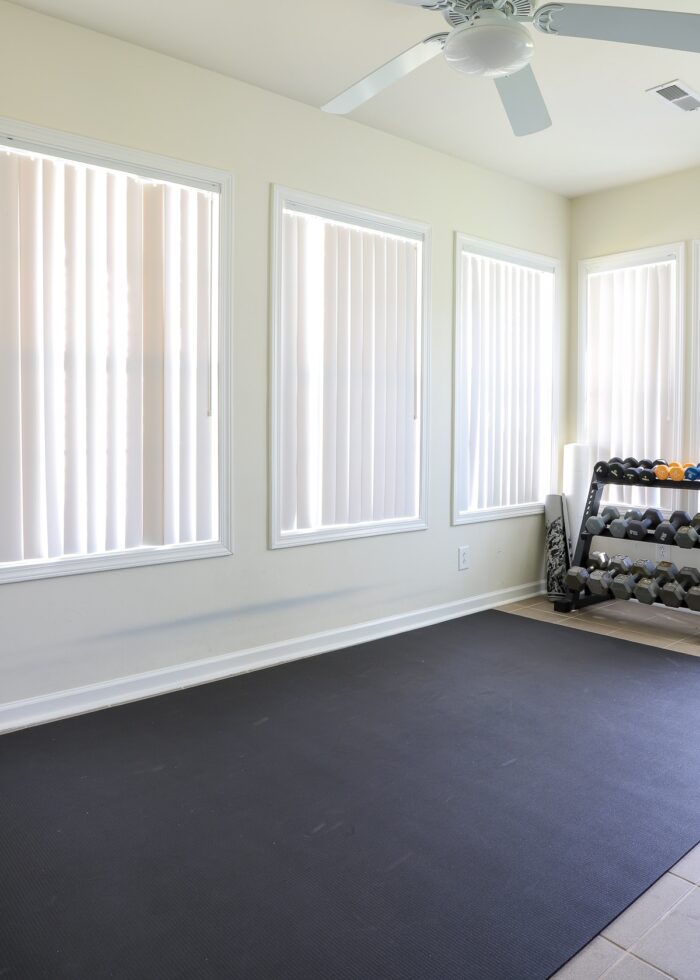

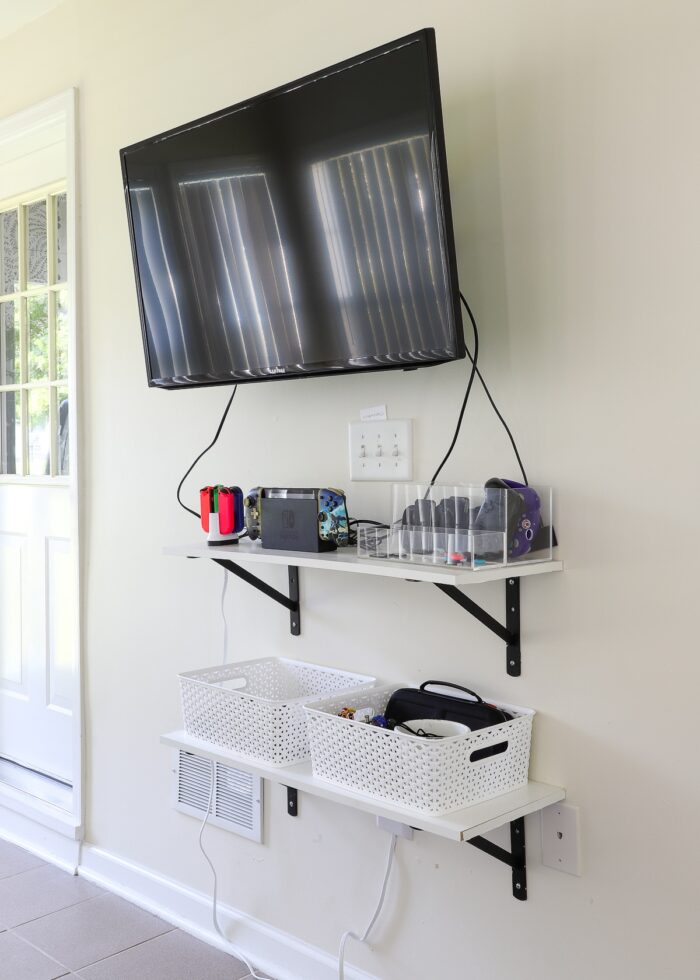
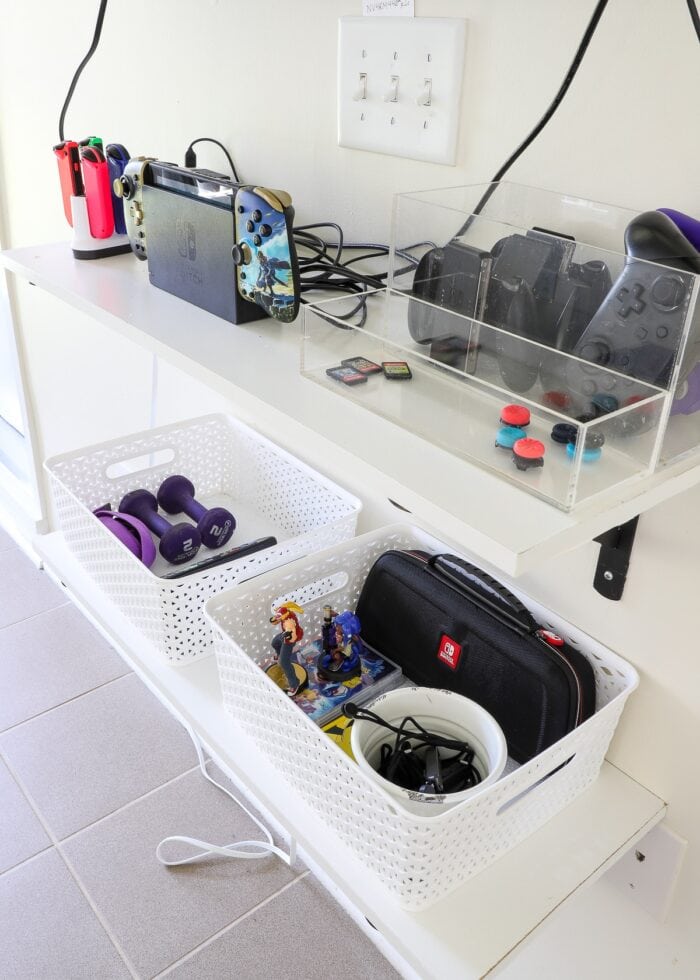
On the skinny wall between the two doors (across from the exercise mat), we mounted a TV and some simple shelving to hold exercise equipment (and more importantly) gaming accessories.
Although I never got the cord situation cleaned up, this setup was surprisingly functional for both exercising and gaming!
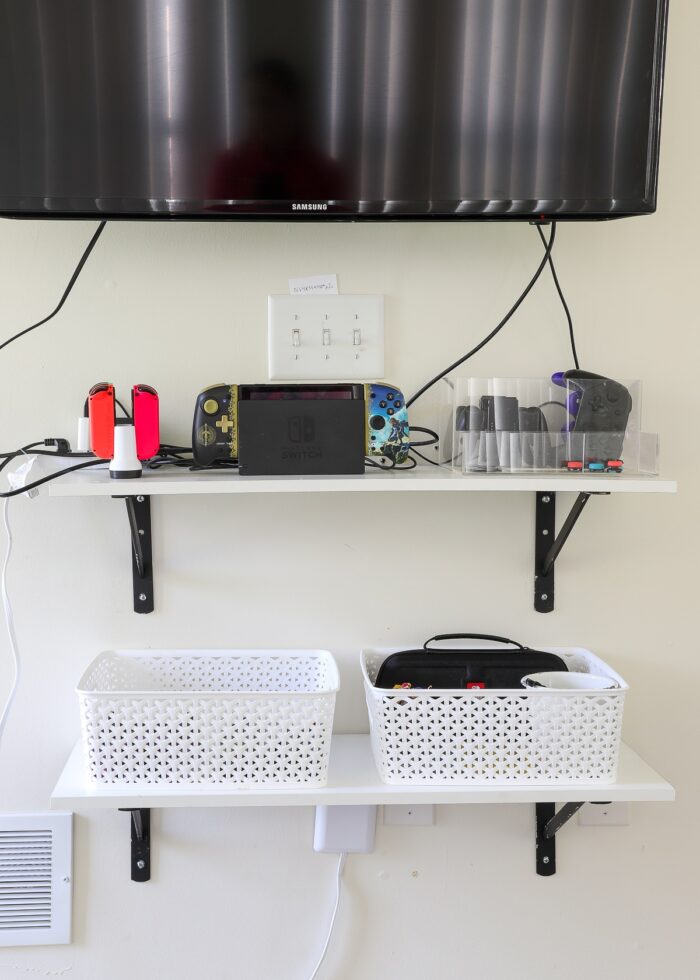
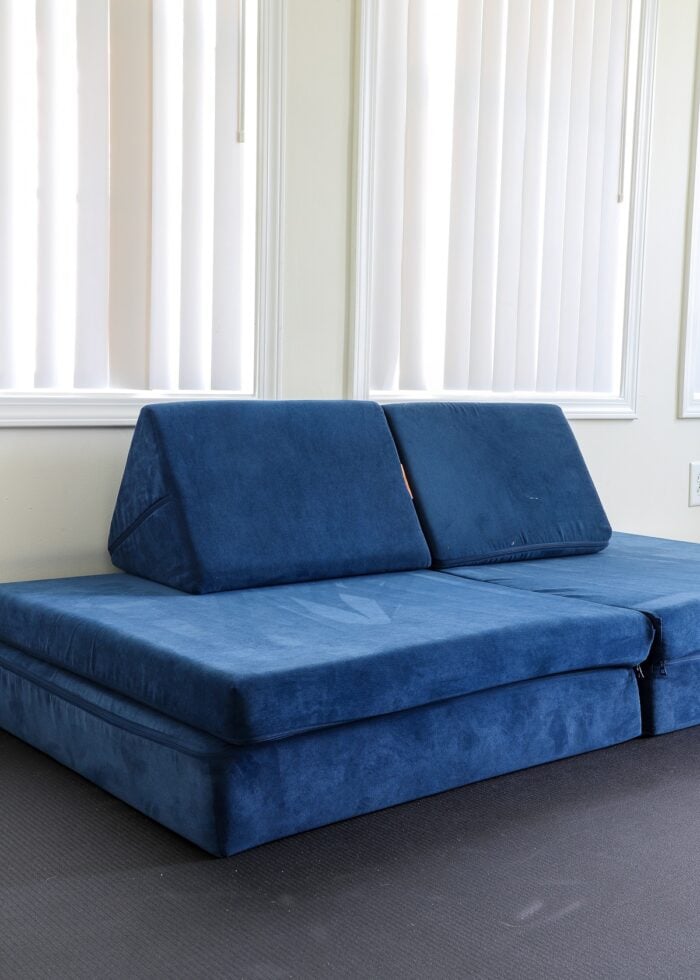
I want to highlight where and how we used a Nugget in here! I’ll admit when I bought this trendy play couch, I had no idea how useful it would really become. Because it’s so lightweight and easy to move, it allowed us to double-purpose this little room without any commitment or hassle.
Most of the time, the Nugget sat along the side of the room, as shown below. (And when my youngest would get up early while I was exercising, he’d sit/lay right there and watch me!)
But when the kids wanted to watch their shows or play video games or have friends over, it was SO easy to drag the Nugget over and make seats for everyone as needed.
Nope, this room wasn’t beautiful by any means. And if we lived in this house longer, I would have likely gotten to it eventually. But boy, did this fitness + game room setup work so well!
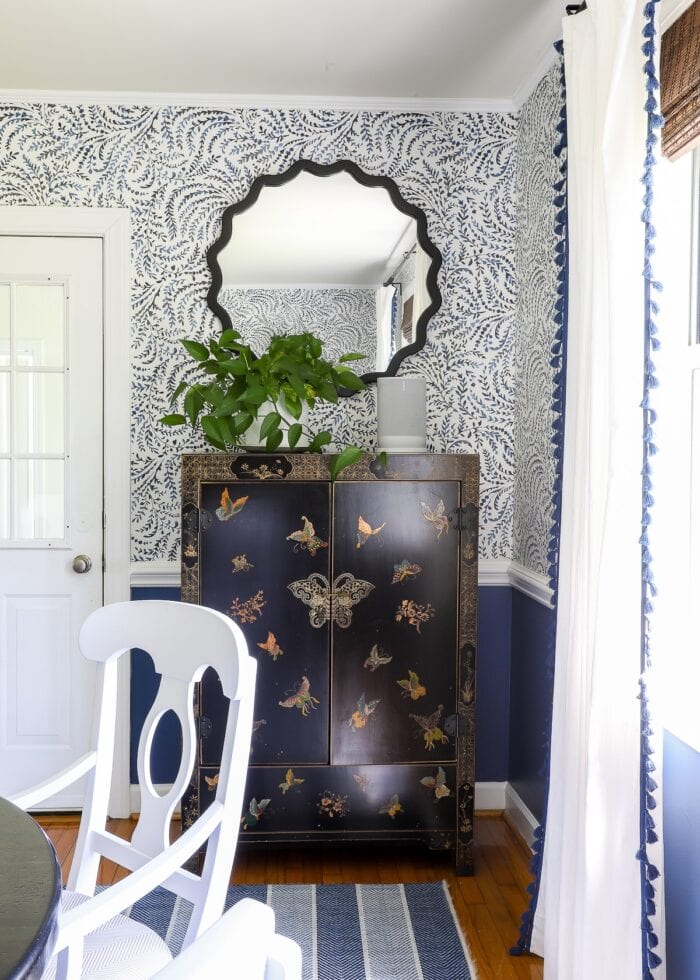
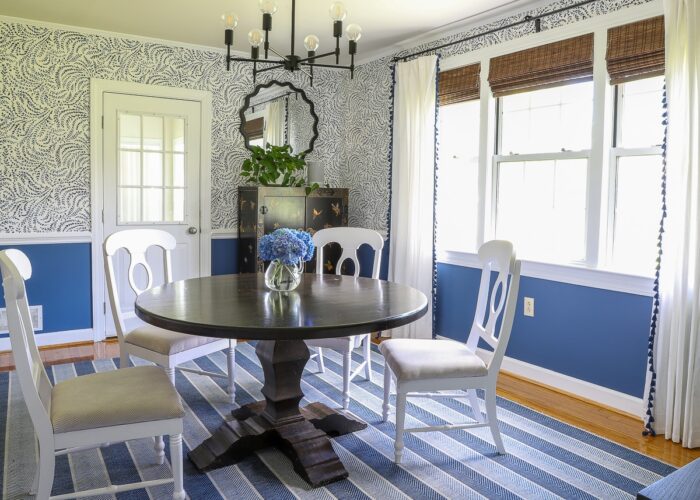
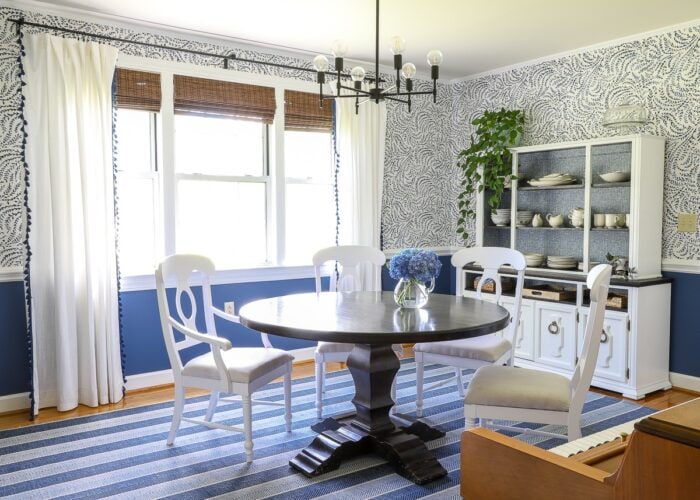
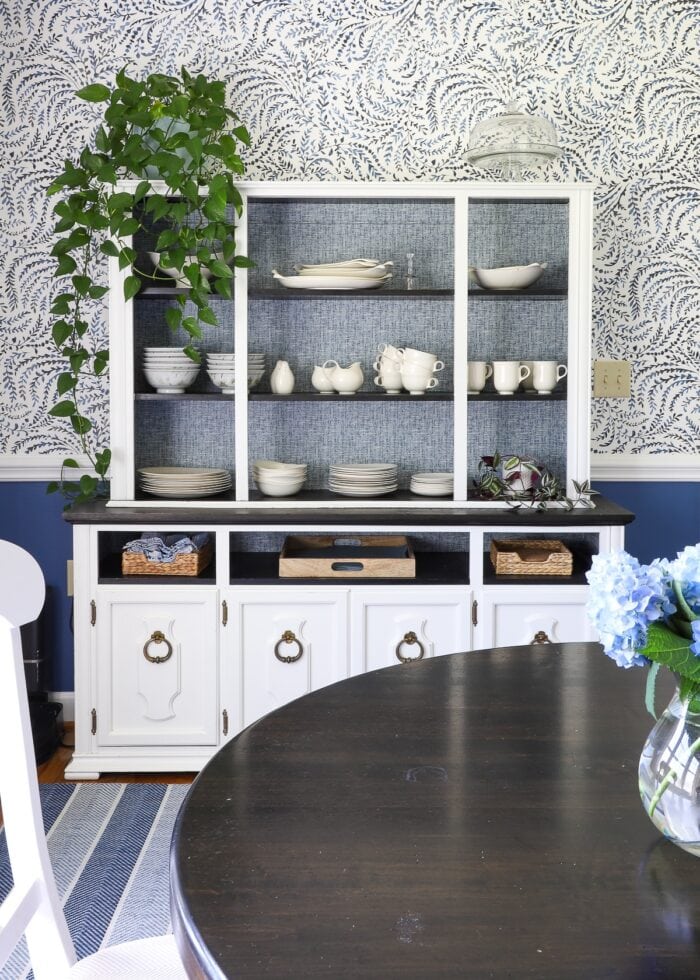
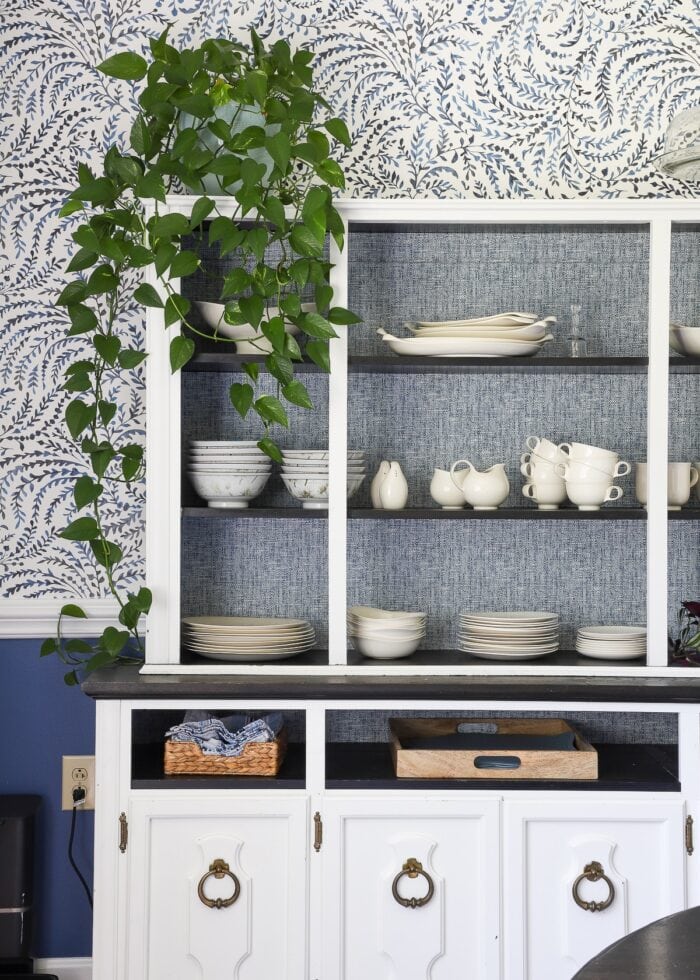
The Dining Room
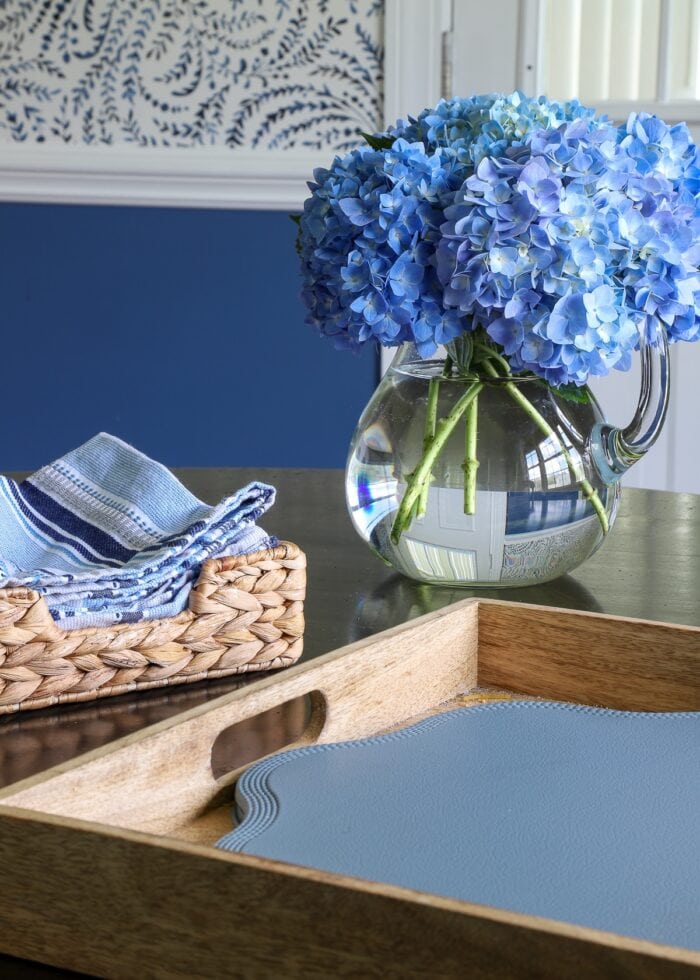
Without a doubt, the dining room was my favorite spot in this entire house (and maybe even a favorite of all time!) The combination of blues, whites, and blacks felt both classic and modern, and everything in here fit together almost seamlessly.
It’s not that the projects themselves were a piece of cake – both the full room wallpaper and the chair makeovers were some of the toughest I took on across the entire house. But each decision, each addition, each choice felt natural and easy and fortuitous.
I can’t say for sure if it was the delightful process or the stunning result that left me most smitten with this particular room makeover!
- Final Reveal: A Stunning Rental Dining Room Reveal (My Favorite Makeover Ever!)
- Wallpapering a Whole Room Versus an Accent Wall | What I Learned
- How to Paint Dining Chairs (& Get Professional Results!)
- How to Cut Upholstery Foam | Easy & Precise
- A Rug Under the Kitchen Table | Yes, Even With Messy Kids!

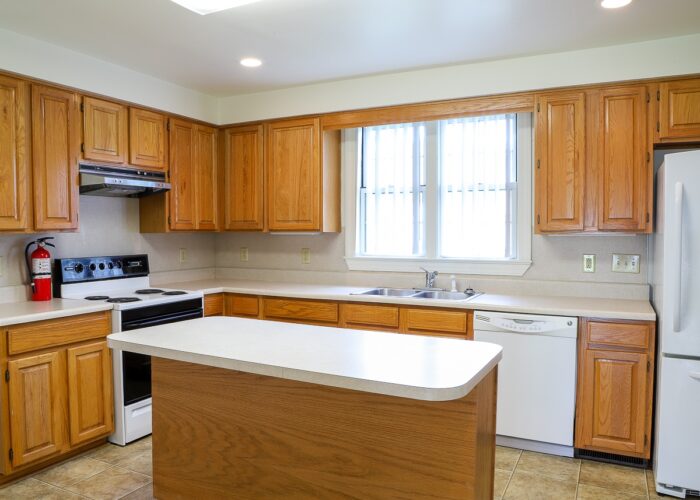
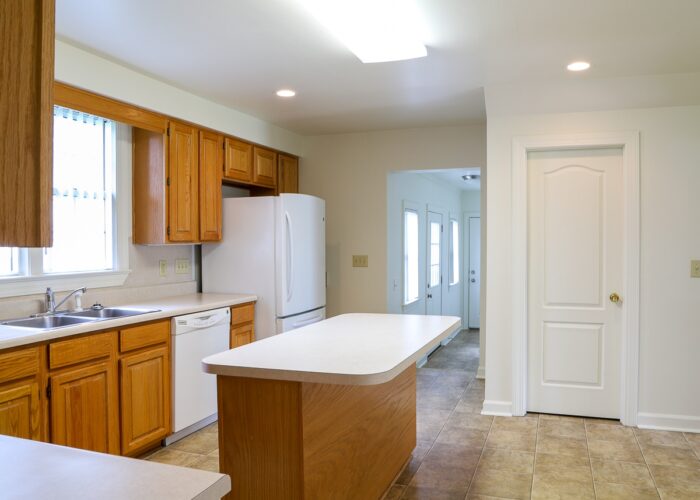
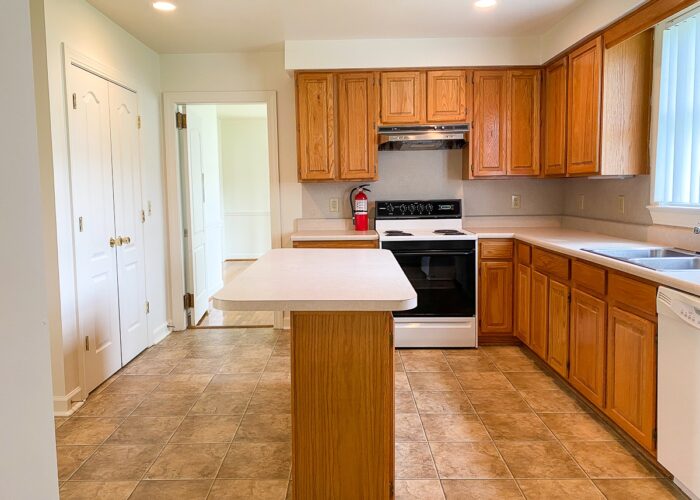
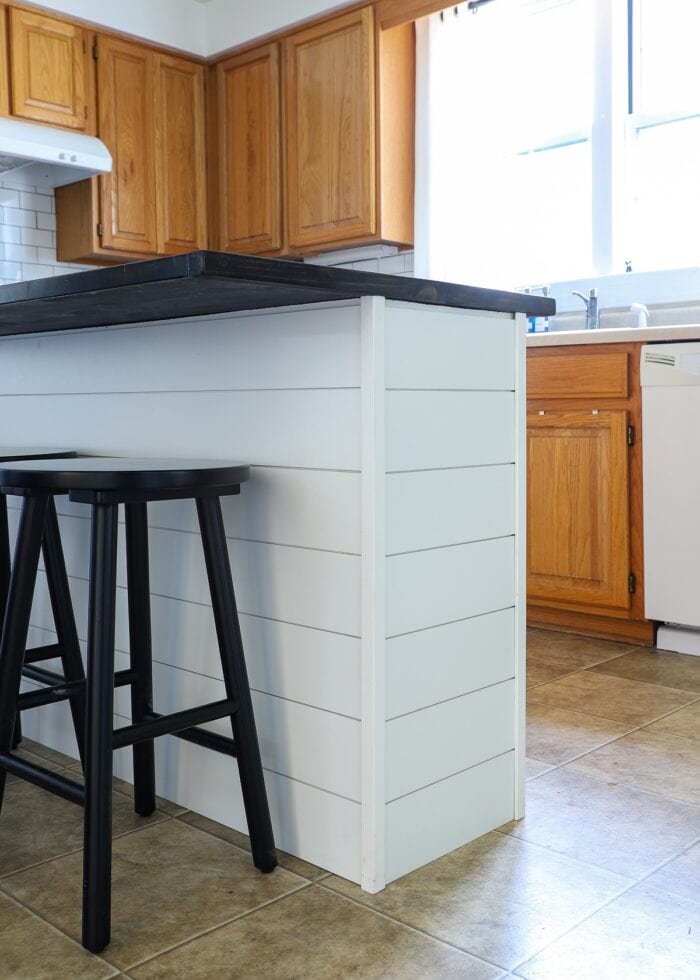
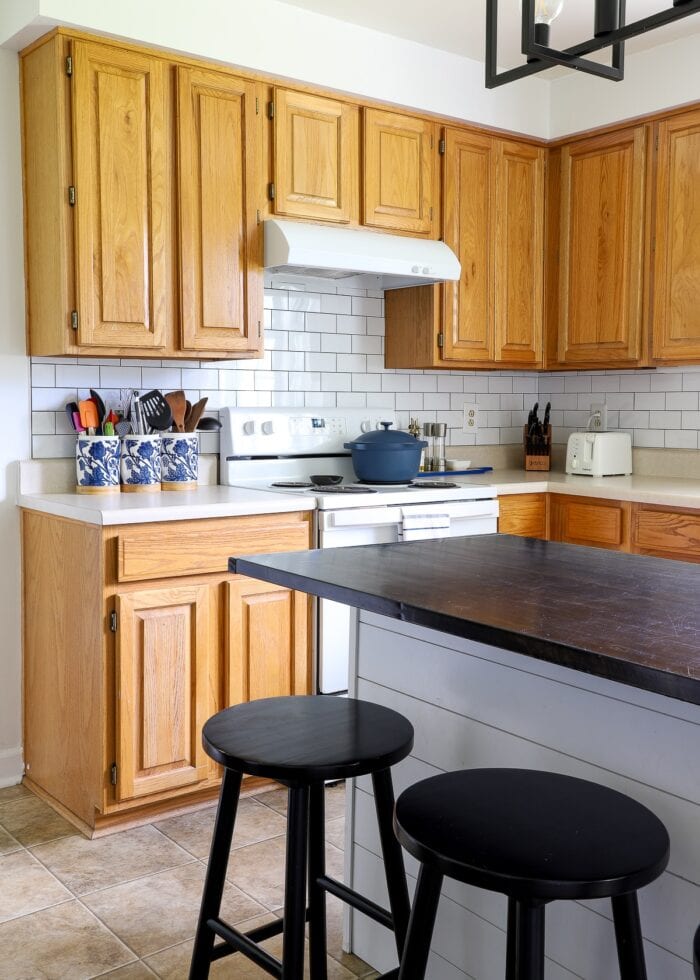
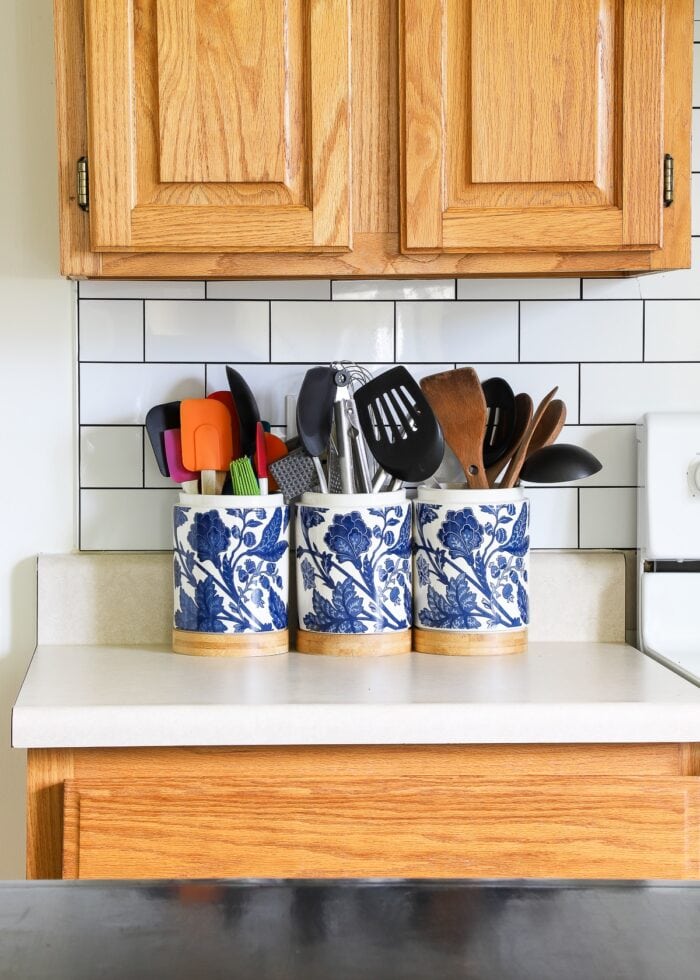
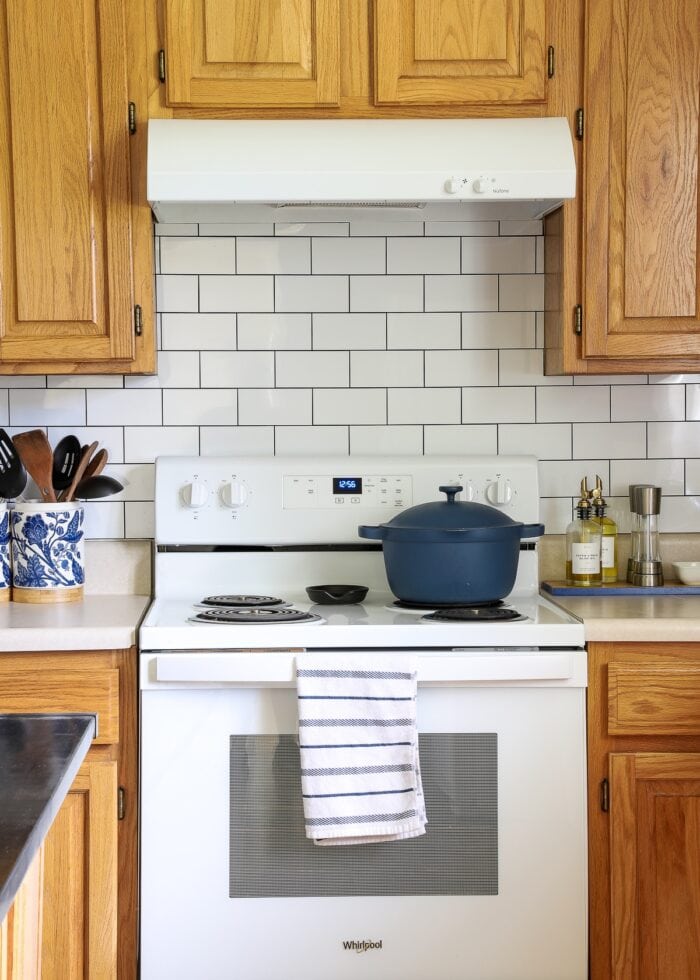
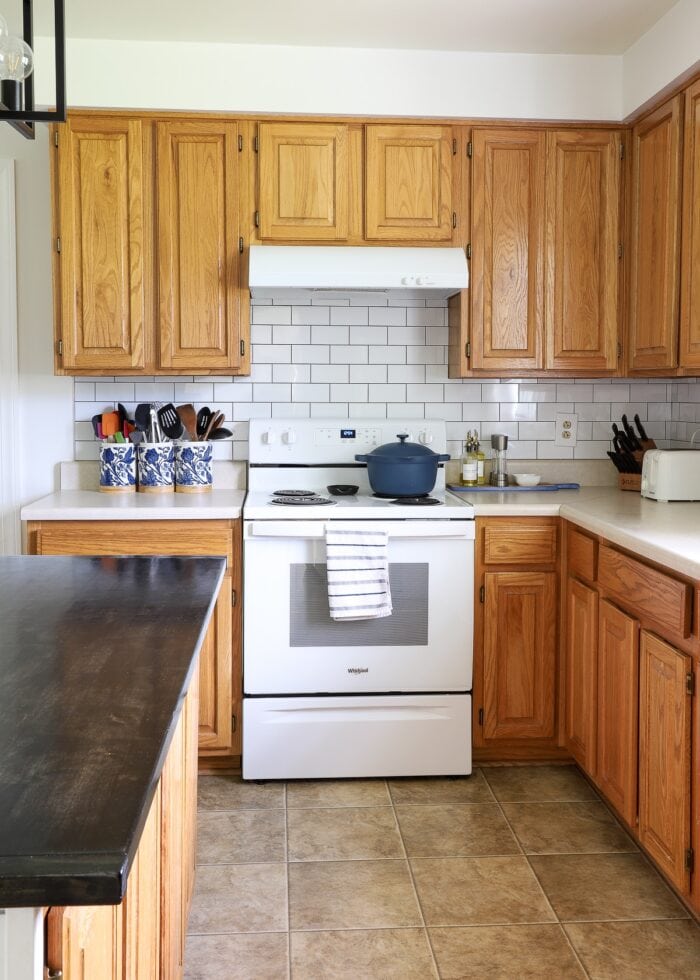
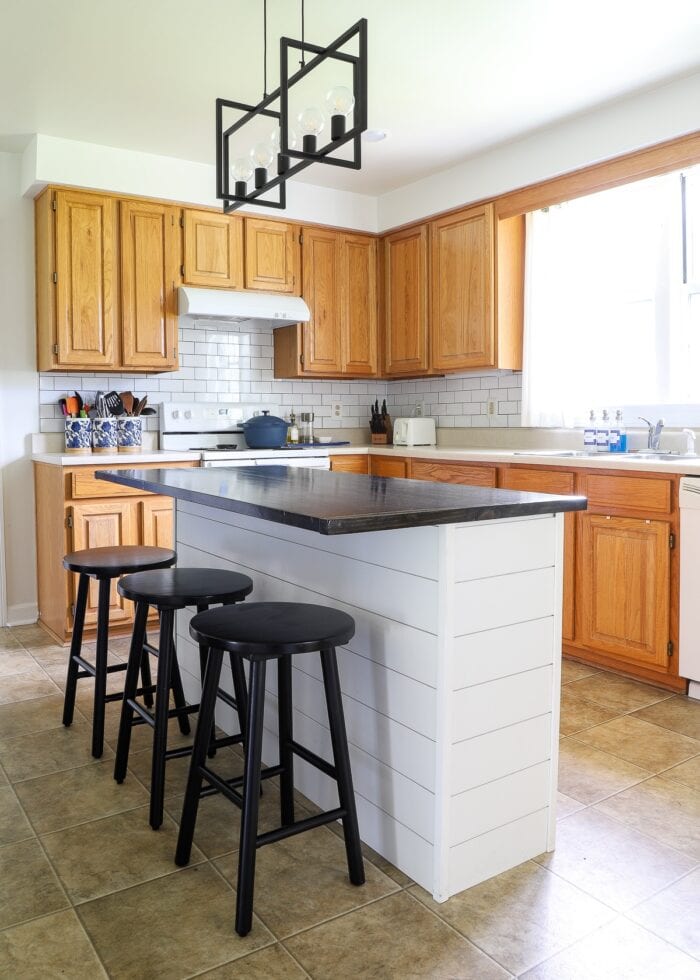
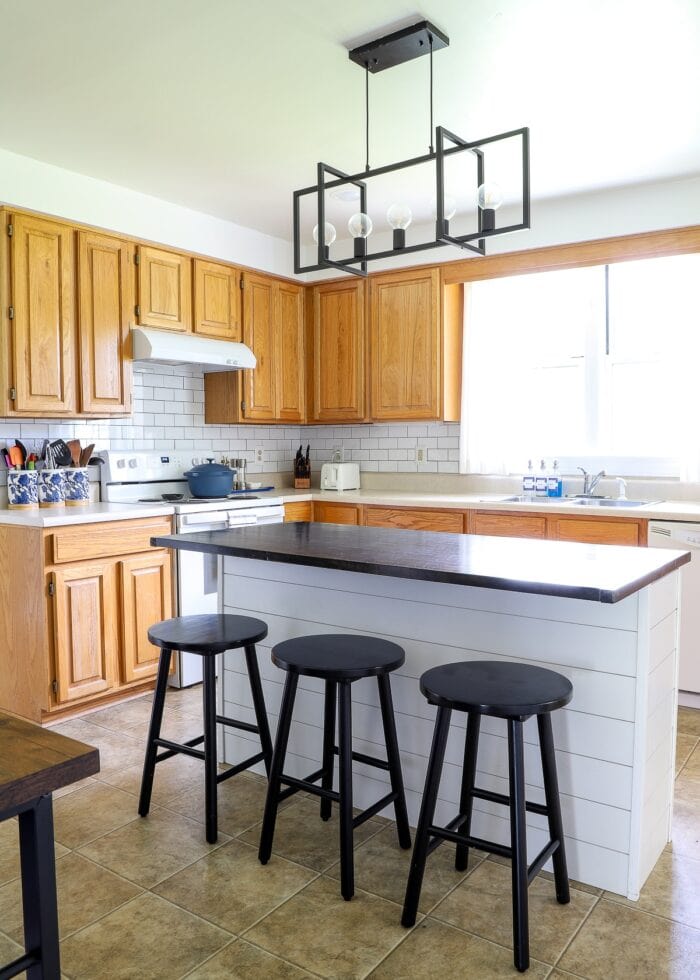
The Kitchen
I’m really am proud of this builder-basic kitchen makeover. The yellow-oak cabinets (easily the biggest eye soar of the entire house) were tough to puzzle out with my preferred style. Instead of fighting the cabinets (which I normally do), I decided to embrace them. And that made all the difference!
By adding (very) heavy doses of bright white (walls, trim, backsplash, island, windows) and crisp black (countertop, pantry doors, light fixtures, stools), the oak cabinets felt neutralized, resulting in a room that did indeed feel bright, fresh, and (dare I say it!) modern! I spent more time in this room than any other in the house, and I always loved the simple, clean aesthetic any time I walked in or by.
- Final Reveal: The Ultimate Renter Friendly Kitchen Makeover
- What Kitchen Color Schemes Work With Oak Cabinets?
- How to Install a Peel & Stick Tile Backsplash In a Rental (Without Damage!)
- How to Shiplap a Kitchen Island with Command Strips
- A DIY Butcher Block Island Countertop (Anyone Can Do!)
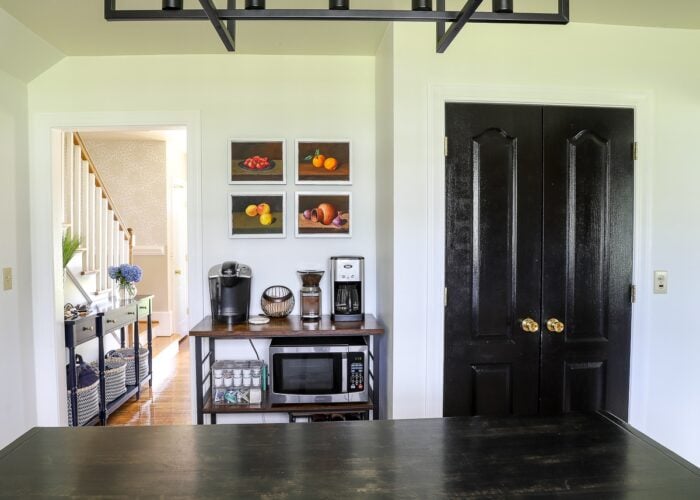
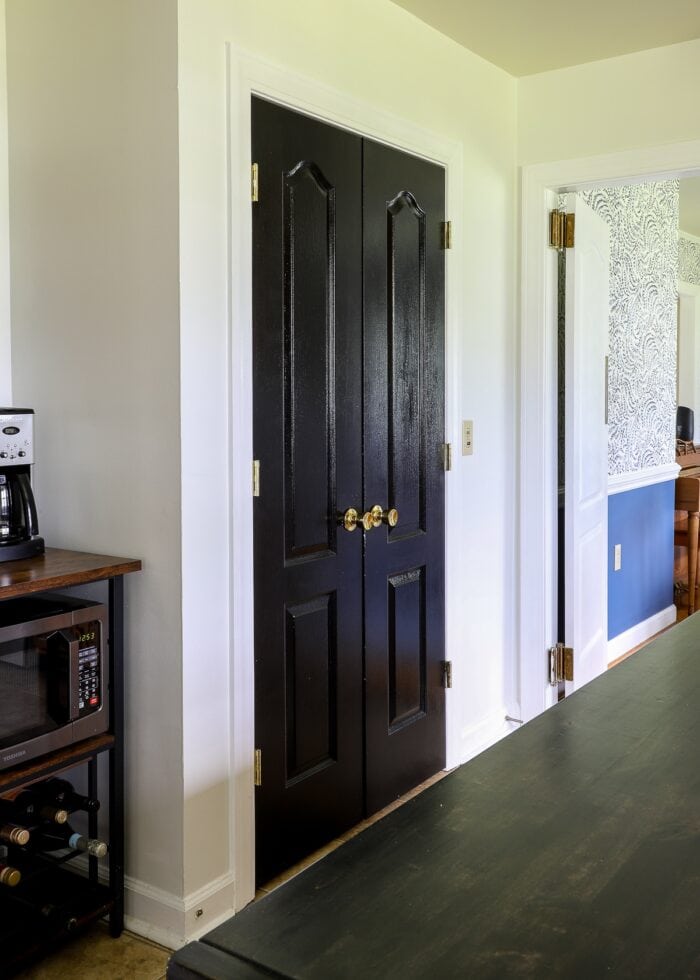
- Let’s Talk About My Black Pantry Doors
- Easy DIY Acrylic Wall Calendar with a Cricut
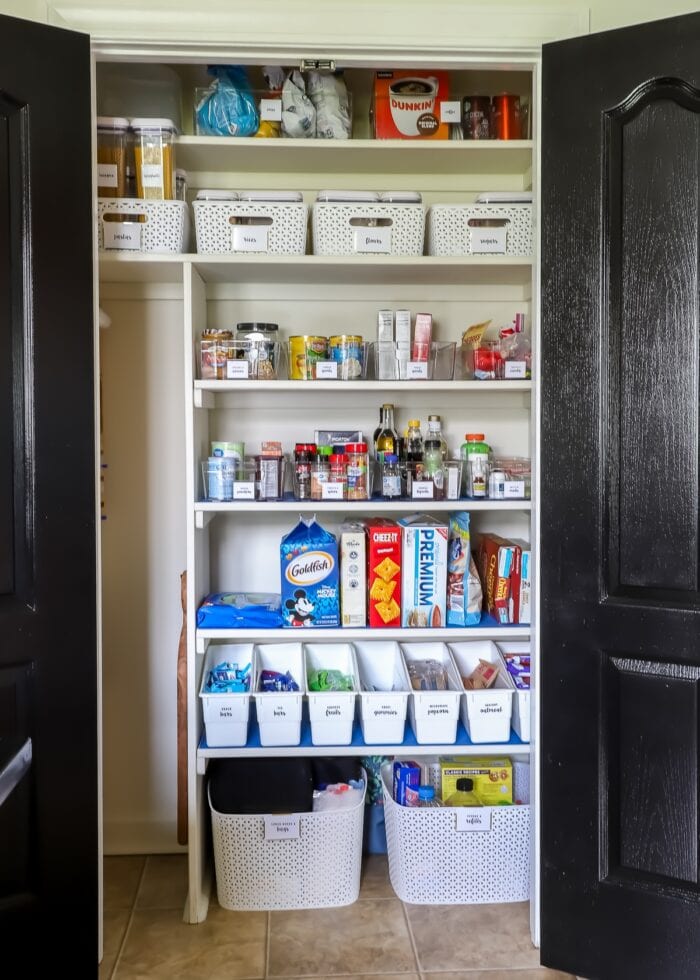
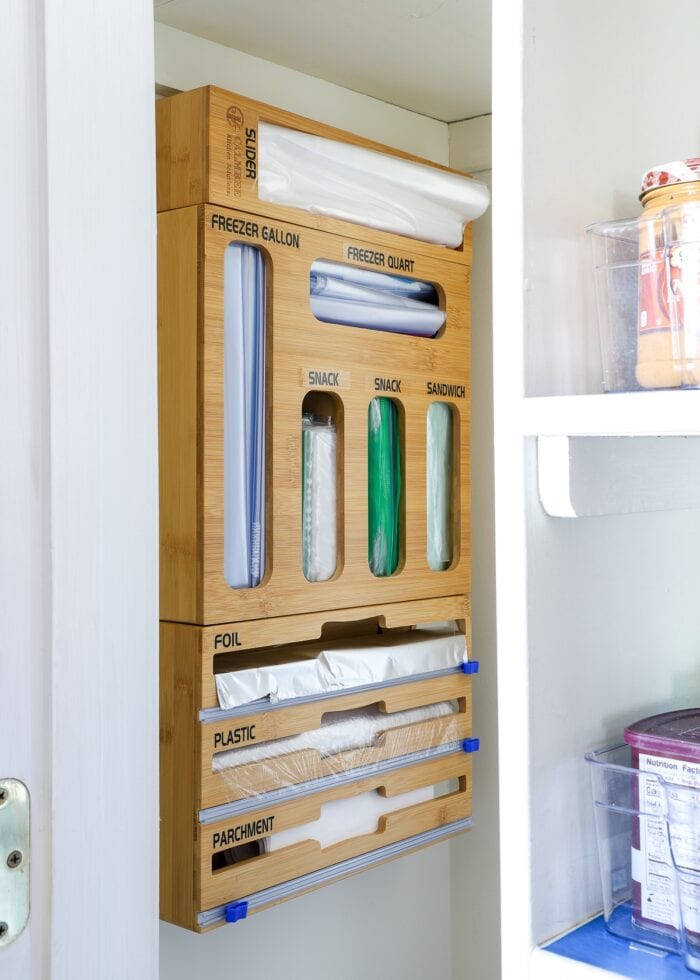
- How to Organize a Pantry | Real Life Solutions That Look Good Too
- How to Organize Ziplock Bags (With or Without a Drawer!)
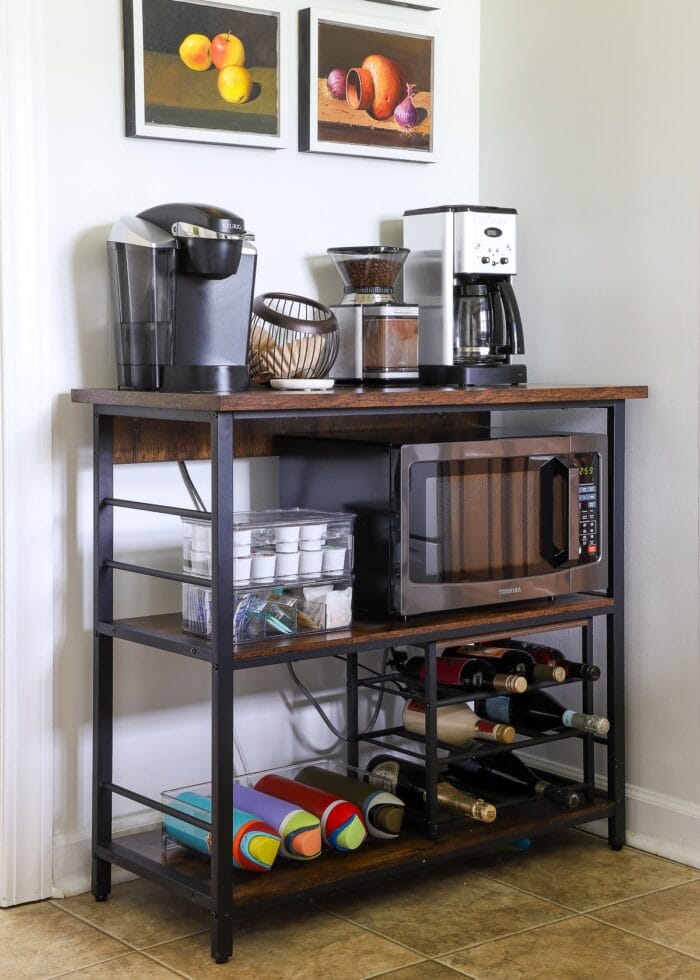
- How to Set Up a Functional Kitchen Coffee Station (& Save Serious Space!)
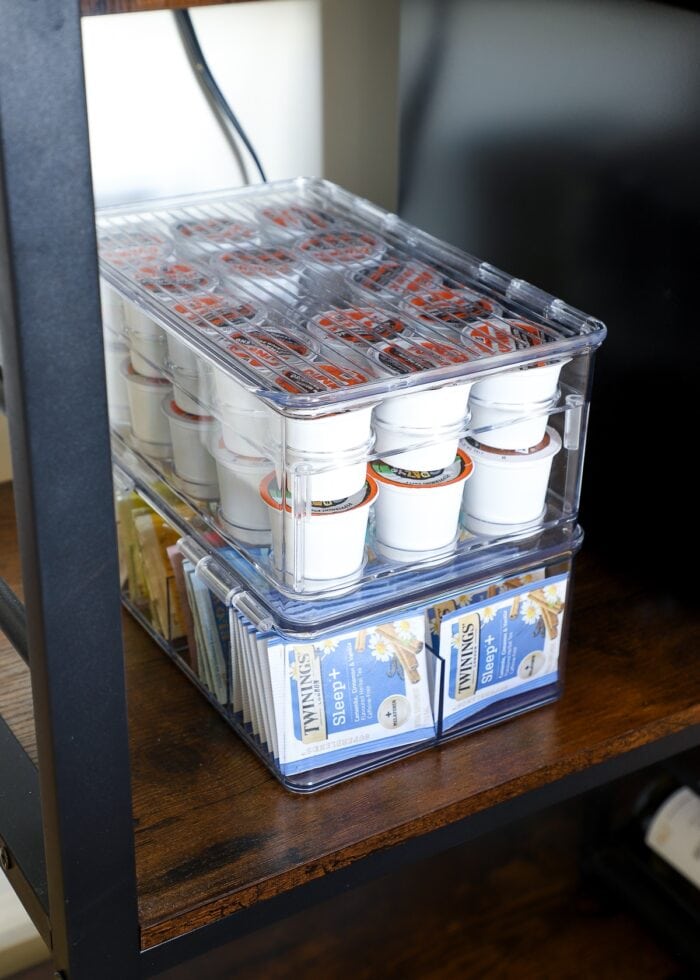
- Where & How to Store Coffee K-Cups (In Any Kitchen Layout!)
- The Easiest Way to Organize Food Storage Containers
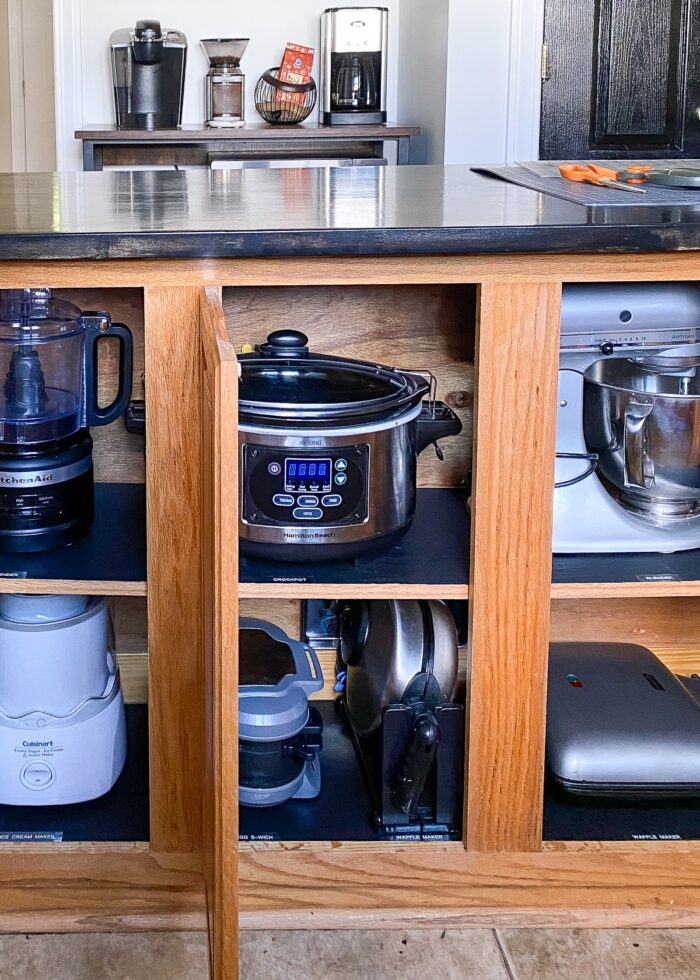
- How to Store Small Appliances Inside Kitchen Cabinets
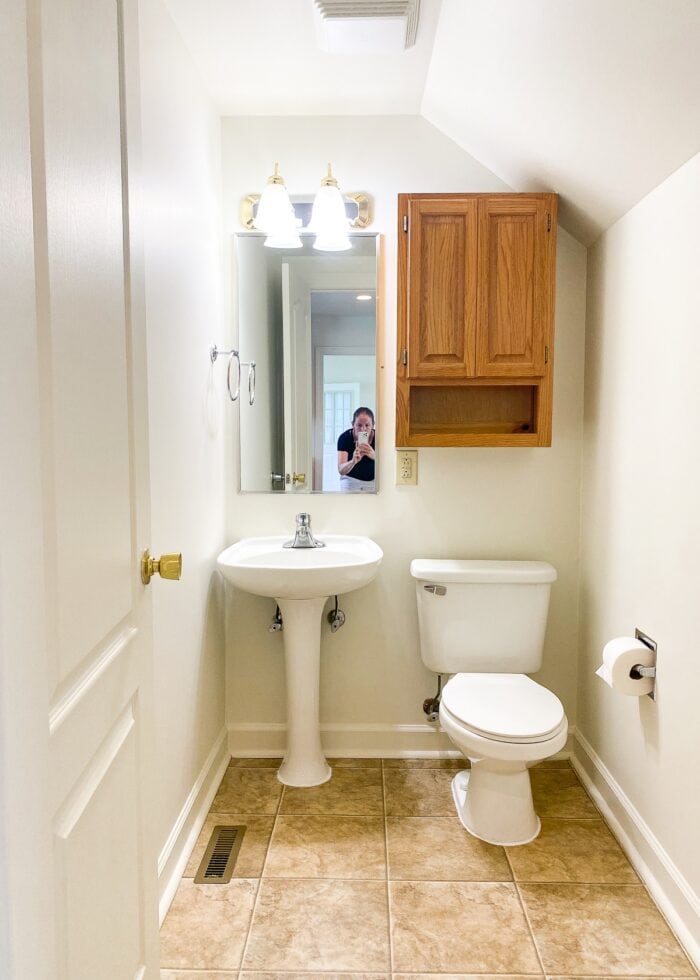
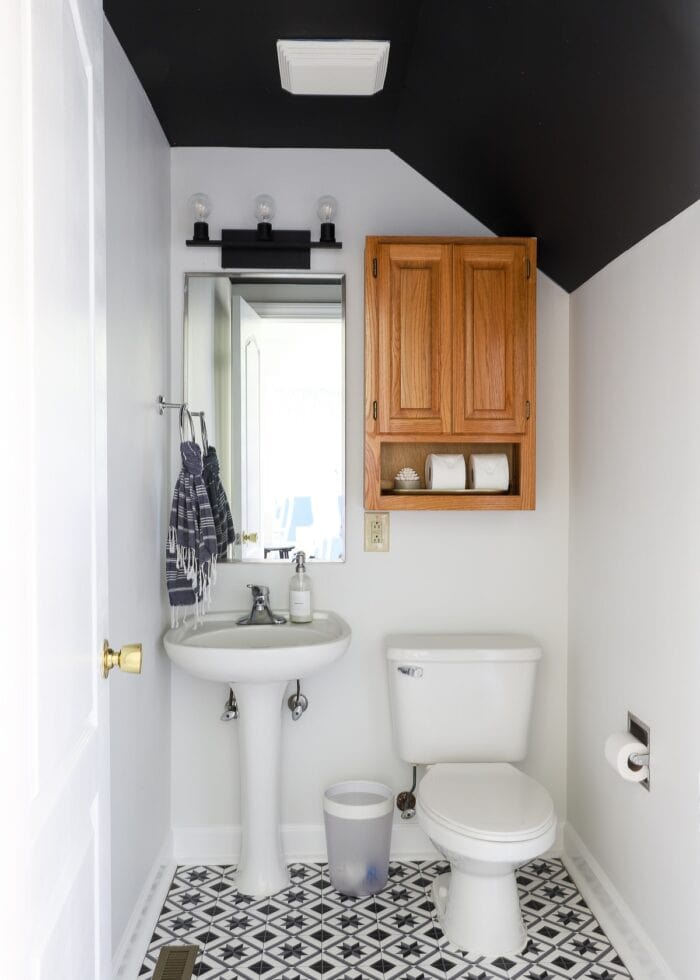
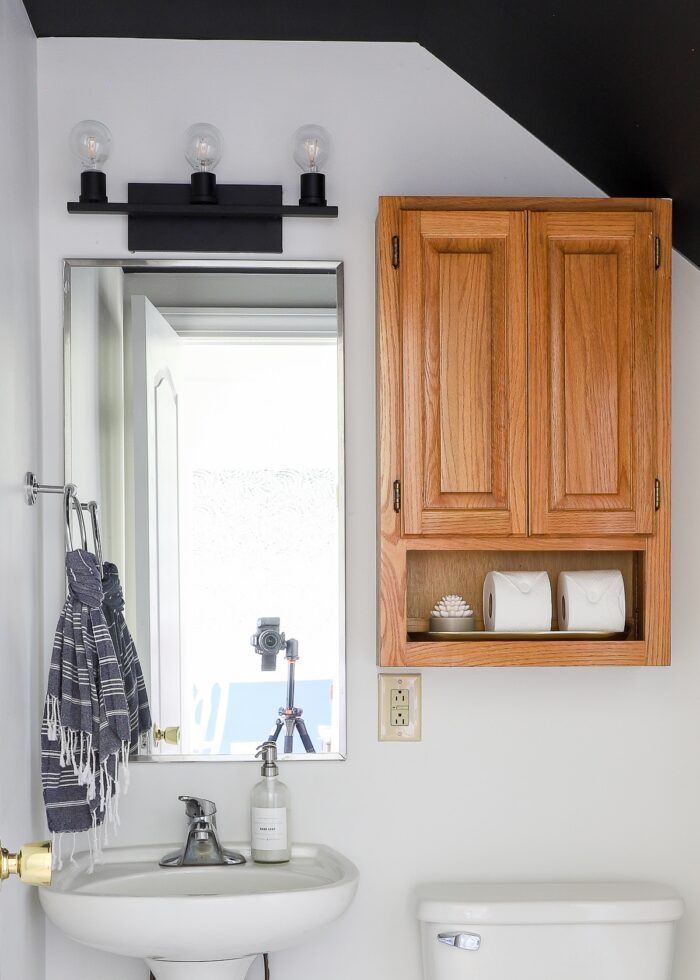
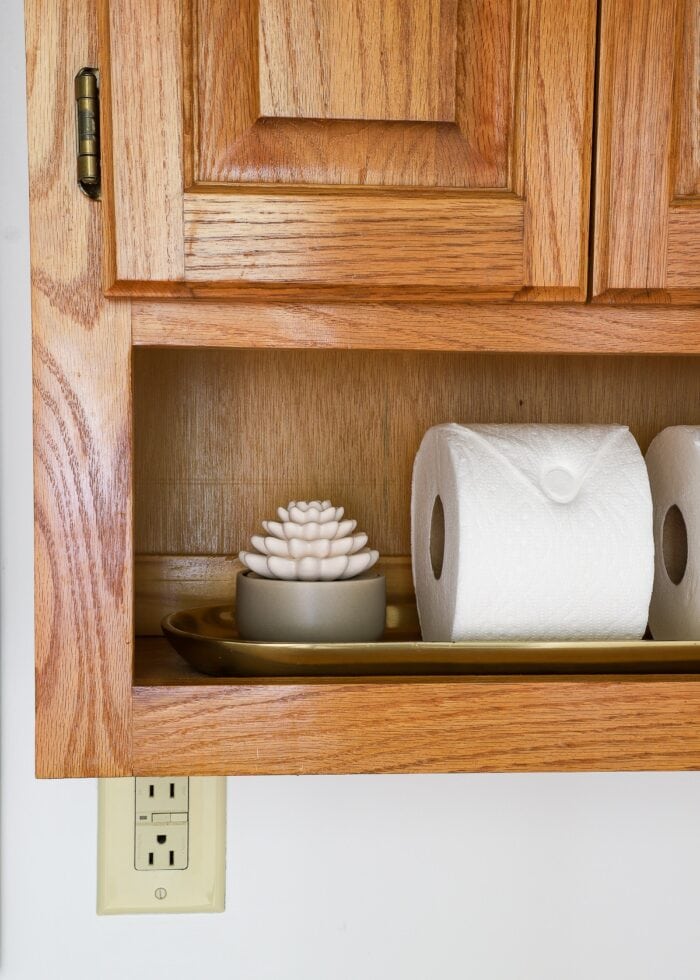
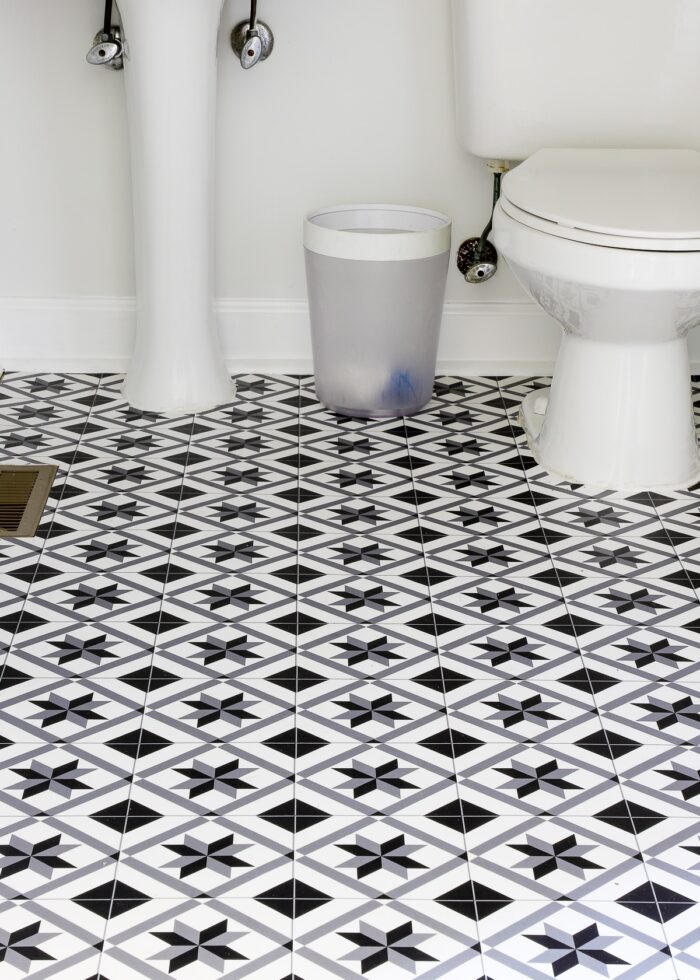
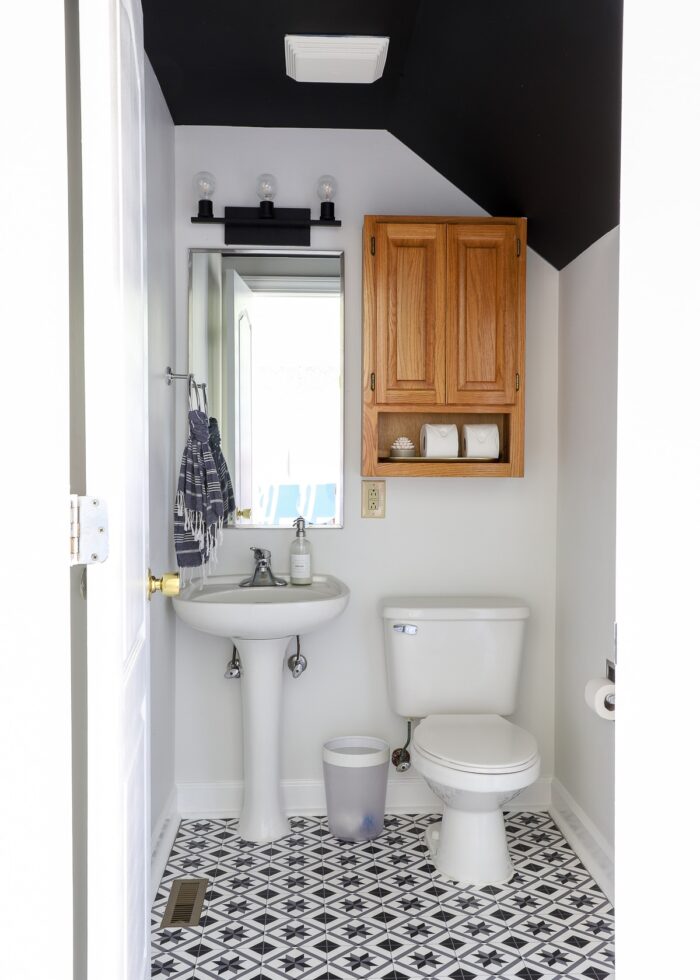
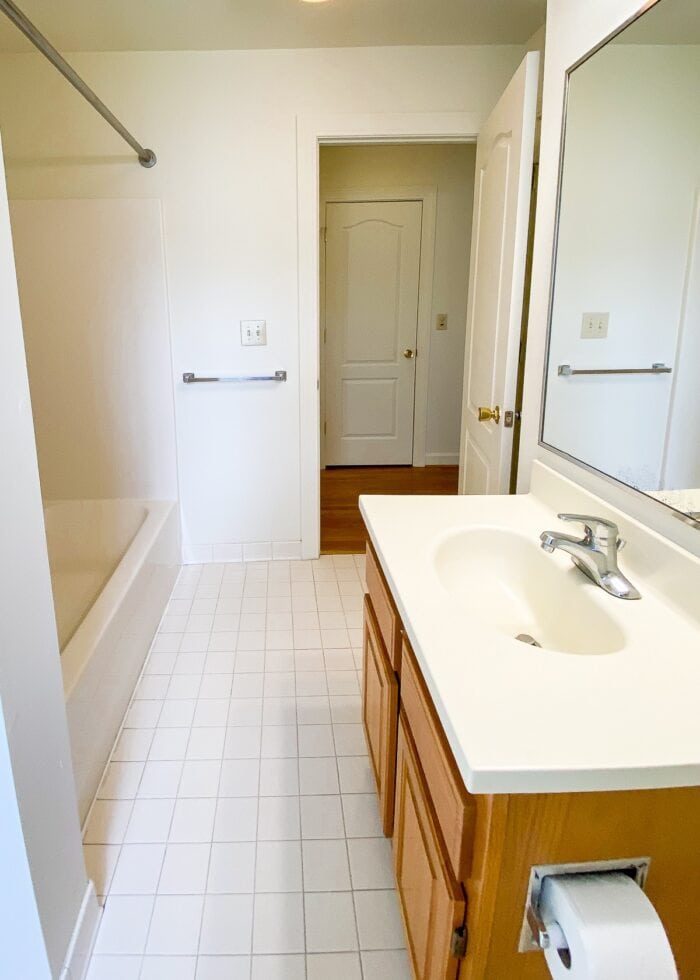
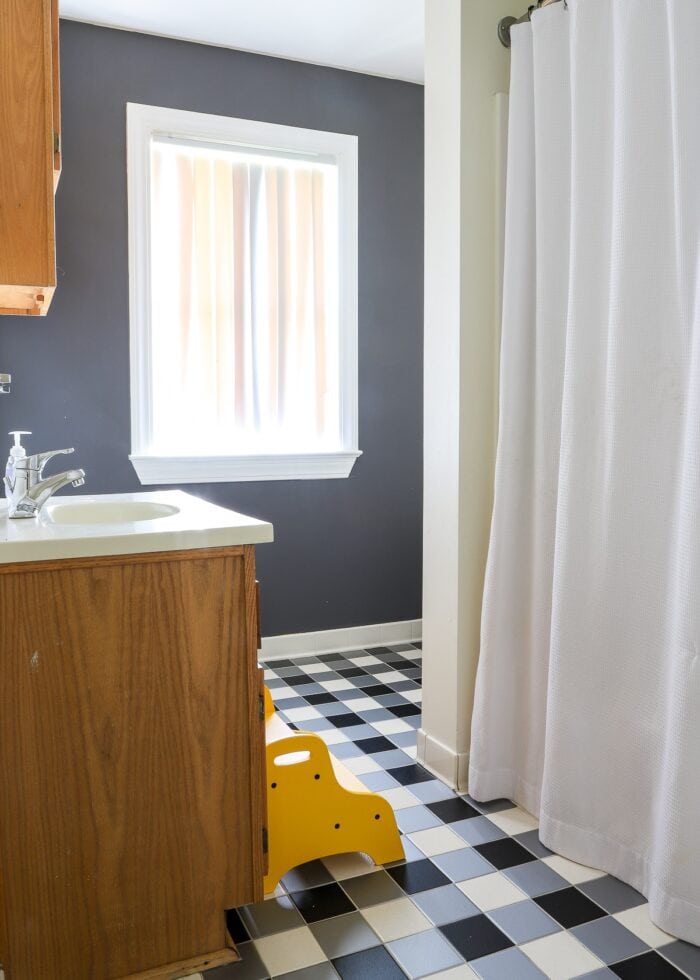
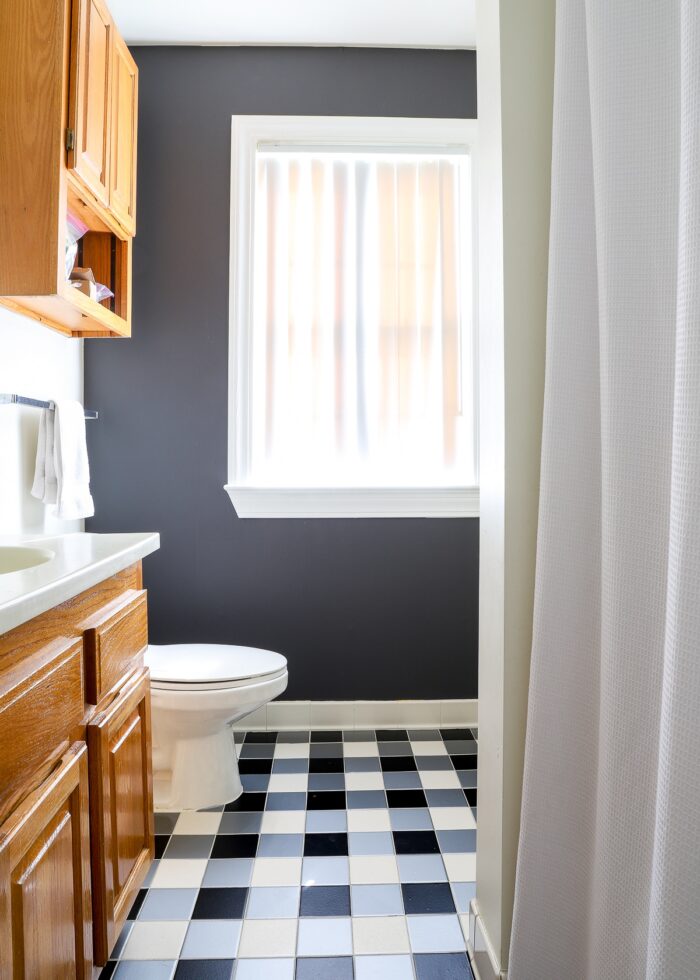
The Downstairs Powder Room
This powder room sat right off the kitchen (awkward, right?!) and was just tiny in all the ways (even the toilet was super low). This little room had a round-about makeover because I started doing things without any plan in mind (never a good idea!)
Although the walls, ceiling, floor, and light fixture eventually came together into a (super fun) final result, it did end up a smidge more on the modern, bold side than I prefer. I always joked that it was our “speakeasy bathroom,” because, especially at night with the light on, it had a very dramatic, mysterious feel to it (most likely due to the black ceiling).
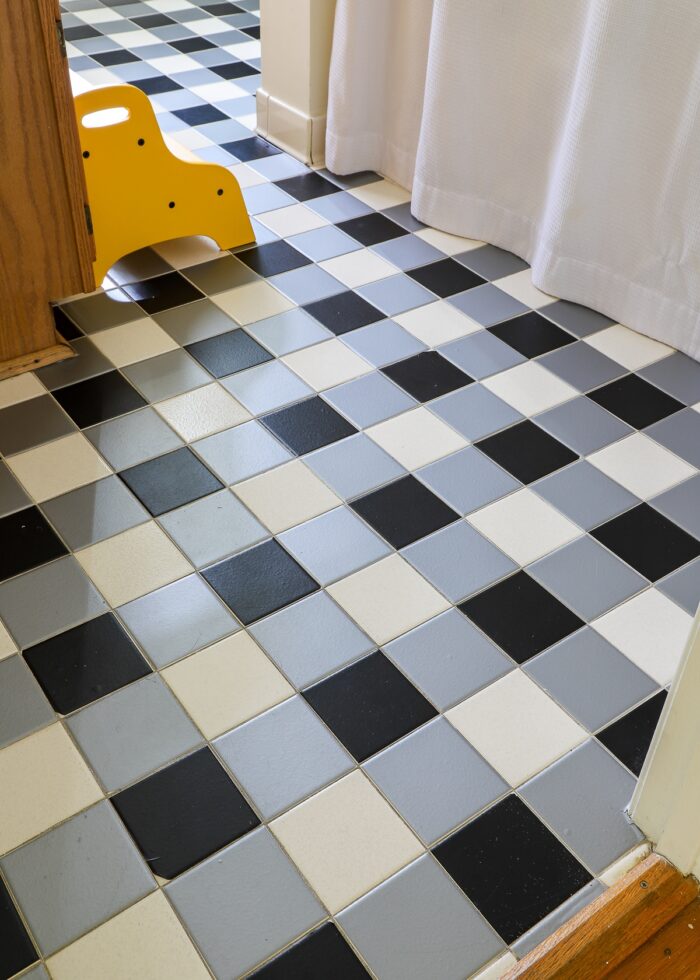
By far, the most notable (and successful!) DIY in this space was using a vinyl rug to mimic the look of tile on the floor. This project was easy, budget-friendly, durable, and removed practically effortlessly (I was even able to give the “rug” to my neighbor who has an identical layout). Although this particular “rug” is still no where to be found for purchase, this is a DIY I would repeat in a heartbeat, should the space present itself again.
- How to Cover Ugly Rental Bathroom Floors with a Vinyl Mat
- Solid Wallpaper | What It Is + Ideas for Using It
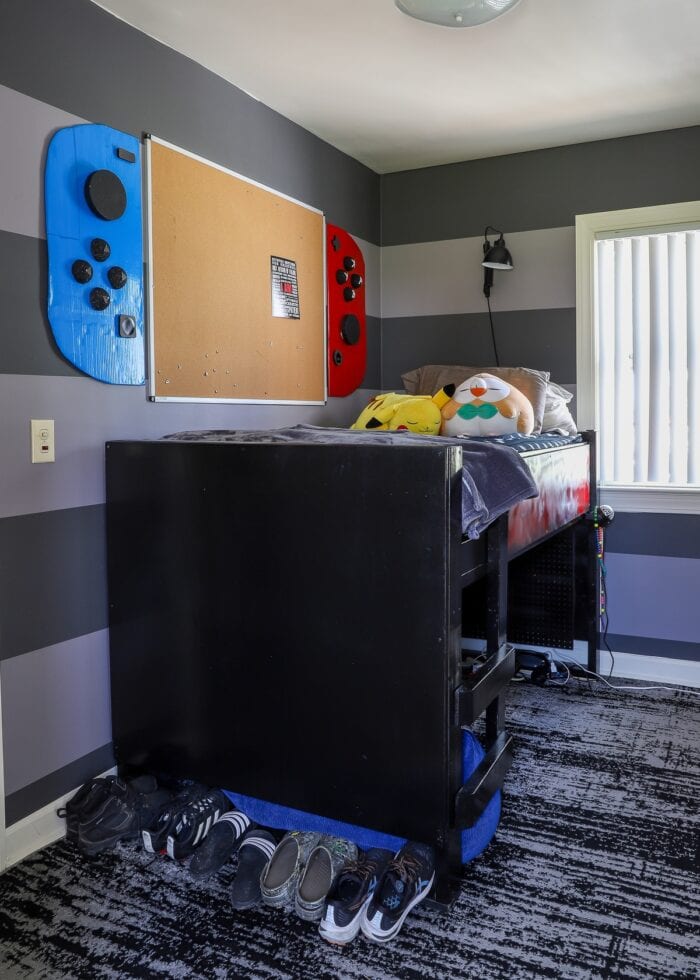
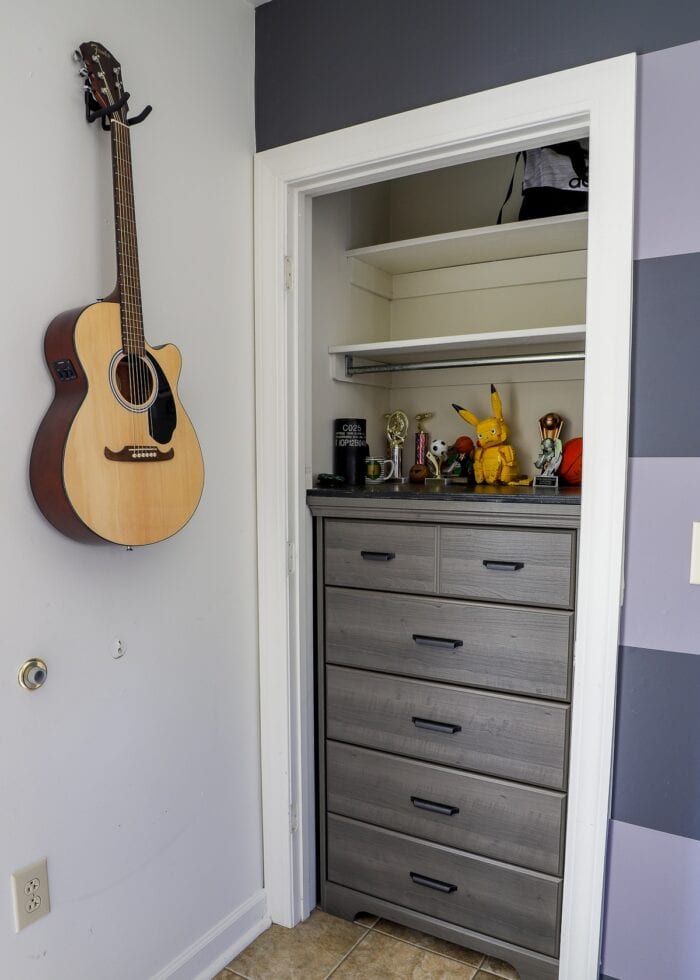
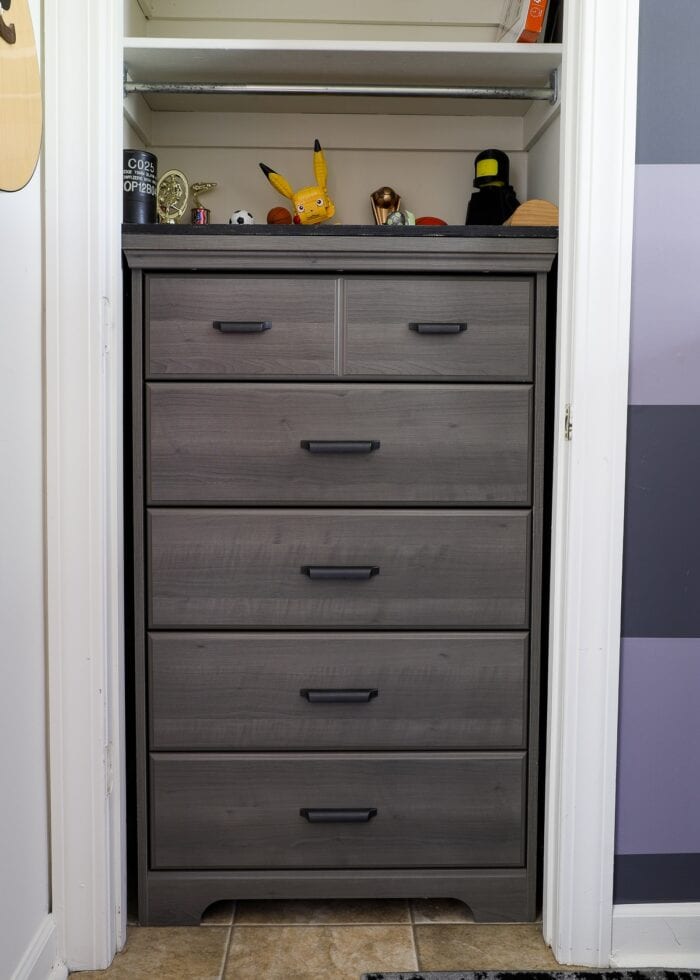
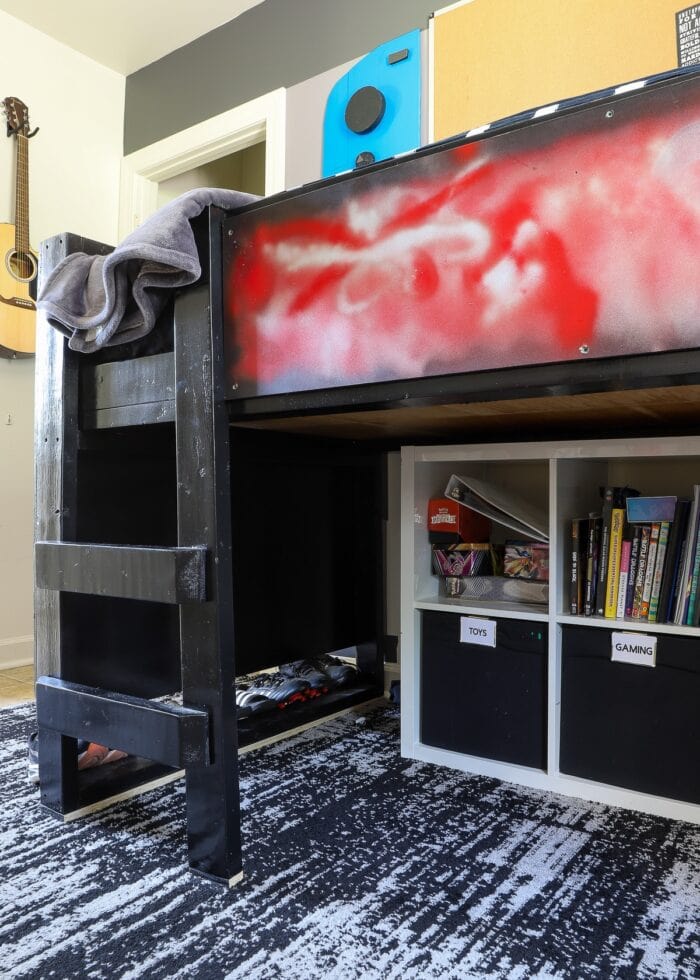
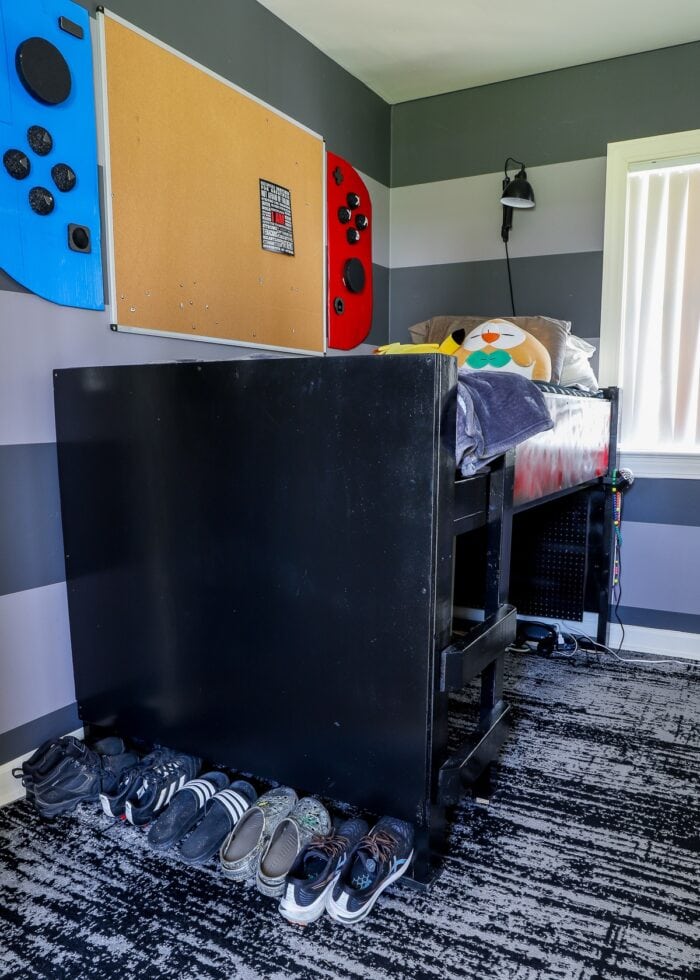
Our Son’s Downstairs Bedroom
Our teenage son occupied a (very) small bedroom, also off the kitchen on the first floor. Because of its size and proximity to the back door, most families don’t use this as a bedroom if they can avoid it. However, with its own bathroom and distance from his little brothers, our teen was more than happy to claim this space as his own.
The lack of floor space in this room really demanded that we get strategic with furniture, storage, and wall usage. While I didn’t love the half loft bed (that we scored incredibly cheap from a neighbor), it added a serious fun factor while providing some much-needed storage space.
This room was one of the first times I had to balance my child’s wishes and suggestions with my own desires. So while this room wasn’t quite my “cup of tea,” my son really did truly love it!
- Final Reveal: A Look at Our Teen’s Tiny Bedroom Filled With Super Smart Storage
- Putting a Dresser Inside a Closet | Why & How
- Solid Wallpaper | What It Is + Ideas for Using It
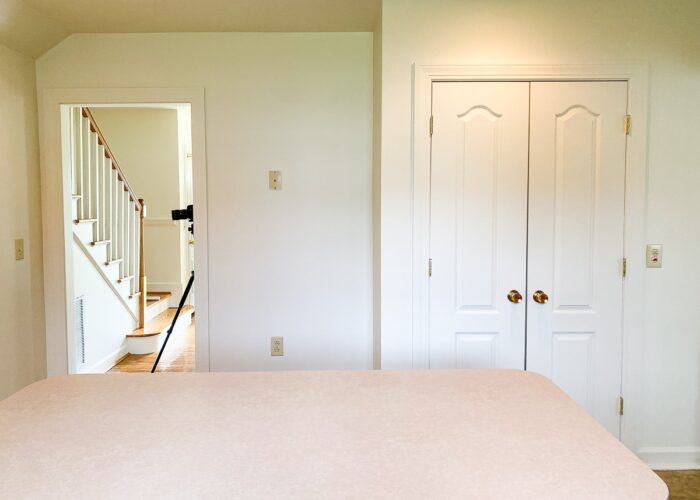
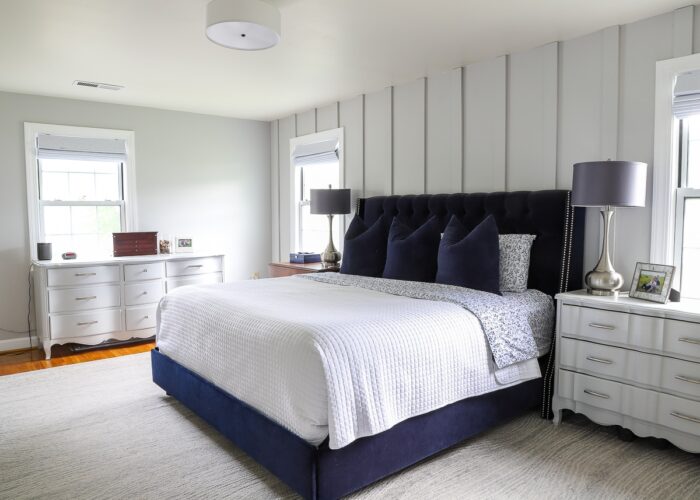
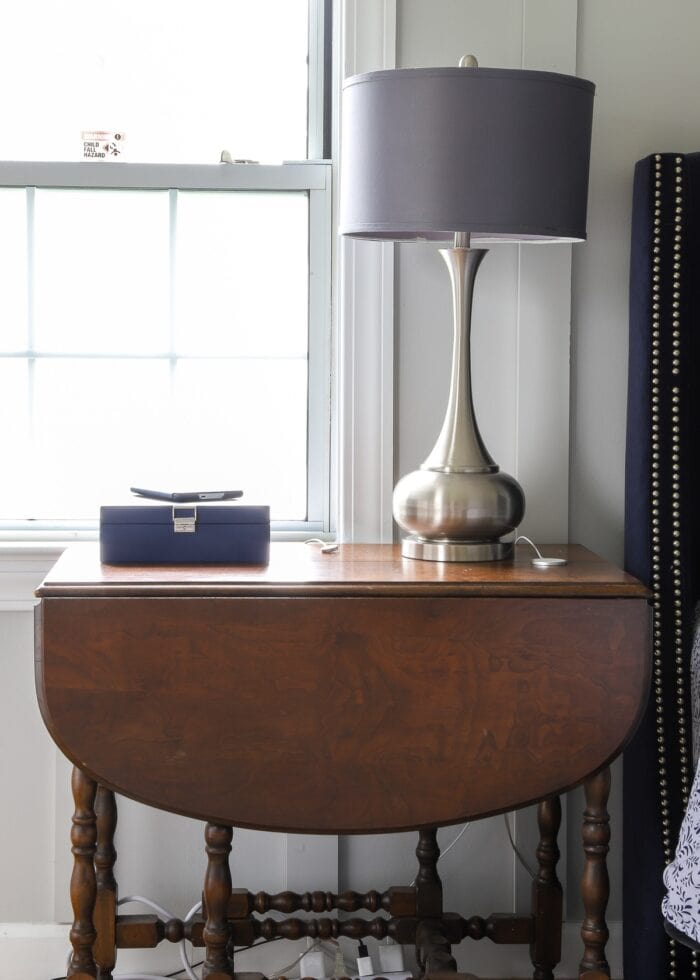
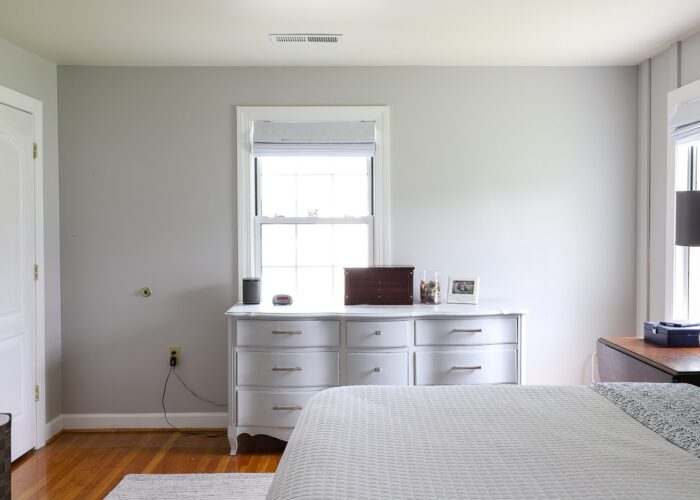
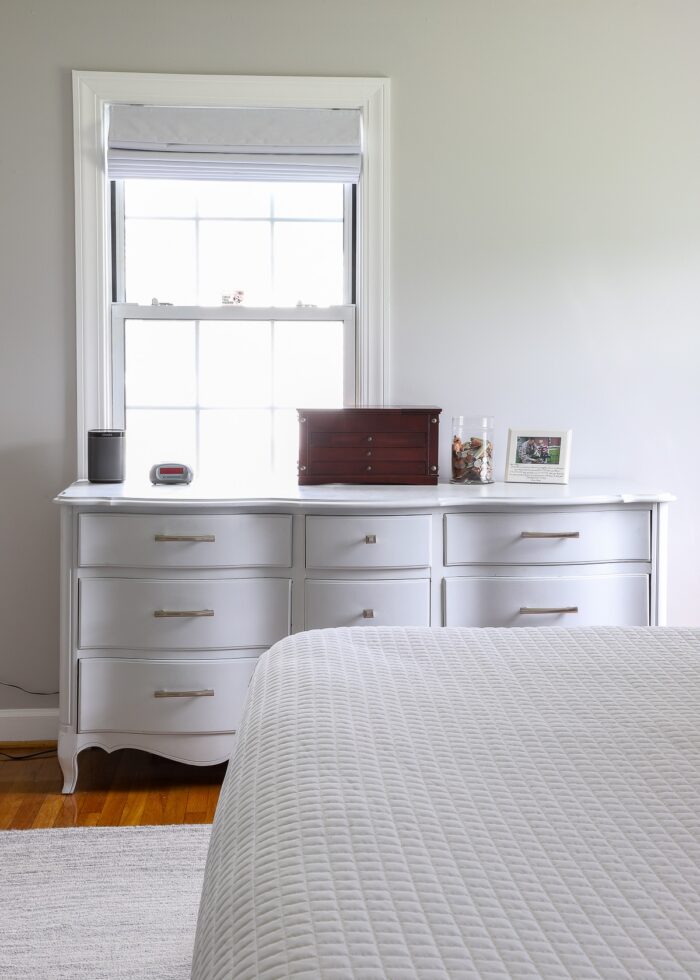
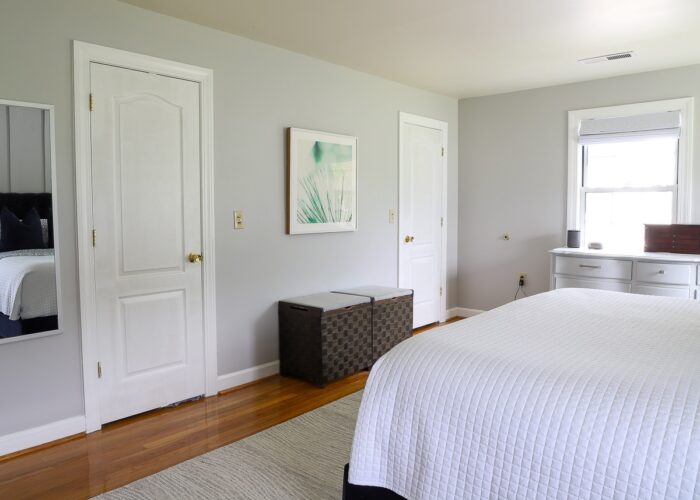
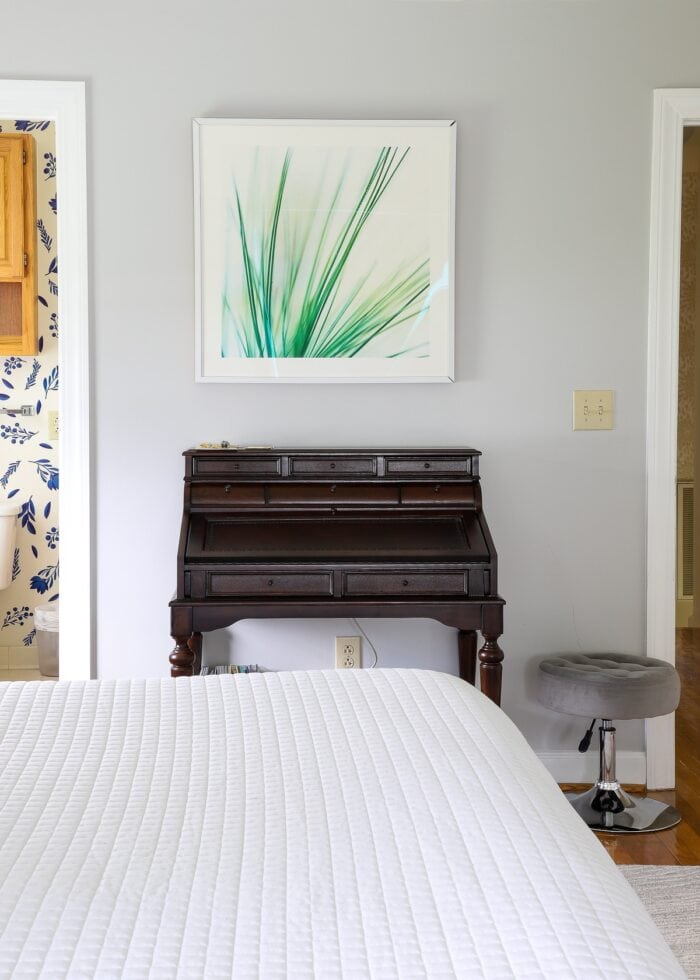
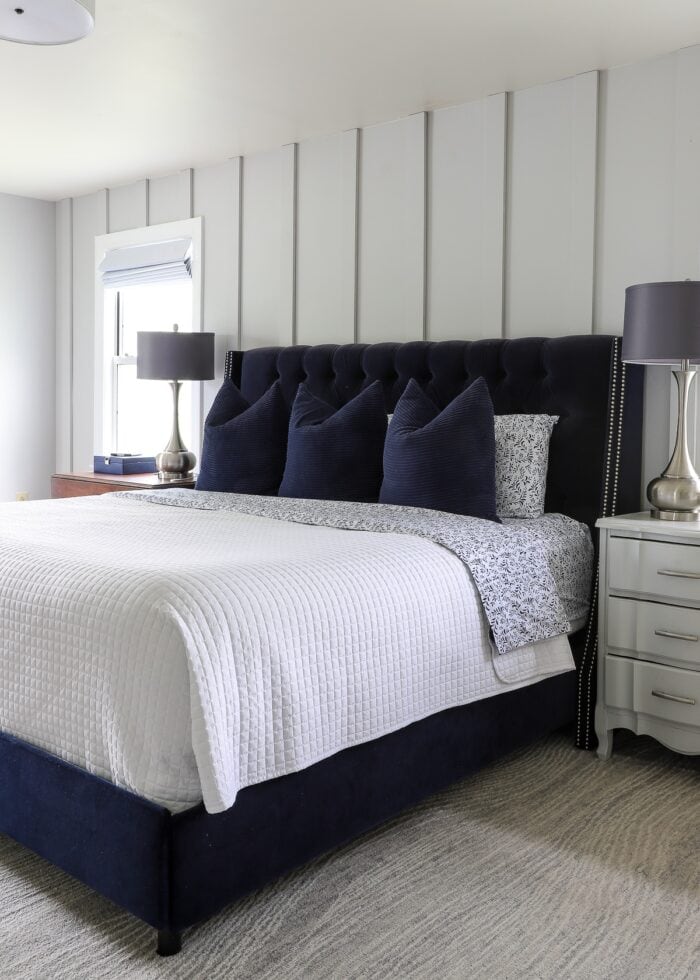
The Master Bedroom
The master bedroom in this home was exceptionally large. We placed a 10×14′ rug and a king-sized bed in the center and still had room to spare!
For the first year in this home, our bedroom was a big, empty white box. When I realized the “approved” grey paint color (meaning, we wouldn’t have to paint it back) matched our old grey dressers, I knew immediately how to transform this space rather quickly.
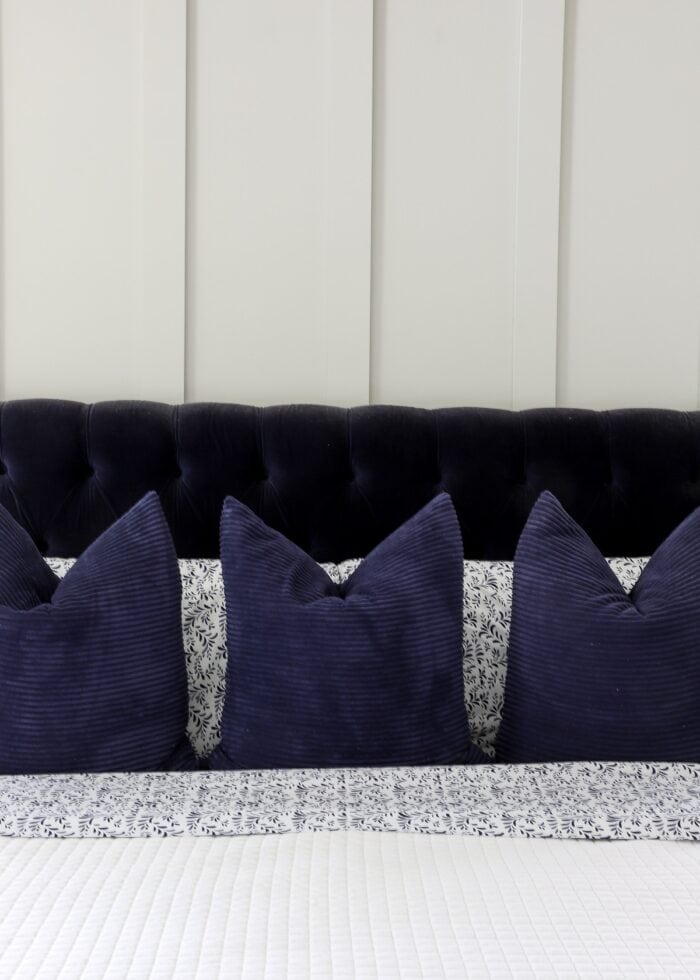
Sure enough, installing a fantastic (and oh so easy) wall treatment, buying some fresh bedding, and swapping out the window treatments and light fixture created a calm, serene space to retreat to at the end of the day!
- Final Reveal: Our Serene Navy & Grey Master Bedroom Reveal
- Easy DIY Board & Batten Accent Wall (Even Renters Can Do)
- The Rugs We Purchased for Our New Home (& Why)
- What You Need To Know About Changing Light Fixtures In Your Rental
Want to save this post?
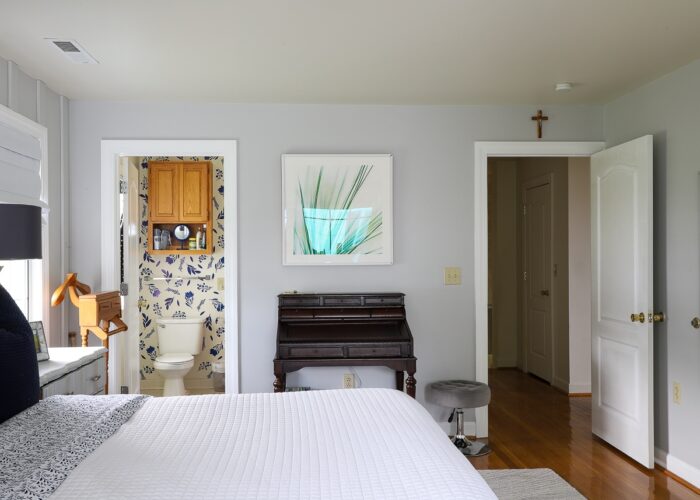
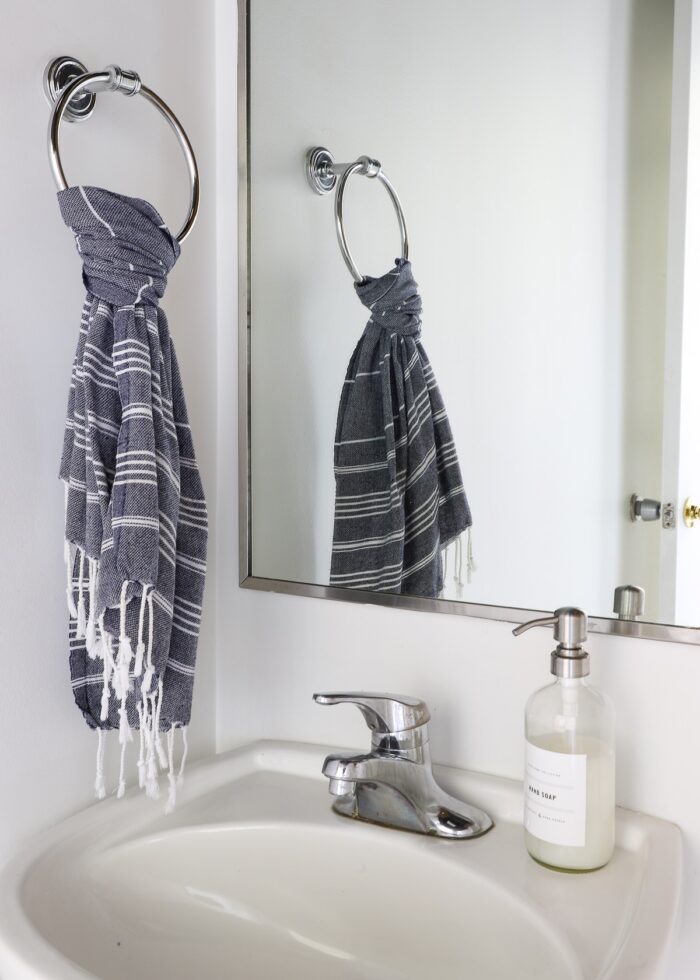
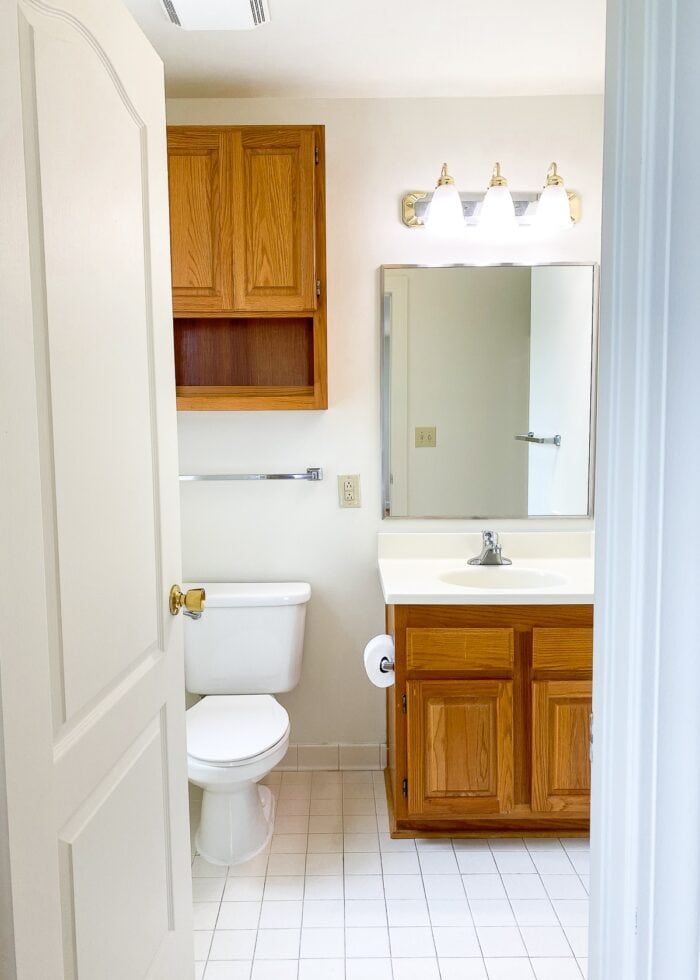
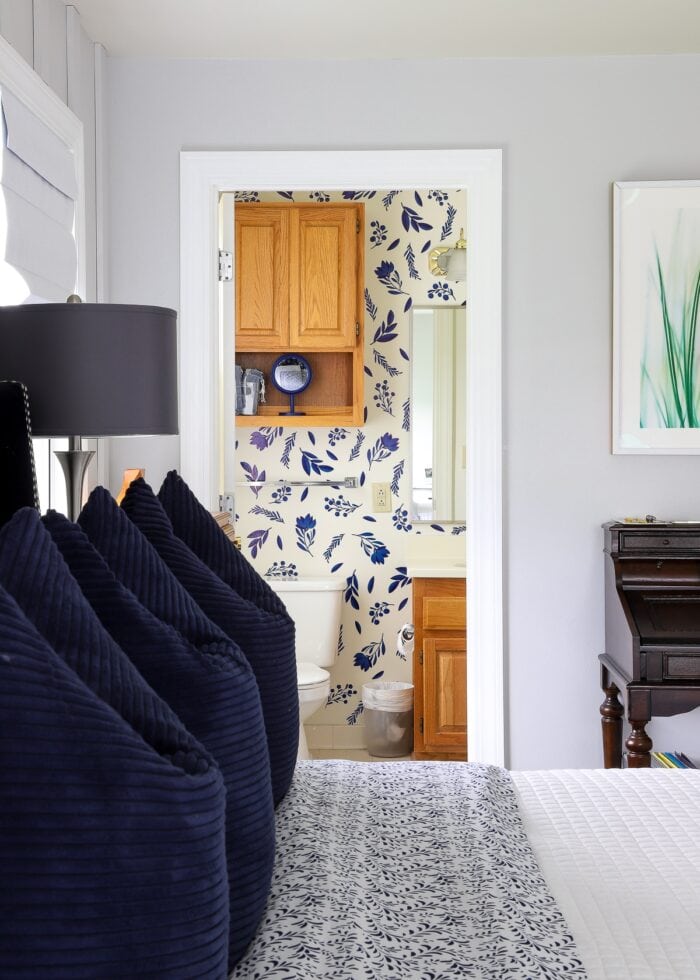
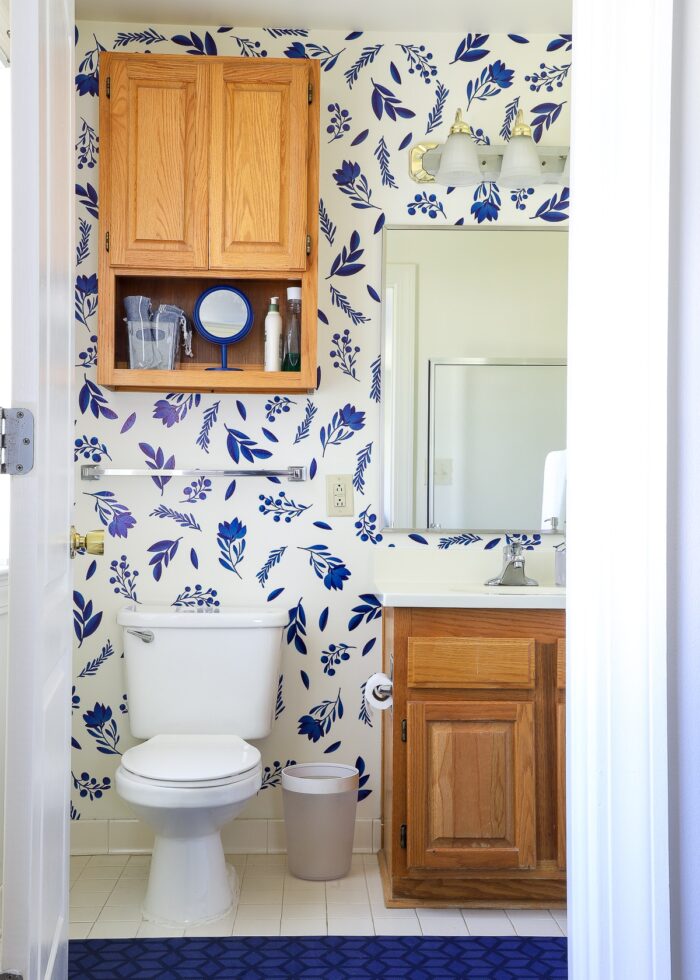
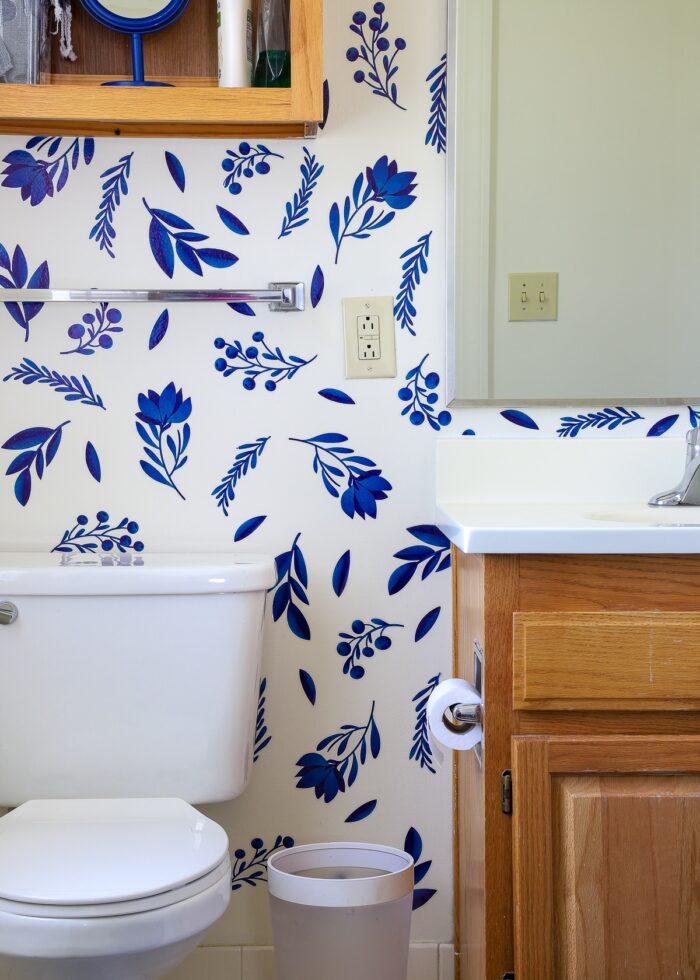
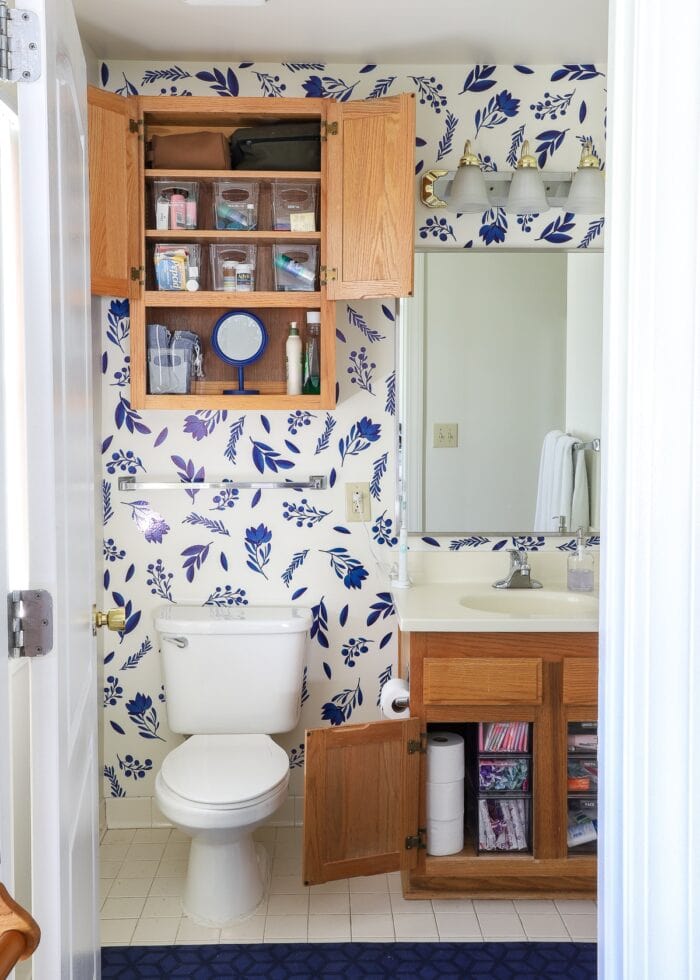
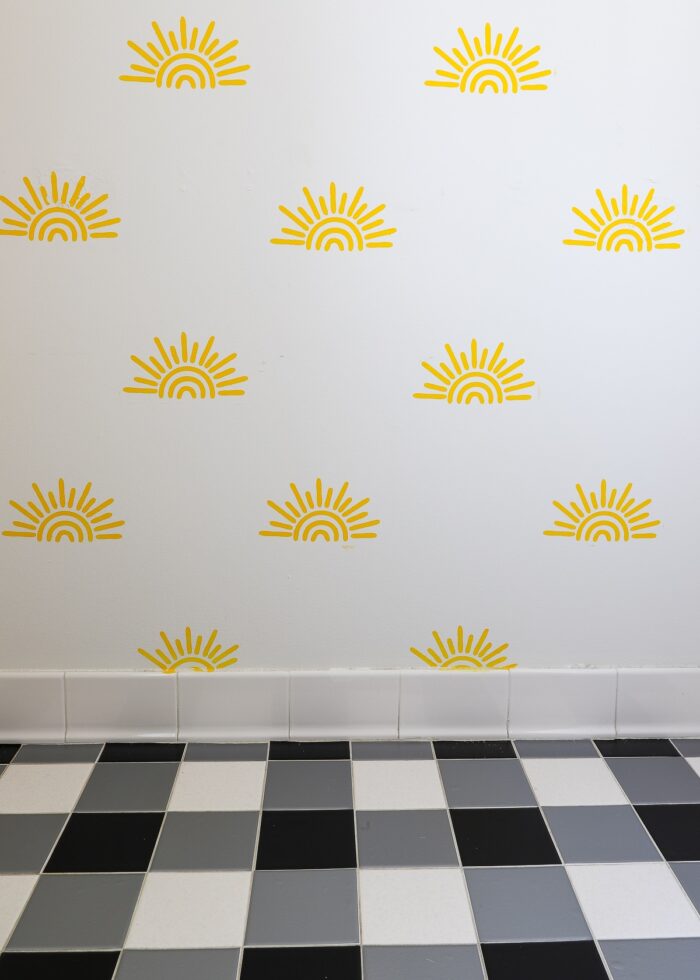
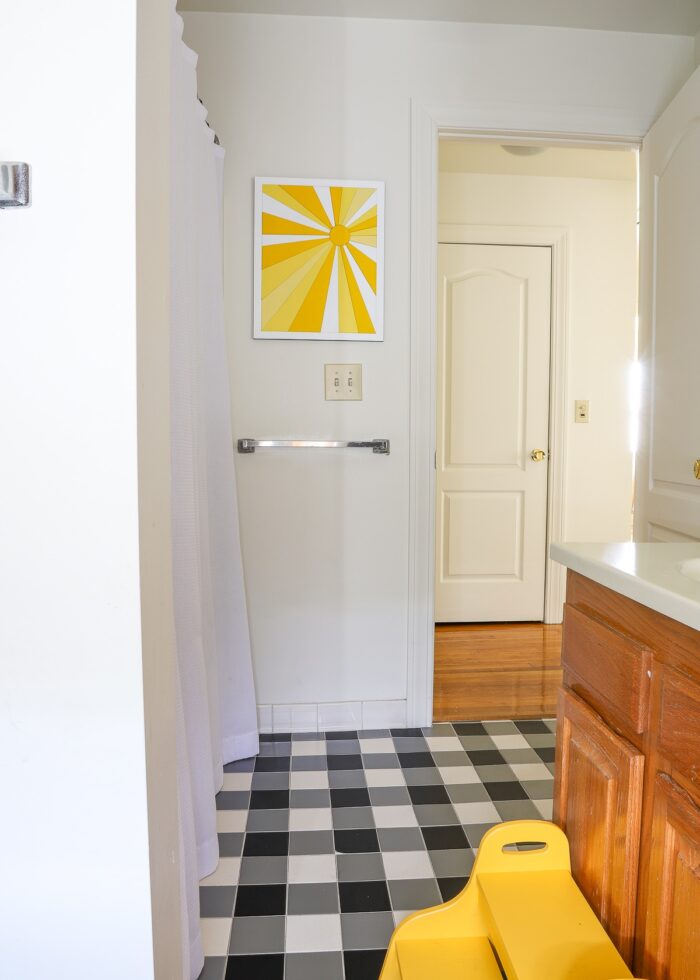
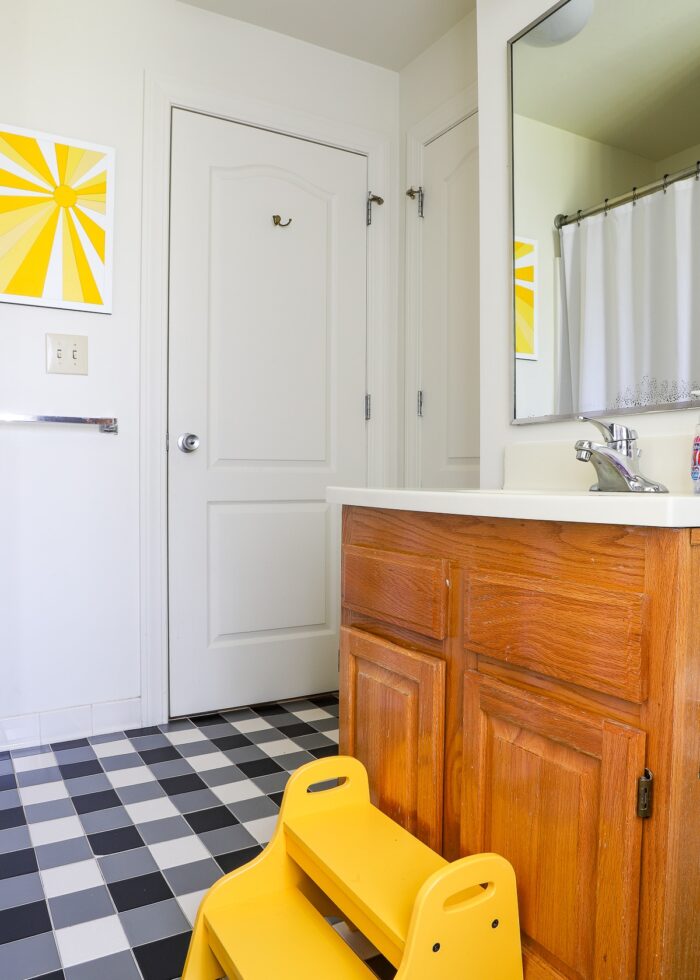
The Master Bathroom
The master bathroom was the very last space I tackled in this home. I had gotten to mostly everything else, and I hated that this space was never shown any love (despite it being a spot we used every single day!)
When I came across some inexpensive wall decals, I decided I could do something quick and easy…even just for the last few months. While I’m not sure this would have been my ultimate solution if I had more time, this bathroom ended up being a happy and cheerful space to begin and end the day!
- Instantly Decorate Your (Rental) Bathroom with Wall Decals
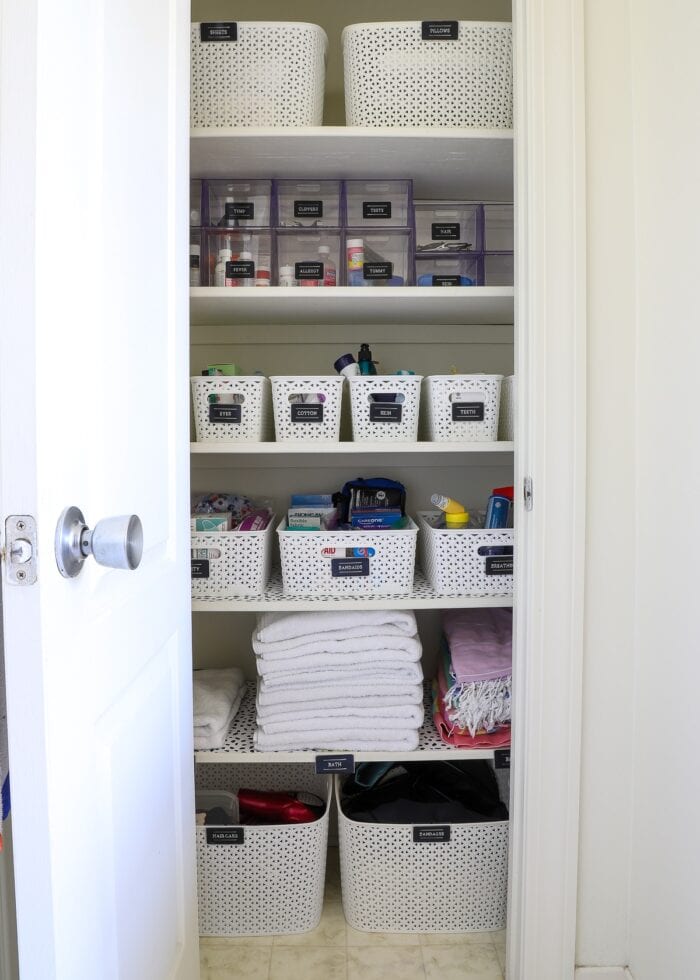
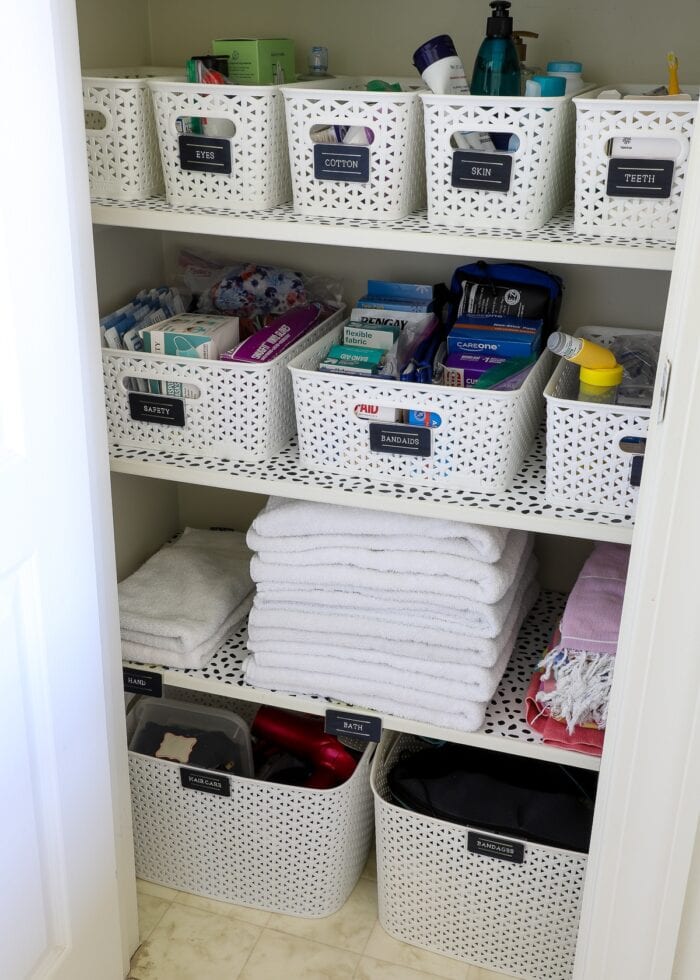
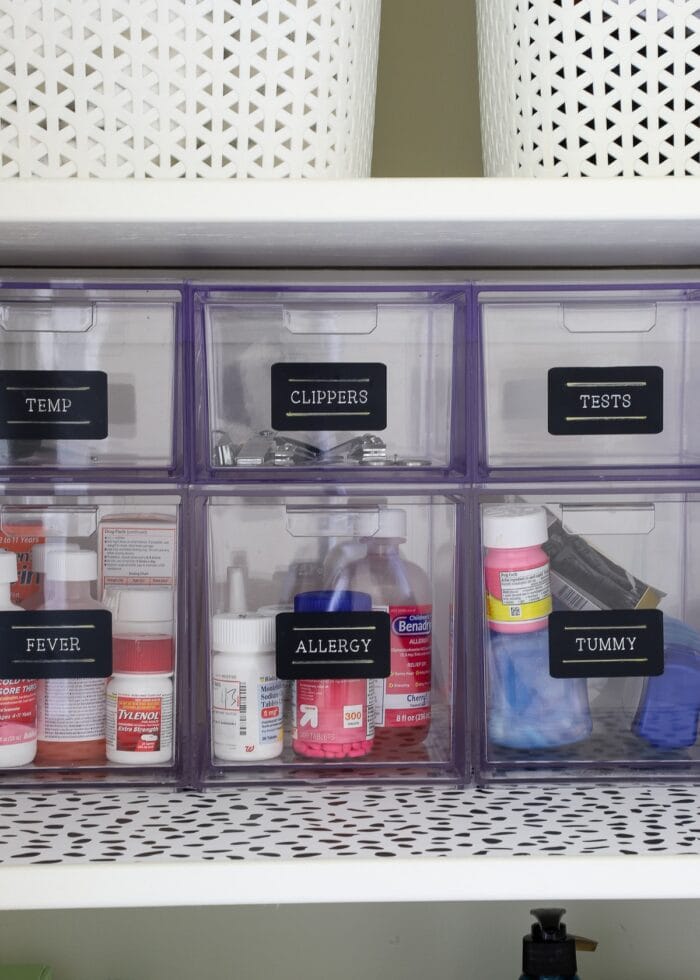
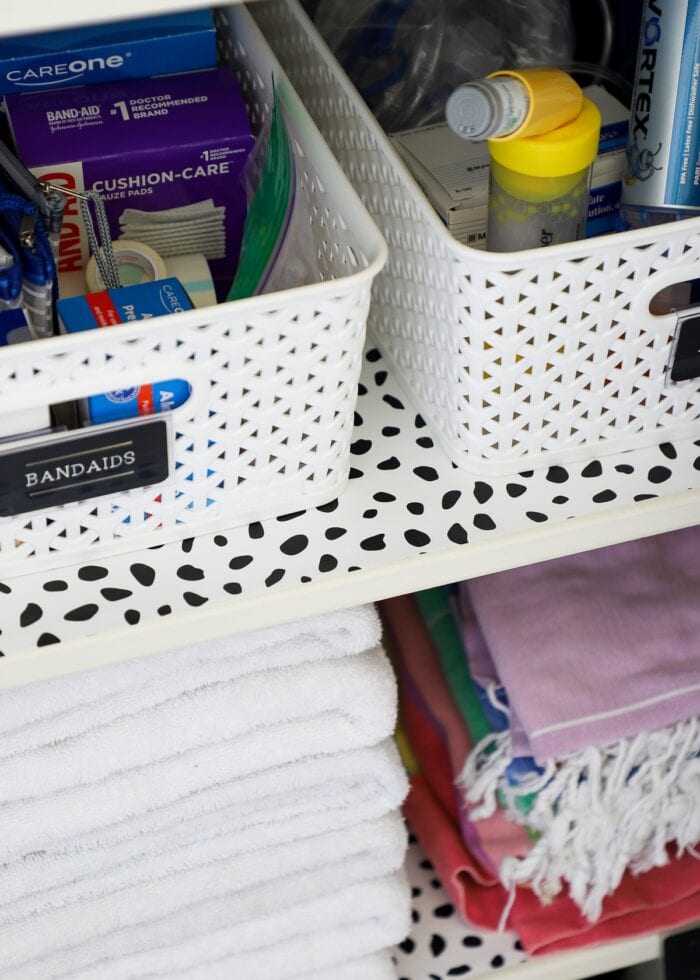
- My Favorite Way to Organize Cabinets Under the Bathroom Sink

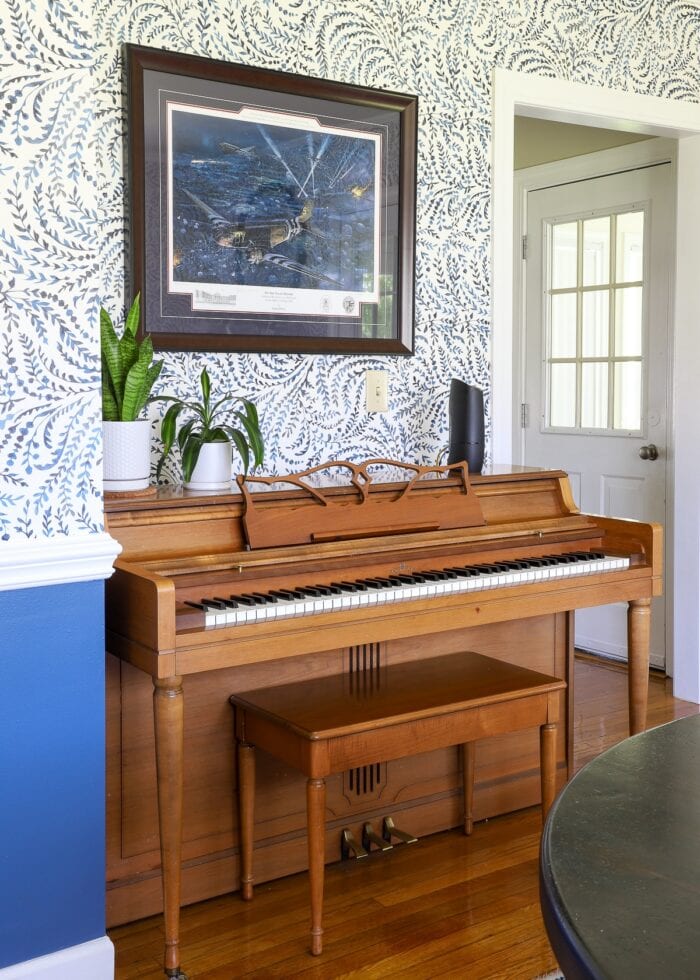
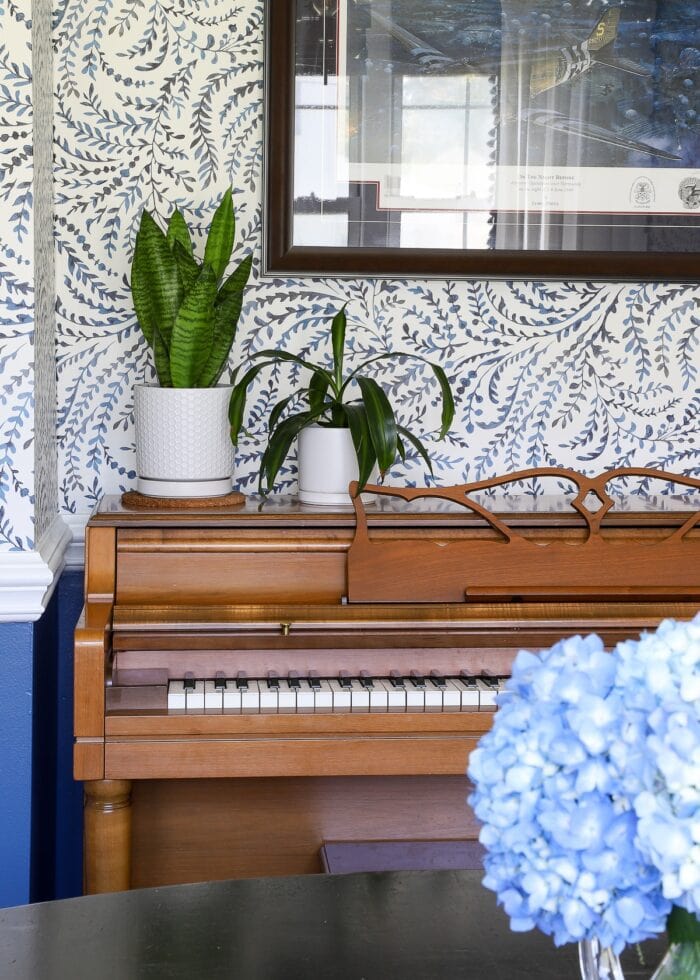
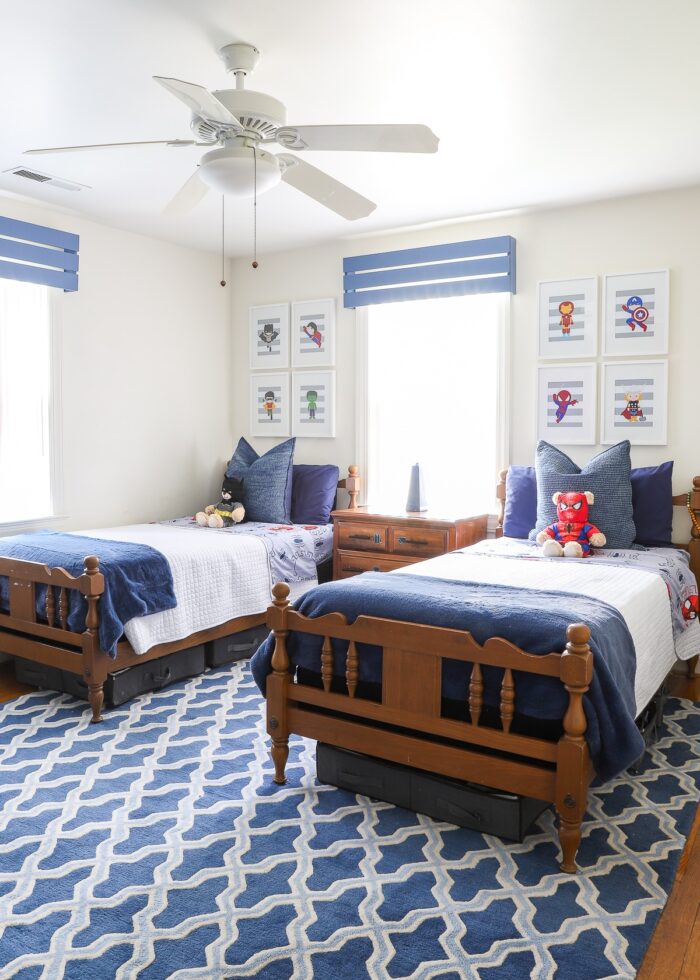
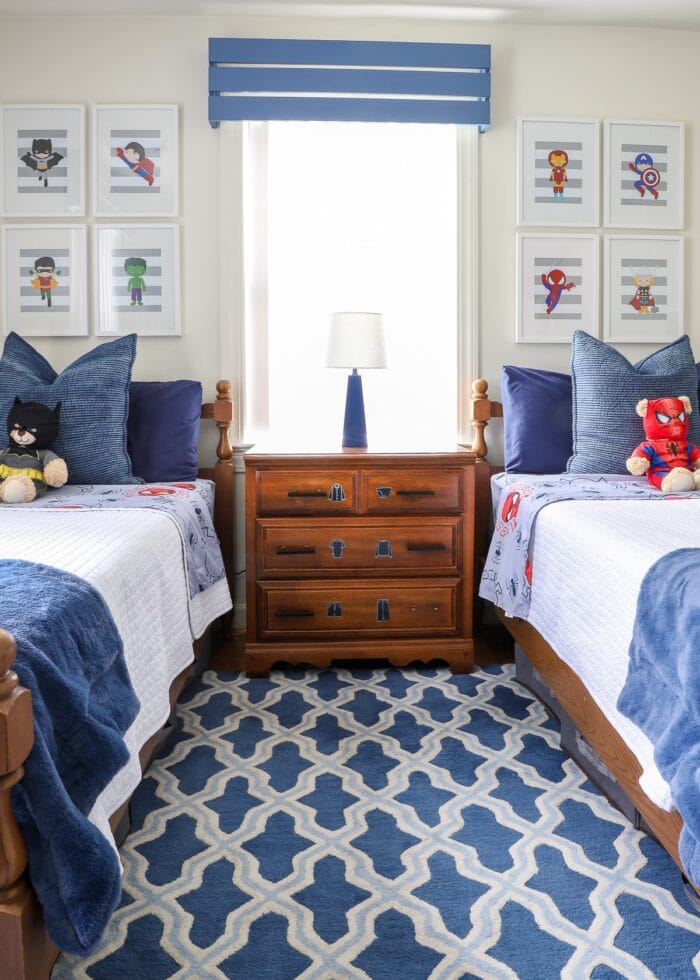
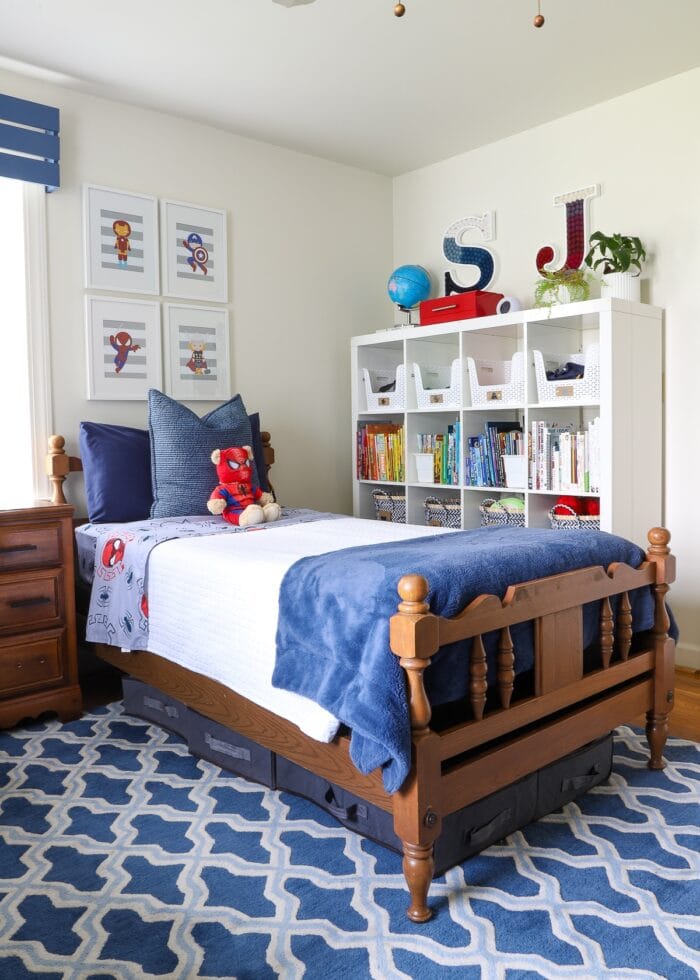
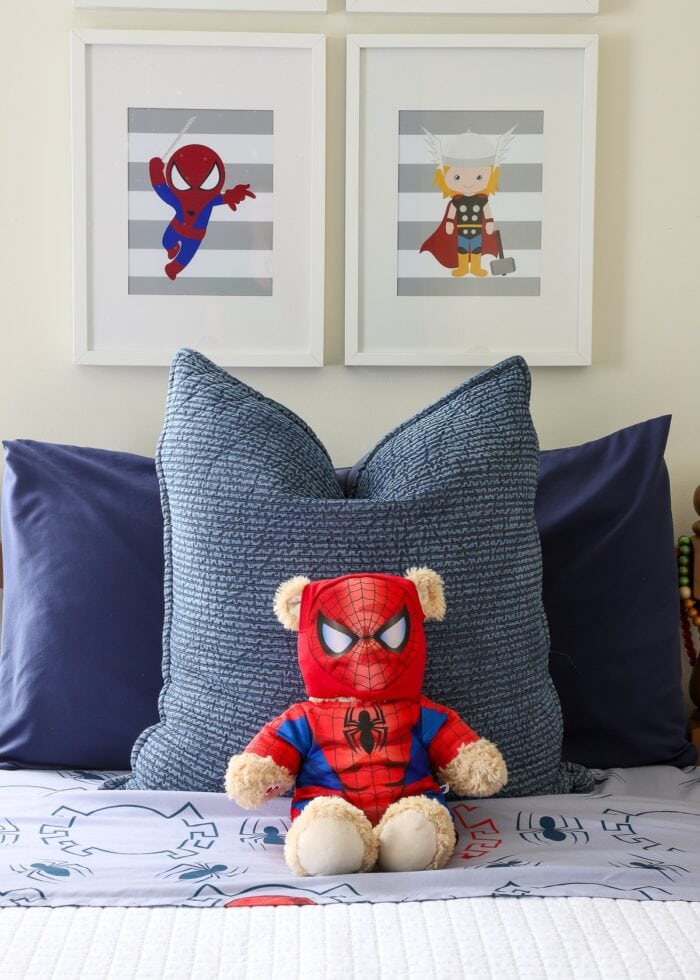
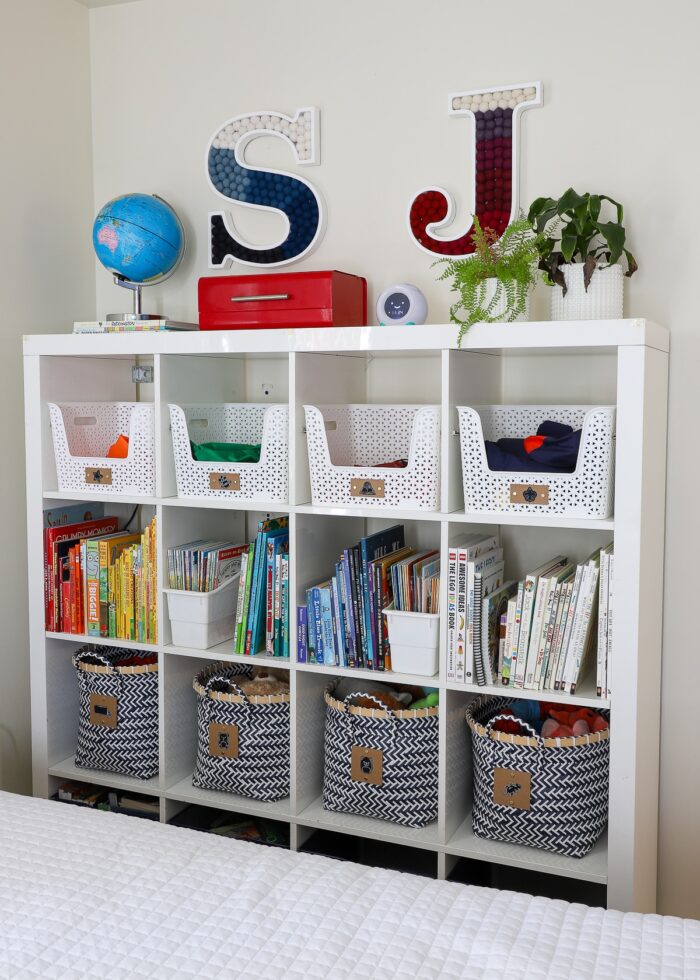
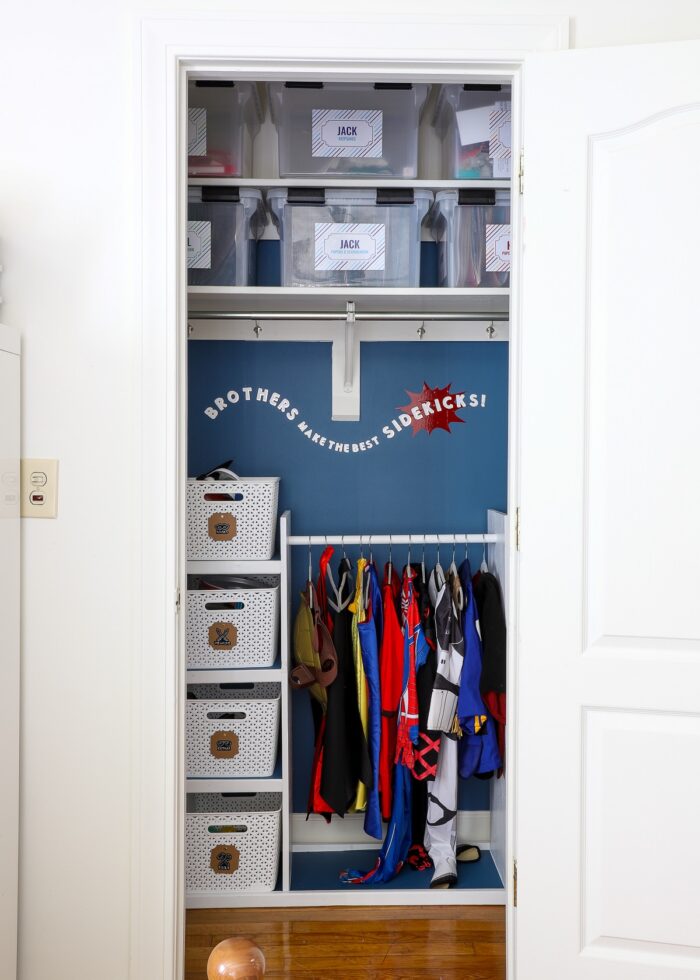
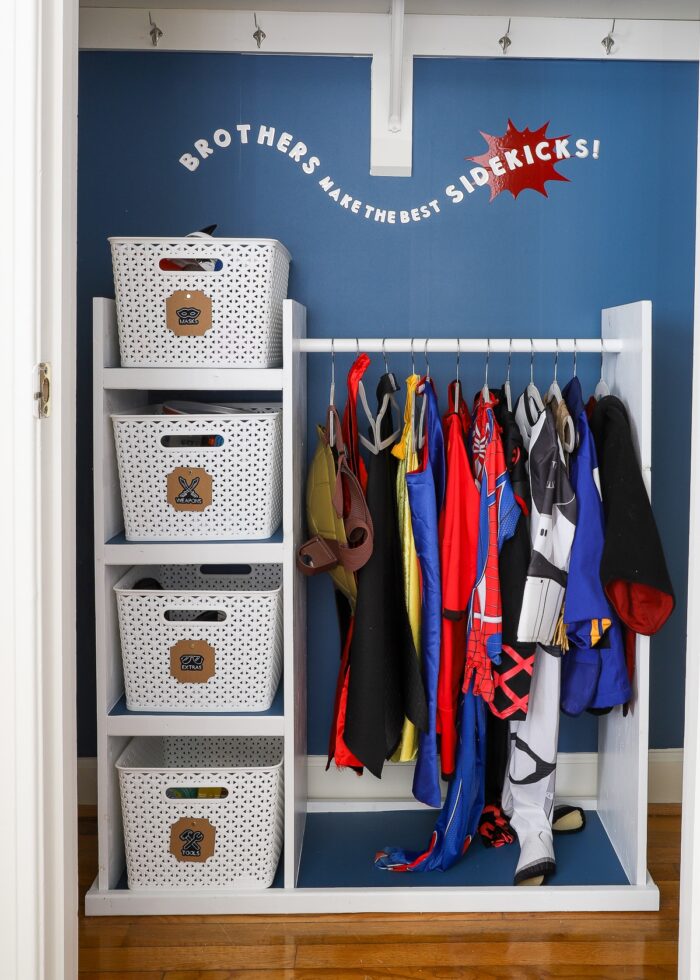
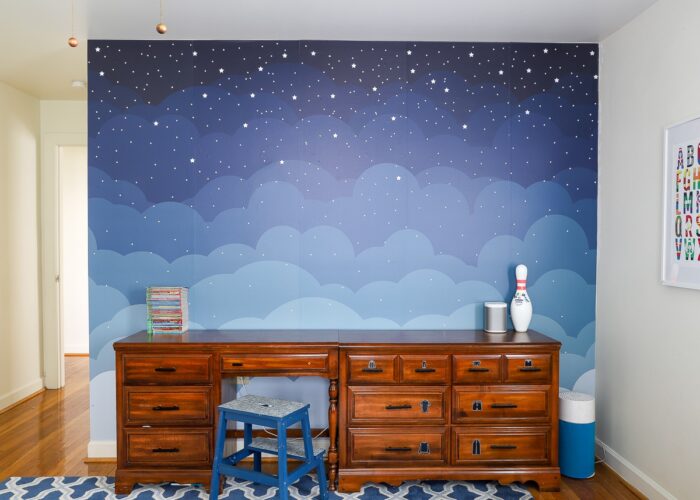
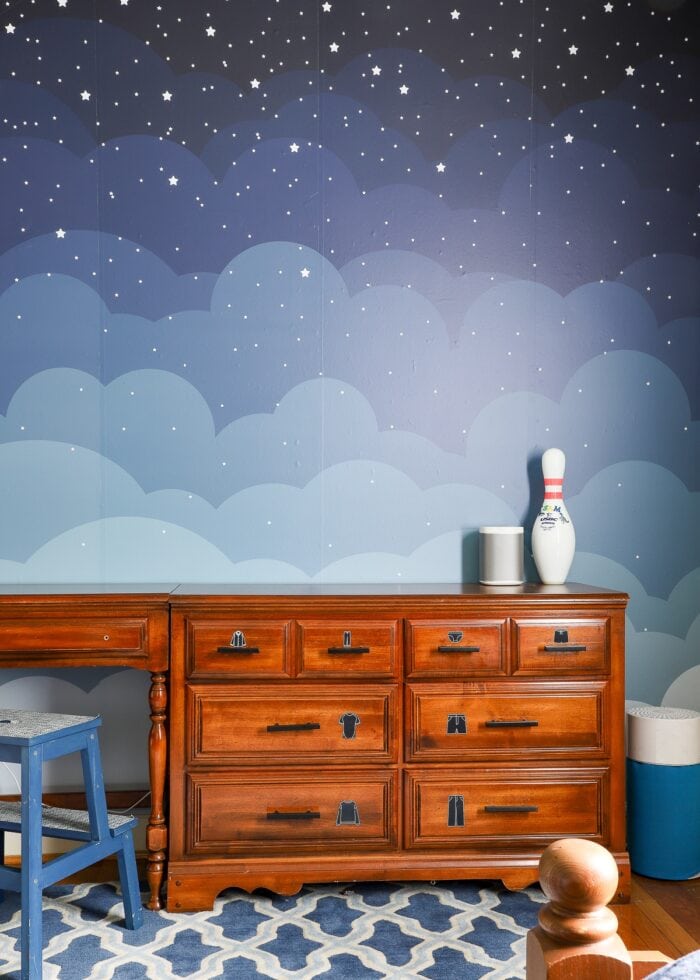
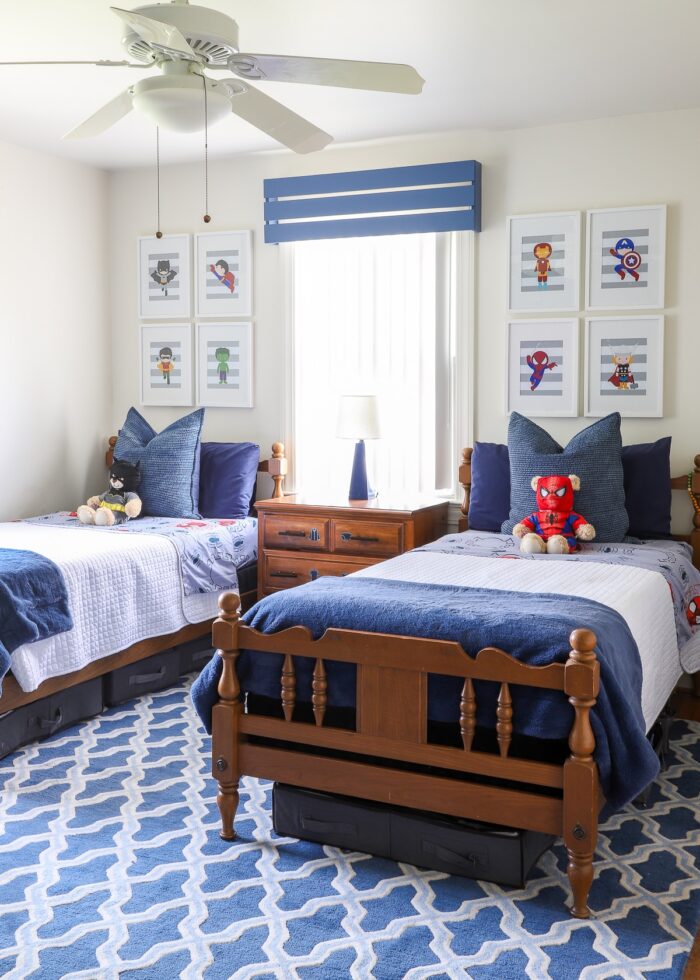
The Little Boys’ Bedroom
Next to the dining room, the little boys’ bedroom is another space that came together so effortlessly, and I loved it so completely. It brought together old and new, simple and busy, and whites and colors to create a space that was totally kid-friendly but also put together and easy to maintain.
When my boys see pictures of this room, they still miss it…the size, the dress-up closet, and the cloud mural, especially! Their days of sharing a bedroom are winding down, and this one definately goes down as a favorite for all of us!
- Final Reveal: Our Boys’ Shared Bedroom Reveal
- How to Hang a Wallpaper Mural | Tips & Tricks for Great Results
- Easy DIY Wood Valance (With a Modern Twist!)
- How to Make Your Own Pom Pom Letter Wall Art
- Setting Up a DIY Dress Up Station for Kids
- DIY Dresser Drawer Labels with a Cricut
- Why Color Sort Your Books (& A Few Other Things Too!)

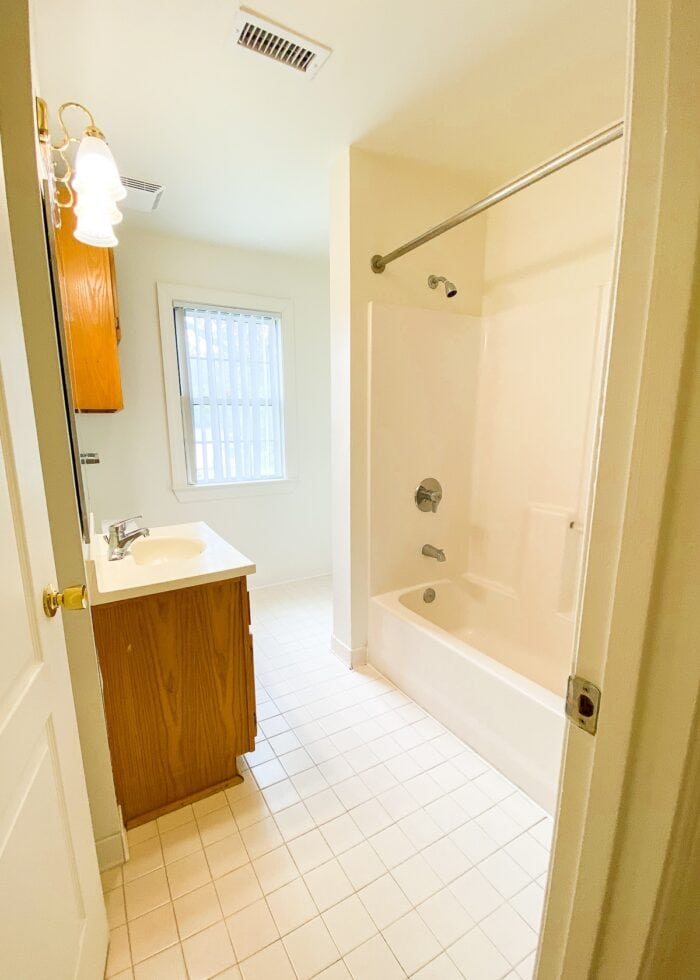
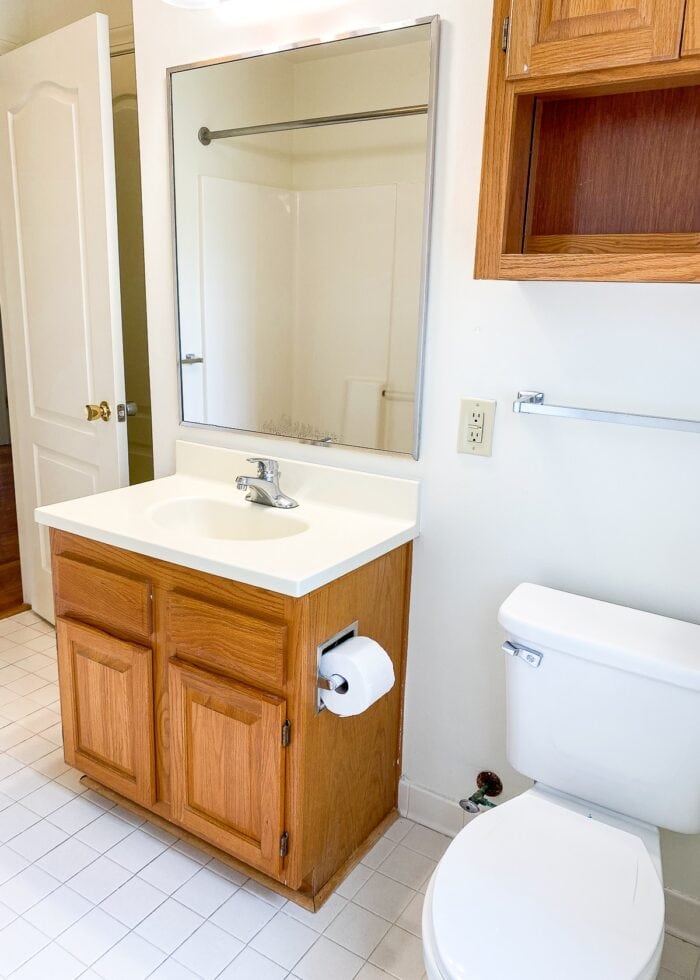
The Hallway Bathroom
The upstairs hall bathroom quite easily had the worst layout I’ve ever seen. Beyond being downright ugly, the sink/vanity placement combined with a huge empty nook made for the most awkward and unusable flow (although, it did have a really great storage closet!)
Since I felt like anything would be better than nothing in here, this became a space I experiemented with. I hung solid-color wallpaper to see if it could mimic paint (without the mess!), I practiced making my own wall design with stencils, and I even completely changed the floor pattern with two rolls of craft vinyl! I never really loved this bathroom, but it was fun to have a blank canvas to try out some new ideas!
- Top Tips for a Perfectly Organized Bathroom Closet (That Looks Great Too!)
- How to Make Your Own (Cheap) Bathroom Tile Stickers
- Stenciling a Wall Using Cricut’s Smart Stencil
- Solid Wallpaper | What It Is + Ideas for Using It
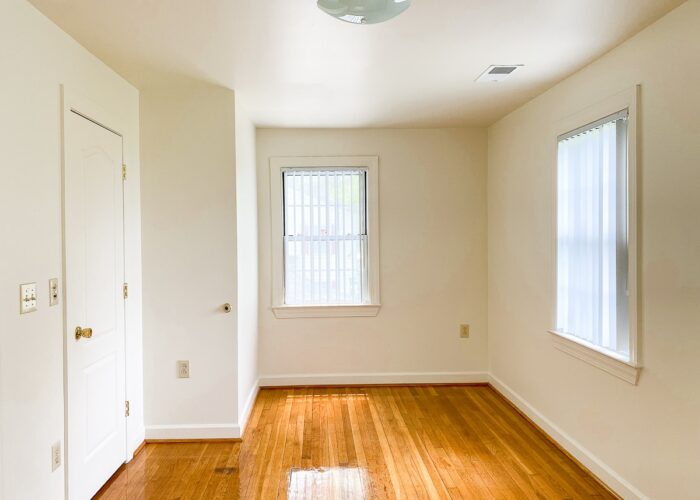
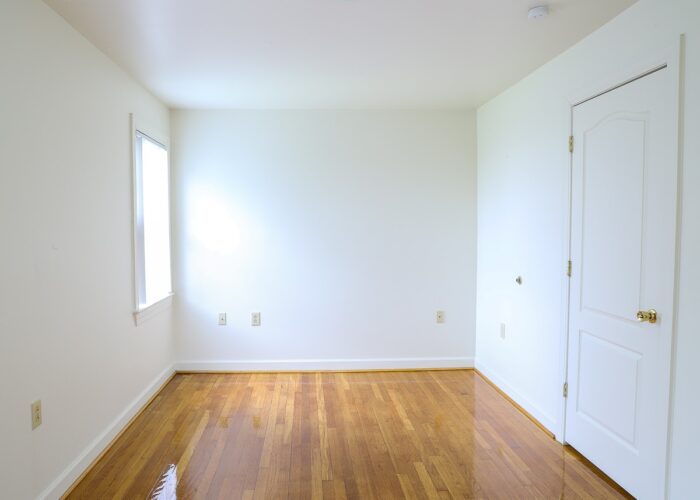
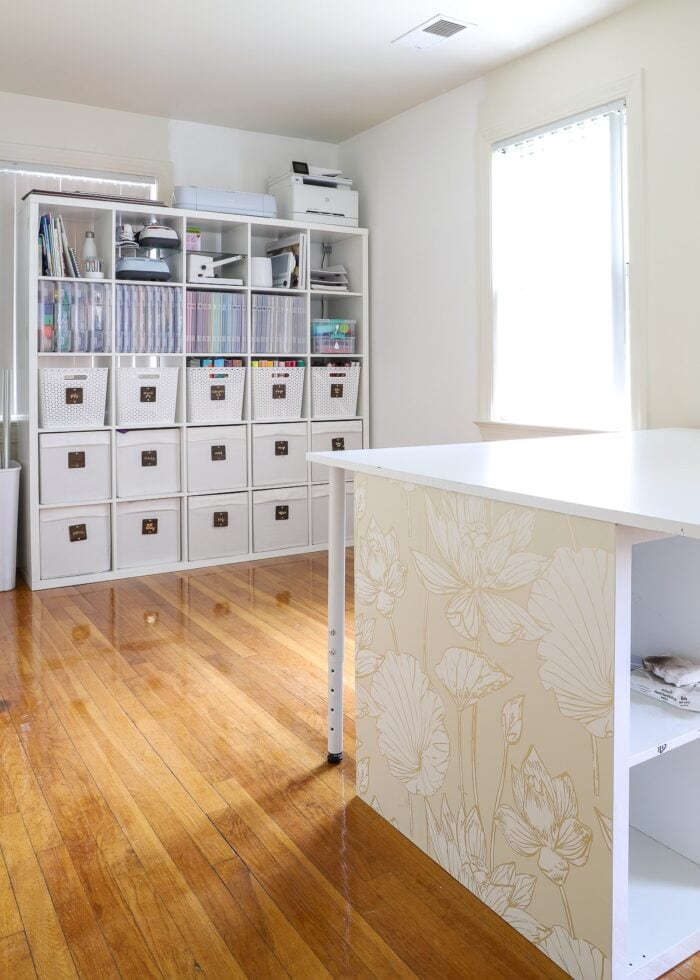
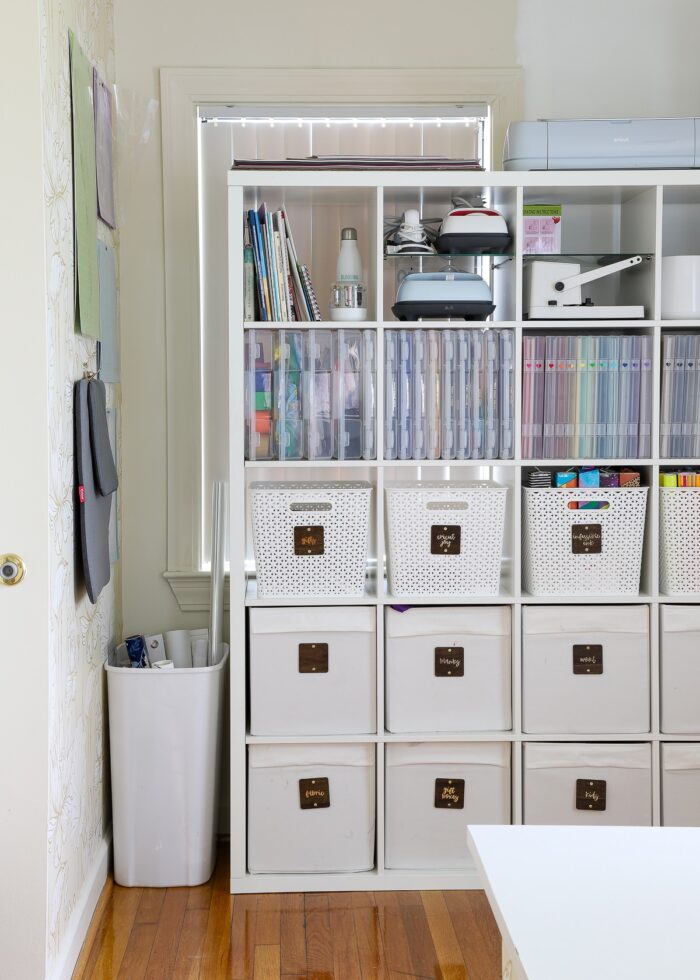
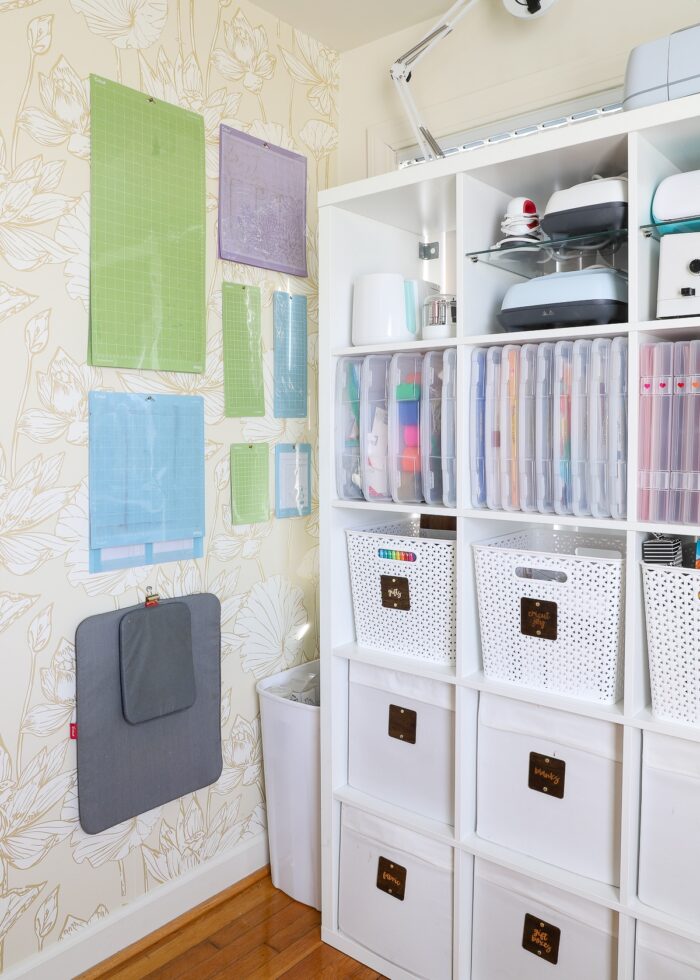
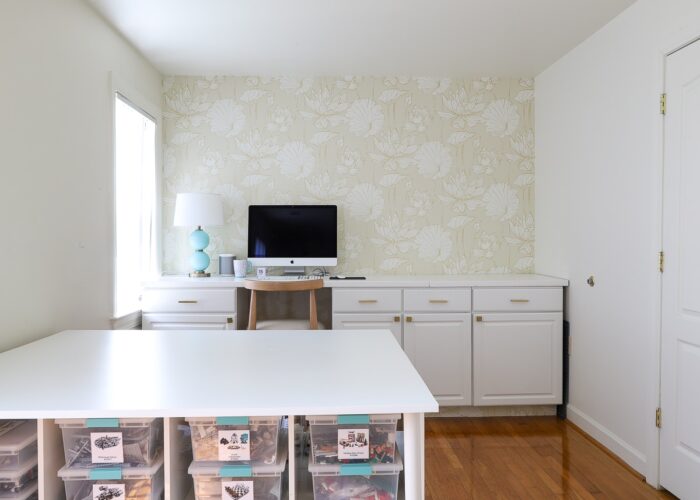
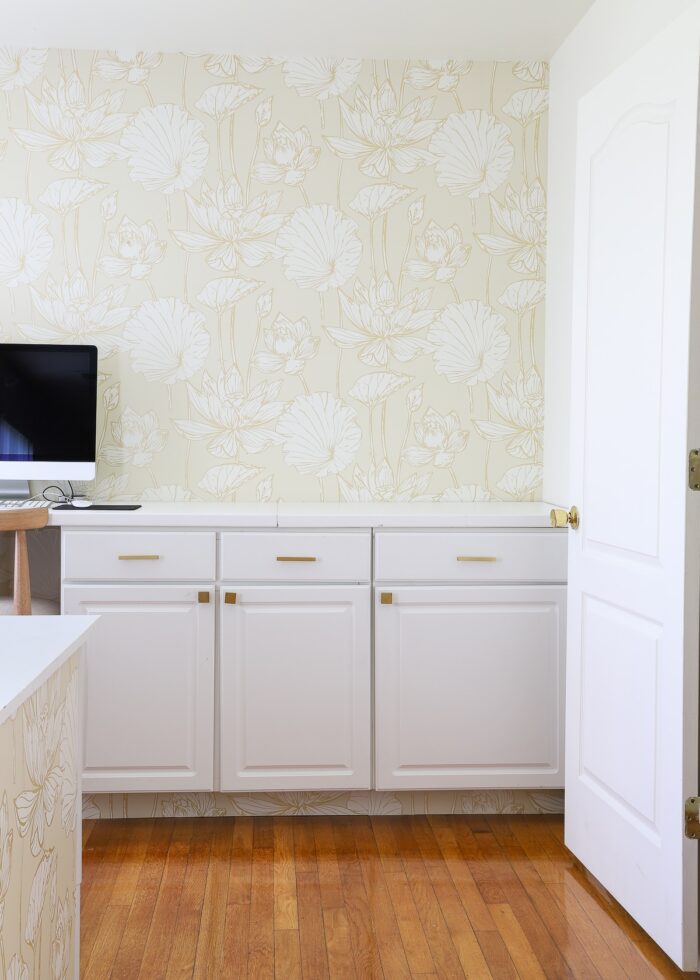
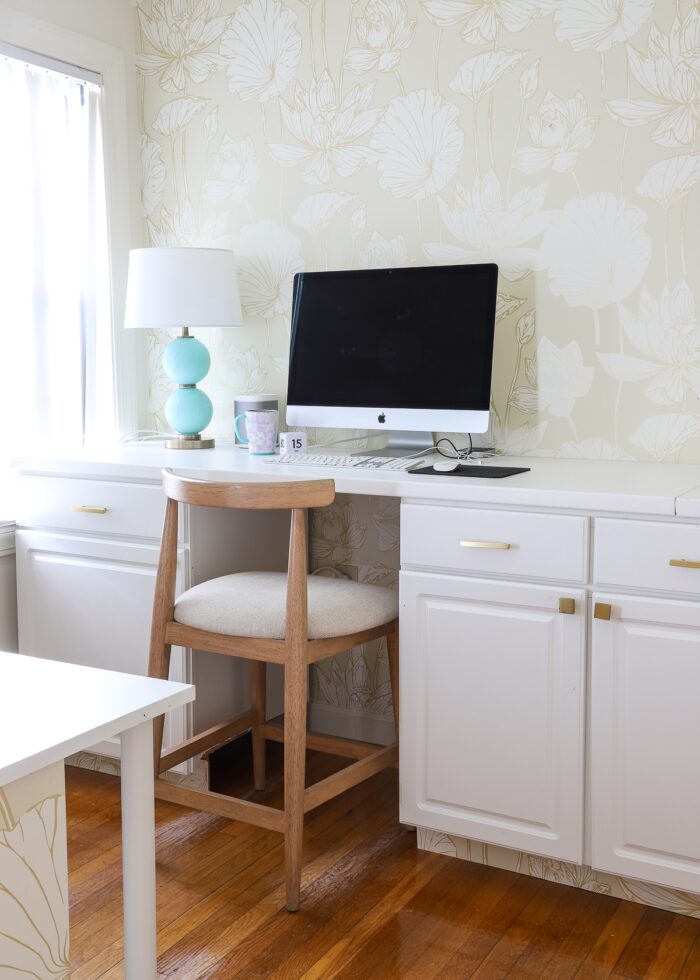
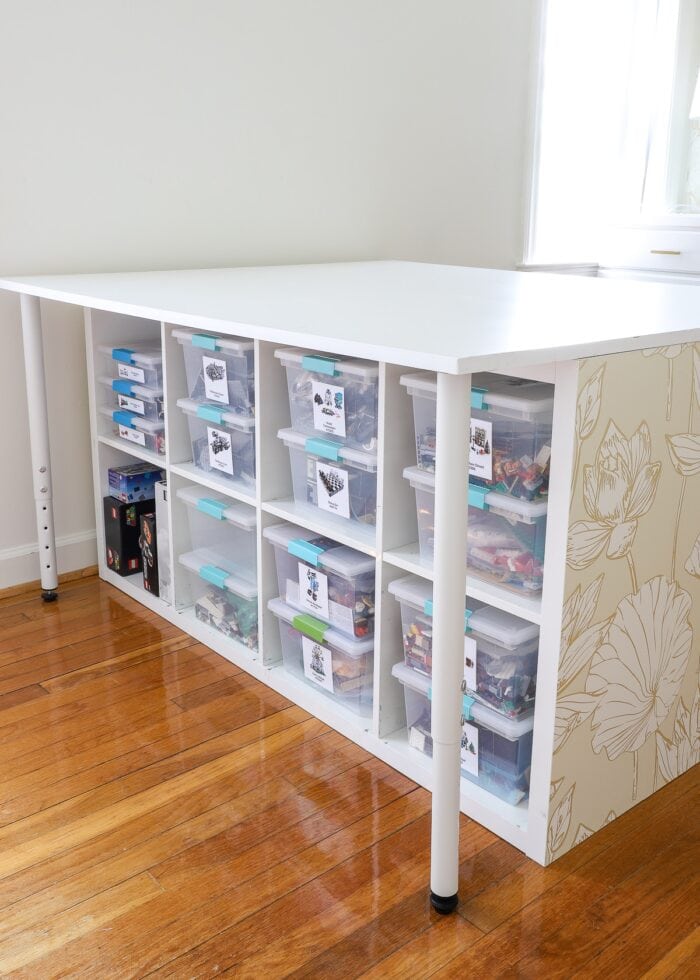
The Office/Craft Room
The long, skinny bedroom along the front upstairs of the house served as my craft room and office. Although I did get some great projects accomplished in here, this is another space where I ran out of time to get it all just right.
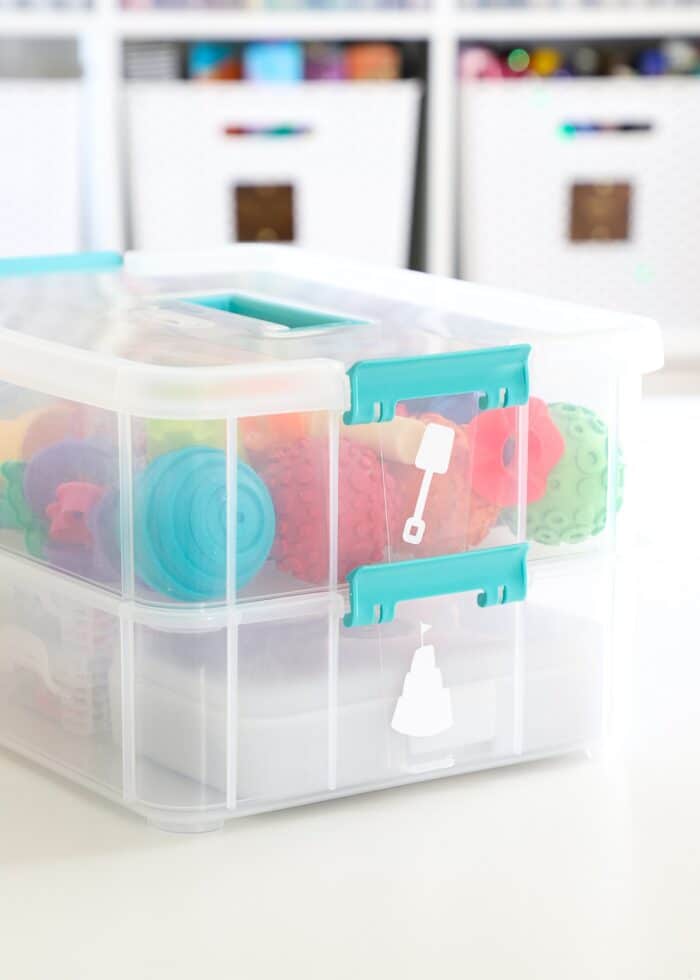
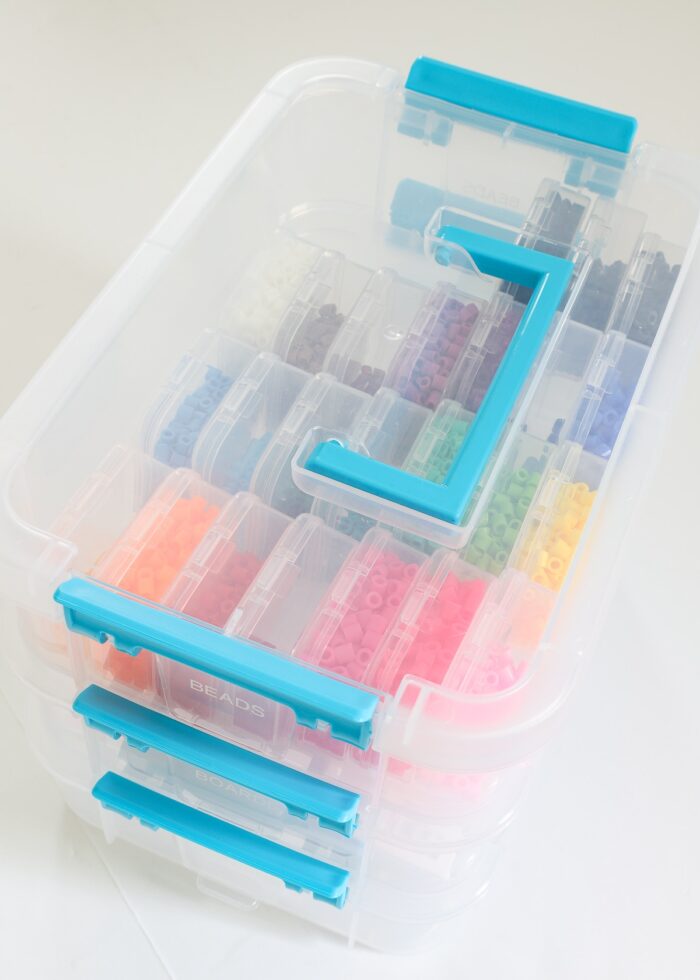
Some of the craft storage solutions I came up with really served me well (the cardstock paper, the perler beads, the kinetic sand!), and I sure did love that subtle floral wallpaper. But the layout never felt right and it was definitely missing a wow/finish factor!
- Final Reveal: One Last Look at Our NC Office & Craft Room
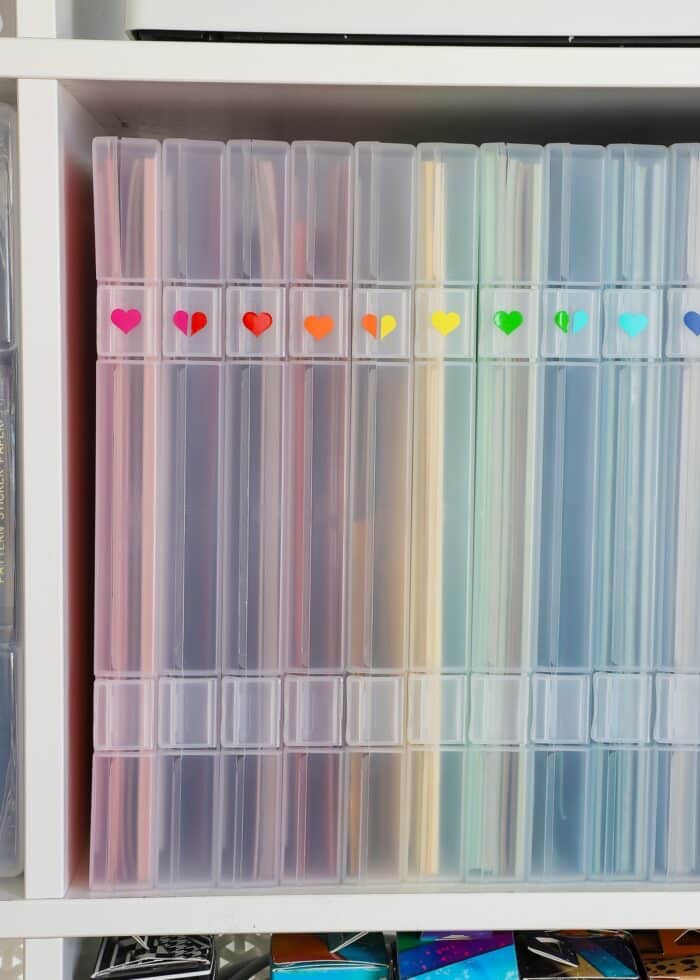
- How to (Affordably) Store Craft Paper on IKEA Kallax Shelves
- The Best (& Easiest) Way to Store Cricut Mats
- A Perler Bead Storage Solution That Works!
- DIY Wood Labels for Baskets

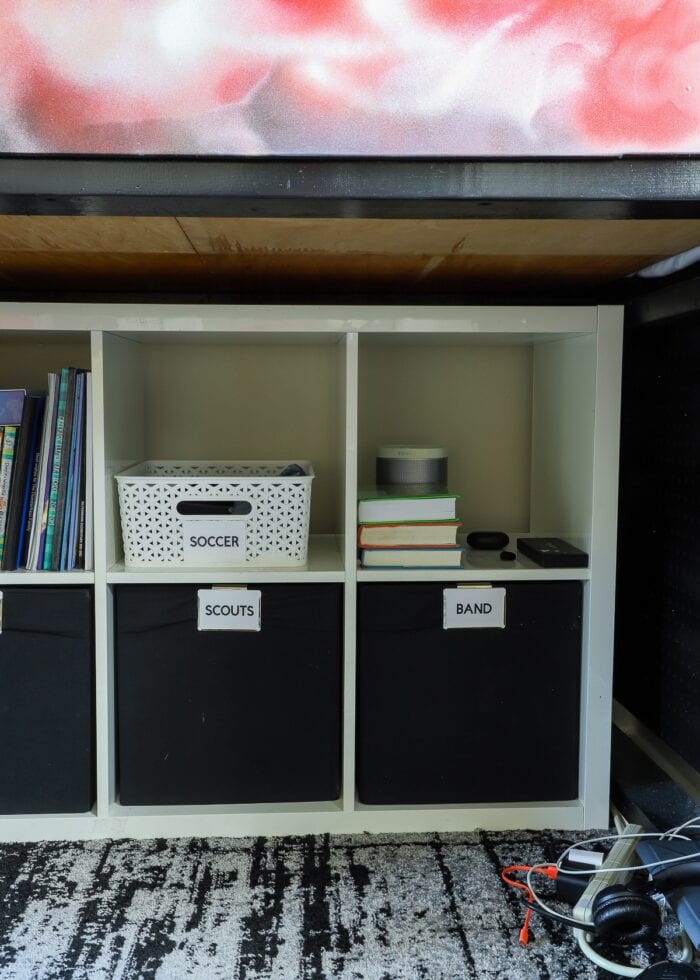
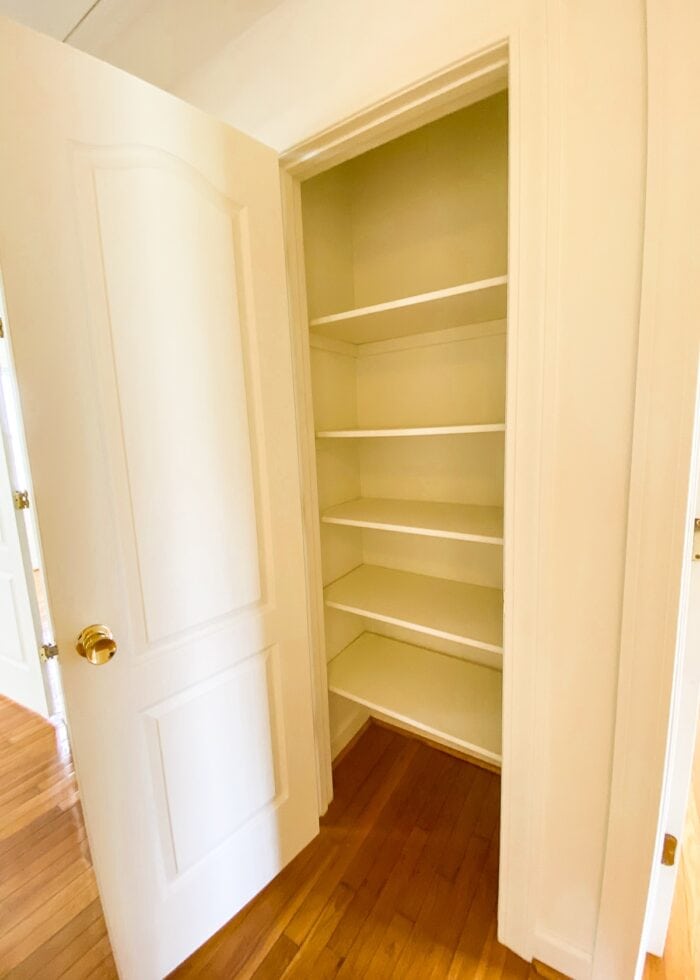
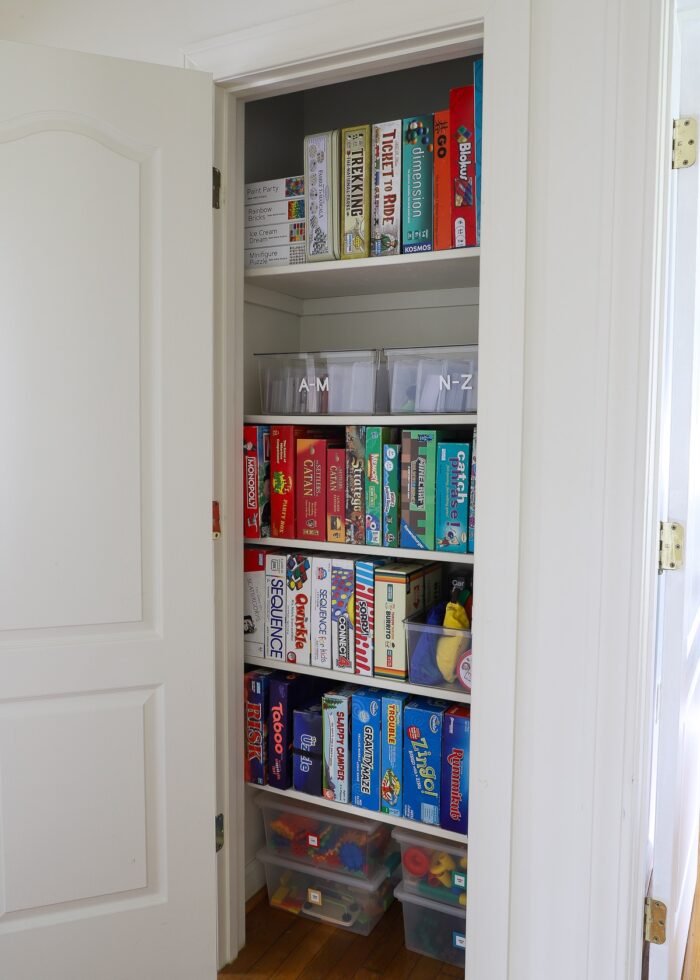
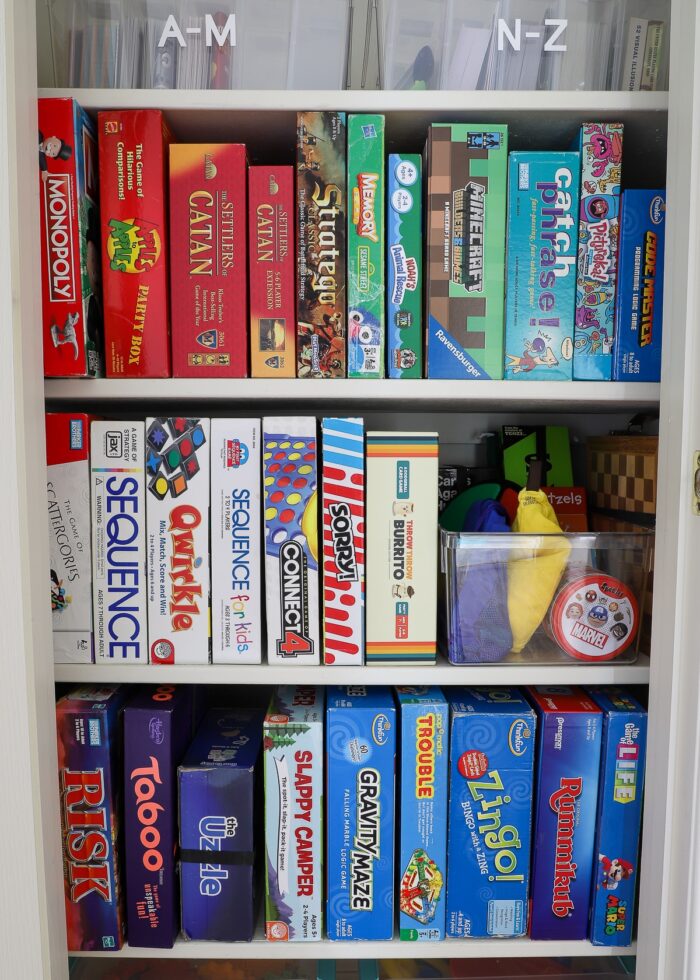
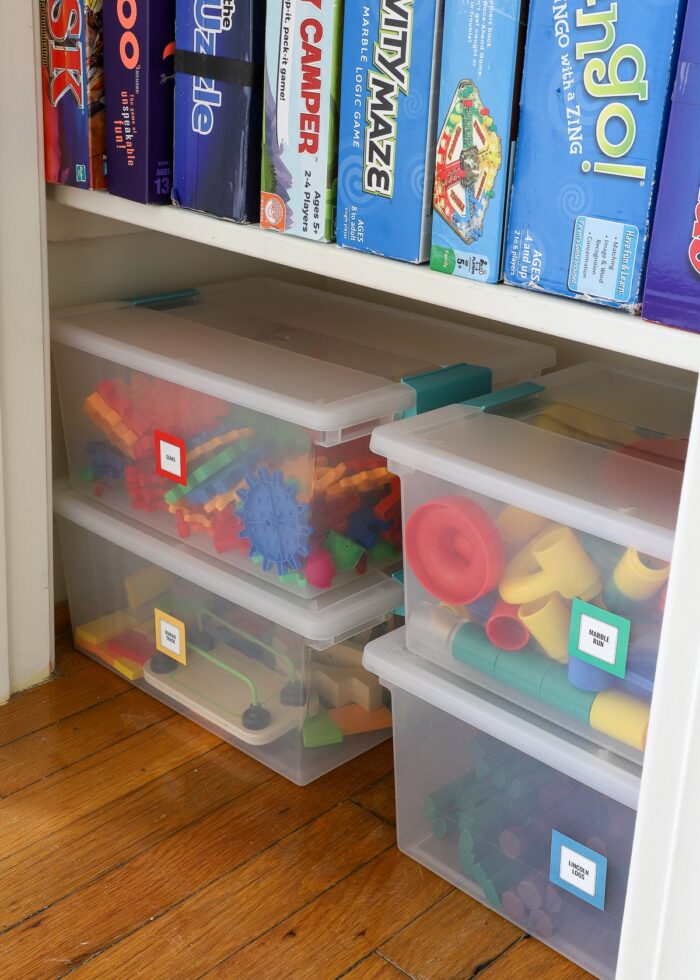
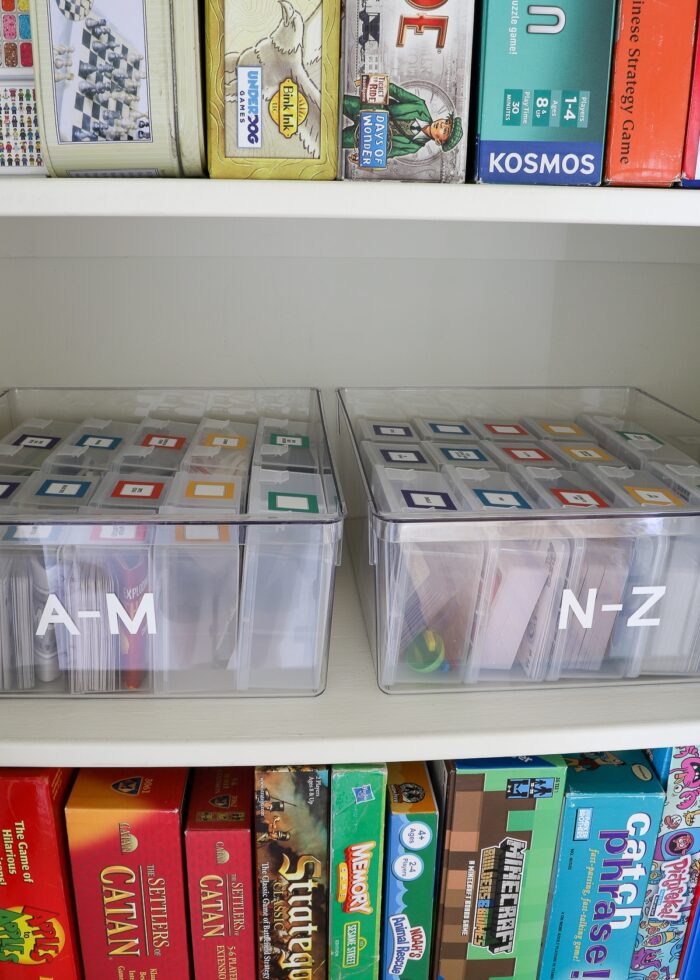
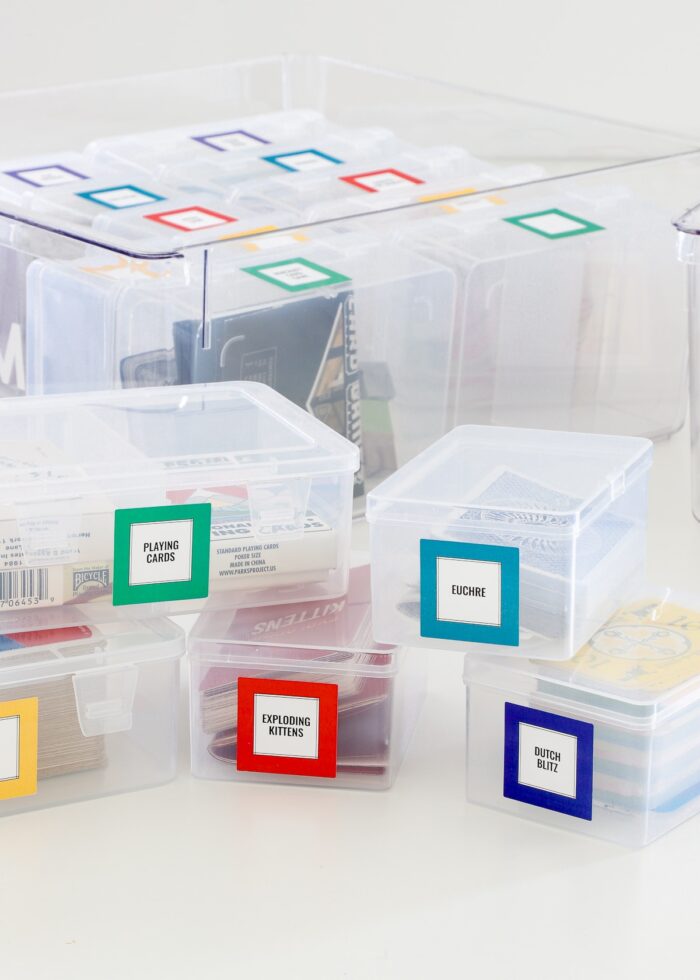
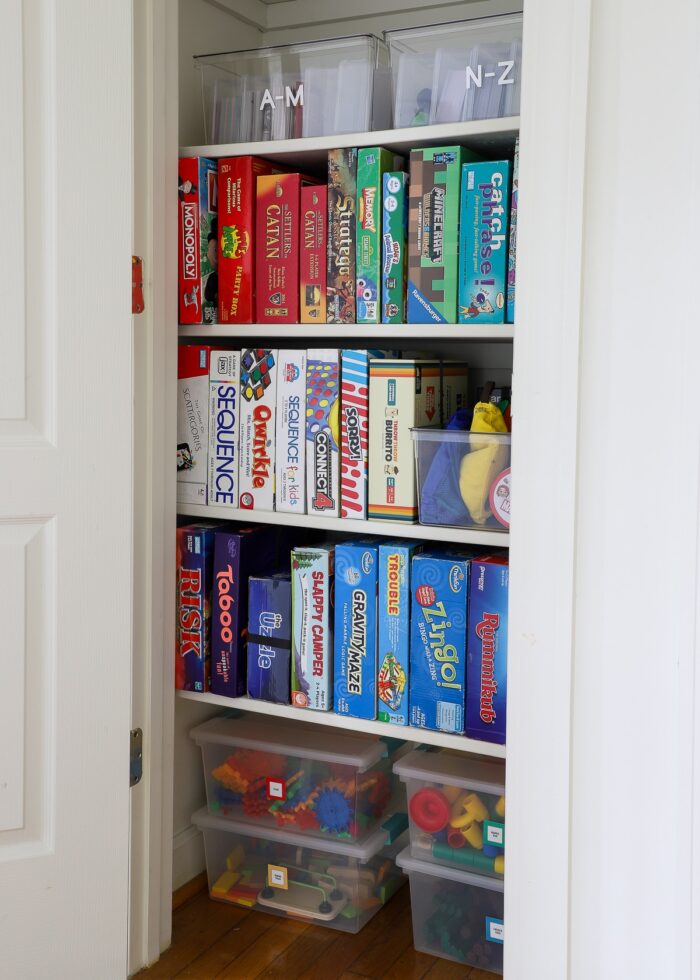
The Game Closet
The upstairs hallway had two very generously-sized closets. I never got a picture of the big one (because all it held was Greg’s military gear and it wasn’t pretty!) But this more-narrow closet held our extensive game collection.
Organizing this closet (“once and for all”) was one of the most gratifying projects in this entire home. After so much thought and consideration, I feel like we finally, actually, really organized our games in a way that worked! If you’re needing game organization, these two posts are very much worth checking out.
- The BEST Way to Store Board Games (Without Ditching the Boxes!)
- Practical Playing Card Storage (That Looks Great Too!)
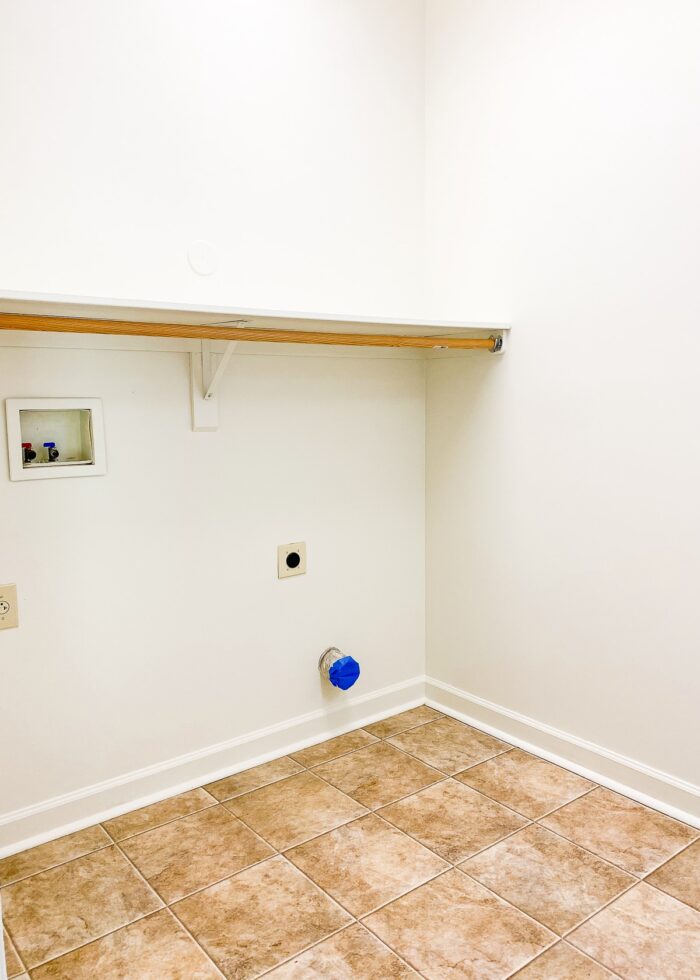
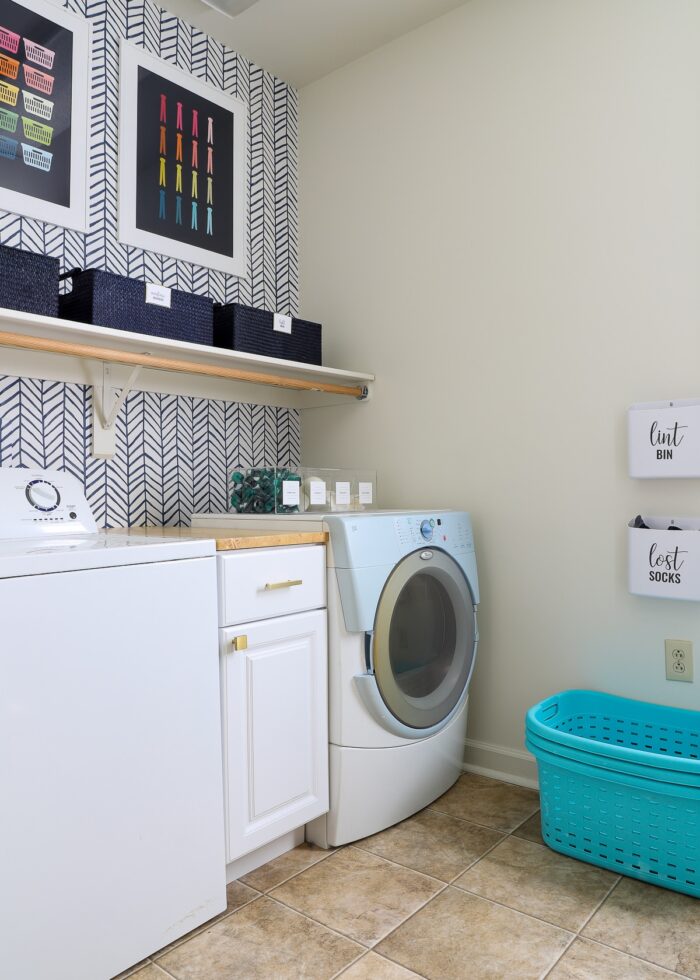
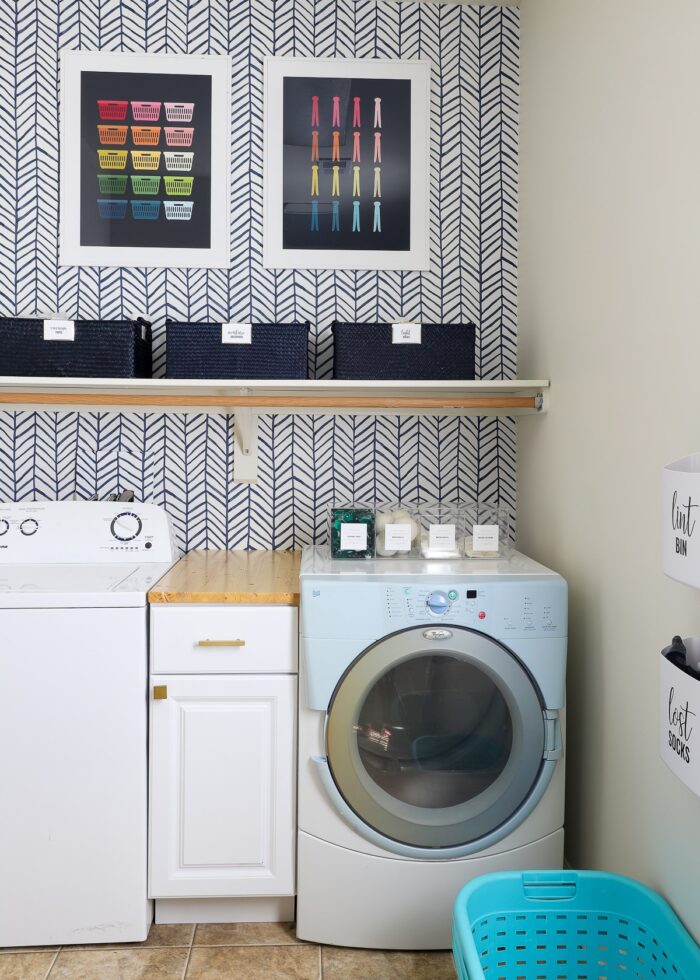
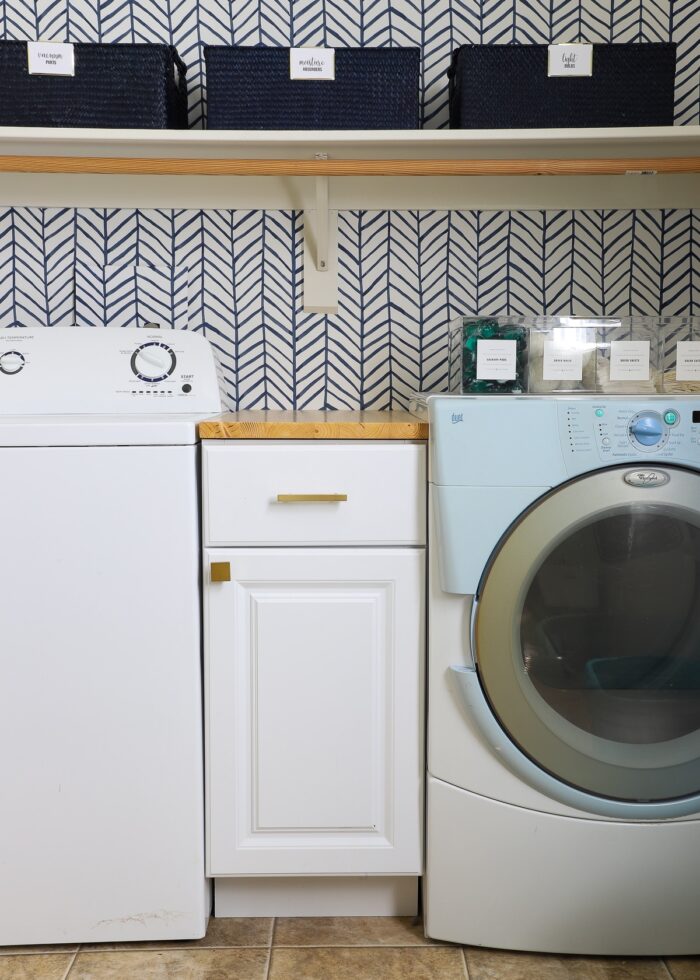
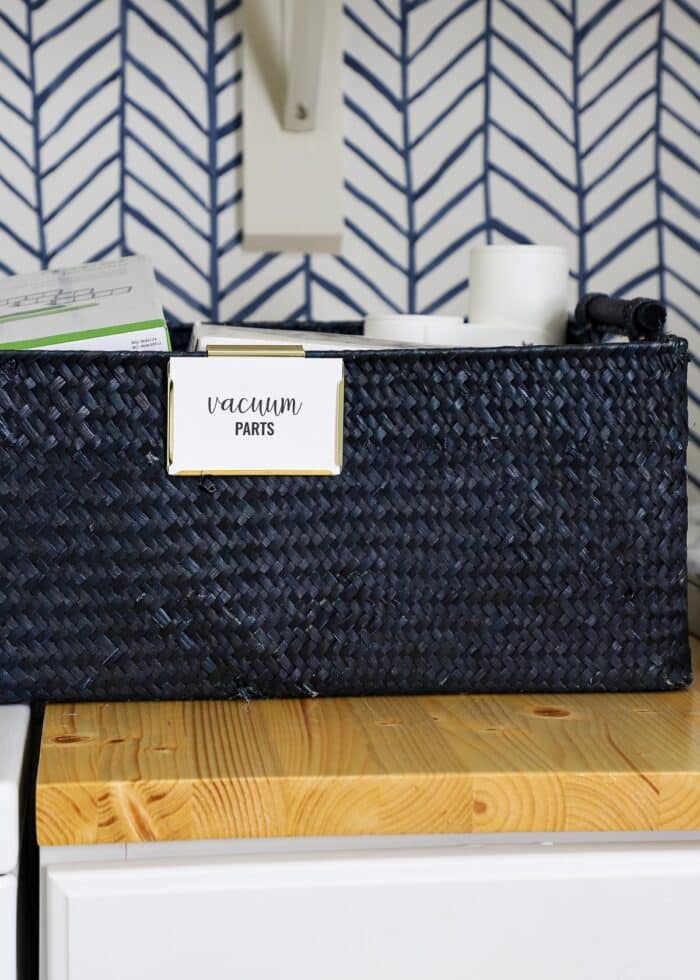
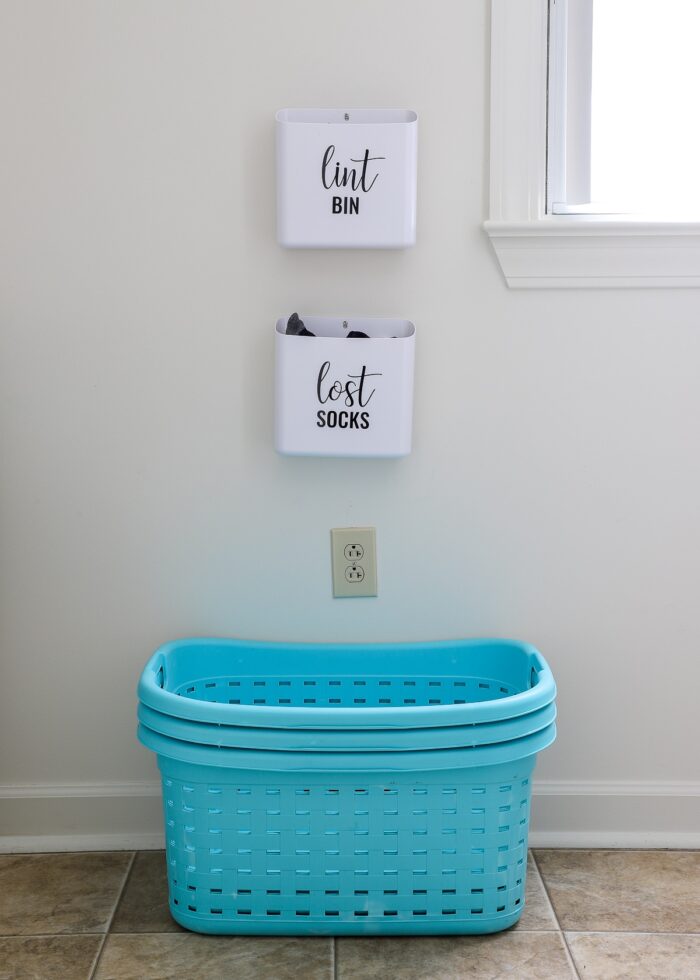
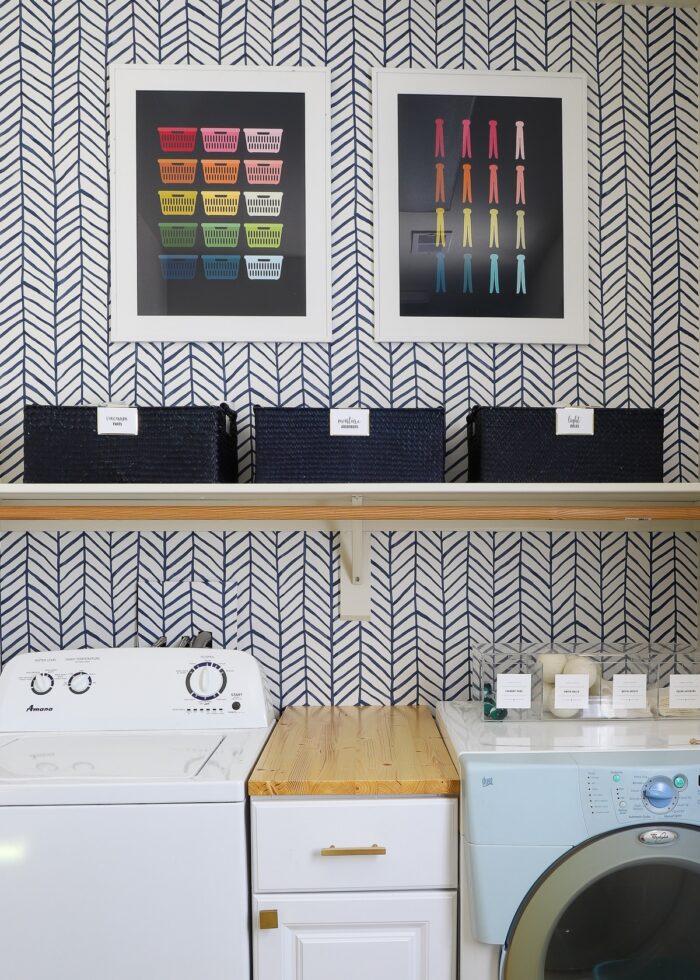
The Laundry Room
I tend to overthink my room makeovers…a lot. This laundry room refresh was (practically) a one-day makeover that used up a bunch of things I already had around (i.e., the wallpaper, skinny cabinet, blue baskets, white frames).
Never underestimate the power of good wallpaper in a laundry room…it can instantly help you not hate laundry quite so much. That, the happy prints, and sleek organization all made this room such a delightful spot at the top of our stairs!
- Final Reveal: Renter-Friendly Laundry Room Makeover with Easy DIYs
- Hide That Ugly Washer Hookup | Quick, Cheap, Easy!


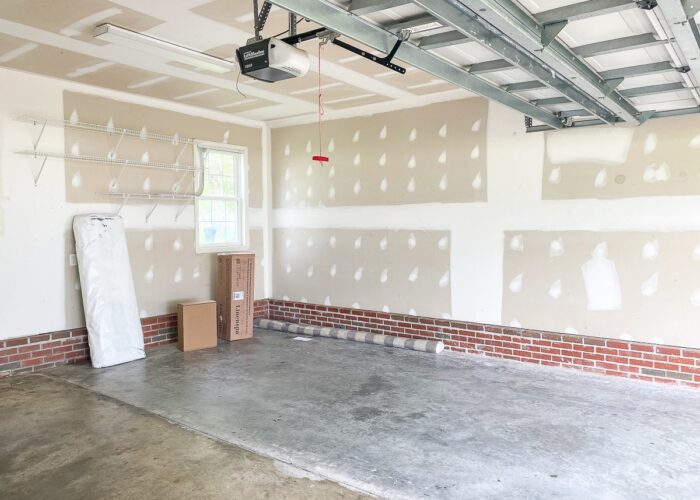
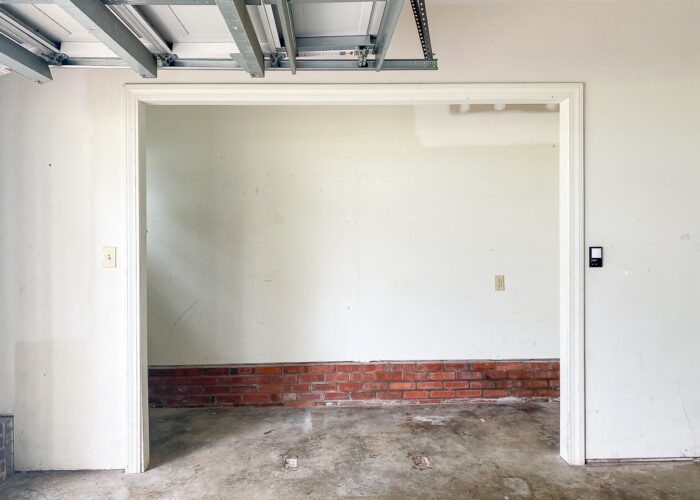
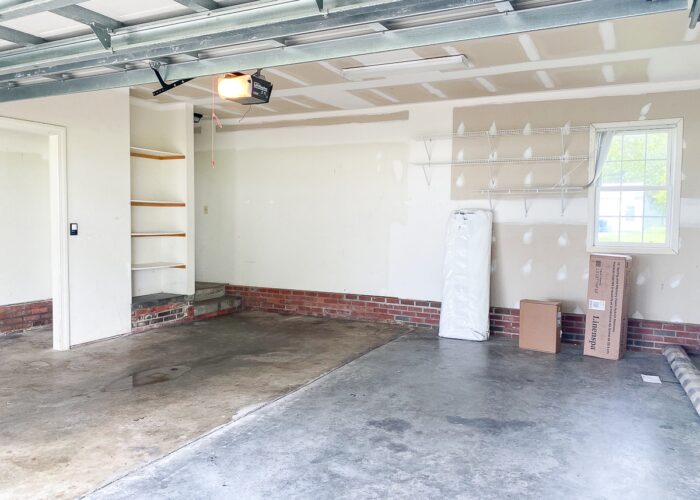
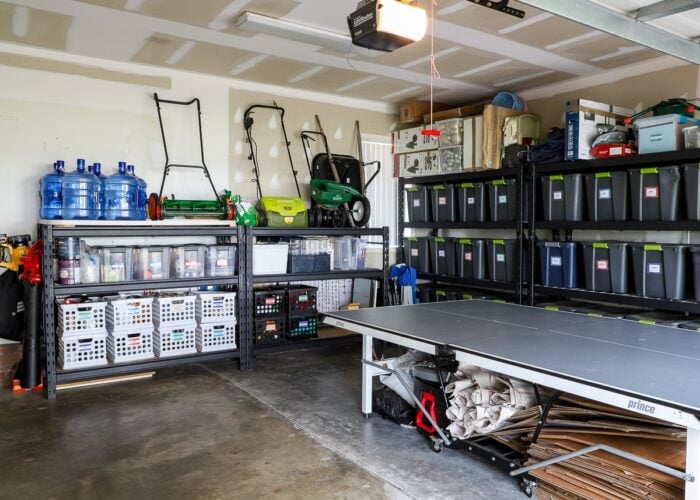
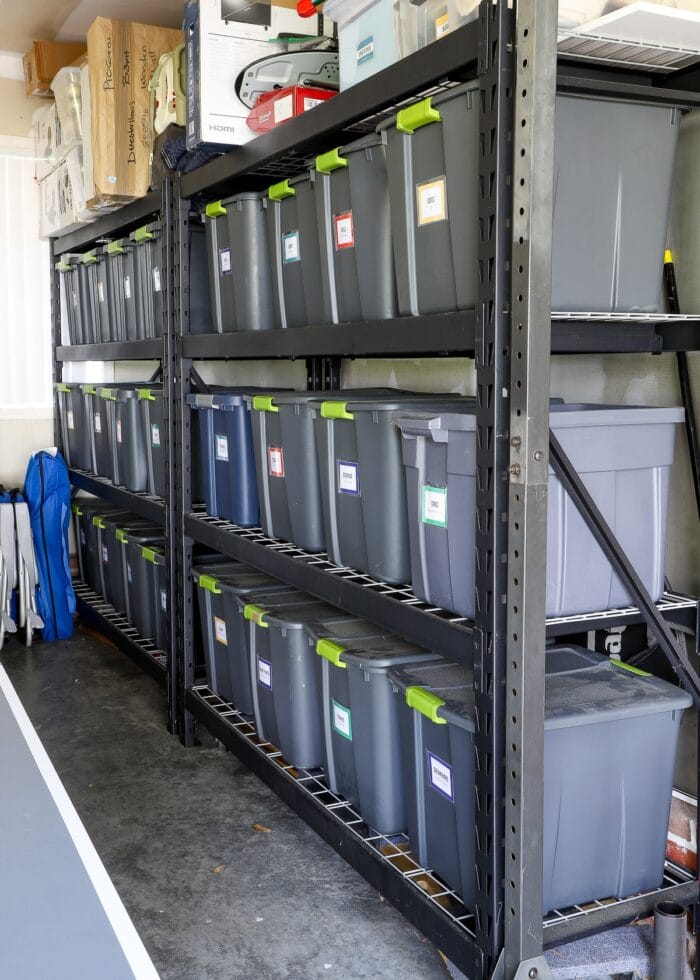
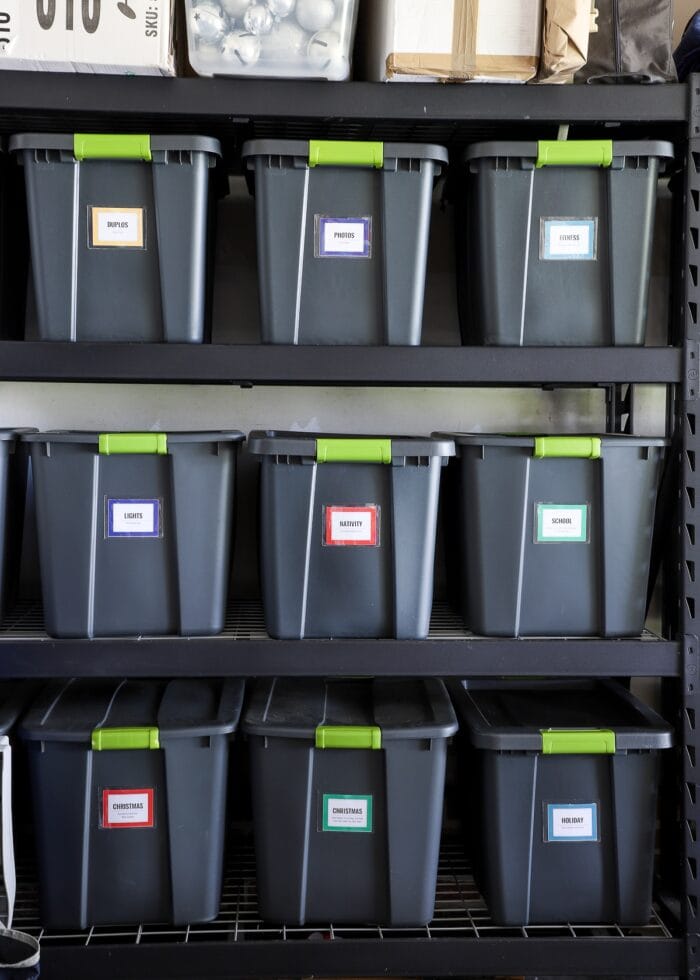
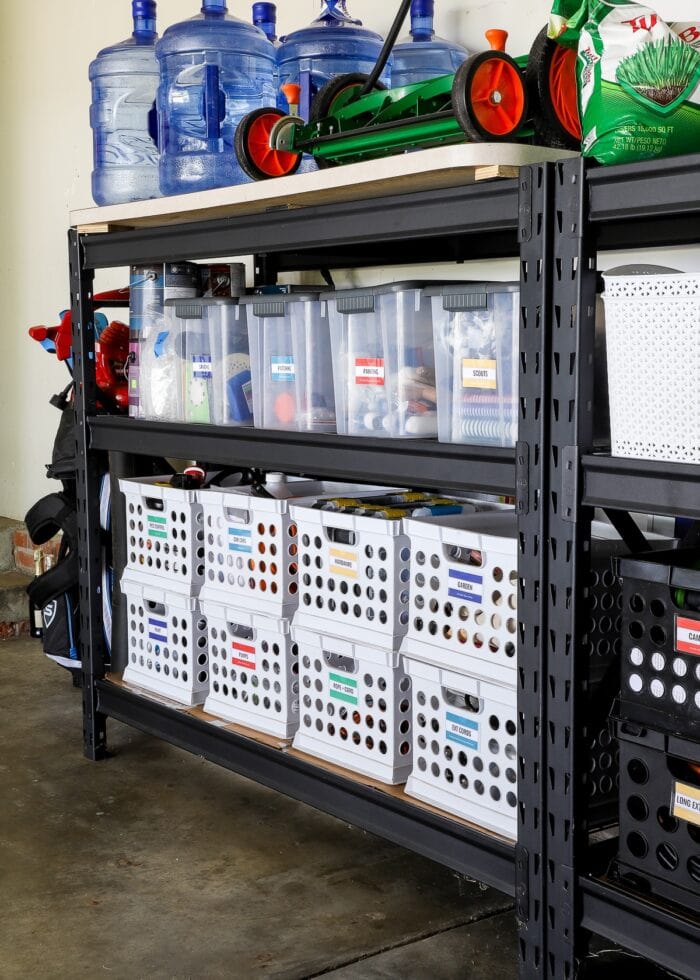
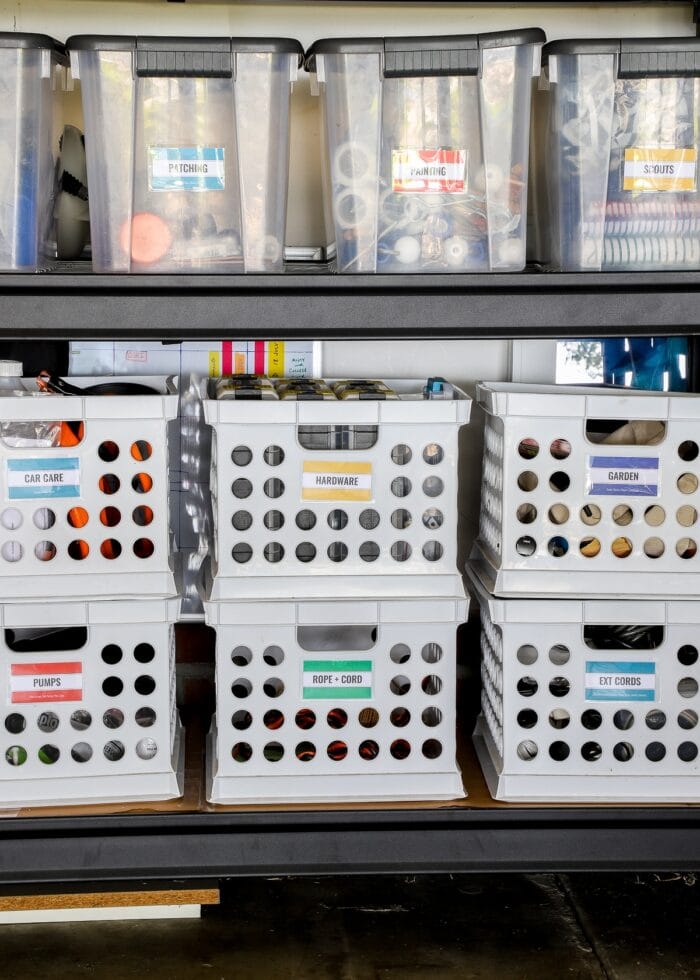
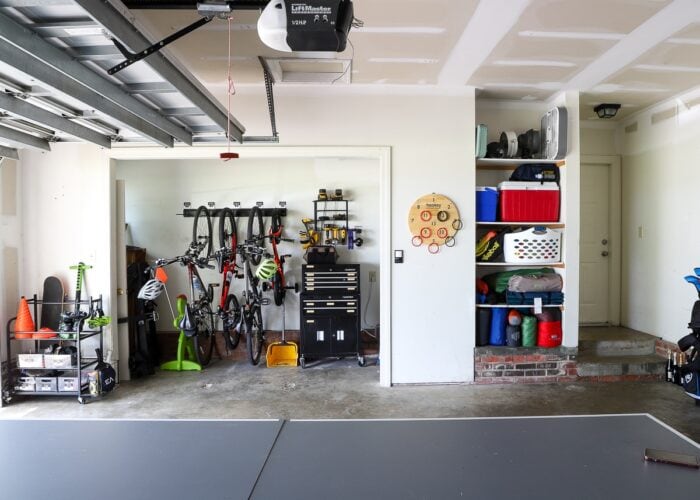
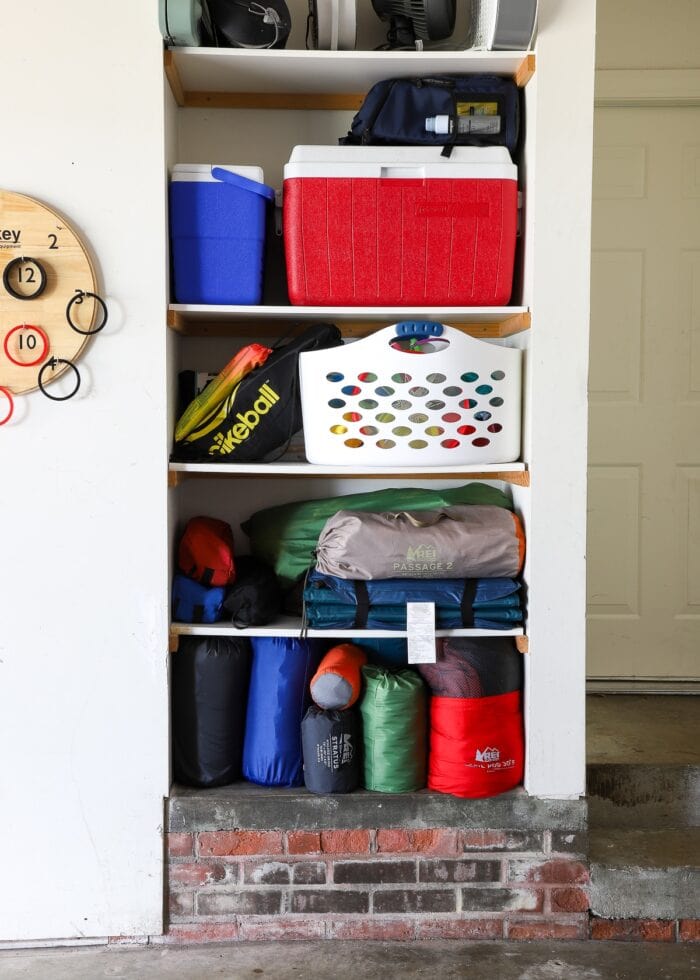
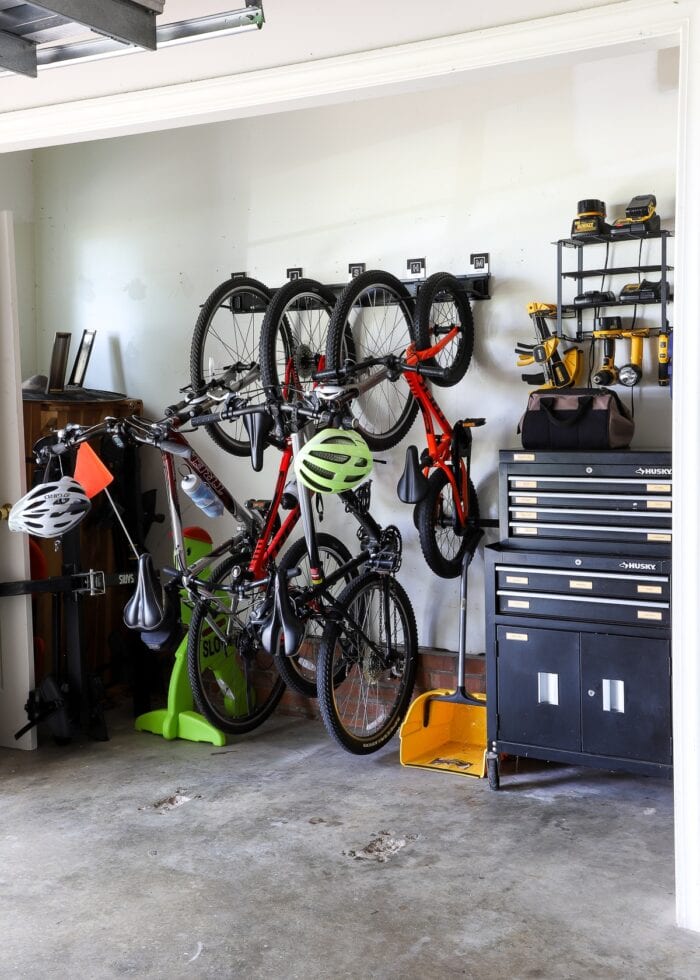
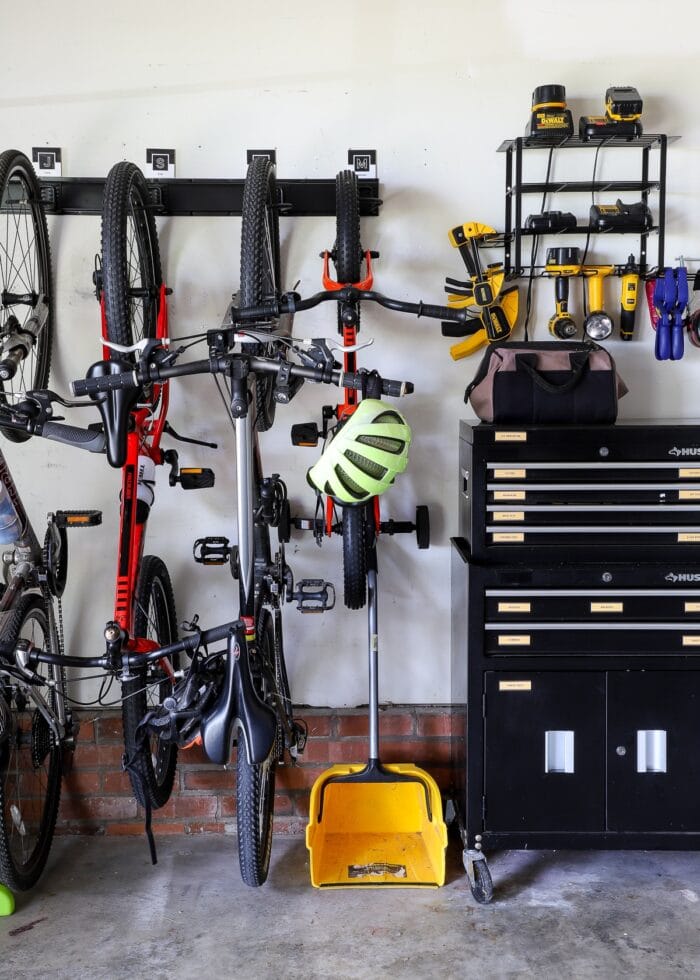
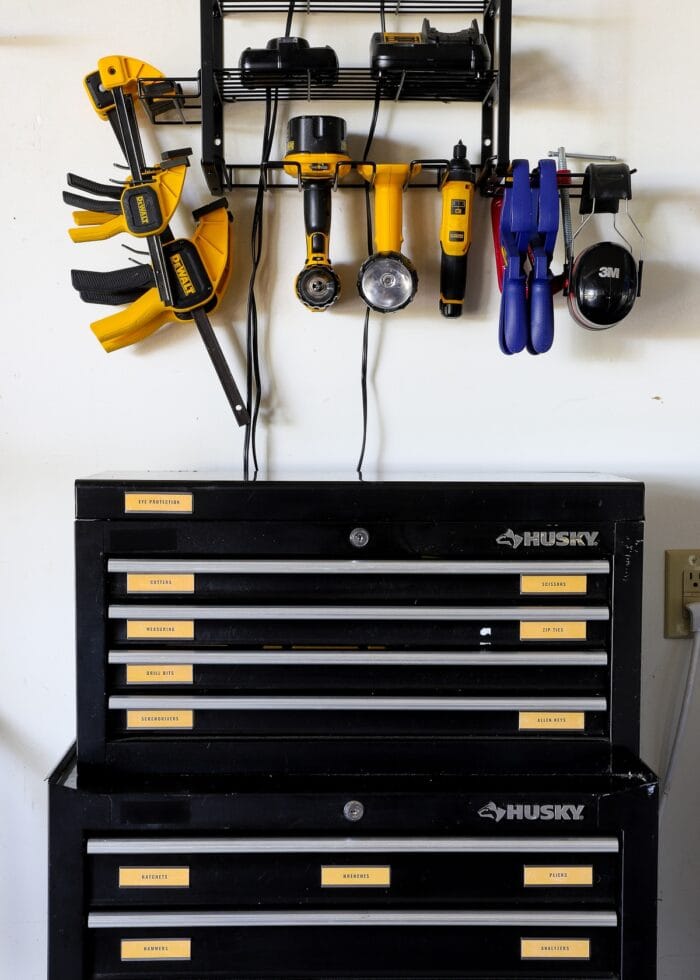
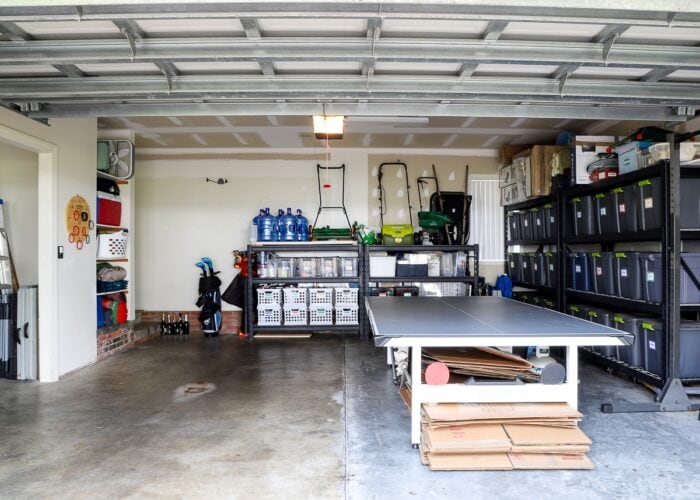
The Garage
I hate that it took almost the full two years to get our garage sorted out and organized just right. But that’s kind of how settling in after a move works. (The garage becomes the last on the list after you find spots for everything else!) This garage took a lot of trial and error to get to the final state shown below. But in the end, we found homes for all the garage “things” and created a pretty functional space to boot!
- Final Reveal: How We Organized All the Things In Our North Carolina Garage
- Storing Kids’ Sports Equipment | Our Real Life Solutions
- Our Compact Tool Storage in the Garage (& Why It Works!)
- Organizing Screws & Nails | A Solution That Really Works
- DIY Magnetic Toolbox Labels (With Template!)
- The Easiest Way to Label Your Storage Bins (With Template!)

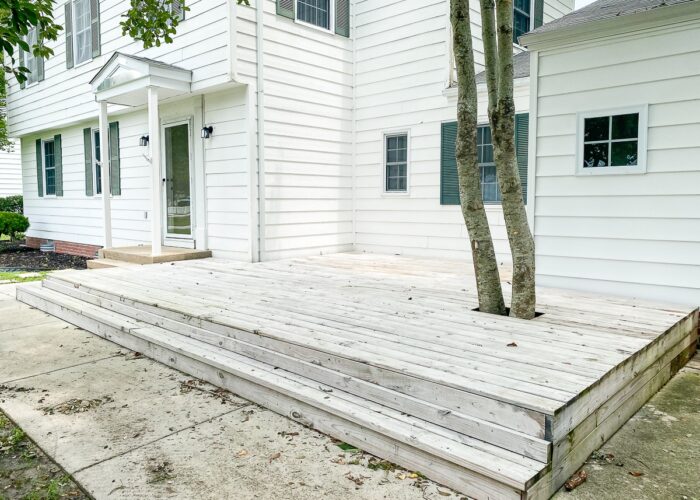
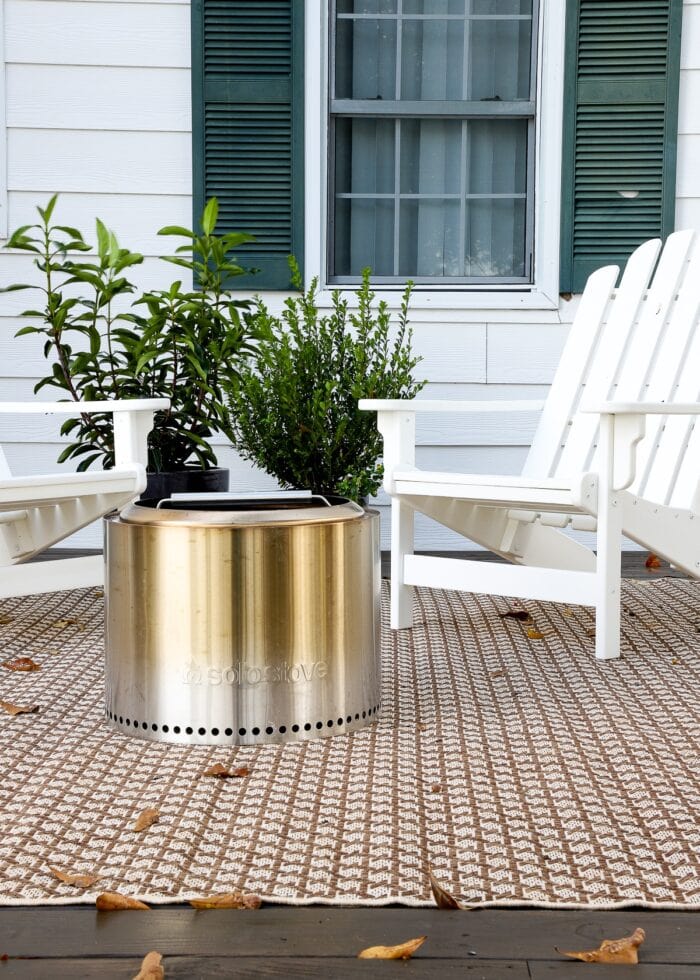
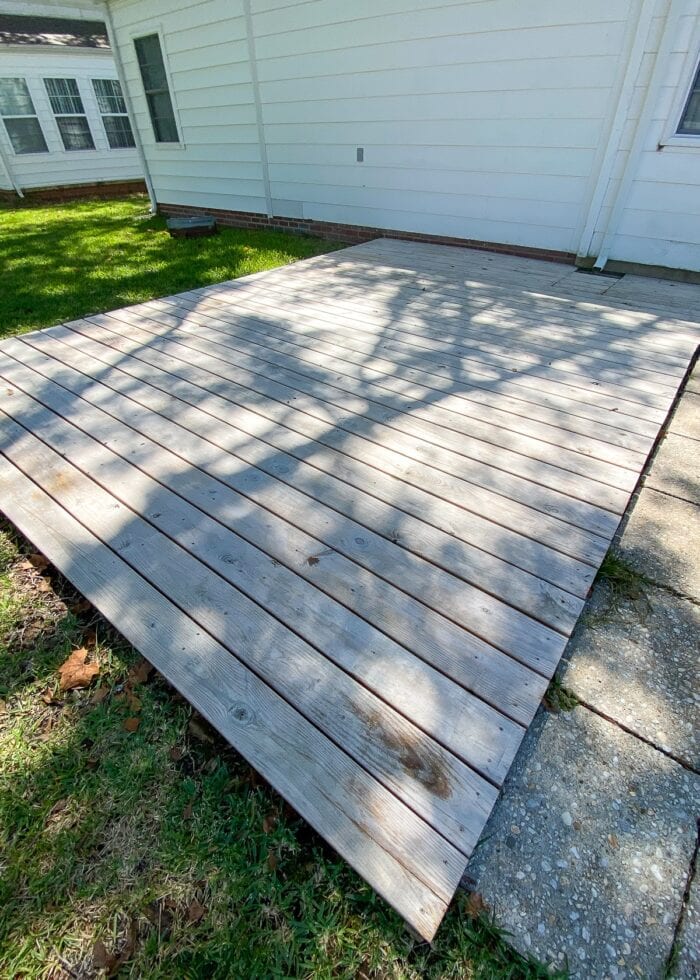
The Front Deck
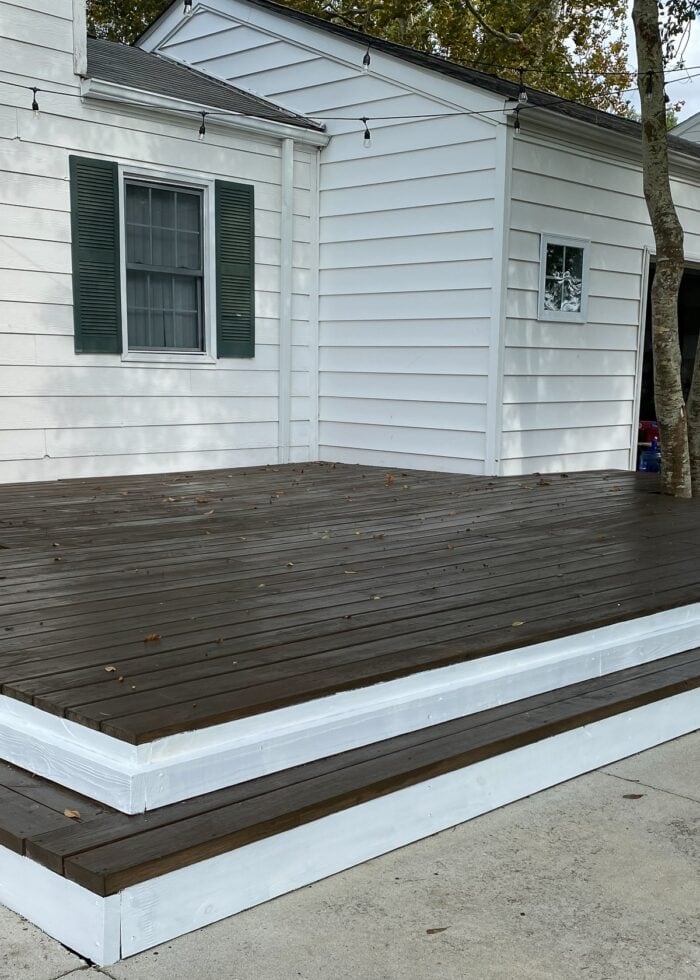
The decks on both the front and back of this home were in rough shape when we moved in. I’ll never understand why someone will pay good money for a nice deck to be installed and not seal it properly so that it maintains its appearance.
Because the decks were so discolored and faded (and prone to even more damage!), we cleaned, sanded, and re-stained both of them shortly after moving in. We chose a medium chocolate stain for the top, and bright white outdoor paint for the surround.
Beyond the staining/painting though, the front deck never got much more attention. We put an outdoor rug out there and some chairs and plants. But it was always on the “To Do List” and never quite reached its full potential.
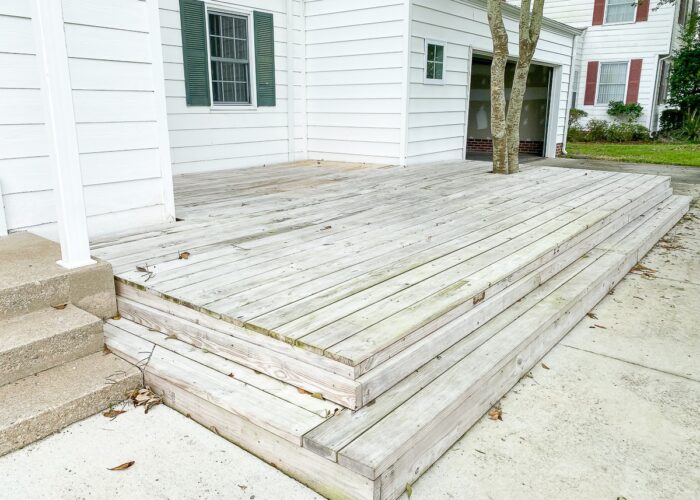
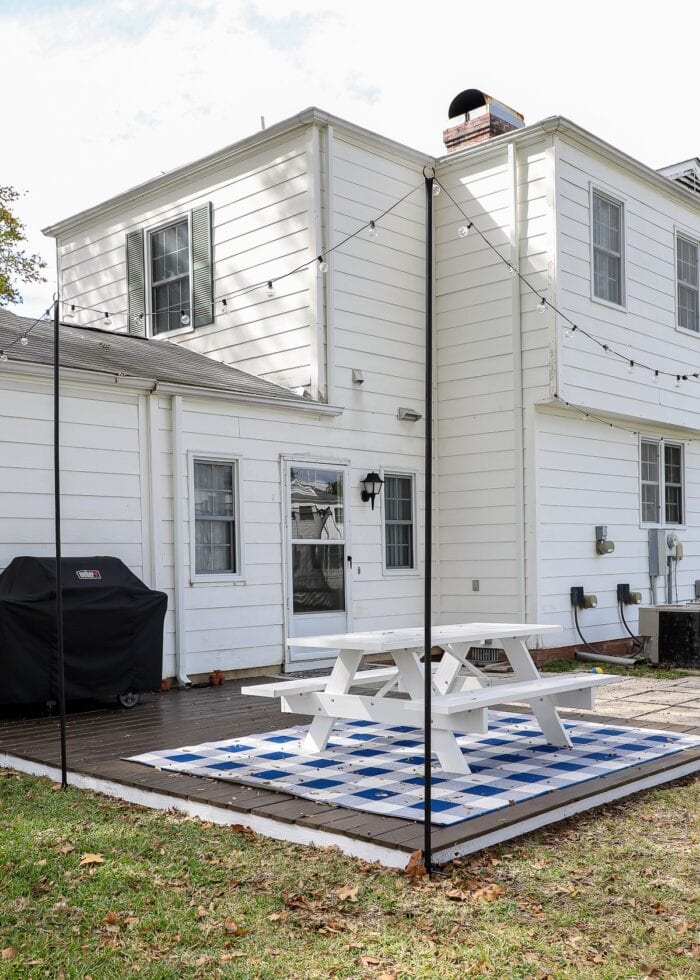
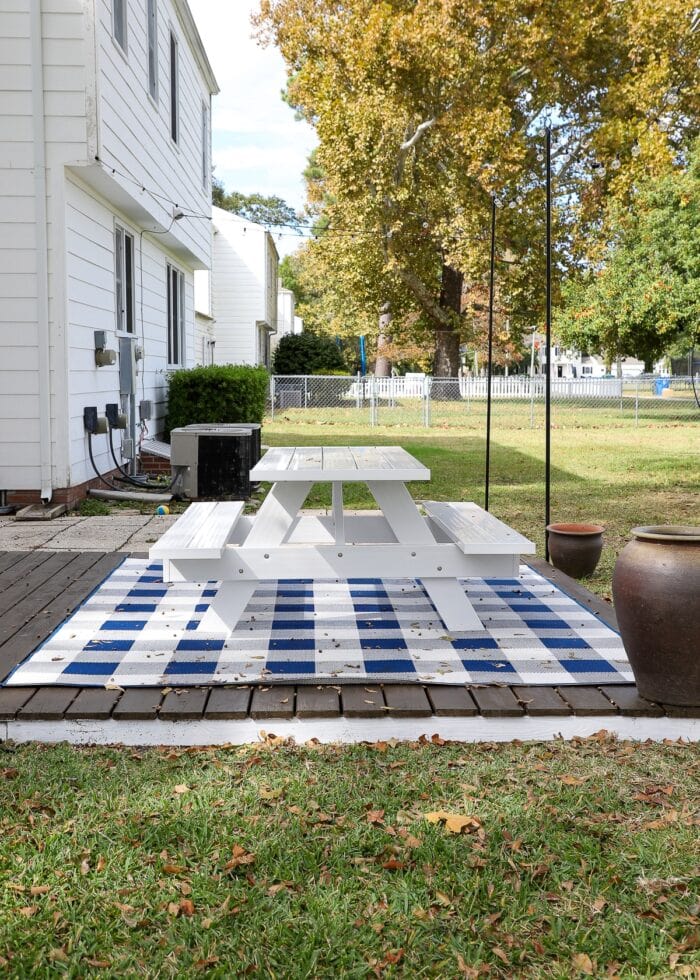
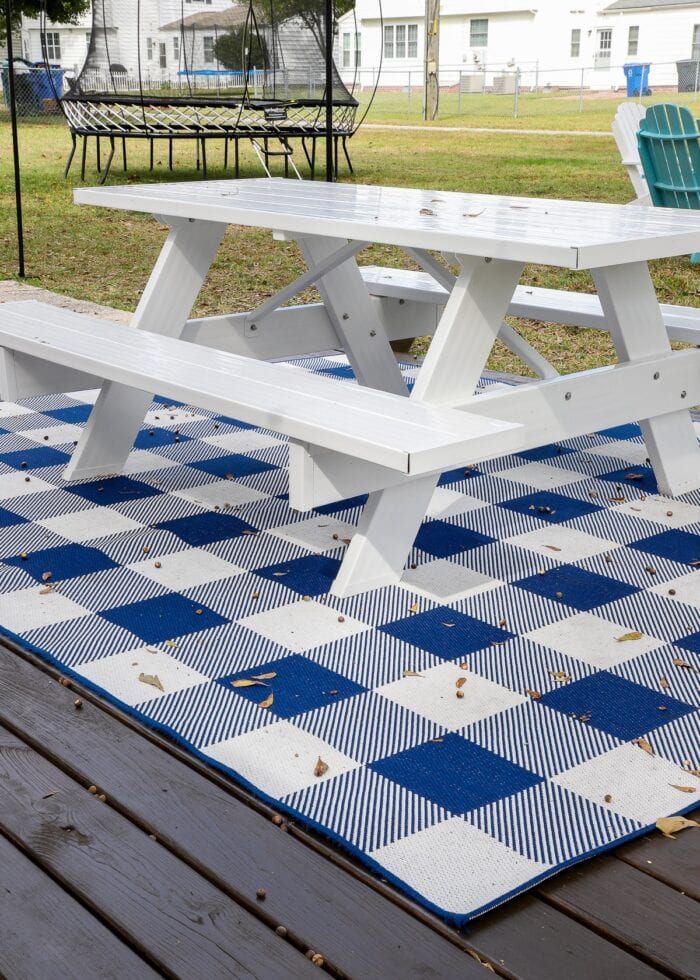
The Back Deck
Maybe we didn’t give the front deck a whole lot of attention because we spent 99% of our outdoor time on our back deck and in our backyard. We loved the privacy of our back deck and the proximity to our neighbors. With patio lights strung around the perimeter and a simple picnic table on top of my favorite outdoor rug, we spent countless nights out here eating, playing cards, and visiting with favorite friends. Sigh…I miss our Carolina nights so much!
Tour More of Our NC Rental
Want to explore the other room makeovers from our NC Rental home? Tour the entire home in the following posts:
- Full Before Tour
- The Kitchen
- The Family Room
- The Dining Room
- The Laundry Room
- The Office/Craft Room
- The Master Bedroom
- Our Teens Tiny Bedroom
- Shared Little Boys' Bedroom
- The Garage
- The Final Home Tour


Taking It All Apart
I’m proud to say that despite aaaaalll the things we did to this house, we ultimately moved out after two years without a single charge or fee! We worked so so hard to un-do everything we did; and with a few exceptions (ahem…the backsplash tile and the floral dining room wallpaper), everything came down fairly smoothly! Below are some of the “take down” posts you can reference for more detail:
- Can (& Should) You Use Floor Pops! Floor Tiles In a Rental? (Un-doing our fireplace makeover)
- What You Need to Know About Using Peel & Stick Tile In Your Rental (Un-doing the kitchen backsplash)
- How the Dining Room Wallpaper Came Down (Un-doing the dining room wallpaper)
As I mentioned above, it’s been almost two years since we moved out of this house. And needless to say, I miss this home and this place (and mostly, the people we were there with) almost every single day. Yes, all this time later.
I’m really proud of how far we pushed the “rental limits” in this house. Simultaneously, I learned that you don’t have to do big, complicated projects just to transform a space. Even in this home, some of my favorite spots were achieved via pretty simple updates. And as I start to reveal our next few homes (yes, it’s been a busy 2 years…there’s more than one new home!), you’ll see that I’ve started to embrace the “simple yet impactful” approach even more.
Thanks for your patience as I (finally) close this chapter of our lives and this home here on the blog. It was a special one that clearly took me some time to recover from. But maybe all this time is good. I’m feeling more ready than ever to share our next chapter(s) with you very soon!
Megan
8 Comments on “Our Camp Lejeune Watson Home | The Final Tour”
I do understand why you have to reverse all your changes when you move out, but….. it’s really such a shame after aaaaall the phenomenal effort and creativity you bring to your homes, Megan! I’m sure there could be times when an incoming family would absolutely love to keep your changes, if they only had a chance to preview them. I know I would!
I’m so happy to see your posts, and so happy you took the time you needed to get closure on this beautiful space. I am in awe of how resilient you are. I look forward to seeing your next spaces whenever you are ready to show them!
So so cannot wait for the new. Love your makeovers.
This post has been the perfect motivation and inspiration that I needed to see! We are currently on the list for a Watson and your posts (especially this one) have been so helpful. If I can achieve a small fraction of what you managed to do, I will call it a win! Beautiful home, and I absolutely admire the energy into making each PCS into a home you love. Hope our paths cross again someday.
Beautiful! Sad to undo, cause there are people who would love it. But just so amazing that you were able to do all that in two years. And it has taken me a lot more years to do anything in my house! Keep up the good work!
By the way…….Welcome back to California! We are south of you in San Diego area.
Always love the ideas you come up with!
Megan,
Wow! In the late 1980s my father was stationed at Lejune and had that style house/floorplan. What you did was beautiful! (Particularly the Chinoiserie cabinet with blue and white)
I’ve subscribed! – Joshua