One Last Look at Our NC Office & Craft Room
If there’s one spot in our North Carolina home that I rarely showed here on the blog, it was my office/craft room. Ironic actually, since it’s probably the room I spent the most hours in! I think this room never quite got its “moment in the sun,” so to speak, because it never felt done or quite right. And boy, did I keep trying until the very end. Although it never felt complete to me, there are some lovely moments in this room that are worth celebrating and some smart solutions worth highlighting. So let’s take a full tour, shall we?!?
Before & After
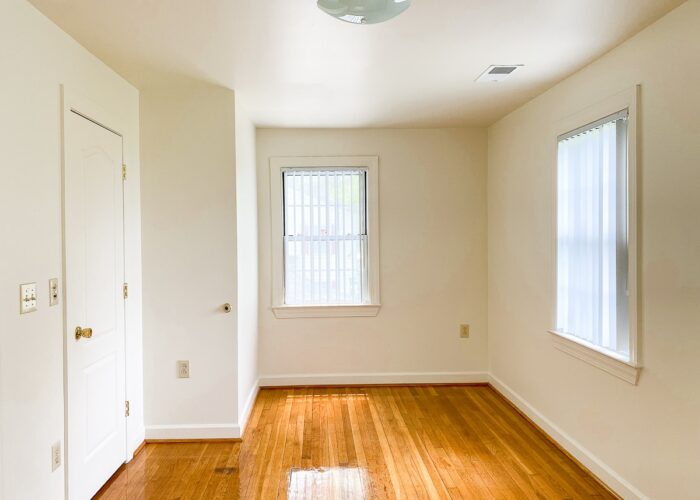
Below are some quick before and after shots of this space, which was the long, skinny bedroom in the upstairs of our North Carolina home. Although it was a fairly spacious room, its awkward shape, window placement, super shiny pine floors, yellowy-beige walls, and dated light fixture provided a fair amount of challenges to overcome.
The furniture arrangement was the hardest to figure out. I can usually identify the best furniture placement within minutes of seeing a room for the first time. But here, getting everything to fit in a usable, functional way took a ton of trial and error. And while it may look like everything (from my previous office space) fit in the end, the extremely observant reader will notice a shorter span of counters, a different work table, and one less set of Kallax cubes for craft supplies.
The Elephant(s) in the Room
Let’s start with the elephants in the room, shall we? Get them out of the way first!
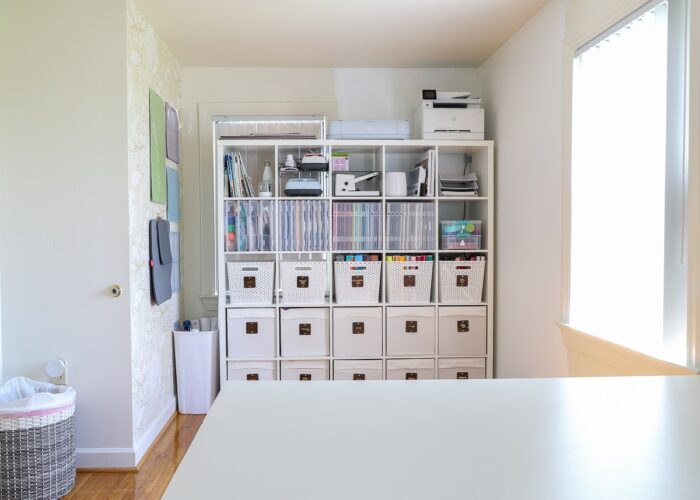
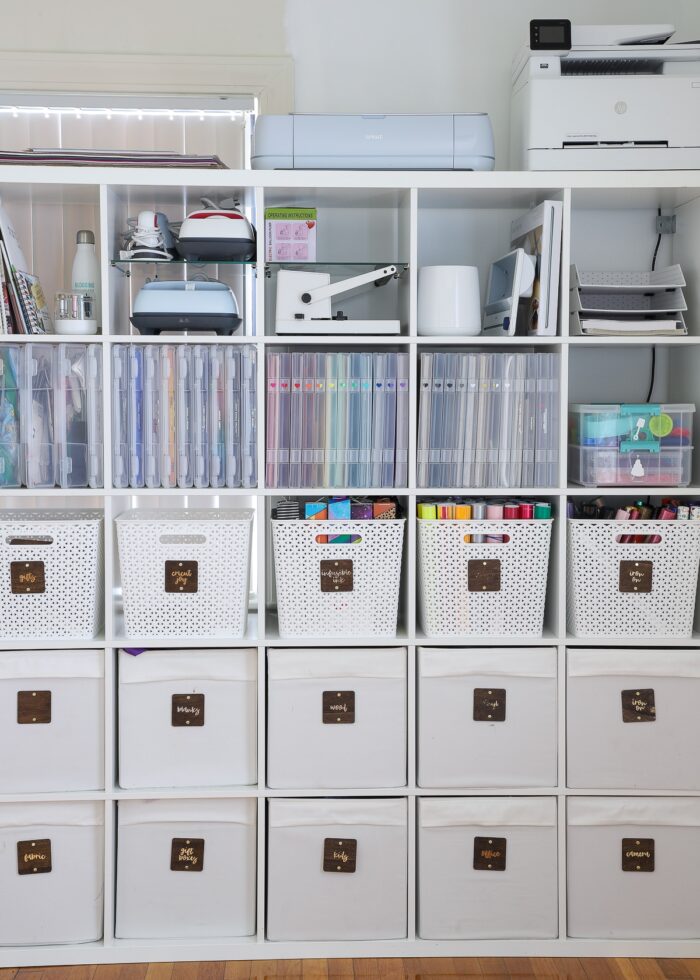
On the left (smaller) side of the room, was where I stored a majority of my craft supplies on a 5×5 IKEA Kallax shelf. But you’ll quickly notice two very “non Megan” situations in this picture: 1) the window is blocked, and 2) the wall is painted bright white…partly.
Blocking a Window
As a general rule, I don’t block windows with furniture. But this was one of those situations were the overall look and function of the room was much better served by placing the tall cubby shelf on this wall. Not only did it fill up the space quite nicely, but there was literally no where else for it to go (when considering light for pictures, outlets, other furniture items, etc). My ultimate plan was to camouflage this window with light-blocking fabric and some MDF painted to match the wall color, but…I never got to it.
A Painted Corner
Okay, so what about the weird paint job in the corner?
As I’ve mentioned (probably about a zillion times), this entire house was painted with a color called “Gull White,” which is an ugly ivory color with yellow undertones. I have always hated this color (mostly because I prefer a crisp, bright white on pretty much everything), but then I also learned it casts an ugly yellow tint in all of my pictures.
So upon first moving into this house, I had the idea to create a “picture taking space,” complete with lights, a table, mounted cameras, and you guessed it…a white wall backdrop. When it became clear that there wasn’t space (or light!) for a photo spot in this corner, I abandoned the plan but never got around to re-painting the wall.
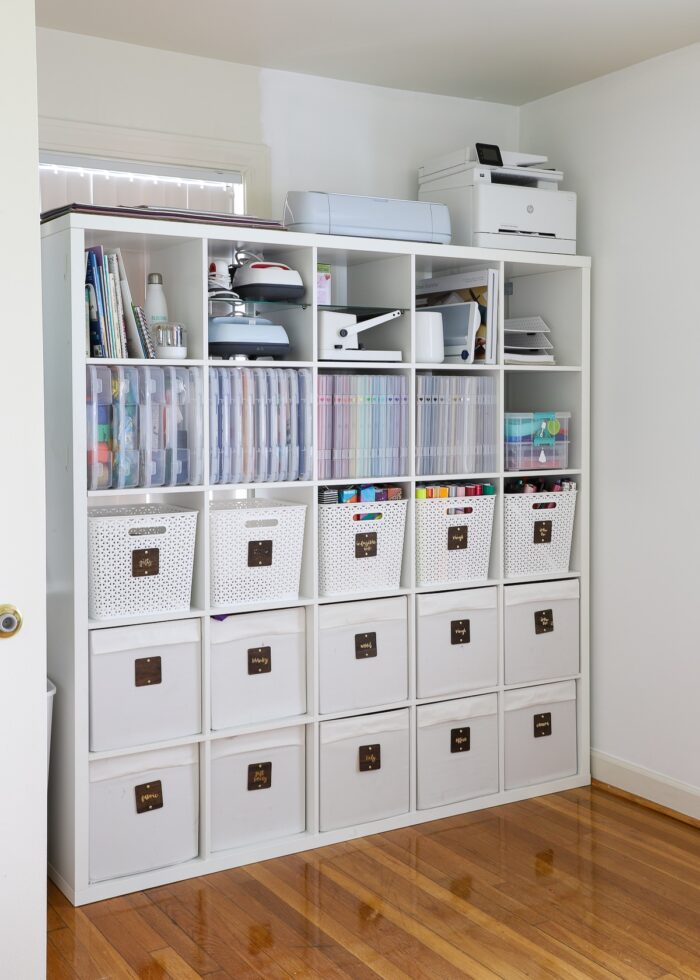
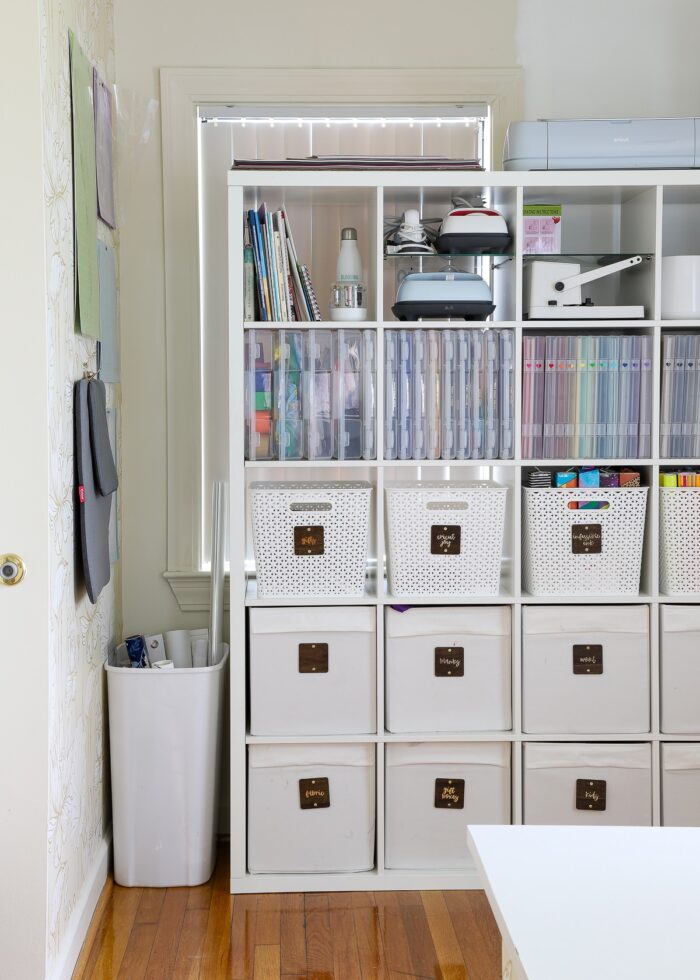
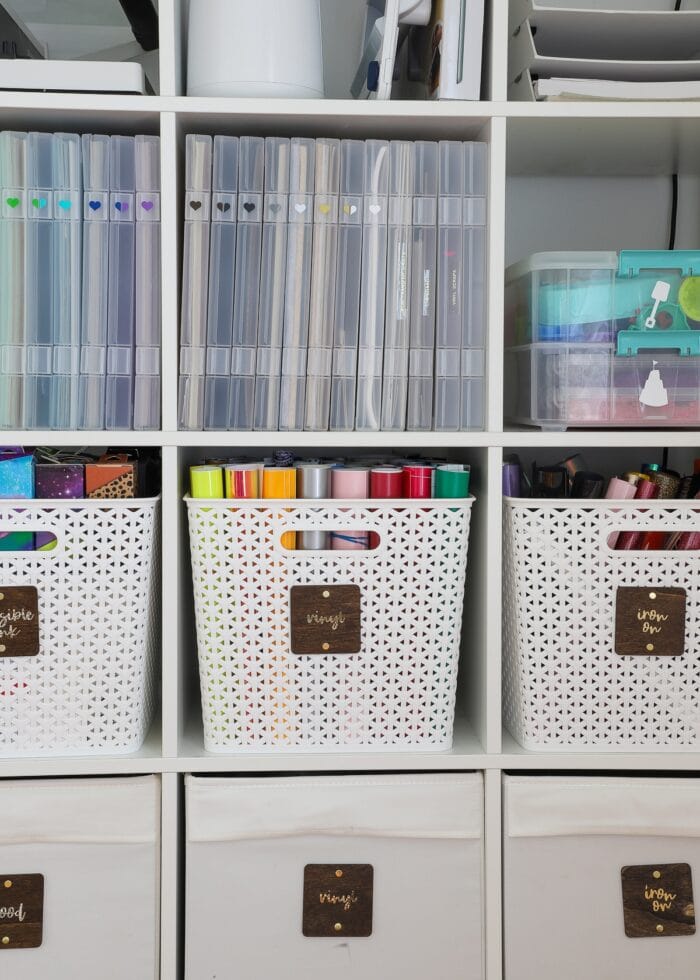
Craft Supplies on the IKEA Kallax
Although there are those two “eye soars” in this corner, I am really proud of the sleek and functional storage I was able to create on this side of the room. Since I was relying on fewer cubbies than my previous office layout, I had to purge down quite a bit AND get really creative in order to fit everything just right.
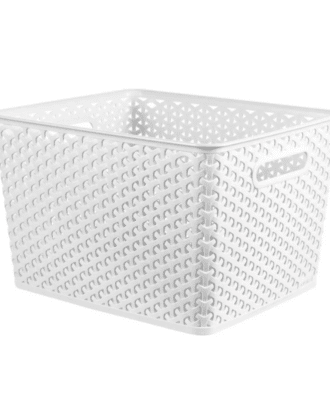
- I continue to love the IKEA Drona bins for big items like fabric, large vinyl rolls, wood shapes, Cricut blanks, etc.
- I place a lot of my “quick use” Cricut items into the large Y-weave baskets along the middle shelf, since they are easy to slide in-and-out and also hold a decent amount of supplies.
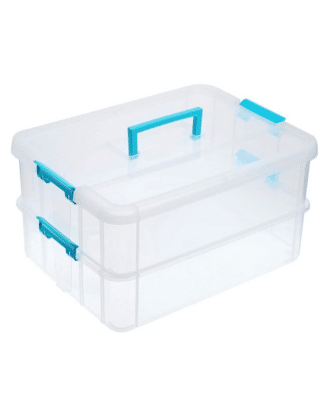
- I then rely on a variety of clear storage cases for cardstock, printer papers and labels, party supplies, etc.
- Along the top row, open shelving holds bigger tools and supplies that look better on display rather than tucked away into baskets.
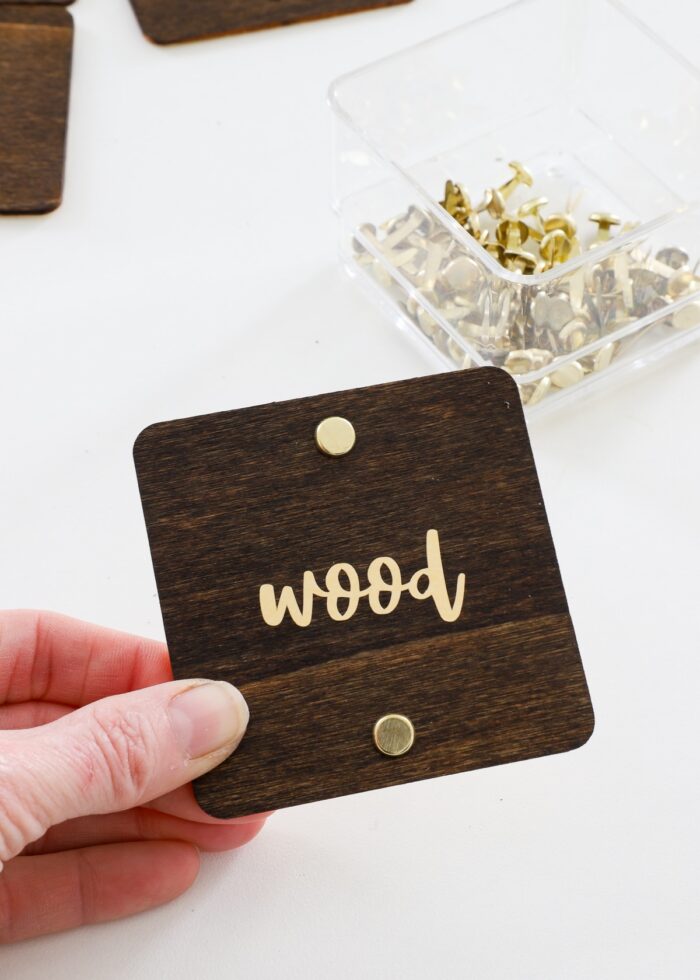
- Finally, all the baskets were labeled with wood placards with shiny gold text or clear text labels with gold type (made with my labelmaker).
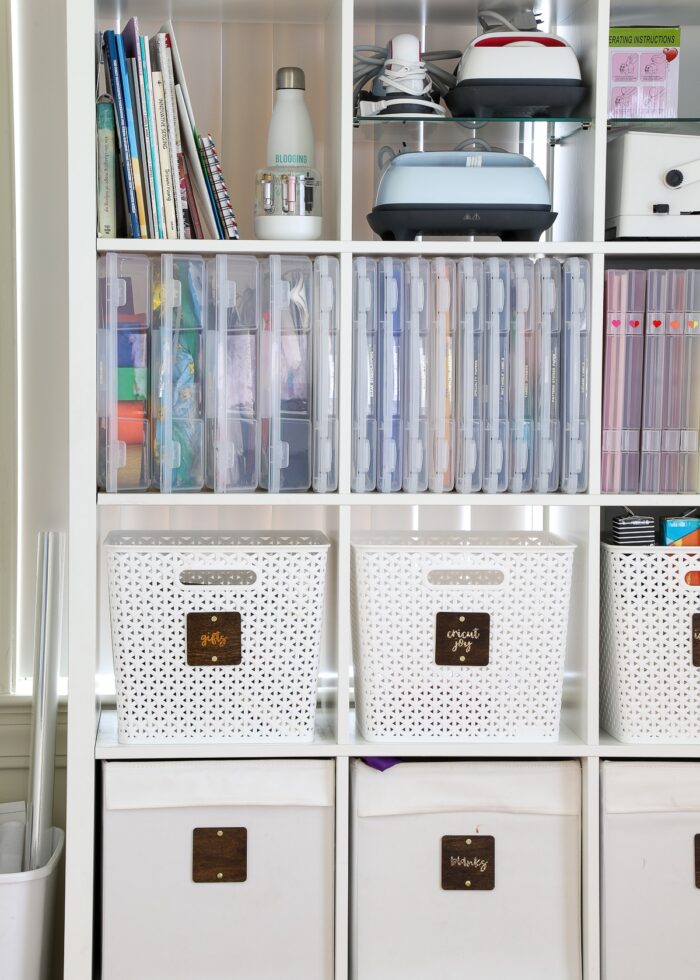
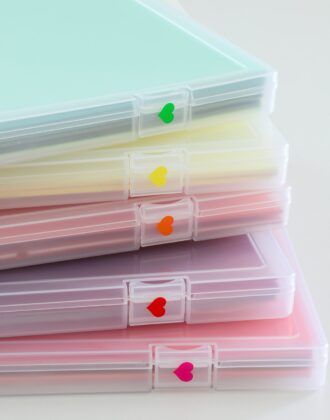
One of my favorite projects in this entire office was getting my cardstock all sorted out and organized. It was a big job and took some research to find the “just right” solution, but having my paper purged, sorted by color, and so darn accessible in these snap-tight cases has been a game changer!
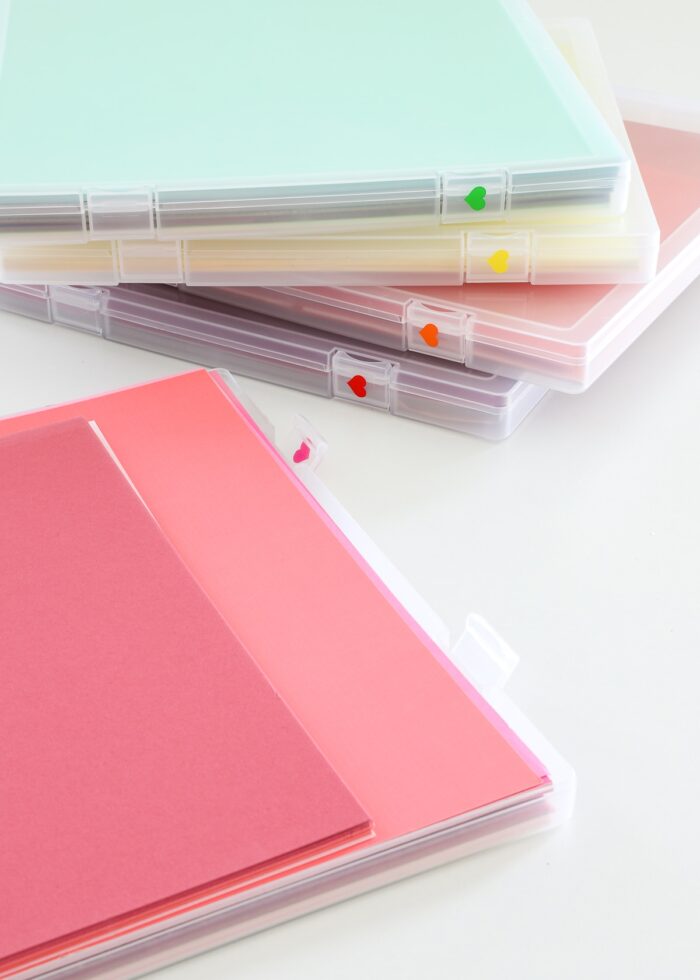
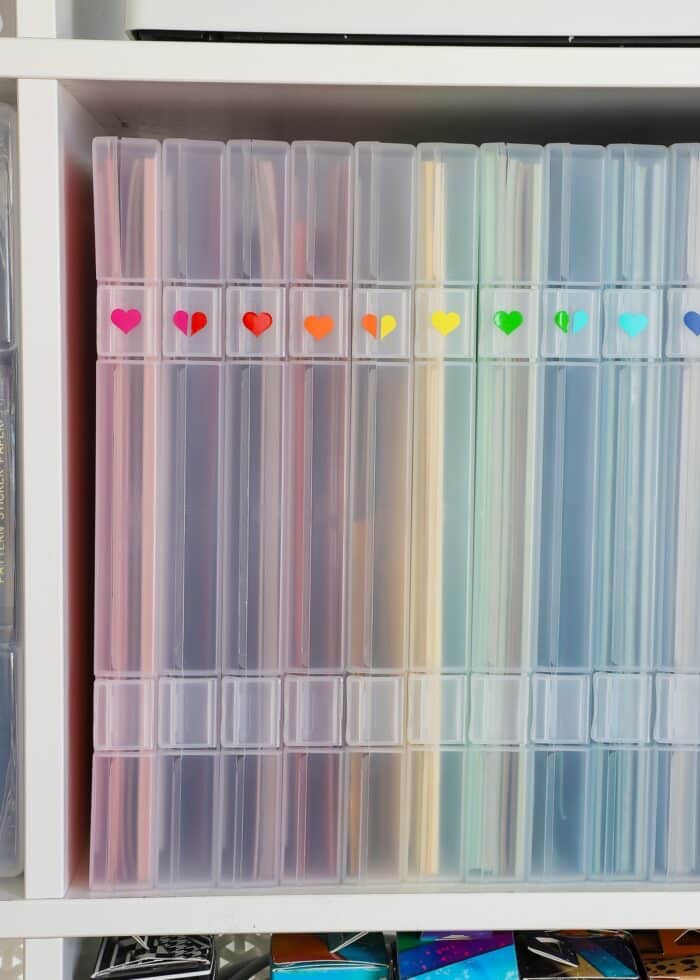
Beyond just having my 12×12″ cardstock sorted into color-coded boxes, I also use project cases for other paper goods. The slender cases hold all my AVERY labels packs and specialty printer papers, while the thicker cases hold party banners, streamers, and favor boxes. These cases fit into the IKEA Kallax cubbies so well and I love being able to see and slide in/out anything I need so easily.
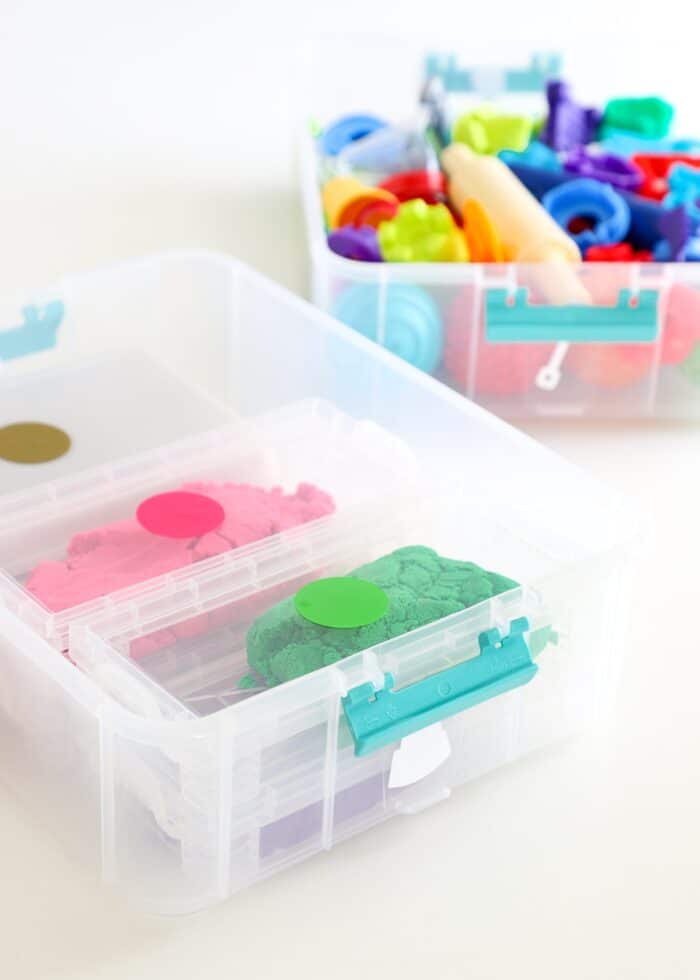
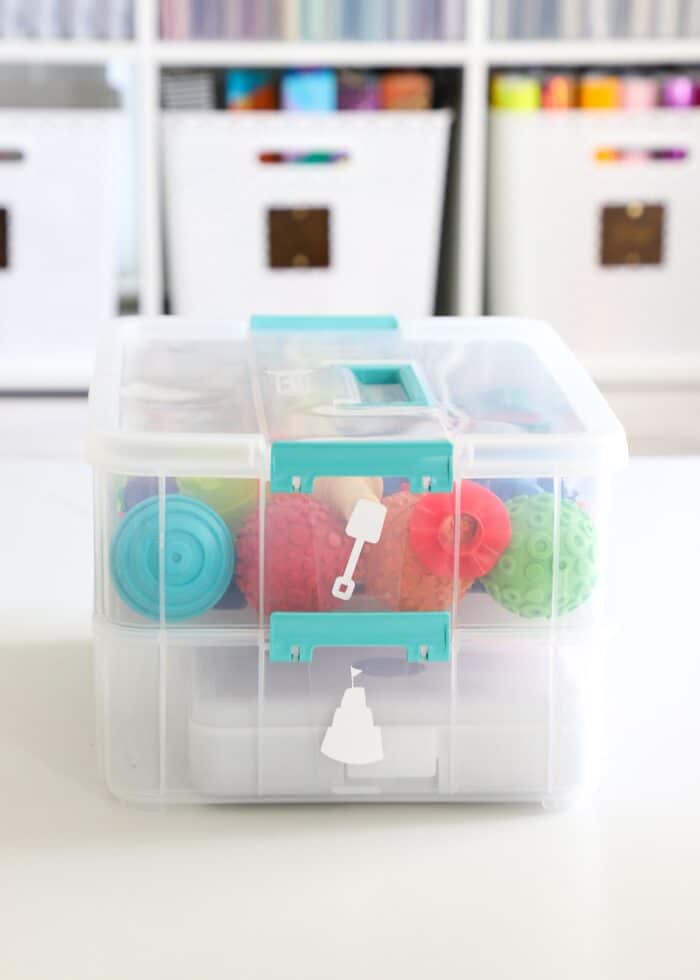
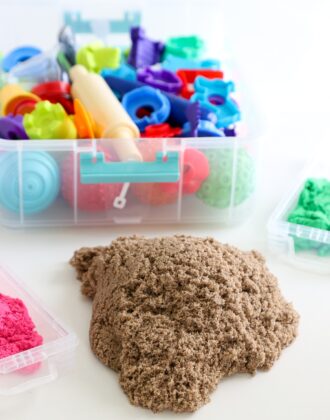
Another solution that continues to work really well is the Kinetic Sand Caddy. Having everything in this quick-grab tote and so accessible on a open shelf really gave our kids agency to play with this (and clean it up!) all on their own.
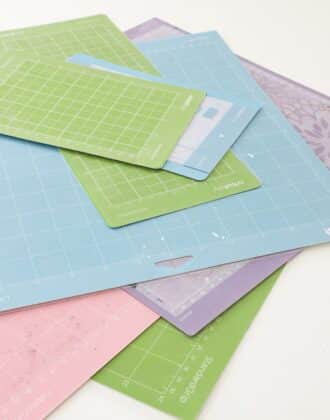
On the short wall next to the IKEA Kallax shelf, I created a Cricut mat wall. This turned out to be the perfect solution for keeping all my mats sorted, safe, and easy to grab whenever needed!

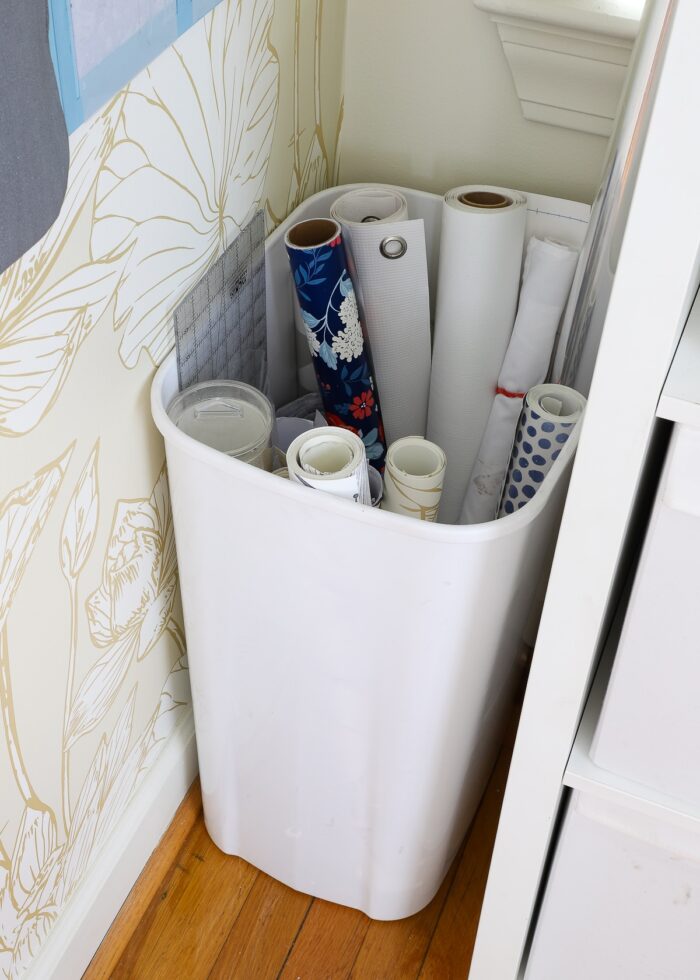
Finally, an unassuming trash can has become my go-to way to store long rolls of contact paper and wallpaper. (I keep looking for a prettier basket with similar dimensions, but I haven’t found one yet!) Sliding it into this open spot helped keep everything perfectly contained yet out of the way.
Want to save this post?

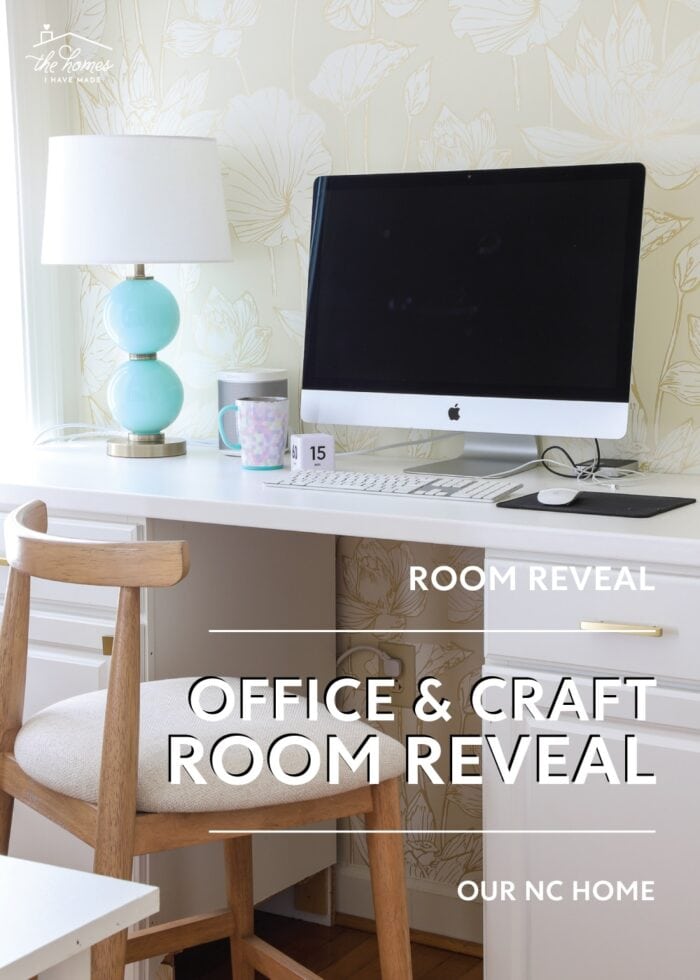
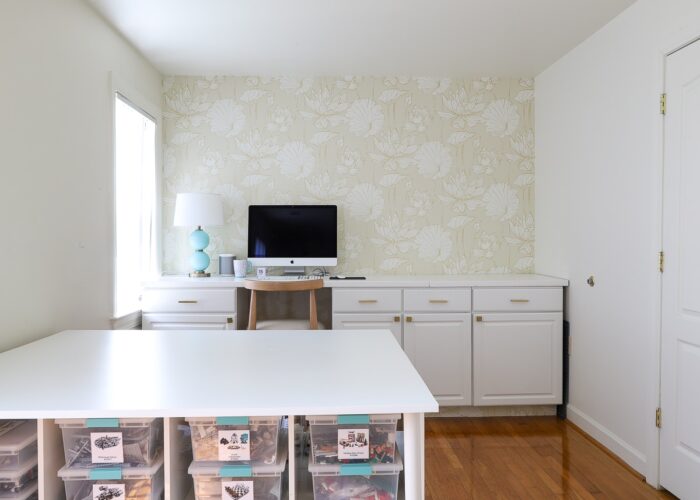
The Desk Station & Cabinet Wall
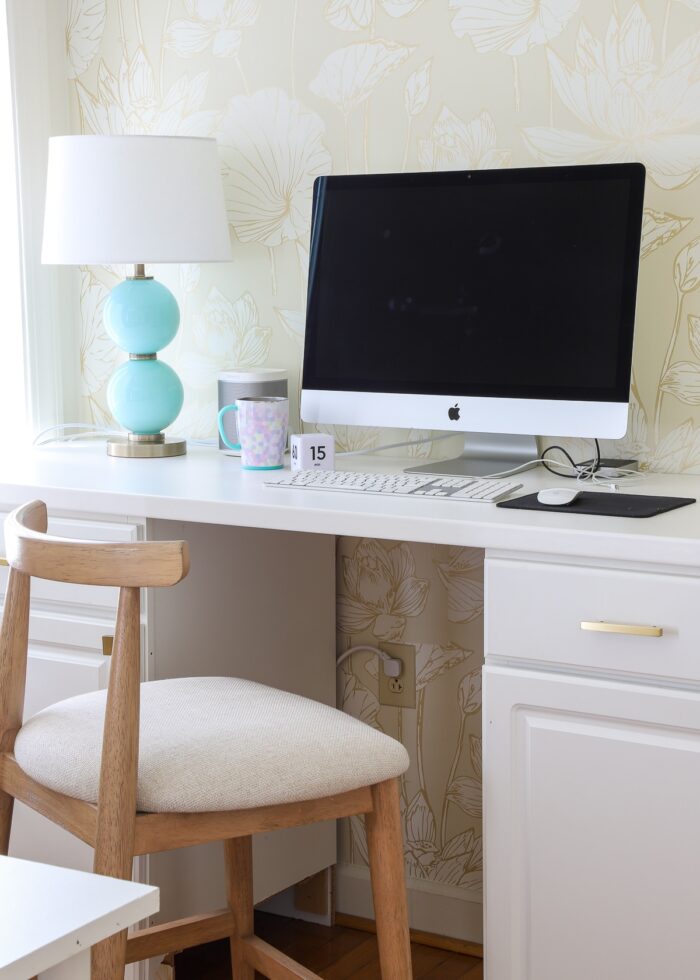
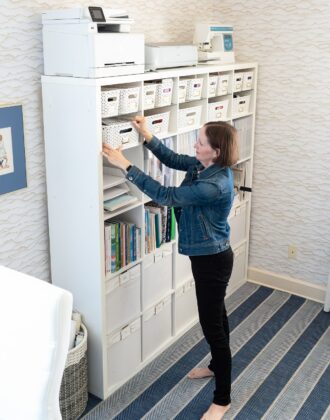
On the complete opposite wall of the IKEA Kallax shelf was the pretty wall that featured my computer workstation, a stretch of cabinets and drawers full of more craft supplies, and an open countertop for projects.
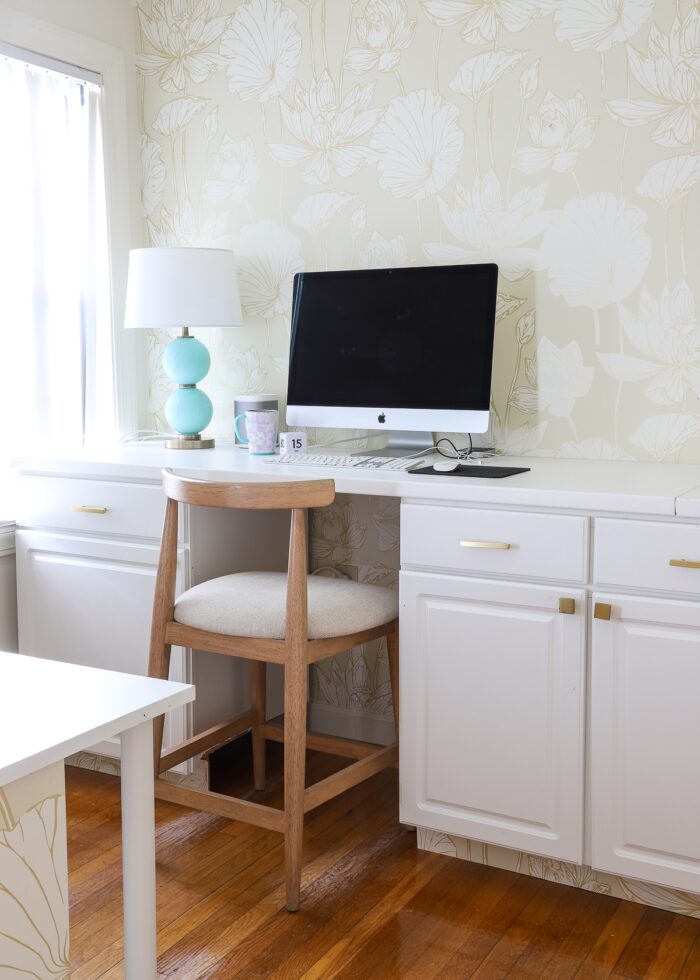
I’ve had my computer setup on this cabinet+counters arrangement for several offices in a row now. It’s become a really efficient way to have both a desk space and craft space in a fairly compact (and attractive!) footprint. We did have to lose one lower cabinet and cut the countertops down in order to get the arrangement to fit on this wall (the extra cabinet was repurposed to the laundry room!)
I added the new cushioned barstool as a nod to the gorgeous floral wallpaper and stole the touch-activated lamp from our son’s previous nursery. Perched next to this window with soft light, music streaming, and hot coffee in hand is where pretty much all of my North Carolina content was created! I loved this spot. Loved it.
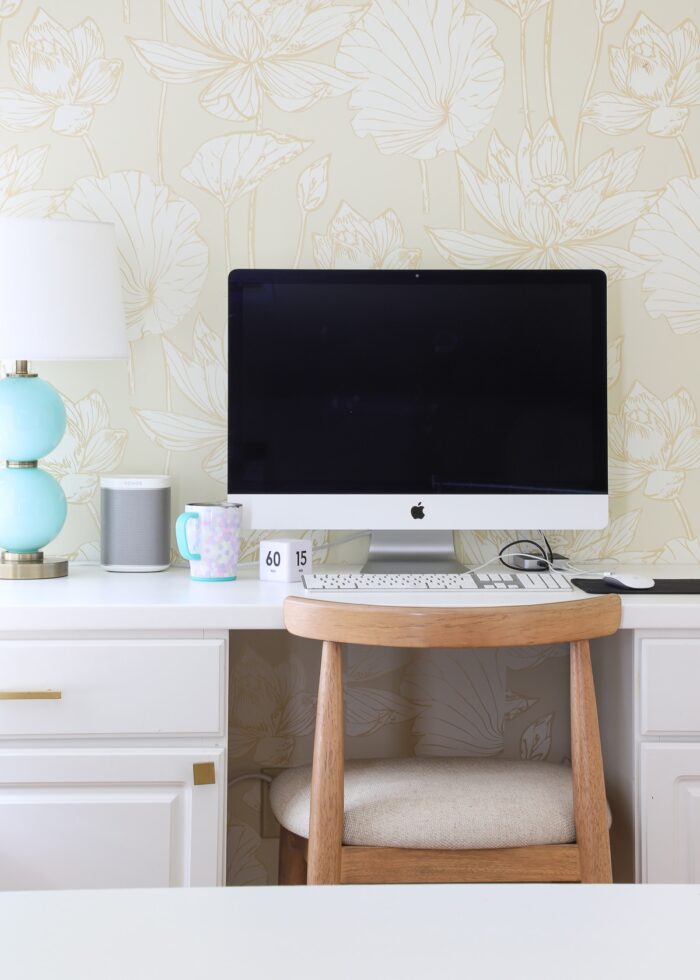
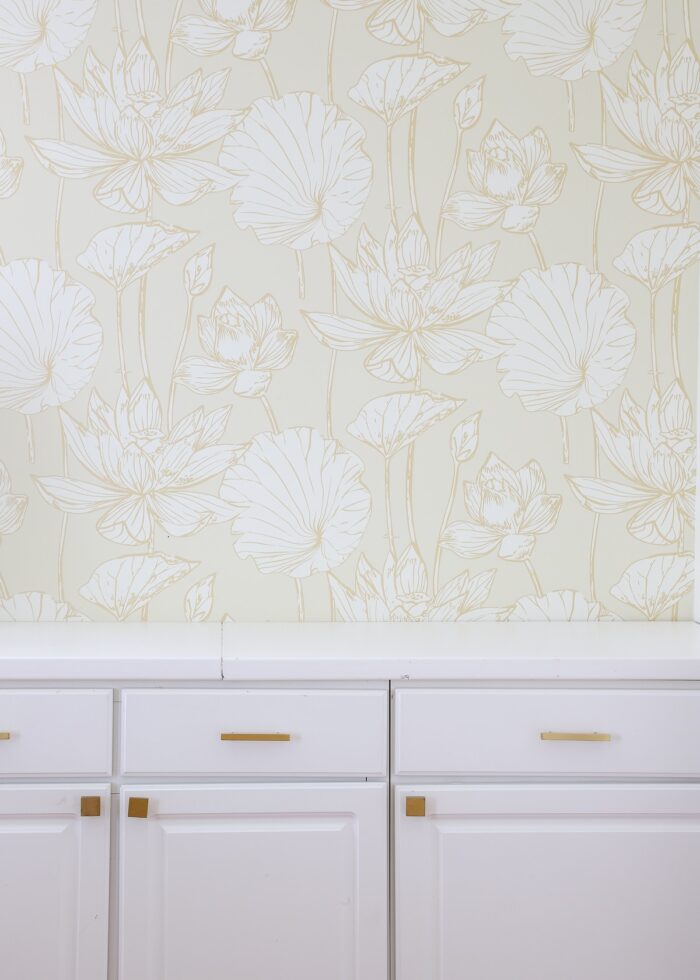
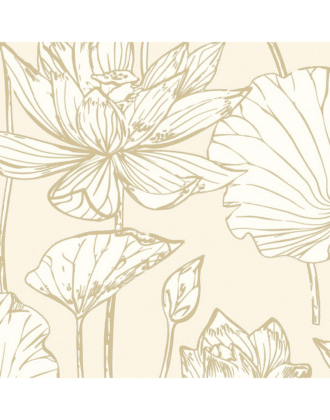
Let’s chat about that gorgeous wallpaper, shall we?
For the longest time, I was planning on doing some sort of tile-like wallpaper in here (this one was on the top of my list). But over time, I grew to really crave something gentle and warm (instead of sterile and bold). I can’t remember exactly how or why I landed on this particular paper, but it created one of my favorite feature walls in the entire home.
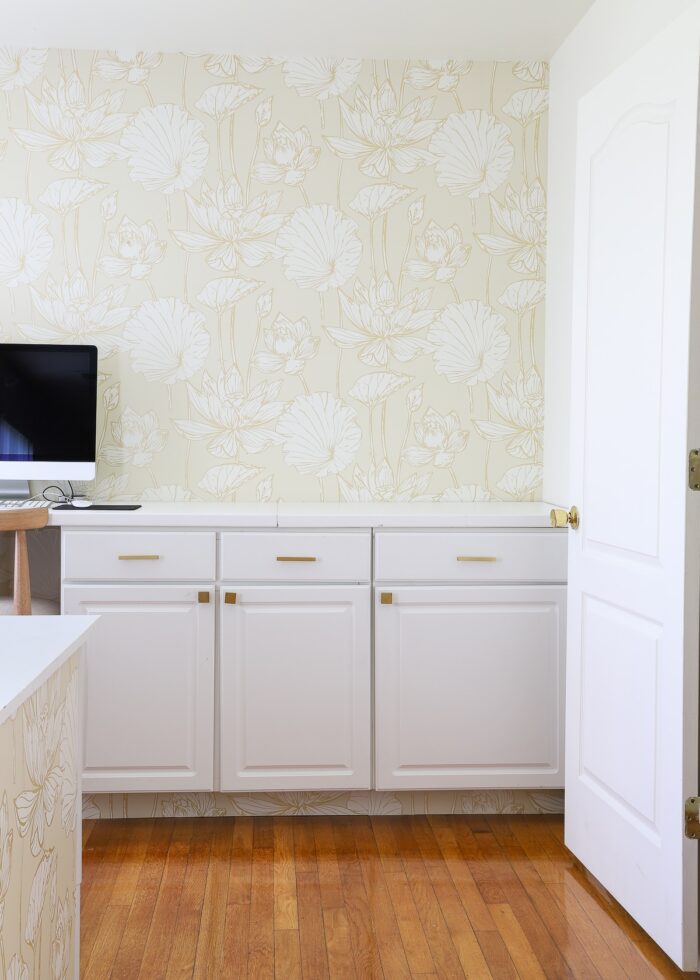
I think what worked so well with this paper is that the bright white flowers against the beige background really made all the bright white furniture in this very beige room all come together. (A good lesson in working with your space rather than against it!) Further, the metallic gold flower stems nodded to the floors, wood details, and gold hardware throughout the room. It goes without saying that this room was really, really meh until I added this paper. And boy did it transform it, instantly, into a space that felt just so calm and lovely.
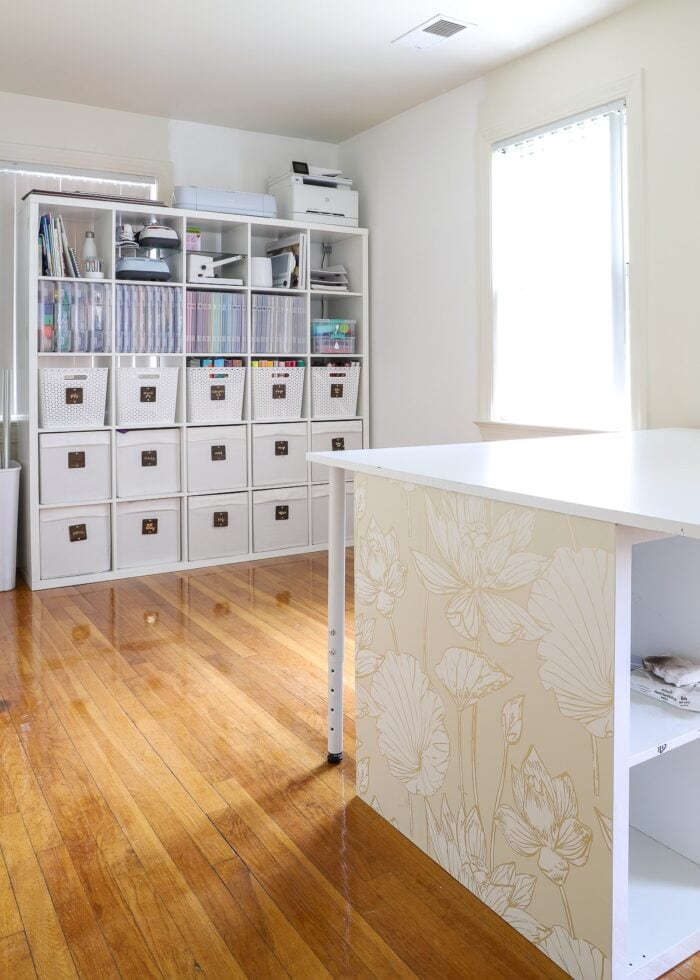
The Craft Table
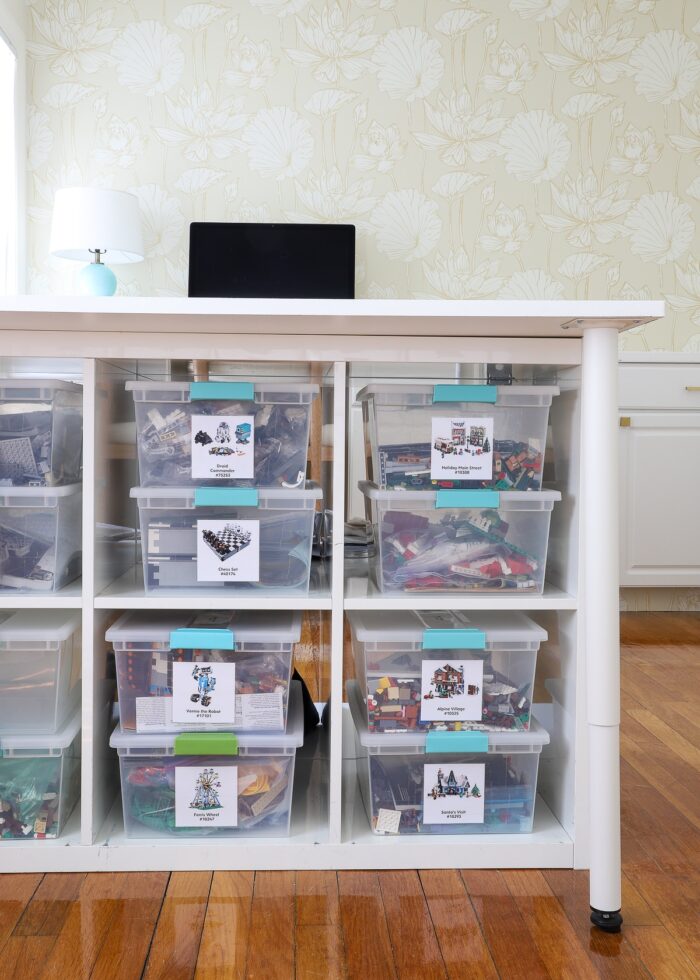
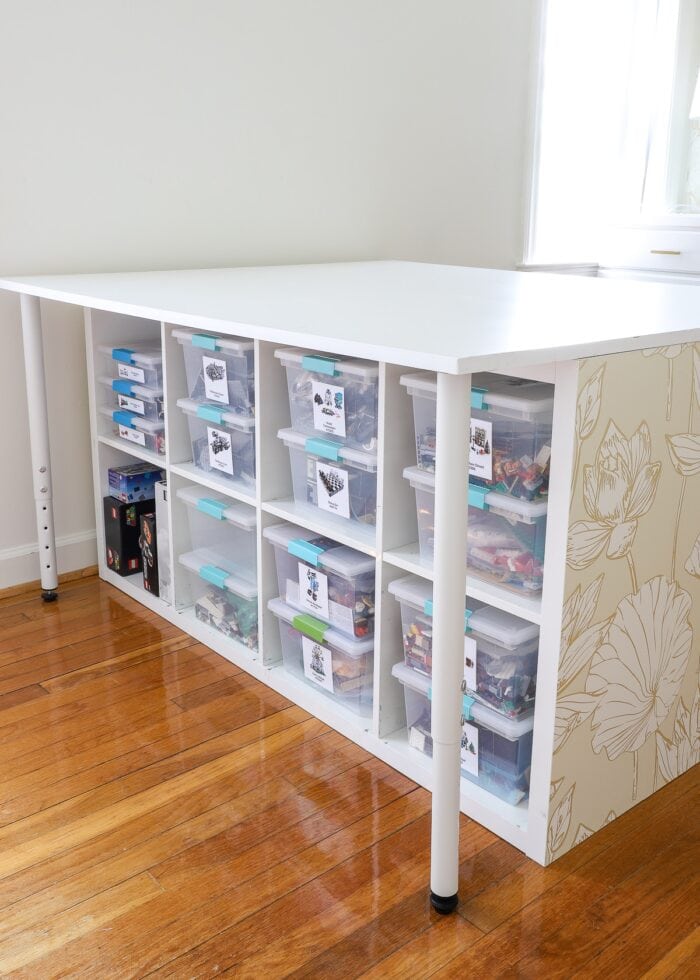
In the center of the room, I replaced my original IKEA table with a massive craft table. The intention behind this table was for it to be all the things: craft table for the kids, LEGO building area, photo area for the blog, my own crafting table. I genuinely thought the bigger the table, the better.
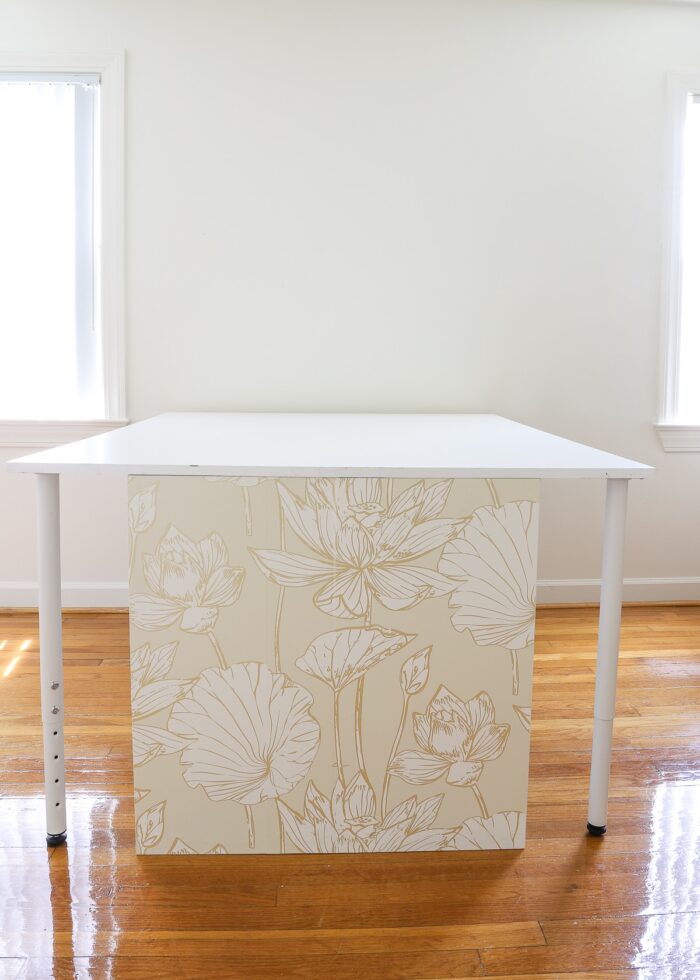
I don’t have a tutorial for the table assembly, but this photo can give you an idea for how it came together. We cut a massive 48″ wide sheet of laminate (right off the shelf from The Home Depot) down to 53″ (the same length as the IKEA Kallax units), and then stretched it over two 4×2 Kallax units back-to back. Nothing was glued or screwed in place. But we did put four adjustable table legs at the corners and wallpapered the end to conceal that it was two separate units.
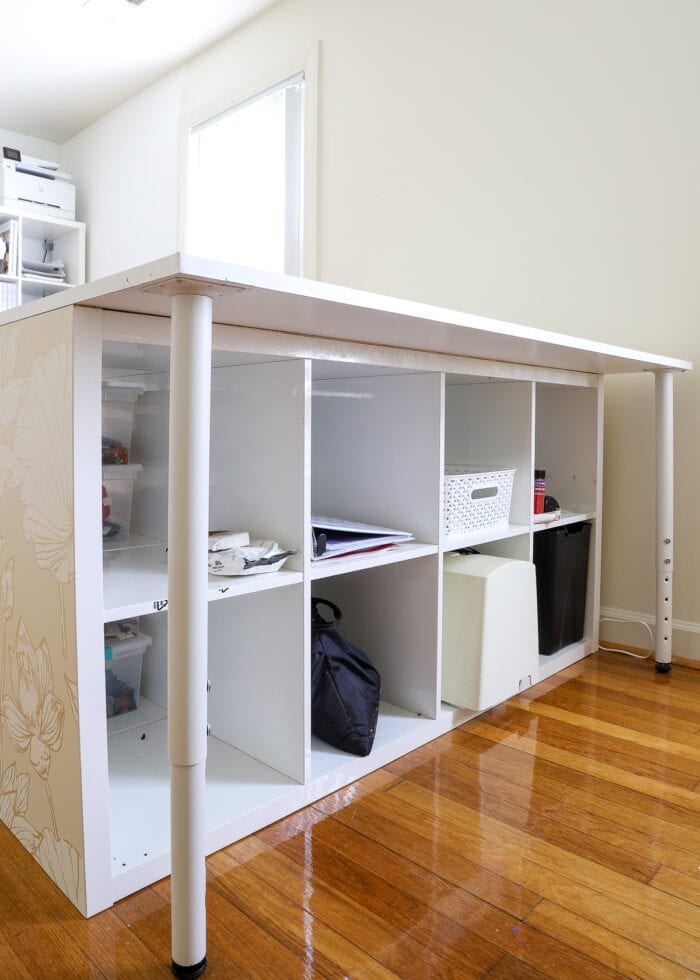
Under one side of the table was a few oversized items that didn’t fit anywhere else (e.g., sewing machine, paper shredder), as well as staging space for projects that were in progress, ready to be photographed, etc (shown above).
Under the other side was our dozen or so LEGO sets that we like to store in the Sterilite deep and large bins, which fit so nicely on the KALLAX shelves. (You can see more about how we store our LEGO sets here and get my LEGO labels template here!)
At one point, there were these four stools around this table, but I must have sold them off by the time I took these photos. They didn’t get used much and were often in the way!
In the end, this table turned out to be too big, in every way (is there such a thing?!) It was really hard to stage and photograph blog projects because it was too high. It was tough to craft with the kids because it was so expansive. And I really didn’t realize how much I moved my previous (wheeled) table around in order to get better light for photos at various times of the day. This one was just too big and heavy to adjust…at all.
I think if I still sewed and quilted a lot, this expanse would have been rather nice. But based on how my particular work and crafting have evolved, my shorter, slender table was a more functional solution after all! Lesson learned!
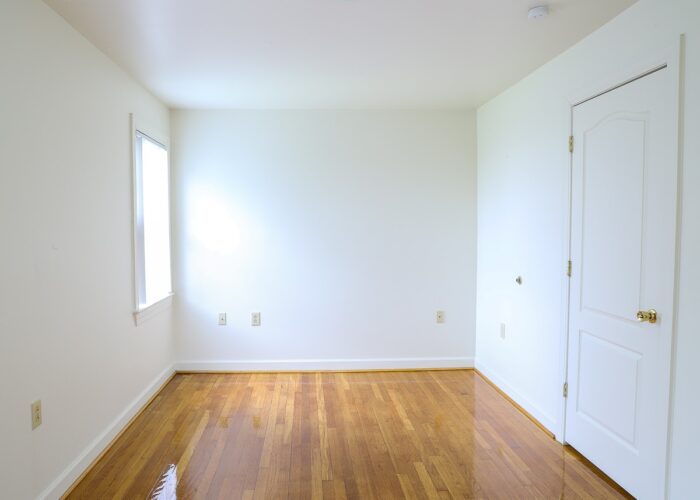
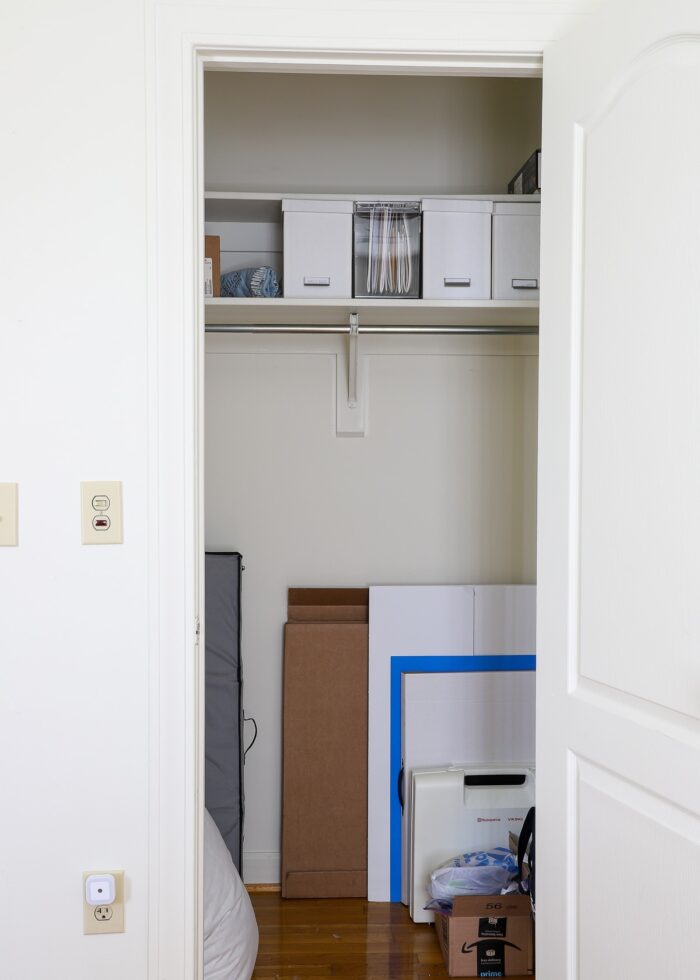
The last little spot in this room was a fairly good-sized closet. My best-laid plans of removing the door, wallpapering this back wall, and finding some better solutions for the few things in here never got done because…you guessed it…I ran out of time!
Explore All the Projects In This Room
If you’re looking for more details about anything in the photos above, below are the in-depth posts for all the projects featured in this room:
Tour More of Our NC Rental
Want to explore the other room makeovers from our NC Rental home? Tour the entire home in the following posts:
- Full Before Tour
- The Kitchen
- The Family Room
- The Dining Room
- The Laundry Room
- The Office/Craft Room
- The Master Bedroom
- Our Teens Tiny Bedroom
- Shared Little Boys' Bedroom
- The Garage
- The Final Home Tour

Fun Fact! We no longer own a lot of the items shown in these photos. (Yes, really!) We purged a ton when moving out of this North Carolina house, including getting rid of the lower cabinets, countertops, and large table. Everything that remained was put into storage for our one year in Pennsylvania. After spending a year without most of my supplies, I purged down even further and now 100% of my “craft room”is contained within the 5×5 IKEA Kallax only. I’ll show it to you eventually 😉
Even now, after all this time, I still have a bit of heartache over showing you this room. It still feels really blah and unfinished to me, but I quite simply ran out of time and steam on this one.
That said, I really love “keeping it real” with you guys, and I think there is value in seeing the realities we face by our constant moving (i.e., furniture that really doesn’t fit no matter how hard I try, running out of time before having to move again, and losing all my decorating energy).
I do hope you enjoyed this tour, nonetheless, and dreaming along side of me on what could have been in this room (which are all now ideas and plans tucked away and saved for another space!)
Megan

4 Comments on “One Last Look at Our NC Office & Craft Room”
The constant “doesn’t fit” has been one of the most draining things about military life. I’m loving the Kallax organization bc I haven’t had a house I couldn’t find at least ONE spot for my unit and if I take some of these ideas (hello 12×12 containers of my dreams) I bet I can get my crafts easier to actually USE!!!
And that cricut mat wall is genius z
Love the wallpaper. It makes the room feel…feminine without being girly…or just fit with how you would use the space. Calm, quiet, but still there. Love how it turned out, and thanks for sharing the reasons why you got rid of stuff. I keep a lot of craft supplies, and I just don’t have the time to use them all. I really need to purge and just have a space I can enjoy sitting it.
Thank you so much for sharing this room! I have already rethought one space in my own home because of it – and I always feel like that when I read your writing and see your pictures.
Your comments about your computer and coffee corner remind me that even in rooms that I don’t consider finished, there are spaces I interact with regularly that I love so much. The whole room doesn’t have to be “done” for that to be true!
Love the peek into “real life” and just how sometimes things don’t work despite our best intentions! THE WALLPAPER THOUGH. 😍