A Perler Bead Storage Solution That Works!
Many of my craft supplies have been organized for quite some time; our kids’ craft supplies though, I’ve always just shoved into a big catch all bin. But as my kids have gotten older, I’ve learned that it’s much more helpful to have such supplies organized in a way that they can access AND use all on their own. I’m working my way through our craft kits little by little, and my first project: our perler beads. After a lot of brainstorming and trial-and-error, I’m really excited to show you this perler bead storage solution that works really well!
Our Perler Beads | Before
To start, perler beads are something my kids use from time-to-time, but they aren’t a HUGE hobby around here. The kids tend to go in fits and spurts, swinging from making aaaaaaaall the perler bead creations to not touching the beads for months.
So admittedly, having all of our perler bead supplies tucked away in an oversized plastic bag hasn’t been that huge of a headache.
Since the plastic beads are often out of sight, it means they are usually out of mind too. But when we do remember to pull them out, our setup is not ideal.
This multi-pack of beads (below) is about the most non-user-friendly container…ever. As you can tell, I frequently open it upside-down, which causes the beads to easily become a jumbled mess.
Beyond how awkward this set is to open though, we’ve also learned that having the beads all open at once and this close together isn’t ideal.
- First, with all the beads uncovered like this, one bump and they are all all over the floor.
- Second, as you can tell below, beads often get pushed into the neighboring spot quite easily; and unless you diligently sort them back out, this can quickly become a mess.
Our Perler Beads | After
I had three main goals when it came to organizing our perler beads:
- I wanted the beads sorted and organized in a way that was easy to open, close, and maintain.
- I wanted everything…beads, boards, ironing paper…in one easy-to-grab kit.
- I wanted the entire system to be 100% kid-friendly so they can use (and clean up!) the supplies all on their own.
After some brainstorming, measuring, and sorting…I was able to satisfy all three goals!
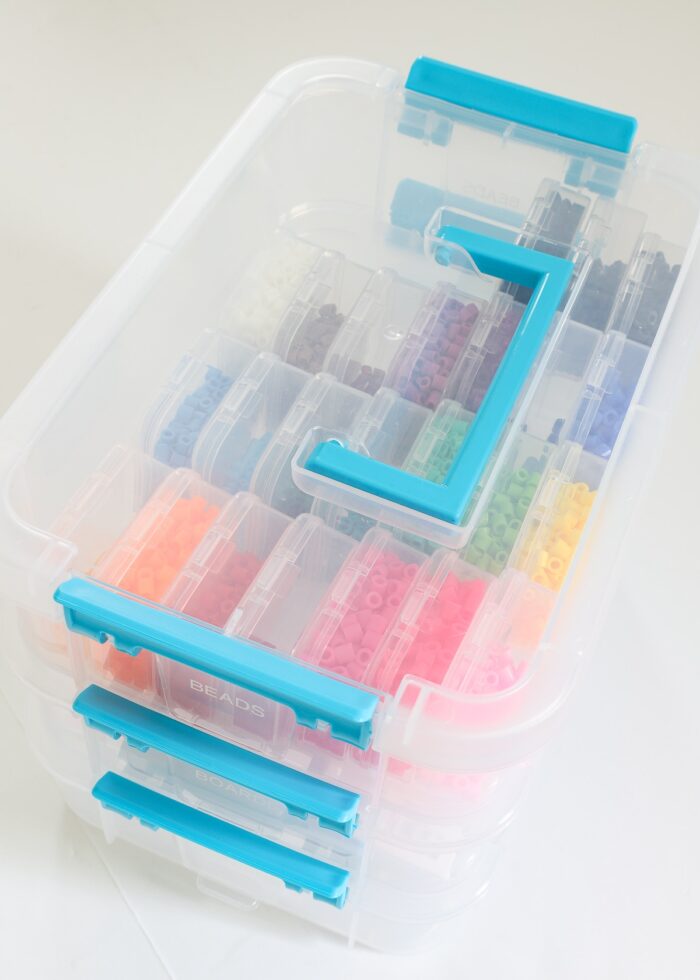
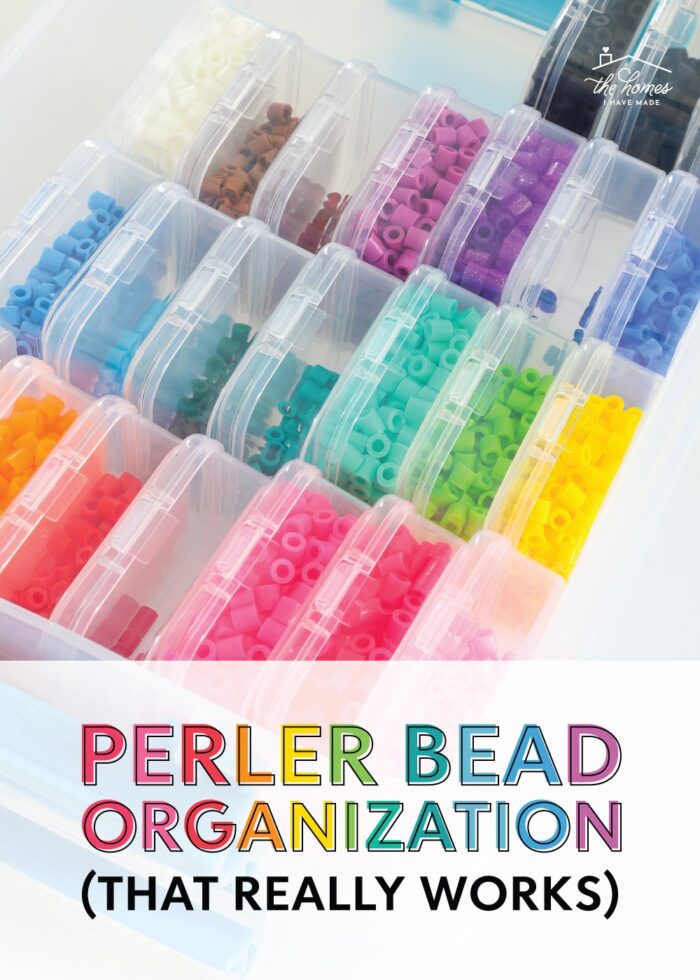
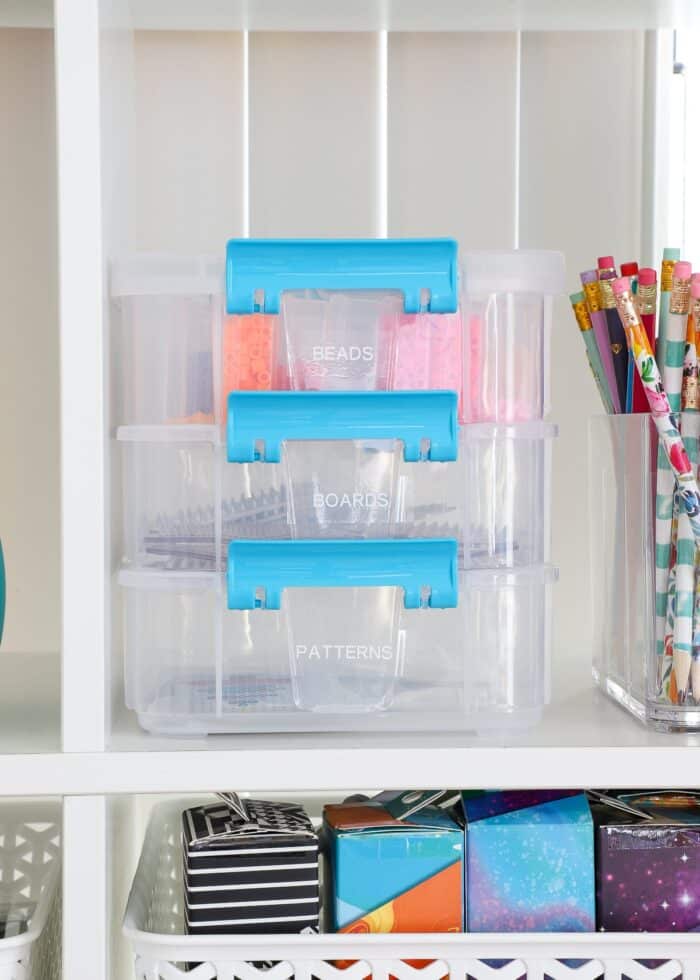
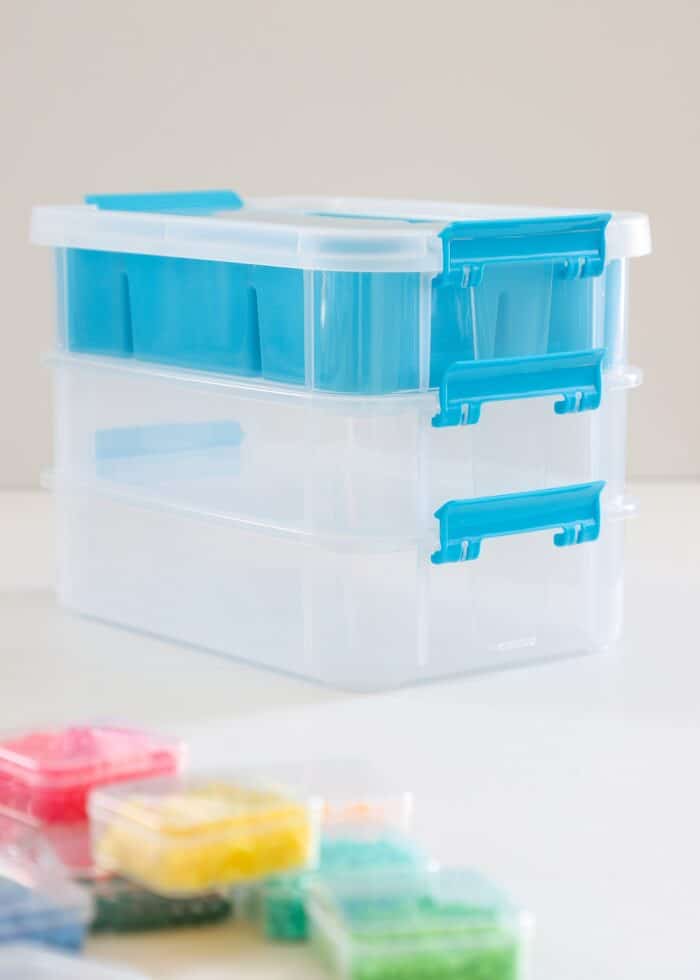
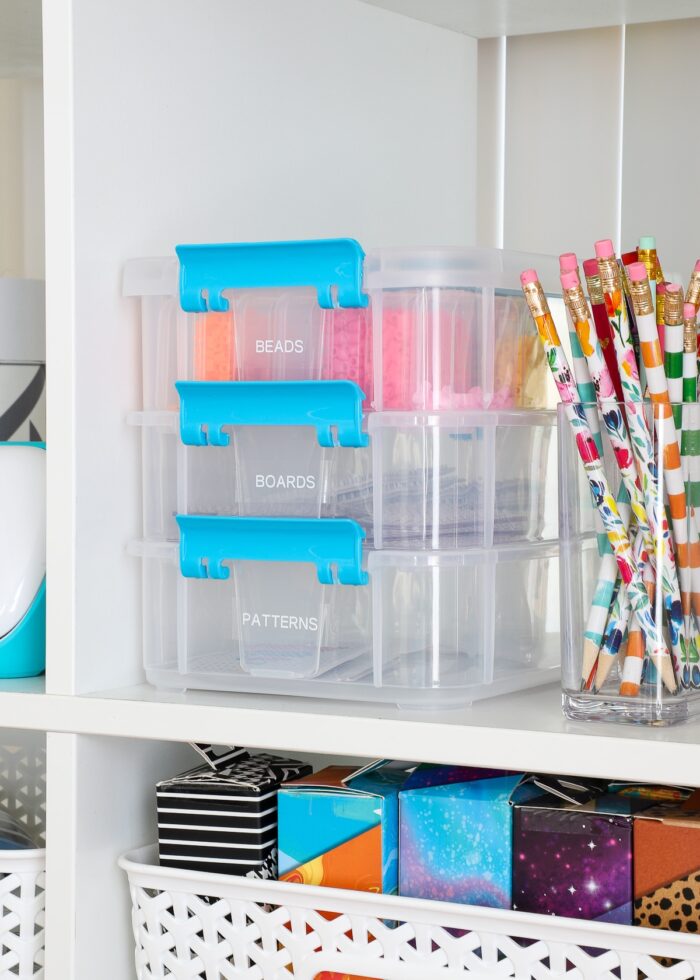
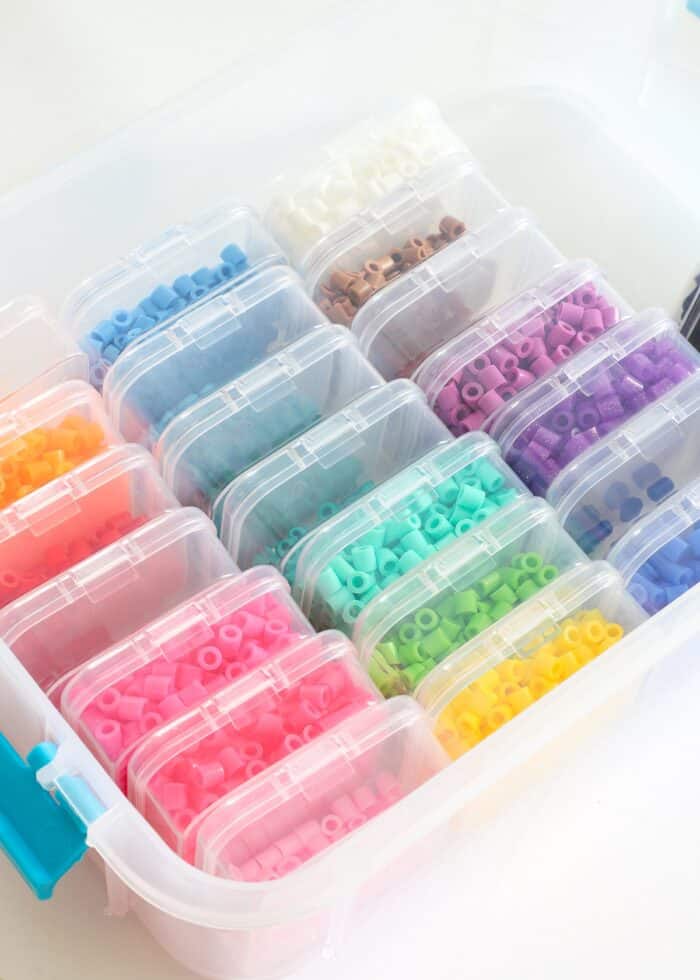
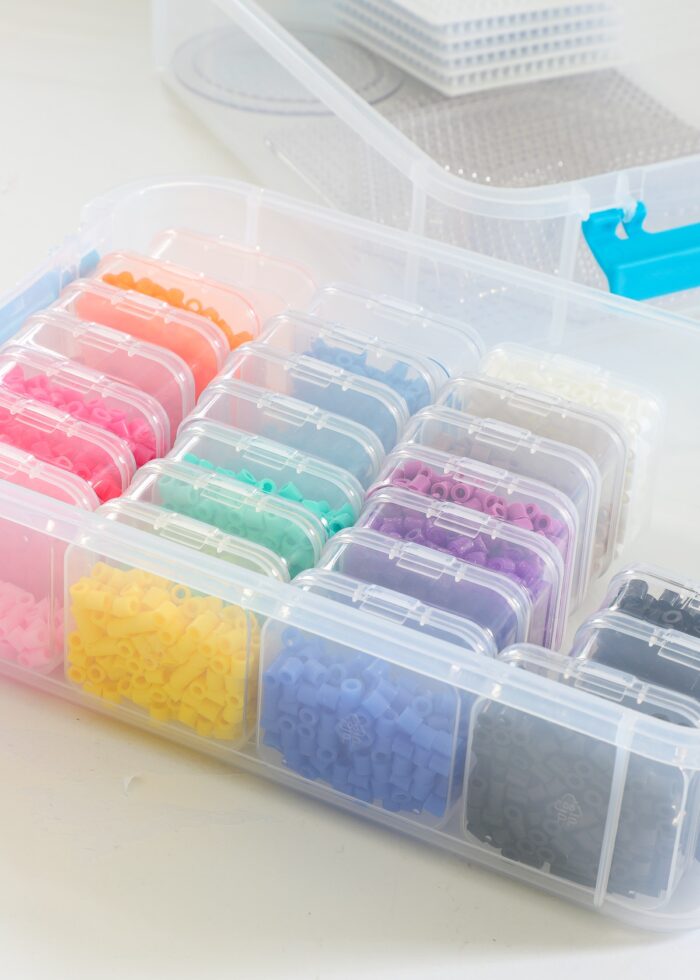
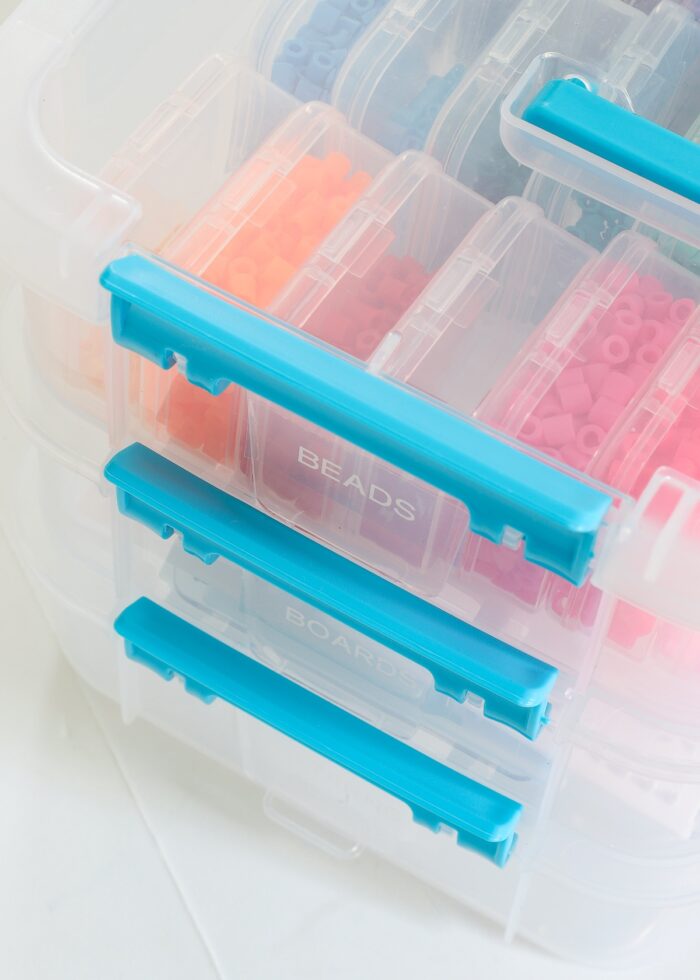
This tiered plastic box has three layers that snap together but can also fully separate and sit alone on a table.
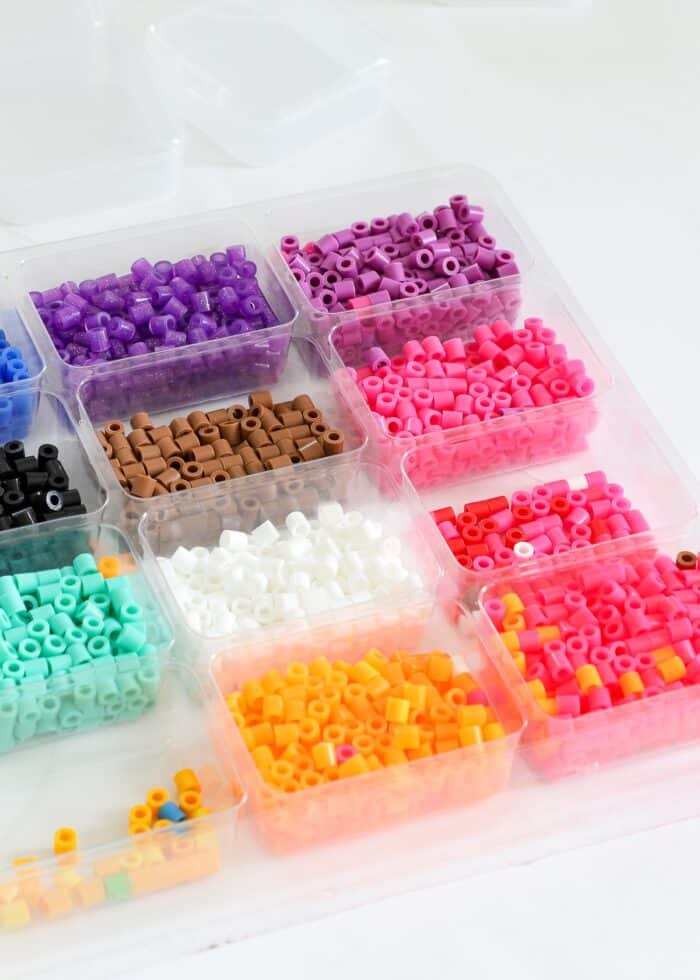
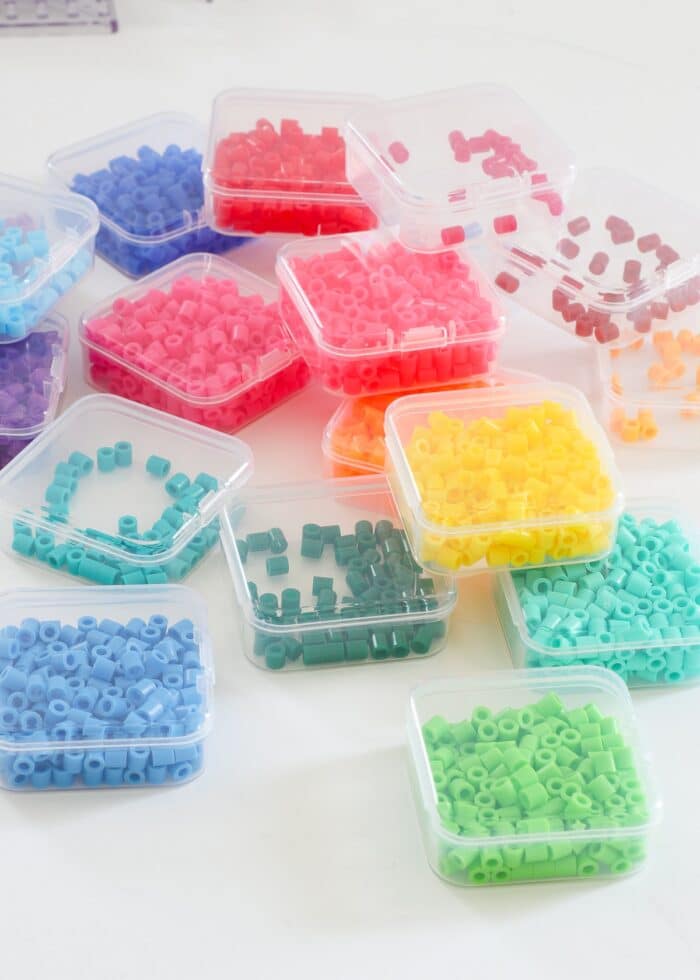
The top layer holds all the beads…
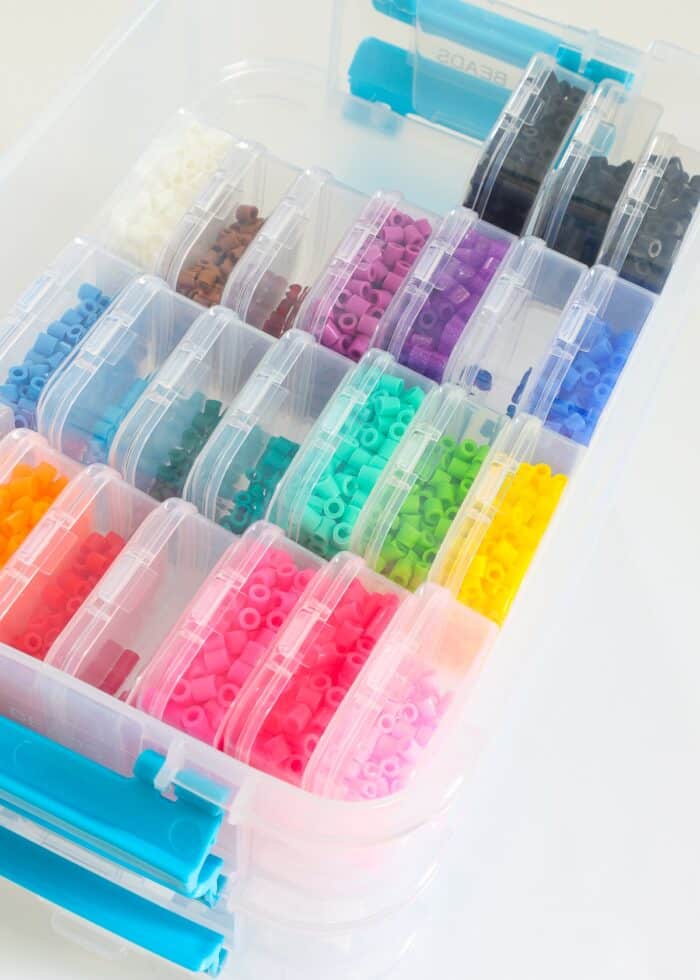
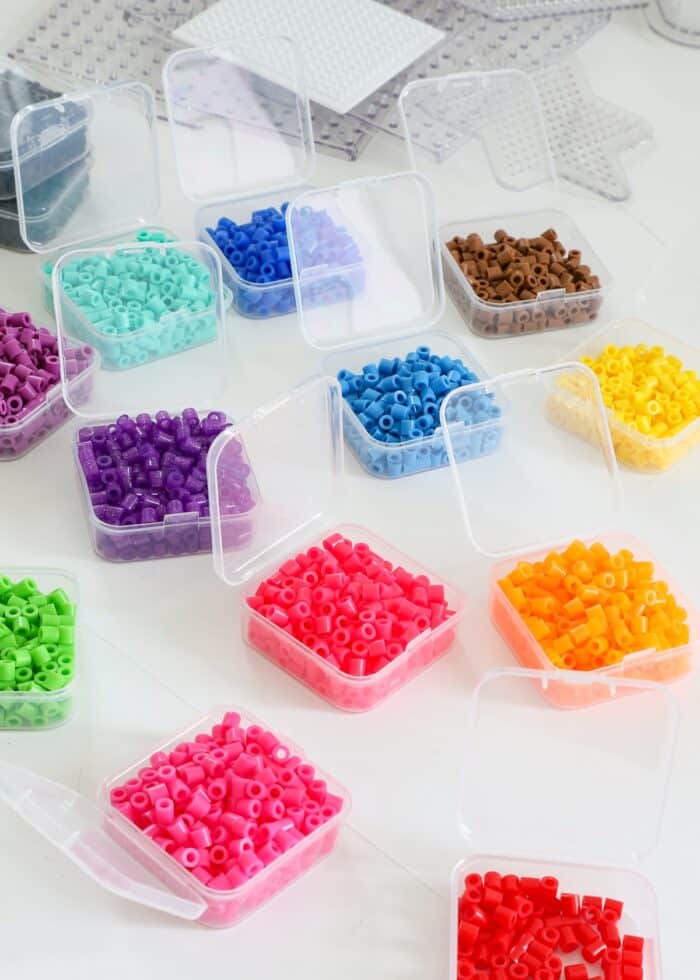
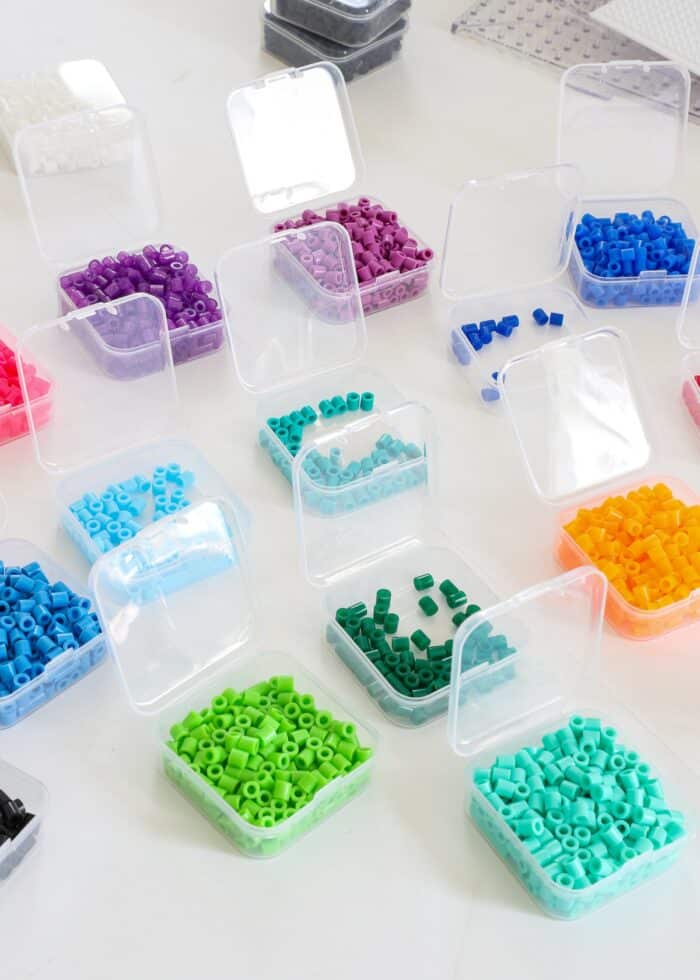
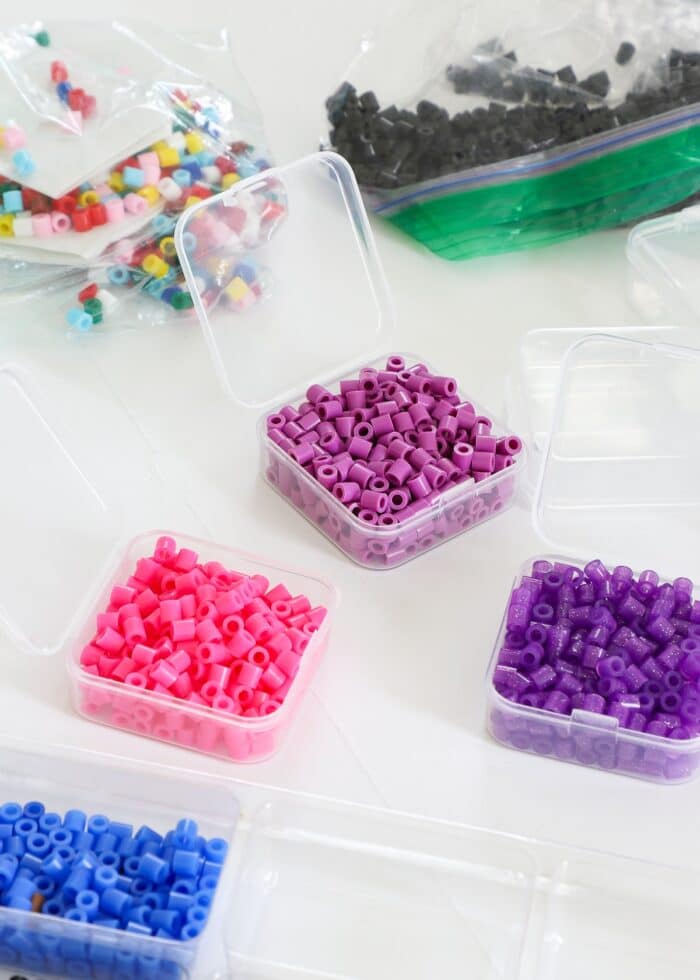
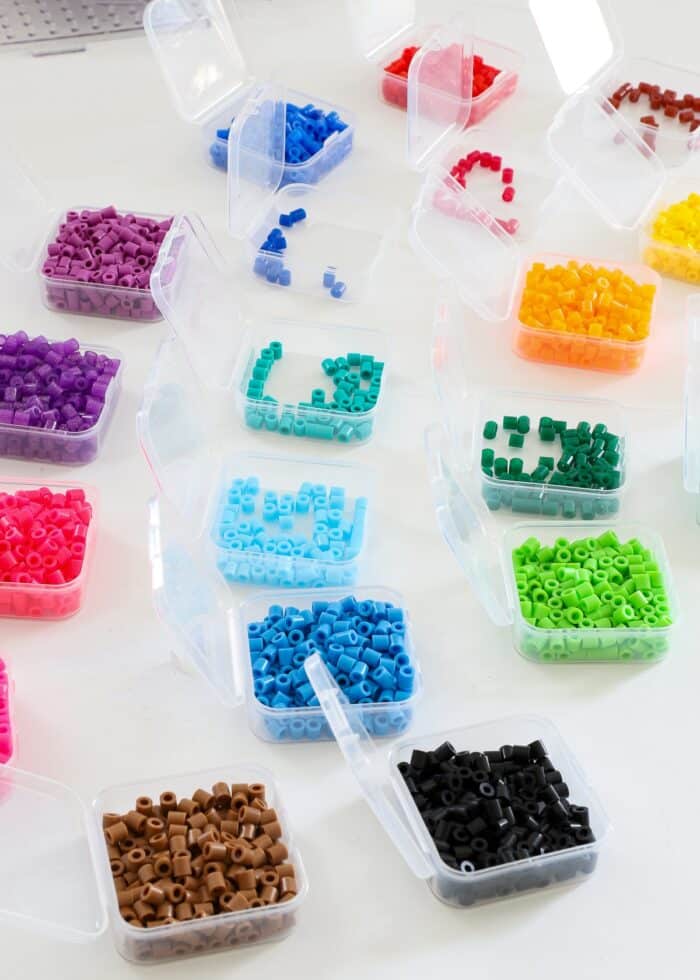
…which are sorted by color into individual plastic boxes.
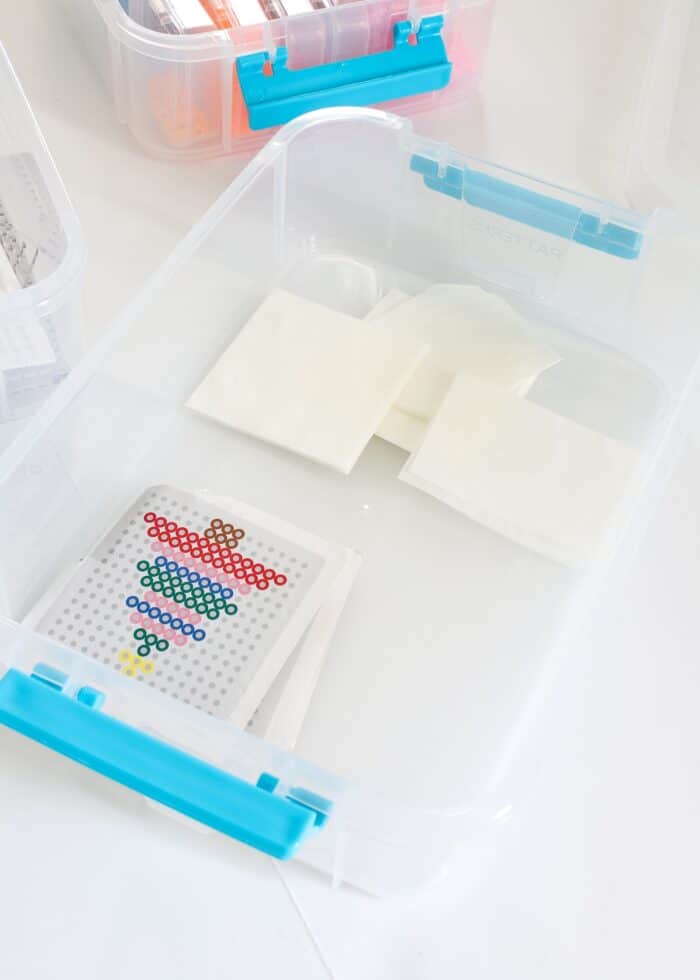
The second layer holds all the boards in various sizes and shapes…
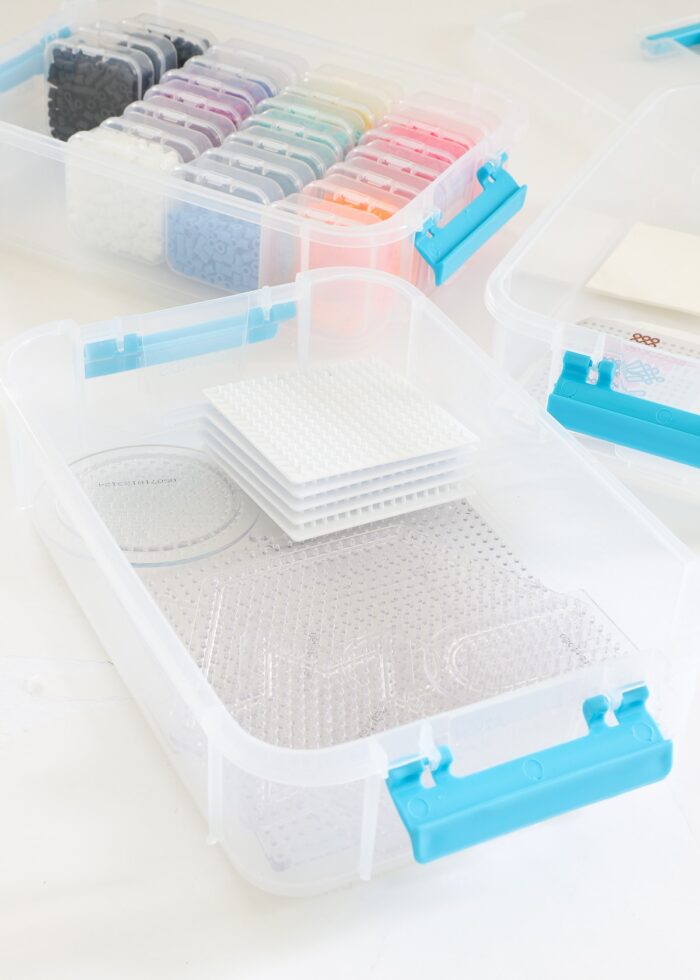
…and the bottom layer holds the patterns and papers we’ve accumulated (although, this could also hold more beads if ever needed).
All snapped together, our perler bead supplies are compact, user-friendly, organized, and ready to use at any time!
What You Need to Store Perler Bead Supplies
This perler bead storage idea hinges on two different products that come together to create the perfect all-in-one solution: small plastic bead boxes + tiered storage box = the ultimate perler bead caddy!
Want to save this post?
Small Bead Boxes
You all know I am partial to a good caddy, especially using stackable trays with removable dividers to create different size compartments (like this hardware organizer, our picture hanging kit, or our battery kit). And at first thought, I assumed that’s what I’d do here too.
But as I mentioned above, I actually don’t think a divided tray is ideal for perler beads. Because of the beads’ size, it is so easy for them to jump from compartment to compartment, especially with little hands using them.
With a divided tray out of the question, I started to consider these small plastic boxes. I’ve used larger versions before to organize cords in a drawer and love how sturdy and reliable they are.

I knew these boxes would allow me to keep all the different colored beads sorted and accessible, but they would also allow us to pull out only what’s needed project-to-project.
Tiered Organizer
Although I could have just gotten a bead organizer (with all the little boxes inside), most versions don’t have a second or third tray to hold the boards, papers, and patterns also used during perler bead crafting. I really wanted something that kept everything all together, and landed on this simple storage box.
Sure enough, the plastic bead boxes fit right into the top layer (vertically, on their edge), and all the rest of the supplies are sorted into the two remaining levels. All together, 100% of our perler bead supplies (minus the iron, of course) are organized but also really easy to access!
Video Tutorial
Want to watch this perler bead storage box come together in a snap? Watch the short video below! (Video not loading for you? You can watch it HERE.)
How to Organize Your Perler Beads
Ready to get your perler beads into a better state?
Step 1 – Assess Your Bead Collection
Don’t run off to purchase bead boxes and a tiered organizer until you have a good look at your existing perler bead collection. Figure out which size boxes you need in order to accommodate the quantity you have and what you tend to buy.
I chose the 2″ boxes because I determined they would hold the amount of beads we have in each color. However, if you tend to buy the larger bags of beads, you might want to pick bigger boxes.
Additionally, I specifically bought this tiered organizer knowing the 2″ boxes would fit vertically inside of it. If you use larger bead boxes for your beads, use a larger tiered tote to get the same setup on a bigger scale. (Yes, I tested them; the 3″ boxes DO fit inside the 2-tier tote).
TIP! When ordering, be sure you count up how many different color beads you have and order the number of bead boxes accordingly.
Step 2 – Transfer Beads Into Boxes
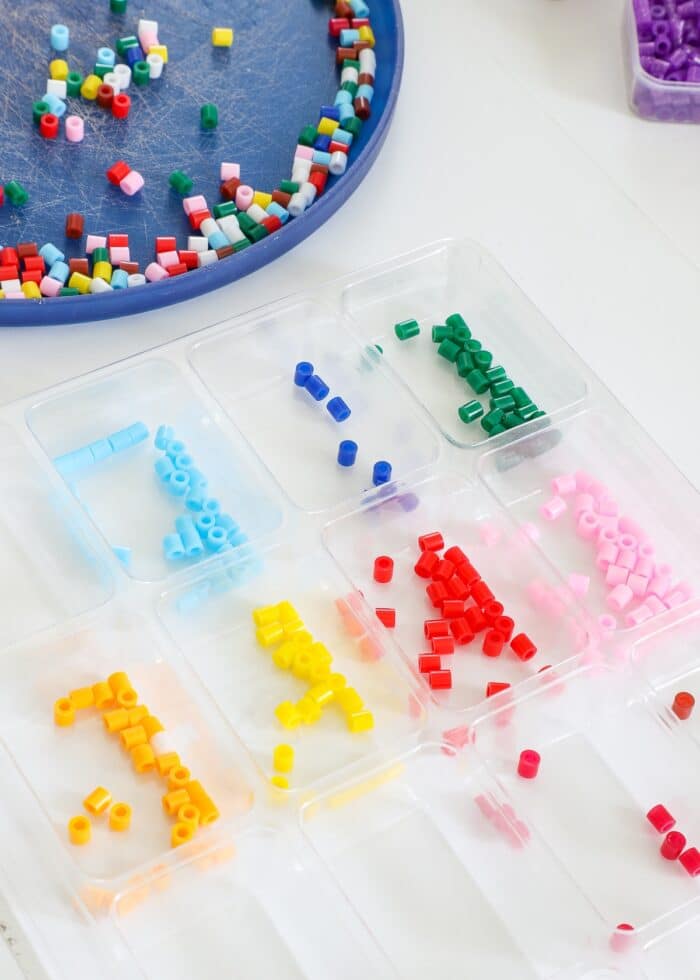
With your supplies in hand, now it’s time to sort your beads out!
Loosen up your hands and turn on a good playlist or audiobook because it can be a bit tedious to load all the beads into the various plastic containers, even if they are already sorted out by color.
Step 3 – Sort Mixed Beads (As Needed)
For most perler bead crafting, it’s really, really, really helpful to have colors sorted out. If you have some mixed-color bags, this is a great opportunity to pull them apart into individual colors too.
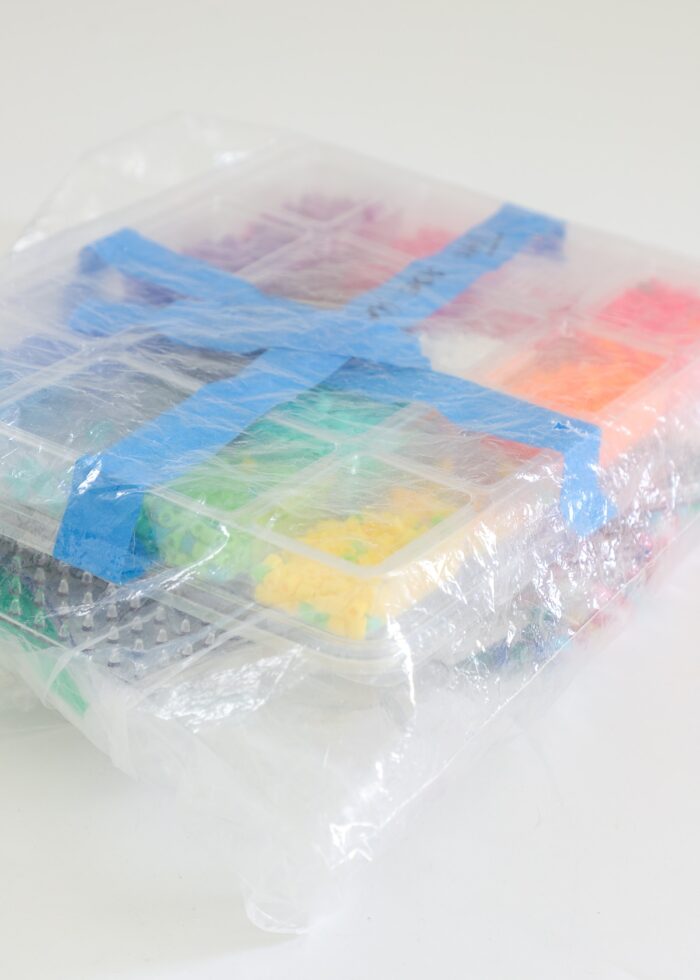
Step 4 – Close Up & Label Boxes (If Desired)
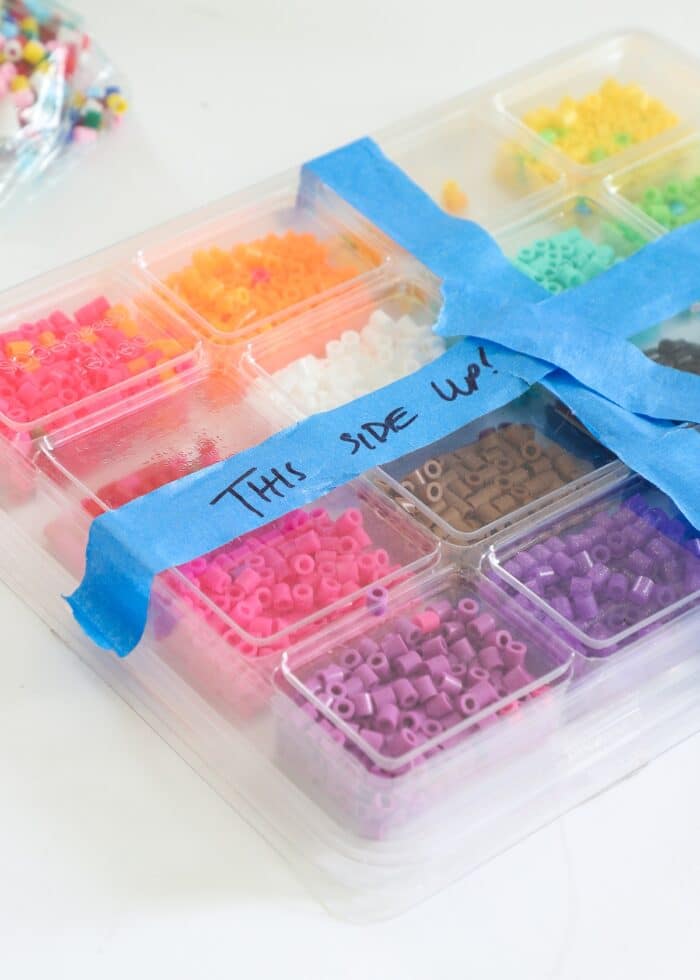
Once all your beads are sorted out into the different colors, close up the boxes and load them into your tiered organizer in whatever arrangement and order makes the most sense to you.
I like the boxes sitting on their back edge so that I can easily see each color at-a-glance, but I don’t need to worry about them accidentally opening.
If your bead collection is quite extensive and you have lots and lots of similar colors, you might want to consider labeling the boxes with the precise color name, either on the lid or along the edge. Our collection is compact enough that seeing the perler fuse beads inside the boxes is sufficient for now.
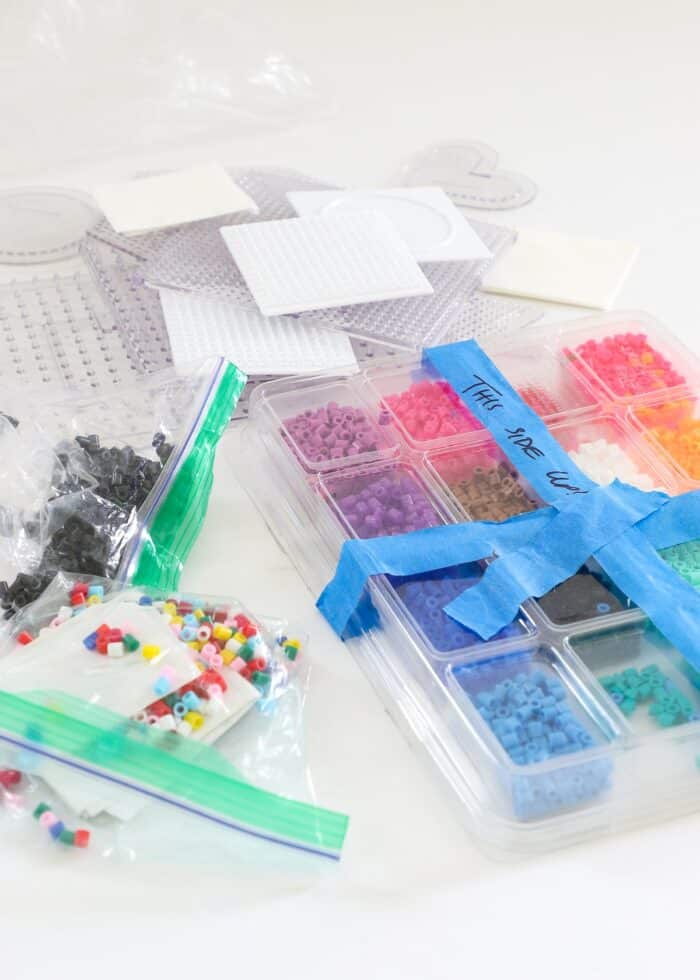
Step 5 – Load Up Caddy With Accessories
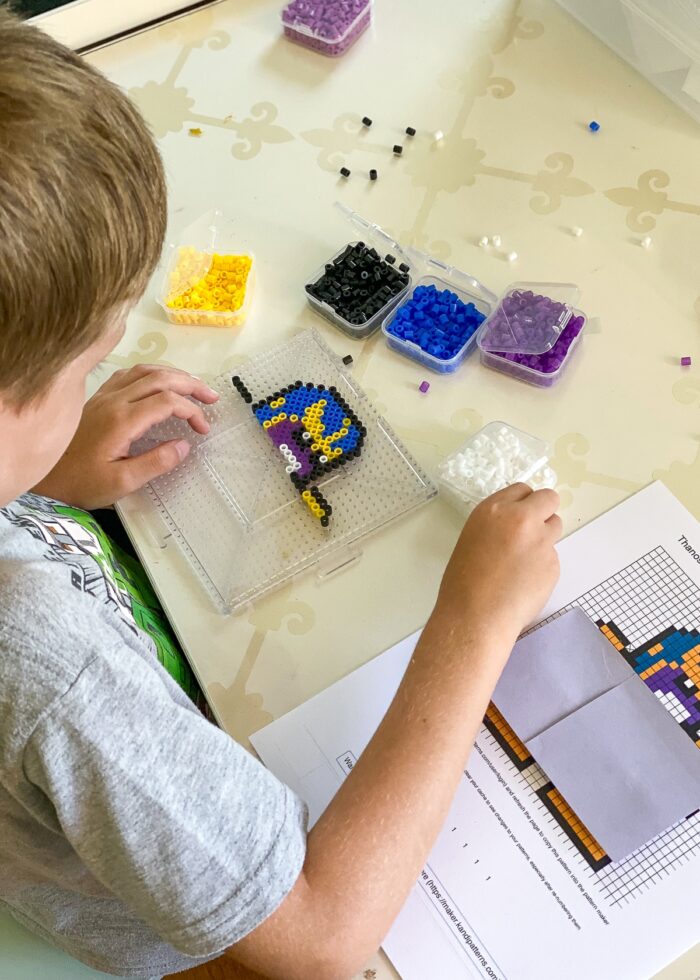
Round up all your pegboards, patterns, parchment paper (used for ironing), beaders, and tweezers and load them into the other tiers within the caddy; then snap the side handles shut.
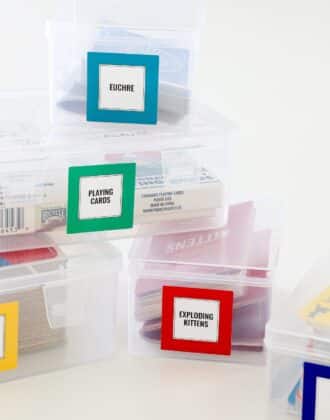
Step 6 – Label Tiers
Use a label maker to add easy-to-read labels to each tier.
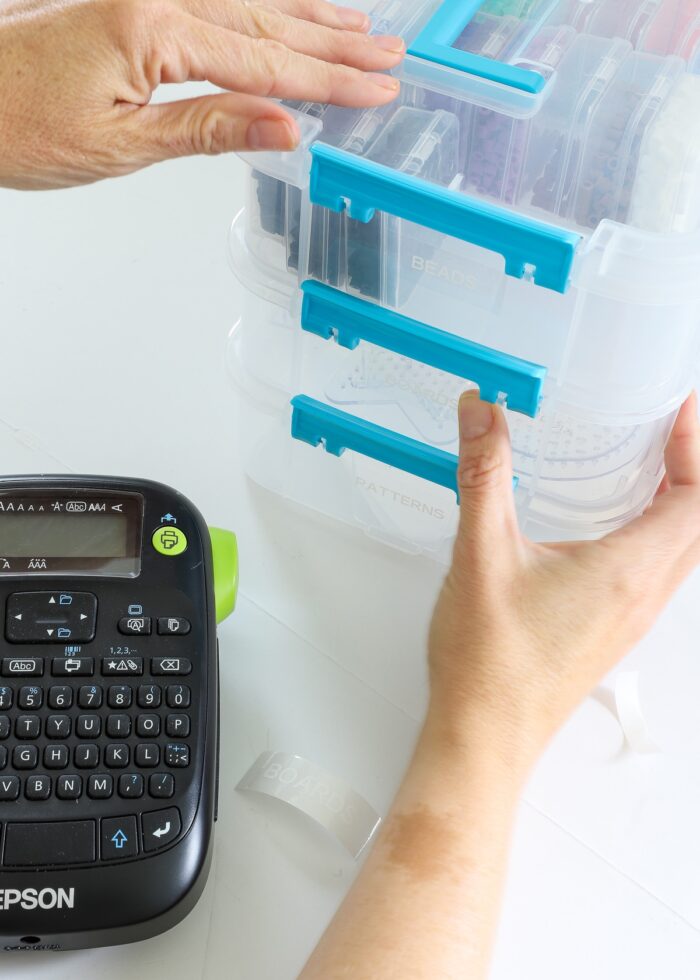
Remember, labels are just as much for reminding you where items go back as they are for alerting you to their initial location.
And with that…your perler beads are all sorted out and ready for your next craft project!
Other Craft Storage Solutions I Love
I pride myself on finding craft storage solutions that look good and work great too. Here are some other favorites for you to check out!
- Easy Sewing Machine Feet Storage Solution
- How Best to Store Craft Paper of ALL Shapes & Sizes
- How to Store Scrapbook Paper Scraps
- Easy & Practical Ideas for Storing Vinyl Rolls
- A Perler Bead Storage Solution That Works!
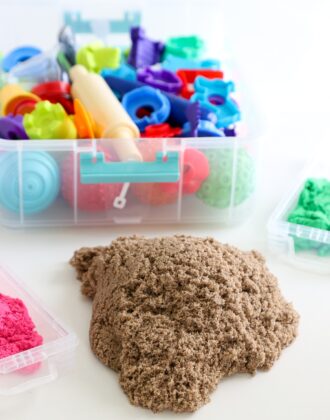
- An Easy (& Clever!) Way to Store Kinetic Sand
- How to Store All Your Cricut Supplies
- The Best (& Easiest) Way to Store Cricut Mats
- How to Organize Ribbon | My Favorite Solutions!
- How to Store Wrapping Paper (& All Your Gift Wrap Supplies!)
- How to Organize Sewing Thread
- How Best to Store & Organize Fabric
- How to Deflate Mylar Balloons (So You Can Save Them)
- I Downsized My Craft Room – Here’s How!
Wouldn’t you believe it…not a day after I implemented this perler bead organization, my middle boy pulled the caddy off the shelf to start a new project! Just as I expected and hoped, he was able to get everything out and work completely on his own. The individual boxes work SO much better than the larger divided tray. Success indeed!
If you have a perler bead lover in your house, I can’t recommend this organization solution enough! Skip the divided trays, fancy roundtables, and little drawers. This solution is inexpensive, customizable to your collection size, easy to grab-and-go, and best of all: great for kids! I hope you give it a try!
Megan

7 Comments on “A Perler Bead Storage Solution That Works!”
I just rehomed our perler stash. It was sad that we were (years) past the perler stage…but I wasn’t sad not to have to manage them anymore! We used a medium nuts/bolts drawer unit from the hardware store but we’d often end up with a dozen little drawers set out and little hands getting them put back without spilling was sometimes a challenge. You’ve come up with a great solution!
Love this idea!! Fun tip – I poked holes in the tops and decorate the small Christmas tree in my sons room with them!
Hello! LOVE this storage idea! You said the 2″ boxes “hold the amount of beads we have in each color.” Do you have an estimate for the number of beads are in the 2′ box when full? That way we can determine which size we need.
Thanks!
What size bag of beads do the 2″ boxes hold? I am trying to determine if we need the larger boxes. Thanks for this great storage idea.
I don’t know what size bags the 2” boxes hold, but I know that you have to use the larger boxes for the 1000 size bag of beads. I also found out the larger two-tier caddy that holds those larger boxes only fits them in the top tier. It won’t close if they up upright in the bottom tier. So you can only fit 28 of the larger box ones in the larger caddy. Just bought them all today to try it out and was disappointed to find I can’t only use the top tier of the caddy for holding the boxes, so even if I buy a second caddy I’ll have the same issue. Great idea, but second part of the caddy needs to be deeper because of how the first tier sits inside of it.
Thank you! My boys are 4 and 6, and I’m excited as they are just starting to love perler beads, but I needed a way to contain supplies and limit the mess. This is perfect! Just ordered and can’t wait to get our stash tidy and easy to use. 🤓
This is genius! Was looking for a solution and found your blog right away. Thank you for doing the homework so I didn’t have to. Just added to cart!