Organizing Screws & Nails | A Solution That Really Works
I recently tackled an organization project that has (way too) long been on the To Do List: our hardware. Truth be told, the situation with all of our nails, screws, anchors, pegs, washers, fasteners (and more!) has been hounding me for years, as I’ve never been able to identify a solution that is flexible, stays tidy, and easily packs up and moves when we do. But after an “ah ha” moment with one of my other favorite organizing solutions, I suddenly knew what I needed to do! Today, I want to show you my new favorite way to organize screws and nails so you too can get rid of the mess, stop buying duplicates, and actually find what you need, when you need it!
Why Organizing Hardware Can Be So Tricky
In the 18ish years that I’ve been doing DIY projects, I’ve never been able to implement a solid organization solution for all our accumulated hardware. From cute little drawers and adorable jars, to various boxes, bins, and baggies…none of them seemed to work beyond the initial setup.
Why? It usually came down to…churn!
Hardware is not something you purchase to hold on to. Usually, you buy a set of screws or anchors or bolts for a particular project, and then you (almost always) have leftovers.
So of course, you need a way to hold those extras or else you’ll just lose track of them. So you put them into a dedicated jar or drawer or plastic container.
But eventually, you use up that supply. So your now-empty box or drawer or jar that says “#8 x 1 screws” needs to adjust to whatever you purchase next from the hardware store. But maybe your next item is a really big box of nails that no longer fits in the specific container.
So the cute little container sits empty, while you continue to accumulate more random boxes of other screws, nails, and more…until the whole system gets completely out of hand.
Sound familiar?
Any hardware organization systems that relies on finite bin sizes or pre-set labels can quickly become obsolete or too difficult to maintain since the items being organized are constantly in flux. The key to organizing screws and nails is employing a system that is compartmentalized, compact, and fully adjustable!
Why Use a Caddy to Organize Hardware
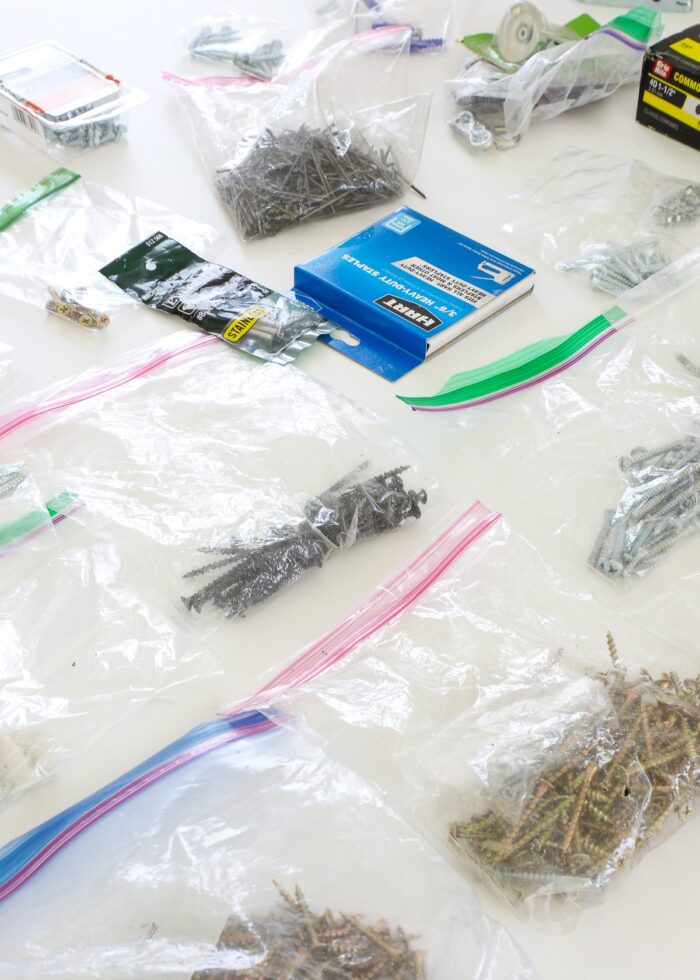
In recent years, we abandoned the cute drawers, jars, and bins and instead resorted to tons of Ziplock baggies stuffed into a plastic crate, which is obviously far from ideal.
Although our various items were (generally) sorted out and some were even labeled, it became impossible to find what we needed mid-project amidst the clutter…which ultimately led us to purchasing more of items we already had.
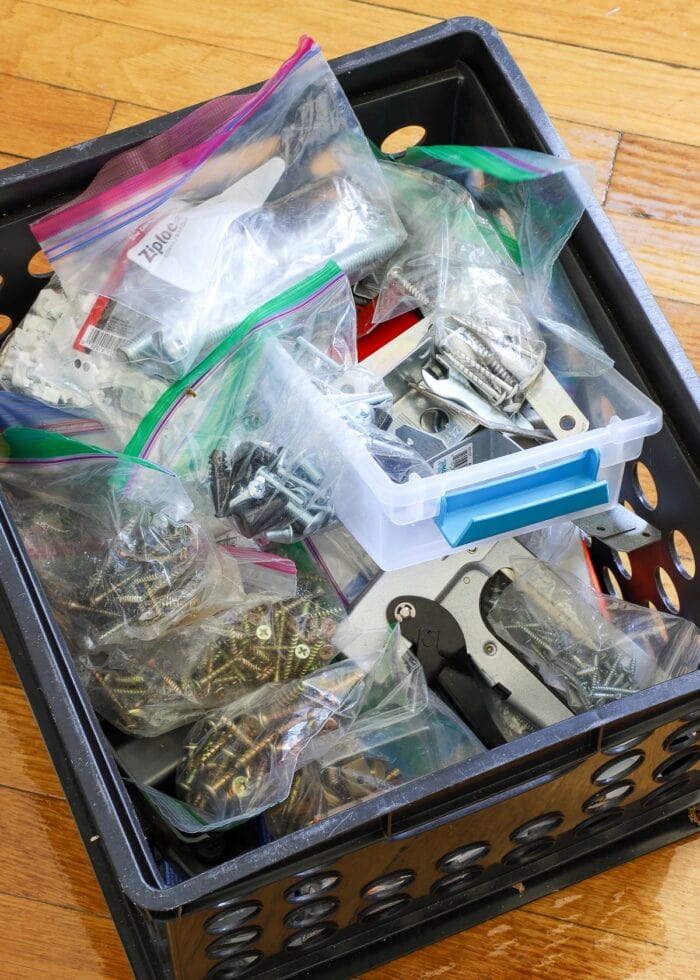
We’ve been doing a lot more DIY projects since moving into our current house, and frustration with the “crate of despair” was reaching its peek. So when I went to retrieve some batteries from our Battery Kit, I had an “ah ha” moment. A caddy!
Both our Battery Kit and our Picture Hanging Kit are two of the handiest organization projects I’ve ever done. Years and years (and moves and moves) later, they are still going strong!
Here’s why caddies are such a great solution for small items:
- A caddy allows you to easily sort a wide variety of (small) items in a very compact footprint. No chest of drawers, shelves of baby food jars, pegboard full of buckets, or stacks of individual bins.
- Caddies are incredibly user-friendly, usually allowing you to see everything at-a-glance as soon as you open the lid.
- Caddies are (usually) adjustable, meaning you can easily make compartments as big or small as you need.
- Caddies can sit on shelves/racks or be loaded into cabinets or bigger bins/baskets in your work area, as needed.
- Caddies are easy to pack into moving boxes just as they are (no having to disassemble or unload just for moving!)
I immediately knew this was the solution for our hardware too, so I set off to find caddies that provided enough compartments for our extensive hardware collection but with all the functionality and flexibility I knew we needed to keep this organization going for the long haul.
And I landed here!
So much better than the crate, don’t you think? Let me show you how this all comes together!
Supplies Needed
Here are the supplies I used to organize screws and nails (and so much more!):
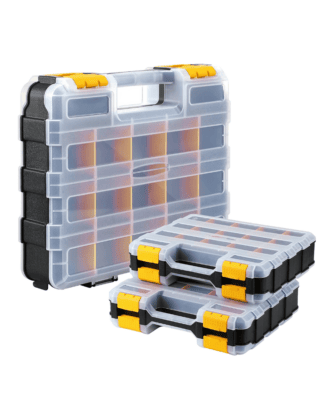
- Double-Sided Hardware Caddies
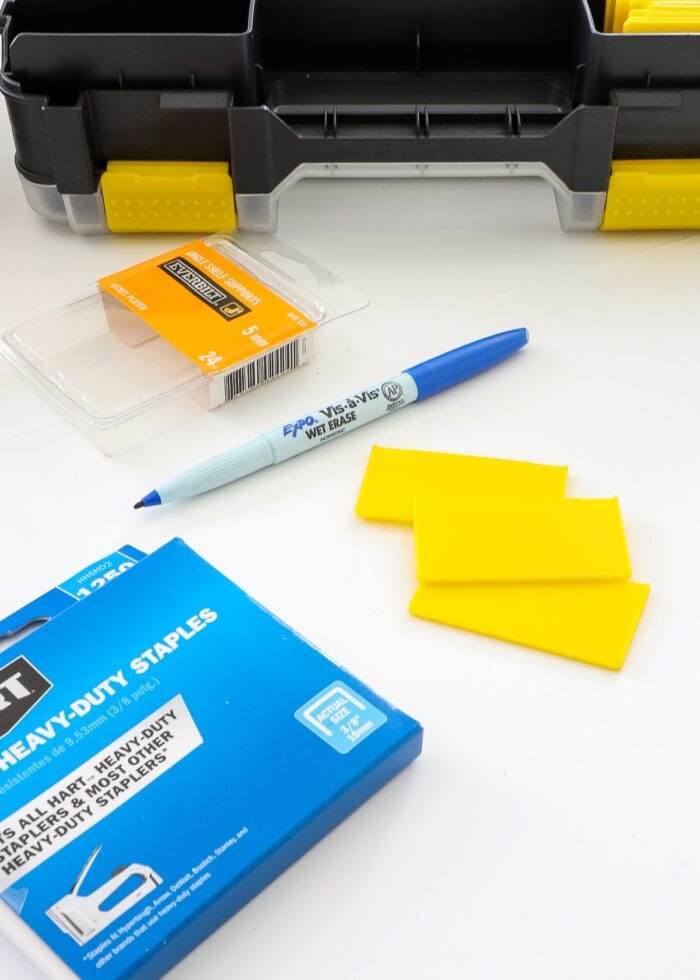
- Wet Erase Marker
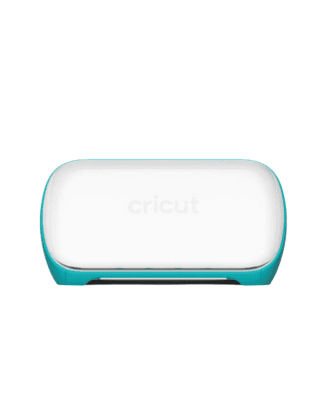
- Label Maker – I used vinyl with my Cricut Joy, but you can use whatever you prefer.
How to Organize Screws & Nails Into Caddies
Step 1 – Assess Your Hardware
Before you can even begin to sort and organize your hardware, you must first pick out a caddy to hold everything. And before you can shop, you need to assess what exactly you have!
So go on…dig through your garage, work space, craft room, storage closet, shed, or basement to find any and all hardware that needs consolidating and organizing.
Don’t get too bogged down with sorting items into groups right now; but you will want to get a general sense for how many compartments you’ll need for your hardware collection. This will guide your product selection in the next step.
Step 2 – Pick the Right Caddy
I think the reason I never considered a caddy for our hardware before is that I didn’t think I could find one with enough compartments for all the various nails, screws, and other items we tend to keep on hand. However, these days, you can find practically anything with a bit of searching!
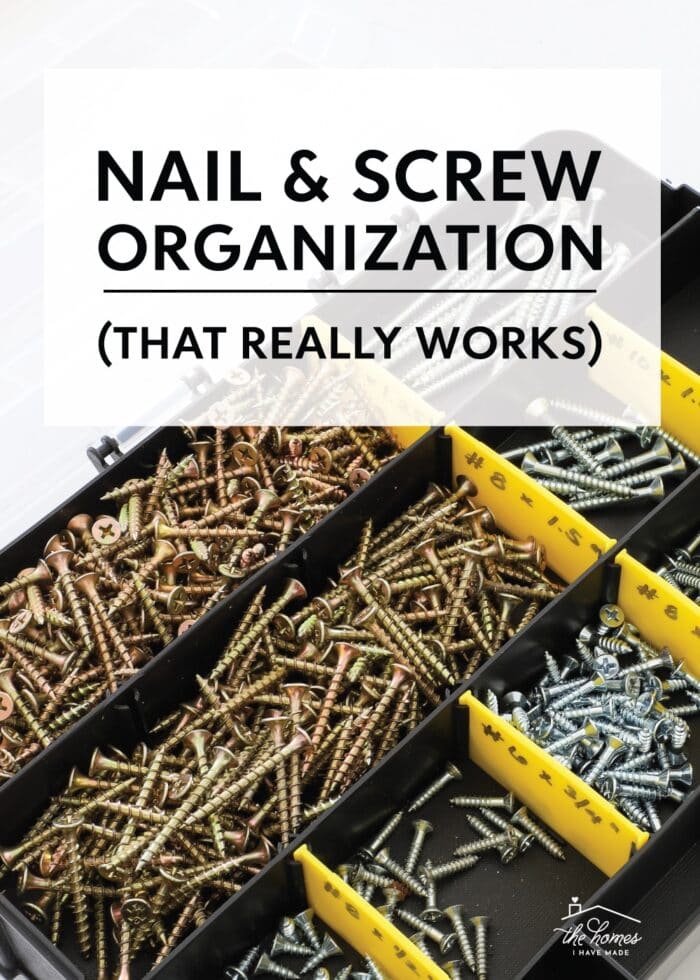
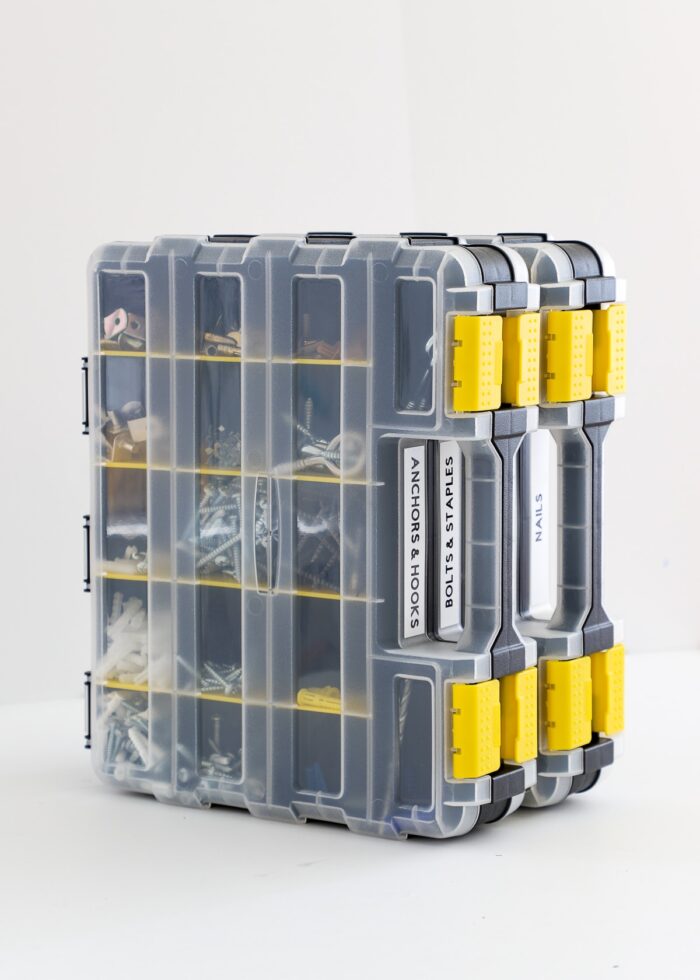
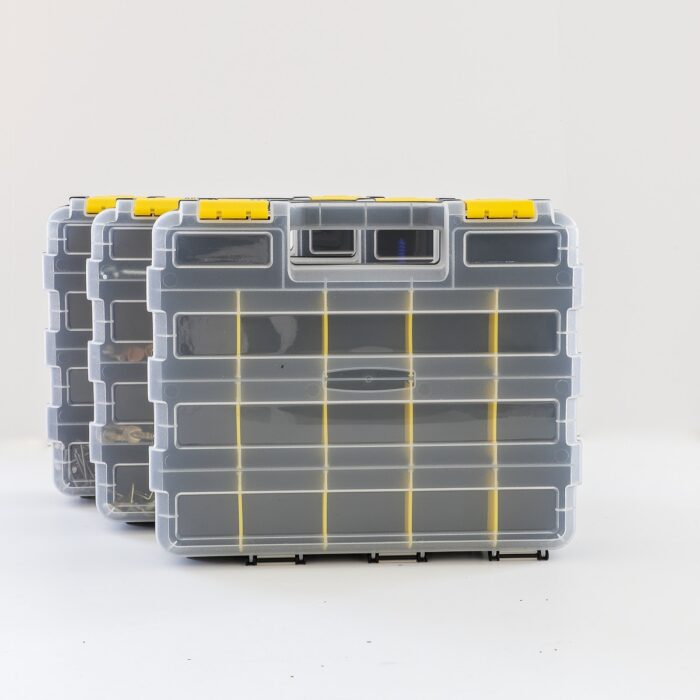
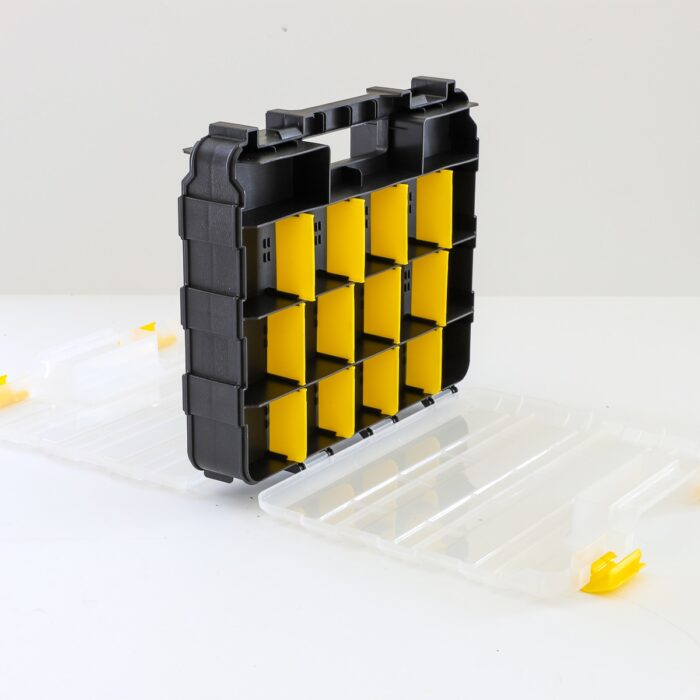
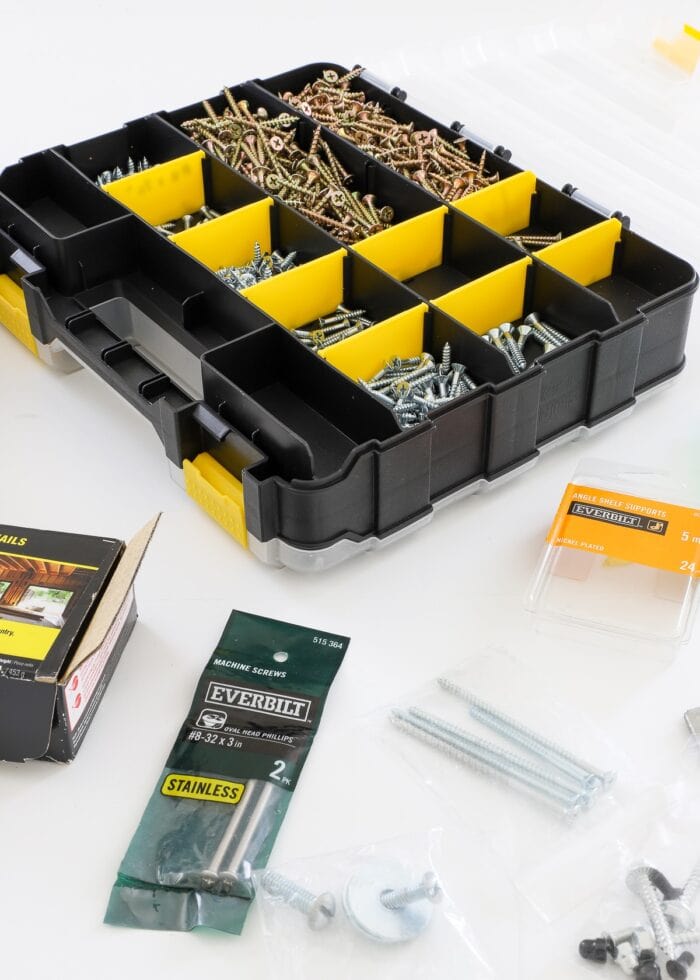
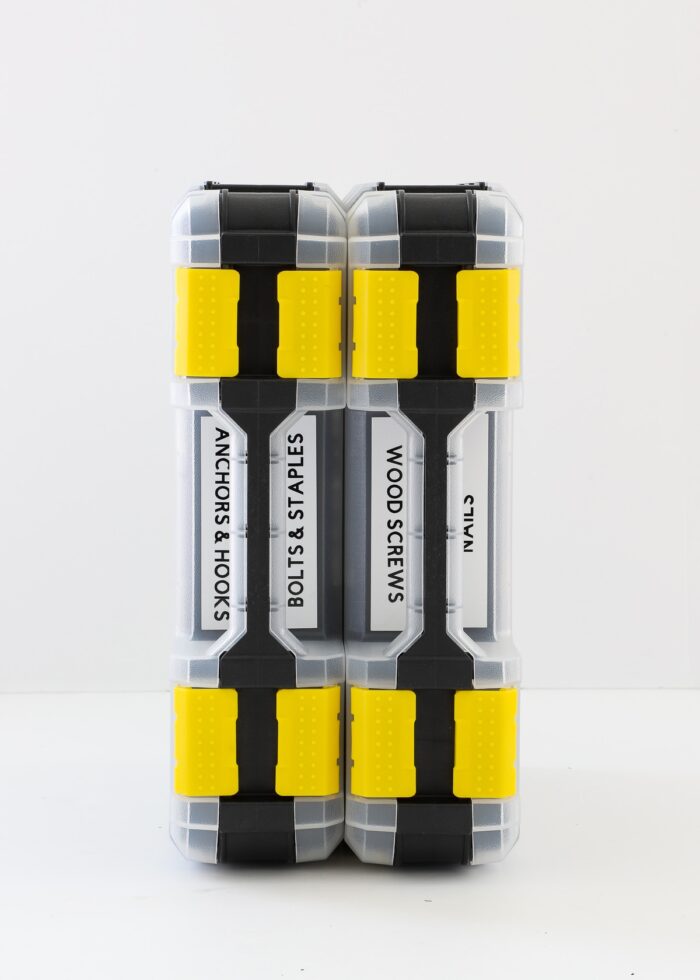
While I wasn’t able to find a “really big” caddy to hold every single item, I was able to find a set of caddies that were each double-sided, providing 100+ different compartments.
Spend some time searching your favorite retailers for a caddy that fits these criteria:
- There are (generally) enough compartments for your existing hardware collection (with some room to grow).
- The compartments are adjustable (usually via removable dividers).
- The caddy (or caddies) fit where you need to store them in your workspace (e.g., on a shelf, in a cabinet, in a bigger bin, etc).
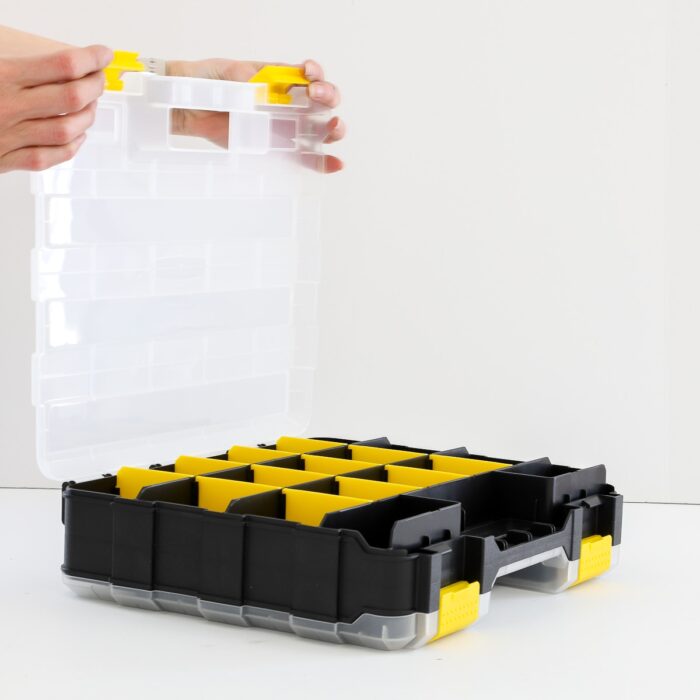
- The divider/compartment walls sit flush to the caddy’s lid, preventing items from shifting from compartment to compartment when closed. This is imperative for hardware storage.
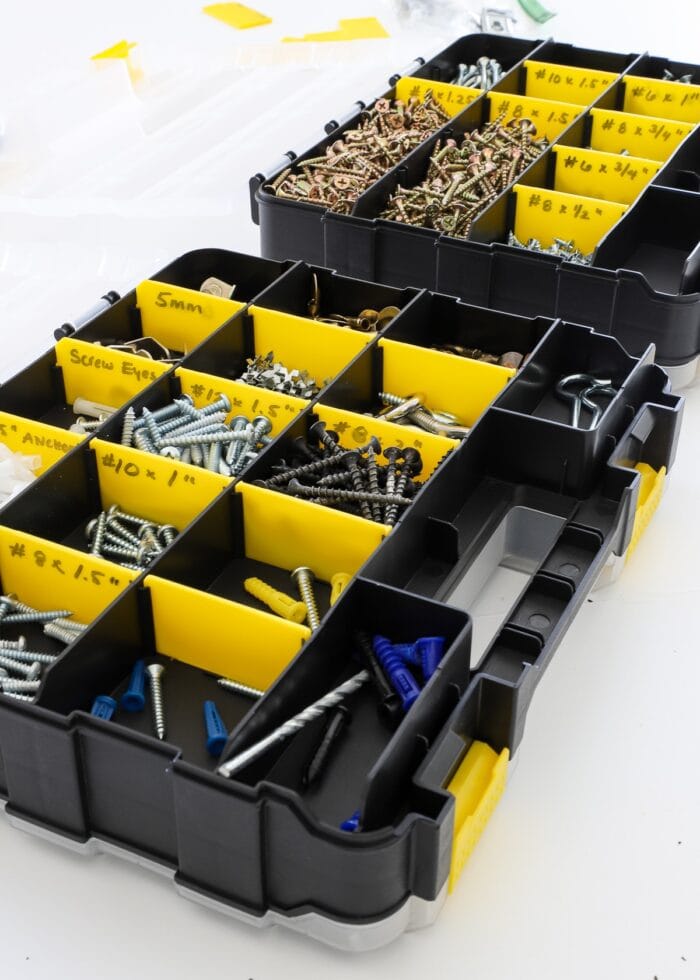
Step 3 – Sort Your Hardware
With your caddy (or caddies) in hand, now it’s time to organize screws and nails into the various compartments! Keep in mind that this WILL take some trial-and-error (i.e., loading in, dumping back out, and re-loading in somewhere else) until you have all the items exactly where they best fit and make most sense to you.

I recommend starting with any hardware still in its original packaging, as well as any sizable collections already grouped together.
Want to save this post?
If your hardware situation is a complete mess, you might also have random or mis-matched items you need to sort through.
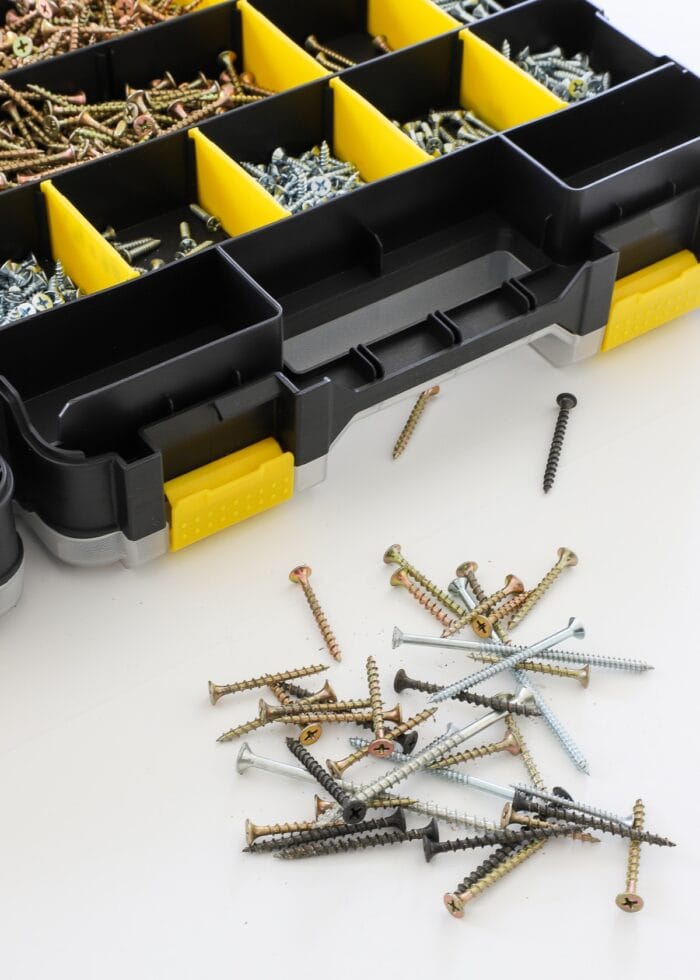
I found it easiest to sort through this pile after the major groupings were already loaded in; there’s a very good chance these random items will match up with your larger collections.
As you organize screws and nails, don’t hesitate to combine similar items (only if it makes sense to do so) or enlarge compartments to make things fit more comfortably.
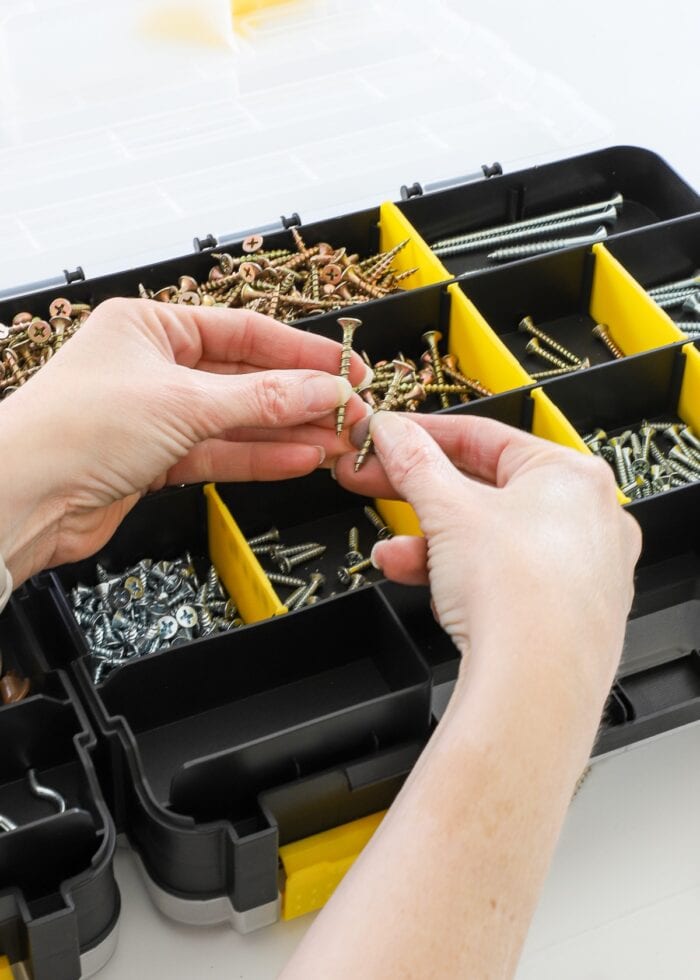
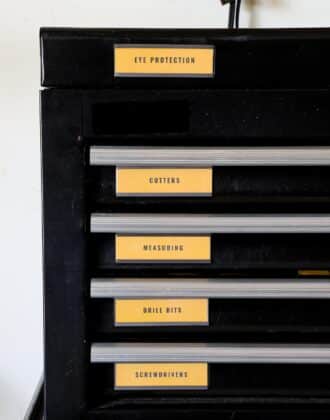
Step 4 – Label the Compartments
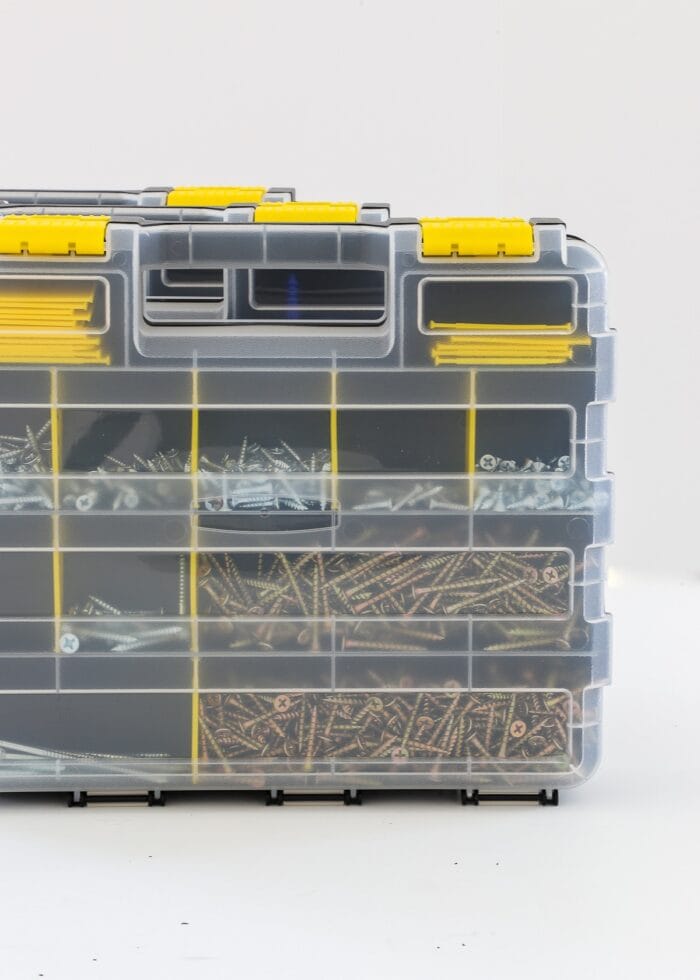
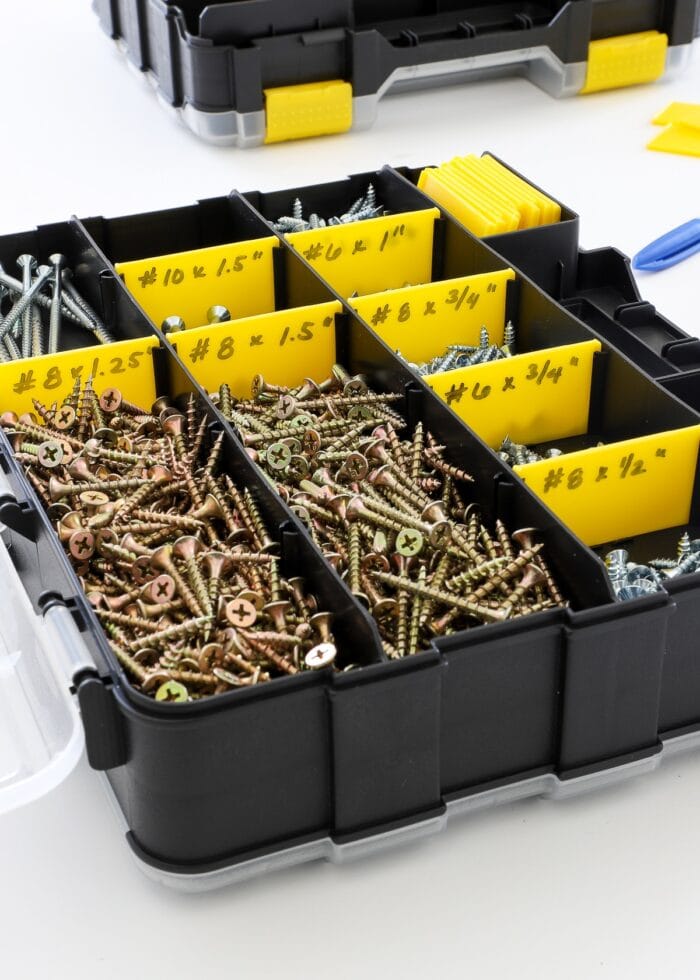
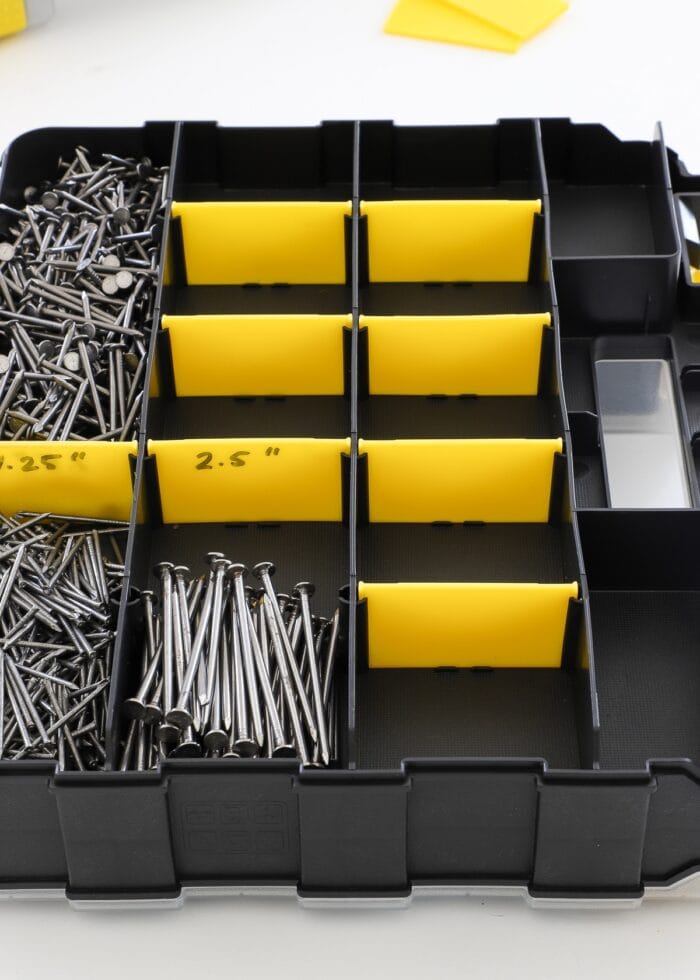
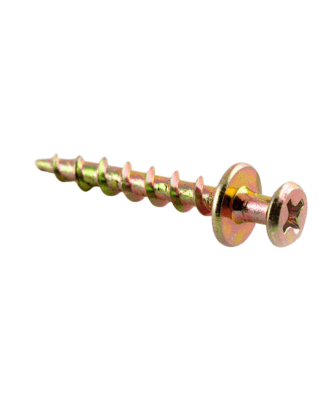
While some things may not need to be labeled, most items in your hardware organizers will so that you can quickly and easily identify what is where. (I don’t know about you, but I can’t tell between a #8 and a #10 screw at a glance!) If you are tossing out packaging, be sure to label (at least temporarily) as you go.
TIP! If you are having trouble identifying items because the packaging is long gone, I found this site helpful in determining the type of fastener.
You all know I am a sucker for a pretty label, but this is one project where I say, “Don’t bother!”
Unless you tend to keep certain items always stocked, these compartments are likely to change as you run out of and re-stock items over time. You will want to be able to remove and add fresh labels without ANY hassle.
After experimenting with lots of different options, I landed on using a wet erase marker for the labels. In doing so, these labels won’t smudge off with day-to-day use; but they can be quickly removed (with water) and re-written in mere seconds. No label maker, no vinyl, no fancy pens.
Although these labels don’t look the prettiest, I am much happier knowing that I can easily update them as we run out, re-stock, and re-arrange as needed.
TIP! Keep the marker tucked right into the caddy itself to make re-labeling even quicker!
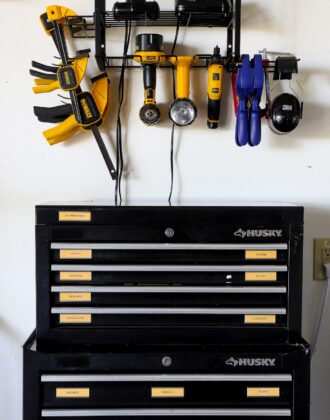
Step 5 – Label the Caddies
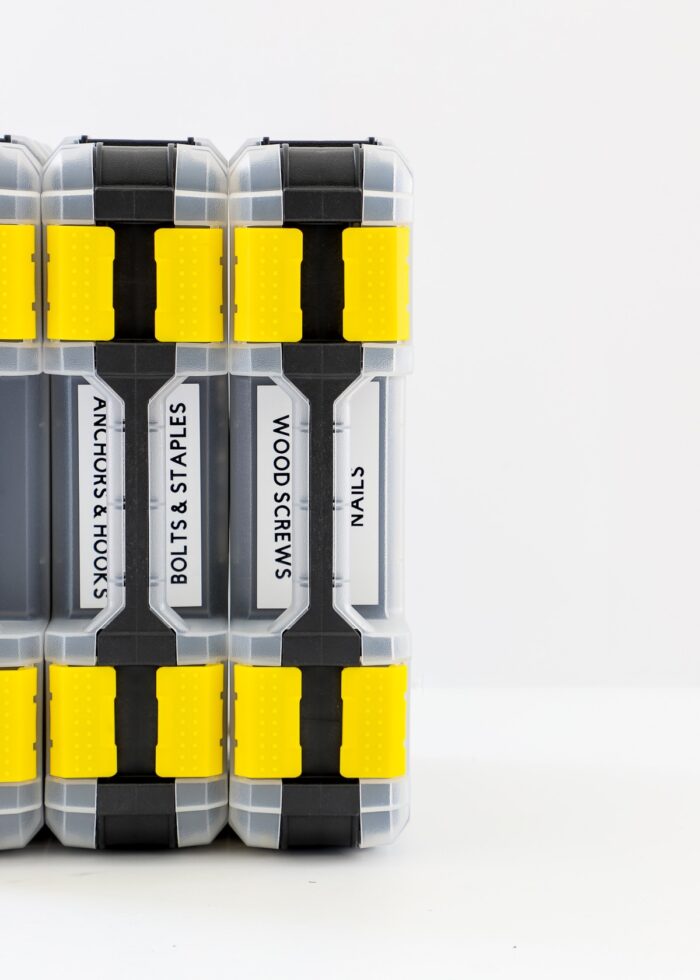
Although the clear fronts of the boxes allow you to peek in to see what is where, I wanted to make it even easier to find exactly what we need when we’re mid-project (especially since these caddies are double-sided and we have two of them!)
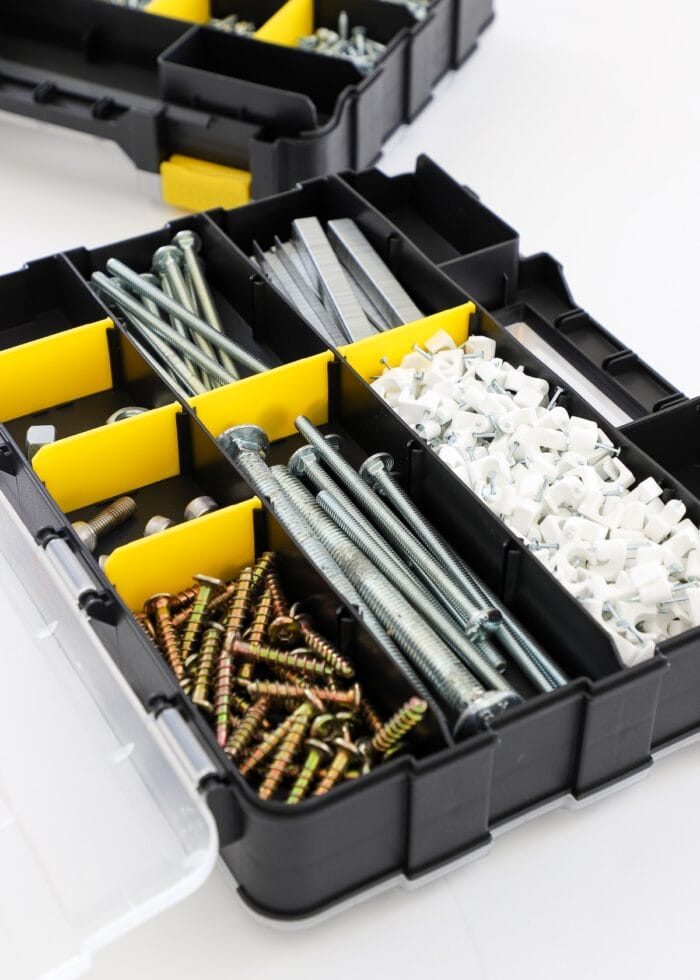
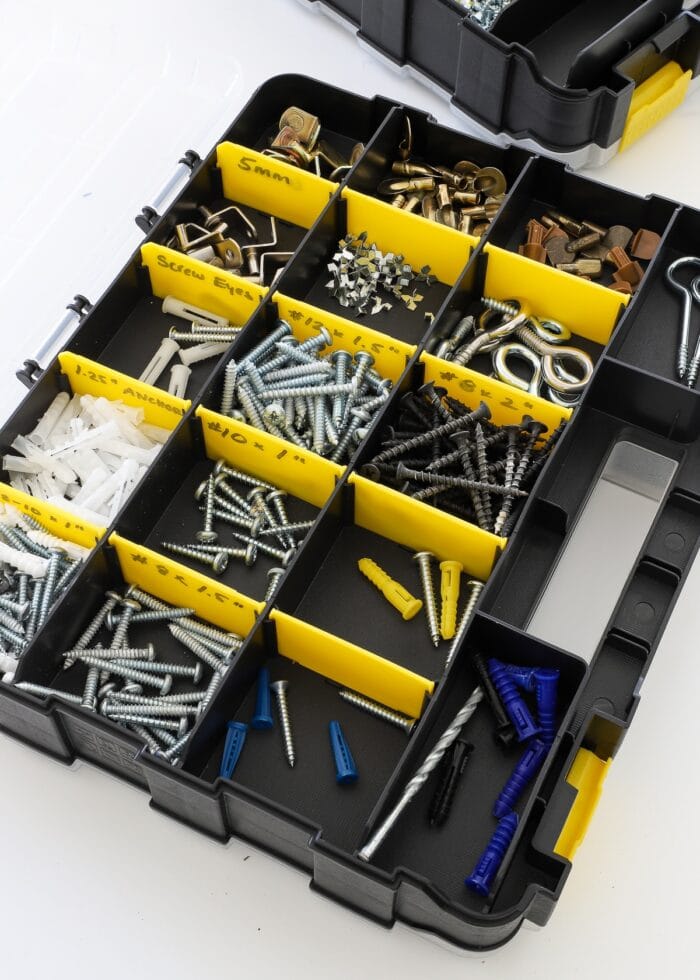
When I was picking compartments for the various screws and nails, I generally kept larger categories together (e.g., wood screws, nails, anchors and hooks, nuts and bolts, etc). So I then added some larger (and more permanent) labels to the outsides of each lid.
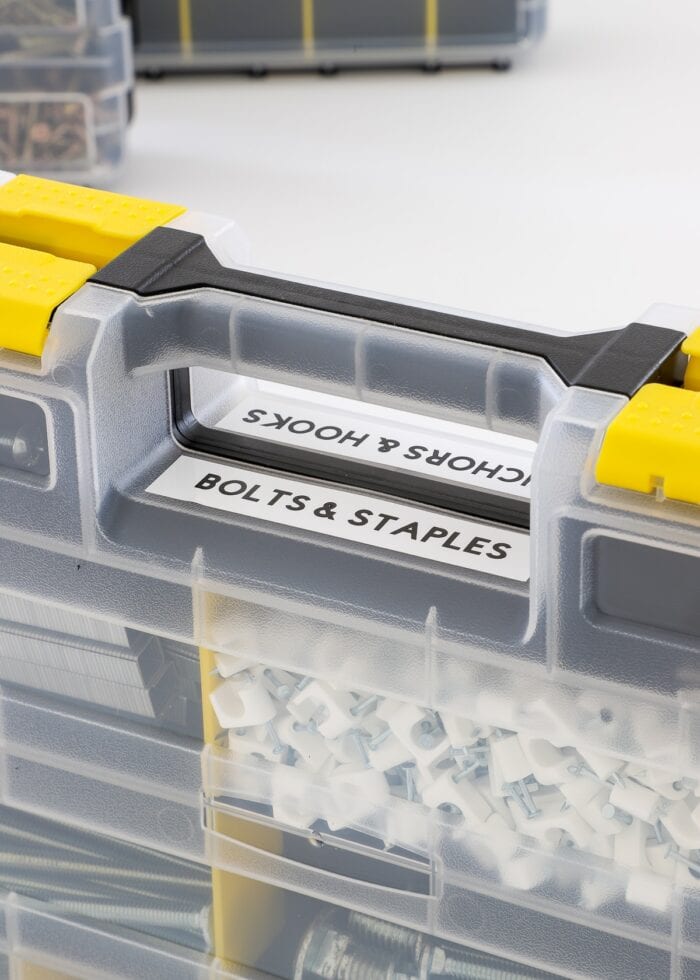
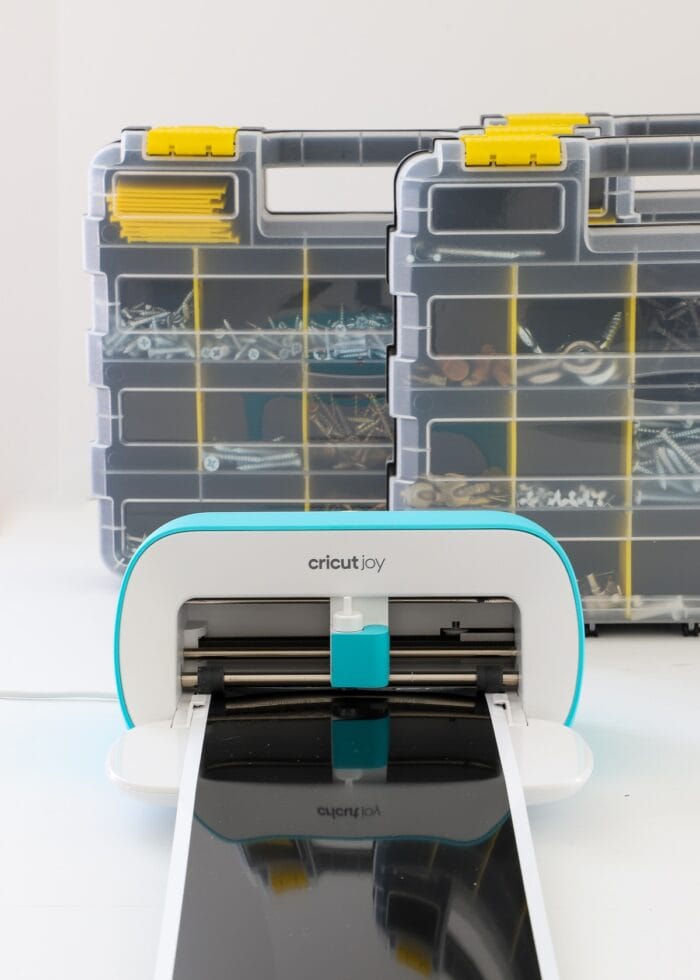
I cut these larger labels out of vinyl using my Cricut Joy. You can see how here: How to Make Vinyl Labels with a Cricut | A Comprehensive Guide
Step 6 – Put Caddies Away
With all your hardware sorted out and labeled, you can close up the caddy (or caddies) and put them away in your storage space!
I’m positively giddy that our big ol’ crate full of baggies has now been condensed down to two caddies that can stand on a shelf. Finding and getting out exactly what we need is (finally) quicker and easier than ever. And if/when we buy something different for the next project, we have room for that too!
Top Tips for Hardware Storage
Although I outline the general process of how to organize screws and nails above, here are a few more tips and tricks I learned when working through our hardware mess!
Flexible Compartment Size Is Key
I can’t over-emphasize how imperative it is that you use caddies with flexible compartment sizes. Being able to remove or add in dividers will ultimately allow you to store anything and everything you purchase over time.
And remember, this system WILL evolve, so keep those extra dividers on hand so you can add them back in whenever needed!

Leave Empty Space
Hardware organization can spiral out of control quickly when you don’t have enough spots for everything. If you purchase a different set of screws for a new project and have no where to put them, you’ll either combine items or end up with overflow (outside the caddy). So when selecting an organizer, be sure to pick ones that have room for you to grow.
This set of caddies not only left me with one full side almost empty (shown below), but a full third organizer we haven’t even opened yet!
Don’t Be Afraid to Toss
If you find yourself sorting through random hardware that doesn’t seem to go with any larger set, don’t be afraid to toss it out. There is really no need to waste precious compartments on onesies and twosies unless they have a very specific purpose.
If you can’t bring yourself to toss out still-usable hardware, consider dedicating one or two compartments as a “catch all” of mismatched items.
Keep Spare Parts Together But Separate
I made a very conscious choice to ONLY store our “bulk” hardware in these caddies. As in, sets of identical screws, nails, pegs, anchors, etc that we use for projects and repairs. These caddies do not contain leftover hardware that comes with assembled items (e.g., furniture, shelves, etc).
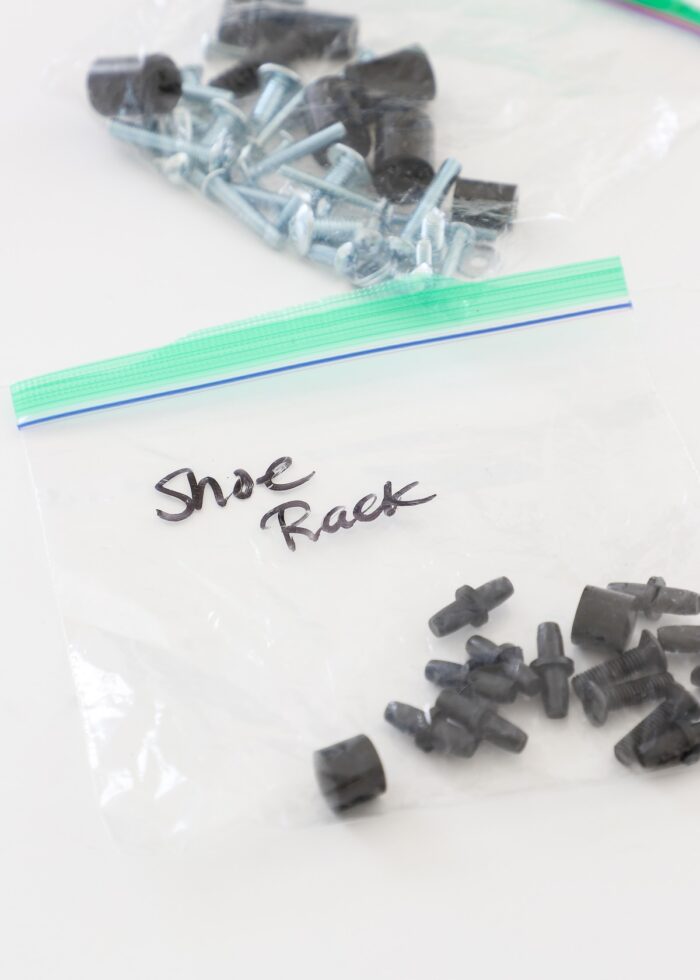
Instead, we store these “sets” in labeled plastic bags inside a “Spare Parts” tote that is better able to accommodate larger items like brackets, casters, furniture feet, etc.

This project is just the first of a few I am working on out in the garage right now. And while I still have a good bit of work ahead of me, I am stoked to have our hardware organized in a way that is so compact and so usable.
If you need to organize screws and nails in your home too, I highly encourage you to give the caddy a consideration. Although hardware isn’t the funnest to sort through and label, the pay off is well worth the work!
Megan
7 Comments on “Organizing Screws & Nails | A Solution That Really Works”
This is really good. Mine fits easily in a fish tackle box, since I don’t do much DIY.
But the principal of adjustable, storage with room for expansion and readjustment also applies to knitting supplies, dog stuff, etc.
I always enjoy your organizational posts, and always find an idea I can use, even though our lives are different.
Nothing makes me happier than an organizer that works well and this is a genius solution! Super impressed with all those tips and tricks and it re-energizes me to tackle my projects! Brilliant as always!!
Ok, I must admit, when I first glanced at this idea, I wondered how you are just now thinking of this. HOWEVER, then I read the whole post and I am ecstatic. I had the idea and had tried, but had no idea how to organize it. I’d also not known about these bins. I can’t wait to drag out my 5 (no kidding) containers, buy these bin things and get organized. I should have known not to second guess you. Megan, you always amaze me!! Health and joy to you and fam.
Sorry I called you Heather. I KNOW you are MEGAN!! Don’t know where that came from. Meanwhile culpa!
I’m ready to toss this tablet. Too many windows open and too little memory. I now sound like an idiot with the Heather/Megan thing and “meanwhile” instead of “mea”, but as long as you get the message, Megan, how much you are appreciated, that’s what matters.
Blessed/ cursed with a mom who cleaned the workbench I had as a kit. Soooo near lifelong (I’m 76 now), not mr. organization! Thanks for the caddy article.
This is what I’m looking for my sheds a mess. Thanks for the tips robert