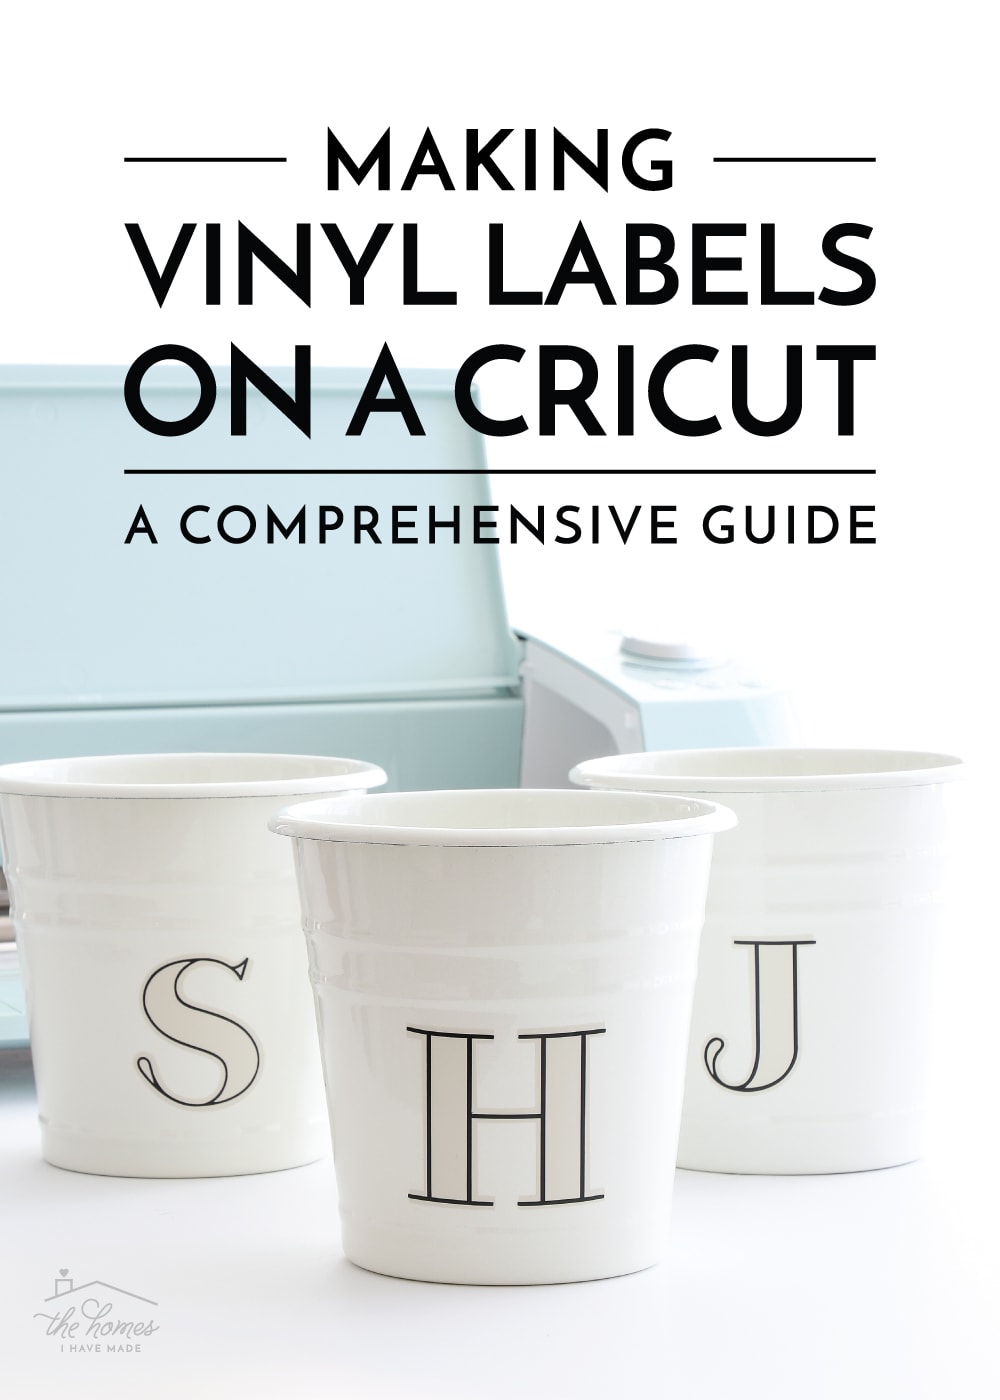
How to Make Vinyl Labels with a Cricut | A Comprehensive Guide
One of my absolute favorite (and most common!) uses for my Cricut machine is to make labels. And while there are lots of different ways to do so (including using Cricut Pens and the Print-then-Cut feature), the most common method is to make labels from vinyl. With vinyl now available in countless colors, sheens, and textures, you can quite literally make labels that look or say anything you want. Today, I want to break down exactly how to make vinyl labels with a Cricut machine. I’m going to cover absolutely everything you need to know to make picture, word, and layered labels, as well as some tips and tricks I’ve learned over years of labeling almost everything in my home. Let’s get started!
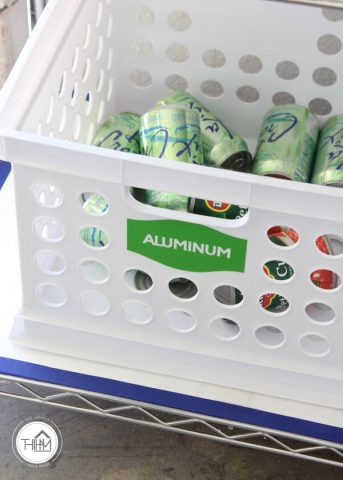
Because vinyl can be cut into literally any word, shape, letter, or pictures, it’s an ideal medium for creating custom labels. And while vinyl sticks best to firm, clean containers such as plastic, glass, and metal, I’ve also had pretty good luck with it sticking on fabric and drywall too. Finally, because vinyl is essentially a big, thick, colored sticker, it is easy to remove or swap when your organizing solutions evolve. While vinyl labels do require a bit more work than your standard label maker, you’ll find the endless design possibilities well worth the added steps!
What You Need to Make Vinyl Labels on a Cricut
To make vinyl labels on a Cricut machine, here is what you need:
- A Cricut Machine – You can use this tutorial to make vinyl labels on a Cricut Explore, Cricut Maker, and Cricut Joy (for an in-depth tutorial on the unique labeling techniques available on Cricut Joy, click HERE.)
- Vinyl – This tutorial will work for all types of vinyl including repositionable, permanent, glitter, foil, holographic etc.
- Standard Grip Mat or Light Grip Mat
- Scissors or Paper Trimmer
- Weeding Tool
- Scraper
- Transfer Tape (if working with glitter vinyl, you will need Strong Grip Transfer Tape, usually included inside the tube of glitter vinyl.)
TIP! If you don’t have any Cricut Tools, this set will include the trimmer, scraper, weeding tool, and scissors you will need to make vinyl labels on a Cricut.
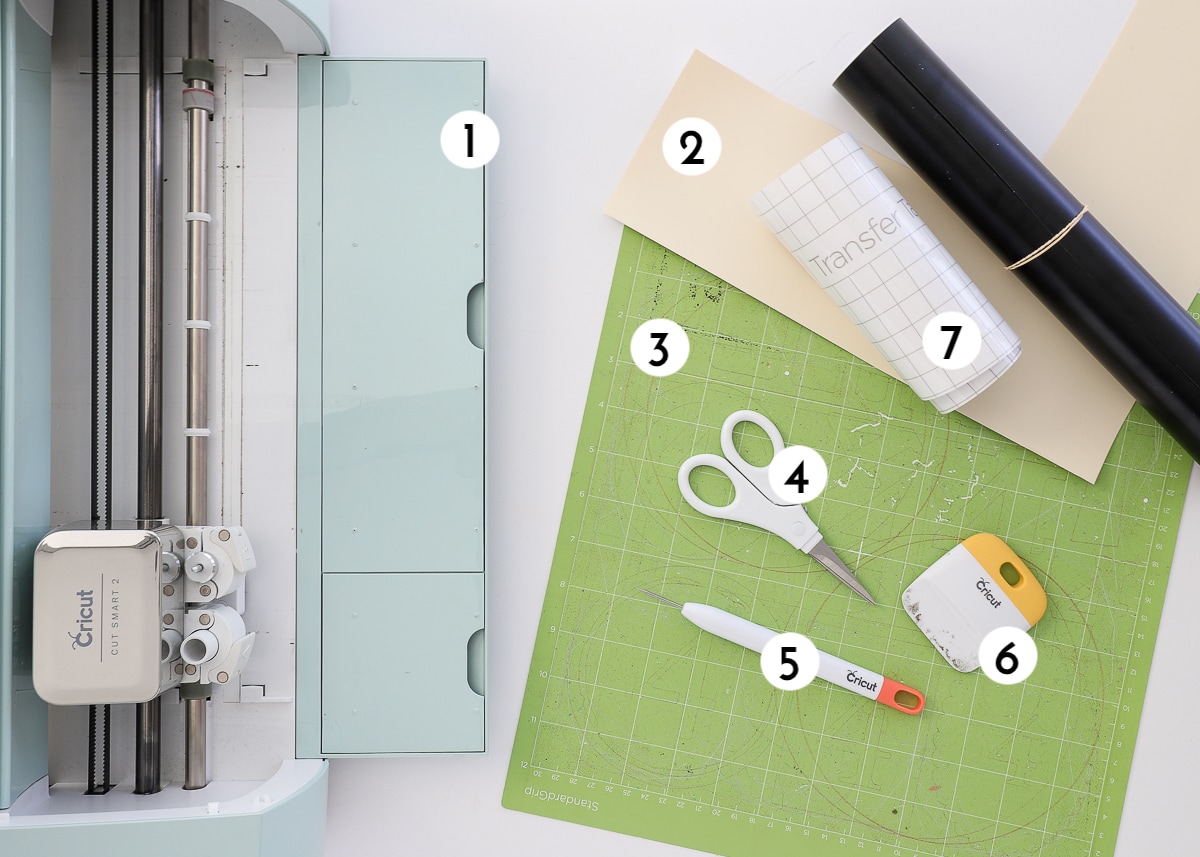
1 – Cricut Explore | 2 – Vinyl | 3 – Standard Grip Mat | 4 – Scissors | 5 – Weeding Tool | 6 – Scraper | 7 – Transfer Tape
The Basic Picture Label
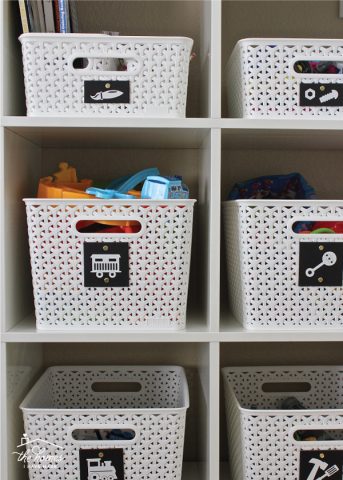
Let’s start with the basic picture label made from a single color of vinyl. I use these whenever a single picture can adequately capture what is contained in the bin or box, as well as in kid spaces for non-readers.
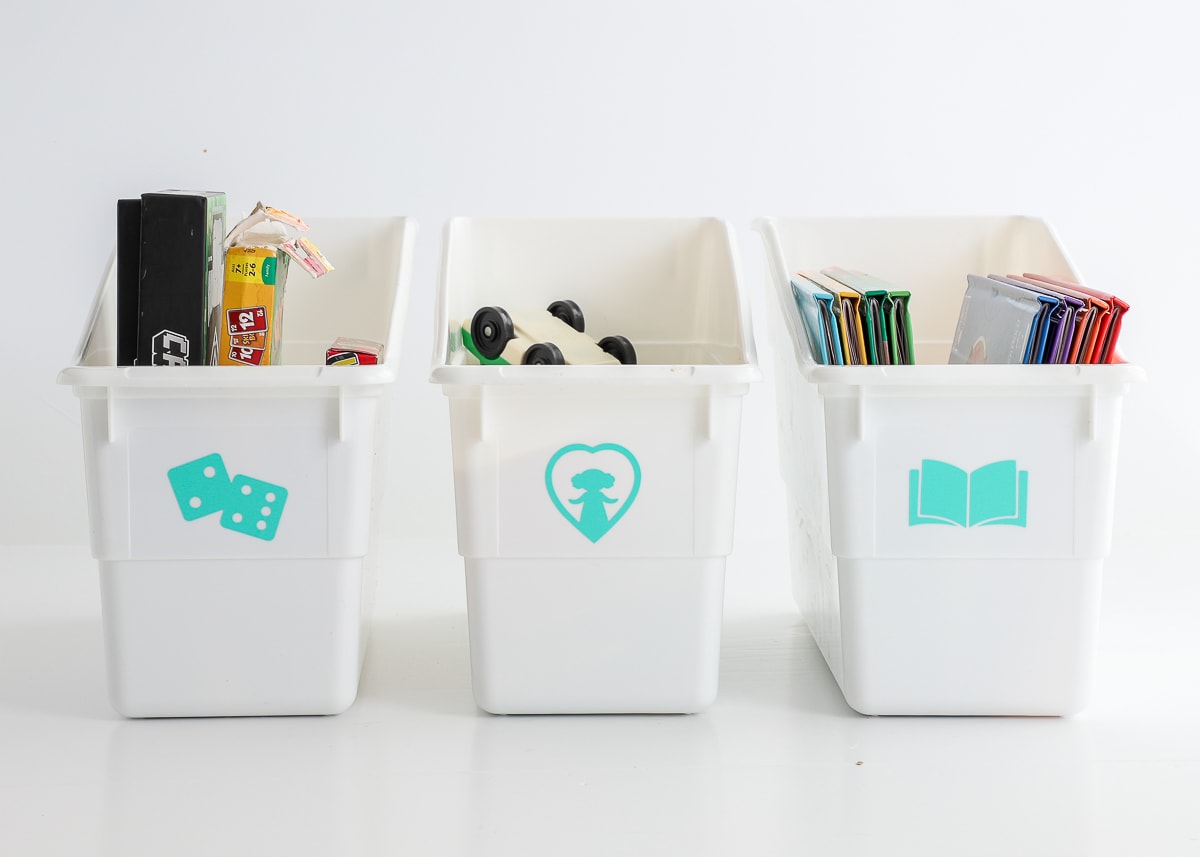
Start by opening Cricut Design Space and use the search bar in the Image Library to find pictures for everything you want to label. Select images that are both simple in design and intuitive to understand.
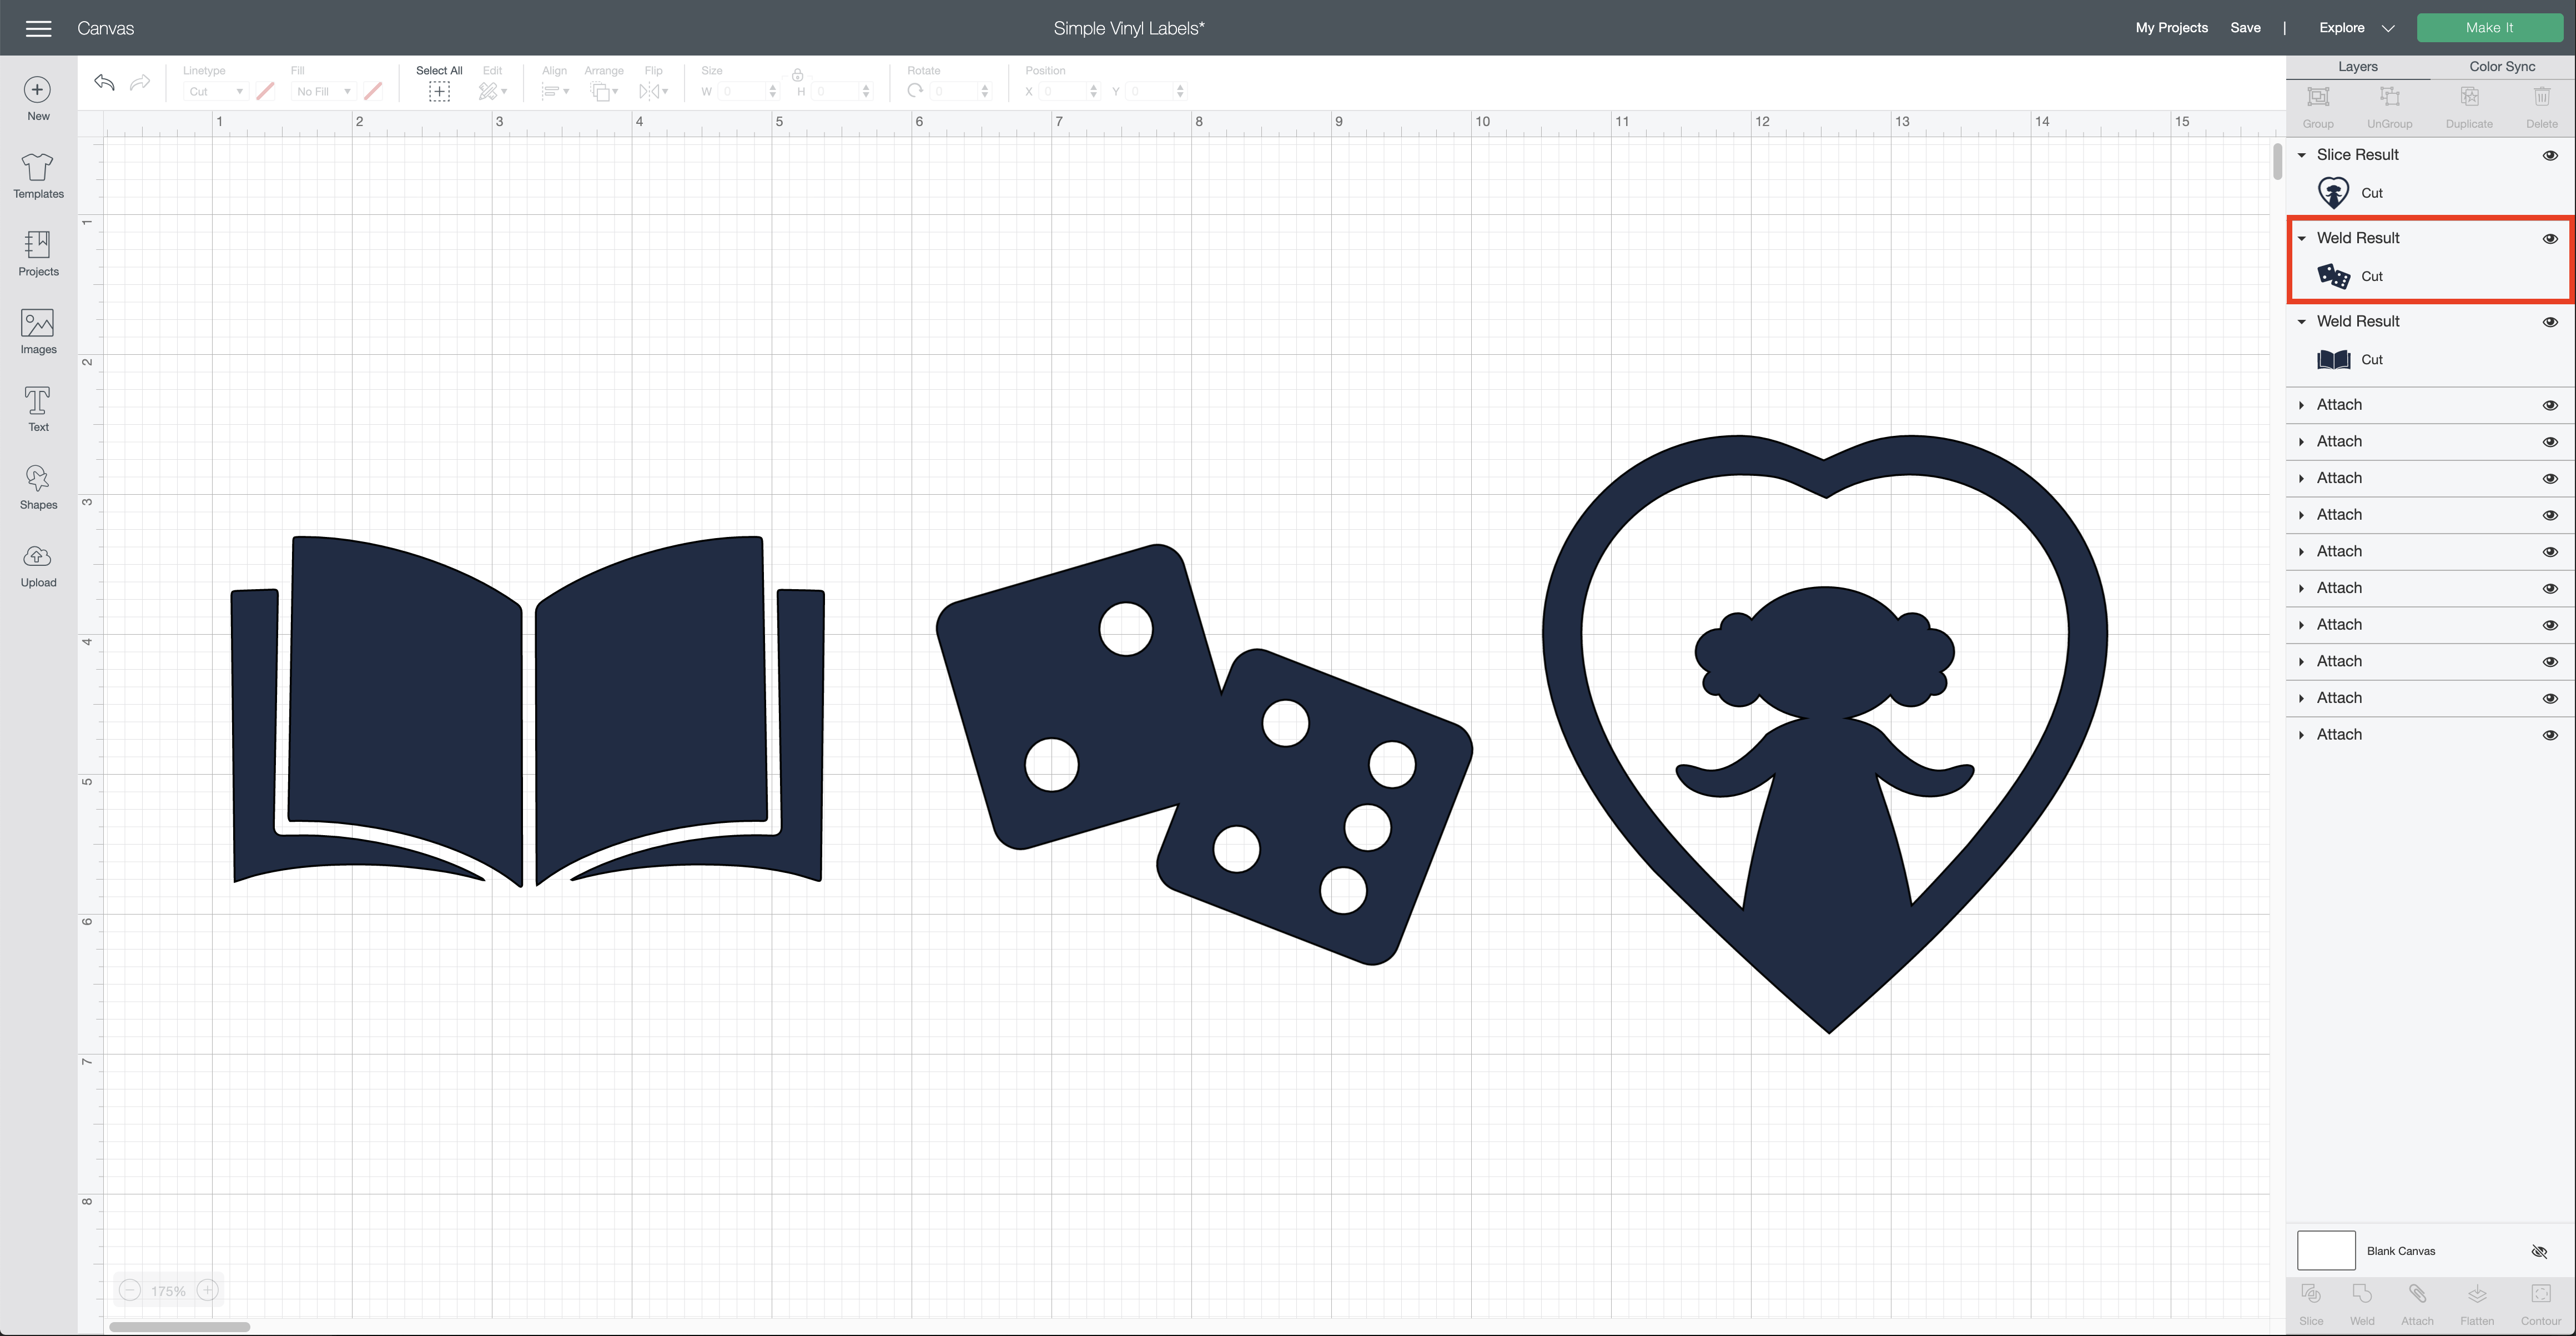
Notice the three images I selected below are not single color/layer images when I first place them on my canvas.
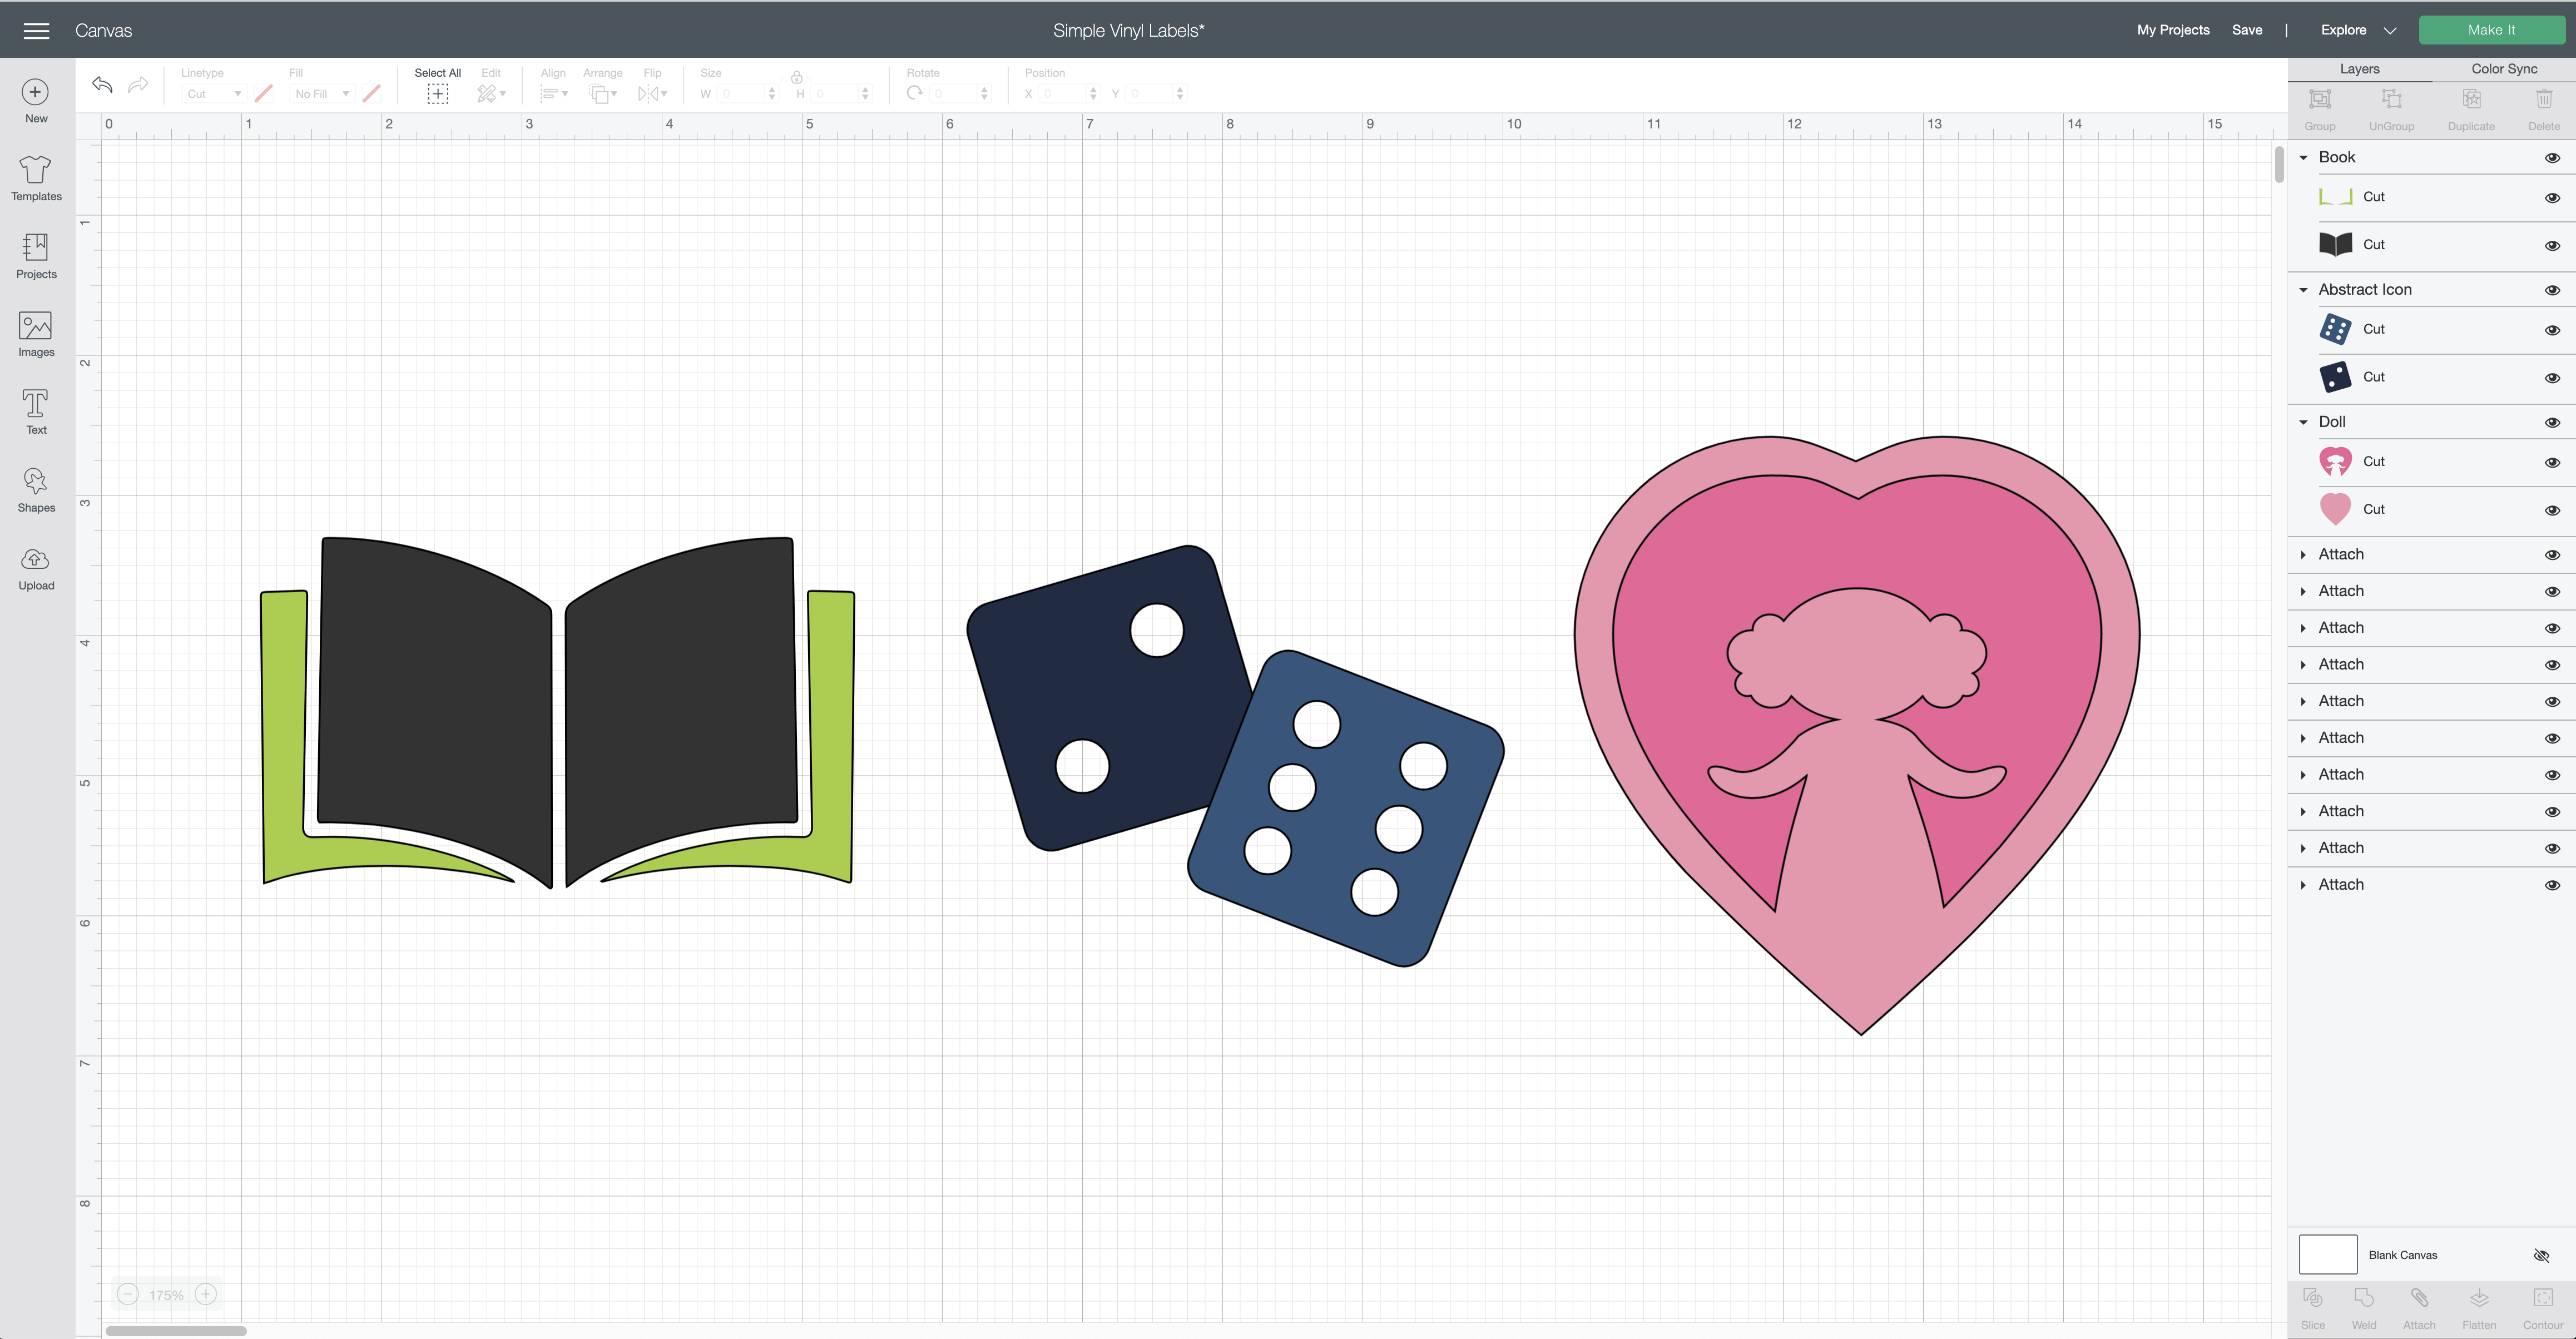
Making your designs a single color/layer can be achieved in many different ways, but the quickest and easiest is usually to “Weld” all the layers together (even if the design’s elements aren’t all touching, Weld will unify them into a single color/layer). To do this, simply select all the layers in one image and click the Weld tool in the bottom righthand panel.
NOTE: In the case of the doll, I sliced the light pink layer out of the dark pink in order to get a clean and simple silhouette.
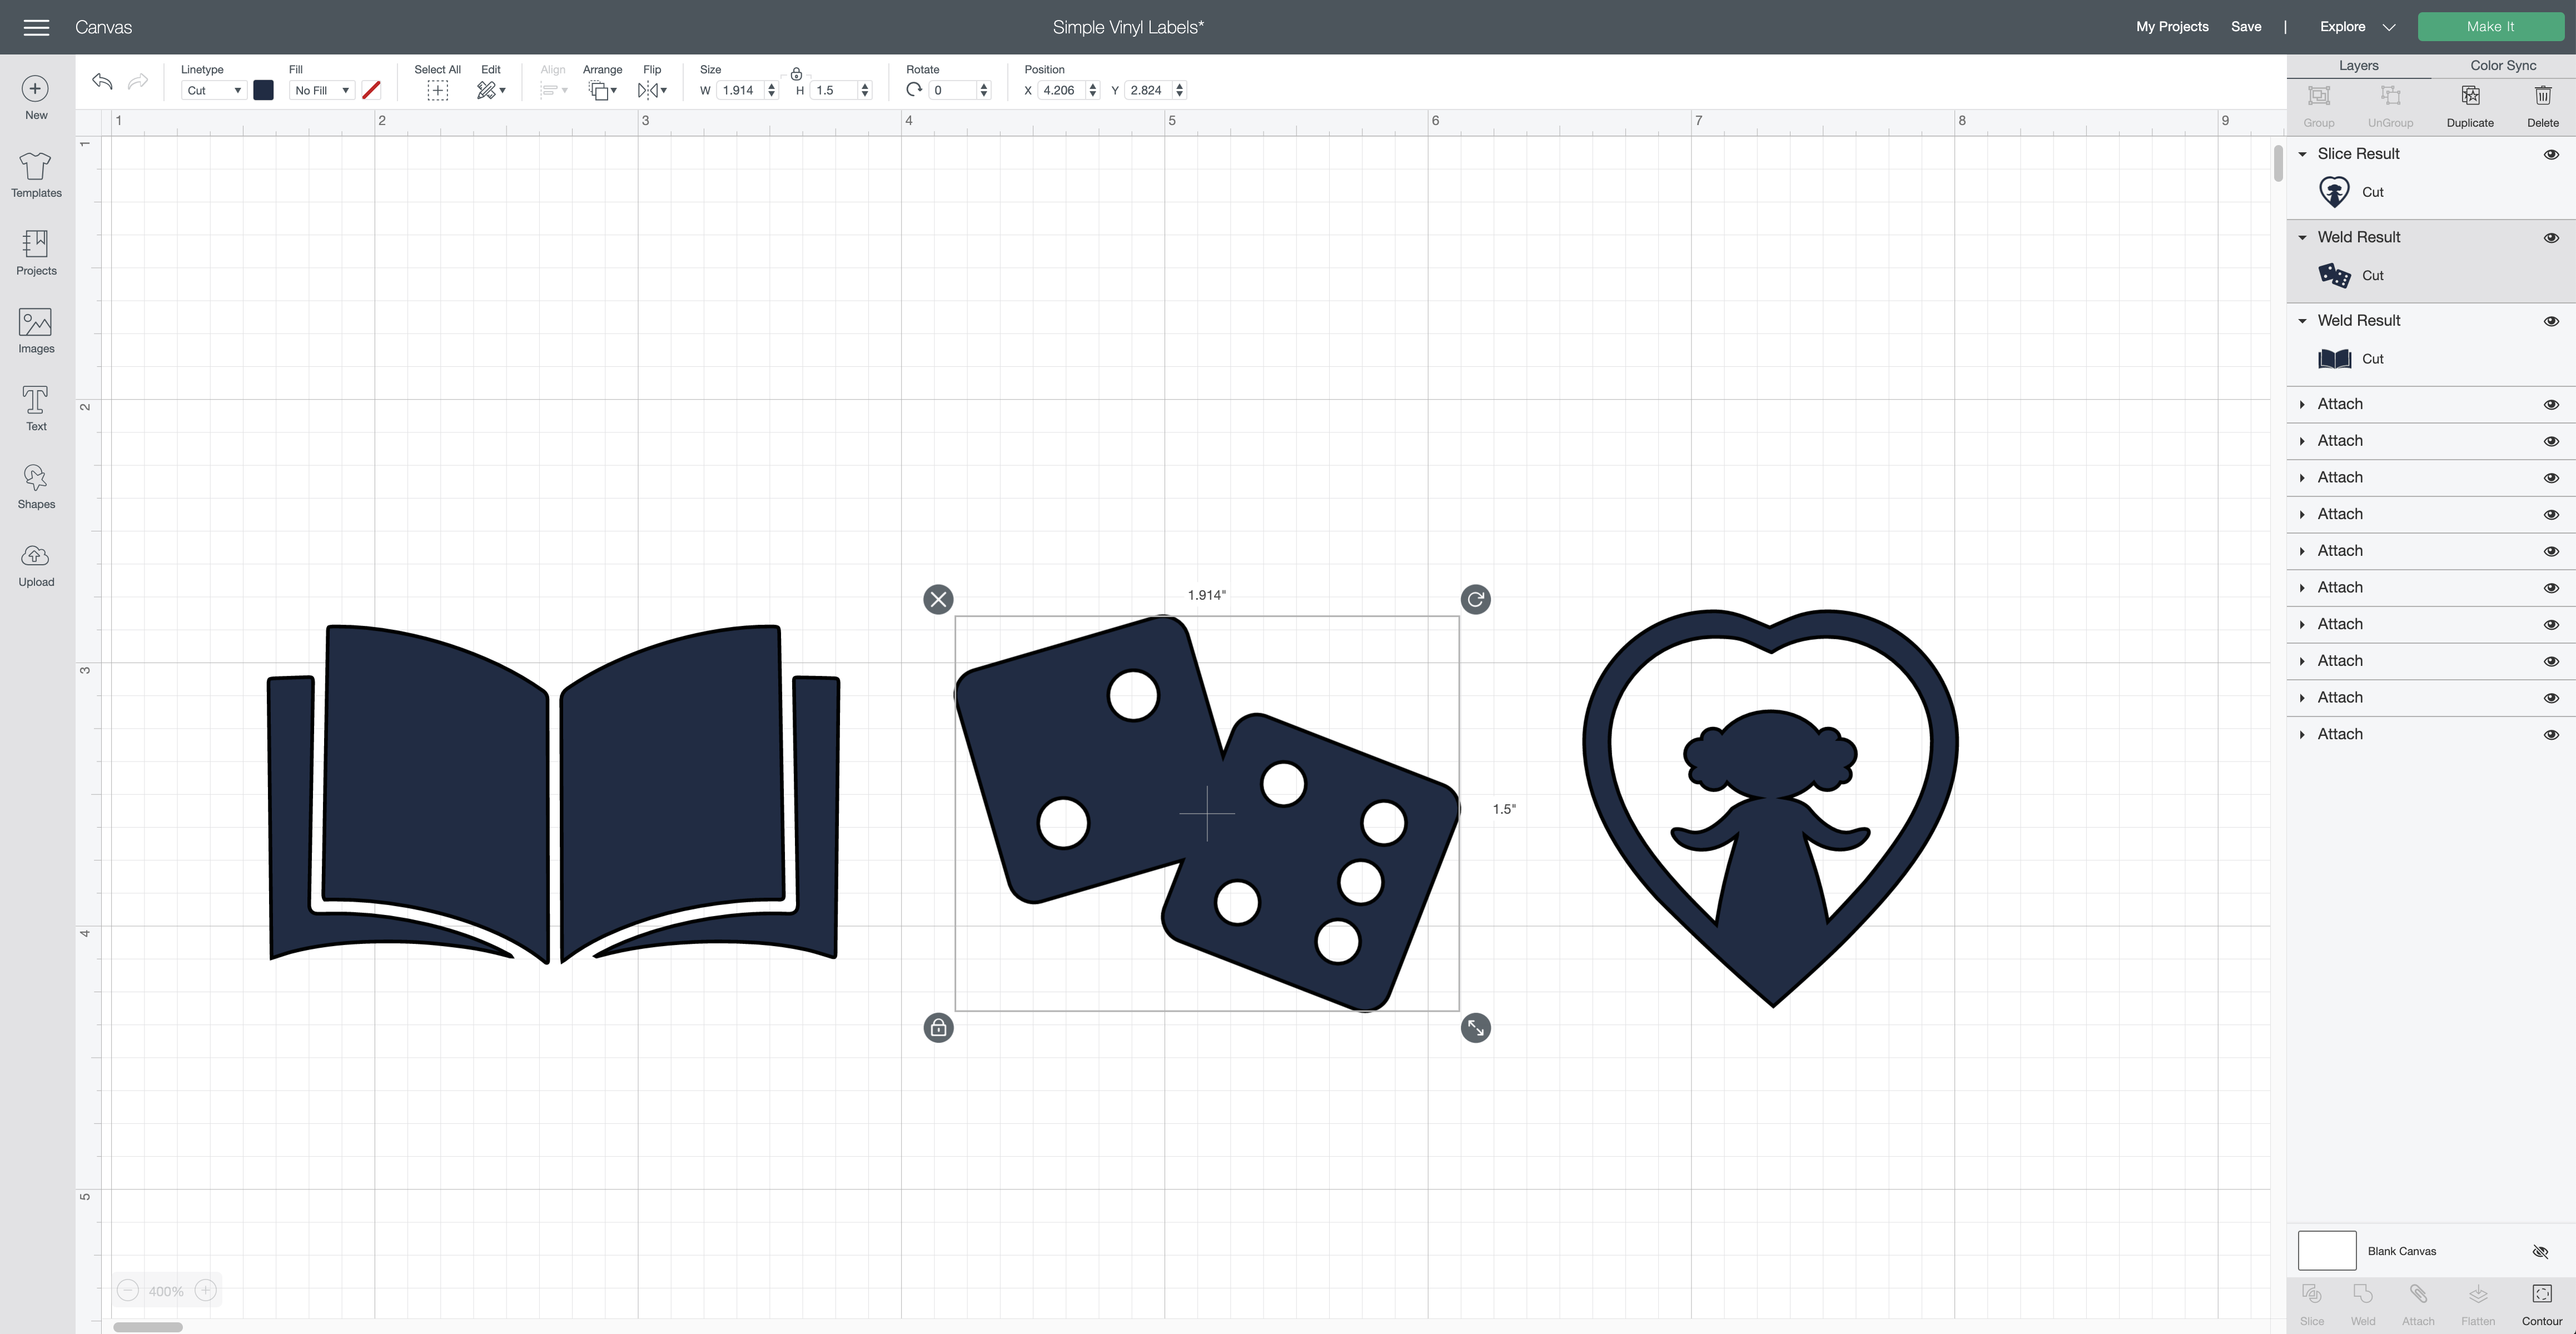
With all your label pictures adjusted to single layers, you will next need to size them to fit on your containers. Instead of guessing, I strongly suggest you measure the spot where you want to place your vinyl label, and adjust your images as necessary.
TIP! Even after making all your labels either the same height or width, ensure each image is proportional to the others so your labels look consistent across all the containers.
When your labels are sized and ready, click the green “Make It” button in the upper righthand corner.
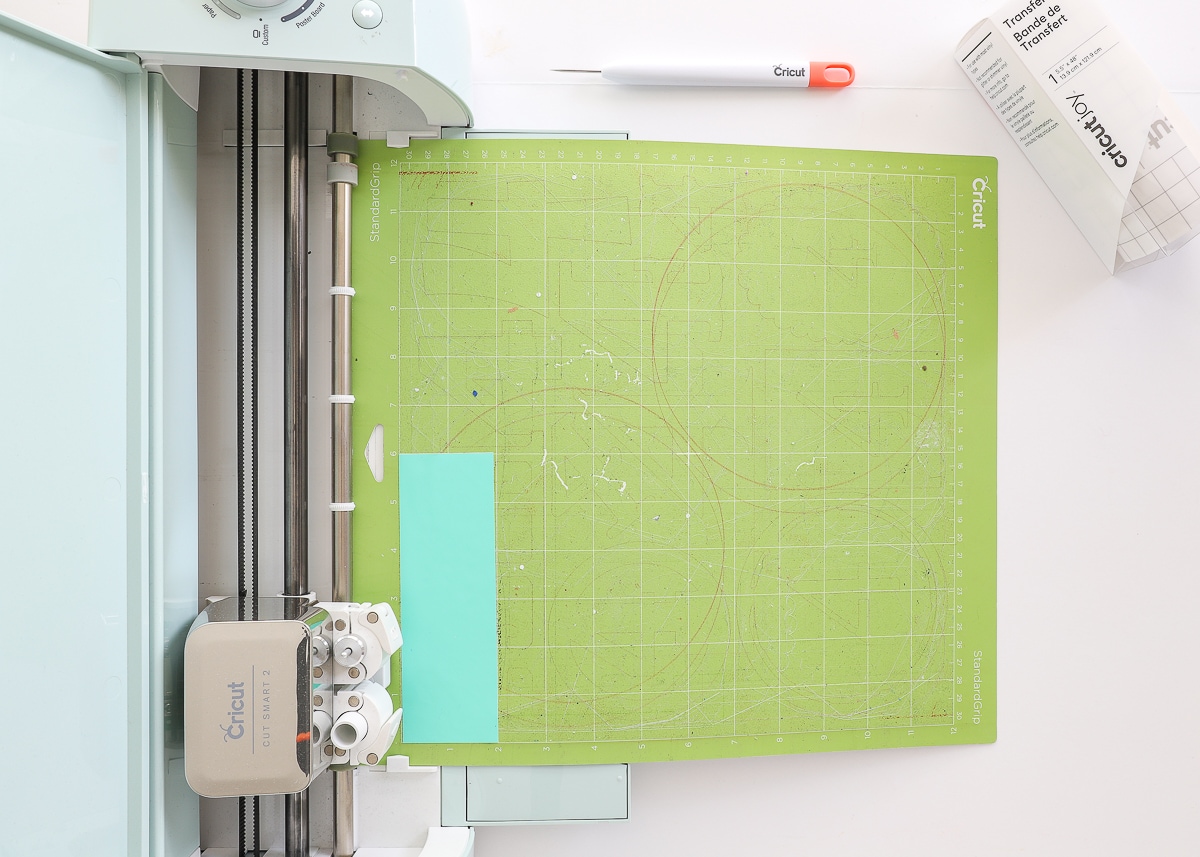
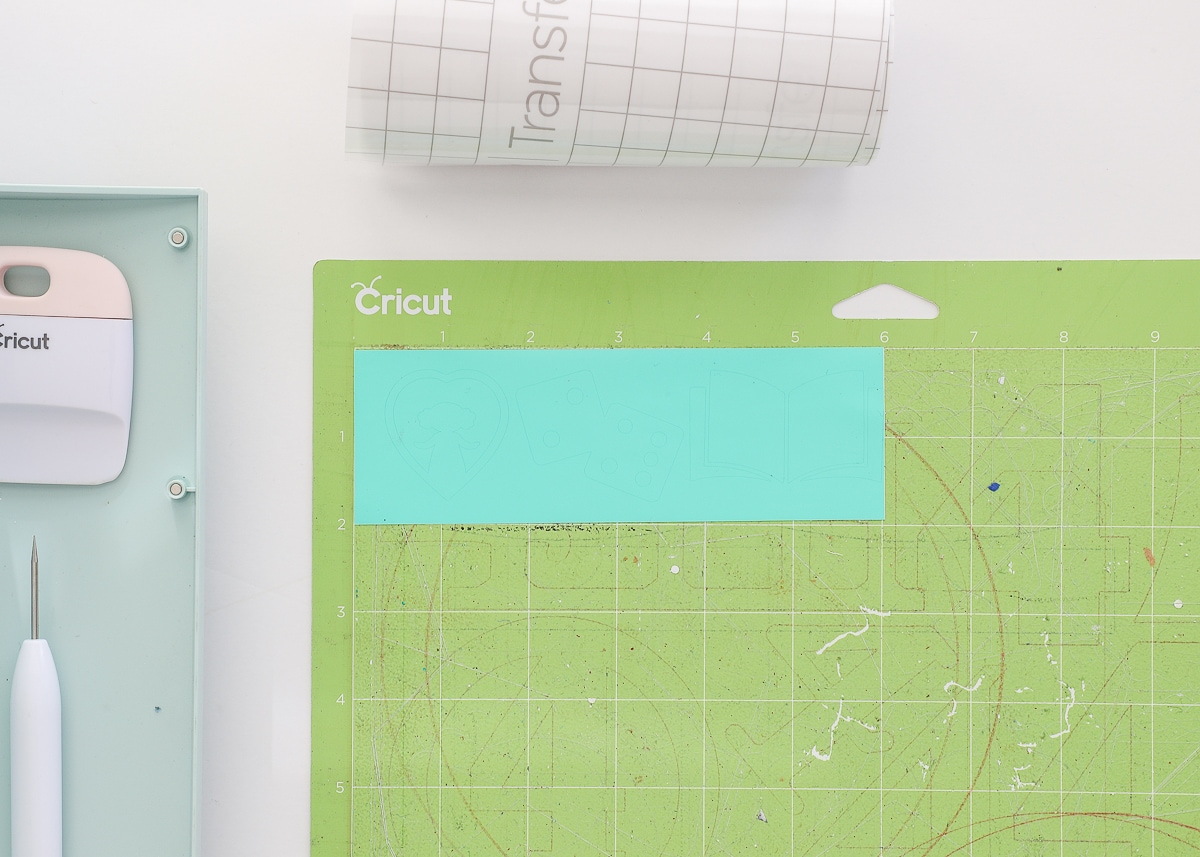
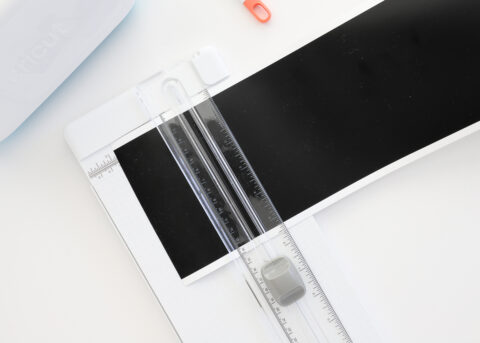
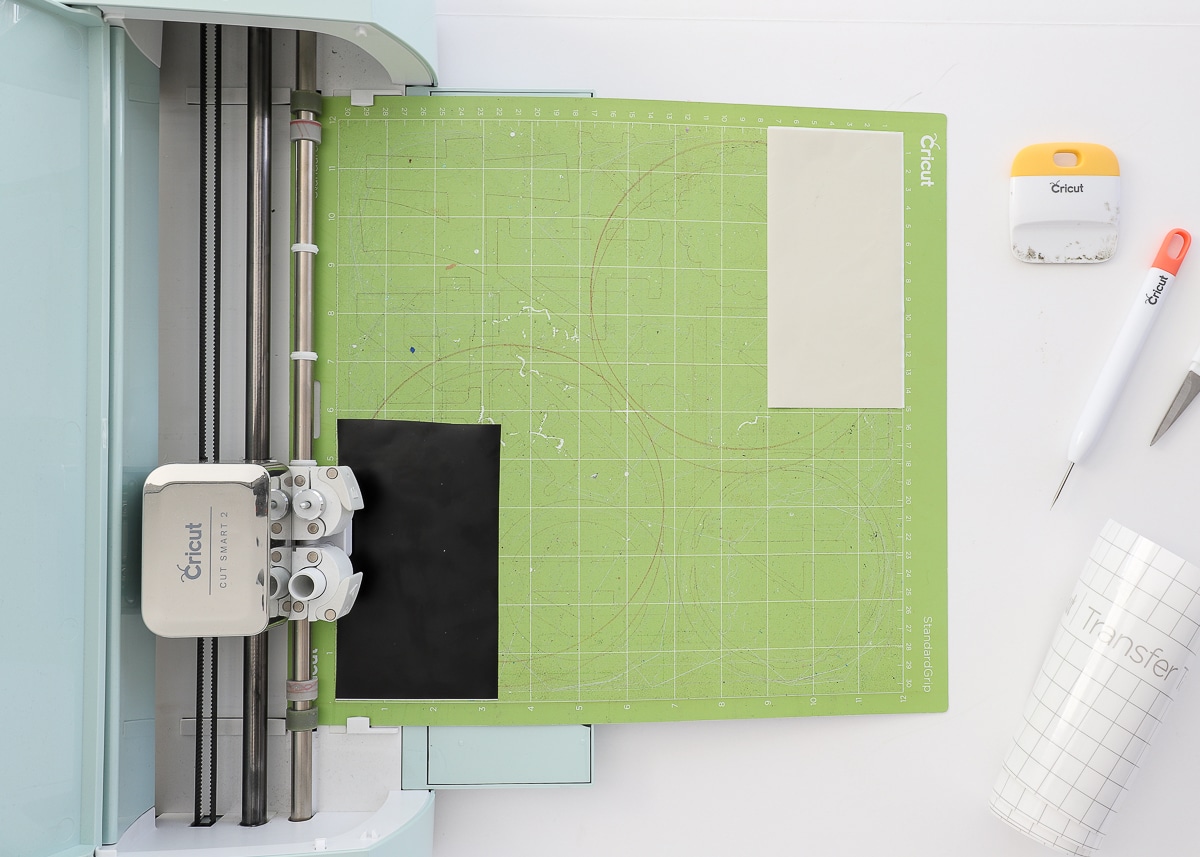
On the cut screen, use the grid lines to determine how much vinyl you need in order to cut out your labels. In the example below, I need a piece about 2×6″.

Using either a paper trimmer or scissors, cut your selected vinyl down into those measurements and place it in the corresponding spot on your sticky mat.
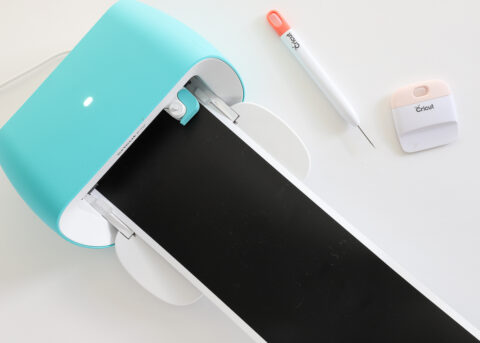
With your machine designated to cut “Vinyl” (either via the knob on Cricut Explore models, or via the Materials Menu in Cricut Design Space for the Maker and Joy), load your mat into the machine and click the blinking Cricut button to start the machine cutting.
NOTE: Using the “Vinyl” setting is important here. It ensure that only the colored vinyl is cut, and not the white liner sheet underneath.
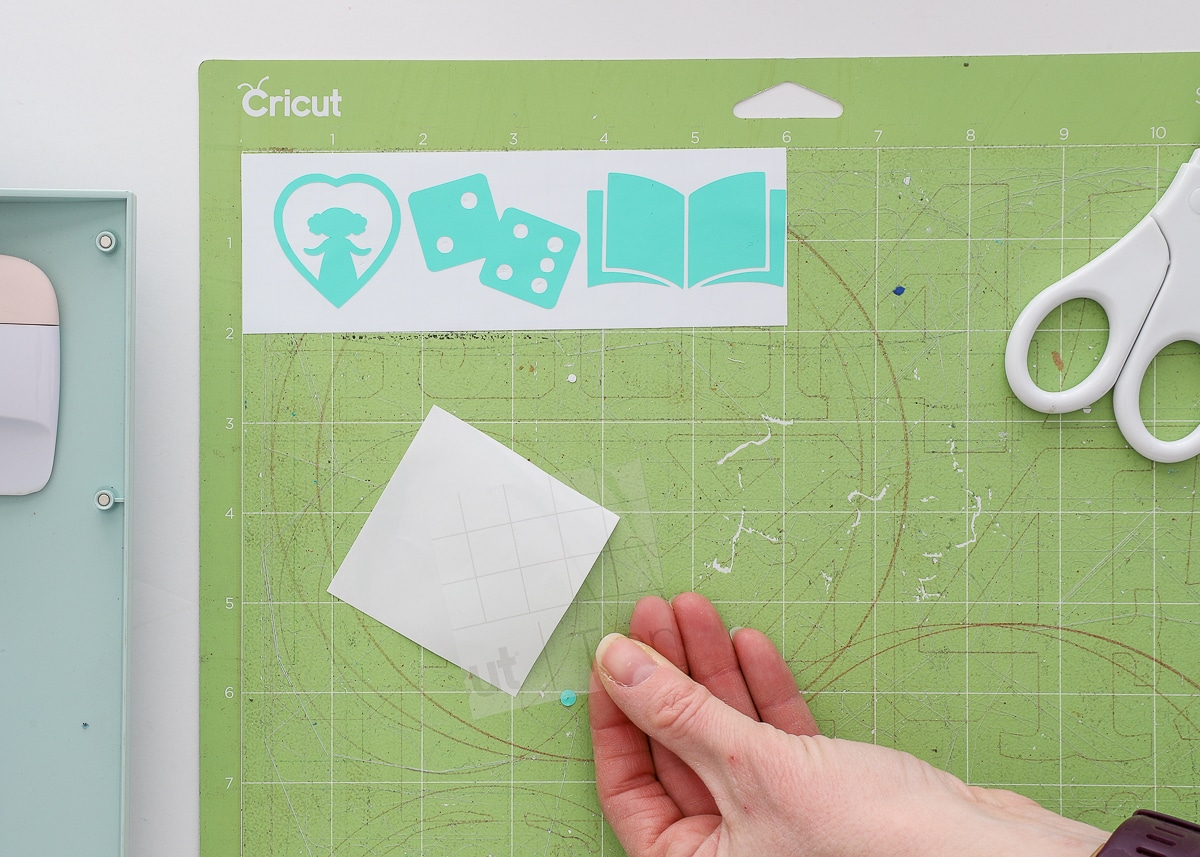
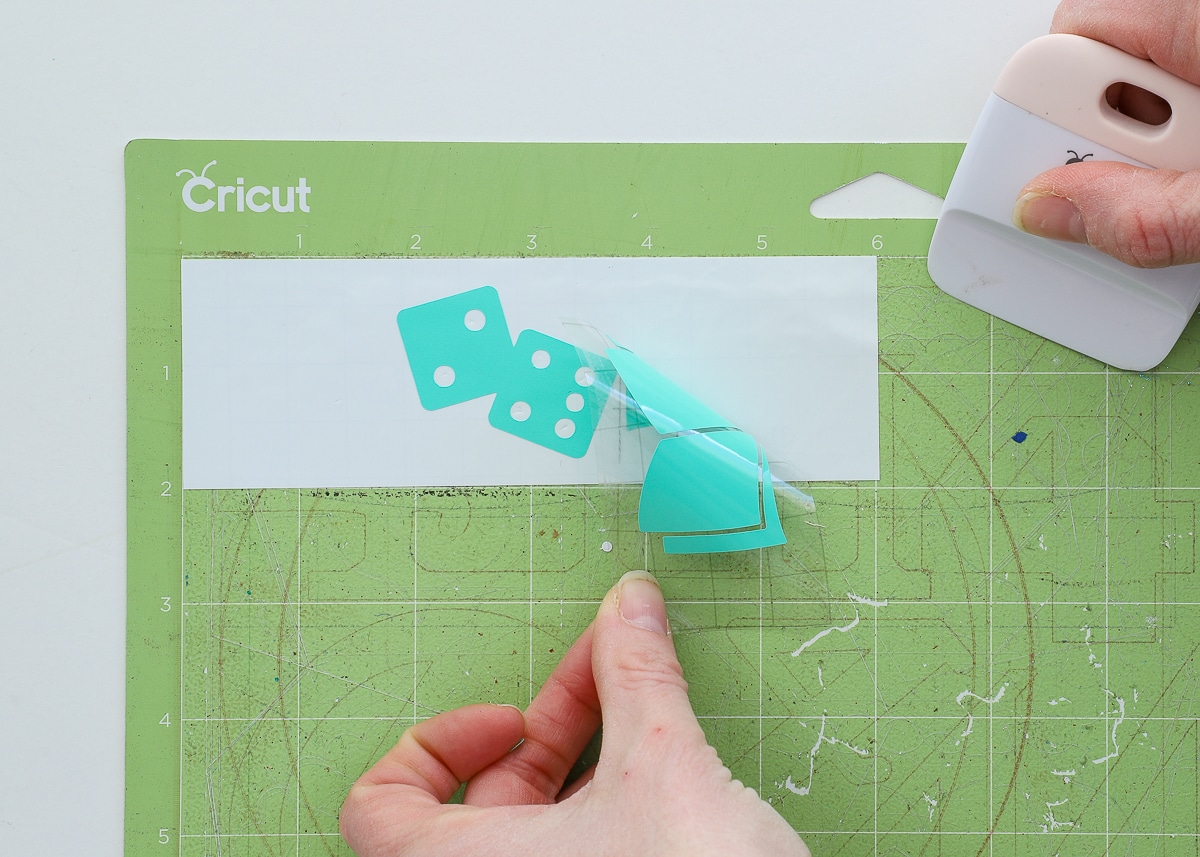
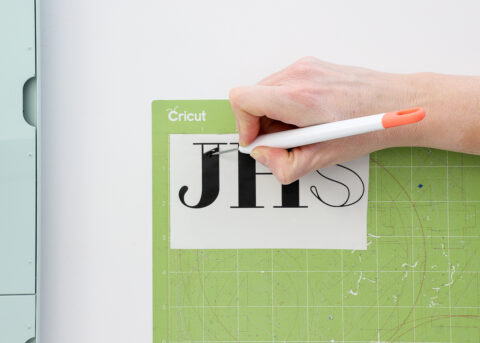
When the machine is finished cutting, unload the mat by clicking the flashing arrow and place your sticky mat onto your work surface. Notice how you can see the label designs cut into the vinyl.
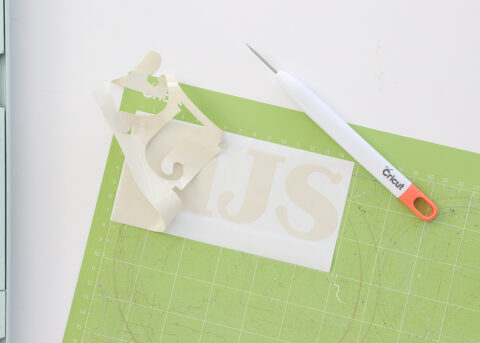
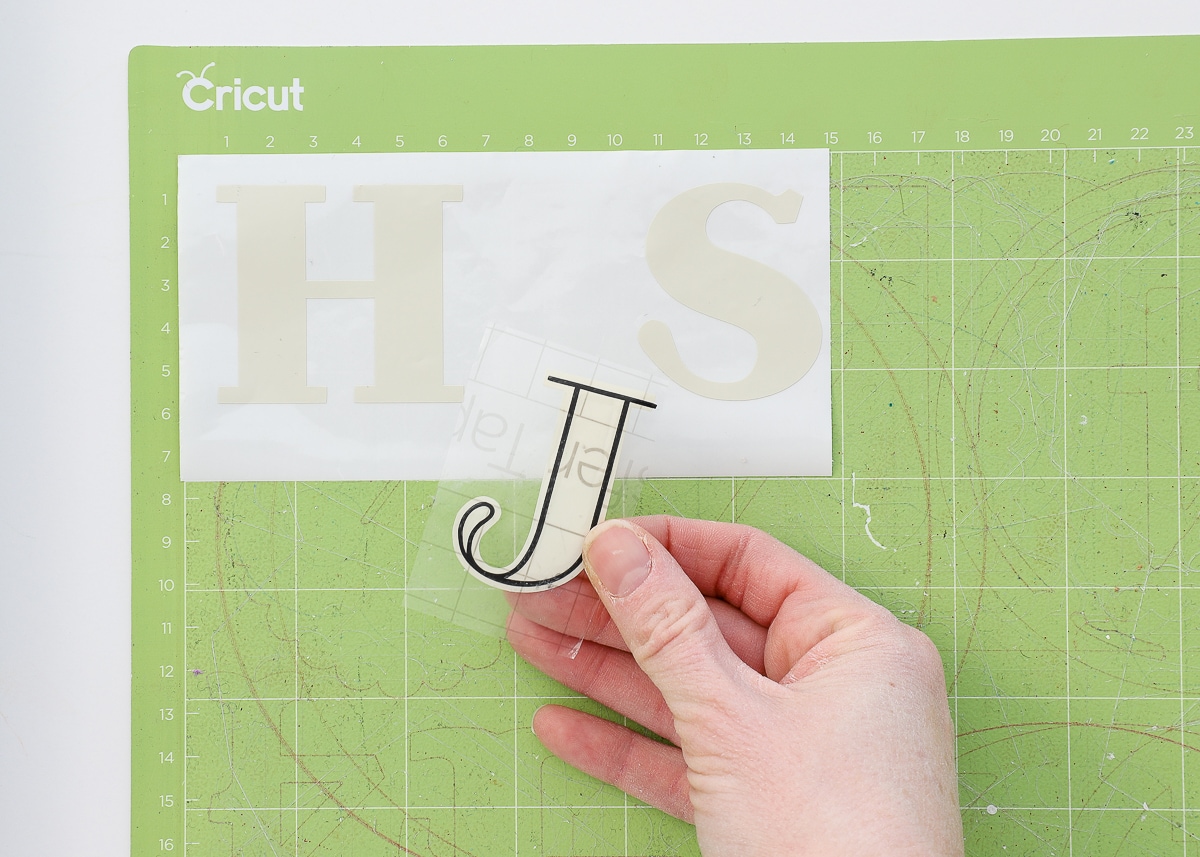
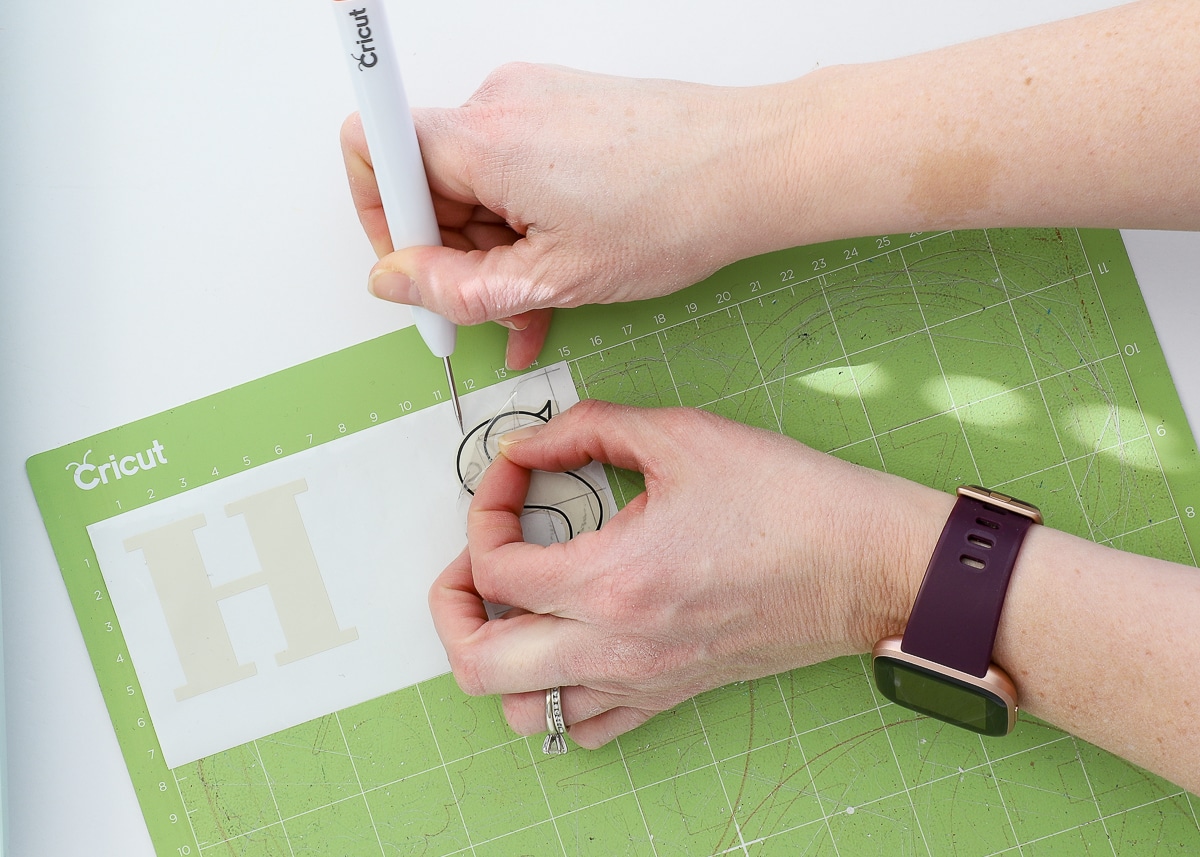
Your next step is to weed out all the “negative” aspects of the labels (which are the parts of the images you don’t need). Use a weeding tool to “stab and lift” away the outside vinyl first. Work slowly to ensure your label stays on the white paper backing and doesn’t come off as you peel away the excess.
TIP! I highly recommend keeping your vinyl cut attached to your sticky mat as you weed (this will keep it from rolling back up on itself or sliding around).
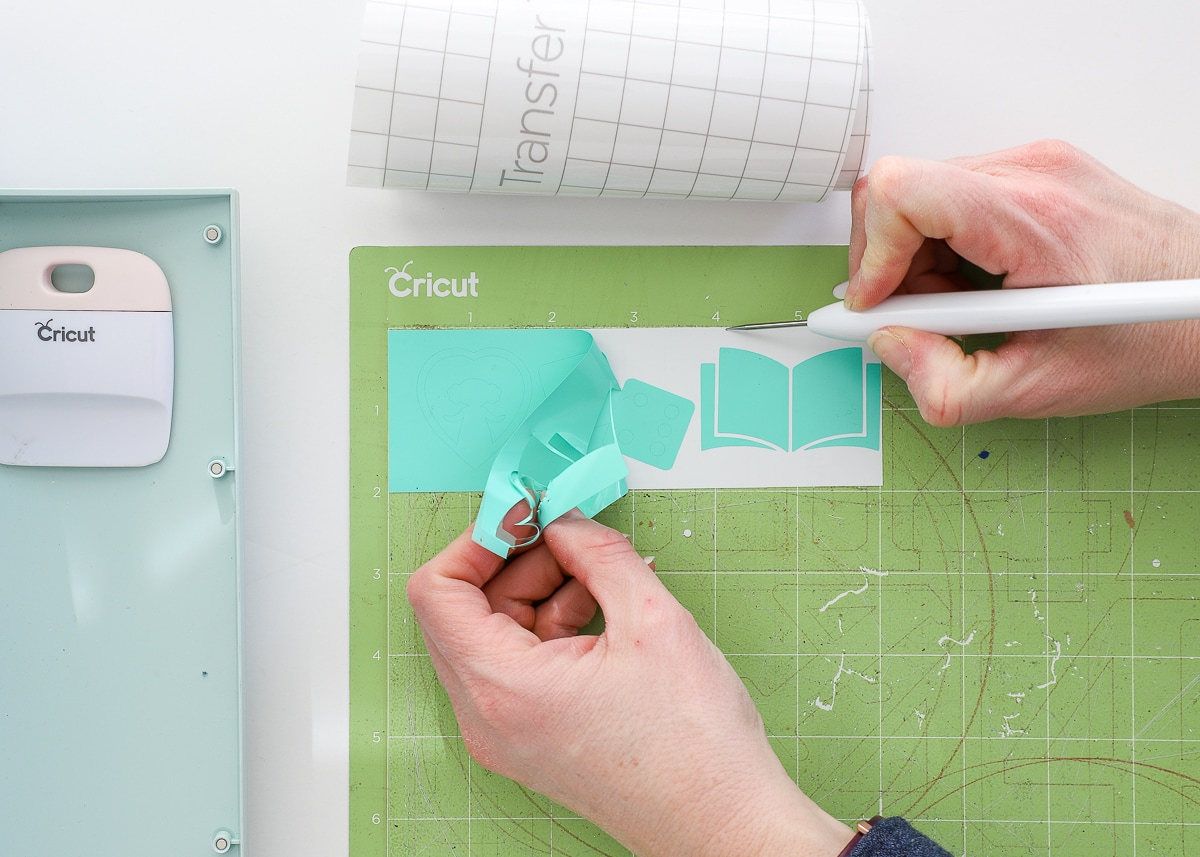
Then…go back and remove any smaller details from inside your label designs. If needed, refer back to your original images in Cricut Design Space to ensure you pull out the correct elements.
NOTE: Your vinyl should weed away almost effortlessly. If you find yourself having to tug or rip the excess away from the design itself, the Cricut most likely didn’t cut all the way through the vinyl. Adjust your settings for a bit more pressure and re-cut your designs.

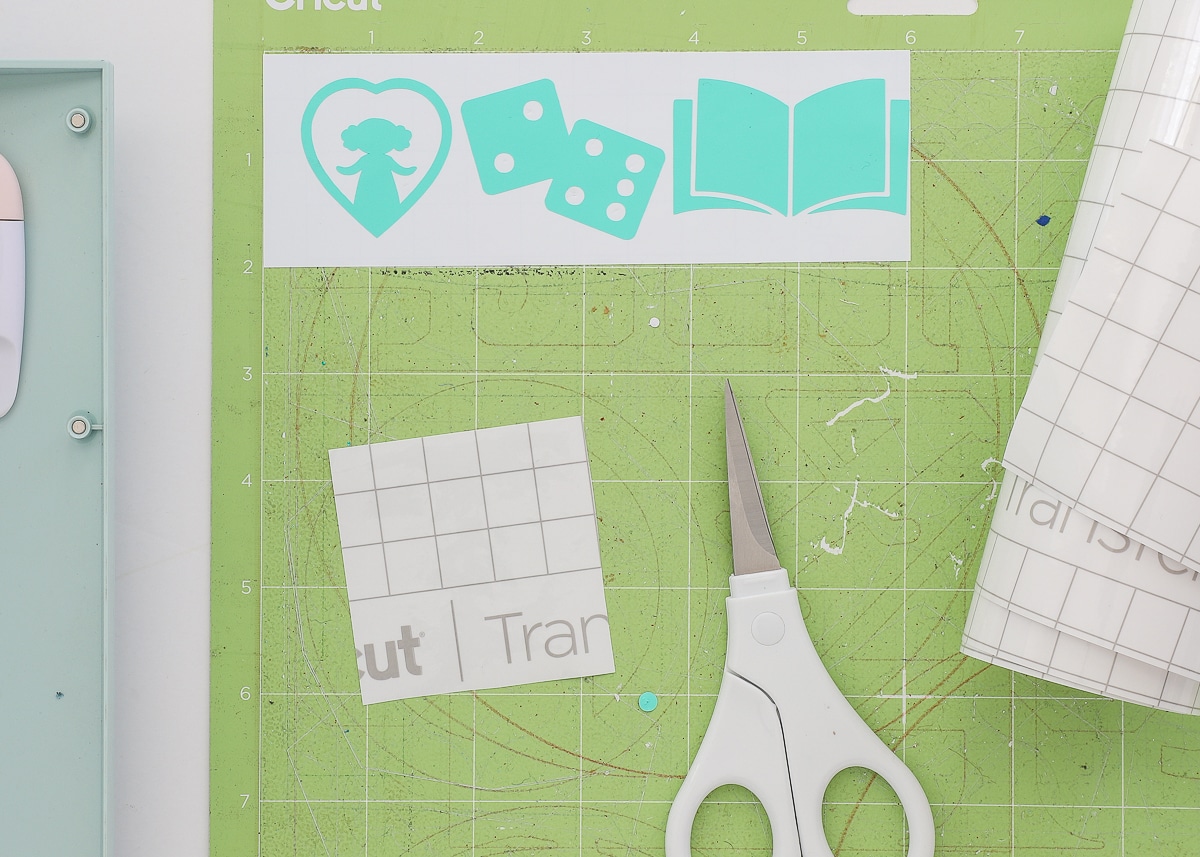
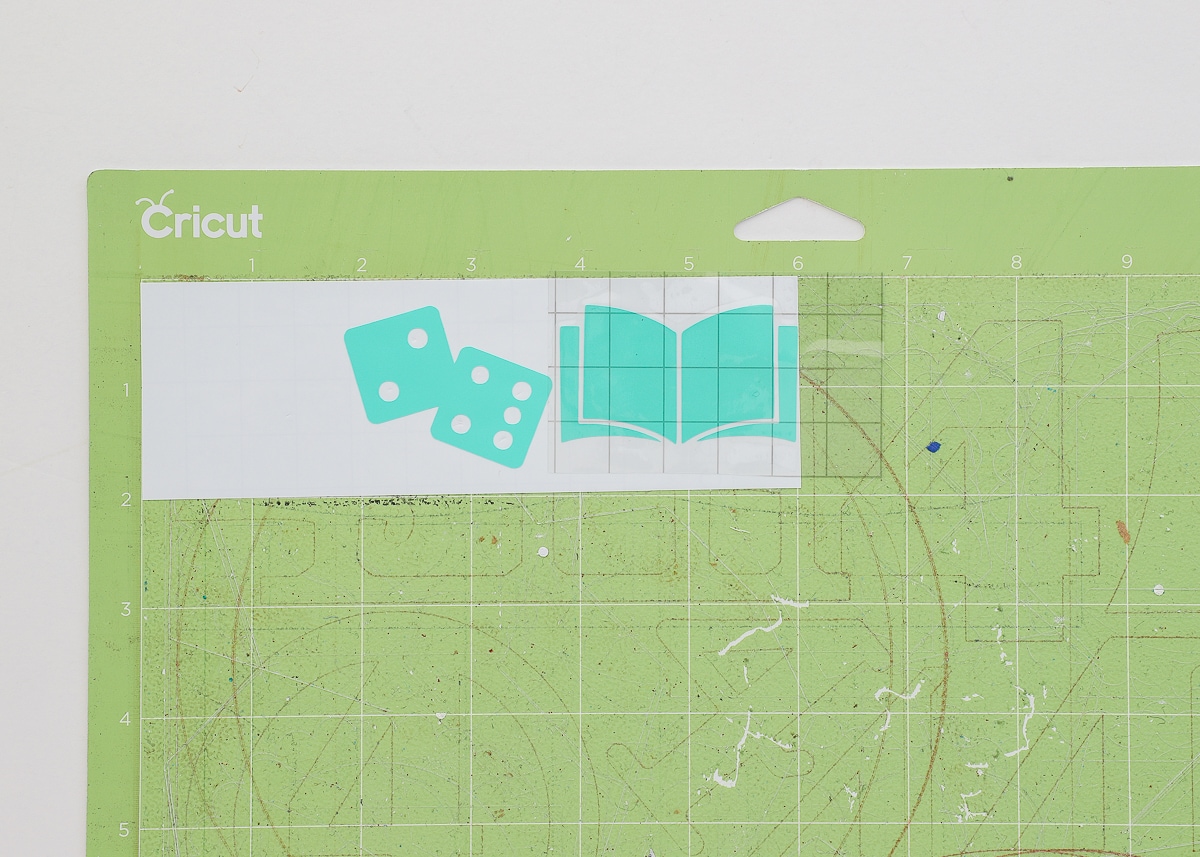
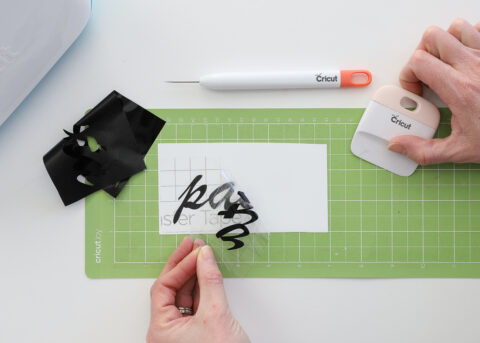
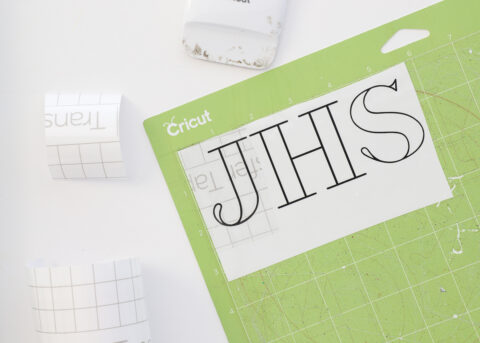
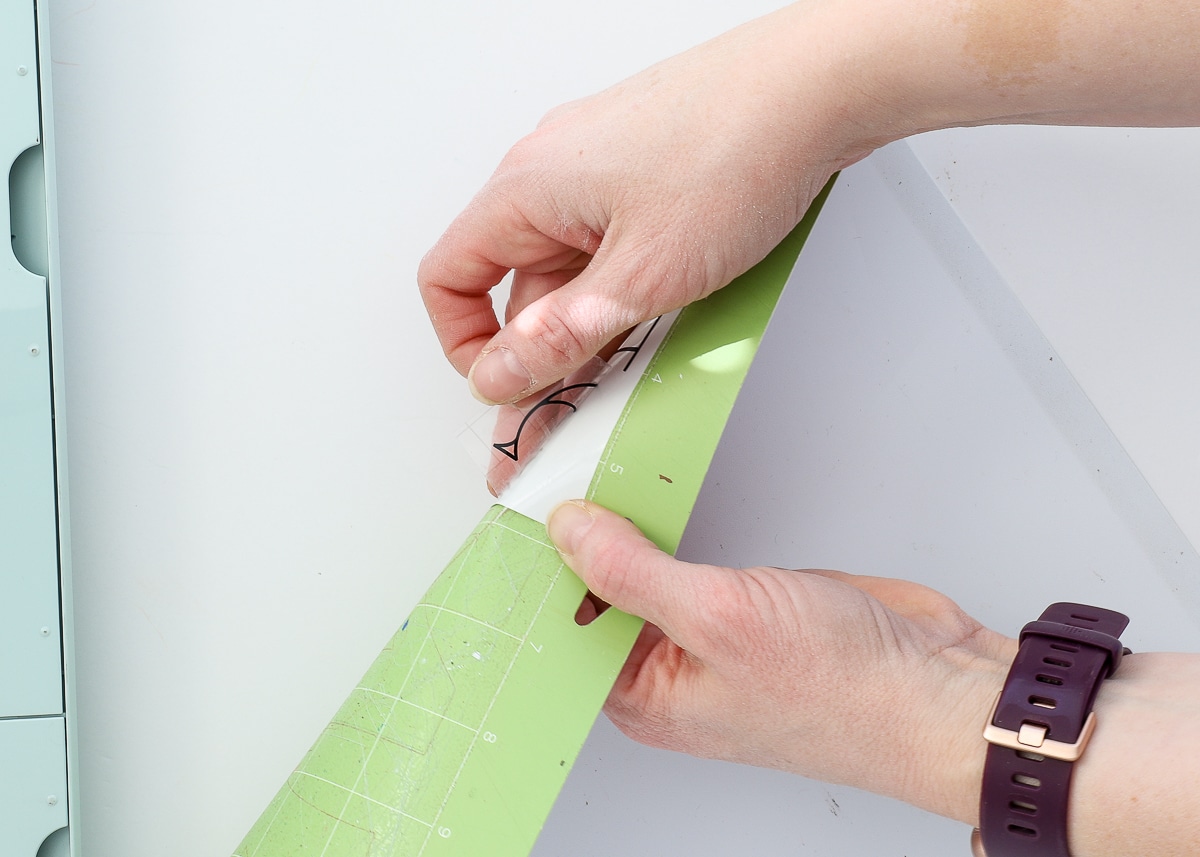
Once your images are fully weeded (they should look exactly like they do on your Design Space screen), cut out a piece of transfer tape that will completely cover just one of your labels. In the example below, I cut out ~2.5″ square.
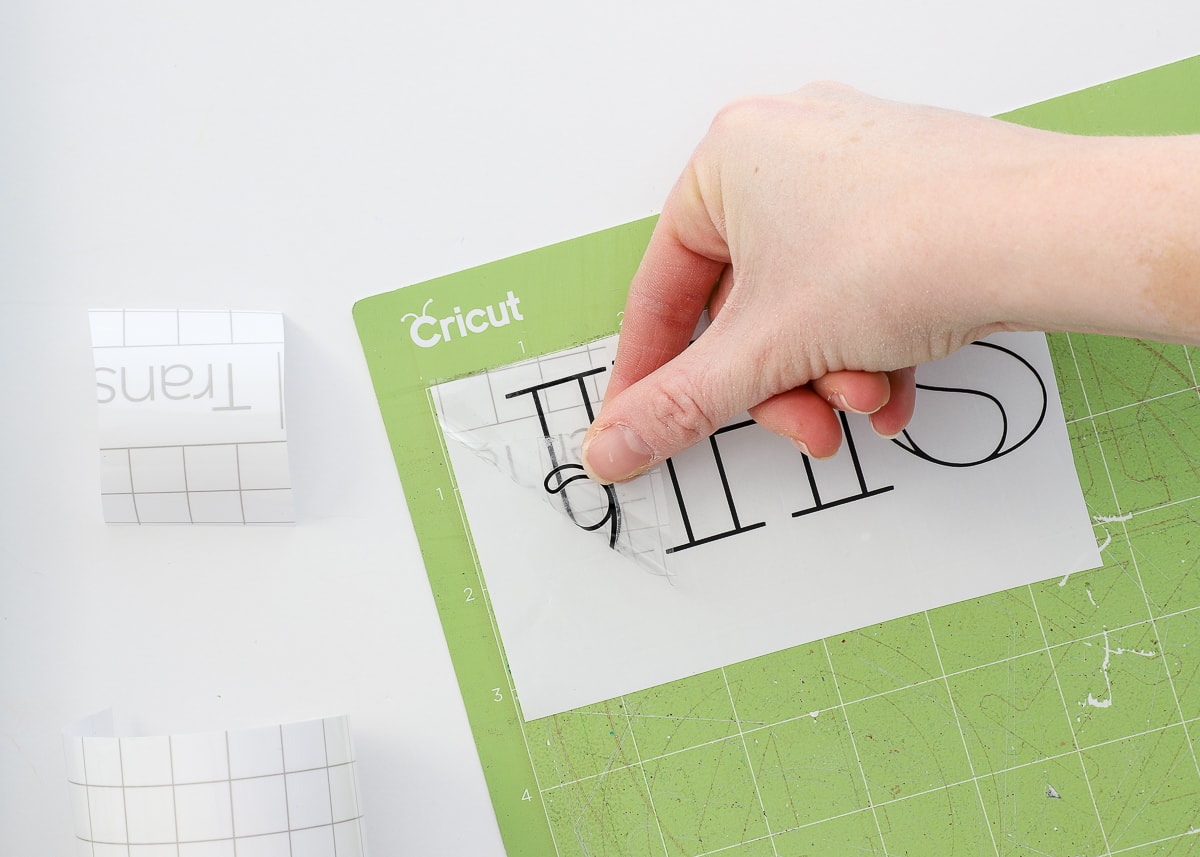
Next, peel the clear transfer tape off the paper backing (it will be sticky on the underside like clear contact paper)…
…and place it sticky-side-down onto the label you want to transfer to your container.
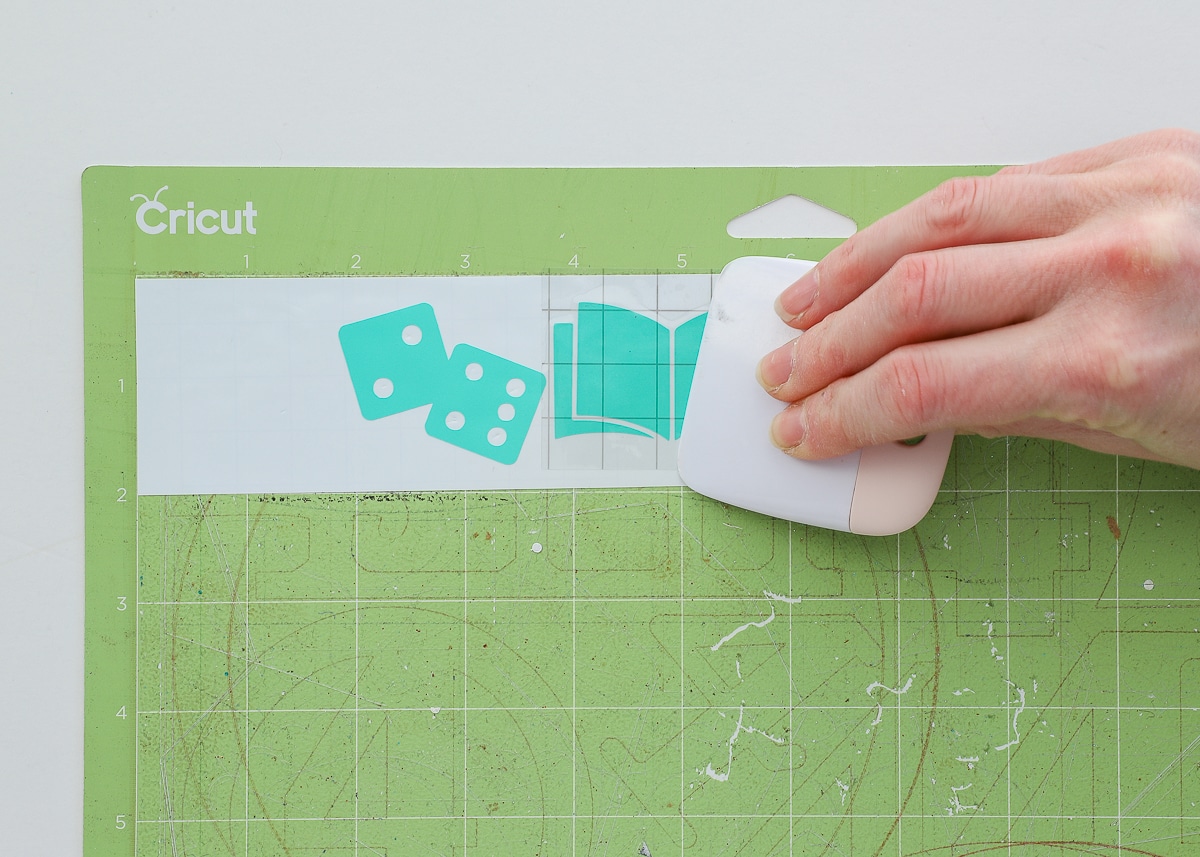
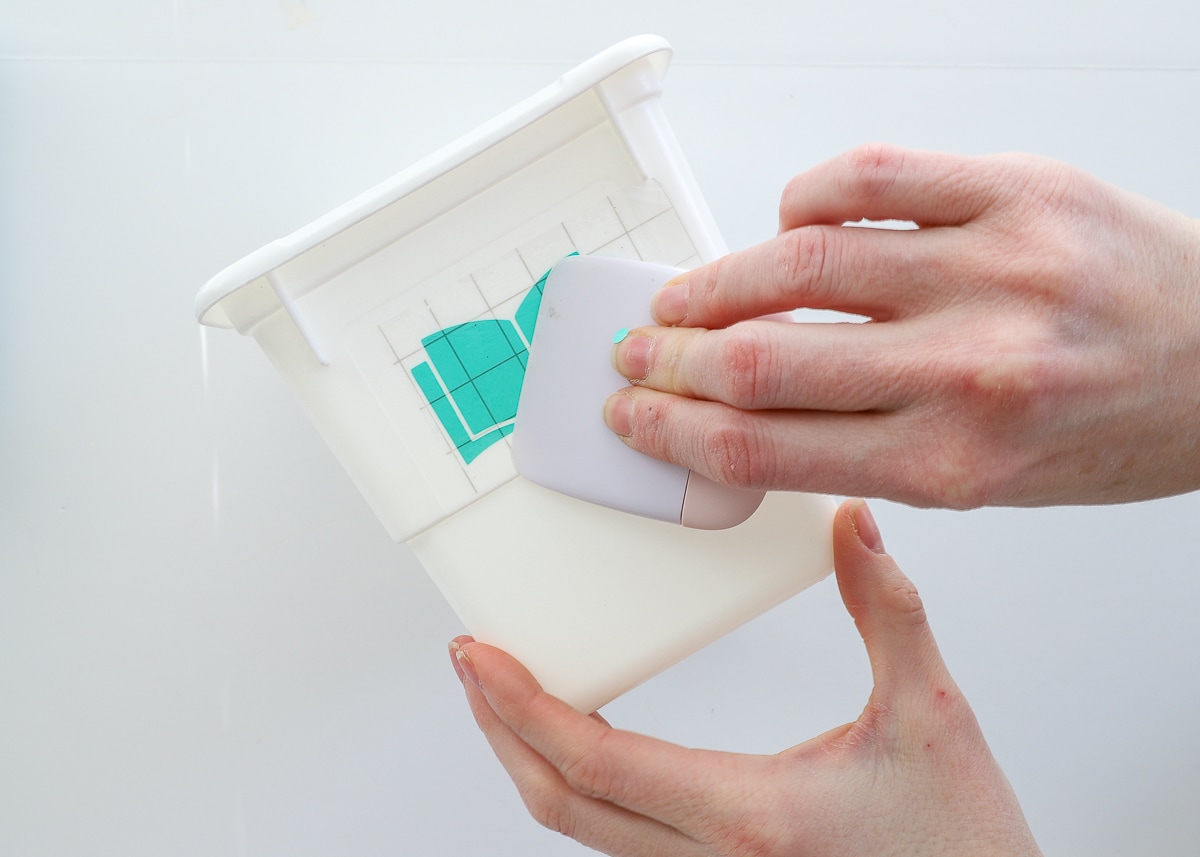
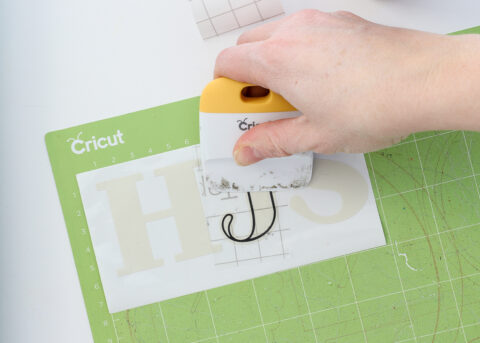
Next, take a scraper and rub, rub, rub, rub, and rub some more…all over your label. Rub in every direction with considerable pressure. And just when you think you’ve rubbed the label enough, keep going. Your goal here is to get the vinyl label to stick to the clear transfer tape and lift off the white paper backing without any trouble.
To peel up the transfer tape+label combo, I like to use the scraper to lift up the top corner of transfer tape (as shown below)…
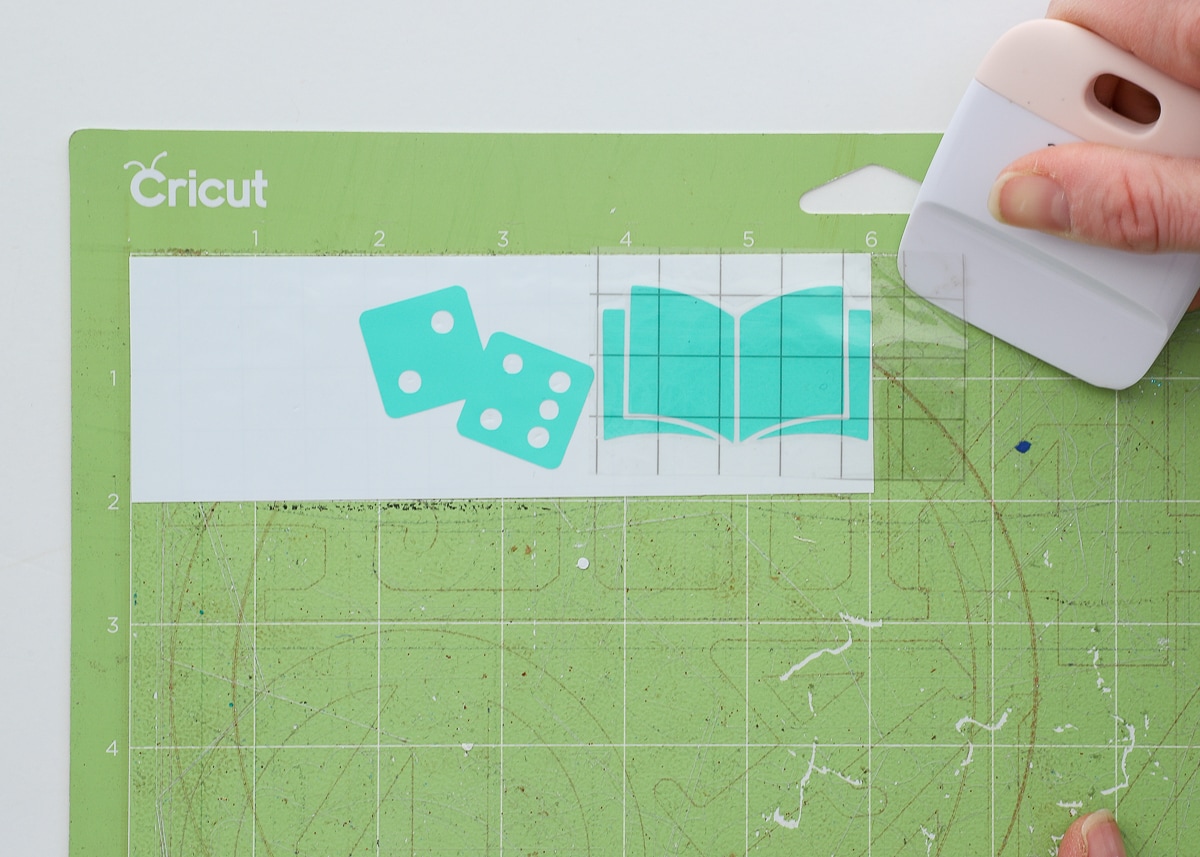
…and then slowly peel up the transfer tape+label combo to remove the label from the white paper backing.
Pssst – If you’re having trouble getting your label to lift off the white paper backing, see my tips at the bottom of this post.
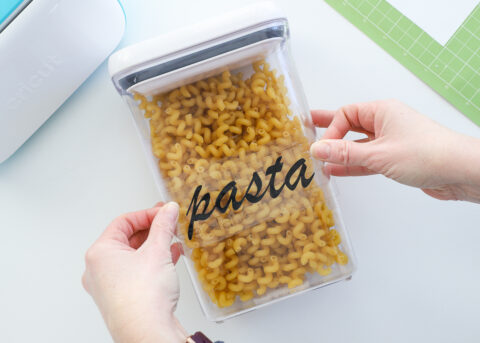
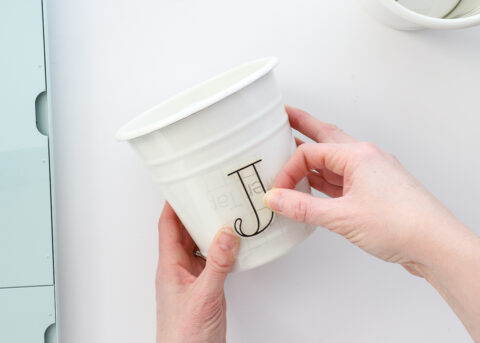
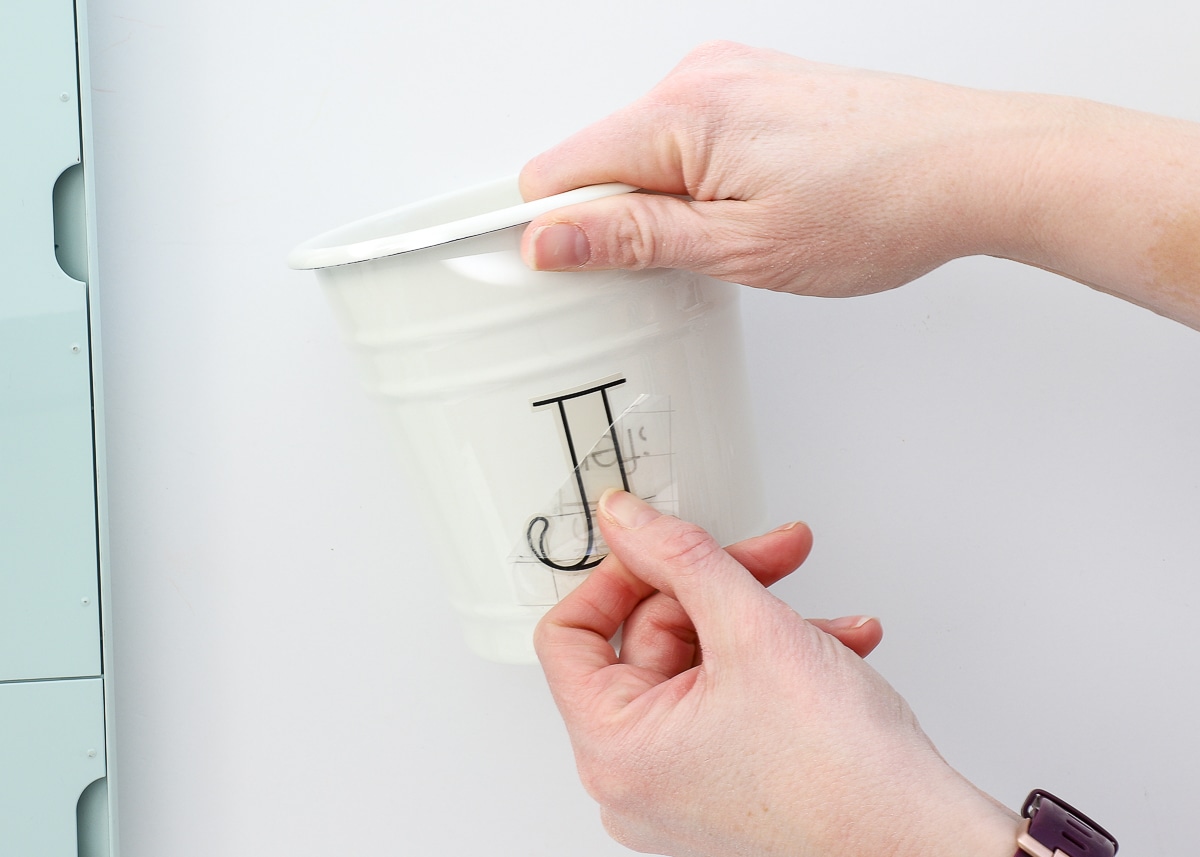
With your label removed off the white paper backing, it’s finally time to apply it to your container!
If needed, wipe your container clean with rubbing alcohol to ensure there is no dust or residue. Then, place the transfer tape+label combo onto your surface. You typically get one shot at this, so take your time to get your placement exactly where you want it.

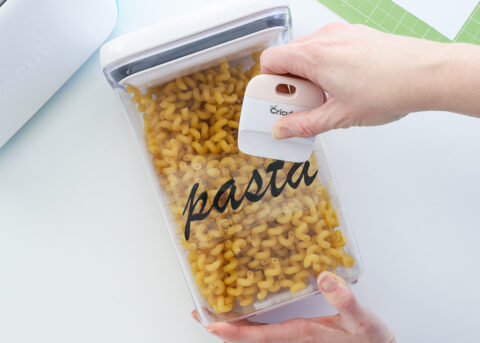
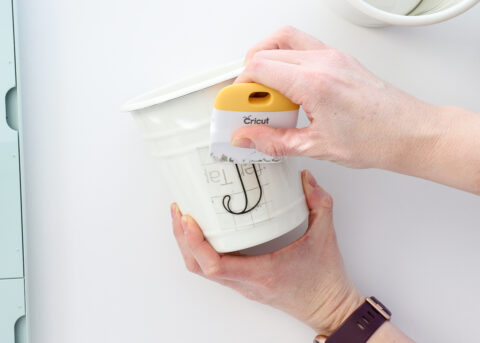
Now…you want the transfer tape to “let go” of your label so it will stick to your container. Like before, use the scraper to vigorously rub the label in every single direction.
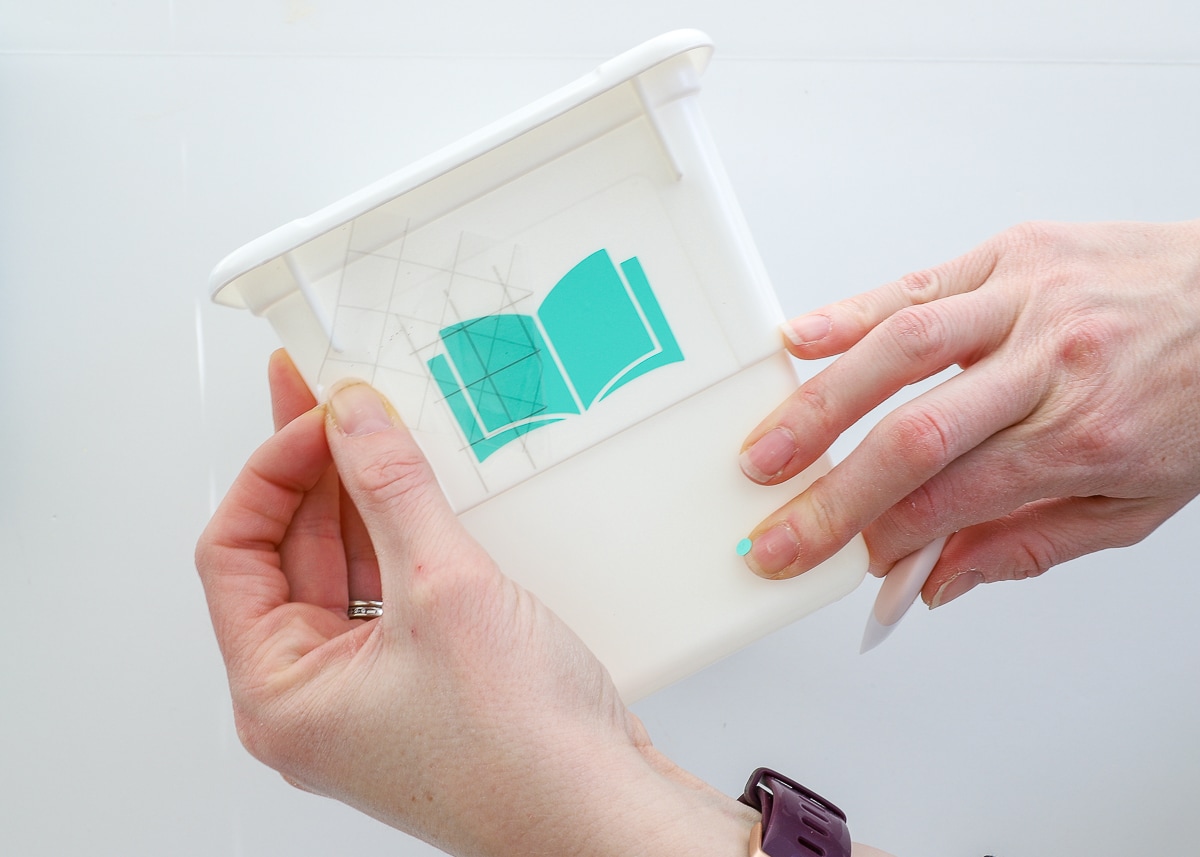
Then lift up a corner of the transfer tape…

…and slowly peel back the transfer tape, this time leaving the label behind.
A few things to note here:
- Pull the transfer tape back at a 180 degree angle…meaning the transfer tape is pulled completely back and flat against your container. This will increase the chances of the transfer tape letting go of the label.
- If the label comes back up with the transfer tape (instead of sticking to your container), place the transfer tape back down and rub some more with the scraper.
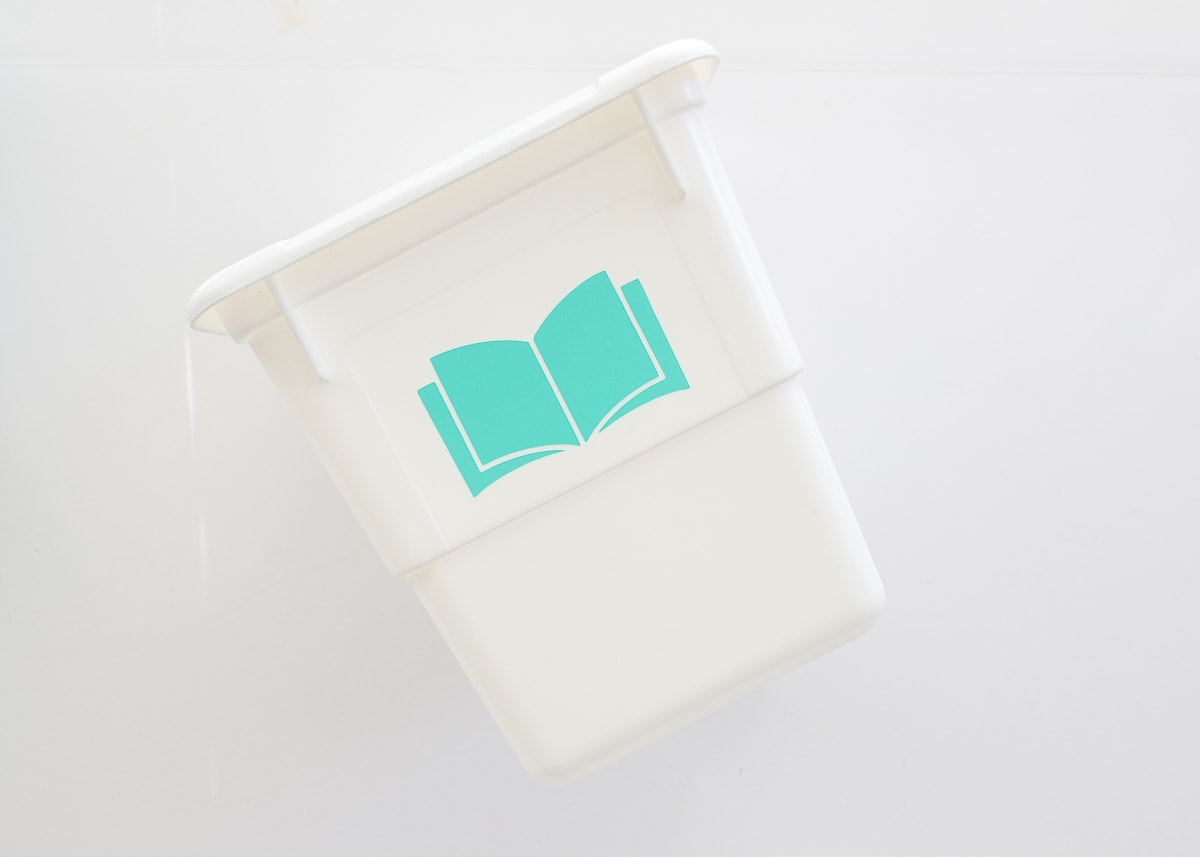
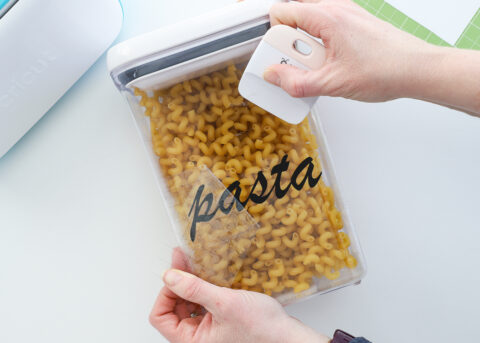
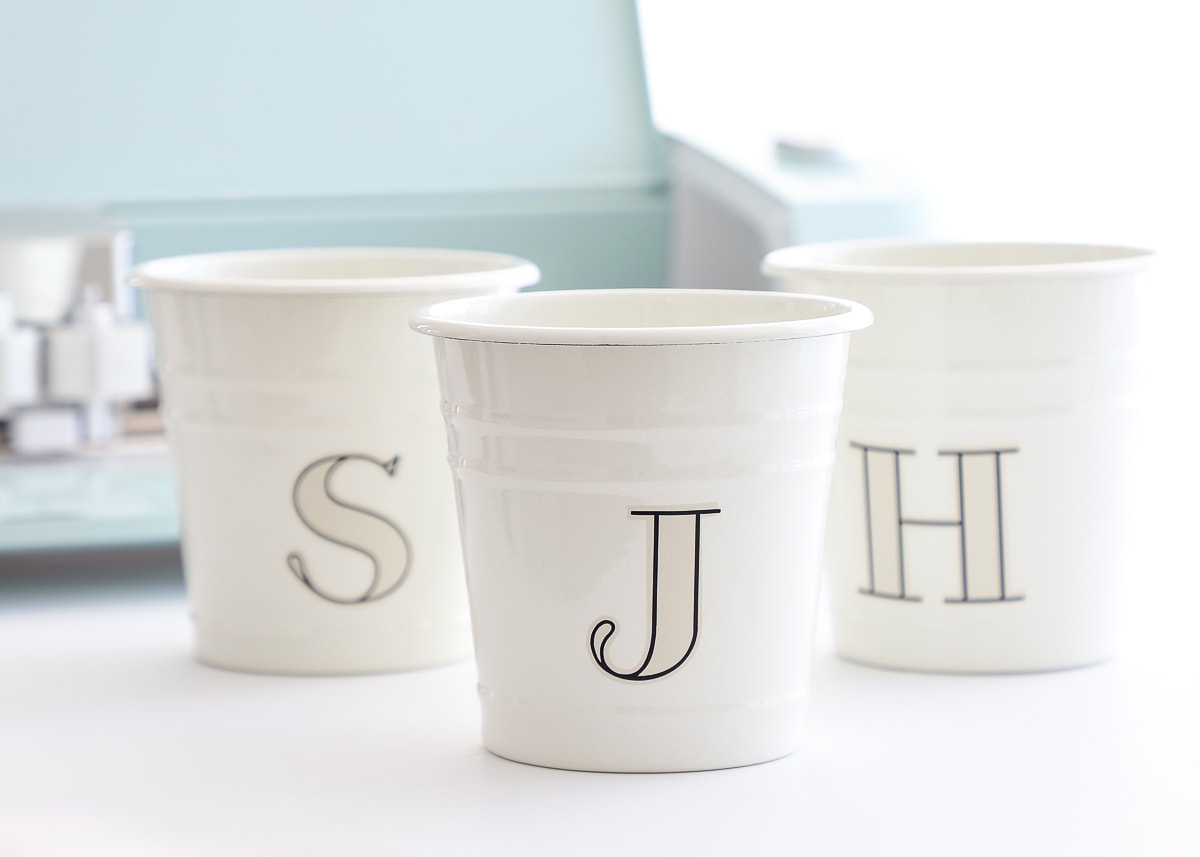
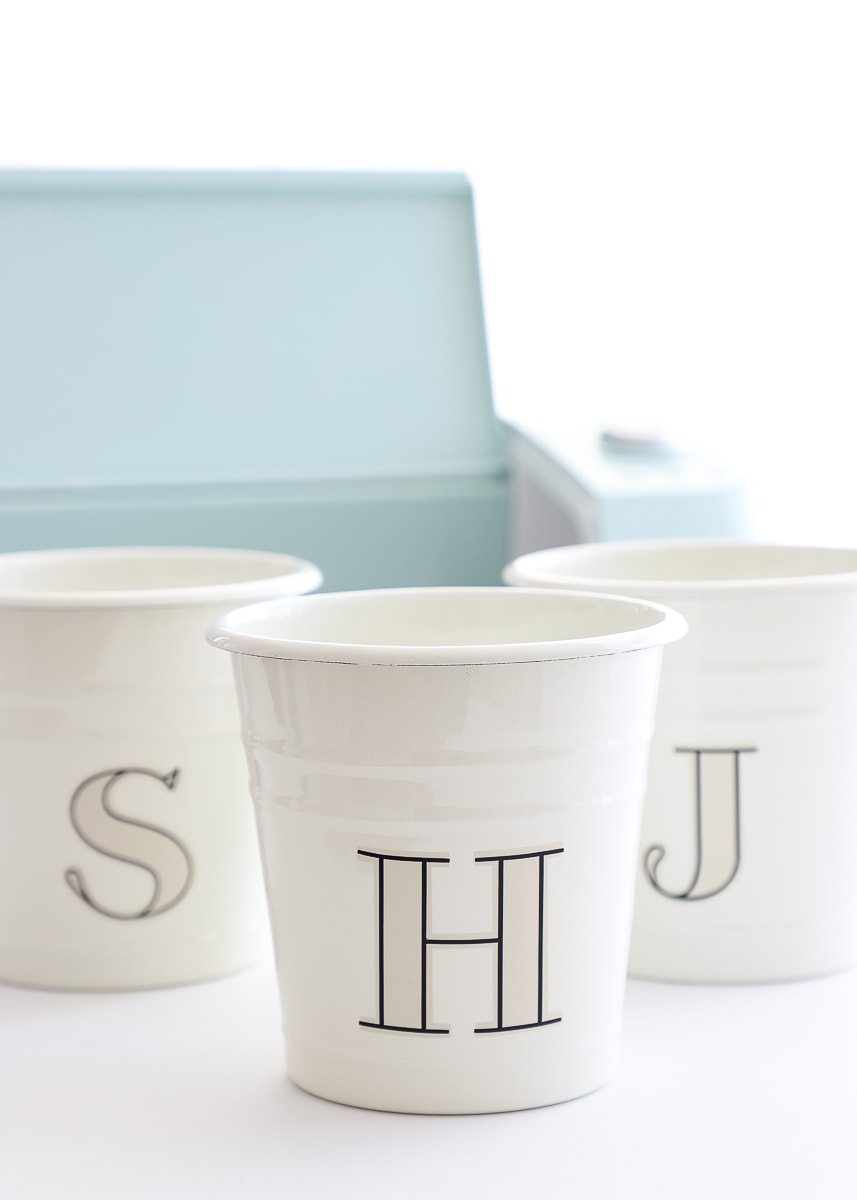
Once you completely peel off the transfer tape, your basic picture label will be on your container!
Want to save this post?
Repeat the process for your other picture labels.
TIP! You can re-use transfer tape over and over again until it’s no longer sticky enough. If you find you just can’t get the transfer tape to pick up your label, it’s time for a new cut!

Now that I’ve walked you thoroughly through the process of cutting, weeding, and applying a vinyl label, I want to show you a few “speciality” variations. While there are a few unique steps, notice all these vinyl labels generally follow the same process!
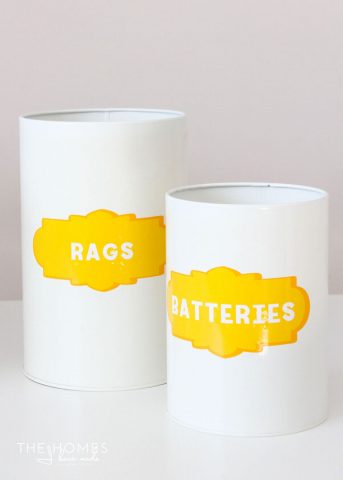
The Basic Text Label
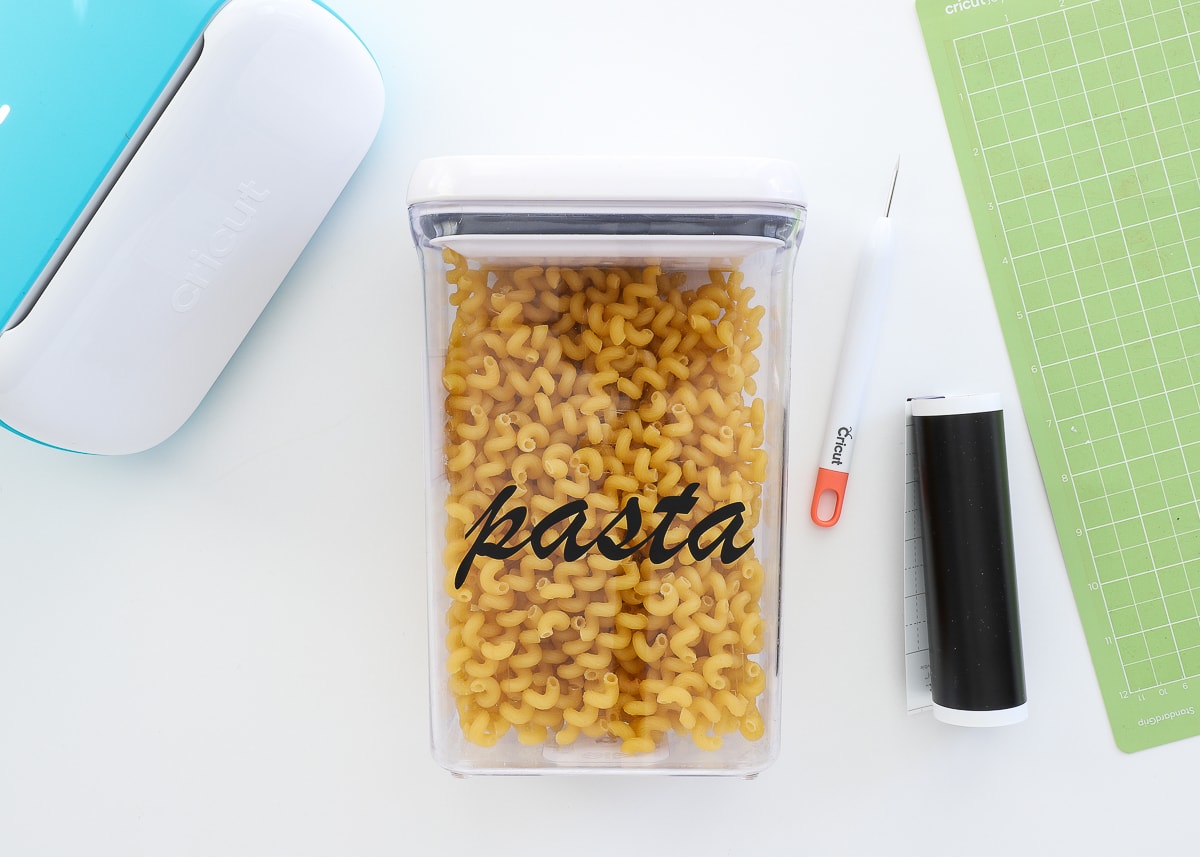
Next, let’s work through making a basic text label made from vinyl. I like to use text on food items, in adult spaces (e.g., offices, closets), as well as when the contents can’t be summed up clearly in one single picture.
As with every project, start in Cricut Design Space. Use the Text Tool (along the lefthand toolbar) to add text to your canvas.
NOTE: In the case of vinyl labels, you want to double check that your font is set to be “Cut” rather than “Draw” (notice there is a “Cut” next to my text in the righthand Layers Panel).
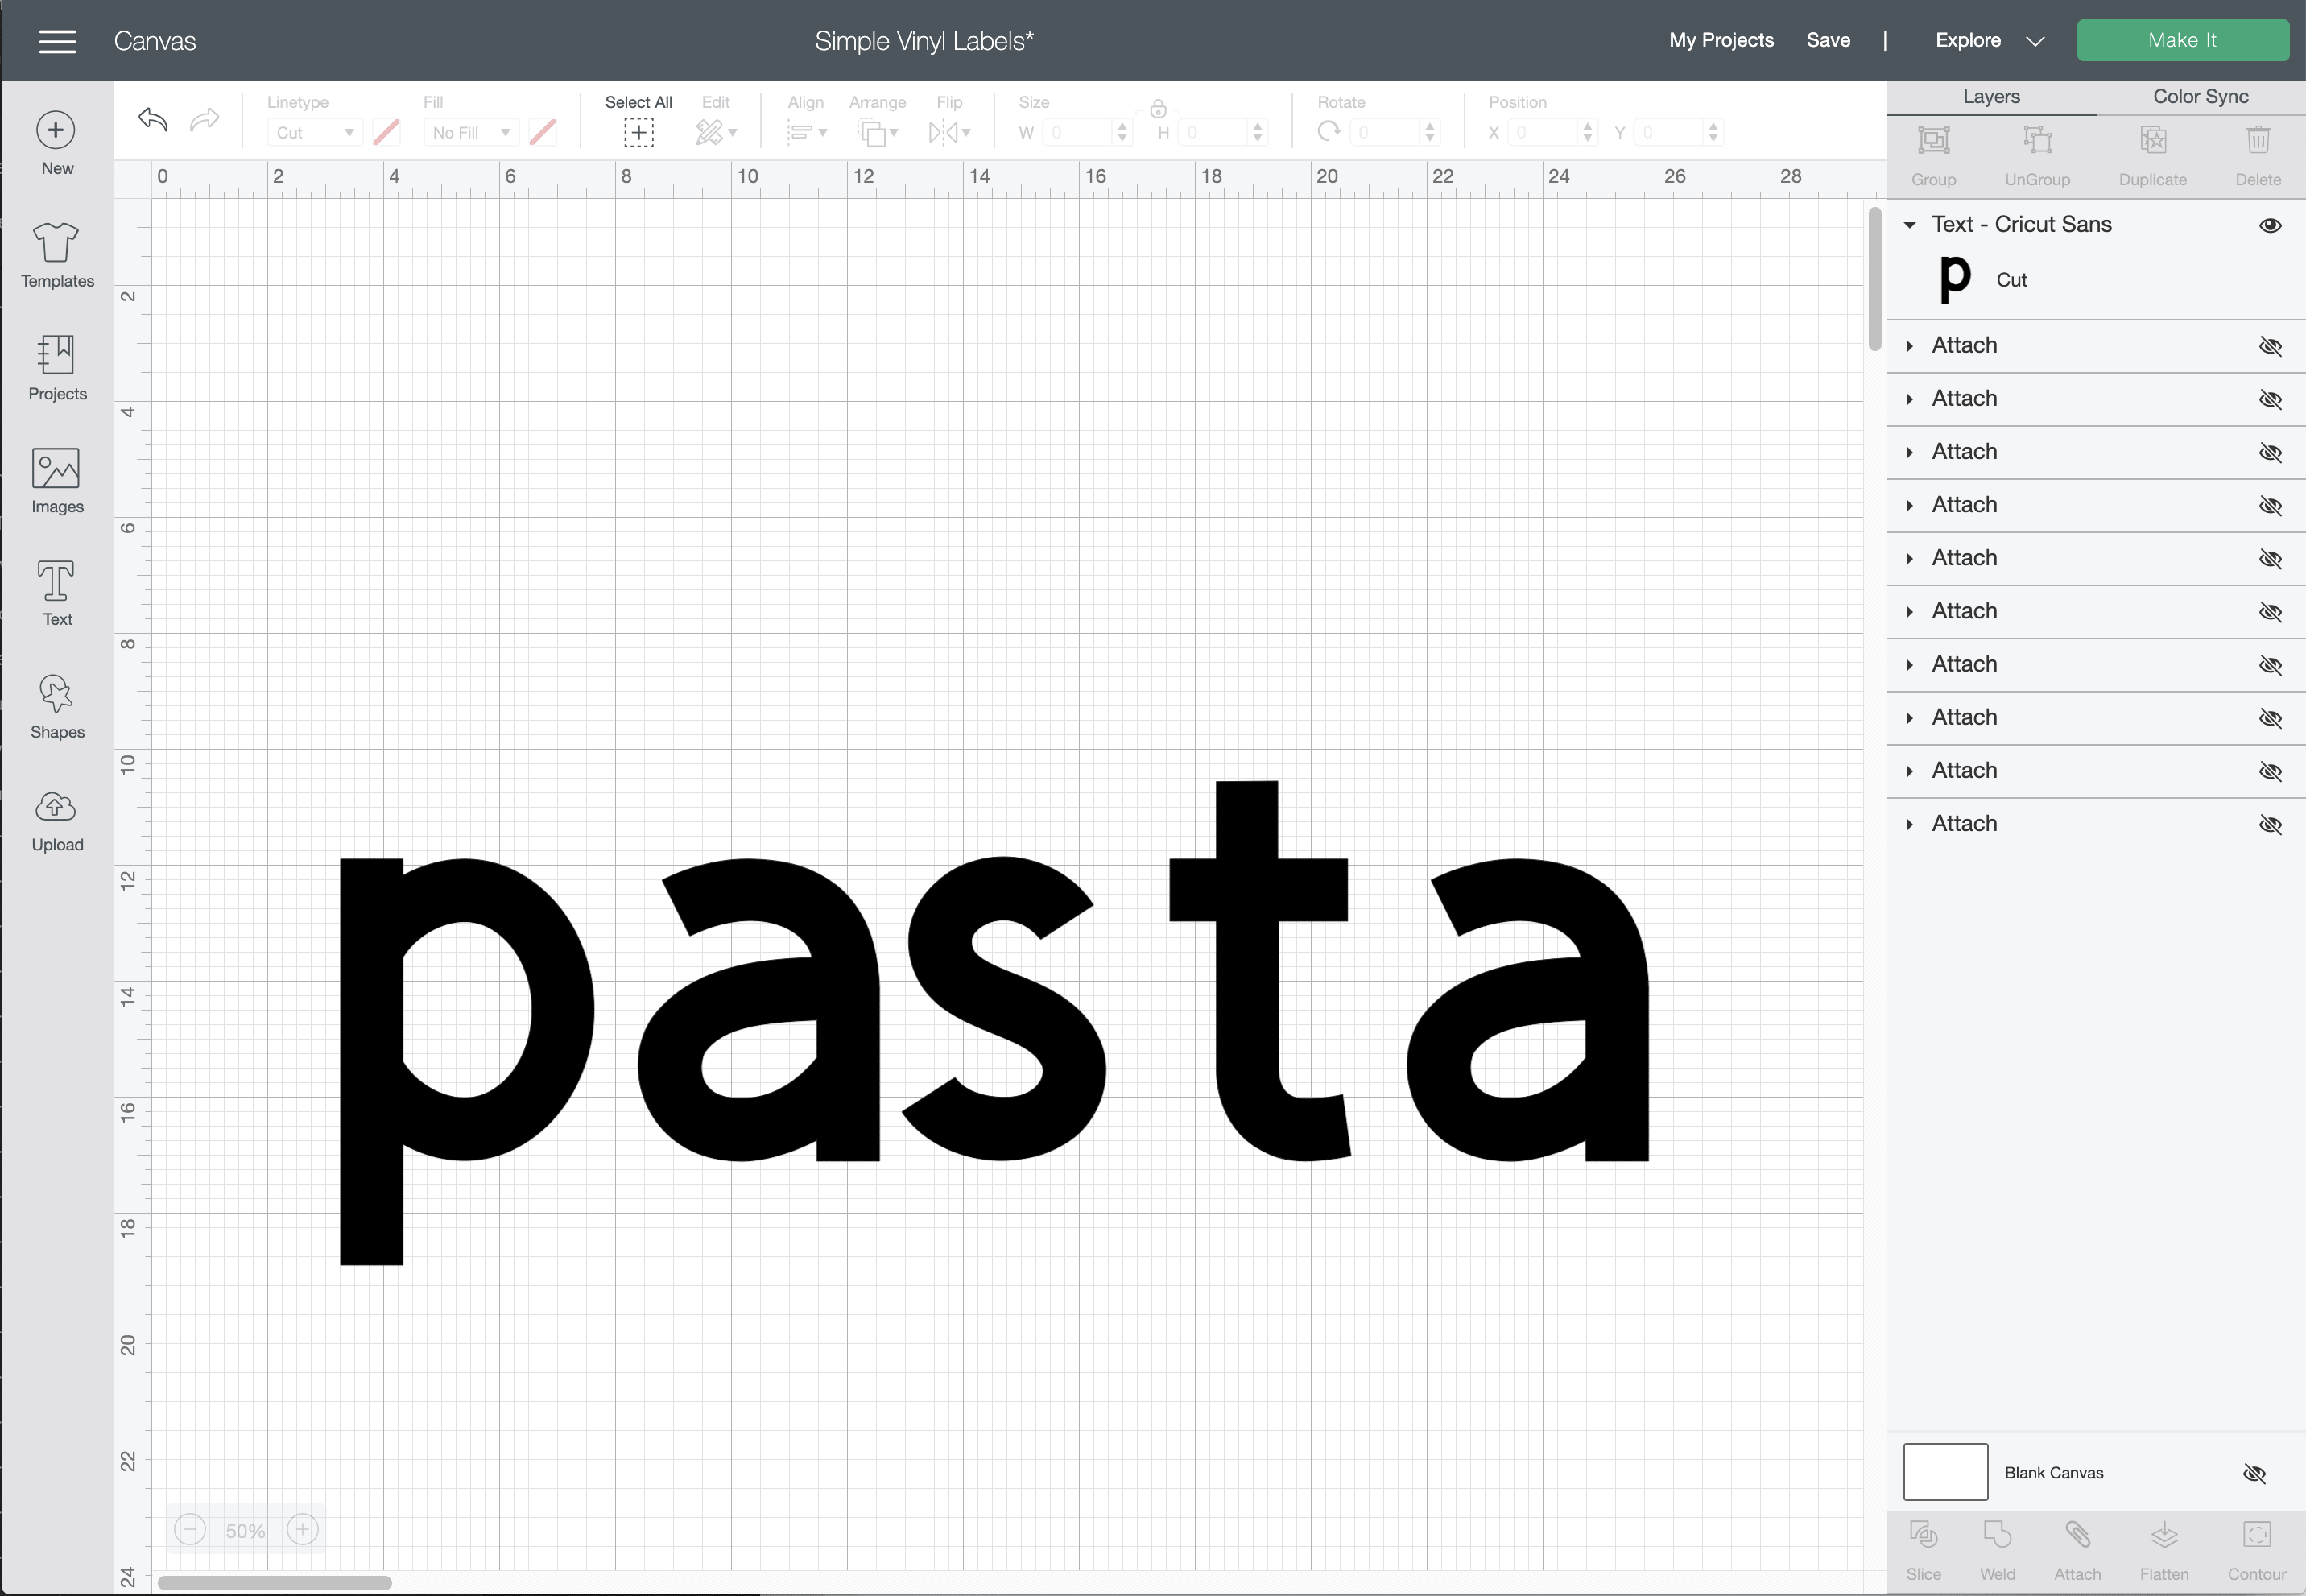
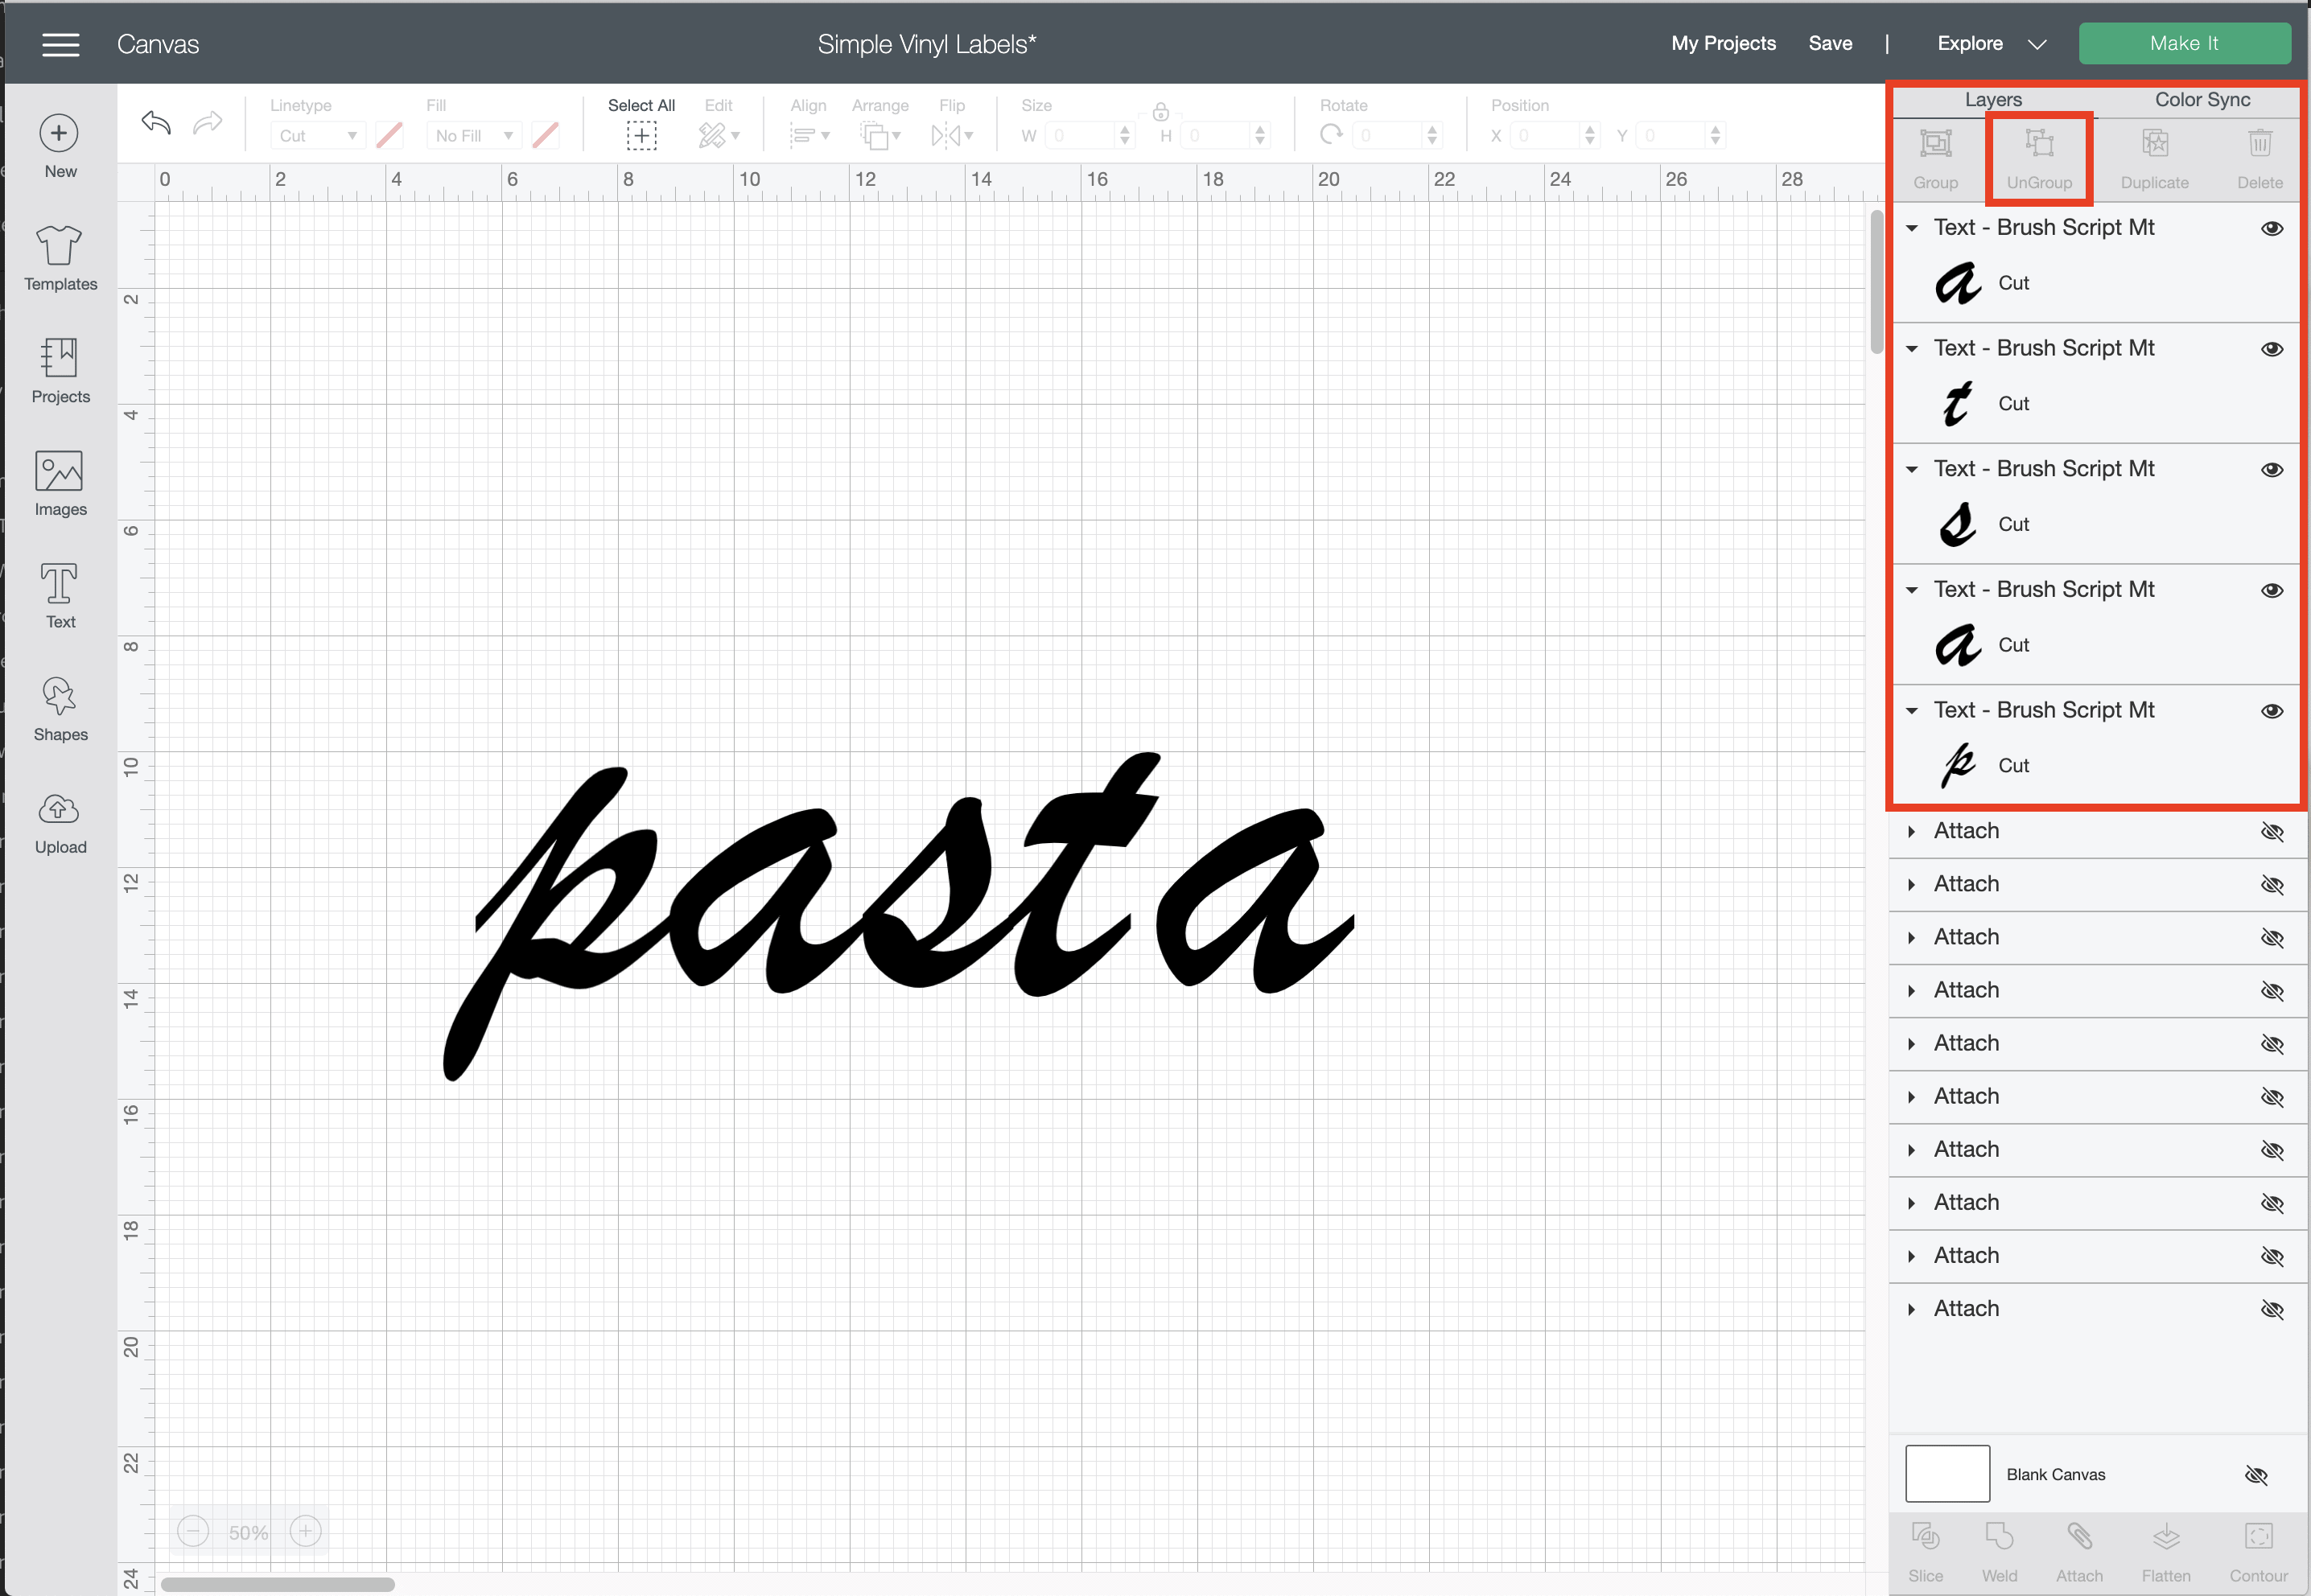
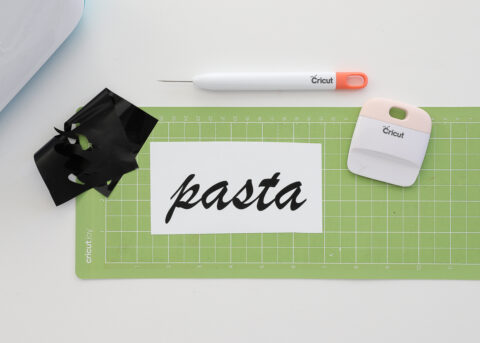
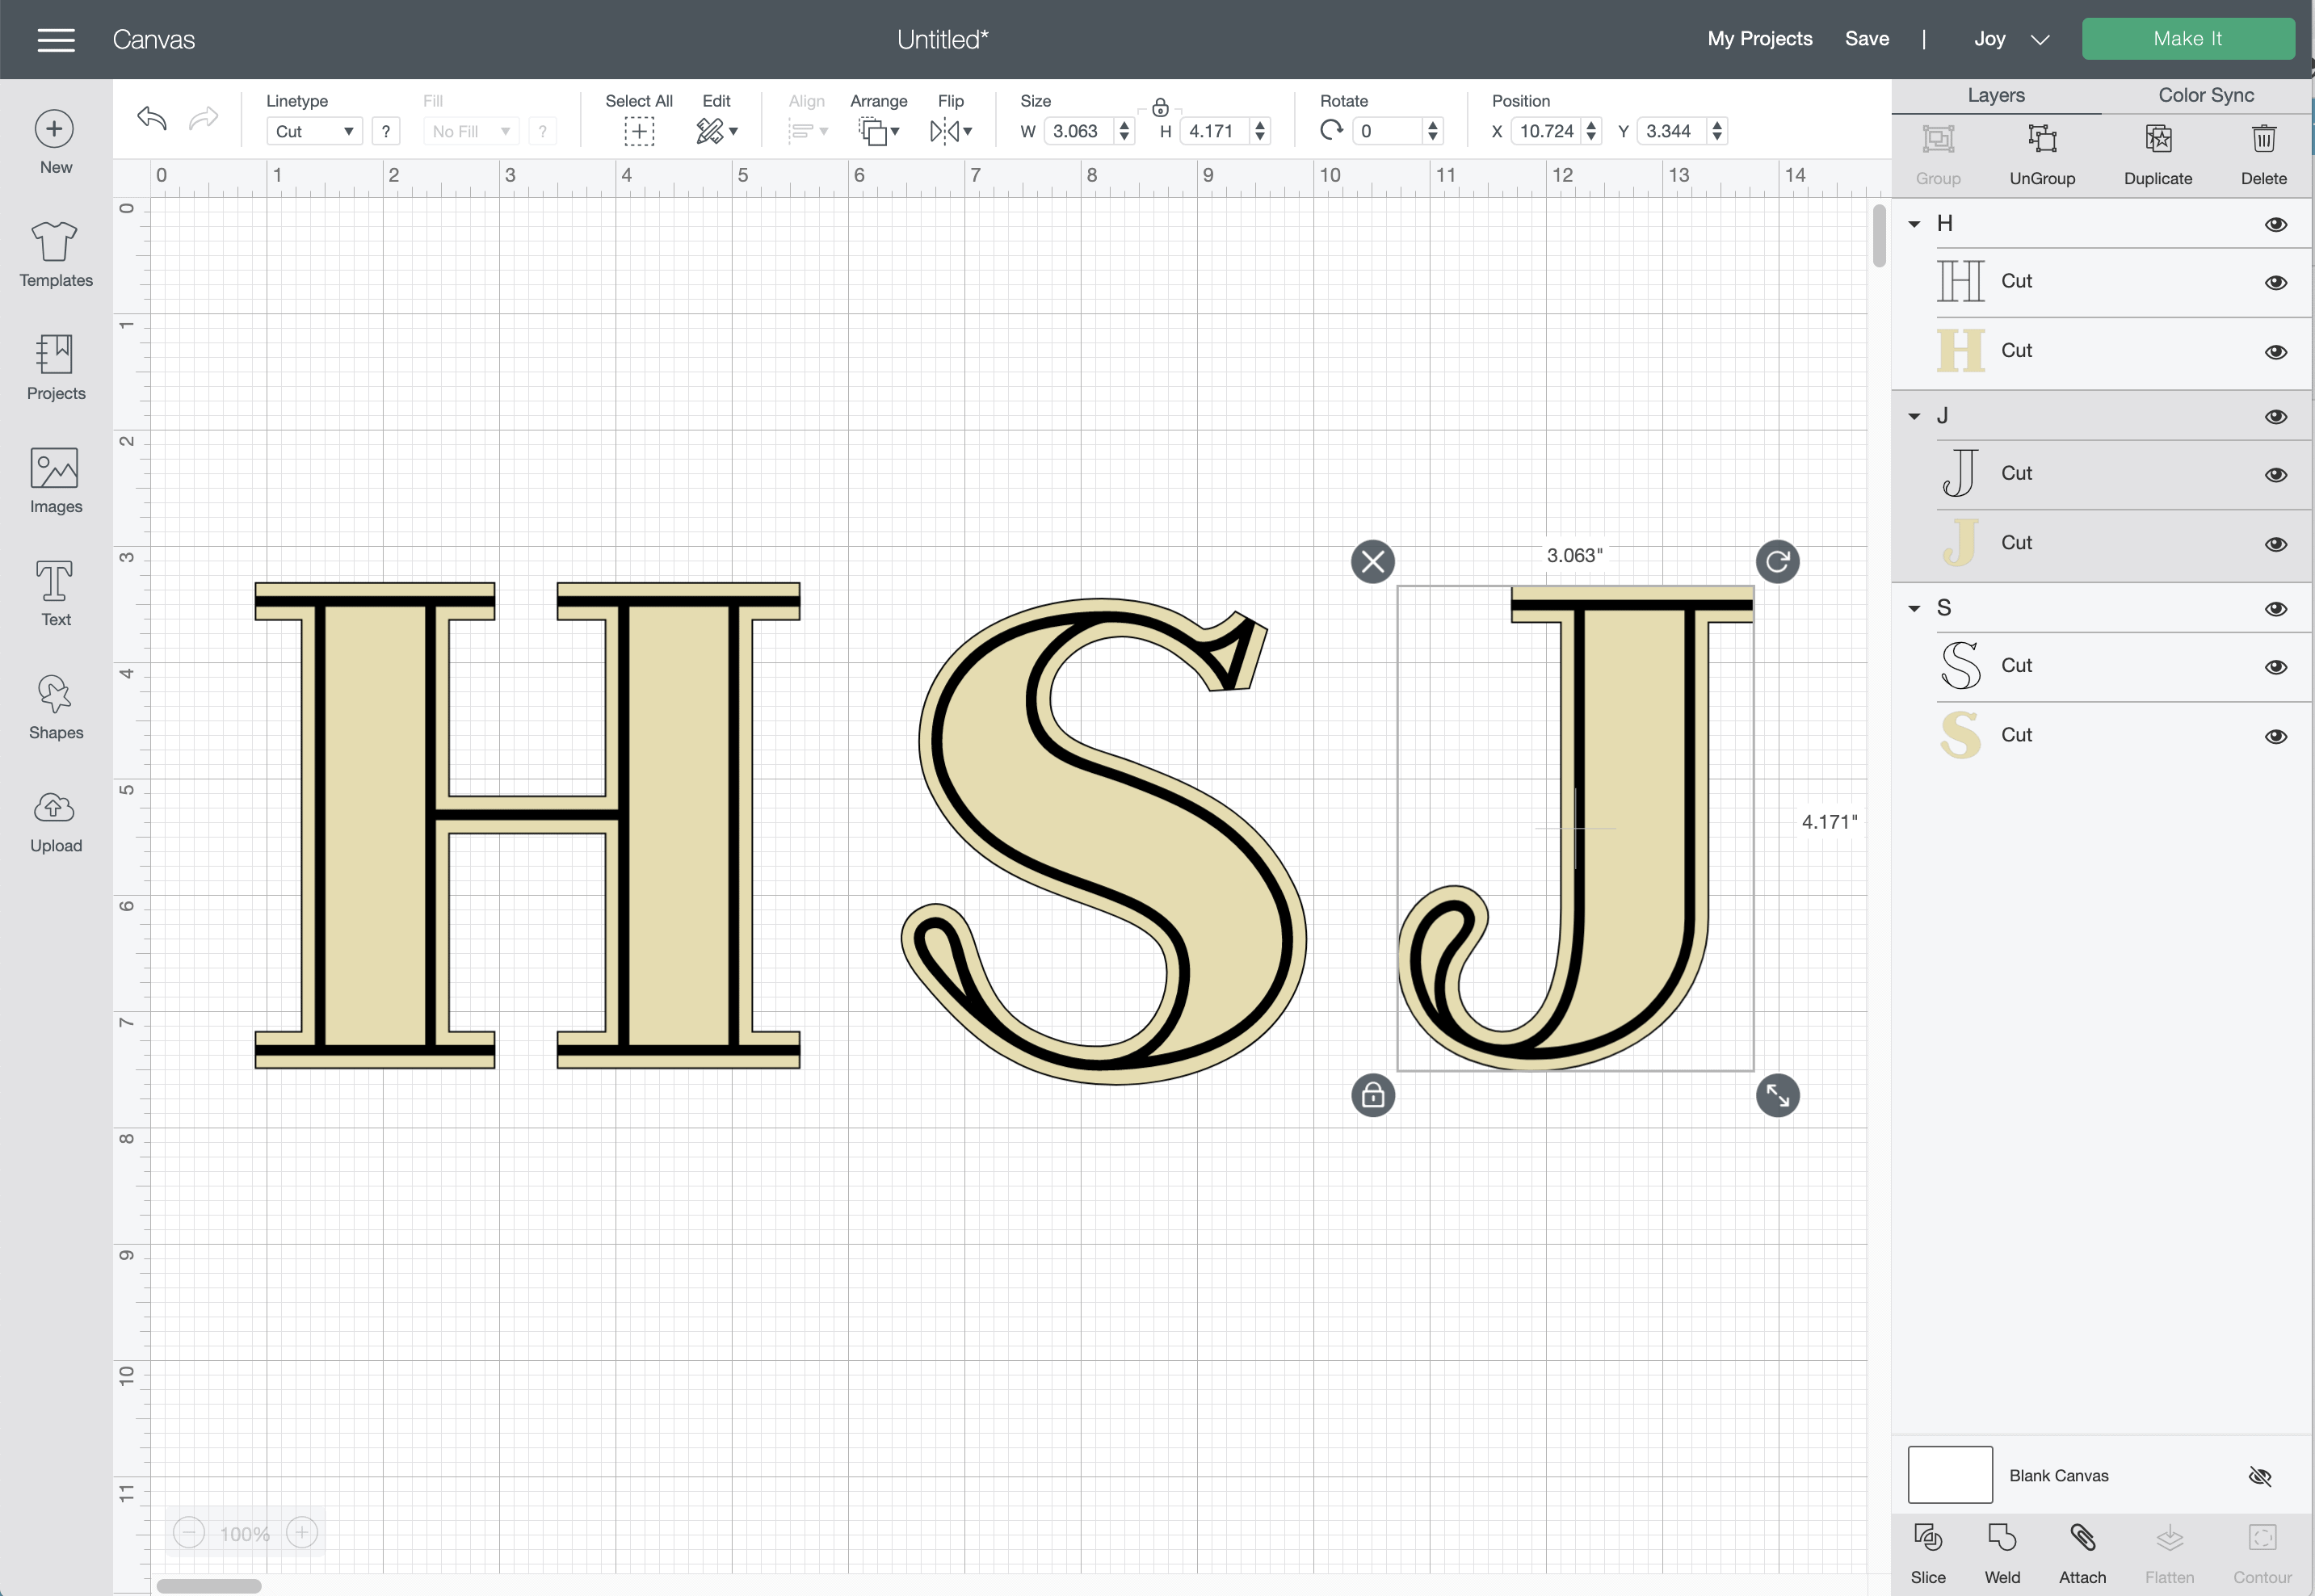
Working with fonts in Cricut Design Space can be a bit frustrating. No matter what type of font you use, the standard spacing will rarely be equal between each and every letter. In the word “pasta” shown above, notice how all the letters having slightly different spacing between them. I am going to show you how to fix spacing using a script font, but please note you will likely need to follow these steps no matter what font (script or otherwise) you use.
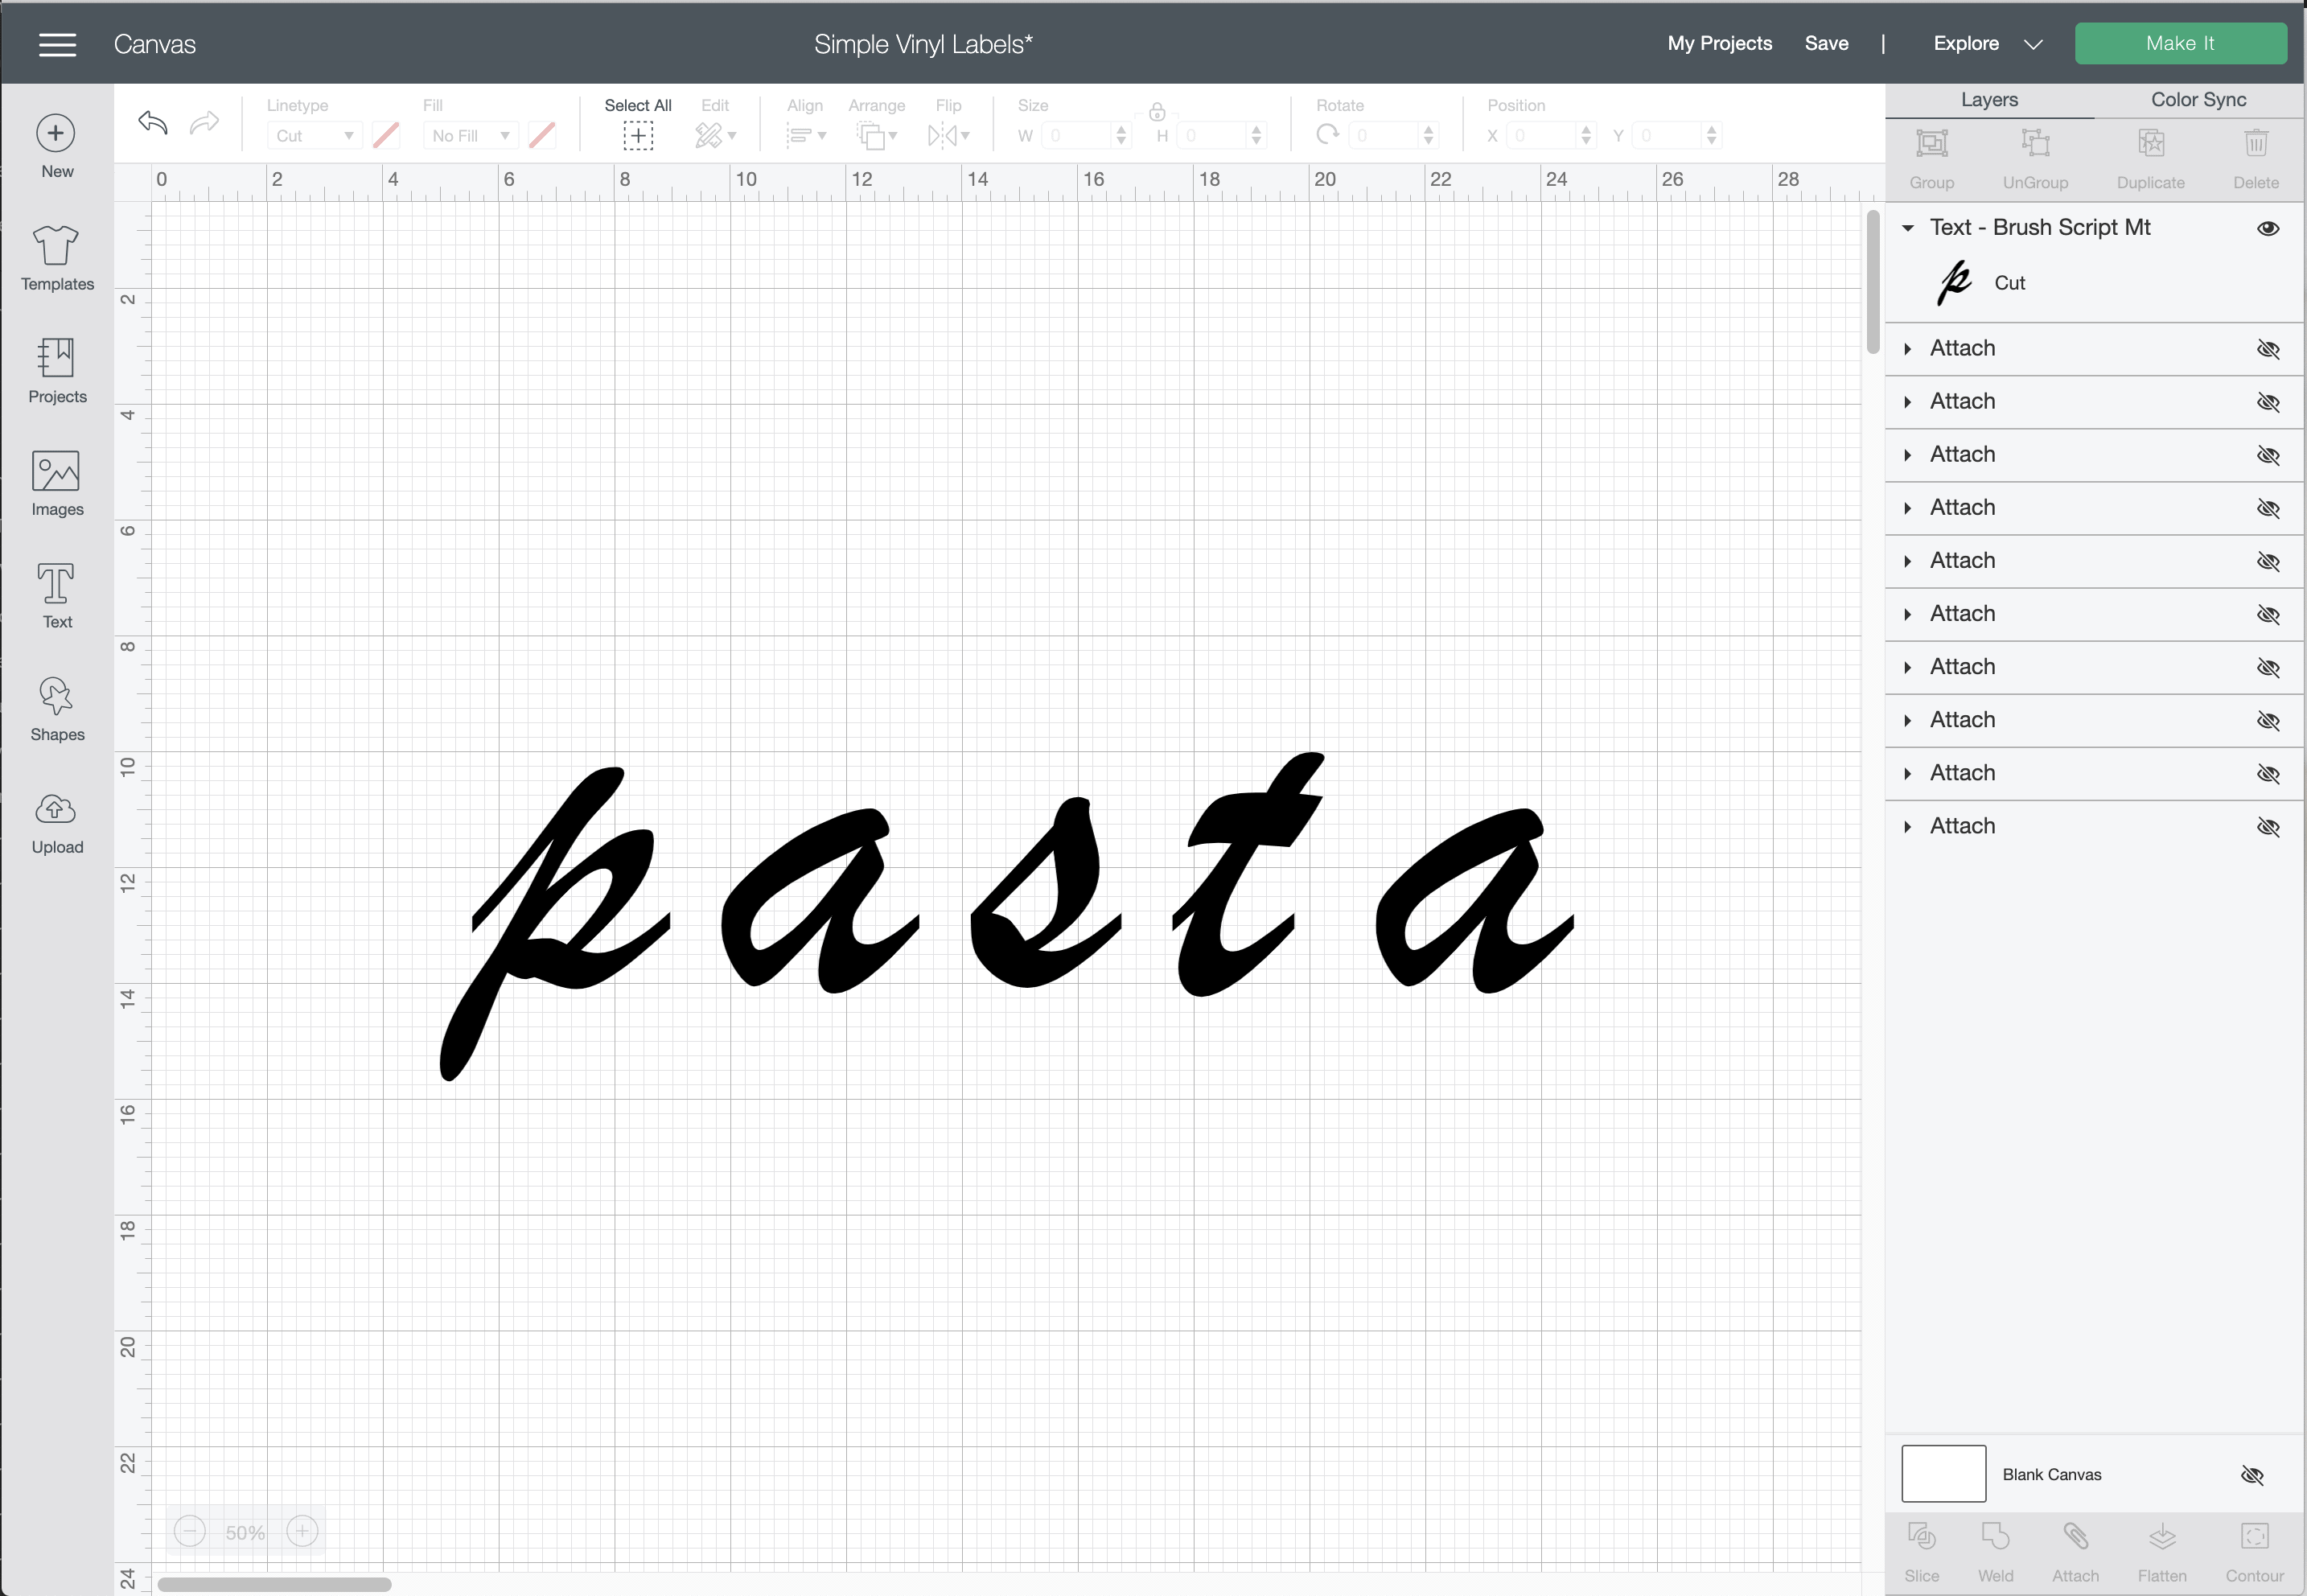
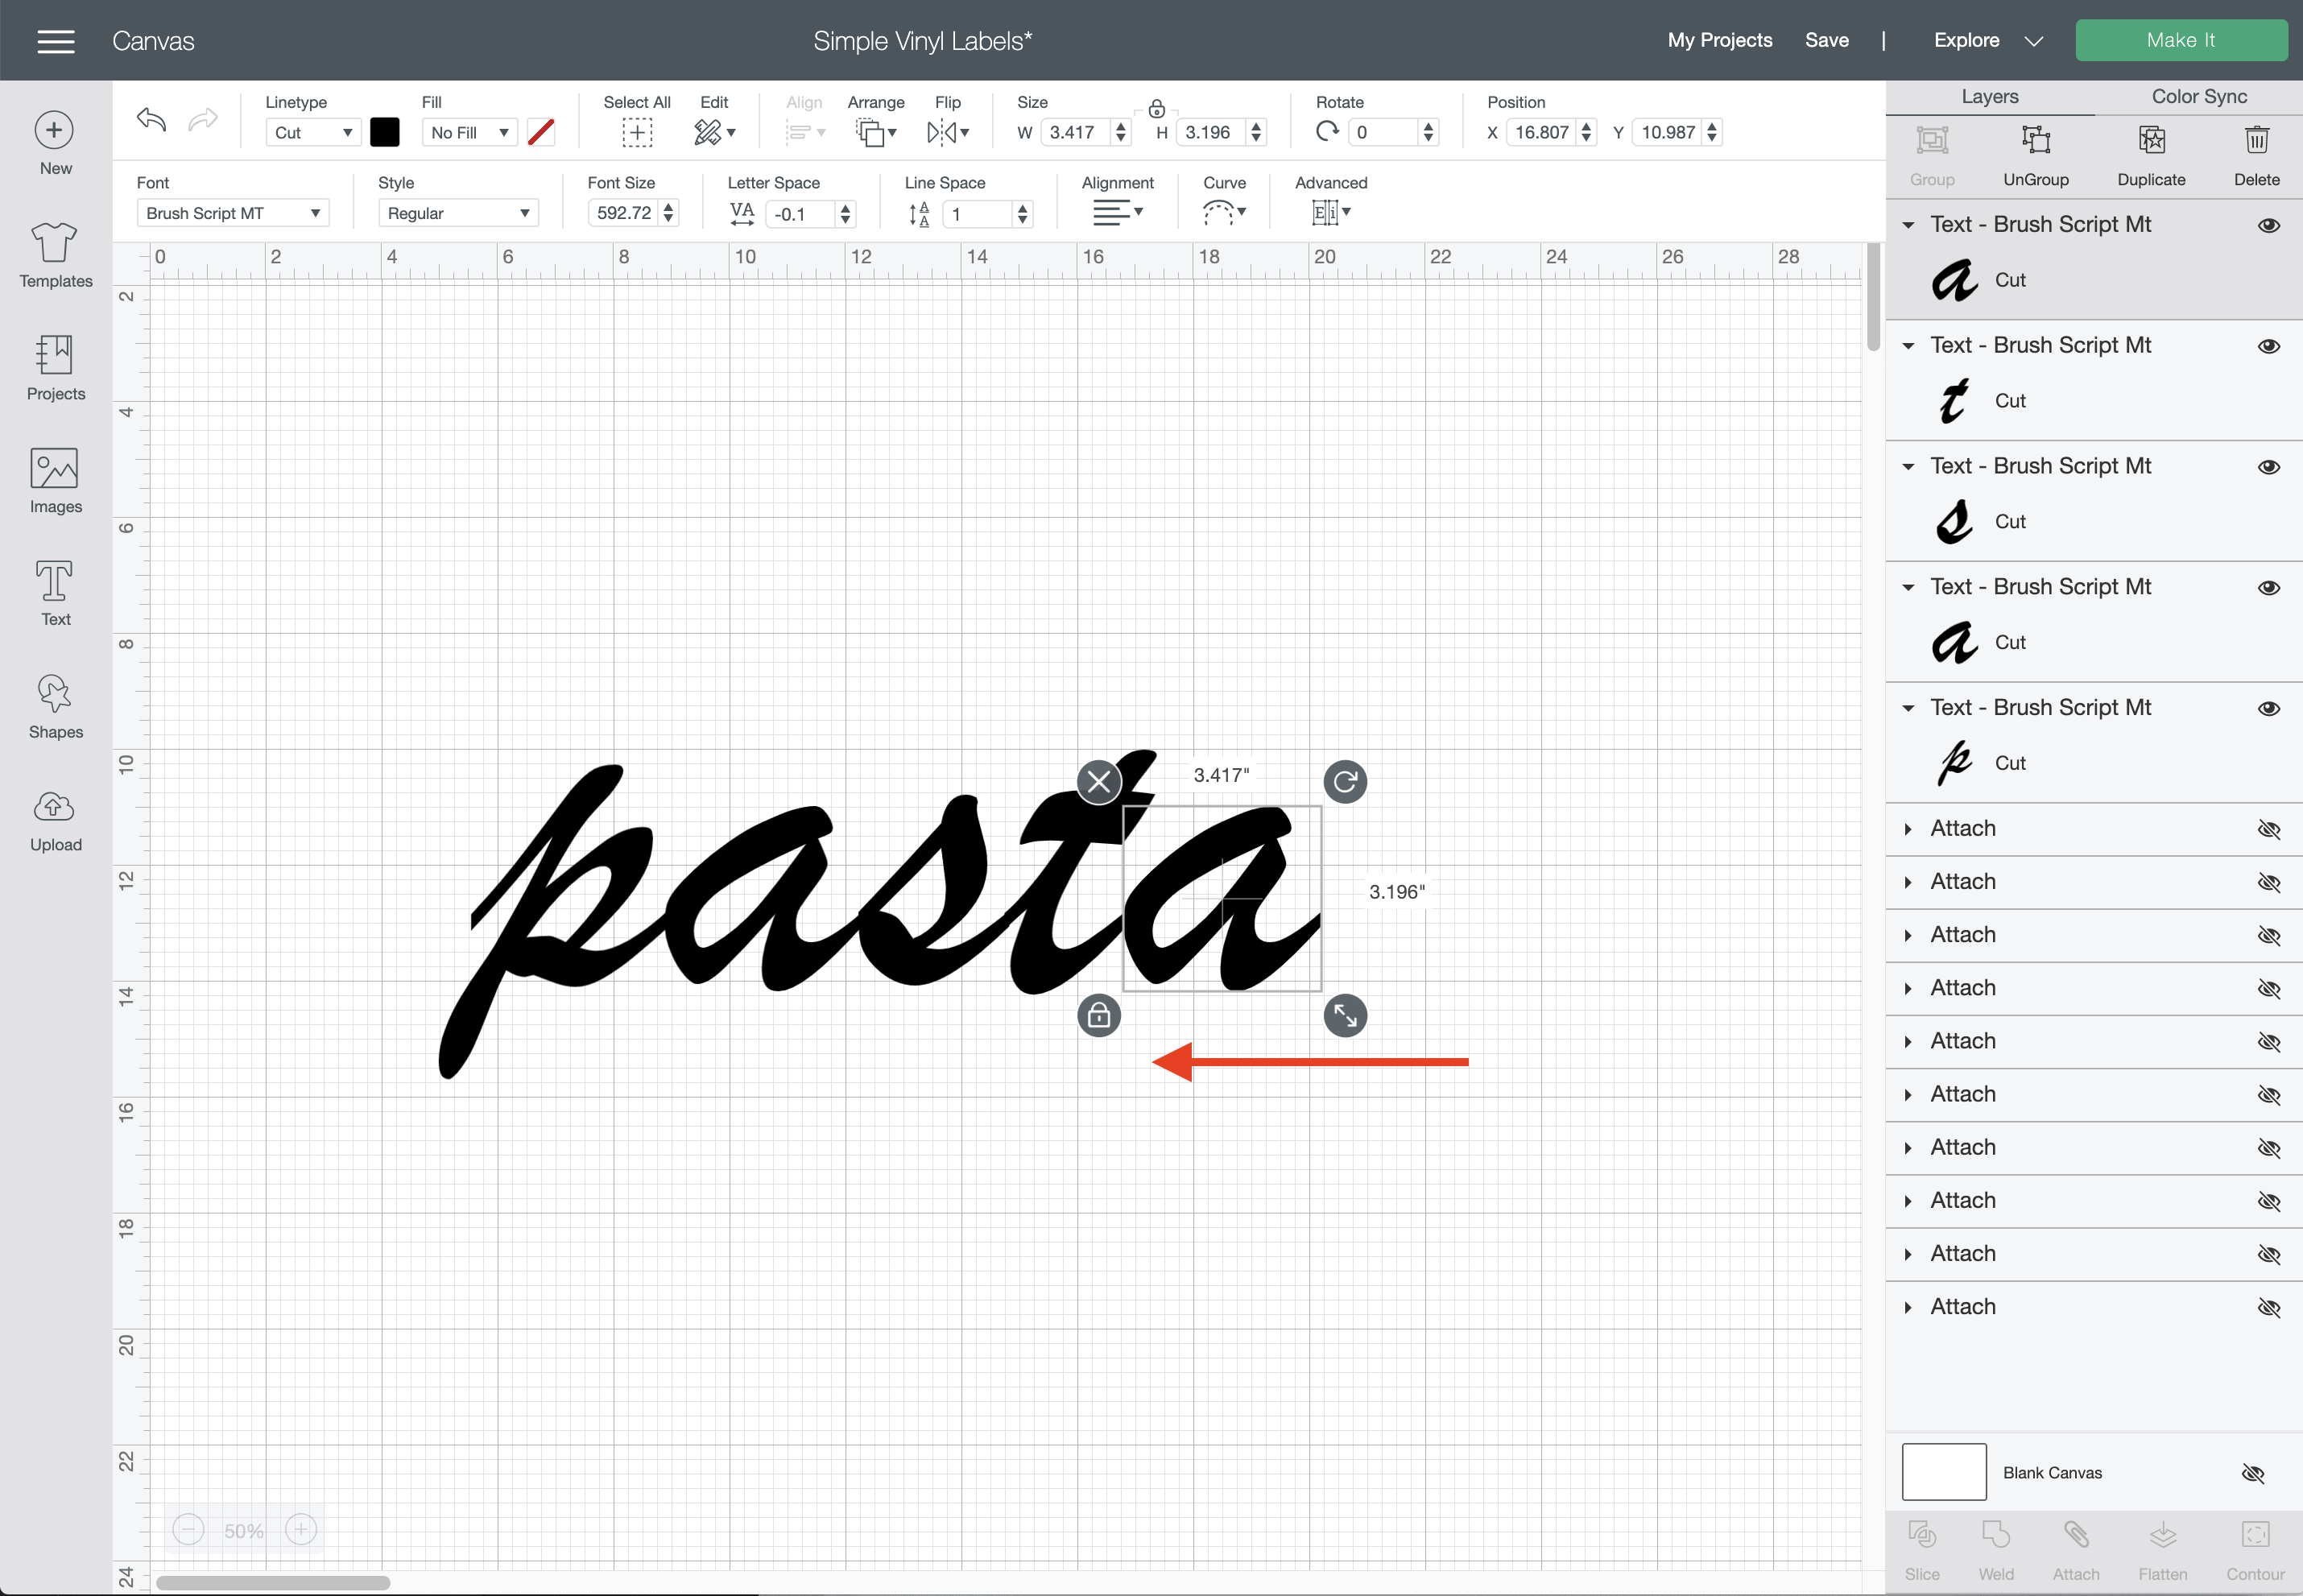
If you’ve ever attempted to cut a script font in Cricut Design Space, you know that it doesn’t appear like a typical cursive word at first. When I first change my “pasta” to the Brush Script font, it looks like this, below:
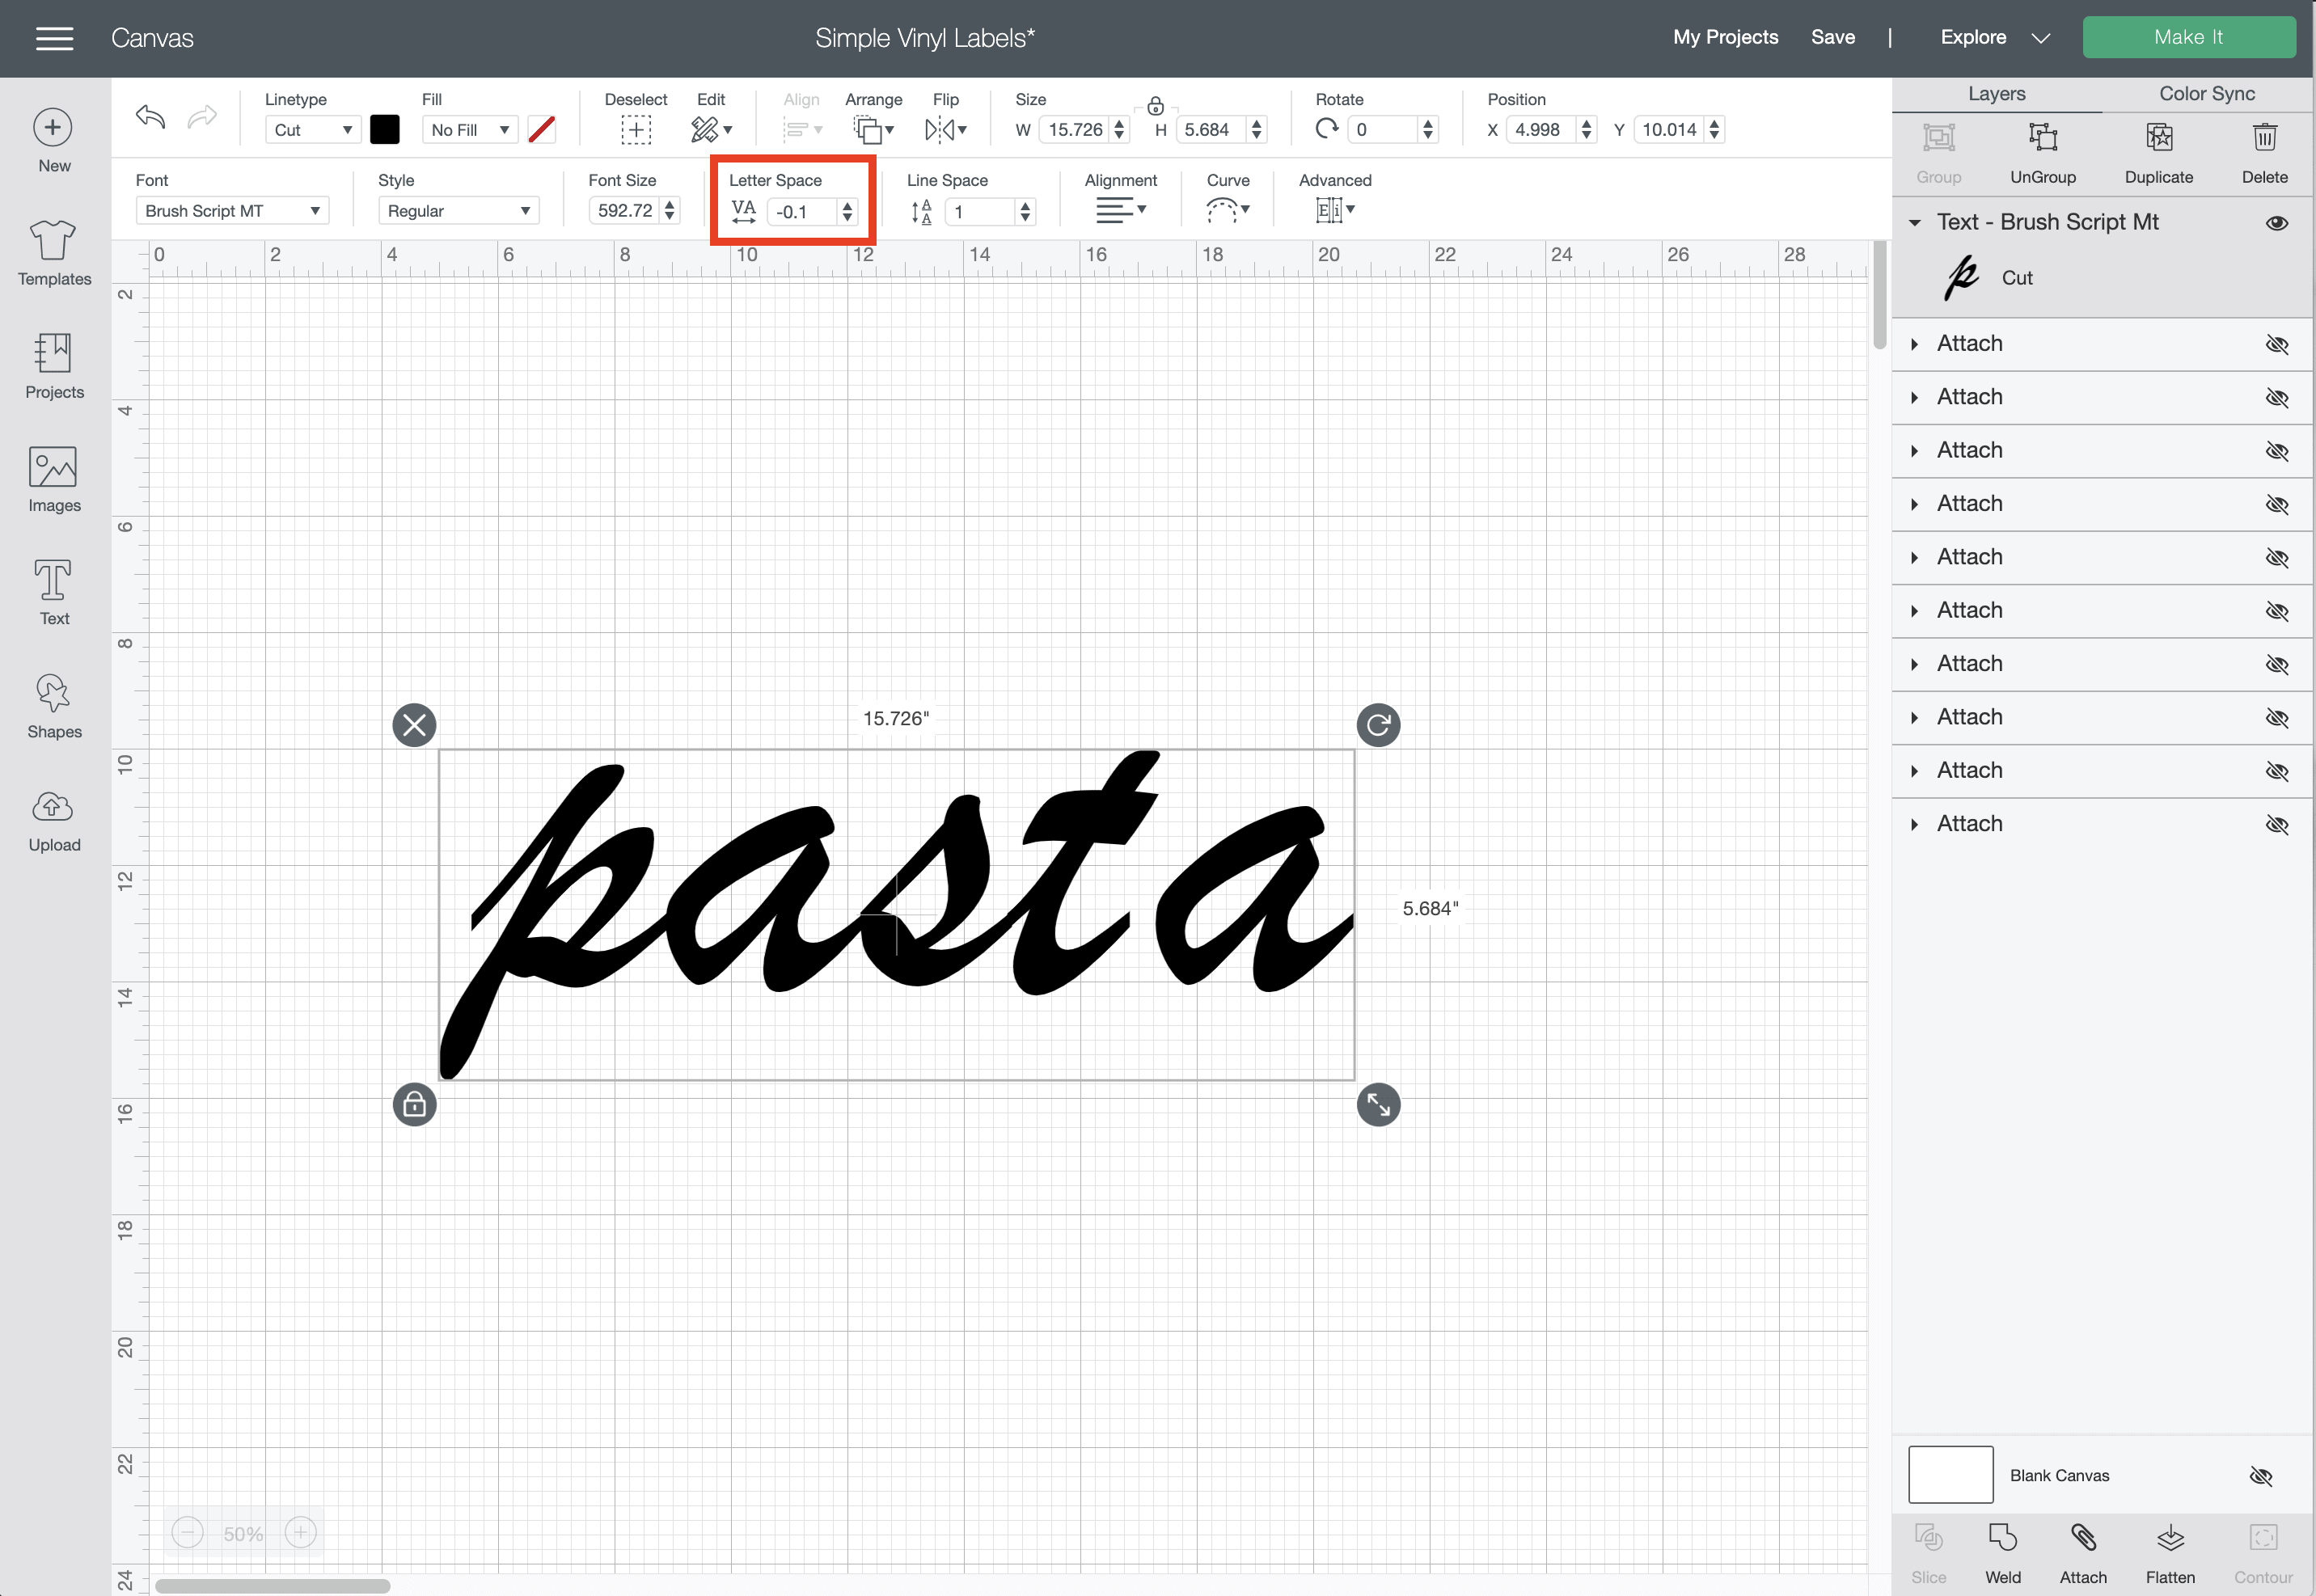
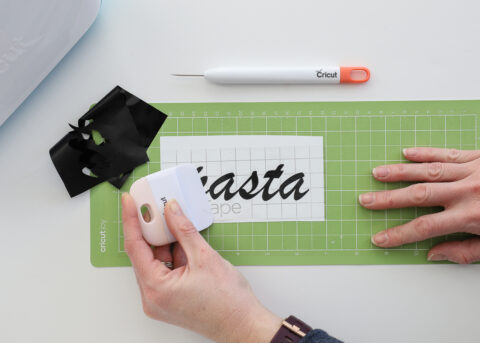
To bring the letters together to make one continuous cut, I always like to start by adjusting the spacing using the Letter Space tool on the top toolbar. This alone might bring your letters close enough. However, for this word, notice my “a” still isn’t attached.
At this point, select the entire word and click “Ungroup” in the righthand Layers Panel. This will separate each layer into its own cut.
Now, you will be able to adjust any remaining letters to the spacing you like.
Once you are satisfied with the spacing of your entire word, select all the letters and click the “Weld” tool in the bottom of the righthand Layers Panel.
NOTE: Weld your letters together, whether they are touching or not, in order to get them back into a single cut. For non-script fonts, you can also “Attach” them together if you’d prefer.
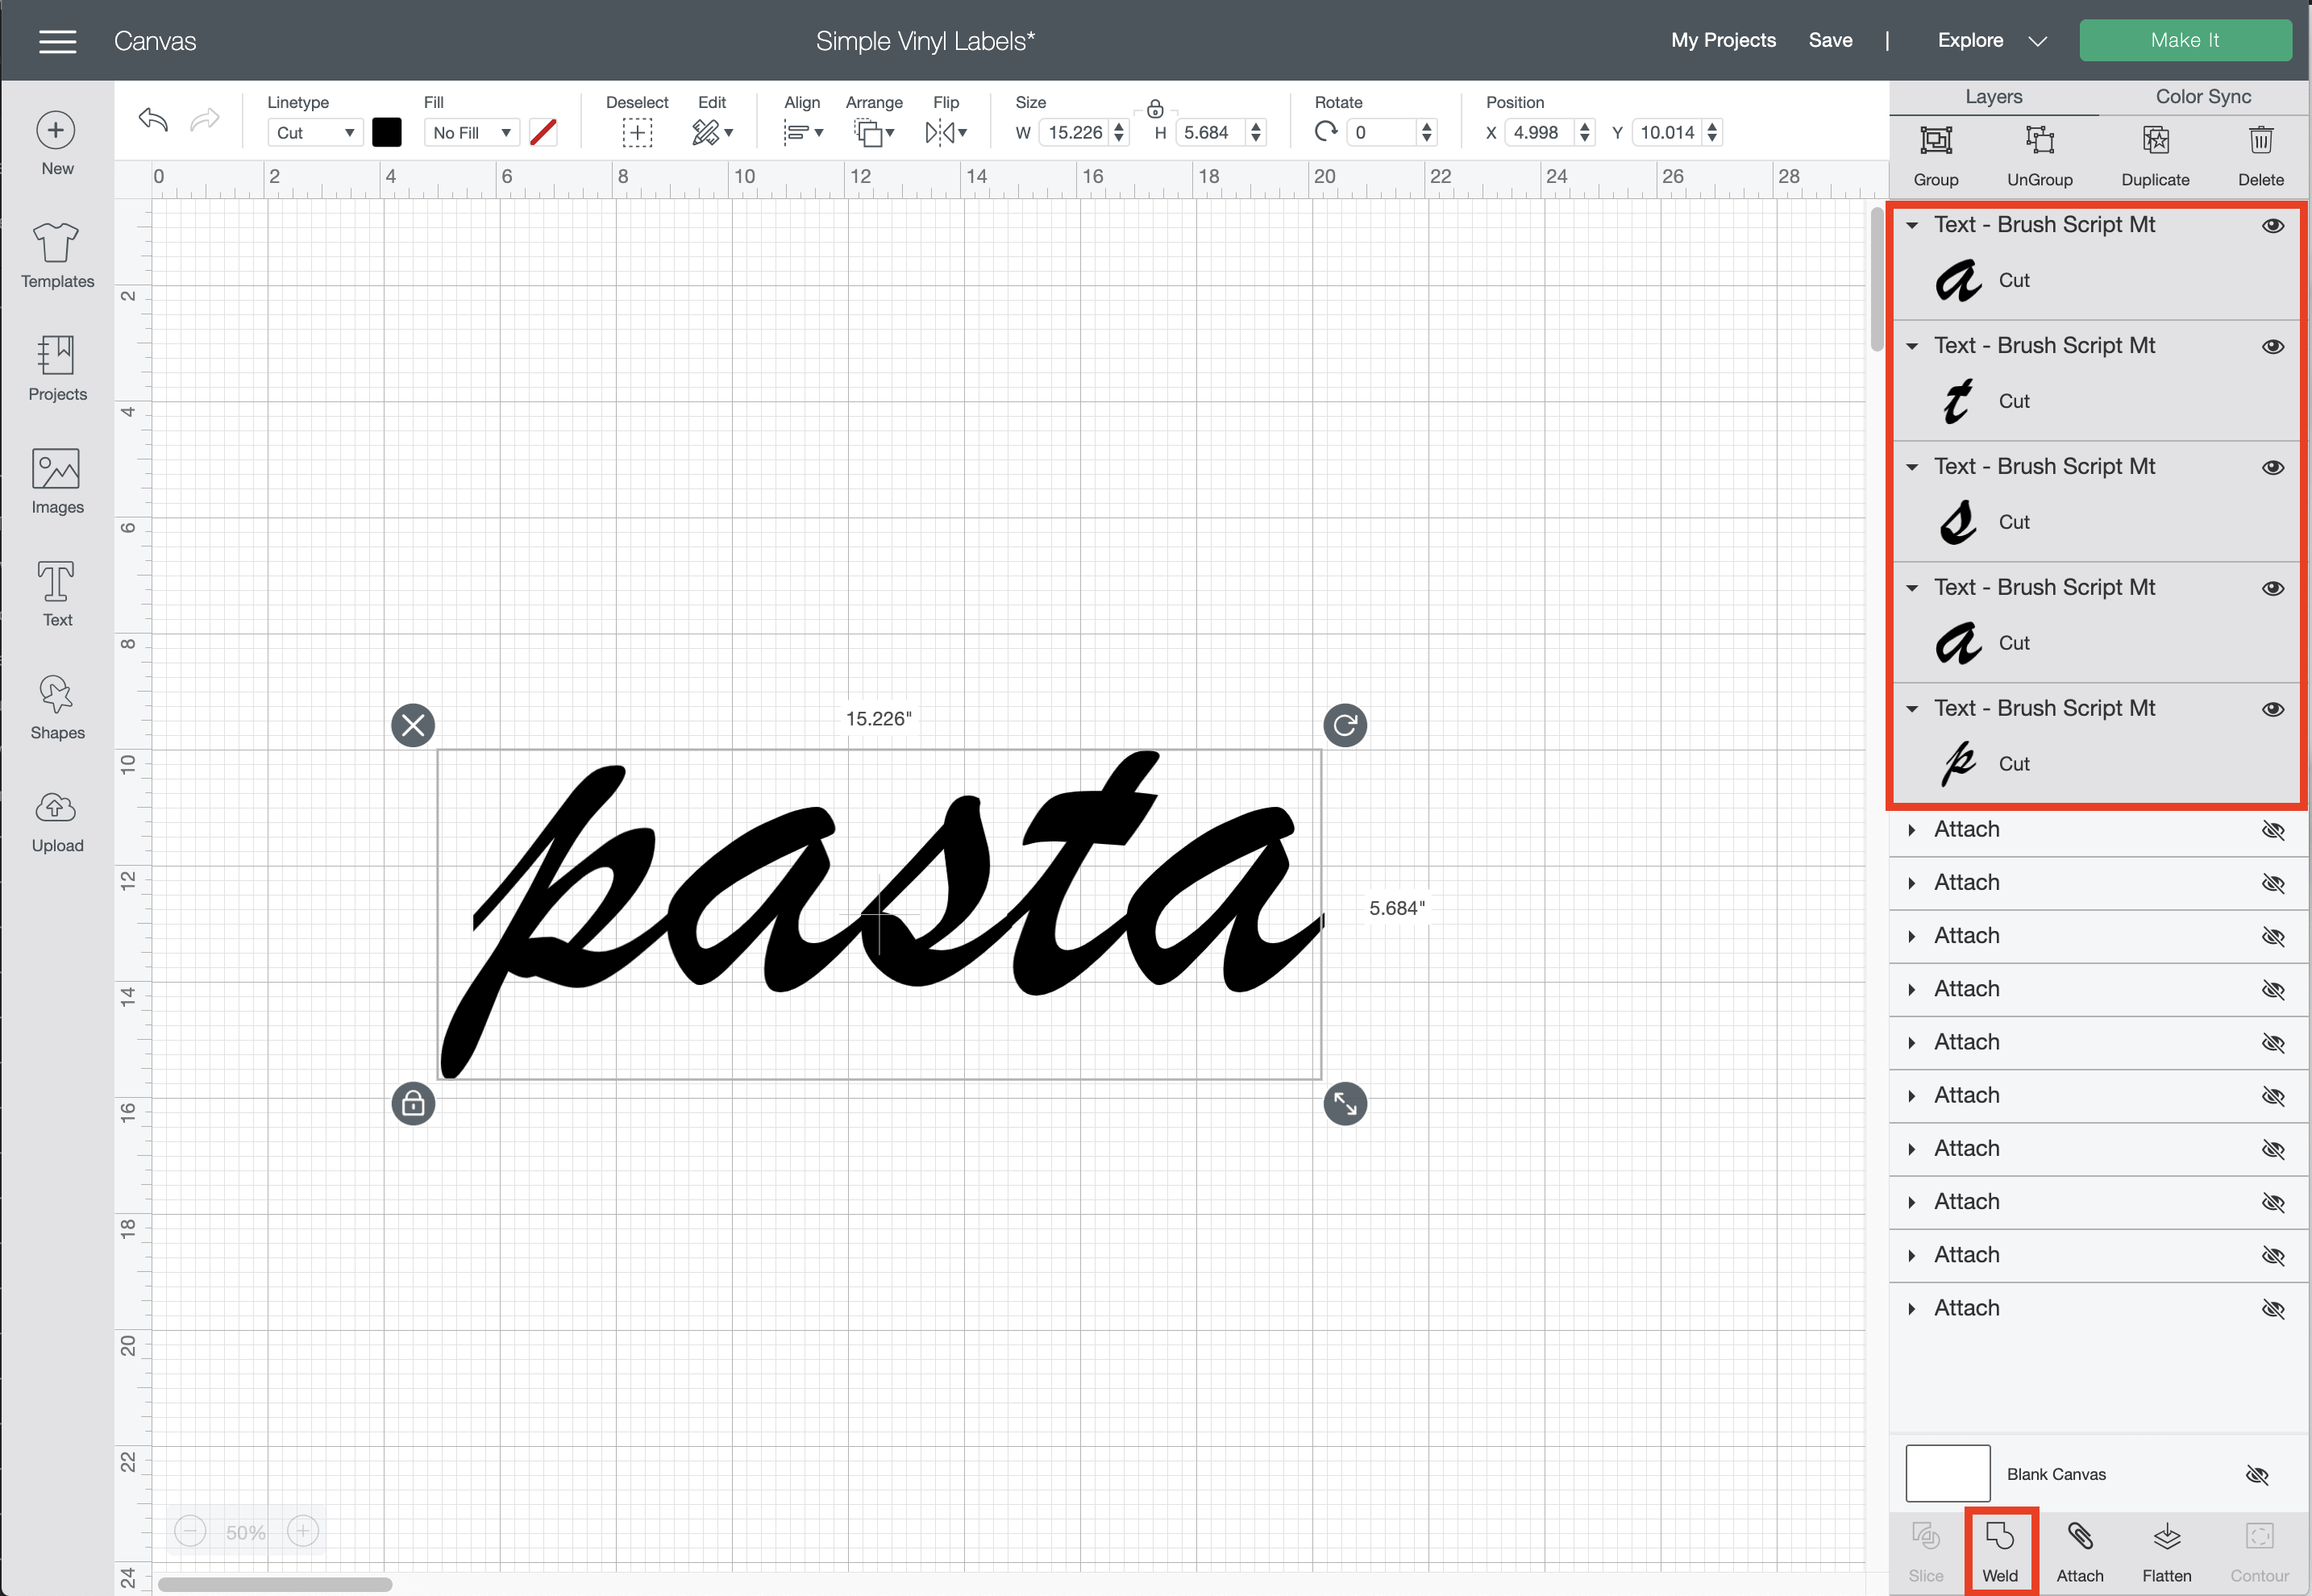
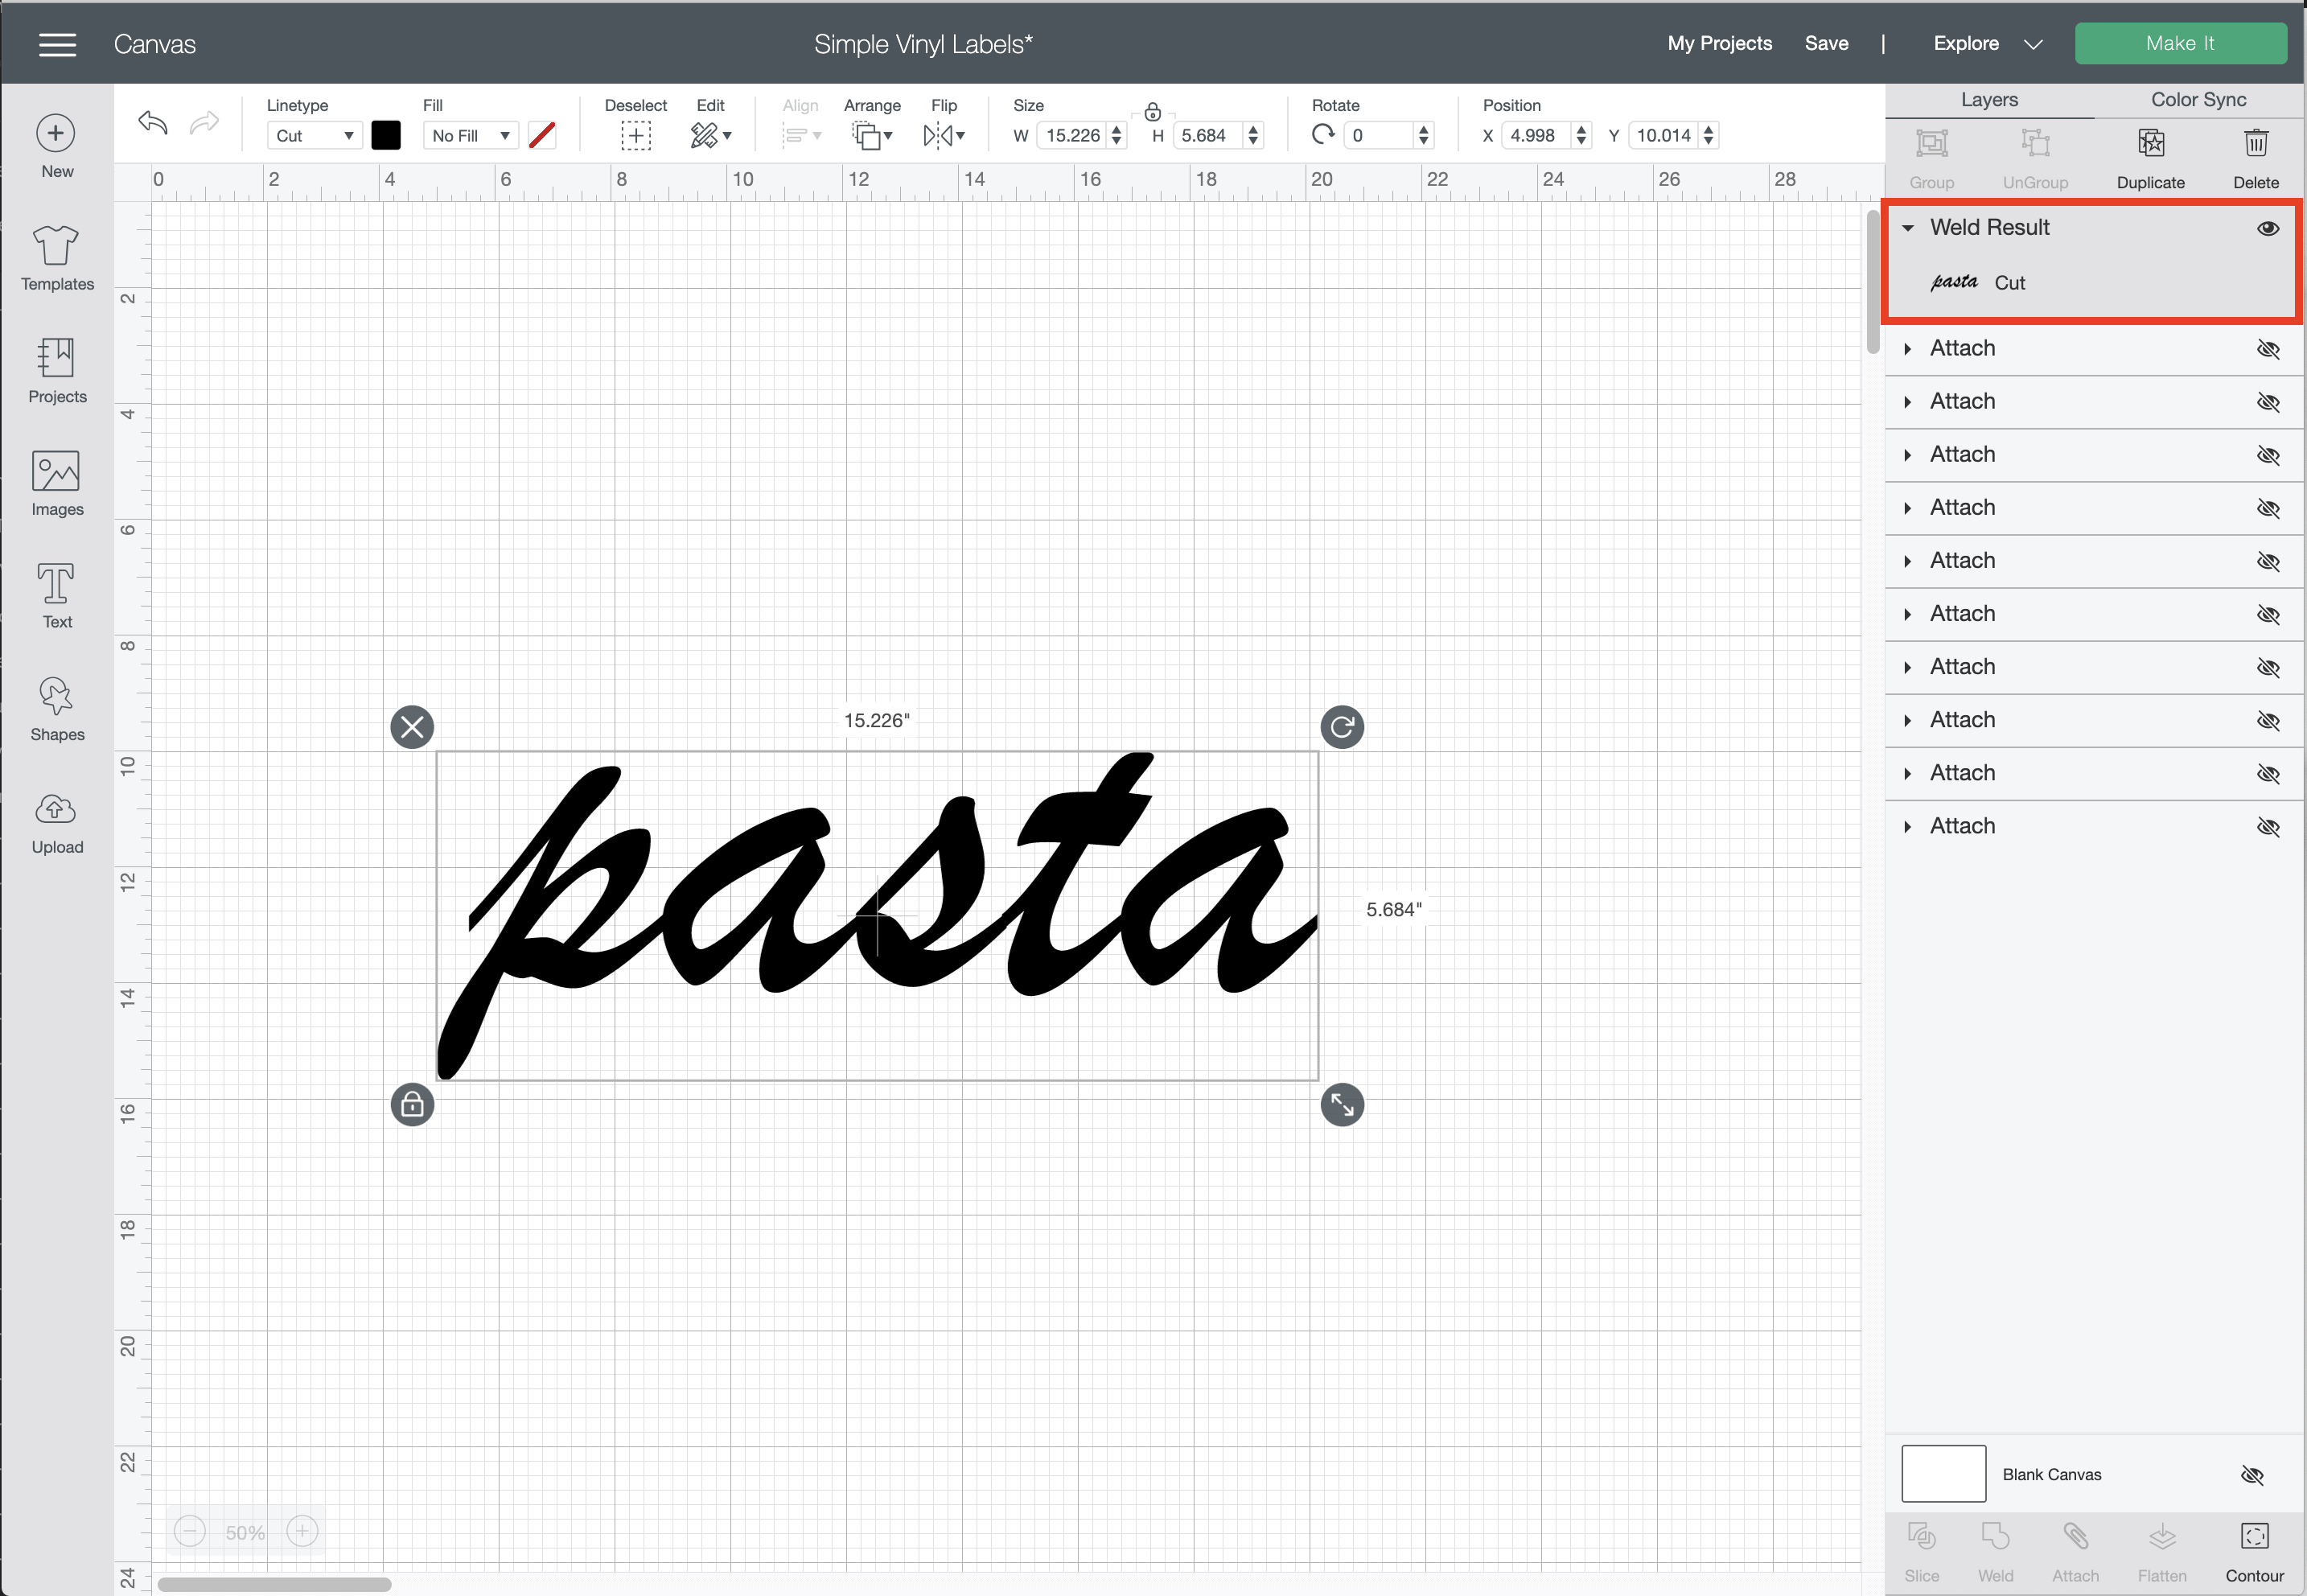
Now, notice that the label “pasta” is a single script word set to be “Cut.”
Once you size the word to fit your container, follow the exact same steps I outlined above for the picture labels:
- Cut your label out using the “Vinyl” setting on whatever Cricut machine you are using.
- Secure your cut to a sticky mat (if it isn’t already) and weed out the “negative” aspects of the design. Don’t forget the insides of letters!
- Place transfer tape over your entire word label and rub vigorously with the scraper.
- Peel up the transfer tape+label combo.
- Place the transfer tape+label combo down onto your clean container.
- Rub the transfer tape+label combo vigorously with the scraper.
- Remove the transfer tape at a full 180 degree angle to leave the vinyl label attached to the container.
Layered Labels
Finally, whether you are creating picture, word, or letter labels, let me show you the process for creating them in several colors/layers. Creating multi-layer labels is not necessarily more difficult, but it does require twice the cutting and twice the transferring. However, the added time/work can often result in really stunning labels!
In Cricut Design Space, pick an image or font for your labels that is (at least) two layers.
TIP! You can sort Cricut Design Space images by layer type in the left-hand filter menu within the Image Search.
Once you have your labels sized to your containers, send all your layers to be cut on your Cricut machine, again using the “Vinyl” materials setting.
Start by weeding both layers, just as I’ve shown in the two label projects above.
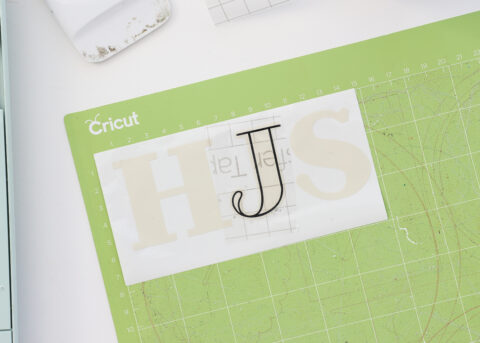
To layer your label, start by picking up the top layer of your design off the white paper backing with transfer tape. In my example, the black thinner letters are my top-most layer.

Place the top layer (that you just picked up) directly onto the next/bottom layer (which should still be attached to the white paper backing). Scrape vigorously atop the transfer tape+label combo to then lift both layers up away from the white paper backing (bottom center photo).
NOTE: If your label has more than two-colors, keep layering (from top-to-bottom) until all your layers are stacked into a single decal.
With your label now perfectly layered, carefully place it onto your clean container and rub it vigorously with the scraper. Remove the transfer tape, leaving your layered label in place!
Repeat the process with any remaining labels, always starting with the top layer and working down to the bottom before placing the entire set onto your container!
Other Tips & Tricks
Handy Replacements
You may find you don’t have all the necessary tools on-hand to complete your vinyl labels project. In a pinch, these tools can be successfully used as replacements:
- If you don’t have a weeding tool, a seam ripper works great!
- If you don’t have (or more likely, you ran out of) transfer tape, you can use clear contact paper or painters tape to pick up your label designs.
- If you simply cannot see your cut lines in order to weed out your images (like with glitter vinyl), tape your vinyl onto a sunny window or use the Cricut Bright Pad to make the lines more visible.
Transferring
Of all the SOS emails I get from readers working with vinyl, almost all of them revolve around the “picking up” process with transfer tape. Depending on what kind of vinyl you’re using (and how sticky your transfer tape is), it can sometimes be really difficult to get your vinyl to come off the white paper backing. While extra-vigorous rubbing with the scraper almost always works, I have two other tricks to share!
The first is to bend back your mat/white layer while you are peeling the transfer tape+label combo in the opposite direction. The opposing forces are sometimes enough to get the white paper backing to release the vinyl label.
For really stubborn vinyl, you can also use your weeding tool to gently and carefully lift just a single leading edge off the white paper backing. Usually, once a tiny bit of vinyl is released, the rest of your design will follow without issue. Be careful here though, because sometimes the weeding tool can leave an indent on the vinyl’s edge.
Making Your Labels “Movable”
The last thing I want to talk about is making your labels easily removable/movable. Why? Whether you use permanent or repositionable vinyl, peeling them off can often be a tedious task. And in the case of labels, if you need to rearrange or move items around, it can be frustrating to have to remove and re-make labels. I have a really easy solution for you!
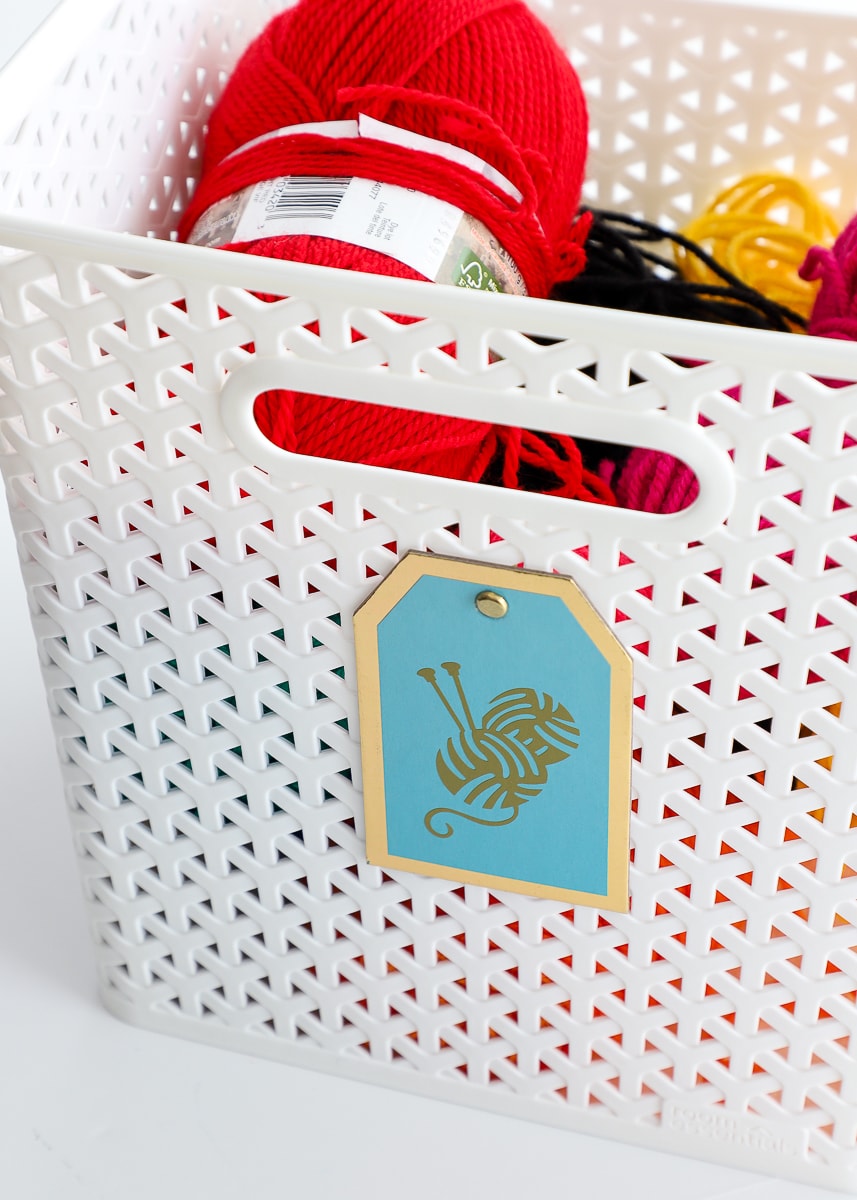
Instead of applying your labels directly to the surface of your container, place your labels on to some sort of removable tag or paper.
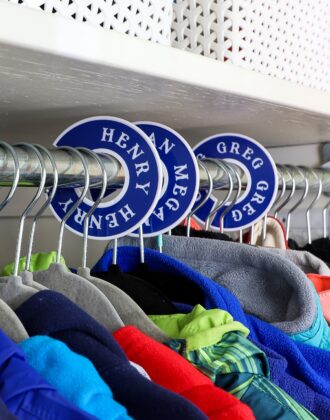
In the example below, I chose to adhere my labels to cardboard tags that can be easily swapped out if the contents of my basket changes.
And in the drawer dividers below, I placed the letters onto cuts of crystal clear sticker paper instead of the divider itself.
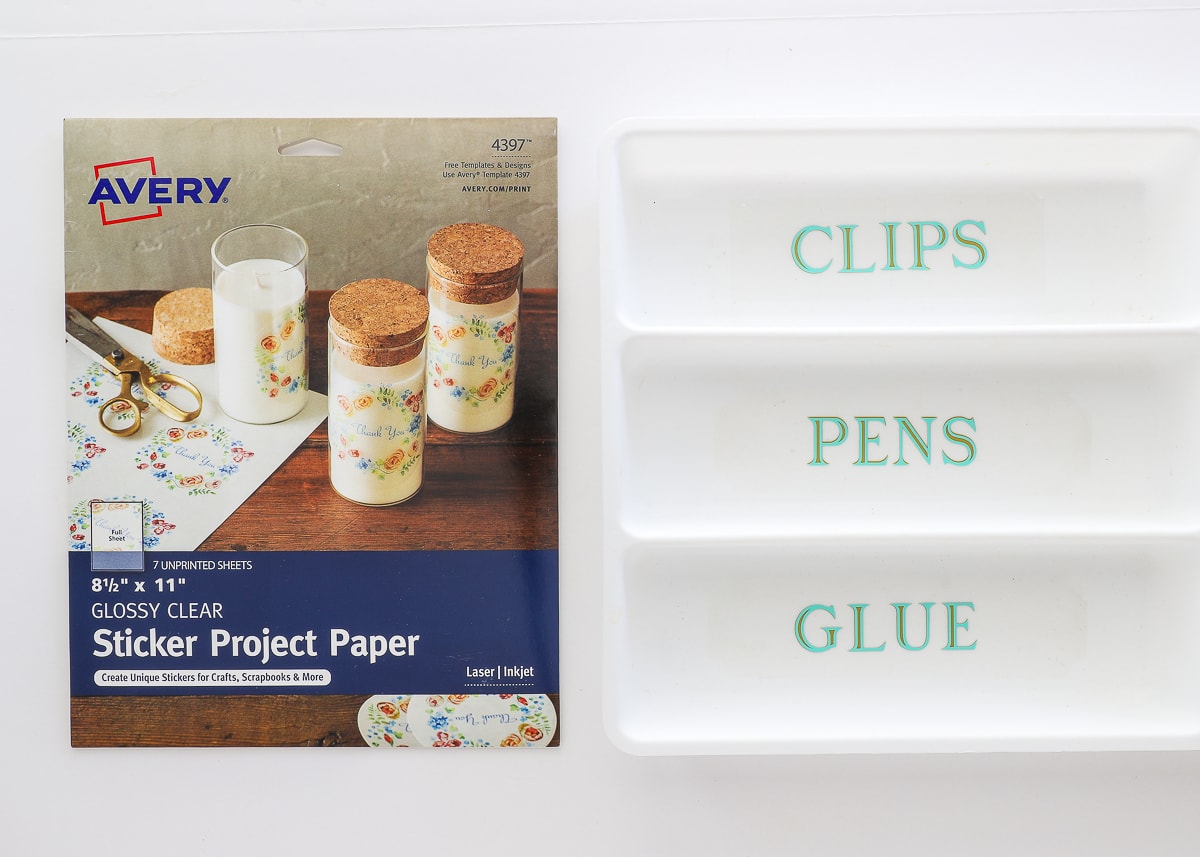
Not only does placing your letters onto clear sticker paper make them easy to remove when your organizing needs change; but if you don’t like their placement, it is much easier to adjust than having to re-cut and replace letters/words individually!

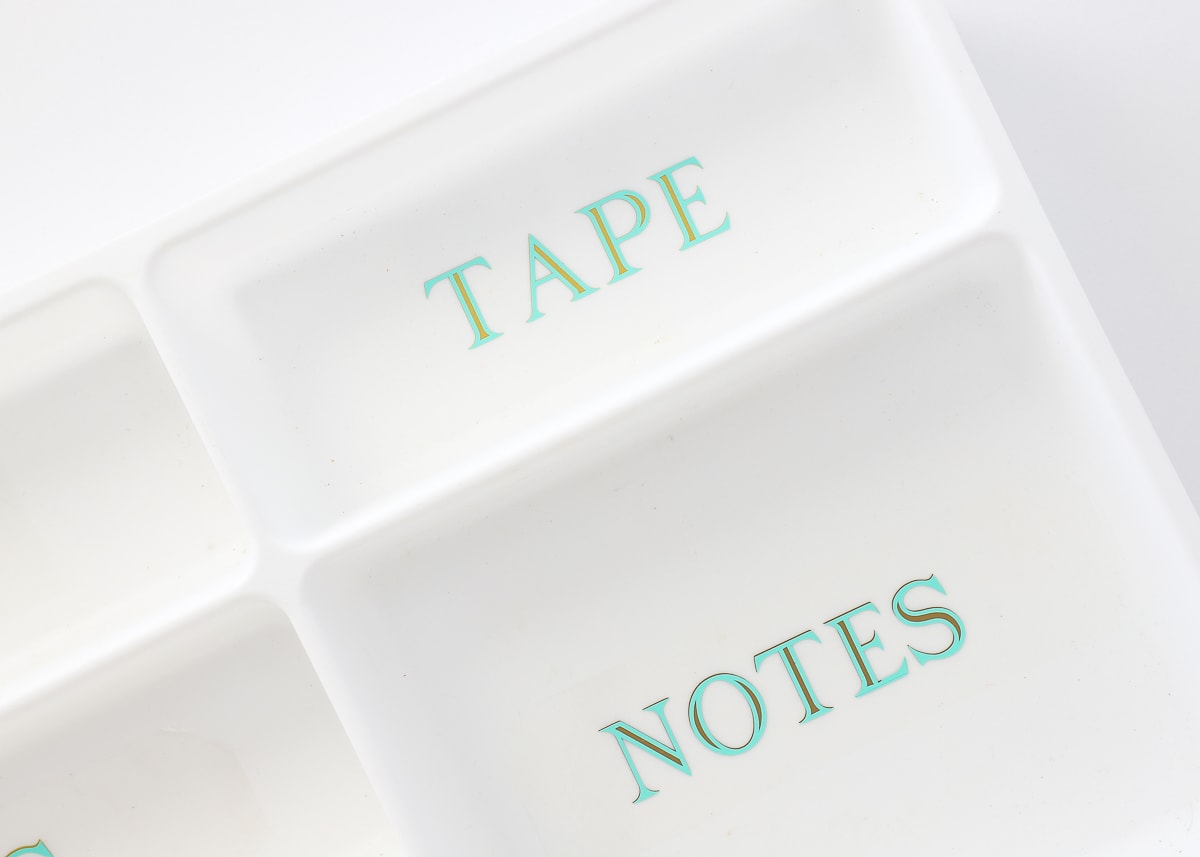
While the clear sticker paper won’t work in every single situation, I offer that it is hardly recognizable on opaque surfaces. Below, the “Tape” label is applied directly on the divider itself, and the “Notes” label is on the clear sticker paper.
More Great Cricut Labeling Projects
Ready to label even more with your Cricut machine? Check out these other awesome projects:- Make Vinyl Labels with a Cricut
- Make Labels Using Cricut Pens
- Make Labels with Cricut Print Then Cut
- Make Waterproof Labels with a Cricut
- How to Label Fabric with Iron-On Vinyl
- Iron-On Clothing Labels with a Cricut
- Toy Bin Labels with a Cricut
- Pantry Labels with a Cricut
- Dresser Drawer Labels with a Cricut
- Luggage Tags with a Cricut
- Return Address Labels with a Cricut
- Fast Labels with the Cricut Joy App
- Make Easy Round Closet Dividers with Cricut Vinyl
- Label Drawstring Backpacks with Cricut Iron-On
- How to Make Vinyl+Wood Labels
Okay! I have covered pretty much everything you need to know about making vinyl labels with a Cricut machine! If anything remains unclear, don’t hesitate to leave a comment and I’ll get right back to you! Happy labeling, my friends!

Megan


5 Comments on “How to Make Vinyl Labels with a Cricut | A Comprehensive Guide”
Another excellent Cricut tutorial. Thanks so much.
Thanks for the tutorial, you’re definitely inspiring me!
You covered every aspect of labels.. with some extras throw in. I can’t thank you enough!!
You are most welcome! I am so glad you found this post helpful!
Meghan I love your site. Thanks so much
Can u get around having to pay for cricket design space?