How to Make (Long-Lasting) Waterproof Stickers with a Cricut
We’ve spent the last few weeks getting “back to school” ready for the boys, including lots of labels for all their supplies. One thing we are cranking out in overtime is waterproof stickers for all their water bottles, lunchboxes, sports gear, and more. Thankfully, I’ve done a lot of experimenting over the years with various processes and waterproof papers, so making custom waterproof stickers with a Cricut takes us mere minutes! Whether you too are labeling aaaaall the school things or just want a cute decal for your coffee mug or laptop, this project is a fun, quick, and easy one!
Why Make Your Own Waterproof Stickers?
I wish I could say I was organized enough to pre-order named waterproof labels for all our kids’ items in time for the new school year. Sure enough, September crept up on me (like it does every year!) so DIYing my own stickers is usually my MO.
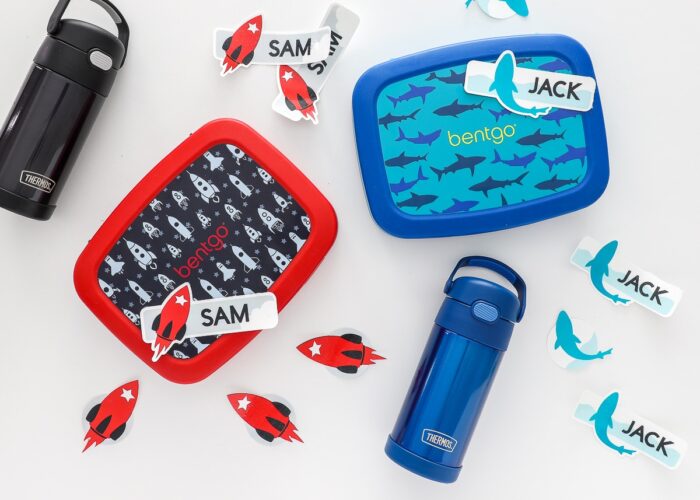
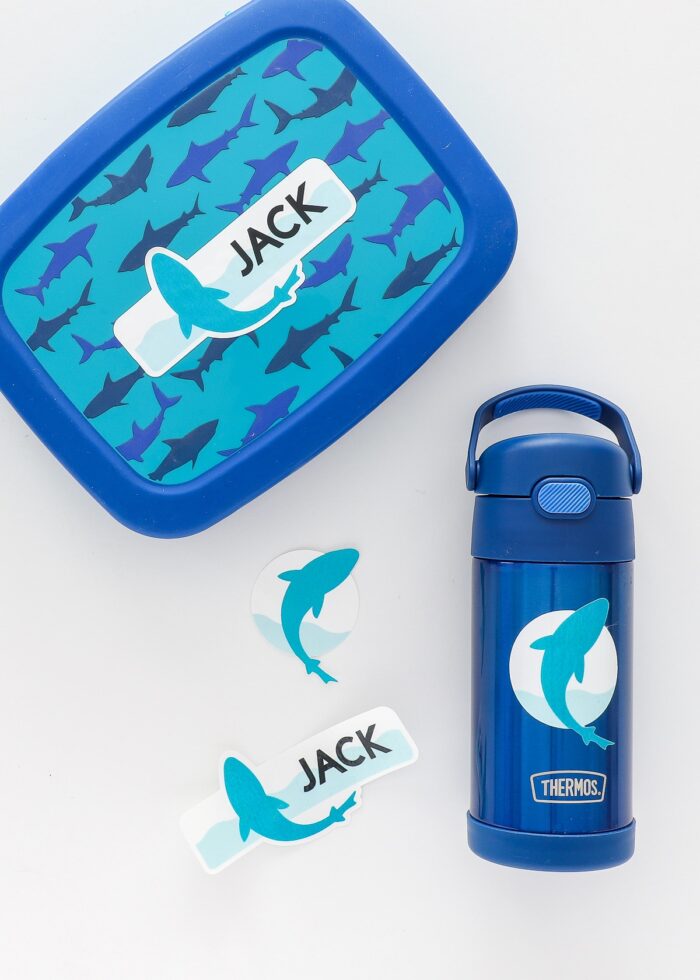
Although making our own custom waterproof stickers is a smidge more work than ordering them, this route does provide me the ability to customize the size, colors, and design all to my exact preferences. So, of course, I couldn’t resist designing stickers that perfectly coordinated with the boys’ lunchboxes and water bottles!
If you search for tutorials on how to make waterproof stickers with a Cricut, you’ll come across lots of different techniques. From various papers, printers, and sealing options, you can quickly get overwhelmed.
But over the last year, I’ve experimented with lots of different supplies and lots of different techniques and settled on a process that isn’t just easy but also creates waterproof decals that last (yes, even through the school year and lots of runs through the dishwasher).
So forget the sprays and fancy products. Here is exactly what you need to make waterproof stickers with a Cricut and how to do it!
Materials Needed
- Cricut Machine – because this tutorial relies on the Print Then Cut feature, you will need either a Cricut Explore or Cricut Maker model machine.
- Premium Fine Point Blade – the one that comes in your machine
- StandardGrip Mat
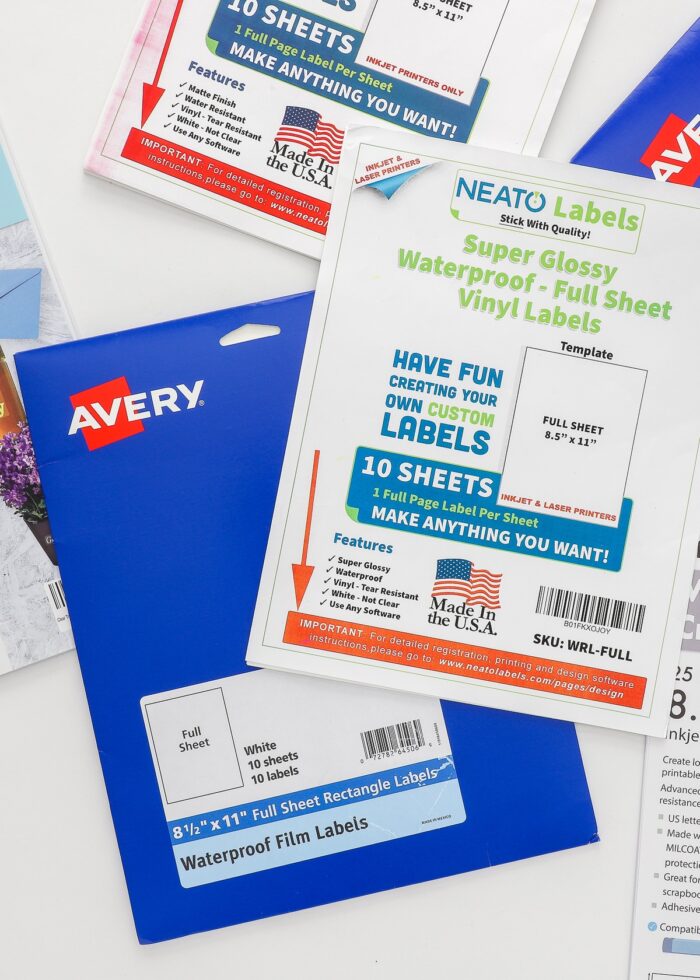
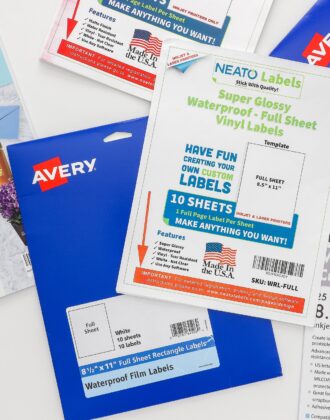
- Waterproof Sticker Paper – I’ve done a lot of testing of waterproof papers, and below are my favorites:
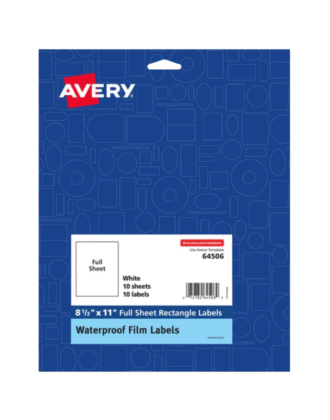
- For Laser Printers: Avery Waterproof Film (more below)
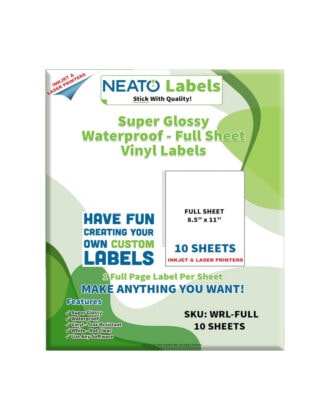
- For Inkjet Printers: Neato Printable Vinyl (more below)
- Avery Self-Laminating Sheets
- Scraper
- Home Printer
What Waterproof Sticker Paper To Use
When making waterproof stickers with a Cricut, it’s important to know that not every sticker paper is created equal. You must use a waterproof printable vinyl in order for them to be truly waterproof. And even then, not all papers are created equal. I wrote an entire post about the best waterproof papers for stickers and decals, but here’s the quick version:
- The Avery Waterproof Film is my very very very favorite waterproof sticker paper that will produce long-lasting results. But it’s unique to laser printers. So if you don’t have one, ask around to friends or neighbors who might, because this paper is worth using.
- If you can’t find a laser printer, the Neato paper is a very close second. I just found it didn’t have the same adhesion as the Avery paper (but it never bled or faded!)
Is Lamination Really Necessary?
As you will soon see, one of the main steps in making waterproof stickers with a Cricut is to laminate them with Avery Self-Laminating Sheets. But if the sticker paper itself is waterproof, you might be wondering if this step is really necessary?
Yes, it is.
As I explain thoroughly in this post, both the Avery paper and the Neato paper are waterproof…as in, the ink/pigment will not bleed when it gets wet.
But these papers are not scratch-proof. Which means that over time, the color can scratch off your stickers. The laminated layer, however, will protect your stickers designs from being scratched off over time.
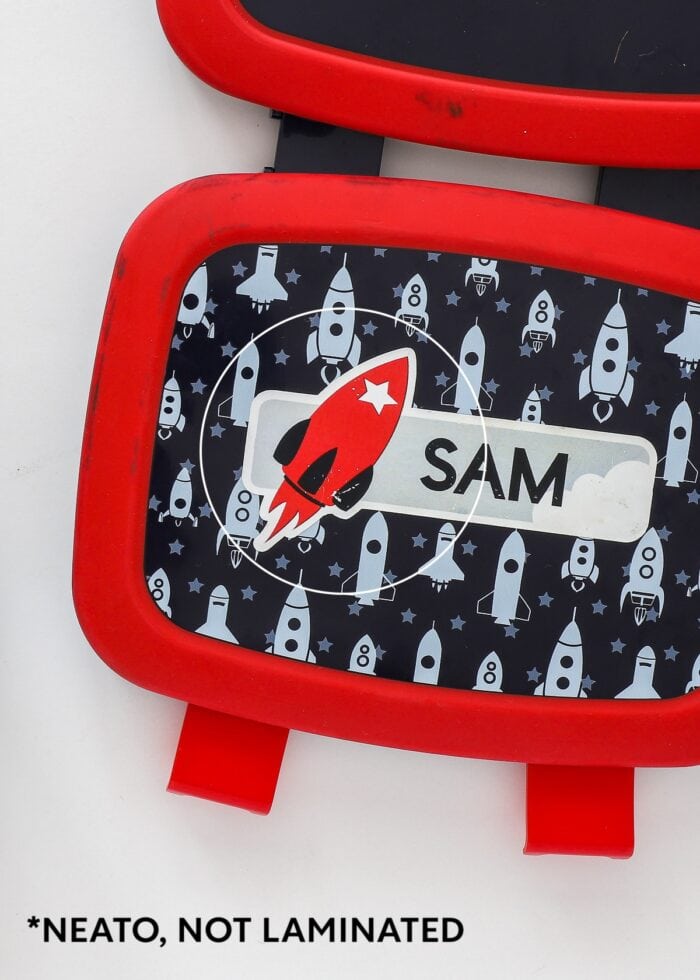
Let me show you two examples.
Both stickers below were made using the same waterproof sticker paper. But the sticker on the left was not laminated, while the sticker on the right was. Notice that the left sticker already has noticeable scratches in the design, while the right-side sticker is still perfect. This picture was snapped about 1 month after the stickers were made.
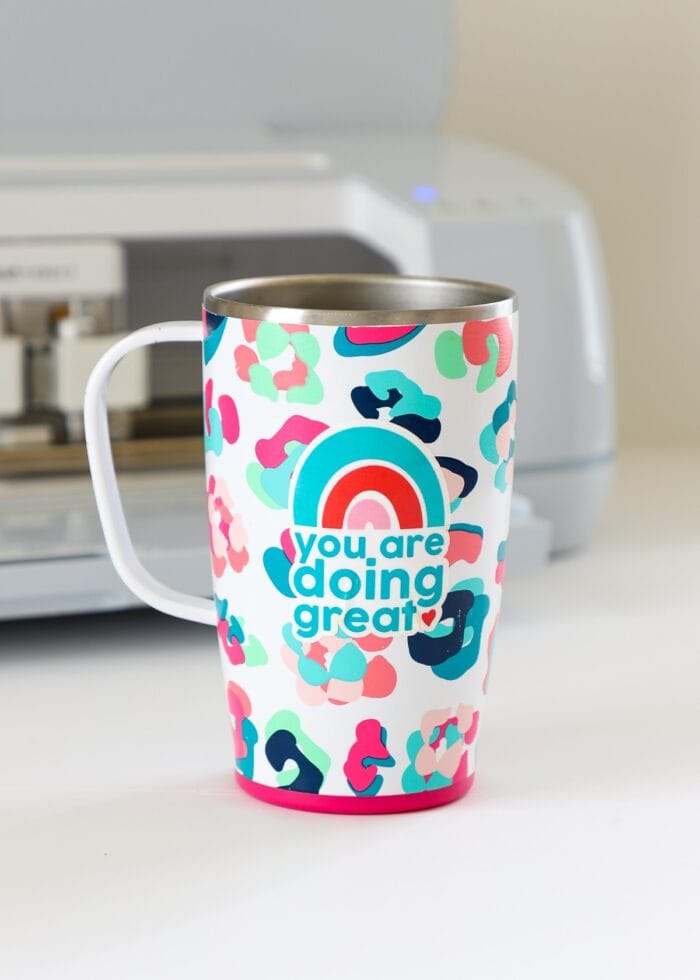
Below is my favorite coffee mug that I use every single day…and the experiment was the same. Both stickers were made with the Avery Waterproof Film. The “Work Hard” sticker was not laminated, while the “You Are Doing Great” sticker was.
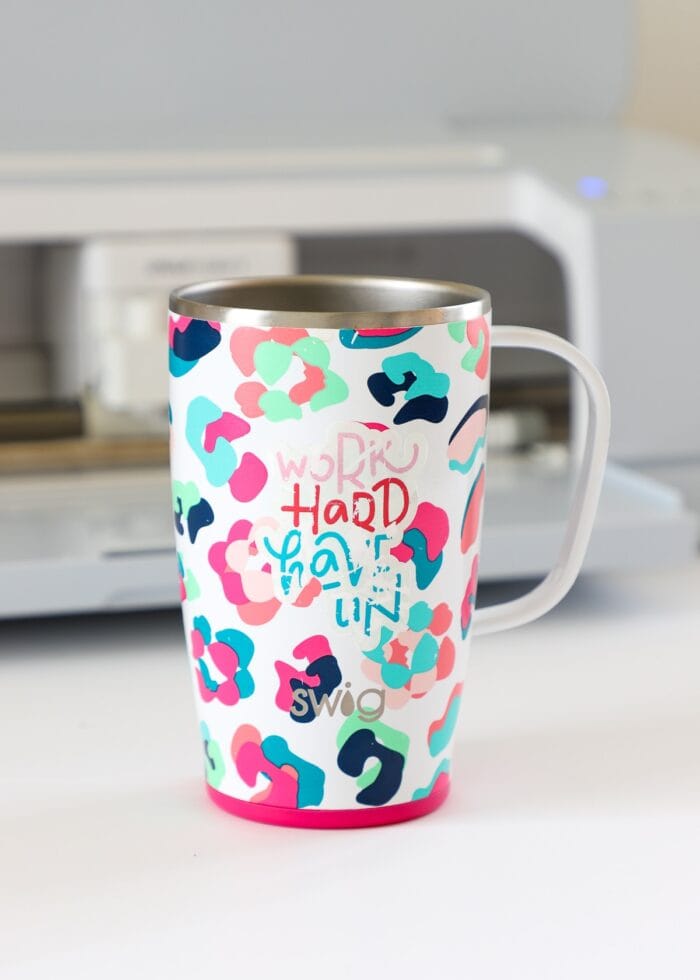
I have put this mug in the dishwasher, practically every day, for the last year. While the color hasn’t faded or bled, the non-laminated sticker is essentially scraped away while the laminated sticker is still practically perfect.
The bottom line? Waterproof sticker paper makes your stickers waterproof, but the laminating layer makes them scratch-proof. Both are necessary for long-lasting, durable stickers. While you may be tempted to skip the laminating step, don’t. It’s not hard, the sheets are inexpensive, and it’s 100% worth it when making stickers that last.
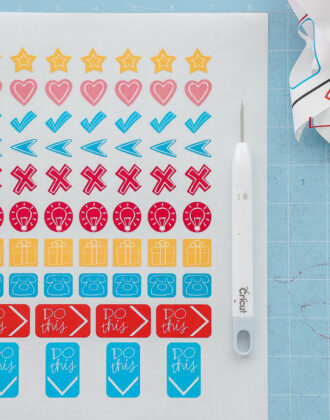
Step 1: Design Your Stickers in Cricut Design Space
Like every project, start by creating your stickers in Cricut Design Space. Since you will be printing your designs (rather than cutting/layering them together), the sky is really the limit here. As such, you can choose as detailed and intricate an image as you like.
You can pick ready-to-print images straight from the Image Library, upload one you purchase elsewhere, or create something totally unique by combining shapes, images, and text (which is what I did for the boys’ labels).
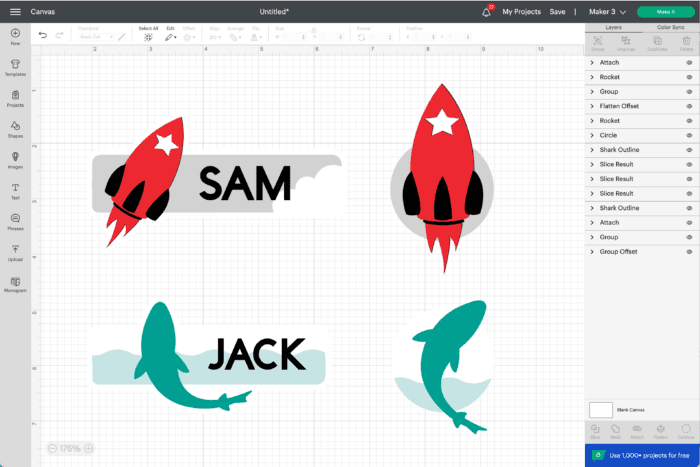
Adding an Offset Layer
Although not necessary, I do highly recommend adding an offset layer to your sticker designs. An offset is essentially the white outline you see around most of my stickers (and on commercially-made versions too). The thickness and color of this outline is completely customizable. It doesn’t just provide a pretty visual border, the offset also serves to smooth out any jagged edges in your design that can easily peel up over time.
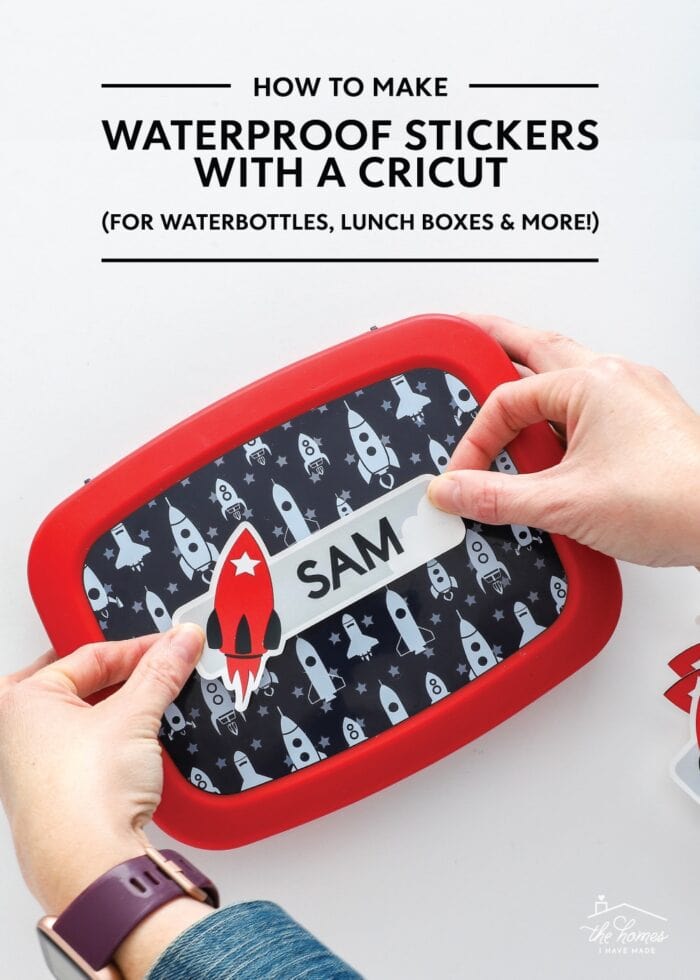
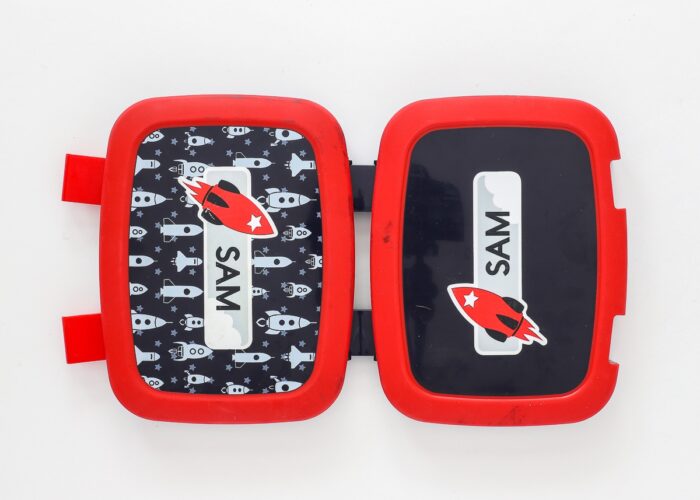
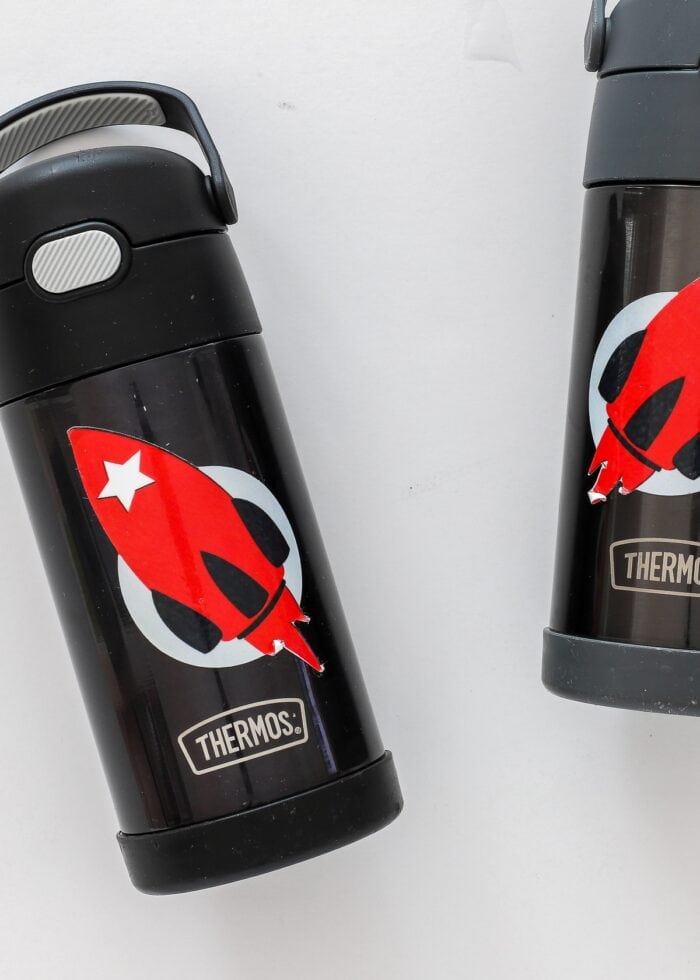
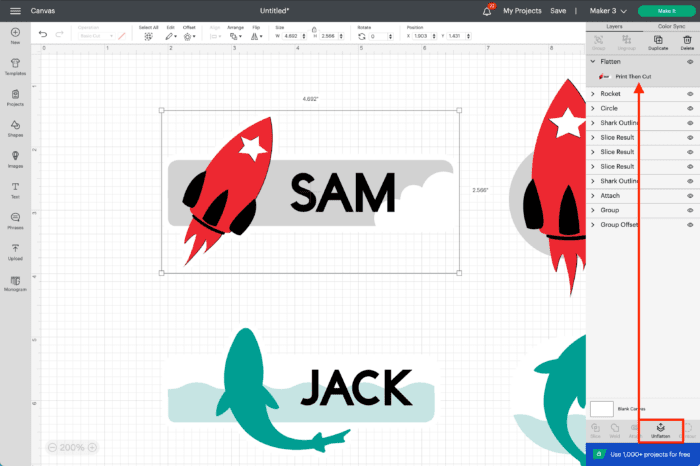
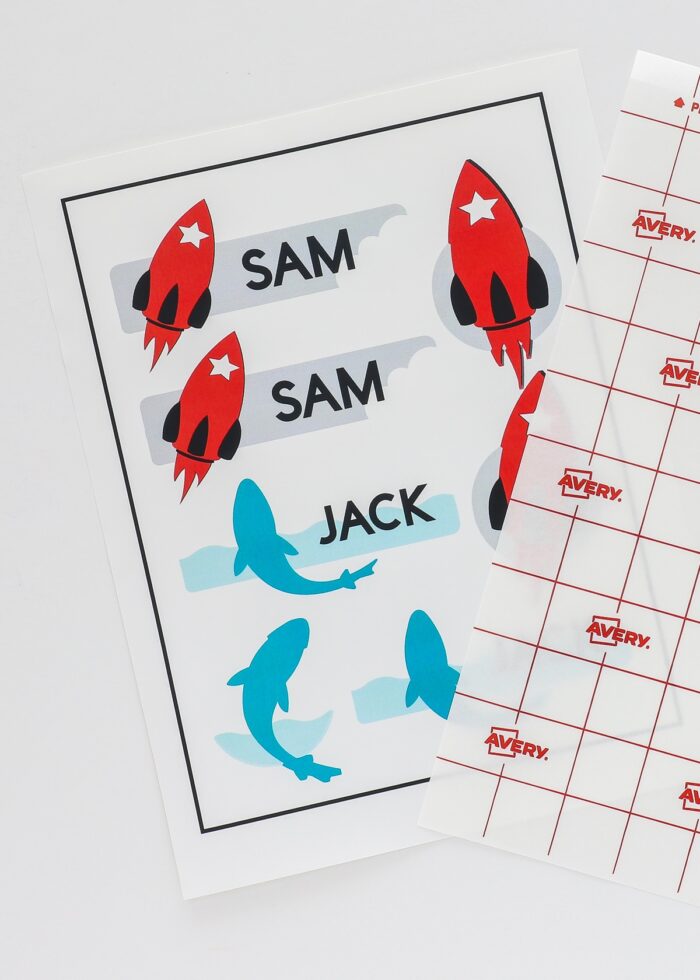
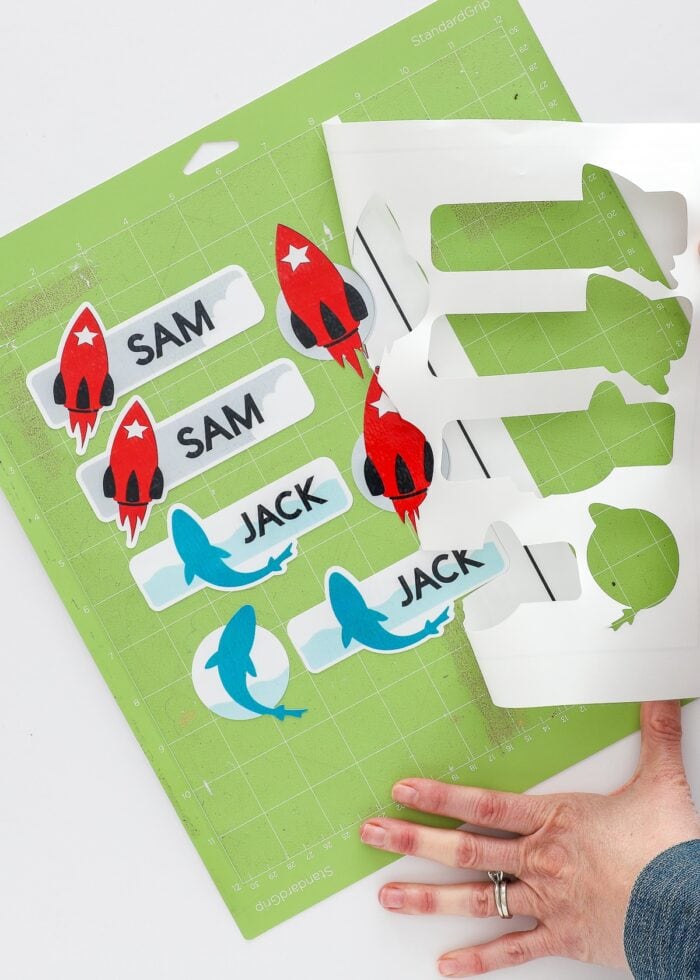
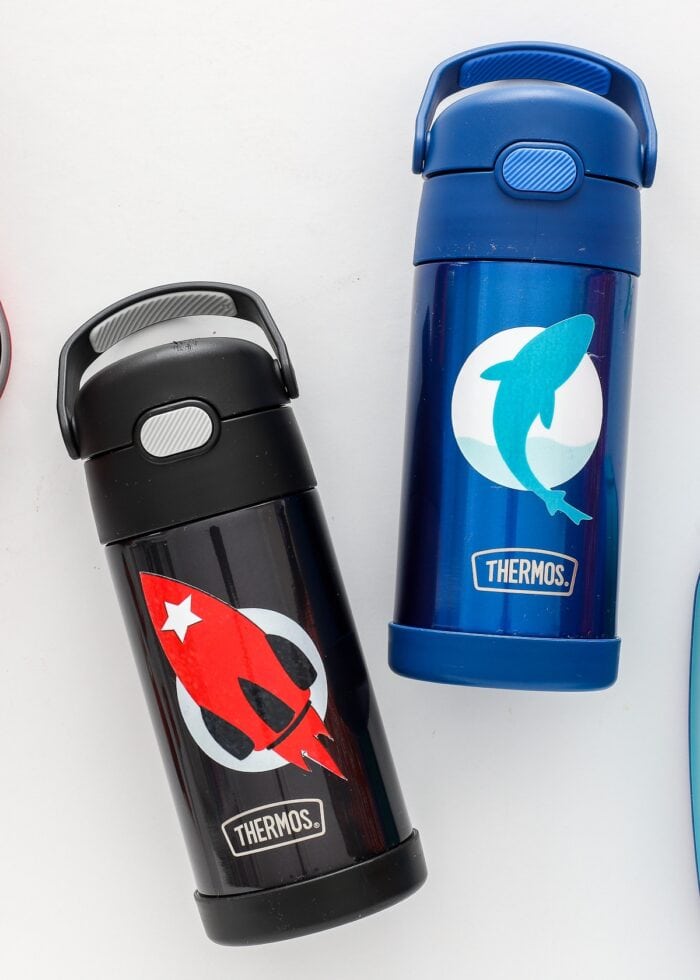
In the image below, notice how there IS a white offset line around the long “Sam” labels but NOT around the rocket water bottle decals.
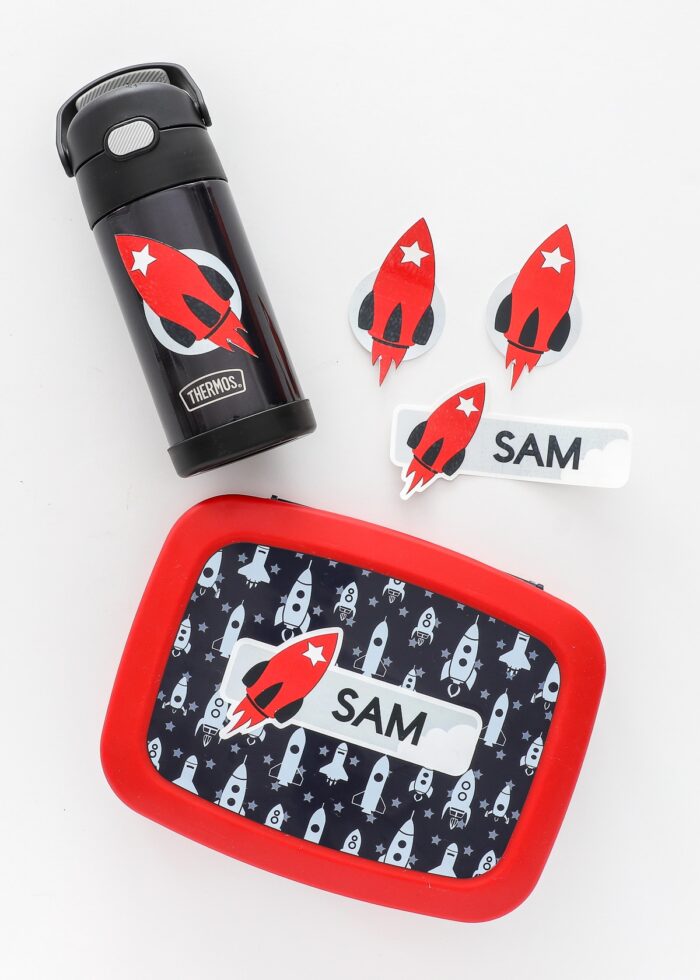
Over time, the rocket decals did not scratch or fade, but the tiny points did quickly peel up (below). On the other hand, the longer decals (with the offset layer around the same rocket flames) never peeled up. Essentially, the offset layer helps thin details become a little more “robust,” helping them stay firmly stuck to surfaces at all times.
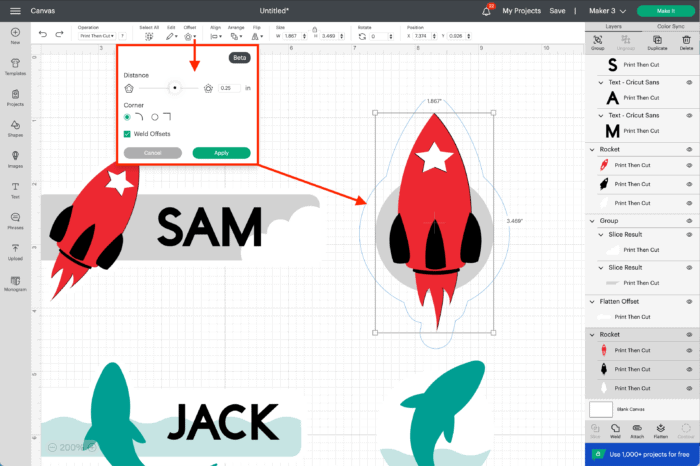
To add an offset layer around any image (or set of images):
- Select the whole design and open the Offset Tool in the upper toolbar.
- Slide the dot up and down the tool to increase or decrease the width of the outline.
- You can also choose if you want the corners to be crisp or rounded.
- Once you are satisfied with the outline’s appearance, click “Apply” to create the new layer.
- Once the outline layer populates on your canvas, you can then change its color to your preference (I made all of mine white).
If you need more help understanding the Offset Tool, see my full tutorial here: How to Use the Cricut Offset Tool
Want to save this post?
Flattening Your Design
Once you have your sticker design(s) completely ready to go, you next must make them “printable” via the Flatten Tool.
- Select each sticker design (including the offset layer).
- Click the “Flatten” button in the bottom right-hand toolbar.
- This will take all the various elements of your sticker design and “flatten” them into a single printable image. (Notice, below, how the image changes to a Print Then Cut designation.)
At any time, you can “unflatten” a sticker design if it needs to be adjusted. Just be sure to re-flatten it before sending the stickers to your printer/Cricut machine.
If you are new to the Print Then Cut/Flatten process, see my full tutorial here: How to Use the Flatten Tool for Cricut Print Then Cut
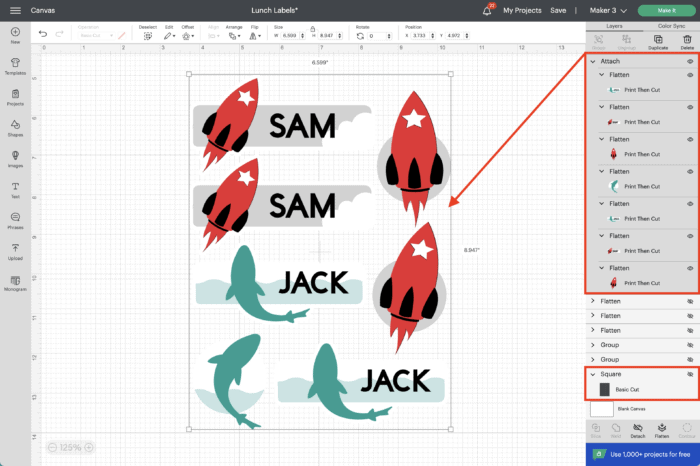
Making a Full Page of Stickers
Good vinyl sticker paper is not inexpensive; and once you run a sheet through your printer and cutting machine, it’s very difficult to use up leftover areas. So…if you’re making stickers…I recommend making a full sheet! After all, having extra stickers on hand is never a bad thing, right?!?
The largest area you can Print Then Cut is 6.75 x 9.25.” So to lay out your stickers in order to take up every available inch:
- Place a rectangle on your canvas and size it to 6.75 x 9.25.”
- Send the rectangle “To the Back” using the Arrange tool (top toolbar).
- Duplicate your stickers as many times as you can. Then nudge them close together to fill up the rectangle space (without any overlapping).
- Once you are satisfied with your layout, hide the rectangle by toggling off the Eye Symbol in the right-hand Layers Panel.
- Then select all your stickers at once and click “Attach.” Now when you send your stickers to print, the exact layout with be maintained!

Step 2: Print the Stickers Sheet
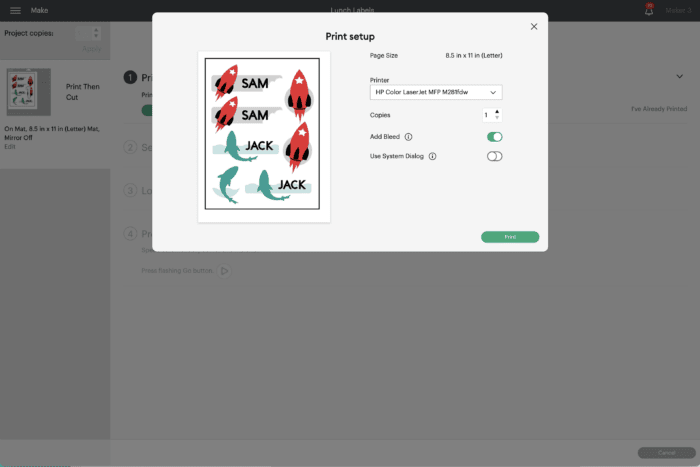
With your stickers ready to go, click the green “Make It” button to send them to your Cricut machine. Because your sticker designs should all be set to Print Then Cut, you will first be prompted to print your designs with your home printer.
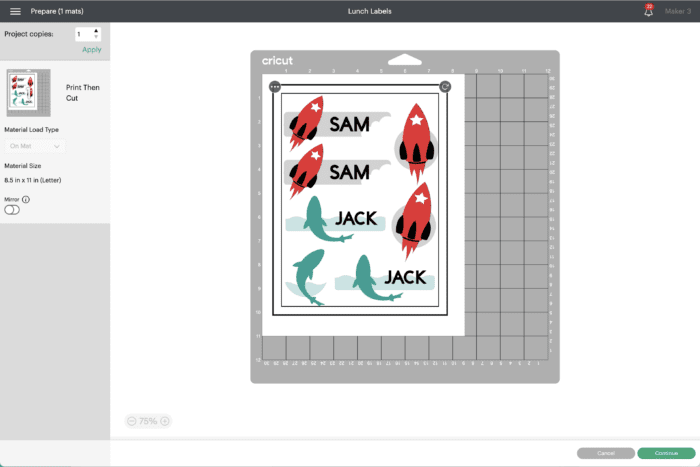
Load your preferred waterproof sticker paper into your printer and hit “Print” within Cricut Design Space.
Step 3: Laminate the Sticker Sheet
For most Print Then Cut projects, you immediately load your printed paper onto a Cricut mat; but for waterproof stickers, there is one important step to do first: lamination!
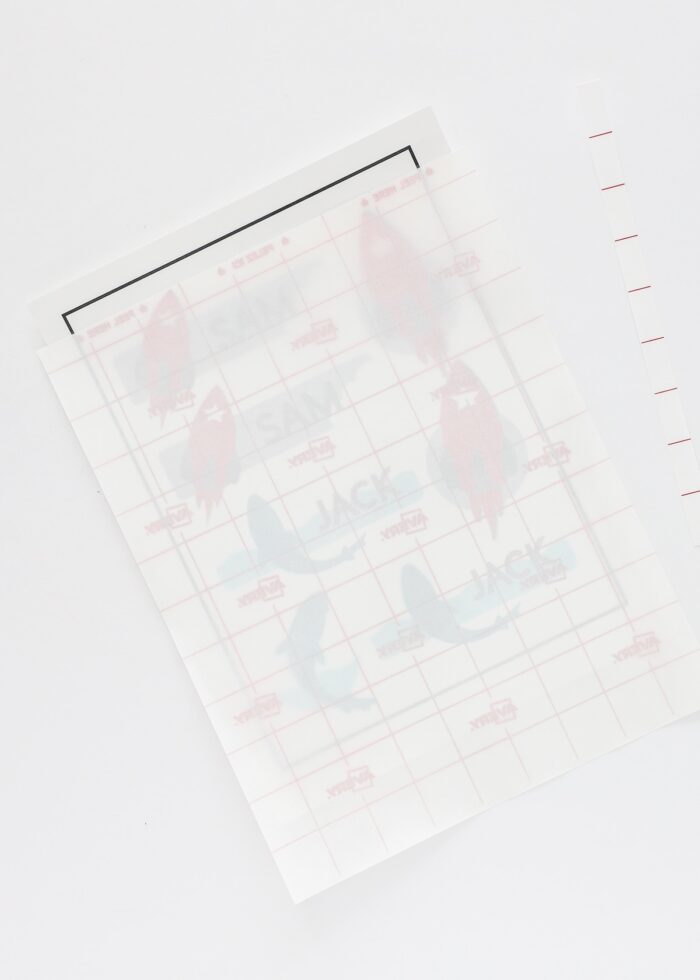
- Remove just the top strip from the Avery Self-Laminating Sheet (it will be pre-cut for you to pull away).
- Place the exposed sticky strip, sticky-side-down, onto the top of your printed stickers (shown above).
- Once in place, carefully remove the rest of the white protective paper to smooth the clear lamination layer onto the printed stickers.
- Use a scraper to really adhere the lamination layer to the sticker paper and remove excess bubbles.
Troubleshooting the Laminating Step
It’s important to know that you cannot peel up and re-place the laminating layer once it’s down. If you end up with too many bubbles or creases, you have three options:
- Use a scraper to smooth out the bubbles/wrinkles as best you can. You likely wont be able to get them all out but maybe just enough to make the stickers usuable.
- Proceed with cutting out the stickers with the page is as. Once fully cut out, you might have better luck pressing out excess air/wrinkles.
- If the wrinkles are really bad, especially atop the black registration box, you may need to discard the sticker paper+laminating sheet and start fresh. Significant wrinkles can prevent your machine from “reading” the design in order to cut it out.
Because this step can go a little wonky (the laminating page has a lot of static cling), I recommend practicing with the laminating sheet a few times (before you place it on your good sticker page), just to get the hang of it!
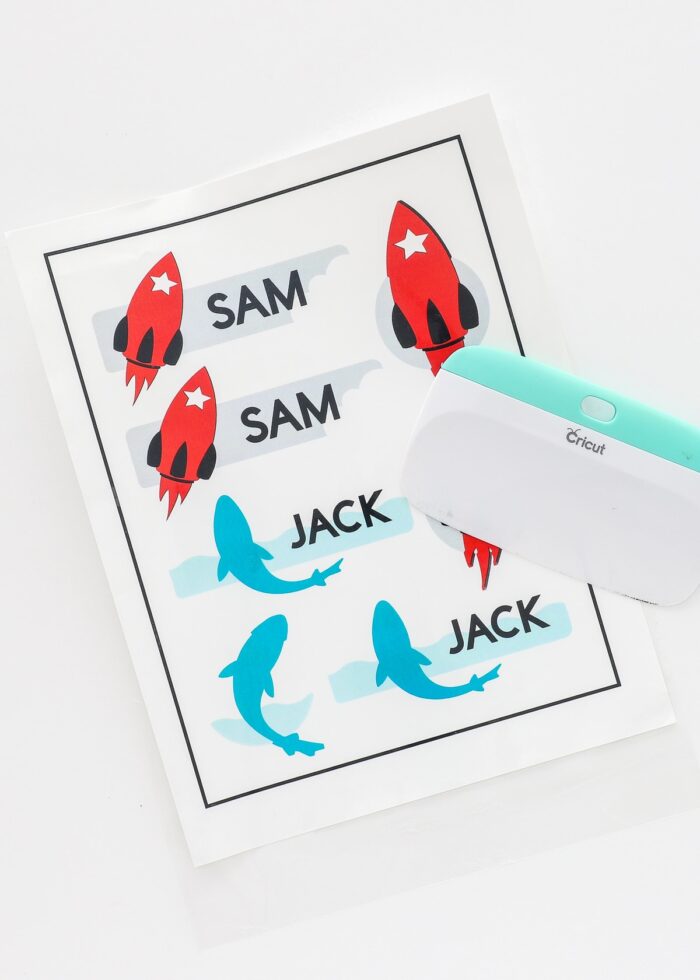
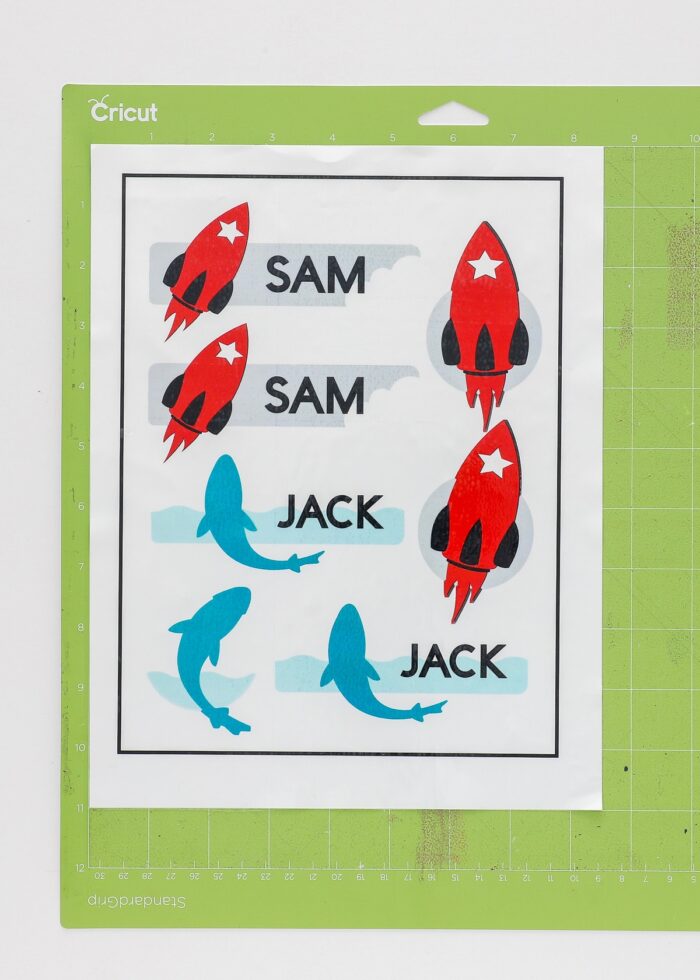
Step 4: Cut Out the Stickers with Cricut Machine
With the clear laminating sheet fully (and smoothly) adhered to your waterproof sticker paper, now you can load the page onto a green StandardGrip mat and proceed with cutting out the stickers, following the instructions presented in Cricut Design Space.
If you’ve never done a Print Then Cut project, you can learn more about how it works and what to expect here: How to Use Print Then Cut on a Cricut
What Material Setting Should You Use for Waterproof Stickers?
When making stickers with a Cricut, you typically select the exact material you are loading into your machine. So in the case of stickers, you would usually pick “Sticker Paper” or “Printable Vinyl,” etc. However, these settings will give you a “kiss cut,” which means that only the top layer of sticker paper is cut and not the white paper liner underneath.
While this is great for regular stickers (like for a planner or your kid’s craft projects), it isn’t quite ideal for waterproof stickers for two reasons:
- Remember…we added a laminated layer on top of the sticker paper. As such, the usual “Sticker Paper” settings will not be enough to cut through both the laminated sheet and the sticker layer underneath.
- Think about commercially-made stickers or decals you buy from Etsy or your favorite local shops. Usually, they aren’t on a big sticker sheet but are instead individual cut outs. While you don’t have to make your stickers this way, cutting all the way through both layers will allow you to make a big stack of stickers and only peel-and-stick them whenever you need them!
You may need to experiment with your own settings, but I chose to use the “Medium Cardstock” setting for my stickers. This was strong enough to fully cut through all three layers (the laminating sheet, the white sticker paper, and the white paper backing) clean through to produce individual die-cut stickers that you can remove from the mat using either your fingers or a spatula.
Step 5: Apply the Waterproof Stickers
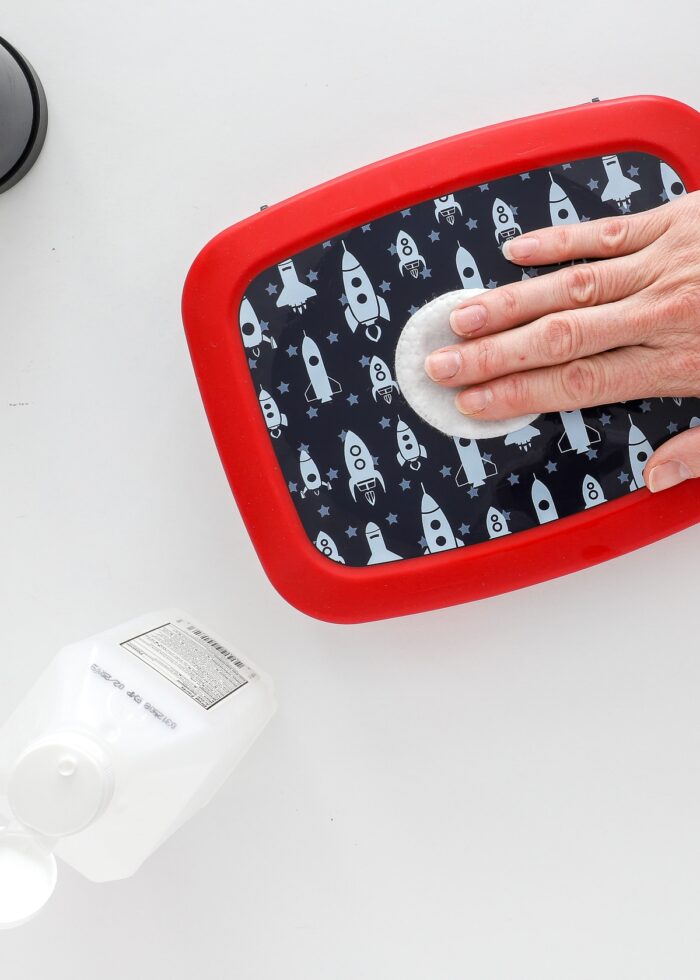
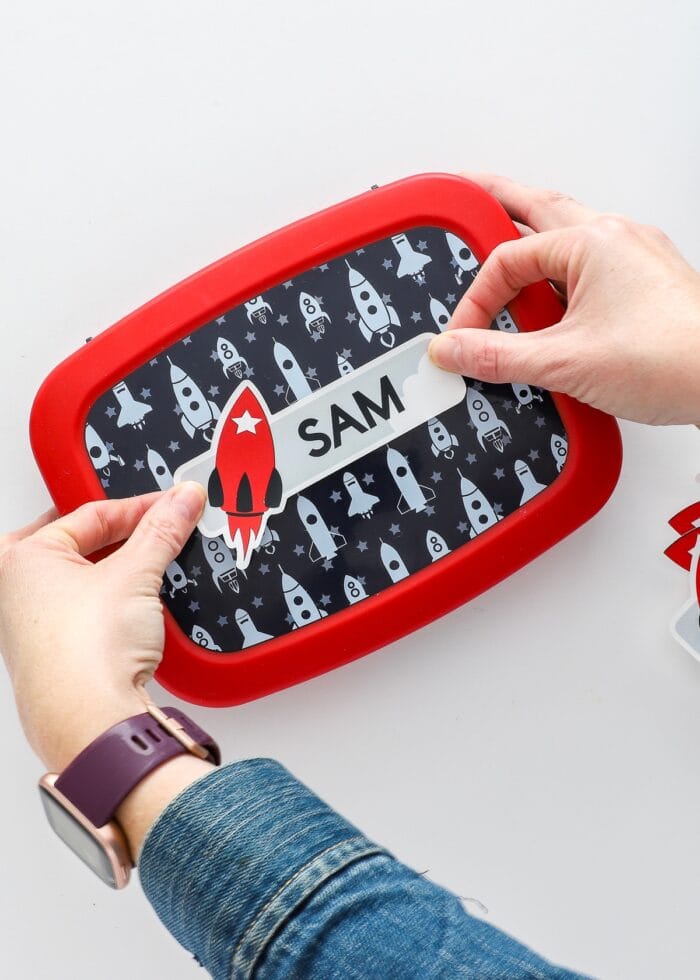
When you are ready to actually place one of your waterproof stickers onto an item, you’ll want to make sure it is free of any dust, dirt, or residue. A quick wipe with some rubbing alcohol is usually sufficient.
Then, simply peel off the white paper backing from the decal and place it wherever you want it. In my experience, you get one shot at this, so work slowly to get your placement exactly right, without bubbles or creases.
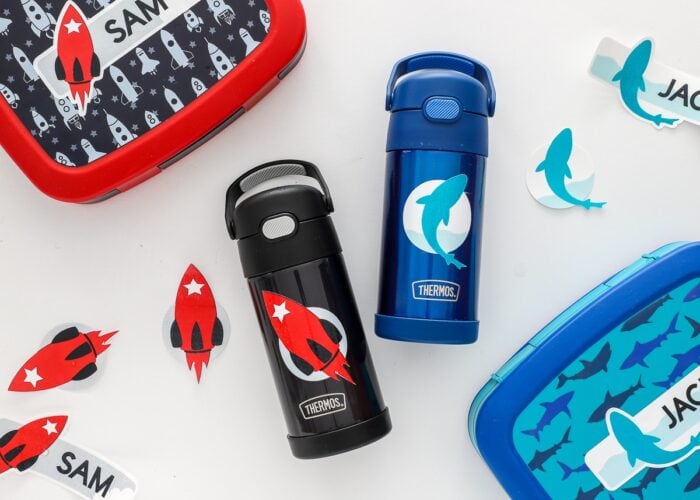
With just a single page of stickers, we were ready to label all the back-to-school items…and have leftovers for later!
More Great Cricut Labeling Projects
Ready to label even more with your Cricut machine? Check out these other awesome projects:- Make Vinyl Labels with a Cricut
- Make Labels Using Cricut Pens
- Make Labels with Cricut Print Then Cut
- Make Waterproof Labels with a Cricut
- How to Label Fabric with Iron-On Vinyl
- Iron-On Clothing Labels with a Cricut
- Toy Bin Labels with a Cricut
- Pantry Labels with a Cricut
- Dresser Drawer Labels with a Cricut
- Luggage Tags with a Cricut
- Return Address Labels with a Cricut
- Fast Labels with the Cricut Joy App
- Make Easy Round Closet Dividers with Cricut Vinyl
- Label Drawstring Backpacks with Cricut Iron-On
- How to Make Vinyl+Wood Labels
In my experience, this simple combination of a good waterproof sticker paper + Avery laminating sheets yields waterproof stickers that are durable and long-lasting. We take no special care with our water bottles, lunch boxes, or coffee mugs…throwing them into bags and loading them into the dishwasher over and over. While I can’t say the stickers will last forever, I’m pretty sure you’ll be ready for a fresh sticker design long before they fade or fall off!
Megan

13 Comments on “How to Make (Long-Lasting) Waterproof Stickers with a Cricut”
Are these good for clothing too for camp labels? Are these durable for the washing machine?
Hi Gitty!
No, for wearable products that go in the washing machine, I would use printable waterproof iron-on transfers.
Hope that helps!
Megan
Hello!
I was wondering what kind of laser printer you recommended for stickers!
Hi Jordan!
I have not personally tested a wide range of Laser Printers.
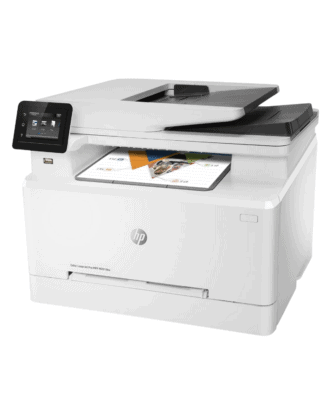
That said, we use THIS ONE and have been very happy with it.
Laser Printers tend to be expensive, so I would watch for sales, especially around Amazon Prime Day or Black Friday!
Hope that helps a bit!Megan
This was so helpful! Thank you 😉
If you laminate the stickers before you cut it with the cricket, how do they get sticky on the back though? Otherwise this was super super helpful
Hi Katya!
These “self-laminating” sheets are not like normal laminating pouches, where the lamination occurs on both sides of the paper.
Instead, these are essentially a “1-sided” protective cover that only goes on top of the sticker sheet. Therefore, the sticky side is completely untouched!
Hope that helps!
Megan
In a printervwhat type of ink do I use for stickers or iron on transfers
I followed all these directions and now have some amazing stickers! Yay 🙂 However, in order to get the sensors to “see” the guidelines on the laminated sheets, I had to trace the lines with a sharpie after laminating. Apparently the laminating film was too shiny. Hopefully, this tip might save someone else a little frustration. Thanks for the great instructions!
HI! I have laminated my stickers in the past, and have always had problems with the laminate separating from the sticker within a handful of washes (3-4?). I have tried a variety of laminate (self laminate sheets, a laminate for stickers, and I have a lamination machine and have tried that also.) and all have yielded the same peeling results. The sticker itself stays, and the laminate peels up with the colors, thus destroying it. I am using printable vinyl with my inkjet printer. What am I missing/doing wrong?!
Using the steps you outline here and the same materials (Avery waterproof vinyl and the self-laminating sheets) will these also be more protected from UV fade? I made a print then cut “band-aid” for the grille on my Jeep to cover up a ding caught on the freeway but it faded fairly quickly. I’m still learning my Cricut so any info would be very helpful@
Question, my Cricut doesn’t like gloss and I keep getting errors. I’ve tried adding matte tape to the black lines to no avail.
I am having trouble using the print then cut function (calibration issue). I’m using a laser printer.
How did you resolve the issue (since you recommended laser stickers) as I read that circuit print then cut can only work for inkjet printers?