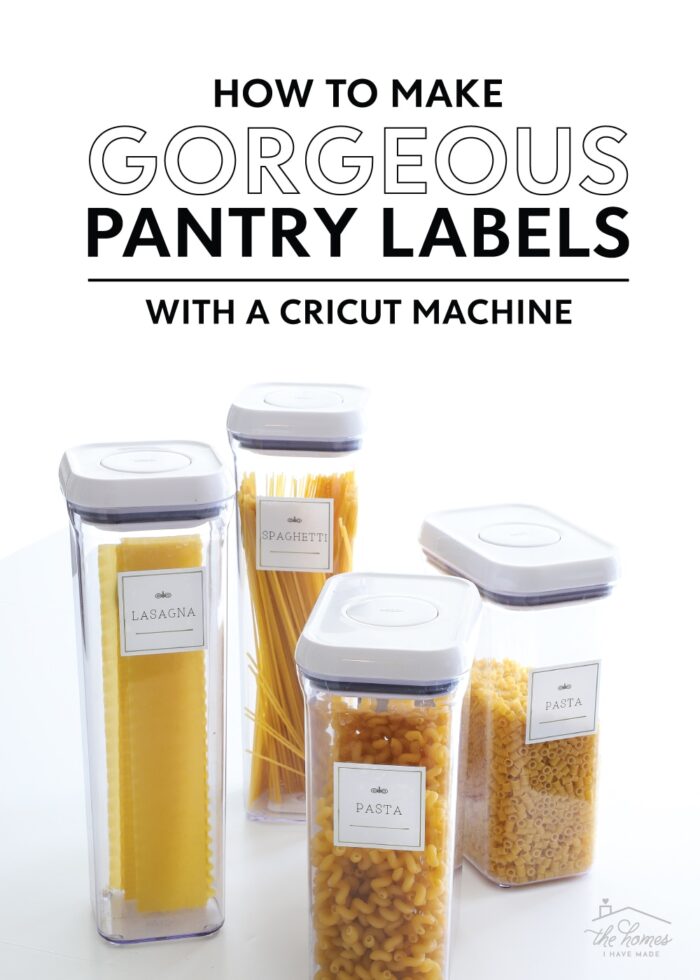
How to Make Pantry Labels with a Cricut | 3 Methods to Try!
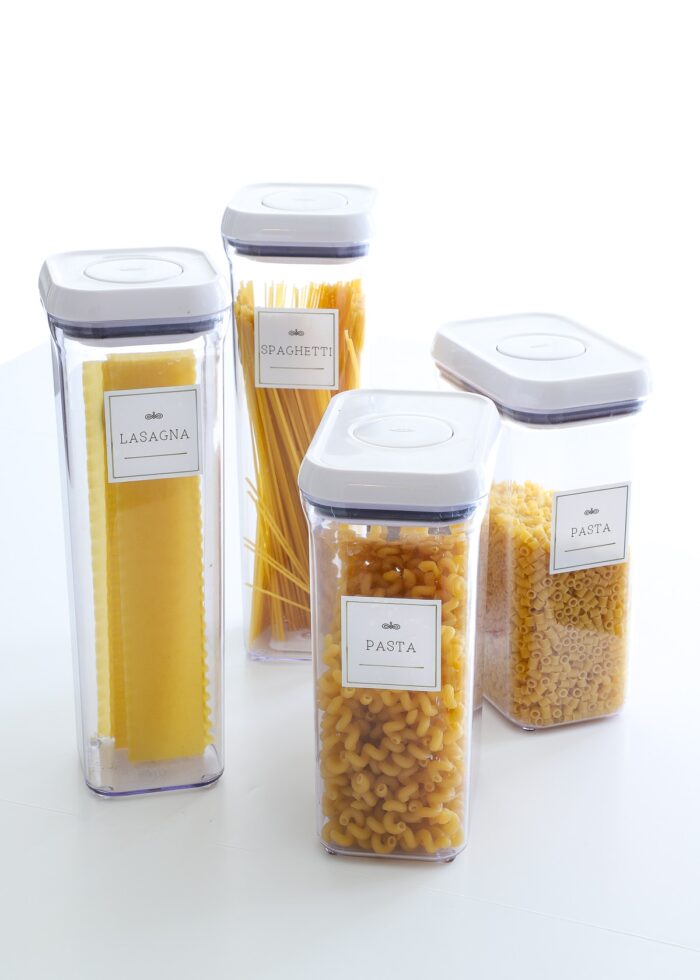
One of the most popular labeling projects you can make with a Cricut machine is pantry labels. And for good reason! Everyone loves the look and function of perfectly-labeled pantry canisters. And a Cricut machine allows you to get the exact size, style, color, and application that works best in your kitchen. Over the years, I’ve made pantry labels in all sorts of ways including with Cricut Pens, Cricut Vinyl, and Cricut Print Then Cut, each having their own unique pros and cons. Today, I want to break down each method for making pantry labels with a Cricut so you too can figure out how best to label your pantry with your Cricut machine! Let’s get to it!
Because the machines themselves are so versatile, it should be no surprise that there are countless ways to make pretty pantry labels with a Cricut machine. Whether you have a Cricut Joy, Cricut Explore, or Cricut Maker…and want to use the pens, the blade, or your home printer, you will be able to make pantry labels that look exactly as you want them, right from home!
Here are the three main labeling options I’m going to cover in this post. Not only do they spam the breath of techniques available on Cricut machines, but they will all provide stylish, clear, and clean labels for anything and everything in your pantry.
- Pantry Labels with Cricut Vinyl – use the Cricut to cut pantry labels out of vinyl
- Pantry Labels with Cricut Pens – use the Cricut to write pantry labels onto adhesive-backed material (e.g., Smart Label)
- Pantry Labels with Cricut Print Then Cut – use the Cricut to cut out printed pantry labels (off your home printer)
There are pros and cons to each method, as well as different materials and steps required…so let me break down each one for you!
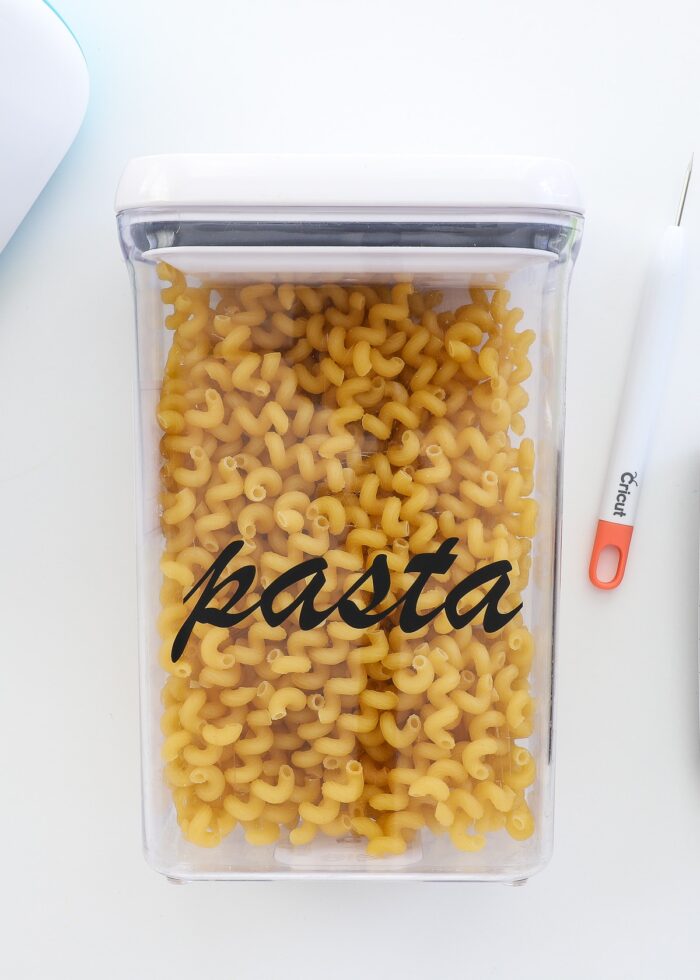
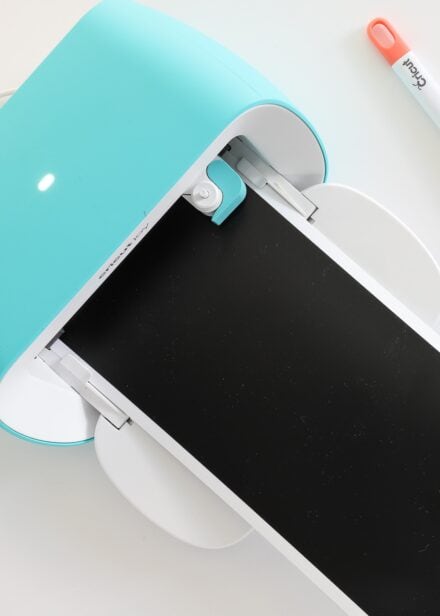
Making Pantry Labels with Cricut Vinyl
This labeling technique involves cutting out pantry labels (either of words or pictures/icons) from adhesive vinyl and sticking them directly onto the canisters themselves.
Pros to Making Pantry Labels with Vinyl
- Vinyl can be cut into pretty much any word, shape, or phrase…making it easy to get the exact look you want.
- Vinyl can be cut by all Cricut machines.
- Vinyl is available in a wide variety of colors and sheens.
- Vinyl comes in various lengths (up to 75′), allowing you to cut A LOT of labels (if not all of them) at once.
- Vinyl can be washed…definitely by hand, but also in the dishwasher.
Cons to Making Pantry Labels with Vinyl
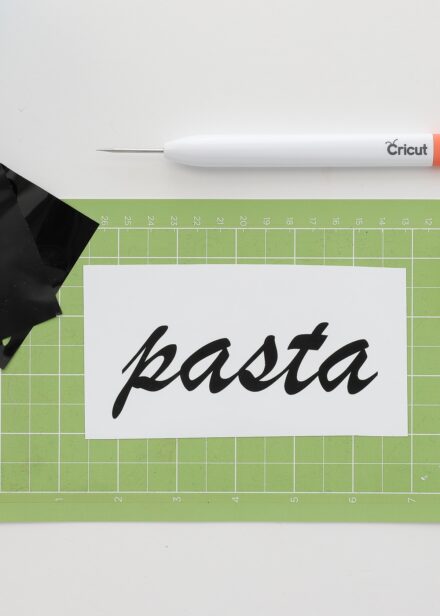
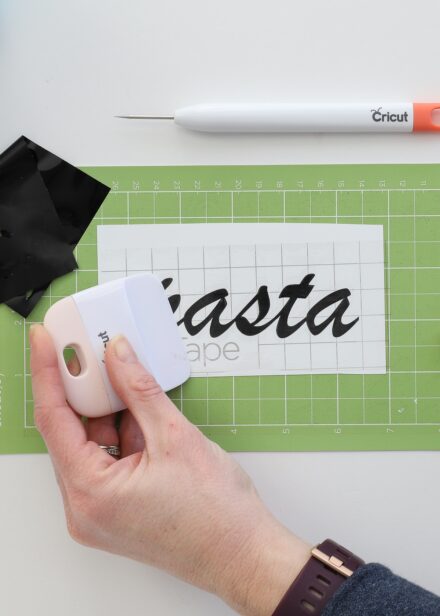
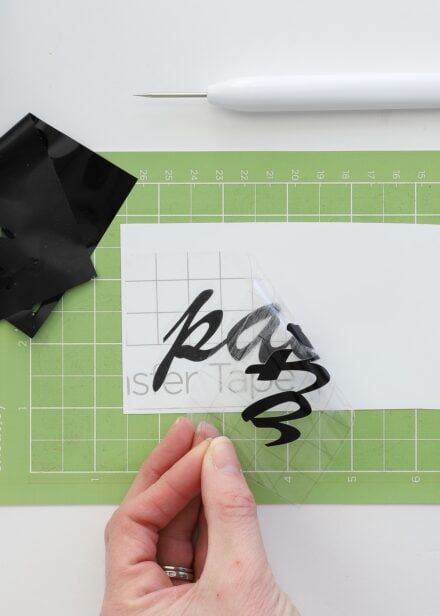
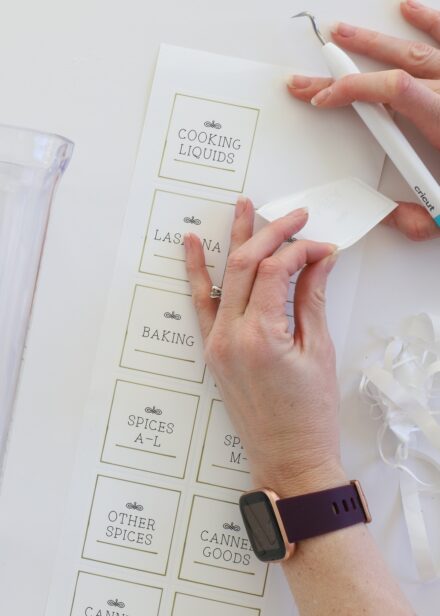
- Cutting words and shapes from vinyl is the most tedious option of those listed in this tutorial, involving both weeding and transferring.
- Working with transfer tape (to apply the vinyl labels to the canisters) requires a lot of patience and practice, which can prove time-consuming and frustrating (See the process: How to Layer Vinyl on Cricut Projects).
- Removing the labels involves a tedious process of peeling up one letter/element at a time, even if you use removable vinyl.
- Tiny details (on small labels) may not cut cleanly from vinyl.
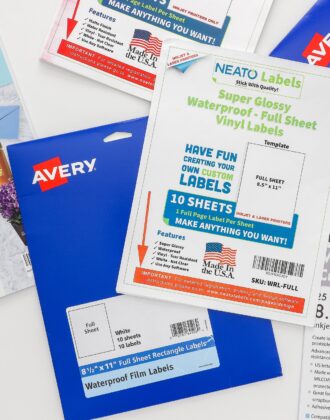
Materials Needed
To make pantry labels with vinyl, you will need:
- Cricut Machine – Cricut Joy, Cricut Maker, and Cricut Explore models can all be used to make pantry labels with vinyl
- StandardGrip Cutting Mat – if not using Smart Vinyl
- Vinyl – in your preferred color, sheen, and size
- Transfer Tape
- Weeding Tools
- Scraper Tool
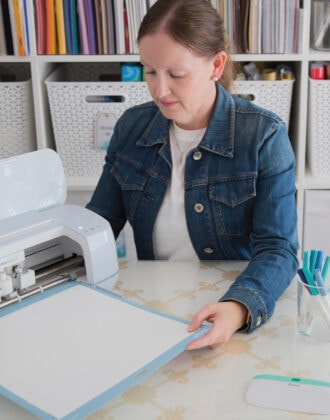
The Process
Below, I outline the general process of making pantry labels with vinyl. For the full step by step, see here: How to Make Vinyl Labels with a Cricut | A Comprehensive Guide.
- Design your labels in Cricut Design Space. Ensure all labels are set to “Cut” in the Operations menu.
- Cut the pantry labels out of your preferred color and size of vinyl.
- Use a weeding tool to remove all excess vinyl (like the surrounding material and the insides of letters)
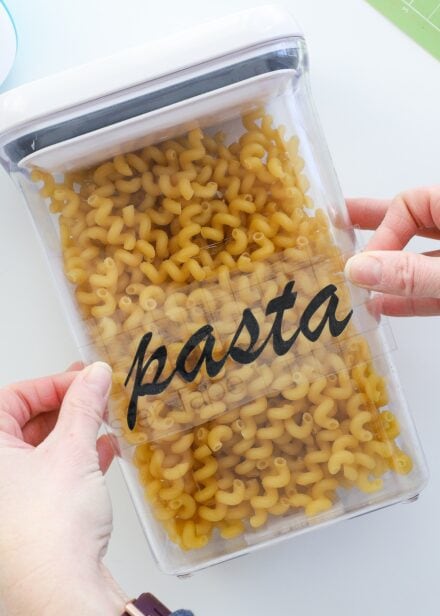
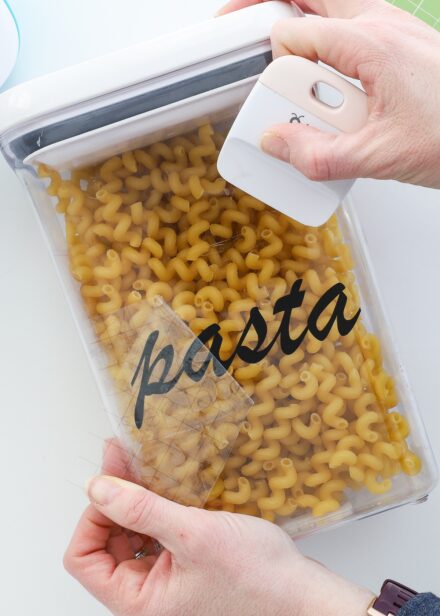
- Use a piece of transfer tape to move the vinyl word/picture to your pantry canister
Detailed step-by-step: How to Make Vinyl Labels with a Cricut | A Comprehensive Guide.
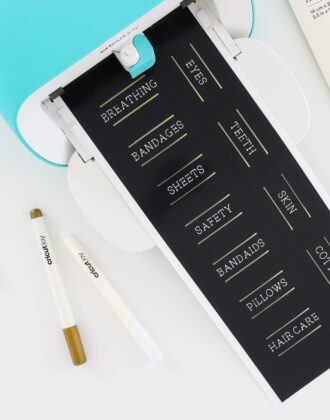
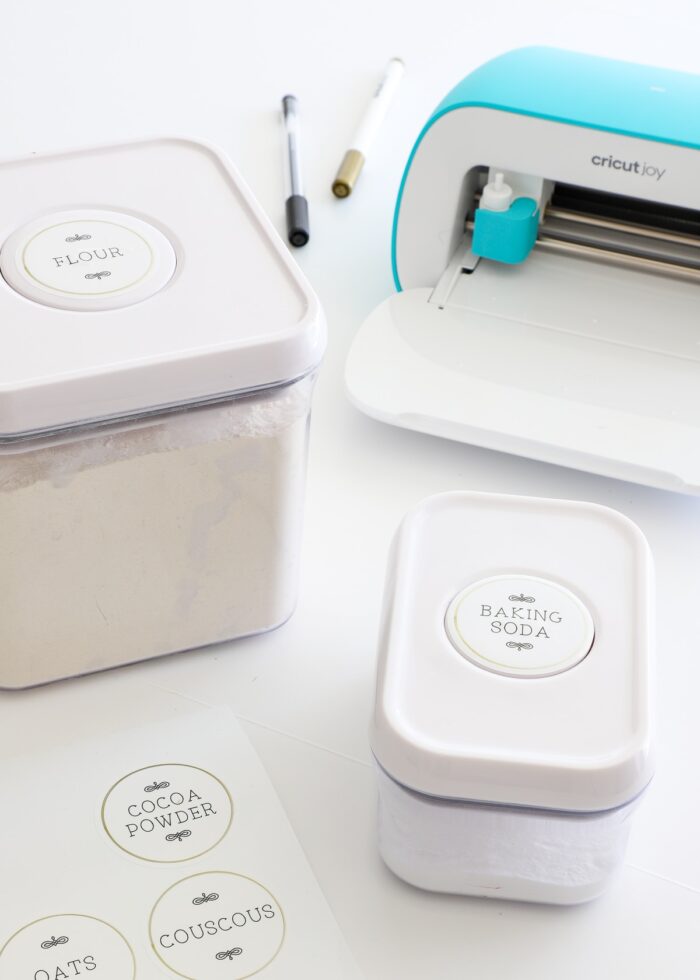
Pantry Labels with Cricut Pens
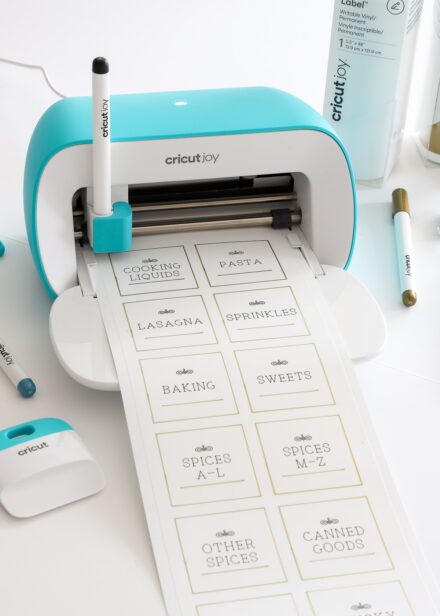
This labeling technique involves having your Cricut draw/write pantry names using Cricut Pens and then cutting out the label shape using the Premium Fine-Point Blade (the one that comes in your machine). Typically, this is done on some sort of adhesive-backed material (e.g., Smart Label, Smart Paper Sticker Cardstock, Sticker Paper) so that the labels can be stuck directly on the canisters.
Want to save this post?
Pros to Making Pantry Labels with Cricut Pens
- Cricut Pens can draw/write pretty much any word, shape, or phrase.
- Cricut Pen designs…even small, tight designs…are crystal clear and easy to read.
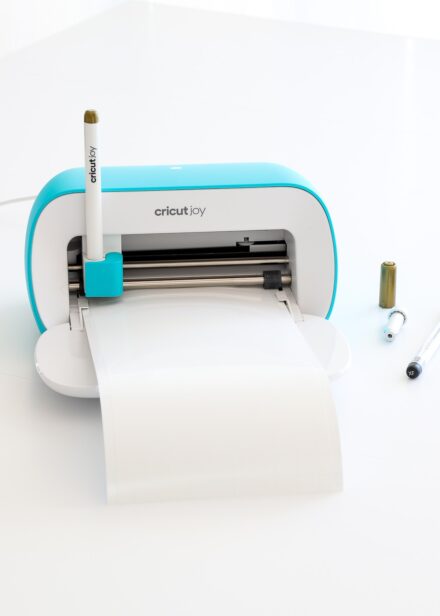
- Cricut Pens can be used by all Cricut machines (if you have a Cricut Joy, just make sure you are using Cricut Joy Pens).
- Cricut Pens are available in a wide variety of colors and sheens (e.g., glitter, gel), and multiple colors can be used on a single label.
- Cricut Pens provide a chic, handwritten aesthetic.
- Labels made with Cricut Pens on Cricut Joy Smart Label can hold up to washing (See More: Everything You Need to Know About Cricut Joy Smart Label).
- There is little-to-no weeding involved with drawn labels.
- Once drawn and cut, these labels have instant application: just peel and stick!
- If you ever need to change the label, most adhesive-backed products (e.g., Smart Label) peel right off in one pull.
Cons to Making Pantry Labels with Cricut Pens
- Creating label designs specifically to be made with Cricut Pens is trickier than other design processes (See more here: How to Use Cricut Pens to Make (Gorgeous) Custom Labels).
- Cricut Pen designs will mostly be fine lines/outlines, instead of thick, solid text or shapes.
- There are fewer writable materials that can stick to pantry canisters (compared to an endless selection of standard adhesive vinyl).
- Certain writable materials are not washable (e.g., regular sticker paper) and even some washable materials (e.g., Smart Label) can bleed slightly when wet. Common waterproofing techniques can’t really be used during the drawing/cutting process.
Materials Needed
To make pantry labels with Cricut Pens, you will need:
- Cricut Machine – Cricut Joy, Cricut Maker, and Cricut Explore models can all be used to make pantry labels with vinyl
- Cricut Pens – pick pens compatible with your machine
- Writable Material such as Smart Label, Writable Paper, Smart Paper Sticker Cardstock, Sicker Paper
The Process
Below, I outline the general process of making pantry labels with Cricut Pens. For the full step by step, see here: How to Use Cricut Pens to Make (Gorgeous) Custom Labels.
- Design your labels in Cricut Design Space. Ensure all text is set to “Pens” and all label outlines are set to “Cut” in the Operations menu.
- Load both your Cricut Pens and Premium Fine-Point Blade into your Cricut Machine; place your writable material onto a mat (if necessary) or load directly into your machine.
- The Cricut machine will first draw all the label text and designs, and then will cut out the surrounding label shape.
- After unloading the material from the machine, simply peel-and-stick labels onto you pantry canisters.
- Repeat for all pantry containers.
Detailed step-by-step: How to Make Labels with Cricut Joy
Need more help with Cricut Writable Vinyl? Everything You Need to Know About Cricut Writable Vinyl
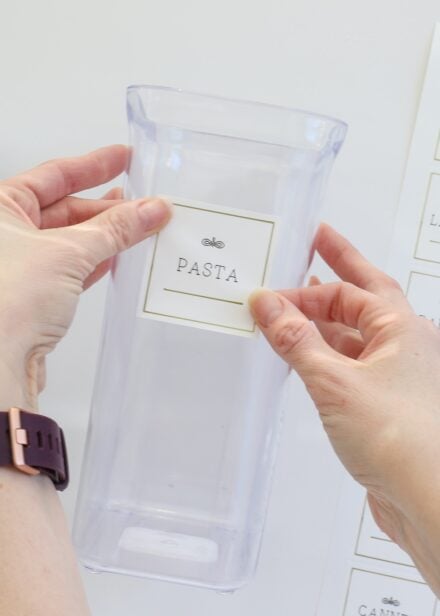
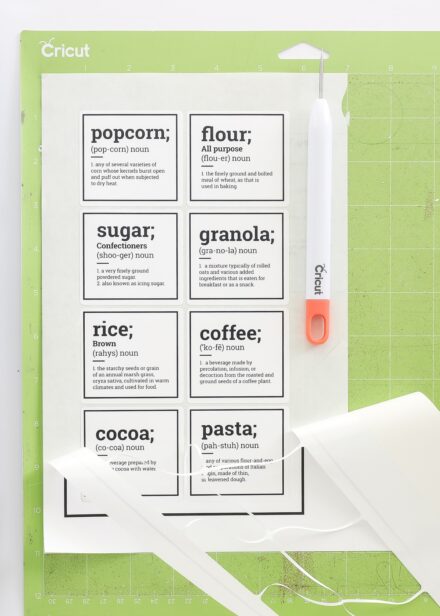
Pantry Labels with Cricut Print Then Cut
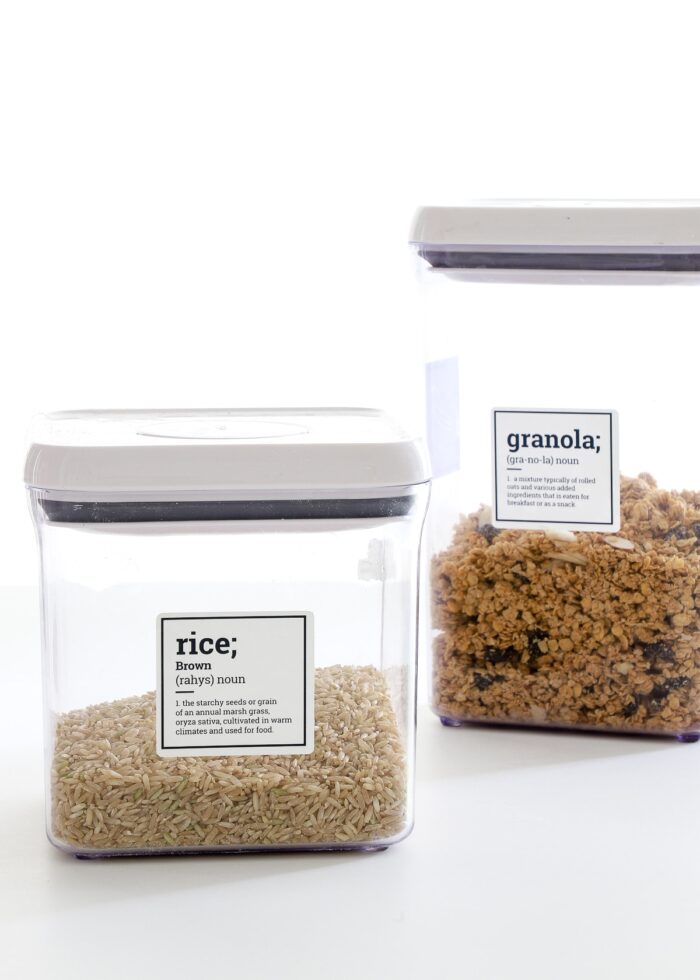
This labeling technique involves first printing out labels on your home printer and then using your Cricut machine to cut out the label shapes. For pantry canisters, you will want to load some sort of printable vinyl so the labels can adhere directly to the canisters like stickers.
Pros to Making Pantry Labels with Cricut Print Then Cut
- Since you are relying on a home printer for the label design, you can make the labels as intricate and detailed as you want.
- Any design, any font, any shape, and any color can be made into a printable image (via the Flatten Tool), which gives you endless customization options.
- This is the fastest of the labeling methods, since you can print an entire page of labels out at once and have them cut in a matter of minutes.
- Although it’s an extra step, it is possible (and easy) to waterproof your printable labels. See more here: How to Make (Long-Lasting) Waterproof Labels with a Cricut
- There is little-to-no weeding involved with printed labels.
- Once printed and cut, these labels have instant application: just peel and stick!
- If you ever need to change the label, most adhesive-backed products (e.g., printable vinyl) peel right off in one pull.
Cons to Making Pantry Labels with Cricut Print Then Cut
- The Print Then Cut function is specific to Cricut Explore and Cricut Maker models. Cricut Joy users CANNOT make labels using this technique.
- Creating label designs for the Print Then Cut function is a bit tricker than other design processes. (See More: A Guide To Making Labels with Cricut Print Then Cut)
Materials Needed
To make pantry labels with Cricut Print Then Cut, you will need:
- Cricut Machine – Cricut Maker or Cricut Explore
- StandardGrip Cutting Mat
- Premium Fine-Point Blade – the one that comes with your machine
- Home Printer
- Printable Material such as printable vinyl (inkjet, laser)
- Laminating Sheets for waterproofing (optional)
The Process
Below, I outline the general process of making pantry labels with Cricut Print Then Cut. For the full instructions, see here: A Guide To Making Labels with Cricut Print Then Cut.
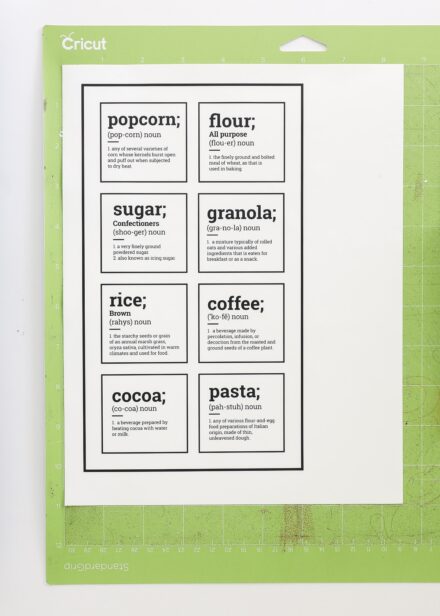
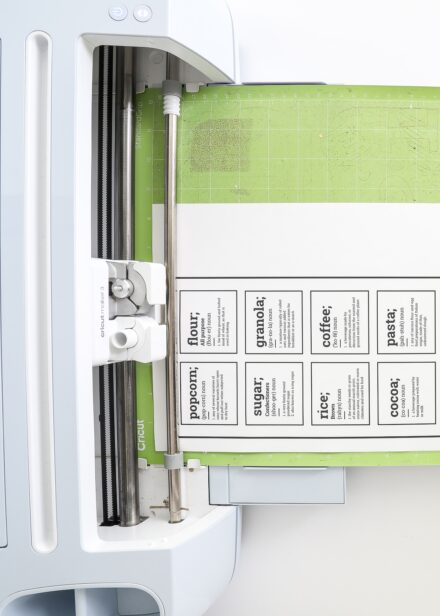
- Design your labels on the Cricut Design Space canvas. Once each label is done, select the entire label and click “Flatten” to make it into a printable image.
- Print the labels onto printable vinyl with your home printer.
- Place the page onto a green StandardGrip mat and load into the Cricut machine; follow the on-screen prompts to start the Cricut cutting each label.
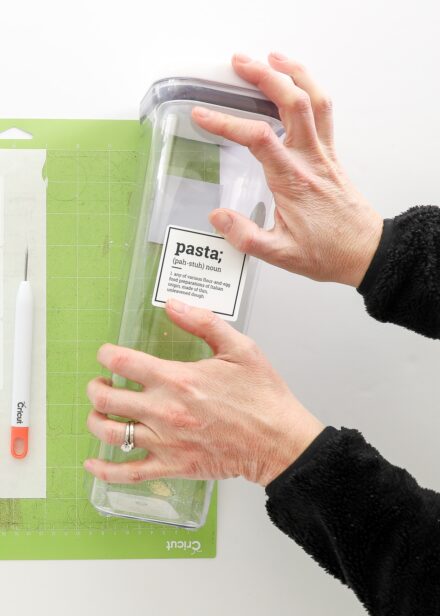
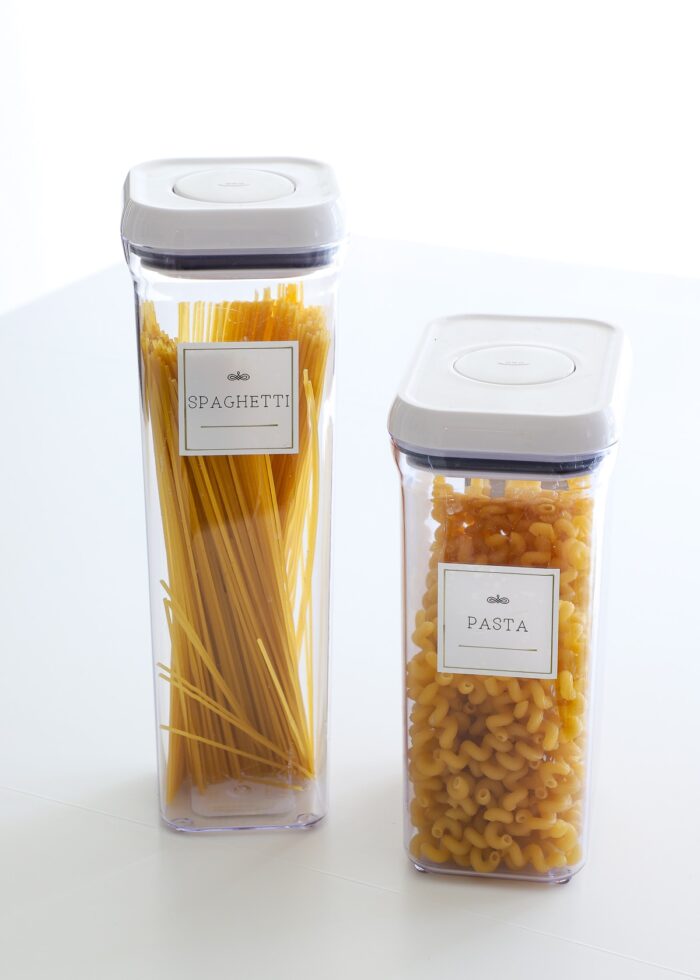
- After unloading the material from the machine, simply peel-and-stick labels onto you pantry canisters.
- Repeat for all pantry jars.
What’s My Recommendation for Making DIY Pantry Labels with a Cricut?
I’ve made a lot of labels over the years…for pantry canisters, bins, and baskets…as well as lots of other things around our home. By far, my preferred way to make pantry labels is either using Cricut Pens or Cricut Print Then Cut. Both techniques give you an immense amount of control over the design process and result in crystal clear labels that are easy to apply to a wide variety of surfaces.
I personally only use vinyl to make labels when the images and text are large and/or simple to weed and apply. For me personally, cutting, weeding, and transferring countless pantry container labels from vinyl is more work than it’s worth.
More Great Cricut Labeling Projects
Ready to label even more with your Cricut machine? Check out these other awesome projects:- Make Vinyl Labels with a Cricut
- Make Labels Using Cricut Pens
- Make Labels with Cricut Print Then Cut
- Make Waterproof Labels with a Cricut
- How to Label Fabric with Iron-On Vinyl
- Iron-On Clothing Labels with a Cricut
- Toy Bin Labels with a Cricut
- Pantry Labels with a Cricut
- Dresser Drawer Labels with a Cricut
- Luggage Tags with a Cricut
- Return Address Labels with a Cricut
- Fast Labels with the Cricut Joy App
- Make Easy Round Closet Dividers with Cricut Vinyl
- Label Drawstring Backpacks with Cricut Iron-On
- How to Make Vinyl+Wood Labels
Using your Cricut machine to make labels for pantry canisters and spice jars isn’t just possible, it’s incredibly fun thanks to the countless options for customizing them to your unique style and preferences. But not all labeling methods are equal, especially when it comes to food-safe canisters that may get a lot of wear-and-tear and are frequently washed. Although I have my recommended methods, any three of these techniques will yield awesome, custom labels for every item in your pantry! Which one are you ready to try?
Megan