How to Make Return Address Labels with ANY Cricut Machine!
Have you ever gone to slip something in the mail only to realize you’re out of return address labels? There’s no need to order some or run out for specialty printable labels…you can make your very own (quite quickly!) using your Cricut machine! Today, I’m breaking down the step-by-step process for any Cricut machine!
Why Make Your Own Return Address Labels?
True Story!
This past holiday season, I went to put our Christmas cards in the mail…only to realize we didn’t have any return address labels with our new address on them! Whoops!
I didn’t quite have the time or energy to run to the store for printable labels, and realized I could quickly whip up a batch using my Cricut machine. Within mere minutes (seriously!), I had several pages of custom return address labels printed off, cut out, and ready to stick onto all our holiday mail!
But beyond just the “last minute, I’m totally in a pickle” situation, why else would you consider making your own return address labels?
- You can customize the labels into ANY shape, ANY size, ANY color, ANY font, ANY design…ANY anything!
- If you have a well-stocked Cricut craft room, you can likely whip these up without having to purchase any additional supplies.
- They are the perfect custom solution for wedding invitations, party invites, and other special events!
- It’s fun!
There are actually two different techniques you can use to make your own return address labels. And which technique you choose will (primarily) depend on which machine you’re using:
- Print The Cut Return Address Labels – Cricut Explore and Cricut Maker models ONLY
- Draw+Cut Return Address Labels – Any machine, including Cricut Joy, Cricut Explore, and Cricut Maker models.
How to Make Return Address Labels with Cricut Print Then Cut
Supplies Needed
Using the Cricut Print Then Cut function is the quickest and easiest way to make return address labels. But only the Cricut Explore and Cricut Maker machines have this capability.
Here is what you will need:
- Cricut Explore or Cricut Maker (any model)
- Fine Point Blade – the one that comes with your machine
- Cricut Cutting Mat – LightGrip or StandardGrip mats will both work
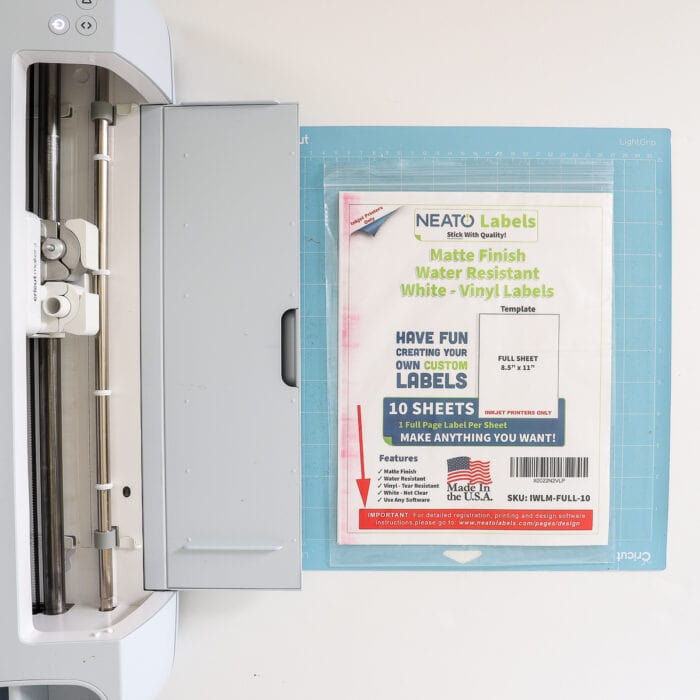
- Printable Sticker Paper – you can choose ANY printable sticker paper you like, including glossy white, holographic, or even clear! Just make sure your printer supports whatever paper you choose.
- Home Printer
Step 1 – Design Return Address Labels in Cricut Design Space
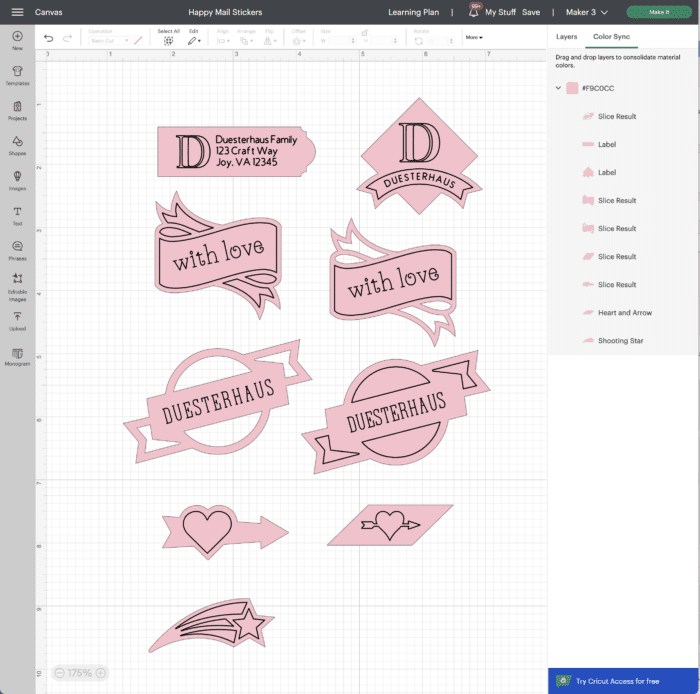
Start by designing your return address labels in Cricut Design Space. While you can use pretty much ANY label shape in the Cricut Design Space Image Library, the easiest (and cheapest!) option is to use free shapes directly from the Shapes Menu on the lefthand toolbar.
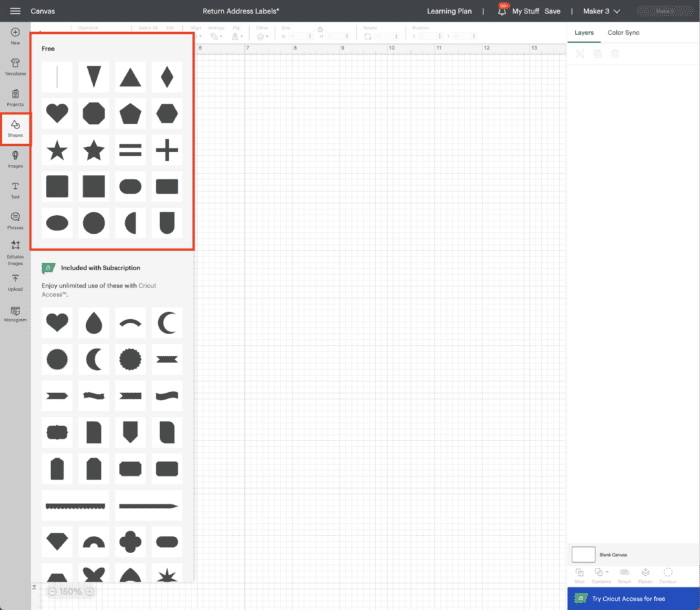
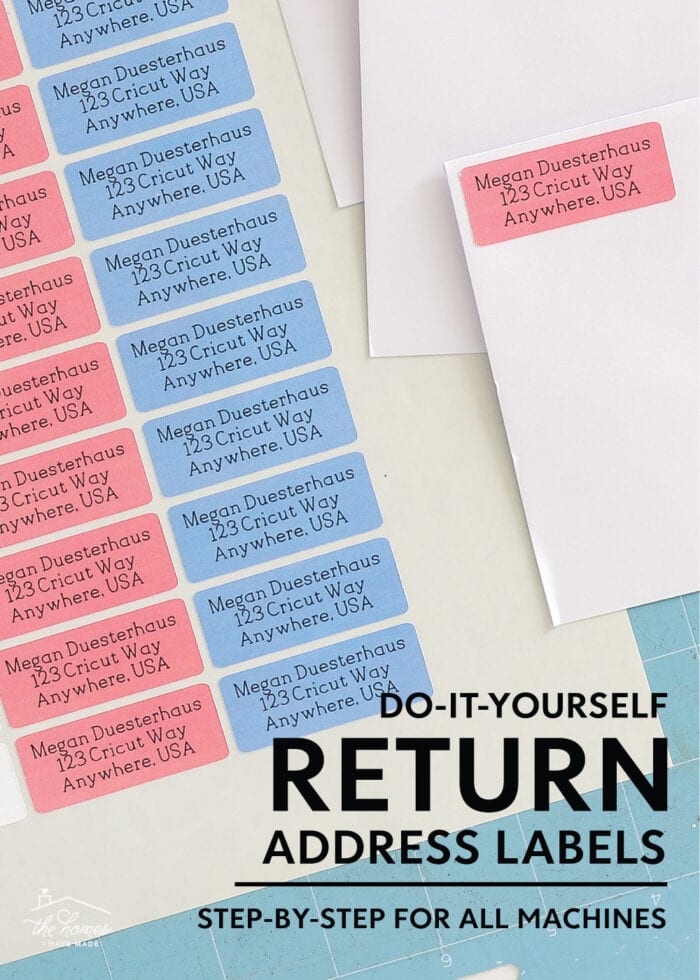
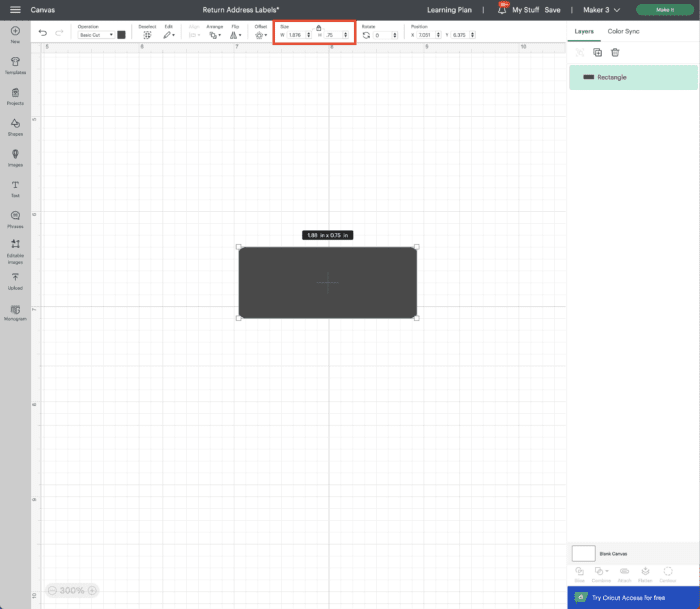
Pick whatever shape you want for your label and then size it to your preference. I kept mine a basic 1:2 ratio and sized them to 0.75″ tall in order to take full advantage of the printable page.
TIP! You may want to experiment with different sizes to see how many you can fit on a single page. Even nudging the size slightly up/down can significantly affect how many labels will fit per page.
Click on the colored square along the very top toolbar to change the shape’s color from the default grey.
- If you want your labels to be whatever color your printable paper is (clear, white, etc), just change the shape to white.
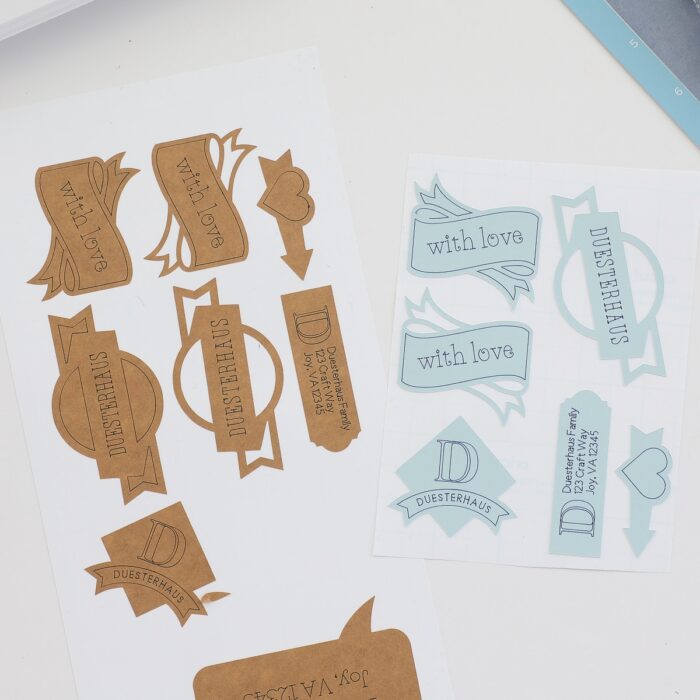
- If you want colored labels, change the shape to any color other than white. Your printer will actually print out that color (e.g., the pink and blue shown throughout) without having to use colored paper!
Learn more about designing printable labels here: A Guide To Making Labels with Cricut Print Then Cut
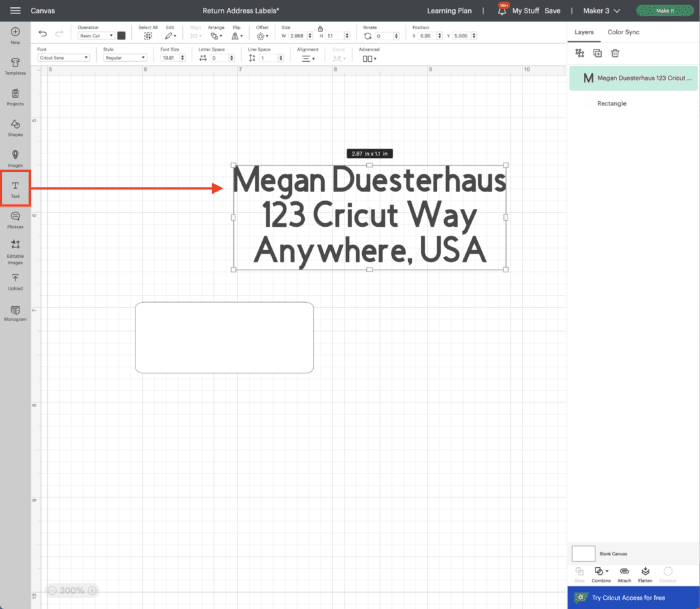
Next, click on the Text Tool (lefthand toolbar) to add a text block to the canvas. Type in whatever you want on your return address label.
The default text setting is “Center Justified,” but you can easily change the alignment to left/right using the Alignment Tool in the Font Toolbar.
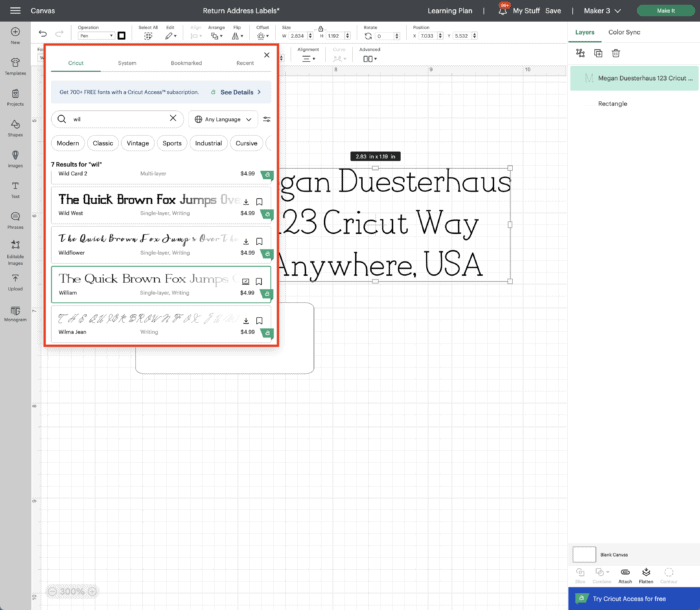
Next, change the font to whatever you prefer using the Font dropdown menu.
NOTE: The Print Then Cut function can utilize ANY font you have access to. You don’t necessarily need to look for a “Writing” font for this label technique.
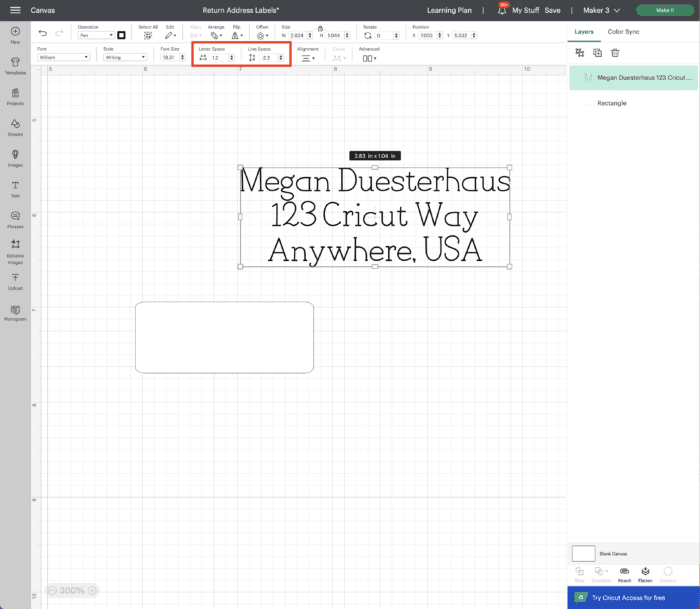
Next, adjust the Line Spacing and Letter Spacing to your preferences using the settings in the Font Toolbar. Tightening up lines and letters will allow you to fit more onto tiny labels; and since these labels are printed, you don’t have to worry about Cricut Pen “legibility.”
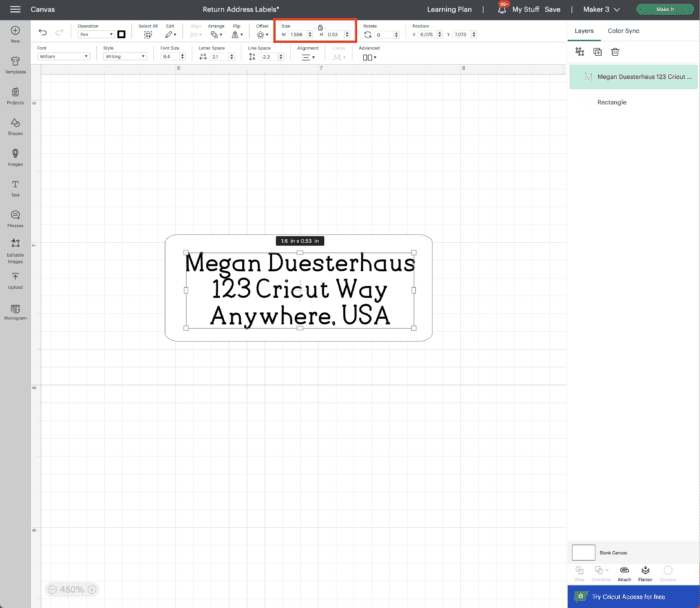
With your text exactly as you want it, re-size it to fit comfortably on top of the label shape you selected.
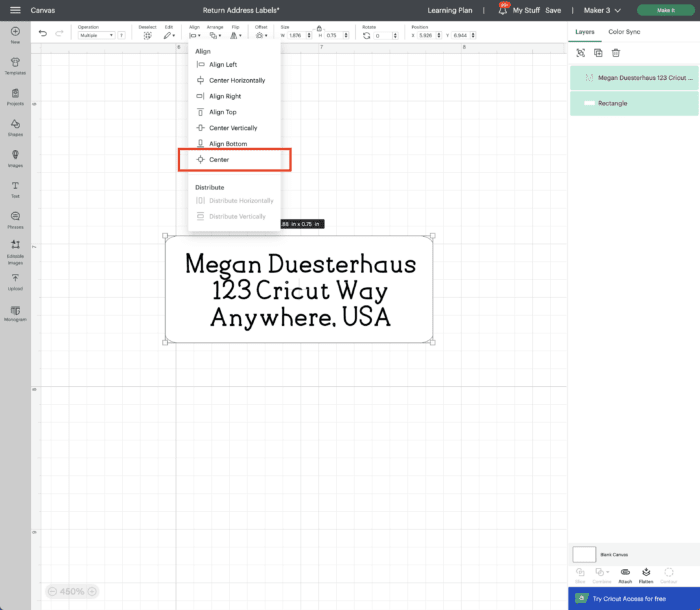
Then use the “Align” tool to ensure your text is perfectly centered on your label (as desired).
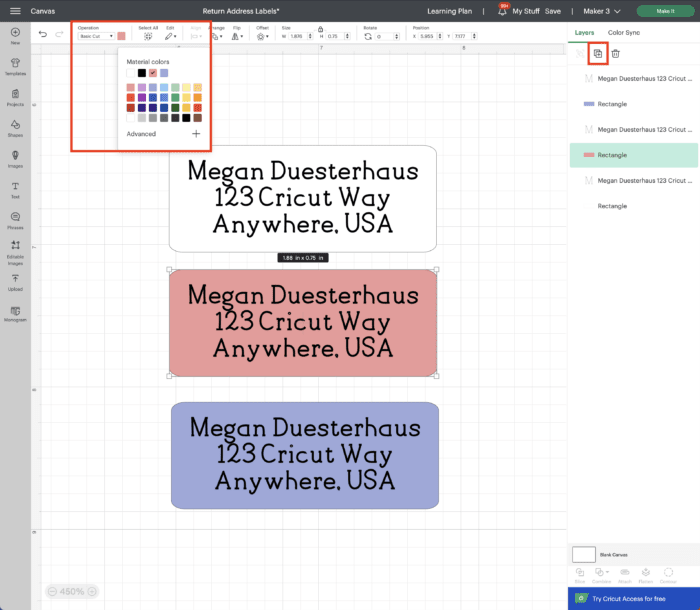
If you want a full sheet of all the same labels, you can skip this step. However, if you’d like to change any component of the label design, duplicate your label and adjust as necessary.
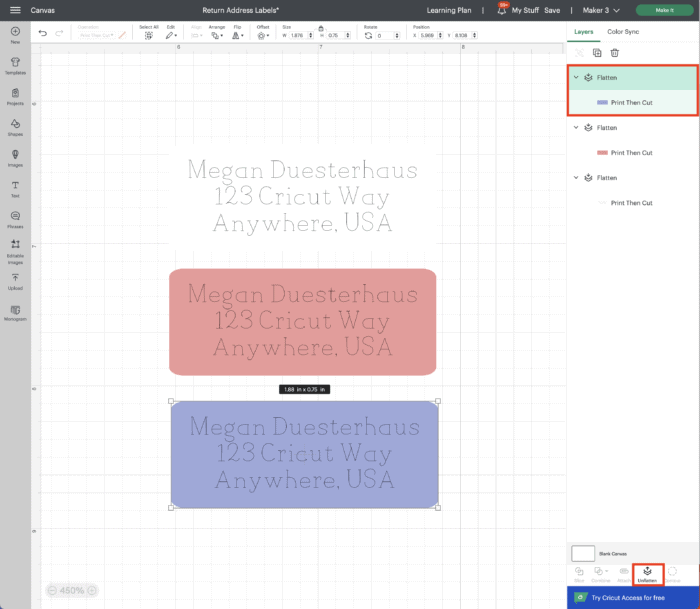
Below, I changed the background label colors to pink and blue for some variety.
Before you send the labels to your printer and Cricut machine, there is one final step: you must “flatten” them into printable images.
To do this:
- Select the label and text together.
- Click the Flatten Tool in the bottom right-hand toolbar.
- Notice the two individual layers become one “Flatten” image in the right-hand Layers Panel.
- Repeat with each individual label design (if you have more than one).
With your return address labels all designed, click the green “Make It” button to proceed.
Step 2 – Print Out Return Address Labels with Home Printer
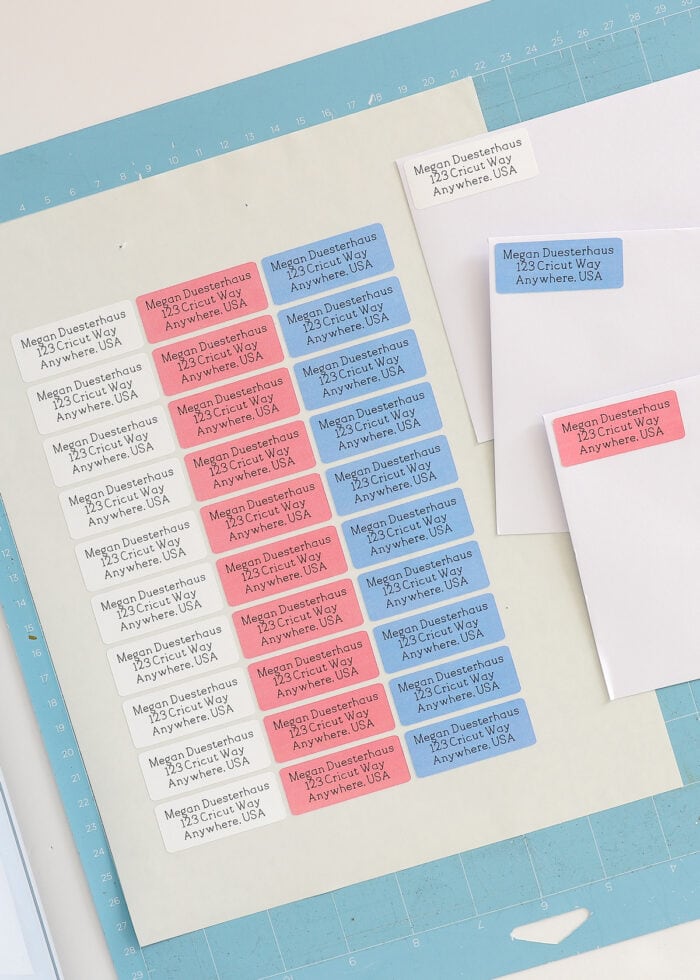
On the first mat preview screen, adjust the Project Copies to however many you can fit to fill the page. For these labels, I was able to multiply the original 3 labels by 11 to create a total of 33 labels on a single page.
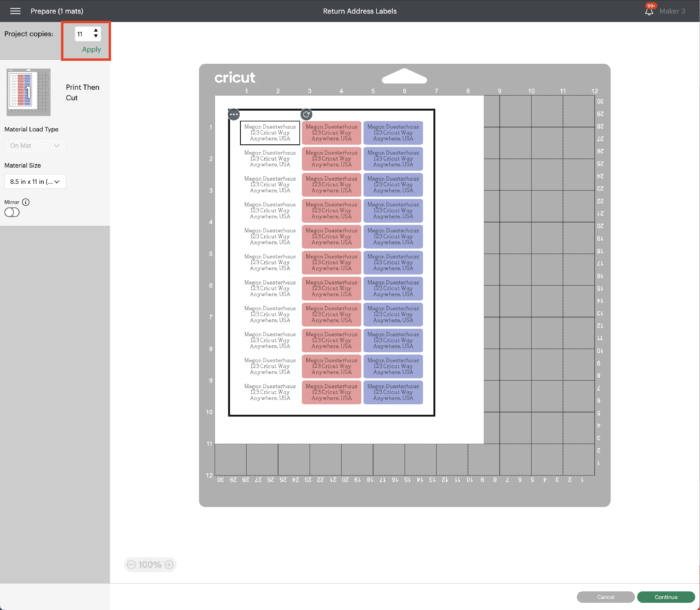
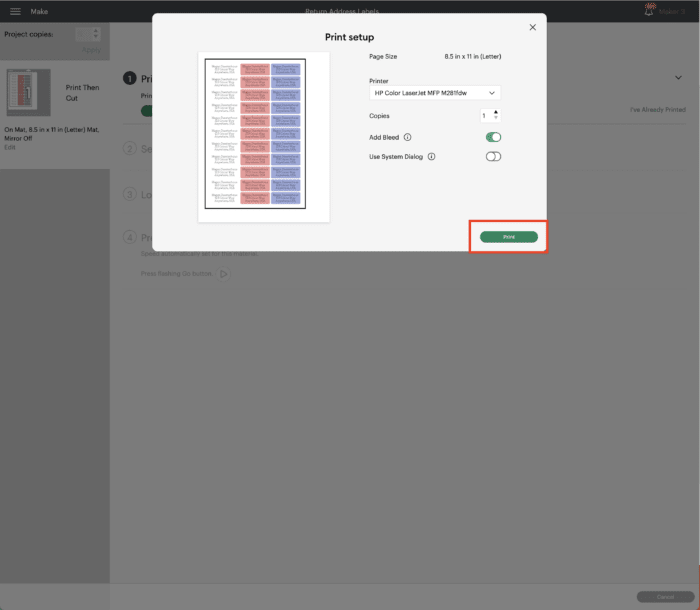
After clicking “Continue,” Cricut Design Space will prompt you to print out your project.
Load whatever printable sticker paper you’re using into your home printer (according to your printer’s specifications) and click “Print.”
Step 3 – Cut Out Return Address Labels with Cricut Machine
Next, Cricut Design Space will prompt you to select a material. Click “Browse All Materials” to find the best match for the specific sticker paper you are using.
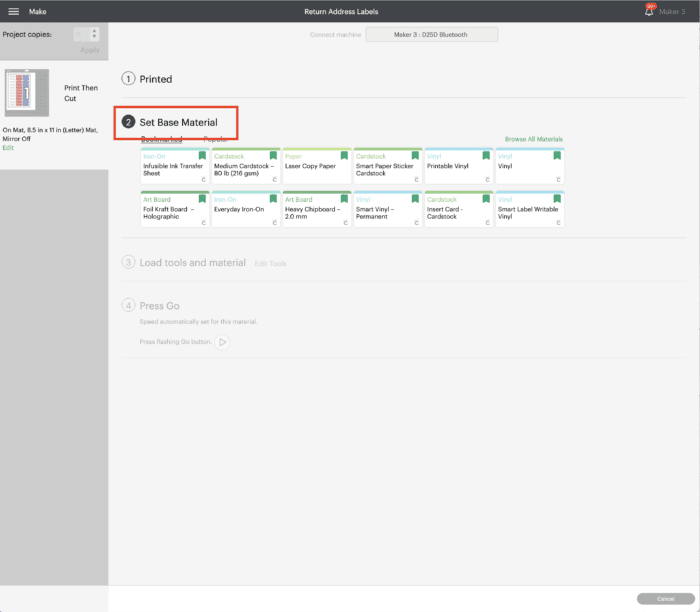
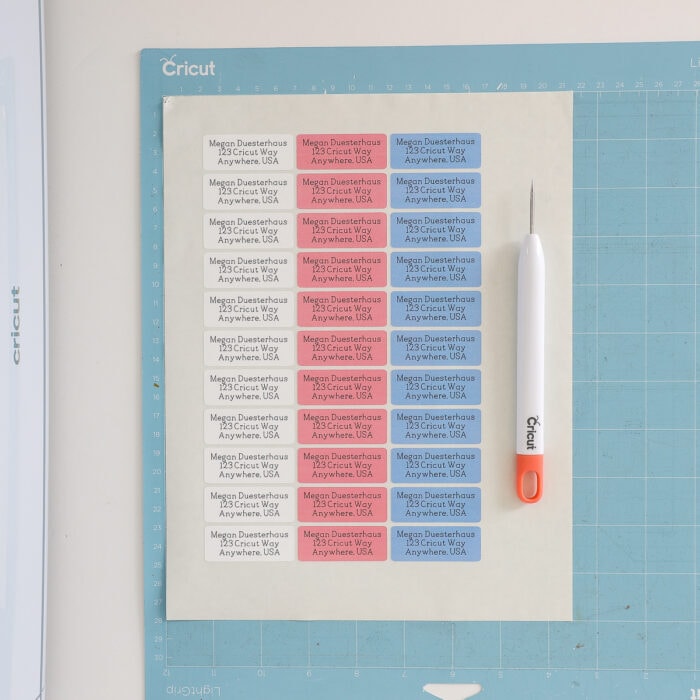
Place your printed return address labels onto a Cricut cutting mat (either a blue LightGrip mat or green StandardGrip mat will work), aligning the top lefthand corner of the page with the top lefthand corner of the white printed grid.
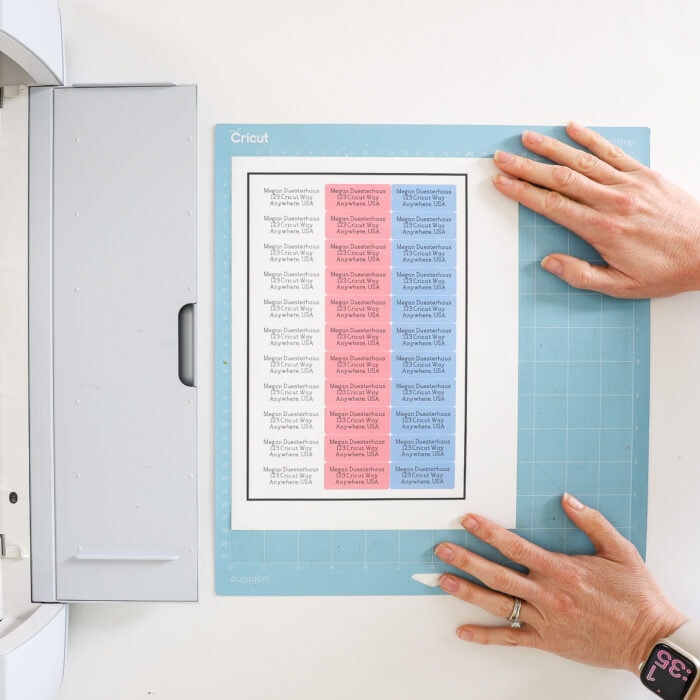
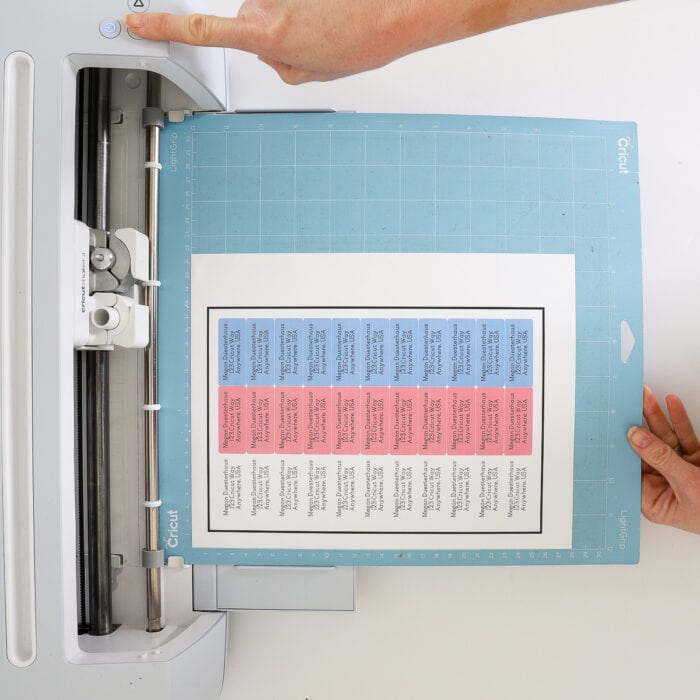
Following the on-screen prompts in Cricut Design Space, load the mat into the Cricut machine…
Want to save this post?
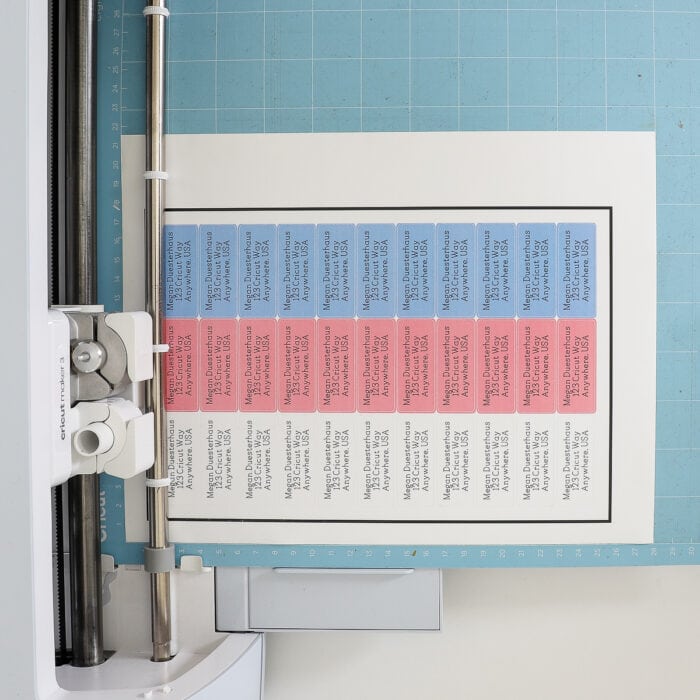
…and press the flashing Cricut/Go button to start the machine cutting. Once complete, unload the mat from the Cricut machine.
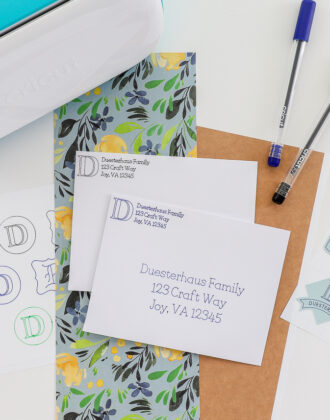
Step 4 – Peel and Stick Return Address Labels onto Envelopes
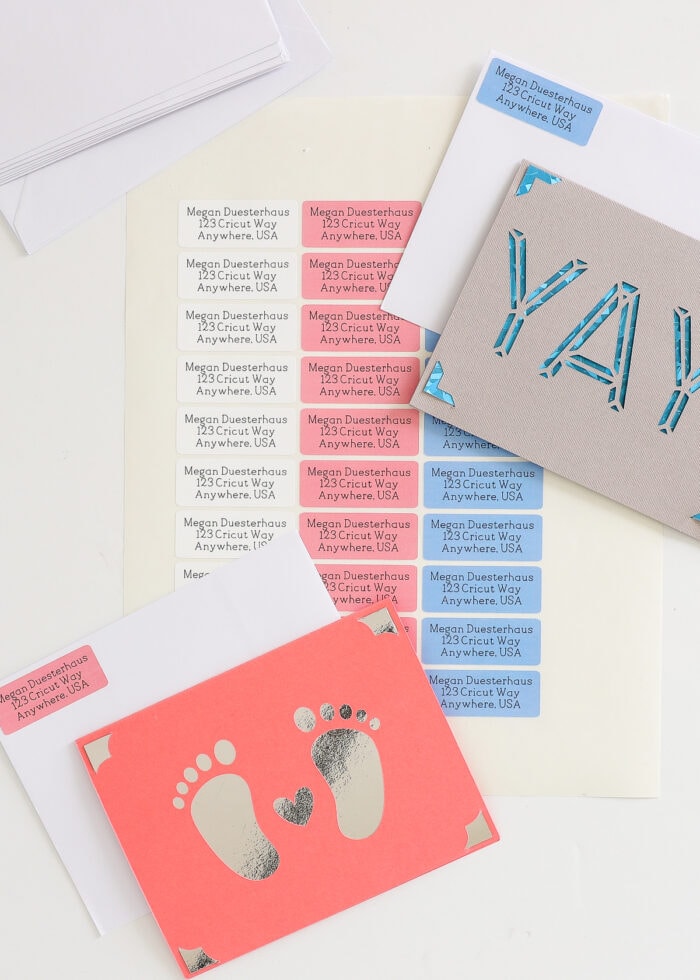
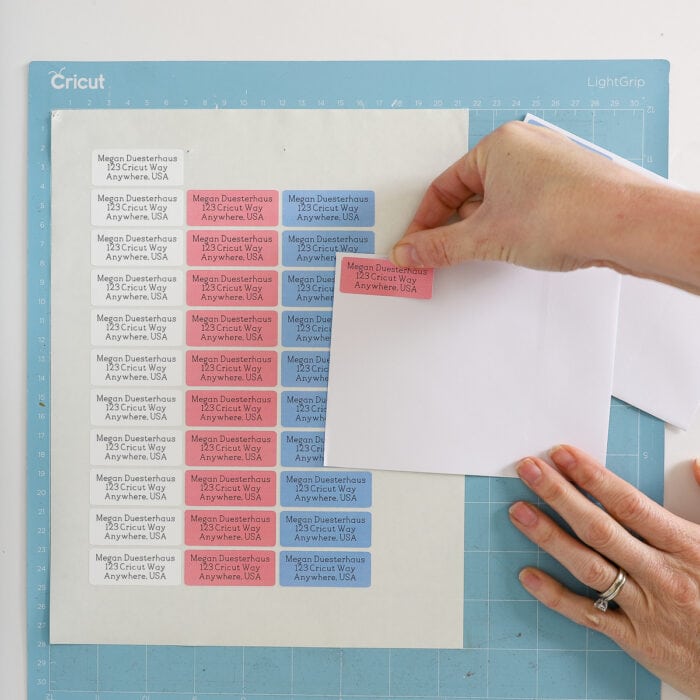
Your return address labels are now printed and cut! To make them easier to use, peel away the excess sticker paper surrounding each label.
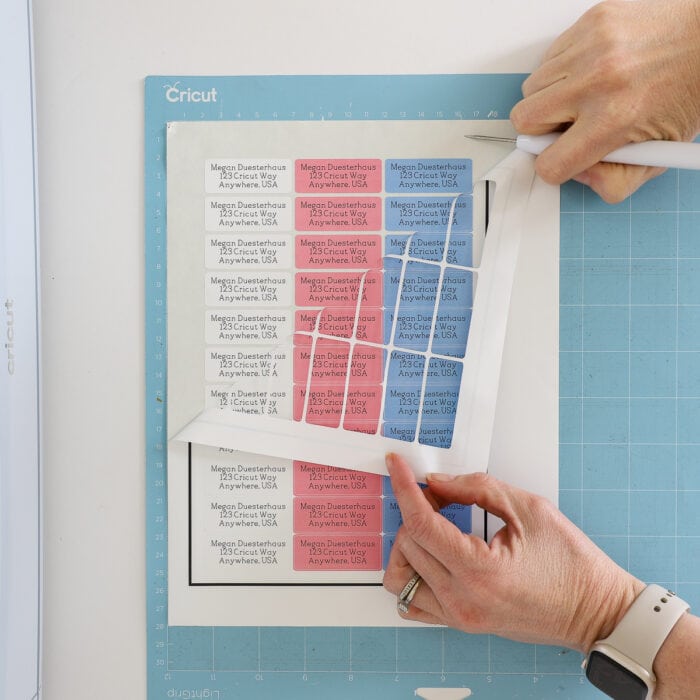
Now, you can easily peel up each return address sticker…
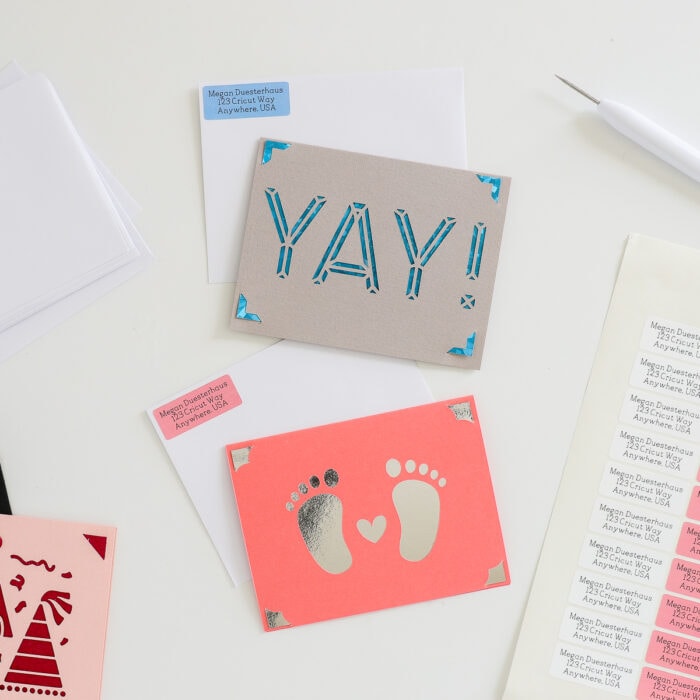
…and place them right onto your envelopes!
In mere minutes, you can have a whole sheet of perfectly-custom return address labels ready to go!
How to Make Return Address Labels with Cricut Pens
Supplies Needed
While the Cricut Print Then Cut function is my preferred way to make lots of return address labels, it is unfortunately not an option for Cricut Joy users. But don’t worry, you can still make the same return address labels using Cricut Pens instead!
Here is what you will need:
- Any Cricut Machine – Cricut Joy, Cricut Explore, or Cricut Maker
- Fine-Point Blade – the one that comes with your machine
- StandardGrip Mat – if not using “Smart” papers
- Extra Fine-Point Cricut Pens* – compatible with your machine
- Writable Paper – you can choose ANY writable paper you like, just make sure it has an adhesive (sticky) backing and is compatible with Cricut Pens.
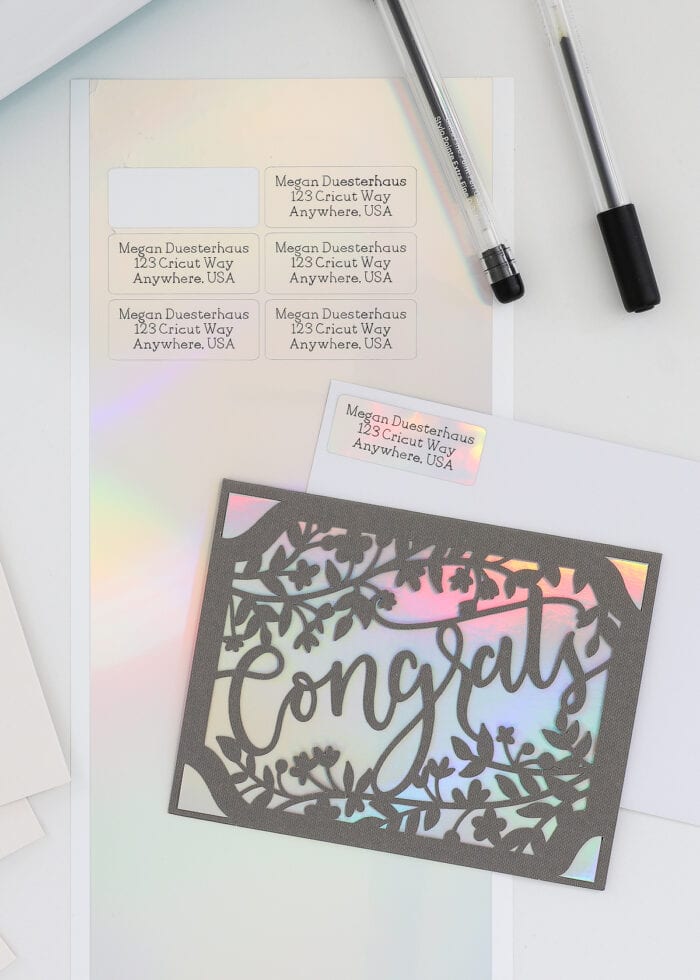
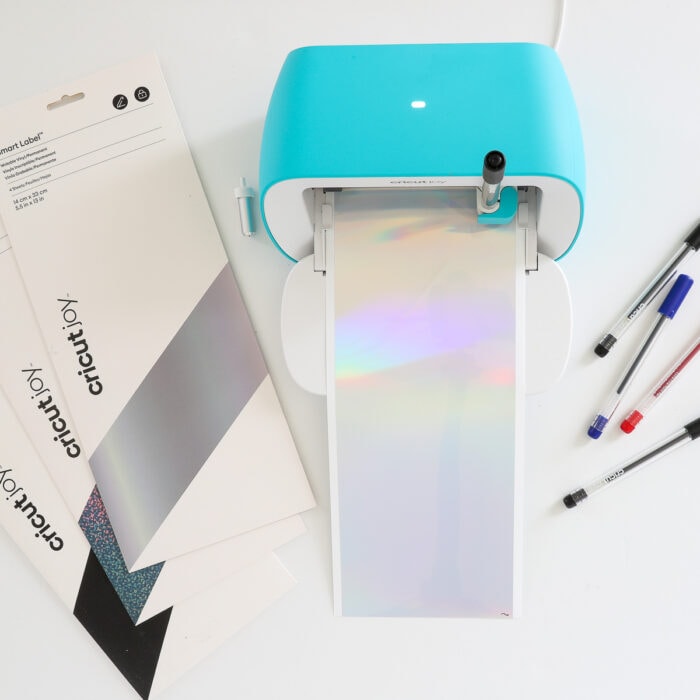
- Smart Label – now available in lots of colors including white, black, clear, silver, holographic, and gold!
- Smart Paper Sticker Cardstock
- Any Sticker Paper – it will need to be loaded onto a mat; make sure it’s compatible with Cricut Pens.
*NOTE: Return address labels tend to be quite small. As such, any drawn details are also quite small. In order to get crystal clear text that doesn’t blur together, I highly recommend using Extra Fine Point (0.3 weight) Cricut Pens.
Something To Know
While all three Cricut machines can make return address labels with Cricut Pens, this process will take longer. The design process is (almost) the same, but it takes the machines a loooooooong time to draw all the tiny text with Cricut Pens.
So if you have an Explore/Maker, I strongly suggest using the Print Then Cut process outlined above (unless you want to use some of the specialty Smart Label materials).
Step 1 – Design Return Address Labels In Cricut Design Space
Like the Print Then Cut process above, first design your labels in Cricut Design Space. While this process will look nearly identical, there are a few important adjustments you’ll need to make for the Cricut Pens.
Pick a shape for your return address labels. Again, I like to use the free Shapes Menu.
Size your shape to your preference. Again, you may want to experiment with different sizes to see how many you can fit on a single page of whatever writable material you’re using. Even nudging the size slightly up/down can significantly affect how many labels will fit per page.
Add your address text via the Text Tool (lefthand toolbar) and adjust the alignment and spacing as needed (Font Toolbar).
However, when selecting a font this time, be sure you filter for a “Writing Font” within the Font Menu (shown below). This will ensure your font has a “written” appearance (rather than an outlined appearance).

Next, ensure your font is set to “Writing” (under Style) and “Pen” (under the Operation). This will tell your Cricut machine to create the text with the Cricut Pen (rather than a blade or your printer).
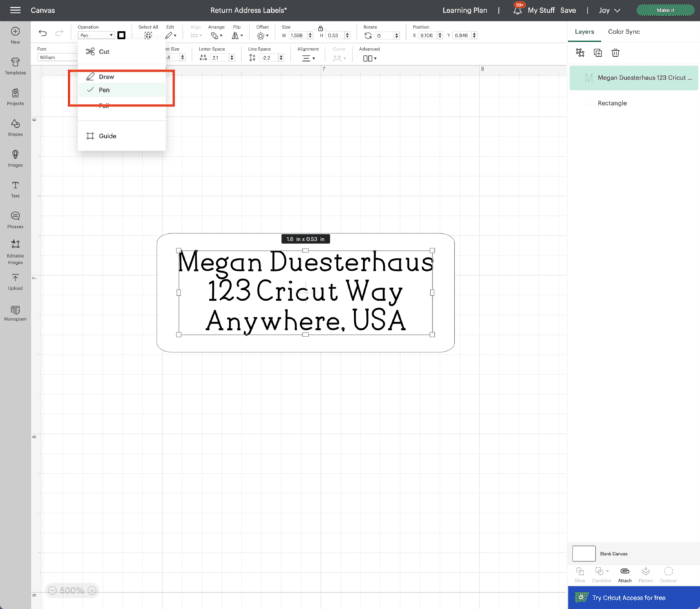
Finally, you MUST attach the text to the label shape before sending it to your machine:
- Select the text box and label shape together.
- Click “Attach” (bottom right-hand toolbar).
- Confirm that your label+text are “attached” in the right-hand Layers Panel.
Once your label(s) is ready, click the green “Make It” button to send it to your machine.
Still confused about using Cricut Pens to make labels? Learn more: How to Use Cricut Pens to Make (Gorgeous) Custom Labels
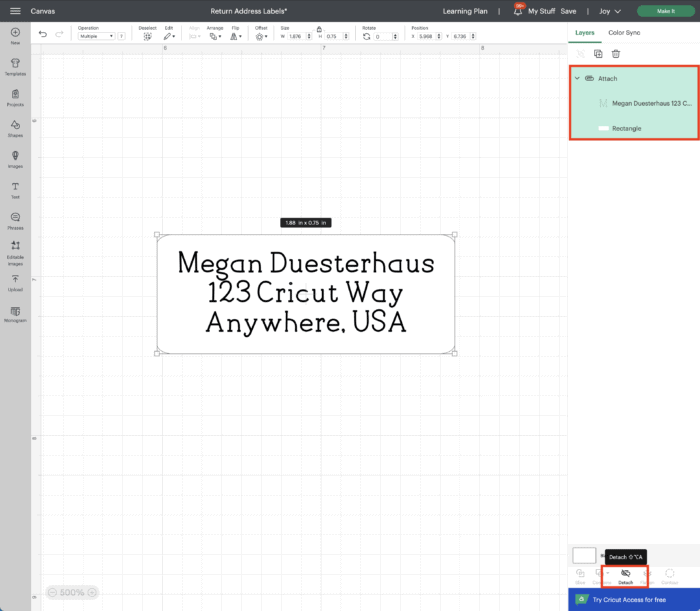
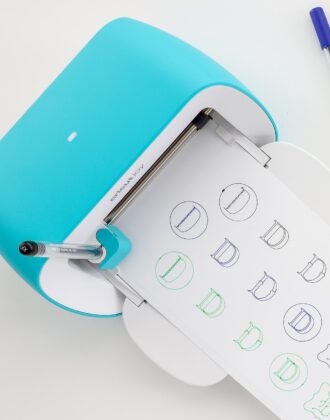
Step 2 – Draw + Cut Labels with Cricut Machine
Next, load whatever paper you want your labels made from into your Cricut machine. If using a “Smart” material, you can load it directly into the machine. All other materials will need to be placed on a mat first.
Then, follow the on-screen prompts within Cricut Design Space to both draw and cut out the labels.
- Cricut Explore/Maker – Load a Cricut Pen into Clamp A and the Fine-Point Blade into Clamp B. Your machine will draw then cut without you having to do anything.
- Cricut Joy – First load the Cricut Pen into the clamp. After drawing all the text, you will be prompted to load the blade in order to finish cutting out the labels.
Once the machine is done, unload the material/mat!
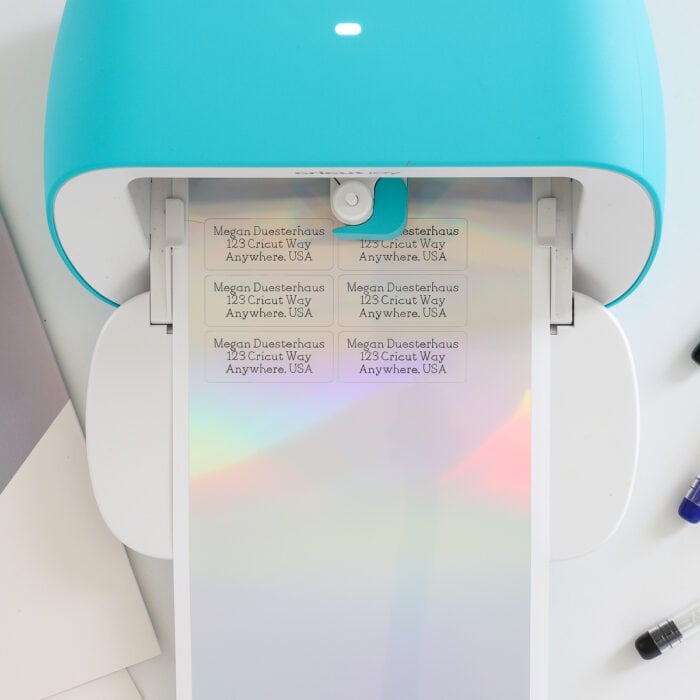
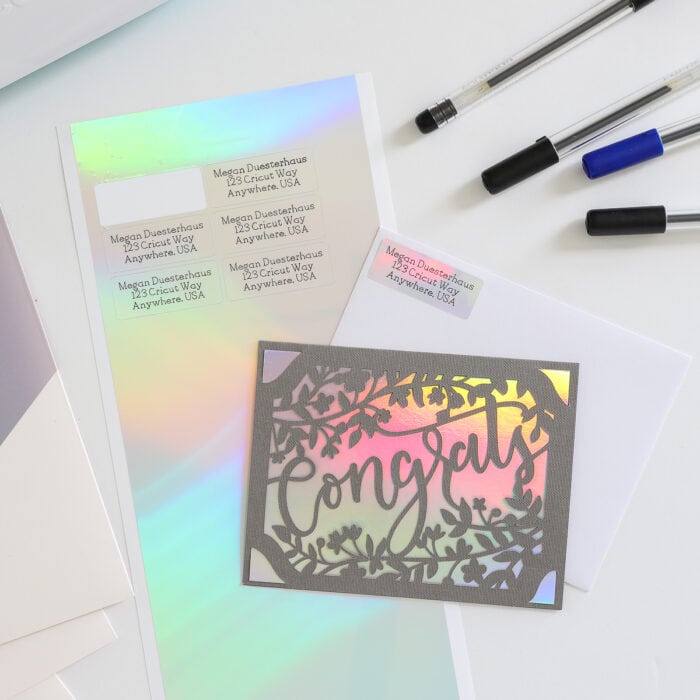
Step 3 – Peel and Stick Return Address Labels Onto Envelopes
Your return address labels are now ready to use! Peel away the surrounding paper/label material and stick the labels directly to your envelopes!
Psssst – Isn’t that new silver Smart Label gorgeous?!? I’m SO impressed with how well the Cricut Pens write on it!
Take It Up a Notch
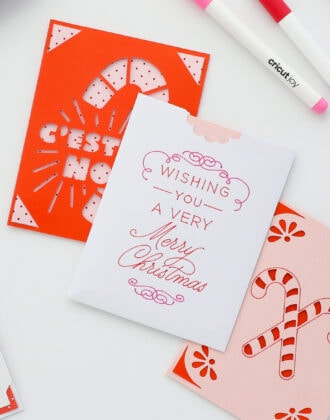
I opted to keep these return address labels super clean and simple. But using either of these tutorials, you can add ANYTHING to your labels.
From monograms and cute icons, to borders, pictures, and logos, the sky is the limit when creating return address labels that are practically perfect for your mail!
Other Great Cricut Mail Projects
Looking for other fun ways to dress up mail with your Cricut? Check out these other fun projects:
- How to Make Cards on Cricut Joy
- How to Address Envelopes with Cricut Joy
- How to Make Envelope Stickers with Cricut Joy
- A Clever Envelope Hack for Gift Bags
More Great Cricut Labeling Projects
Ready to label even more with your Cricut machine? Check out these other awesome projects:- Make Vinyl Labels with a Cricut
- Make Labels Using Cricut Pens
- Make Labels with Cricut Print Then Cut
- Make Waterproof Labels with a Cricut
- How to Label Fabric with Iron-On Vinyl
- Iron-On Clothing Labels with a Cricut
- Toy Bin Labels with a Cricut
- Pantry Labels with a Cricut
- Dresser Drawer Labels with a Cricut
- Luggage Tags with a Cricut
- Return Address Labels with a Cricut
- Fast Labels with the Cricut Joy App
- Make Easy Round Closet Dividers with Cricut Vinyl
- Label Drawstring Backpacks with Cricut Iron-On
- How to Make Vinyl+Wood Labels
Whether you want to make custom address labels for some specialty mail or are just in a pinch, making your own return address labels with a Cricut machine is quick and (really) easy! I hope the two tutorials outlined here empower you to give this fun (and super handy!) labeling project a try…whichever machine you own and love!
Megan
3 Comments on “How to Make Return Address Labels with ANY Cricut Machine!”
Thank you so much! By far the best instruction I have seen!!!
I followed your instructions for the Cricut Joy, but it did not prompt me to insert the blade after the text had been written. What do I do now?
Do you have any tips for me…I did the print then cut to create the labels on my Maker, but when I cut them out, it cut all the way through the backing also. I tried using “less pressure”, but it still cut all the way through. So frustrating! What material setting should I be using? Thank you for your help!