Top Tips for a Perfectly Organized Bathroom Closet (That Looks Great Too!)
If there’s one thing our current home has, it’s closets! And with many of our larger decor projects out of the way, I’m slowly making my way through each one. Today, I’m giving a tour of our organized bathroom closet and sharing my very best tips for creating storage that functions well while looking great too!
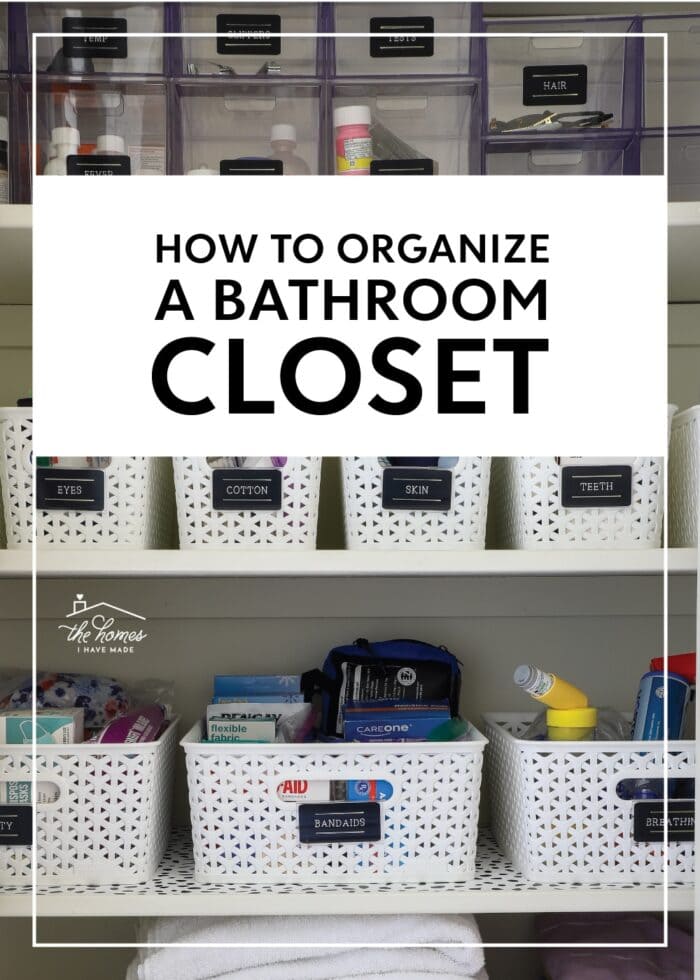
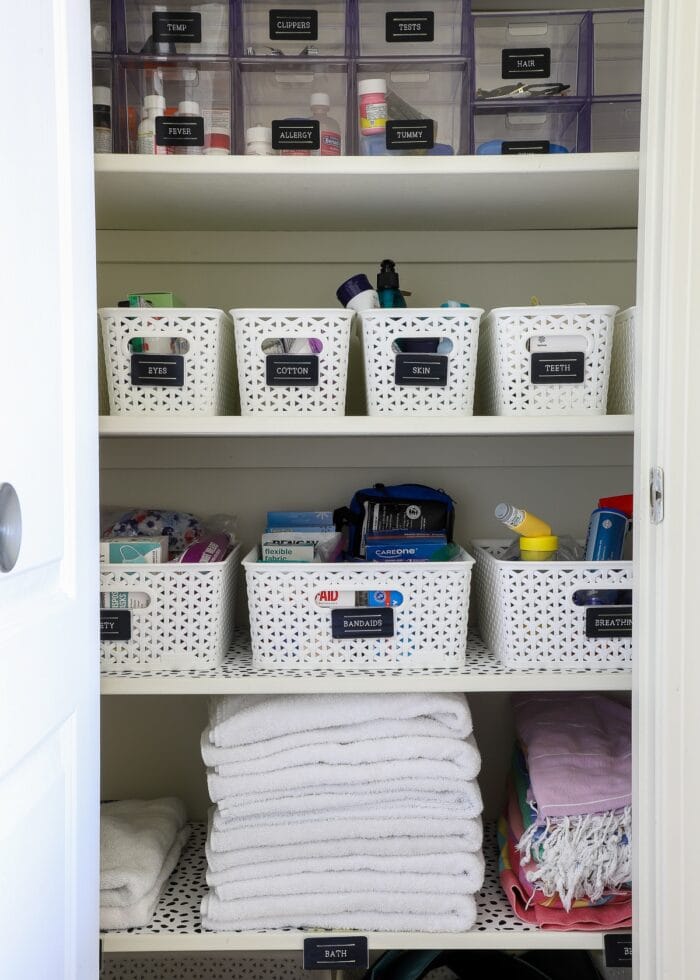
Our Organized Bathroom Closet
In all our homes, we’ve never had a full-size closet inside a bathroom!
Sure, we’ve had hallway linen closets and expansive bathroom counter cabinets, but never a floor-to-ceiling closet with multiple shelves for storage. So although this home lacks larger storage areas (like a basement), I was pretty surprised (and excited!) to discover this rather spacious closet in the upstairs hallway bathroom (that our two younger boys primarily use).
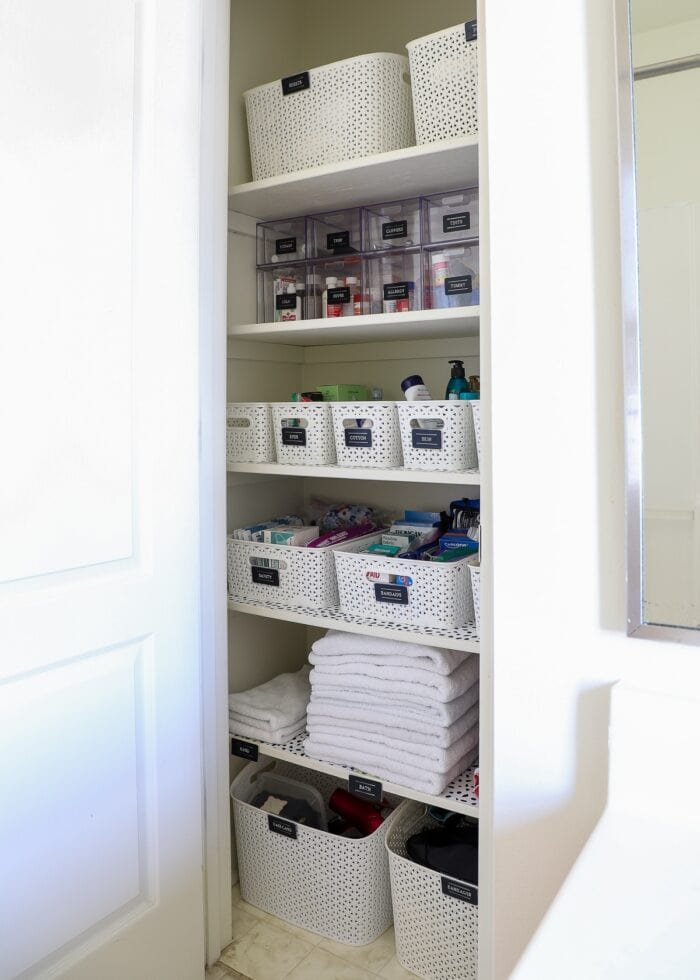
Upon moving in (and in the months that followed), this large closet became a dumping ground for all things medical, hygiene, toiletries, and linens. But after struggling to find non-expired medication amidst the towels and Bandaids and masks and cotton balls, I moved this closet to the top of the project list!
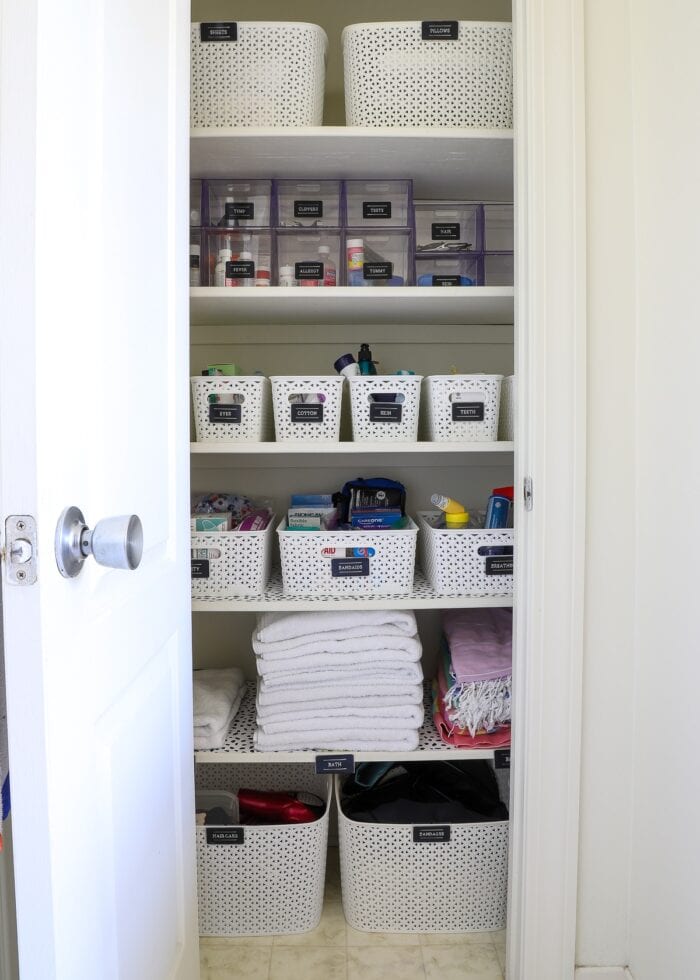
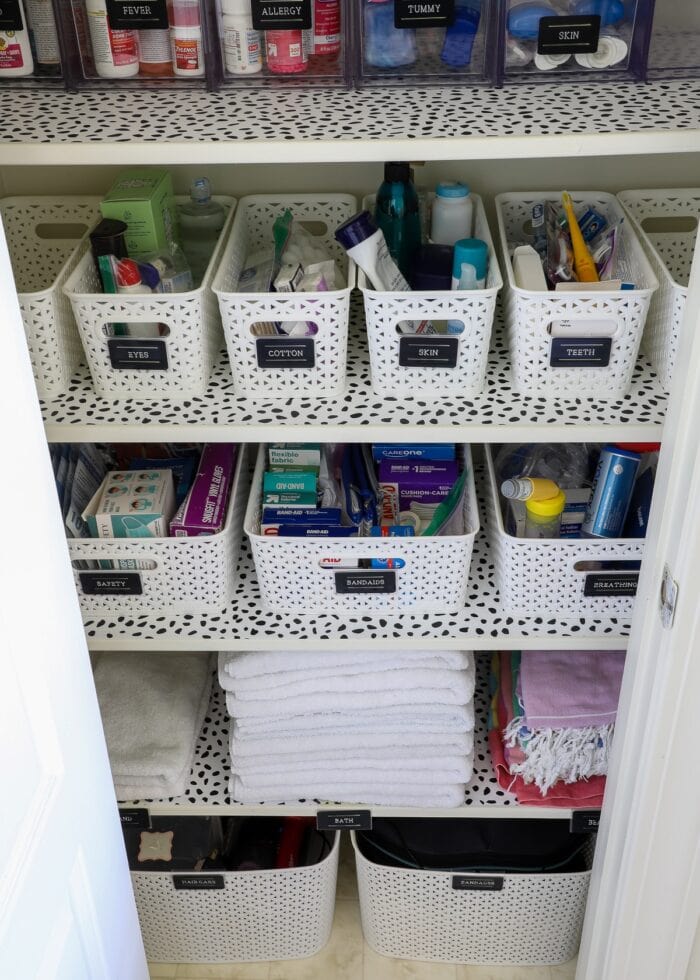
Now, it’s filled with the items we use and need the most, all organized in a way that is easy to see, reach, and access. And thanks to a few fun and decorative details, this closet is mighty fine on the eyes as well!
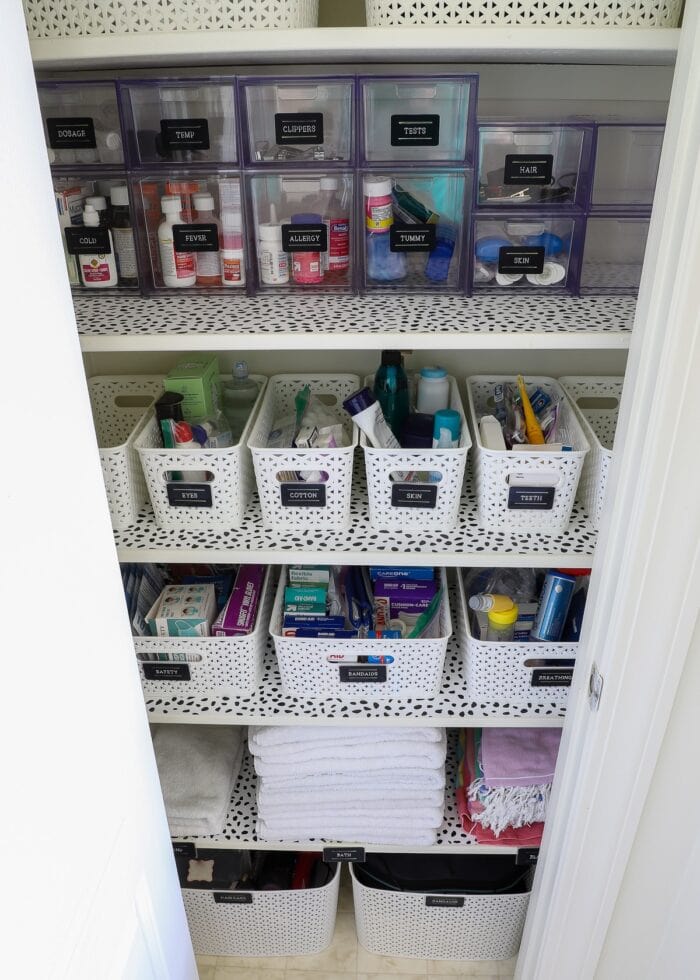
How to Organize a Bathroom Closet
To give you a sense for how “dire” of an organization project this became, I don’t have any before photos (gasp!) That’s because I very much decided to organize this closet on the spot, spur of the moment. I started emptying the closet, throwing items out, and making piles before I even had a chance to grab my phone!
That said, I followed my tried-and-true SPACE method, just like I do for every organization project. While you can learn more details here (Learn How To Organize Any SPACE In 5 Steps), there are some specifics to keep in mind when tackling a bathroom closet organization project.
Step 1 – Empty the Closet & Sort Items
Bathroom and linen closets tend to become dumping grounds in many homes. Because we need and expect them to hold such a wide variety of items, it becomes all-too-easy to just open the door, throw things in, and close the door again.
No shame. That’s what I was doing too!
But to really organize a bathroom closet, you need to pull out every last item. Yep, every half-used box of Bandaids and wadded up pillow cases. Pull it all out and sort items into basic categories as you go (e.g., linens, hygiene products, medical supplies, etc).
2 – Purge Expired or No-Longer-Needed Items
As you empty the closet and sort items into categories, purge as you go. In a bathroom closet, you’ll want to keep these things in mind:
- Are the items expired? (Check all medications and home tests too. They expire quicker than you realize!)
- Are the items still used/needed?
- Should the items be stored in this closet?
By eliminating these items now, you’ll not only have more space once everything is loaded back in, but you’ll also know for sure that everything is current and usable.
3 – Analyze the Items
With all the items sorted into (large) general categories and purged out, it’s time to re-visit each pile and see how things can be broken down even further:
- Medical Supplies – Bandaids | Gauzes & Tapes | Bandages | Cotton Swabs, etc
- Hygiene Supplies – Teeth Care | Eye Care | Lotions| Soaps | Makeup | Feminine Care, etc
- Medicines – Fever/Pain | Allergy | Cough/Cold | Gastro, etc
- Linens – Blankets | Sheets | Pillowcases | Tablecloths, etc
The specific categories you’ll end up with will be directly determined by what items you have and how many. Keep refining the broader categories down until you have simple, intuitive groupings that can be contained individually.
4 – Contain Every Category
Next, you’ll need to find the right size container to hold each category. Small categories (e.g., clippers) should have small containers, and large categories (e.g., sheets) should have large containers.
Admittedly, this step can take quite a bit of measuring, shopping, and experimenting until you find the perfect combination of storage baskets, bins, and containers for your items AND your shelves. Refer to my tips below for identifying the “just right” container for each group of items.
5 – Embellish
Finally, once (and only once!) everything is in its final spot, consider adding embellishments such as labels, shelf liners, wallpaper backing, or other decorative details. Although not 100% “necessary,” these are the details that will ultimately help everyone in the home understand your organization methods and motivate them to keep it that way!
Top Tips For a Perfectly Organized Bathroom Closet
Keeping that general organization process in mind, here are some other really helpful tips to consider as you work through the process of organizing your bathroom closet!
Give It Some Time
(This tip only applies to people who are just moving into their home.)
While you might be tempted to organize every single closet the second the moving boxes are unpacked, I suggest you wait a little while. Because it’s only after you’ve lived in a space for a few weeks/months, that you have a really good idea of what should go where.
Had I organized this closet our first weekend in the house, I probably would have loaded it up with linens. But we actually discovered a better spot for those bulkier things, leaving these shelves open to store smaller collections of items.
You will have much better luck organizing a bathroom closet “for good,” when you fully know what should be in it.
Psssst – If you’ve been living in your home for a while and it’s still a disaster, no need to wait! Get to work, my friend!
Should It Stay or Can It Go?
Whether you have a really large bathroom closet or a tiny one, one fact remains the same: space is finite. There is only so much you can fit into the storage space you have.
As you work through Step 3 (Purge) and Step 4 (Assess), consider what items must stay in the bathroom closet versus what items can be stored elsewhere.
- You might notice there is no toilet paper in this closet. That’s because we have plenty of space under each bathroom sink to store several rolls, instead of using up precious space here.
- Likewise, all our bulky comforters, blankets and quilts didn’t fit nicely on these shorter shelves. But there was plenty of room on the open shelving in the nearby hall closet.
So although I generally like to keep groups/categories of items together across the entire house, considering other areas such as medicine cabinets, laundry rooms, and linen closets, can ultimately keep the bathroom closet tidier and more user-friendly.
Size of the Item(s) = Size of the Container
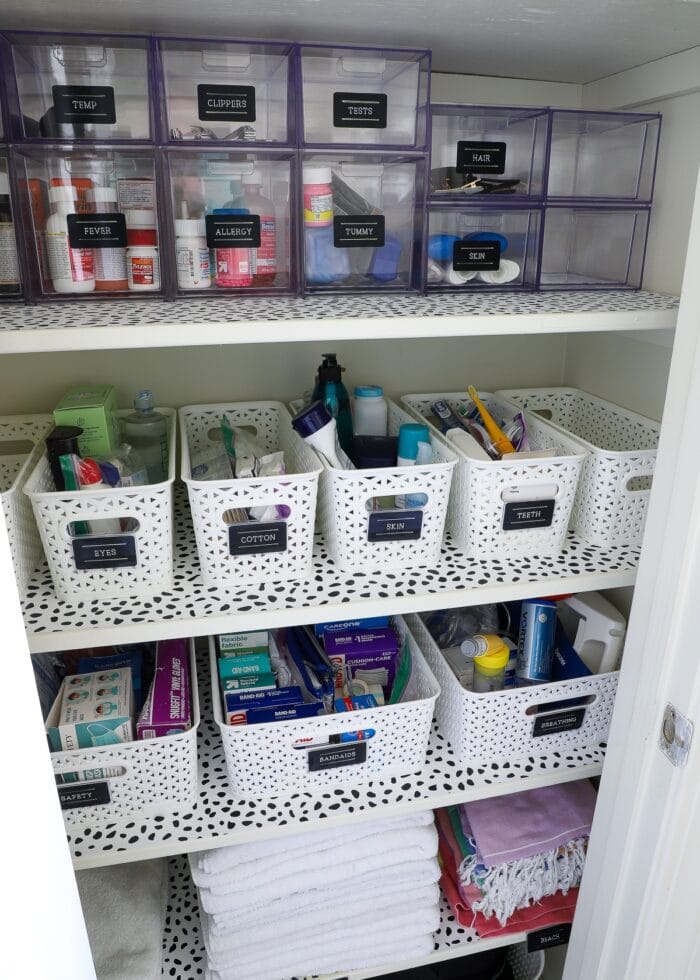
My original plan was to use the skinny y-weave baskets on both middle shelves. But as I sorted and grouped my items, I realized I had some collections that simply wouldn’t fit in the narrower baskets (e.g., our extensive assortment of Bandaids). So I switched to the medium-size y-weave baskets for these larger groupings.
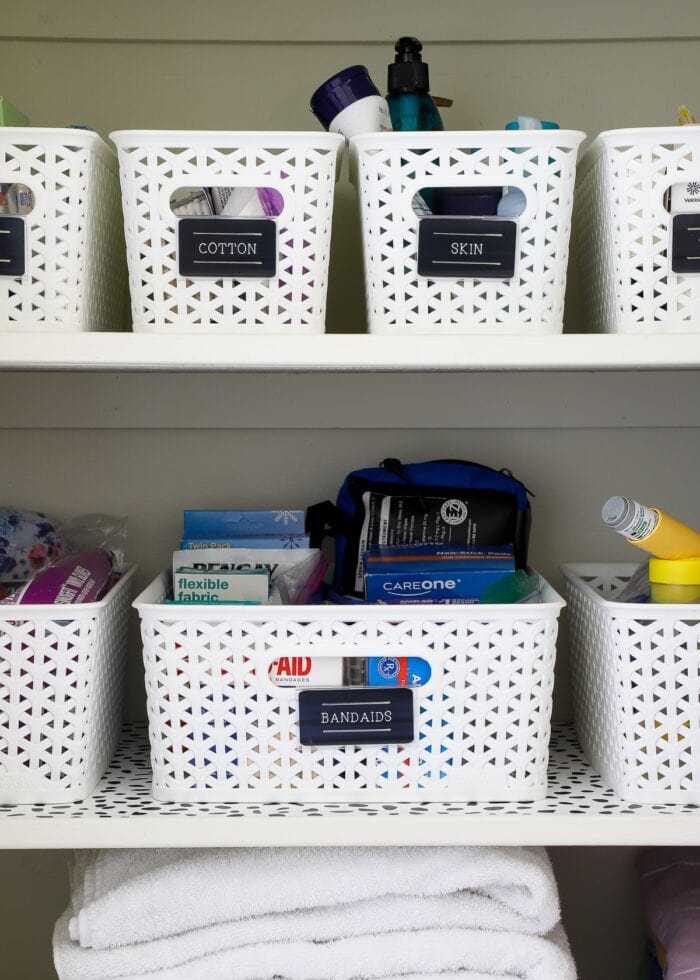
By matching the size of the collection to the size of the storage bins, you will take most advantage of the available space. But also, each category will ultimately be easier to see/access and remain tidier since it’s not drowning in a too-large basket or overflowing in one that’s too small.
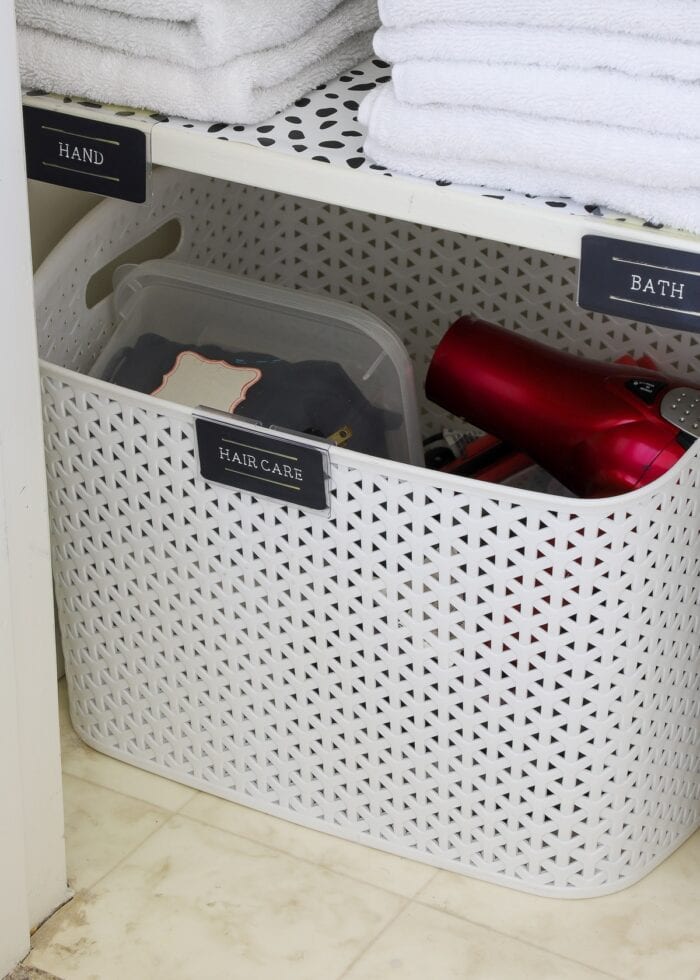
Mix-and-Match Container Types
I had to play a good amount of “Organization Tetris” to determine what would fit, where, and how. I swear, I had every bin, basket, and container we own pulled out to find the solutions you see now.
While I’m a sucker for all matching baskets, don’t let “matching” prevent you from employing the “just right” solution for each category of items.
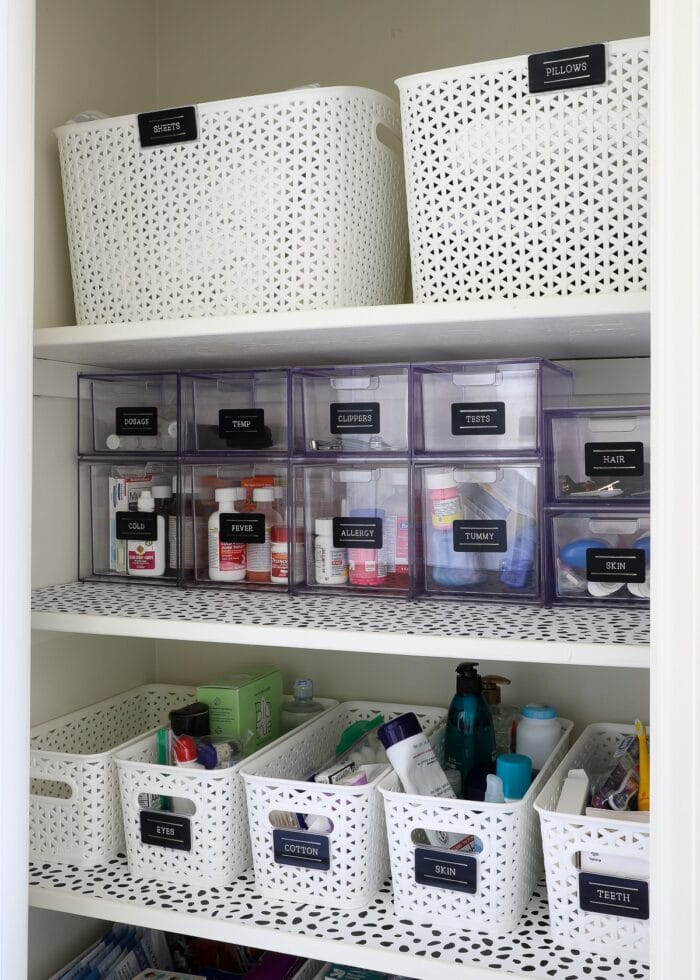
As I sorted out all our medicines, clippers/tweezers, thermometers, and hair products, I determined even my smallest baskets weren’t ideal for these tiny items. But you know what were?!? These stacking acrylic drawers (which just so happen to fit perfectly across the open shelf!)
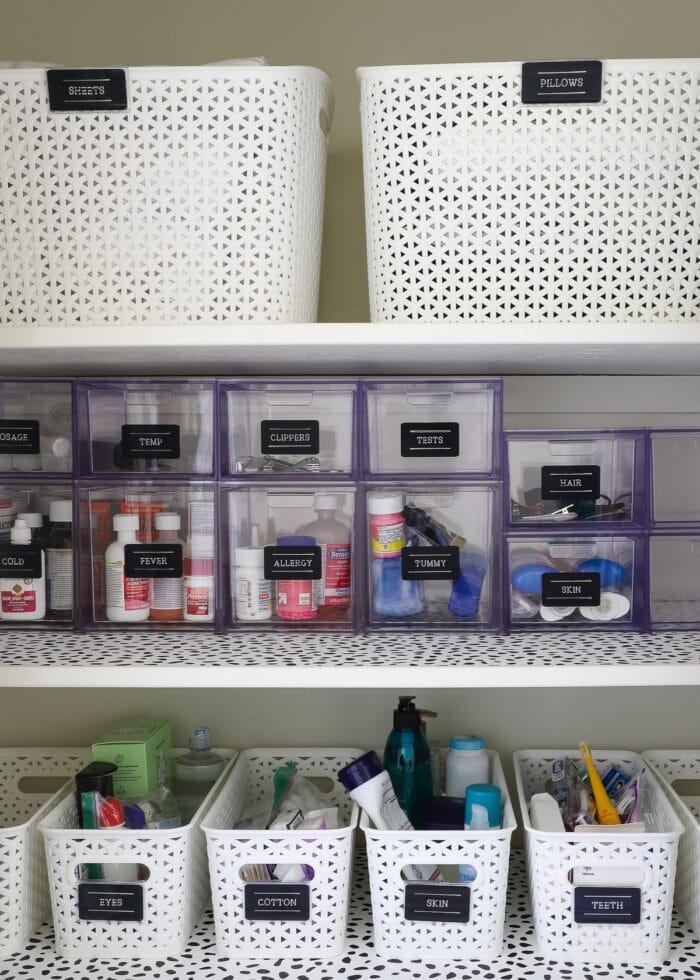
So beyond just the size, also consider a variety of container types (e.g., baskets, containers, drawers, boxes with lids, plastic bins, lazy susans/turntables, glass jars, etc) to hold each collection of items just the way you need it.
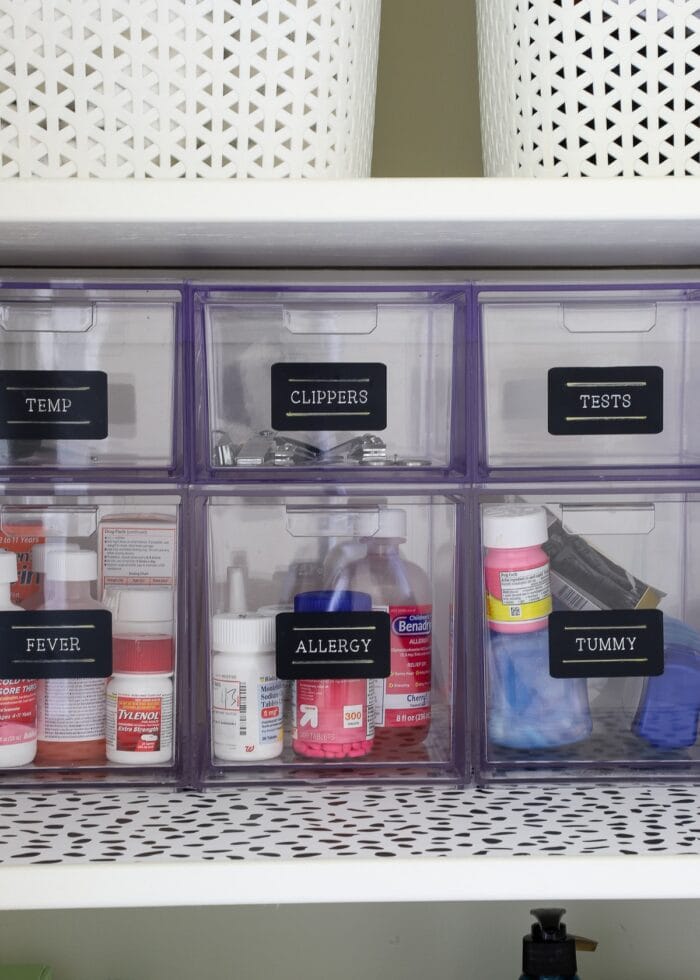
Is a Basket Really Necessary?
If I can put something in a basket, 99% of the time I will. But sometimes…baskets just aren’t the right solution…such as:
- If the basket doesn’t fit in the spot comfortably
- If the basket doesn’t come down or go up easily
- If the items don’t fit into the baskets comfortably
While these situations can sometimes be remedied with bigger/different baskets, sometimes it’s worth asking if a basket is needed at all.
I determined that stuffing our towels into baskets didn’t solve anything. In fact, a basket just made the towels harder to get out and put away. Folding and stacking the towels directly on the shelf not only looked tidier, but also allowed us to fit more in a single spot (since the basket also takes up precious space).
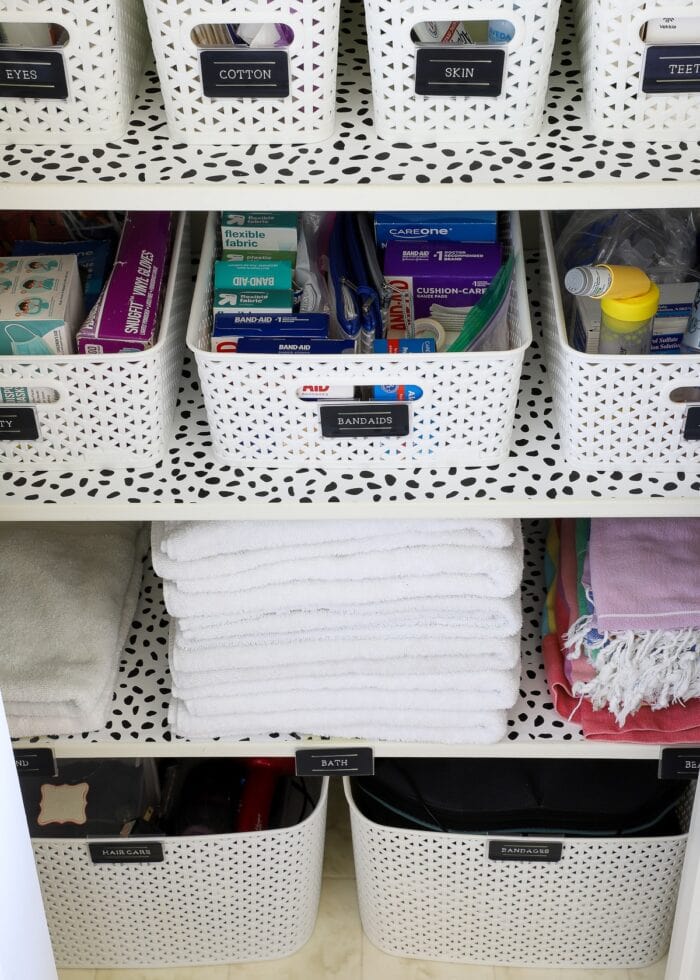
While loose and small items are almost always better in a basket, oftentimes big bulky things like towels, blankets, and sheets are better off folded and stacked instead.
Accessibility Matters
When you are placing items into containers and those containers onto shelves, practice getting things in and out.
Sure, a particular basket might fit in a certain spot; but if it’s too hard to get down, you will not ultimately use it in the long run. And then, you’ll be much more likely to put items next to or around the basket instead, creating a bigger mess!
The acrylic drawers we’re using to hold smaller collections of items fit perfectly across a single shelf. But if these drawers were not fully removable, getting our hands into the far outside drawers would be quite bothersome.
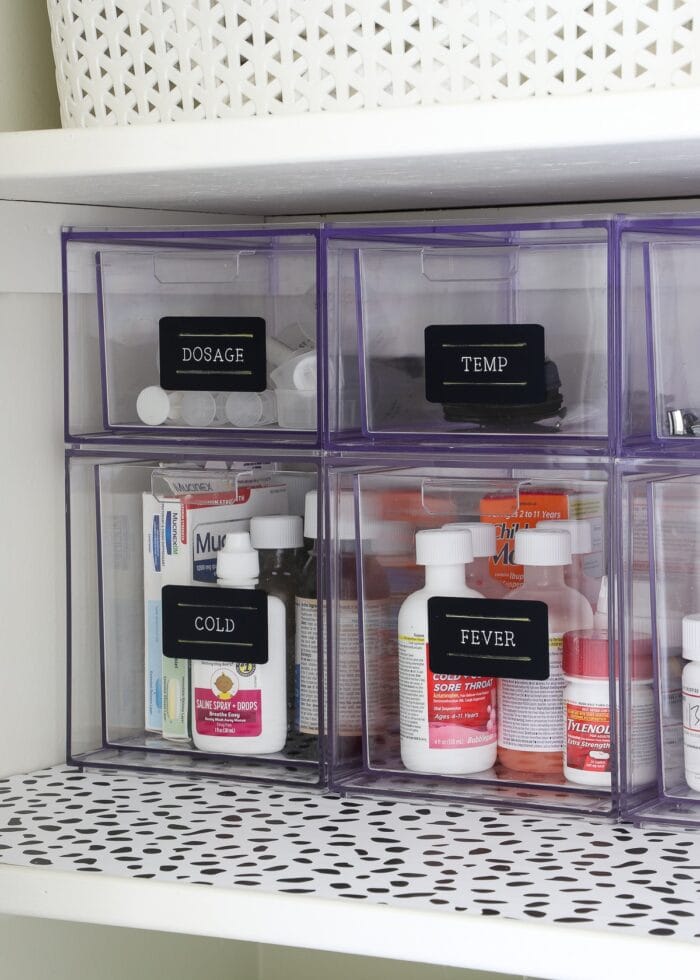
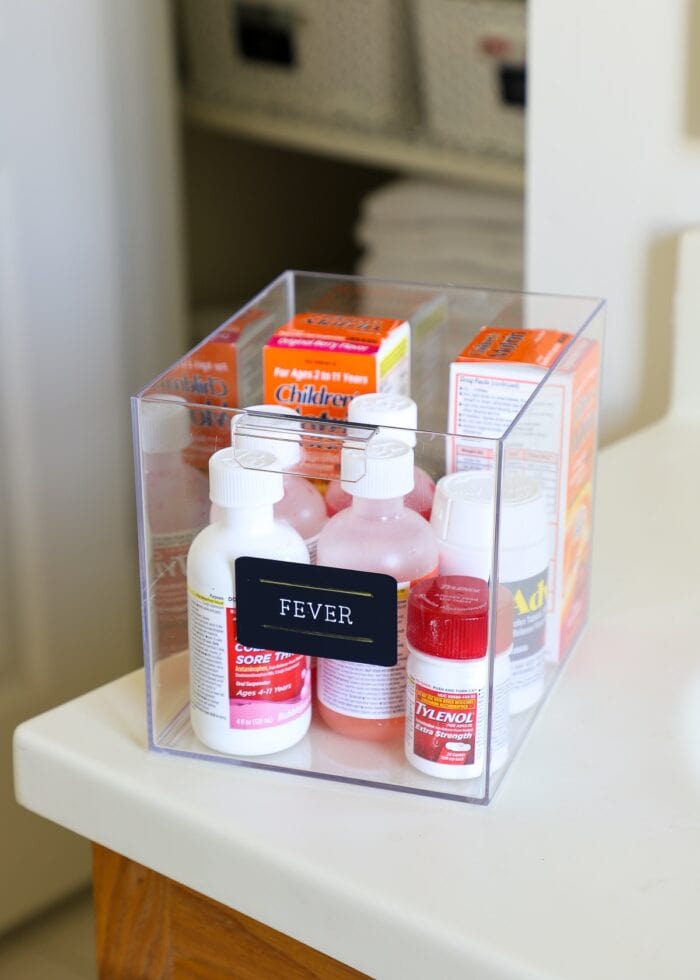
However, since these particular drawers slide all the way out, we have easy access to the contents, no matter where it sits on the shelf. In fact, we can pull the clear bins right out and move them to the counter/around the house as needed!
Leave Room For Growth
Has this ever happened to you?
You perfectly organize something (anything…a drawer, a closet, a shelf). Everything fits juuuuuust right without an inch to spare. But then you buy something new or find an item elsewhere in the house, and it doesn’t fit…anywhere. So it gets put on the floor, crammed in, etc. And your pretty, perfect organization project is no longer quite right.
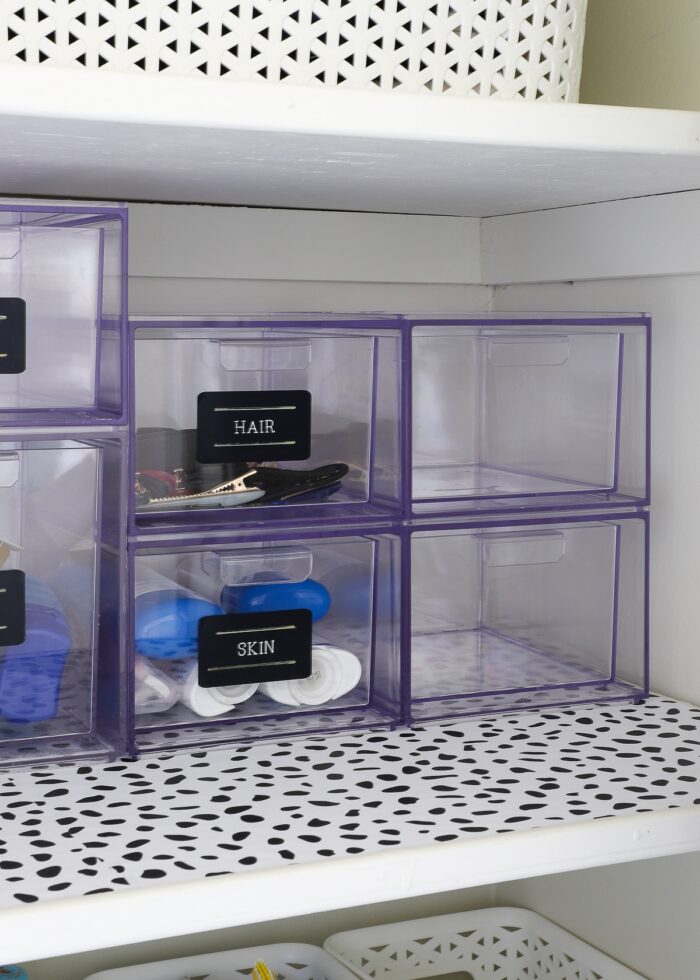
Leaving some empty space will give you room to grow. Sure, it might seem weird to have empty baskets or drawers or shelf space, but you’ll be happy (and relieved) the next time you go to put something away and have an open spot available!
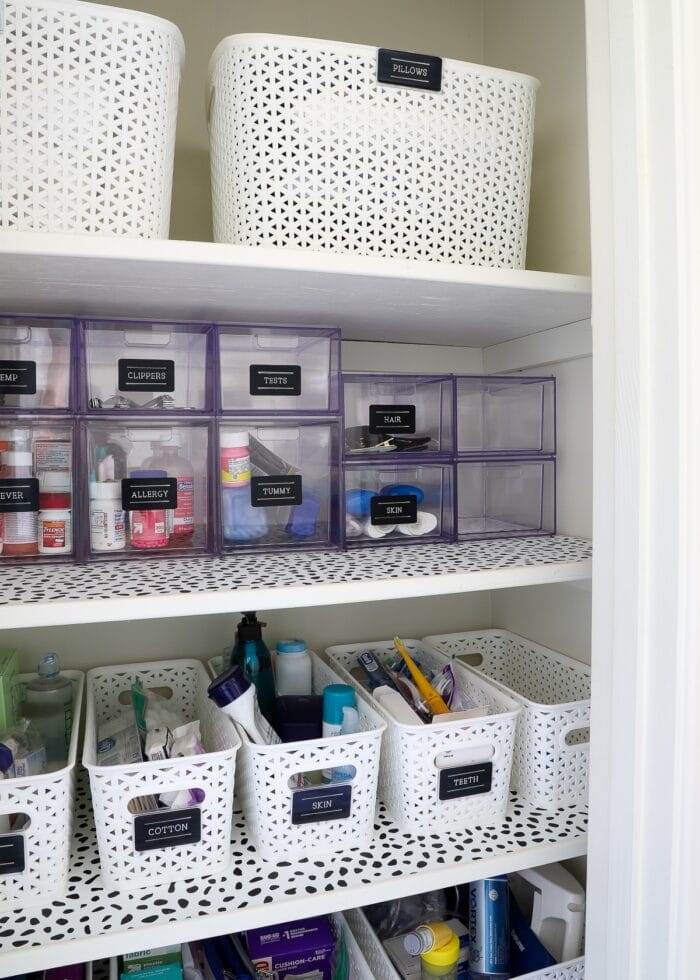
Wondering why my last two stacks of drawers are shorter than the rest? While I would love to have the same arrangement all the way across the shelf, these drawers were from the bathroom cabinets in our last house. I didn’t want to buy more tall drawers just to make this arrangement look “perfect,” especially since I already had empty drawers!
Label…Everything
Remember, there are two primary purposes to labeling:
- So you (and everyone in the household) can easily find what they need when they need it.
- So you (and everyone in the household) can put items back where they belong after they’re used.
And both functions are equally important when it comes to a bathroom closet!
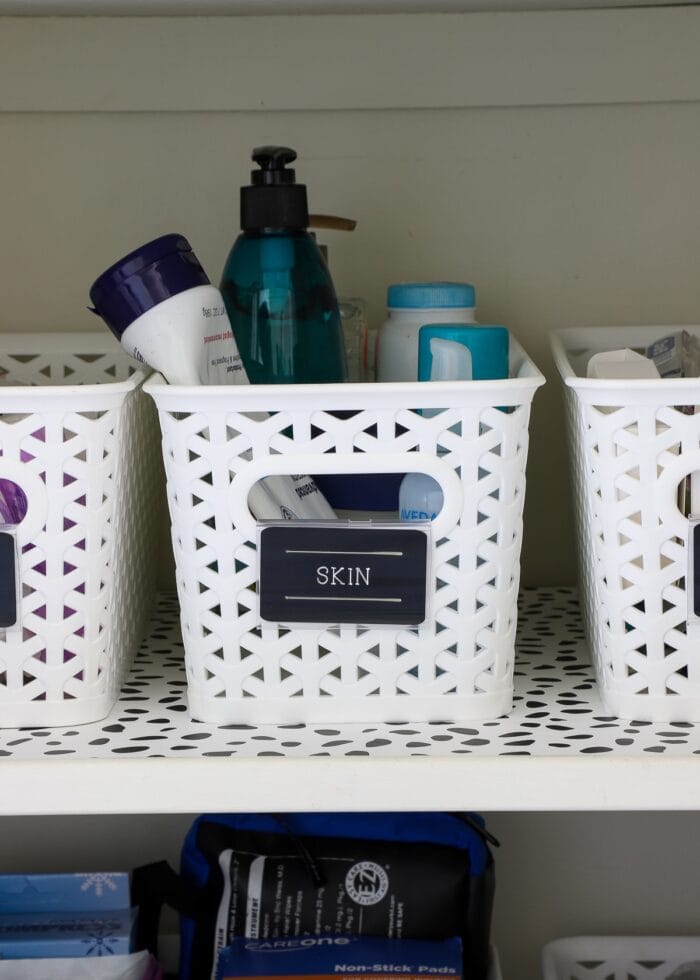
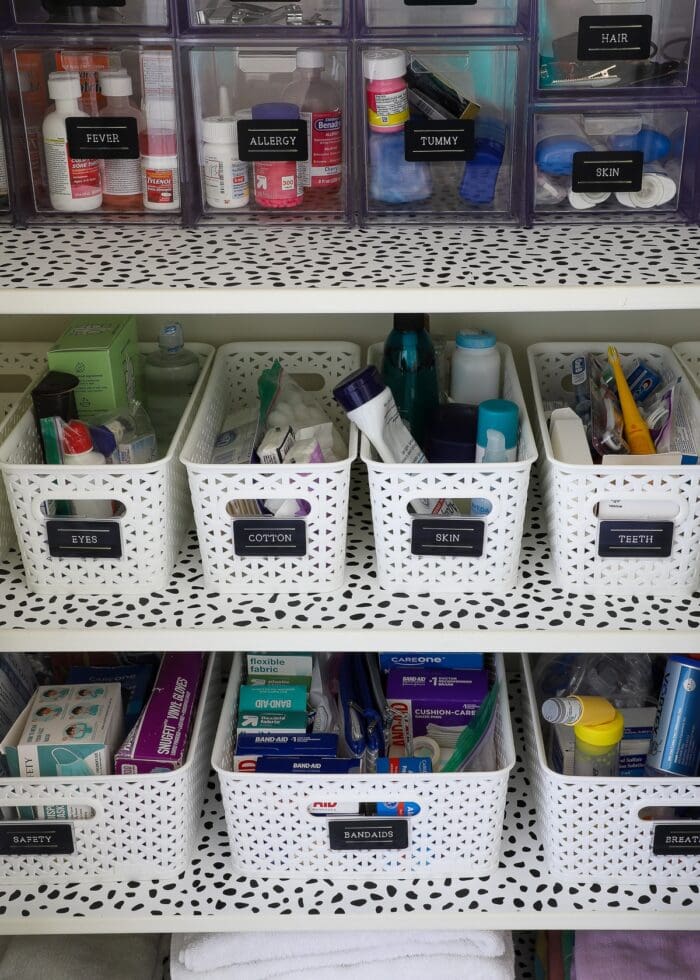
Bathroom closets tend to hold lots of little items across a wide variety of categories. And without labels, it can be very difficult to quickly and easily locate exactly what you need (Tums versus Tylenol). Whether you use clear containers or not, I always recommend adding labels so that it’s apparent what exactly is being stored where.
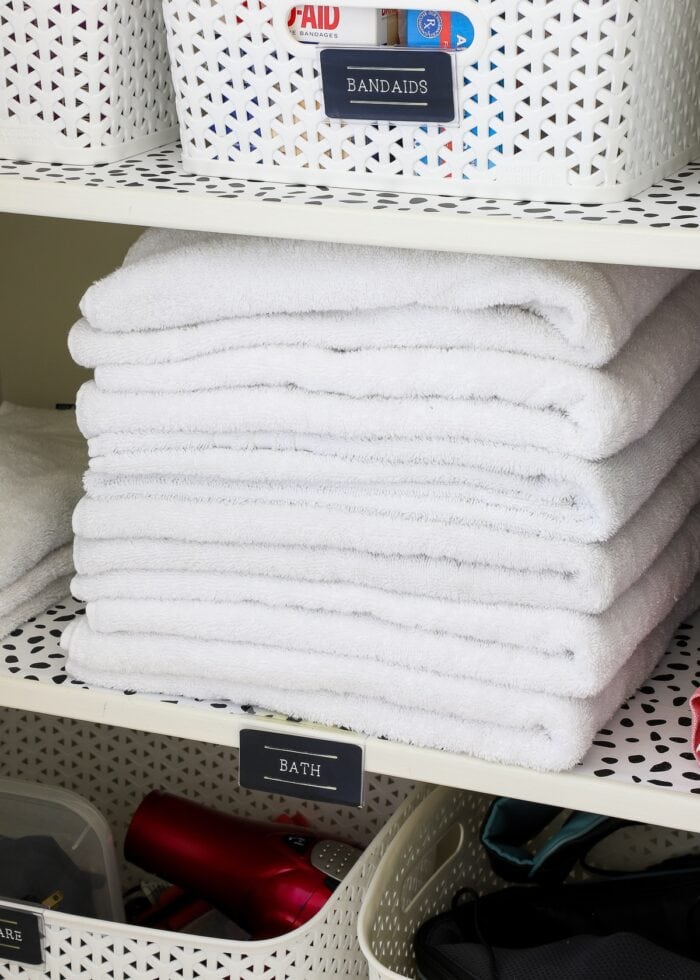
Further, labels help reinforce where to put used/replacement items too.
Did I need to add towel labels to our shelf? Probably not. It’s pretty obvious which towels are hand towels versus bath towels. But these particular labels instead serve as gentle (but important) reminders of where the extra towels go after use/washing.
Without labels showing where items are AND go, over time, everything will likely get put anywhere…and you won’t be able to find anything all over again!
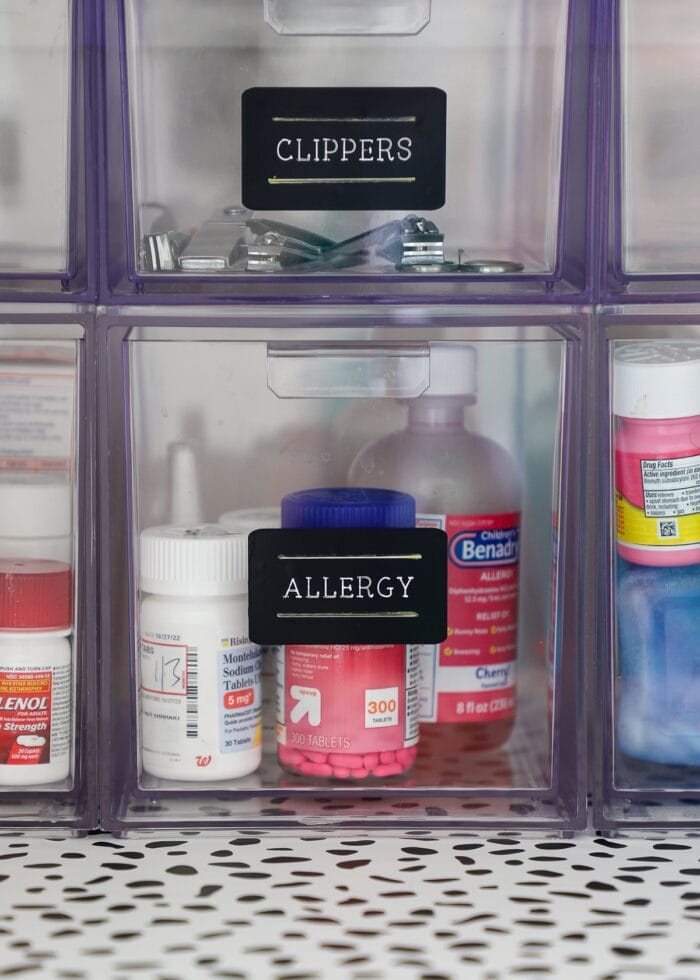
Curious how I made my black labels? With my Cricut Joy label maker and Smart Label Writable Vinyl! See here: Everything You Need to Know About Cricut Writable Vinyl
Label Intuitively
When making labels, keep them simple and intuitive for the entire family. I personally love labels like “Ouch” and “Yucky” and “Hurt,” but these can oftentimes be more cute than helpful. Especially if you have husbands and kids, label things plainly so that everyone can find exactly what they need…without asking you to interpret!
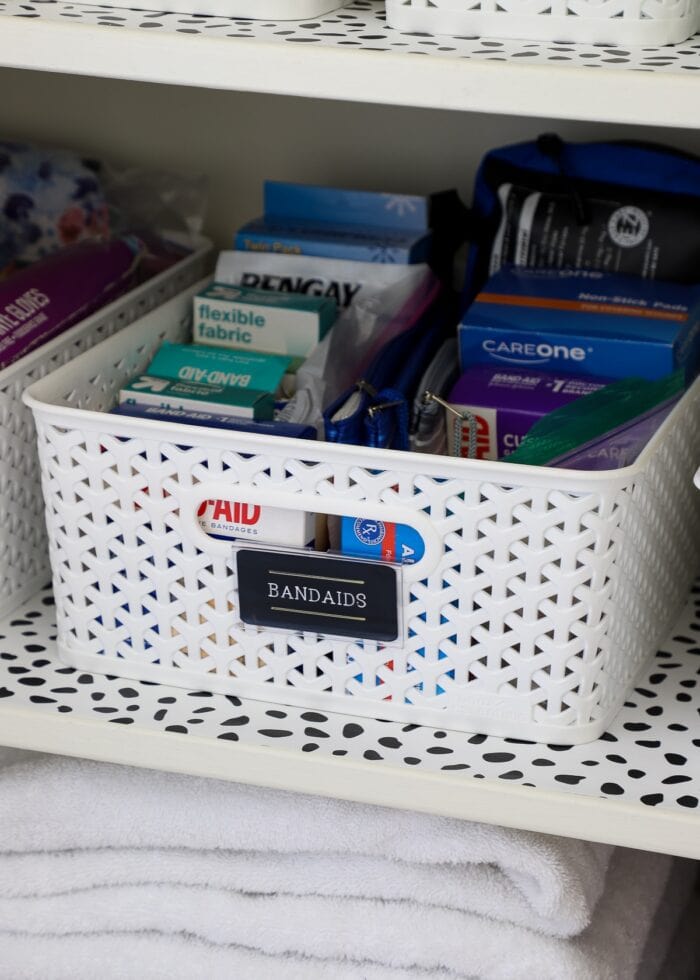
Add Decorative Touches
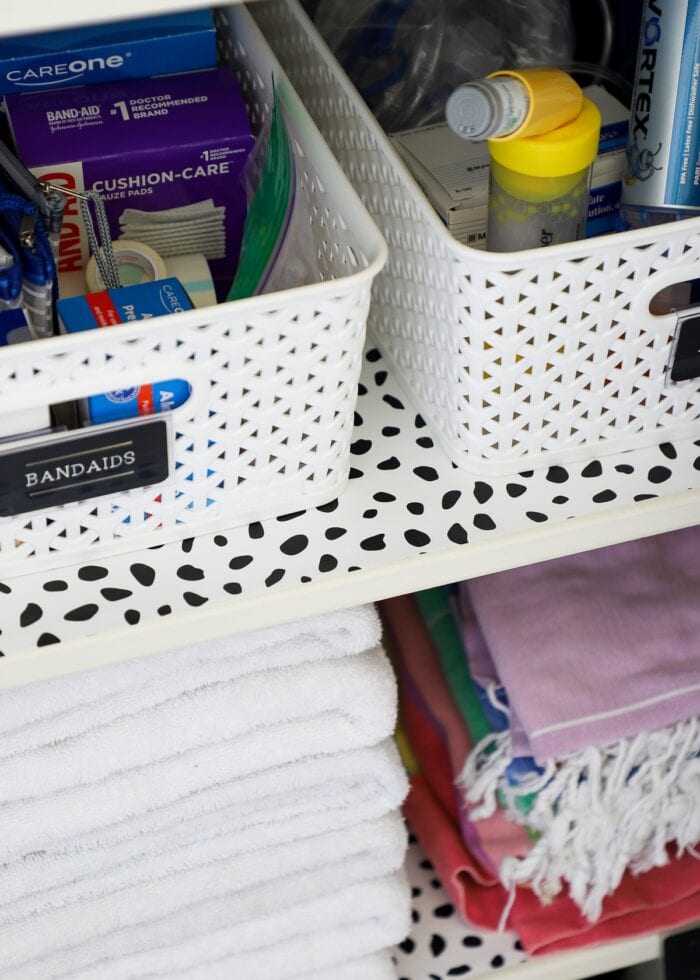
Finally, when you love the way a space looks, you will be more inclined to keep it looking tidy. Which is why I always like adding some sort of color, pattern, or decorative detail to my organizing projects.
I had a leftover roll of this dotted wallpaper from this furniture makeover (ages ago!) It was just enough to cover these bathroom closet shelves and provide a “fun factor” that makes me smile every time I open the doors.
Shop My Bathroom Closet
Below are my bathroom closet organization product picks!

1 – Stacking Acrylic Drawers (Short) | 2 – Stacking Acrylic Drawers (Tall) | 3 – Medium Y-Weave Basket | 4 – Large Y-Weave Basket | 5 – Label Holders (Basket | Shelf) | 6 – Long Y-Weave Basket | 7 – Cricut Joy Writable Vinyl in Black | 8 – Black and White Dot Wallpaper
Other Closet Problems Solved!
Now that you have your bathroom closet organized, consider tackling another closet next. Check out these other great makeovers full of more smart solutions!
- Master Closet Organization Ideas
- Front Hall Closet Organization Ideas
- Nursery Closet Organization Ideas
- Linen Closet Organization Ideas
- Laundry Closet Organization Ideas
It’s funny what projects help you feel “moved in” to a home. Interestingly, it wasn’t any wallpaper project or kitchen update that helped me feel settled. Instead, it was figuring out this bathroom storage situation that moved me from feeling like “everything is an unfinished mess” to “okay, this home feels like ours!”
Creating organization out of chaos and finding “just right” solutions for these common, everyday-use items can really go a long way in helping you feel settled, calm, and in control while in your home. I hope the tips I shared here help you tackle that bathroom closet clutter and find the perfect solutions for your items too!
Megan



8 Comments on “Top Tips for a Perfectly Organized Bathroom Closet (That Looks Great Too!)”
You are my absolute favorite organizing person!! We were in the military for 24 years
and have now been settled here in the Ft. Hood, Texas area since over 20 years.
I salute you!! You actually organize the every day things we have in our lives, not just
put a few items on the shelf to look cute. I wish you had a book!!!!!
Lovely! Great job. 🙂
Since you do a lot of these, I wante dto ask: why do they make the sides of storage baskets slanted??
It always irks me because I feel I waste space and things inside just topple over/shake more than needed
Is it just me?
I ten to look for baskets with straight sides, but they don’t seem to be the norm. 🙁
Not the author of this post (which is wonderfully informative and inspiring!) but I know the answer to this one. It’s not a decision they make with the end consumer in mind … it has to do with logistics (and cost) of shipping and storing the items on their way to being purchased.
When the top is wider than the base, you can nest the same-size containers one inside the other. Containers that have straight sides can’t do that – instead, you have to stack the same-size containers on top of each other.
Imagine a nested stack of 20 slanted-side containers and a stacked group of 20 straight-side containers. They weigh the same, but the slanted-size group takes up much less space – and is, therefore, drastically cheaper to ship.
And imagine those same 20 containers displayed on a store shelf for sale. The nested set takes up 1/20th the horizontal shelf space.
All of which means they’re able to sell them to us, the consumer, for a lower price since they don’t have to pass those higher shipping costs along in the container’s sale price. Anyway, hope that info helps!
Thanks so much! That makes a lot of sense and my curiosity is put to bed. 🙂
Thank you so much for this post it has helped me dive into organizing my bathroom! It makes sense to use your Organizing Any Space as it works. Thank you again.
Bathroom closet of my dreams! I would love it if mine looked like that. I need to figure out how to make this happen at my house. SOON!
This is aspirational for me. Our bathroom “pantry” is 24″ deep which is a problem. Baskets aren’t that deep, leaving wasted space in front or hiding a smaller basket behind. It has been very frustrating trying to find ways to organize this!
I loved this article! Today, I decided to redo the bathroom closet. I pulled everything out, got rid of old stuff and looked around online for some baskets. I decided I needed to see some examples of where this project was going so I got on Pinterest and found your inspiring article right away. Thank you