A Complete Guide to Updating Furniture with Wallpaper
For many years, paint was my go-to method for updating old or ugly furniture. But right now in my “Busy Mom Era,” I just don’t have the time (or energy!) for the moving, disassembling, sanding, painting, and sealing that paint makeovers usually require. So in recent years, I’ve been updating our furniture with wallpaper instead. I love this quick, easy, and mess-free alternative, but wallpaper isn’t necessarily the right choice for every project either. Today, I’m breaking down everything (and I mean everything) about updating furniture with wallpaper, so you too feel confident giving it a try!

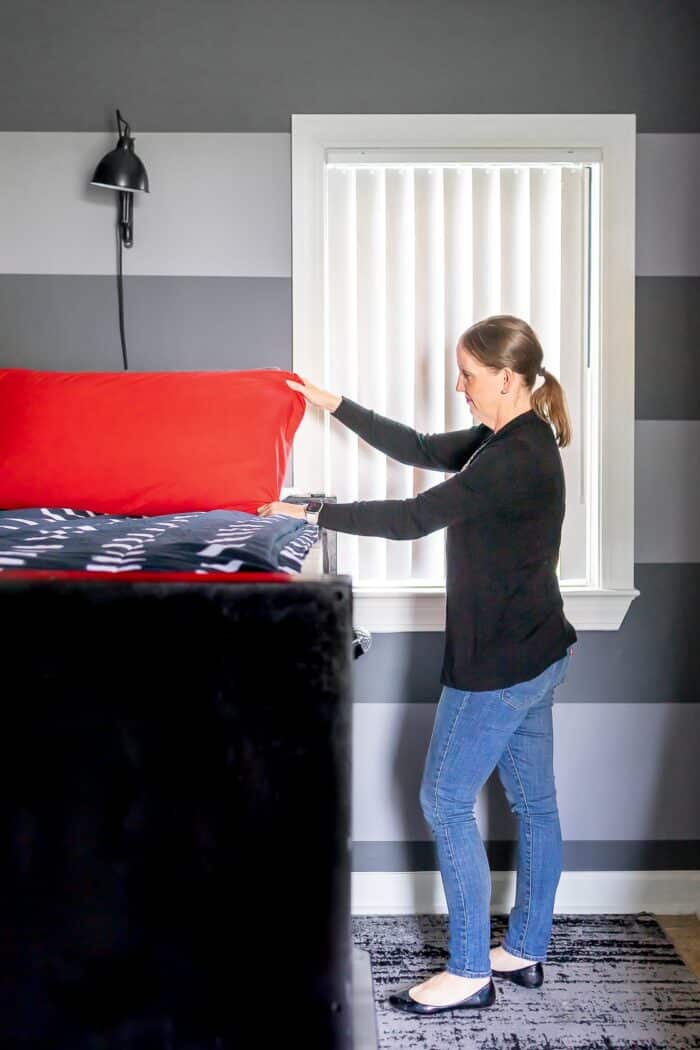
Show & Tell: Our Wallpapered Furniture
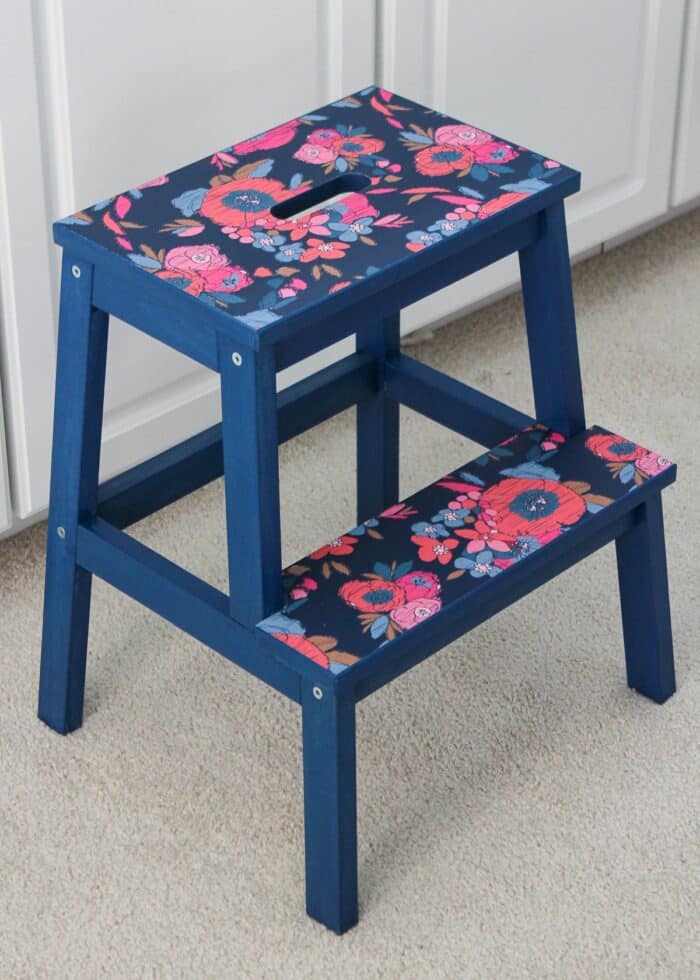
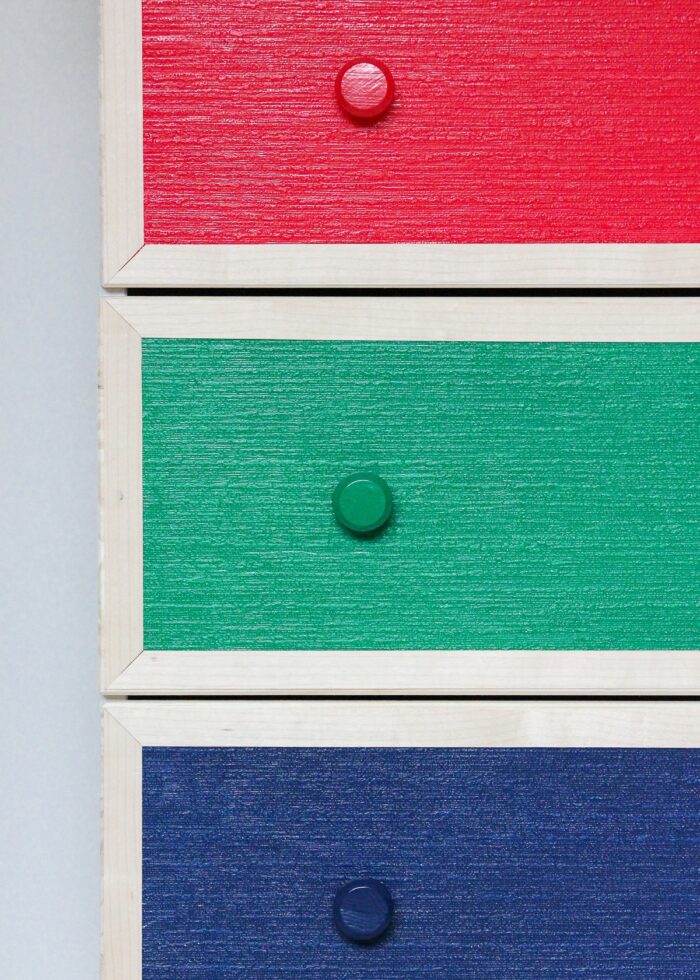
Digging back through my project archive, even I was surprised how many furniture pieces I’ve transformed with wallpaper. From stools and dressers to bookcases, tables, and countless drawers, I clearly love putting wallpaper on more than my walls!
Why Use Wallpaper to Transform Furniture?
It’s Quick
If you’ve ever taken on a furniture makeover using paint or stain, you know first-hand that it’s a long, laborious, tedious project. Prepping the surfaces, applying paint, and letting everything cure properly is usually a multi-day process (at a minimum).
On the flip side, wallpapering furniture is usually a multi-hour project (depending on size and complexity). There is very little prep and zero cure time, which means you can complete your furniture makeover from start-to-finish in much less time.
It’s Mess-Free
Without a doubt, one of the best aspects of using wallpaper (versus paint/stain) is not having to deal with the mess! You don’t need to protect your carpet/flooring; worry about spills, drips, or scratches; or (best of all) clean up brushes, cups, rollers, etc.
It (Can Be) Temporary
Using wallpaper (specifically peel and stick versions) is a great way to make a temporary change that can easily be un-done. As someone who moves frequently, we need a lot of flexibility in our furniture. Using peel and stick wallpaper allows me to customize furniture for the home we’re in, and then easily un-do it or change it for the next one.
TIP! While most peel and stick papers can be removed without damaging the paint or finish, I always recommend testing it before you start.
Pump Up the Pattern
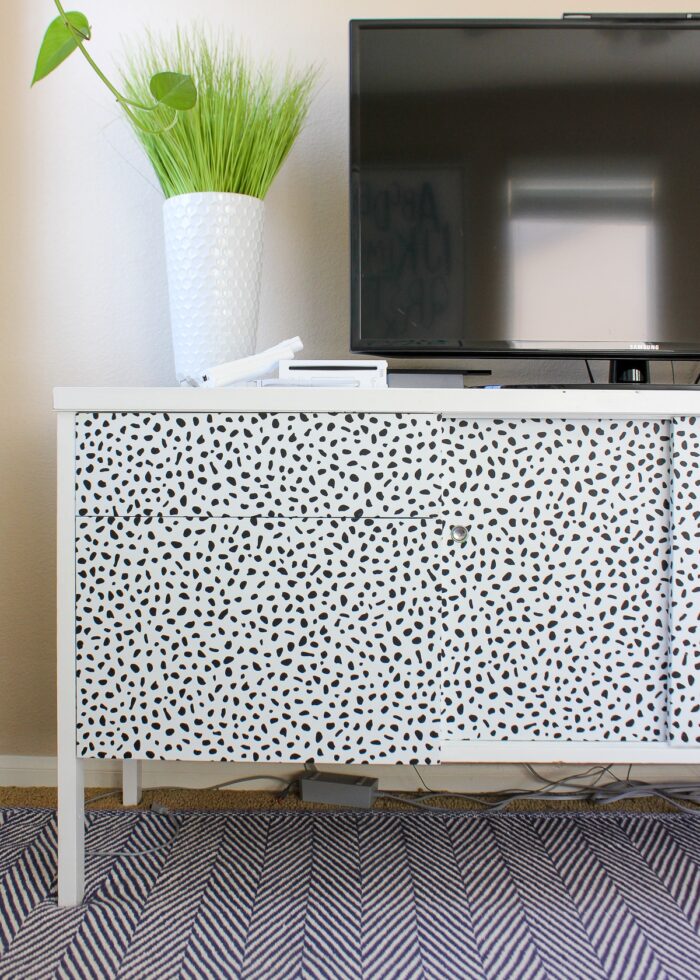
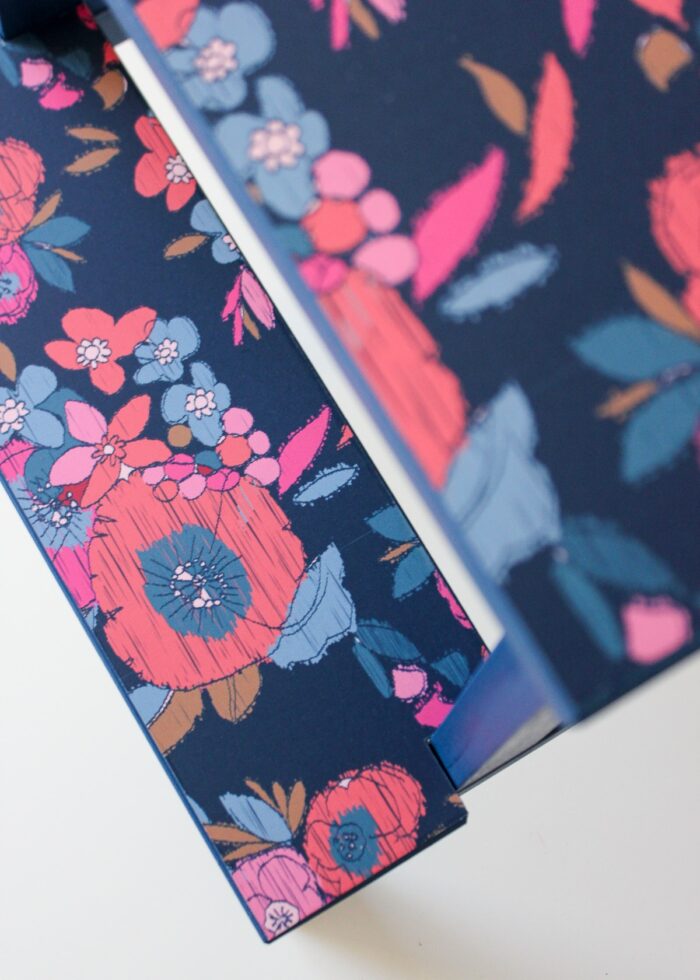
Adding pattern is one of the best ways to liven up a space, but you may be nervous to splash a big design across your wall. Using a bold pattern on a smaller piece of furniture allows you to create a focal point without the commitment (and cost) of a larger installation. Further, unless you’re a gifted artist and/or brave enough to paint patterns by hand, using pre-printed wallpaper is a foolproof way to get stripes, spots, flowers, or other motifs on your furniture.
A Little or A Lot
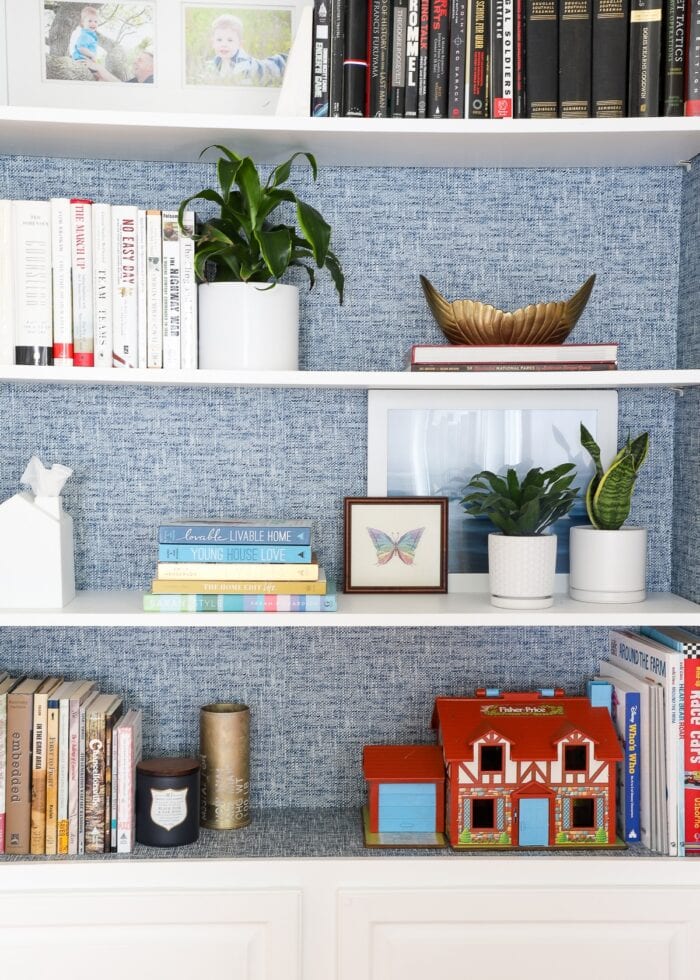
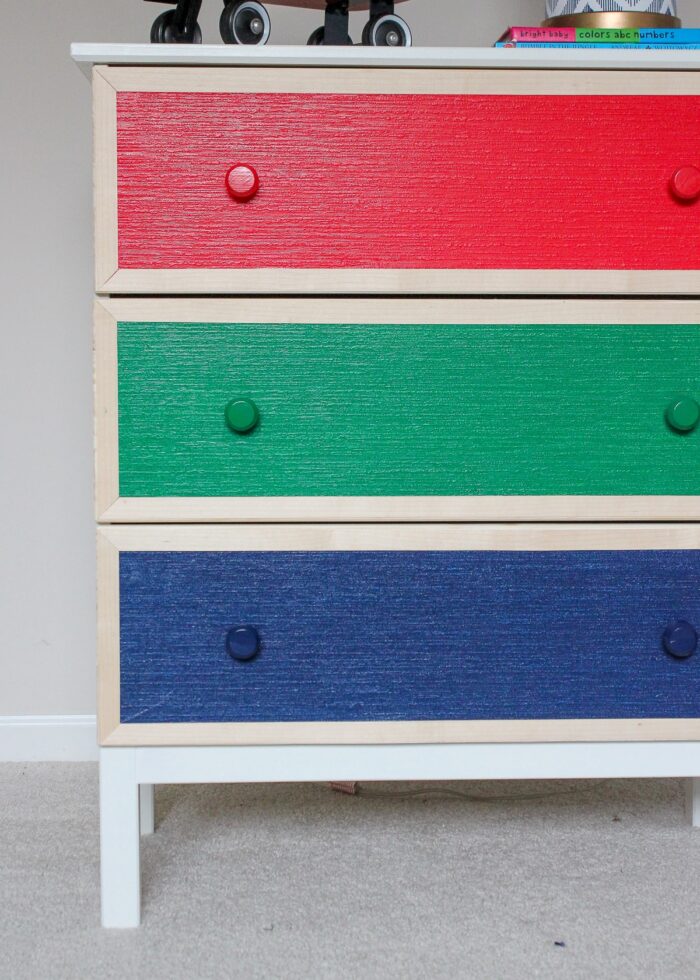
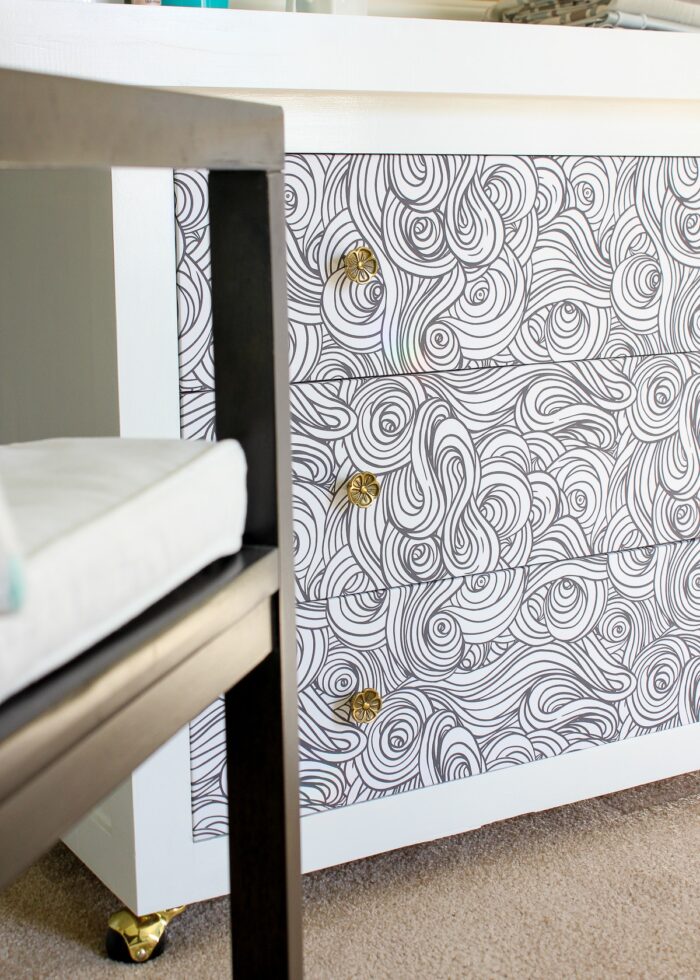
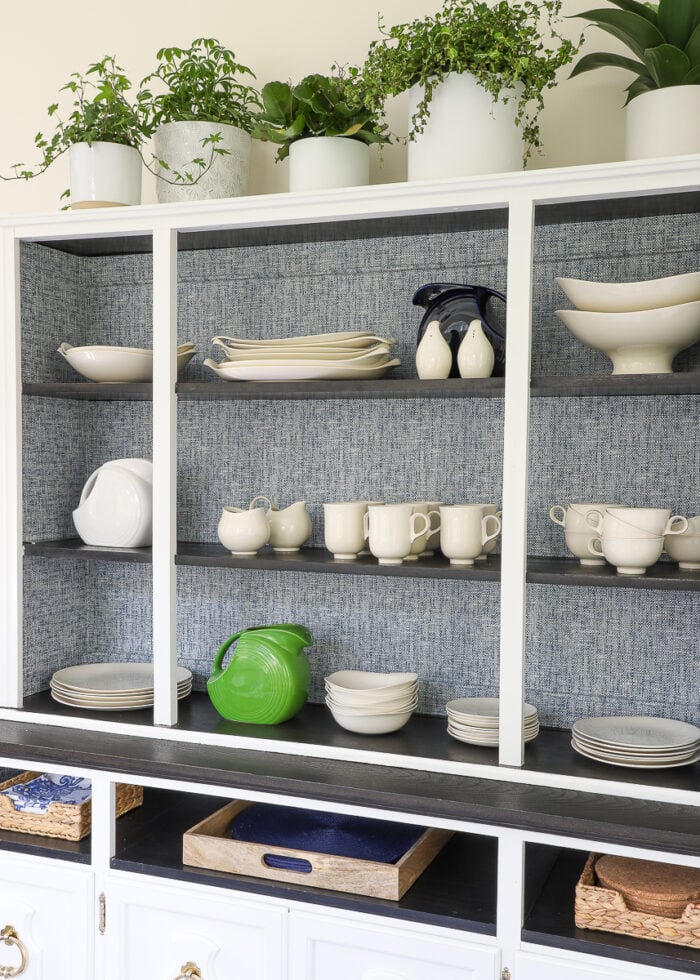
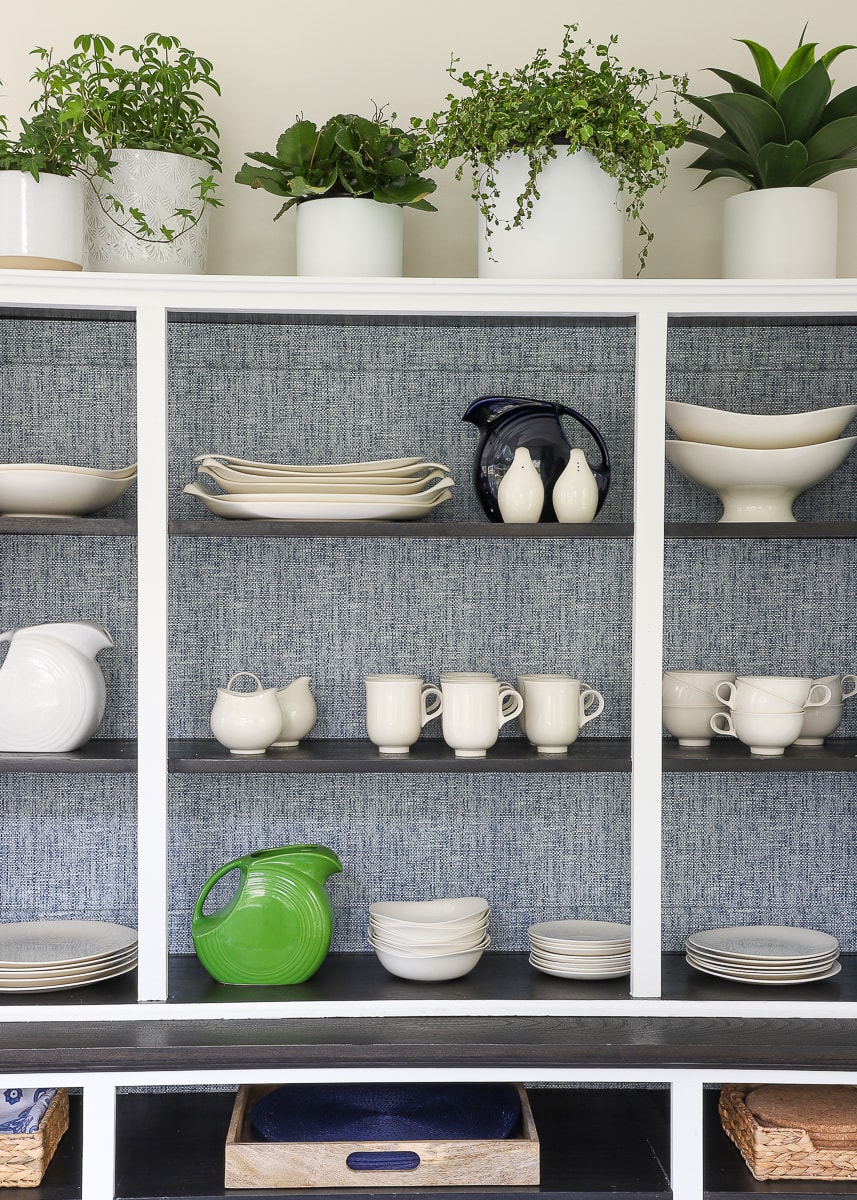
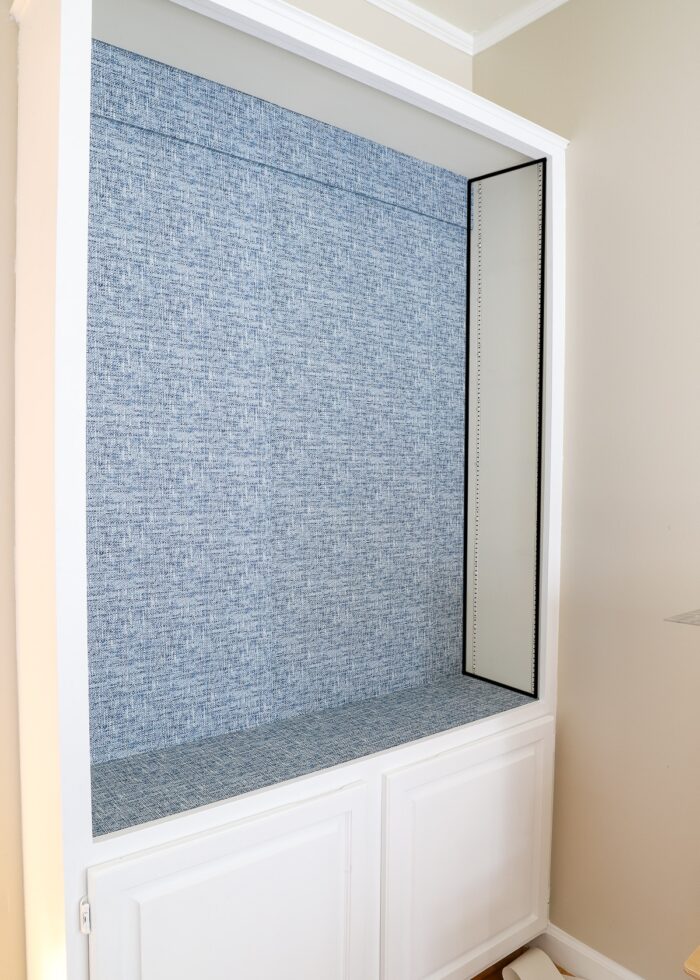
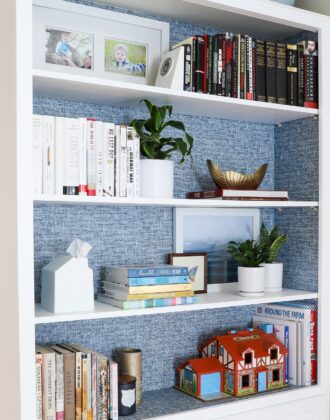
Another fun thing about using wallpaper is it doesn’t have to be all-or-nothing (as is often the case with paint). You don’t have to wallpaper your entire piece to give it an entirely new look. You can add paper to the back of a bookcase, just the drawers or doors, or along the top/outer surface. A single (or even half) roll of paper can go a long way in changing how something looks in your space.
What Kind of Wallpaper is Best for Furniture?
Over the years, I’ve received lots of questions about what kind of wallpaper will stick to certain kinds of furniture. While I’ve tested a lot (and I share what I know below), my best advice is to test it. Before you purchase full rolls, test a sample on an inconspicuous part of the exact item you will be wallpapering. With so many different wallpapers, adhesives, and furniture surfaces now available, I can’t say for sure that something will or won’t work.
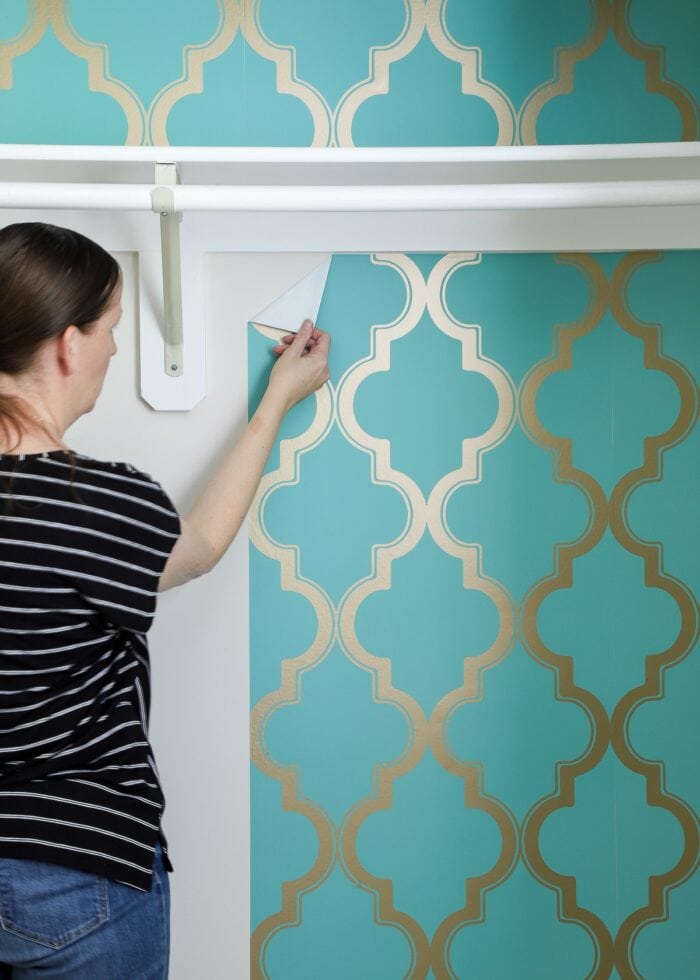
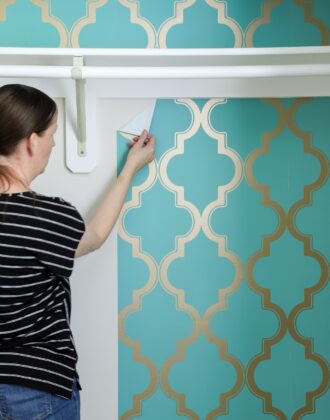
Peel & Stick/Removable Wallpaper on Furniture
In general, my favorite type of wallpaper for furniture projects is peel and stick wallpaper. This is primarily because it’s all the things I describe above: mess-free and quick to apply; totally removable; and available in countless patterns, colors, and textures.
The primary downside to self-adhesive wallpaper, though, is that it can be tricky to work with thanks to its very sticky backing, which can easily cause wrinkles and air bubbles.
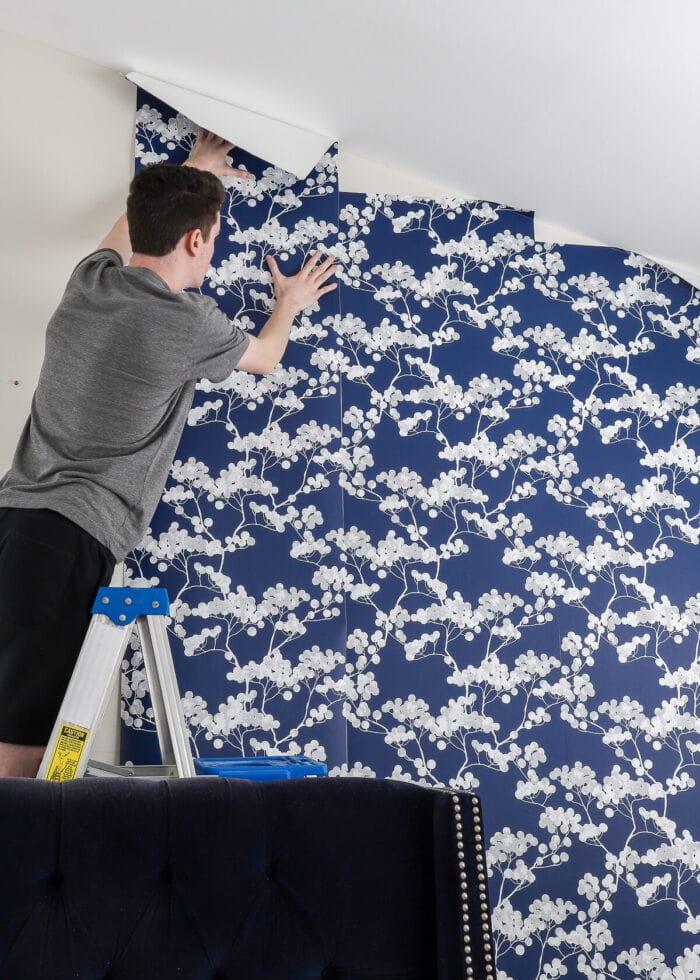
Traditional Wallpaper on Furniture
From an ease of application and durability perspective, I do love using traditional wallpaper (either pasted or non-pasted) on furniture. Traditional wallpapers tend to be thicker and come in longer rolls. And because the paper doesn’t have a tacky surface, it can be much easier to lay flat and smooth.
That said, traditional wallpaper will involve more mess than its peel and stick counterpart, as you will need to activate the glue (on pasted wallpapers) or use glue (on non-pasted papers) in order to adhere it to your furniture.
Further, because you need to use wallpaper paste/glue to keep it in place, it is not easily removed. In fact, you will likely have to sand it off or chemically strip it if you ever want to remove it.

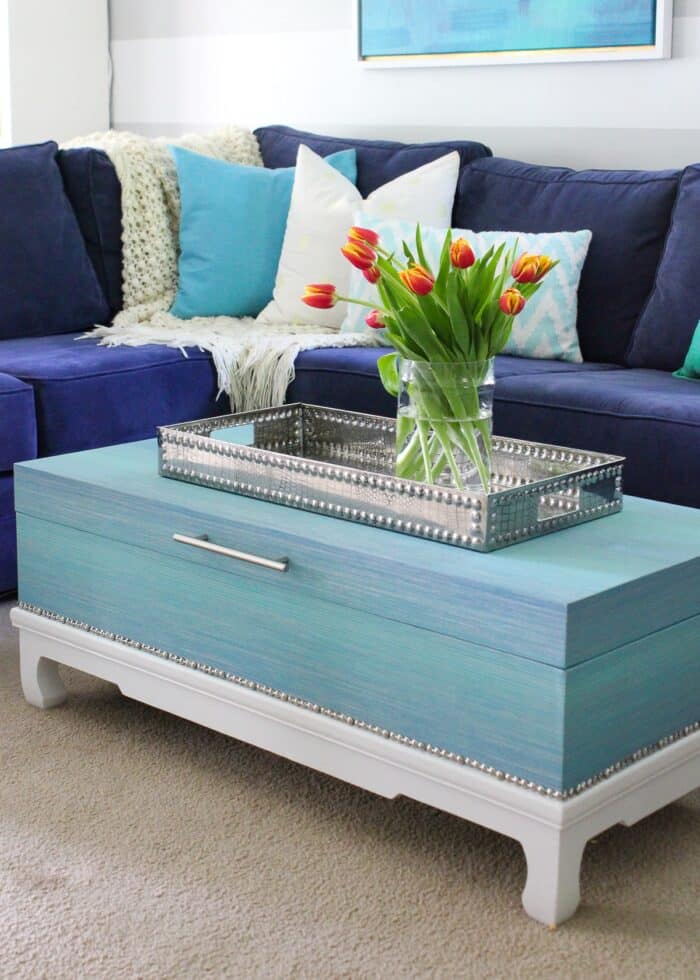
Grasscloth Wallpaper
A Note About Paintable Wallpaper on Furniture
If you are hoping to transform a piece of furniture to a very specific color, you will have much more luck using paint (since it comes in so many more shades). But if you can’t or don’t want to paint the piece itself, you might be tempted to use paintable wallpaper.
In my experience, I could not get paintable wallpaper to sufficiently adhere to my raw wood dresser. However, since sharing my experiences here on the blog a few years back, many passionate readers have weighed in on the “correct” way to use paintable wallpaper (none of which I followed at the time).
If you are tempted to use paintable wallpaper on furniture, I suggest you read the comments section here: What You Need To Know About Paintable Wallpaper. (For whatever it’s worth, I still don’t recommend it 😉 )
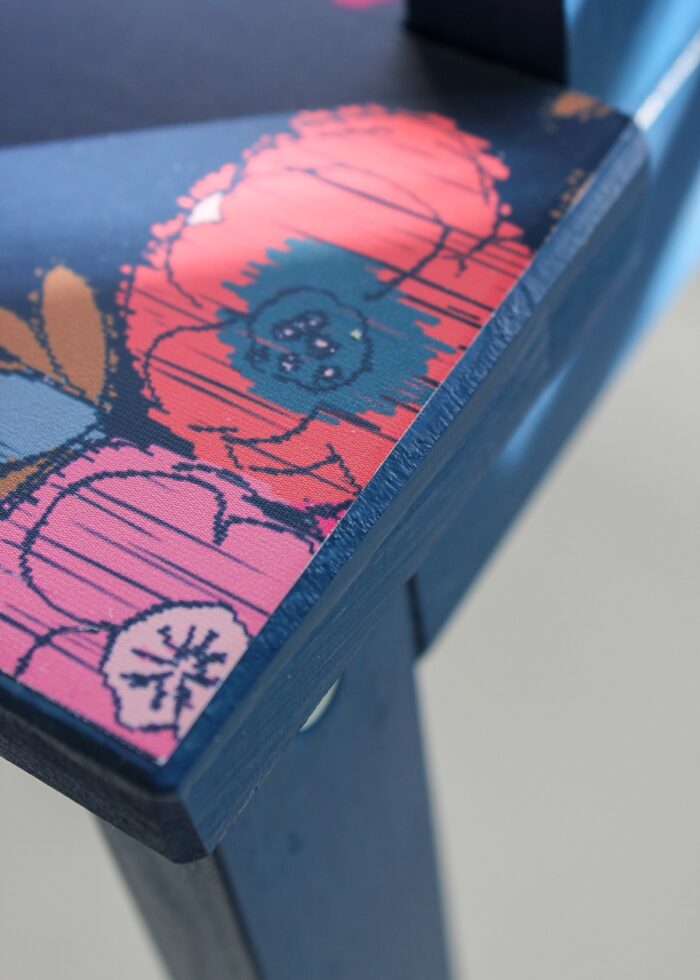
A Note About Picking Patterns for Furniture
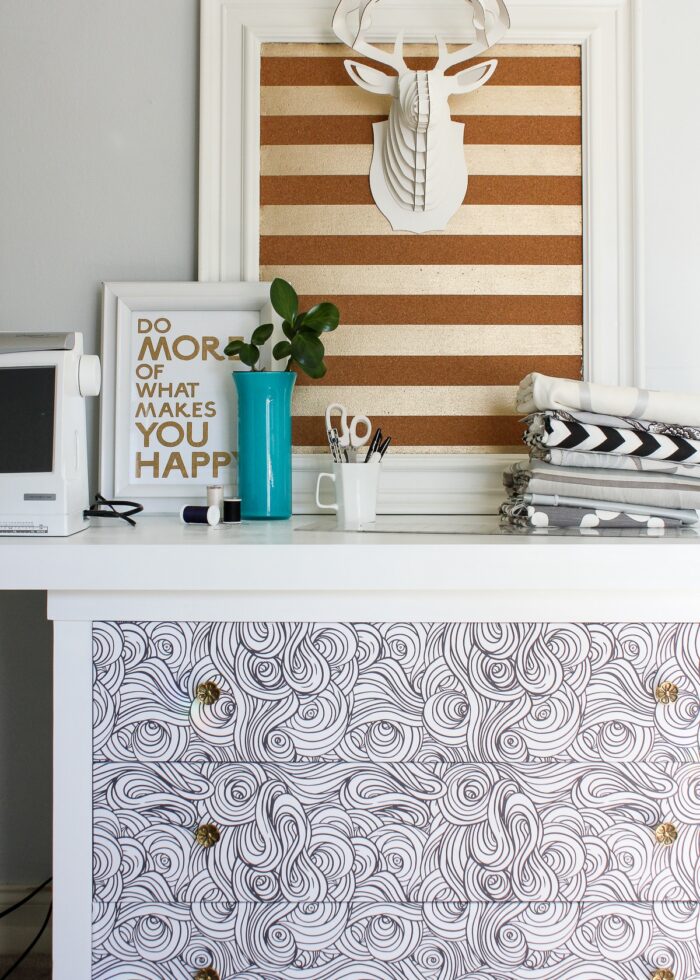
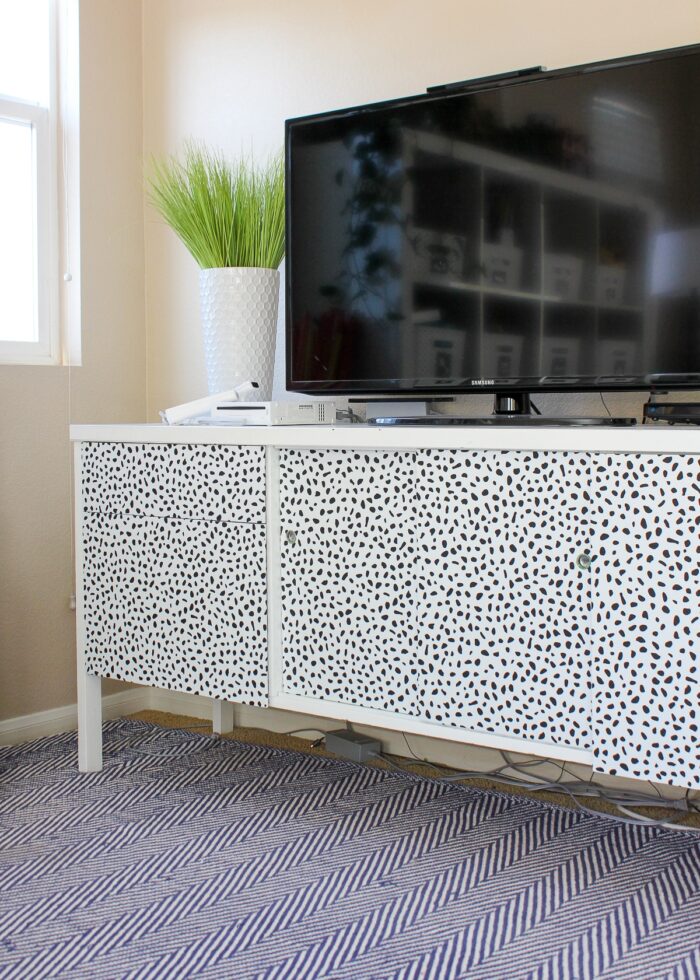
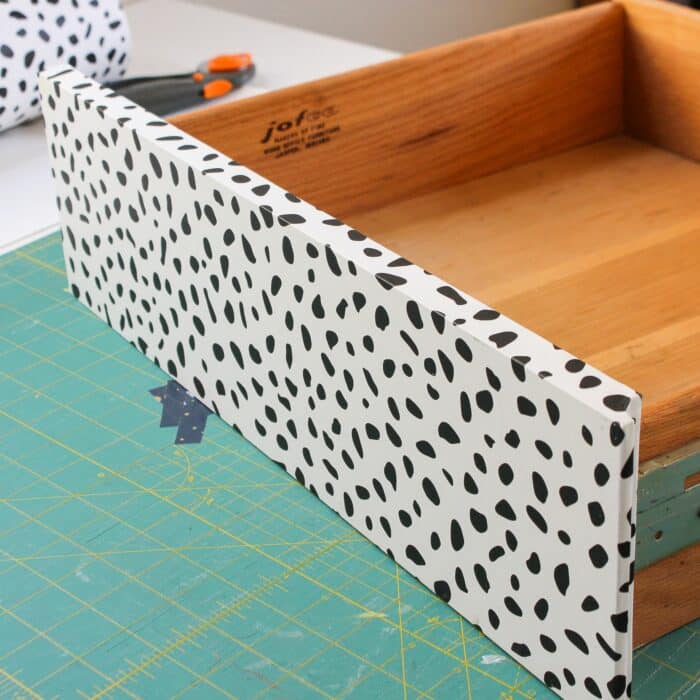
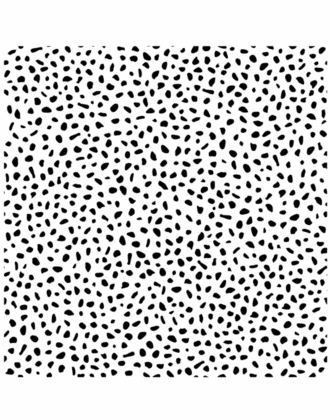
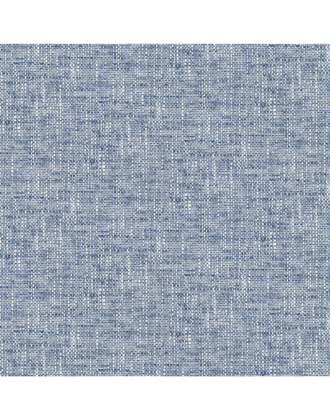
Just a word of caution when picking the paper for your project: matching up patterns can be a really, really tricky on furniture thanks to curves, corners, shelve, doors, drawers, etc. As such, I recommend picking an overall pattern that won’t require matching or carrying the pattern precisely across different components of the furniture (e.g., from drawer to drawer or door to door). Notice throughout this post how I used tight dots, woven textures, and randomized all-over patterns.

What Furniture Surfaces Can Be Wallpapered?
As I mentioned above, I always recommend testing your specific wallpaper and furniture instead of just taking my word for it. That said, here is what I’ve discovered when wallpapering various kinds of furniture.
Wallpaper on Wood Furniture
Beyond the paintable wallpaper mentioned above, I have not had any issues getting wallpaper to adhere to my raw and/or stained wood furniture. I have successfully applied peel-and-stick wallpaper, un-pasted wallpaper (with Mod Podge), and pasted wallpaper to raw wood surfaces.
Further, all my attempts at removing peel and stick wallpaper from wood have been successful, coming off easily and leaving no residue behind.
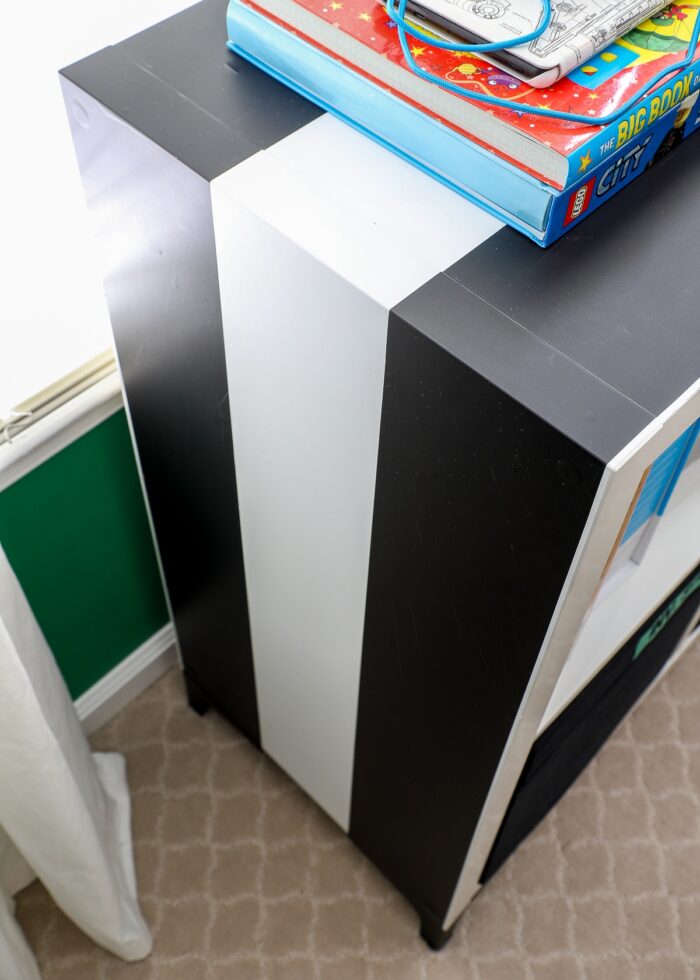
Wallpaper on Laminate Furniture
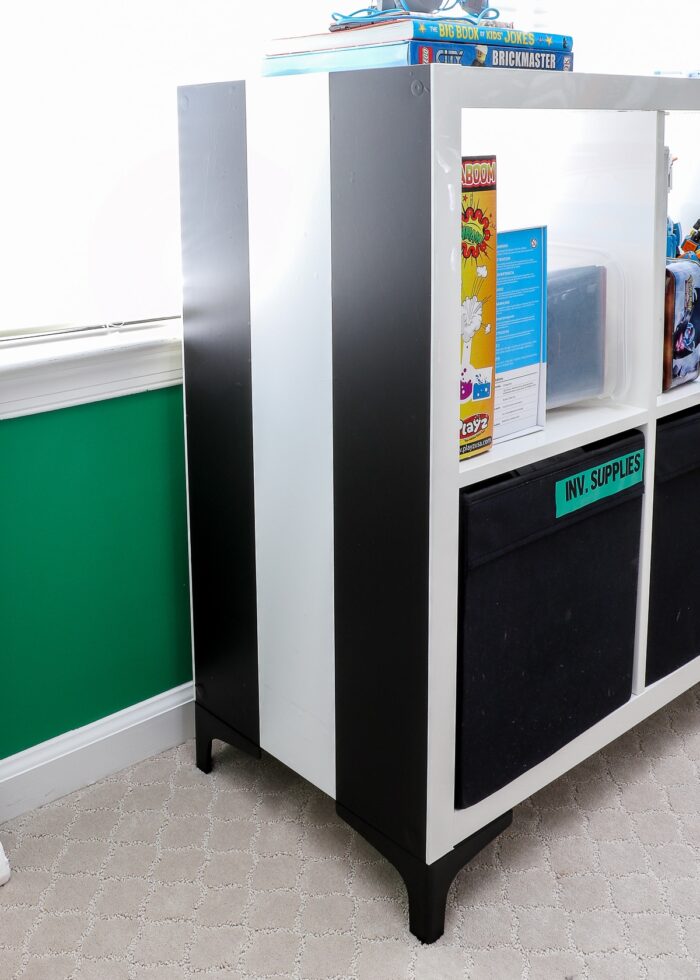
I have applied peel and stick wallpaper to a few laminate surfaces, including an IKEA Kallax and wood laminate cabinets.
Although the peel and stick wallpaper goes onto laminate beautifully and stays adhered without issue, it has peeled off the finish upon removal (on occasion).
If you do not care about the existing laminate surface and/or removal, you can proceed without concern. However, if you need to be able to safely remove the wallpaper from a laminate surface, I recommend heating it first (via a hair dryer) to loosen the adhesive.
You can see more safe removal tips here: Does Peel and Stick Wallpaper Damage Walls?
NOTE: I have not tried applying traditional wallpaper to a laminate surface. While I don’t think pre-pasted papers would stick, I do think using spray adhesive or Mod Podge would work on non-pasted papers.
Wallpaper on Painted Furniture
I have successfully applied peel and stick wallpaper to painted furniture (that also usually has a polyurethane coating on it). The wallpaper adhered without issue and also removed cleanly without leaving residue or peeling the paint.
If you are concerned about the paint peeling upon removal, see my tips here: Does Peel and Stick Wallpaper Damage Walls?
Handy Tools for Wallpapering Furniture
Every piece of furniture is unique, and whether you’re doing a long flat surface (like a table or shelf) or going around edges (like on doors and drawers), you’ll need different tools. In general, though, here are my tried-and-true supplies that will make each job go a little smoother
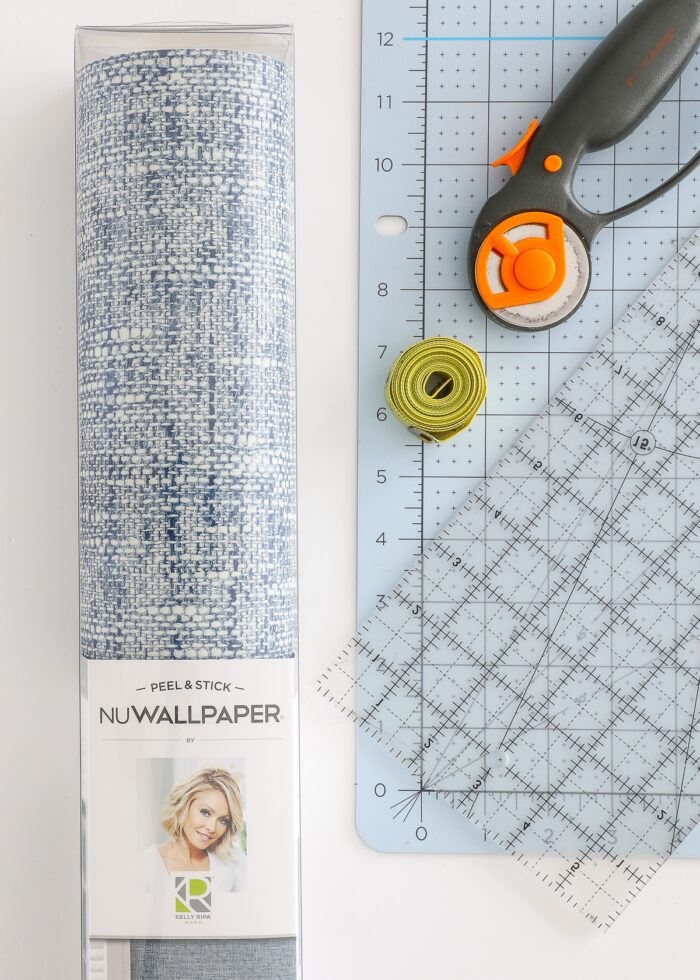
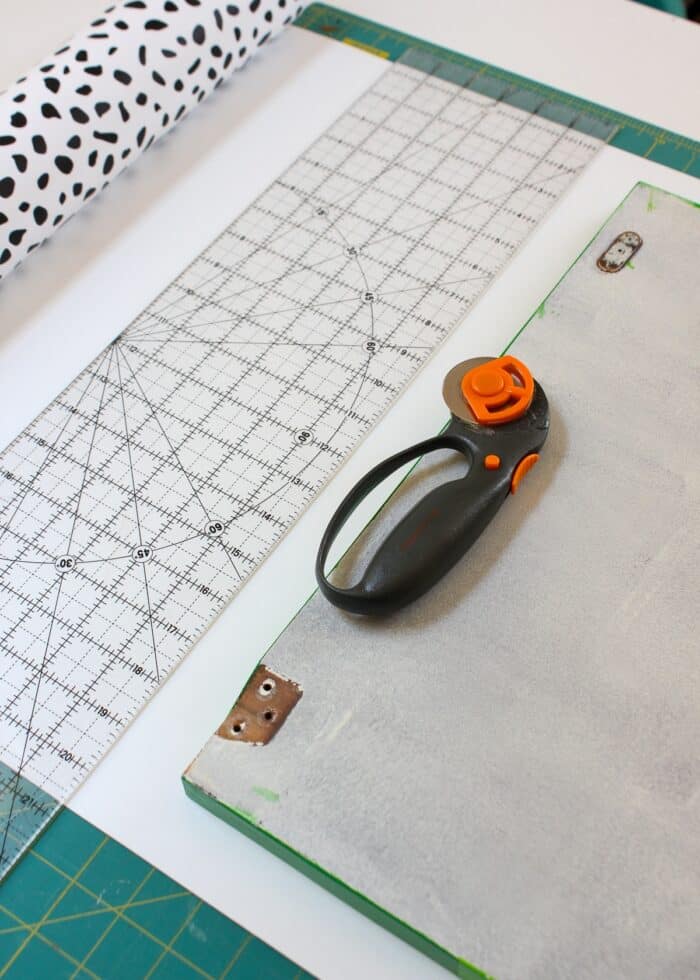
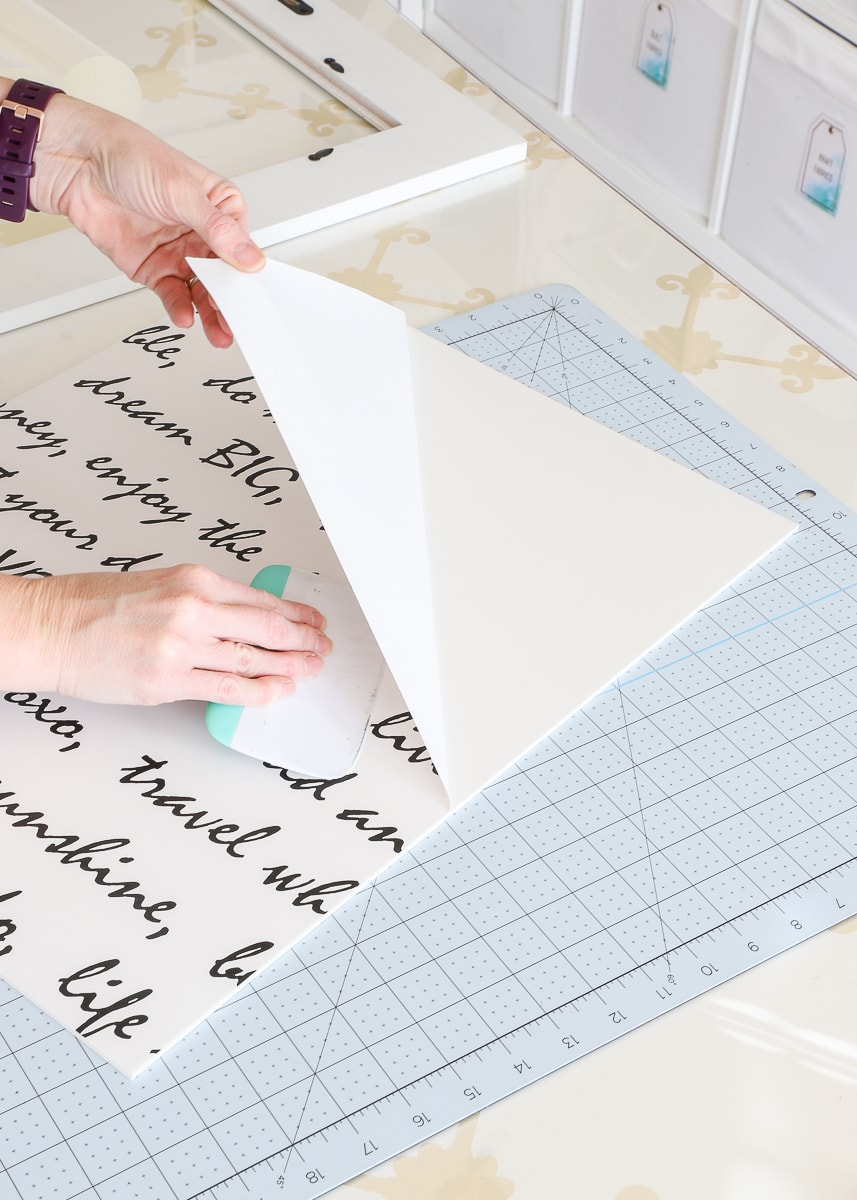
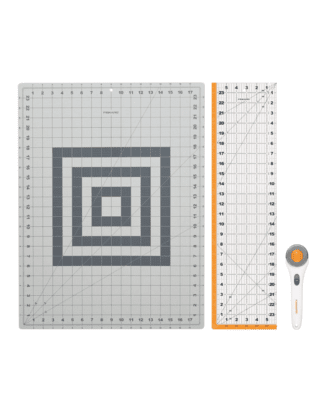
- Rotary Cutting Set with 24″ ruler and self-healing mat – This is my favorite way to cut wallpaper down to precise dimensions.
- Scissors – While I like a rotary cutter for large, straight cuts, you’ll still need a small scissors for precision trimming.
- Sharp Craft Knife – A really sharp knife is the best way to get clean cuts at corners and edges.
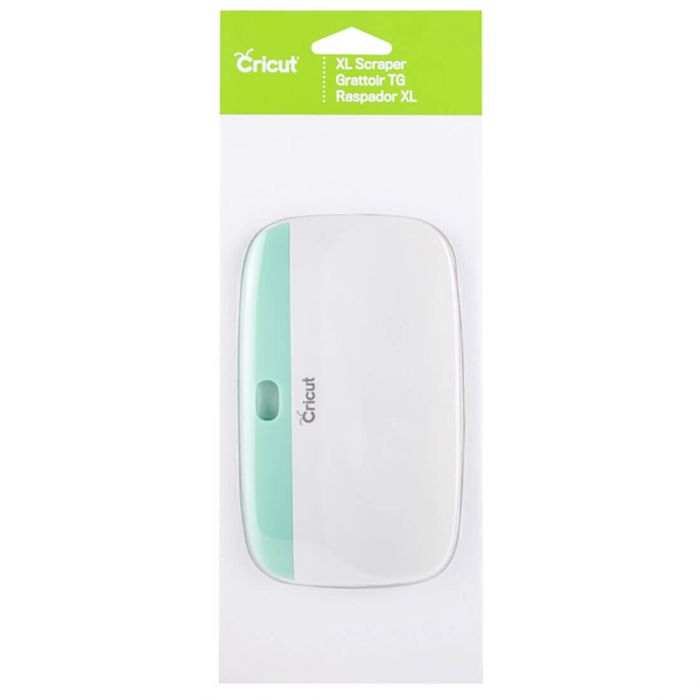
- Scraper – Really helpful for creasing paper into interior corners and edges.
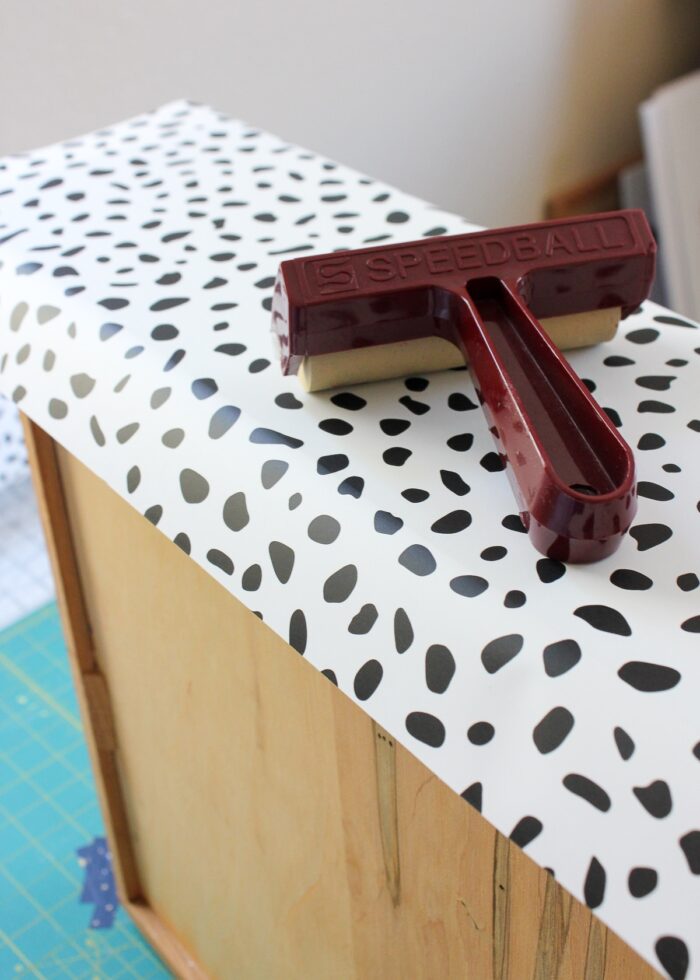
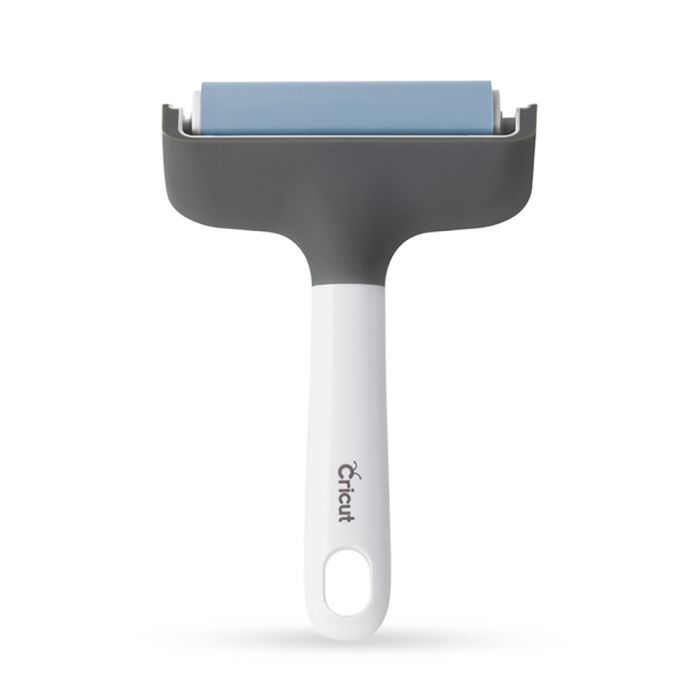
- Brayer – Really helpful for smoothing paper flat and working around outside corners.
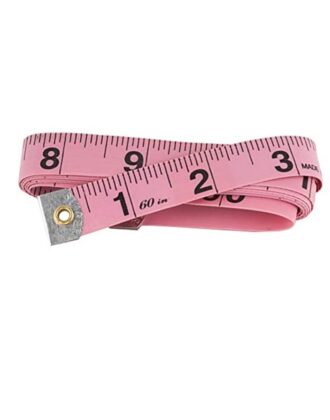
- Flexible Tape Measure – To be able to get really precise measurements inside shelves, drawers, and around corners.
Do You Need to Protect Wallpapered Furniture?
Of all the questions I’ve received over the years about wallpapering furniture, this one is the most common: do you need to seal and/or protect the wallpapered surfaces?
And my answer: it depends…primarily on the piece itself and how it’s used in your home. Personally, I have not protected most of my wallpapered pieces and have had pretty good results.
No Protection Needed When…
In general, most wallpapered furniture items do not need any special protection. This is especially true for the insides of bookcases, fronts/sides of a piece, doors, and drawers. These surfaces simply do not get enough wear-and-tear from usual daily life that you need to worry that they will get damaged.
Want to save this post?
Consider Protection When…
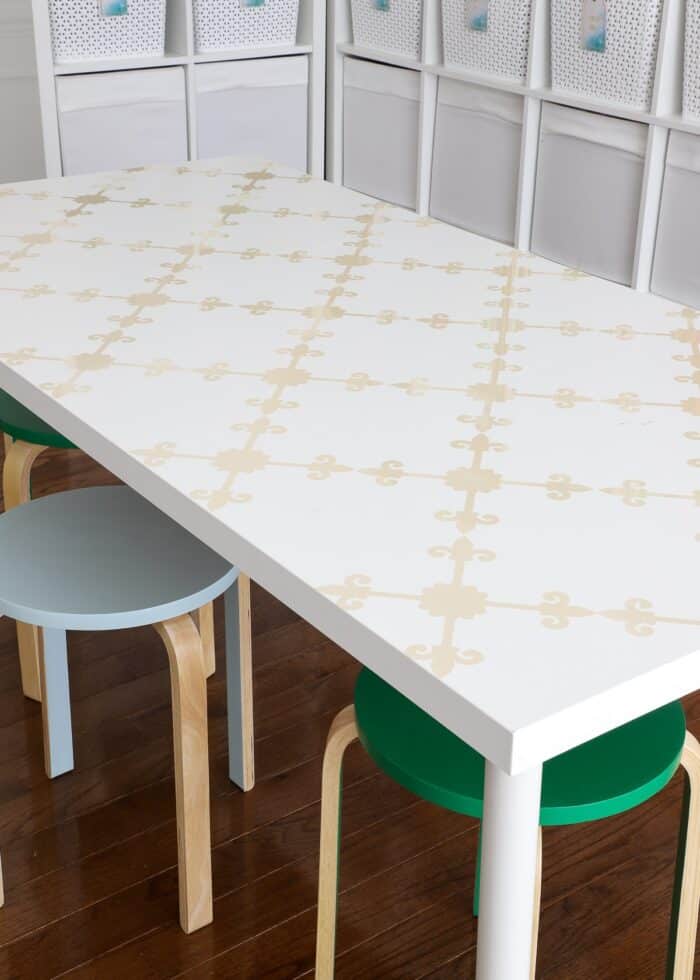
The main surfaces that could warrant protection are table tops (or other horizontal surfaces that might get a lot of contact like benches or stools). This is mainly necessary if you’re concerned about spills or peeling edges, or you want to be able to write on the surface (e.g., a desk).
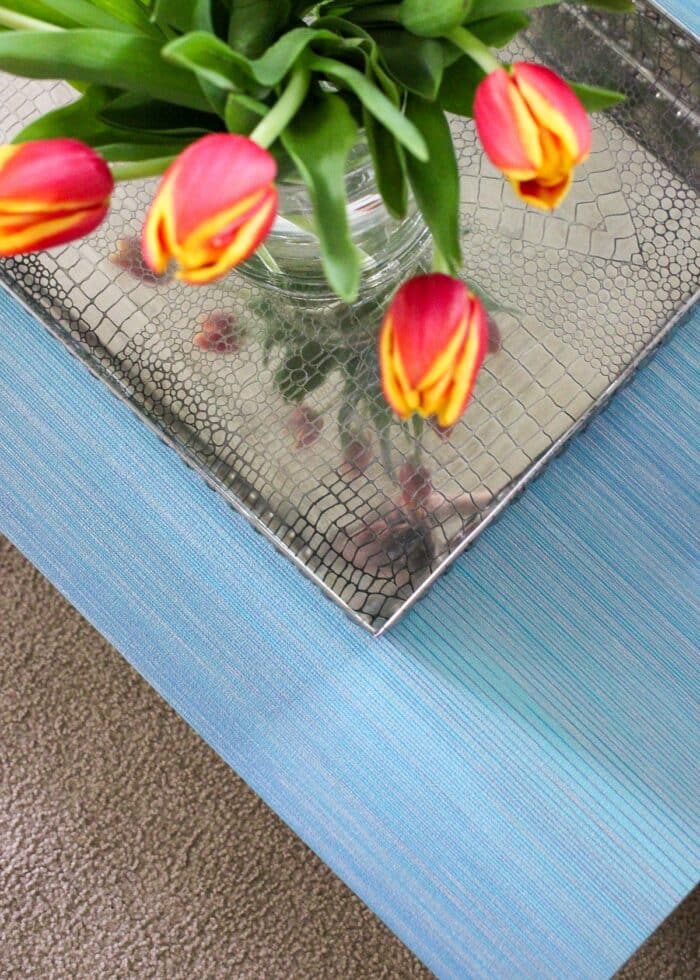
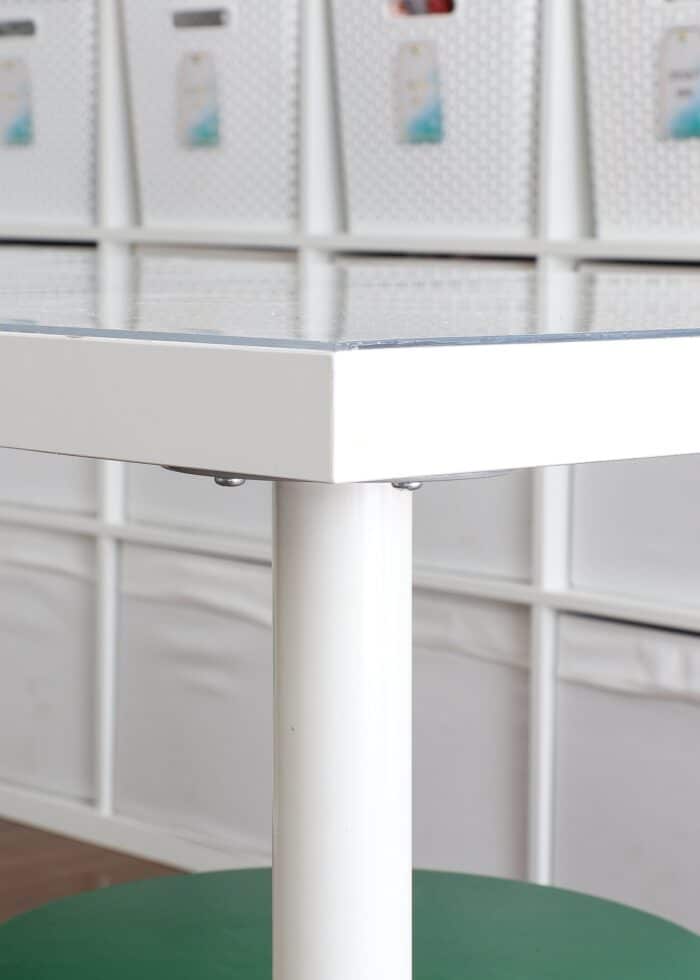
Acrylic or Glass
The best way to protect a wallpapered surface will be with either a glass or acrylic sheet. Both options are affordable (from major home stores like The Home Depot and Lowes) and will give crystal clear, durable protection to any paper underneath.
Polyurethane
I am often asked about applying clear polyurethane over wallpaper. Although I’ve never done it, I typically don’t recommend it unless you’re putting wallpaper on a floor, stool, or table top.
Polyurethane will make the wallpaper much more durable but also much more difficult to remove. It could also slightly change the color (darken it) and possibly reveal brush strokes created during application.
A Note About Seams & Edges
One type of protection you might want to consider is along raw edges or seams. If you are not able to wrap the paper toward the back (e.g., around a door, to the bottom of the table, etc), that raw edge can eventually lift up over time. If you are concerned about this, you can use a light coat of Mod Podge or polyurethane along the edges only to keep the paper perfectly flush over time.
How to Wallpaper Furniture
Each piece of furniture is so unique that I cannot really provide step-by-step instructions. That said, here is some general guidance that will apply for most projects.
Step 1 – Decide Which Surfaces to Wallpaper
Before starting, consider the nuances of your piece. In my experience, items with clean, straight lines are ideal candidates for a wallpaper application; while anything with curves, bevels, carvings, grout lines, etc are not.
TIP! If papering your entire unit seems too complicated, covering just the doors, drawers, tops, backings, insets, or fronts can have an equally as transformative effect.
Step 2 – “Disassemble” Furniture
You will typically want to take apart anything that will prevent you from achieving a clean, crisp wallpaper application such as drawers, doors, hardware, shelves, hinges, feet, handles, knobs, etc. Your goal is to create clean, simple surfaces that can easily be wrapped/lined with paper.
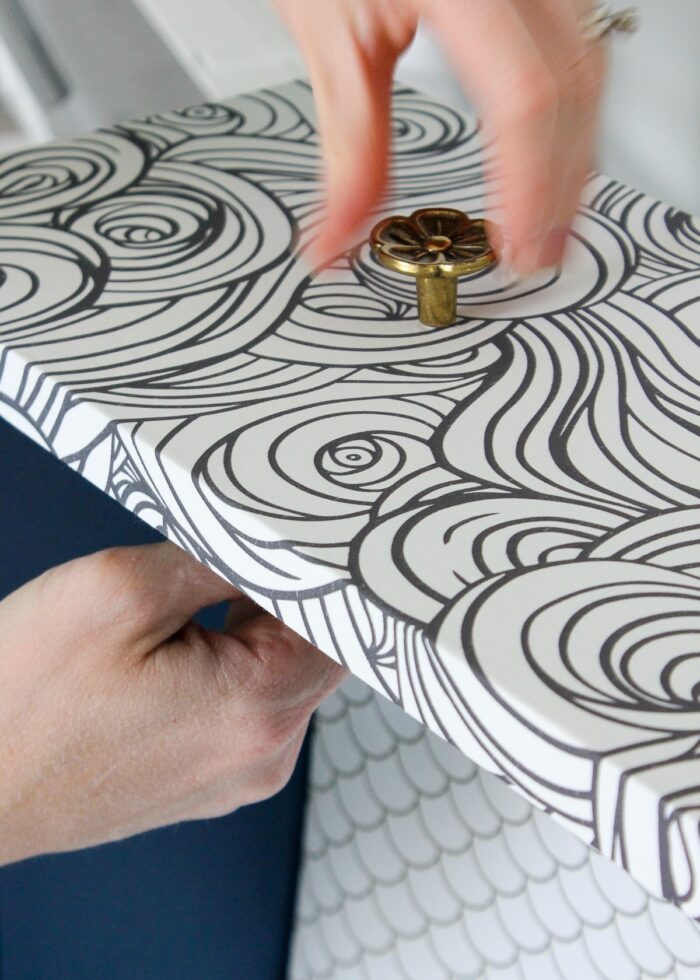
TIP! If your item has hardware, feet, or other details that are difficult to remove, it is possible to wallpaper around them. This is where a very sharp craft knife comes in handy!
Step 3 – Clean Furniture
The success of your wallpapering will greatly depend on how well the paper adheres to the furniture. As such, spend some time removing dust, dirt, grime, price tags, adhesive, splinters, etc from any surface that will get wallpapered.
Step 4 – Measure, Then Cut Big
Whether you’re covering a table top or wrapping a drawer, it is typically best to measure the exact size you need but then cut big, adding 1-2″ in all directions. It is always much easier to trim away excess wallpaper than have to patch sheets that were cut too small.
Step 5 – Apply Wallpaper to Furniture
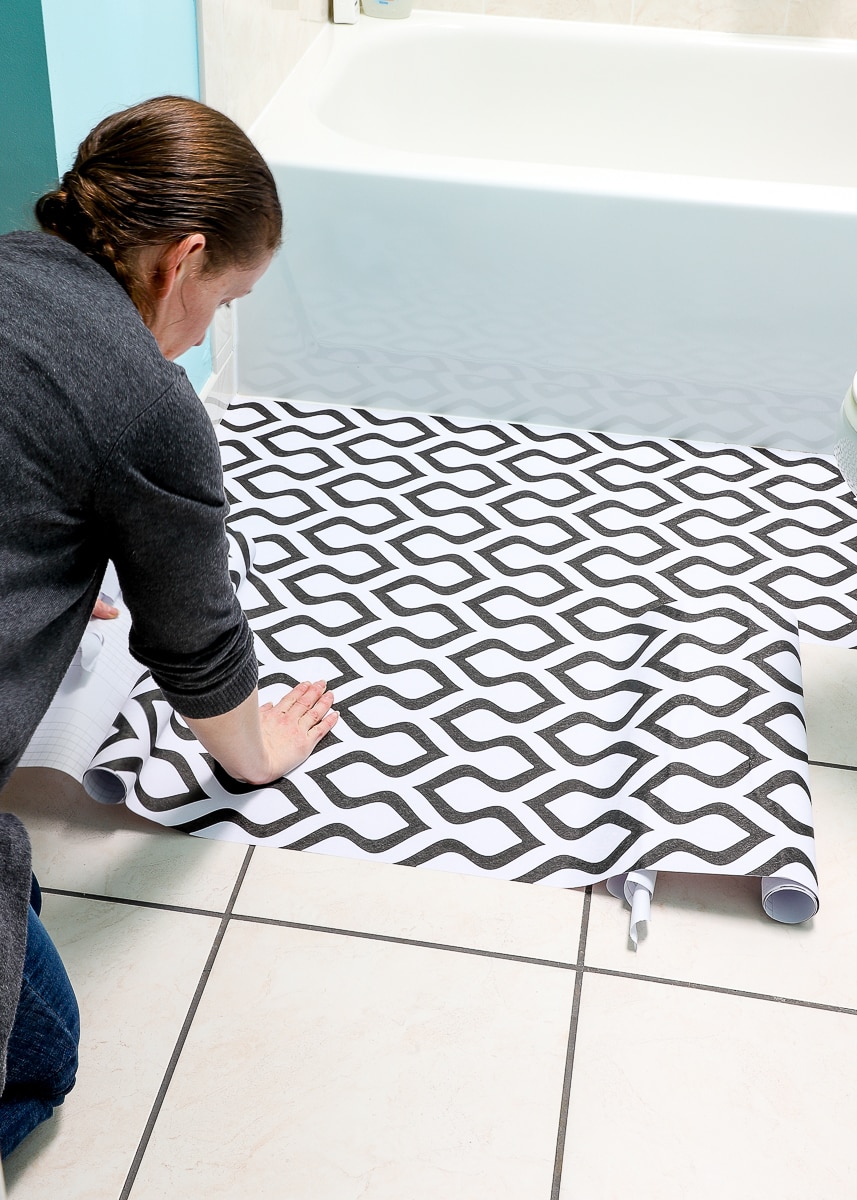
Flat Surfaces
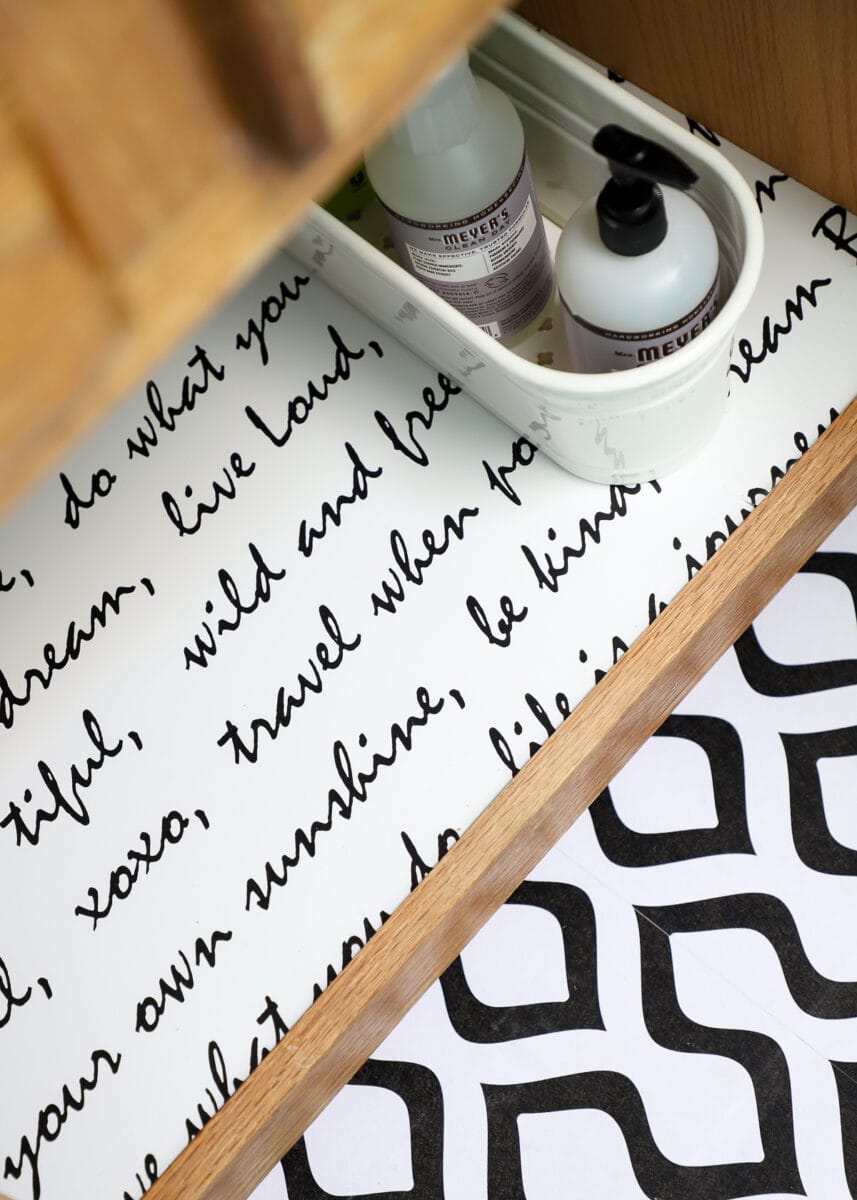
For most flat surfaces, applying wallpaper will be just like wallpapering a wall or adding liner to the bottom of a drawer. You can see my entire step-by-step process for getting paper to lay flat and smooth here: The Best Way to Line Drawers & Shelves with Pretty Paper
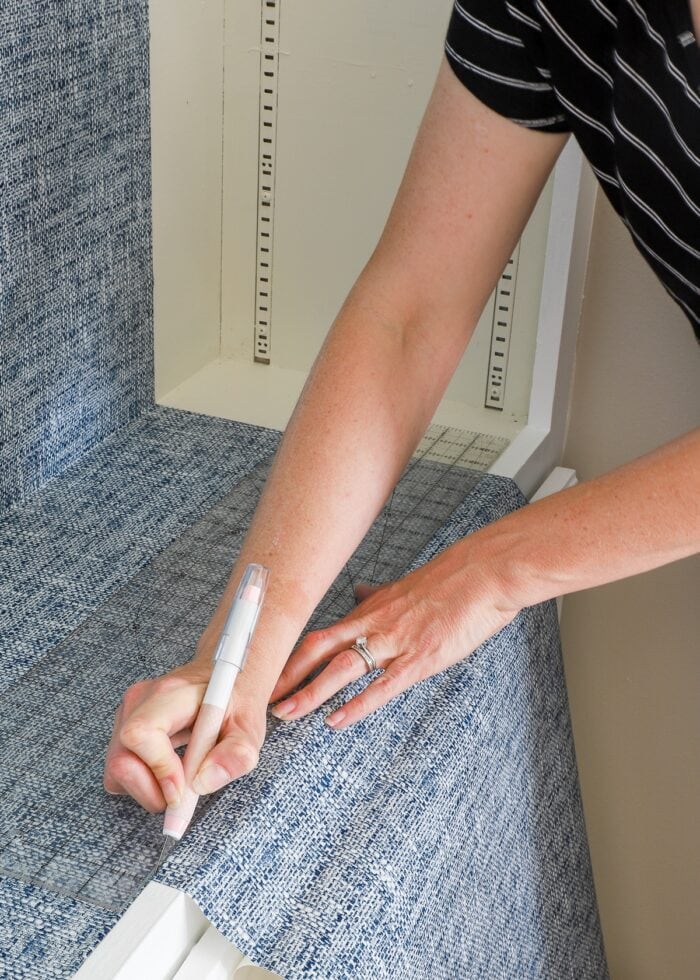
Interior Corners
When applying paper into what I call an “interior corner” (e.g., the inside of a bookshelf) it is usually easier to slice the paper vertically at the corners and apply each section individually. Getting paper to press deep into corners and remain wrinkle free as it turns the 90 degree corner is very difficult. It is best to cut separate sections and overlap the seams within the corner itself.
Exterior Corners
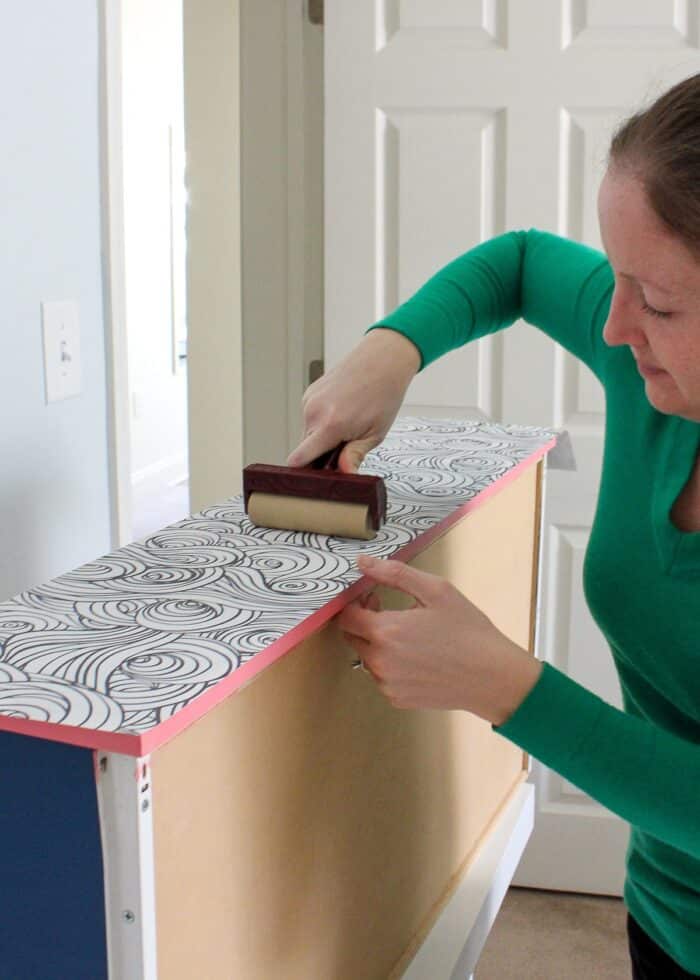
However, the opposite is true when going around “exterior corners” (e.g., around the perimeter of a table). It is usually quite easy to smooth paper around a protruding corner; and covering a perimeter can usually be done in one long cut, avoiding seams all together.

Wrapping Around Corners
When wallpapering furniture, I typically recommend wrapping paper around to the back or inside whenever possible. This applies to table tops, drawer fronts, doors, etc.
Wrapping paper around an edge and out of sight will give a cleaner, smoother appearance from the front, but it’s also where wallpapering furniture gets really tricky. Not only do you want everything to be fully covered and look nice and tidy, but you want the paper to lay as flat and smooth as possible.
After much experimentation, I found a method that produces those neat, clean wraps each and every time.

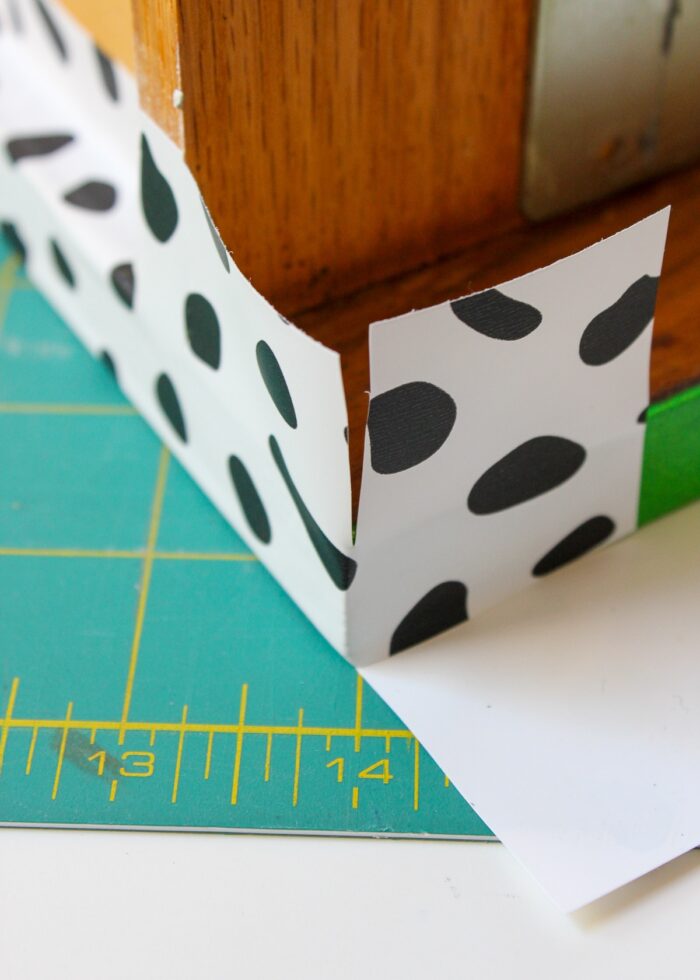
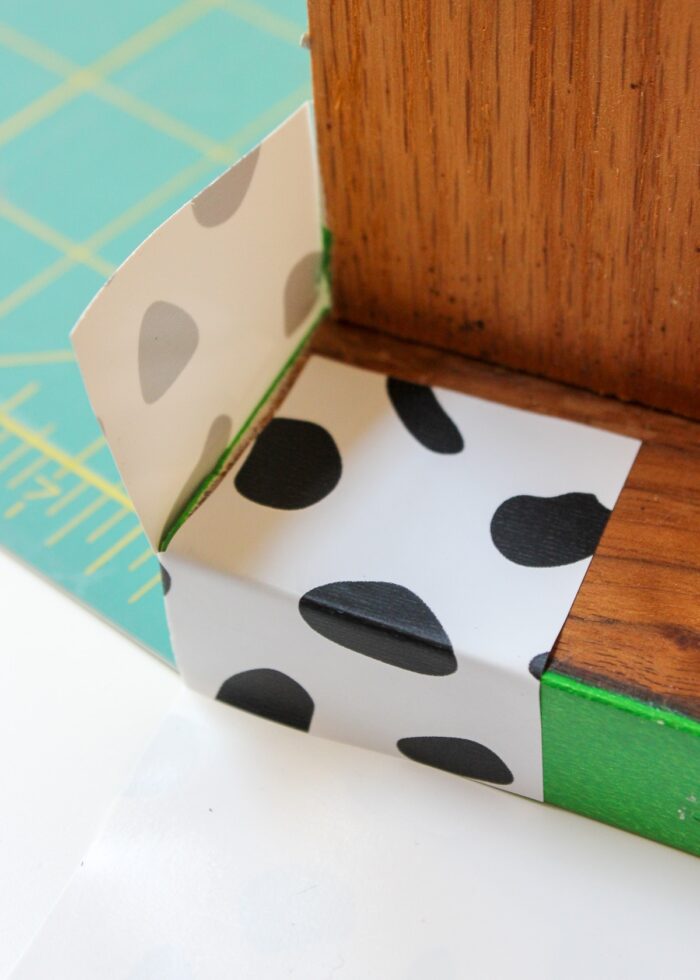
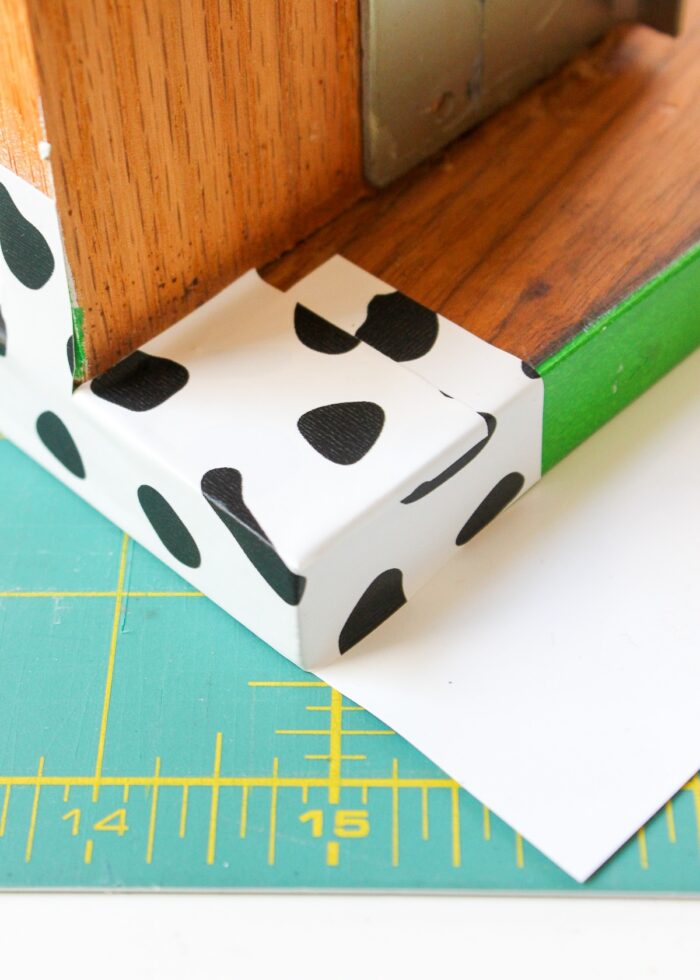
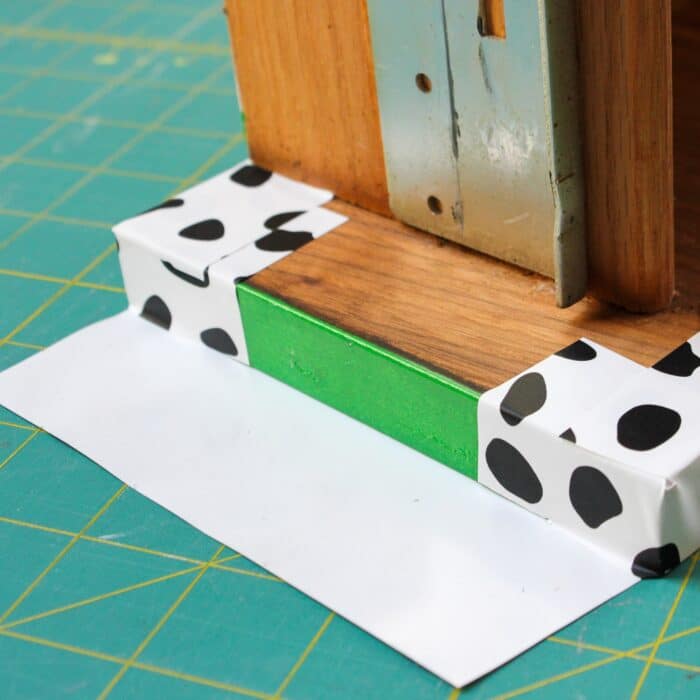
It can take some practice and patience to get the corners and edges covered just right, so you may want to practice on a book or box until you get it.
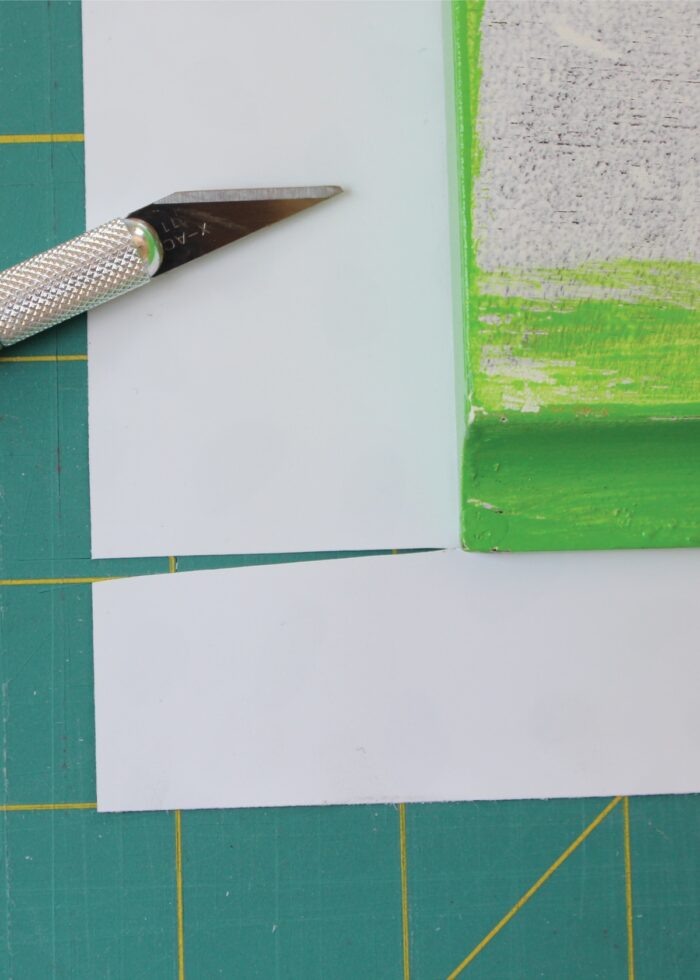
Trimming Raw Edges
Sometimes wrapping wallpaper to the back is not always a possibility (e.g., back of a bookshelf, table top, etc). If you have to slice paper along an edge,
- Be sure your craft knife is very sharp to get as clean of a line as possible.
- Slowly run your blade along the furniture edge/corner so that the wallpaper matches the line of the furniture perfectly.
- Consider adding a light layer of Mod Podge under the raw edge to prevent curling over time (usually only necessary on table tops, stools/chairs, or high traffic spots).
TIP! When matching up seams of paper (at corners), consider painting the furniture’s edge to match the paper. This will make any paper seams harder to see from afar.
Step 6 – Reassemble Furniture
Once all the surfaces are covered to your liking and you’ve trimmed away all excess paper, re-assemble your piece, including re-attaching doors, drawers, hardware, feet, etc.
Now, your new-and-improved furniture is ready to enjoy!
More Great Information on Wallpaper In Your Home
Ready to tackle more wallpaper projects in your home? Check out some of my other favorites!
- How to Hang Peel and Stick Wallpaper
- Does Peel and Stick Wallpaper Damage Walls?
- A Complete Guide to Updating Furniture with Wallpaper
- Can You Use Peel & Stick Wallpaper In a Bathroom?
- Can You Put Wallpaper on Textured Walls?
- How to Wallpaper the Back of a Bookcase | Step-by-Step
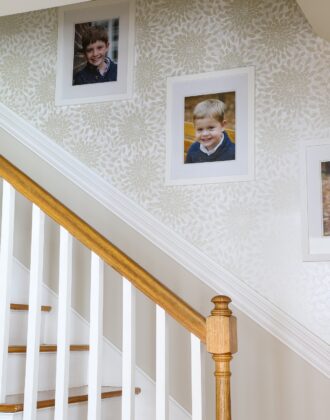
- Wallpapering a Stairwell | Tips You Need to Know!
- How to Hang a Wallpaper Mural | Tips & Tricks for Great Results
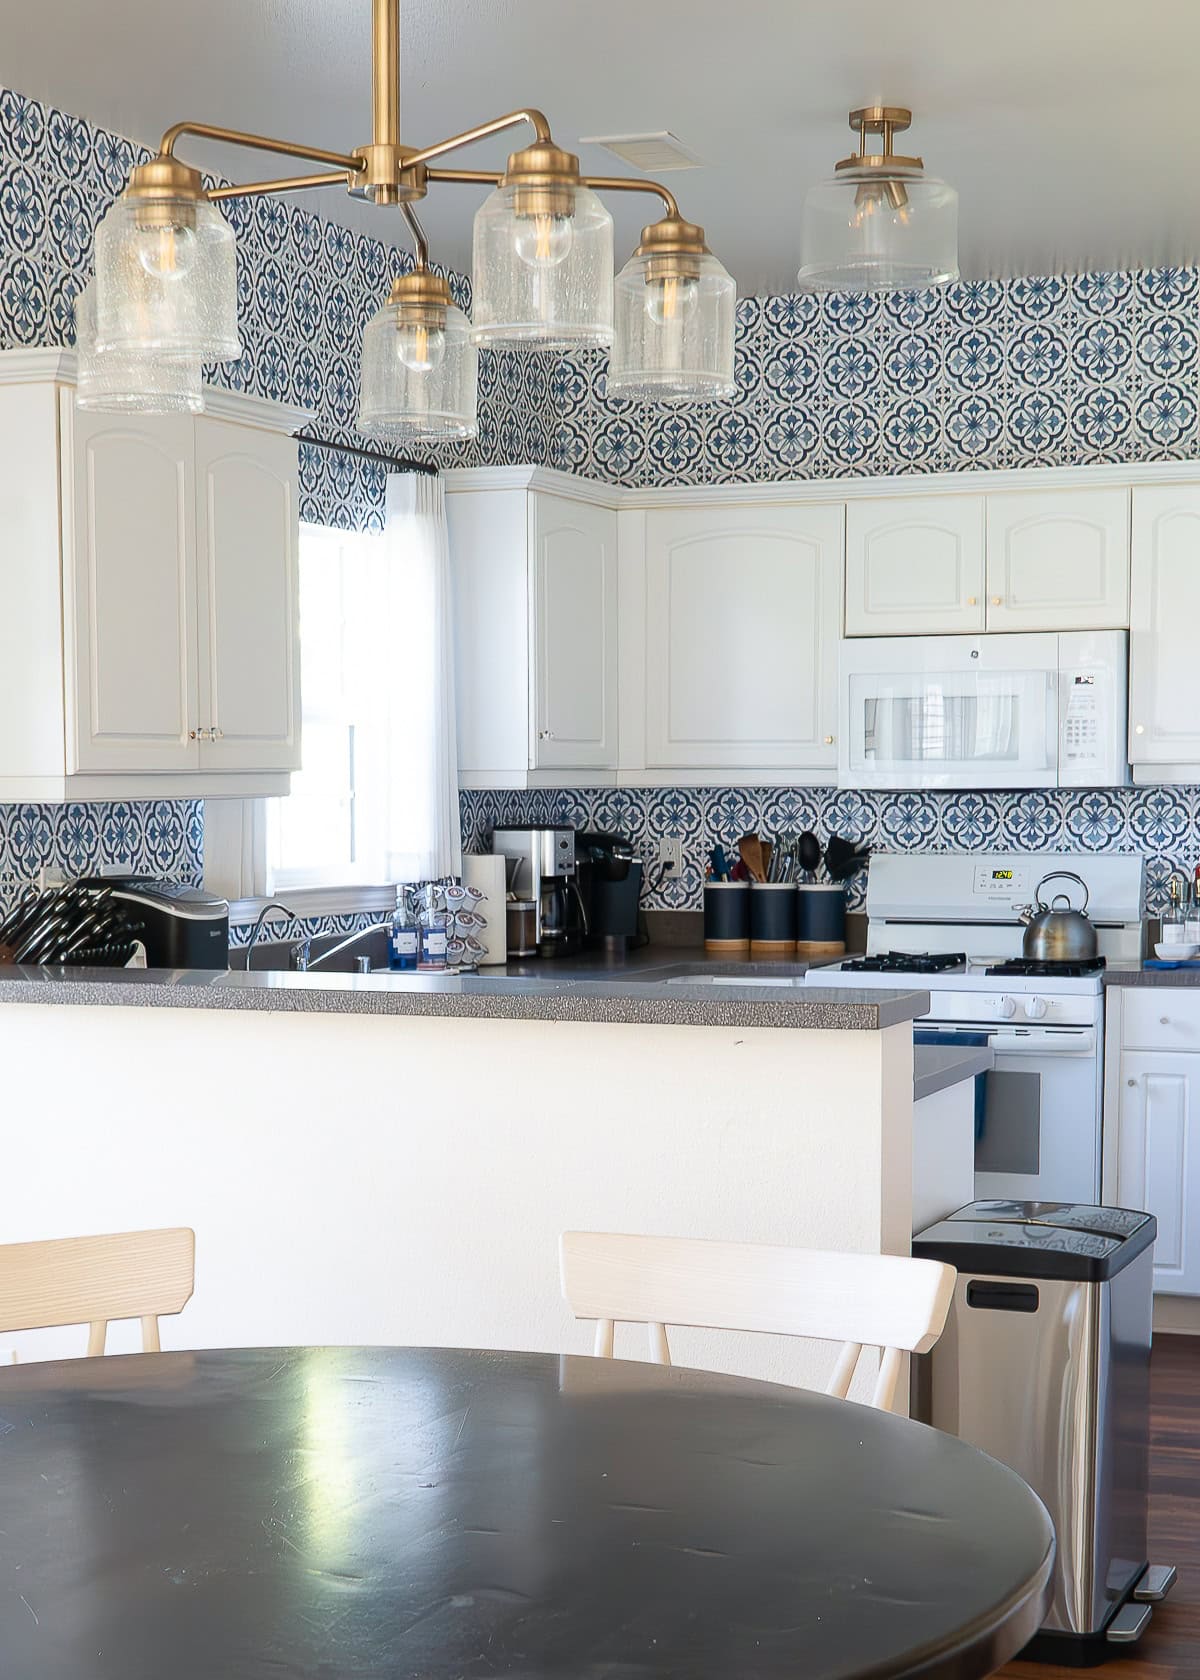
- How to Wallpaper a Backsplash
- The Best Wallpaper for Your Kitchen Backsplash
- Can You Put Peel and Stick Wallpaper on the Floor?
- How to Line Drawers with Wallpaper
- Solid Wallpaper | What It Is + Ideas for Using It
- Wallpapering a Whole Room Versus an Accent Wall | What I Learned
- How to Frame Wallpaper as Art
- How to Use Wall Decals to Look Like Wallpaper
- How to Wallpaper the Inside of Wall Molding Frames
If you have a piece of furniture that could really use a new life, but you just aren’t up for the hassle and work of paint, I strongly suggest you give wallpaper a try. Although wallpaper really works best on simple surfaces (i.e., straight, smooth lines), you’ll be amazed at what a transformation you can achieve with just some cutting, peeling, and sticking!
Megan


8 Comments on “A Complete Guide to Updating Furniture with Wallpaper”
Absolutely love this idea! We are updating my daughter’s bedroom. I found a perfect tall chest of drawers in a consignment shop that was a furniture showroom model. It is unfinished and the wood is beautiful. don’t want to paint it because I love wood furniture but she wants it painted. Since it is her room I want her ideas put in place. This will be perfect! Now to find a pattern to match her color scheme. As always you inspire me to try something different. Love your blog!
I loved this idea as soon as I saw it! We have one of those 3×3 cubby shelving units that one might use with fabric storage boxes and I wanted to lighten it up for my oldest girls new bedroom. I didn’t find any reusable wallpaper that I loved so bought shelf liner paper instead and got to work. It was tricky as I wanted to cover the whole thing – front, top, sides, inside the cubbies, etc. I am not perfectionist, which helped. 🙂
It looks really good and I appreciate your inspiration!
I am planning to doing this same project again on the drawer fronts in my baby girl’s room. Now that will be much easier compared to what I did with the cubbies!
HI! Megan,
You have some really great info on your site. Have you tried using the liquid starch method with wallpaper on furniture? Just curious to see if that would work rather than buying peel and stick wall paper, which as you know, tends to run more expensive.
Hi Elia,
The only time I have used he liquid starch method on furniture was when I did the inside of my son’s dresser drawers here: https://thehomesihavemade.com/2017/02/how-to-line-drawers-with-wallpaper/
It worked just fine, but those exposed edges along the top rim of the drawers didn’t hold up all that well from daily use. If you were to try it where the raw edges are wrapped toward the back/inside, I think it would work. Otherwise, you may want to figure out a way to seal the raw edges to keep them from pulling away.
I have also covered furniture with wallpaper using Mod Podge, which works brilliantly – https://thehomesihavemade.com/2015/05/diy-grasscloth-covered-truck-with-walls/ – but be advised, this is a permanent application!
Hope that helps!Megan
Thank you for this post! I used these instructions to update two damaged ikea dressers that my puppy had destroyed. Sadly the wallpaper I ordered and fell in love with turned out NOT to be stuck-on but I bought glue and made it work. They turned out really well!
Hi Alissa!
Sounds like a great project! I’ve had to use glue/Mod Podge in the past, and it’s almost easier than the peel-and-stick papers…it’s just not as easily removable.
So glad these instructions helped though! Enjoy your “new” dressers!~Megan
Love all these ideas….and was tossing around in my head the same thing for a desk that my teen daughter has. It is big, and very dark wood. And….dad won’t let us paint it. So, that was my thought. But is has edges that are curved and beveled…sometimes three layers of them. Is there a good technique for covering those, or figure a way to only hit the straight flat surfaces and leave those for “trim” like you did some of the other projected you show?
This is THE most helpful, comprehensive resource I have found on this subject. Thank you for sharing it all so clearly with the exact right amount of detail!
(And thank you for doing it with text and photos – I have a personal dislike of how-to videos when I can avoid them!)
This has definitely emboldened me to carry out what I envisioned!