How To Put Feet on an IKEA Kallax | A Complete Guide
Every now and then I make an update to our home (or something in it) and don’t intend to dedicate an entire blog post to it. Then, over time, I rack up questions or comments about said change, and a full post becomes warranted. Such is the case with the feet I added to our IKEA Kallax shelves years ago. This is an easy and stylish update to one of IKEA’s most famous items, but you might not be entirely sure how to pull it off (or how well it will last!) So today, I’m breaking down exactly how to put feet, legs, or wheels on an IKEA Kallax shelf, and answering a bunch of questions I’ve received over the years too!
Why Put Feet on an IKEA Kallax?
The IKEA Kallax line of shelves are brilliant in their basic-ness. Their generous cubby size make them a storage powerhouse; and the simple design allows them to work seamlessly with a wide variety of home decor styles.
That said, their simplicity also makes them a prime candidate for a good “hack;” and adding feet is one of the easiest and cheapest ways to customize the cube storage for your space.
Height Adjustment
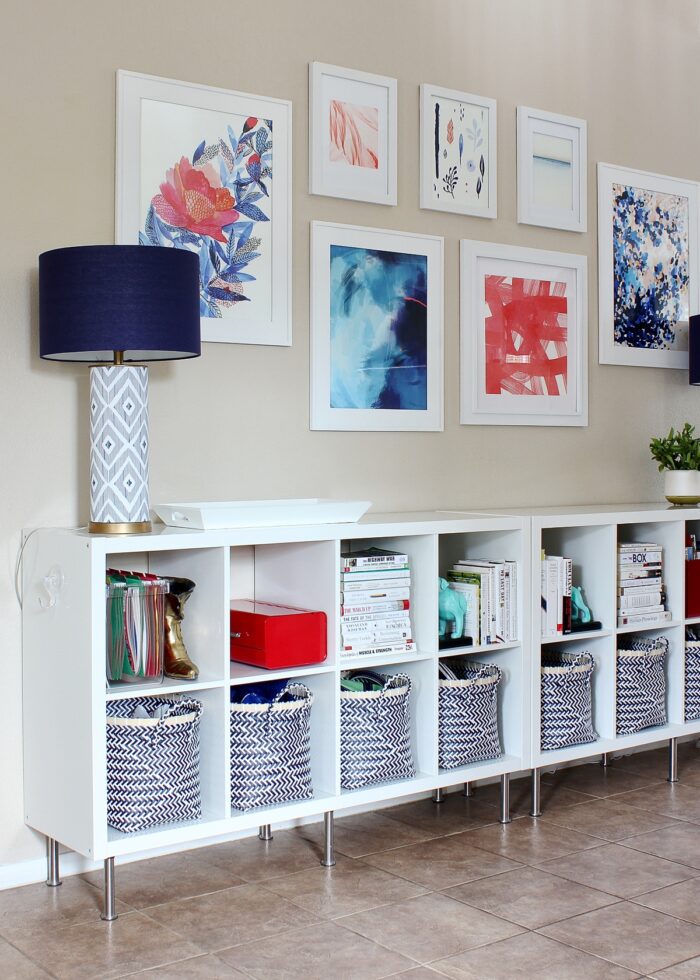
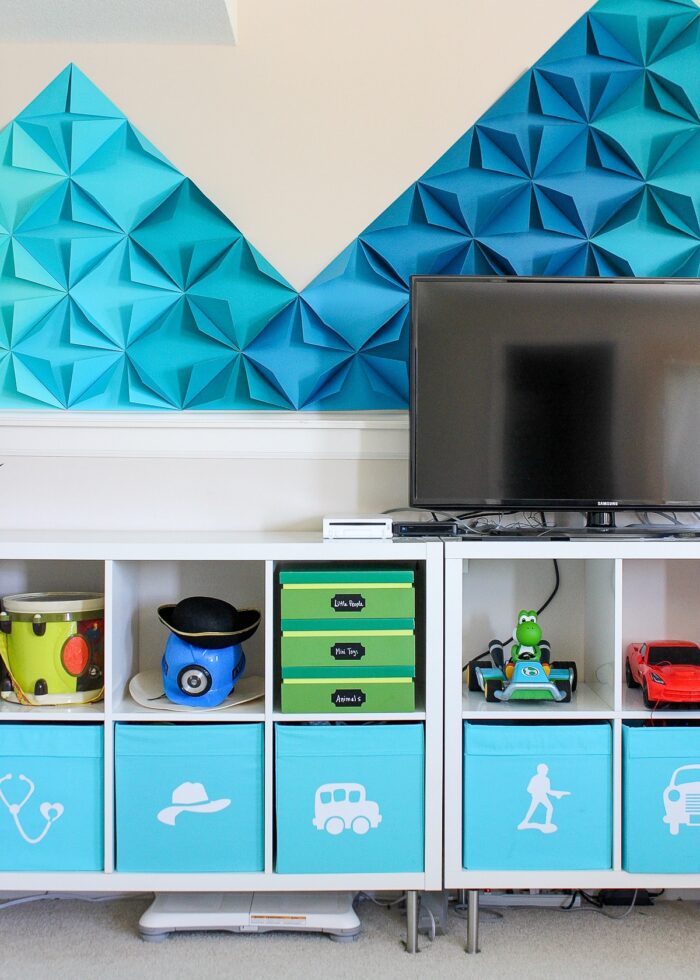
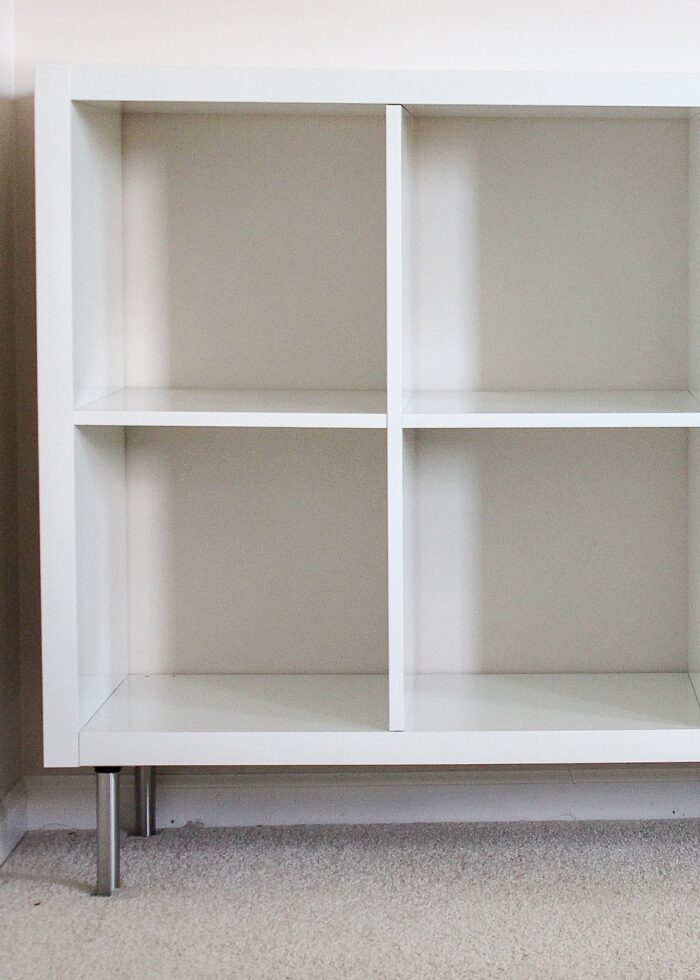
First and foremost, adding feet to the shelves will give them a little more height. This is especially helpful for any units that are 2 cubbies high (2×2, 3×2, or 4×2). Adding just a few inches of height can make the 30″-tall units more comfortable as tables, consoles, media stands, sideboards, work tables/desks, dressers (with drawer inserts, door inserts, etc) etc.
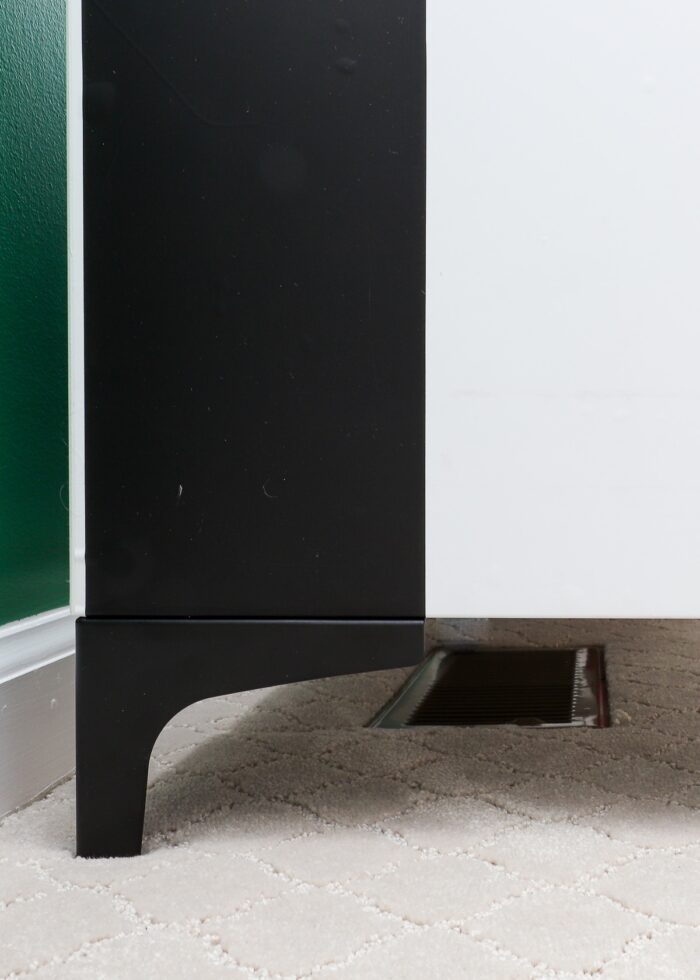
Air Flow
If you need to place a unit in a certain place in a room, but it’s over an in-floor vent, you might be concerned about air flow and safety. Adding feet to the unit will allow you to keep that furniture placement but float it above the vent for better circulation.
Functionality
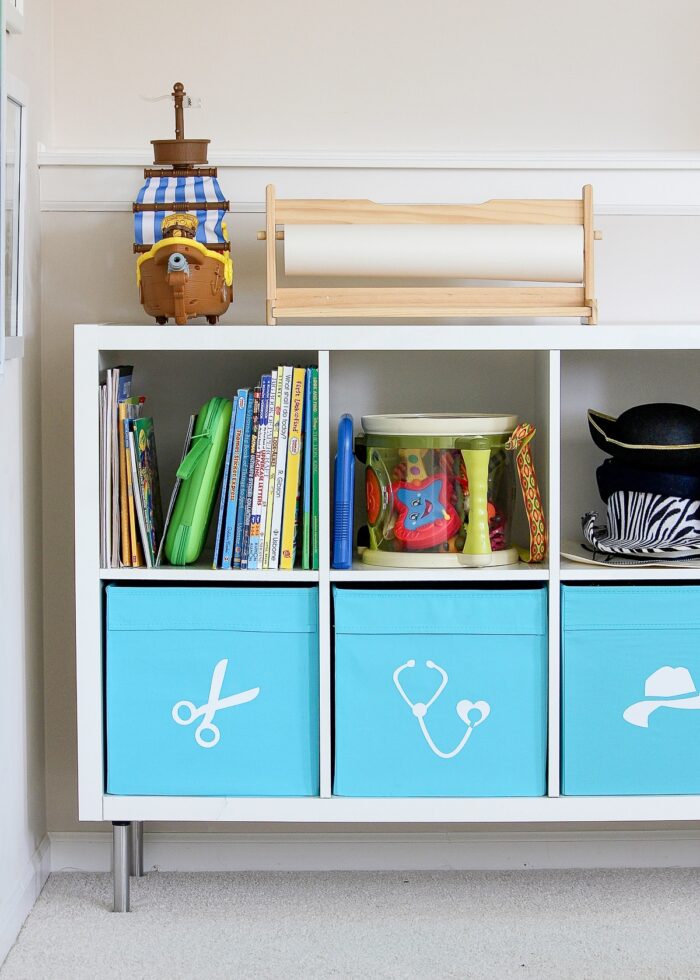
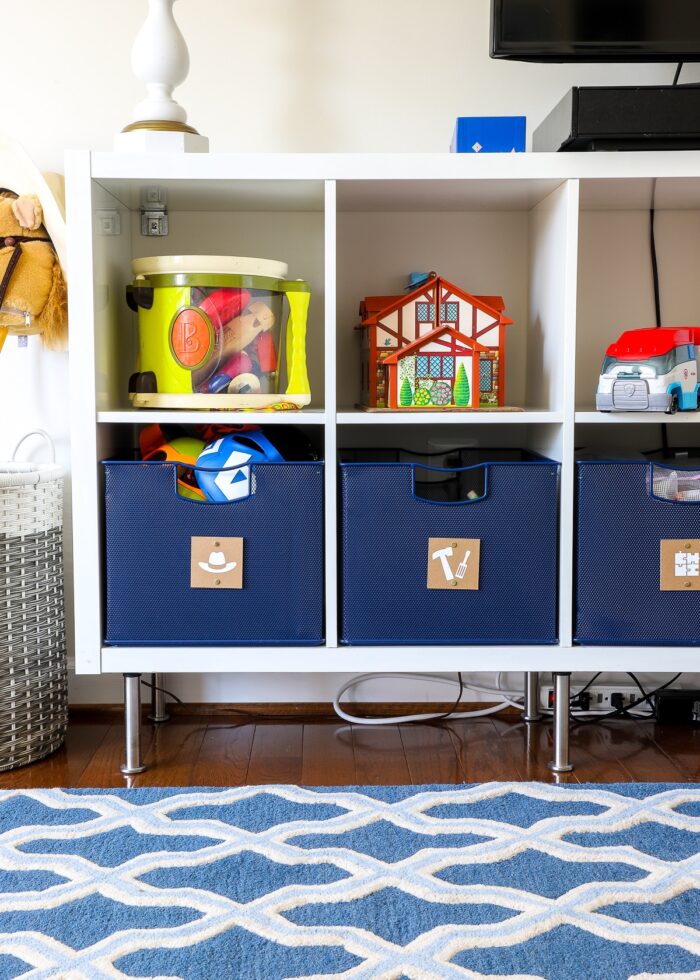
Depending on the height of the feet, you can gain an additional 4-6″ of extra storage space, which can be helpful for long, flat things like books, puzzles, shoes, etc.
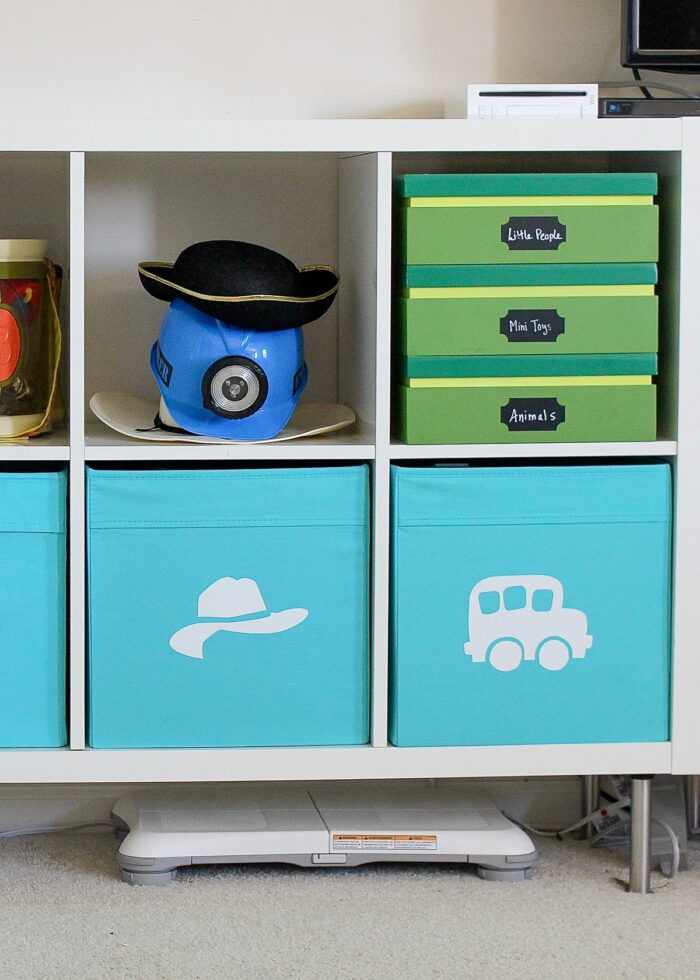
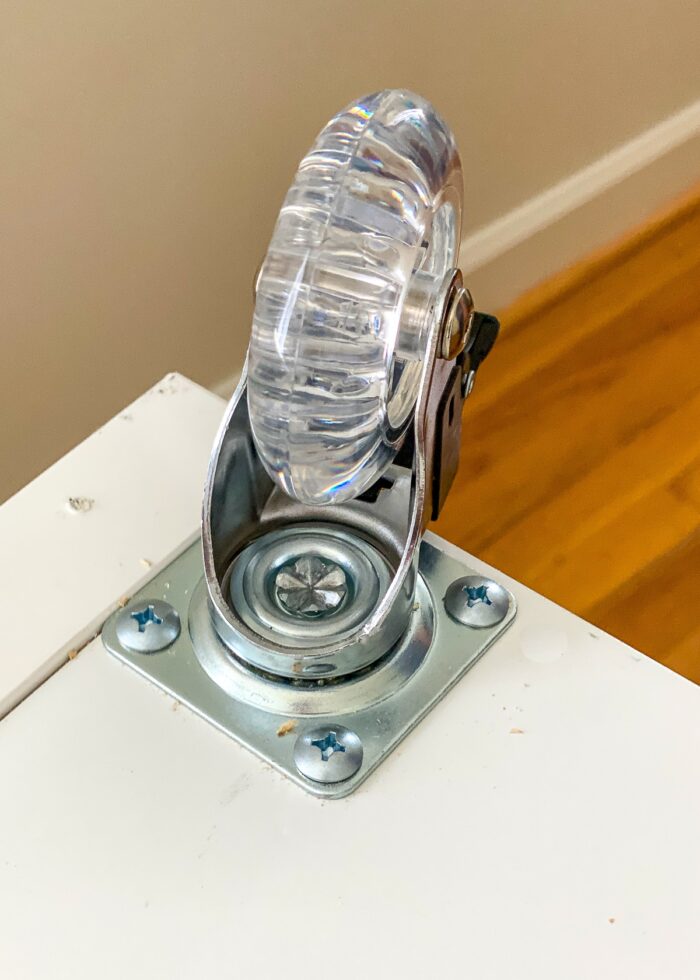
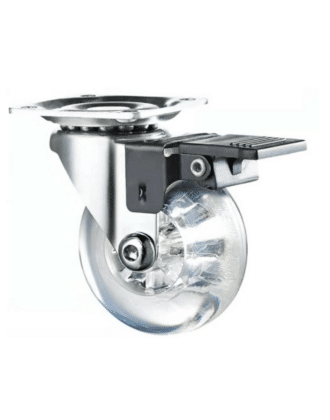
Additionally, putting wheels underneath Kallax shelves can allow the unit to be mobile, which is helpful in multi-use or craft spaces.
Style
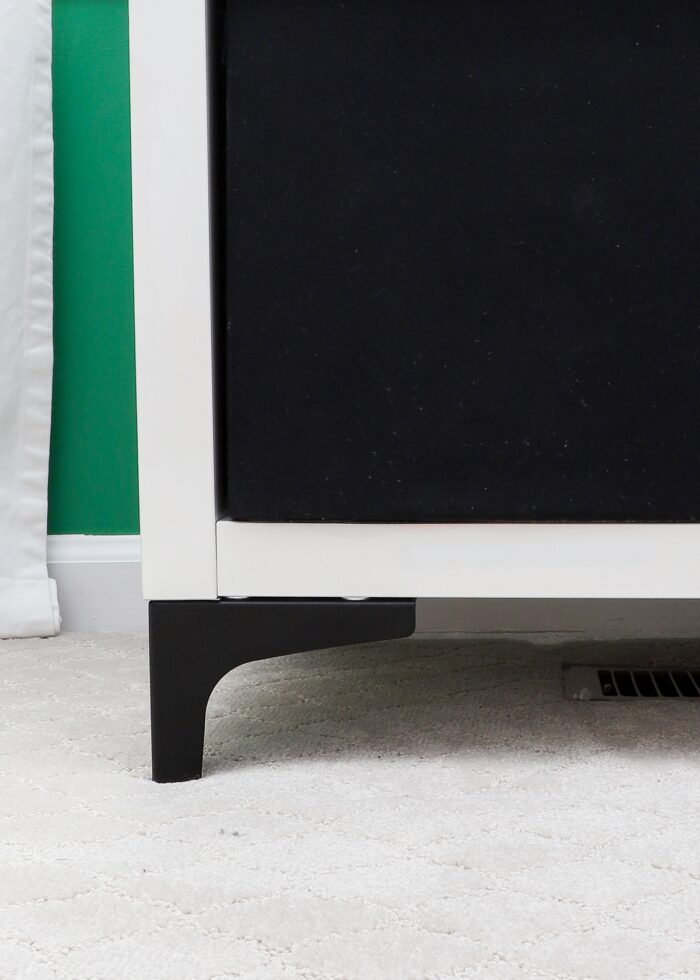
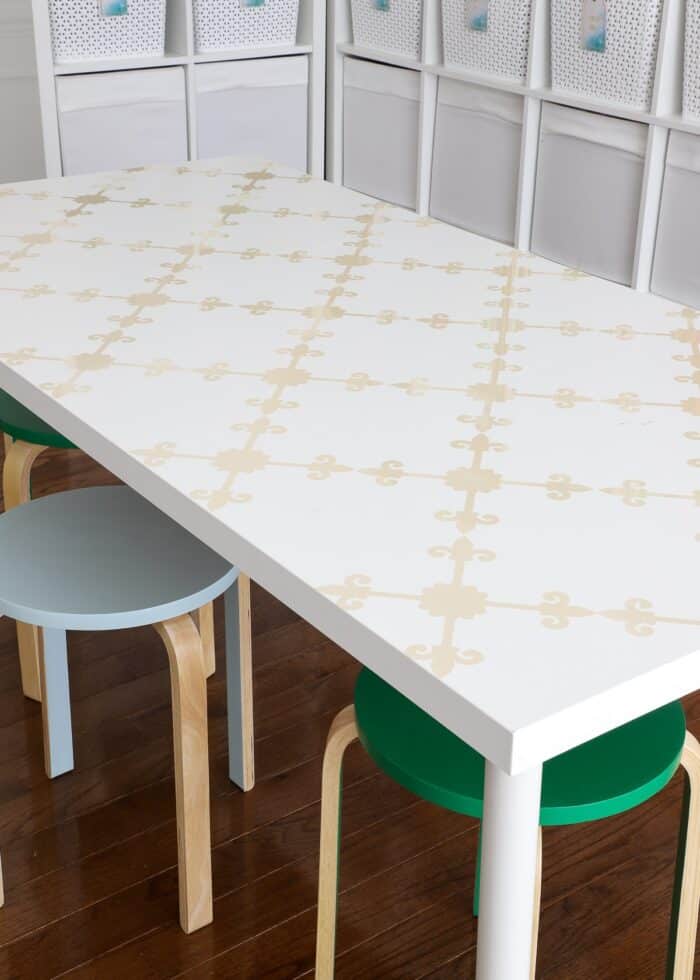
Finally, adding feet to IKEA Kallax shelves can give the basic storage cubbies a whole new look. Instead of boring cubbies sitting right on the floor, feet help the unit look more like actual furniture, making a stronger style statement.
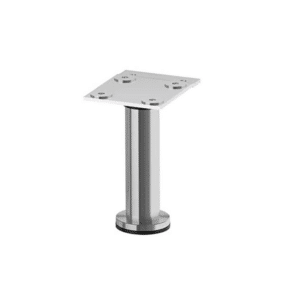
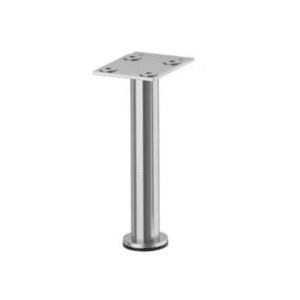
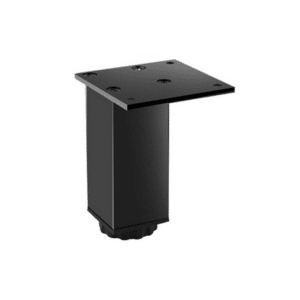
Choosing the Right Feet for the IKEA Kallax
Back when I first added feet to our IKEA Kallax shelves, there were very few options. Now, there are lots (and lots) of different styles to choose from at all different price points from retailers such as Amazon and Pretty Pegs.
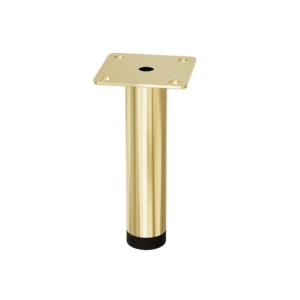
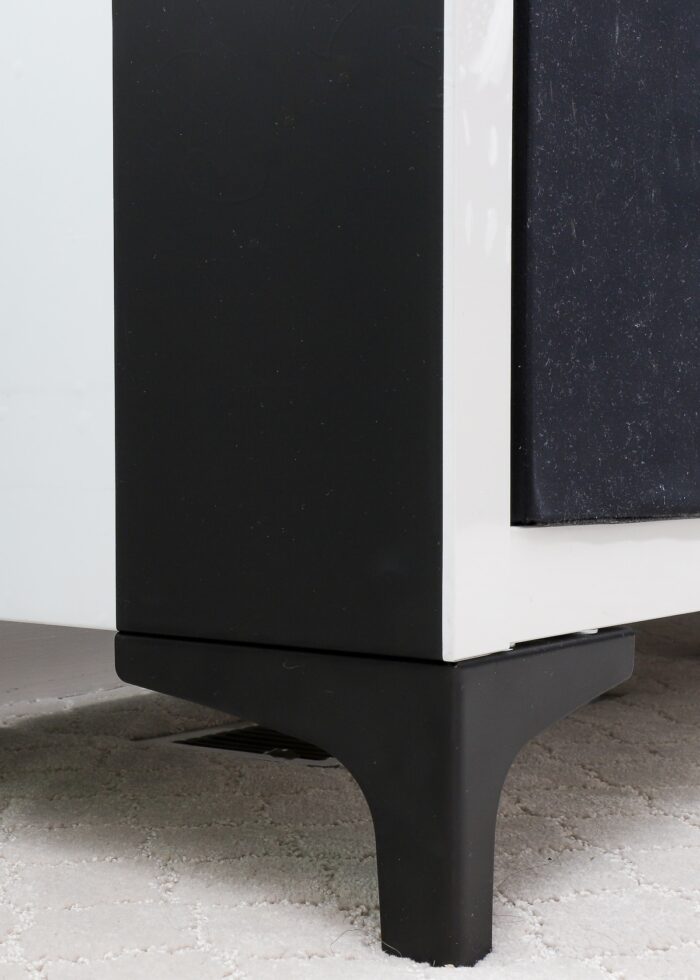
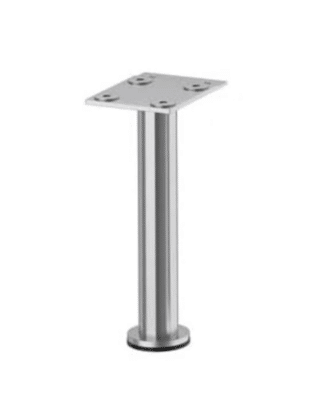
Whether you’re looking for something sleek and simple or ornate and dramatic, there is one feature the feet must include: screw-in base plates.
The bottoms of IKEA Kallax units are perfectly smooth and flat; there are no pre-installed holes for you to screw feet into. As such, any feet you want to secure to the unit must have their own (flat) base plate that can be screwed into the bottom of the shelves.
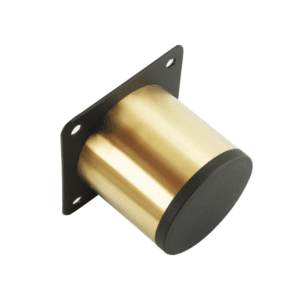
I have long used IKEA’s own Capita feet because they are cheap, sleek, and easy-to-install. But below are some other stylish legs to consider that have the same mounting mechanism.
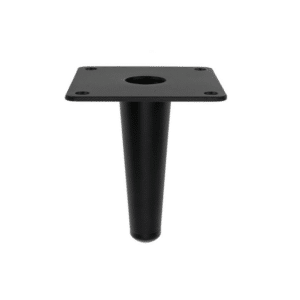
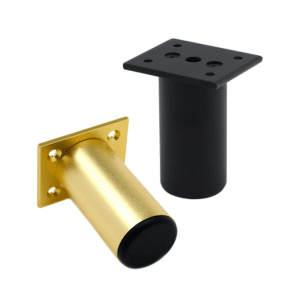

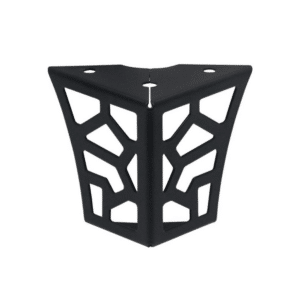
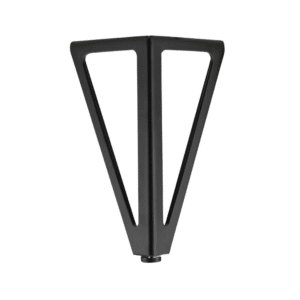
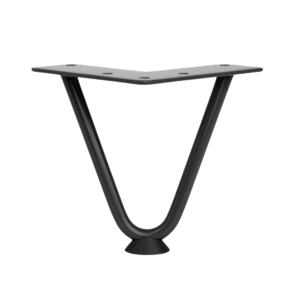
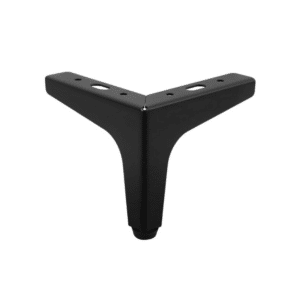
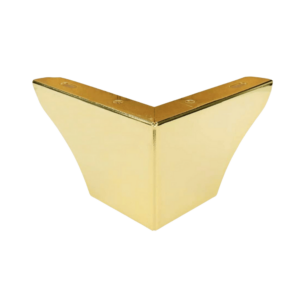
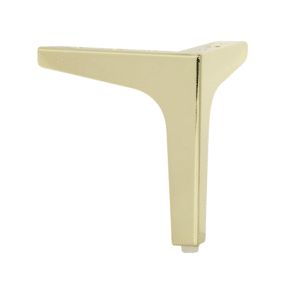
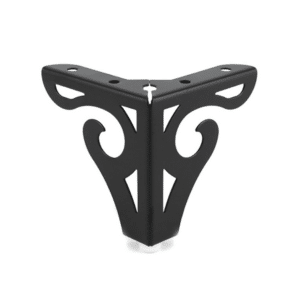
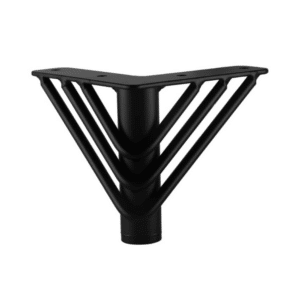
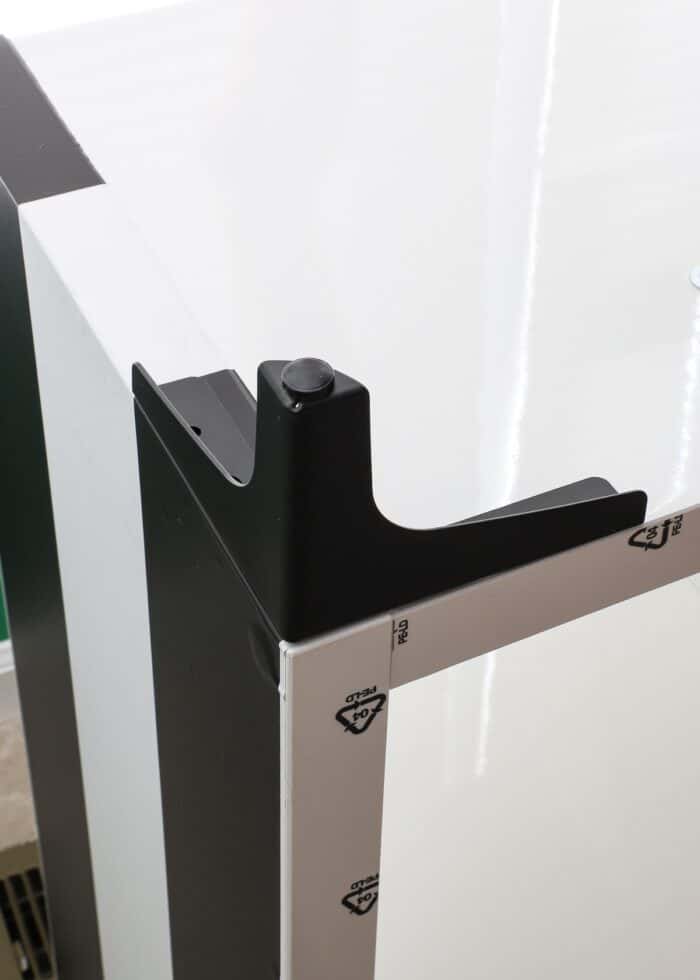
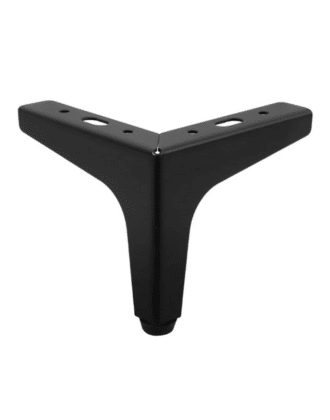
A Note About Triangular Feet
A type of furniture feet you might consider are triangular feet (like shown below). These feet are especially sleek and stylish, and they can also give a little more stability to your Kallax.
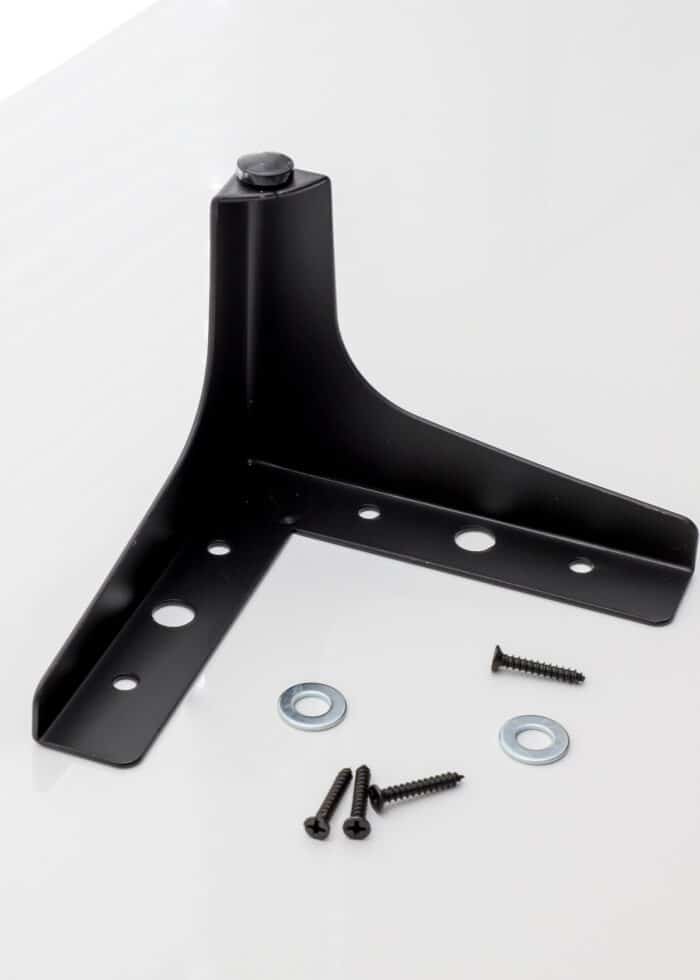
However, keep in mind that the Kallax shelving unit is not perfectly flat on all sides. Depending on how you orient your Kallax, you might end up with an uneven bottom surface, where the sides of your Kallax intersect with the bottom (see below).
While attaching the feet to the outside corners will not be problematic with this height difference, you may end up with a tiny gap of space between the bottom of the unit and the flat foot. The separation is hardly noticeable from a distance but is something to be aware of.
Her are some super stylish and affordable triangular-shaped furniture feet that would look great under an IKEA Kallax!
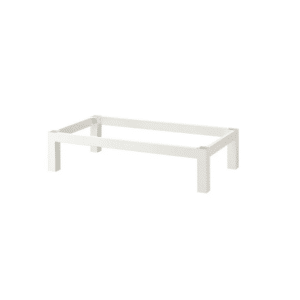
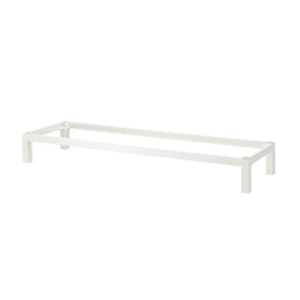
IKEA’s (New) Kallax Bases
Quite recently, IKEA released their own base for the Kallax unit. They come in both 29″ wide (for 2 cubby wide orientation) and 57″ wide (for 4 cubby wide orientation) and black and white color schemes. While I have not personally used these bases; as you might expect, the unique hardware attachment creates a much more seamless and sturdy installation.
TIP! Even if you don’t live near an IKEA store, they now deliver. If you’re looking for a sleek and sturdy feet option for your Kallax, the IKEA bases are definitely worth considering!
Supplies Needed
To attach feet to an IKEA Kallax shelf, you will need:
- IKEA Kallax Shelving Units – any size, color
- Furniture Feet with mounting baseplate (see above)
- Drill with (thin) Drill Bit
- 3/4″(ish) Screws – usually included with your furniture feet
- Electric Screwdriver
- Tape Measure
- Level – sometimes feet will come with an adjustable mechanism to help level it on uneven floors
How to Put Feet on an IKEA Kallax
The following instructions cam be used to attach (almost) any feet to an IKEA Kallax unit:
Want to save this post?
Step 1 – Identify Placement of Legs
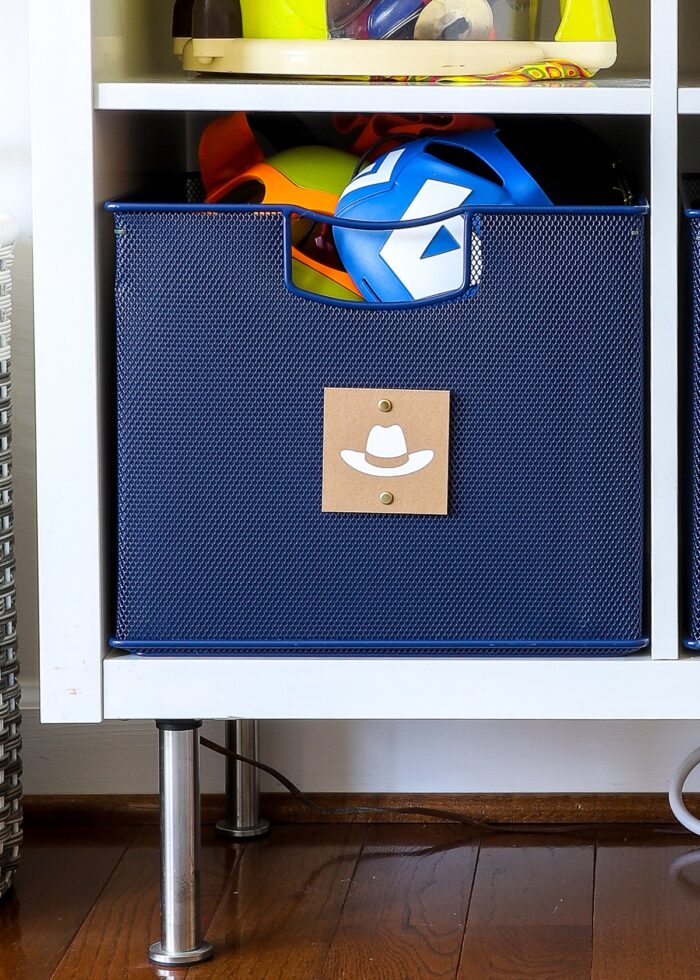
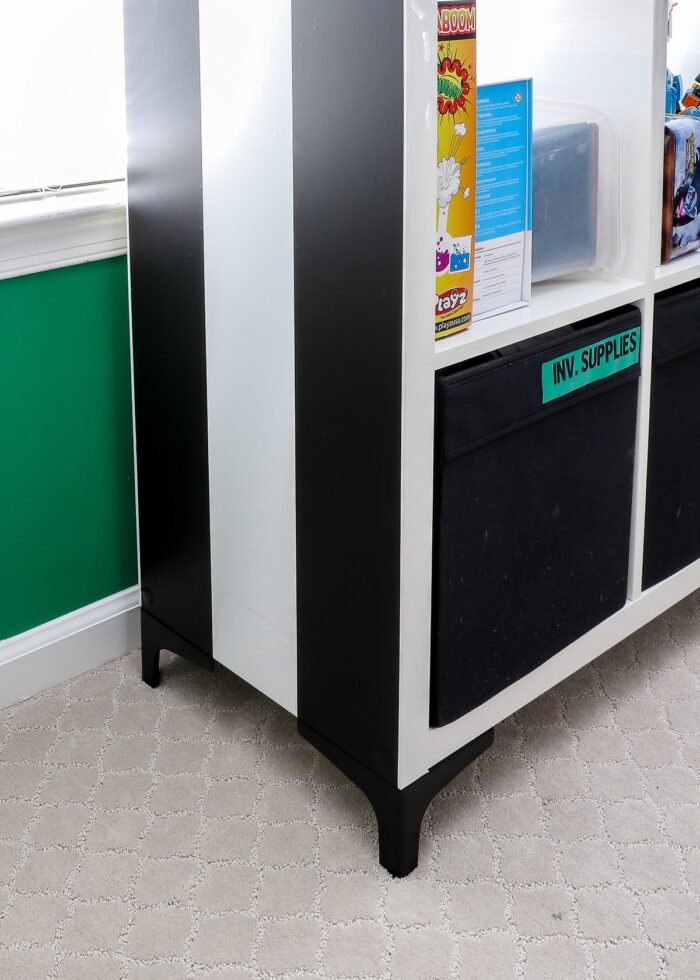
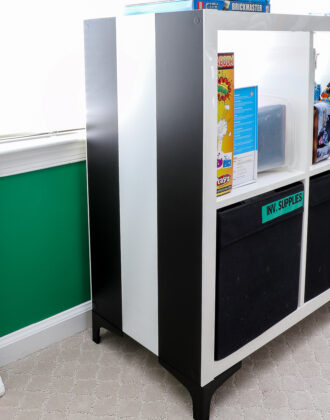
Start by determining where you want your legs to be on the base of your Kallax. Unless you are using triangle-shaped feet (which should be positioned right at the corner of the unit, as shown below), I suggest insetting the feet at least 1″ on all sides.
If you encounter a seam on the base of your unit (where the side and bottom panels meet), you will likely want to place the feet interior to that seam.
Step 2 – Pre-Drill Pilot Holes (Optional)
We’ve have some hardware that screws right into the Kallax surface without any trouble. If this is the case, you do not need to bother pre-drilling.
However, if your screws are not pointed/sharp enough, pre-drilling with a (very) thin drill bit can help your screws go in a little cleaner.
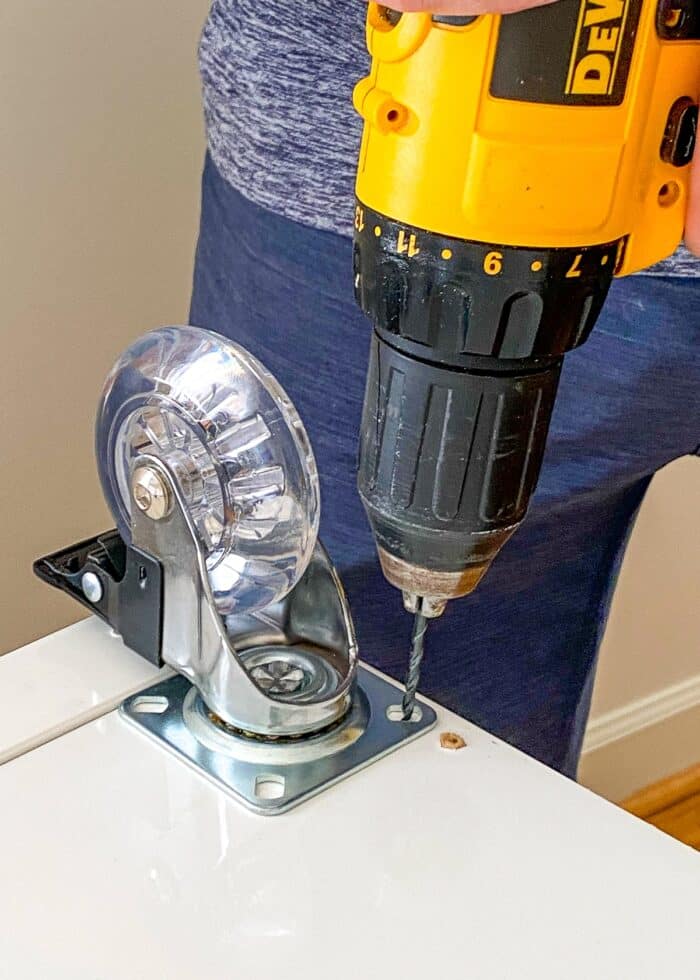
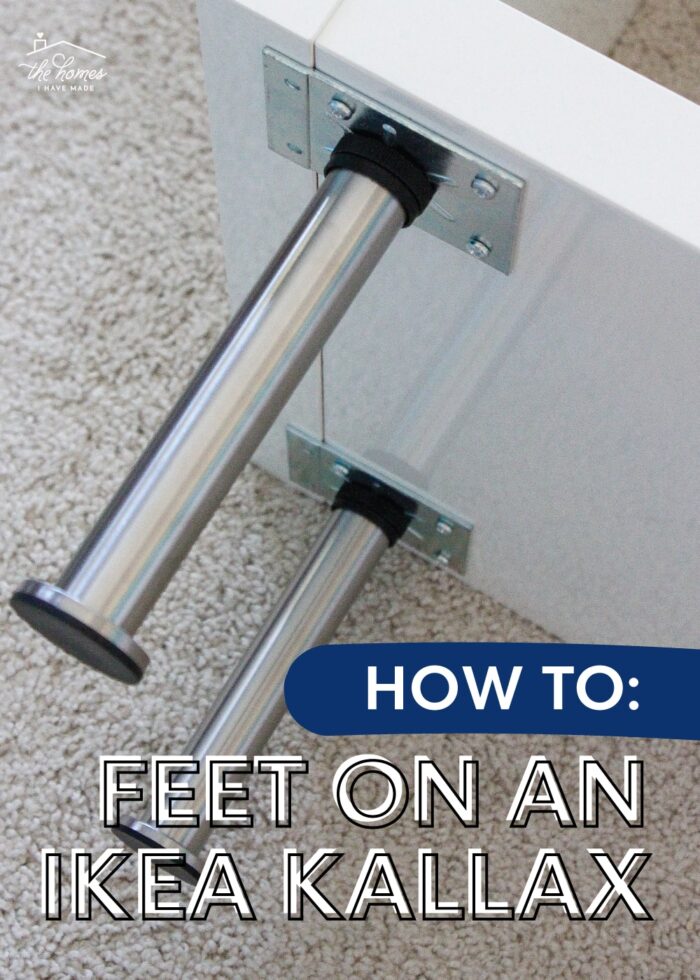
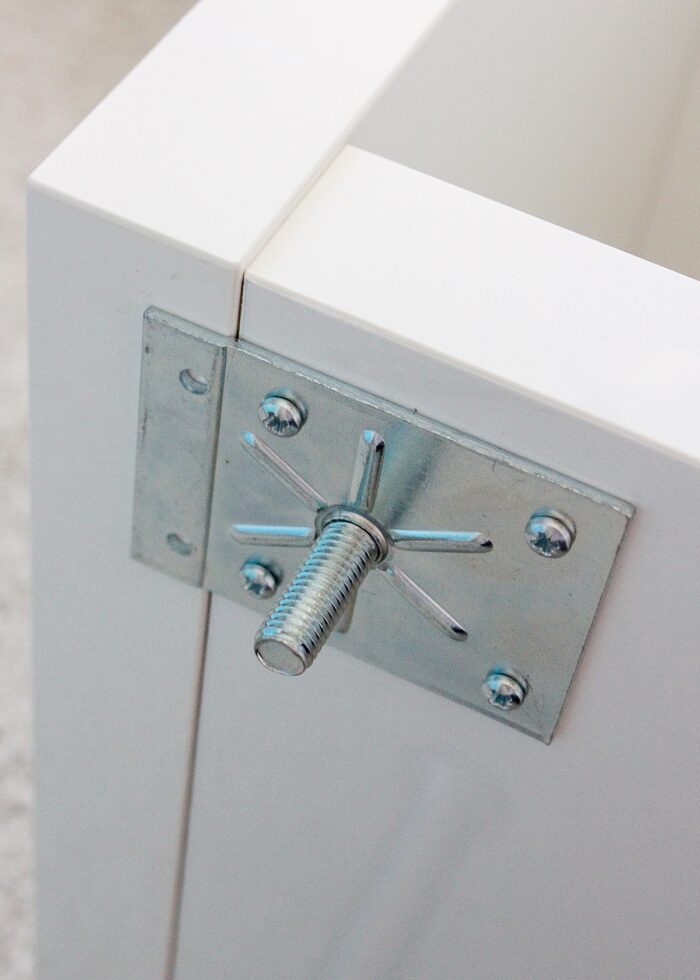
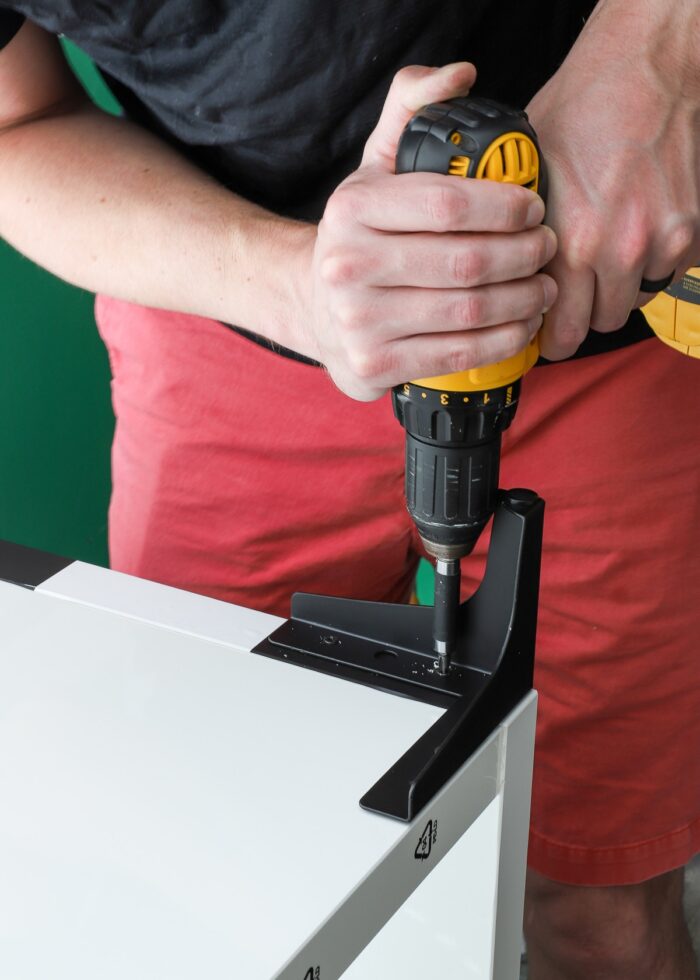
Step 3 – Attach Feet
Using an electric screwdriver, secure the mounting plate to the shelf with the included screws. Repeat on all four corners.
TIP! IKEA Kallax units are not made of solid wood but rather MDF/particle board. As such, the screws can spin indefinitely. Insert the screws in slowly so as not to completely shred the interior of the Kallax unit.
If the mounting plate and actual furniture foot are separate pieces, next screw the foot onto the mounted plate.

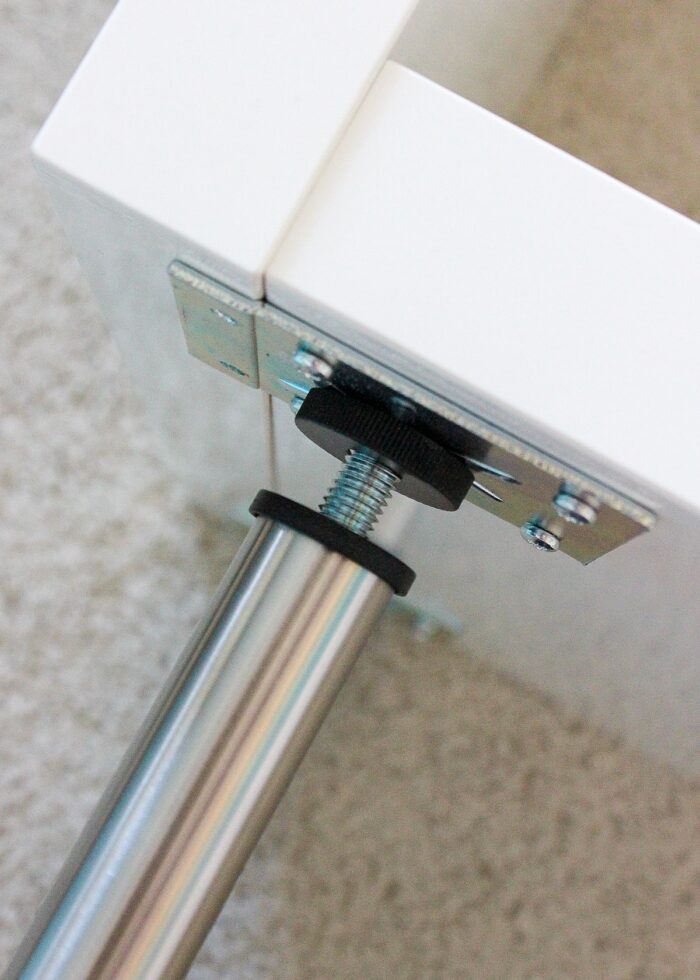
Step 4 – Level Unit
Some adjustable feet come with “washers,” which can be used to fine-tune the overall height or make the unit level on uneven floors. If needed, place a level on top of the Kallax and add/adjust the washer(s) so that the unit is level to your liking.
Step 4 – Put Kallax Back Upright
With all the legs securely attached, flip your unit upright and place it squarely on the feet. If possible, get a partner to help you so that you don’t have to put any pressure on the legs as you tilt it back upright.
FAQ About Putting Legs on IKEA Kallax Shelves
Do You Secure the Kallax to the Wall for Safety?
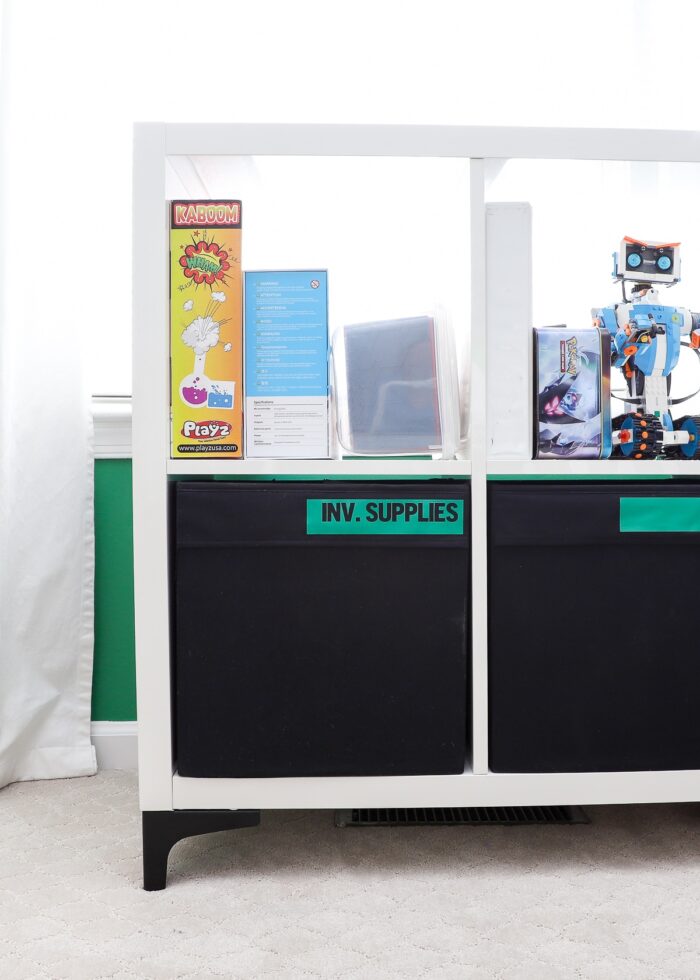
The feet can make the Kallax shelves a tad more unsteady than if they were sitting flat on the floor (simply because they are higher and don’t have as solid of a base). You may want to consider using the mounting hardware (that comes with the Kallax) to secure the shelves to the wall (especially in kid spaces).
Will the Shelves (Eventually) Sag?
This is the question I get more than any other. Since the shelves now have open air underneath them (rather than solid floor), will they eventually sag? It very much depends on what you place in the cubbies themselves.
On the (many) shelves, we’ve added feet to, we have not had any huge issue with sagging. While there might be a slight dip over time, we’ve added additional legs (in the center) to any shelves that have a lot of weight in the cubbies.
Will the Legs Stay Put in the Fiberboard Underframe?
As I’ve mentioned a few times already, IKEA Kallax shelves are not made of solid wood. You will be screwing directly into particle board. This means, that yes, technically, you can probably rip the feet right out (damaging the base of the unit).
While the feet will not be as securely in place as they would be in solid wood, we’ve had zero issue with feet falling off or tearing out.
That said, when we move, we do remove all the feet before the units are loaded into moving trucks, as we’re 100% certain they’d get pulled out if we didn’t.
Have You Put Feet On a Large Kallax Unit?
No. We have only put feet on small Kallax units (two cubbies high). If you choose to put feet on the taller units (4×4, 5×5, etc), I would definitely consider adding legs in the middle (to accommodate the added weight) and securing the unit to the wall for safety reasons.
Other Stylish IKEA Hacks
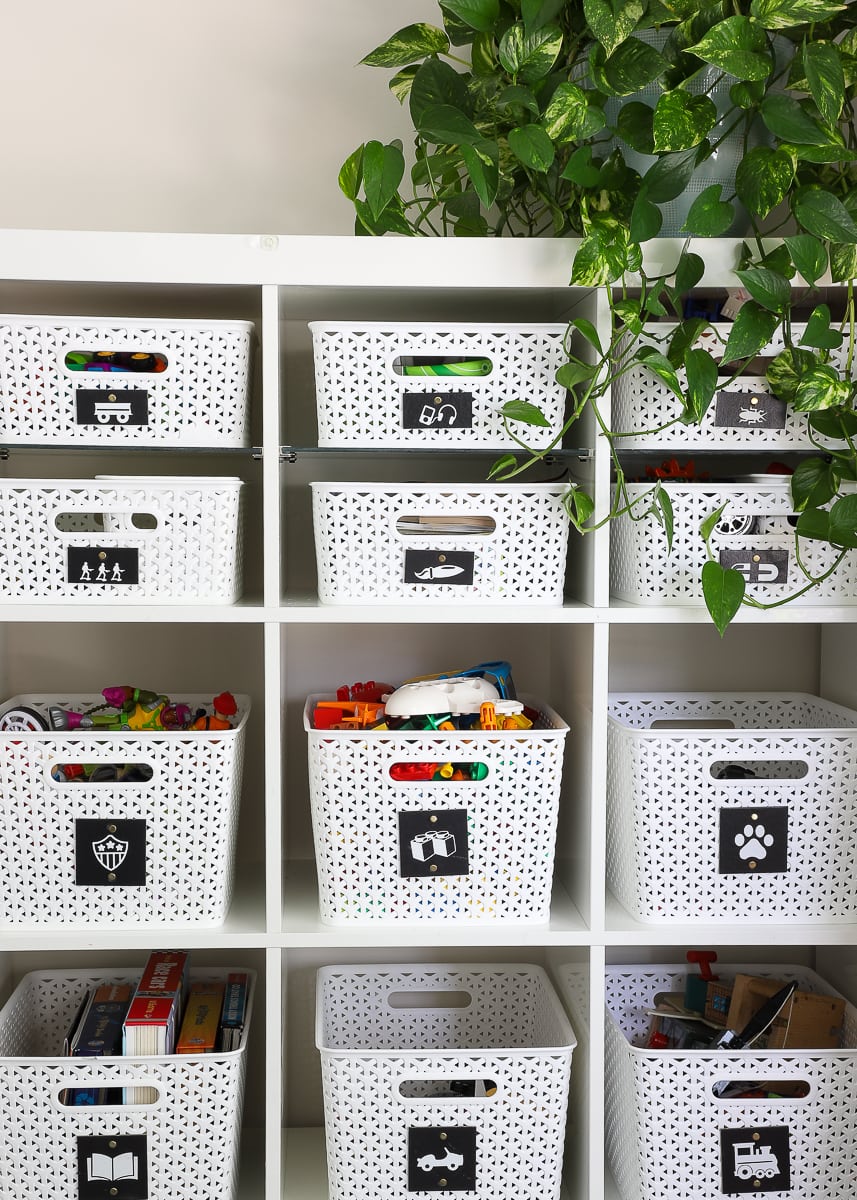
- Functional & Stylish Inserts for the IKEA Kallax
- Make a Sofa Table in 10 Minutes Using IKEA Parts
- IKEA Kallax Hack With Wallpaper
- How to Put a Backsplash on the IKEA DUKTIG Play Kitchen
- How to (Affordably) Store Craft Paper on IKEA Kallax Shelves
- Creative Ways to Label IKEA DRONA Bins
- DIY Wallpapered Stool (An IKEA BEKVÄM Hack)
- How To Add Feet to an IKEA Kallax
- "Stenciled" IKEA Table with Cricut Vinyl
- 1 IKEA Dresser | 4 Totally Temporary Transformations
Without a doubt, this IKEA hack is one of the easiest, cheapest, and most-impactful updates you can make! Installation really is a breeze, and the style upgrade will likely surprise you. If you’ve been wanting to put feet on your IKEA Kallax units, I hope everything I’ve shared here gives you the confidence to go for it!
Megan


36 Comments on “How To Put Feet on an IKEA Kallax | A Complete Guide”
I love this! I use Kallax to corral my daughters’ toys as well and now I’m itching to add feet. It really does make a huge difference! Luckily for me, I was already planning to go to Ikea in the next week or two.
Hi Megan!
So glad you found this post helpful! I know I had such a hard time visualizing how the feet would actually attach (and look!) until I actually did it myself, so I am glad the pictures helped! I’m really glad we decided to do it, like you said, it makes a big difference! Have fun at IKEA 😉
Megan
Woohoo! This tutorial was just what I needed to take the plunge and try it myself. Thanks so much! Glad that I found you. <3
Hi Diana!
I am so glad you found this tutorial helpful! I too was struggling if it would be worth the cost or effort and couldn’t find any good pictures to help me out! Hope it works out for you!!!
Megan
Small changes sometimes I find make the biggest changes! Great little addition and it actually makes everything seem more streamlined and clean with the legs :). I also like how it lines up more with the ledge that’s behind the TV.
Lauren Baxter | Lovely Decor
xx
Hi Lauren (obviously checking in with my weekly spamming of your email ;)!
I am so glad we went for the feet too. My husband was all “do we need to do this? what difference will it make?” I think it makes a huge difference too, so it was worth the cost!
Thanks for chiming in!
Megan
How did you get the images/symbols onto to the Drona inserts? Did you use stencils and paint or are they stickers? Thanks!
How did you get the images/symbols onto to the Drona inserts? Did you use stencils and paint or are they stickers? Thanks!
//edit: Never mind… nosed around your blog and found it 🙂
Hi Stephanie!
Thanks for your comments. Glad you found what you were looking for! These labels have worked surprisingly great for us, and are super easy to change out when the contents of the boxes shift around!
For easy reference, here is the tutorial post again: https://thehomesihavemade.com/2013/08/image-labeled-toy-bins/
And you can see how I did the same thing in our recent laundry room here: https://thehomesihavemade.com/2015/09/simple-sweet-laundry-room-reveal/
Hope those help! Good luck!
Megan
Looks great and is exactly what I am trying to do but have not had the luck/time/smarts to figure it out. Thank you for posting this!
You are most welcome! Glad it helped!!!
Megan
Hi Megan,
I’m curious to know how the larger, 8 cube, Kallax is holding up with just 4 feet (as opposed to 1 or 2 extra feet in the center)?
Thanks!
-Adela
Hi Adela!
Thanks for your question. I’m happy to report that we’ve had absolutely no bending/warping/sagging or any other issues so far! Now, we only added the feet about 6 months ago, and we don’t have super heavy stuff on the shelves (just toys). But I feel like the Kallax is sturdy enough in itself that four feet are sufficient. If we were going to store books, records, or dishes…we would maybe consider adding additional feet.
Hope that helps!
Megan
It’s bowing
Hi Mike,
It may appear to you that is is bowing in the pictures (???) but I can assure you it is not at all bowing in real life!
Thanks,
Megan
Those shelves are honeycombed cardboard after about a 1/2cm of press board. Securing them was probably smart, because there isn’t much for the screws to grip onto.
Hi i am confused, on your picture you put the feet on the side that in the manual shows are gonna be the “sides” and not up or down. So i dont know how to do it. For me the manual says that the side with the 4 holes is gonna be up or down, can i just ignore it?
Hi Daniel,
The IKEA Kallax shelves can either be placed on their long side or short side. So you can put feet on either side. I believe the holes you are referring to are for mounting the unit to the wall?
Hope that helps,
Megan
Pingback: 75 more IKEA hacks - DIY Joy
I am looking for the feet on the Ikea website and not finding them anywhere. Can you point me in the right direction or do you know of other feet that look like that?
Here you go!
http://www.ikea.com/us/en/catalog/products/10267895/
Hope that helps,
Megan
Hi,
That looks like a great idea.
I’m trying to attach casters/wheels on kallax shelves. I thought the shelves are hollow inside, and so I would have to put pieces of wood to screw in legs/casters. But it seems like you attached the legs right onto the shelves. Do you think they are secure enough?
Thanks in advance!
Hi Sak,
The shelves are made of several layers of compressed cardboard with a veneer protective covering (I think). When we first screwed the feet into the shelves, they felt nice and sturdy and we didn’t have any concerns. I will say though, that our shelves were moved (across country, by professional movers, in and out of trucks) and we didn’t take the feet off any of the shelves. One foot (out of 12) had been completely broken off. As in, the foot/screws pulled out the cardboard of the shelf, leaving us with a hole in the shelf. We were able to just move the foot over to screw it back in, but I guess when you apply enough pressure to the foot (laterally), it can break through the cardboard.
All that to say, I think your casters would be just fine, but you’ll need to make your best judgement. Hope that helps!
Megan
Pingback: IKEA Hacks That Will Make Your Life Easy• DIY & Crafts
THANK YOU SO MUCH!
I am getting ready to buy the Kallax shelves and was wonering if I could raise them and if so what would work so I really appreciate this post!
Hello! I want to make a little bed side table, with a 1×1 kallax cube and wanted to put the 8cm Capita feet. The ikea worker informed me it would not be a good idea, because the kallax is not adapted to feet. But seeing your example, I have no doubts! Thank you so much!
Hi Marcia!
Yea – I’m sure IKEA wouldn’t approve but we’ve had zero issues in the 5 years we’ve had feet on ours. I will say though, they are currently in our playroom and we did affix them to the wall just in case a kiddo tried to climb them!
Good luck!
Megan
Okay, some important info has somehow not yet been covered in the comments. These instructions as they stand no longer work, but don’t worry if you’ve already gone out and purchased all the stuff, because I’ve got your back.
When they renamed EXPEDIT to KALLAX they saved weight by making it from hollow particleboard. This means you can’t attach feet to a KALLAX with screws, they’ll just fall though into the carcass of the KALLAX.
So, get to a DIY store or Screwfix, and get yourself a tube of grab adhesive, and a sealant gun if you don’t already have one. This is powerful adhesive, basically a massive tube of crazy strong super glue for gluing anything to anything. Forever.
Apply very generously to the feet and place them where you prefer, then apply pressure, clean off excess with kitchen paper and discard. After a few hours, very carefully turn it over and carefully place it on its feet to apply more pressure, then leave for 24 hours.
The end result is absolutely rock solid. You’ll tear the KALLAX in half before these come off. I even did this to my super slippy polished high gloss white KALLAX, still no problems.
Thanks for sharing your experience and tips, Mike!
Our feet ARE indeed attached to several Kallax units (not Expedits) and we have screwed them on AND taken them off the Kallax units over and over (since we move a lot) without any issue of them “falling through into the carcass.”
But I’m sure your tips will prove helpful to anyone who encounters such an issue.
Thanks,Megan
Hi Megan,
If it’s worked for you, I suspect that there may be a difference between US and European KALLAX units (I’m in the UK), or that IKEA have very recently changed the design. I had these delivered by IKEA (in lockdown) last week. Sometimes companies make these changes to save shipping weight, across all the units they sell globally it would save them money. If you read the comments of this article you will see others have had the same issue I had.
I attempted to fit the CAPITA legs, I drilled pilot holes, then when I screwed them in, the screws dropped inside when screwed in half way. So the KALLAX units I have contain a hollow cavity in the centre of each exterior panel. As a result, the legs were not secure at all.
The grab adhesive is an excellent solution though. It’s up to you but it might be worth informing people of this potential problem.
Best regards,
Mike
Can confirm what Mike is saying for North American KALLAX. I’m in Canada and we just bought a KALLAX unit and attempted to follow your instructions and as Mike said, the board is hollow and the screws just fall through.
Great tutorial but doesn’t seem to work for KALLAX units in North America.
Mike, how is your unit holding up using the grab adhesive?
Pingback: Legs For Kallax - Playroom Ideas
Thank you so much for this suggestion and how to guide for adding feet to the Kallax bookcase! I need to add a book case to one of my son’s rooms but I’m a little strapped for cash right now – so this is a great and affordable suggestion! One reason I prefer feet on a book case is because they will allow the main frame of the bookcase to sit above the baseboard and render it more flush against the wall. If you’re entering a room and the bookcase or shelving unit is situated on the back wall it doesn’t really make a difference visually, but if it the first thing you see on the side wall when you enter a room, personally I think it looks horrible. Thanks again’
As with anything, if you don’t like the color use spray paint from rustoleum to change from the silver to white. Just make sure it is dry before attaching. IKEA was always my go to furniture when I was on active duty! I renovated my basement with the Billy Bookshelves and used shiplap around the sides and back to give them a farmhouse look.
Thank you for the inspiration! I have an 8 cube and wasn’t sure if I should do four or six legs but I’m just going to follow your exact directions as yours seems to have turned out beautifully and held up all this time! 😘😘
Hello there. I live in a tiny house but love to craft and have many supplies. I plan on getting the 5×5 unit and would love to put feet on it as it’s going to be in my living room. Do you think 4 sets of two feet would be sufficient?
I love your post on inserts. I plan on using them so my unsightly clutter will be behind doors. Thank you so much for the inspiration. Josi