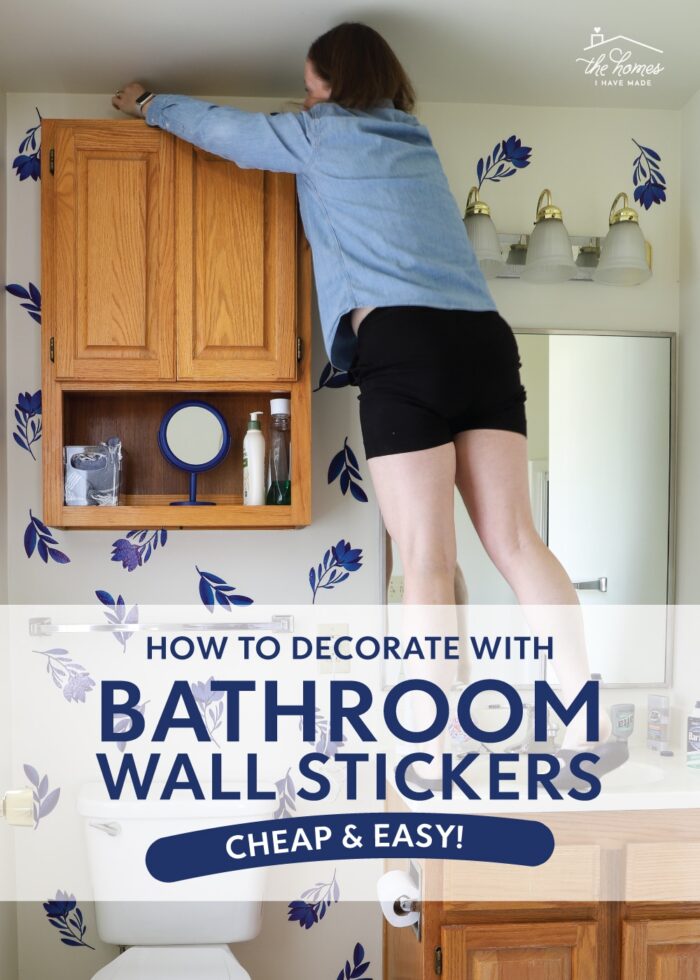
Instantly Decorate Your (Rental) Bathroom with Wall Decals
As we near the end of our time here in our 9th home, our rental master bathroom still hadn’t received any DIY love. Not wanting to leave any space un-done but also not up for a complicated or expensive investment, I quickly landed on the idea of using bathroom wall decals to infuse some personality and style into this tight and bland space. This was a new-to-me project that had quick and immediate results; but like any DIY endeavor, there was also a bit of a learning curve too. If you’re considering applying bathroom wall decals in your own home, read on for everything you need to know!
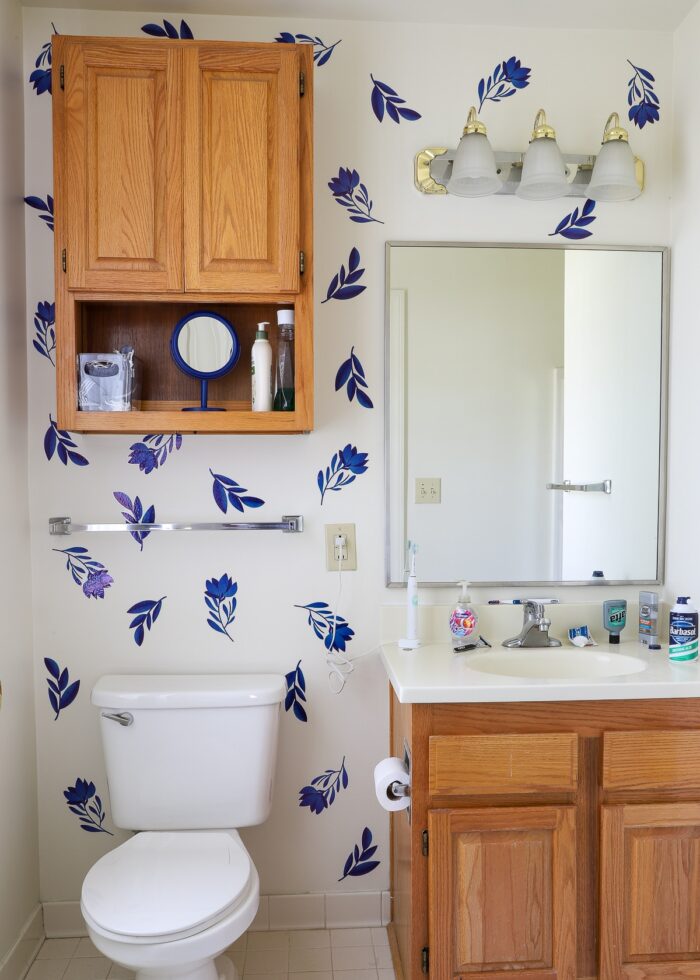
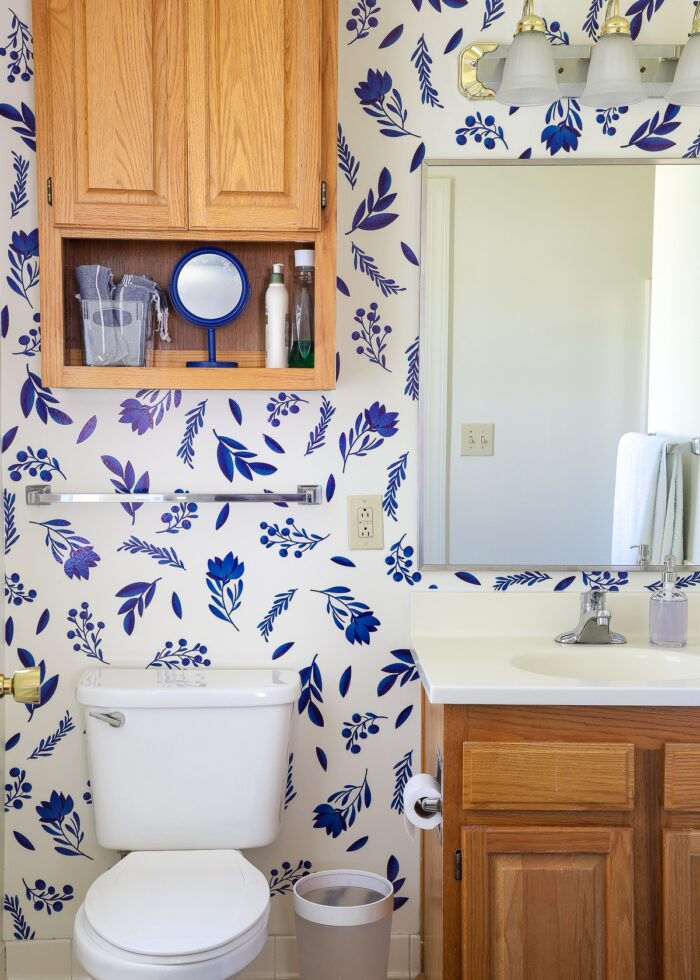
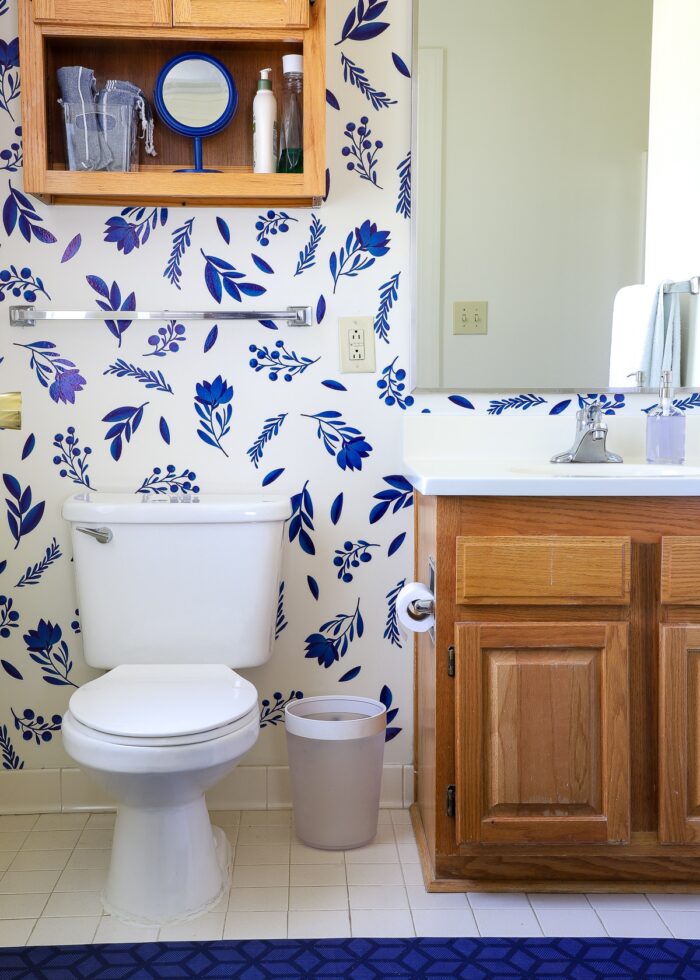
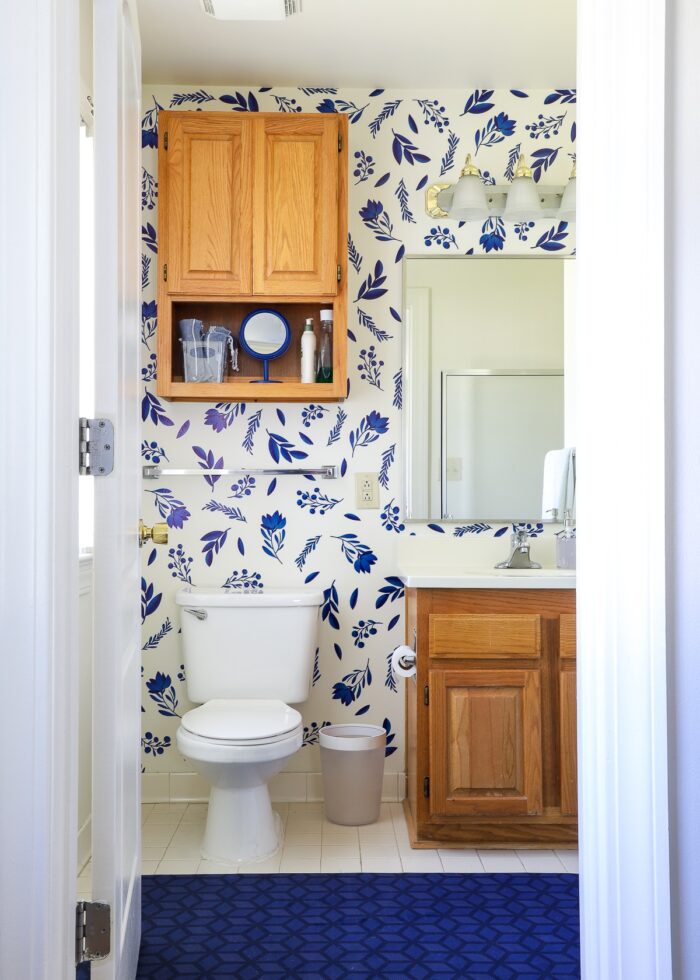
Our Rental Master Bathroom | Before & After
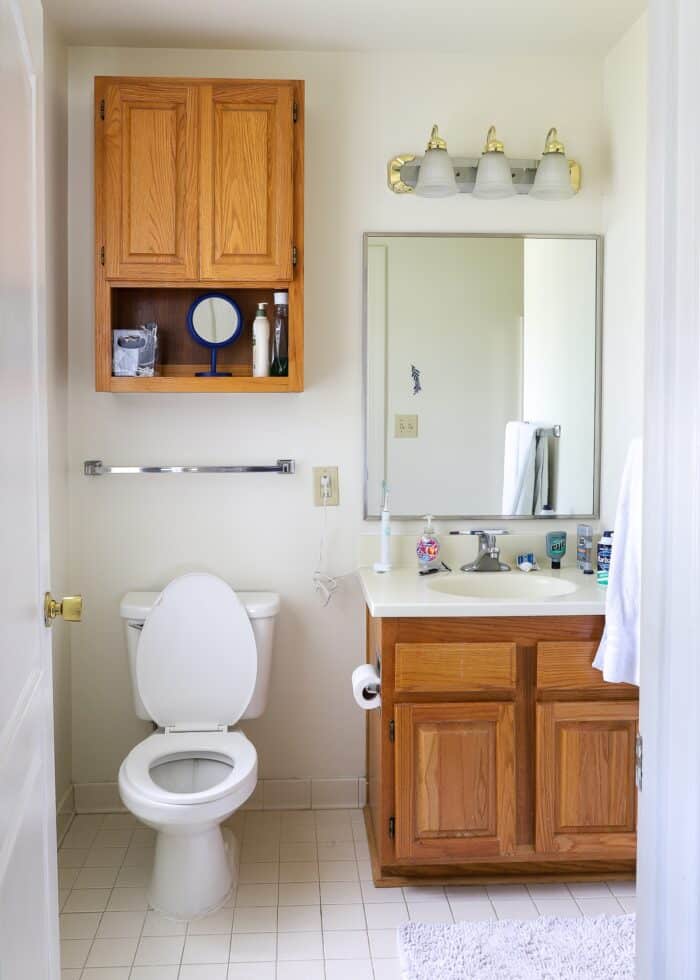
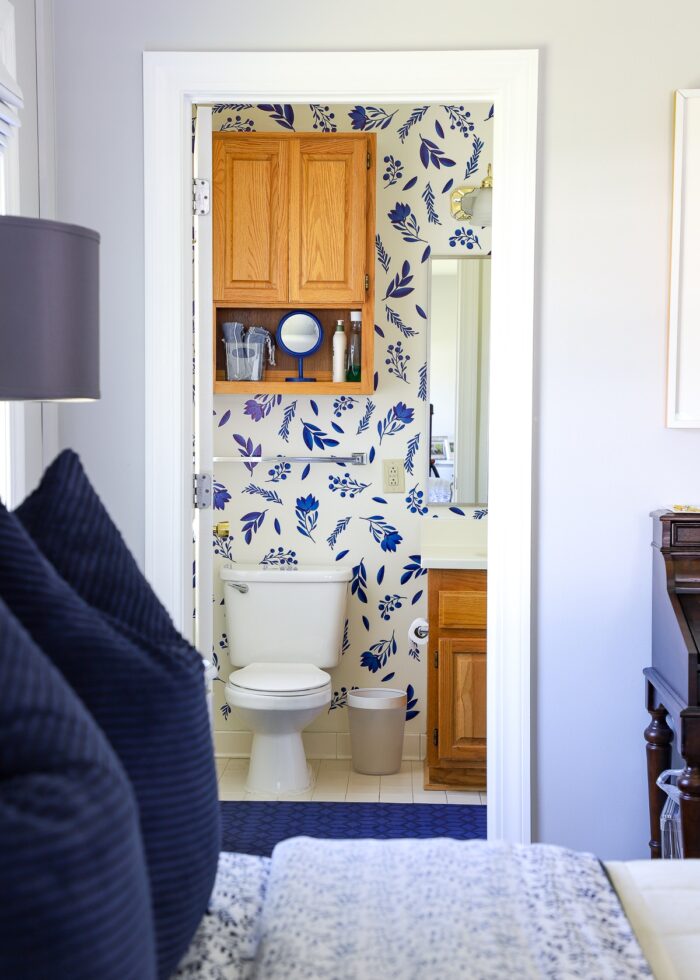
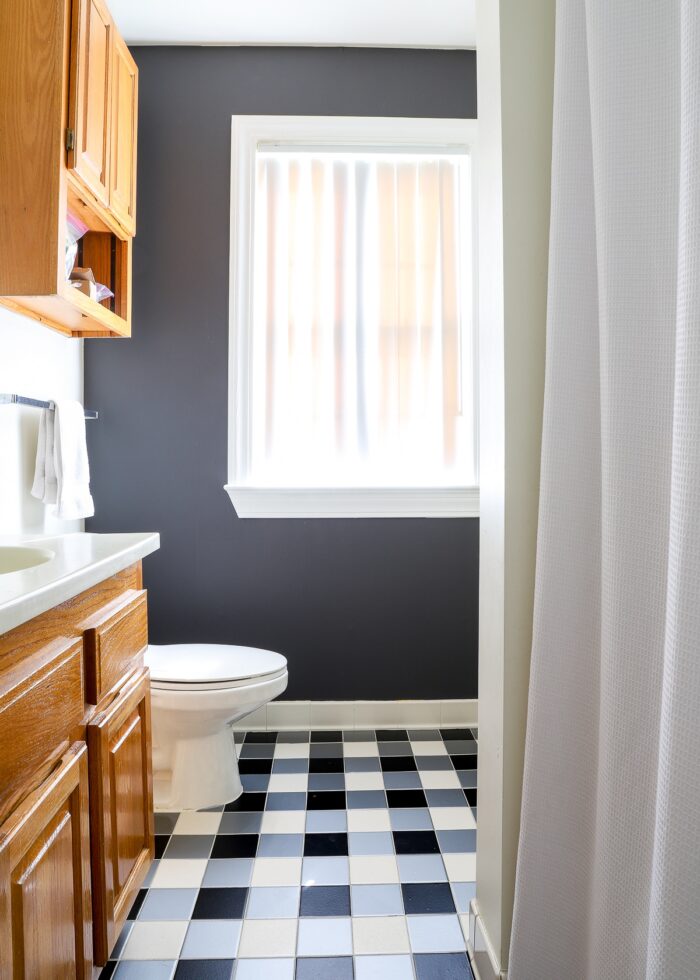
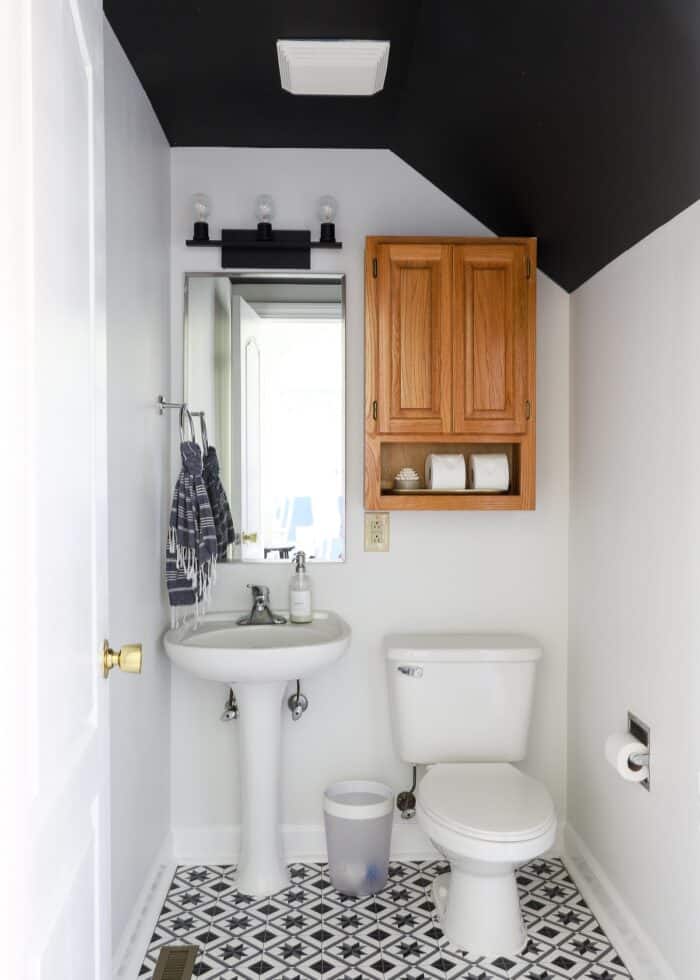
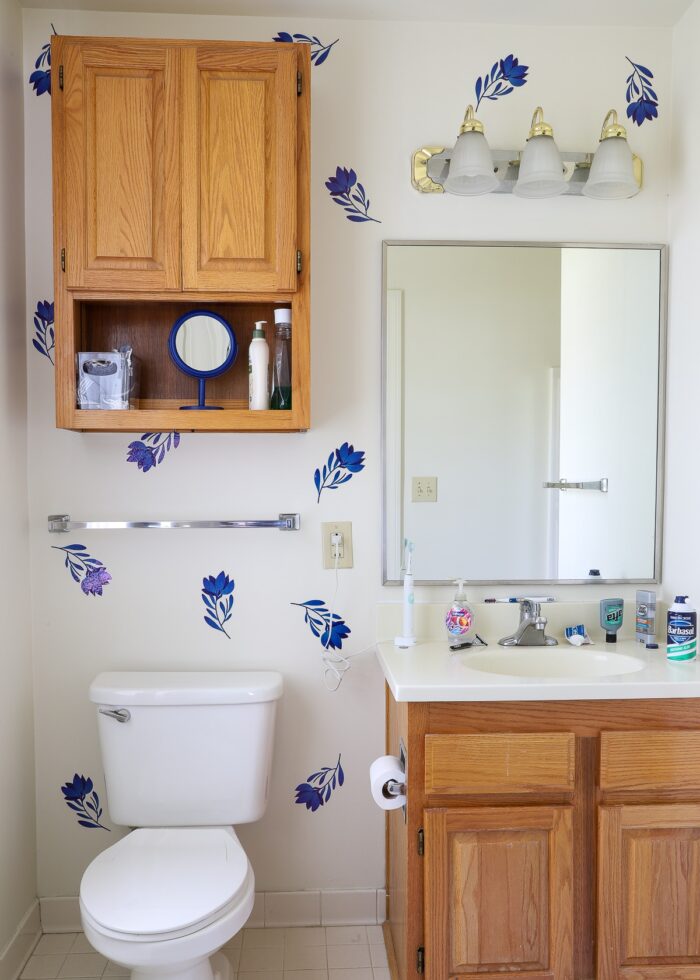
Below is a “before” shot of our current Master Bathroom. Yes, this is our master, complete with a skinny walk-in shower, single sink, dated cabinets and light fixture, and yellowy-blah walls and matching tile. In the almost 2-years we’ve lived here, it has looked just like this. Sad. Bleh. Boring.
When we move into a new rental home, it always takes me time to get to every last room, closet, drawer, nook, cranny. This sad little bathroom was most certainly at the very bottom of my list; and for a while, I figured I wouldn’t do anything to it.
But with a few months left to go and most large projects wrapped up, my antsy eyes hyper-focused on this bathroom; and I couldn’t help but yearn for something in here that was quick, easy, and inexpensive, but also transformative.
My girlfriend recently used some peel-and-stick bathroom wall decals to update her powder room; and I’ll admit, I was 100% allured by not having to navigate the toilet, cabinets, sink, and plumbing in the same way wallpaper requires.
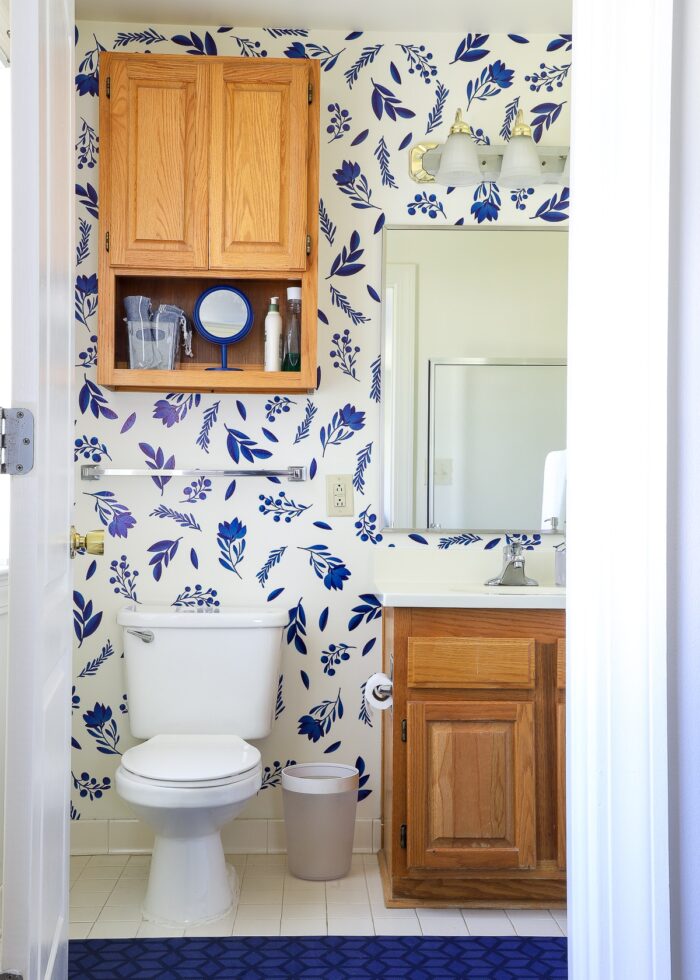
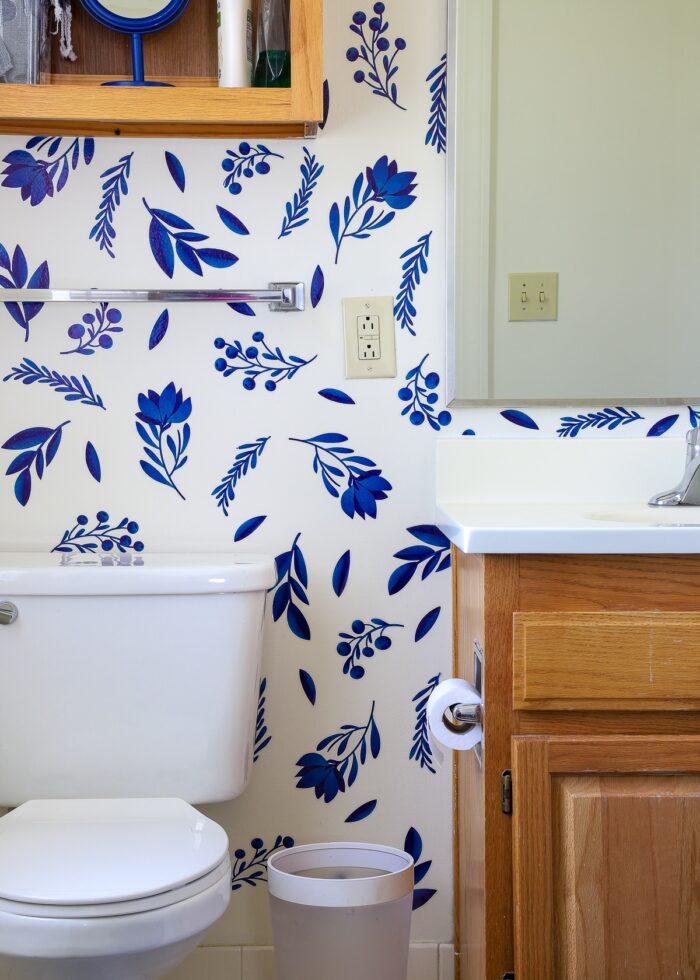
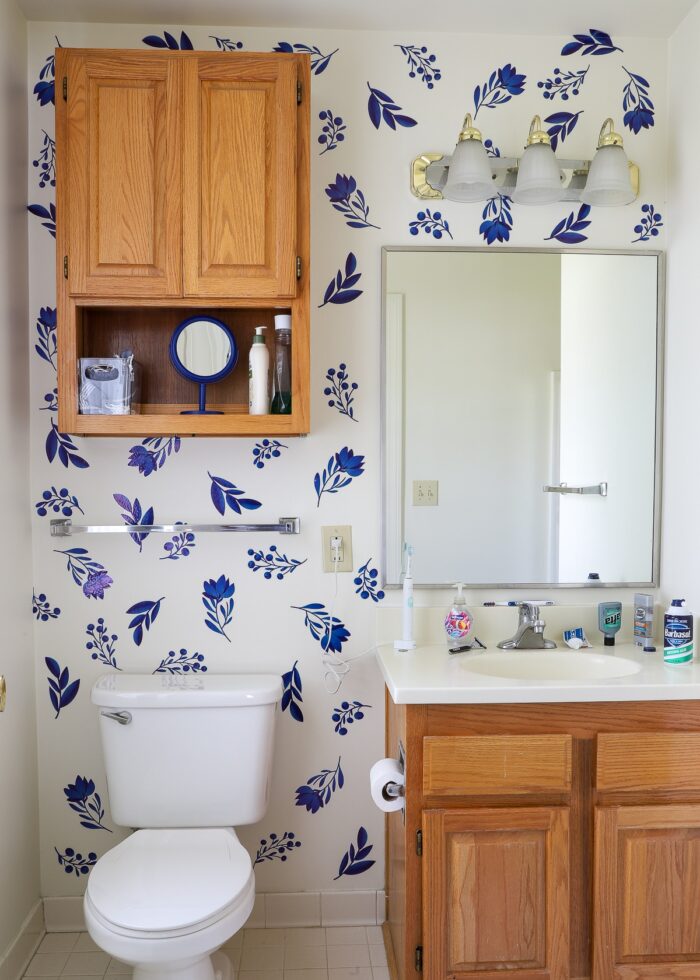
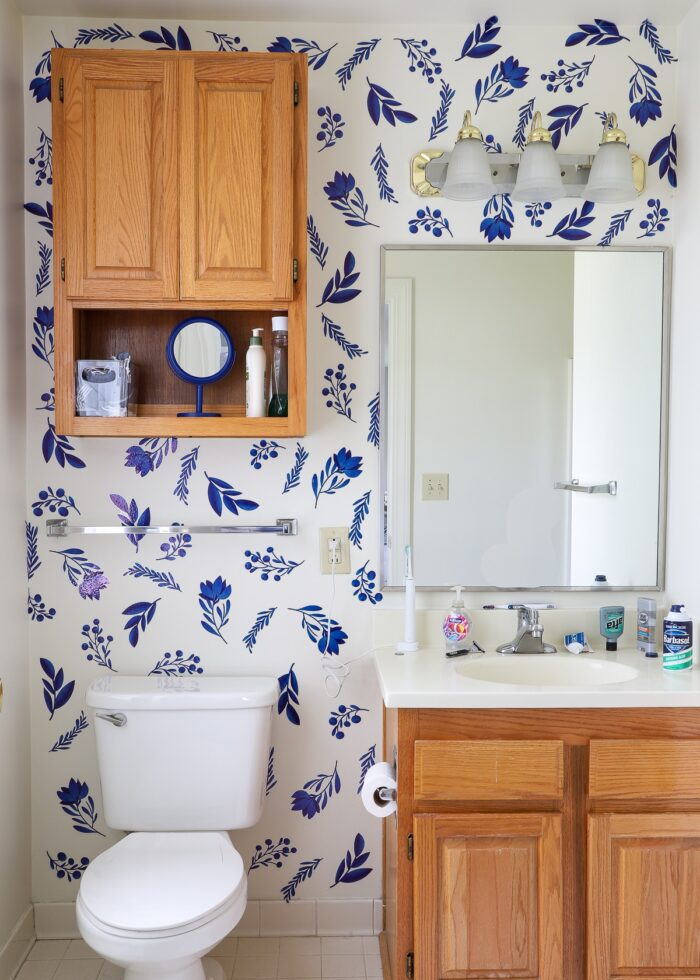
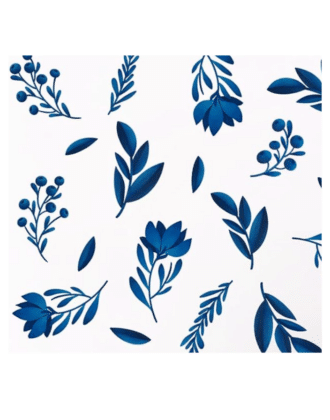
So I hunted down some wall stickers that coordinated with our Master Bedroom; and in less than an hour, I completely transformed this tiny little space.
In complete honesty, I can’t say I am 100% satisfied with this project. Even for me (who loves pretty much anything and everthing blue, bold, and patterned), the wall design is a bit much in this tiny, dated bathroom.
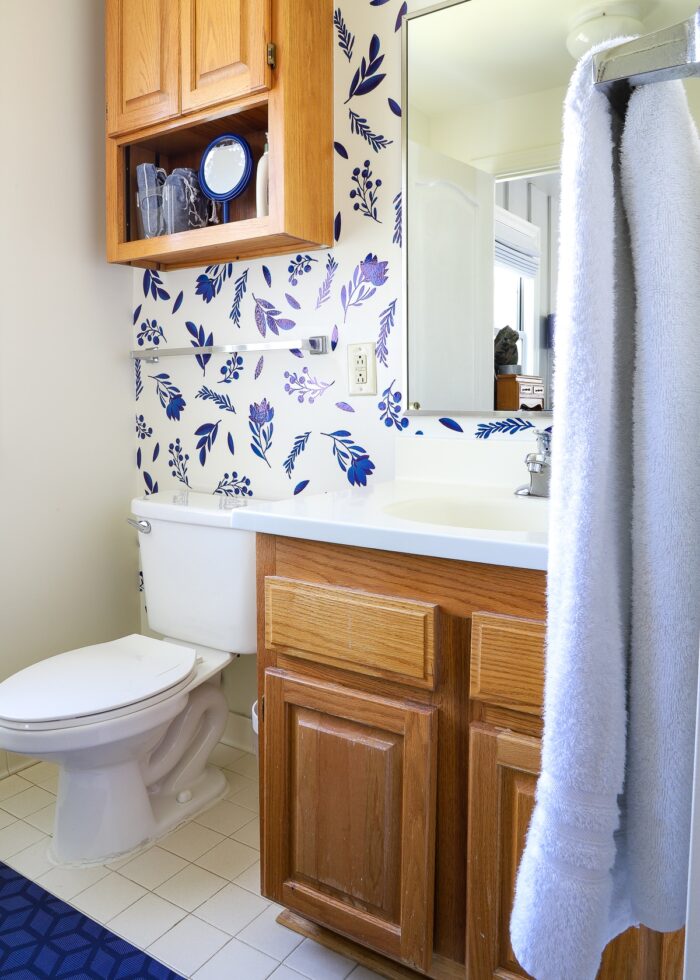
But on the other hand, I truly can’t over-express how nice it was to go from bland to bold for $30 and less than an hour. I’ve been known to take on far more complicated projects with much less visual payoff; so the time:cost:benefit ratio is certainly worth celebrating.
In the end, I’m glad I gave this project a go. I experimented with a new-to-me product, gave our tiny rental bathroom some personality, AND I get to tell you aaalllll about it!
Why Use Wall Decals in a Bathroom?
Ease of Installation
I have long since learned that one of the most impactful ways to update a space is to use wallpaper. With a single investment, you can dramatically change the look of almost any room (and when you use the peel-and-stick versions, un-doing that transformation is also fairly effortless).
But when it comes to bathrooms, wallpaper isn’t necessarily always my go-to choice. While I’ve never had issues with wallpaper falling down in bathrooms, the presence of plumbing, fixtures, cabinets, sinks, and small angles/walls, quite frankly, intimidates me. Navigating wide, sticky paper around these features while matching up patterns and preventing bubbles and wrinkles is not exactly easy (which is why every time I’ve wallpapered a bathroom, it’s NEVER been the toilet or sink walls).
Bathroom decals, however, allow you to get the transformative effect of wallpaper, on any wall, but without the complicated installation. Since you place the stickers down one at a time, you can easily work around any bathroom features without the (literal) sweat and tears.
Transparency
Pre-printed bathroom wall decals can (theoretically) be put down onto any wall color. Many printed versions are now on clear vinyl, so you can stick them directly to the wall (without having to use any transfer tape or other tools) and you can hardly identify their borders. This means you don’t have to worry about backgrounds matching or the edges being overly evident.
That said, keep in mind that the wall decals will not dramatically change your underlying wall color and may even amplify specific undertones.
For whatever it’s worth, I don’t love how the bright blue of these decals conflicts with the yellow undertones of our paint color, and I wish I had anticipated that contrast before ordering.
If something on your wall is better than nothing, then no need to overanalyze your wall color. But if you’re sensitive to undertones, hues, and color matching, your existing wall color should be considered.
Flexibility
Finally, because you get to place one decal at a time, you get to pick the pattern, how the stickers are oriented, etc. While an all-over, organic pattern (like I chose to do) is much easier than a measured-out approach, the sticker-by-sticker placement gives you ultimate control on how the stickers look in your space.
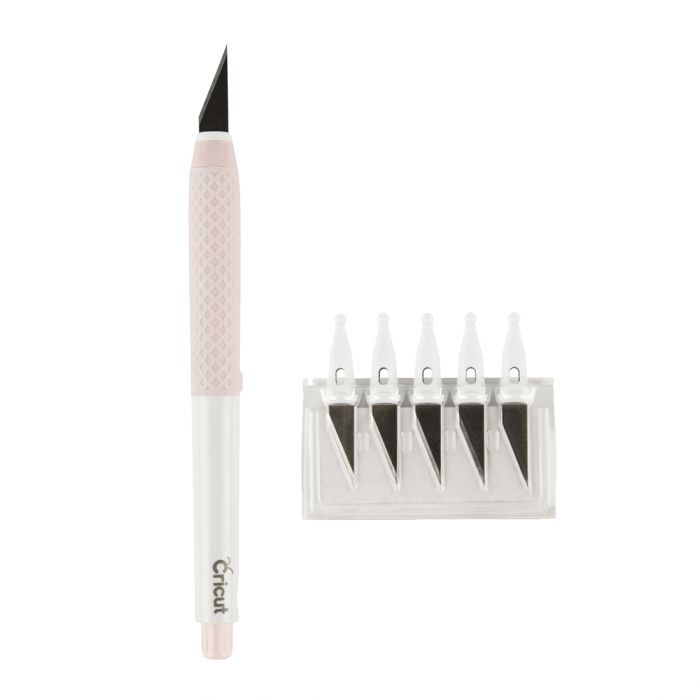
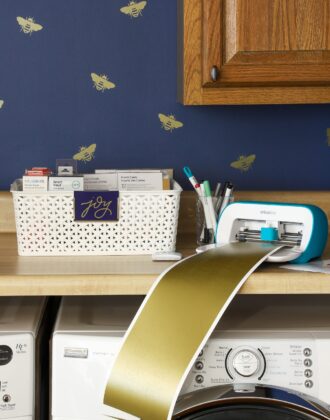
Supplies Needed
Ready to get started? Here are the supplies used for this rental bathroom wall transformation:
(Yep, that’s it!)
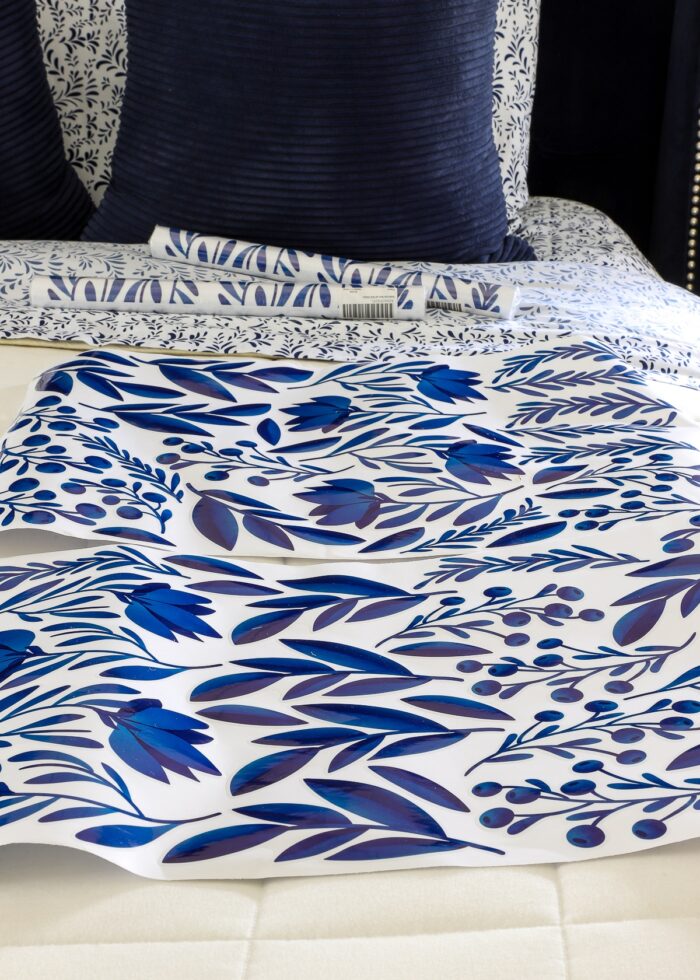
TIP! I highly recommend purchasing more wall decals than you think you’ll need (as long as you can return them). Wall decals never go as far as you think they will; and if you’re trying to replicate the look of wallpaper, you’ll want them in a densely-packed arrangement. I purchased 3 sets (2 sheets each), and used most of 2 (4 sheets).
Video Tutorial
If you’d like to see our bathroom wall transform with the help of wall decals, watch the (very) short video below. (Video not loading for you? You can watch it here.)
How to Hang Bathroom Wall Stickers | Step-By-Step
Ready to hang some bathroom wall decals in your own place? Here is how I did it plus some tips and tricks I learned along the way.
Want to save this post?
First…a Word to the Worriers
True story: it actually took me months to gather up the courage to start this project. Yep, I ordered the decals with all the confidence in the world; and then they sat, unopened, while I over analyzed the entire process.
Then, one day, I decided I was being silly, hastily opened the package, and just started. In less than an hour, it was done (I think I only repositioned 3 or 4 stickers.)
The ease of this project can actually be intimidating, so I encourage you to shove your worrying aside, and just go for it (you can ALWAYS peel the decals right off!)
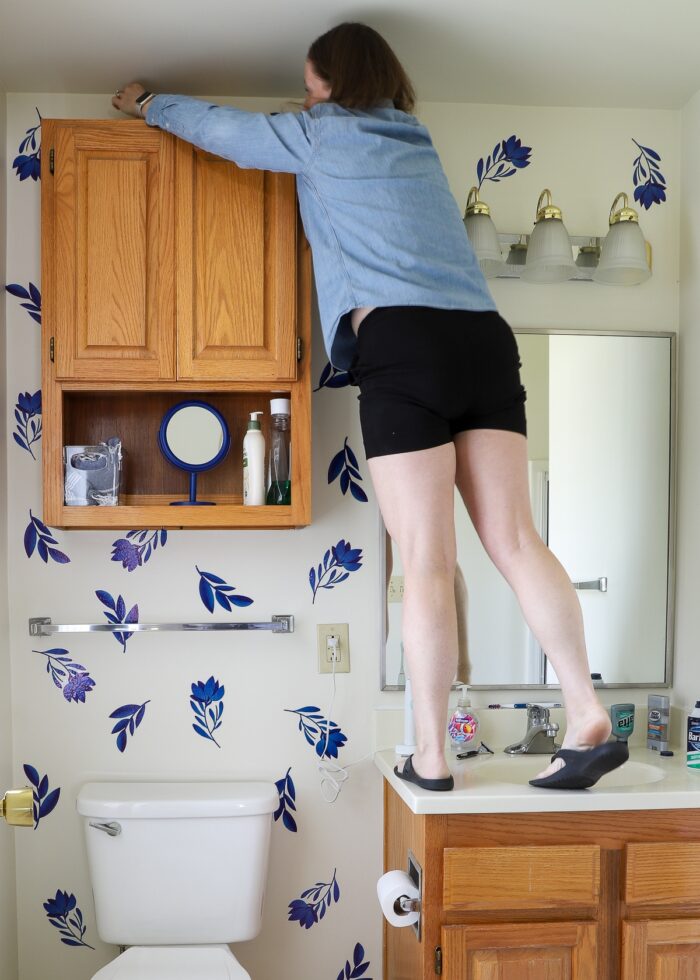
Step 1 – Decide On Your Sticker Layout
All that said, before you stick any stickers to the wall, I do recommending first deciding if you want:
- An all-over, organic layout – where there is no discernible pattern
- An organized, measured layout – where there is an obvious and predictable pattern
While you can certainly measure out and place every single decal with precision (which is sometimes helpful for geometric decals), the beauty in using this specific product is the speed at which you can apply them. So if you can’t decide or you’re overwhelmed, I recommend choosing an organic placement and adjust as needed.
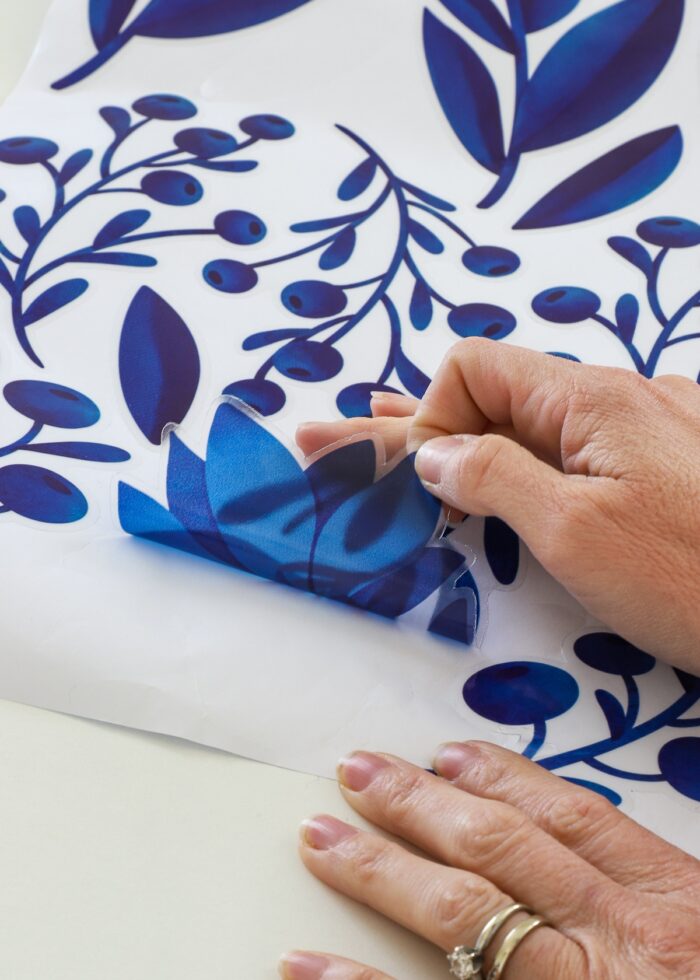
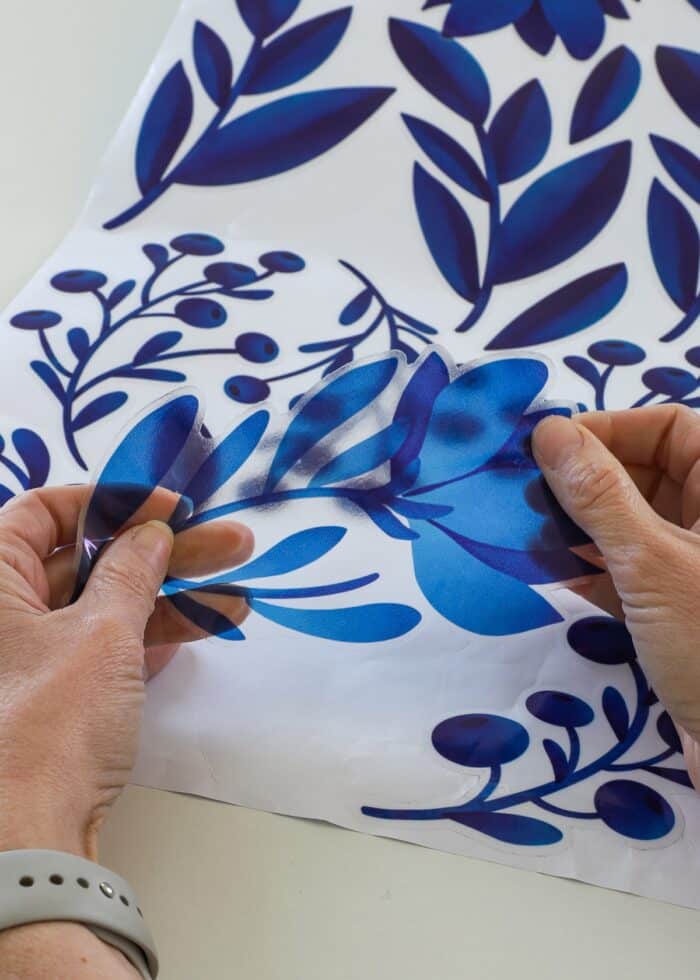
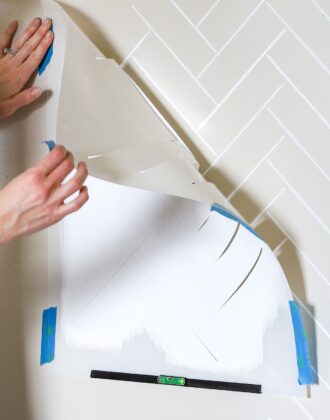
Step 2 – Peel and Then Stick Decals on the Wall
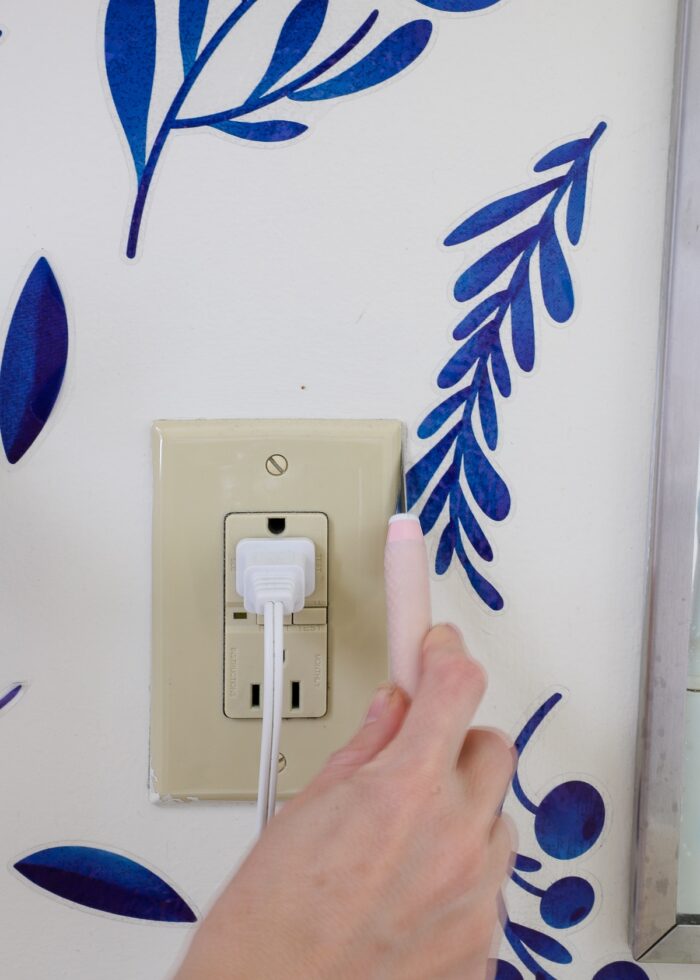
The process of actually placing your wall stickers couldn’t be easier. Simply peel them off the white paper backing and stick them to your wall. You do not need any transfer tape or special tools; but you will likely want to ensure they lay down flat, without any wrinkles, every time.
Step 3 – Work From Large to Small
If your decals have several different images (like mine), I highly recommend working from largest to smallest. Place your largest decals first, as evenly-spaced as possible. As you work through your smaller and smaller decals, fill in empty spots to give the overall impression of a single, solid pattern.
TIP! Step back VERY frequently. This is not a precise project, so as you place each decal, move way back to see if it’s in a good spot. Don’t hesitate to peel up the sticker and re-place it as necessary. Yes, you can peel them up; and yes, you can stick them back down without any trouble!
Step 4 – Take the Decals to the Edge
Whether you’re just doing a feature wall or taking your decals all the way around the room, you’ll want to place the stickers across tub/shower/mirror/cabinet edges, corners, and the ceiling. This “to the edge” installation gives the allusion that you used wallpaper instead of individual stickers.

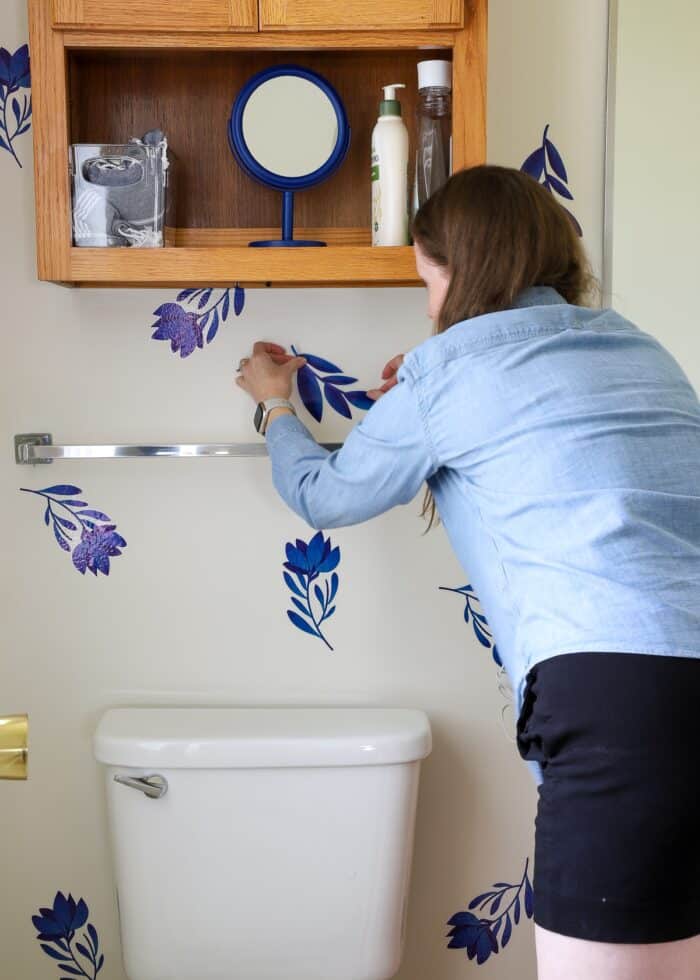
Step 5 – Trim Decals as Needed
Any decals that do cross over a corner, ceiling, shelf, bathroom mirror, etc should be trimmed to a clean line with a sharp craft knife. Again, this gives the appearance that the wall decals were placed behind the fixtures rather than stuck all around them.
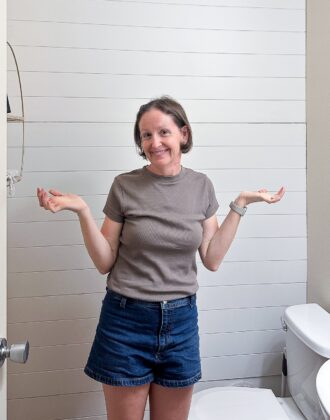
Step 6 – Enjoy Your New Wall!
And in just those few steps, you can have a totally refreshed wall to enjoy. No measuring, no sweating! I know I use the terms “quick” and “easy” a lot around here, but this is definitely a project where they are most appropriate!
FAQs About Bathroom Wall Decals
Do Wall Decals Come Off Cleanly?
Yes. Both before install and during, I peeled up several of the bathroom wall decals without any issue. Not only did they remove completely cleanly (without peeling paint), but they had enough tac left for me to re-stick them down again.
Do Wall Decals Come Off In Steamy Bathrooms?
So far, we have had zero issues with the wall stickers peeling up and/or falling off. I will update this post if this changes in time.
Do Wall Decals Leave Residue?
In the few stickers I removed during installation, no residue was left behind. I will update this post when I remove all the decals later this year.
Are Wall Decals Still In Style?
Okay, so do I consider these vinyl wall stickers “high end” or super “stylish” home décor? Nope. They are very much shiny, vinyl decals that I stuck to my ugly yellowy-white walls. And does the overall design strike me as a smidge “granny chic”? You bet.
But for my particular situation (a renter, who moves a lot, can’t paint the bathroom, and doesn’t want to spend a lot of money right now), are they a great option? Absolutely.
What Are the Disadvantages of Wall Decals?
I’d say the biggest “cons” to using wall decals are 1) their vinyl-like appearance, and 2) the lack of options. If you have something very specific in mind, you will likely not be able to find what you want (although, Etsy sellers appear to have more options). But with some creativity, you can still do a lot with this simple, inexpensive product.
Other Renter-Friendly Wall Treatment Ideas
Looking for some other removable wall decor options? Here are some more renter-friendly ideas I love!
- Easy DIY Board & Batten Accent Wall (Even Renters Can Do)
- How to Hang Shiplap with Command Strips
- Renter Friendly Fireplace Makeover with Peel & Stick Tiles
- How to Install a Peel & Stick Tile Backsplash In a Rental (Without Damage!)
- Solid Wallpaper | What It Is + Ideas for Using It
- Look for Less: How to Stencil a Wall to Look Like Wallpaper
- How to Install Shiplap Wall Panels in a Rental
Every project I do around here tends to mimic the book “If You Give a Mouse a Cookie.” You better bet, I’d now love to swap the light fixture, add a window treatment, perhaps even replace the towel rods. But alas, time is not on my side; so this is about as far as this little rental bathroom will go.
While I don’t know if peel-and-stick wall decals are the “chicest” solution for every space, I do think they are an excellent option for renters, short-timers, college kids, or anyone who just wants something on their bland walls. I’m glad I gave them a try, and urge you to do the same when paint, wallpaper or other decor choices just aren’t on the table!
Megan

5 Comments on “Instantly Decorate Your (Rental) Bathroom with Wall Decals”
It looks great! Amazing what a little bit of color can do. You have great ideas 😀
love love love!
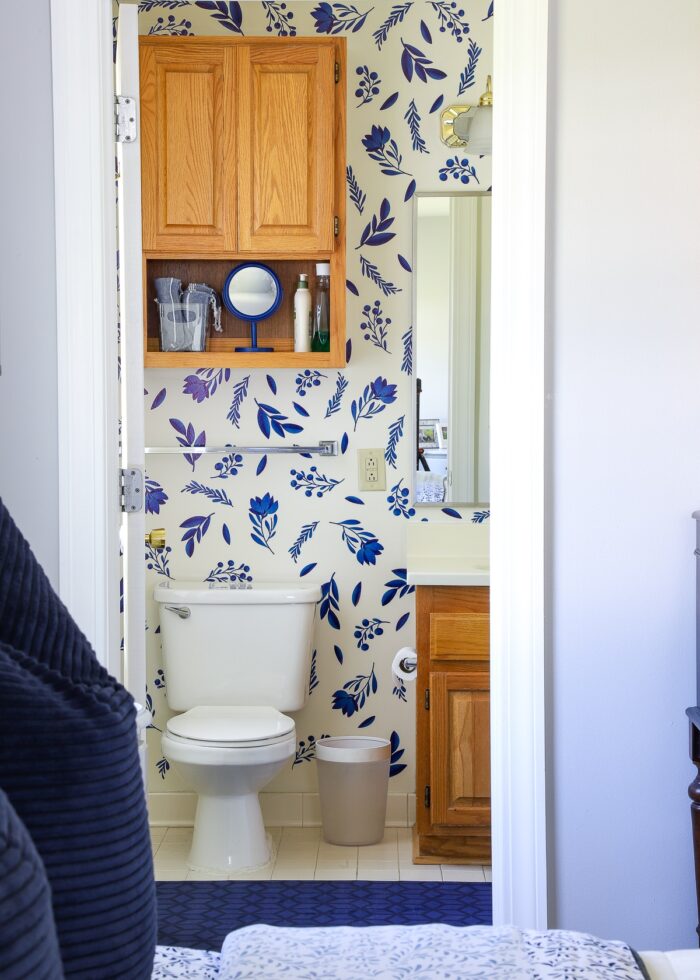
Beautiful! Love that you take design risks. Love the shot of the decals perfectly coordinating with your bedding! Very grand millennial 😍 So chic!
Looks awesome and has me thinking about where to use them myself -well done!
Love how this turned out. It looks fantastic, something simple but gives a big punch. Thanks for sharing your process.