How to Install a Peel & Stick Tile Backsplash In a Rental (Without Damage!)
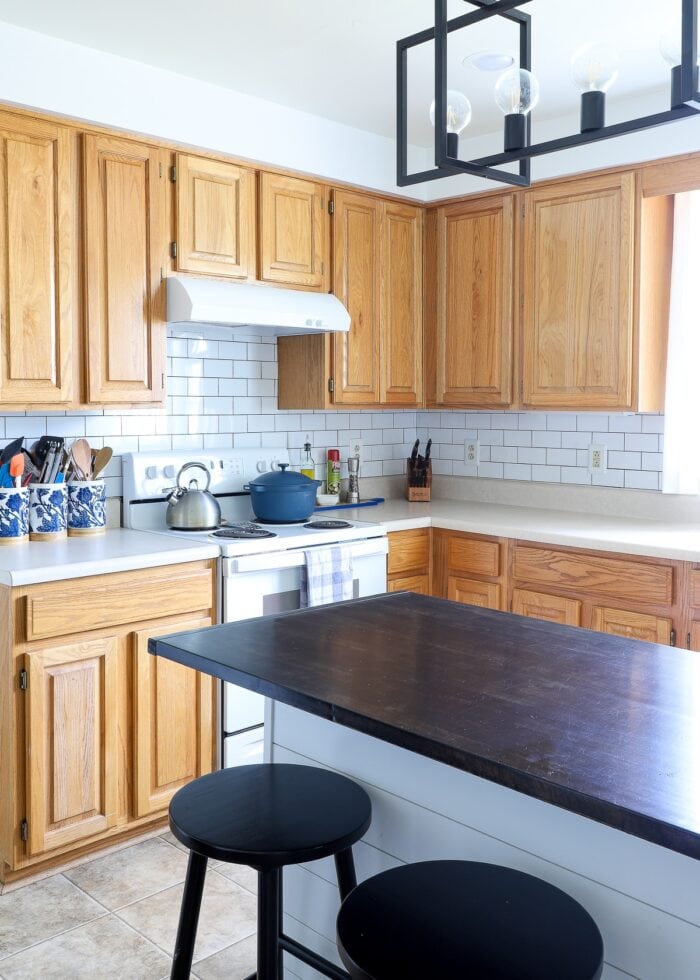
I’ve been on a mission to transform our builder basic, honey oak rental kitchen. With painting cabinets completely out of the question, I knew the backsplash area would prove key to toning down the orange and creating a fresh, bright space. But it took some creativity to achieve a modern subway tile aesthetic in a totally removable way. Today, I’m teaching you how to install a peel and stick tile backsplash, including an easy trick to ensure it comes back down completely damage free!
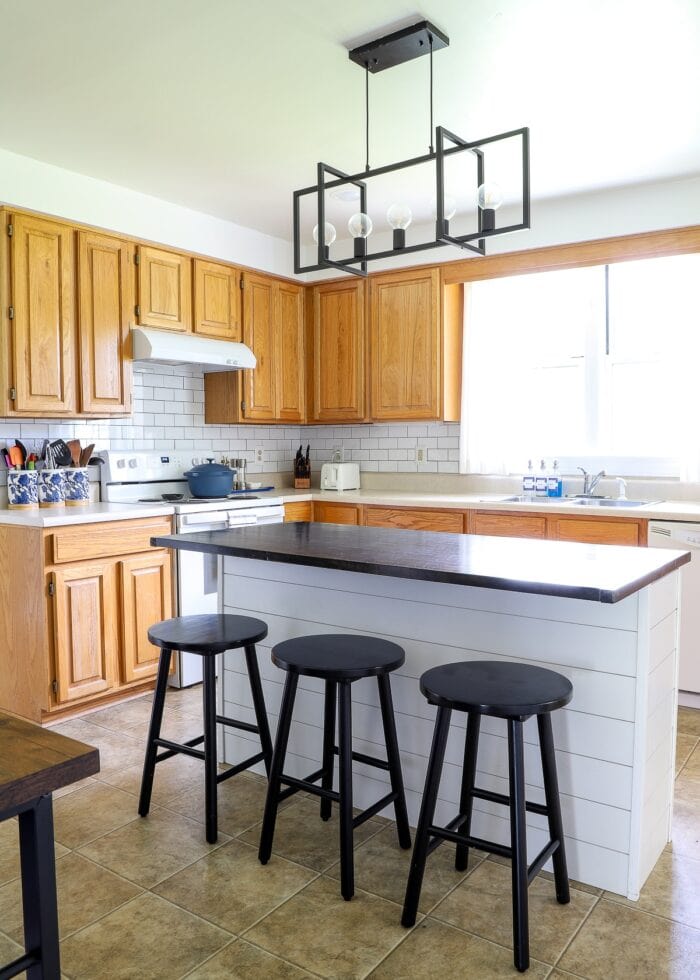
Our Kitchen | Before & After
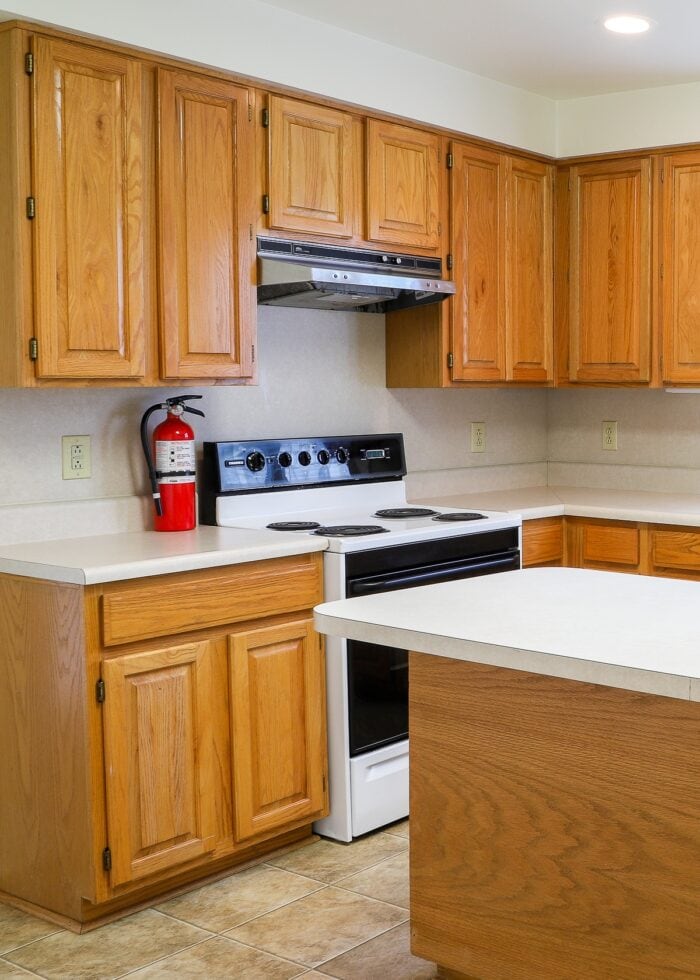
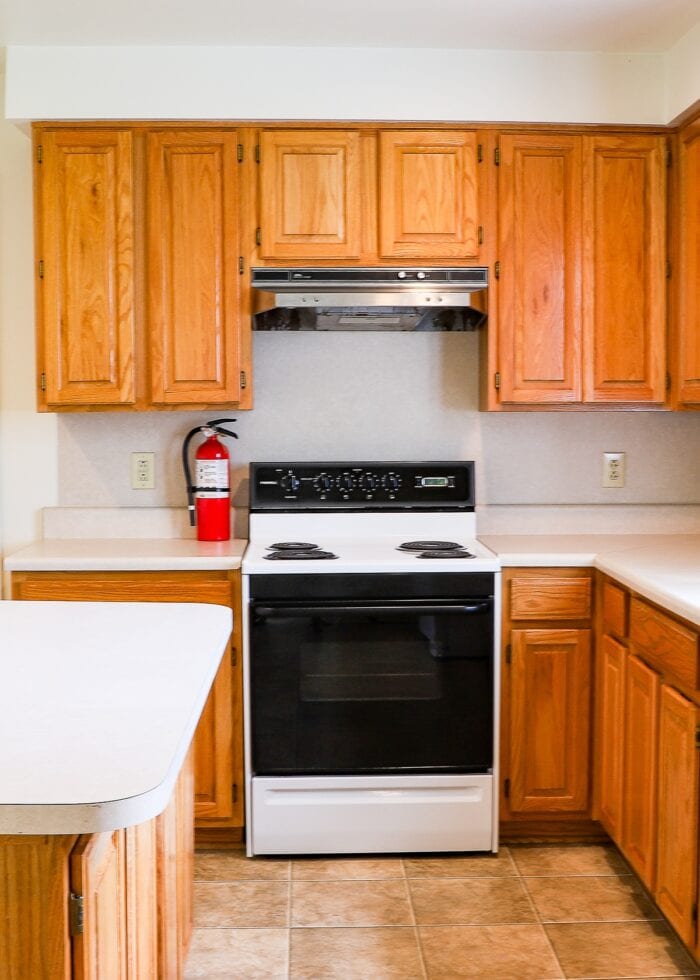
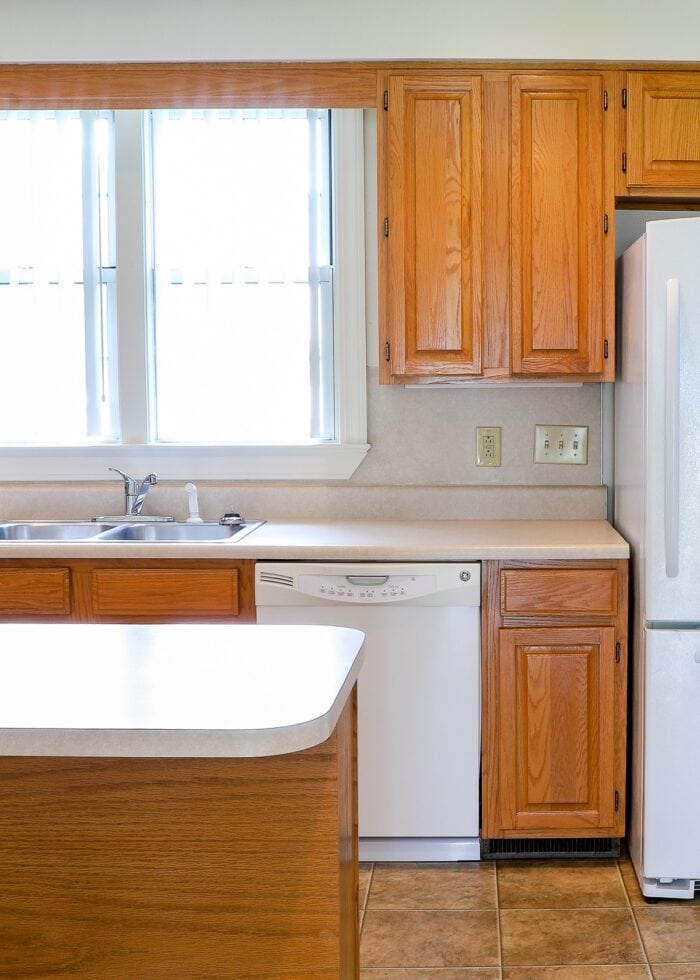
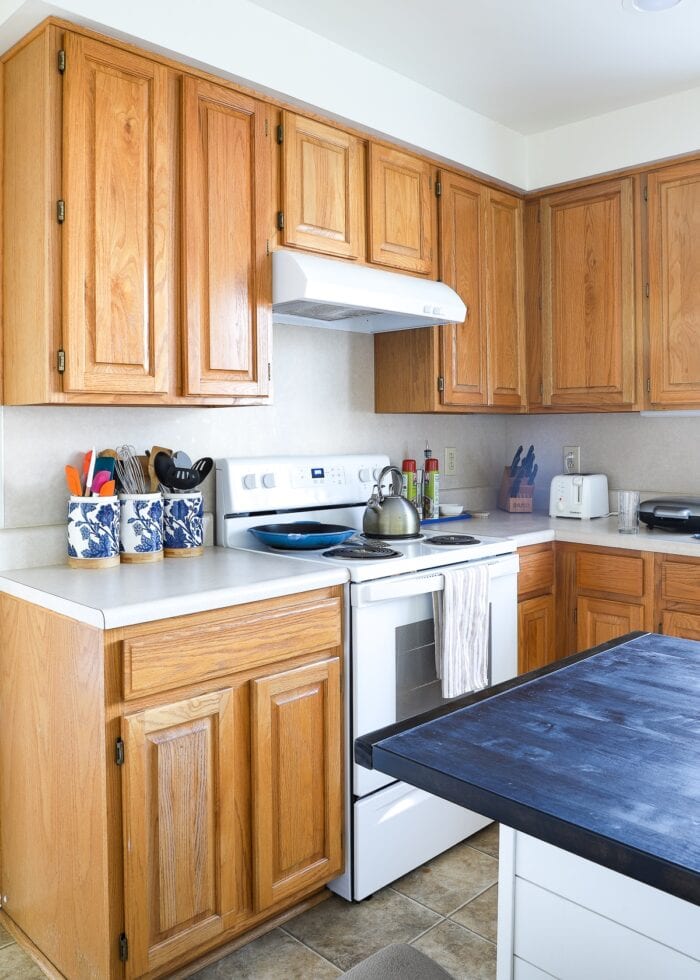
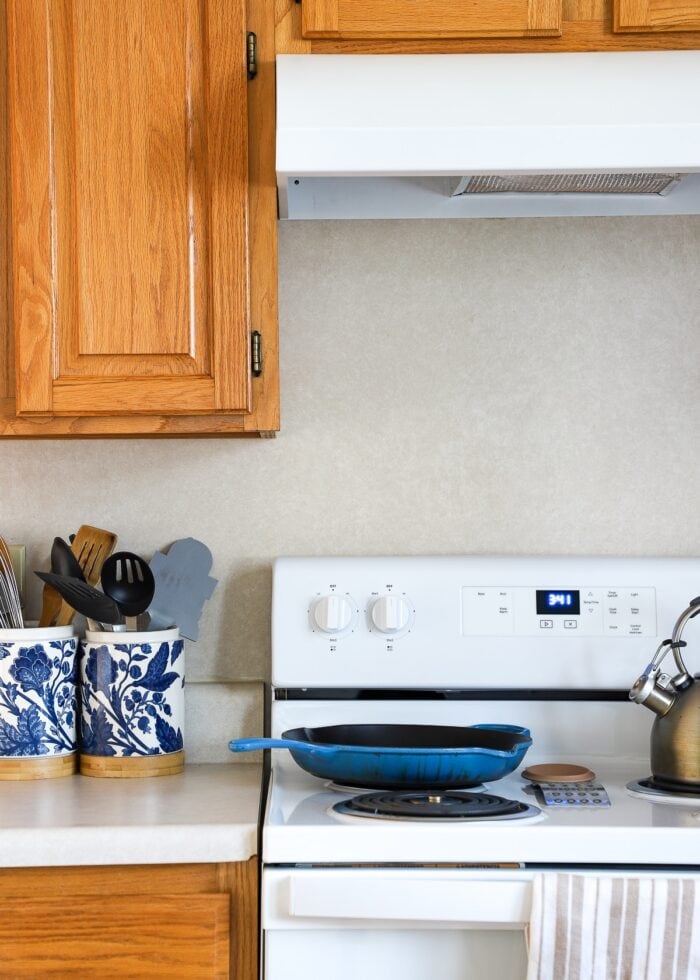
Every great DIY project has to begin with a good before and after, right?!? And this one certainly is no different. Below is how our rental kitchen looked the day we moved in:
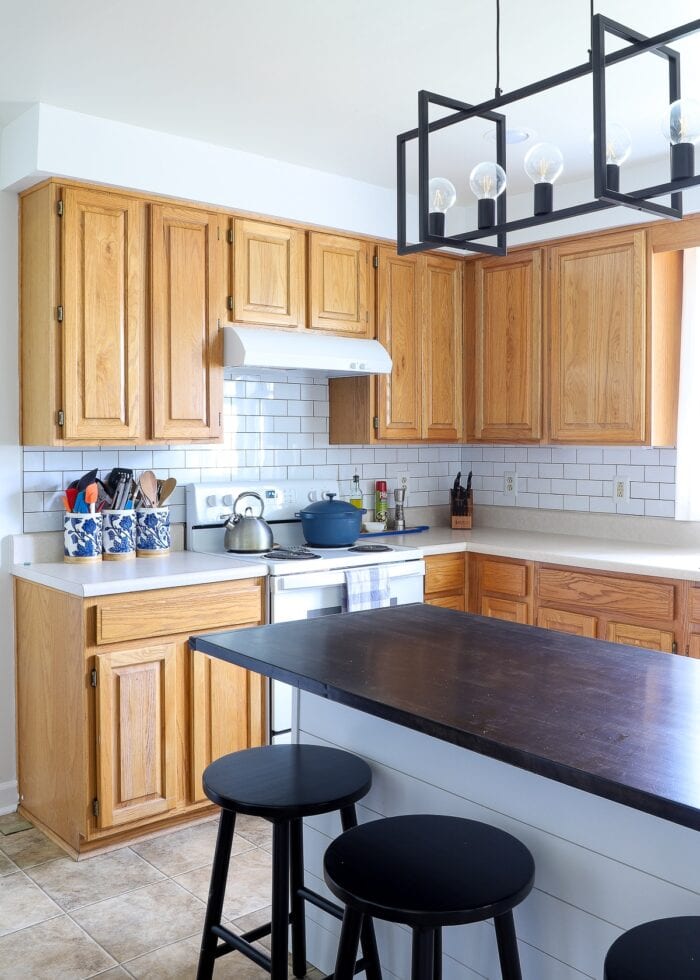
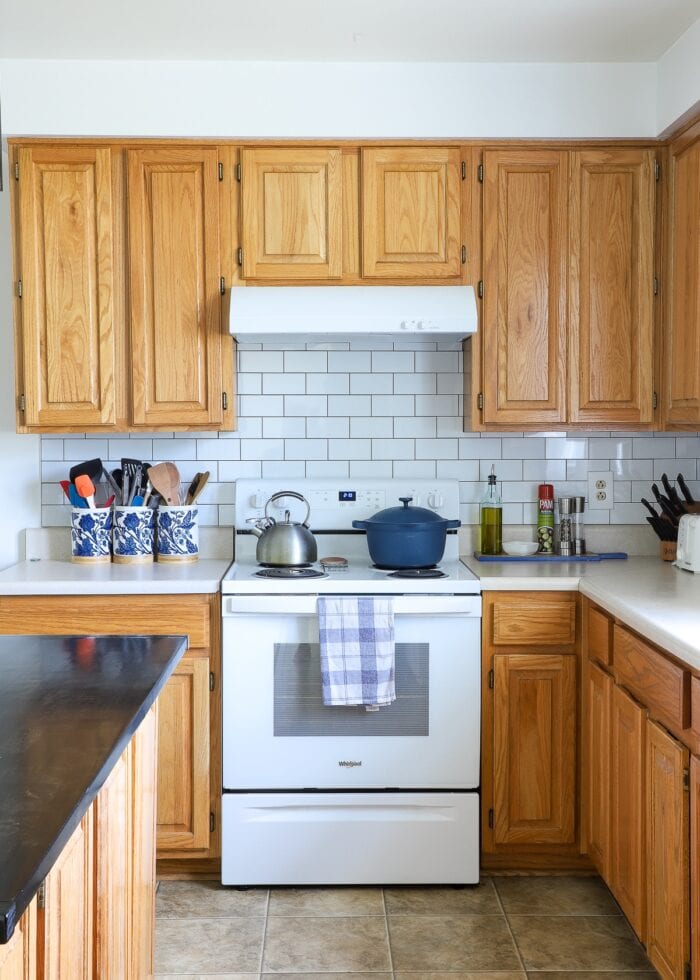
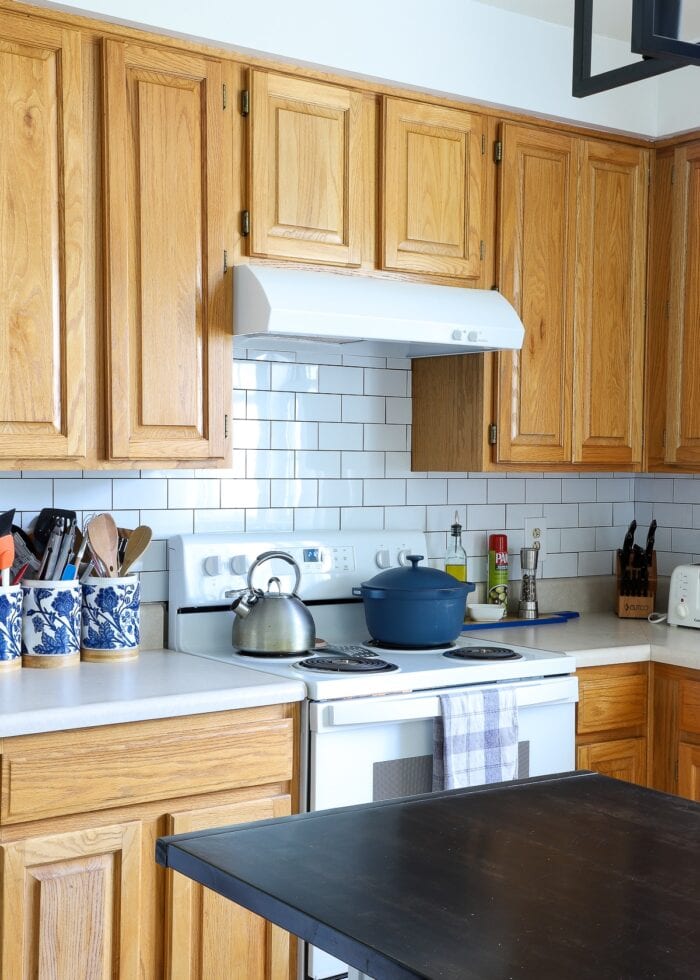
After getting our management company to swap out the dated oven and vent hood and doing a few other projects to lighten and bright then space (Shiplap Kitchen Island | Butcher Block Island Countertop), covering up the laminate backsplash became the next big task.
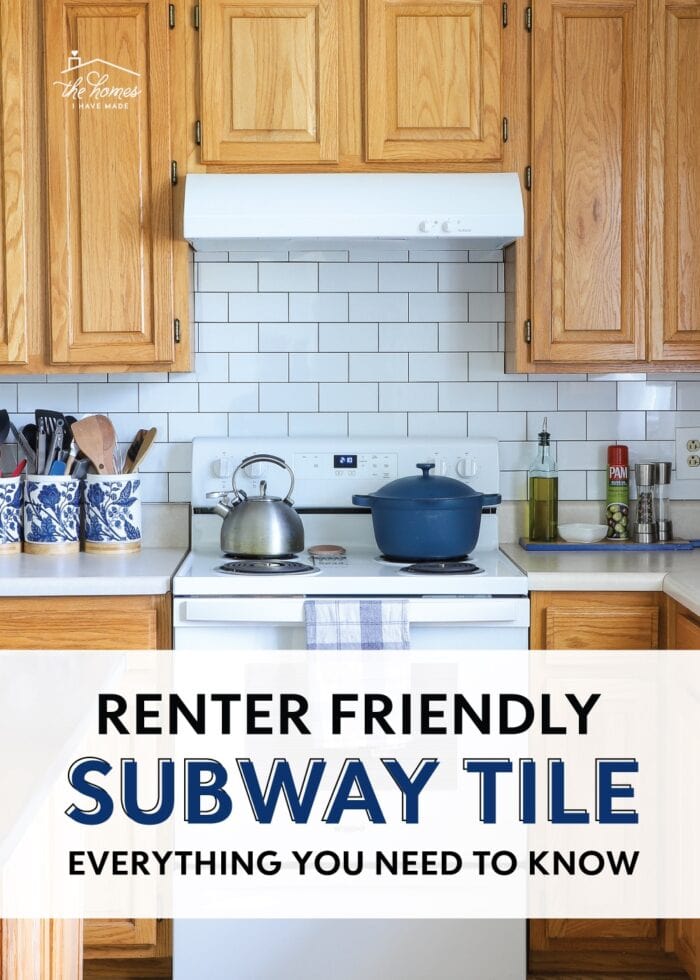
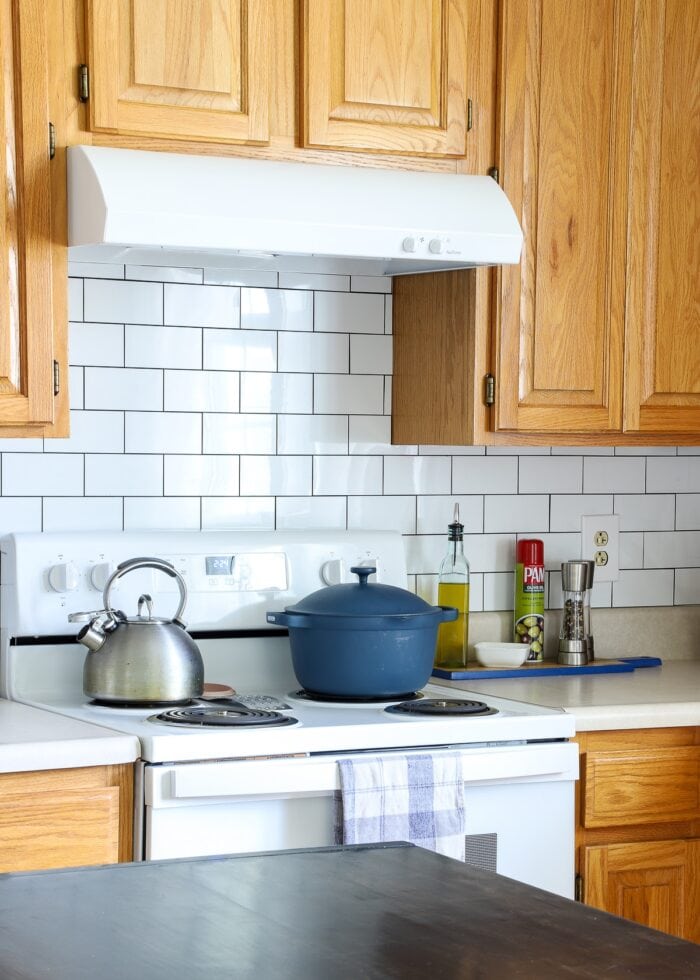
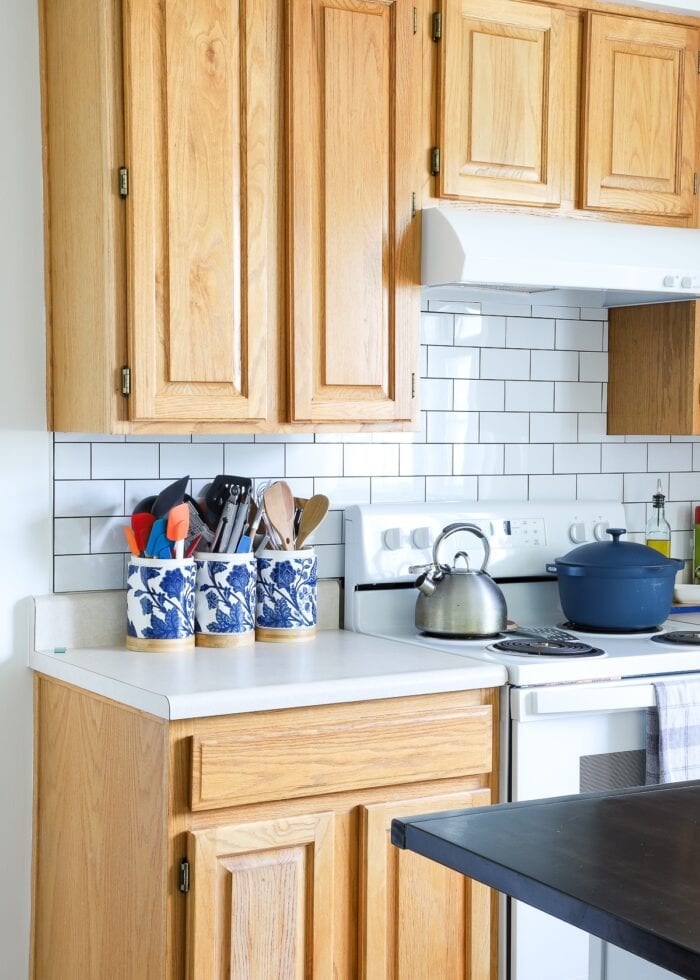
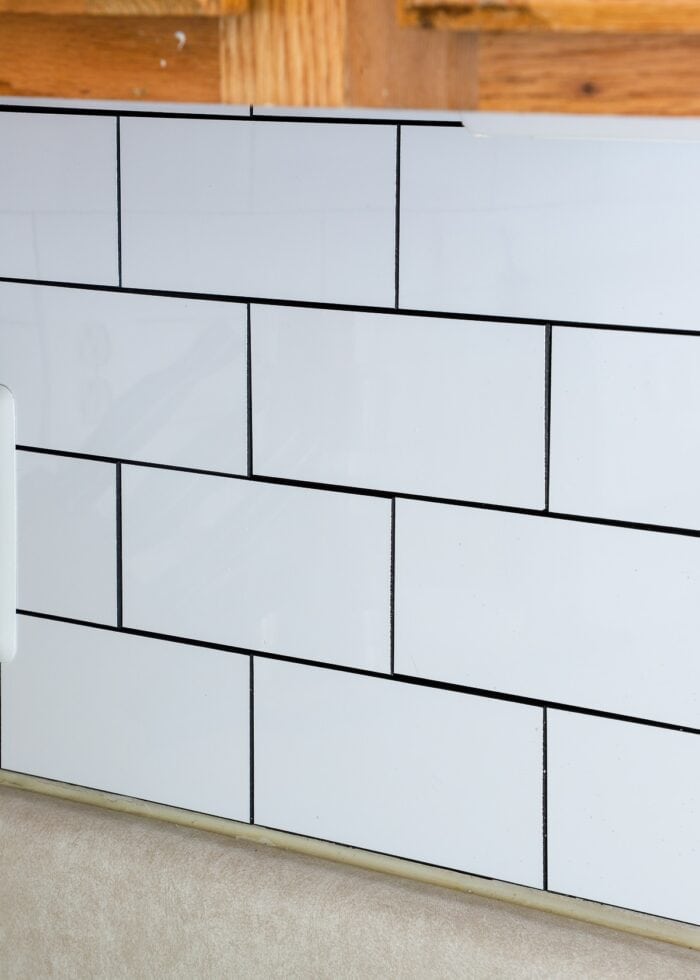
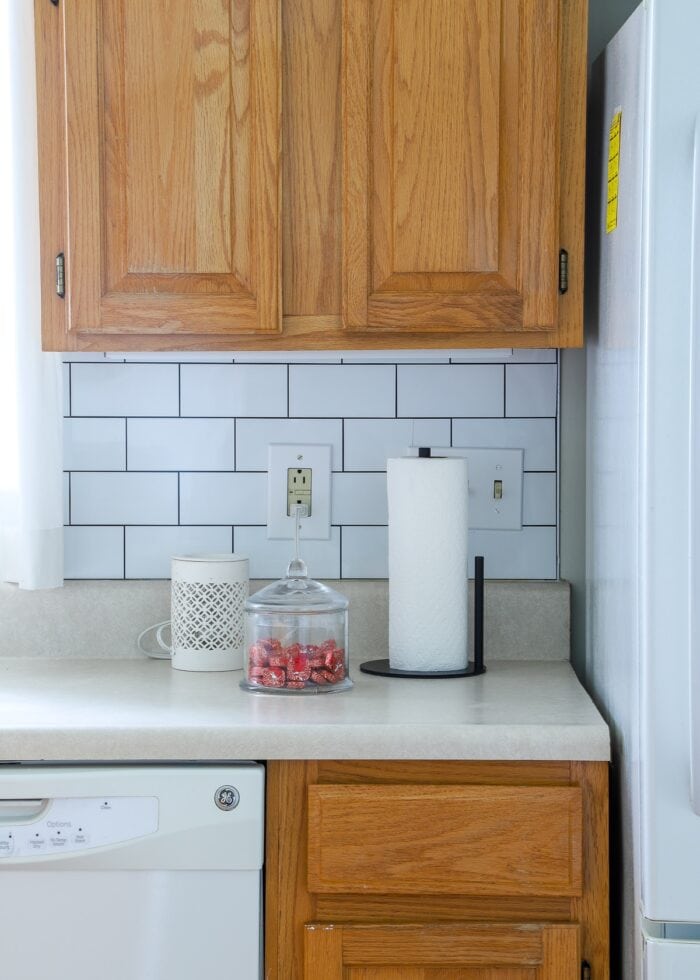
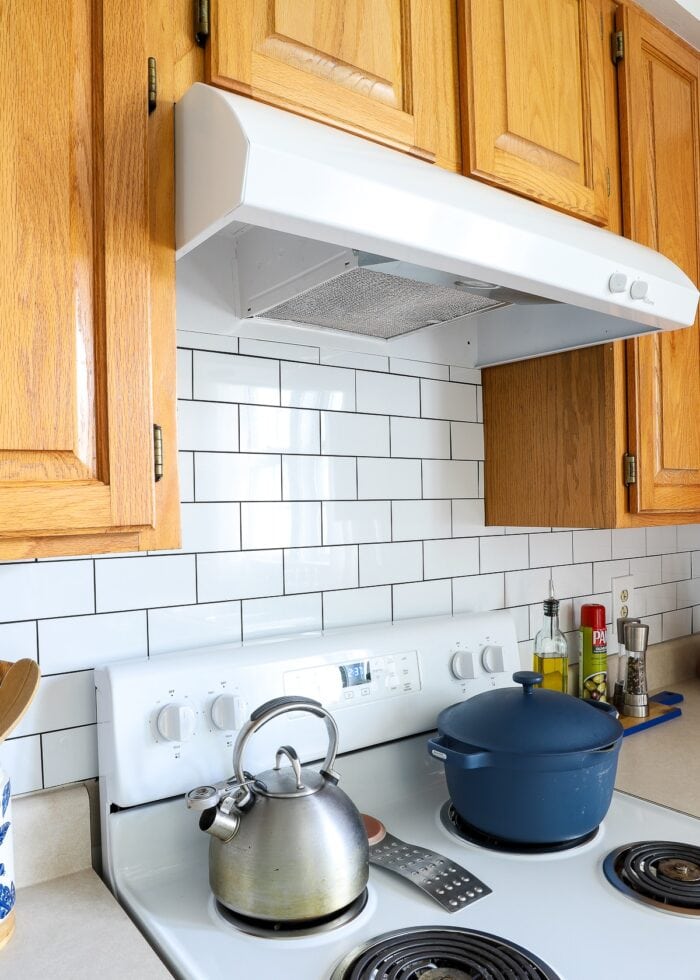
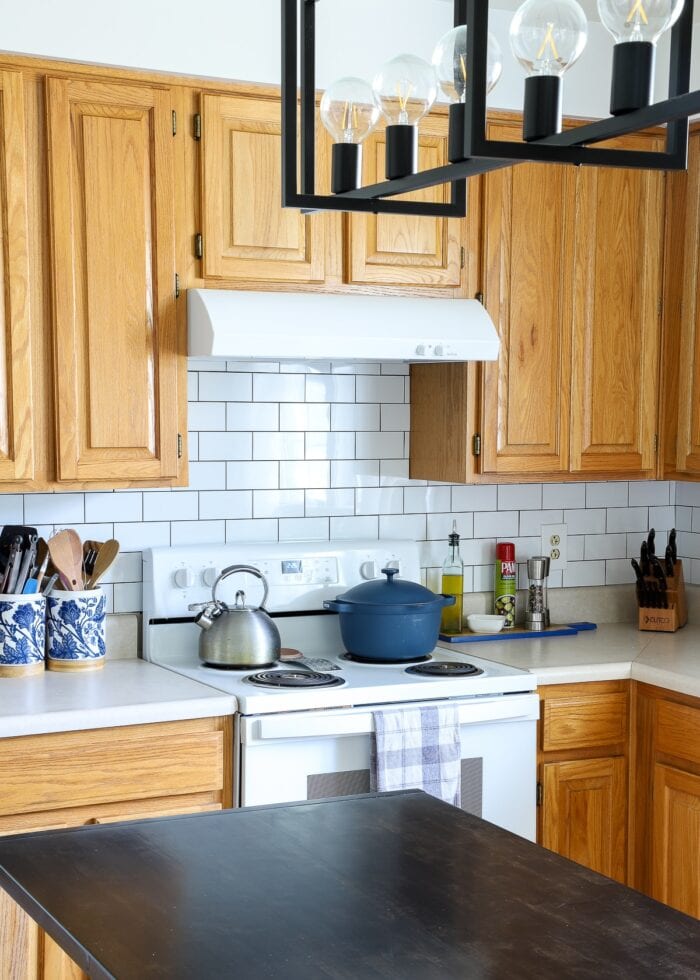
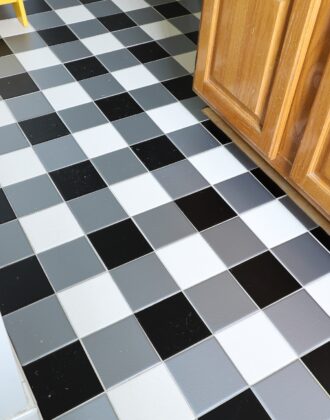
I chose this white peel and stick subway tile with black “grout” lines to not only lighten the entire kitchen, but also tie together with the nearby black-and-white island.
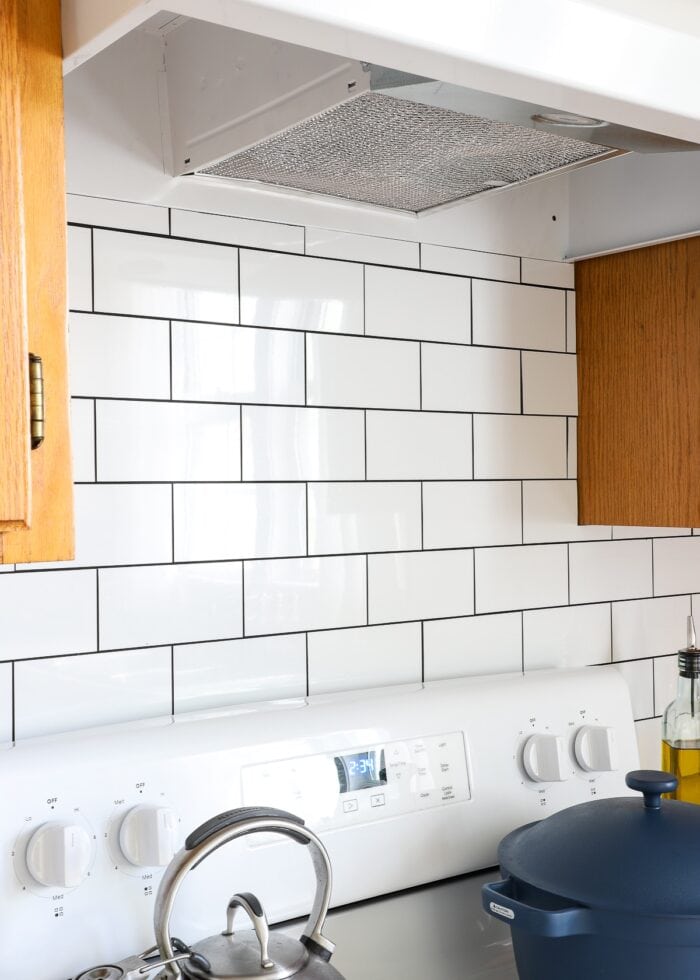
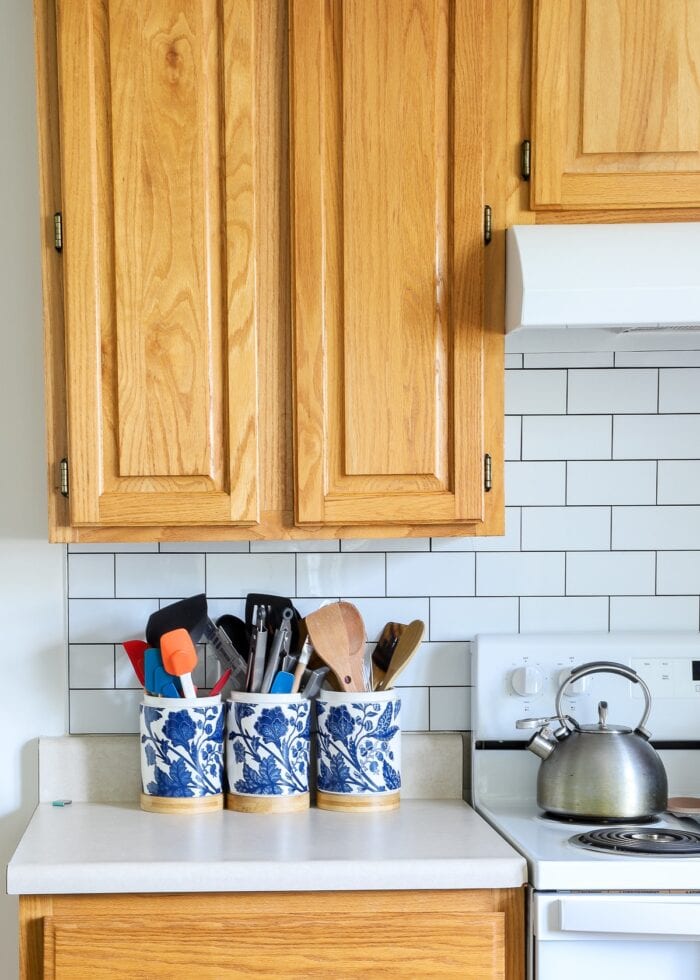
The classic tile design paired with the very glossy surface of the tiles themselves almost single-handedly transformed this dated kitchen. What felt dark, dingy, and old instantly became fresh, modern, and oh-so-sparkly bright!
This was a big project with lots of details and even more lessons learned along the way. Let me break it all down for you!
Supplies Needed
Here is what you’ll need to install a peel and stick backsplash in your kitchen:
- Peel and Stick Subway Tile – Measure your backsplash area and read product descriptions to ensure you order enough. I used about 1.75 boxes of 100 tiles each. More details about this product and why I chose it are below.
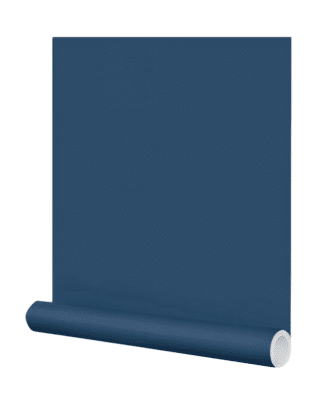
- Solid Color Contact Paper or Wallpaper – This is my “secret” to keeping this project completely damage free. While it’s optional, I highly recommend it for renters or anyone concerned with damaging the original backsplash area. When possible, match the paper to the grout lines on your tile.
- I used this solid-color wallpaper for my project, but it left behind more residue than I would have liked when I removed this tile installation. Instead, I recommend trying a lightweight contact paper, but test it first to ensure it comes off your walls cleanly.
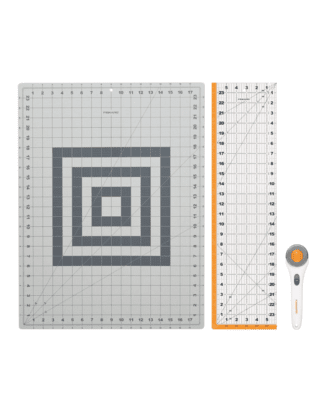
- Cutting Tools – I experimented with lots of different methods, and here is what I recommend using:
- Self-Healing Mat | Ruler | Rotary Cutter
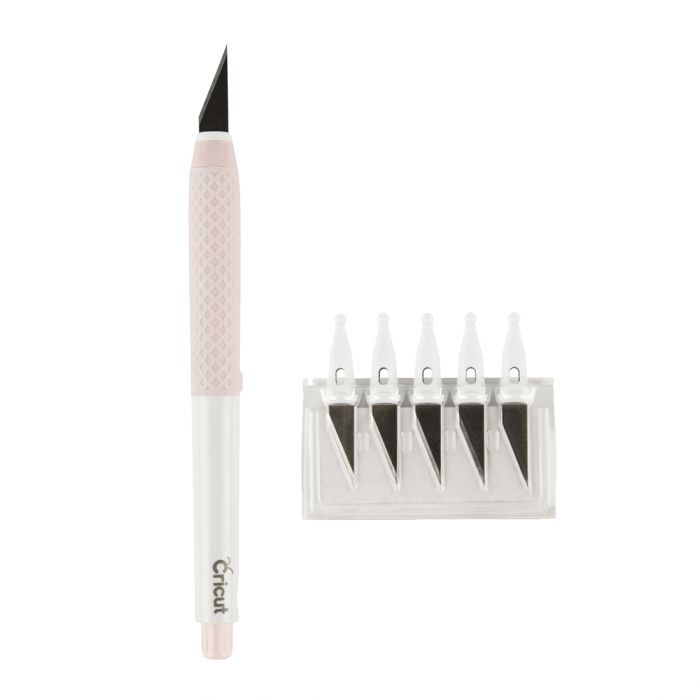
- Sharp Craft Knife or Utility Knife
- Small Level
- Screwdriver – For removing and replacing outlet covers
- Perry Metal Wall Plate Outlet Covers – As you’ll see below, these work best when trying to create a clean tile arrangement around outlets.
What You REALLY Need to Know About Peel and Stick Tile Before You Start
I am no stranger to renter-friendly backsplash projects. My preferred method for updating a backsplash in a completely removable way is usually with peel and stick wallpaper that looks like tile. See my process here: How to Wallpaper a Backsplash
I have never before considered using peel and stick tile on a backsplash before because of one primary reason: peel and stick tile is not typically removable.
Let me repeat: just because something is “peel and stick” (rather than grout or cement), it doesn’t mean it comes down damage free. In fact, the glue used on peel and stick tile products tends to be “extra strong” to hold the heavier products up on a vertical surface. So really, the appeal of peel and stick tile is mainly about the ease of putting it up when compared to traditional tile. It has nothing to do with removability.
So…Why Did I Used Peel and Stick Tile This Time?
Whenever friends or readers ask me about using peel and stick tile on their kitchen walls, I usually say something to the effect of “run,” or “don’t,” or “beware.” So why did I use it in our current rental kitchen? Two main reasons actually!
- I’ve never used it before. And I am all about trying something once to test and see if it is a truly viable option for me and for you.
- I figured out a way to use these tiles in a damage-free way. As you’ll see below, I first cover my backsplash area with contact paper and apply the tiles on top. This means that the super sticky adhesive is attached to the removable paper and not my wall!
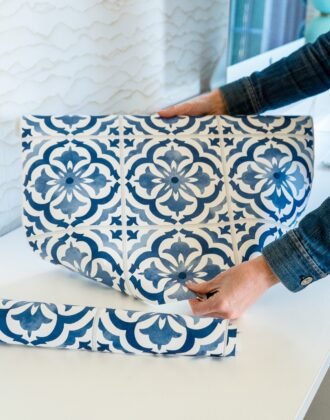
Why I Chose Individual Tiles Over Sheets
Most peel and stick backsplash products comes in 12×12″ tile sheets. But you’ll soon see that the tiles I chose are individual tiles. I opted for tiles over sheets for the following reasons:
- The individual tiles look more like “real” white subway tiles with actual indented grout lines. Sheets tend to have a plastic-y artificial appearance and very shallow grout lines.
- I couldn’t find true-to-size subway tiles in sheets.
- I wanted the option to play with different tile arrangements. While I went for a classic horizontal layout in the end, the individual tiles gave me more flexibility.
- I suspected one-by-one placement would be easier than trying to manage large sticky sheets around outlets, corners, etc.
Now having used the individual tiles, there are some cons to consider too:
- One-by-one tile placement takes longer to cover the same amount of area than larger sheets.
- Individual tiles are more prone to inconsistencies since you are placing them one at a time.
Video Tutorial
This is actually a DIY project that is a bit difficult to capture in pictures. So to see exactly how I cut and applied each tile to transform our kitchen backsplash, watch the video tutorial below. I intentionally left this video a bit long so you can really get a true sense for the tedious, little-by-little nature of this installation! Video not loading for you? You can watch it HERE.
How to Install a Peel and Stick Tile Backsplash
Step 1: Prepare the Wall Surface for a Peel and Stick Tile Backsplash
Before you can even begin peeling and sticking tile to your kitchen wall, there is some prep you need to do first. At the very least, clear off your counters, remove all outlet covers, and wipe down the existing backsplash area to remove grease, dust, etc.
Step 2: Protect Existing Wall (Optional)
As discussed above, adhesive tiles are not generally considered a removable product. The adhesive is very strong; and even if you can get them to come down without damaging the original surface, it will require a lot of patience and quite likely a lot of sticky stuff left behind.
As such, if you are wanting to use peel and stick tile in a way that is completely damage free, I recommend first covering the backsplash area in something that is more removable. This can include:
- Contact paper
- Peel and stick wallpaper
- MDF or thin plywood cut to size*
- Foam core board or sturdy cardboard*
*Use nails or Command Strips to hold these products in place.
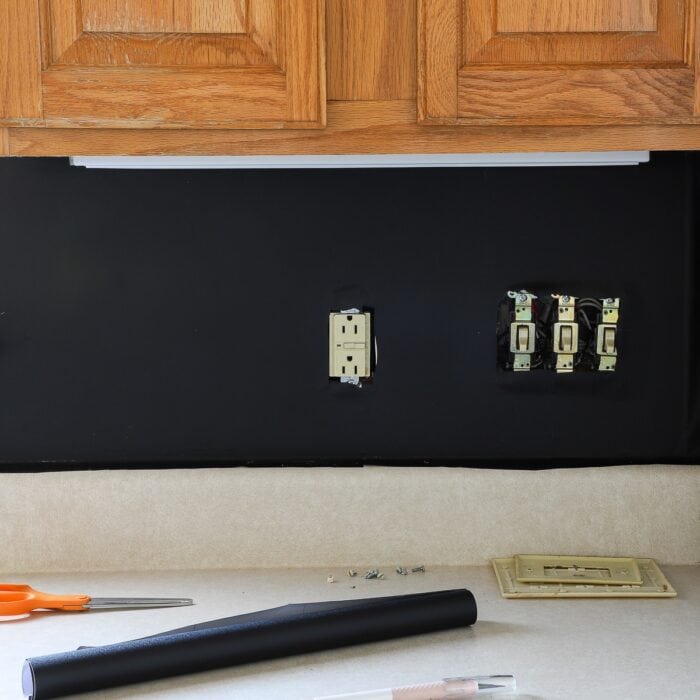
Our backsplash is covered in a beige laminate sheet. And while I don’t think the peel and stick tiles would damage this surface, I am 99.9% certain they’d leave a whole lot of sticky residue behind for me to painstakingly clean up.
I opted to cover my backsplash area in solid black peel and stick wallpaper. It not only helped fully protect my original surface, but it also conceals any alignment issues since it matches the grout lines on the tiles themselves.
To ensure that all tiles are placed on top of the paper (and don’t come into contact with the wall at all), you will likely want to cut it a bit bigger than the actual backsplash area. Don’t trim the excess off just yet; we’ll do that after the tiles are placed.
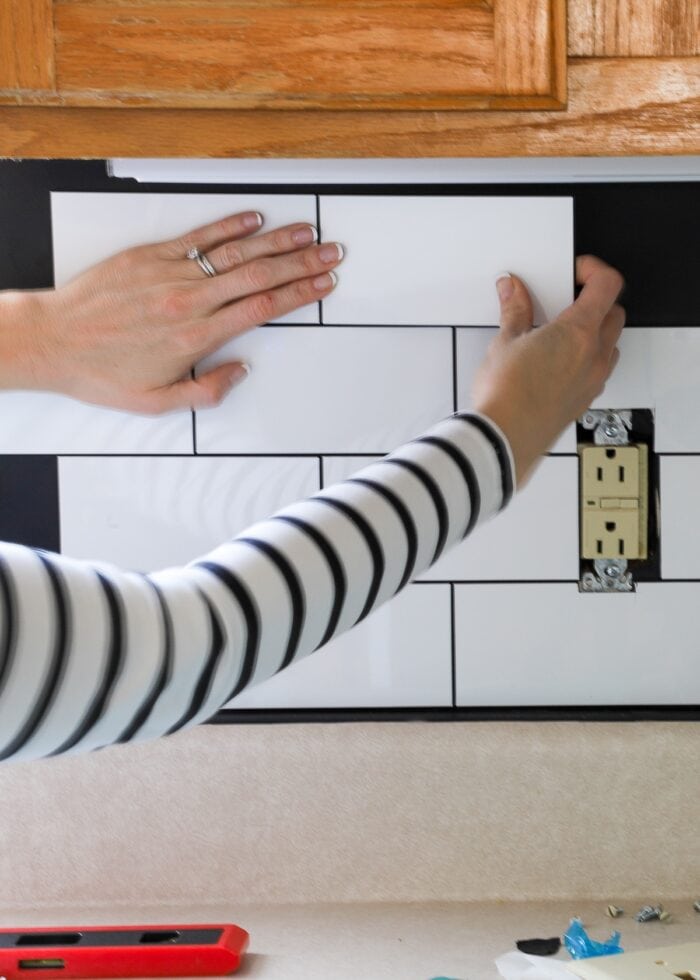
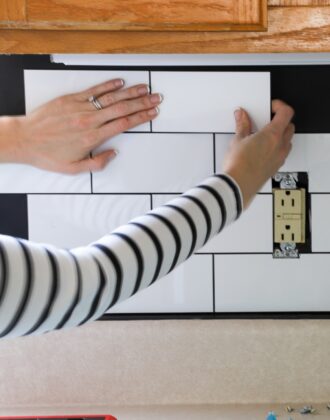
Step 3: Place First Tile(s)
The next step is to apply the peel and stick backsplash tiles! You may (or may not) want to use a level for your initial tile placement. While you certainly don’t want your tiles crooked or running on diagonal, you likely want them parallel to your counter and/or existing grout line. When your countertop is not perfectly level, you could end up with an awkward gap between the tile and countertop if you rely on a level only. Use your best judgement for aligning your first few tiles above your specific counter situation.
Step 4: Build Out the Pattern
If you have a perfectly smooth surface, peeling and sticking the tile will go quite fast once you have the few first in place. I did not bother using the level every time. I just ensured the vertical edges were perfectly lined up as I worked across the wall horizontally. I then moved up a row, offset the tile by half, and kept placing.
Step 5: Trimming Down Tiles
Inevitably, especially in a kitchen, you will run into outlets, windows, edges, or other features quite quickly and repeatedly. And unfortunately, you will have to stop your speedy installation and deal with each one individually as you get to them. Do not try to skip tricky spots and keep your pattern going (unless you are very good at measuring), as there is a good chance you’ll end up with unwanted gaps or tiles that don’t line up right.
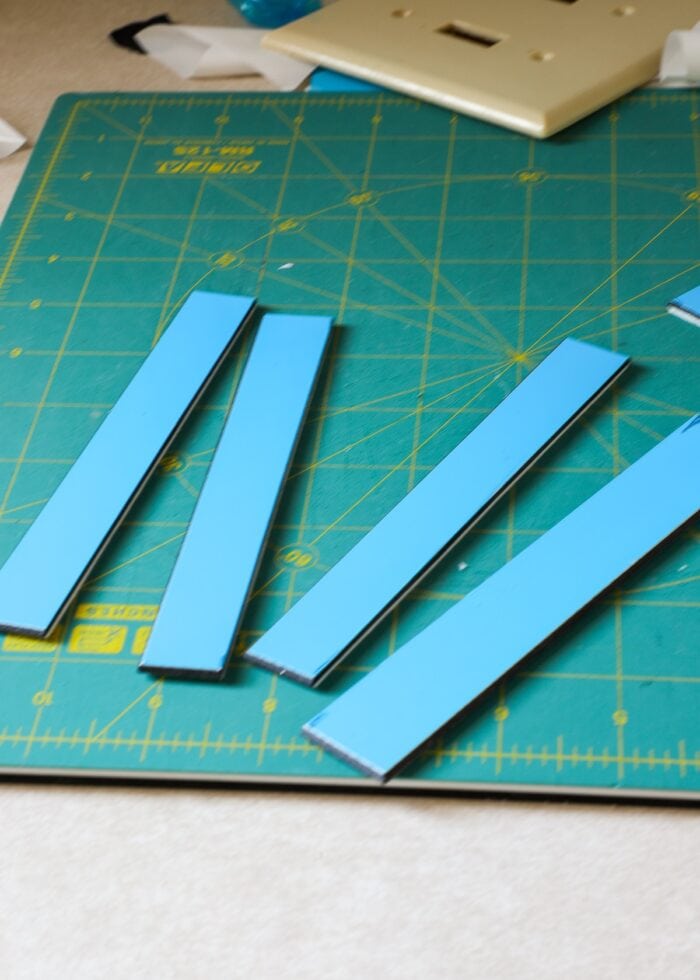
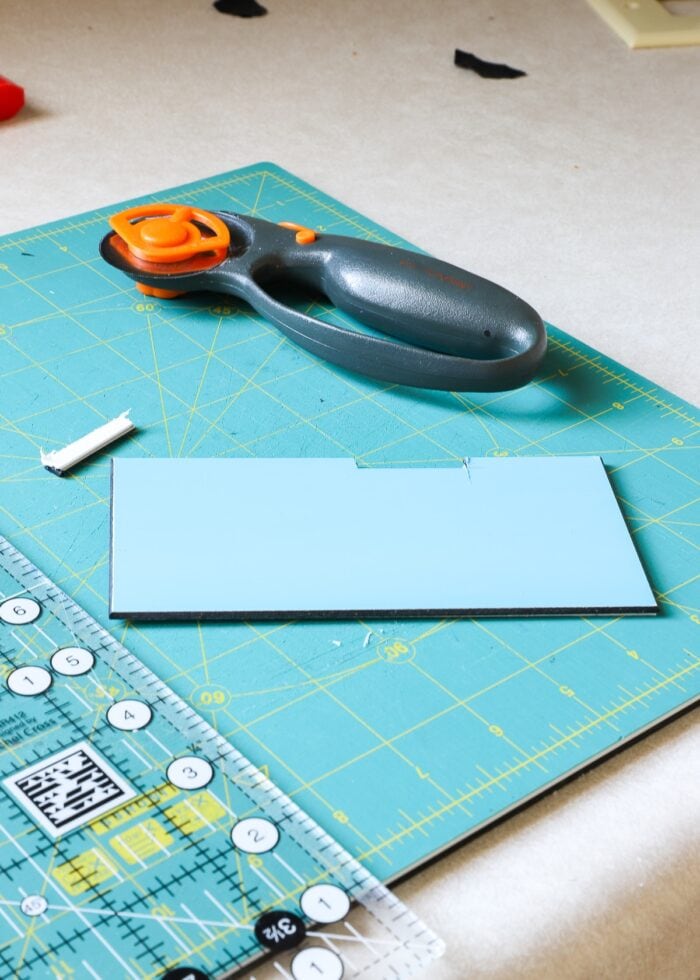
Although these tiles “can” be cut with a sharp scissors, I found a scissors warped the tiles ever-so-slightly, which then prevented them from sitting flush on the wall.
After much experimentation, I found it best to cut down the tiles using a few passes of my rotary cutter against a straight edge on a cutting mat. After the initial line is “scored” a few times, the tiles will snap cleanly apart! (Watch the video to see exactly how this works.)
Want to save this post?
Even if a notch is needed in a particular tile, using the rotary cutter to make tiny (repeated) slices was the only way to get smooth, clean, straight lines without bending the tile itself. Admittedly, this can be a bit imprecise and tedious.
In the event that you need a rounded edge, start with straight cuts and then carve out curves as needed with a sharp craft knife.
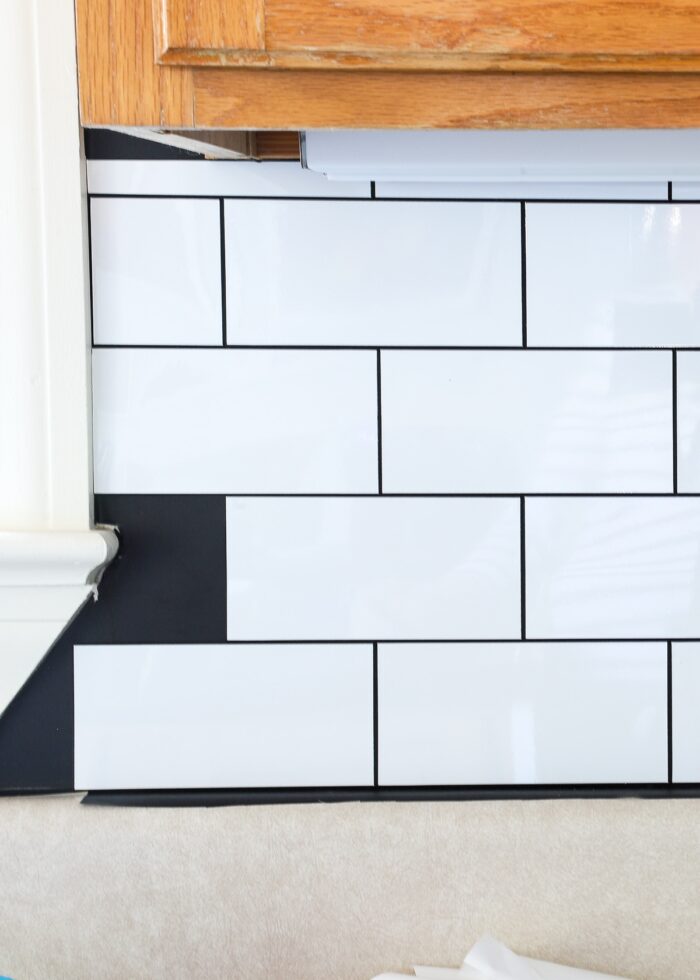
Keep placing tile by tile and row by row until your backsplash area is filled.
Step 6: Filling Gaps & Edges
There’s a pretty low chance that you’ll be able to perfectly fit a neat number of full tiles on your backsplash area. Inevitably, along the top or sides, you will have to trim tiles down to fill all remaining gaps and create a wall-to-wall effect.
After lots of experimenting, I found it easiest to skip the measuring with a ruler. Instead, just hold the tile up to where you need it and mark the cut point(s) on the tile itself with a pencil. After trimming it down using the methods above, it will mostly likely fit right into place. (Again, this is heavily demonstrated in the video tutorial!)
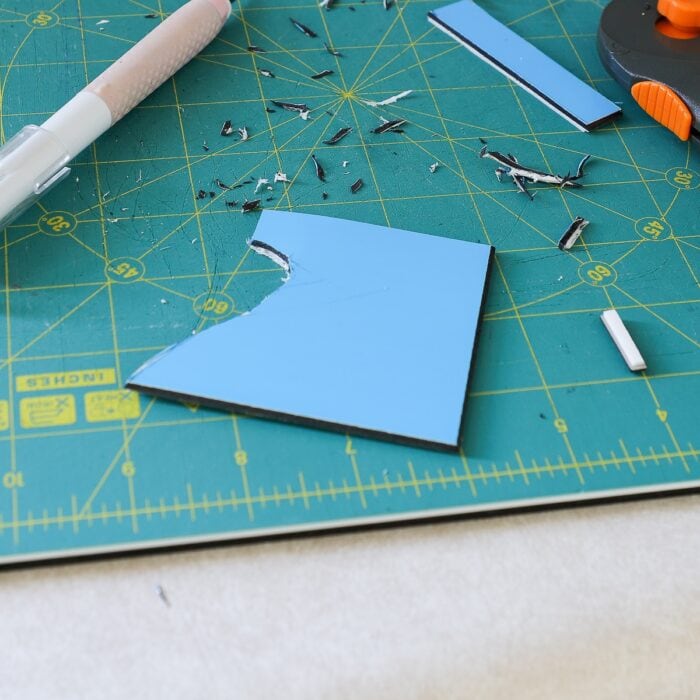
This only becomes problematic when working around diagonal or curved edges (like shown below). On these types of edges, you will not be able to hold a tile flush against the wall in order to get precise measurements. Instead, I recommend pressing a piece of paper (such as a Post-It Note) into these edges, creating a fold in the paper where the cut needs to occur on the tile.
You can then trace the edges onto the tile before cutting…
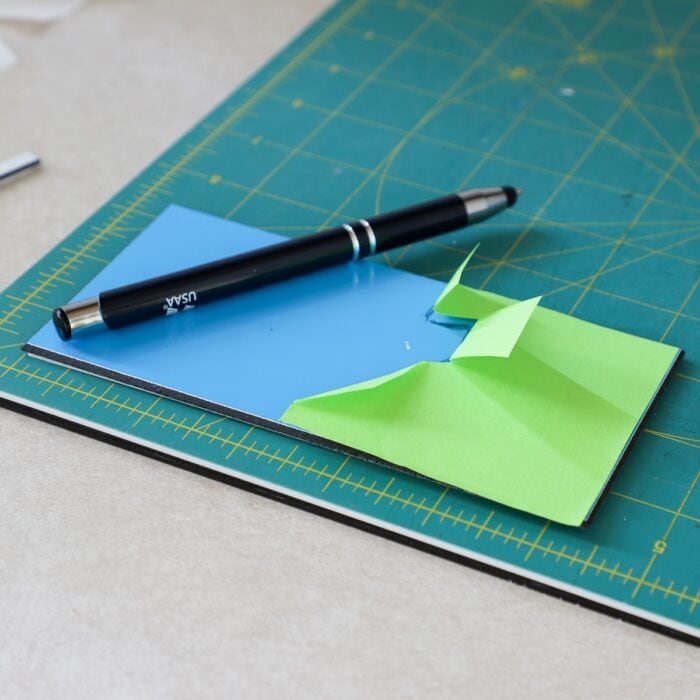
…and sticking into place!
Step 7: Trim Away Contact Paper
Once all your tiles are in place, use a sharp craft knife to trim away any excess paper and create a clean edge.
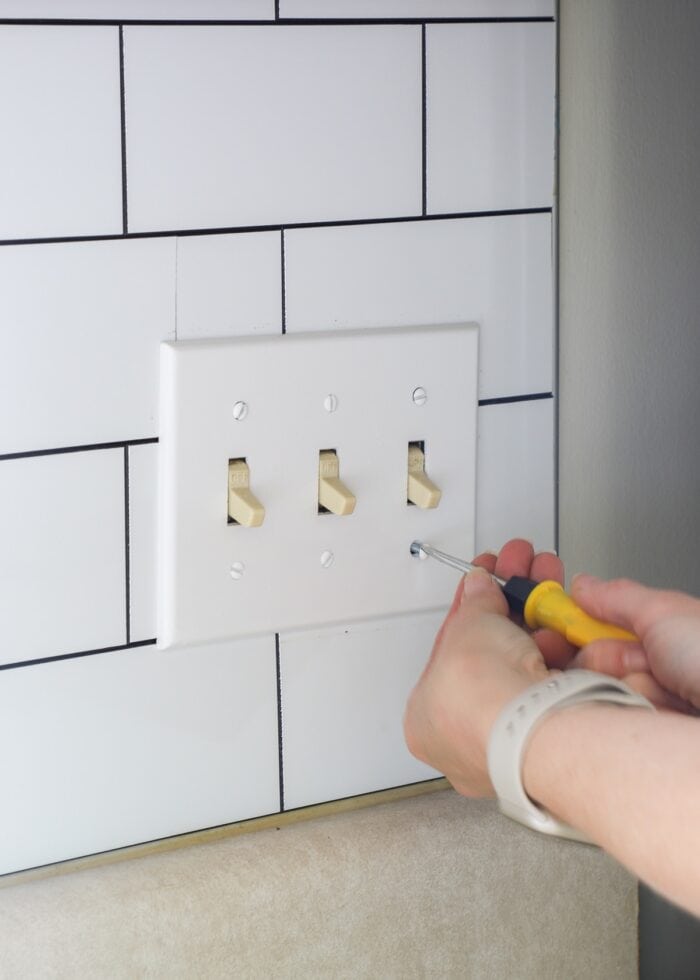
Step 8: Replace Outlet Covers
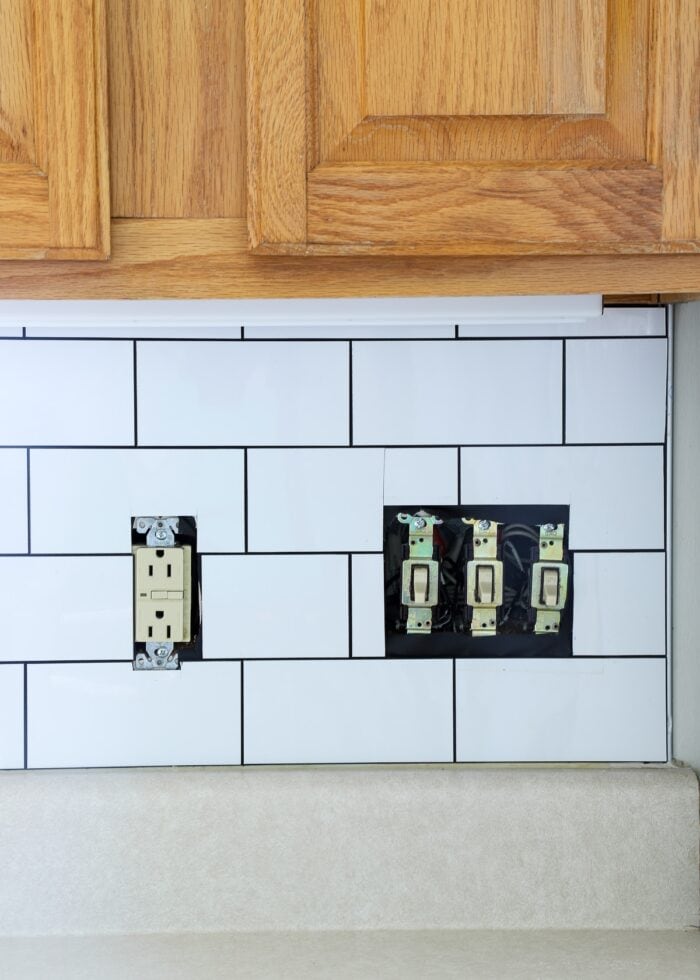
The final step is to replace the outlet covers. This will instantly clean up the entire tile installation. I have more information on the best way to deal with outlets below.
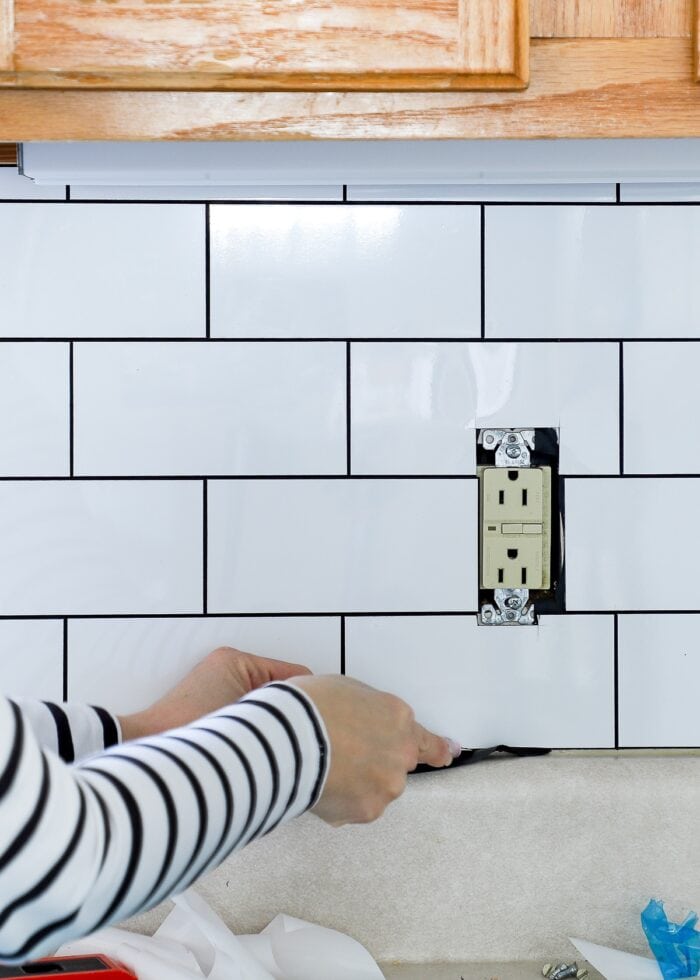
Working Peel and Stick Tile Around Outlets
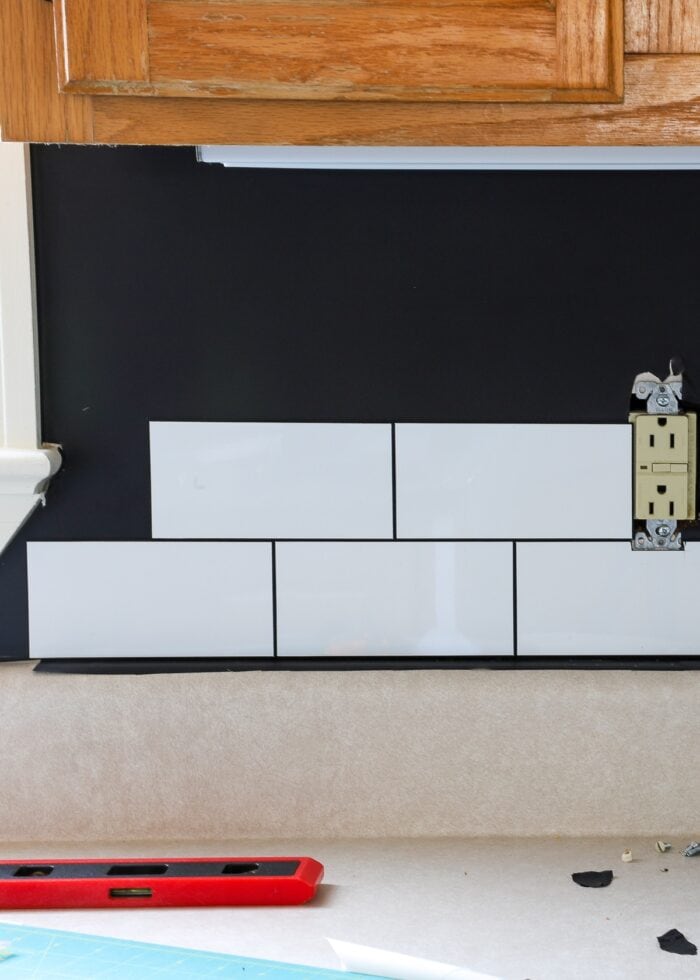
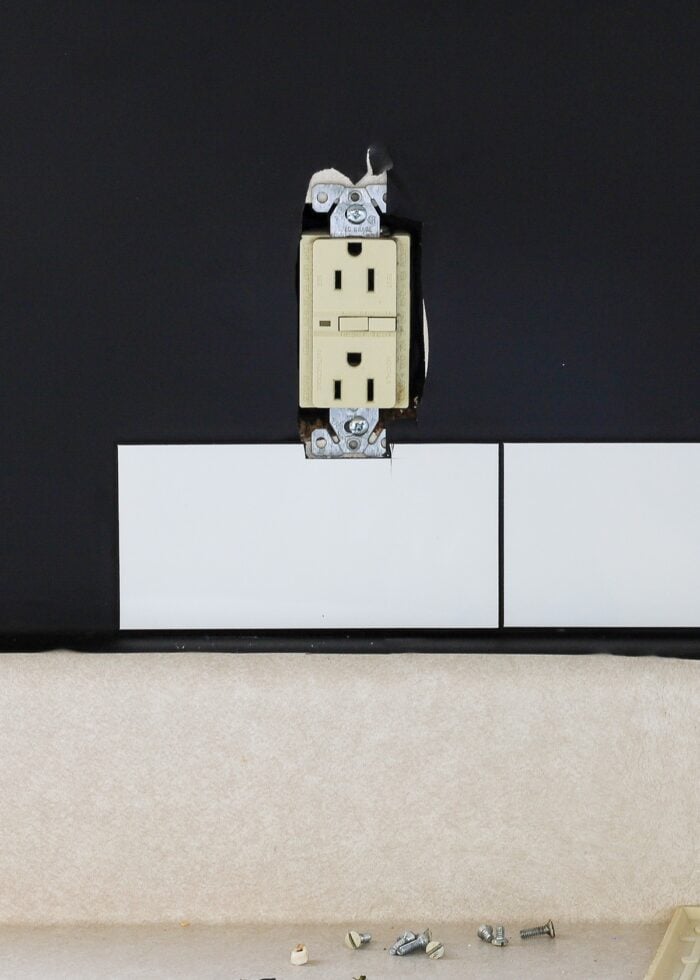
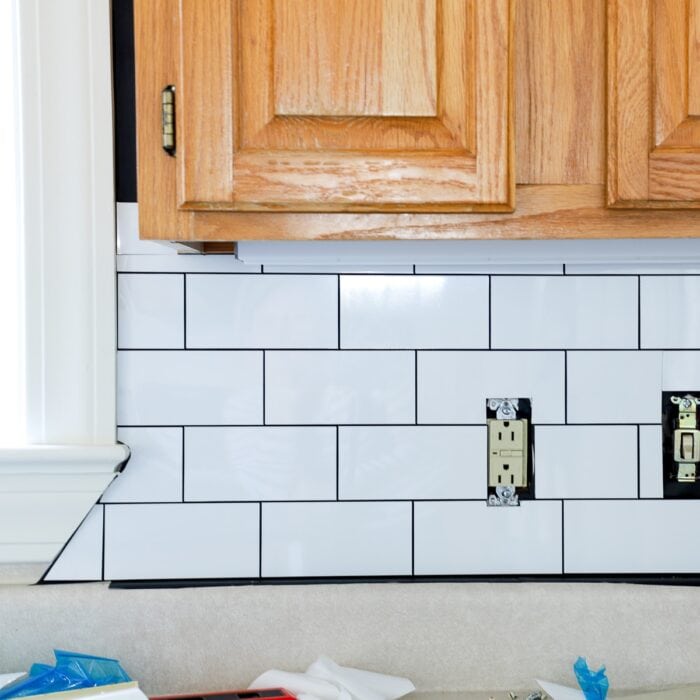
Without a doubt, the most complicated and exhausting part of this entire project is navigating outlets. And unfortunately, when installing a backsplash in a kitchen, there are a lot of them! Our small kitchen has no less than 7 outlets above the counters.
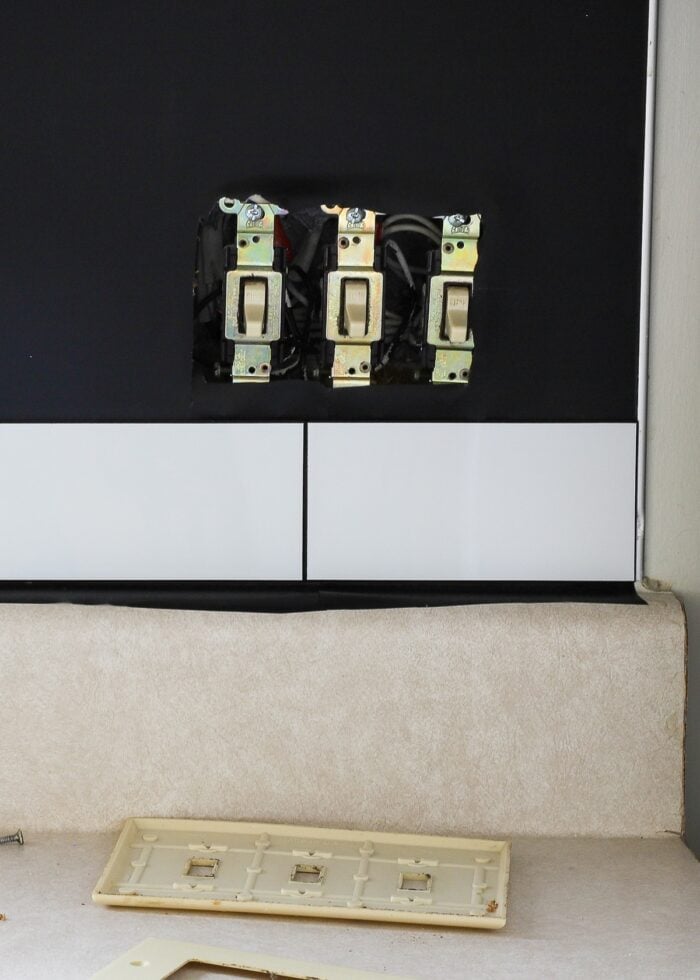
My original plan was to keep the outlet covers in place and cut the tile to fit around them. But as you can see in the photo below, it was very challenging to get clean, straight cuts all the way around the cover plate. Not only was it tedious to make all the various corner cuts, but the imprecise results really bothered me.
I eventually determined it was best to run the tiles under the cover plates. To do so, cut the tiles as close to the actual outlets as possible, only cutting away what is absolutely necessary to ensure the tiles sit completely flush to the wall.
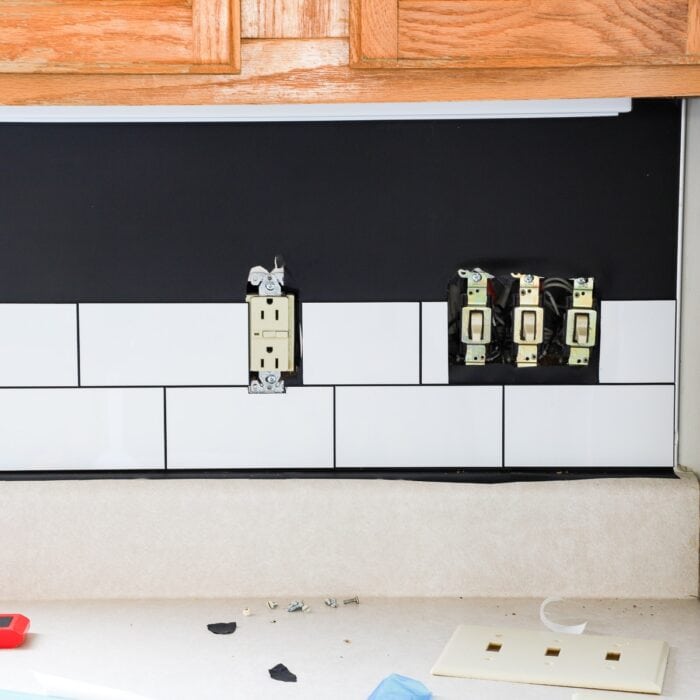
Although this still requires some “complicated” cuts, I was actually able to use more full tiles and didn’t have to be quite as precise since all ugly edges are eventually concealed behind the plate.
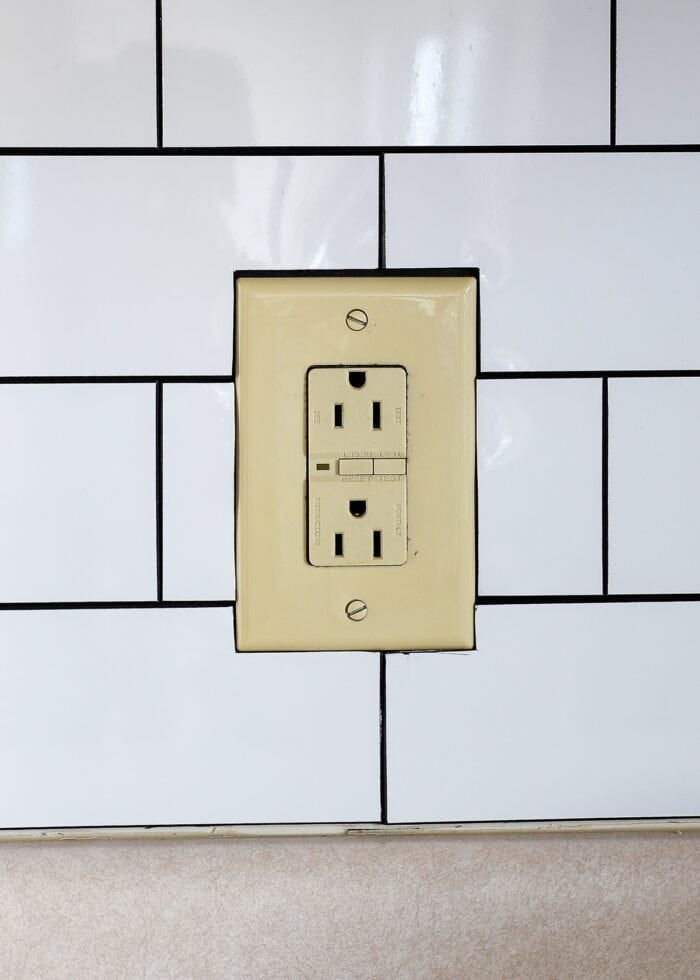
When replacing the outlet cover, it will sit on top of the tile. However, since these tiles are rather thick, you’ll notice that the plate and the plug no longer sit flush. That bothered me too!
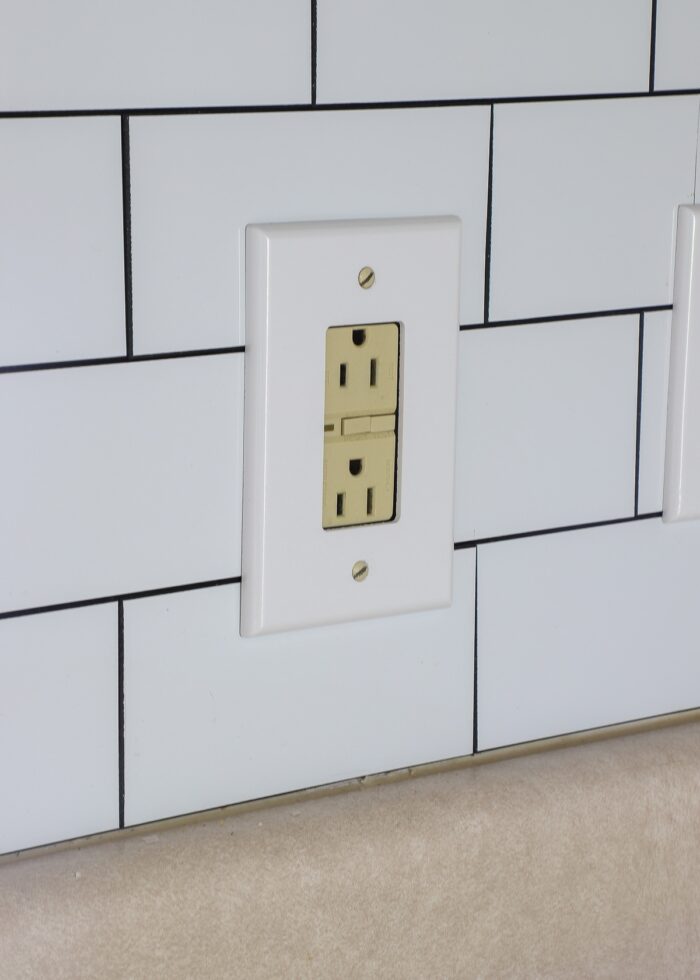
After some more experimenting, I discovered that these contoured metal outlet covers really nicely cover up the tile edges while also remaining flush along the front of the plug.
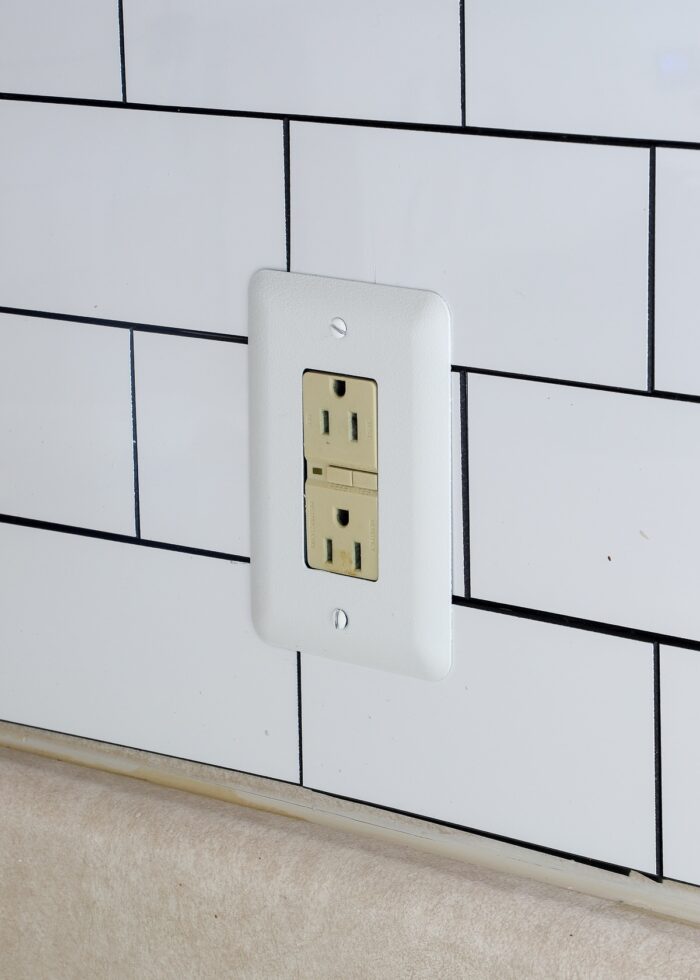
Admittedly, dealing with the outlets can be frustrating and tedious. But the result of a clean display along your countertops will be well worth it!
Working Peel and Stick Tile Around Corners
Another tricky situation you might have to deal with in your kitchen is corners. Thankfully, I only had one corner to deal with, and the individual tiles made it a bit easier than I originally expected.
There are likely several different ways to maneuver around the corner, but here is what I recommend:
- Cut down the tiles to end at the corner, just as you would at the end of the wall.
- Instead of discarding the remainder of the tile, place it perpendicular to its other half, continuing the pattern around the bend onto the next wall.
Yes, this does mean the corner will have a “cut” crease down the corner, but there really is no great way to “bend” these tiles in a straight, 90 degree fashion. If the crease bothers you, you can always fill it with some white caulk.
FAQ About Installing Peel and Stick Tile
What Are These Tiles Made Of?
It’s probably really hard to tell from the pictures, but these specific tiles are actually made of shiny PVC (yep, like the pipes). So the tile are quite rigid and sturdy but cuttable and very glossy. While I don’t think you’d mistake them for real ceramic tiles, their individual nature (with the grout lines around each one) very much give them the appearance of “real-ish” tile!
Is a Peel and Stick Backsplash Easy to Install?
This project isn’t hard, but it is tedious. Placing each tile one at a time goes fairly quickly when you have a solid wall. But for such a small surface area, there is a disproportionate amount of “special cuts” required to fill in the gaps along the edges, around outlets, and under the cabinets.
That said, this is very much a project you can work on a little bit at a time. I tackled the small area to the left of the stove first, then above the stove another day. I finished the far corner and wall on a third day, and then finished to the right of the window and corner by the refrigerator on a fourth installation. Breaking it up like this helps you continually make progress while also staying diligent to all the tedious cuts required.
Do You Have to Use the Contact Paper Under the Tiles?
You don’t! But if you’re worried about damage to the underlying surface (e.g., wall, laminate, or even other tile), then I very much recommend it.
If you are worried about peel and stick wallpaper causing damage too, nailing up really lightweight MDF or luan is another great solution (because filling holes is an easy fix!)
Does the Peel and Stick backsplash Stay On?
This backsplash has been up since October; and in general, I’ve seen minimal issues with the tiles staying adhered to the contact paper (rather than drywall).
I do have two stubborn tiles that like to pop up every so often. But I think this has more to do with the wall not being perfectly flat in those two spots. As much as I try to press them flat, the surface tension ultimately causes them to pop up slightly.
As a whole though, I haven’t had to replace a single tile yet!
Can You Fix Tiles After They Are In Place?
Sure! I successfully peeled up and replaced many tiles during my installation. This was mostly because I was figuring out how best to cut the tiles; and once I found a good method, I went back and replaced bad cuts.
That said, these tiles are plastic. And as you pry them off the wall, they bend considerably, rendering them unusable. As such, there really isn’t a great way to “adjust” one tile that is slightly off. If you want to fix a tile, plan on fully replacing it.
Can These Tiles Be Used in Bathrooms or Showers?
I would not use these particular peel and stick tiles in a shower. While you do place the tiles edge to edge, it is far from a water tight seal. I would not feel comfortable with the potential for water build up behind these tiles.
I would feel comfortable using the tiles above a bathroom sink or on a vanity wall, as that area doesn’t typically receive the same amount of steam or moisture as a shower wall.
Are the Tiles Heat Resistant?
We’ve had zero issues with the tiles in and around our stovetop or near the countertop griddle (when we use it).
How Do You Remove the Peel and Stick Backsplash From the Wall?
I recently removed this entire backsplash and detail the whole process here: What You Need to Know About Using Peel & Stick Tile In Your Rental.
In this follow-on post, I share what went right, what went wrong, and if I still recommend this installation method!
So there’s the “secret” behind our rental friendly subway tile! Since first sharing sneak peeks of our kitchen progress, I’ve actually gotten quite a few messages from readers, concerned that I installed real tile in our rental. Hopefully by now, you guys know I usually have some trick up my sleeve!
Psssst – this rental kitchen makeover is now complete! See it all here: The Ultimate Renter Friendly Kitchen Makeover
This tile installation was indeed a tedious project, but I think the pay off was well worth it! We get so many compliments on it, and I’m really glad I gave peel and stick tile a try. If you too have been tempted to use it but were nervous about potential damage…I say go for it! Using my tricks outlined here, it should come off your wall without issue (and probably a lot quicker and easier than it went up!)
Megan
7 Comments on “How to Install a Peel & Stick Tile Backsplash In a Rental (Without Damage!)”
That turned out great. The last time I was a renter was in the 70s between college and marriage. There are so many nifty products now! We are moving to a house with old yellow oak cabinets. Yuck. Time to learn to paint. Too bad they cannot be covered up. They look just like yours. I’ll be using my moving kit! Not bought yet, need to do so soon. You’ve been a great halp. As Winnie the Pooh put it.
What a fantastic upgrade — you have done an amazing job to make your kitchen beautiful!!
Would love to see down the road another backsplash (bathroom?) done in the sheets that I always see at discount stores to see how you think that compares.
Have to say, that’s hilarious ~concerned readers~ would write you, of all people, to make sure you know your backsplash needs to be removable! In fact, I predict you are going to be asked to leave it! 😀 Just like your outlet covers…hello, no more dingy yellow ones, management!
Was in the same situation with outlets and wanted to share outlet spacers:
https://www.homedepot.com/p/IDEAL-Caterpilar-Spacers-Shims-5-Pack-772453/202937113
That way your outlets will pull forward to sit proud of the plate as they were before and everything will be tight & sturdy when you pull out your plugs.
Wanted to recommend the electric tea kettle at costco too 🙂 (return policy; sometimes the switch breaks)
No looking back for me: so much faster and the glass is pretty enough to leave out. Since now we know you have 7 outlets 🙂
I love your ideas for renters and I am absolutely taking your backsplash idea. I do have one question about putting something on the wall before the stick-on tiles. Do you think painter’s tape would work the same as the contact paper?
Hi Stephanie!
Thanks for reaching out!
Sure, I think painter’s tape would work just fine! My gut reaction says it would cost more and be more work than the contact paper, but I’ve never tried it so I can’t say for sure 🙂
Good luck with your backsplash!
Megan
I love this idea! I’ve longed to cover our kitchen backsplash for years, but haven’t in fear of ruining the wall. (We are renters also)
Before I embark on this project, I must ask: Have you removed the tile yet? Did it come up easily? My concern is that the heat from cooking and regional Texas humidity will cause the glue on each tile to seep through the contact paper and onto the wall; Thus, crushing my hopes and dreams of a kitchen revamp. Patiently awaiting your reply and feedback.
Hi Shaye!
Thanks for reaching out about this project!
Unfortunately, I have not yet removed these tiles from our wall. They will come down in the Spring in preparation for a move next summer, so I’ll be able to fully update you then (which I realize, is not great timing for you!)
That said, I really can’t imagine the adhesive would “seep” through the contact paper. The adhesive is just like a Command Strip or strong tape. I guess it technically could, so perhaps you could do a test (single tile on top of a patch of contact paper) and watch it for a while to see how it performs.
I realize this might not be all that helpful but I do think once you hold a tile in your hand and do a test, you’ll feel more confident giving it a try!
Good luck!
Megan
I am so glad I found this post and followed the steps including adding contact paper. I just did my backsplash and without the contact paper I would’ve completely destroyed the wall and probably would’ve quit mid-process. Thank you!