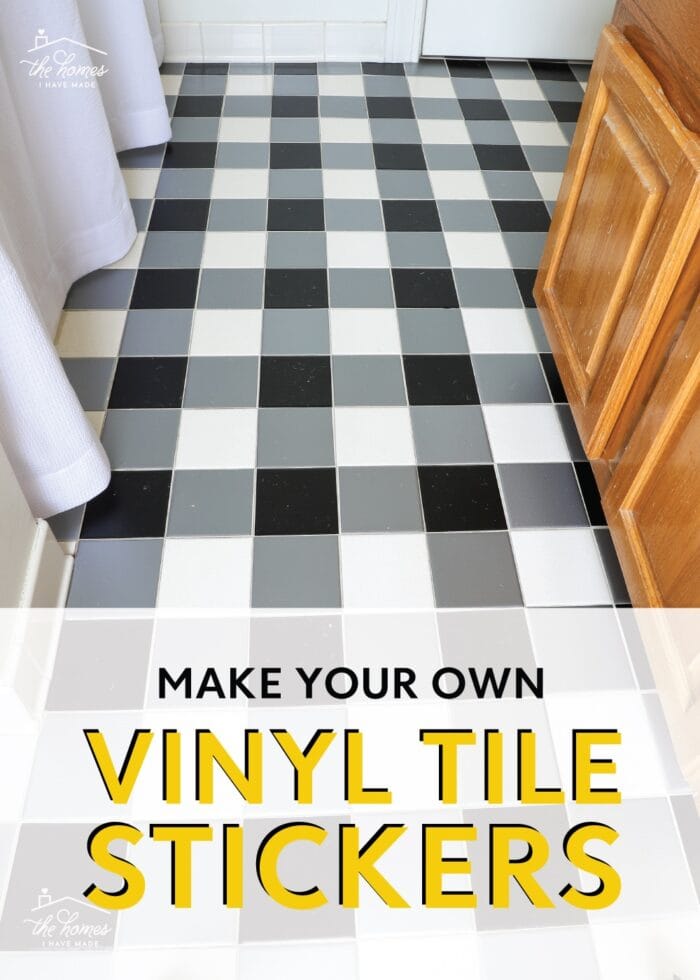
How to Make Your Own (Cheap) Bathroom Tile Stickers
About a year ago, my neighbor sent me a link to a shop that manufactures floor and tile stickers. At first I was totally thrilled and quite intrigued by the idea of covering up all of our old and dated tile in a completely removable way…until I saw the price tag. Even with sales, coupon codes, and free shipping, these peel-and-stick (one-time use) products tend to be exceptionally expensive. So what did I decide to do? I figured out a way to make my own bathroom tile stickers…for a lot less! Let me show you this truly easy AND budget-friendly bathroom floor makeover idea!
When You Can’t Replace Your Bathroom Floor
Bathrooms are notoriously difficult to “decorate” because they don’t have a lot of update-able surfaces. Thanks to relatively “permanent” fixtures like the shower, vanity, and toilet taking up most of the wall space, it’s a bit more challenging to just paint or wallpaper your way to a whole new bathroom design.
Because the floor surface area in a bathroom is so vast, it’s actually one of the best places to create dramatic change. But whether you own your home or rent, pulling out traditional tile is not exactly a “quick and easy DIY.” In fact, replacing bathroom tile is not only difficult, time-consuming, and expensive, but it might also be outside the scope of what you’re able or willing to do yourself.
So…How Can I Cover My Tiles Without Removing Them?
So what can you do when you desperately want or need to update the look of your bathroom tile floor but replacing it is out of the question?
Here are some options to consider:
- Paint the bathroom tile – Supposedly, this works pretty well when done properly. I’ve never done it (because…renters!) but it might be worth considering if you own your home or have your landlord’s permission!
- Put peel-and-stick wallpaper on the floor – I had mixed results with this project.
- Place permanent peel-and-stick vinyl tiles/flooring over existing tile – While relatively budget-friendly, this is not typically a removable option.
- Put down a removable vinyl mat – so far, this solution is working great!
- Using tile stickers on top of tile
Since I can’t paint our tiles or put down permanent products, and I had mixed results with wallpaper…I was more than ready to give vinyl tile stickers a try instead!
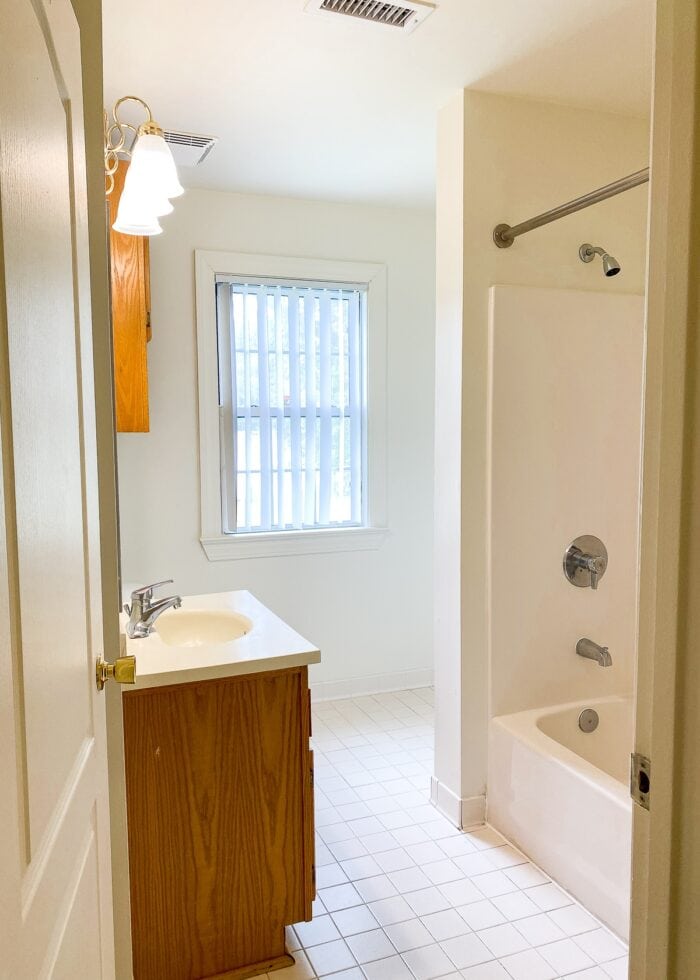
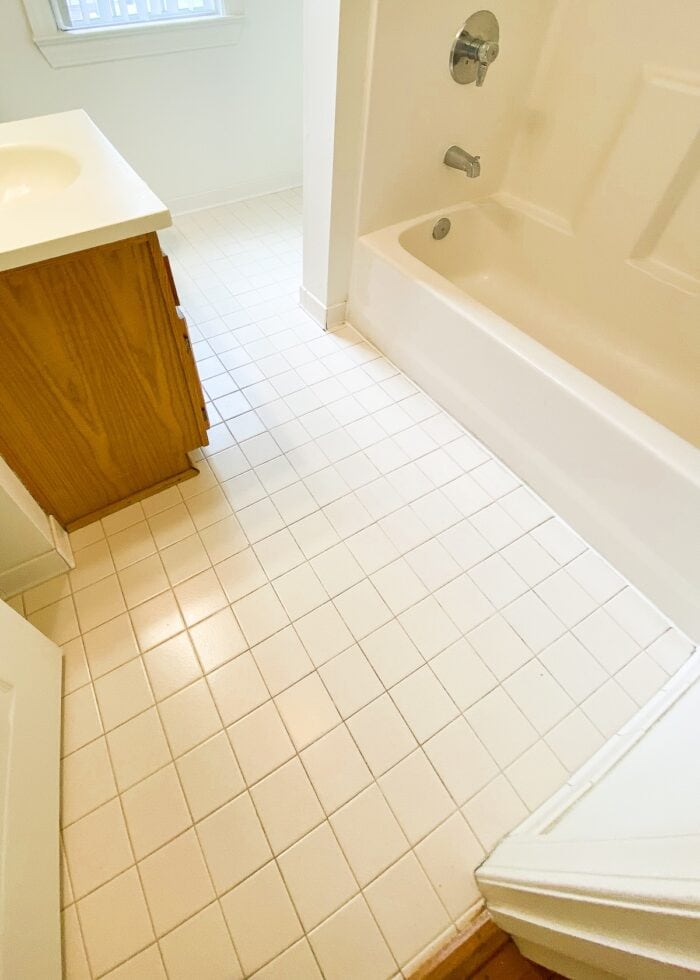
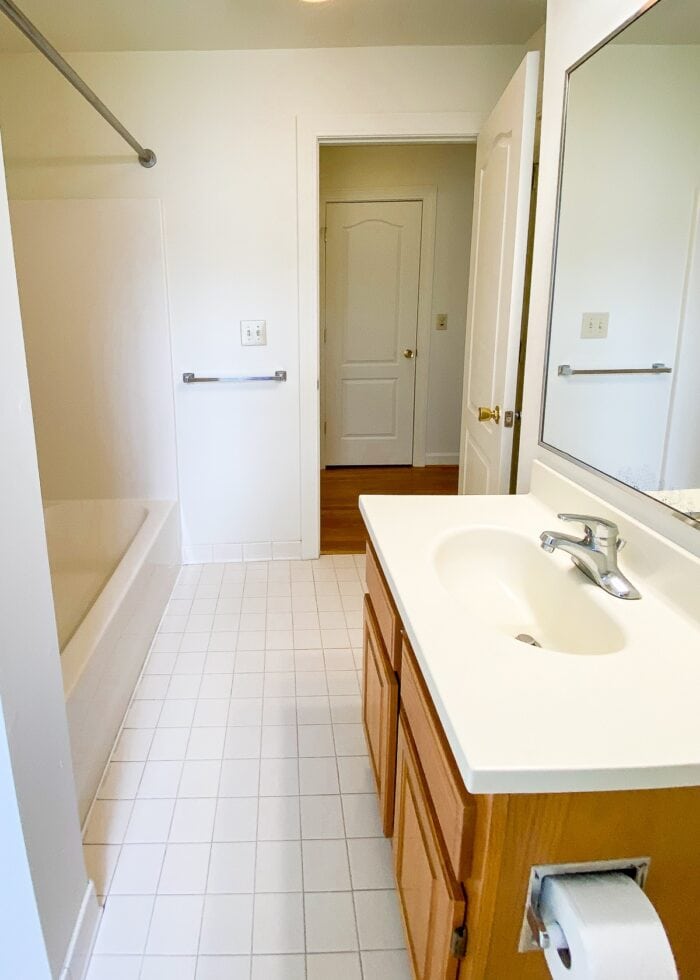
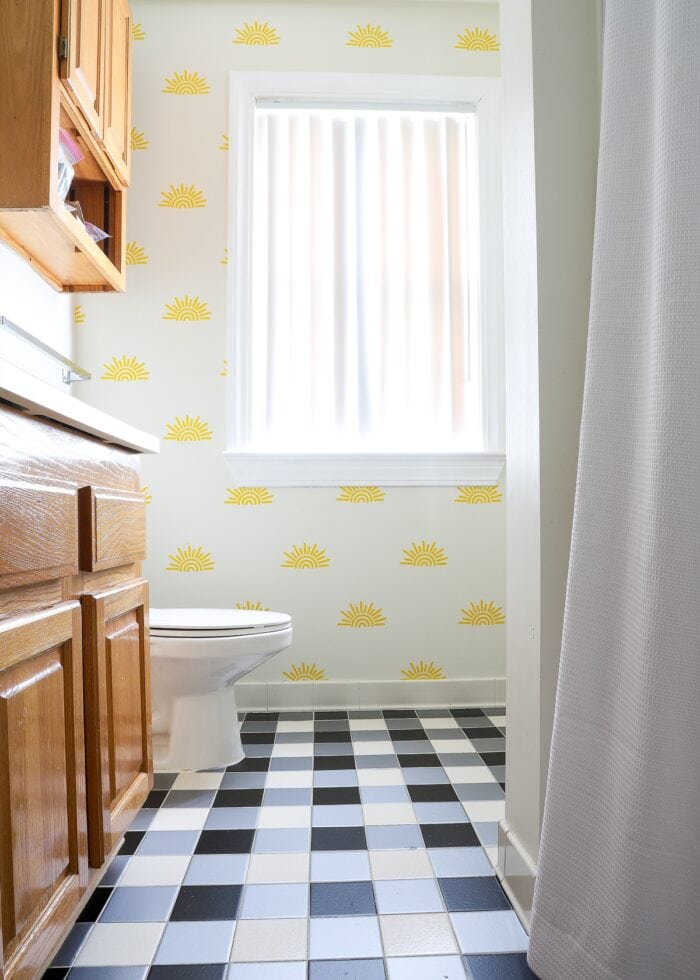
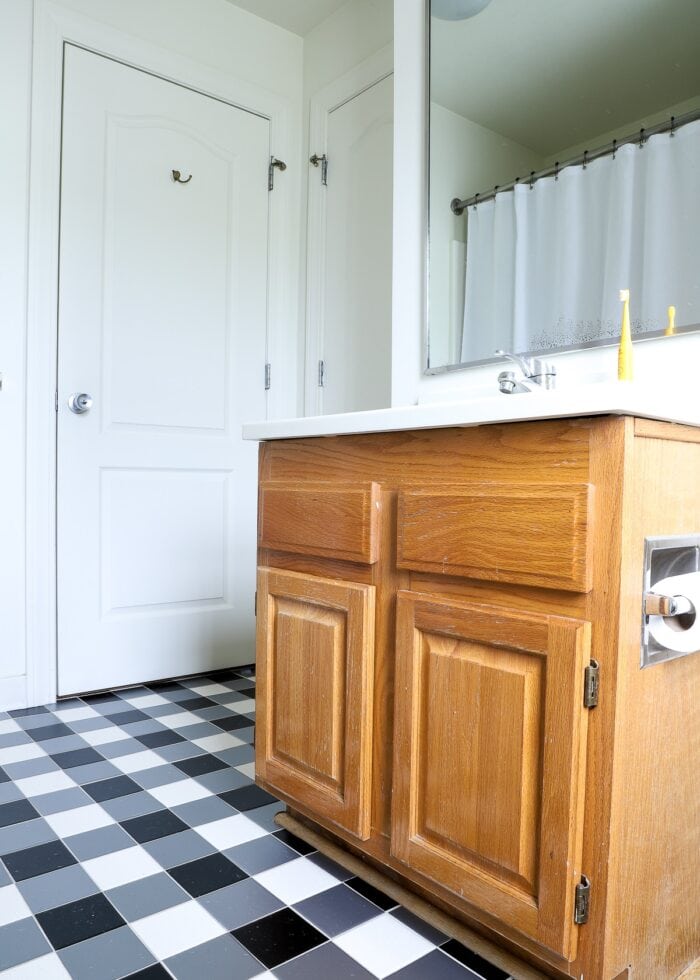
Our Rental Bathroom Tile Floor | Before & After
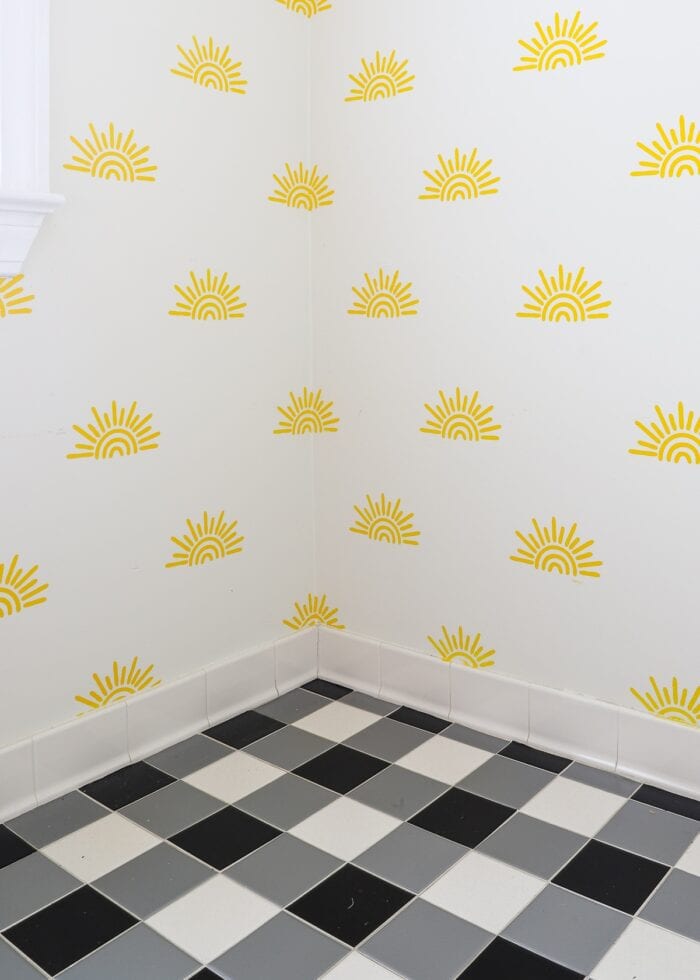
All the bathrooms in our current rental home are the definition of old, dated, basic, and bland. With beige walls, beige fixtures, and beige tile, I knew it was going to take a major “statement” project to wake this space up!
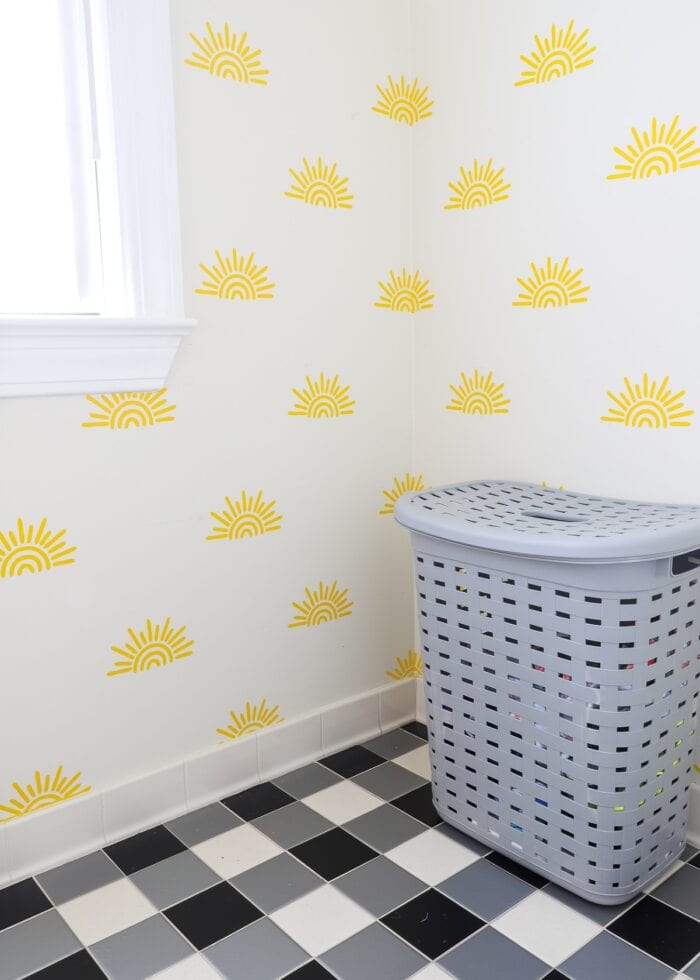
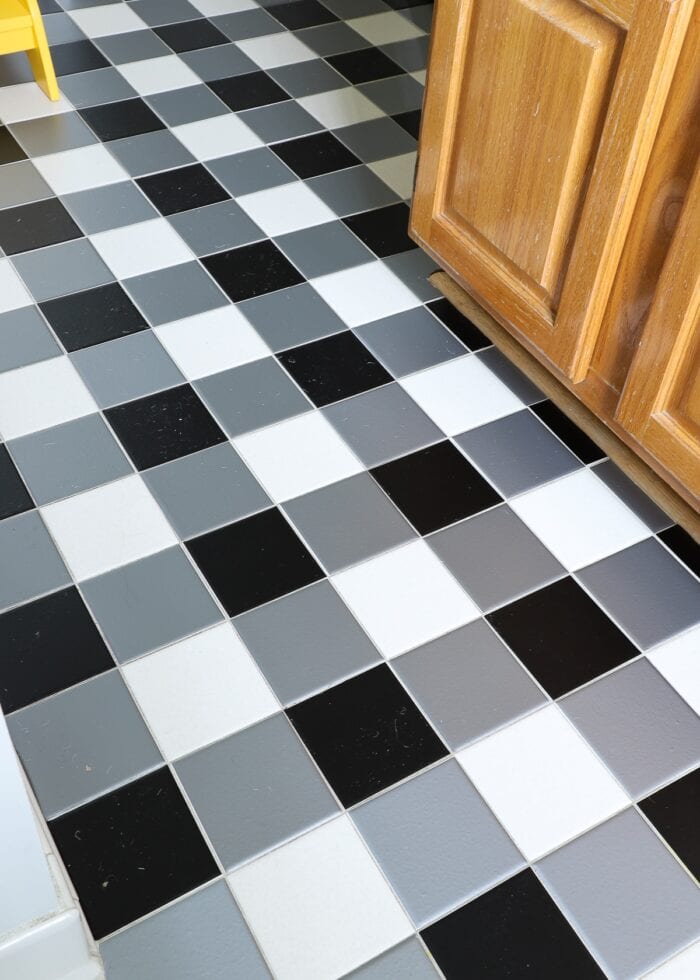
After stenciling a fun sunshine treatment on the wall, something was still missing. I had a hunch a fantastic tile design on the floor would completely transform this kid-friendly space…and boy…I think I was right!!!
Why Use Vinyl Tile Stickers In the Bathroom?
Easy Application
The appeal of vinyl tile stickers is somewhat obvious: you don’t have to pull out the ugly, cracked, or dated tile. Instead, you simply put a sticker right on top to give it an entirely different look.
Although placing individual vinyl tile stickers does take some time, it’s actually a fairly quick and easy project…especially when compared to more renovation-heavy alternatives!
Works With the Grout Lines, Not Against Them
You might recall that the main problem I encountered with our wallpapered bathroom floor was that the paper eventually cracked apart along the grooves between each tile. The air pockets (created by the grooves) combined with the pressure from walking caused the paper to split apart, looking messy, uneven, and honestly…quite terrible!
Vinyl floor stickers, on the other hand, are designed to fit on the tile surface itself…and not touch the grout at all. Not only does this visually preserve the “tiled” look (most appropriate for a bathroom floor), but you won’t experience the same breaks and cracks with larger, solid sheets.

Extensive Design & Color Options
Because tile decals are cut and placed individually, YOU get to decide on the exact pattern you want to do! (And this is true whether you buy vinyl tile stickers or make your own.)
Vinyl tile stickers can be made in countless color and patterns, and can also be placed in innumerable ways to create so many different looks. Simply put, there are so many more design choices when you use stickers compared to pre-fabricated versions!
Easy to Replace and/or Remove
Above all though, the biggest appeal of using bathroom tile stickers is that they can easily be removed (or replaced as needed). Although it will take some time, the stickers are designed to simply peel right up and leave no sticky residue behind. Likewise, if a single sticker peels up or tears, you can easily fix it by peeling up the damaged one and putting a new one down.
To be clear on this point, vinyl decals on top of tile should not be considered a permanent or long-term alternative to traditional tiling. But this lack of permanence is exactly what makes this project such an ideal solution for renters or those who can’t tackle a costly renovation right away.
Materials Needed
If you’re ready to give vinyl tile stickers a try but don’t want to buy the expensive or permanent kind, here is what you need to make your own!
- Standard Adhesive Vinyl – in the colors of your choice
- I used Removable Cricut Premium Vinyl in silver (two 15′ rolls) and black (1 15′ roll)*
- A Way to Cut the Vinyl
- E-cutter such as a Cricut or Silhouette
- Paper trimmer
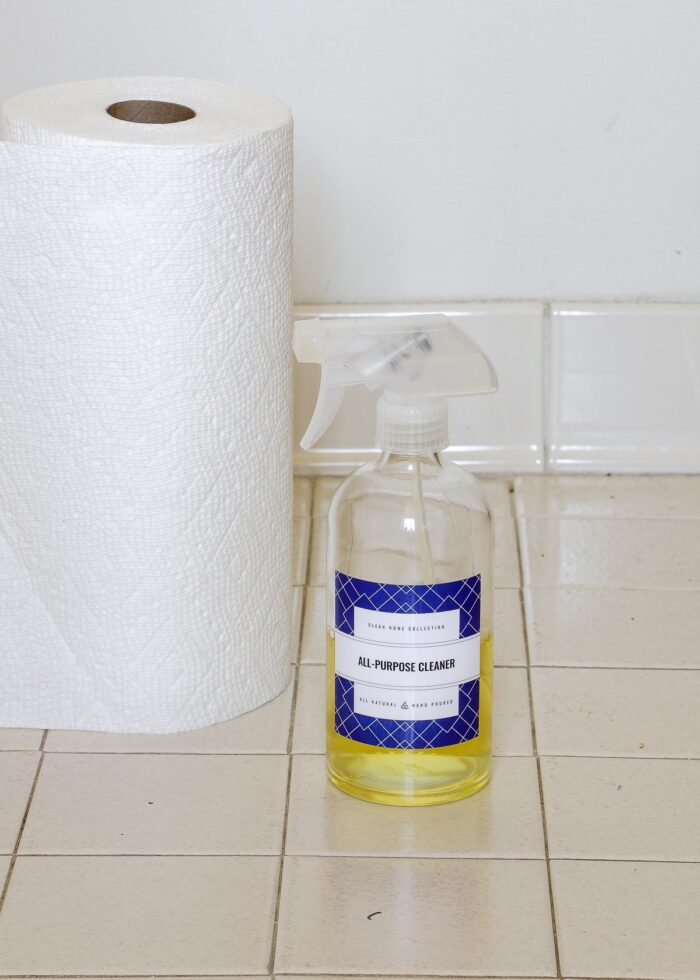
- Floor Cleaner – such as Windex, All-Purpose Spray, White Vinegar, or even some Clorox Wipes.
- Tools
- Cloth Measuring Tape
- Scraper – only needed if your bathroom tiles are quite large (8″+)
- Sharp Craft Knife
- Knee Protection – Knee pads or a gardening cushion would have been very helpful during this project!
*Why Didn’t I Use “Smart Vinyl?
Using Smart Vinyl would have allowed me to cut all my squares at once. However, Smart Vinyl is quite a bit more expensive than standard rolls, and the added cost wasn’t worth the extra effort to load the vinyl onto a mat!
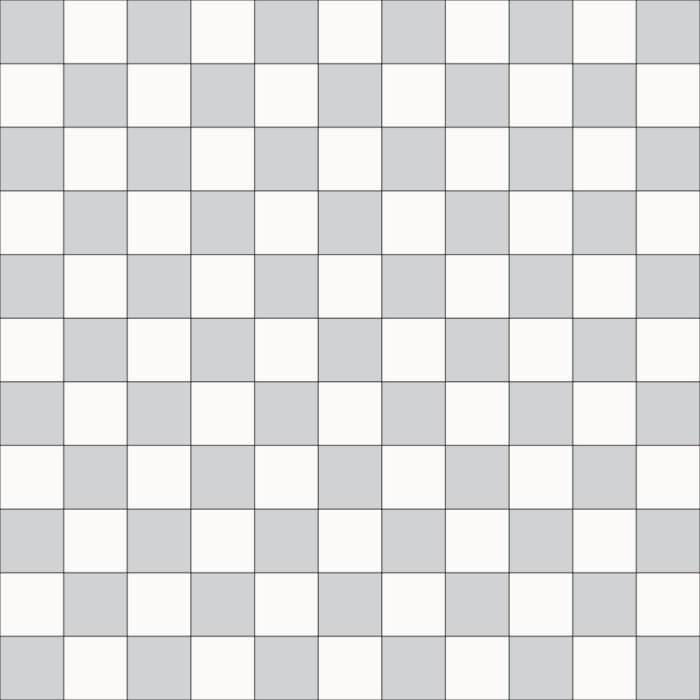
Planning Your Tile Design
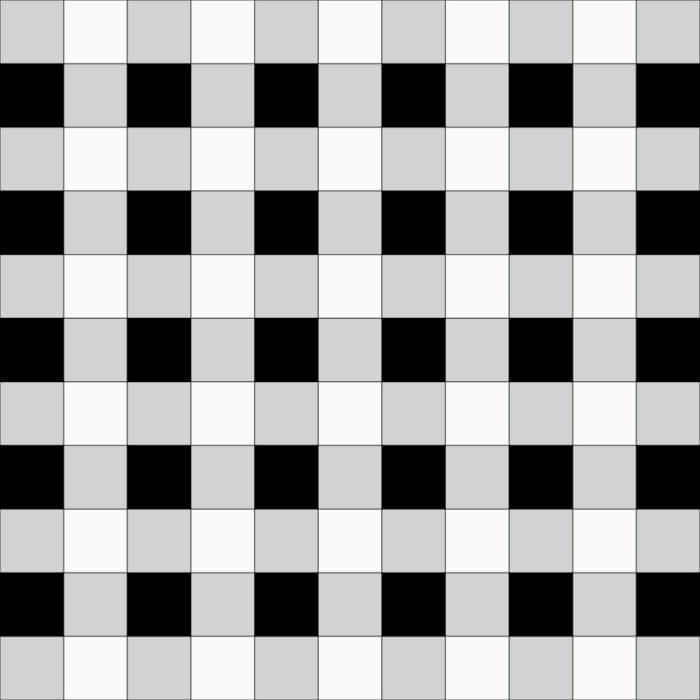
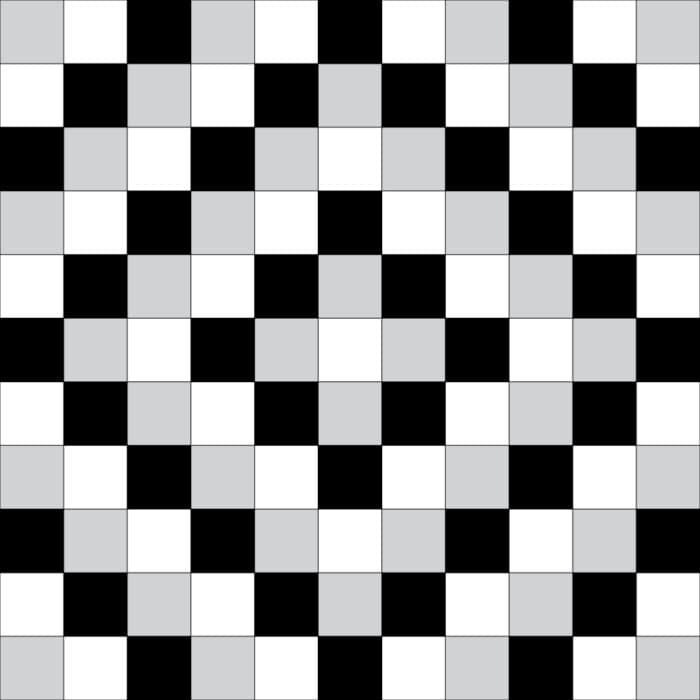
Most floor tiles, especially in the bathroom, tend to be squares. So not only are squares especially easy to cut out (even without a cutting machine), but they also lend themselves to really fun design options!
Play with Patterns
You can most certainly cut all your vinyl tile stickers from one color…especially if your main goal is to simply cover up damaged or unsightly tile.
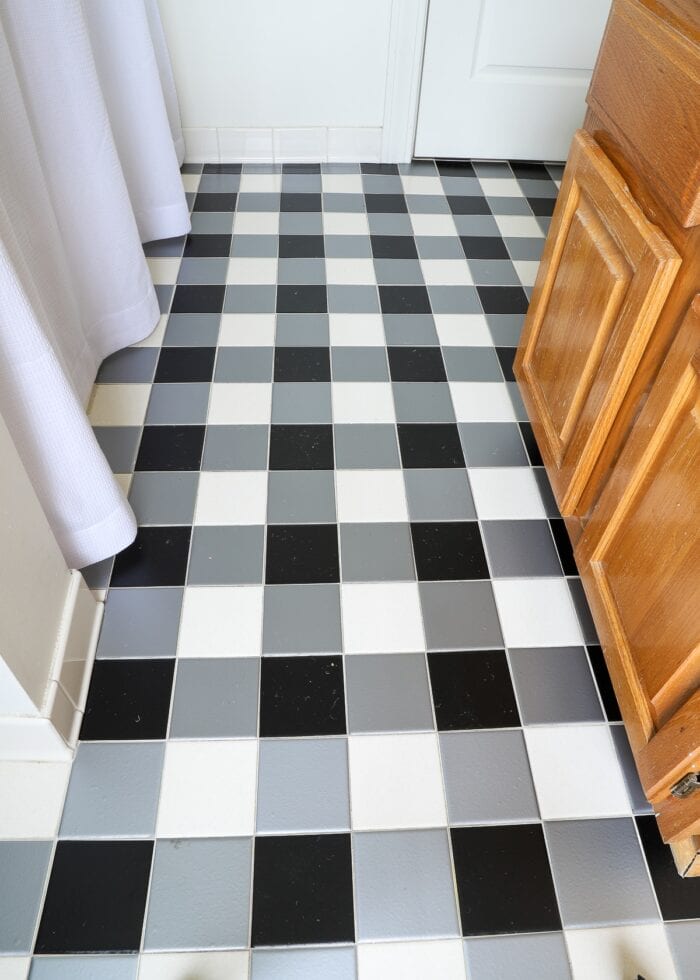
However, squares can also be used to create some fun patterns including checkerboard, buffalo check, stripes, diagonals, or even random “dots.” If you want something really unique, consider checking out quilt patterns using squares for some fun options!

Determine Material Colors and Quantity
Once you determine the design you want on your floor, figure out what colors you need in order to bring it to life. Make sure you check to see if the colors you need are available in adhesive vinyl rolls; and to keep costs down even more, try to incorporate your existing tile color into the pattern (like how I used the existing white tile in my overall black/grey buffalo check design!)
Finally, spend some time calculating how much vinyl you’ll need (of each color) to create the design. You don’t need to be overly precise here; but counting up how many tile stickers you’ll need in each color will help you determine how many rolls to buy!
TIP! To quickly count up tiles, I used a dry erase marker to dot each tile for a certain color ( a pencil could work too). Once I had them counted up, the dots wiped right up!

Video Tutorial
If you’d like to watch this entire floor tile stickers project come together in about 4 minutes, watch below! (Video not loading for you? You can watch it here!)
How to Make DIY Bathroom Tile Stickers
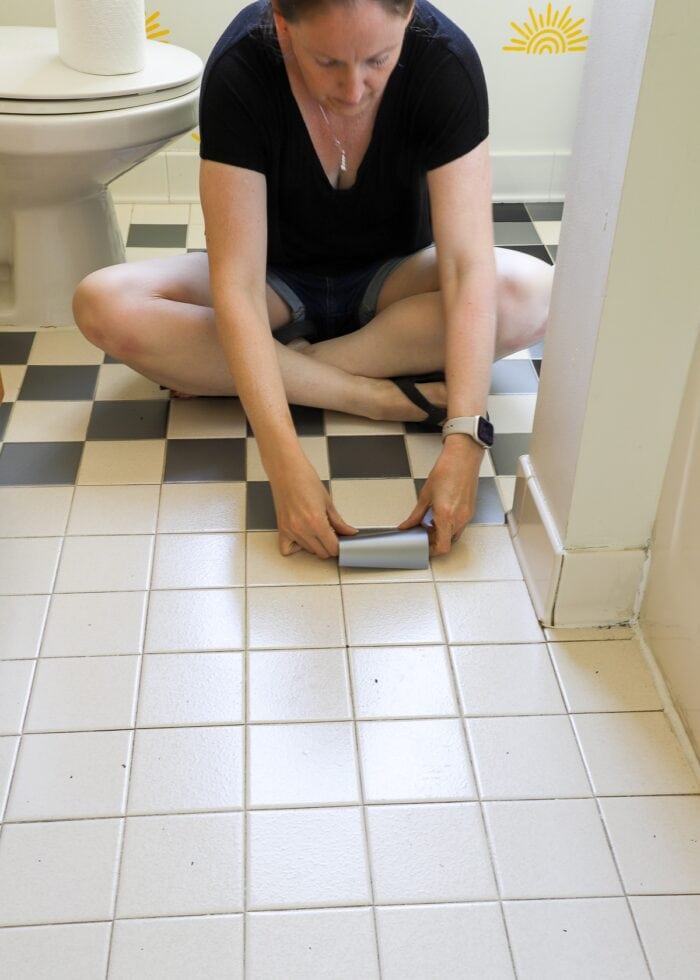
Step 1 – Measure Your Existing Tiles
Start by measuring your existing tiles with a cloth measuring tape (if possible). The cloth tape will allow you to “bend” around the curved edges of the tiles, resulting in the most accurate tile measurement possible. Your goal is to get as precise a measurement as you can so that your tile stickers perfectly cover the tile.
Step 2 – Cut a Practice Sticker
You DO NOT want to cut out feet upon feet of vinyl stickers until you are absolutely sure you have the size just right.
As such, I very much recommend cutting a test sticker (or a few) to ensure you like the “fit” on your tile before moving on. (Full cut instructions are outlined below).
If you are not satisfied with the amount of coverage your test tile sticker provides (either too much or too little), keep adjusting until the size is exactly as you want it!
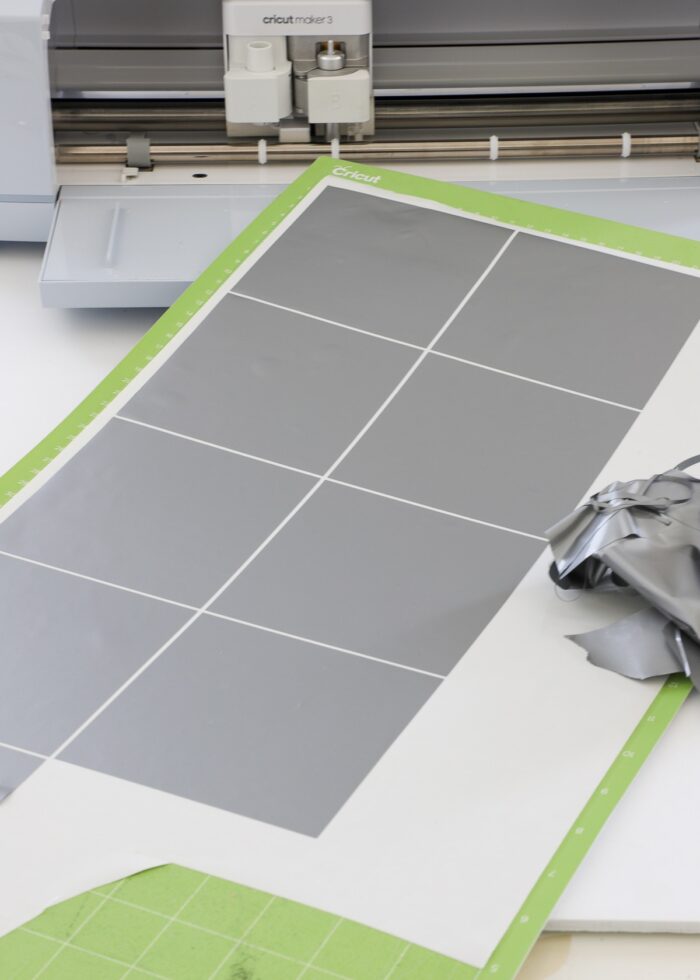
Step 3 – Cut Out Vinyl Tile Stickers
Once you have finalized the exact size of your tile sticker, it’s time to cut out lots (and lots) more from the vinyl rolls.
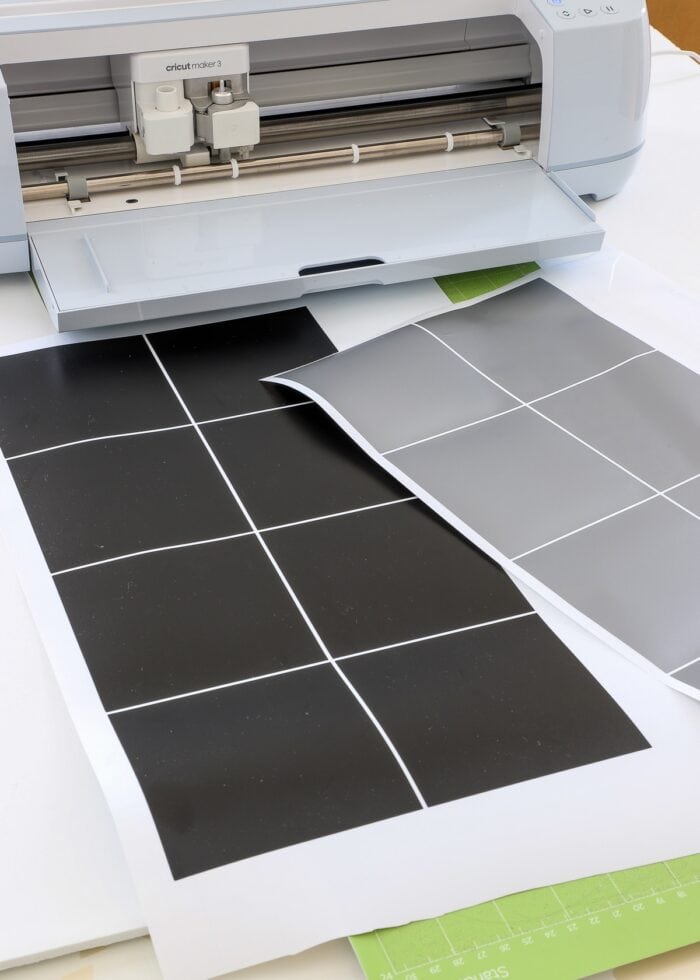
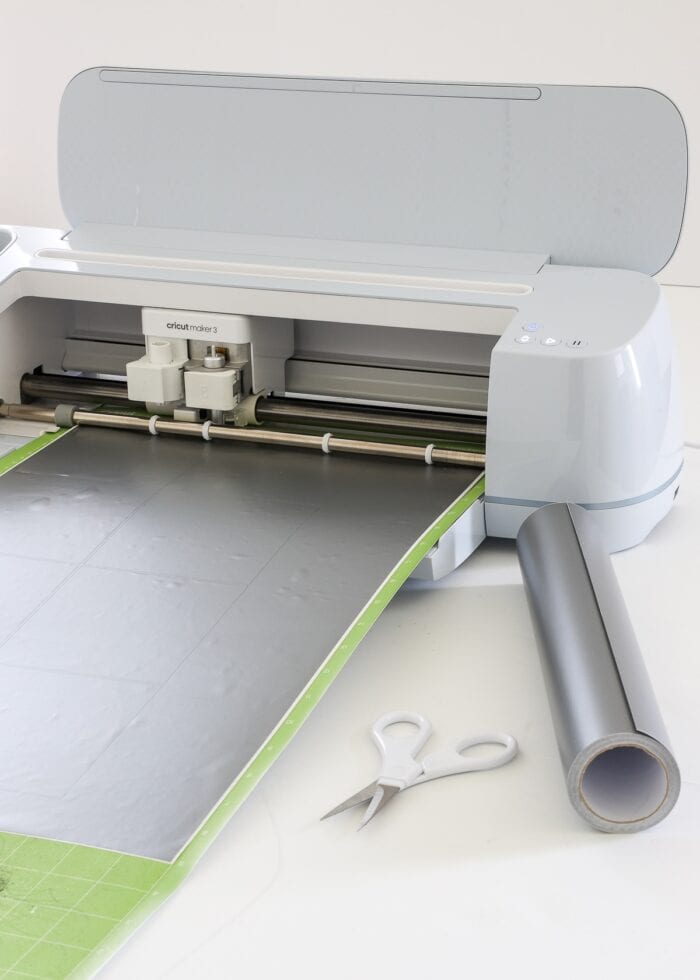
Using an E-Cutter
If you are using an electronic cutting machine, such as a Cricut or Silhouette:
- Place a square on the design canvas and size it to match the exact measurements you determined in the testing step.
- Duplicate and/or re-color the square as many times as necessary for your specific tile pattern.
- Cut out the squares with your cutting machine on the “Vinyl” setting.
- Weed away excess vinyl from around all the squares.
TIP! You likely won’t need to re-create your entire tile floor design on the computer screen. There’s a good chance you can just cut a full sheet of squares, use them up, and then re-cut more as needed.
Using a Paper Trimmer
If you don’t own an e-cutter machine, you can still do this project…it will just take you a bit longer to cut all the squares by hand!
- Load the short end of the vinyl roll (12″ wide, typically) into a paper trimmer.
- Slice a strip of vinyl in the same dimension as your final test tile.
- Rotate the slice 90 degrees and cut again at the same measurement.
- Repeat over and over as you work your way down the full roll of vinyl.
TIP! Although you might be tempted to use a scissors with the the printed grid on the back of the vinyl, I do NOT recommend it. It is VERY difficult to cut perfectly straight lines by hand, and those imperfections will be VERY noticeable once you get the stickers down on the floor. Investing in an inexpensive paper trimmer will not only make this project quicker, but your final results will be much better. If you don’t have a paper trimmer, a rotary cutter and quilting ruler can also give you decent results.
Step 4 – Clean Bathroom Floor
How well your tile stickers stick and stay put will greatly depend on how clean your bathroom floor is. In general, you want to get any dust, dirt, sticky residue, or other debris up off the floors so the tile has great adhesion.
Want to save this post?
If you’re planning on doing all your tile stickers at one time, go ahead and mop the entire floor with your preferred cleaner and let it fully dry before starting.
Alternatively, work in sections by wiping down a set of tiles, letting them dry, and then proceeding with placing your stickers. Just make sure you don’t get carried away placing stickers before you clean each new section of floor!
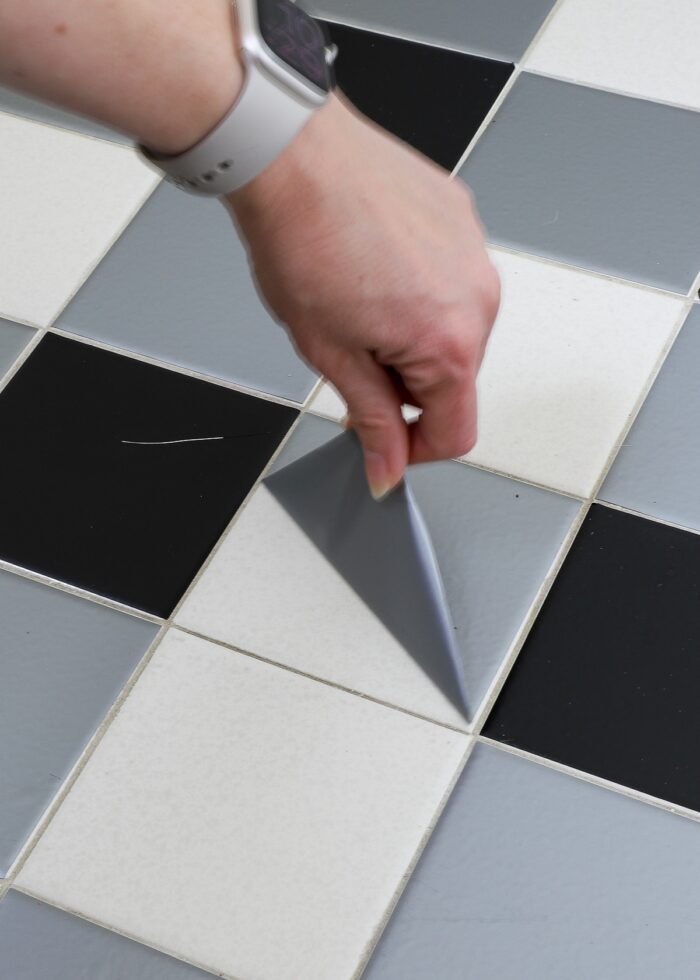
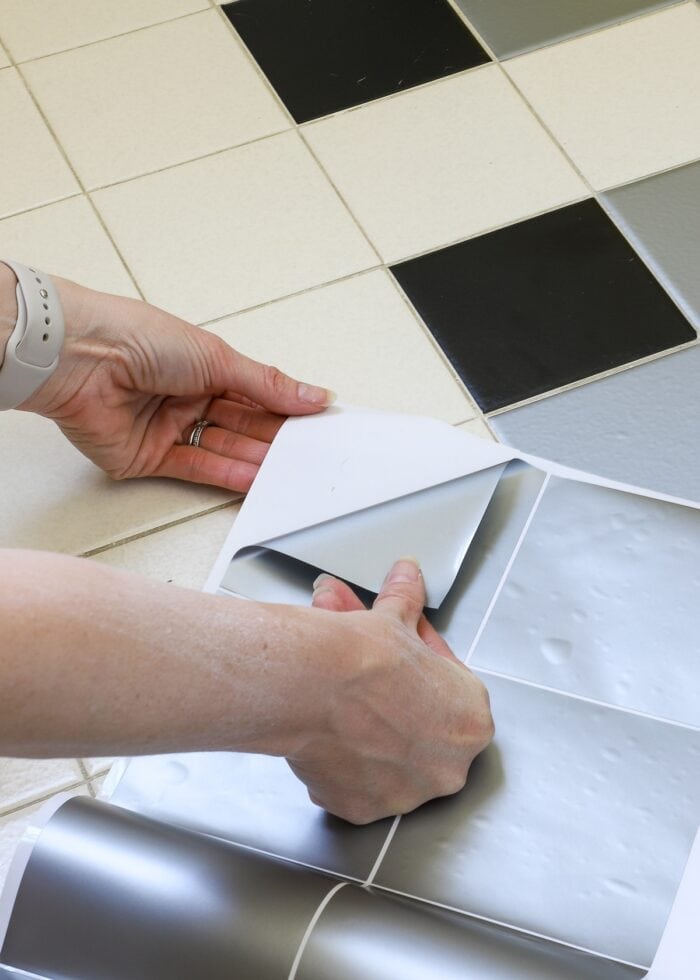
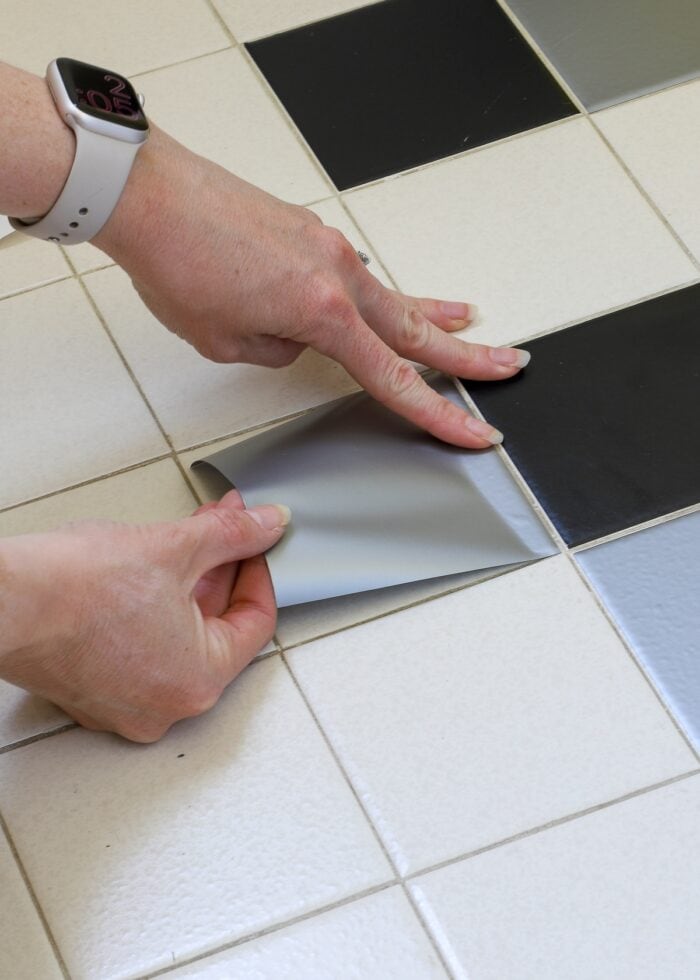
Step 5 – Peel and Stick!
Next, all you have to do is literally peel the squares off the white paper backing and lay them down onto your tiles. Make sure you pay attention to your pattern as you go, and address any crooked stickers or bubbles right away.
I was actually very pleasantly surprised how smoothly these vinyl tile stickers went down. They laid down straight the first time (almost every time), and I rarely encountered air bubbles I couldn’t smooth out with my fingers. That said, if your tile stickers are large (bigger than 8″), you might need to use transfer paper if you’re having trouble placing them straight or getting them down bubble-free.
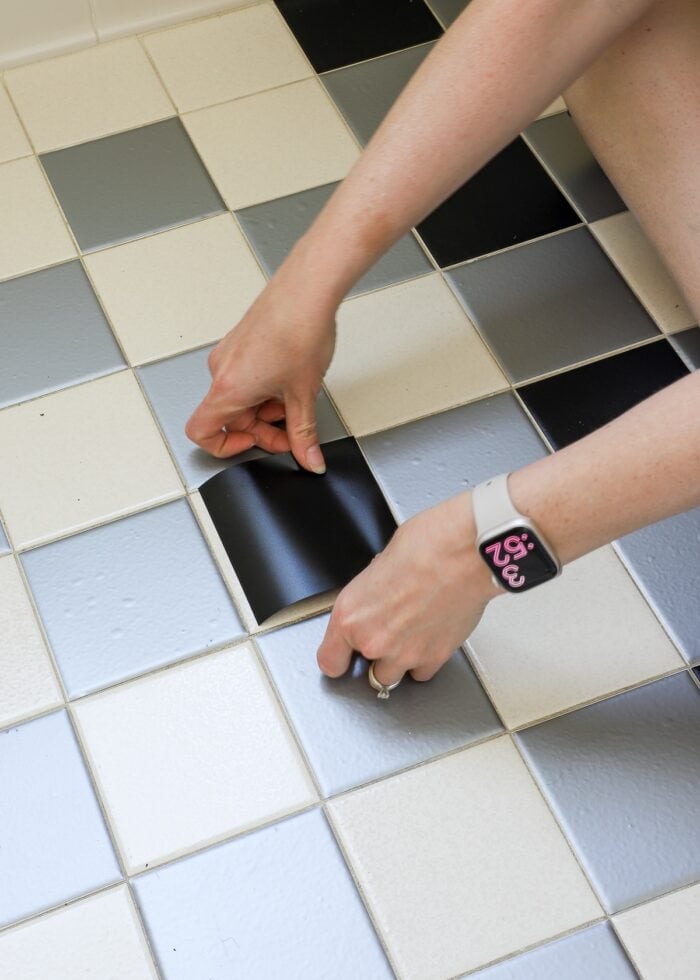
To keep your momentum, I recommend placing all your “full tile” decals first, since they’ll require no trimming. You’ll get a lot of your floor covered fast, which is both motivating and gratifying!
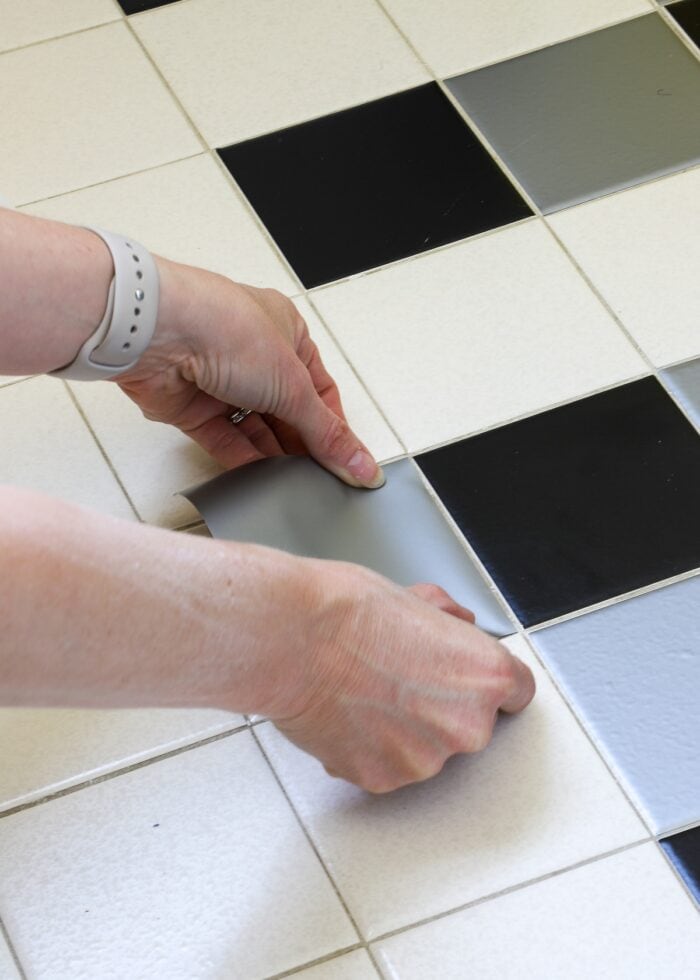
TIP! I found it easiest to lay all one color first (in my case, grey), and then go back and lay the second color. You’ll better keep your pattern correct and won’t waste time going back-and-forth between sticker sheets.
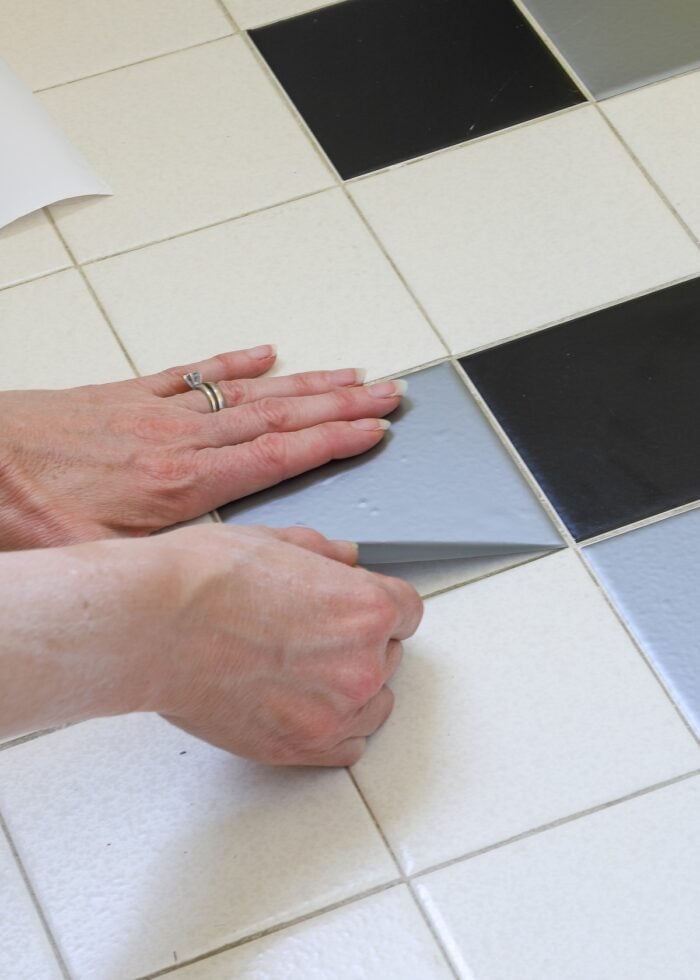
Step 6 – Address the Edges
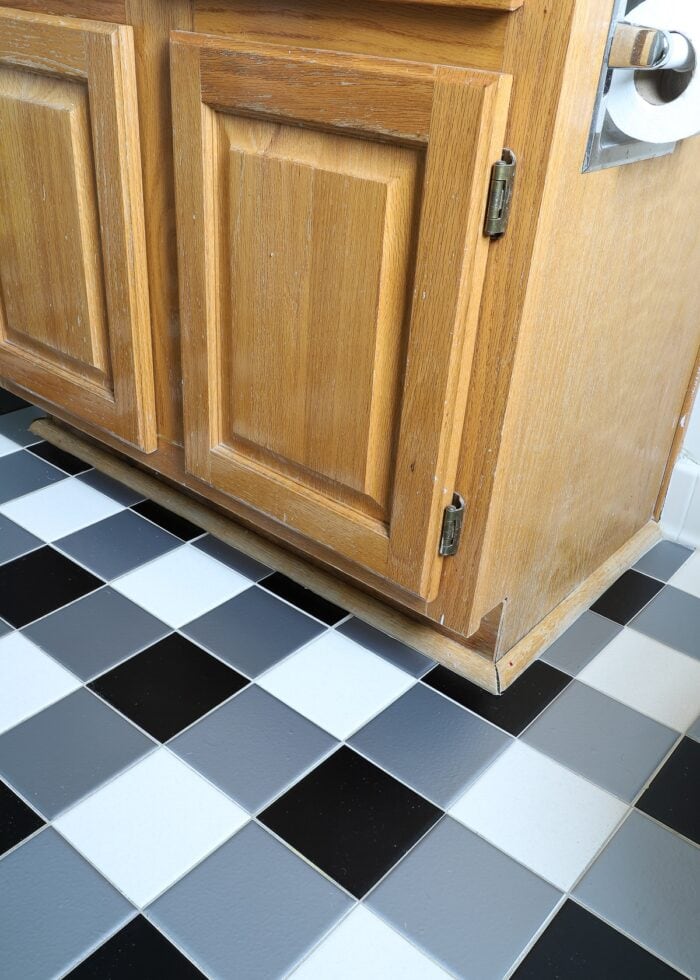
Once you have all the “full tiles” covered, you will likely need to go back around the edge of the bathroom floor and address any “border” tiles or awkward areas.
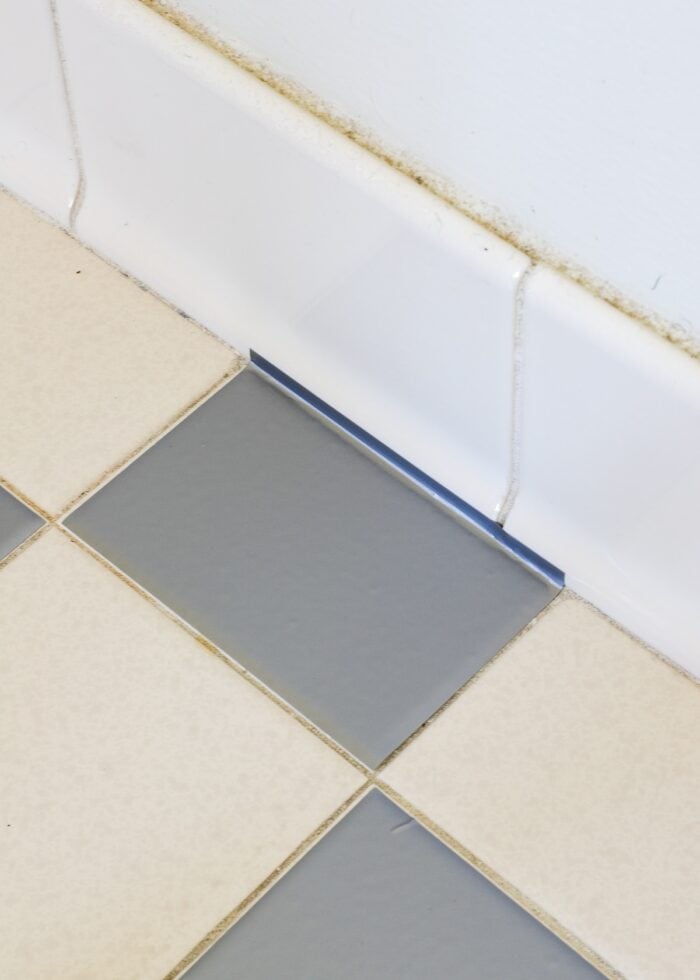
Unless the existing tiles were applied very uniformly in your bathroom, this might very well be a tile-by-tile process, where you measure, trim down, and place each sticker individually. I was able to run my favorite Craft Knife along the grout lines to quickly trim down each sticker to the right size!
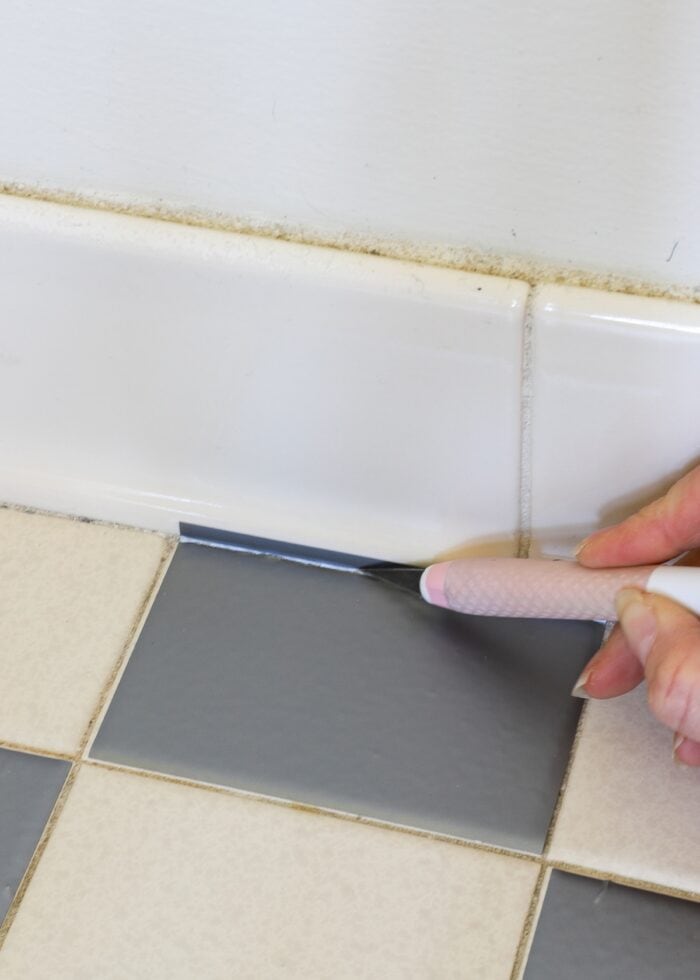

Finishing off the edges (especially if they are incomplete tiles) can take some time and patience, but it is exactly what will give your floor a polished, finished appearance!
Step 7 – Enjoy Your “New” Floors
Once every tile has the correct color sticker, your project is done! Load back in your space (as needed) and enjoy your “new” floors!
FAQs About Using Vinyl Bathroom Tile Stickers
Will the Vinyl Tile Stickers Peel Up?
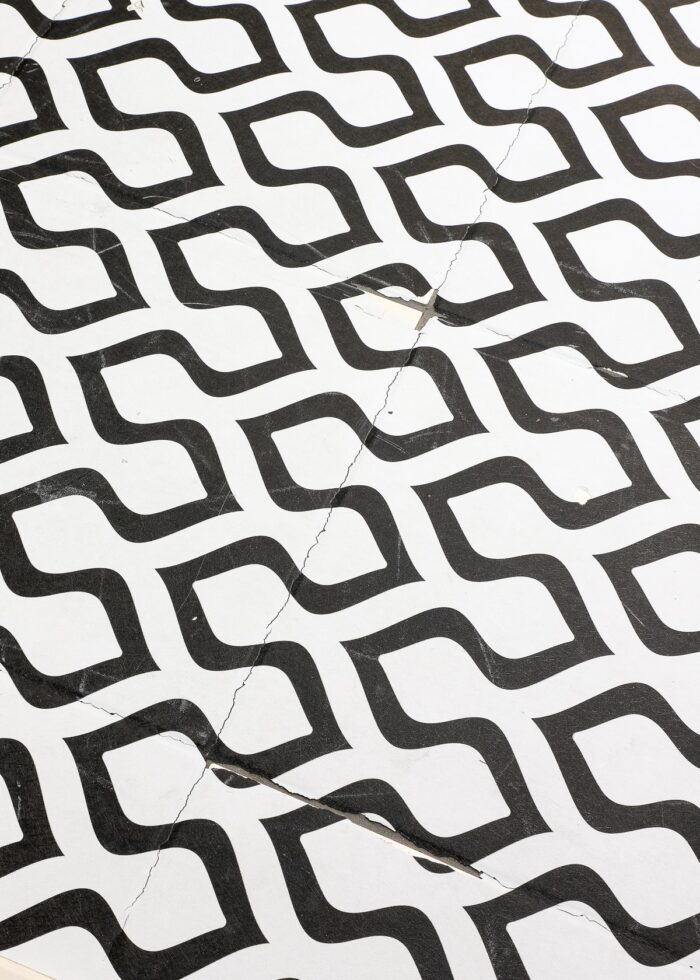
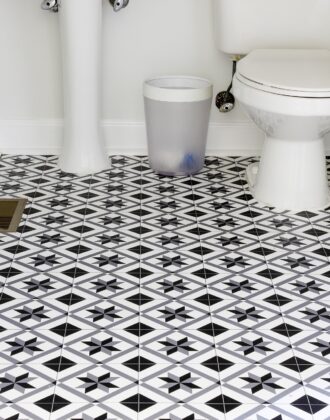
As much as I like to just knock out a project while I’ve got the supplies out, I am getting better at “testing” my ideas before I do a full execution. As such, I “tiled” this 2′ by 3′ tile section of floor back in October. I purposely didn’t complete the entire bathroom floor because I wanted to see how durable the stickers were (i.e., would they peel up with foot traffic, steam, water, etc?)
In the first 4+ months, I saw no visible wear-and-tear on any of the bathroom tile stickers. Only in the last months so, I noticed a few corners peeling up, as well as a scratch in one sticker (no idea how that got there!)
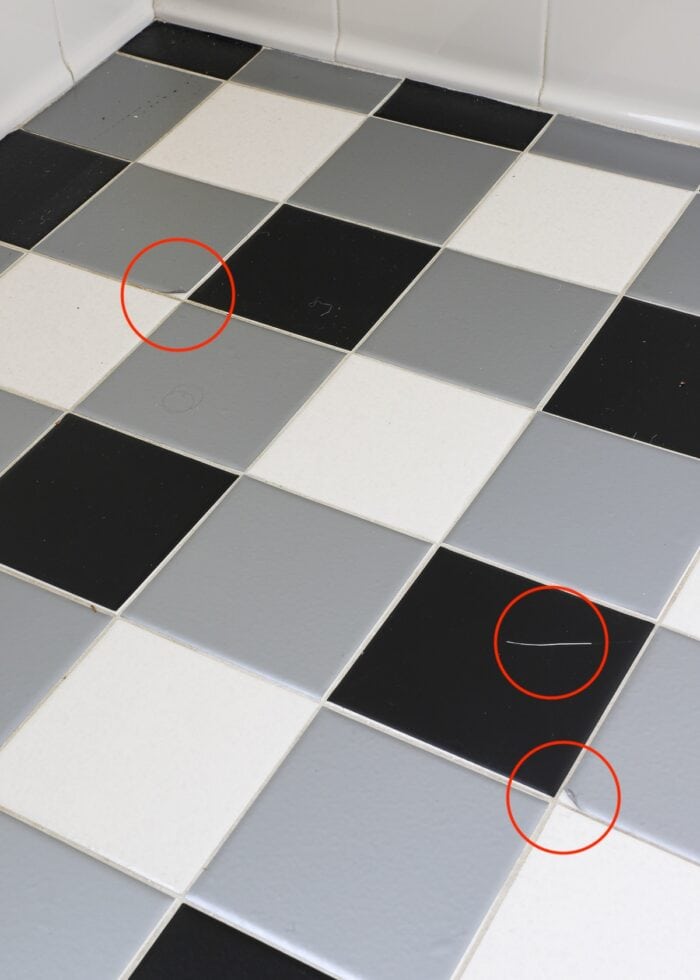
Since this was the only evidence of “wear and tear” in a full 6 months, I confidently finished the bathroom. These imperfections are hardly noticeable, and if any stickers really become peeled up, they are quick and easy to replace!
TIP! While you’re cutting stickers, go ahead and cut some extras to keep on hand in case repairs are needed down the road. You’ll be much more inclined to fix problems if the stickers are already cut and waiting for you! I have a roll of each color waiting in the vanity cabinet.
Are the Vinyl Tile Stickers Waterproof?
Yep! Vinyl, by its nature, is water resistant. So drops of water will not get absorbed and can be wiped right up (or just evaporate).
If significant water gets under the vinyl tile stickers, it can lead to reduced overall adhesion of the sticker itself. In this case, I’d just peel it up and place a new one. If certain areas continue to get “water logged,” consider placing a bath mat or runner in that area of the floor.
Are the Vinyl Tile Stickers Slippery?
While I wouldn’t say the vinyl provides “non-slip traction,” they are far less slippery than the bare porcelain tiles!
Can you Put Tile Stickers Over Tile?
Yep! That’s the whole beauty of this project. No demo, no mess. Just clean the tiles and place the sticker right on top!
Can You Use Tile Stickers in the Shower?
Honestly, I don’t see why not. As mentioned above, standard craft vinyl holds up beautifully to water. And when placed on the shower wall, tile stickers won’t have the added problem of foot traffic causing them to peel up, tear, or wrinkle.
Hmmm…maybe that sounds like another project I need to try!
How Much Does the DIY Method Cost By Comparison?
To do this floor treatment using professionally-made tile stickers from a popular retail site, it would have cost me close to $800! By comparison, I spent about $50 on 3 rolls of vinyl.
Now admittedly, standard adhesive craft vinyl doesn’t have the same UV-protection, super strong adhesive, and durability that the commercially-made tile stickers feature. But for such a short-term transformation, I’d take the cost savings over the longevity any day!
How Long Did Laying the Stickers Take?
This project is surprisingly fast going. I would estimate if I had done everything all at once (cutting, laying, edging), it would have taken no more than 3 hours total (obviously depending on how big your floor is). I tried to cut squares while I was placing them, but the machine cuts faster than I could stick. In hindsight, I would have just cut all the stickers at once and then placed everything at once!
Are There Bubbles Under the Vinyl Stickers?
On some, yes! But honestly, they aren’t really visible when you’re moving about the space at all. Could I have stressed about getting out every single bubble? Sure. But it was more important to me to get this project done!
Do You Wear Shoes In the Bathroom?
We do! While I’m not sure I’d go dancing all over the floor in high-tread boots, I’ve seen no issue with our shoes and these tile stickers!
What Else Are Tile Stickers Good For?
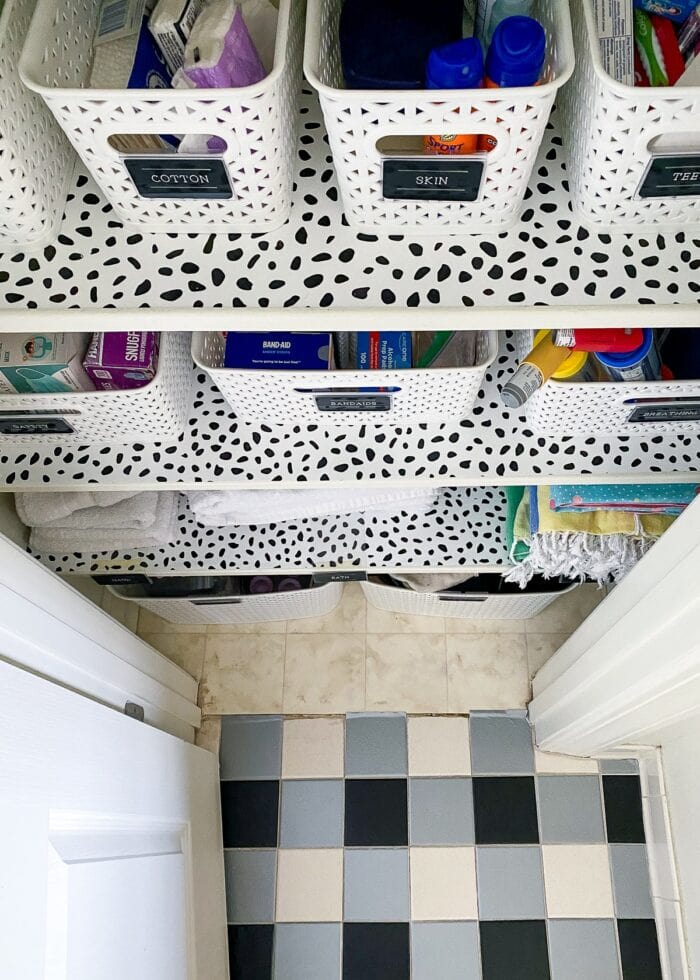
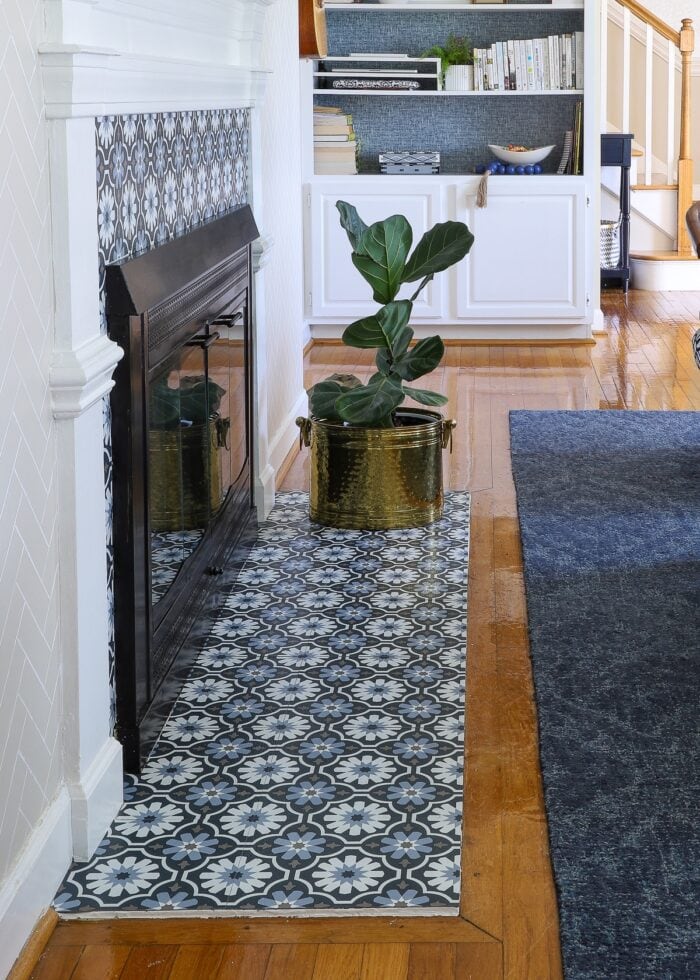
Vinyl tile stickers can also be used in other areas around the house including on the kitchen backsplash, any tile floor, stair risers, and even a fireplace surround…which is actually the next tile sticker project I’m going to show you! Stay tuned!
Other Great Rental Floor Solutions
Ugly or damaged rental floors are tricky to cover up. If this project isn't right for your floor, here are some other solutions to check out:
- How to Cover Ugly Floors with a Vinyl Floor Mat
- How to Make Your Own (Cheap) Bathroom Tile Stickers
- Can You Put Peel and Stick Wallpaper on the Floor?
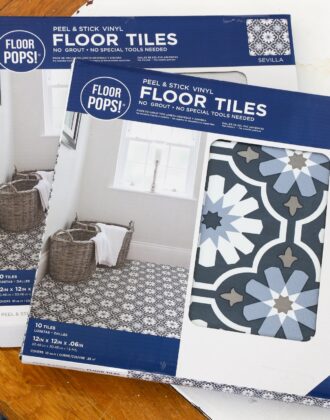
- Can (& Should) You Use Floor Pops! Floor Tiles In a Rental?
- What You Need to Know About Using Peel and Stick Tiles In a Rental
- The Rugs We Purchased for Our New Home (& Why)
- A Rug Under the Kitchen Table | Practical Ideas for Making It Work
- Did You Know You Can Re-Size Your Rugs?
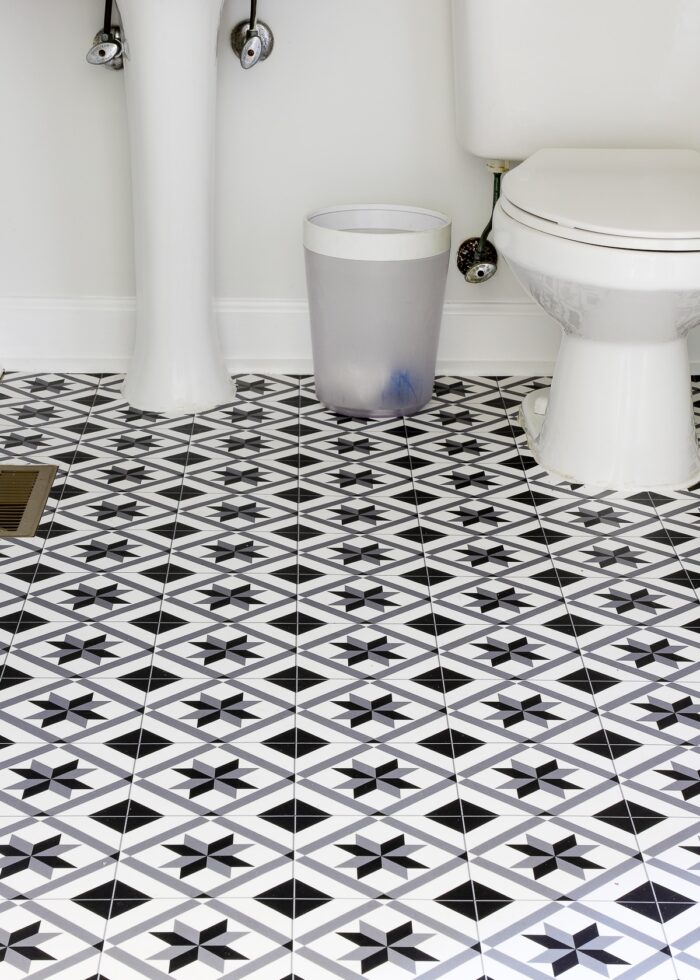
Without a doubt, every time I walk past this bathroom, I get all giddy. I’m a total sucker for a good pattern on the floor, and this easy DIY tile project definitely packs a visual punch at a might fine price tag!
If you have ugly or dated tile in your home and you’re up for a bit of a project, I definitely recommend giving this a try. While I can’t yet speak to the long-term viability of these tile stickers, the visual rewards in the meantime are already more than worth it!
Megan

9 Comments on “How to Make Your Own (Cheap) Bathroom Tile Stickers”
Thats a great idea. My question is how well and for long will they stay on with foot traffic, shower or bath. I am afraid it would not stay on long.
Hi Darlene!
I address at the bottom of the post in the FAQ section. After about 4 months, we had minimal curling/peeling on a test section I did…so I proceeded with the whole floor. While I don’t expect it at all to be a “permanent” solution, I’m optimistic they’ll work out for the next year+ that we will live here 🙂
Thanks for stopping by today!Megan
Not something I would do as I’m incredibly lazy /other focused – but does look amazing
I am in awe and trying to figure out where to use this hack! Absolutely brilliant and I suspect this will be hugely popular everywhere including Pinterest-well done!!!
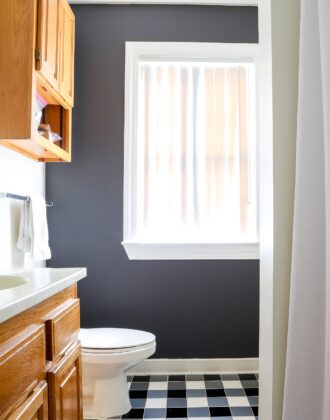
I got to the picture of you sitting criss-cross applesauce and my knees hurt. That floor looks amazing. I am constantly amazed about your thinking out of the box methods that get you a gorgeous house. Thanks for sharing the how to. I may have to try this in my shower. We have 80’s pink roses scattered all over the walls. And after looking at them for the last decade, I think it is time to cover those gems up!
Looks beautiful,I would love todo this to my outdated floor butI have tiny tiled floors and I haven’t figured out how to do that yet.
I’m wondering if this would work on an old ugly linoleum floor. I have hated my bathroom floor since I bought my house, but I haven’t renovated my bathroom yet. I put in a powder room on my first floor, and I have other things I want to do, so my upstairs bathroom keeps getting put off. I love this idea, and I really want to try it! I might just stick some vinyl in the middle of the floor and see how it holds up! If I go this route, may use permanent vinyl, since I own my house and will end up ripping up the whole floor eventually anyway.
This is amazing! My son’s bathroom is an original mint green beauty, but he absolutely hates anything vintage, or anything green. I’m looking for alternatives to make him happy until college. I’m thinking of leaving the floor and shower green, but covering the wall tile to reduce its offensiveness. 😂
My only concern is how removable are these? I don’t mind cleaning some sticky residue, I just don’t want to ruin my original tile.
How do you mop the floors without getting them too wet? Should you run a dry mop after you mop the floor?