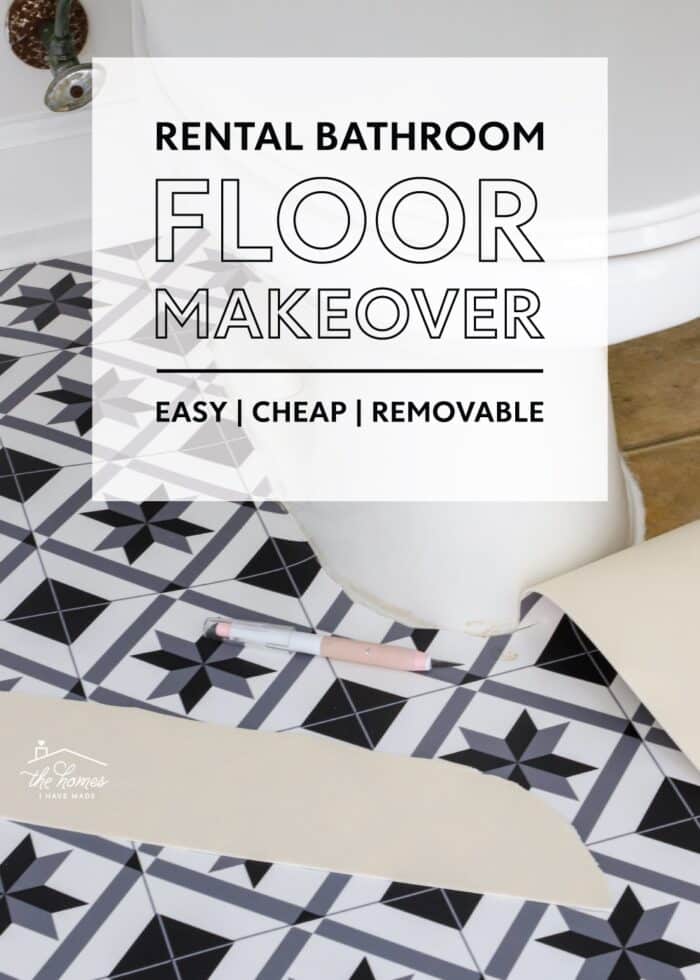
How to Cover Ugly Rental Bathroom Floors with a Vinyl Mat
Without a doubt, covering up ugly flooring is one of the more challenging rental problems. Beyond just finding a damage-free, removable solution…because floors get so much wear-and-tear, anything you put down has to be incredibly durable too. I’ve had mixed results using a variety of peel-and-stick products, so in our downstairs rental bathroom, I tried a different approach: a vinyl floor mat. Usually used for foyers and kitchens, this easy-to-cut, super durable, and quite stylish solution has yielded AMAZING results. Let me break down this awesome idea for covering up ugly rental floors!
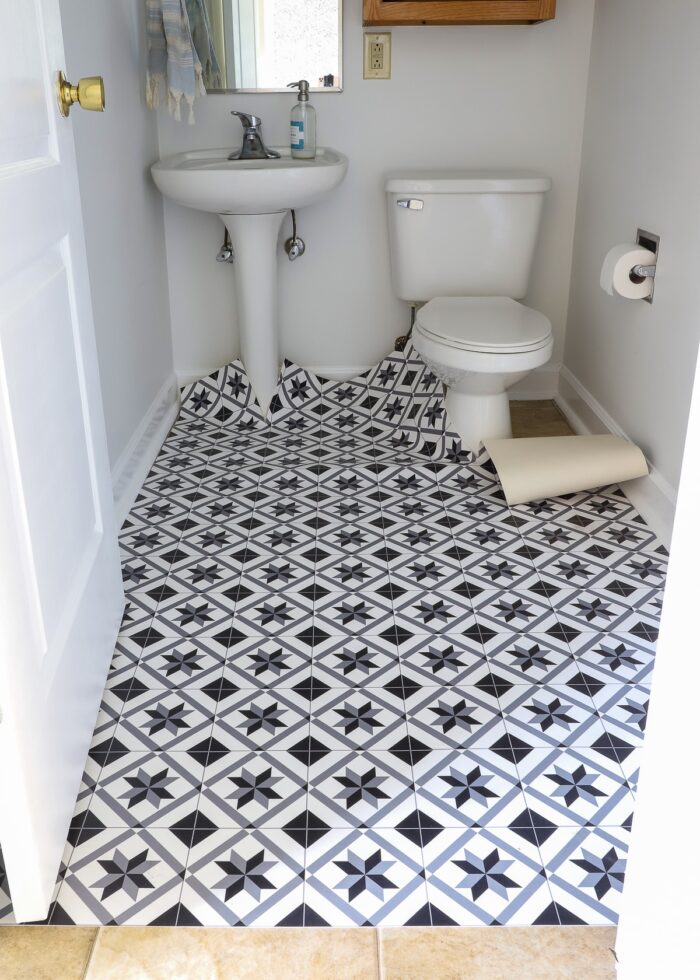
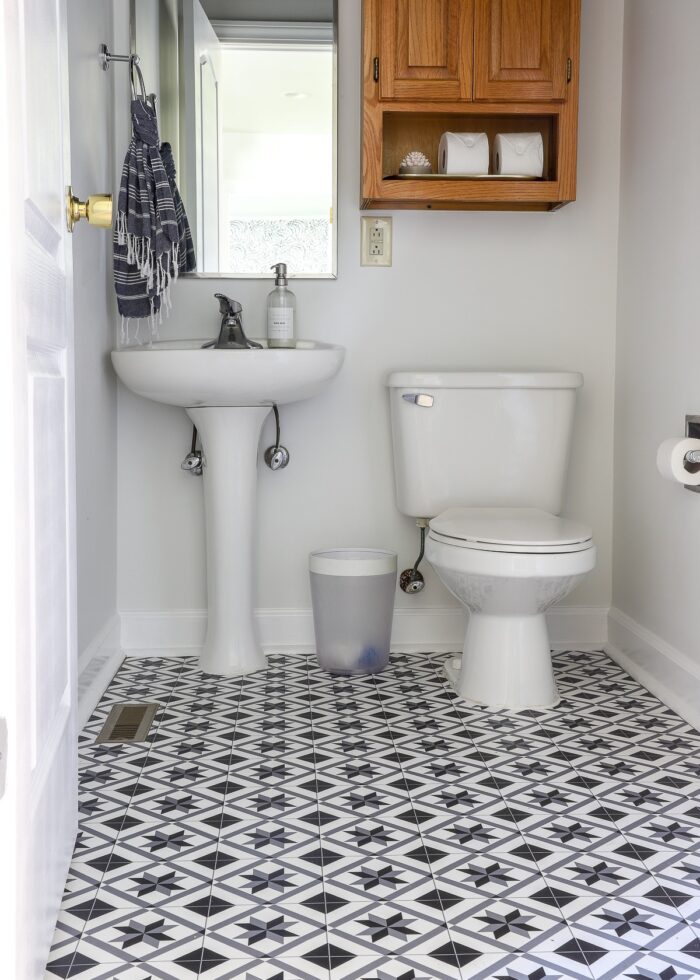
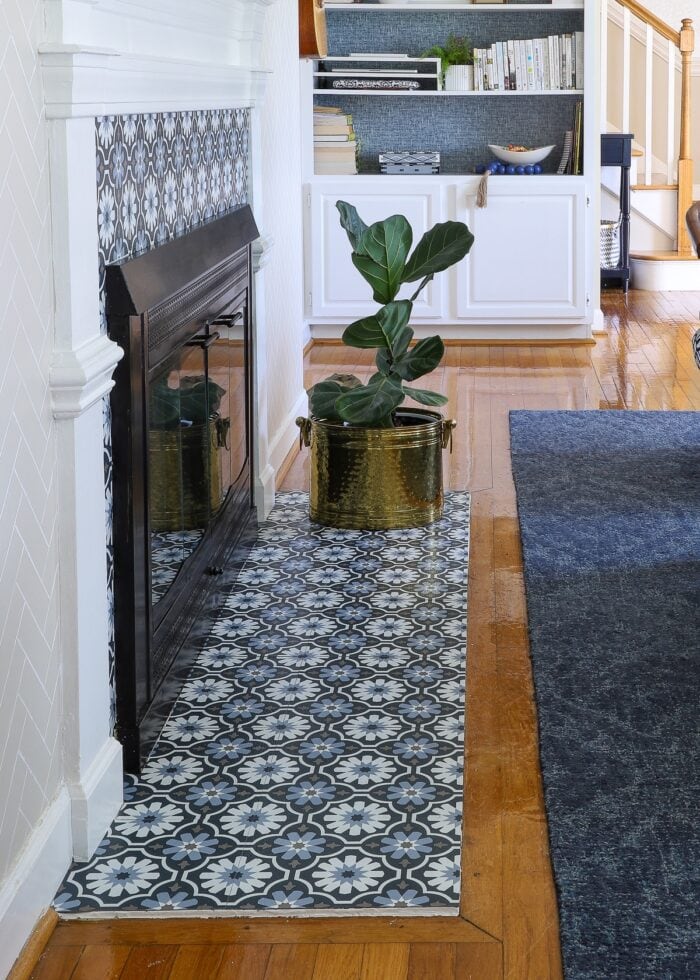
Our Rental Bathroom | Before & After
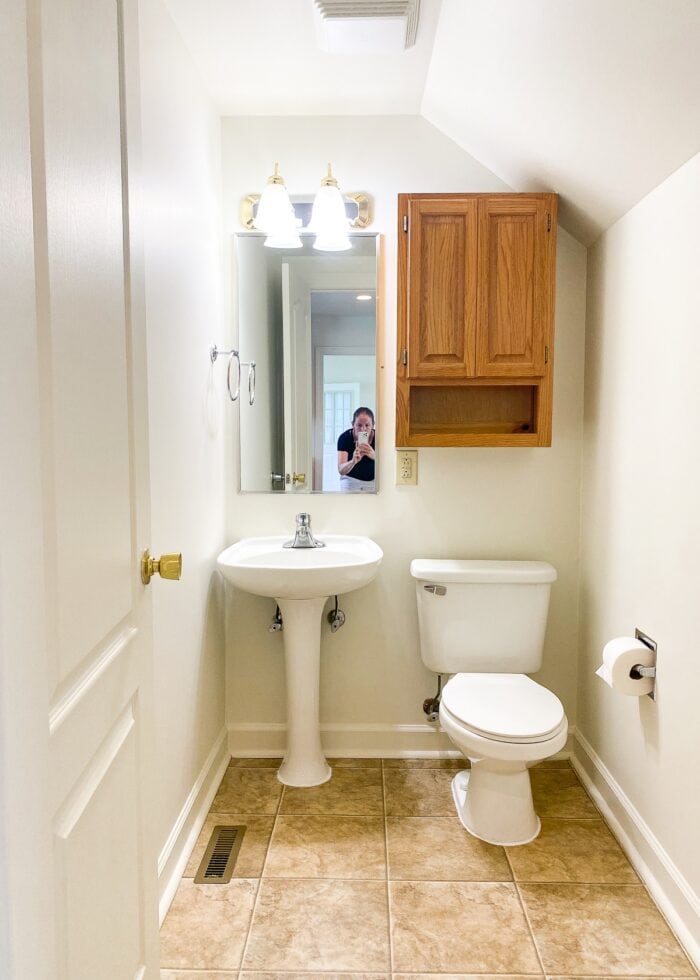
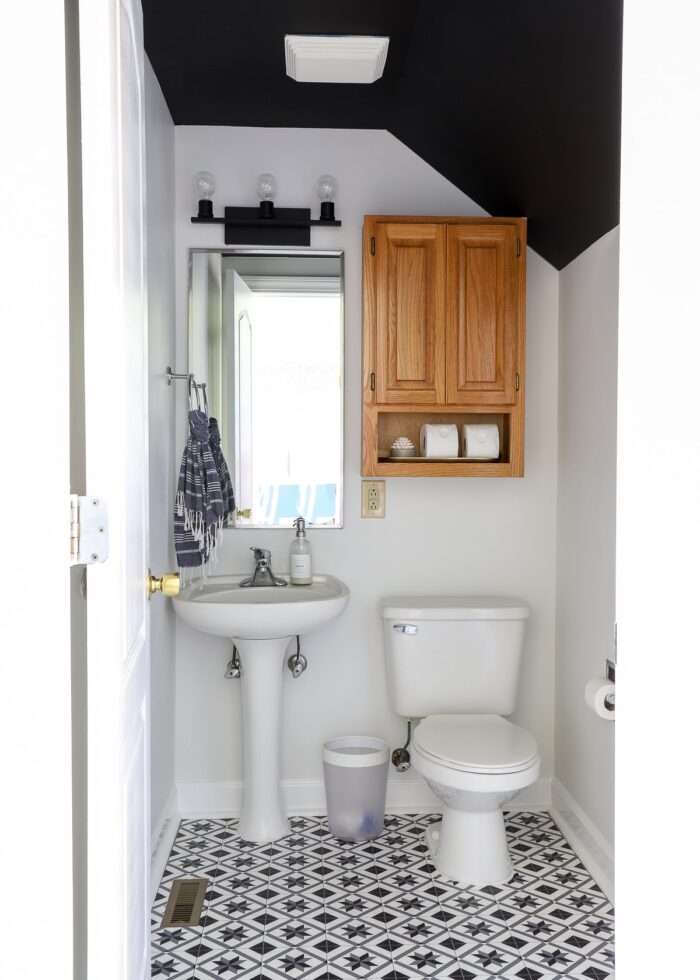
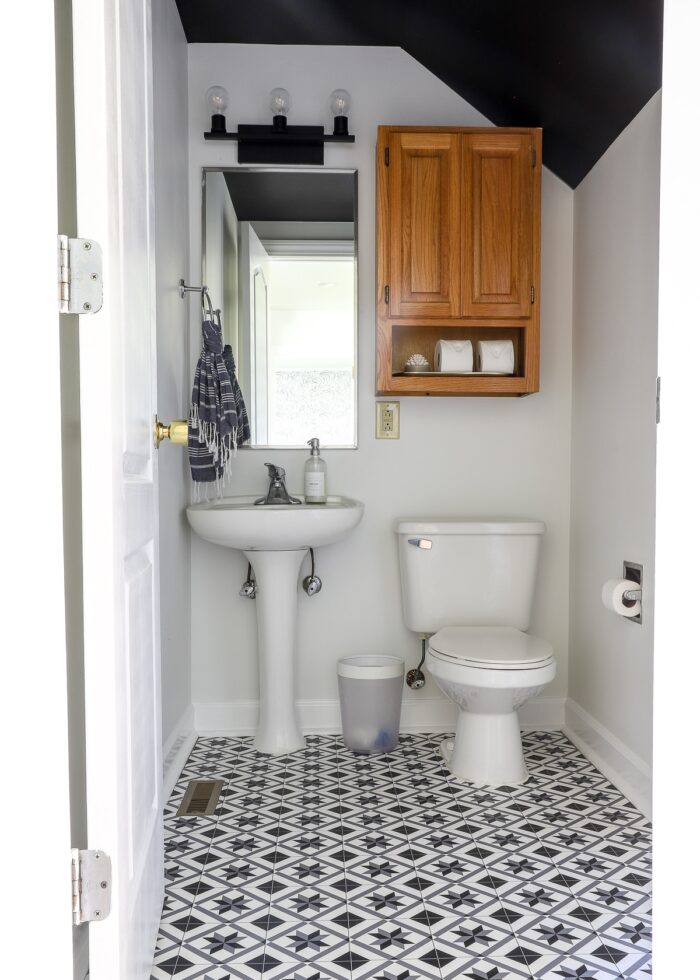
Our downstairs powder room has proven quite the challenge for me. Not only does it sit directly off the kitchen and is in sightline of the foyer, kitchen, and dining room; but its awkward size, dated fixtures, and sloped ceiling had me feeling puzzled and frustrated.
After painting the walls and trim a true white and the ceiling a powder blue, I wasn’t quite loving where the bathroom was headed.
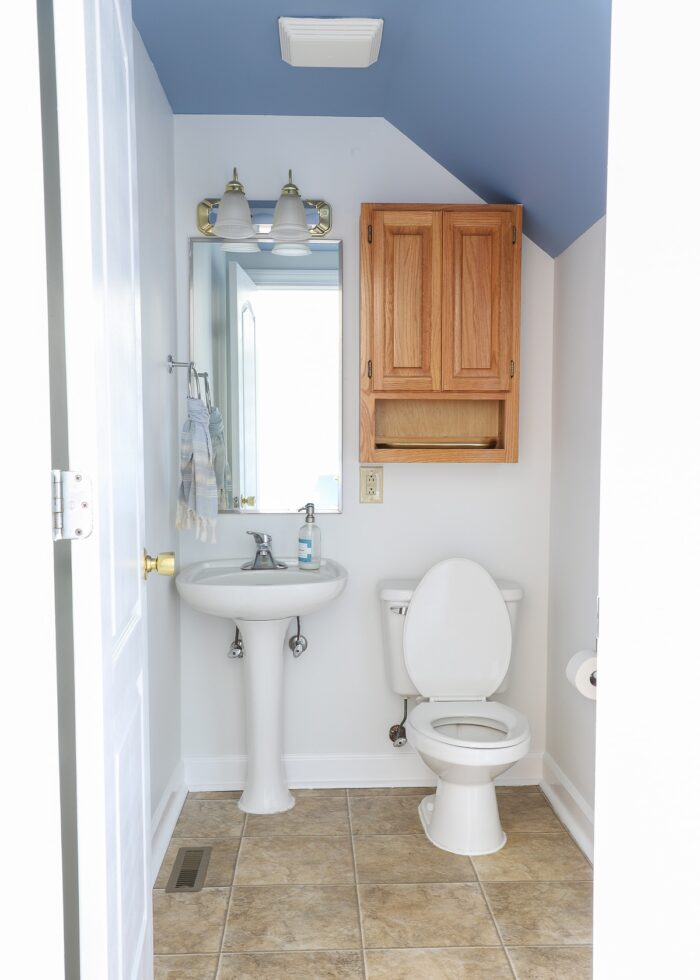
I toyed with the idea of putting a fun wallpaper on the ceiling (of course), but I couldn’t find anything that made sense in the context of the bathroom itself and the whole downstairs. But feeling like the bathroom needed something to wake it up, I turned my attention to the floor instead.
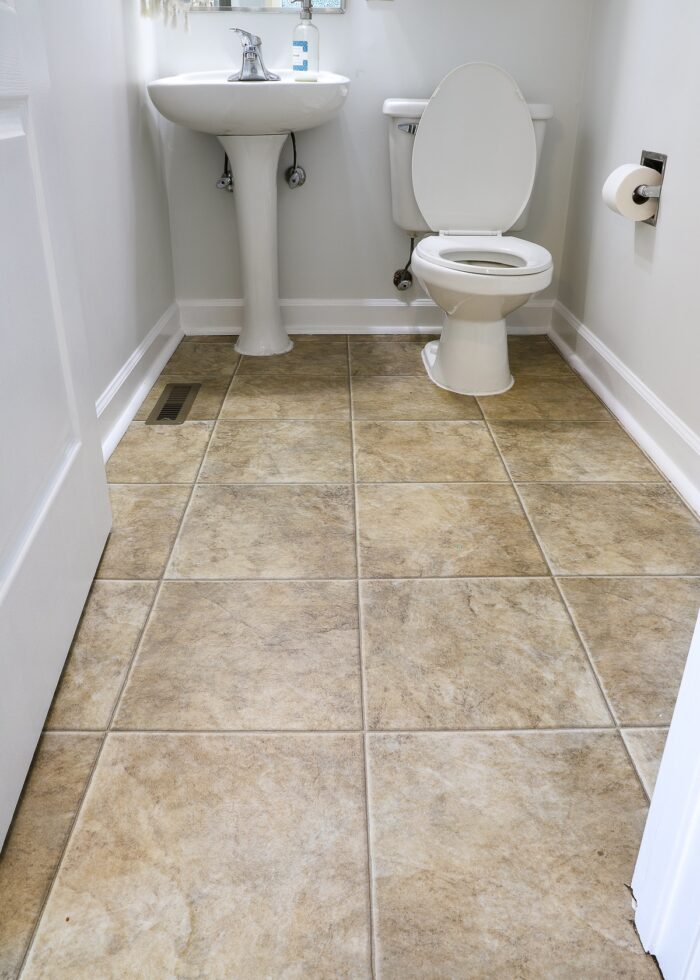
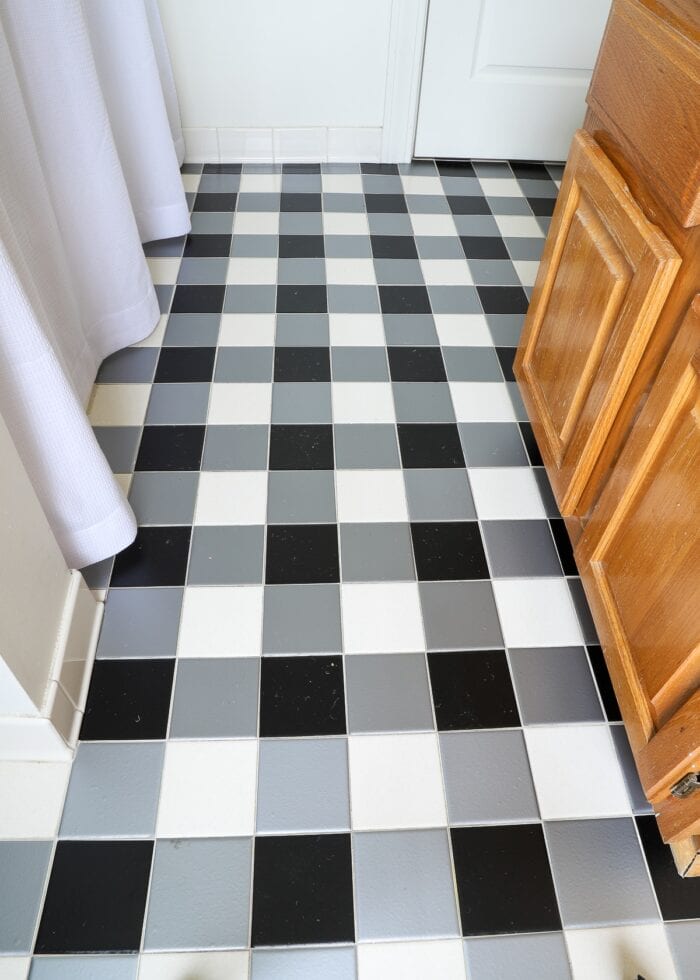
Currently covered in ugly brown “tile” vinyl flooring, I loved the idea of adding a fresh pattern to the floor. But I didn’t want to use wallpaper again (see my first experience here: Can You Put Peel and Stick Wallpaper on the Floor?), and I wasn’t convinced my latest peek and stick tile decals would work on the laminate flooring.
Then, when I was at my neighbor’s house, I noticed she had a very thin, patterned, totally wipeable “mat” under her kitchen table for their pets, dirt, spills, kids, etc.
Intrigued, I asked her what it was and she told me it was a “vinyl floor mat.” My eyes were suddenly open to a whole new product I’d never seen, used, or considered before!
After doing a bunch of research and comparing brands, sizes, patterns, and costs, I ultimately determined using a vinyl floor mat to cover the entire bathroom floor was indeed my best option. Take a look!
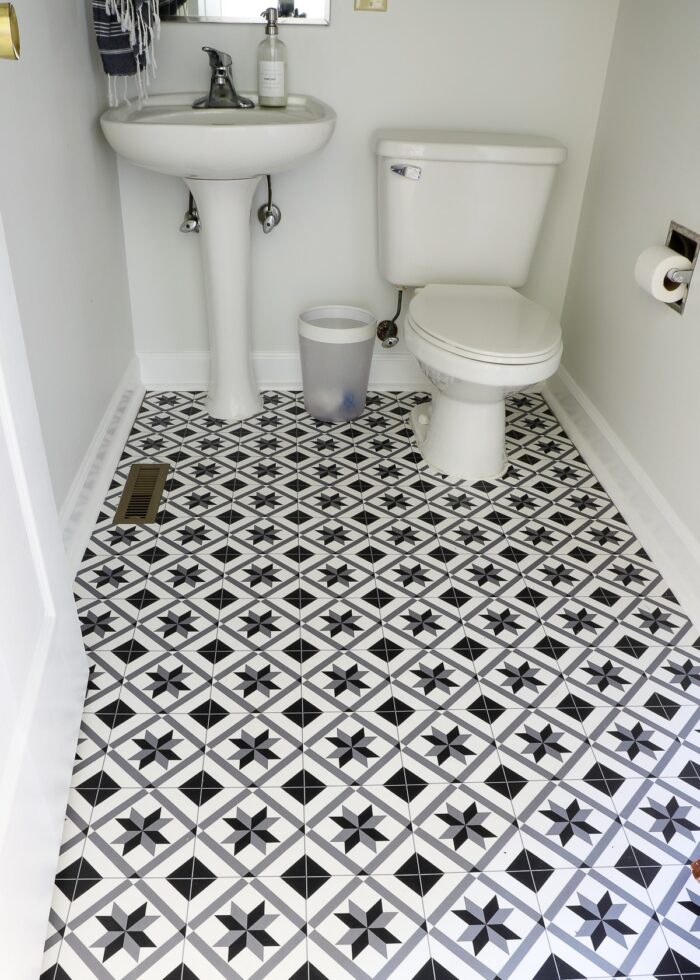
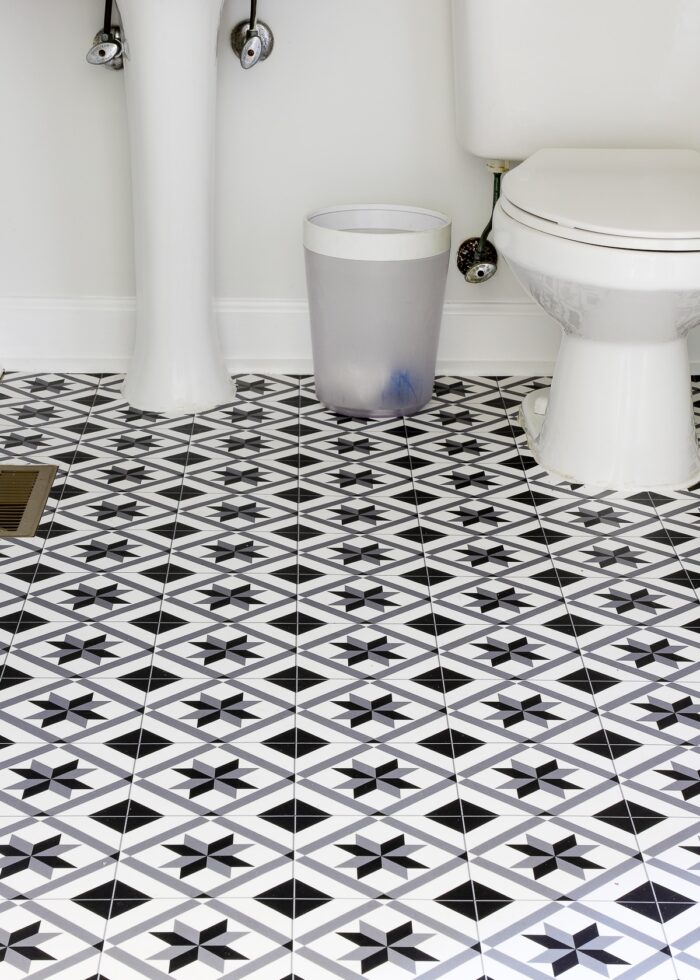
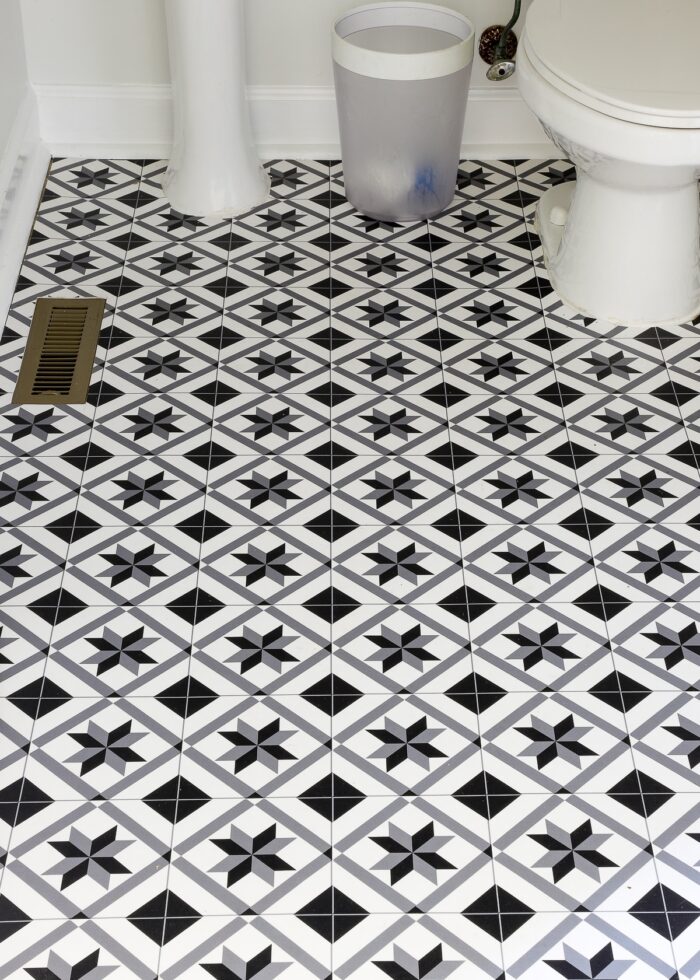
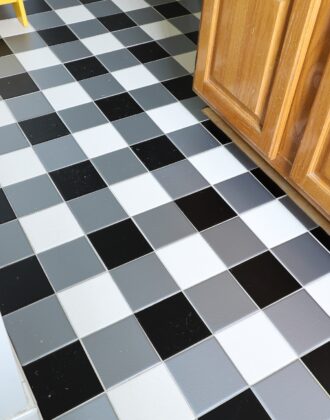
I specifically chose this mat because 1) it’s black-and-white (which I’ve already determined works best with the oak-colored cabinet), and 2) it gives the appearance of actual tile.
But what looks like tiles with actual grout lines is really just a flat, smooth, plastic mat cut to completely cover the bathroom floor. And I’m slightly obsessed…
Sure enough, installing this mat was the “click” I needed to pull the entire bathroom together. I’ll give the full tour another time, but here’s how we’re looking now!
The vinyl floor mat has been in place for a little over 2 months now, and I am more convinced than ever that this is one of the best (and easiest) ways to cover up rental floors in a totally temporary way. Let me break everything down for you!
Supplies Needed
- Vinyl Floor Mat – select a size that is either just right or larger than the floor you want to cover
- NOTE: My particular mat appears sold out; I will update this post with similar products as I find them. * indicates some of my favorite finds for this project!
- V Mat – use code MEGAN for 10% off!
- Carolina Creekhouse FloorFlats
- *NIS Kitchen Mat – Grey
- *NIS Kitchen Mat – Black
- Yellow Geometric Rug
- *Grey Hexagon “Tile” Rug
- Grey Herringbone “Tile” Rug
- *Black, White & Green “Tile Rug
- Solei Vinyl Floor Mat
- Turquoise & Grey “Tile” Rug
- Geometric Vinyl Rug
- Colorful “3D” Vinyl Rug
- Grey & White “Tile” Flowers Rug
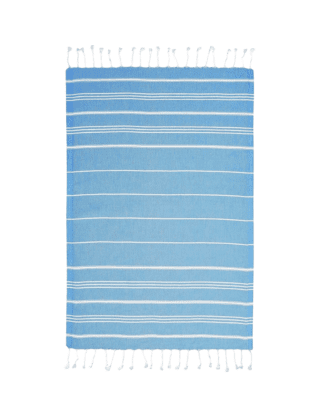
- Blue & Ivory Floor Mat
- Colorful “Tile” Floor Mat
- “Vintage” Floral Mat
- Green Pattern Vinyl Rug
- *Brown Star Rug
- *Fontana Vinyl Rug
- *Tuxedo Vinyl Rug
- *Blue “Tile” Rug
- *Gracia Rug in Green or Blue
- NOTE: My particular mat appears sold out; I will update this post with similar products as I find them. * indicates some of my favorite finds for this project!
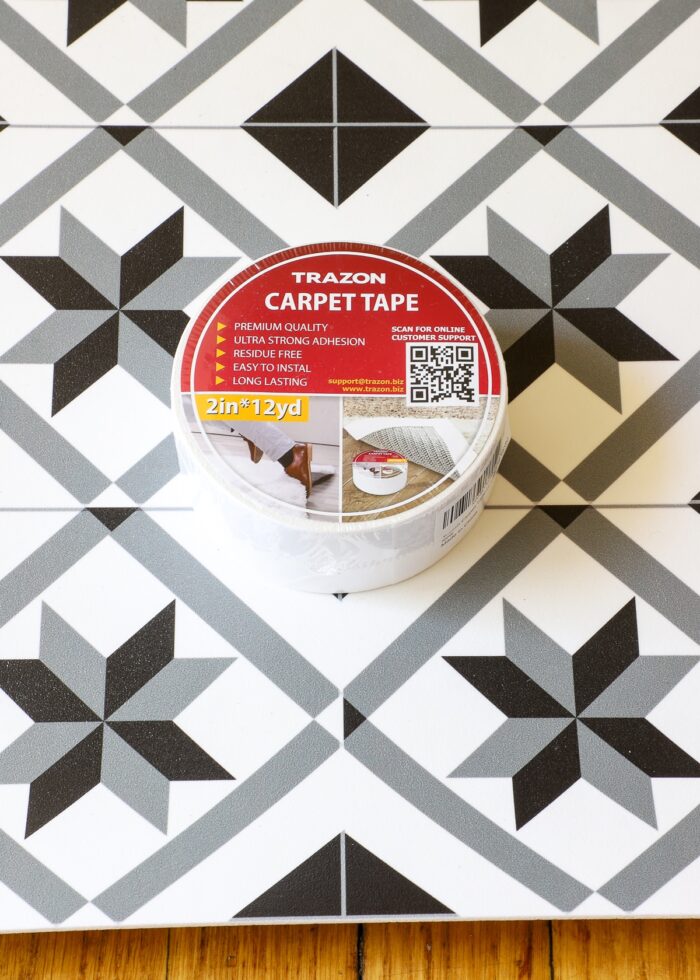
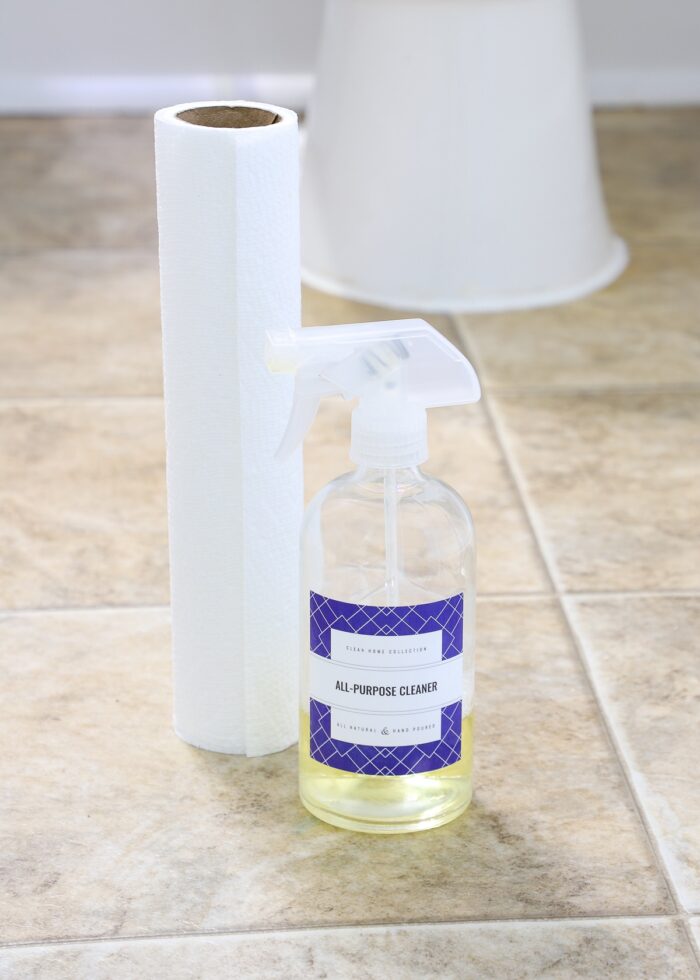
- Double-Sided Carpet Tape
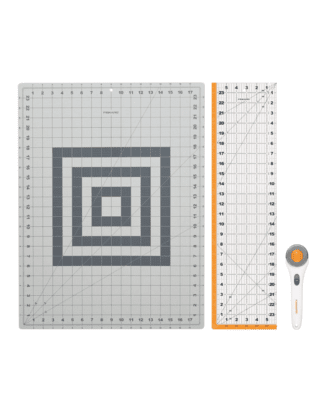
- Rotary Cutting Set (self-healing mat, rotary cutter, acrylic ruler)
- Sharp Craft Knife
- Scissors
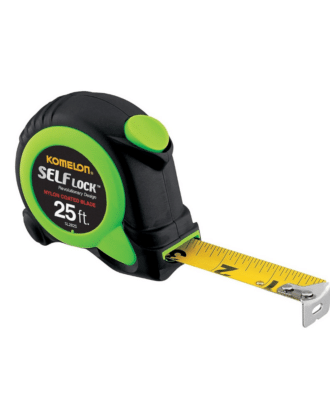
- Tape Measure
- Paper & Pencil
What Is a Vinyl Floor Mat?
Admittedly, a vinyl floor mat is a little difficult to explain in words, but I’ll give it a try!
A vinyl floor mat is essentially a vinyl rug. It’s a suuuper thin mat that has a slight cushion pad on the bottom (to hold it in place) and a durable, water-resistant coating on the top.
NOTE: The exact mat I purchased appears sold out; here are some similar products I’ve found as good alternatives. Those with an * would be especially great for this project!
- V Mat – use code MEGAN for 10% off!
- Carolina Creekhouse FloorFlats
- *NIS Kitchen Mat – Grey
- *NIS Kitchen Mat – Black
- Yellow Geometric Rug
- *Grey Hexagon “Tile” Rug
- Grey Herringbone “Tile” Rug
- *Black, White & Green “Tile Rug
- Solei Vinyl Floor Mat
- Turquoise & Grey “Tile” Rug
- Geometric Vinyl Rug
- Colorful “3D” Vinyl Rug
- Grey & White “Tile” Flowers Rug
- Blue & Ivory Floor Mat
- Colorful “Tile” Floor Mat
- “Vintage” Floral Mat
- Green Pattern Vinyl Rug
- *Brown Star Rug
- *Fontana Vinyl Rug
- *Tuxedo Vinyl Rug
- *Blue “Tile” Rug
- *Gracia Rug in Green or Blue
It comes rolled up; but once un-rolled and allowed to “rest” for just an hour or so, it lays perfectly flat and the edges don’t curl up. This makes it practically trip-proof and slip-proof on hardwood floors, kitchen floors, ceramic tile floors, luxury vinyl flooring, vinyl plank flooring, laminate planks, and more.
The mats come in a (very) wide range of patterns, colors, and price points. And since they are sized to sit in front of doors or sinks, almost all are at or under the 4×6′ size.
Since these mats are designed for high-traffic areas such as a foyer, kitchen floor, or under tables and breakfast bars, I had a good feeling they would hold up to bathroom traffic and…ahem…messes…really well too. And best of all, their thin-ness makes them really easy to cut and maneuver, allowing them to be easily customized to wherever you need to fit it!
If you begin shopping for a vinyl floor mat, you will quickly notice they are not the cheapest things in the world. But I’ve been so incredibly impressed by the durability that I’ve now got my eye out for sales to get some for other areas of the house too!
Video Tutorial
If you’d like to watch me “install” this a vinyl floor mat in our bathroom, below is a 5-minute video of the entire process from start-to-finish. (Video not loading for you? You can watch it HERE.)
Vinyl Floor Mat Installation | Step-By-Step
Step 1: Measure Your Floor
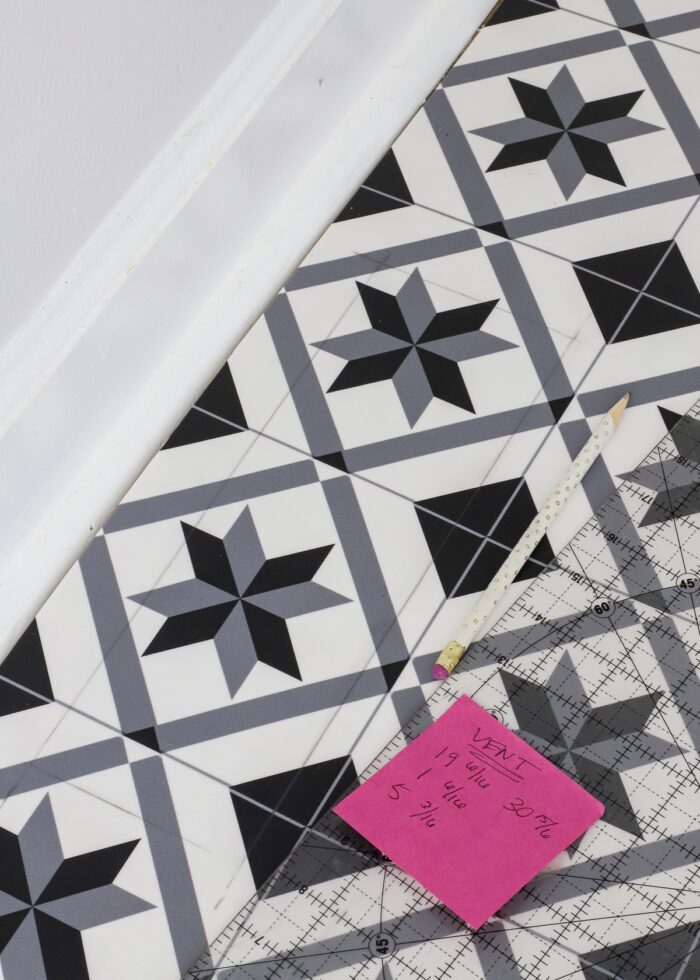
Your very first step is to measure your floor…precisely…so that you can cut the mat down to fit exactly edge-to-edge. If your room is not perfectly square, do your best to capture the differences in overall lengths so you can translate them appropriately to the mat.
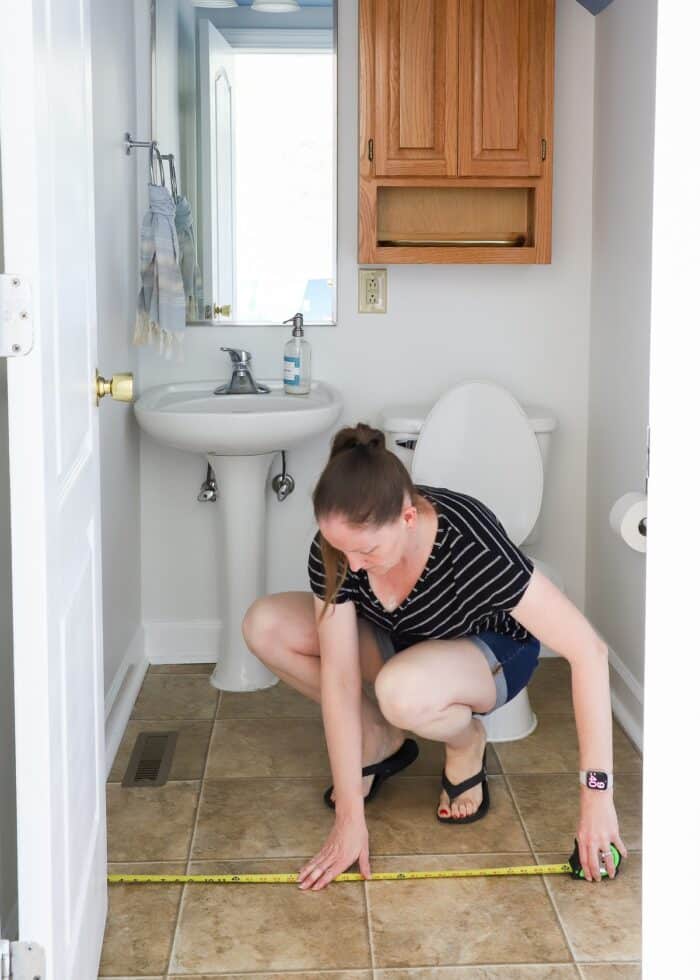
In addition to just the overall floor dimensions, you will also want to precisely measure the exact location of any fixtures that sit directly on the floor. This might include sinks, toilets, vents, vanities, tubs, etc.
In order to give the floor mat an “installed” appearance, you will cut each of these fixtures out of the mat. As such, take your time to get as exact of measurements as possible.
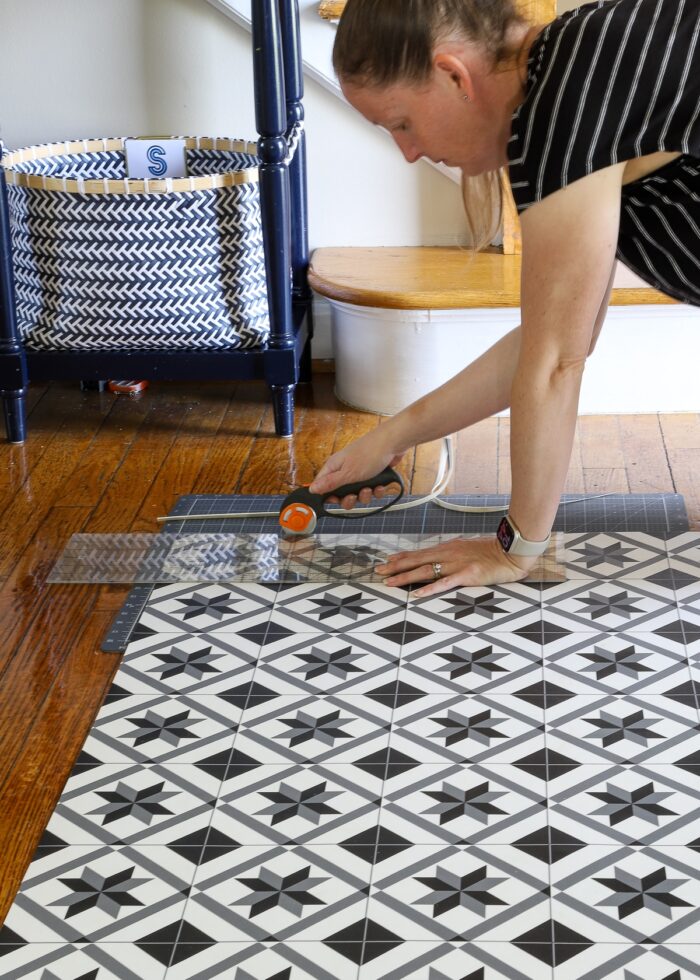
Step 2: Cut Vinyl Floor Mat to Size
Before proceeding, I recommend moving to an area where you will have plenty of space to work. Then unroll the mat and let it rest a bit to allow the edges to relax down flat.
If your mat is solid or has an all-over pattern, you can likely just trim down one width and one length (as needed). If your mat is geometric (like my tile-like mat), be sure to cut your mat down in a way that leaves the pattern looking centered and intentional.

Want to save this post?
You will not be “tucking” the edges of this mat under any baseboards, so it’s imperative that you get as clean and smooth of cuts as you can. If possible, I recommend skipping the scissors and using a rotary cutter with a ruler and self-healing mat to make clean slices.

Yes, the rotary cutter will be strong enough; this mat cuts like butter even on the thinest trims! In fact, I was pleasantly surprised how easy this mat was to cut down to the exact shape I needed.
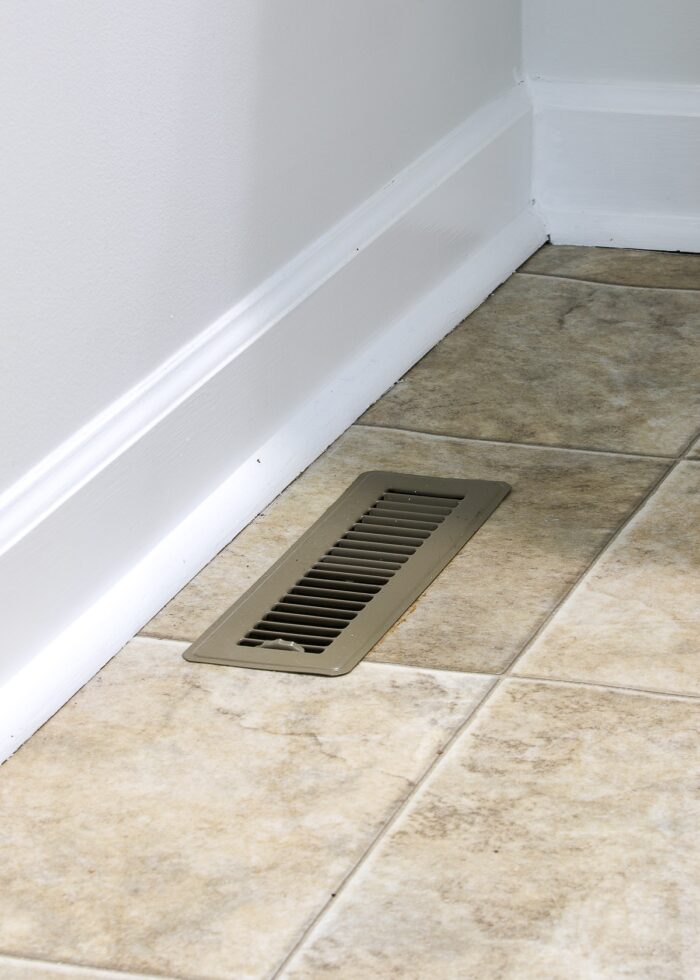
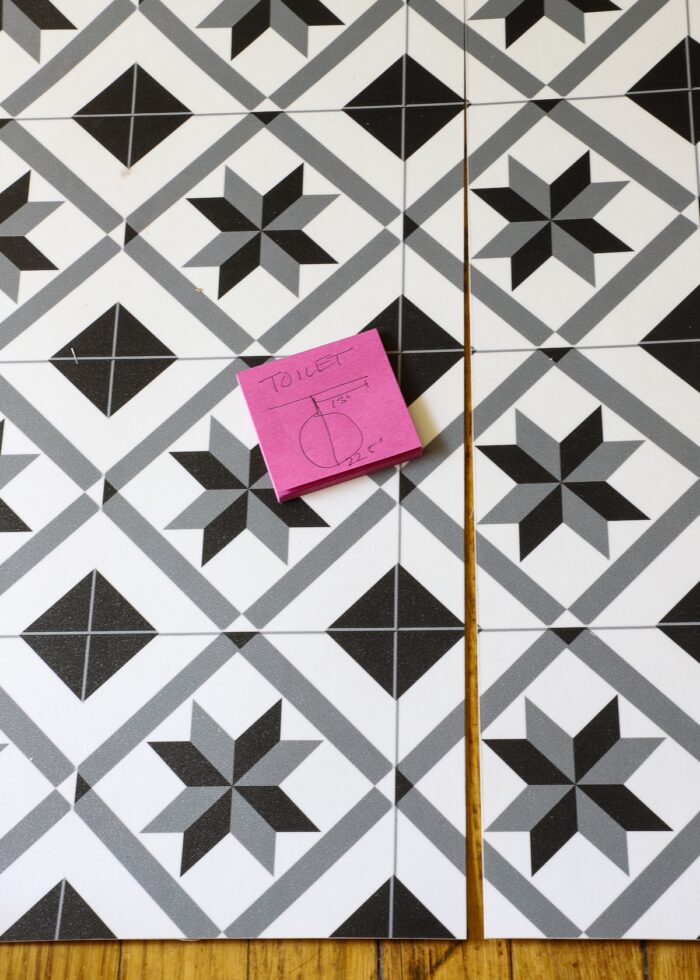
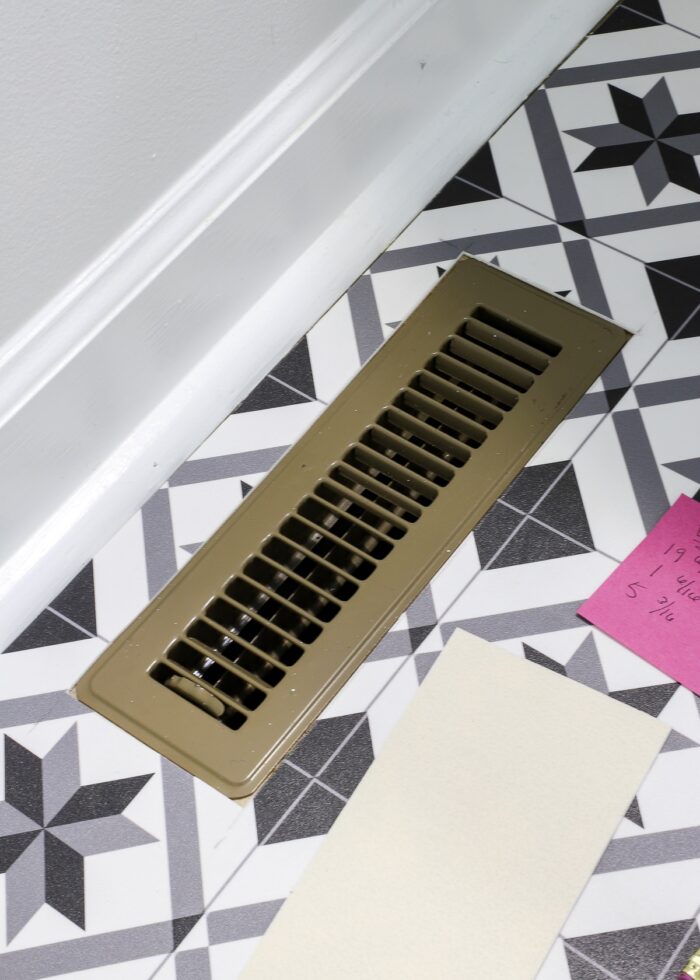
If you have square fixtures to cut out of the mat (like a vanity or vent), you can do that before putting the mat into place, relying solely on measurements.
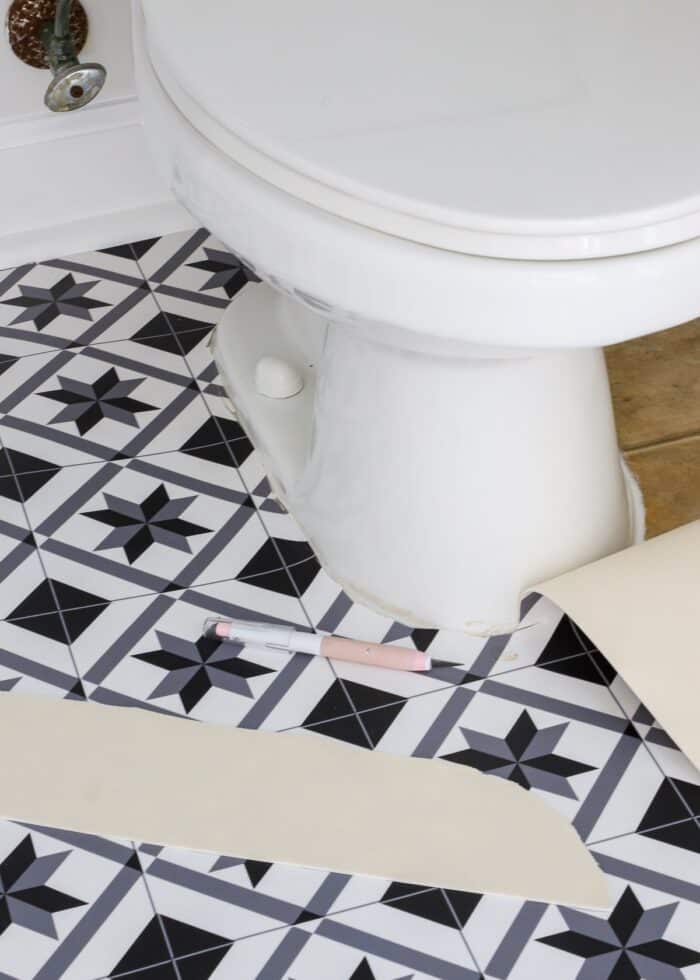
However, round fixtures (such as our toilet and pedestal sink) are exceptionally tricky to measure out and then translate to the mat with the correct amount of bend/angle etc.
To cut out round fixtures, I instead recommend making a single slit from the center back of the fixture to the center front of the fixture via measurements (reference my Post-It note below). Make similar straight-line slits for all your round fixtures (in my case, I made one for the toilet and one for the sink).
These slits will at least allow you to lay the mat in place, then do more detailed work up against the fixture itself so that it fits just right (more details below).
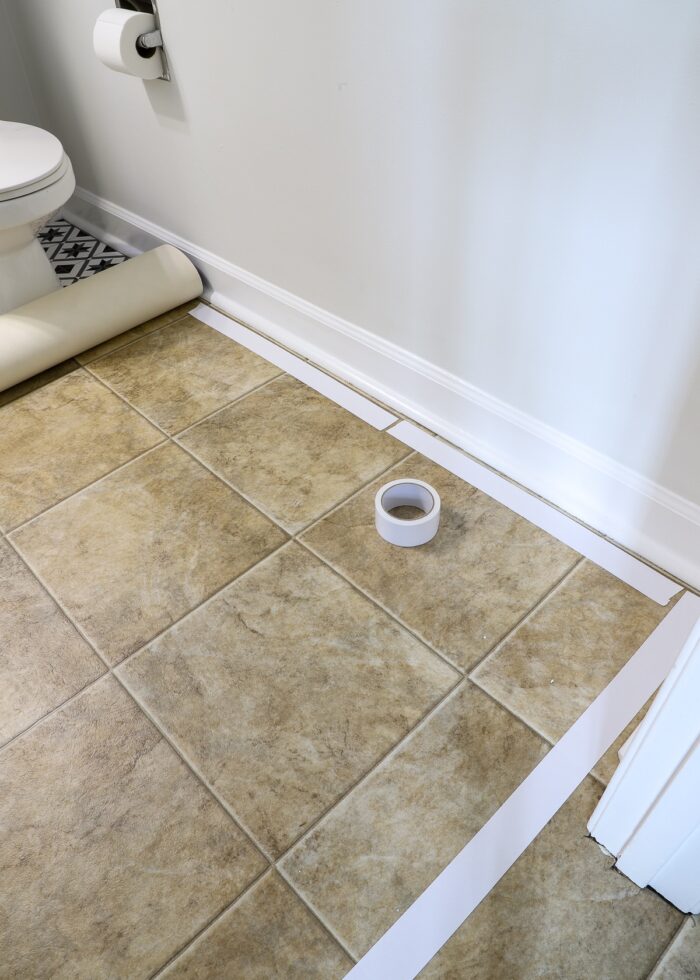
Step 3: Clean Floor & Mat
Before you move the mat into its final place, clean both the existing tile floor and the bottom side of the mat so that you don’t have any debris, moisture, or messes trapped underneath.

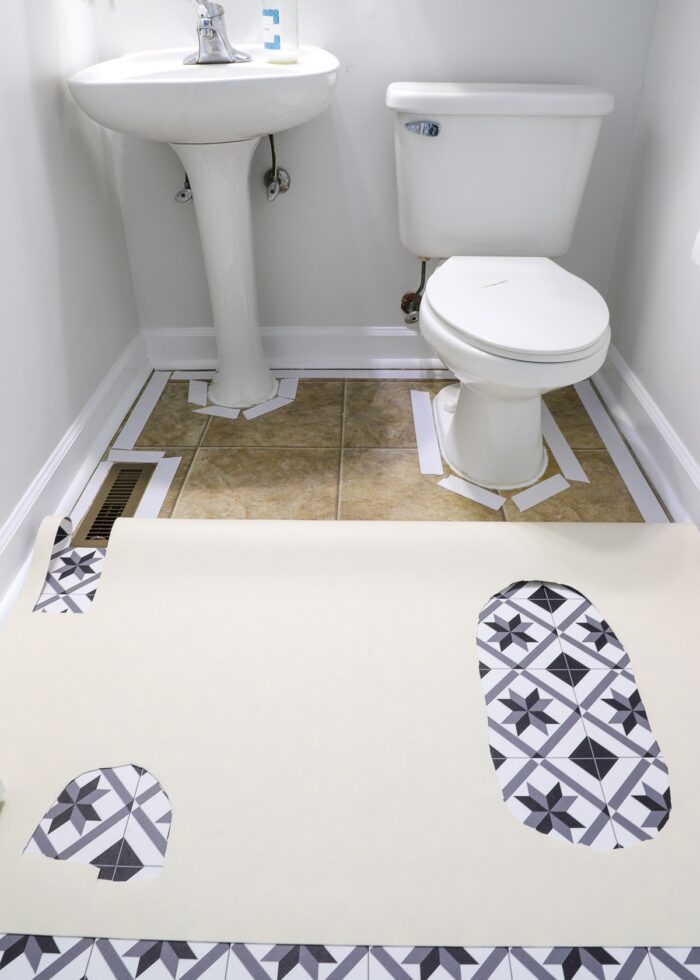
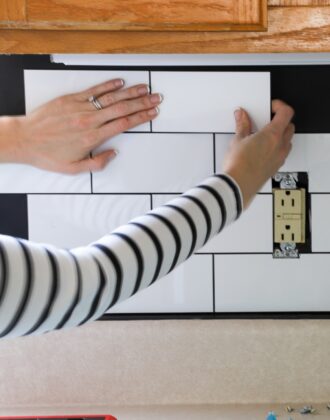
Step 4: Trim Mat Around Fixtures
With the floor and mat clean and dry, lay the mat into place, lining up all the edges. Notice below that, while I couldn’t lay the mat perfectly smooth just yet, the slits allowed me to get most of the mat into place.
Then, using a very sharp craft knife, carefully trim the mat to fit snug against any floor fixtures (e.g., toilet, sink, etc); admittedly, this can take some patience. Work slowly, and continuously press the mat down smooth as you go to ensure a tight of a fit as possible. Watch the video tutorial to see exactly how I did this.
Ultimately, your goal is to remove any sections that prevent the mat from sitting flush with the floor while also creating a nice, clean cut line around all fixtures.
NOTE: In case it’s not clear or obvious, there are cut seams in the mat at the back of these two fixtures. If you cut around precisely, the two sides should “meet” at the back, completely out of sight.
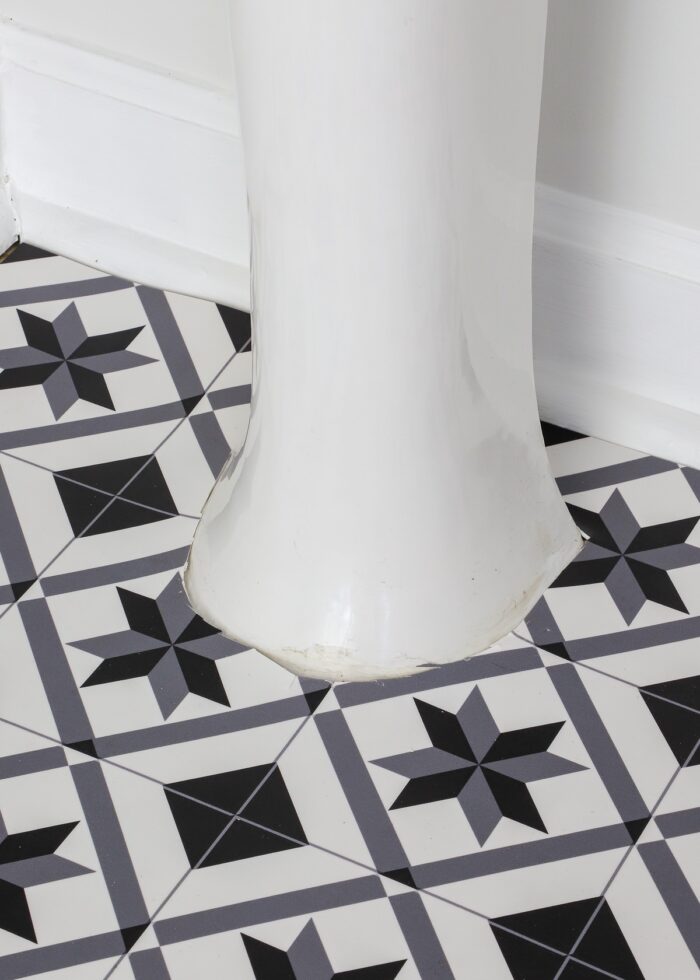
I didn’t mind creating slits for both the toilet and the sink since they would be out of view. For the vent however, I chose to cut the hole out without any slits from the edge so that the mat was perfectly solid in all directions.
To do this, translate the exact vent placement measurements to the top of the mat (in pencil)….
…then slice out the rectangle using a rotary cutter or scissors. With some very exact measuring and cutting, you can create an opening that perfectly outlines the floor vent.
Step 5: Secure Mat In Place
Vinyl floor mats are designed to be non-slip. And if you’ve successfully cut the mat so that it covers the entire floor, sitting perfectly edge-to-edge between your walls/trim, I honestly doubt it will move without any further products to hold it in place.
That said, this powder room gets a ton of foot traffic (both from our family and guests) AND the floor vent blows just enough air for it to “billow” slightly. So I opted to secure our mat in place with (fully removable) double-sided carpet tape.
In order to lay the tape down but also ensure your mat goes back exactly where you’ve trimmed it out to fit, I recommend applying the tape in two phases. (Watch the video to see exactly what I mean).
Start by rolling up just one side of the mat to the center point of the room. Then lay carpet tape around the exposed perimeter, including across doorways and around fixtures.
Remove the paper backing off the tape and then roll the mat back into place, pressing firmly to affix the mat to the tape.
Then, repeat with the other half of the room. Roll the mat back to where it is not yet secured to the floor. Tape around the remaining perimeter, remove the paper backing, and then roll it into place, pressing the edges down firmly all the way around.
Because you never fully removed the mat (always keeping at least half of it in its original location), it should lay back down exactly where it’s supposed to go!
Step 6: Enjoy Your “New” Rental Floor!
And that’s it! Really! No mess, no clean-up, and very little waste. Once your mat is stuck down into place, you’re done and can enjoy your new floors!
Other Great Rental Floor Solutions
Ugly or damaged rental floors are tricky to cover up. If this project isn't right for your floor, here are some other solutions to check out:
- How to Cover Ugly Floors with a Vinyl Floor Mat
- How to Make Your Own (Cheap) Bathroom Tile Stickers
- Can You Put Peel and Stick Wallpaper on the Floor?
- Can (& Should) You Use Floor Pops! Floor Tiles In a Rental?
- What You Need to Know About Using Peel and Stick Tiles In a Rental
- The Rugs We Purchased for Our New Home (& Why)
- A Rug Under the Kitchen Table | Practical Ideas for Making It Work
- Did You Know You Can Re-Size Your Rugs?
Quite frequently, I go into projects blind, not really knowing if it will work. And more often than not, I have to push, pull, tug, and suffer my way through in order to get the result I want (hello, stencil fireplace wall!)
That was NOT the case with this project!
This was the very rare project that worked out exactly as I hoped. From start to finish, this “installation” took about 2 hours (with lots of stops for video and pictures along the way), and I didn’t encounter a single hiccup. And best of all…this mat is easy to clean, totally durable, and hasn’t budged at all since the day I laid it down.
My only gripe now is that I wish these mats came in more colors and sizes so I could do something similar in bigger spaces! Oh the possibilities!
Megan


8 Comments on “How to Cover Ugly Rental Bathroom Floors with a Vinyl Mat”
I’ve seen these under kitchen tables before and they always look so good. Never thought to do this in a bathroom. But it makes me wonder, could just a piece of linoleum do a similar job? I guess the thinness would be the issue, they are meant to go under the trim and such.
The bathroom looks great! And this is such a great solution if you aren’t renting. 😁
A few weeks after I installed this mat, I found some clearance rolls of vinyl flooring at a local home store and they were super cheap. I had the same thought as you…why not just use that!
Honestly, it never occurred to me to just lay some different vinyl flooring over the existing floors using the same carpet tape. I DO think that could work too but not sure how much harder/easier it would be to cut and get to lay flat?!?
Maybe something to try next 😉
Truly outstanding and giving me lots of ideas! I did get a large piece of vinyl flooring from a roll at Lowes to make an outdoor patio rug and it has stayed put each summer -not curled up at edges -so it has been an awesome $50 investment.
Stunning!!!
Before I saw this post, I saw your “How to make your own bathroom tile stickers” and I was going to try it in my bathroom. I purchased the vinyl and everything! Then I realized how cheap vinyl flooring is. You can buy it in your local big box hardware store (don’t know if I am allowed to give a store name), and they will cut it off a roll. The one I chose looks like black and white marble pavers, and was 66 cents per square foot! The only draw back was it comes on a 12 foot roll, so I had to buy a 12 x 7 foot piece when I only needed a 7 x 7 foot piece. It still only cost $59 and I have a big chunk left to put on my laundry room floor. I was able to cut it with scissors as well as a sharp utility knife. I also put in a new vanity (refurbished dresser and old sink I bought for $20). I used the vinyl bought that I originally planned to use on the floor to line the dresser drawers, on the wall behind shelves, and as a border. My bathroom turned out amazing! Thank you, Megan, for the inspiration! I didn’t do exactly what you did, but your posts inspired me to think outside the box.
Hello, I wanted to thank you for this post! It was an absolute game changer after I was ghosted by a flooring contractor with only 2 weeks to go before my family came from out-of-state. I had planned for new sheet linoleum to be laid but contractor stopped replying when I tried to schedule the work.
I ordered from Carolina Creekhouse, they were wonderful, and I love my kitchen, pantry, and home office. Still need to finish laundry room, and bath is a whole other project! Thanks so much.
Can you put caulking around the fixtures?
I would definitely spray paint that floor vent white!