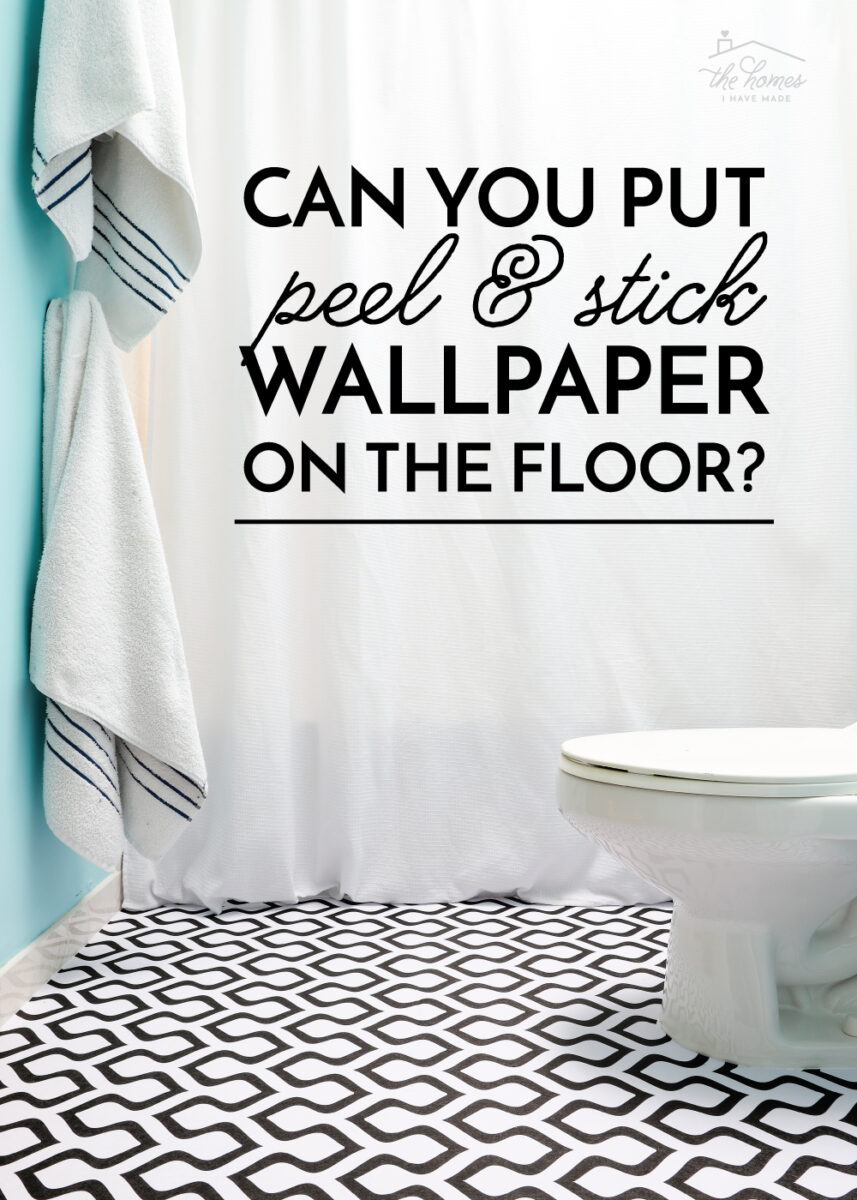
Can You Put Peel and Stick Wallpaper on the Floor?
Ugly or damaged flooring in a rental is one of the trickiest situations to (temporarily) remedy. Peel and stick wallpaper is an appealing solution with its budget-friendly price tag and total removability. But does wallpaper actually stick to floors? Can you put wallpaper over tile? Does it hold up to foot traffic, moisture, and furniture? What about floor seams? How hard is it to install? Does it come back up easily? Well…I wallpapered the floor in our rental bathroom, and I am now ready to answer all these questions and more!
Why I Chose to Wallpaper the Floor
I chose to wallpaper the floor of the upstairs hall bathroom in our Virginia rental for a few reasons:
- It was a small space, so the cost and time investment was minimal.
- It didn’t get a ton of heavy foot traffic, so I wasn’t worried about the floor getting instantly destroyed.
- The existing tile was super slick when wet, and the boys were constantly slipping on it.
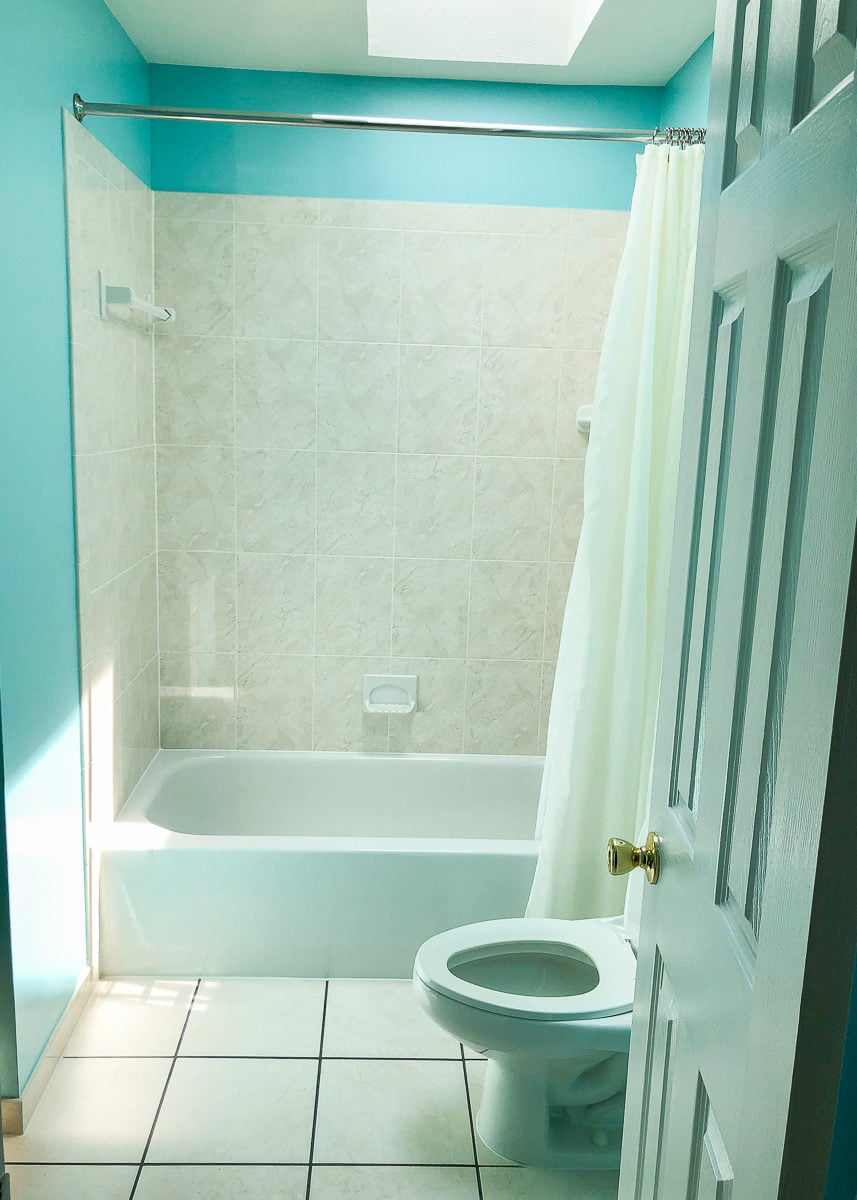
- The bathroom was feeling really boring, and I thought a bold splash of pattern on the floor would be super fun!
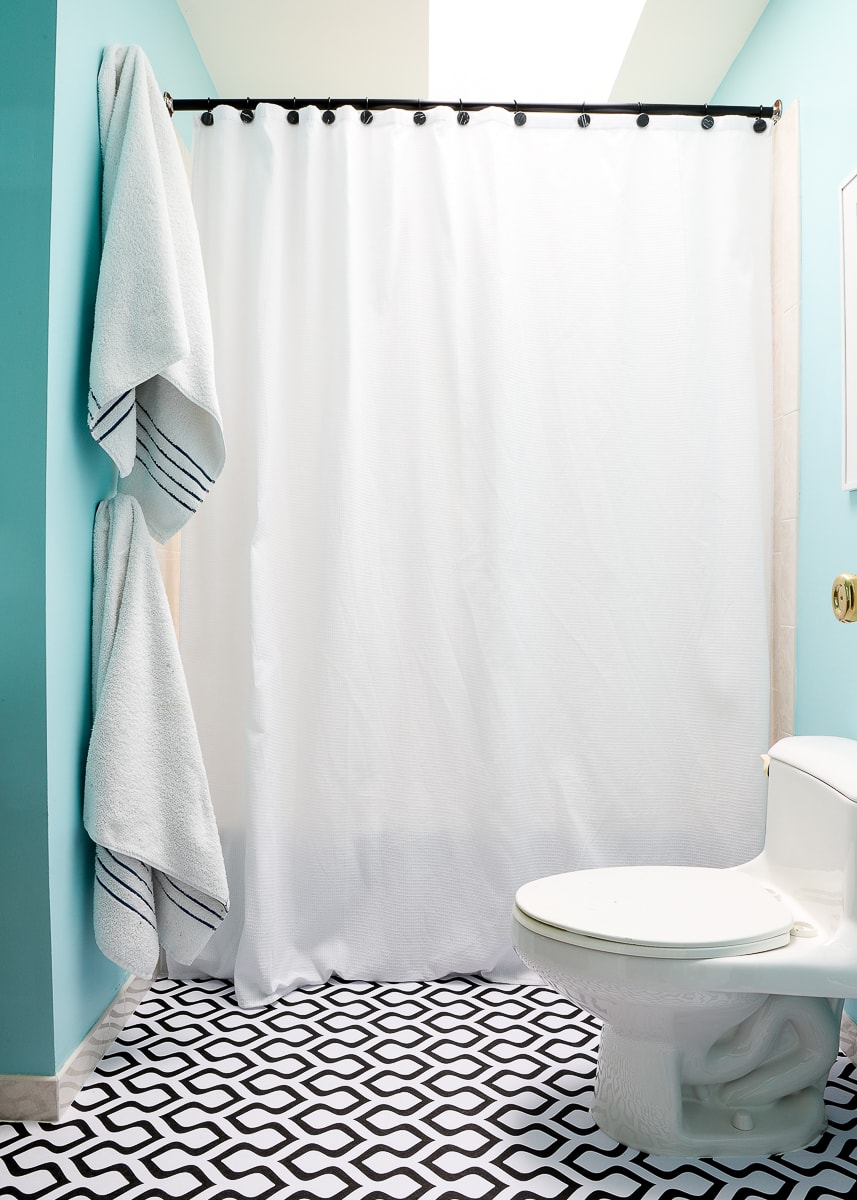
So I invested about $20 and 90 minutes to put peel and stick wallpaper on the floor. And WOW…FUN indeed!
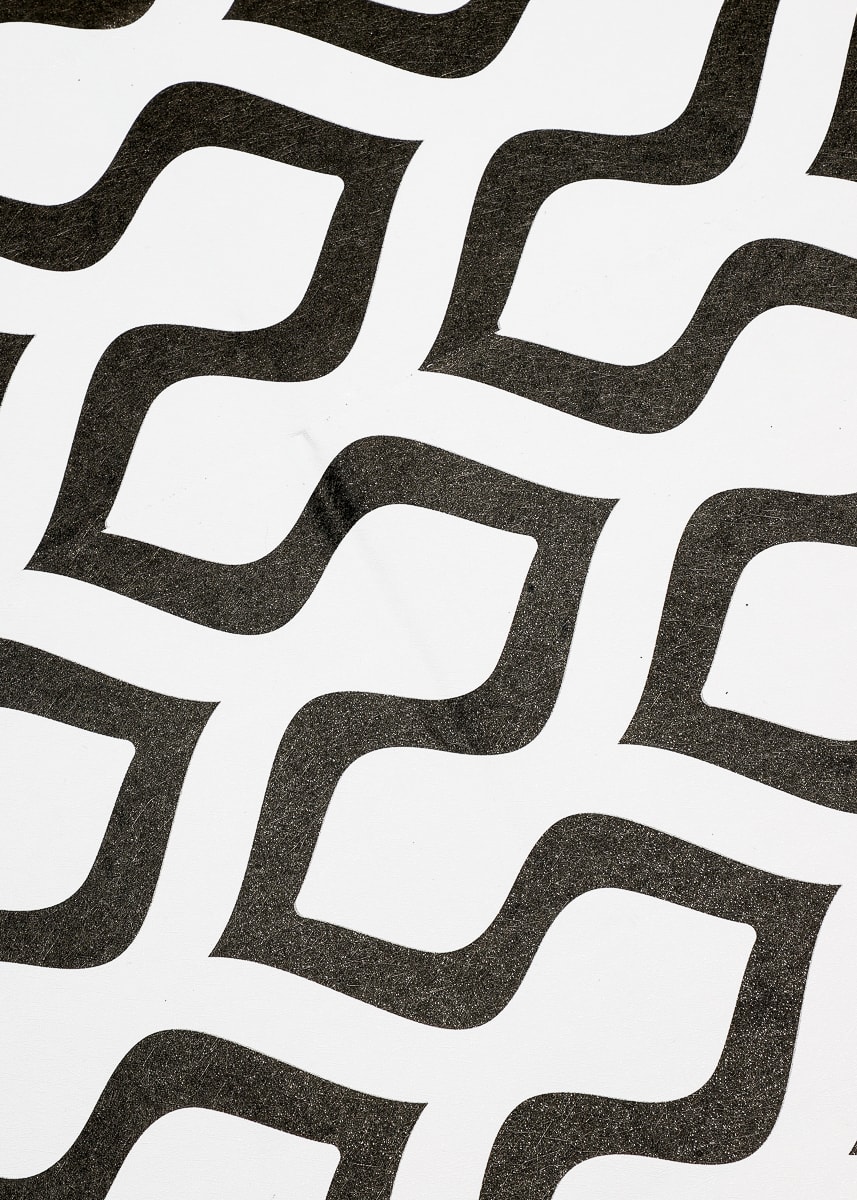
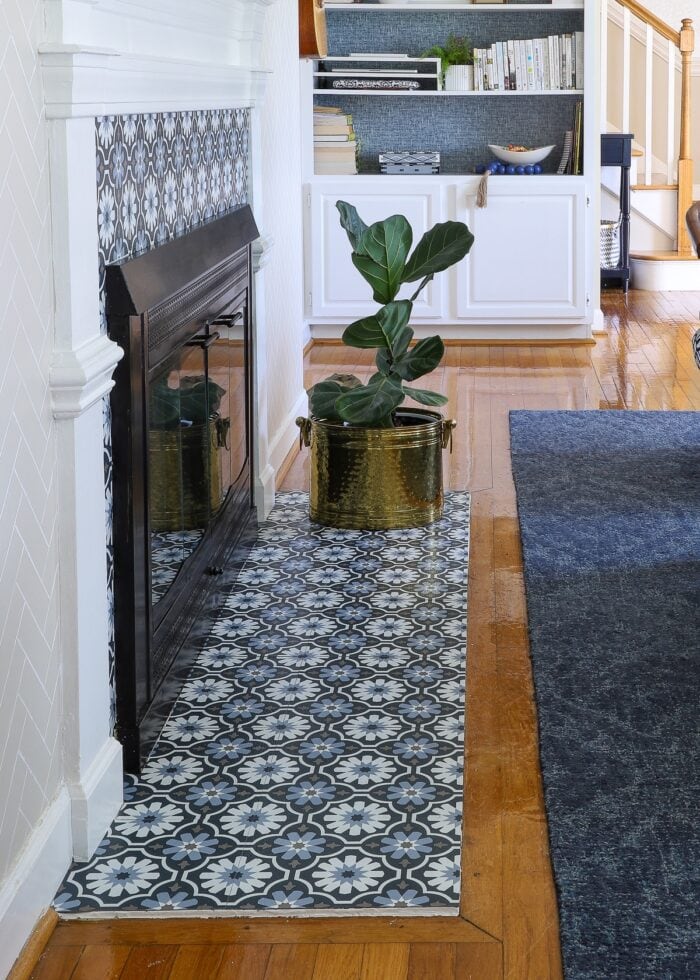
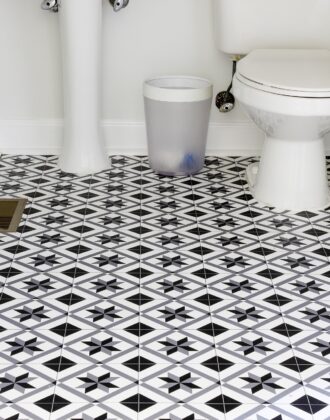
Since this bathroom was primarily for our young boys, I wanted something funky and modern. But being a bathroom floor, I also wanted a paper that would give the impression of tile.
The $10/roll price tag of this specific paper sealed the deal for me, and I honestly couldn’t love the look more!
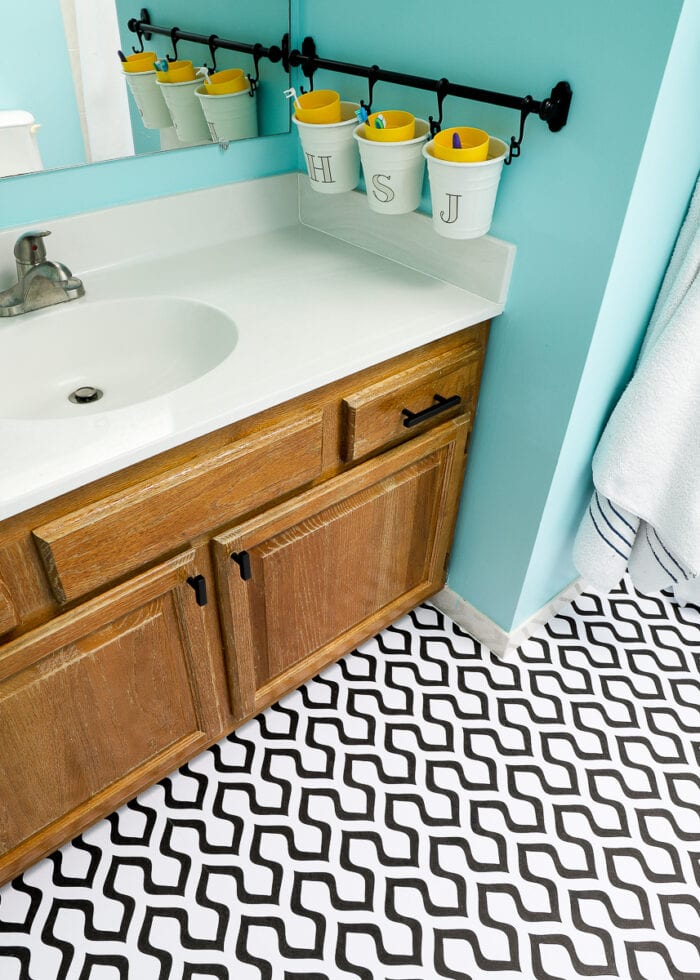
See the full bathroom makeover: The Ultimate Rental Bathroom Makeover
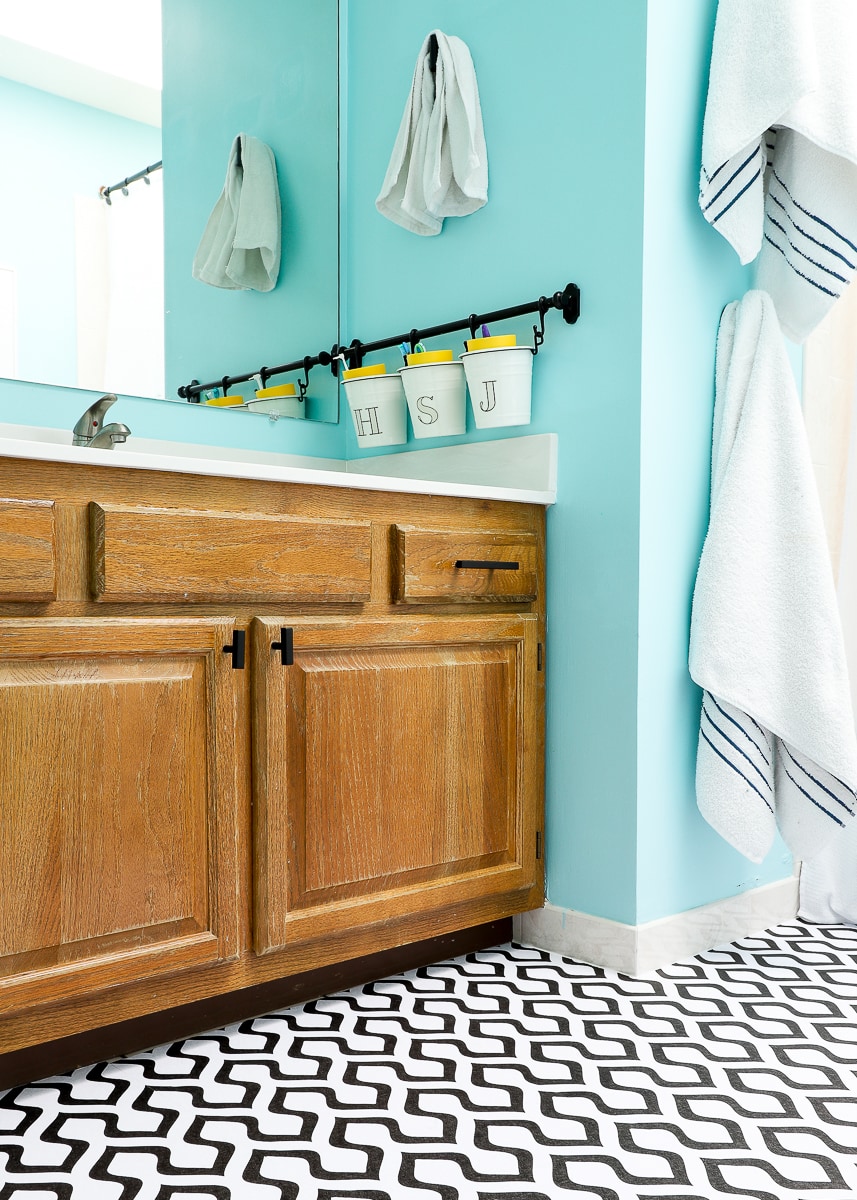
From an aesthetic perspective, this might be one of my favorite rental updates ever!
But it’s now been almost 2 years since I first installed that floor wallpaper; and I have now even completely removed it since we recently moved out of that home.
So let me break down AAAAAALL the details including how I installed it, how it held up, and if I’d do it again! Buckle up!
Before You Start
Anytime I instal wallpaper on a new-to-me surface, I always always always test it before doing a full installation. There’s nothing more frustrating than wasting time and good wallpaper on a project that won’t work, so whether you’re adhering wallpaper to textured walls, furniture, a backsplash, the back of a bookcase, a stairwell, flooring, or something else, apply a swatch (how big is up to you) and watch it for a few days. If you’re happy with the results, proceed with the full installation.
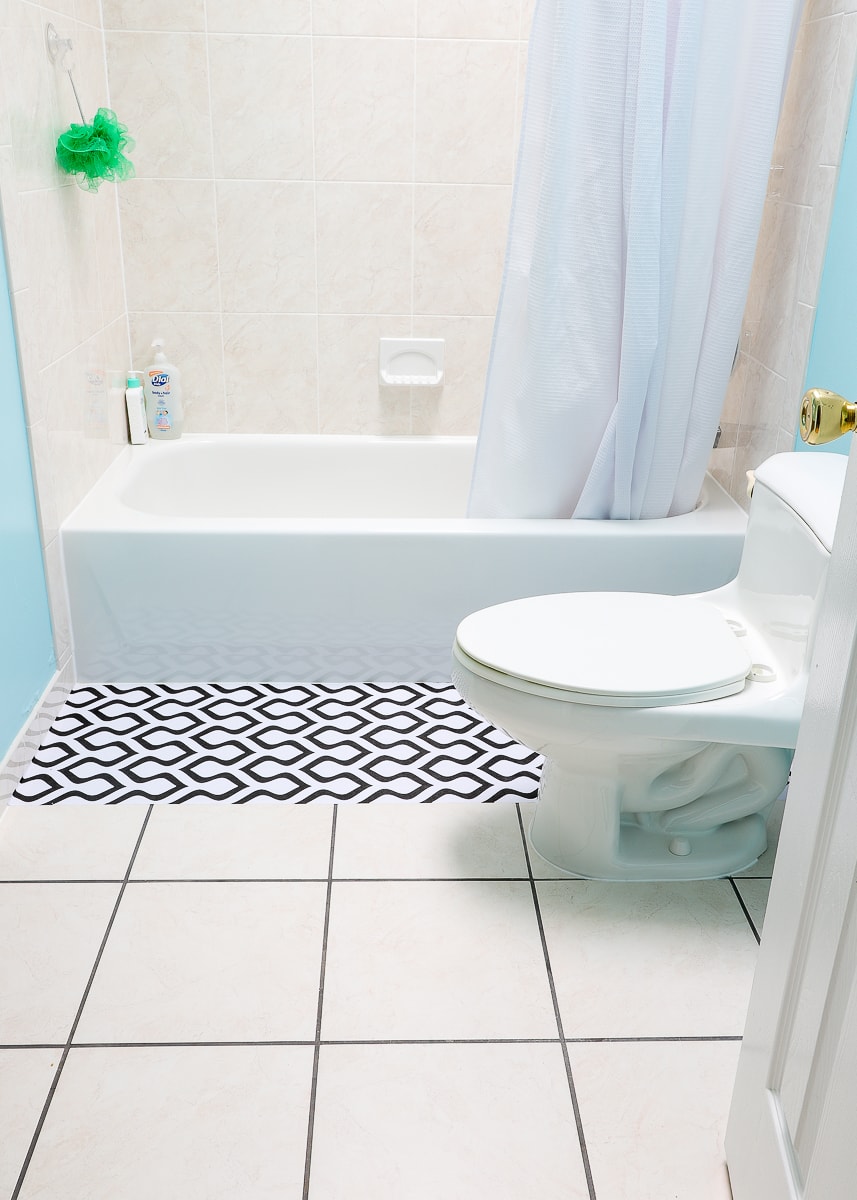
In the case of the boys’ bathroom, I was most concerned with water. Would it get under the panels? Would it wrinkle? Would the edges curl up from shower steam?
Although I’ve installed wallpaper on lots of surfaces, I didn’t have experience with water exposure. So I laid a single length of paper closest to the tub (the area that gets splashed the most) and watched it through a few bath cycles. There was no bubbling, warping, tearing, or curling. So with my confidence bolstered, I decided to go for it!
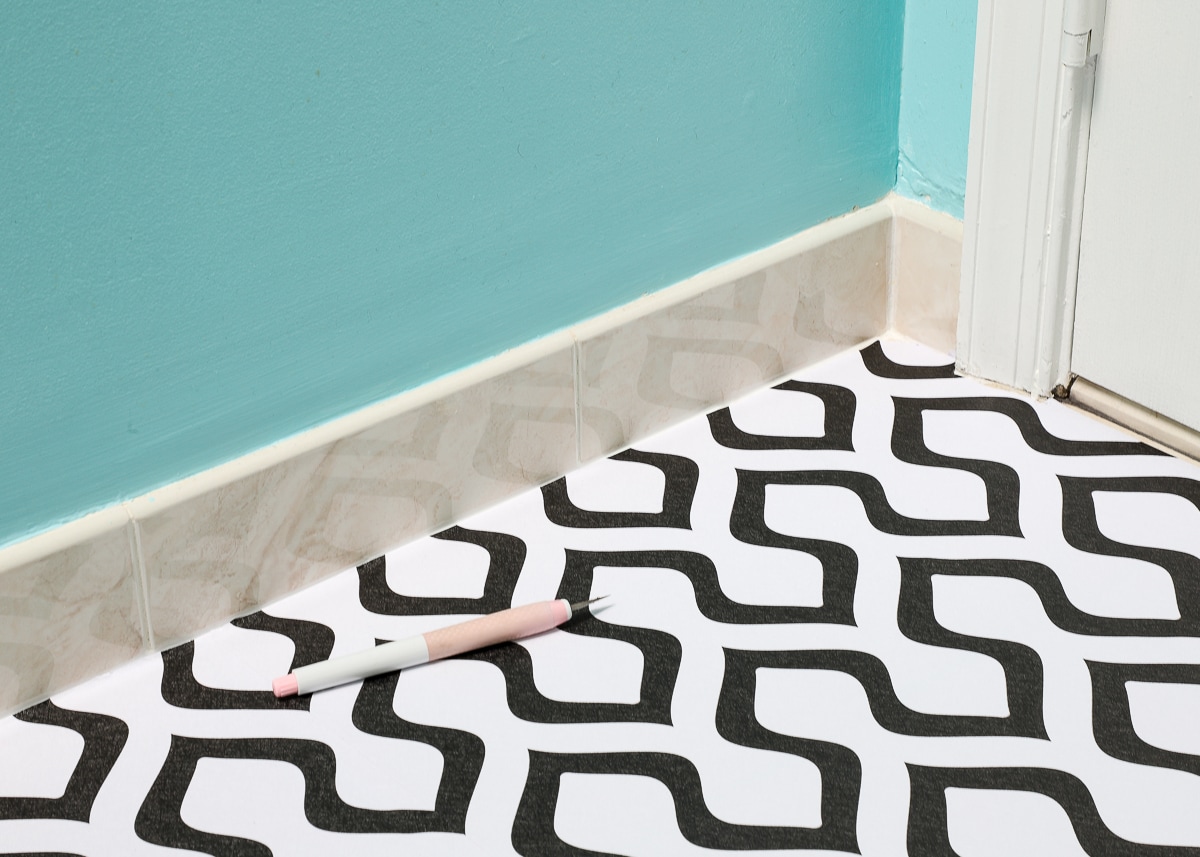
Supplies Needed
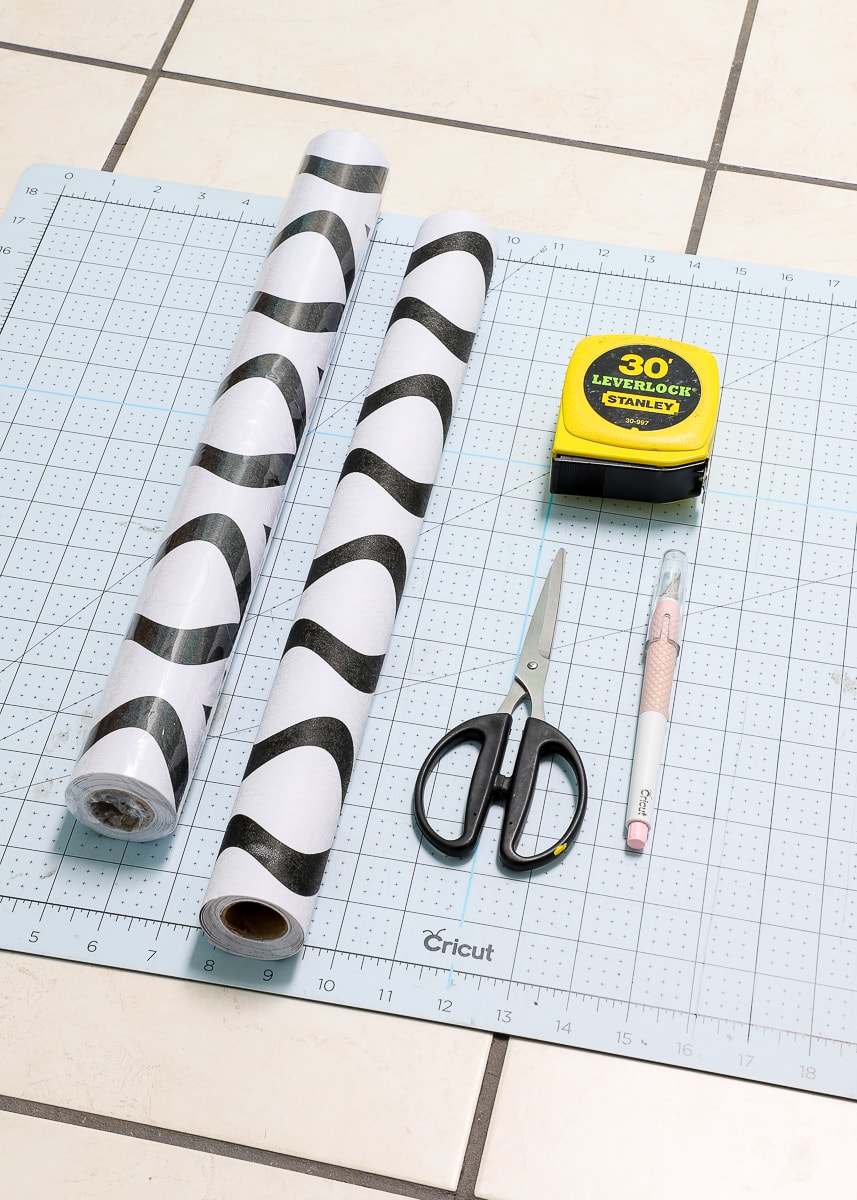
To wallpaper a floor, here is what you will need:
- Peel and Stick Wallpaper – see more specifics below
- Tape Measure
- Scissors
- Craft Knife
- Scraper (not shown)
What Wallpaper Should You Use on a Floor?
I’ve experimented with many different brands of wallpaper over the years, and the paper I chose for this project was easily the cheapest, poorest quality paper I’ve ever used. Admittedly, I picked it because it was so inexpensive. Not knowing if this project was going to work, I didn’t want to invest $60-$100 (or more!) on wallpaper.
“You get what you pay for” was true in this instance; and one of my only regrets is not investing in higher quality paper.
So what paper should you use?
I’ll be the first to say that price doesn’t necessarily equate to a wallpaper’s quality. Instead, I recommend that you let your sense of touch guide you. If the wallpaper is brittle (as in, it tears SUPER easily with just your fingernail) or it is rigid and really difficult to manipulate, it’s likely not a good paper for the floor (because you will have to work it around corners, vents, and other features).
Here are some brands I’ve used in the past that I think would work brilliantly for a floor installation:
- Spoonflower – I used this wallpaper on this stool, and it held up really well for many years. Thanks to its texture, it’s easily the most durable wallpaper I’ve ever worked with, but it is more expensive than most.
- NuWallpaper & RoomMates – These papers are almost identical in their quality. They aren’t as thick as Spoonflower’s papers, but they can withstand lots of tugging, pulling, and manipulating and do not tear easily at all.
- Target – Target’s wallpapers are among my favorites because they are priced well and easy to work with. While not the most durable paper you can find, it will still surpass the paper I used!
It warrants reiterating that testing will help you determine if a paper is durable enough for your floor, so consider ordering samples and trying them out for an extended period of time before you order more.
TIP! If you want greater confidence that your floor project (and investment) will work out, you might also want to consider specially-made floor wallpapers, such as those sold by Quadrostyle, Bluecoin and FloorPops. These vinyl floor coverings are formulated to withstand heavy foot traffic and moisture; however, that durability comes at a price. Floor wallpapers tend to be MUCH more expensive than a roll of standard adhesive wallpaper.
How to Put Peel and Stick Wallpaper on the Floor
Prepping the Floors
If your floor has dirt, dust, or any particles on it, it can affect the overall adhesion of the paper. Before you even unroll your paper, ensure you have a perfectly clean surface to start.
Determining Paper Layout
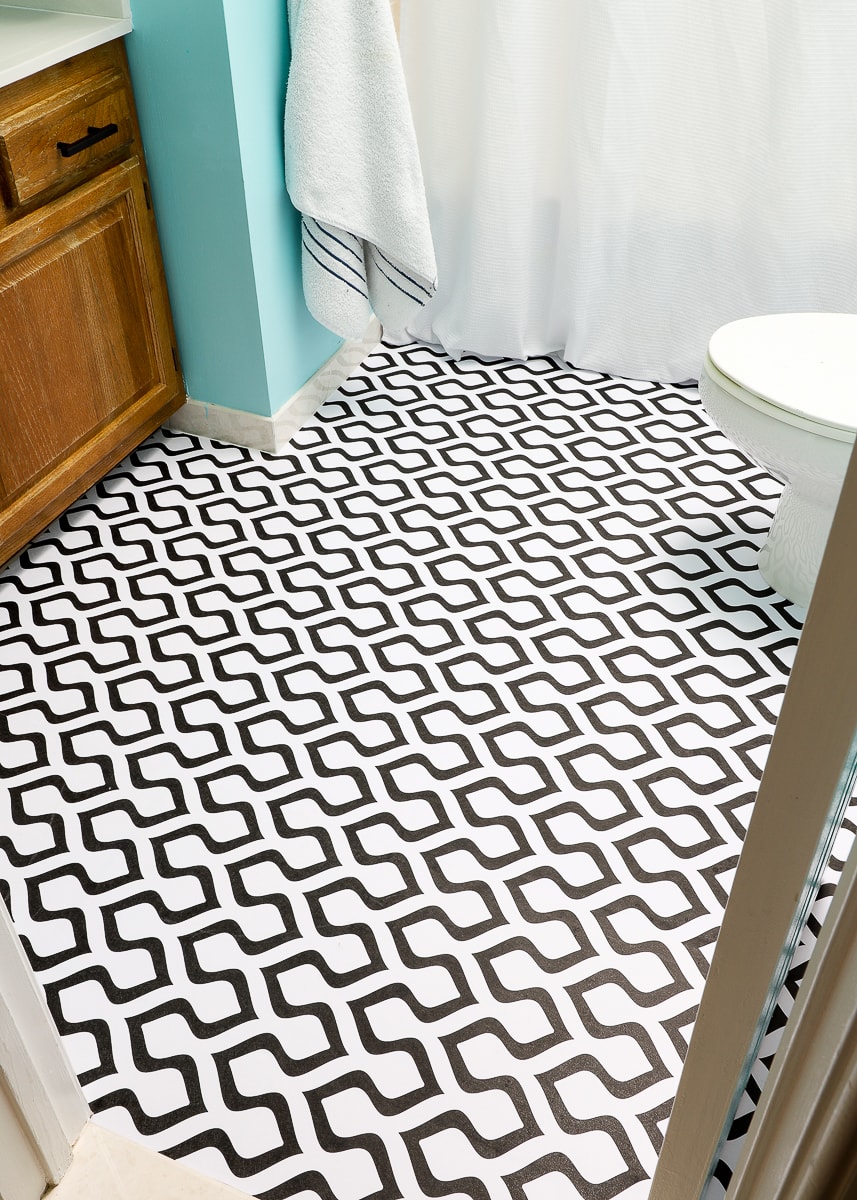
Just like with a wall installation, you will lay the wallpaper down in strips. Before cutting any paper though, decide which way you want your strips to lay based on the paper’s pattern or specific floor/room features. I wanted as few seams as possible for water to get under, so I opted to run my panels parallel to the tub.
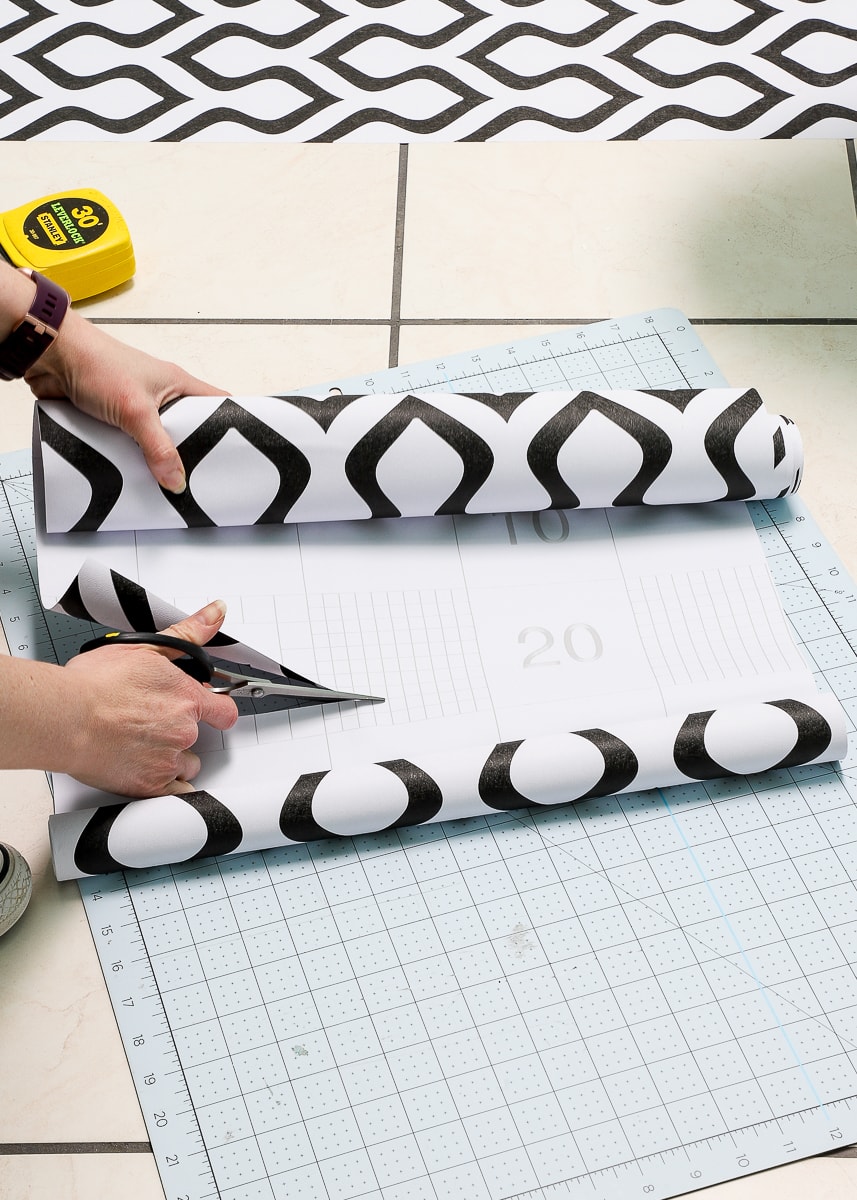
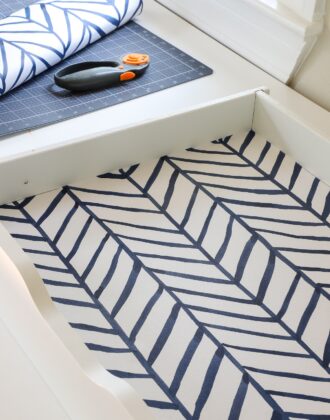
Measuring & Cutting the Panels
Start by measuring the length of your floor from baseboard to baseboard. Be aware of common floor features such as corners, bump-outs, toilets, vents, or stairs. Always measure the longest possible distance between walls so your strip can extend past protruding corners or other features.
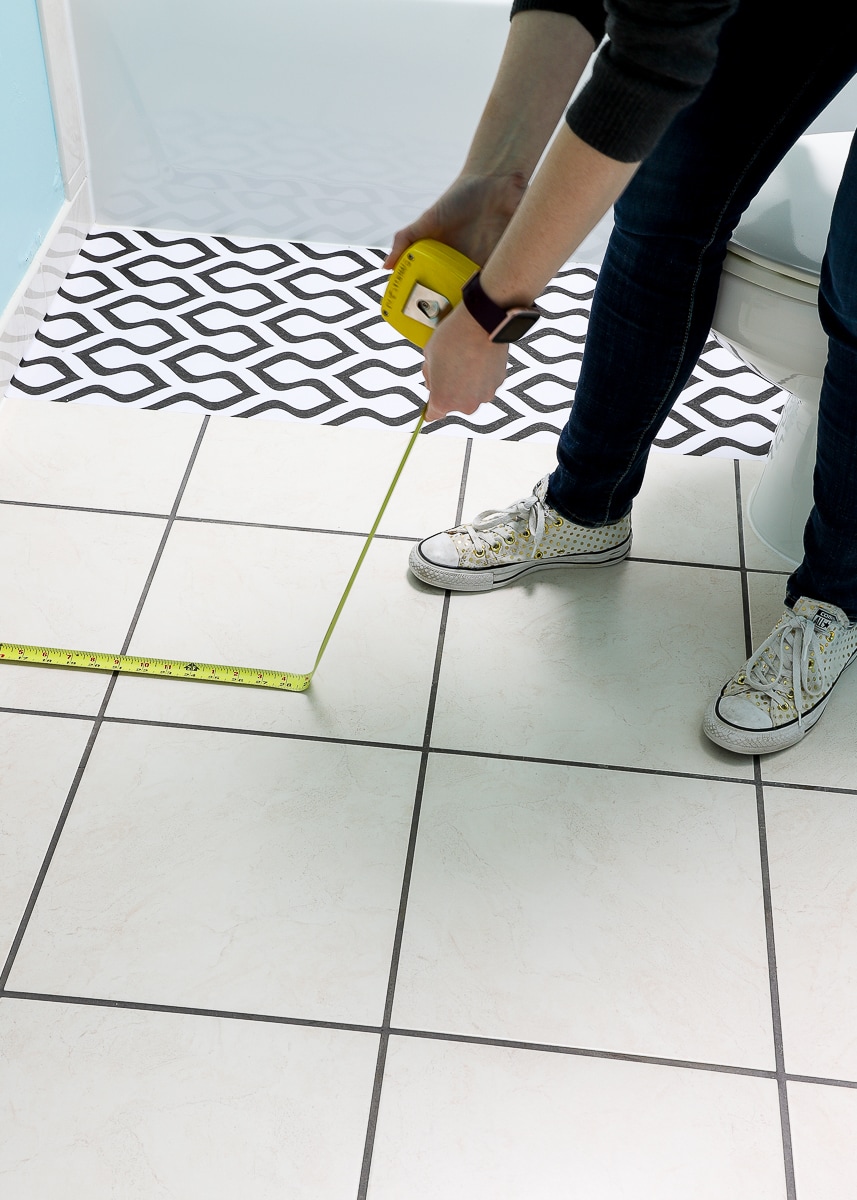
Next, cut the wallpaper down into a strip that fits the length of your floor. Be sure to take into account pattern matching (always double check where the panels line up before you cut!), and I recommend adding an extra 5″ for wiggle room.

I never rely on the measurements on the backs of wallpapers or contact papers (they never seem right!), and instead use my cutting mat as a ruler. Since you’ll clean up the edges with a craft knife, a basic trim with scissors is sufficient at this point.
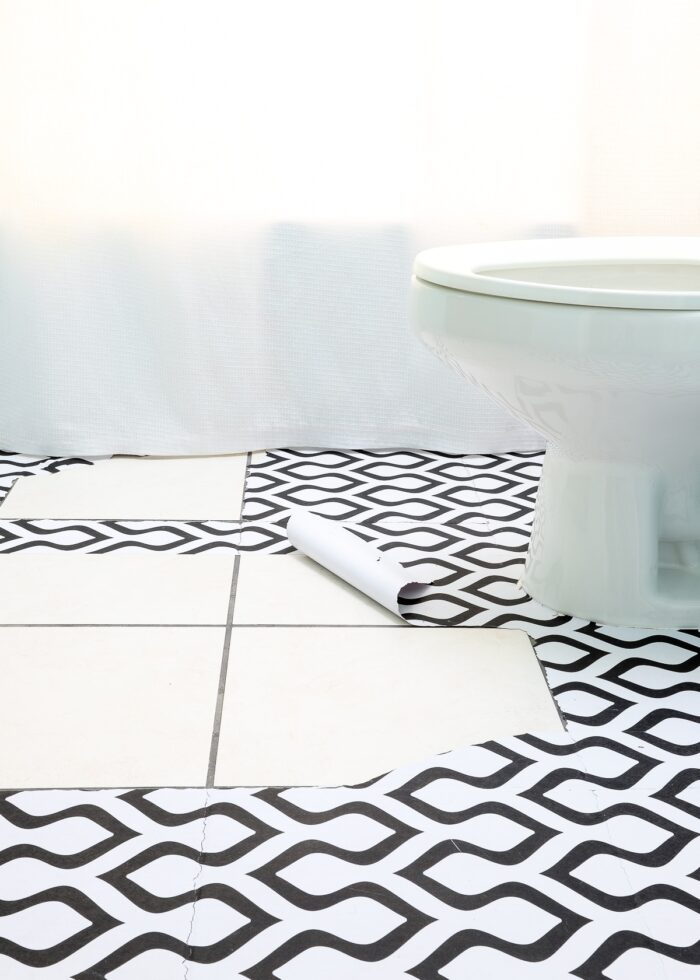
Applying Wallpaper Panels to the Floor
Before removing any paper backing, line up your panel with either the floor’s edge (to lay your first panel) or the previous panel (to match the pattern). I like to use a pencil or crease to mark my place, as necessary.
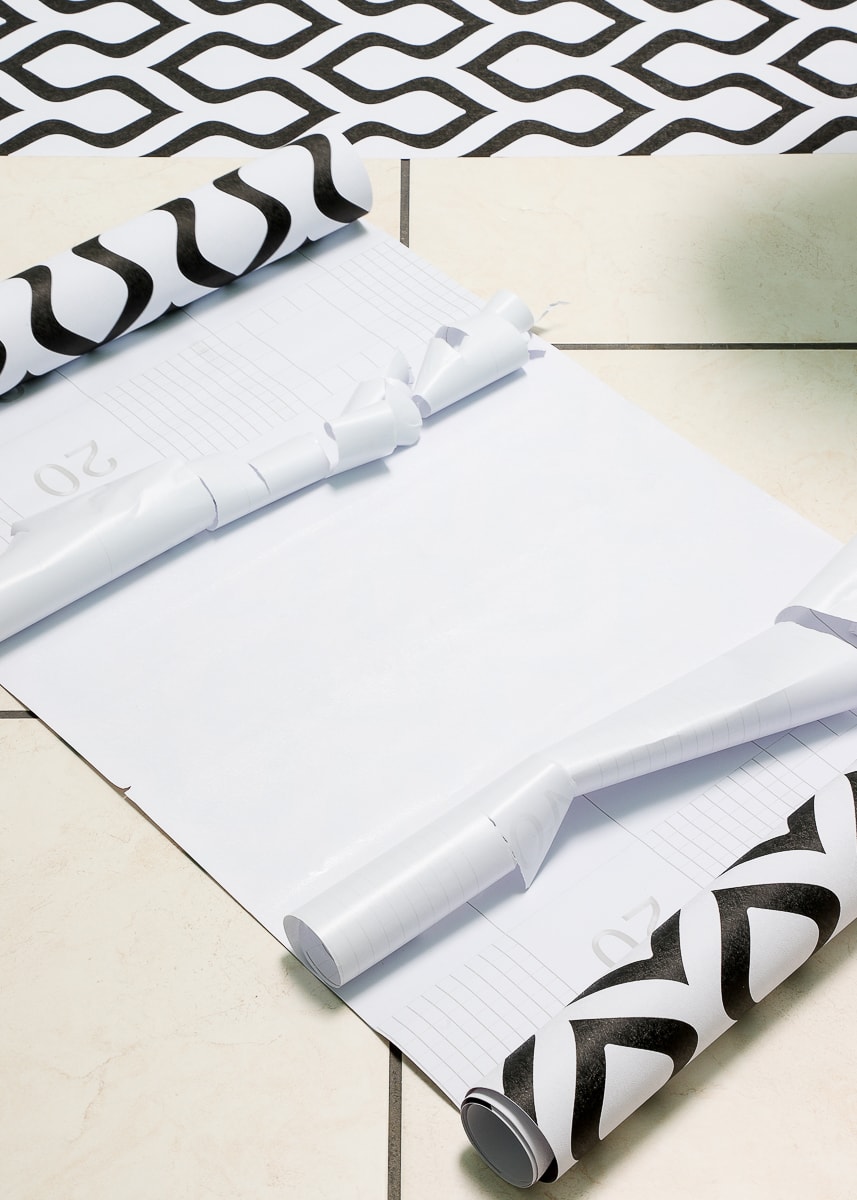
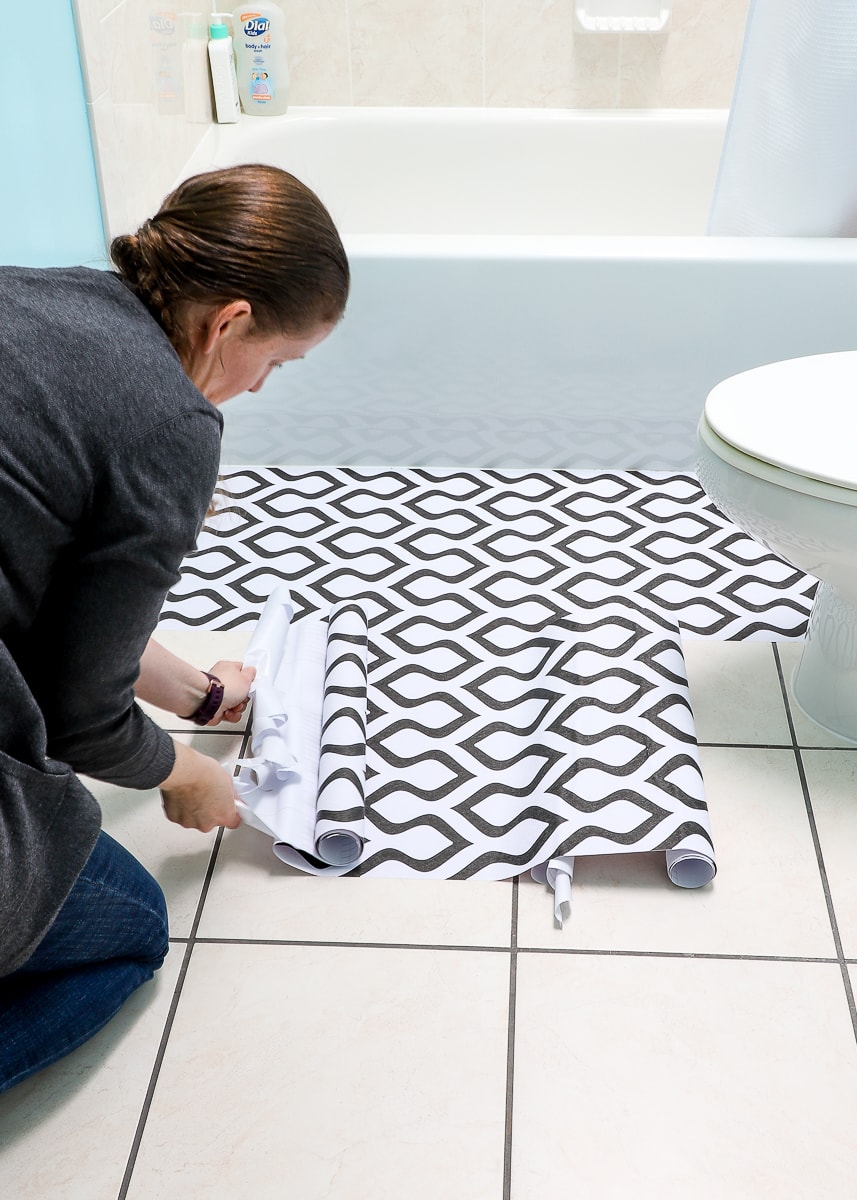
I have installed a lot of wallpapers, and time-and-time again I use the same method: start from the center. I prefer to remove a wide chunk of the paper backing from the center of the panel, and then roll up a few inches of the backing in both directions (this will make it easier to pull out as you smooth the panel down).
Then…lining up the pattern and ensuring your panel is completely parallel to the one before it…smooth down the center of the panel, across the full width of the strip.
(That sounds a little confusing. In the photo below, I smooth from where my hand is down toward my knee.)
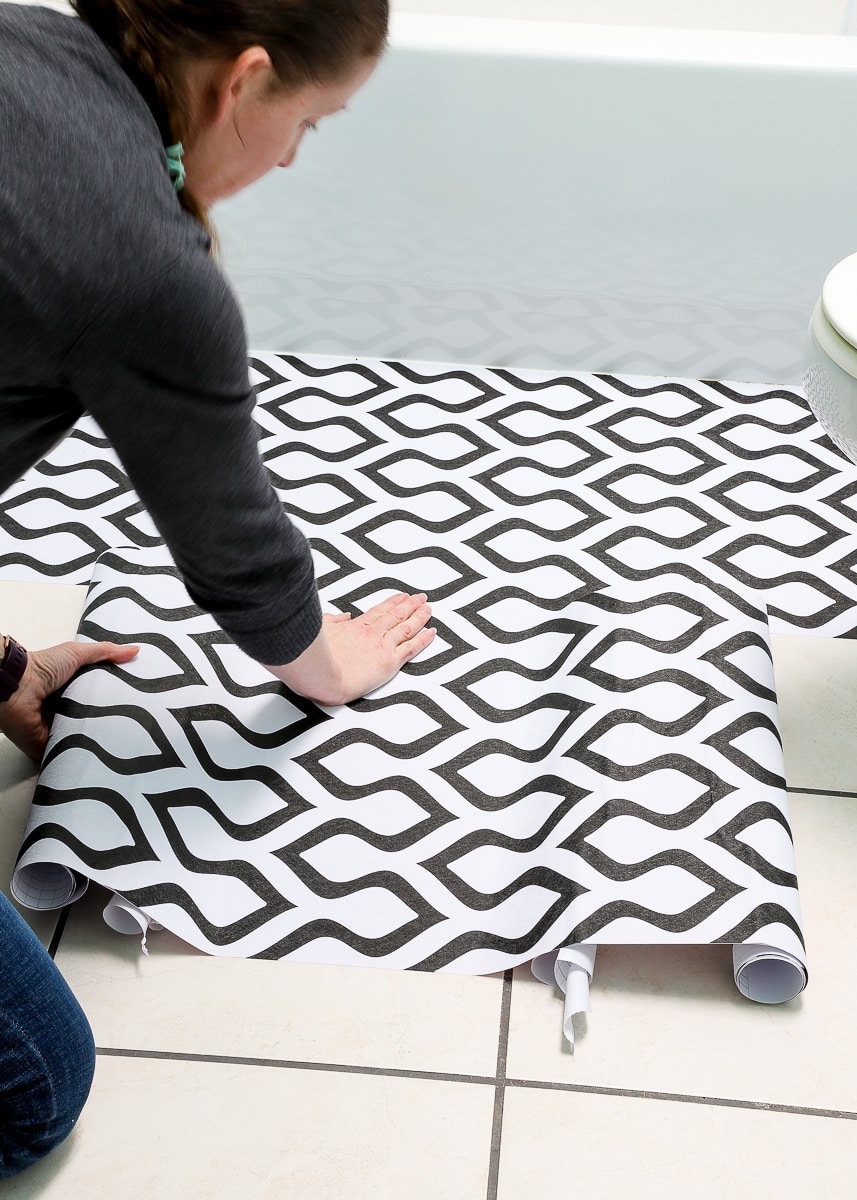
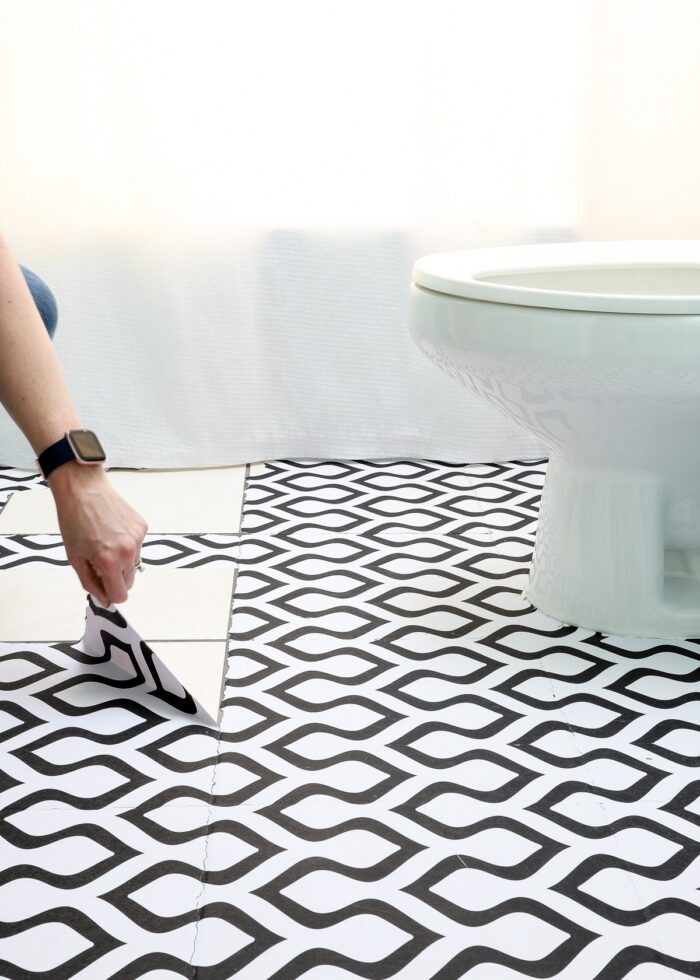
With the center of the panel smoothed flat, find the rolled up paper backing on one side, and start to pull it away from the panel’s center.
As you pull the paper away with one hand, smooth the top of the paper down with the other.
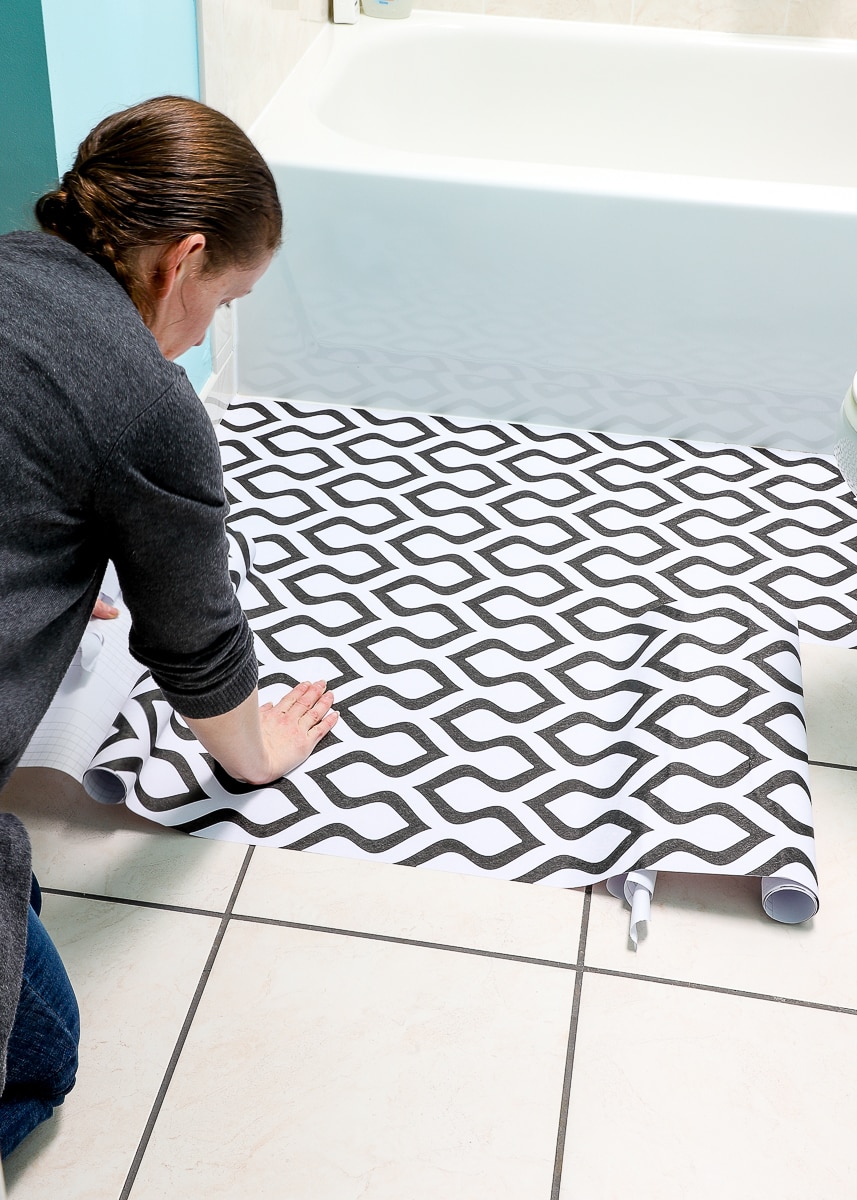
Continue to work your way toward the wall, pulling out the paper backing and smoothing as you go. Use a scraper, as needed, to work out bubbles and wrinkles.
NOTE! See how my panel will need to extend to the left of that protruding corner (above)? This is why you always measure the longest distance between walls so you are sure to have enough paper length.
Return to the center of the panel, and repeat the process in the other direction.
TIP! Peel and stick wallpaper is called “repositionable” for a reason! If your panel doesn’t go down straight or is bubbled or creased, IT IS OKAY to peel it up and lay it back down again. However, because you’ve already removed all the paper backing, a second set of hands might be needed in order to keep it all from sticking to each other!
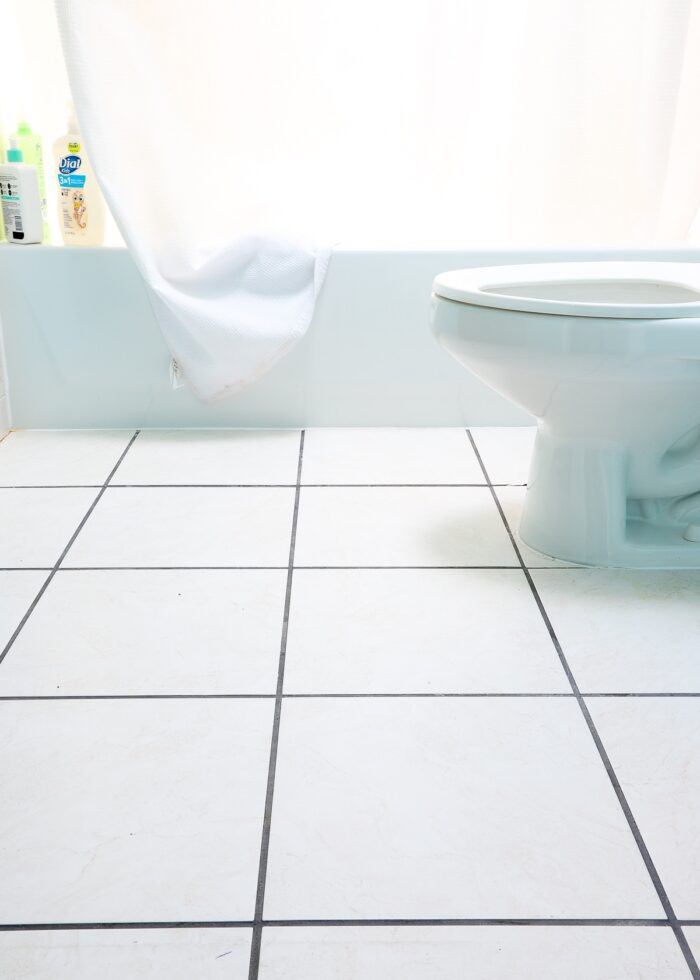
Maneuvering Groves & Grout Lines
In a perfect world, you’d apply peel and stick wallpaper to a perfectly smooth, flat surface.
Our bathroom tile floor had recessed grout lines (meaning the lines between the tiles sat lower than the tiles themselves), but I wanted the wallpaper to appear like a solid, level floor. So I specifically chose NOT to lay the paper into the grooves. As such, I pulled the paper taut across the grout lines; but this meant the paper wasn’t in contact with the underlying grout across most of the floor.
Little did I realize at the time how problematic this approach would end up being.
Want to save this post?
Over time, the tension of the paper across the empty spaces (created by the grooves) actually caused the paper to crack/split apart. I will discuss this in more detail below; but to prevent what I eventually experienced, I now recommend laying your paper down into any sizable grooves, keeping your wallpaper flush against the floor at all times.
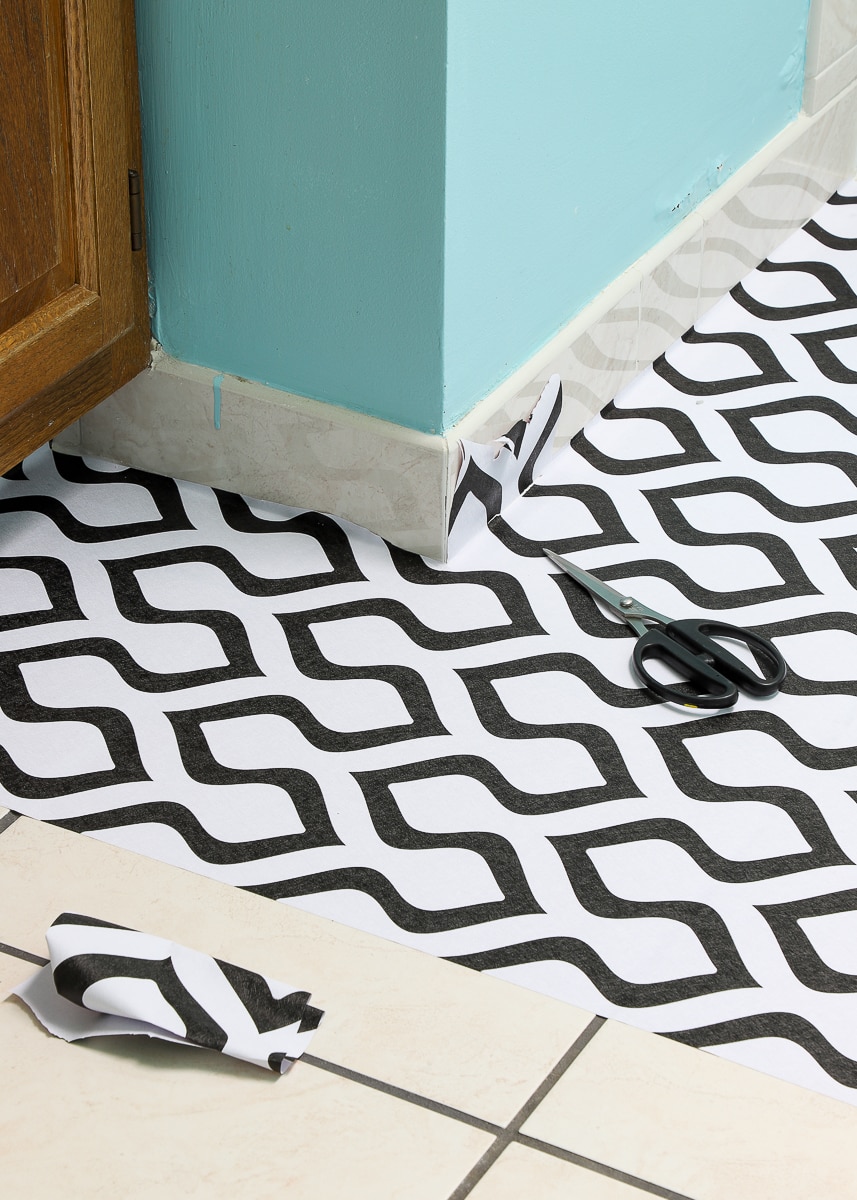
Working Around Edges & Corners
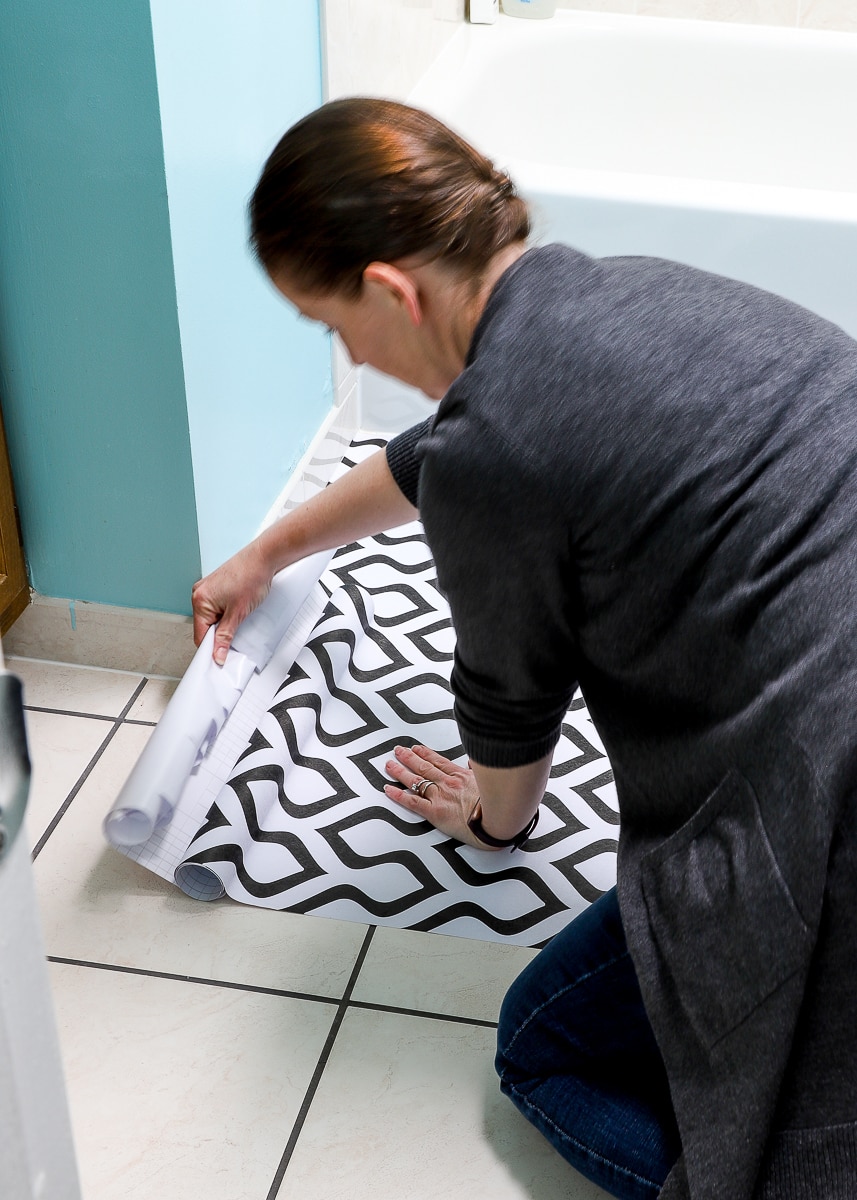
Just like working around windows, outlets, and corners on a wall installation, you will have to do some creative cutting to work around bump outs, corners, toilets, stairs etc. The best method, no matter what kind of feature you are working around, is usually to create vertical cuts in the paper so you can ultimately lay the panel flat.
In the example below, notice how I cut a vertical slice at the protruding corner. This alleviated the tension in the paper panel and allowed it to be smoothed down in both directions of the corner.
In the case of the round toilet, I created vertical slits at closer intervals, which helped the paper lay flat against the floor as I worked around to the back.
See how brittle this paper is! I could literally cut it with my fingernail.
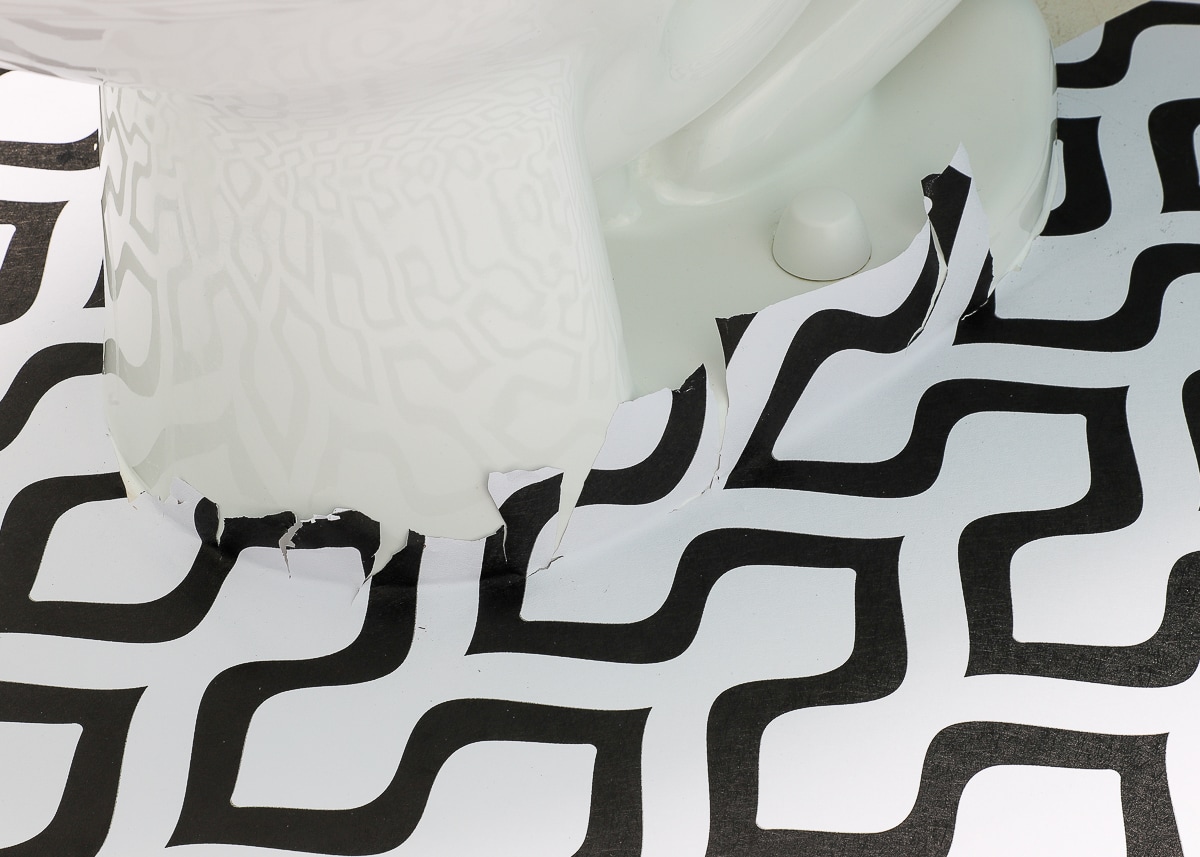
Don’t hesitate to make as ugly of vertical cuts as you need to get the paper to lay flat against the floor in all directions. Once you have the paper smoothed down, use a sharp craft knife along the baseboards or grout lines to clean up all the raw edges.
Completing the Full Floor
Repeat the process of measuring, cutting, peeling, smoothing, and trimming each panel until your entire floor is covered!
To Seal or Not to Seal the Wallpapered Floor
In originally researching this project, I read this tutorial over and over, where the DIYer recommended adding a clear polyacrylic coat over top of the wallpaper. While adding a clear floor sealer will most certainly lead to improved durability, I intentioinally chose not to do this step.
Why? As renters who pride themselves on always getting back their security deposit, I will not do anything to our rental homes that might cause damage I can’t (easily) fix.
I couldn’t conceive a way to safely add a protective coating without it possibly seeping under the seams and/or damaging the original floor. It just wasn’t a risk I was willing to take.
That said, if you’re trying this project in a high-traffic area (e.g., foyer, kitchen) and/or the condition of the original floors isn’t a huge concern, adding a clear coat is definitely worth considering.
Did It Work?
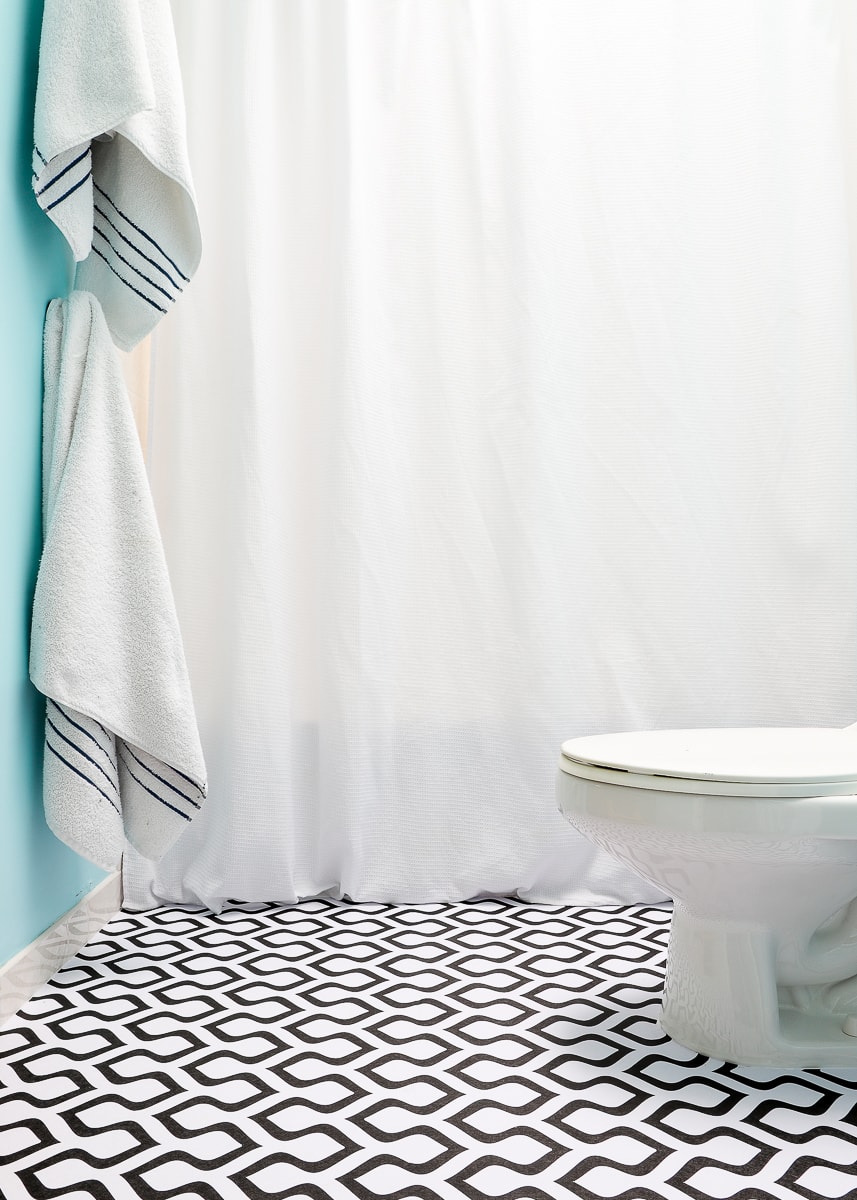
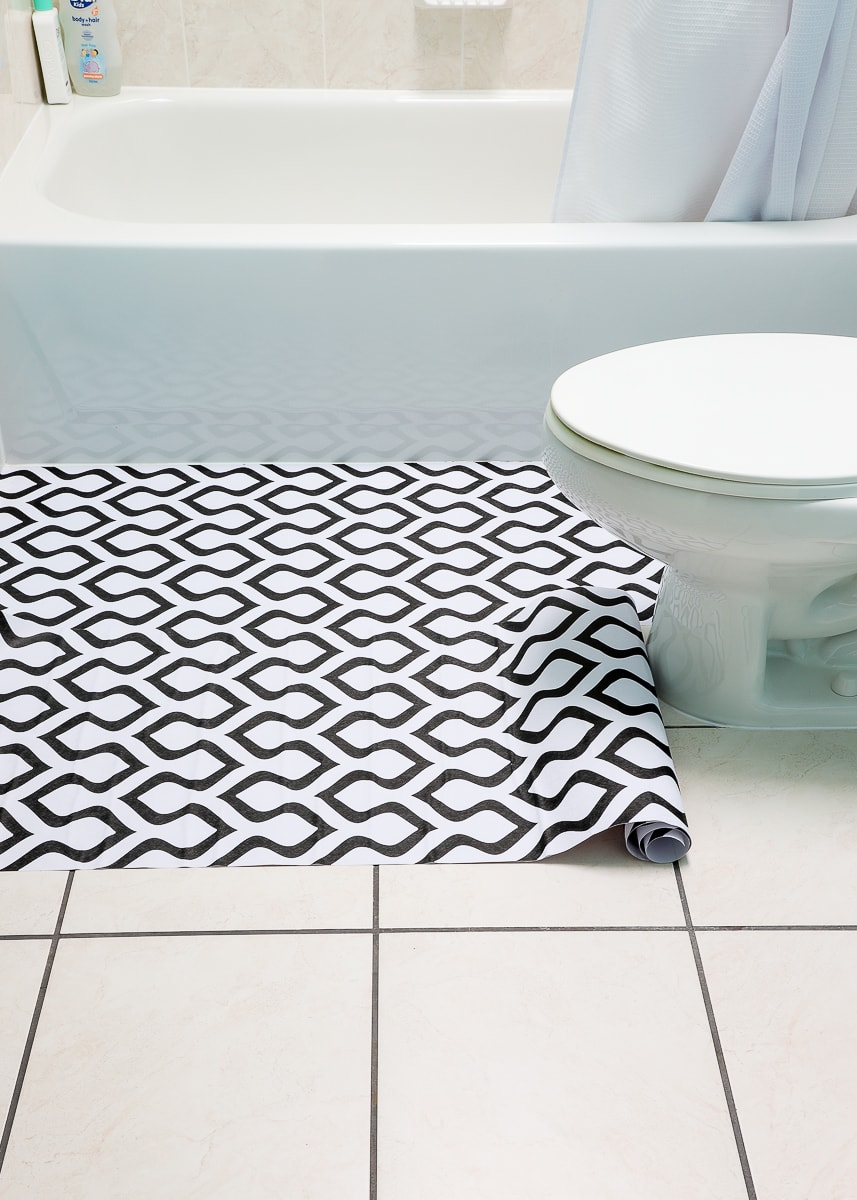
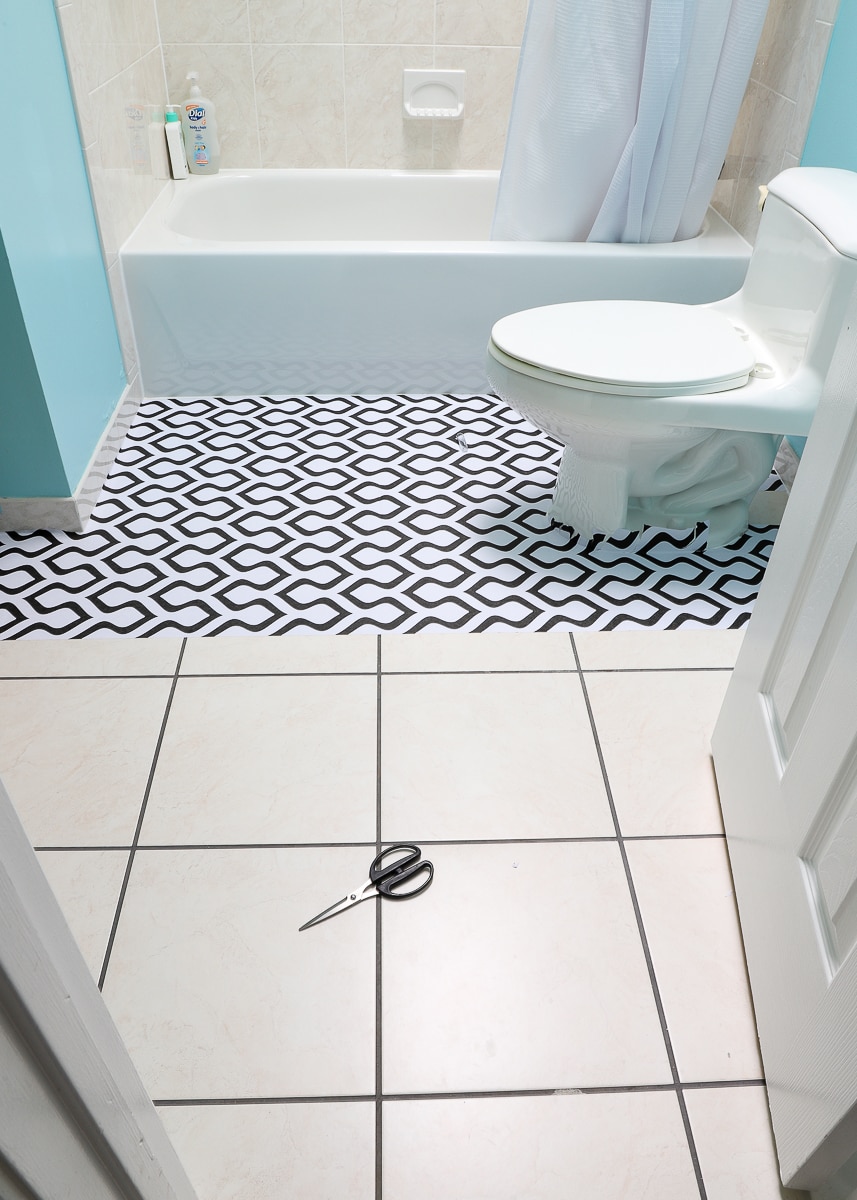
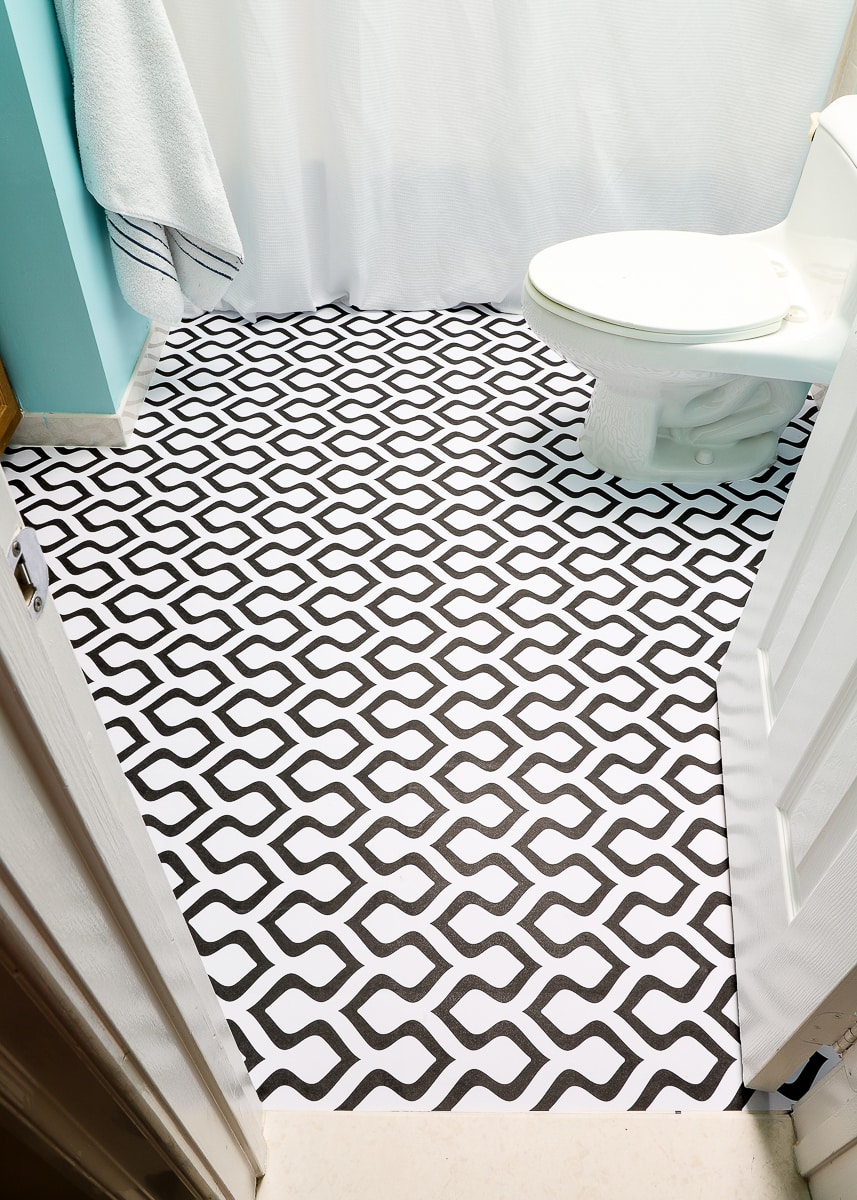
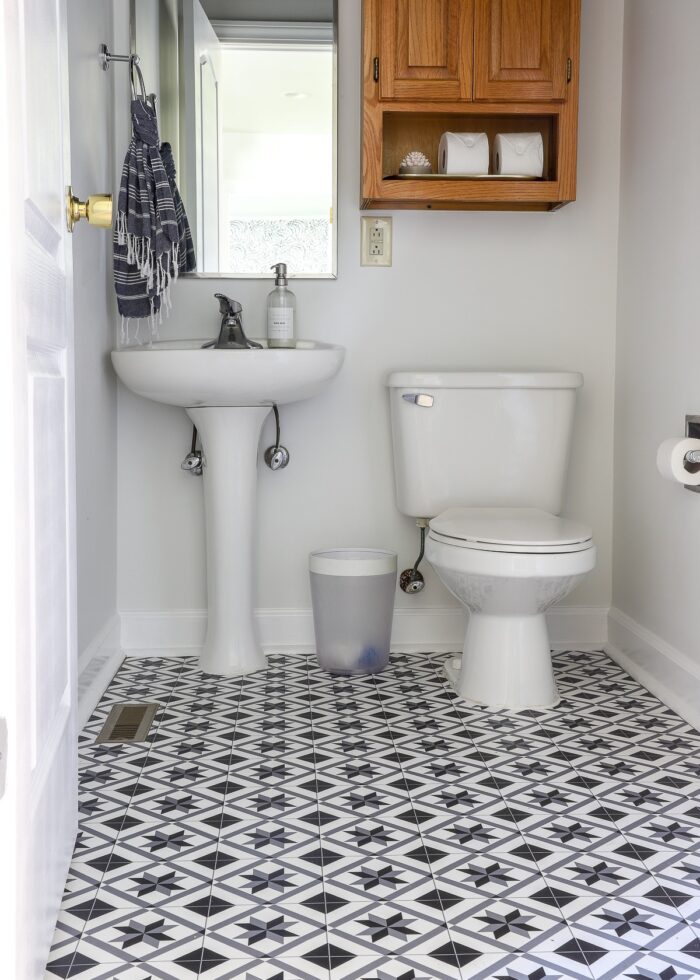
Oh boy! Ready for a real life update on how this wallpapered floor really held up?!? Below is how I originally showed this project here on the blog right after installation:
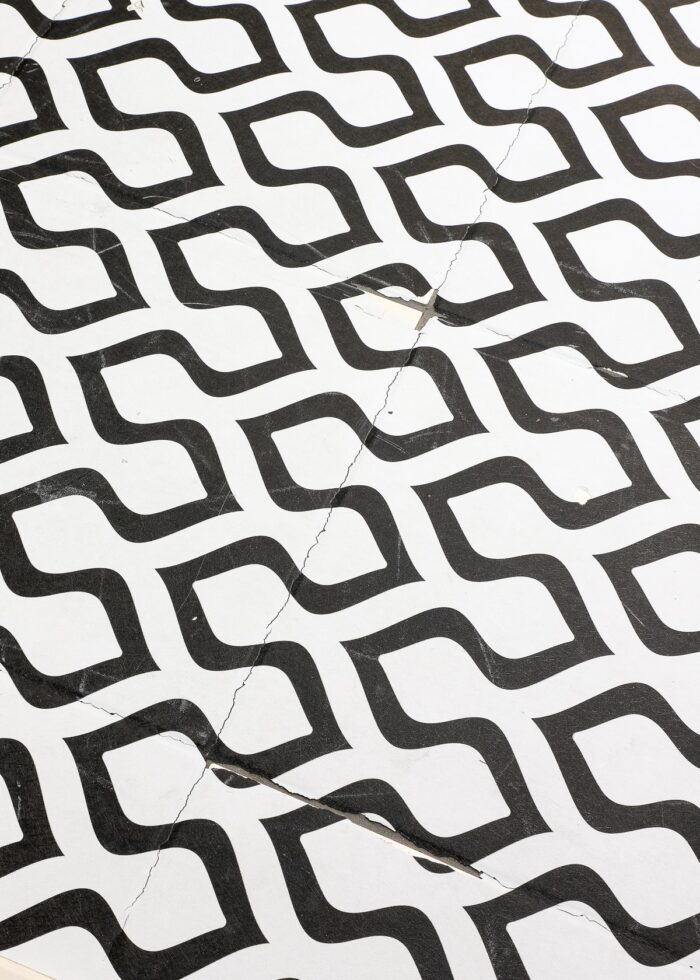
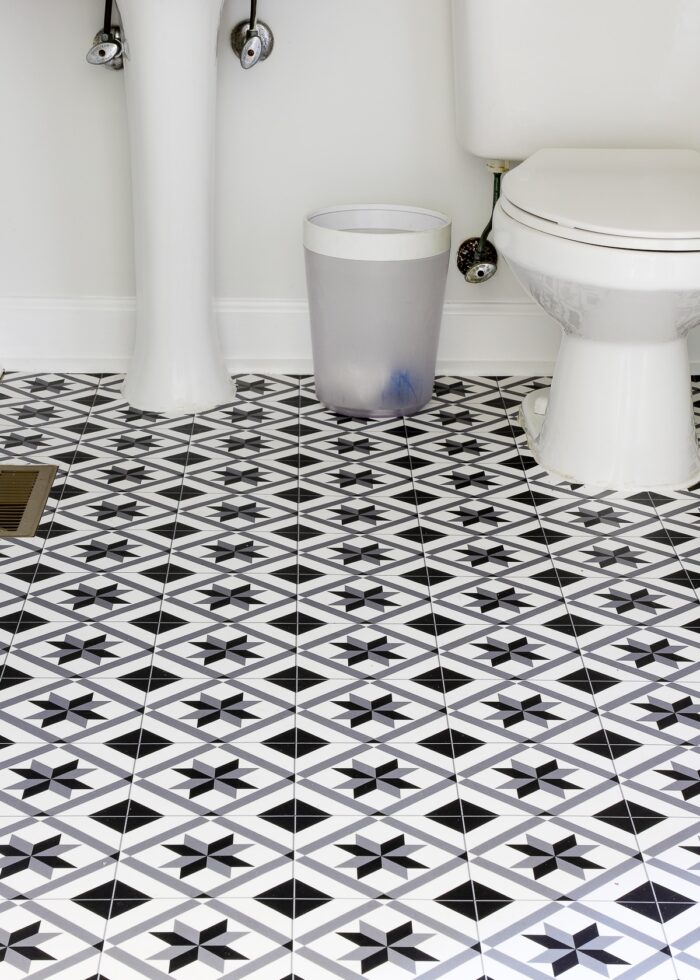
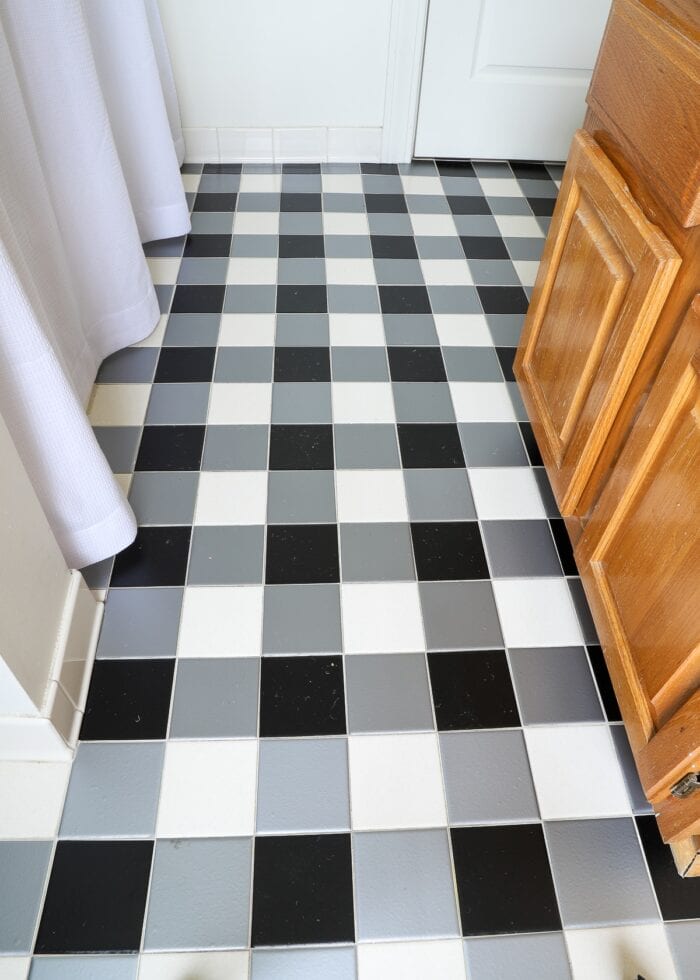
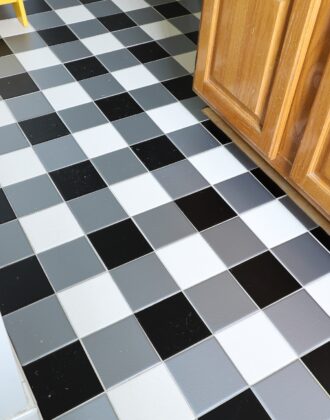
And here is a shot of the wallpaper about 16 months after (right before we moved out).
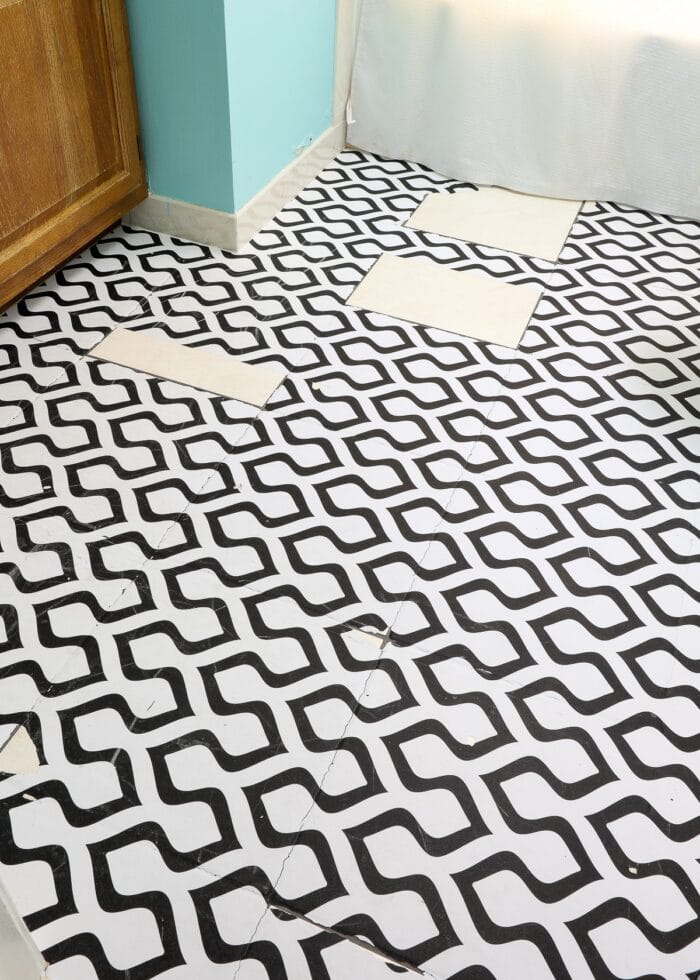
As you can see, the paper eventually split along most of the grout lines due to that tension discussed above. Then, because the paper was essentially sliced into smaller squares, it became quite easy for it to peel up all together (mainly due to water getting under each section thanks to the open seams). By the end our our time in this house, we had 3 large sections of flooring without any paper on it.
Whomp. Obviously not the result I was hoping for!
So What Went Wrong?
I have analyzed this wallpaper flooring project quite a bit. And since you are presumably reading this to determine if it is a viable project for your floors, I want to share what I ultimately think went wrong and how I’d fix it in the future:
- The Paper Quality – As mentioned several times now, the peel and stick wallpaper I chose for this floor was exceptionally low quality. While many peel and stick wallpapers have a vinyl-like quality to them (where you actually need a sharp knife/scissors to cut them), I could easily tear this paper with just my fingernail. I am all-but-certain that a higher-quality vinyl wallpaper would have withstood daily use and walking much better.
- The Grooves – Hindsight being 20/20, I wish I had laid the paper down into the grooves of the floor. Eliminating this surface tension and keeping the paper in contact with a firm backing would have surely prevented at least some of the “cracking” we experienced.
- No Protective Sealant – Obviously, putting some sort of polyurethane or acrylic coat on top of the peel and stick wallpaper would have greatly improved its durability. But as outlined above, I personally find that a risky approach for a rental floor. If you can apply a topcoat and know for certain that it won’t damage the floors underneath, it’s worth considering. Personally, I’d still skip it even after seeing how our paper turned out.

Removing the Wallpaper From the Floor
One of the main appeals of using wallpaper on a rental floor is the temporary nature of it. So…did it come off cleanly? What was the state of our floors after all was said and done?
Smell
Wallpapering a bathroom floor was always somewhat of a gamble. While we don’t tend to wear shoes in the bathroom, nor does it get the foot traffic of other areas, it does get a fair amount of water on the floor (hello, little boys!)
While the moisture never did cause the paper to actually peel up along the edges by the tub, when I eventually removed the paper, it was clear water had gotten underneath. The bathroom never stunk per-say, but once I peeled up that wet paper, it wasn’t exactly…ummm…pleasant.
Scraps
I had visions of simply lifting up an edge of one of the panels and pulling the entire sheet off the floor. After all, that is typically how wallpaper comes down from the wall.
Again, because this paper was so brittle (and possibly because of it being matted down for over a year), it came up in patches…and sometimes tiny little scraps.
Yes, I was eventually able to peel up every last inch. But it wasn’t exactly quick or easy.
Adhesive
Lastly, once I had all the wallpaper (painstakingly) peeled off the floor, there was indeed some residue left on the tile from the paper’s adhesive backing. This might be attributed to the quality of the paper or the fact that it was applied to tile (and not drywall). I ultimately had to clean the entire floor vigorously (with Windex) to remove the sticky residue.
Would I Wallpaper a Floor Again?
If you had asked me that questions as I was peeling up tiny scraps of wallpaper and scrubbing off residue, I would have said “no way, never again!” But I’m actually not ready to give up on this concept entirely. Yet.
I very much believe the issues we experienced were mostly due to the quality of the paper I picked and how I dealt with the grout lines. I am pretty confident that thicker and/or vinyl-like wallpaper spread across the floor and into the grooves would not have resulted in the same horrible cracks (which is then what led to the paper peeling up entirely).
Time will tell if I give a higher-quality floor paper a try. In the meantime, I’ve tried a few other things that are working out much better:

Okay! So now that I’ve covered our experience with putting peel and stick wallpaper on the floor, let me answer a few other common questions you might have!
How Long Does Floor Wallpaper Last?
It’s all a bit blurry now, but I would say our floor stayed pretty pristine for at least a year, maybe even a bit longer. The cracks along the grout lines started ever so slowly, and the paper only started to peel off in big chunks toward the 16 month mark.
Can I Put Wallpaper on Tile Floor?
Yep! The paper itself stuck to our tile without any issue and even laid down smooth and flat (no wrinkles or air bubbles in sight!) Where I ran into trouble was along the grout lines. Instead of stretching the paper straight across the grout lines to create a chasm, I would instead work the paper into any recessed areas so that it remains in contact with the floor at all times.
How Do You Clean Wallpapered Floors?
We cleaned these floors with the same standard wet mop that we used on the tile floors before. This wallpaper is listed as “waterproof,” and any of our water issues came from the sides/seams not from cleaning.
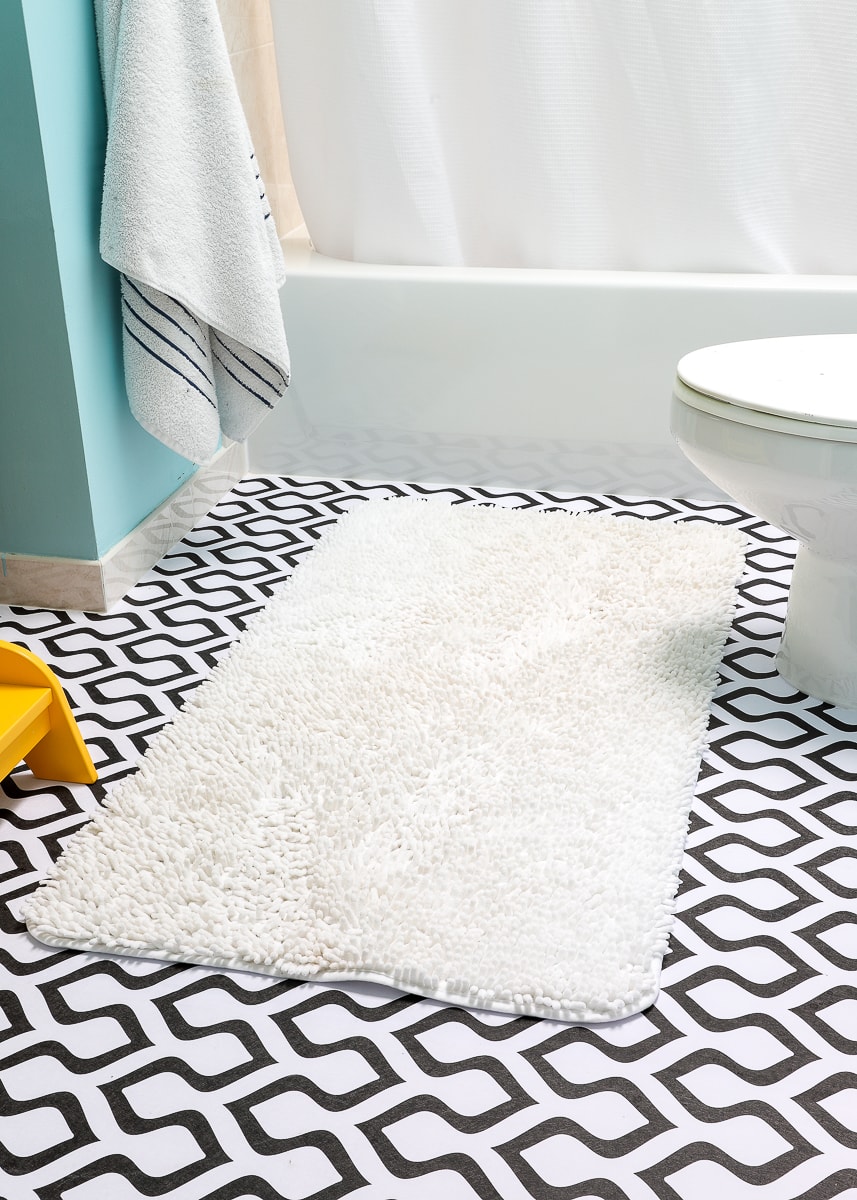
Is the Wallpaper Slippery?
Nope! At least not the paper we used. Again, the tile floor underneath was SUUUUPER slippery when wet, so I was actually a little relieved to have it all covered up. We did keep our bathmat in place (by the way, these mats are the best we’ve ever bought!) to catch most of the water off the boys; but otherwise, we had no slipping issues at all!
Other Great Rental Floor Solutions
Ugly or damaged rental floors are tricky to cover up. If this project isn't right for your floor, here are some other solutions to check out:
- How to Cover Ugly Floors with a Vinyl Floor Mat
- How to Make Your Own (Cheap) Bathroom Tile Stickers
- Can You Put Peel and Stick Wallpaper on the Floor?
- Can (& Should) You Use Floor Pops! Floor Tiles In a Rental?
- What You Need to Know About Using Peel and Stick Tiles In a Rental
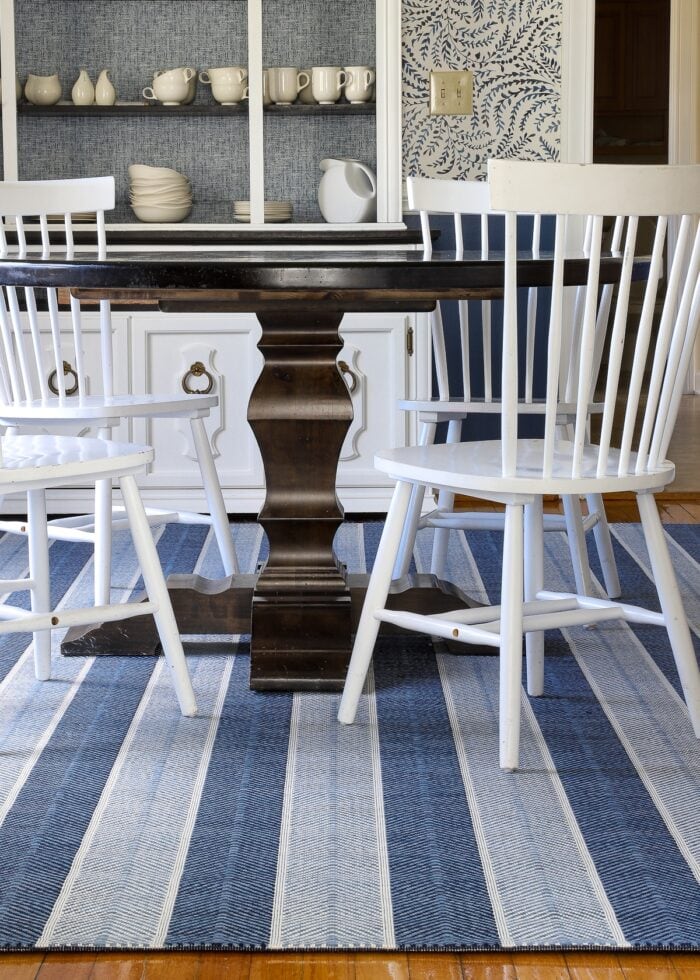
- The Rugs We Purchased for Our New Home (& Why)
- A Rug Under the Kitchen Table | Practical Ideas for Making It Work
- Did You Know You Can Re-Size Your Rugs?
In Conclusion
I’ve said it before and I’ll say it again: a good patterned wallpaper can single-handedly transform a room. And that was certainly the case in this bathroom. From an aesthetic perspective, this wallpaper was a total home run.
Although the paper didn’t end up being as durable as I hoped, I still consider this endeavor well worth the $20 and few hours of my time. We got a solid year out of this paper before it started to become a mess; and I could have easily re-papered over sections had we been planning to stay in that home for much longer.
I hope what I’ve shared here doesn’t discourage you but instead helps you head into this kind of project with eyes wide open and a better understanding of where and how things can go wrong. With a few of my errors corrected, I suspect you will ultimately have much better results than I did!
Megan
11 Comments on “Can You Put Peel and Stick Wallpaper on the Floor?”
Looks amazing! Thanks for the tutorial.
You are welcome! You’ll have to let me know if you ever give it a try!
~Megan
I’ve never tried repositionable wallpaper, but I did use contact paper to cover a counter in the laundry room of military housing. That counter top made me sooooo happy (it covered and ugly black formica) and came up with no damage (just a little scrubbing!)
Yes!!! These products have come such a long way. And if you really just need a temporary fix to camouflage something ugly you can’t change…it sure is an amazing option!
So nice to hear from you, hope you’re doing well!~Megan
So very pretty and I love the colors together!!
How did your floor wallpaper hold up? I’m using a heavy duty vinyl which has a five year warranty. Would this be hard to remove someday if I put a coat of epoxy on top the sealant, which I believe is polyurethane. Thank you.
Hi Cheryl,
The wallpaper on our bathroom floor has held up “okay.” I haven’t updated the post yet because I want to let some more time pass.
You might recall from my post that I used VERY cheap wallpaper (it tore easily even as I was applying it), so I shouldn’t be surprised that it has ripped in some areas. Mainly, due to tension across the grout lines. If I could re-do it, I’d lay the paper INTO the grout lines instead of across them.
If you want to use wallpaper in a high traffic area, I think sealing it is a good idea. However, I have no experience whatsoever on how it will come up. My gut says that it will be fine, but until you test it on your specific floors, there’s no way to know for sure.
I’d try sealing it in a small corner and see how it comes up before doing the entire floor.
Hope that helps a bit!Megan
Hello!
You are amazing! Thanks for doing what you do.
Quick question. Do you think I can Wallpaper a vinyl floor? If so, is it the same procedure?
Thanks for your kind answer.
Hi there!
I don’t see why not! Peel-and-stick products stick to almost anything these days, so it’s worth a shot. If you’re nervous about adhesion, you can always test a small corner before you do the whole floor!
Good luck with your project and keep me posted how it turns out!Megan
What color paint is that gorgeous wall?
We own not rent so when we needed to replace our floors with vinyl plank last spring we had to remove the old sheet vinyl. But we had some weirdly similar experiences. We were told it wasn’t glued except at the seams and perimeter. Wrong. The vinyl came off in tiny strips and pieces in a lot of places. Worst issue was the smell. The vinyl was a coating on some sort of papery substrate. It peeled off the backing in most places with minimal scraping but the underneath smelled like vomit.
I did not want to replace the vanities but they were in bad shape so we gel stained them and I lined them with peel and stick wall paper. That was hard because the pieces were about 20 in x 15 in so I peeled it all at once and did a lot of under my breath muttering of bad words but eventually got it stuck down. It’s been there about a year and it looks fine. I pull stuff in and out of the vanity all the time. There were only two shallow drawers so I made my own drawers with bins. One holds all my hair stuff and I pull it out and set it on top to dry my hair. I bought my paper on Amazon – it’s plain white and was pretty expensive compared to the contact paper it replaced.