Wallpapering a Stairwell | Tips You Need to Know!
Do you know what happens when you spend an entire summer “mentally decorating” a home you have yet to move into? You get ideas. Aaaaall sorts of ideas that may or may not actually be feasible in your new space. And then you get so attached to said ideas that you can’t let them go and instead find a way to make them happen. Such is the story of the wallpaper now hanging in our stairwell. It looks ah-mazing, and it might very well my favorite wallpaper installation…ever. But this is definitely not a DIY for the faint of heart. Today, I want to share all my tips and tricks for wallpapering a stairwell, in case you too reeeeeaally want to make it happen (despite your better judgement).
Why I Chose to Wallpaper Our Stairwell
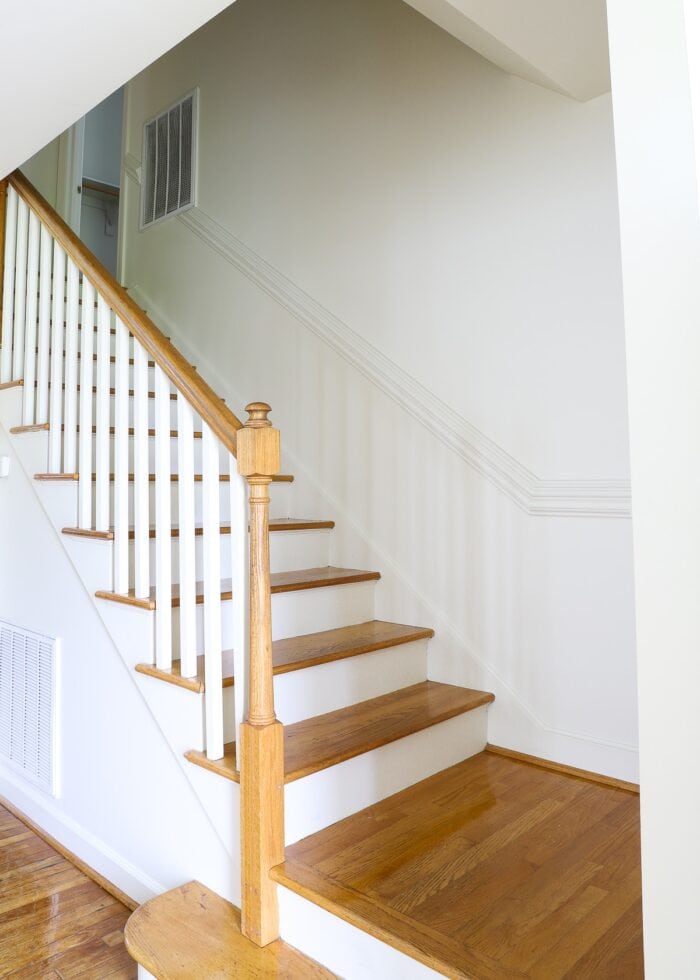
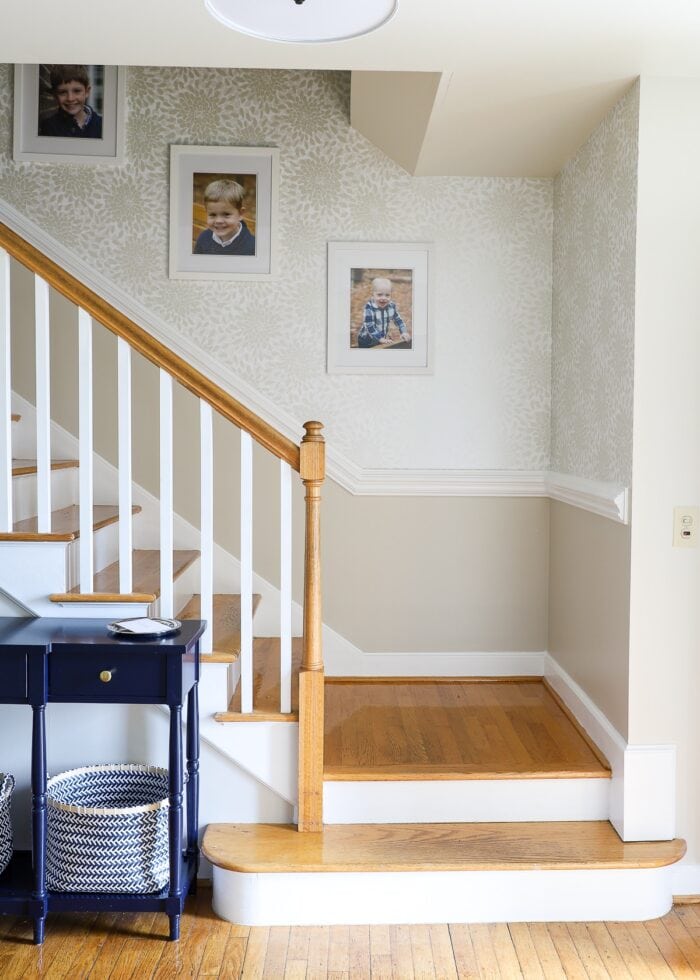
Early on in the summer, before we moved in, we were able to quickly walk through our home and haphazardly snap a few photos. It was then that I discovered that our staircase had a gorgeous, chunky chair rail; and I immediately became obsessed with the idea of painting below it and wallpapering above it. After all, the stairwell wall is short, and since I’d only be doing above the chair rail, it wouldn’t require much paper (or time!) at all!
Right?!?
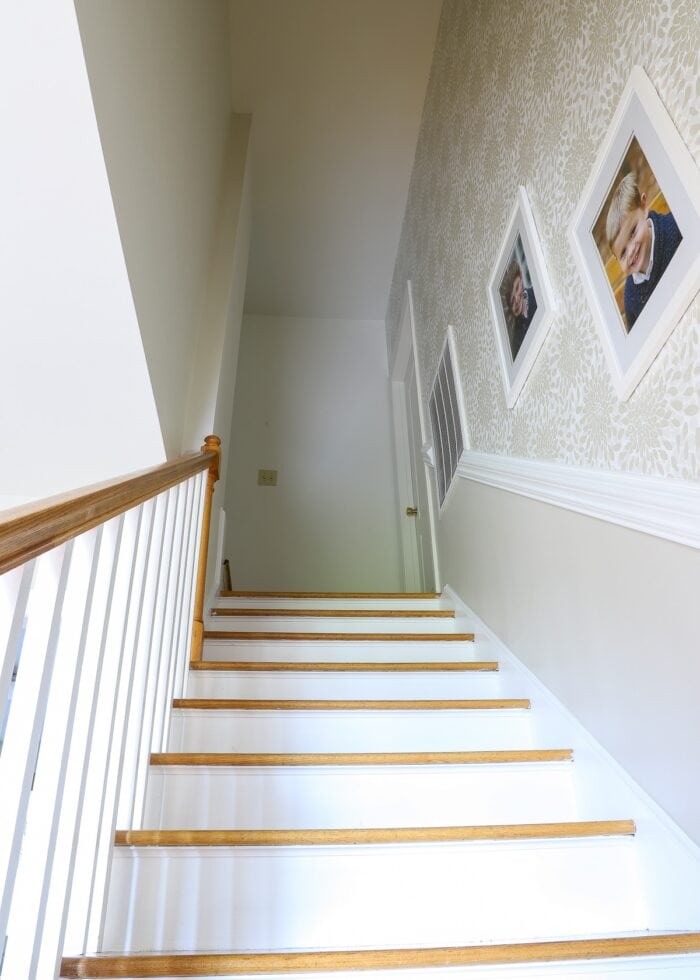
What I didn’t realize…until after we moved in…is that the staircase wall is a full two-stories high. Some staircases have a slanted ceiling that matches the slope of the stairs, creating a “normal” height wall up the stairs. But this one doesn’t have that lowered ceiling, leaving a full-height wall on one side of the stairs.
Whomp.
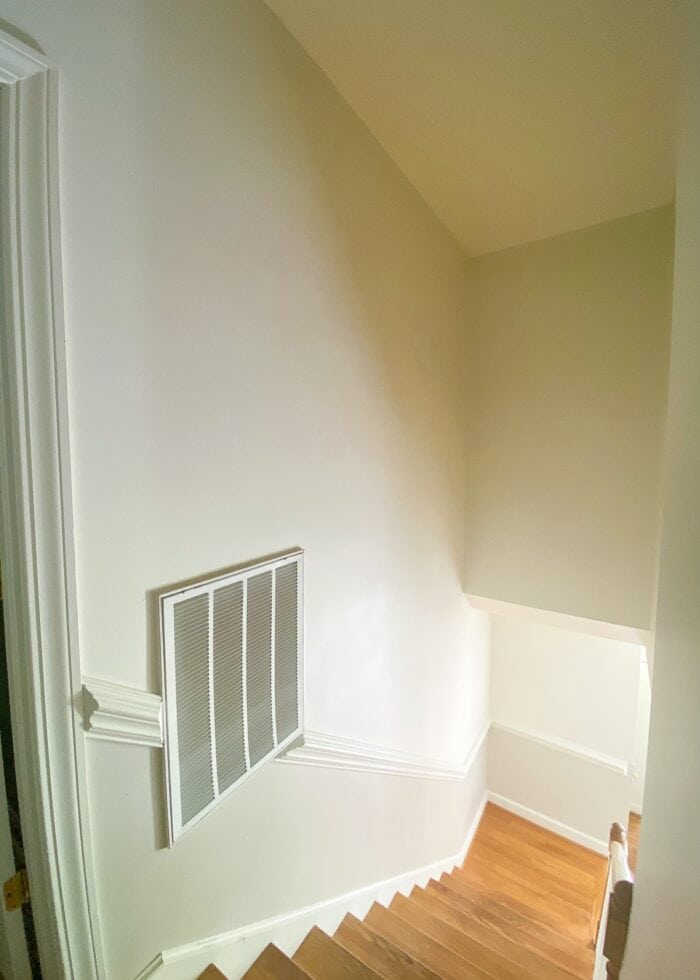
That super tall was not only going to take a lot more wallpaper than I originally planned but also a lot more time than I hoped. On top of that, I had no idea how we’d actually hang it.
So I tried to drop my plan of wallpapering the stairwell. But I just couldn’t. I had already ordered the wallpaper and I looooooooooved the whole idea of adding this stunningly simple pattern to our foyer. And with Greg’s confidence that we could actually hang it (without getting hurt), we ultimately decided to go for it!
(Doesn’t that face just breed confidence!)

Before and After
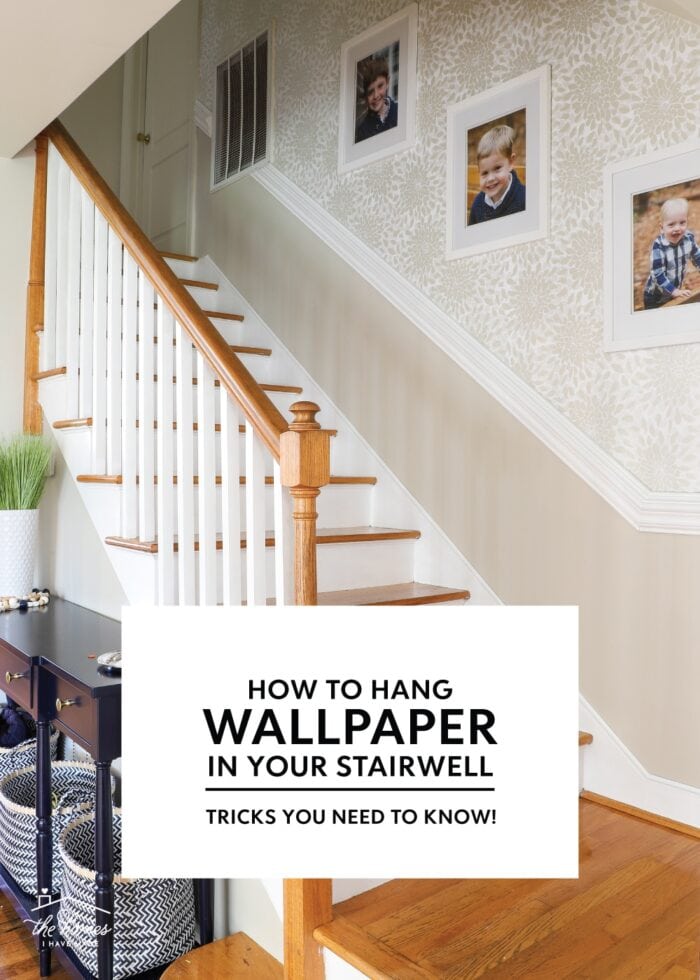
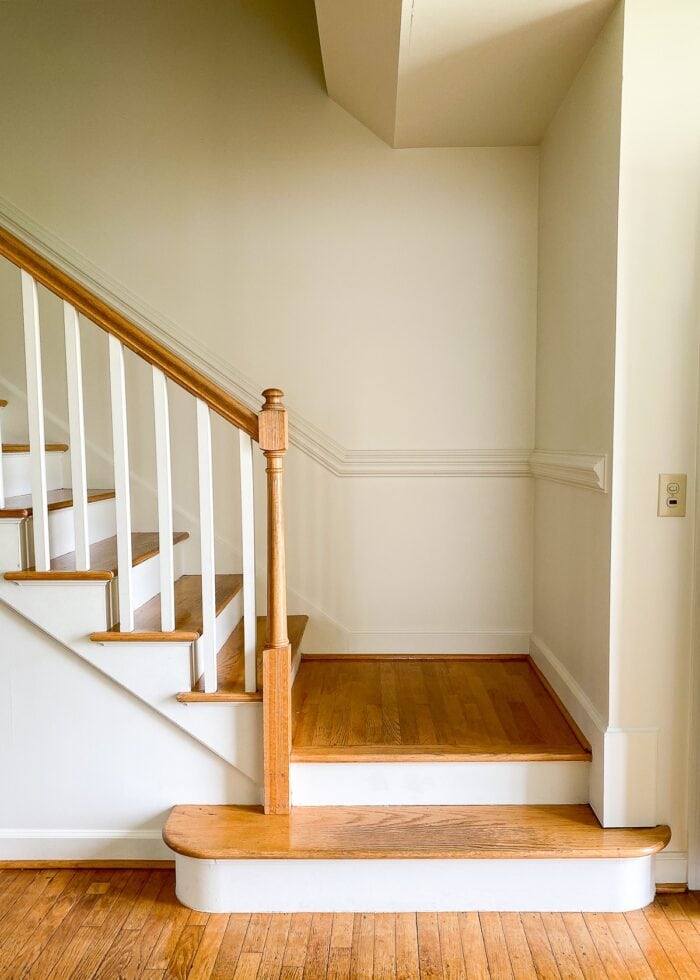
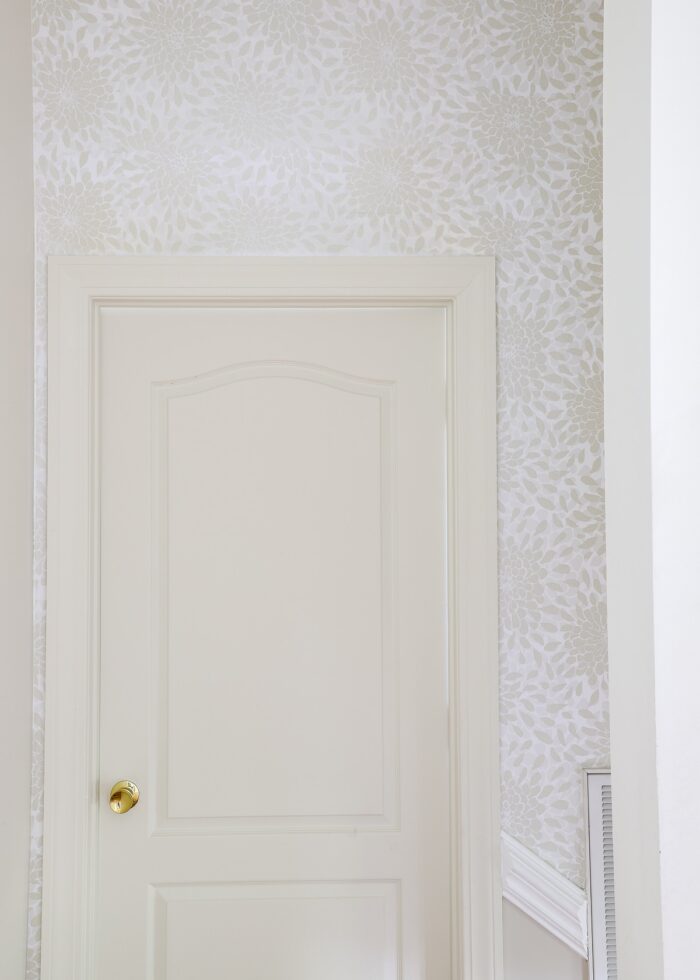
Below is a snapshot of our foyer staircase the day we moved in. The shadows in this home make every angle look a little different; but in general, the stairs have original pine treads, bright white risers and spindles, and a yellow-ish white paint on the walls, chair rail, and baseboards.
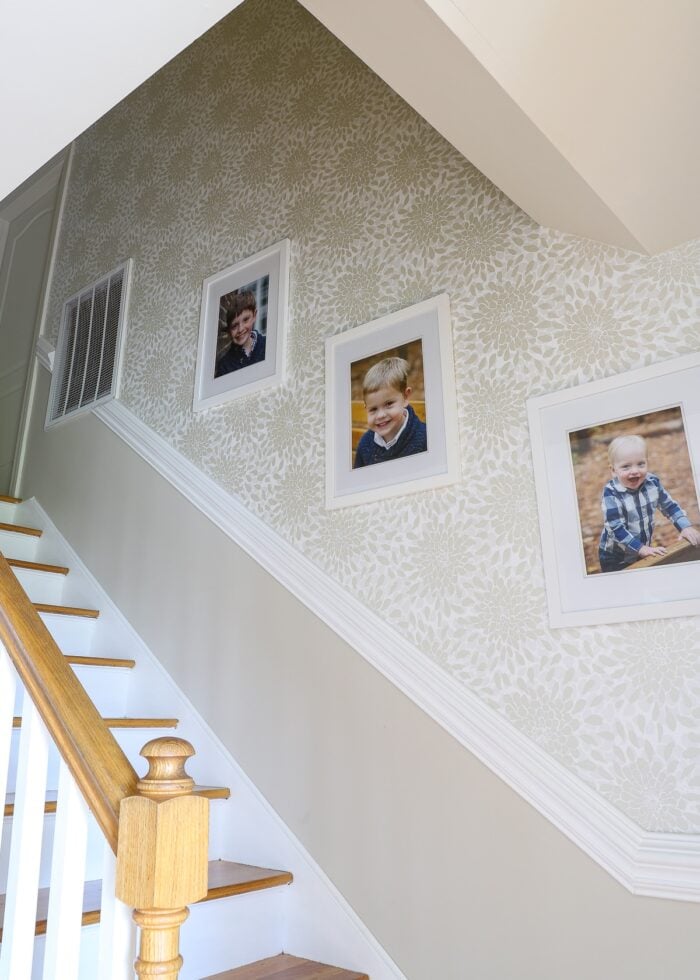
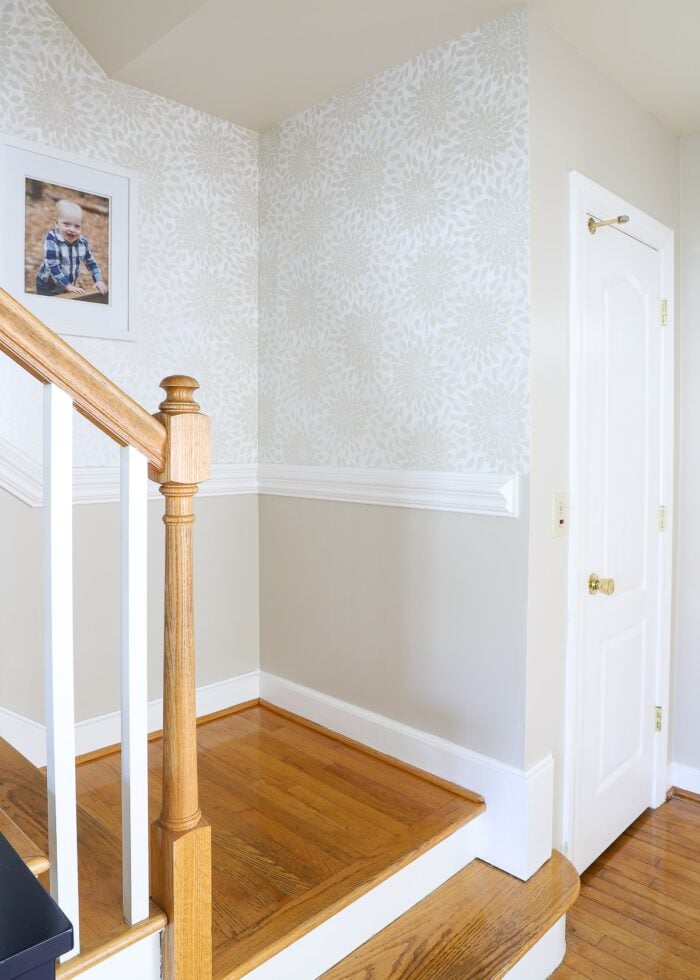
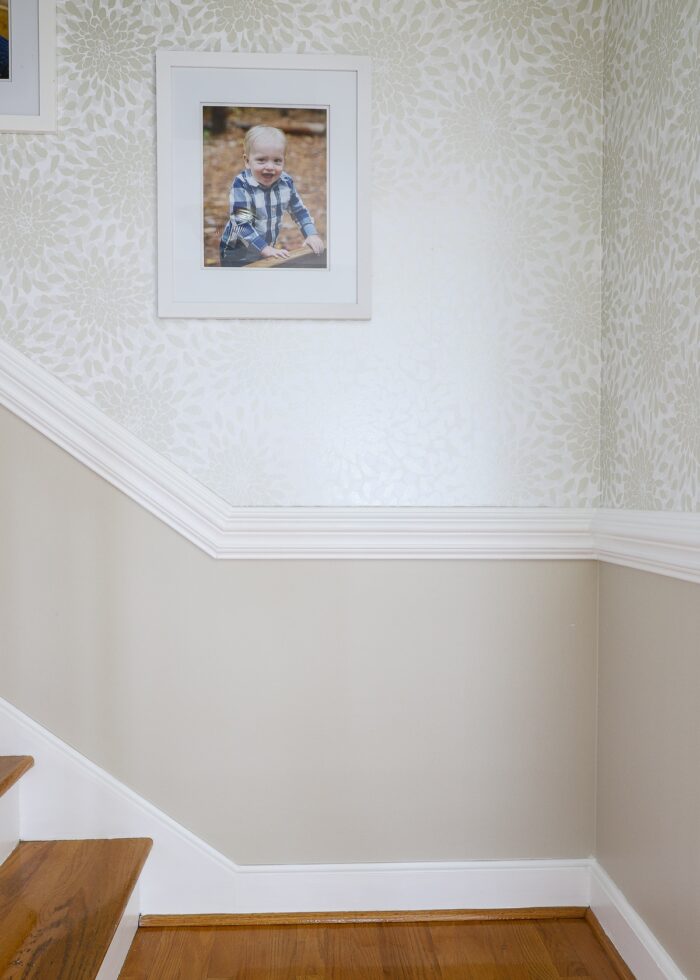
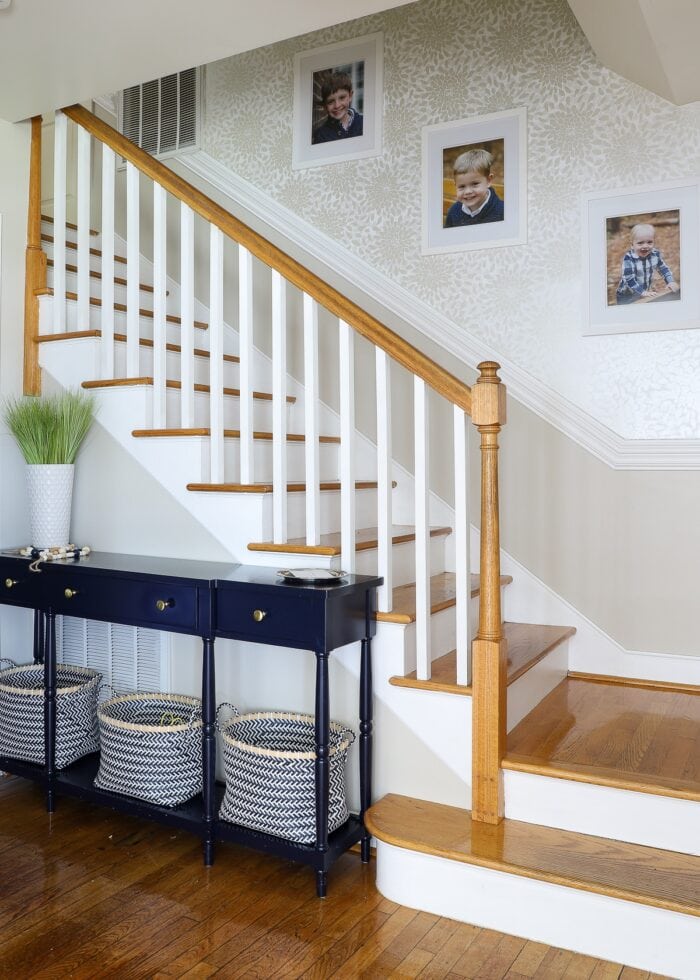
After painting the lower half of the wall with Edgecomb Grey and wallpapering above the chair rail with Roommate’s Toss the Bouquet wallpaper, here is how our foyer looks now!
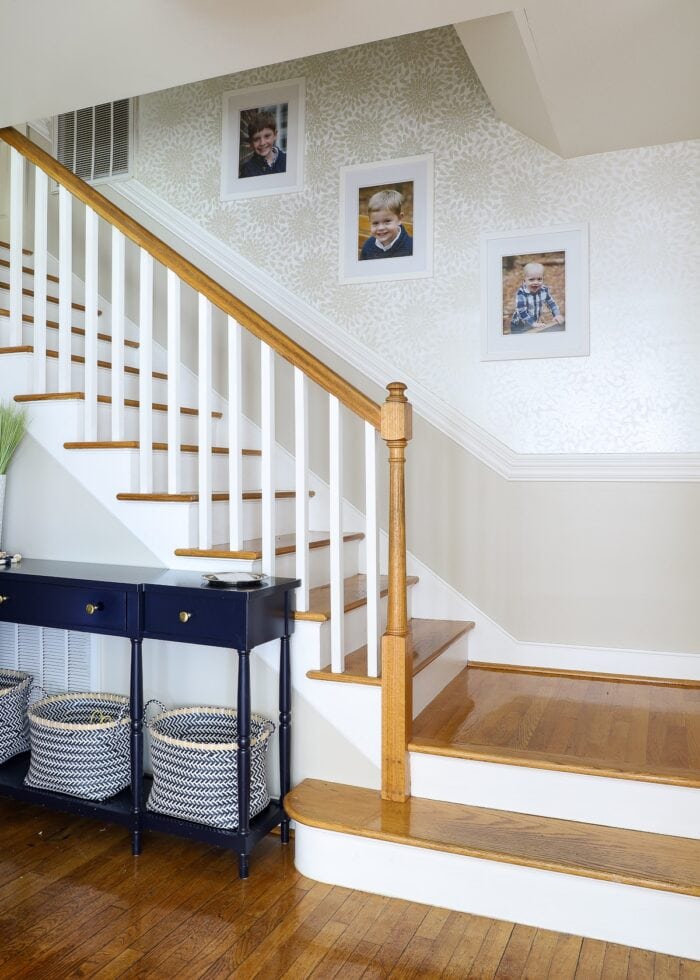
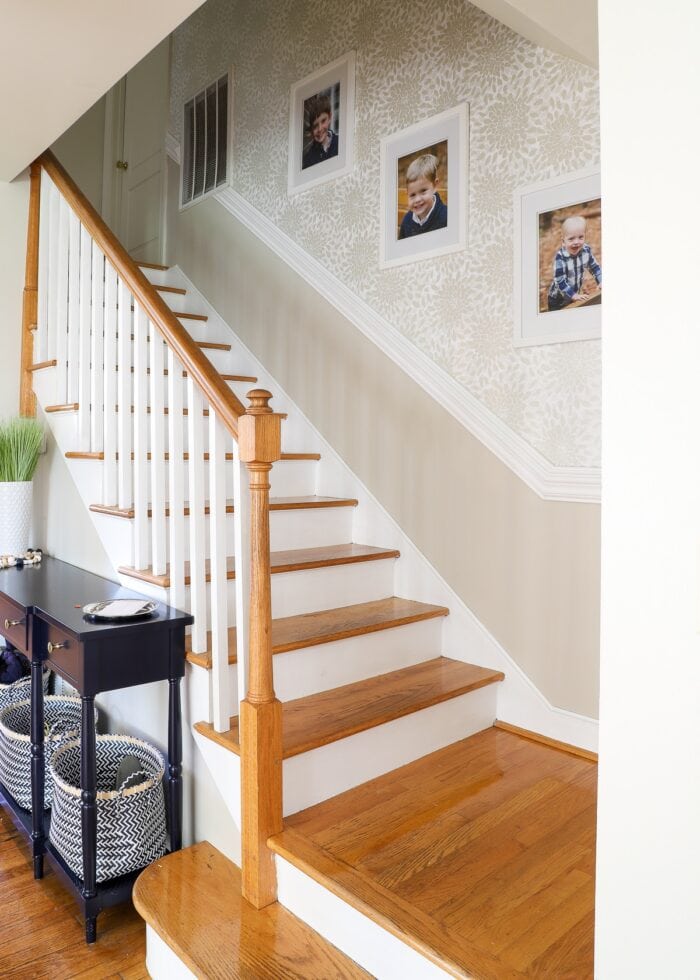
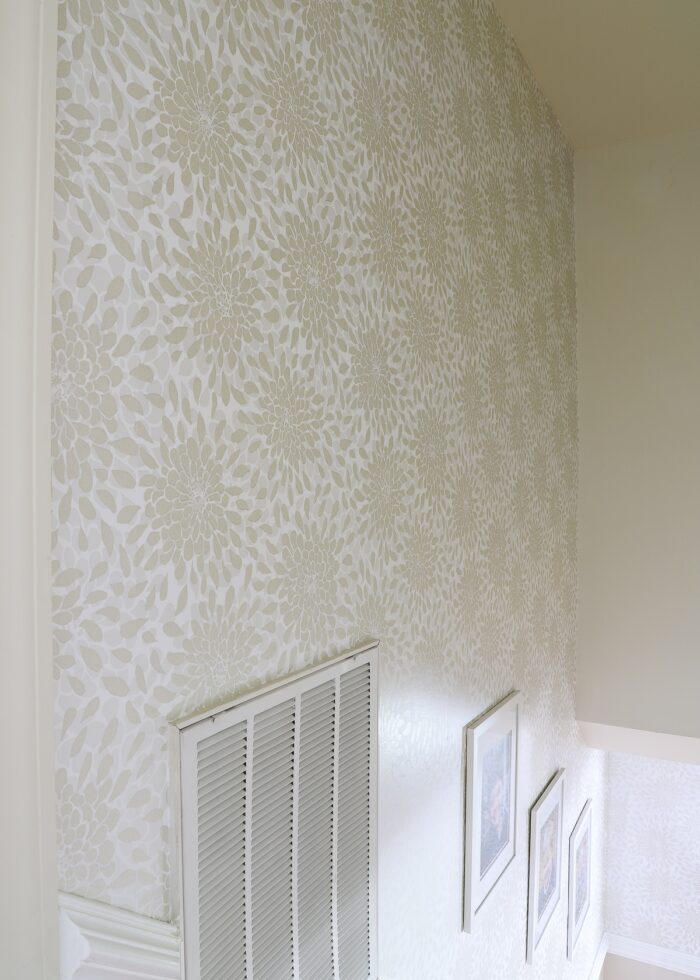
This wallpaper actually has a slight shimmer to it (which is why it is so darn difficult to photograph) but it’s an absolute stunner in person. It is both whimsical and sophisticated, simple and dramatic. It adds the perfect amount of style to our foyer without being too bold or intense.
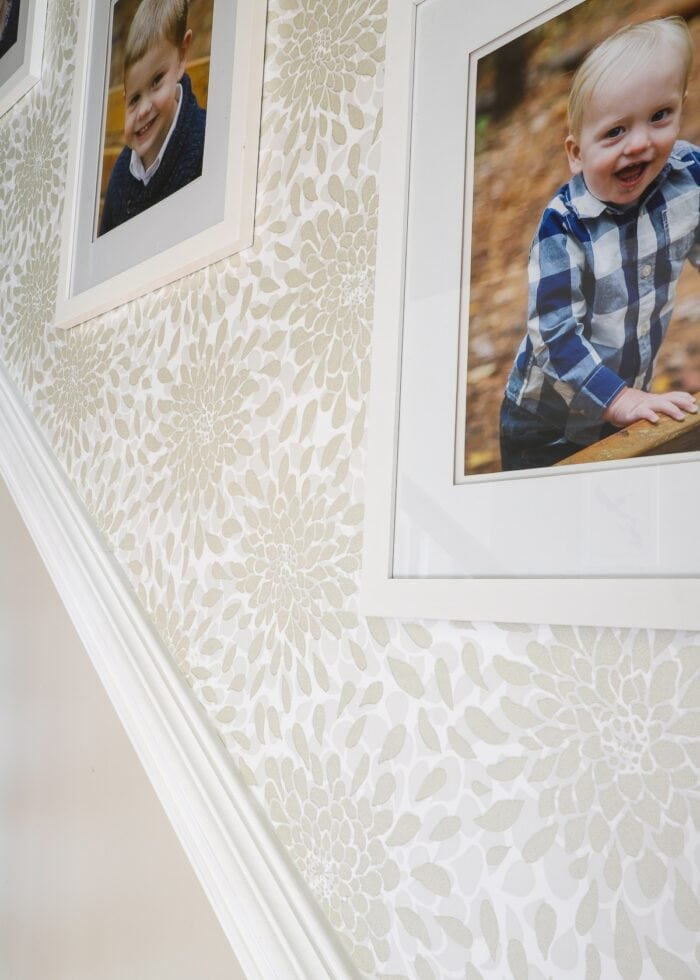

Side Note: What I didn’t quite anticipate is how dingy the yellowy trim would look next to the pretty white wallpaper. So I decided to paint the chair rail bright white. And then…I didn’t realize how dingy the bright white chair rail made the entire rest of the stairwell paint look. So as a result, I ended up panting the chair rail, stair risers, and railing ALL bright white. And then had no choice but to paint the rest of the trim throughout the foyer. That my friends, is the definition of a domino effect!
Supplies Needed for Wallpapering a Stairwell
While every stairwell may call for slightly different supplies, here is what we used to wallpaper our staircase:
- Peel and Stick Wallpaper – read below to see my tips for how much to buy and what kind of pattern to pick.
- Adjustable Extension Ladder
- Sharp Knife
- Scissors
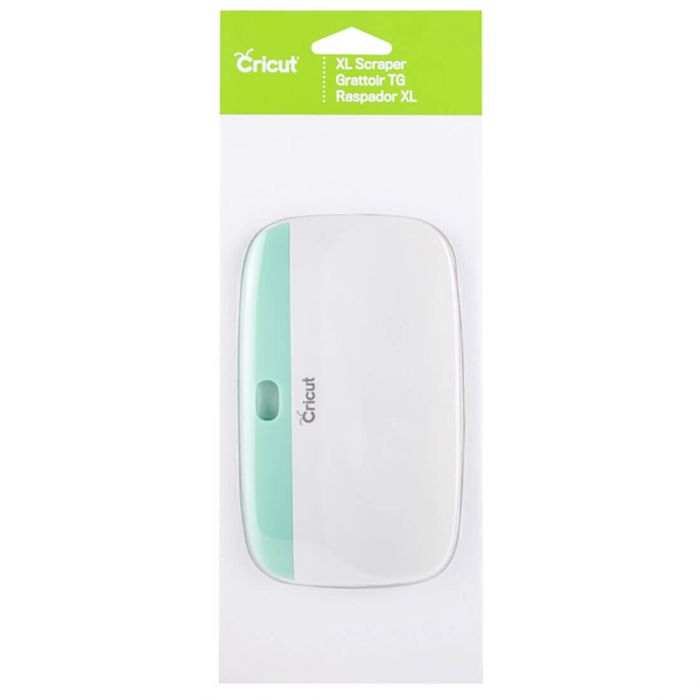
- XL Scraper
- (At Least) Two People
- Patience – lots of it
Tips & Tricks for Wallpapering a Stairwell
Master the Wallpapering Process First
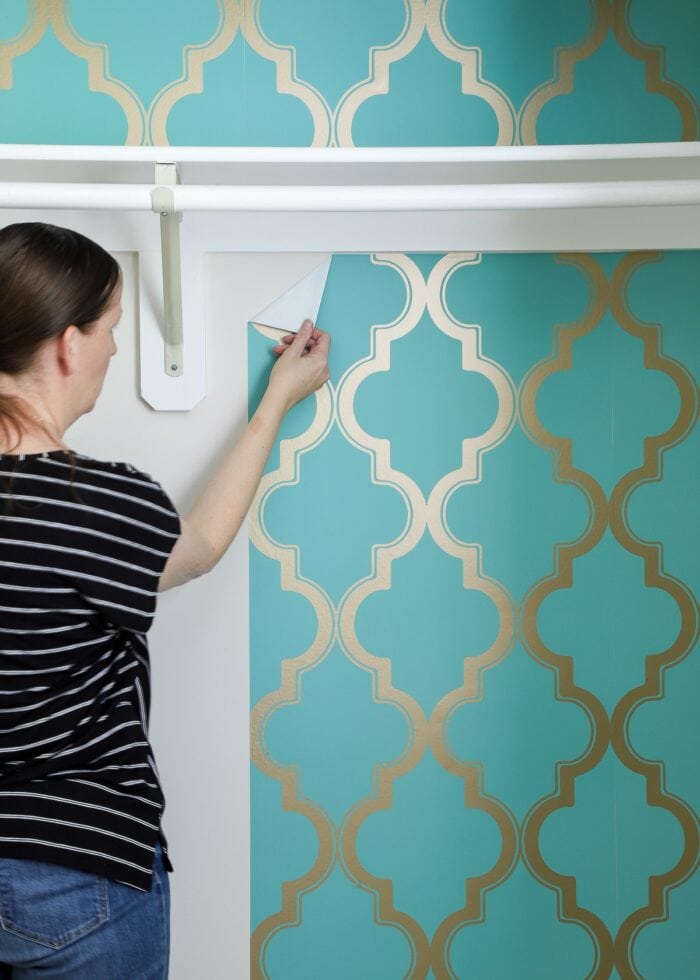
First and foremost, if you’ve never wallpapered a wall before or even used peel-and-stick wallpaper, I don’t recommend a staircase wall being your first attempt. Working with peel and stick wallpaper…even on a small, short wall…can be exceptionally frustrating. Add in the height challenge and the uneven stairs, and this application process is not a “simple” one.
Before wallpapering a stairwell, first get the hang of cutting wallpaper, matching patterns, and actually applying panels on a smaller area. If you need help, refer to my comprehensive instructions here: How to Hang Peel and Stick Wallpaper
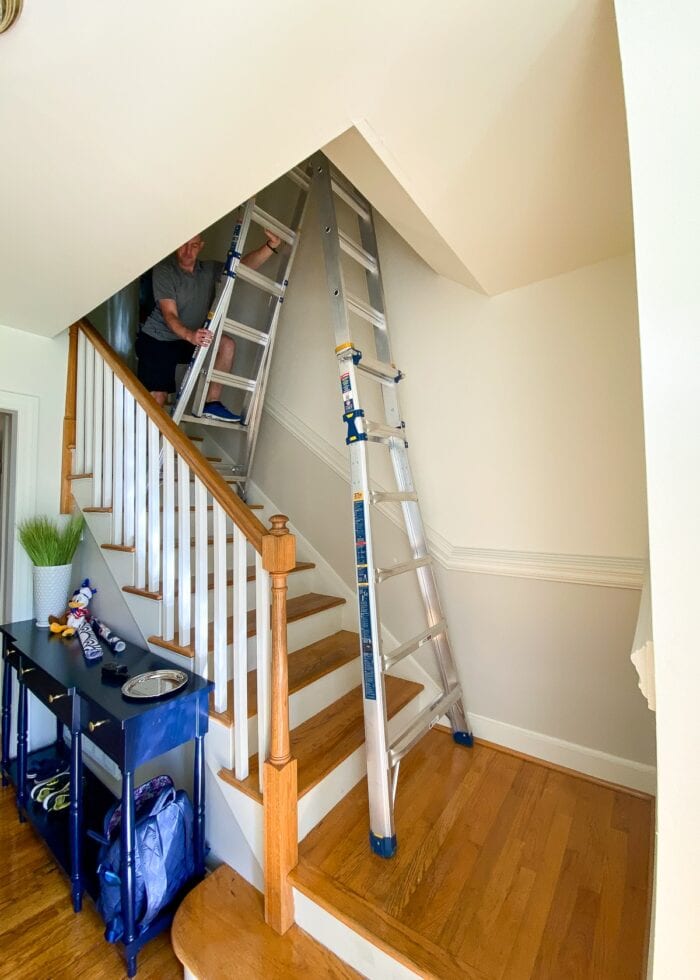
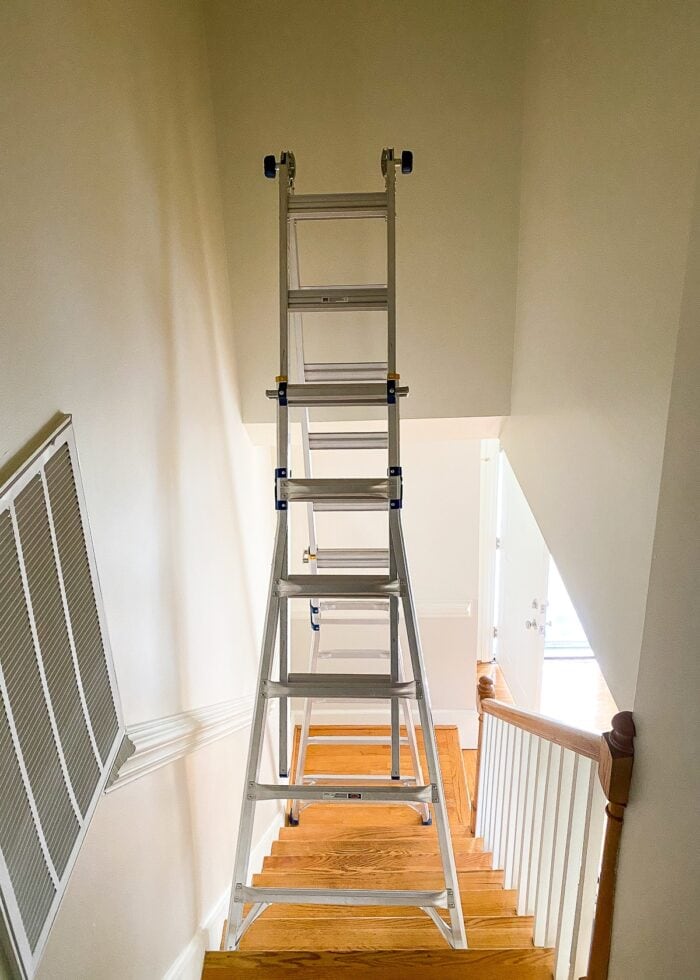
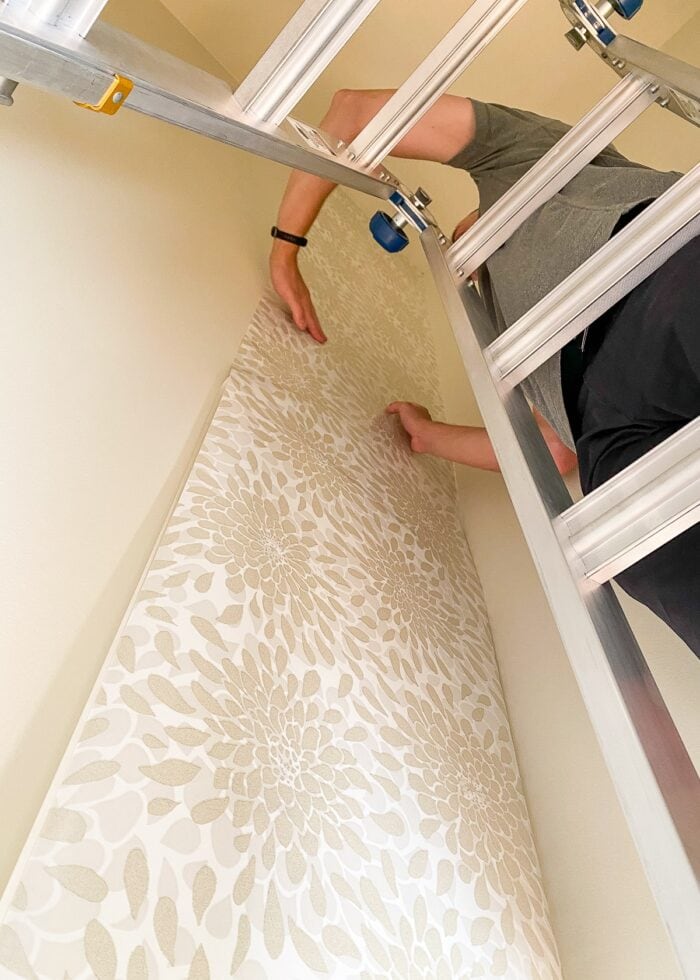
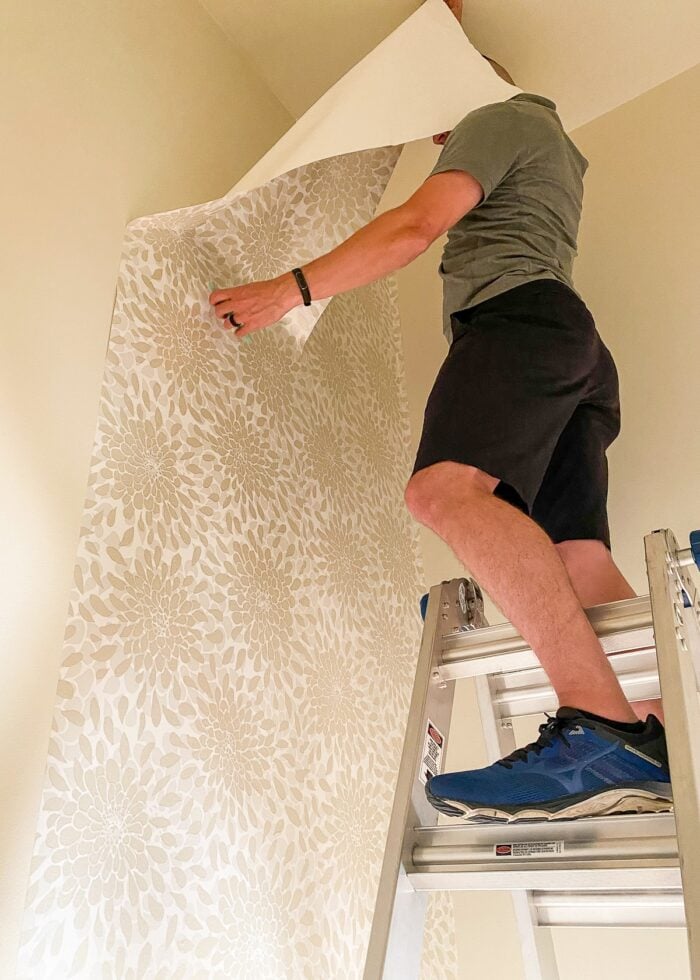
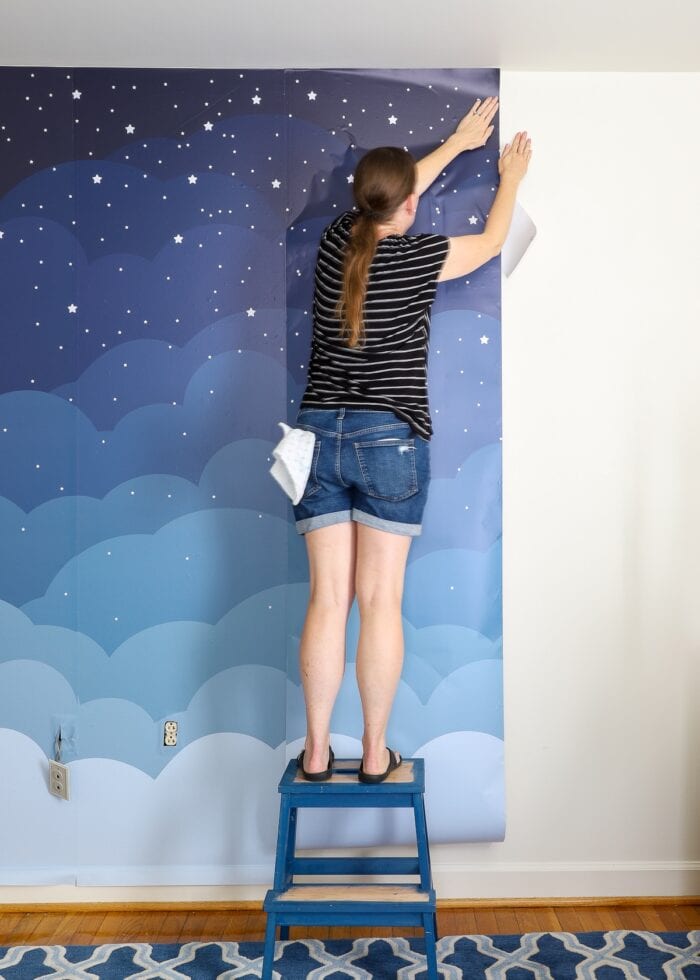
Get a Really Good Adjustable Extension Ladder (& Learn How to Use It Safely)
So you might be asking the obvious: “How do you wallpaper a high stairwell?”
And the answer? Carefully.
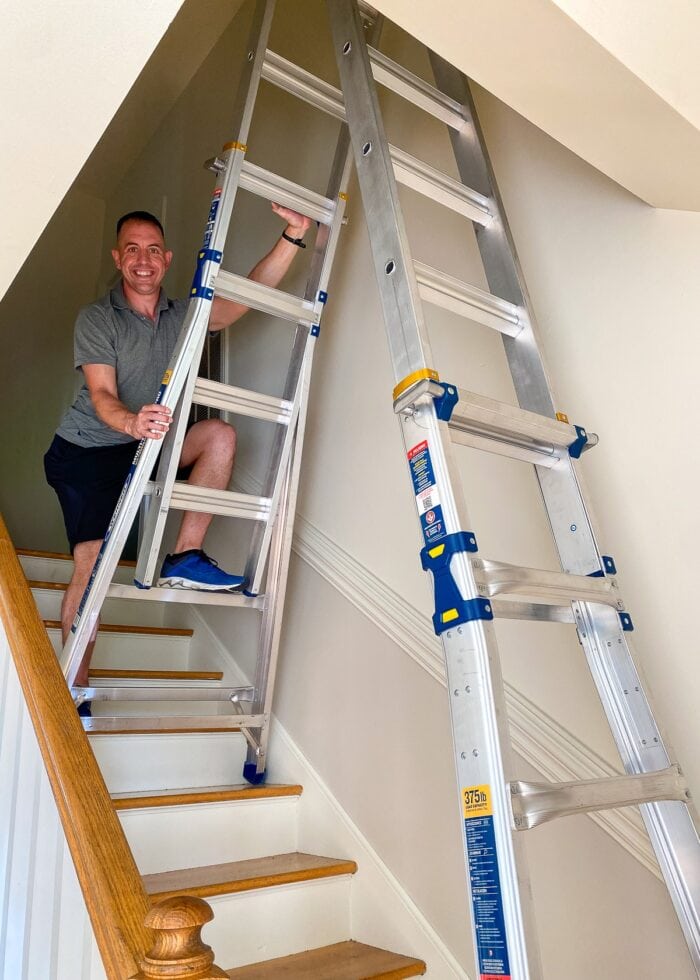
Without a doubt, this project would not have been possible without a really good adjustable extension ladder. There is just no way to reach all the way to the ceiling on a stool; and a standard ladder will not provide the stability or safety you need for this dynamic installation process. We own one (because Greg likes to do fancy outside Christmas lights every year), but you can also rent one from your local hardware store.
I will admit, I don’t know the mechanics of using an extension ladder; but Greg painstakingly ensured that it was adjusted, locked in, and super safe any time either of us (or both of us) got up on it. We started with two legs on the lower landing and two legs on the stairs and then slowly worked our way up the entire staircase to the upstairs landing.
Want to save this post?
Keep in mind that the extension part of the ladder is necessary. There were a few panels that required all four legs to be on the stairs AND the extension pushed all the way up so that we could reach the very top of the wall. A standard adjustable ladder will likely not be sufficient.
Don’t know the first thing about using an extension ladder? Here is a great beginner’s guide!
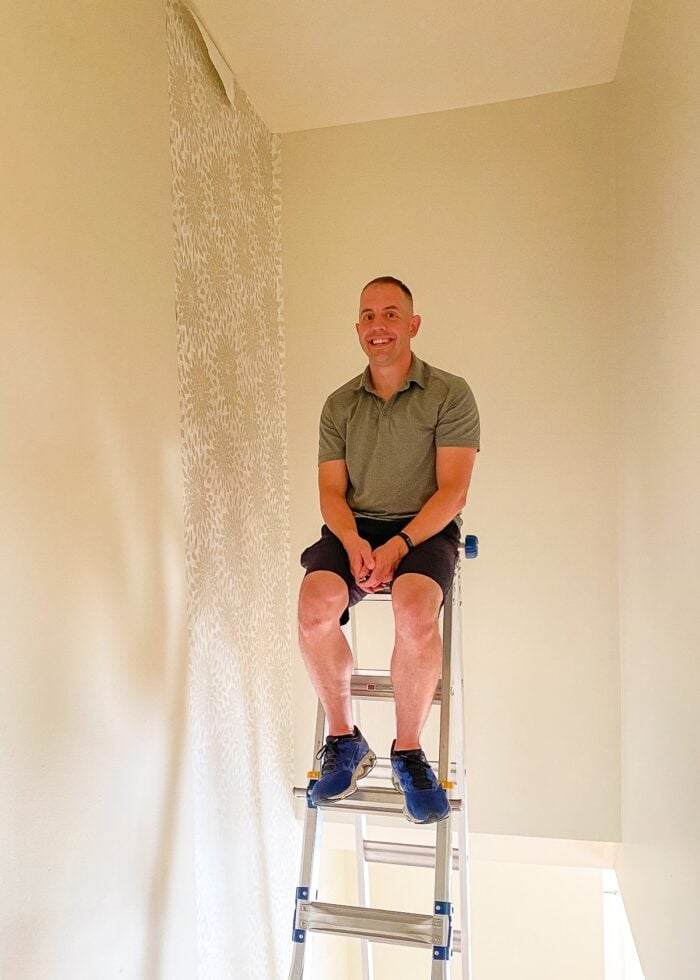
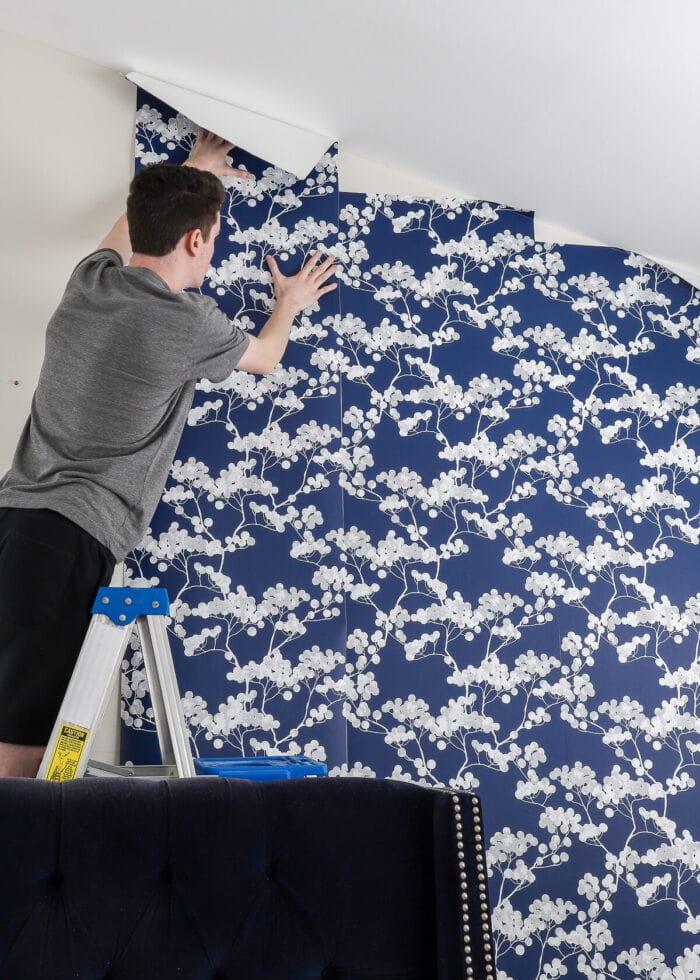
Work with a Partner (& One More Helper If Possible)
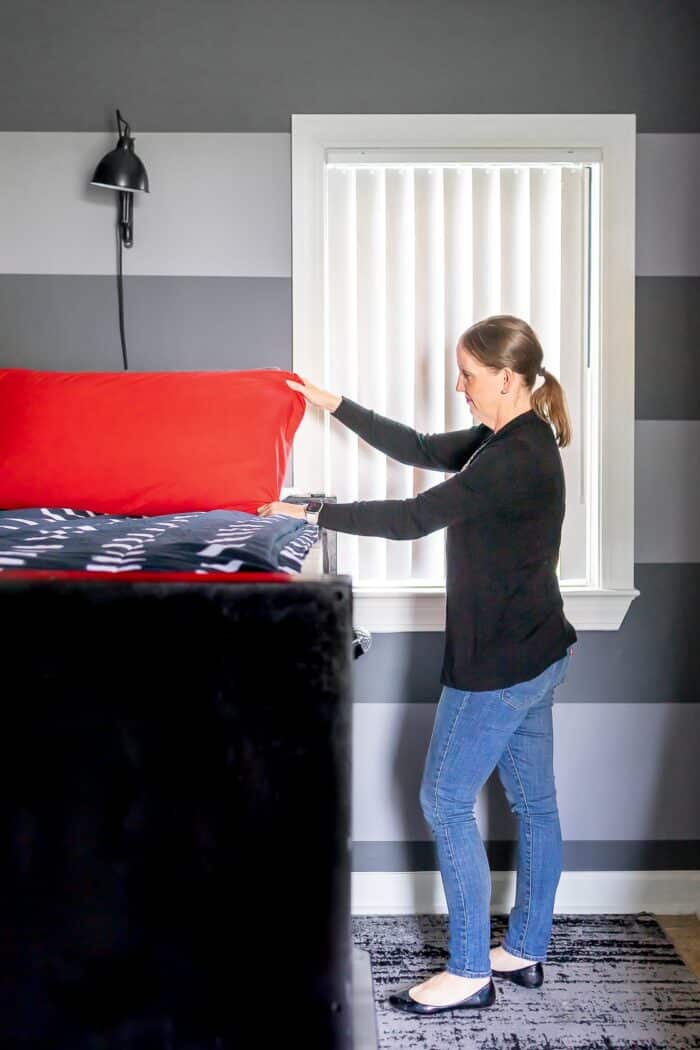
I have wallpapered almost all of our walls on my own. While four hands will make any wallpaper installation easier than just two, they are a MUST for this high of an application. Greg was usually positioned at the top of the ladder and I was (mostly) on the stairs beneath him. Beyond just passing necessary items back-and-forth (e.g., the paper, knife, scraper, etc), having an extra set of hands to hold the paper away from the wall while the other one smoothed it down was extremely helpful.
If you have an older child or neighbor who is also willing to help…exclusively with spotting…that is also a great idea. There were a few instances when both Greg and I had to be on the ladder (on the stairs) at the same time. Having our oldest son as a spotter was an extra fail-safe for keeping this entire project safe.
Pick a Forgiving Wallpaper Pattern
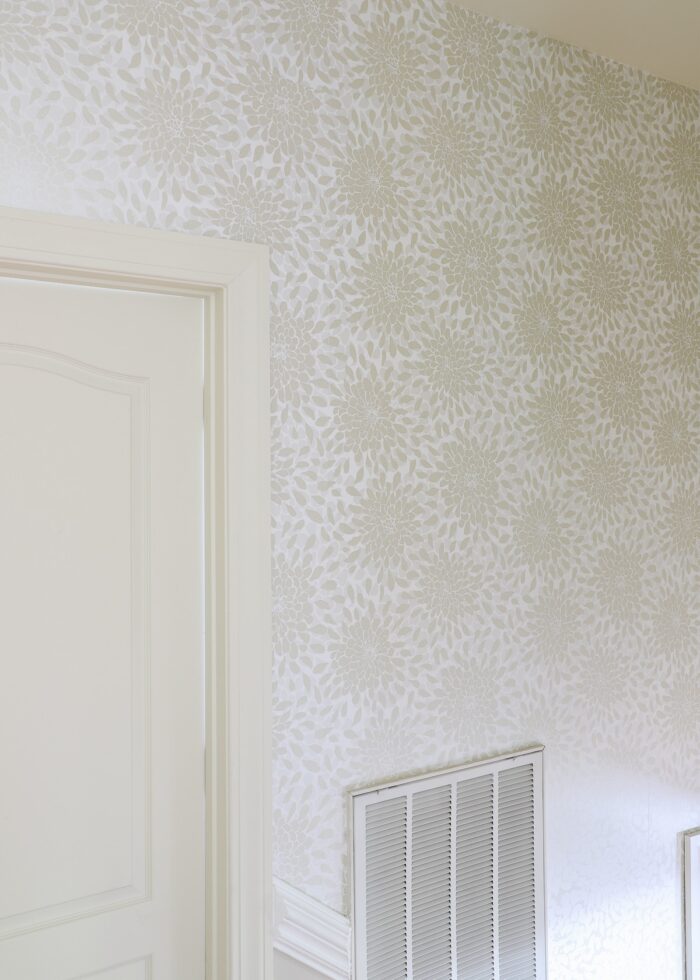
When you are precariously perched atop an extension ladder, on top of stairs, it is not an ideal time to be fighting with a complicated pattern. Matching up wallpaper panels is tricky, even on standard walls. You will most likely not get a perfectly-straight application all the way up to the ceiling or across all your panels. So to avoid a lot of frustration and cut yourself some slack, pick a very forgiving pattern that won’t be noticeable if your seams aren’t quite right.
What makes a pattern “forgiving”? Usually, anything with a very random, organic pattern (like these blooms) or really small, tight designs. I highly recommend avoiding stripes, checks, plaids, or anything else that requires a straight, level, and perfectly-aligned application in order to look right.
As we reached the very top of the staircase (at the end of our installation), we were running out of paper. I didn’t want to order another roll just for this hard-to-see spot, so we papered around the door frame with the scraps we had. This paper is so forgiving that you can’t even tell where the paper is right or wrong!
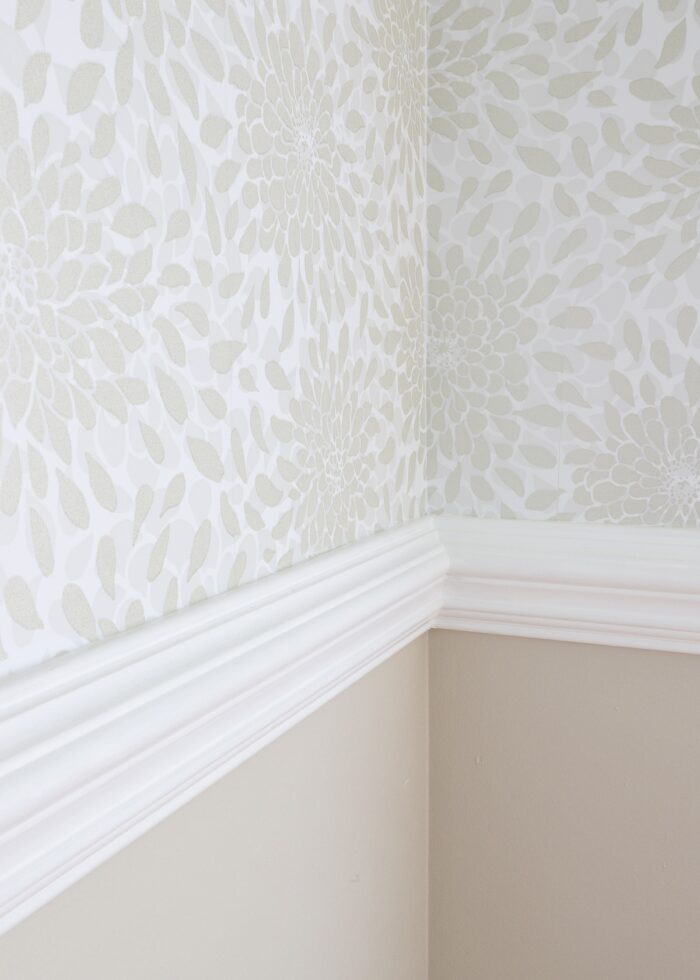
Match the Wall Color to Your Wallpaper
Similarly, I recommend matching your wallpaper background to the wall color as best as possible. Again, getting smooth, flat, joining seams all the way up such a high wall will be incredibly difficult for the novice installer. But if your wall color is the same (or even just close) to your wallpaper color, you won’t be able to tell if there are any gaps between your panels.
As our panels went higher and higher on the way up, they drifted apart ever-so-slightly; but you cannot tell from the foyer or even from the steps. However, had there been bright white wall peeking out between navy panels, it would have been much more noticeable.
Buy More Wallpaper Than You Think You Need
Even if you painstakingly measure and calculate how much wallpaper your stairwell will require, buy an extra roll or two. Matching up patterns and the diagonal slope of the bottom of each panel will eat up more paper than you realize. It’s always easier to return rolls you don’t need than to have to stop and wait mid-project for extra rolls to arrive.
Don’t Bother Pre-Measuring Your Panels
Another reason wallpapering a stairwell is so tricky is because of the angle of the skirting board (where the stairs go down). This diagonal edge can make it really tricky to measure the right lengths of paper (since it will be longer on one side and shorter on the other).
So our solution? Don’t bother measuring at all!
After we hung our initial panel (just using the very top of our first roll), we then hung each subsequent panel by matching the pattern first. We then let the remainder of the roll fall all the way to the floor and used the bottom of the chair rail to serve as our cut line. This ensured we fully accommodated the diagonal edge.
Start With the Longest Drop
I very much recommend starting with your longest strip, wherever that is. For us, it was where the tall stairwell wall met the corner.
Starting with the longest/highest panel not only gets the hardest application out of the way early in the process (when you’re still energized and motivated), but it also means you likely won’t have to maneuver long panels around awkward angles. If you do have awkward areas (e.g., corners, diagonals), it’s much easier to work around them with shorter stretches of paper (closer to the bottom or top of the stairs).
Paper from the Bottom Up
In almost all cases, wallpaper is hung from the top to the bottom. However, we learned pretty quickly that when wallpapering a stairwell, it doesn’t matter much if the top half of the paper is aligned (where no one can see it). Rather, it is most important that the bottom half of the panels (that you can easily see as you walk up the stairs) are matched up perfectly.
Since panels tend to veer ever-so-slightly as you lay them down, we had better success getting the lower half of the panels flush and perfect, and then laid the rest of the panel down moving up the wall. If we ended up with a small overlap or gap up toward the top, it didn’t matter much.
Take Breaks
Unless you have a fairly short staircase, there’s a good chance you will hit a wall (figuratively, although maybe literally too!) Dealing with the long lengths of paper, adjusting the ladder over and over, and climbing up and down can be quite exhausting. So if you find yourself starting to make mistakes or cut corners, it’s time to take a break.
We got through the four longest panels and then stopped. I finished the lower and upper landings the following day. Although these two areas weren’t particularly tall, they did have some harder areas to work around (i.e., doorway, corner, diagonal ceiling), so it helped that I had fresh arms and eyes before tackling these spots!
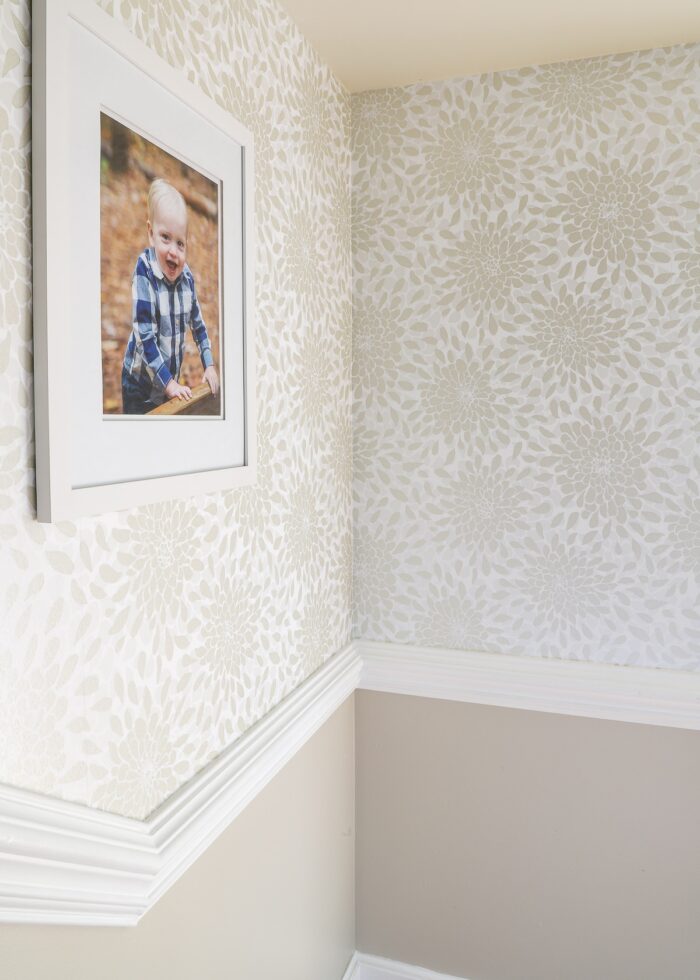
There are so many things I love about this particular wallpaper installation. Not only is the paper itself simply stunning, but the two-story wall application is really just jaw dropping. Since we seemingly walk up and down these stairs a million times a day, it’s definitely a project we get to appreciate over and over.

I am so proud of us for not backing down from this challenge. Although it was a bigger project than I first anticipated, wallpapering a stairwell was still within our skill set and truly created a captivating focal point out of this basic staircase. If you’re looking for some major impact in your foyer, this really is a great project to consider!
More Great Information on Wallpaper In Your Home
Ready to tackle more wallpaper projects in your home? Check out some of my other favorites!
- How to Hang Peel and Stick Wallpaper
- Does Peel and Stick Wallpaper Damage Walls?
- A Complete Guide to Updating Furniture with Wallpaper
- Can You Use Peel & Stick Wallpaper In a Bathroom?
- Can You Put Wallpaper on Textured Walls?
- How to Wallpaper the Back of a Bookcase | Step-by-Step
- Wallpapering a Stairwell | Tips You Need to Know!
- How to Hang a Wallpaper Mural | Tips & Tricks for Great Results
- How to Wallpaper a Backsplash
- The Best Wallpaper for Your Kitchen Backsplash
- Can You Put Peel and Stick Wallpaper on the Floor?
- How to Line Drawers with Wallpaper
- Solid Wallpaper | What It Is + Ideas for Using It
- Wallpapering a Whole Room Versus an Accent Wall | What I Learned
- How to Frame Wallpaper as Art
- How to Use Wall Decals to Look Like Wallpaper
- How to Wallpaper the Inside of Wall Molding Frames
Megan
13 Comments on “Wallpapering a Stairwell | Tips You Need to Know!”
Megan-I LOVE your blog!
Quick question- do all military families decorate to the extent you do? Wallpapering, painting, etc? I can’t imagine others are as ambitious, what with usual two year tours of duty….
Brave team to tackle that two story wall!
Hi Elizabeth!
Great question! There are definitely other spouses who are “into” home decor and do LOTS of amazing things to their homes. And there are some who don’t do anything at all…with lots of people somewhere in the middle.
I certainly push the envelope more than most…not just because I love DIY so much but also because I like to show new ideas of what all is possible! I love knowing that my projects spark ideas and solutions for others!
Thanks so much for stopping by today…happy Friday!Megan
Wow. I’m absolutely gob smacked at how amazing this looks! I’m almost excited about ending up at Lejeune again!
Having lived in these houses, your transformation is incredible & makes them feel so homey!
Awww…thanks so much friend, that means a lot! This house really has so much potential and I just know I’m not going to want to leave it when the time comes. Trying to enjoy every little nook while I can!
Simply stunning!
Methinks military life has really solidified your marriage. Wallpapering with your spouse is a real challenge. My hubby and I decided early on that we would not attempt this after our first venture. We wanted to stay married.
Ha! This comment had me laughing. There are definitely things we can’t do together but this one was okay. Honestly, if he wasn’t willing to climb up on that ladder, I don’t think it would have gotten done. So I kept my mouth shut and cheered him on from the floor!
It’s lovely, but my palms sweat just thinking about it.
Not for all the coffee in Brazil would I climb that ladder.
Okay – each comment is getting funnier than the last!
Yes, I should definitely have put “no fear of heights” on the Supplies list, lol!
Thanks for stopping by today!
Megan
The final product is so gorgeous! Well done. And thank you for the suggestions, and all the ideas.
I love your husband! Does Greg ever “tool” his eyes at your decorating ideas?
The stairwell just makes the entrance.
I have a 61 yr. House. All my walls are plaster, could I use peel and stick wall paper.walls are sum what uneven, what do you think.
What color paint is that
If that Toss The Bouquet were a tad bit grey/green, I’d be putting that on my bookshelves this weekend. So, I’ll be using the blue poplin peel and stick instead!