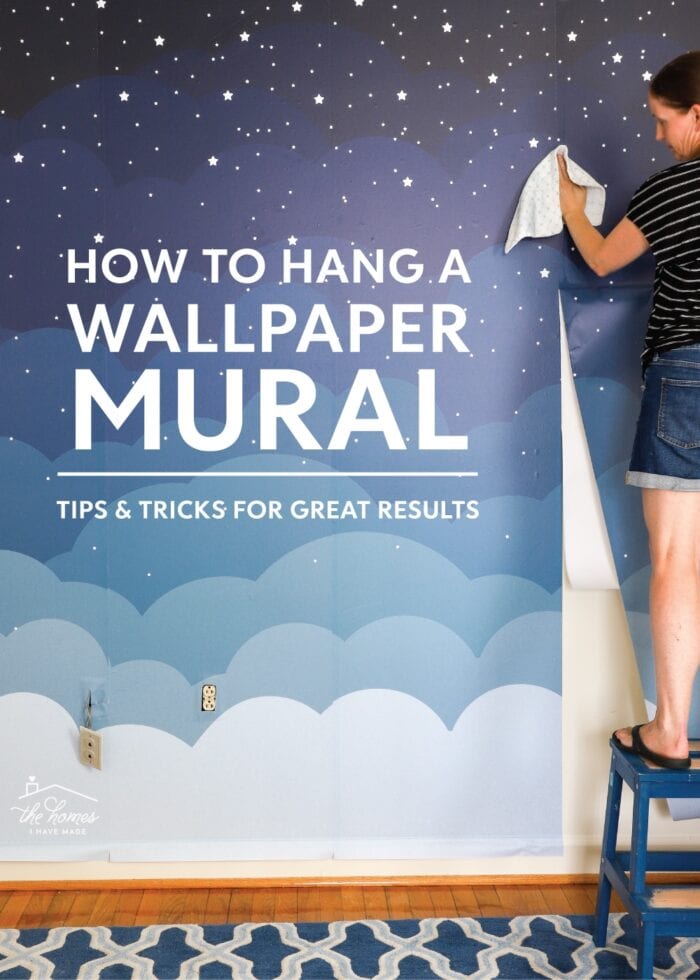
How to Hang a Wallpaper Mural | Tips & Tricks for Great Results
By now, you know that one of my favorite ways to infuse (temporary) style into our rental homes is with peel-and-stick wallpaper. And while I’ll never tire of all the amazing paper patterns now available, I wanted to do something really fun and different in our two younger sons’ new shared bedroom. My original idea was to paint a cloud mural on their bedroom wall. But an artist I am not; so when I found this gorgeous Night Time Sky mural by Artsy Decal Wallpapers (in aaaaaall my shades of blue!), I knew I had my solution! Having hung peel-and-stick wallpaper dozens of times now, this project didn’t scare me one bit. But I did learn that hanging a mural is different than just hanging wallpaper. So today, I want to show you exactly how to hang a wallpaper mural; and answer a bunch of your questions so you feel inspired to give it a try too!
A huge “thank you” to Artsy Decal Wallpapers for providing the mural for this project. I only work with brands and products I fully support and that make sense for my home, my family, and this blog. All opinions are 100% my own.
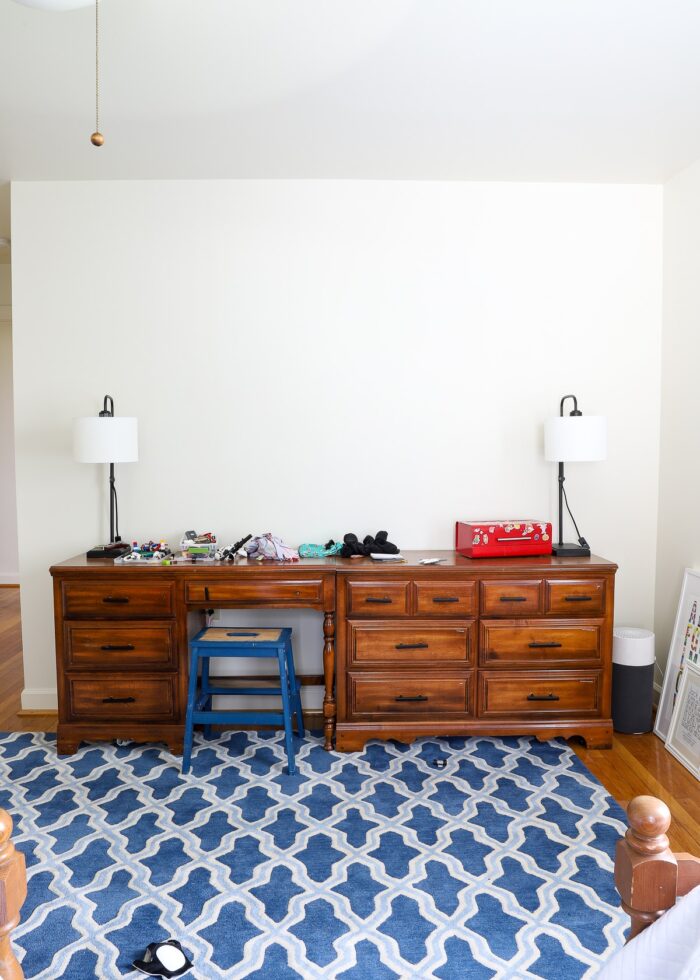
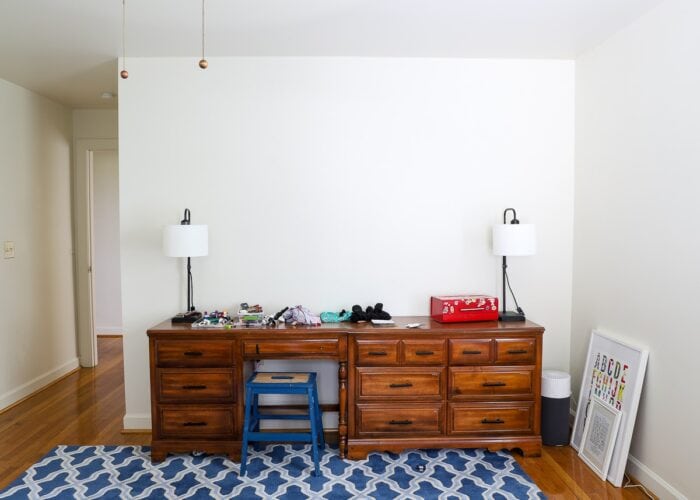
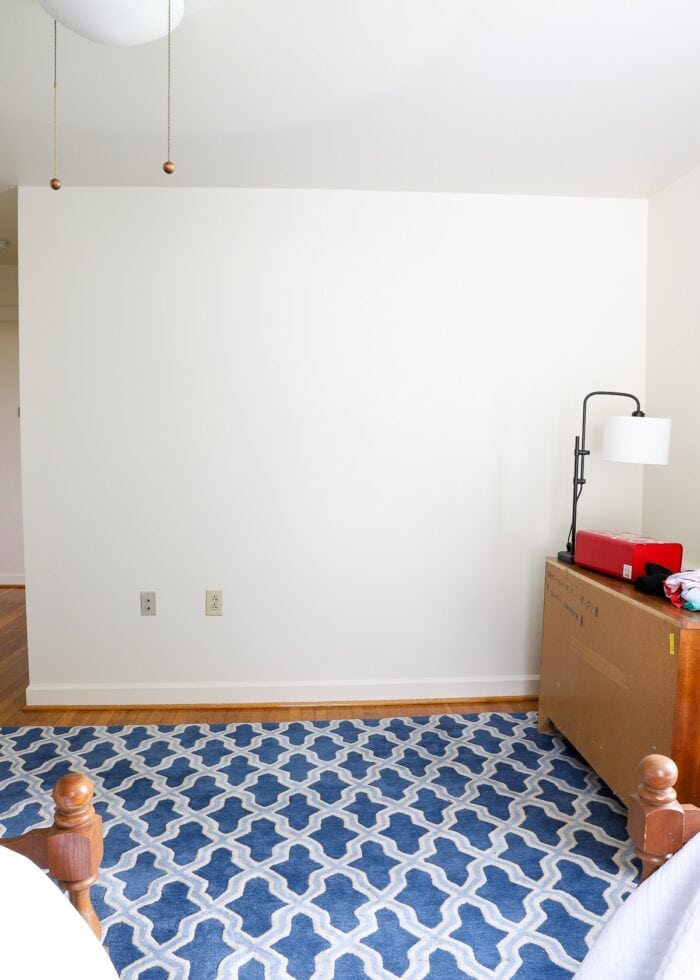
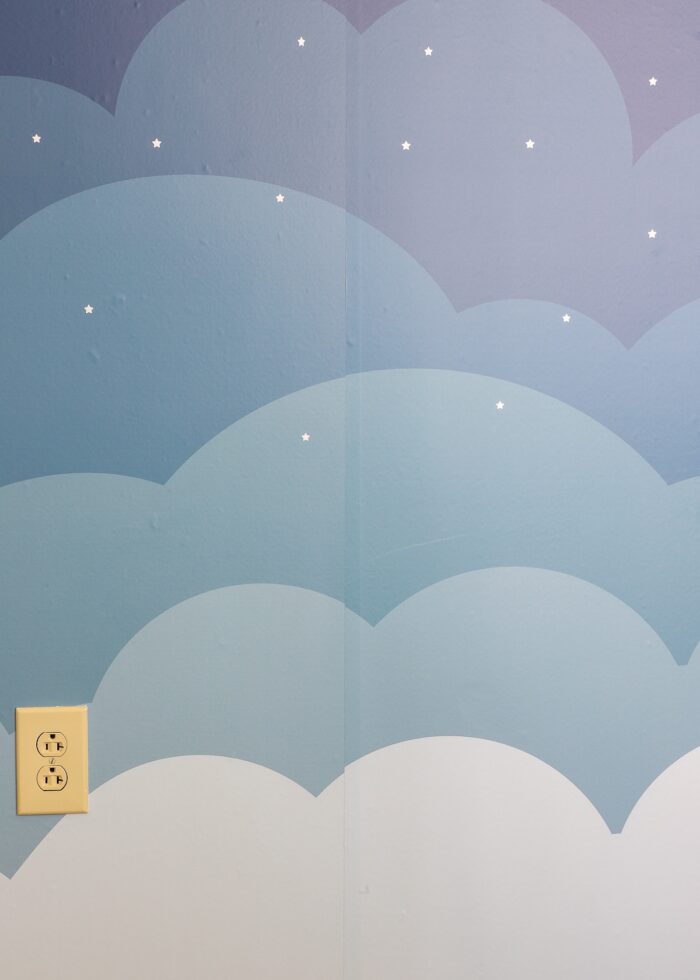
Before
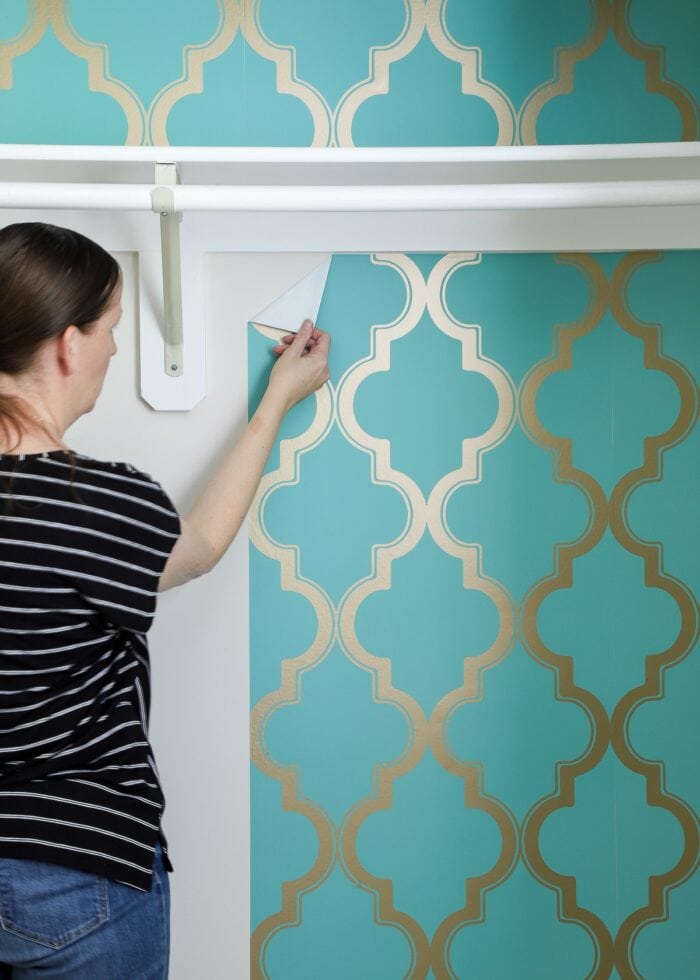
Before we dive into the specifics, let me first show you what a dramatic difference a wallpaper mural can make in a room. Below is the small feature wall directly across from my sons’ beds. This is the view they wake up to every morning.
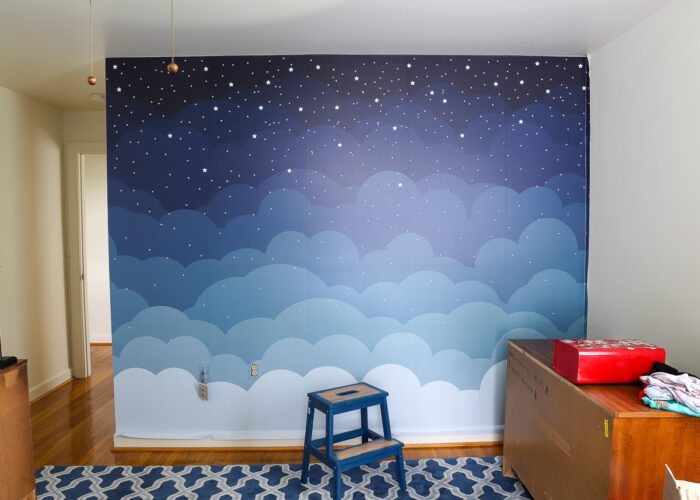
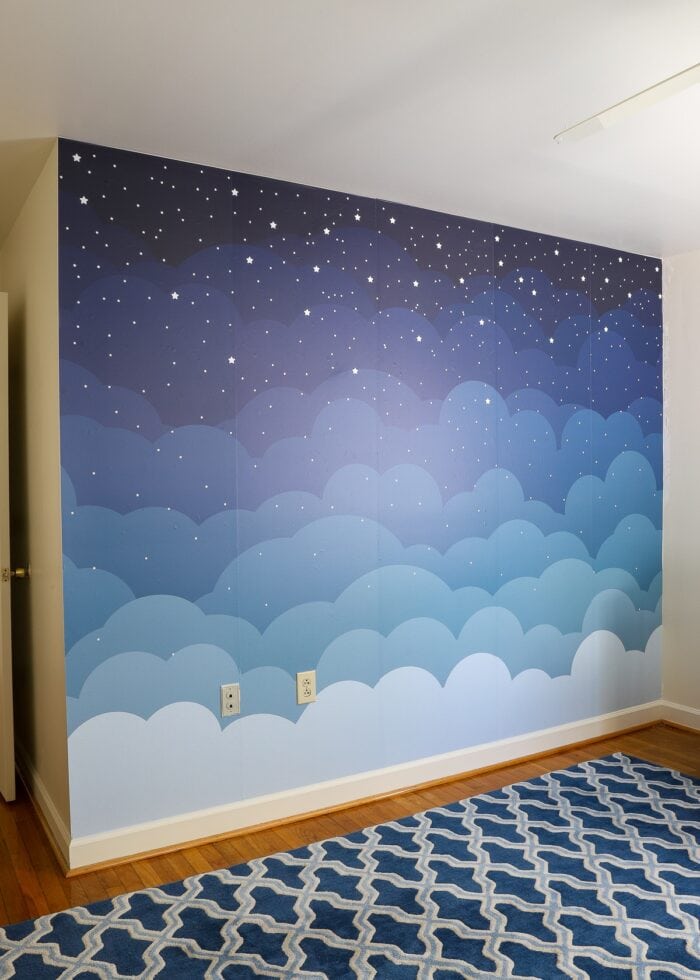
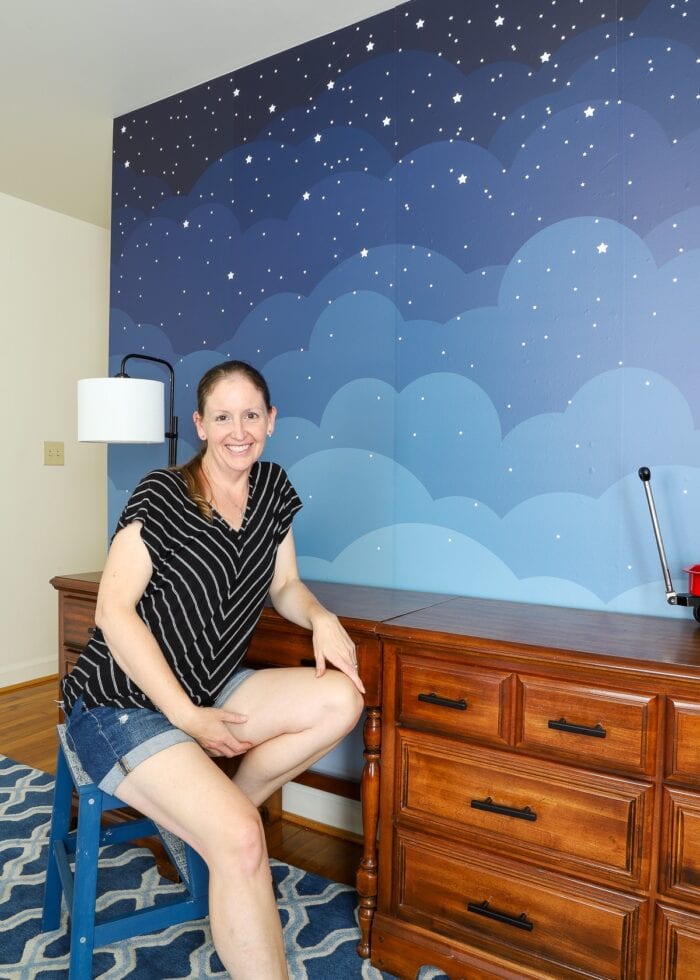
After
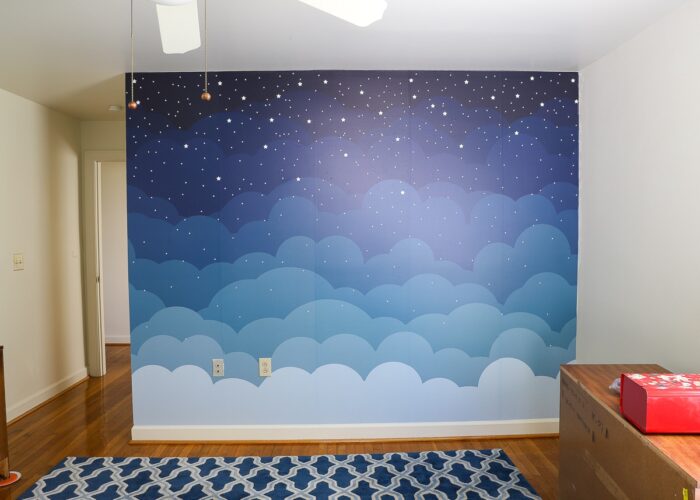
And here is the same view now!
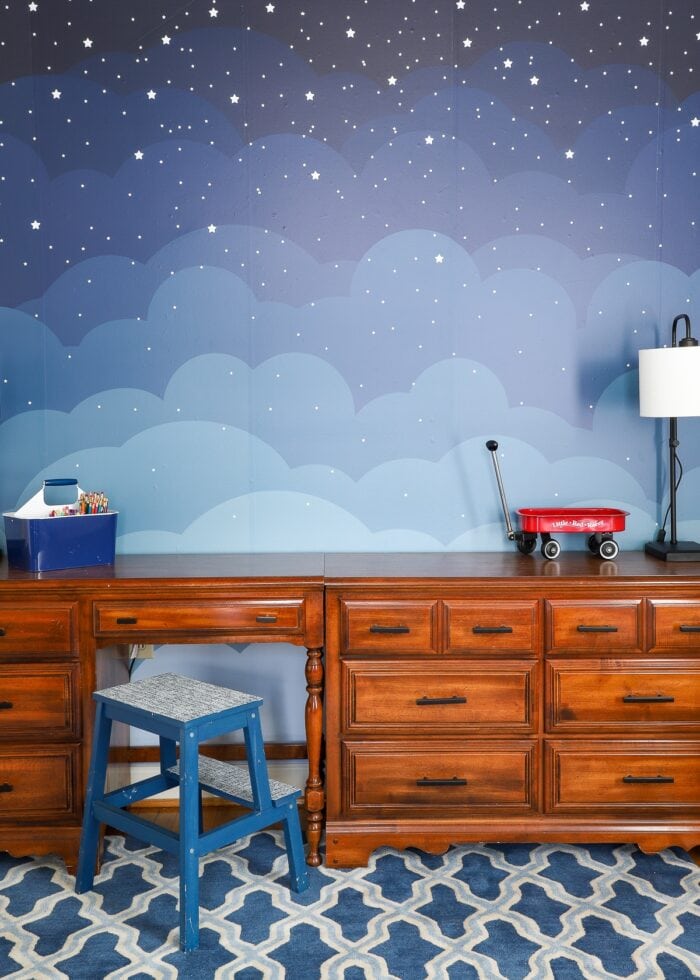
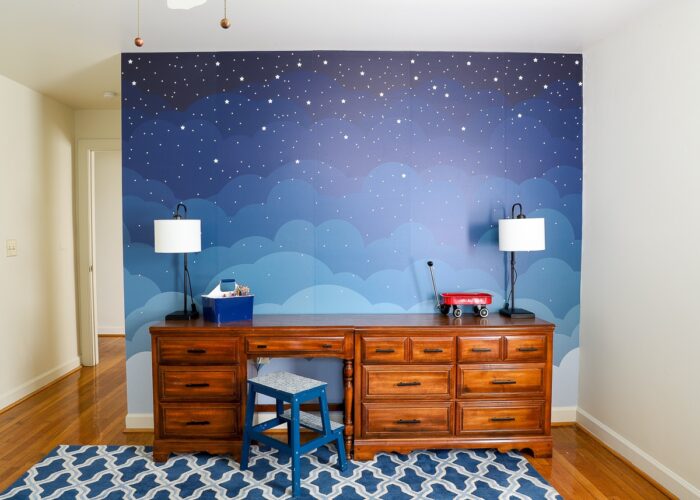
Pretty incredible, right?!?
This vibrant, whimsical (and honestly, quite show-stopping!) display was not only possible in just about 2 hours without a drop of paint, but it is also completely temporary!
When my boys got home from school, they couldn’t believe it…in fact, they are still talking about the “stars” in their room on a daily basis. My goal of doing something fun and different was certainly achieved, and we all LOVE it!
What Is a Wallpaper Mural?
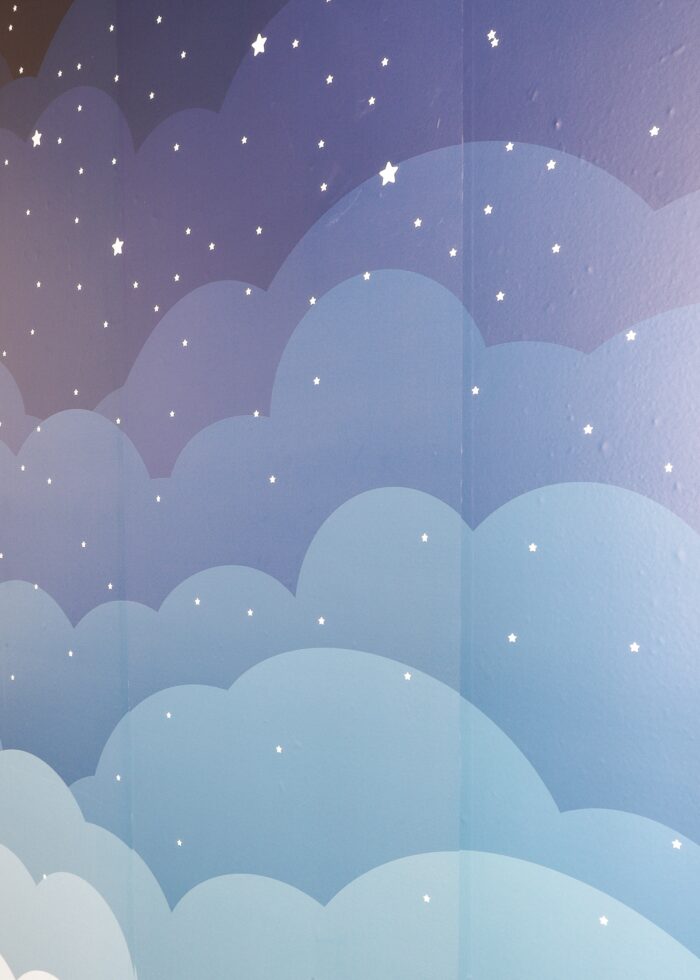
A wallpaper mural is a single image or design that is printed onto several wallpaper panels. When the panels are hung on the wall together (in the correct order), they form the complete image. Wallpaper murals do not typically feature a recurring, repeatable pattern. Rather, they are usually full scenes (e.g., mountains, sky, forest, etc); although, pretty much any image can be printed onto a mural these days!
What’s the Difference Between Wallpaper & a Mural?
Admittedly, I assumed hanging a wallpaper mural was going to be just like hanging peel and stick wallpaper. And in some ways, it was. But there are also some pretty big differences between a roll of wallpaper and a wallpaper mural…such as:
- No Repeatable Pattern – In general, most wallpaper murals display a singular (complete) image, rather than a noticeable, repeatable pattern.
- Printed to Order – Since murals are an enlargement of a singular image, that image often needs to be sized to your particular wall. Otherwise, you run the risk of the graphic being cut off in an awkward spot. As such, most murals are “print to order” based on your unique wall measurements. This way, you can be certain your mural will not only fit, but the image will also look complete after installation.
- Panels Arrive Pre-Cut. Because the mural is printed for your wall, it comes pre-sized and ready to hang. This means there is no measuring your wall, no piecing patterns together, and no running out of paper. Measuring and lining up panels is a huge part of hanging traditional wallpaper, so this is a huge time savings. In fact, this might be my favorite feature of hanging a wallpaper mural!
- Little-to-No Waste. And finally, because the mural is sized to your specific wall, there is very little waste (beyond the extra inches along the bottom or width). When you hang wallpaper (especially with a large repeat), there is a ton of wasted scraps created by having to line up patterns…sometimes almost a full roll worth. Having no scraps helps you feel like your money wasn’t wasted and actually ends up on the wall instead of the waste basket!
What Does a Wallpaper Mural Feel Like?
I can only speak from my experience with Artsy Decal’s wallpaper murals, but I suspect many are the same. This mural was printed on what is called “fabric” wallpaper, but don’t let that name confuse you. The material has none of the softness or flowy-ness that fabric does. Rather, this wallpaper has a thick, shiny, vibrant “plasticity” to it; very much like other peel-and-stick wallpaper products you’ve seen.
So where does the term “fabric” come from? The panel material is actually a woven material, rather than a rubbery, stretchy vinyl (which is what most peel-and-stick wallpapers are). During this installation, I found this “fabric” wallpaper much more durable than vinyl wallpaper, it cut much cleaner, and it doesn’t stretch (at all) when you peel it off the wall.
Where to Buy Wallpaper Murals?
Wallpaper murals are becoming more and more popular, especially as the use of peel-and-stick products evolves and becomes more mainstream. There are lots of options on Etsy, which is where I found Artsy Decal Wallpapers, a small business shop that has countless, vibrant designs that can all be print to fit your walls. The owner is incredibly accommodating and can even provide samples so you can get a sense for how the paper feels and if the colors will work in your space.
How Much Do Wall Murals Cost?
Based on my research, a wallpaper mural will be more expensive than pre-printed rolls of wallpaper to cover the same area (although, that also depends on the quality of wallpaper you’re buying). The print-to-size nature of murals (plus the higher quality material) is likely what contributes to this cost. So while a wallpaper mural may not be the most budget-friendly option for your walls…it is certain to provide the most visual “bang for your buck,” so to speak!
How Long Does It Take to Hang a Wall Mural?
It took me about 2 hours to get all 5 wallpaper mural panels up on the wall and the room put back together (and that was with a lot of pausing for pictures). It’s easily a “do it in an afternoon” or “during naptime” project.
Is Hanging a Wallpaper Mural Messy?
This tutorial covers installing a self-adhesive wallpaper mural, so no wallpaper paste, sealer, paint brush, or tray were required. As such, this project is essentially mess free!
Is Hanging a Wallpaper Mural Hard?
Ummm…it’s not easy. But it’s not hard either. In every single wallpaper project I’ve ever done, there is always a point when it seems horrible and I doubt my decision and I worry I wasted my time, money, or both. But then I take a deep breath (and sometimes even a walk) and get back to work. And little-by-little, the wallpaper (or in this case, the mural) goes up…and ultimately looks amazing.
Hanging up a wallpaper mural will test your patience (and maybe even your tear ducts), but you can do it. I promise!
Alright…with those questions out of the way, let me show you exactly how to hang a wallpaper mural (with great results!) I’ve broken the rest of this tutorial down into three sections:
- Part 1 | Getting Ready to Hang a Wallpaper Mural
- Part 2 | How to Hang Wallpaper Mural Panels
- Part 3 | Cleaning Up Your Wallpaper Mural
Supplies Needed
The supplies needed may vary based on what your mural manufacturer recommends. Here is what I used:
- Custom Wallpaper Mural – sized and pre-cut to your wall; I used this Night Time Sky Wallpaper Mural
- Small Clean Towel
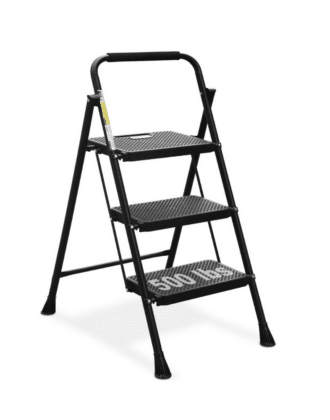
- Step Stool
- Screwdriver
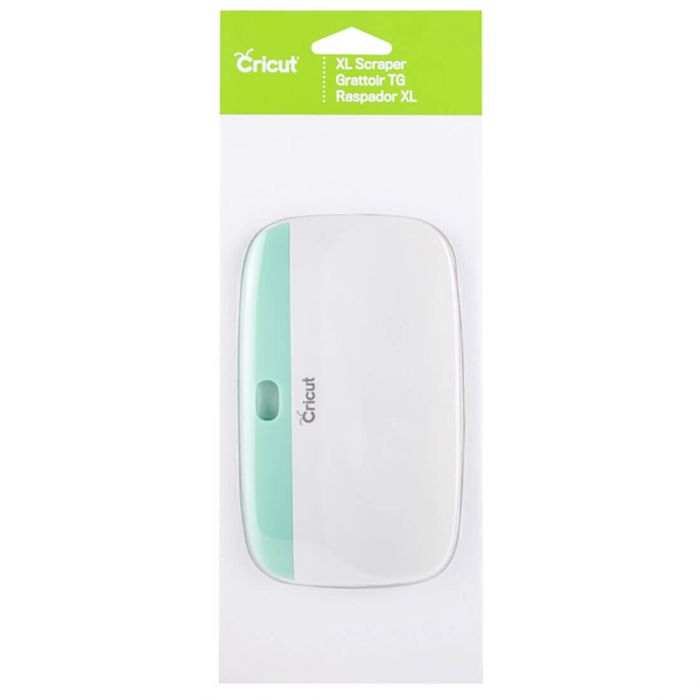
- Scraper
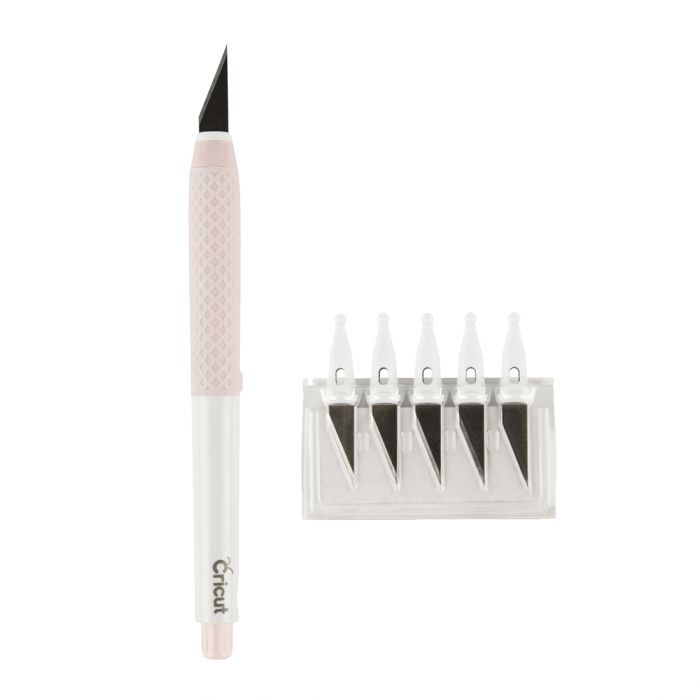
- Sharp Utility Knife
Part 1 | Getting Ready to Hang a Wallpaper Mural
Step 1: Measure Your Wall
The very first step in hanging a wallpaper mural actually happens before your mural ever arrives. As I have emphasized quite a bit already, wallpaper murals are usually printed to size based on your exact wall measurements.
As such, your very first step is to measure your wall and communicate those dimensions to the mural designer. In most scenarios, like with Artsy Decal Wallpapers, they will be able to provide a digital mockup of how your selected mural image will look in your wall dimensions, and can sometimes even accommodate doors, windows, angled ceilings, or other unusual features.
Step 2: Familiarize Yourself with the Instructions
Once your mural arrives but before you get started, I strongly recommend you fully familiarize yourself with the provided instructions. As I’ve mentioned, I am super comfortable hanging peel-and-stick wallpaper and thought I knew exactly what I was doing. As you’ll soon see, this specific mural installation had some new-to-me nuances…but these steps were fully detailed in the included instructions.
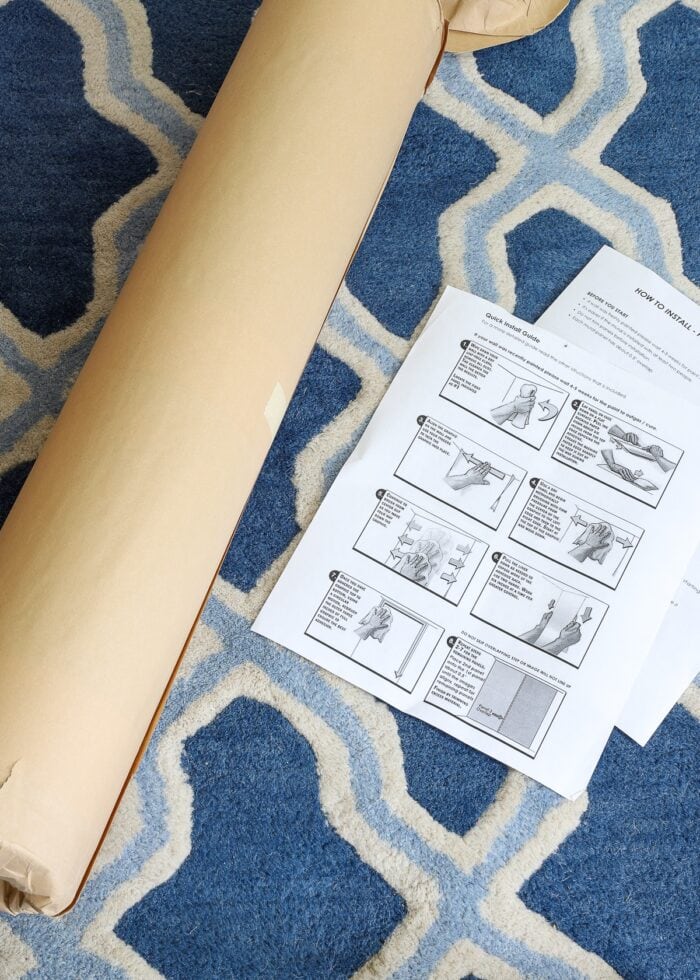
Every manufacturer and every mural may have its own unique steps for best results. So while I’m going to share everything I learned hanging this particular mural, I definitely recommend referring to your included instructions first!
Step 3: Clear the Wall
In most instances, a wallpaper mural will be hung from the very top of the wall to the very bottom. It can and will get tricky, so do yourself a favor and clear away everything from in front of the installation wall before you even get started. I do not recommend attempting to wallpaper around furniture if you can avoid it.
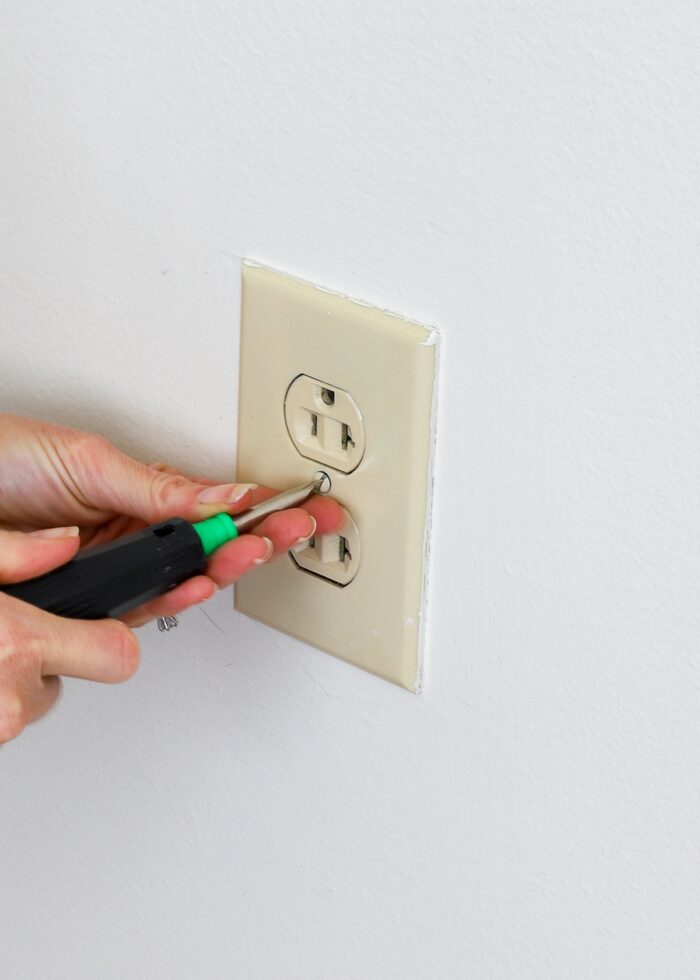
Likewise, this is a good time to remove any plates, grates, or screens around outlets, light switches, vents etc. In order to get your wallpaper mural to lay perfectly flat, it is easiest to remove the protruding features and re-place them after installation.
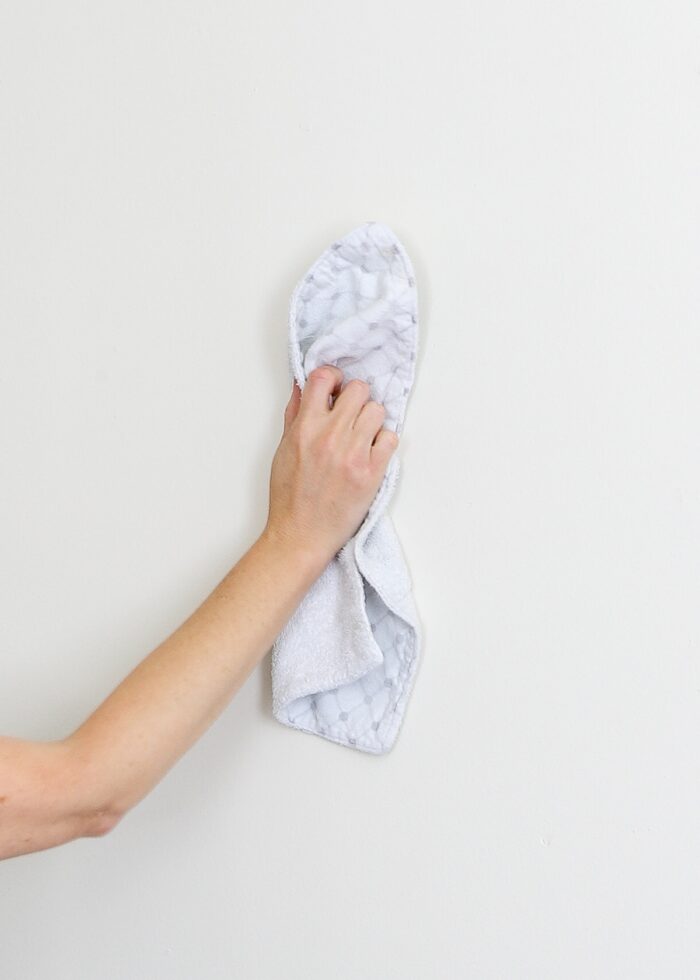
Step 4: Clean the Wall Surface
Most wallpaper murals are “peel and stick,” which means they rely on adhesive to keep them on the wall. Whenever working with adhesive-backed products, it’s always recommended that you start with a clean, dry, dust-free wall. You don’t need to go crazy here; but taking a simple cloth to your wall will wipe away any lingering dirt or dust and ensure your panels have optimum adhesion.
Step 5: Organize the Panels
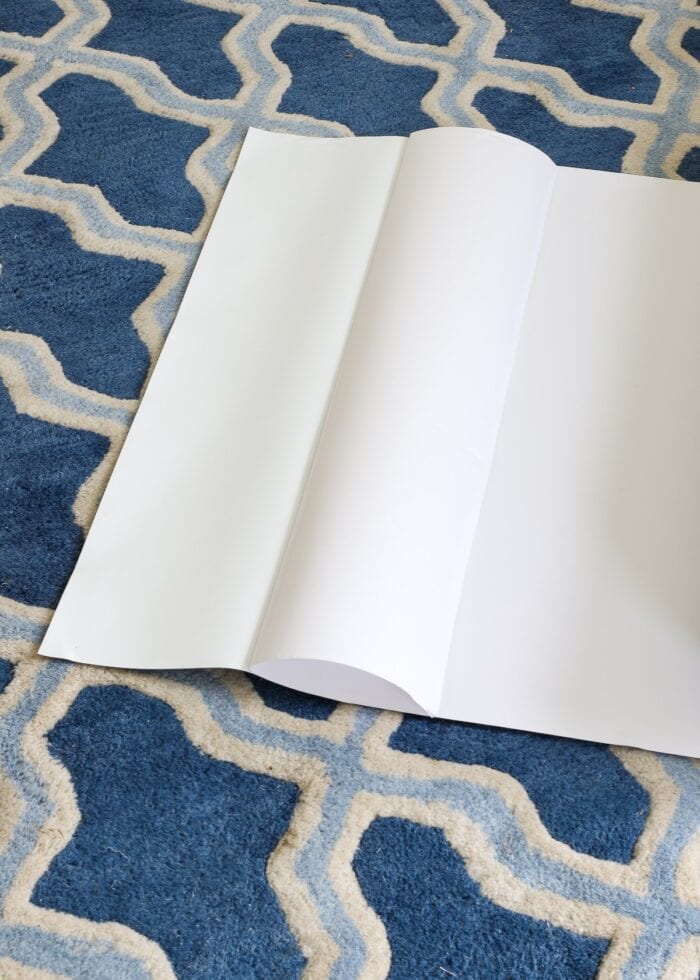
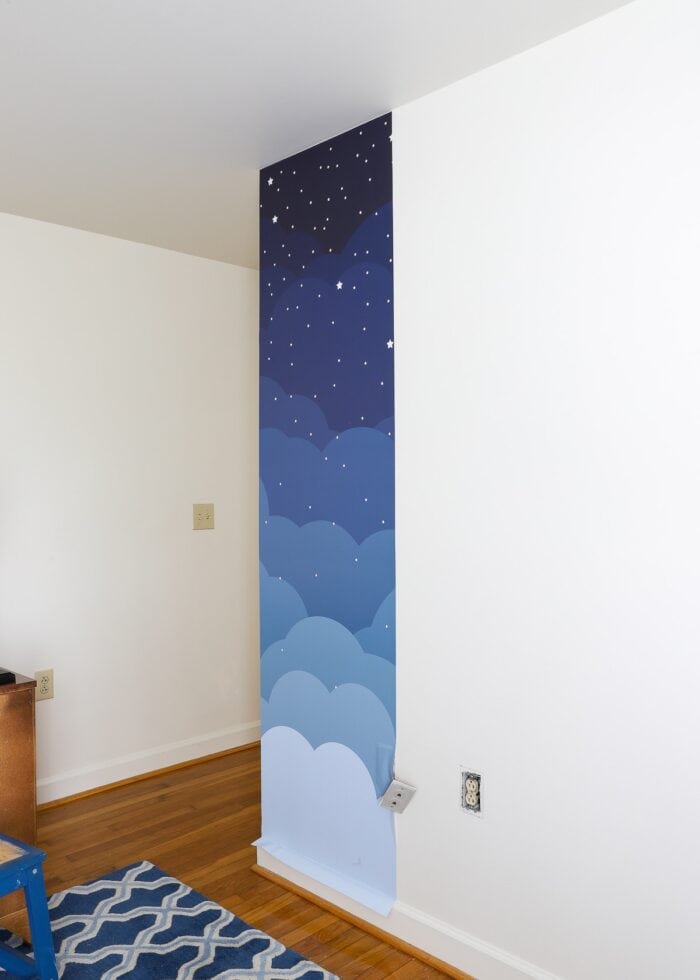
With your wall prepped, now it’s time to (finally!) unwrap and prepare the new wallpaper mural panels. My mural arrived in a single (thick and heavy) roll…
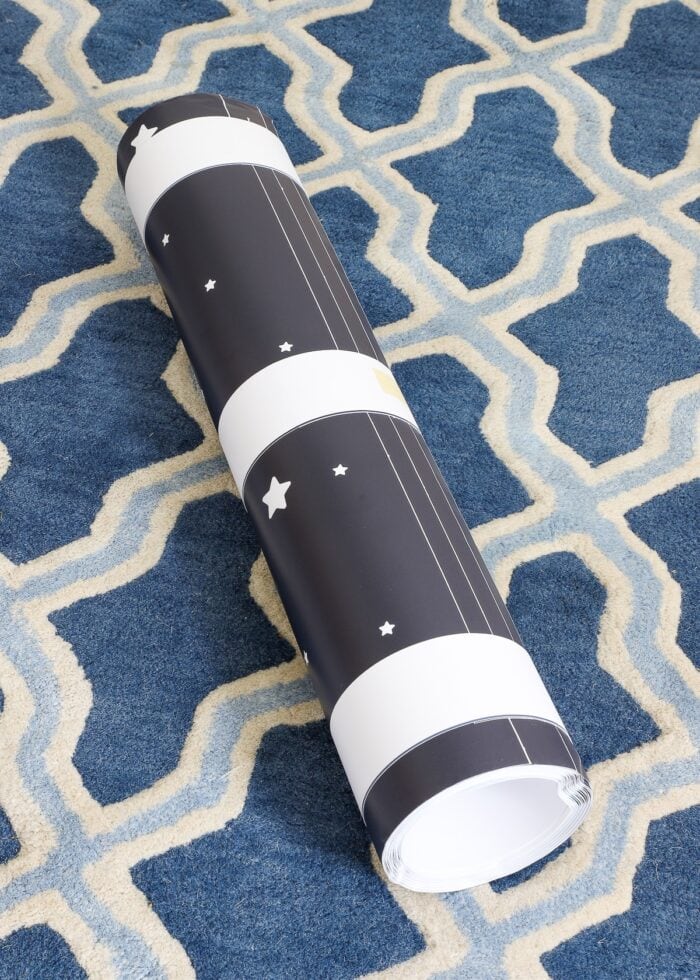
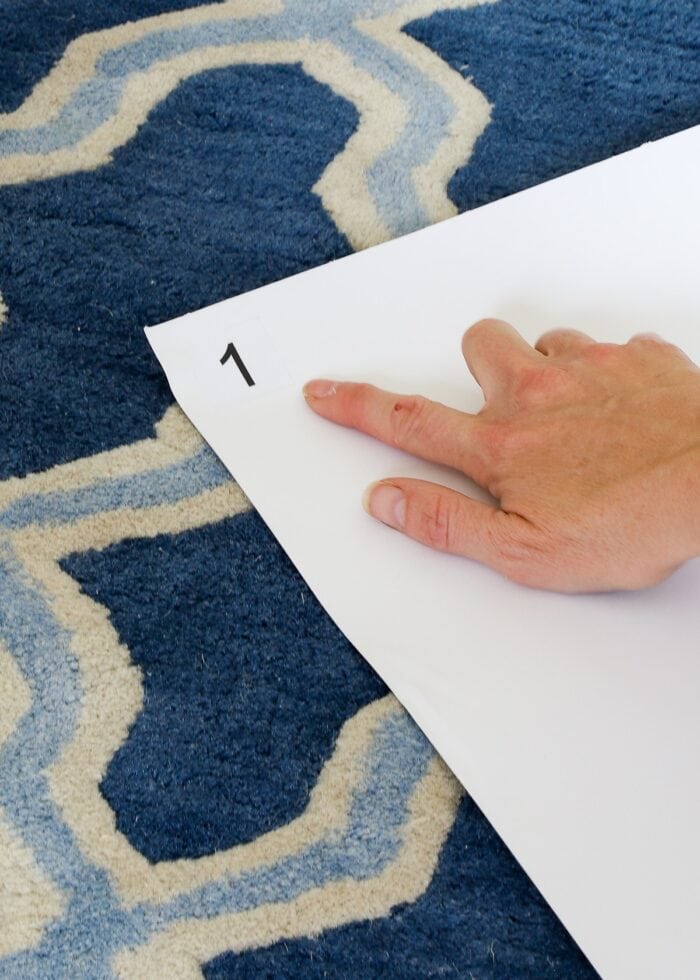
…but upon unrolling, I immediately saw it was in fact 5 distinct, pre-cut panels…each with a number on the back…designating the order in which they were to be hung.
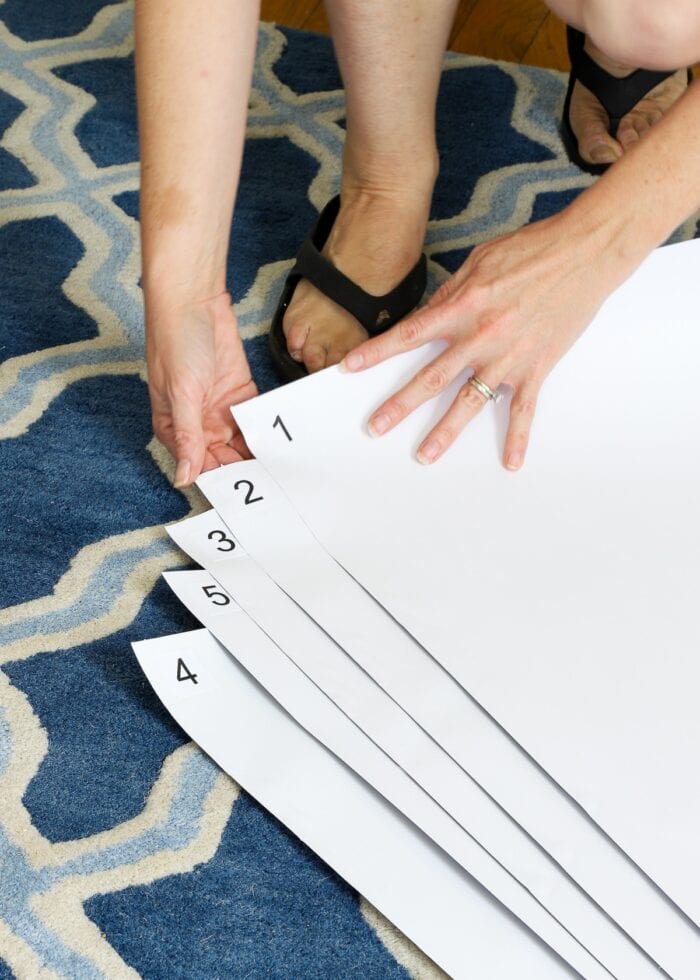
While you don’t need to pull all the panels apart and line them up on the floor (you can trust your mural designer got the panels printed and numbered right), you may want to ensure you have the panels in the right order for installation. (Mine were packaged out of order.)
Part 2 | How to Hang Wallpaper Mural Panels
Step 1: Prep the First Panel
Most murals will be numbered from left to right (just like you read and write), with the far left panel being #1 and all follow-on numbers extending to the right in order. As such, you will hang Panel #1 on the far left side of your installation wall.
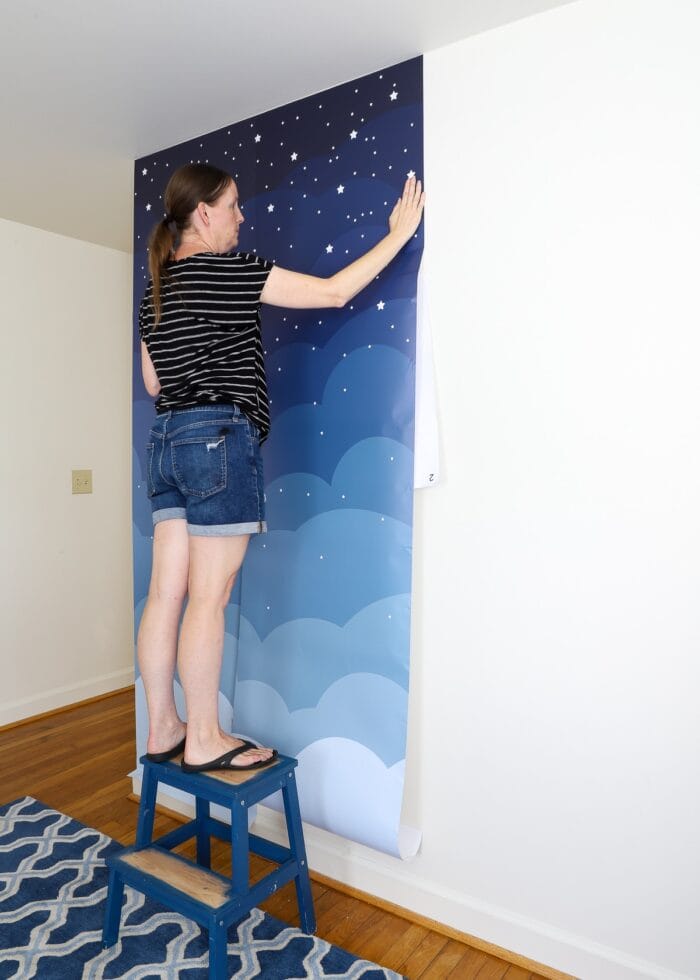
Sometimes separating the wallpaper panel from the white protective backing can be a little tricky. So before you climb up on your ladder, it helps to pull back just the top 6-10″ of paper backing (creasing it can help keep it out of your way).
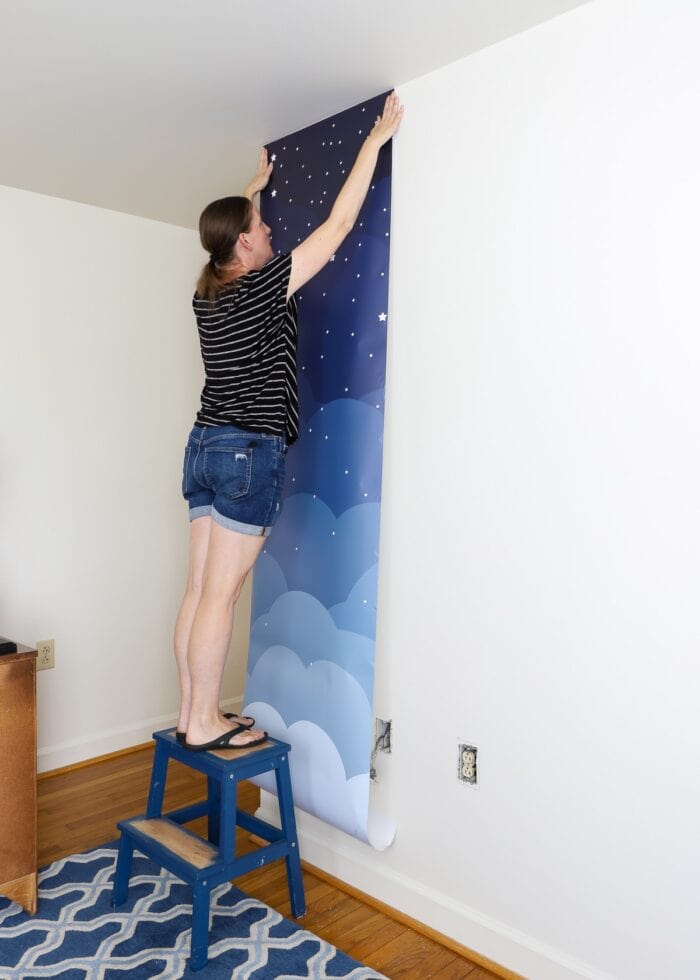
Step 2: Secure Top of Panel to the Wall
All follow-on panels will be lined up in accordance with your first panel, so it’s worth it to take the time to get the initial panel up right. If your ceiling or corner is level, you can line up the top/side of the panel with one (or both) of those features. If not, consider drawing a vertical line (using a level) against which you can line up your initial panel.
Since our wall had a distinct left side corner, I lined up my first panel along the side edge, while also ensuring it reached all the way to the ceiling.
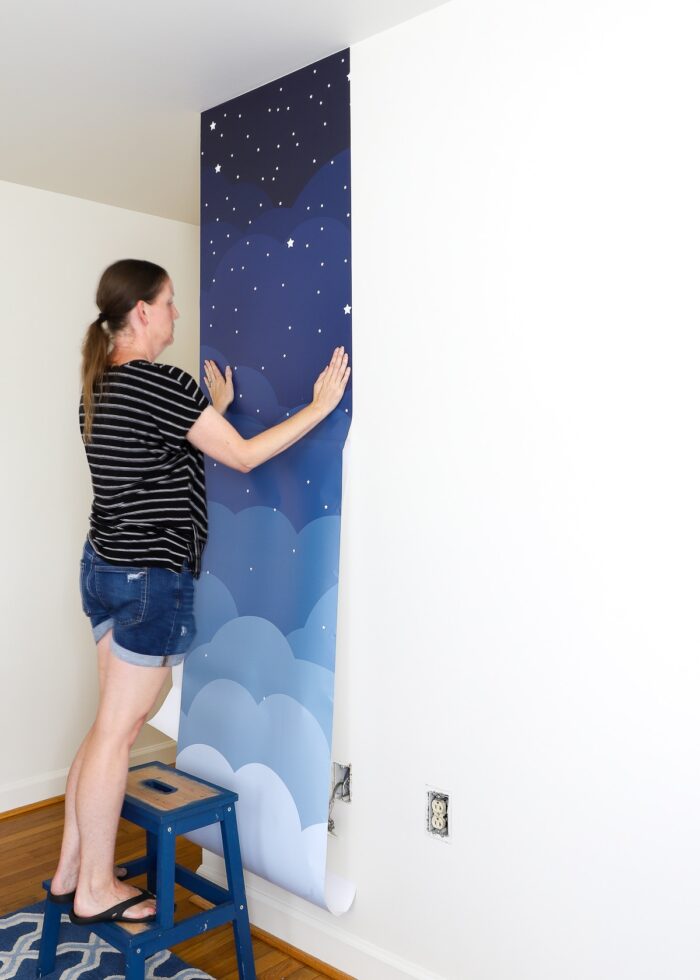
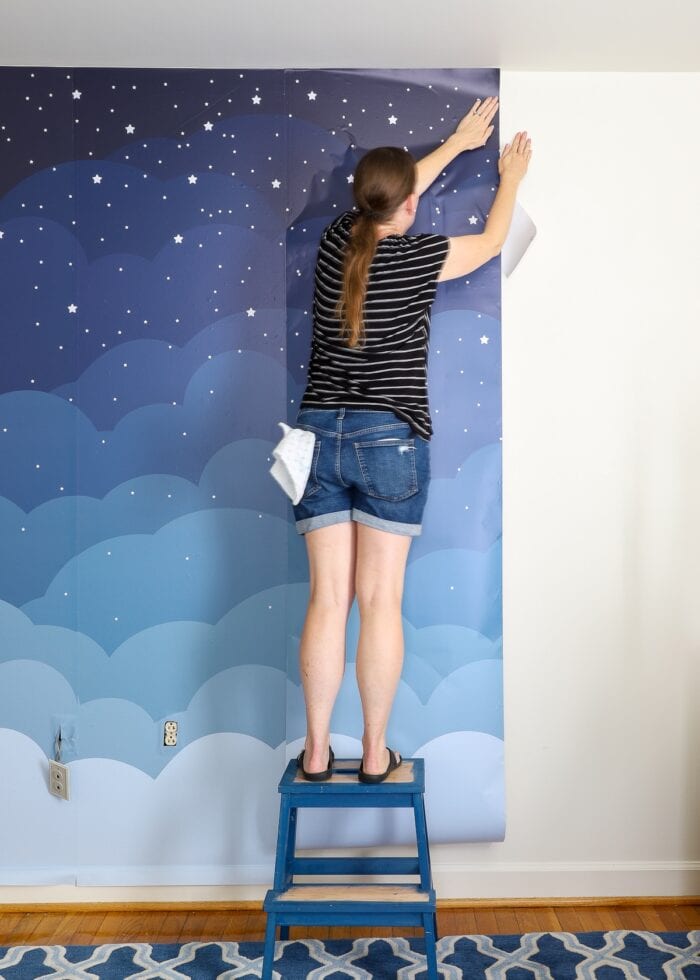
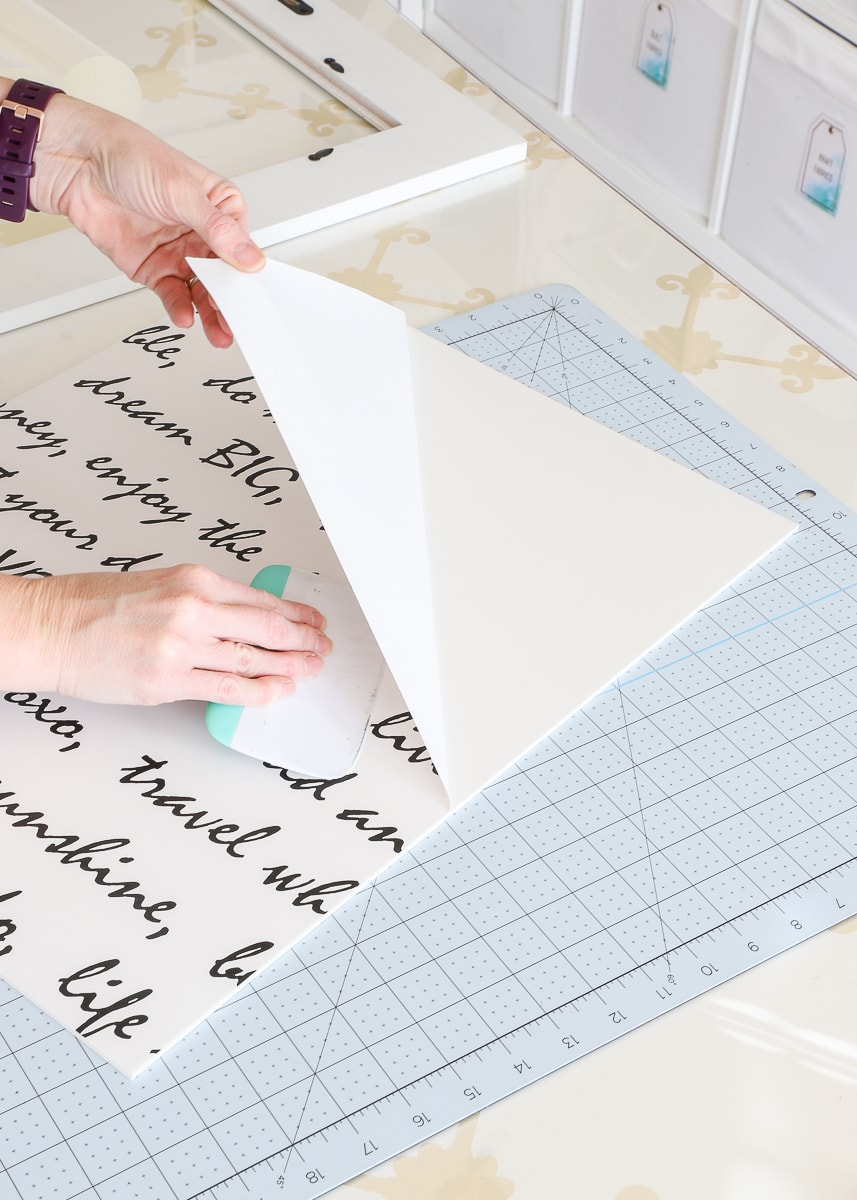
Step 3: Smooth Down & Out
To smooth the panel down, I used same the process I actually use for most of my normal wallpaper installations: down and out. First, you smooth straight down the center of the panel…just about 10″ or so.
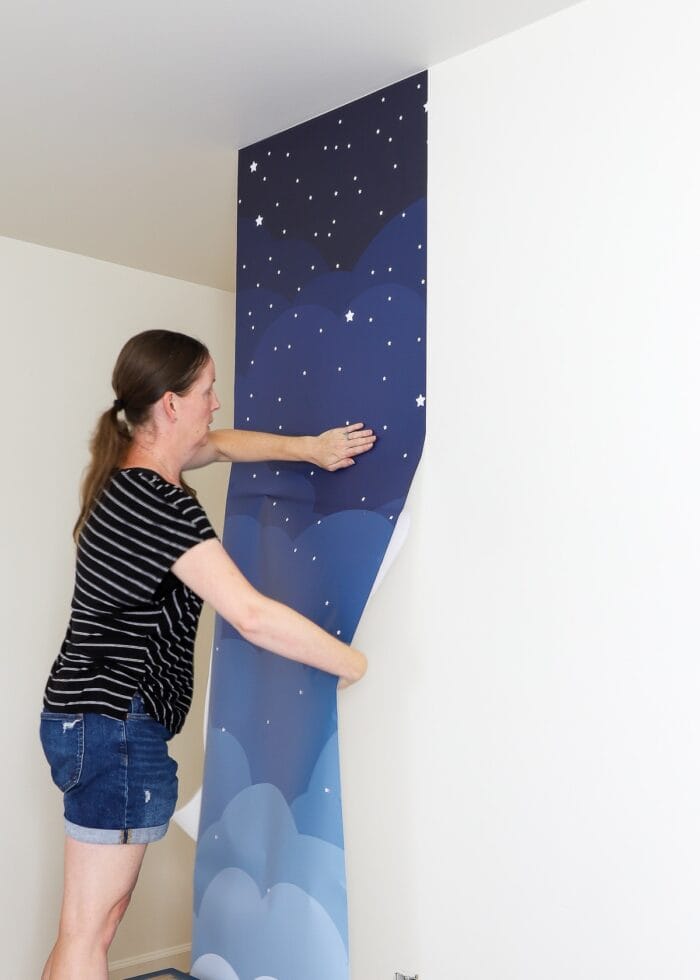
…then smooth the panel out to each side. This ensures no air bubbles get trapped in the center of the panel.
Want to save this post?
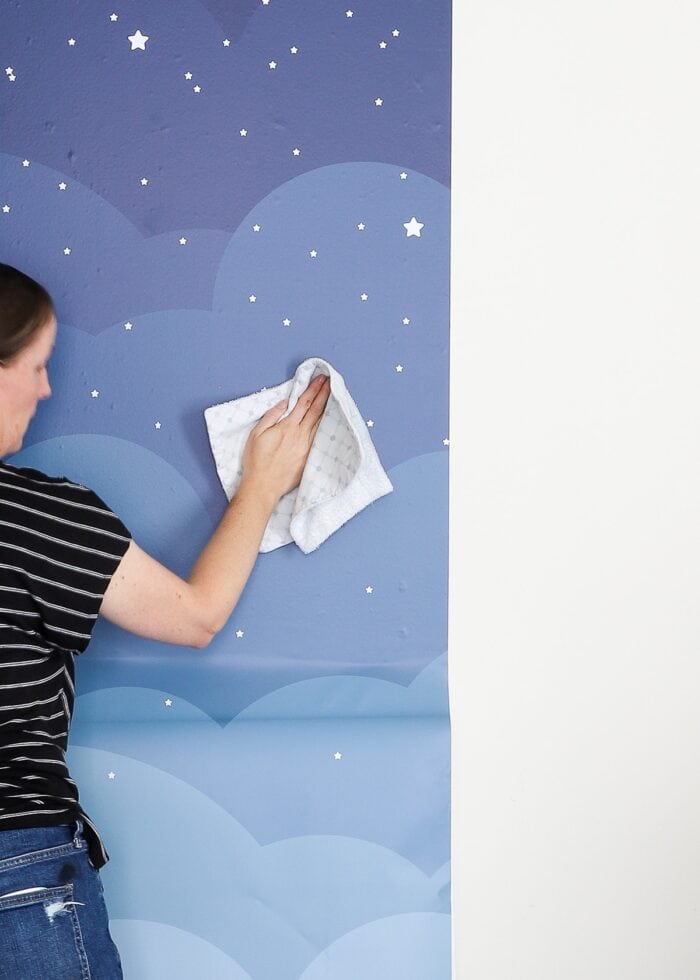
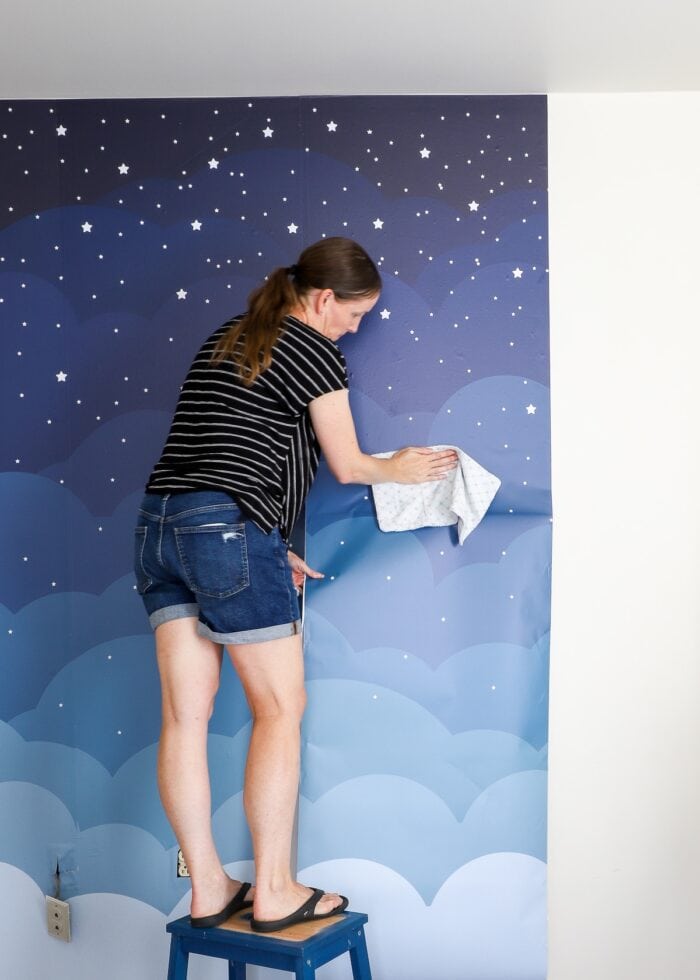
In almost all cases in the past, I have relied on a large smoothing tool (i.e., scraper) to adhere my wallpaper panels and remove any bubbles or wrinkles. But I learned quickly that the sharp edge of the scraper actually created noticeable lines on the dark paper. So I checked back through the instructions and noticed they recommend using a towel to smooth the paper down instead.
Although skeptical, I gave it a try…and lo and behold…I found the towel did indeed work the best in smoothing the paper down without bubbles OR scratches. (See…this is why I recommend deferring to your manufacture’s specific instructions!) I actually really loved using the towel to smooth down the wallpaper, so I plan to try it in future wallpaper applications too.
Step 4: Pull & Repeat
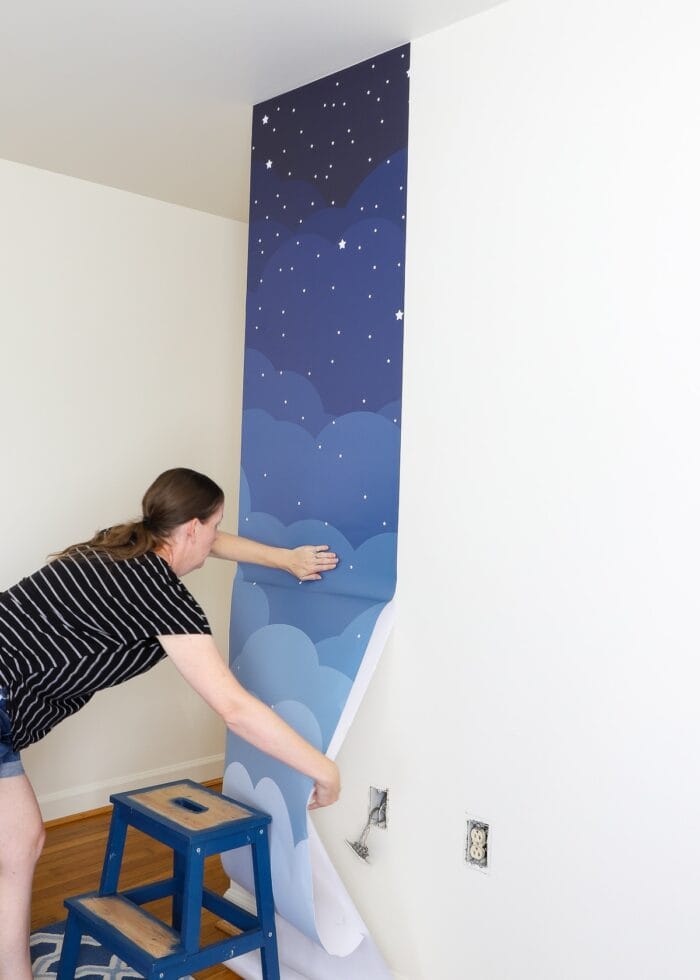
To hang the full panel, you will essentially repeat the “pull off the paper backing, then smooth down and out” process over and over again…working about 10″ or so at a time.
With vinyl-like wallpapers, I can usually remove big sections (or sometimes all) of the paper backing (then smooth down the center and out to the sides). But that technique did not work with this thicker, heavier paper. In order to get the paper down nice and smooth, I recommend only pulling away about 1 foot of paper backing, then smooth down before moving on.
If at any point (at the top, along the way down, or at the bottom), you notice this first panel is not perfectly vertical, take the time to fix it now. Since all follow-on panels will be based off this initial placement, any skewing will only become more noticeable as you move horizontally across the wall. Yes, it might be more difficult to re-hang the panel (since some or all of the paper backing might now be pulled off) but it can be done; and you’ll be glad to have it right later on.
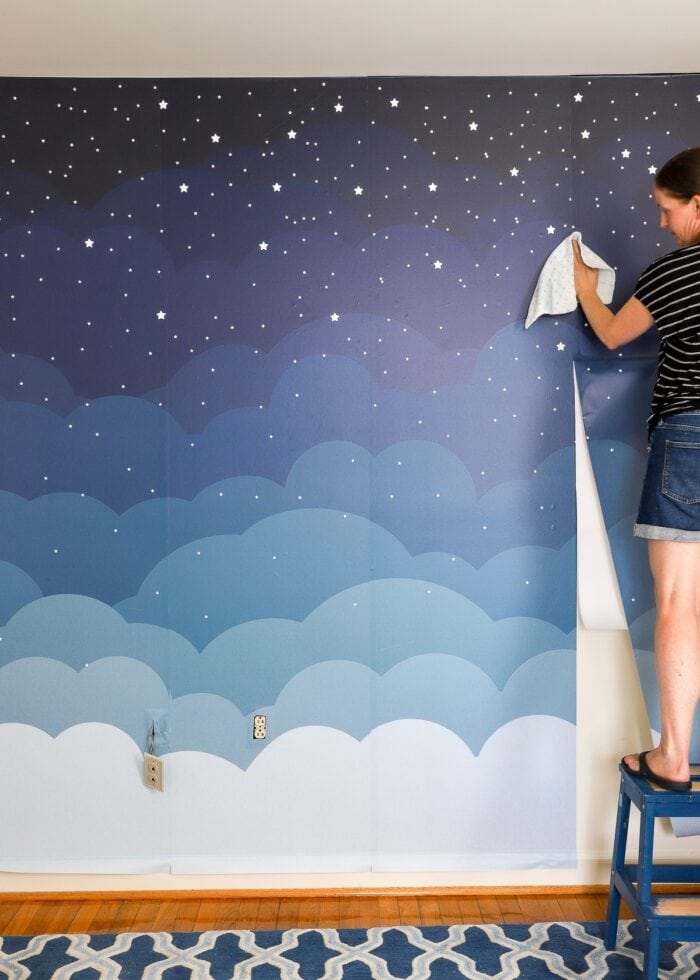
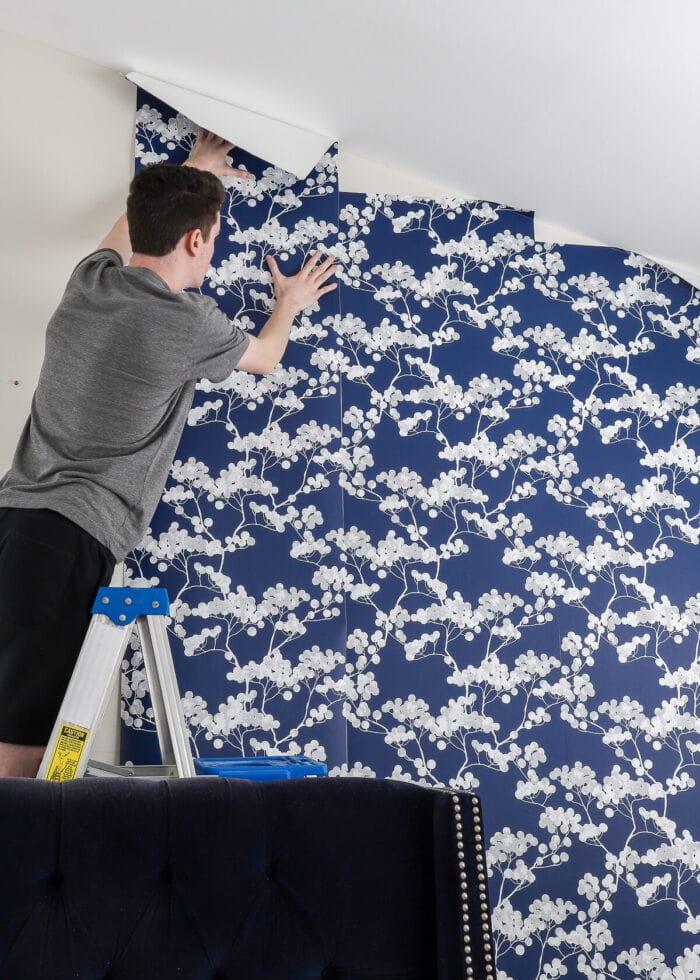
Step 5: Hang Follow-On Panels
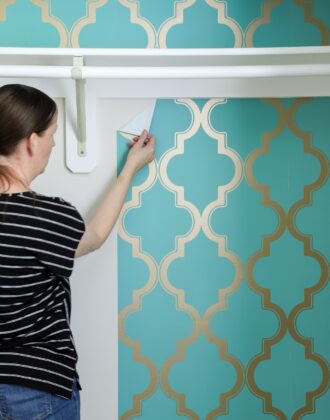
To hang the rest of the mural, you will essentially hang all follow-on panels (in the correct order) using the same process (peel back the paper backing, then spread down and out). And while it’s mighty convenient that you don’t have to measure any of the panels, getting the panel designs to line up correctly does take some patience (and deep breaths).
When hanging follow-on panels, it’s incredibly important to refer to your mural’s instructions, because they can differ based on how it was printed.
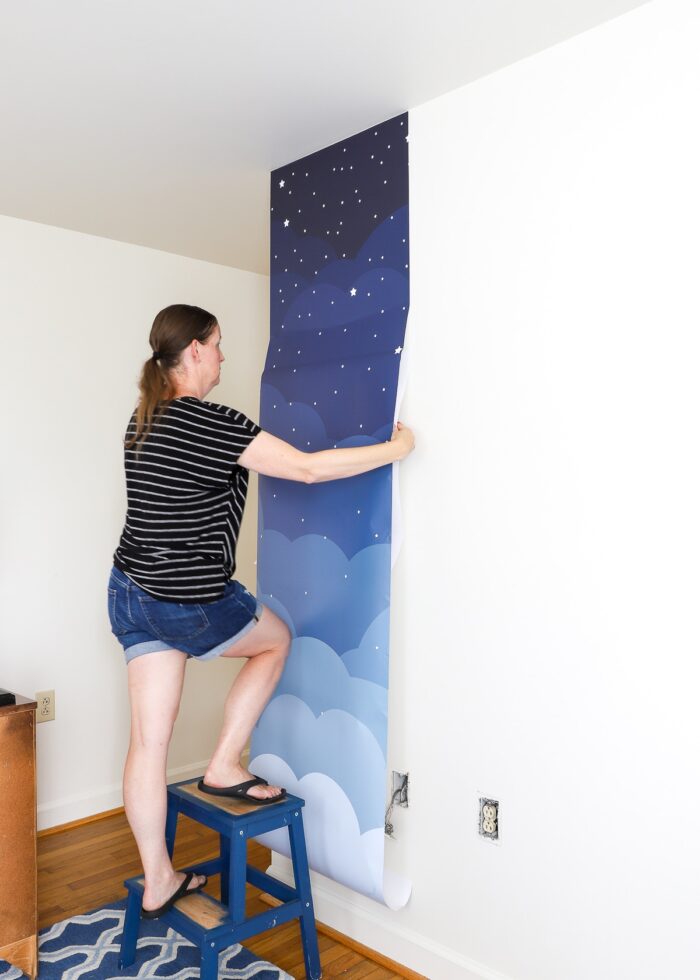
This cloud mural was printed with what’s called an “overlap.” Essentially, there is an extra 1/2″ of pattern printed on the right side of every panel. So in order for the pattern to match up perfectly, you overlap each new panel onto the previous panel by 1/2″.
Having always hung my wallpaper edge-to-edge (instead of overlapping), this was an unusual and uncomfortable process for me. As I worked across the wall, I actually found it easiest to line up the left edge of the pattern down about 24″ from the ceiling, before securing the top of the panel to the wall. This ensured I had the panel lined up properly before sticking a lot of it down.
I did find lining up the pattern much trickier on a mural than with traditional wallpaper, mostly because the design isn’t nearly as forgiving. If a plaid or stripe or floral doesn’t line perfectly up…it’s not really noticeable because the pattern is busy. But if a cloud or star didn’t match quite right, it’s very noticeable. I have a few recommendations on this:
- It’s always worth the effort to peel up the panel and re-place it. As you move down the wall, you might find the panel veers, causing your design to either overlap more or pull apart imperfectly. While panels can be a little off without perception, large deviations need to be fixed. Yes…you CAN pull the panel up and re-lay it down. (This is where the deep breath and short walk come into play!)
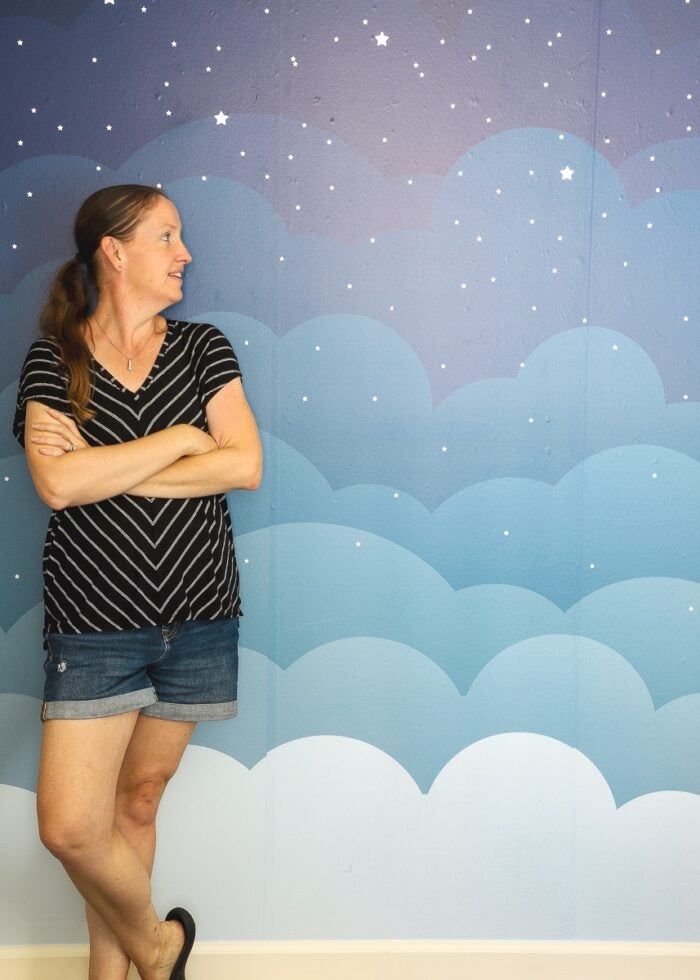
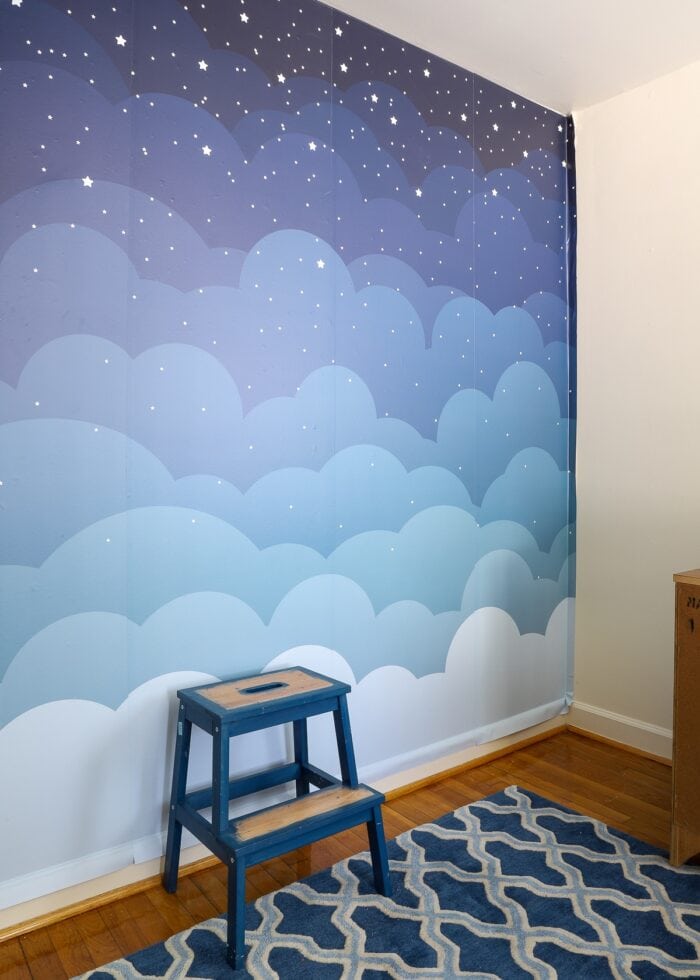
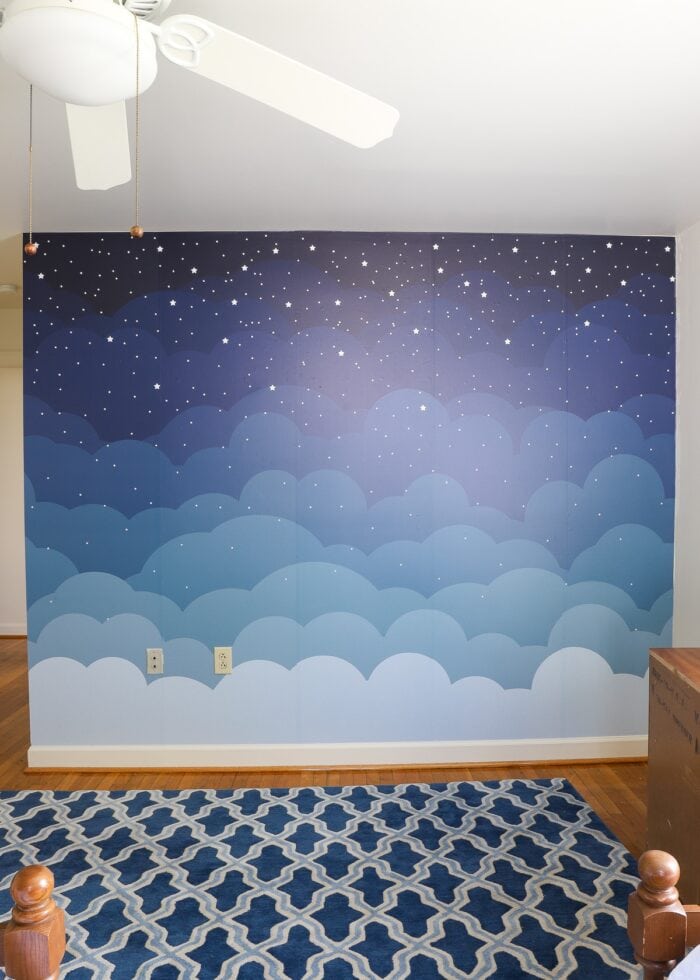
- Take a step back. My panel matching isn’t perfect. And when you get up close, you can really see where some parts didn’t line up quite right. But when you step back (second photo below), the imperfections fade away and all you really see is the big, glorious, overall effect. So if you’re going crazy trying to get the design to match up, take a breath, do the best you can, then step back to see if it’s really that obvious! (Spoiler: It won’t be!)
Another thing you are likely seeing (I saw it right away too!) is that the overlap is noticeable, purely from there being a double “layer” of paper along the seams. I’ll address this (and what to do about it) later on in this post.

Part 3 | Cleaning Up Your Wallpaper Mural
Once you get all your panels up on the wall, pat yourself on the back because the hard part is over! All that’s left to do is clean up any excess paper and put your wall/room back together!
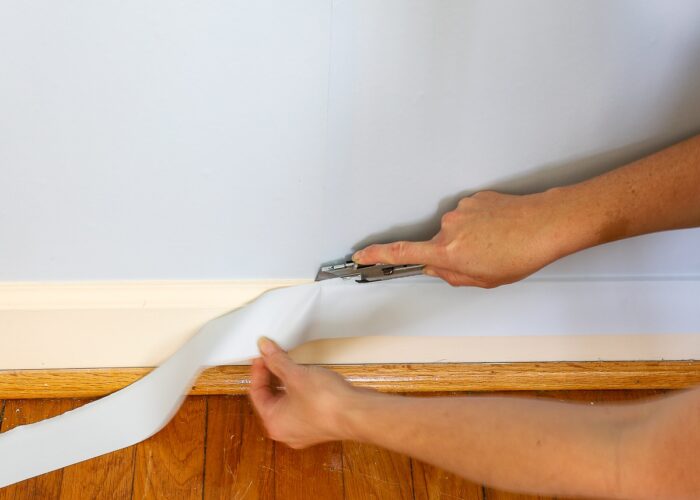
Cut Off Excess Paper
Along the bottom of each panel and at the corner(s), I found it easiest to use a scraper (or a credit card if you don’t have one) to get the panel to tightly sit into the edge created by the floor, walls, or baseboards. A nice sharp crease at these edges will improve overall adhesion of the panels while also creating an easy-to-cut line.
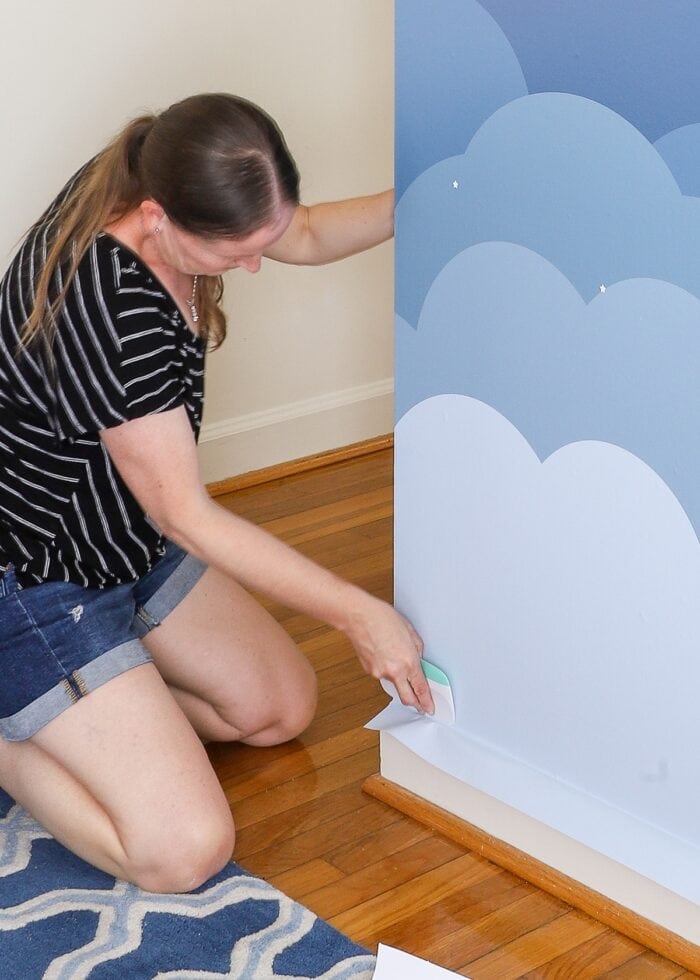
In fact, once I had created a deep crease, I was able to take a (very) sharp utility knife and run along the line to cut the excess paper strip away. If you are having trouble trimming a straight line, a ruler along your knife edge can help here.

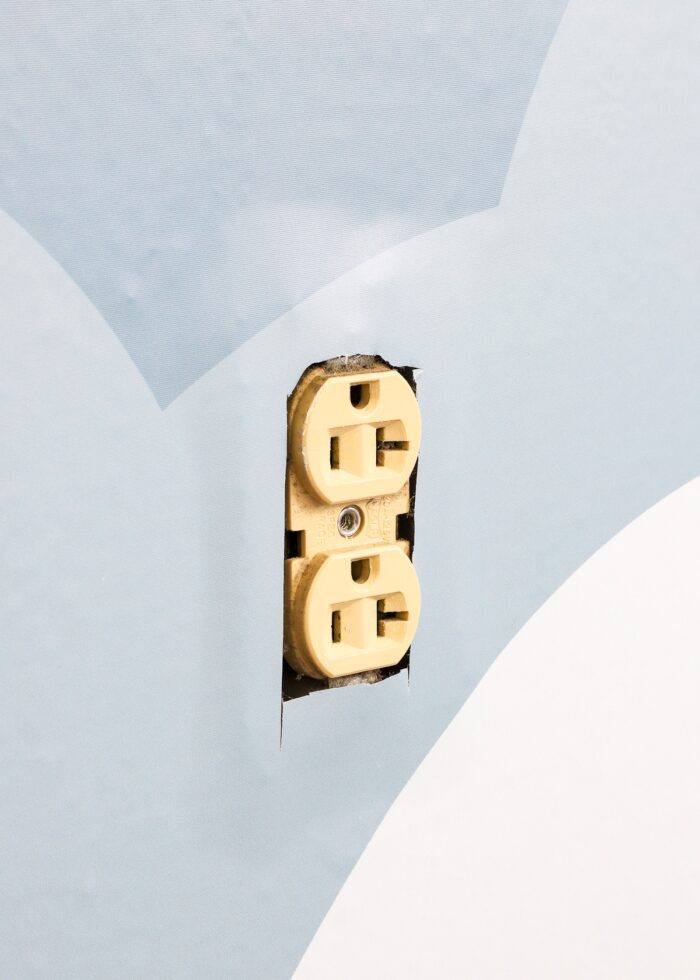
Cut Around Outlets
In order to get your panels to lay perfectly smooth in every direction, you will likely need to cut away the paper in front of and around outlets, vents, and switches. Whether you do this as you put up each panel or at the end is completely up to you. Either way, use a sharp blade to carefully trim away the paper around these fixtures, keeping as much paper in place as safely possible (so exposed wall doesn’t show once the switch plate covers are back in place).
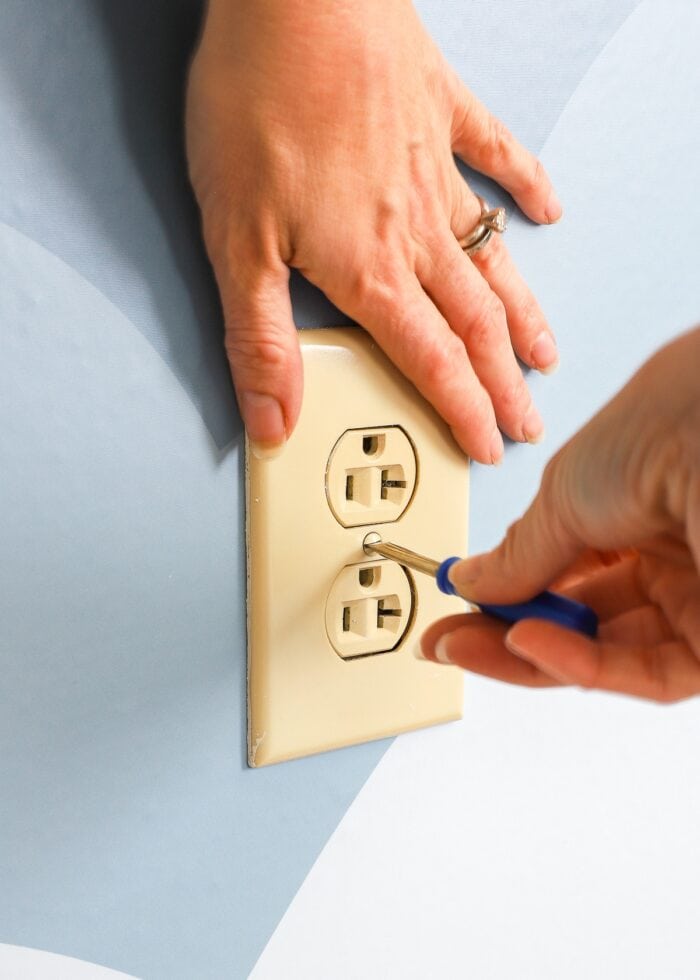
Once the paper is trimmed away, you can replace any covers as needed.
Then take a step back…because your big, beautiful wallpaper mural installation is complete!
Let’s Talk About Those Seams
As highlighted in the installation instructions, this particular wall mural included “overlap,” which means each panel was hung on top of the previous one by a 1/2″. This was not optional; it’s the only way to ensure the image lined up and was continuous. Aside from this being uncomfortable for me (just because I am so use to placing wallpaper panels end-to-end), I was a bit disappointed to see how noticeable the seams are. Well…at least up close.
But just like any imperfections you see up close, the seams don’t really bother me when I am in and around the room on a day-to-day basis. Can you see them in certain lights or from certain angles? Yes. But do they negate the overall effect the mural provides? No, not at all.
What To Do About Overlapping Seams
If the overlapping seams really bother you, you have a few options:
- Get Panels Without Overlap. Remember…wallpaper murals are typically custom, so they can likely make this change for you. Some people prefer the overlap (because it ensures you have continuous pattern on top of your original wall color), where others don’t. If you have a preference, make it known to your mural designer and they can likely accommodate you.
- Double-Cut Your Seams. Professional mural installers use a technique called “Double Cut,” where they intentionally overlap panels but then cut away the extra layers in order to create perfect, seamless seams (ha!). In complete honestly, I was too scared to try this (I was worried I’d make a more noticeable problem); but if you want to try it, you can see a full tutorial HERE.
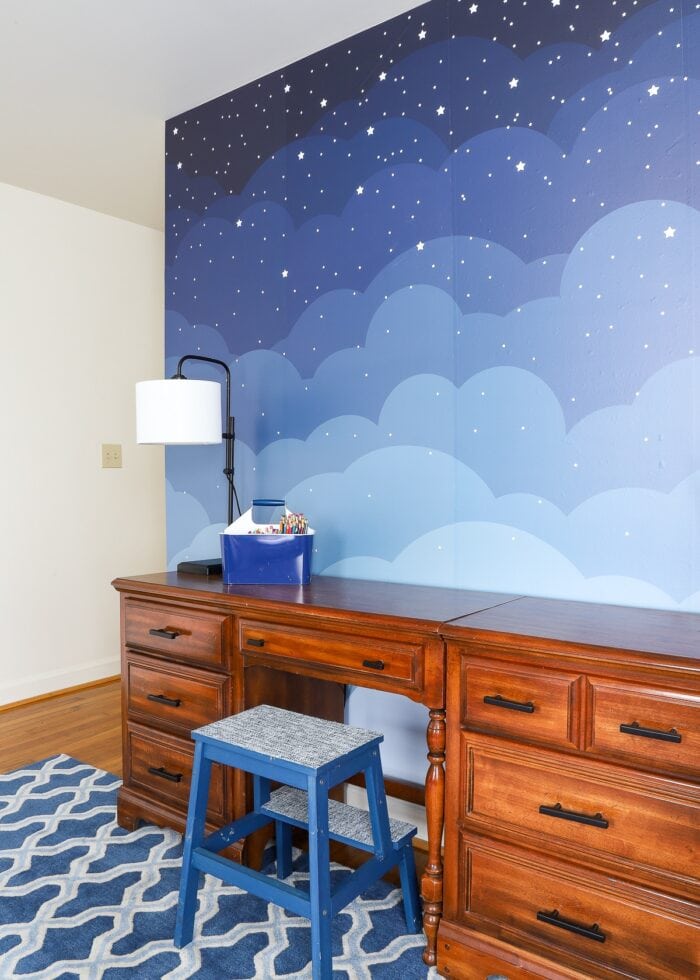
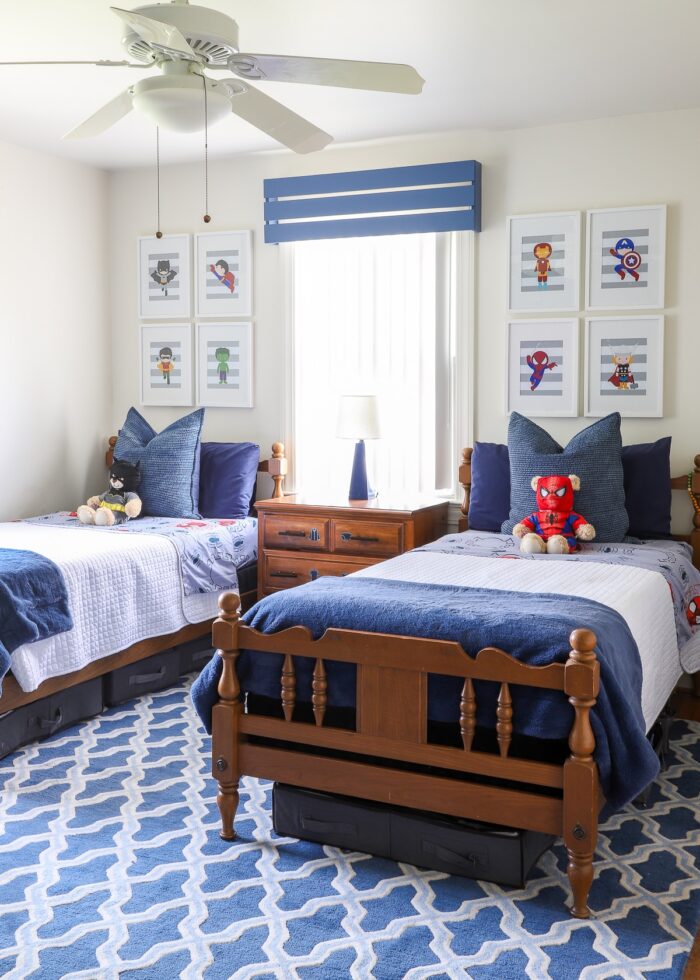
When I first saw a digital rendering of this cloud design on Etsy, I knew it was exactly what our little boys’ room needed; and if I can admit it…my instincts were spot on! This mural is an absolute show-stopper, bringing so much color and design to an otherwise very beige and boring room.

I am so glad I didn’t just create another wallpaper feature wall…like I’ve now done so many times. Trying this new-to-me product was not only incredibly fun and insanely gratifying, but adds such a whimsical effect we’ve never really had in our home before. The boys are obsessed; and you better bet I also love the view while reading stories or cuddling at bedtime.
A wallpaper mural might seem really overwhelming and scary. But I hope what I’ve shown here is that 1) it’s totally do-able, and 2) the wow factor is really unmatched! If you have any other questions about this wall mural or how to put one up in your own home, don’t hesitate to leave a comment. And thanks again to Artsy Decal Wallpapers for totally making my (and my boys’) cloudy, starry dreams come true!
Ready to give a wallpaper mural a try?!?
Artsy Decal Wallpapers is offering The Homes I Have Made Readers 15% off! Just enter THIHM15 at checkout!
More Great Information on Wallpaper In Your Home
Ready to tackle more wallpaper projects in your home? Check out some of my other favorites!
- How to Hang Peel and Stick Wallpaper
- Does Peel and Stick Wallpaper Damage Walls?
- A Complete Guide to Updating Furniture with Wallpaper
- Can You Use Peel & Stick Wallpaper In a Bathroom?
- Can You Put Wallpaper on Textured Walls?
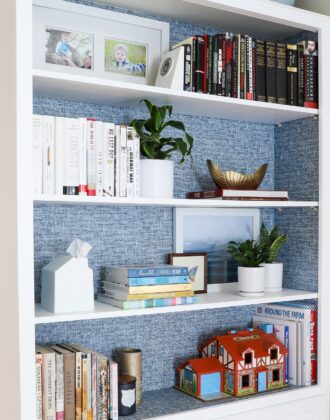
- How to Wallpaper the Back of a Bookcase | Step-by-Step
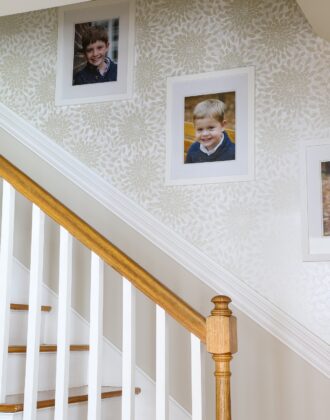
- Wallpapering a Stairwell | Tips You Need to Know!
- How to Hang a Wallpaper Mural | Tips & Tricks for Great Results
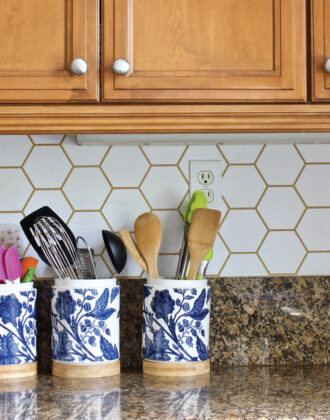
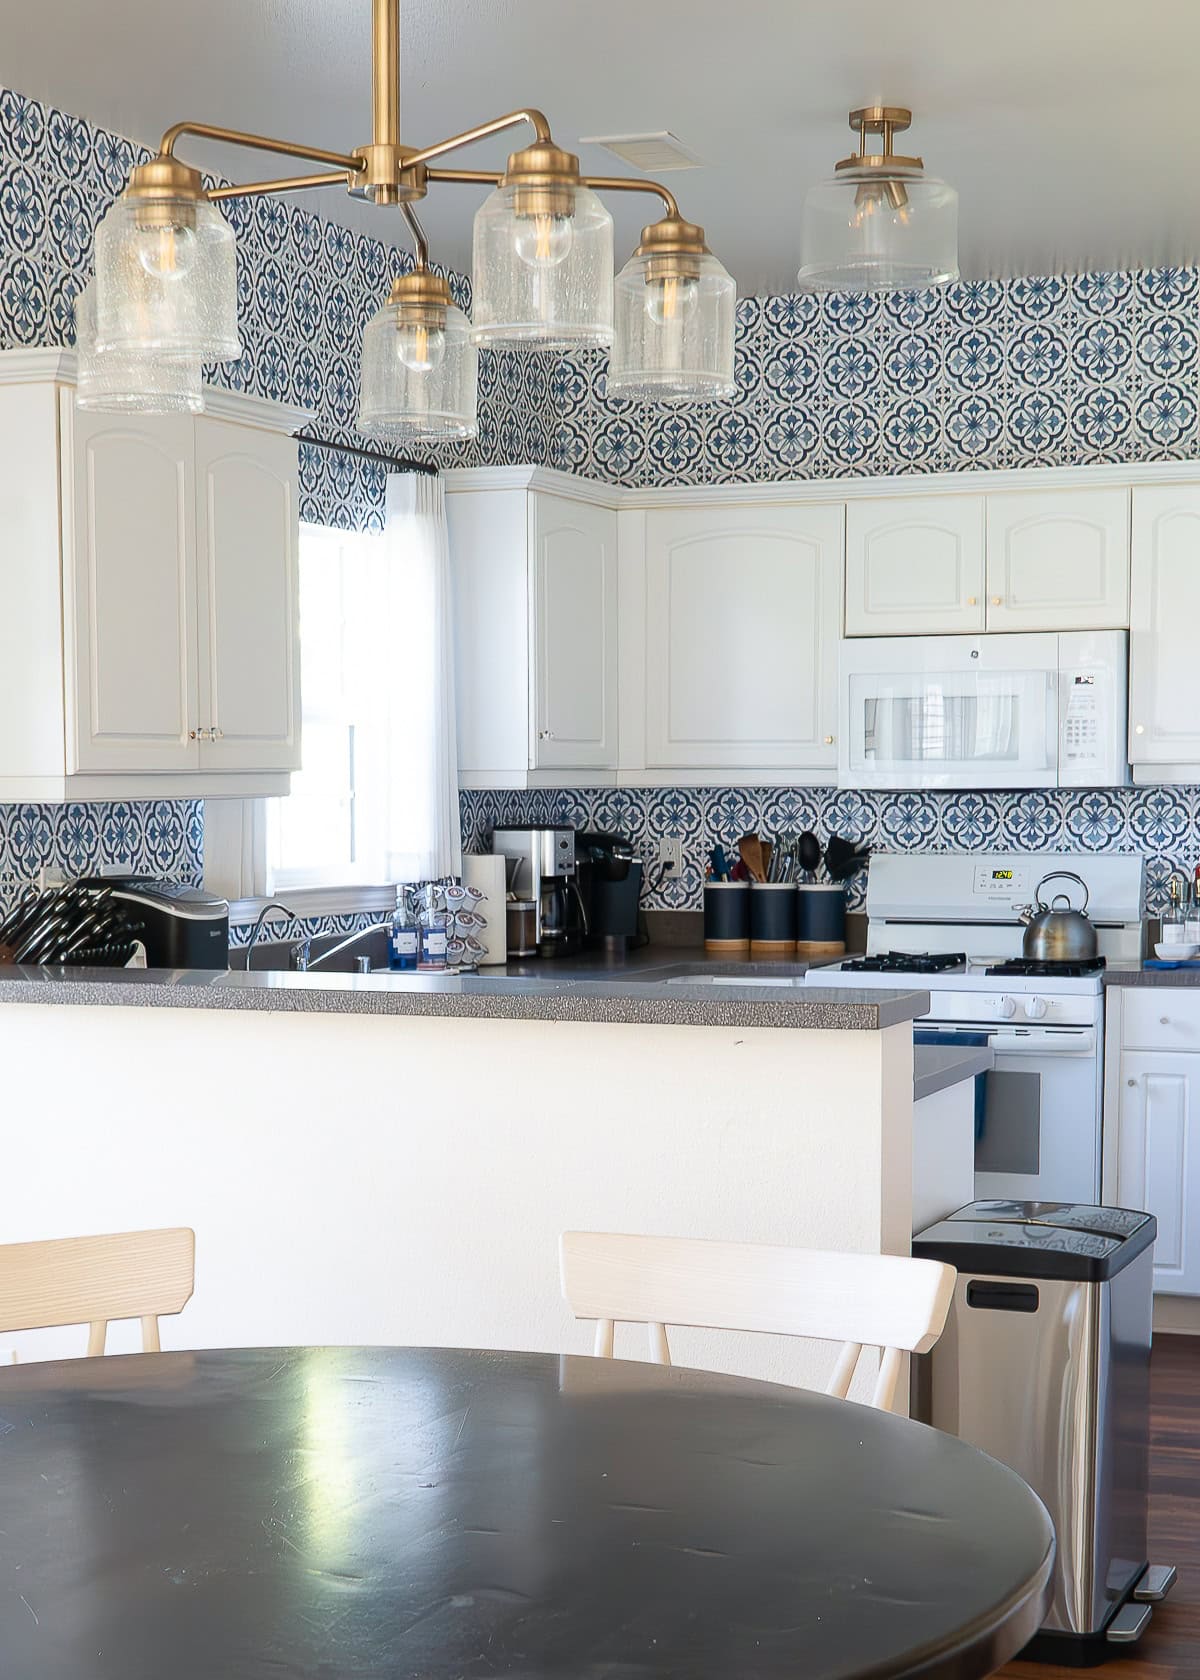
- How to Wallpaper a Backsplash
- The Best Wallpaper for Your Kitchen Backsplash
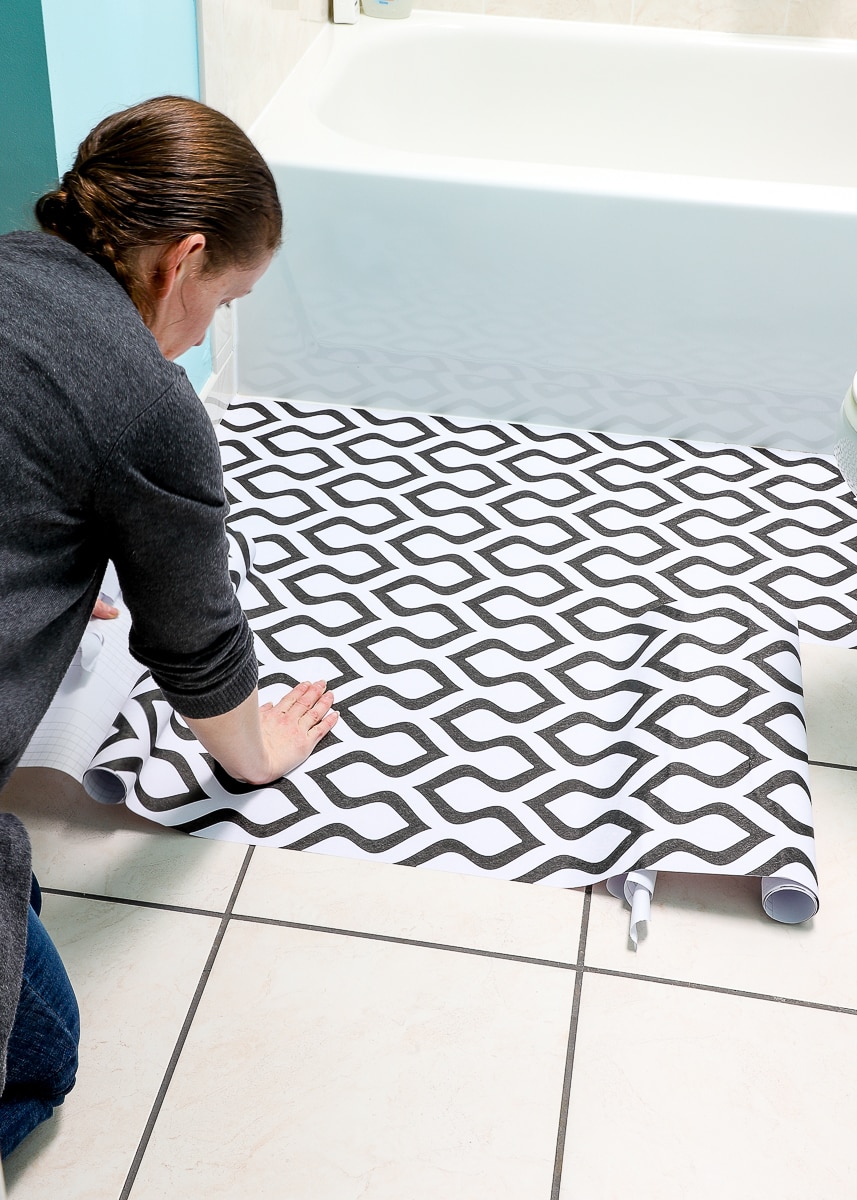
- Can You Put Peel and Stick Wallpaper on the Floor?
- How to Line Drawers with Wallpaper
- Solid Wallpaper | What It Is + Ideas for Using It
- Wallpapering a Whole Room Versus an Accent Wall | What I Learned
- How to Frame Wallpaper as Art
- How to Use Wall Decals to Look Like Wallpaper
- How to Wallpaper the Inside of Wall Molding Frames
Psssstt – This room is now completely done! See the full room reveal here: Our Boys’ Shared Bedroom Reveal
Megan

3 Comments on “How to Hang a Wallpaper Mural | Tips & Tricks for Great Results”
Beautiful! I have been hoping to try a mural and you’ve given me the confidence to do it.
Some of the mural would look great on the lampshades too!
Wow!
I’ve wanted a mural in one of my rooms forever. Wonder if I can talk my kids into it?
You must have so many ideas for your “forever” home; Features you want, ideas for decorating.
Each of your homes has that warm and cozy feeling. And all so different.
WOW…Megan that looks AWESOME!