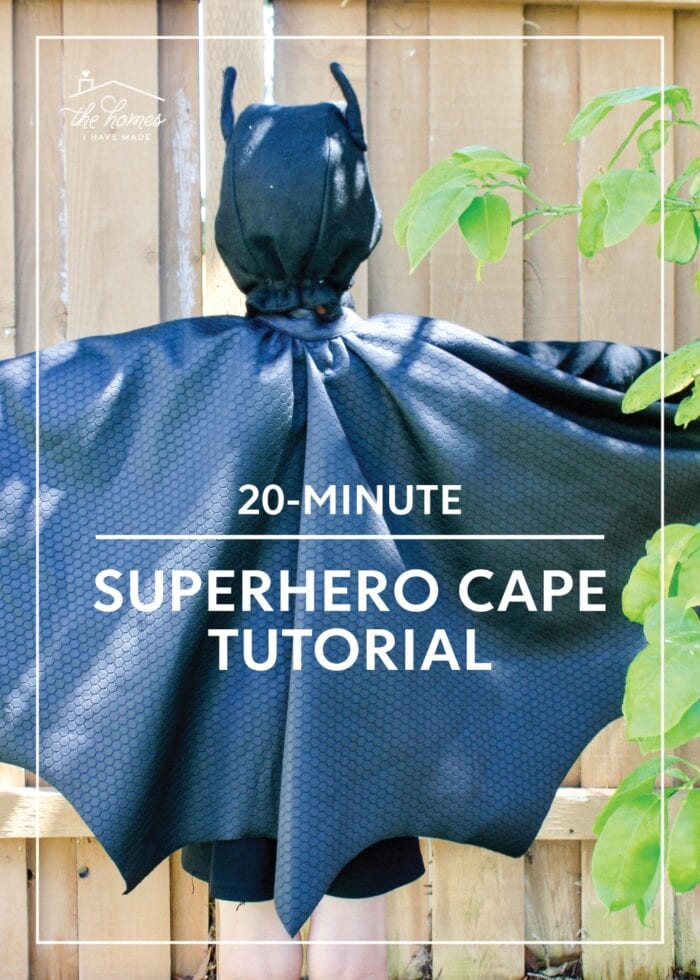
Easy Superhero Cape Sewing Pattern | A 20-Minute Project!
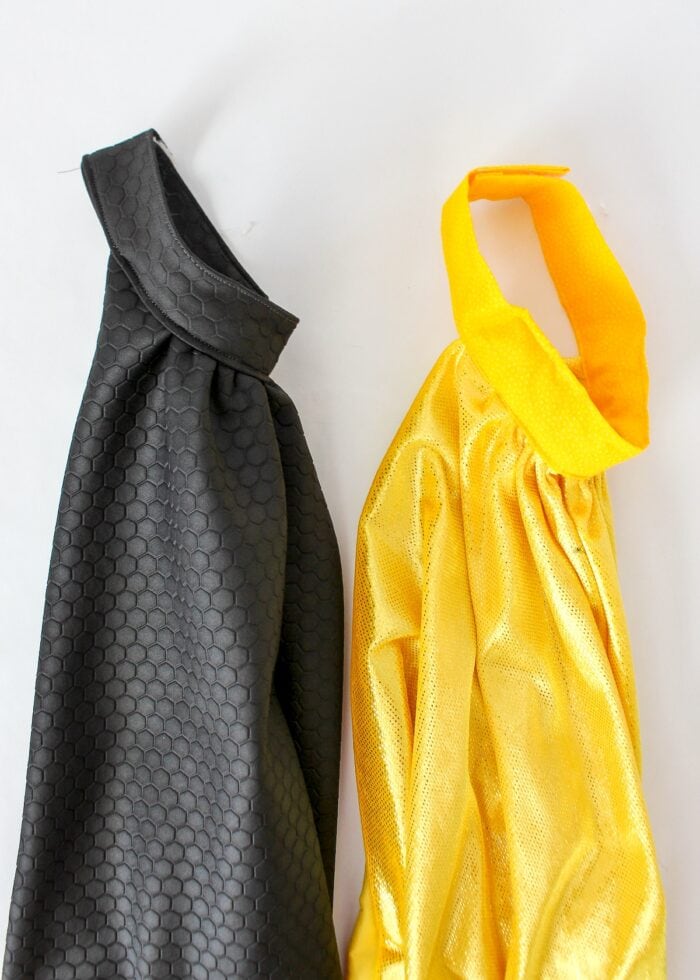
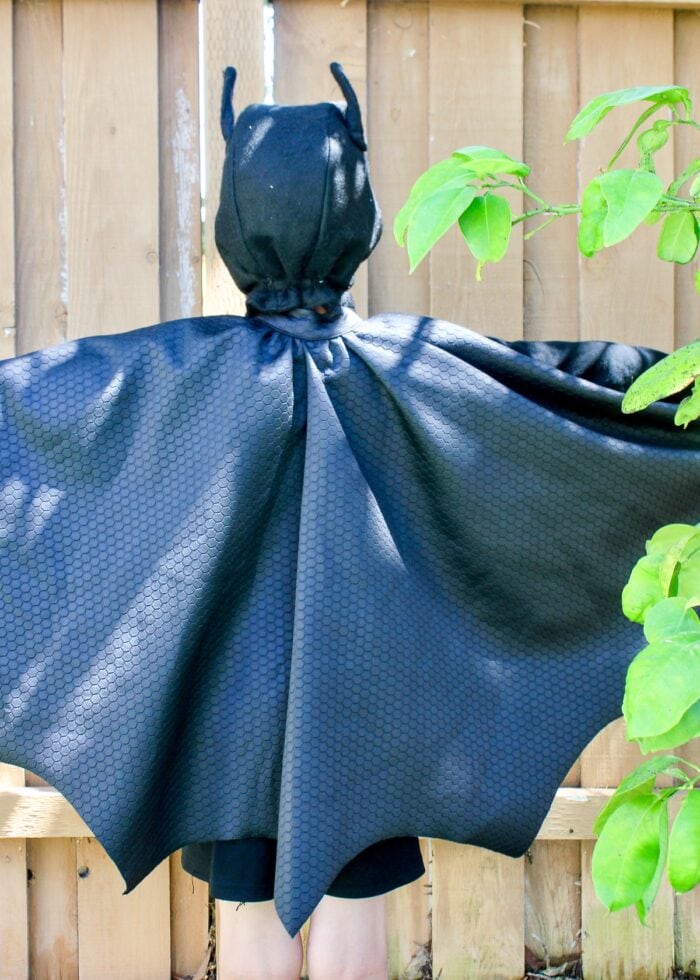
Over the years, I’ve made a lot of Halloween costumes and dress-up items for our kiddos. From Baby Waldo to the cast of Tangled though, nothing has had more staying power and popularity among my young boys than our Batman cape. I made this cape 5 years ago, in just about 20 minutes. It is still going strong and is even worn on a daily basis…in fact, we often get questions and compliments on it whenever it’s worn to the grocery store or out playing with friends! This super easy superhero cape is great for both kids and adults alike and really comes together fast using the most basic of sewing skills. Whether you need a cape for Halloween, a super hero birthday party, or just to add to your dress up box, this is one anyone can make and will look great for years to come!
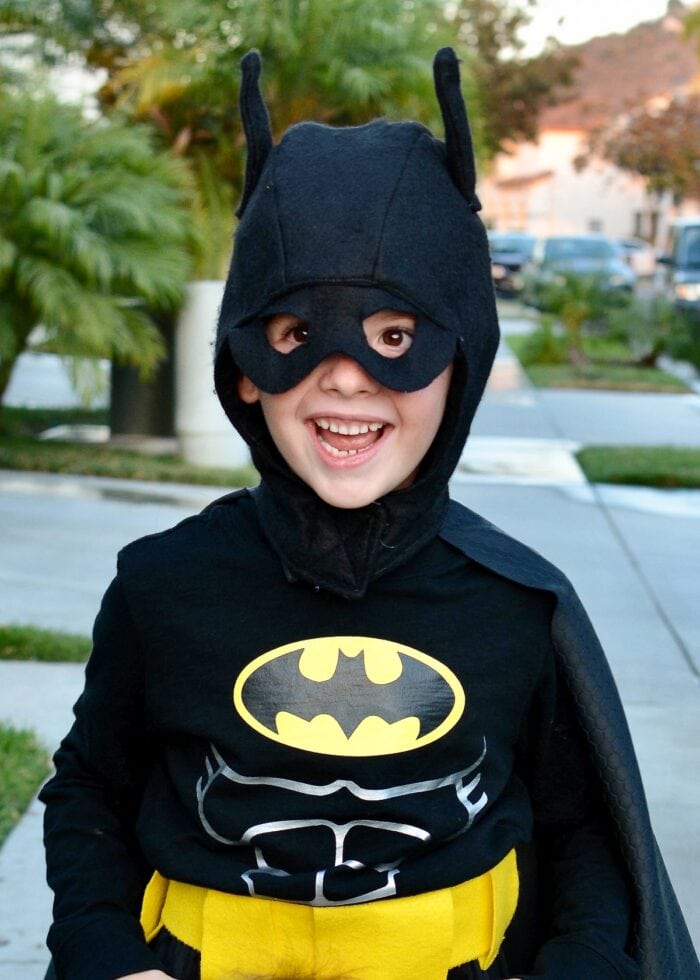
I first made this superhero cape as part of our Lego Batman Family Costumes. When combined with hoods and iron-on t-shirts, they made for a quick and easy Halloween costume!
There are three factors that make this particular super cape a “must make”:
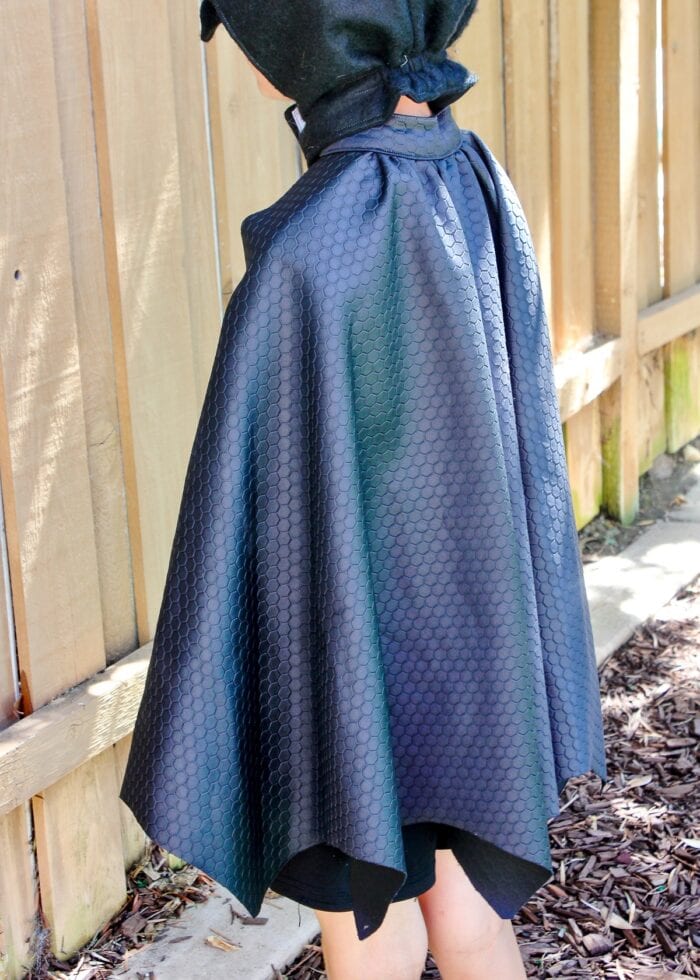
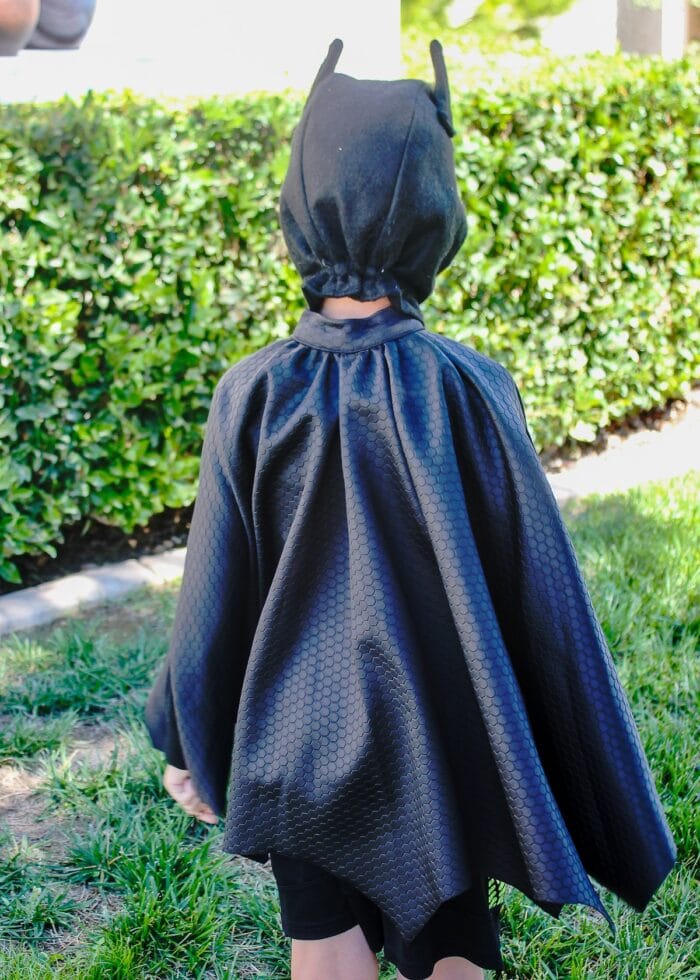
- This cape is a full half circle, so it’s nice and full when worn by either kids or adults. Although it attaches around the neck, it reaches over the shoulders so it can still be seen from the front.
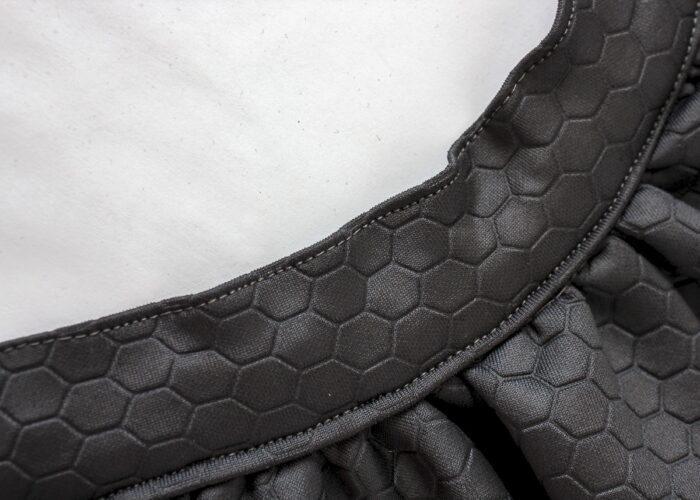
- The fabric doesn’t fray when cut. This not only saves you the step of hemming, but it also looks incredible. The hexagon pattern is very “Batman,” and the fabric’s weight helps it hang soooo nicely.
- It’s really easy. Seriously. I don’t sew clothes (just curtains and pillows!), but I could handle this! Even if you consider yourself a beginner sewer (as in, you can thread your machine and sew a simple straight line), you can make this cape!
I chose to give our cape scallops to make it a “bat capelet” specific for our Batman costumes. But you could easily leave the bottom edge un-cut for any favorite superhero or add sharp points or tattered edges for a different look. Whether you need different lengths or neck girths, this cape sewing pattern can be adapted for anyone in the family!

Supplies Needed
Here is what you need to make an easy superhero cape!

- 2(ish) Yards of No-Frey Fabric. If you are making this cape for a small child, you can get away with a smaller cut. However, if you want this cape to be long or for an adult, 2 yards will be sufficient.
- Sew-on Velcro. You can certainly use adhesive-backed Velcro if you’re in a hurry, but I find that kids are prone to yanking the cape right off. Sew-on is a better bet for a lasting costume.
- Matching Thread
- Tools
- Sewing machine
- Scissors
- Chalk pencil or roller
- Iron
- Measuring tape
- Seam gauge
Picking Fabric for Your Superhero Cape
As far as what fabric to choose, I suggest you first head to the fabric store and see what you can find this season, as options continually change. Start in the costume fabrics section (usually extra robust leading up to Halloween), where you will find lots of fun fabrics.
While you can pick any color, texture and design you like, I highly recommend picking something that has some weight (so it drapes really nicely) and (more importantly) won’t fray. This cape isn’t lined or hemmed (which is why it’s so quick and easy); so if you choose a fabric that frays, you’ll be frustrated with the messy hem line. Instead, tug along the raw edge of the fabric (the cut edge) and if no threads easily come loose, you’re good to go!
Fabric Width = Cape Length
I made two identical capes (the black one for my child and the yellow one for myself), both using standard 42″ wide fabric. As a Kindergartener, the black cape touched my son’s knees; on my three year old, the same black cape is full length, almost reaching his ankles. On me, the yellow cape comes to just below my waist.
As you will soon see, this tutorial uses the fabric’s width for the cape’s length. So if you are hoping to make a cape longer than 38ish inches, you’ll need to start with 54-60″ wide fabric (or sew multiple widths together).
Step 1: Determine Your Superhero Cape Size
Before you can cut out the cape, you first need to determine how long you want it. This is very much a personal preference and/or is determined by the specific costume/look you’re going for. For example, super hero capes tend to be a bit shorter (just below the waist), while cloaks or a Darth Vader costume might come all the way to the ankles.
You’ll want to use this formula to determine the length: Your Cape’s Length = Distance from Neck to Desired Length + 4″
Step 2: Cut Out the Superhero Cape
Cutting out this cape is quicker and easier than you probably expect; and yes…you’ll end up with a perfect half circle!
Fold the Fabric In Half
Start by folding your fabric in half with the raw “cut” edges together.
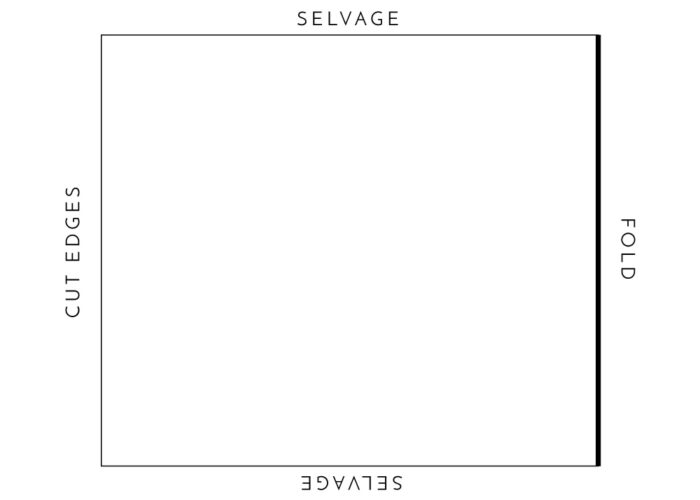
You will essentially cut out a quarter circle (as shown in the diagram below), which when unfolded, will be a perfect half circle.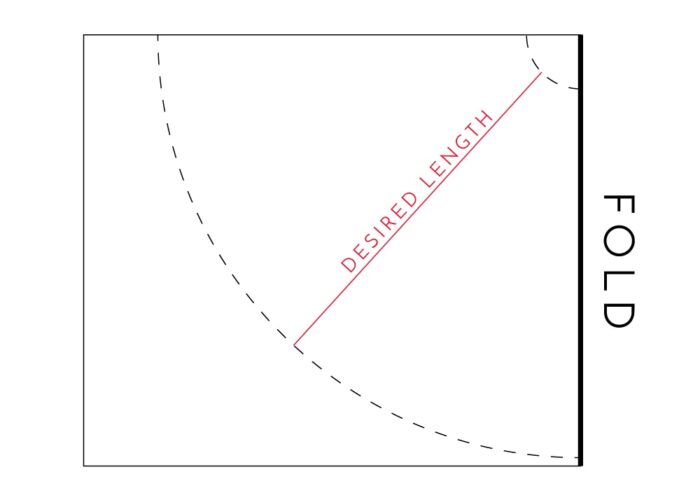
Draw a Quarter Circle Onto the Fabric
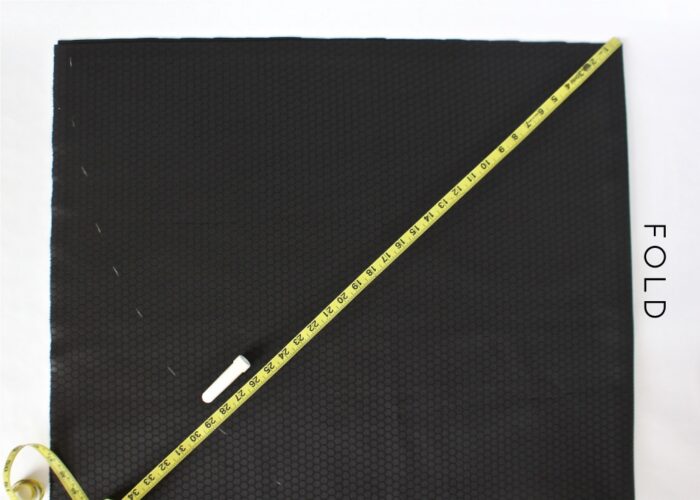
To draw a perfect quarter circle directly on your fabric, use a measuring tape just as you would a compass.
Take the measurement you identified in Step 1 (desired length + 4″) and measure that many inches (in my case, 29″) from the corner at the top of the fold down the fold itself. Make a hash mark with a fabric pen or chalk marker.
Then, rotate the tape measure just a few inches (being sure to keep the end of the tape measure still in the corner) and make another hash mark. Work from one corner of your fabric to the other, making hash marks along the way. When you’re done, you should have a quarter circle of hash marks on your fabric.
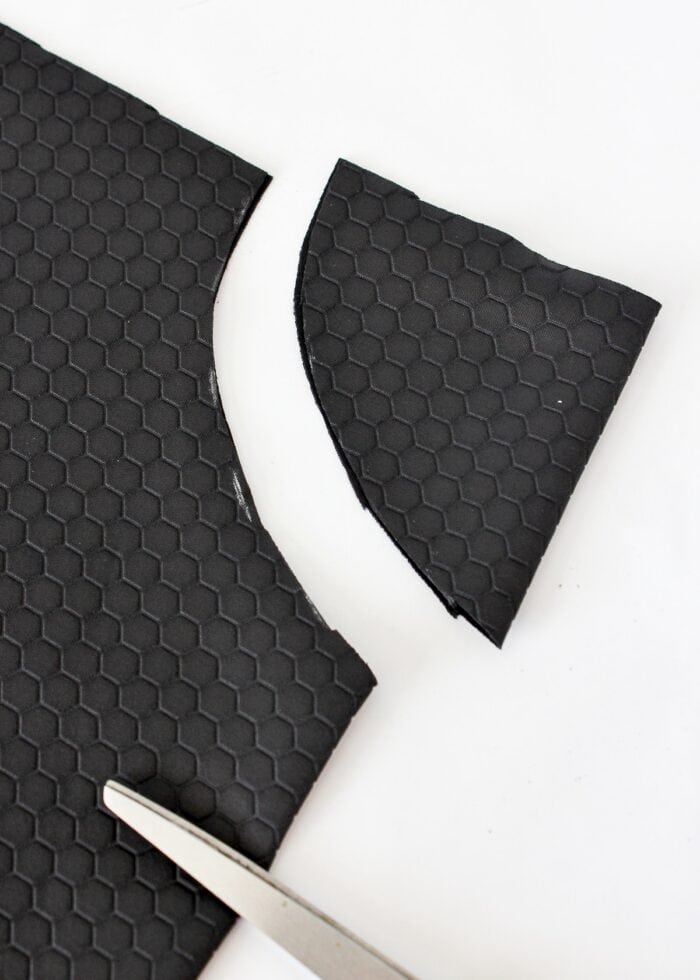
Cut Out the Cape
Next, take a scissors and cut along your hash marks. Don’t fret too much on making this cut perfect. The cape will have plenty of body to disguise any crooked cuts, whether you make the scallops or not.

Now your fabric is cut into a half circle, but keep it folded for the next step.
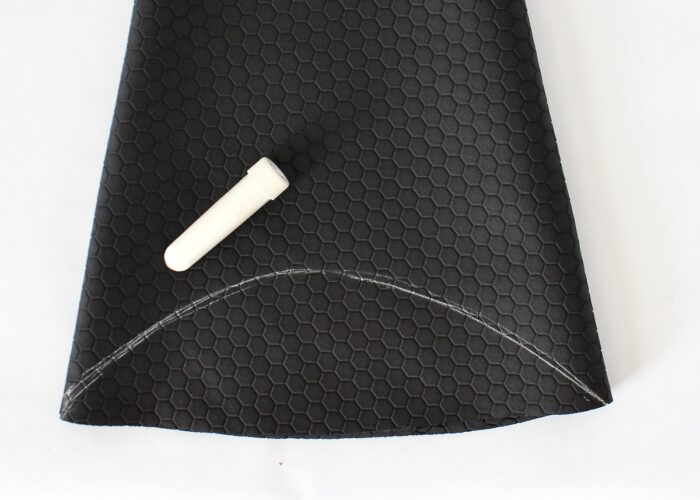
Cut Out the Neck
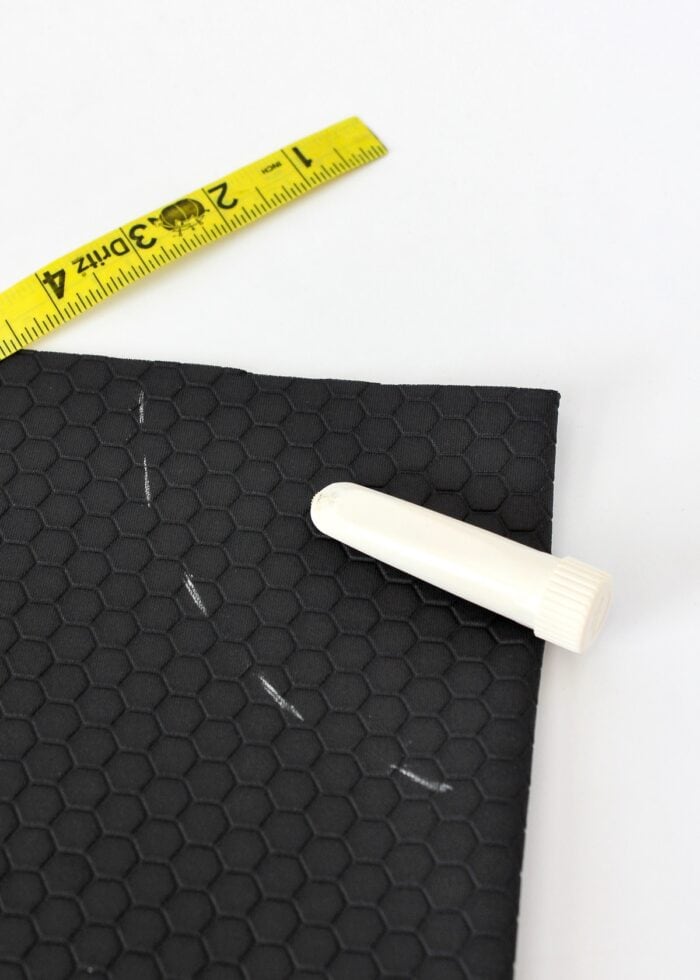
So that the cape bends nicely around the neck, you’ll repeat the same process but on a smaller scale. This time, measure down 4″ from the same corner to create a smaller quarter circle…
…and just like the bottom, cut out the smaller half circle along the hash marks.
Step 3: Create the Scallops (Optional)
(The next step is to make scallops across the bottom of your cape. This is completely optional based on the look you are going for and will not affect how the cape comes together in follow-on steps.)
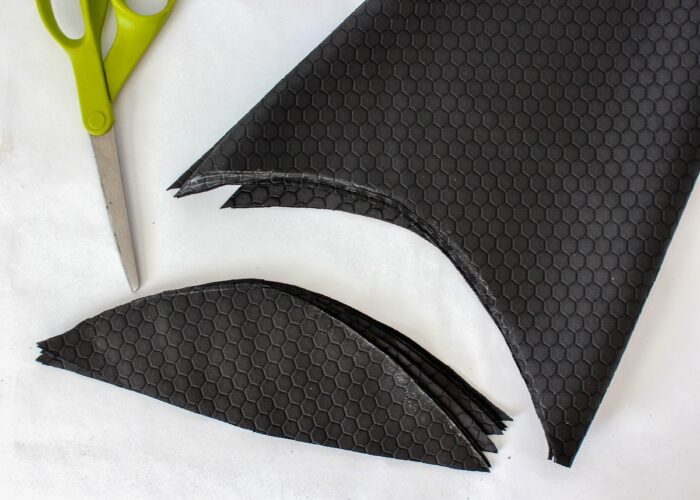
At this point, your cape should still be folded in half with the bottom rounded and neck cut out. To easily make uniform curves across the bottom of your cape, fold the cape in half again…
…and in half again. You should end up with 8 layers of fabric.
With the cape all folded up, use your chalk roller or fabric maker to draw a round shape from one corner to the other (as shown below). You can trace a plate or a bowl or just eyeball it. I do suggest making the scallop deeper than you might think you want. Once the cape is unfolded and put together, shallow scollops can be hard to see.
Remember…fabric pens and chalk markers can be erased, so don’t hesitate to draw and re-draw your scallop line until you are satisfied with it.
Once you’re happy with the scallop line, use a scissors to cut through all the layers of fabric at one time.
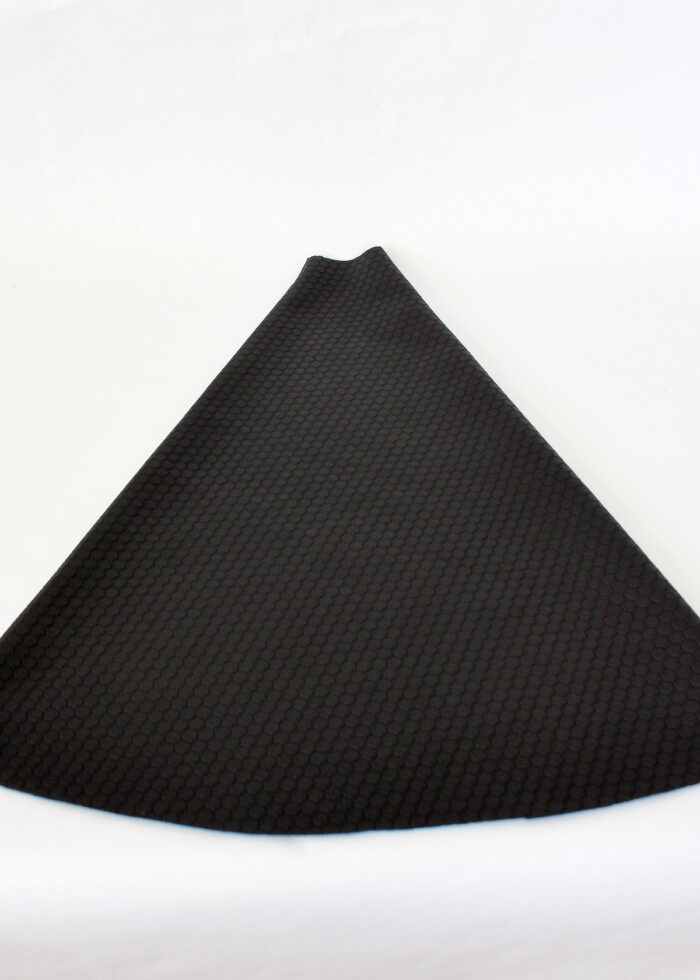
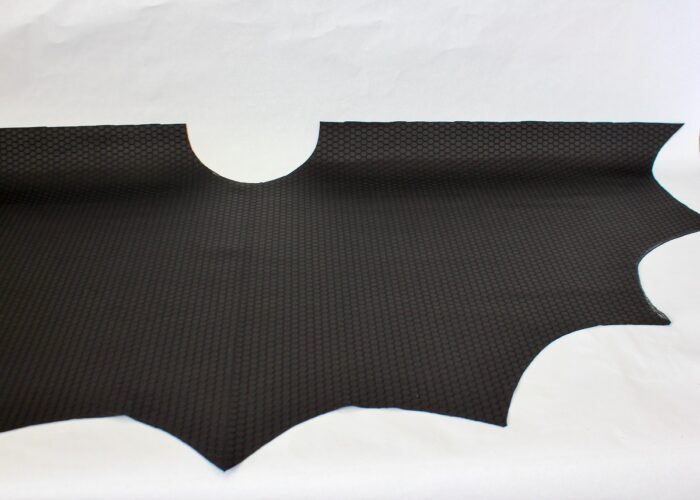
Unfold The Cape
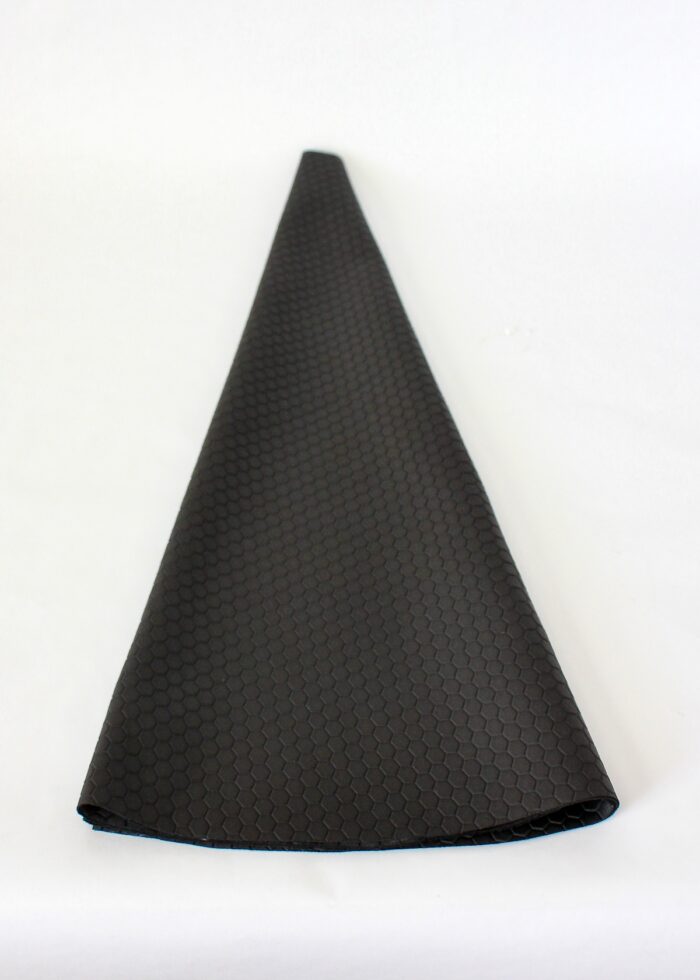
Now, when you fully unfold the cape, you will see you have a full half-circle cape (with a neck cut out) and scallops along the bottom! Wasn’t that easy?!?
Step 4: Gather the Cape Neck
Alright, this is the toughest part of the whole cape (and it’s not even that hard!) To make the fabric lay nicely at the neck, you’ll need to gather the fabric. Don’t be scared – gathering isn’t that hard. I’m going to quickly walk you through it here but if you need a more detailed tutorial, see here: How to Gather Fabric (the Right Way).
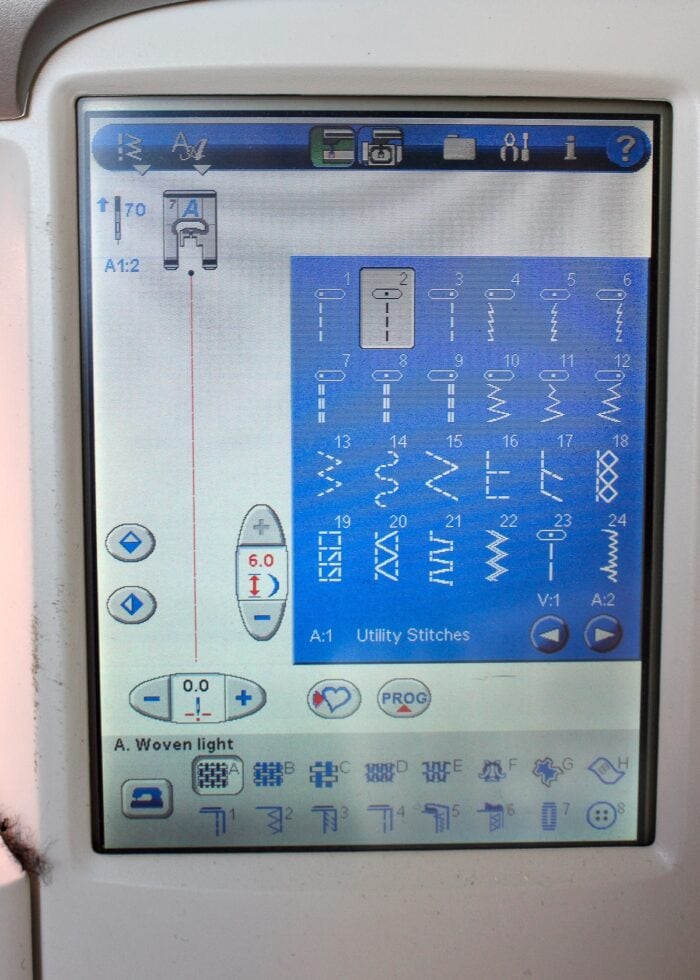
First, set your sewing machine to the longest stitch length possible (mine is at 6.0).
Want to save this post?
Once you have your machine threaded with matching thread, pull out a lead length of about 6-10 inches.
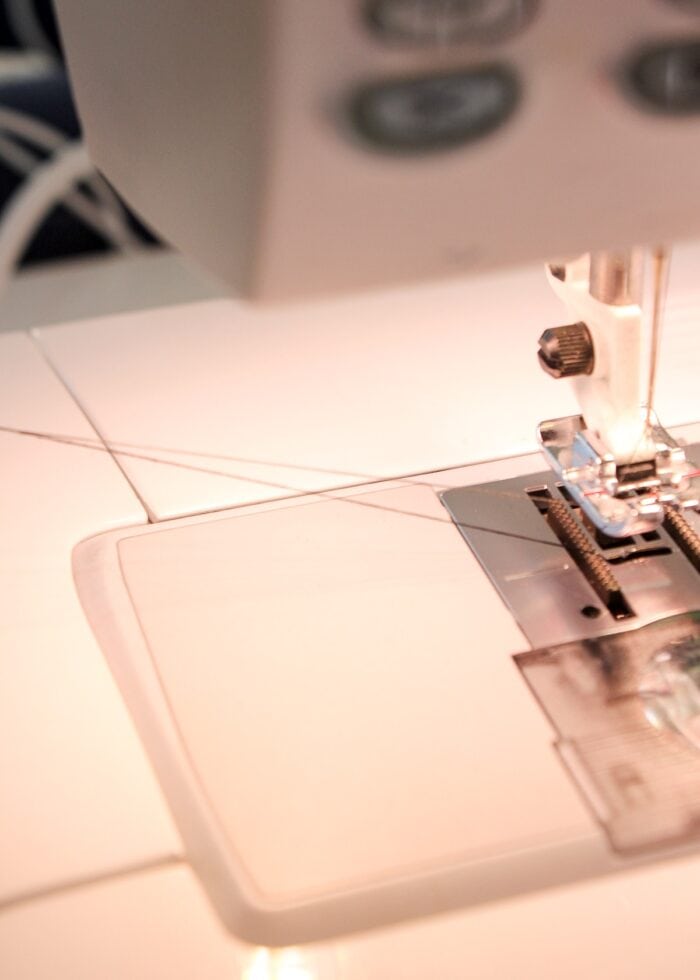
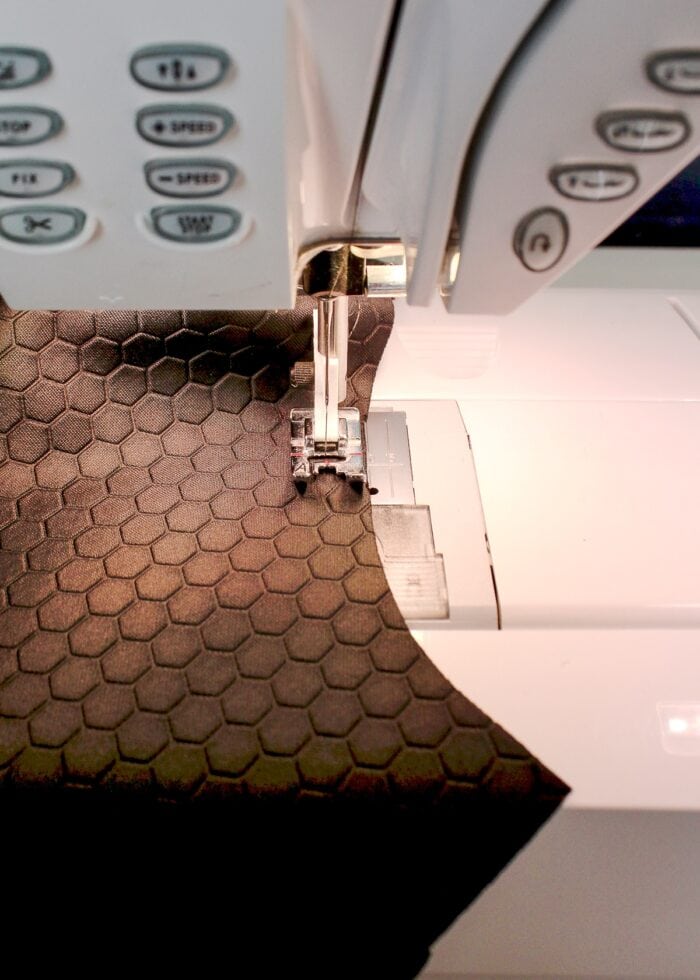
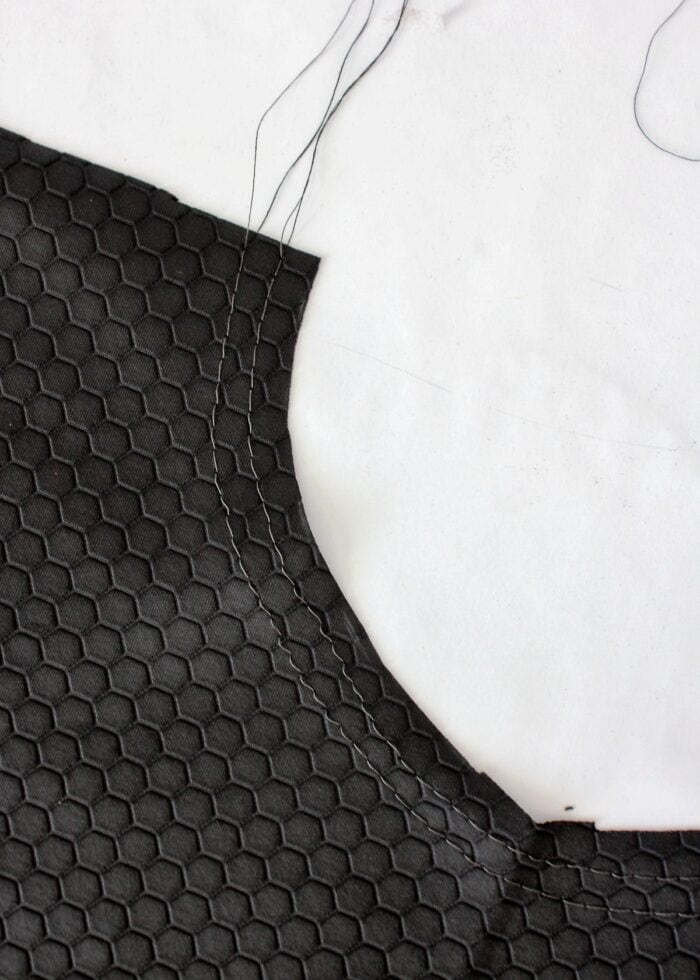
Then sew two lines of stitching from one end of the cape’s neck around the curve to the other. Do NOT backstitch at either end.
Before cutting, pull the cape away to produce another 6-10″ of thread; then cut.
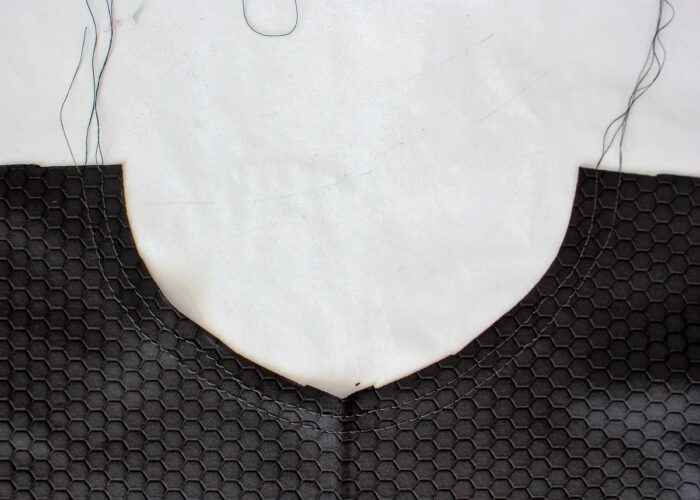
You need at least 6-10″ of thread on both ends of the neckline, and your stitch lines should be spaced about 1/2″apart. When finished, the neck line should look like this:
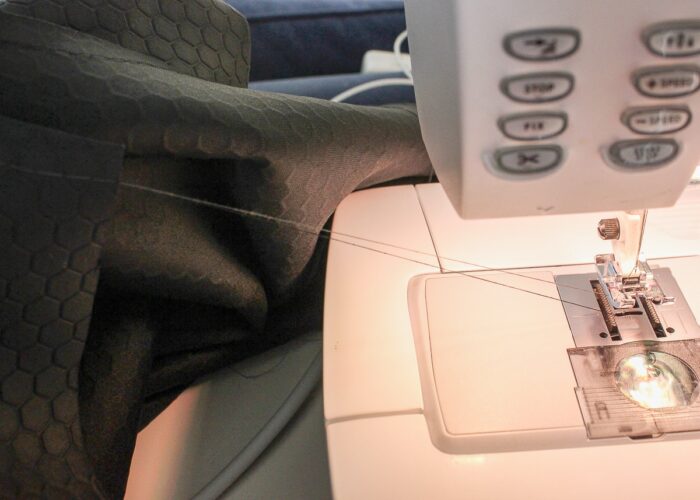
To gather the fabric, pull only the top threads and slide the fabric along the bottom threads. (I know this sounds scary, you can do it! Again, if you need more help, read this post.)
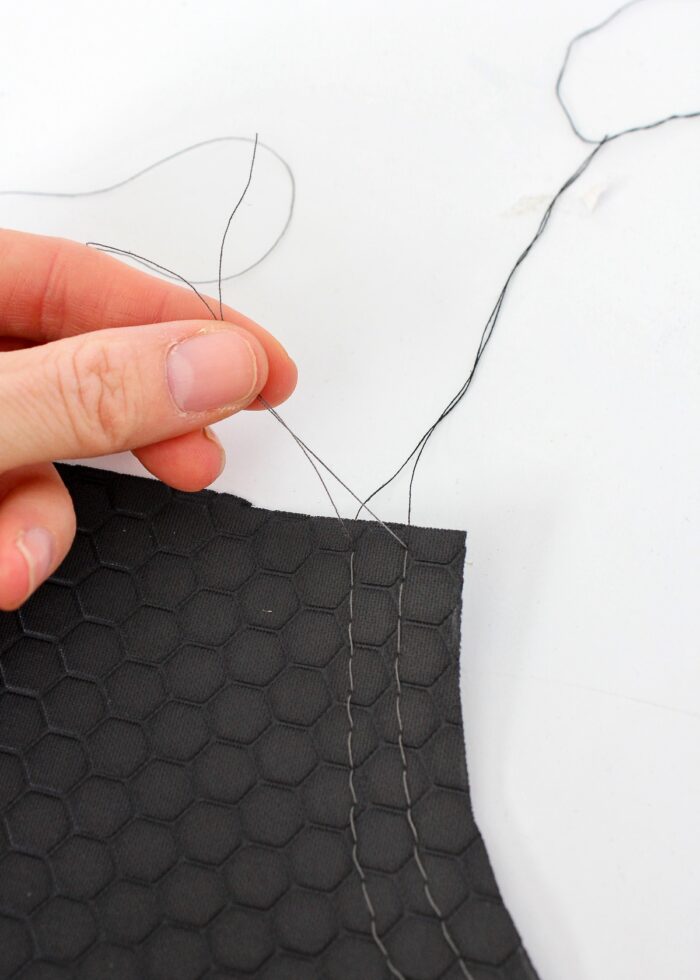
As you (gently) pull, the fabric around the neckline will cinch up into little gathers. Take some time to make your gathers even all the way around the half circle.
Once you are satisfied with the tightness of your gathers, run the neckline through your sewing machine again. This time, stitch directly between the two original lines of thread with a regular stitch length. This final line of stitching will hold all the gathers in place as you attach the neck strap. If desired, remove your original lines of stitching with a seam ripper.

Step 5: Make the Neck Strap
At this point, you can set aside the cape while we focus on the neck strap.
From your fabric (or a coordinating cotton if you chose a cape fabric that is stretchy), cut a strap that is about 4″ X 16-18.”

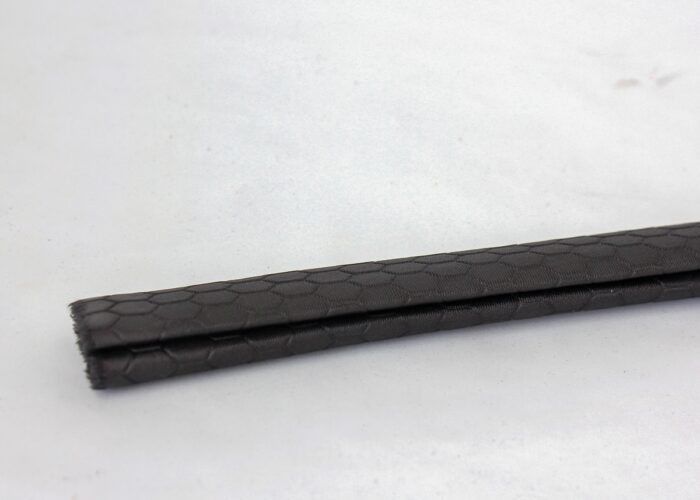
Use an iron and a seam gauge to fold over a 1/2″ hem down the long edges of the rectangle.
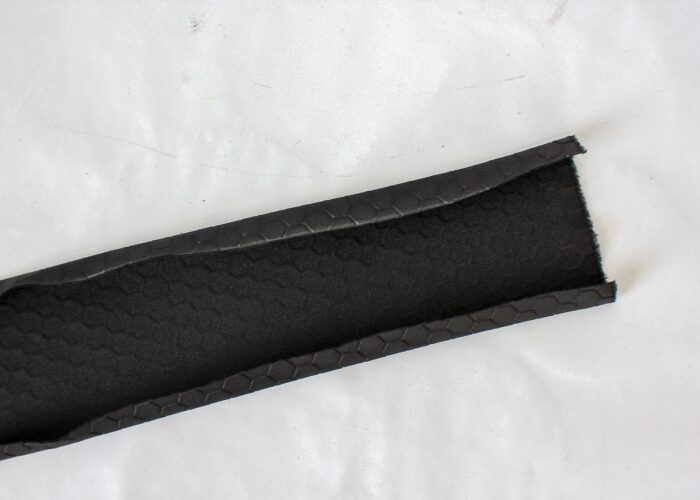
Then fold the entire strip in half length-wise (bringing the folded edges together) and iron in place.
Step 6: Attach the Neck Strap to the Superhero Cape
Find the center of your neck strap (by folding it in half) and mark it with a pin. Next, find the center of the cape’s neckline and insert it inside the folded strap at the pin mark. Feed the rest of the neckline into the folded strap and pin in place. Make sure the entire circumference of the neckline is fully encapsulated by the neck strap so it doesn’t pull loose while sewing shut.

With the cape tucked into the neck strap, sew down one side of the strap and up the other with a 1/4″ or 1/8″ seam allowance. Take your time here, as you want to ensure you catch all the gathers AND the back side of the strap in your stitching. Use a standard stitch length and coordinating thread for these stitches.
TIP! I suggest sewing the neck strap closed with the right side of the cape facing up, so you can ensure the outward-facing line of stitching is nice and clean!
As you make your way down one side of the strap, there’s no need to cut and unload your cape from the machine. Just pivot at the corners, about 1/2″ from the end of the strap, and keep going all the way around the neck strap.

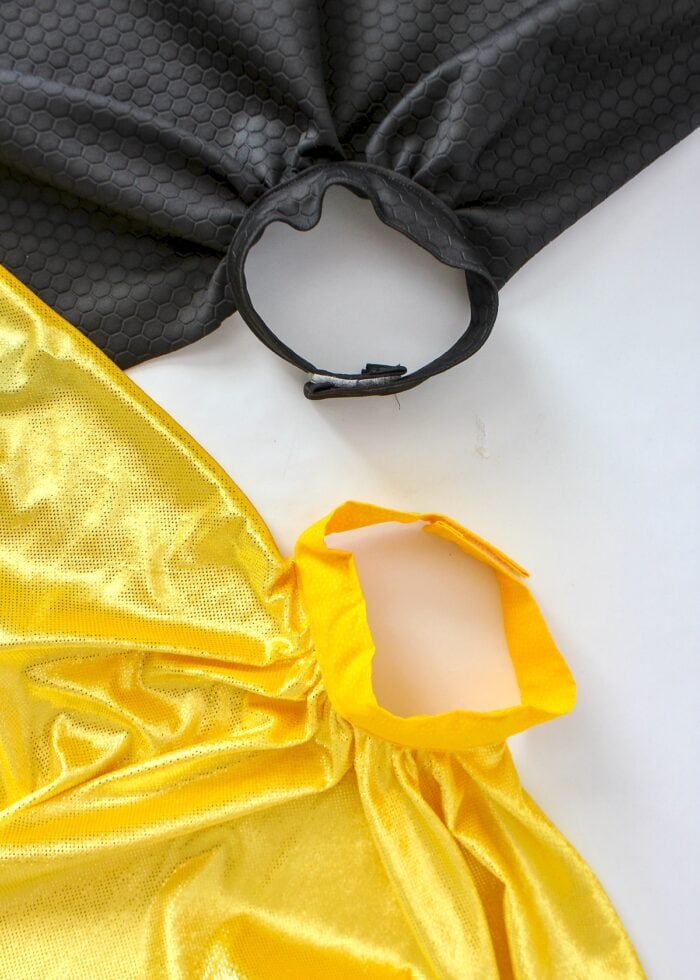
Step 7: Attach the Velcro
Your cape is pretty much done and almost ready for wearing! The final step is to attach Velcro to make it easy for kids (and adults!) to get on and off.
At the end of the strap, fold over that final 1/2″ of raw fabric (along the stitch line you created above) toward the inside of the neck strap and place a piece of Velcro to cover the raw edge; pin it in place.
Note. I only used two pieces of Velcro side-by-side because I didn’t have a big enough piece. You could also use buttons or snaps here based on your preference and your stash!
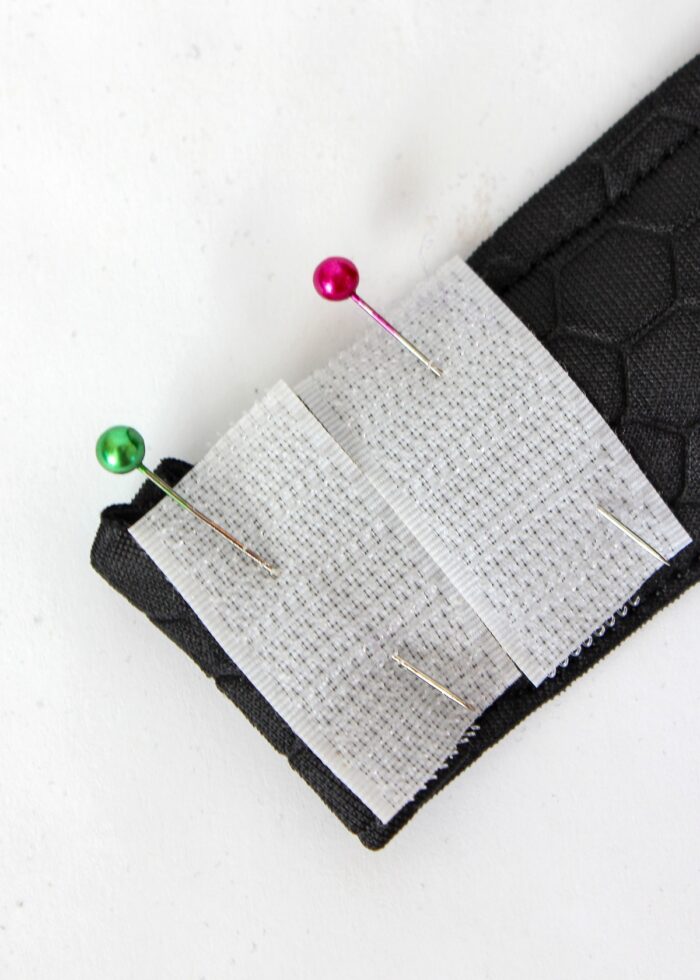
Then sew the Velcro in place with your sewing machine.

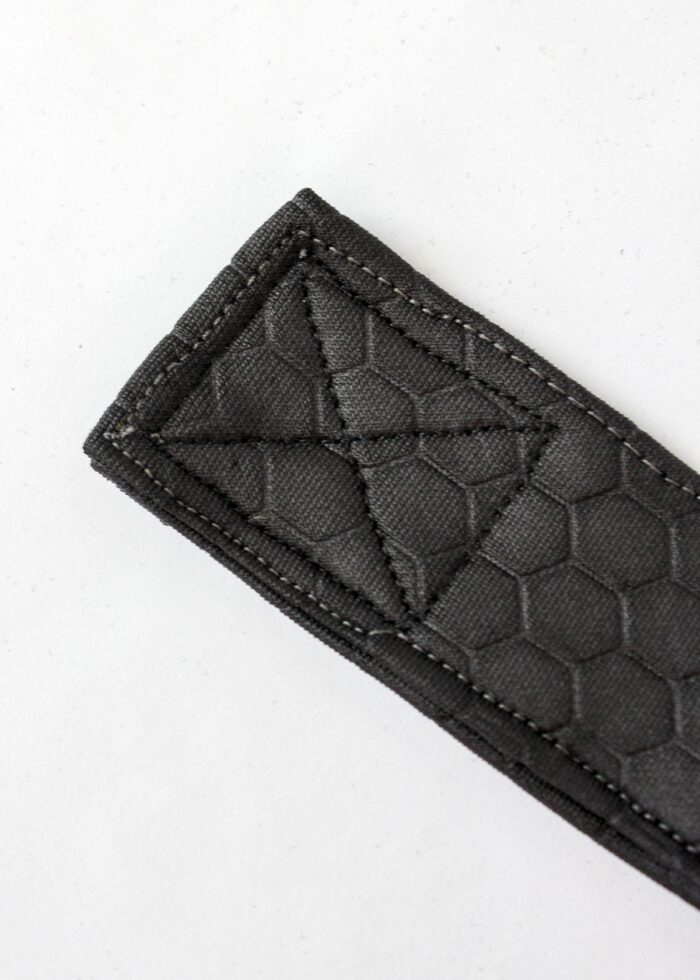
Notice that by tucking in the raw edge of the neck strap under the Velcro, the cape closure looks nice and clean from the outside!
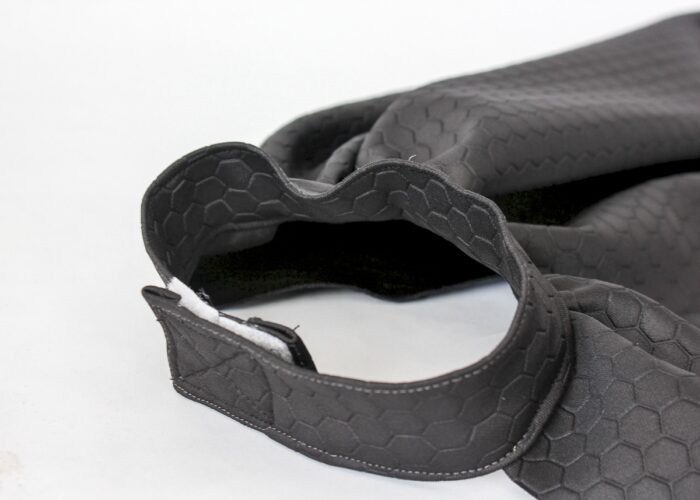
Repeat on the other side of the neck strap with the other half of the Velcro swatch. However, be sure to place the Velcro on the correct side of the neck strap so that the two ends will overlap as shown below. Essentially, you will have Velcro on the top of the neck strap on one end and on the bottom (underside) on the other end.
TIP! I recommend placing the softer side of Velcro on the strap that will face TOWARD your child’s neck so it is less scratchy.
TIP! Pin the Velcro on both sides and try the cape on before stitching everything in place to ensure you have the Velcro in all the right spots.
And just like that…your cape is done and ready for wearing!
When I sat down to make these capes, I searched around for a quick-and-easy tutorial and kept coming up empty handed. I either found ideas that were too complicated (with a lining, hood, bodice, etc) or not complicated enough (tie around the neck).
Using some of the techniques I found during my search, I pretty much made these superhero cape instructions up as I went along. After I got the first one right (the yellow one) and it looked so good, I was ready to dive into the now very-much cherished black Batman cape. If you need a superhero cape for any reason, I hope you’ll give this easy version a try. I just know you’ll be “super” thrilled with the results!
Psssst – Need a baby version? I’ve got you covered: How to Make a Cape for a Baby Onesie
Megan


8 Comments on “Easy Superhero Cape Sewing Pattern | A 20-Minute Project!”
Wow – Megan. these are brilliant. Thank you.
Just in time for my daughter’s bat girl costume! Can you share info or pattern on your bat hood? Thanks!
Hey Jill!
The hood pattern was a little harder to find than I expected. After coming up short on Pinterest, I ended up using McCalls M5952 (I bought it at JoAnns). I don’t particularly love sewing from patterns, but it actually came together pretty easily and has held up great in our dress up box!
Hope that helps, and good luck!
Megan
I’m a 64 yo gramma of two. I loved creating all sorts of things for my own three children but I admit I’m a bit rusty!! My daughter asked if I could make a cape for her 20-month old and I’ve been dragging my feet because I couldn’t quite figure out how to design it. I, like you, always preferred to create rather than use a pattern. Long story short… I’m absolutely thrilled to have found your tutorial! I’ve cut it out & will sew it tomorrow! Thank you so much!
I’m so grateful to find this tutorial! I didn’t want a tie cape and I hate the capes I see online that hang off the child’s back – I’m working on a Jafar cape and I need it to be really sharp! I am going to use your tutorial!! The gathering and neck band are perfec.t Thank you!
Thanks so much for this tutorial! I already had bat ears and a mask with a bat on it, and at the 11th hour decided that a cape would finish the look. I was able to zip this up the night before I needed it, and it worked perfectly!
Just wanted to let you know that I featured your amazing superhero cape tutorial on Crafts on Display, I hope you enjoy it! It’s the perfect quick costume. https://craftsondisplay.com/sewing/superhero-cape-202114/
How much did you gather the neckline of the cape? I read over twice and do not see that stated anywhere.
Approx half the length of the neck strap, so 8-9”?
Seems to make sense so cape flows out sides and back of body. Or slightly more than half? i.e. 10 inches for an 18” neck strap (9” for a 16” neck strap)