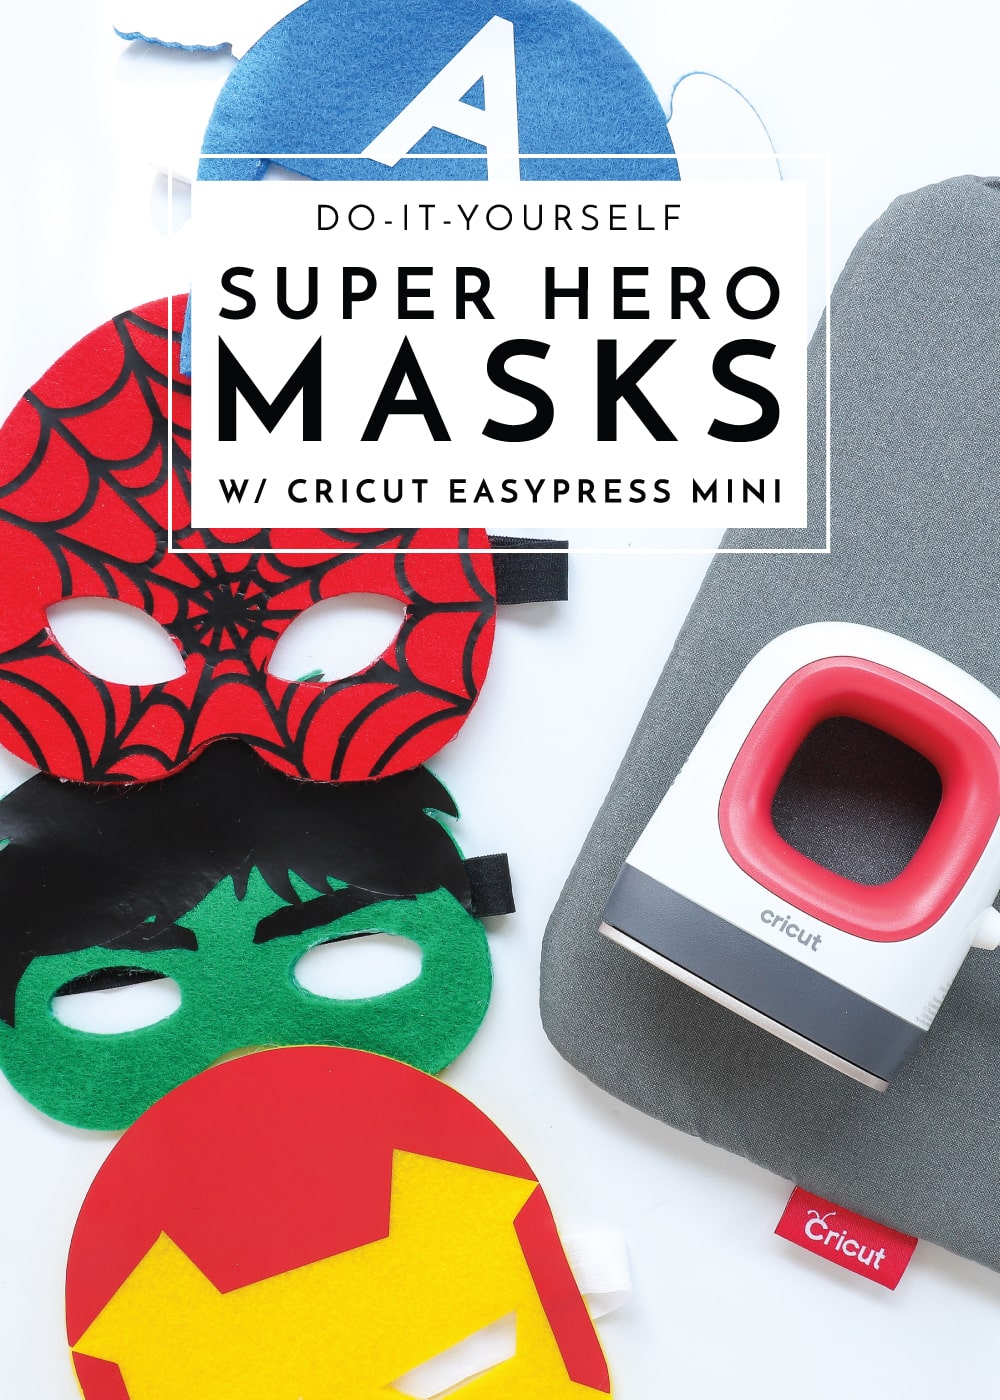
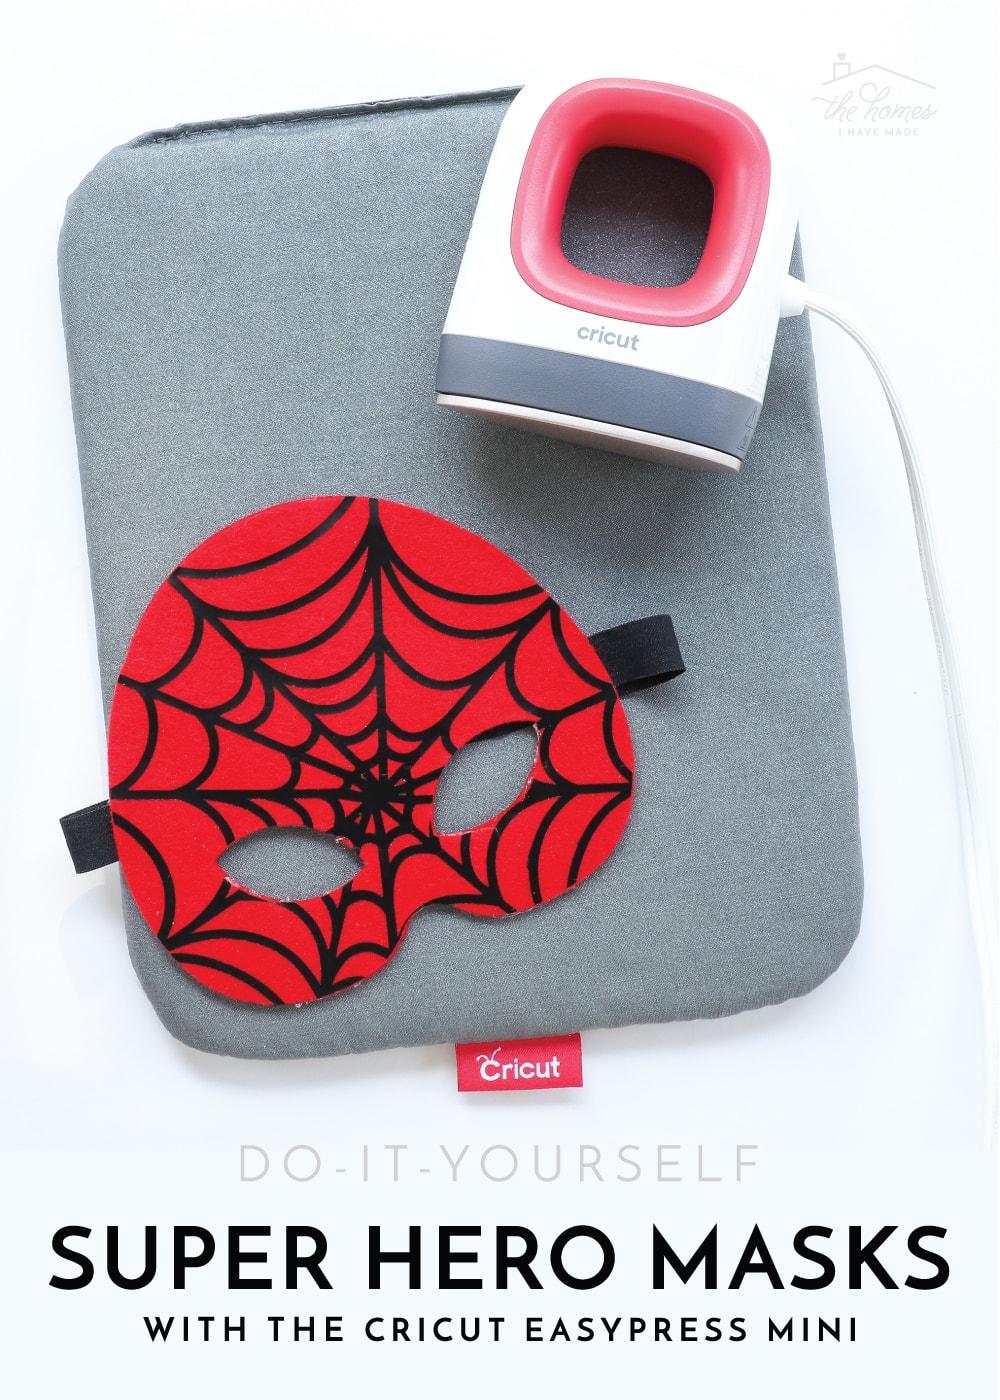
DIY Super Hero Masks with Cricut’s EasyPress Mini
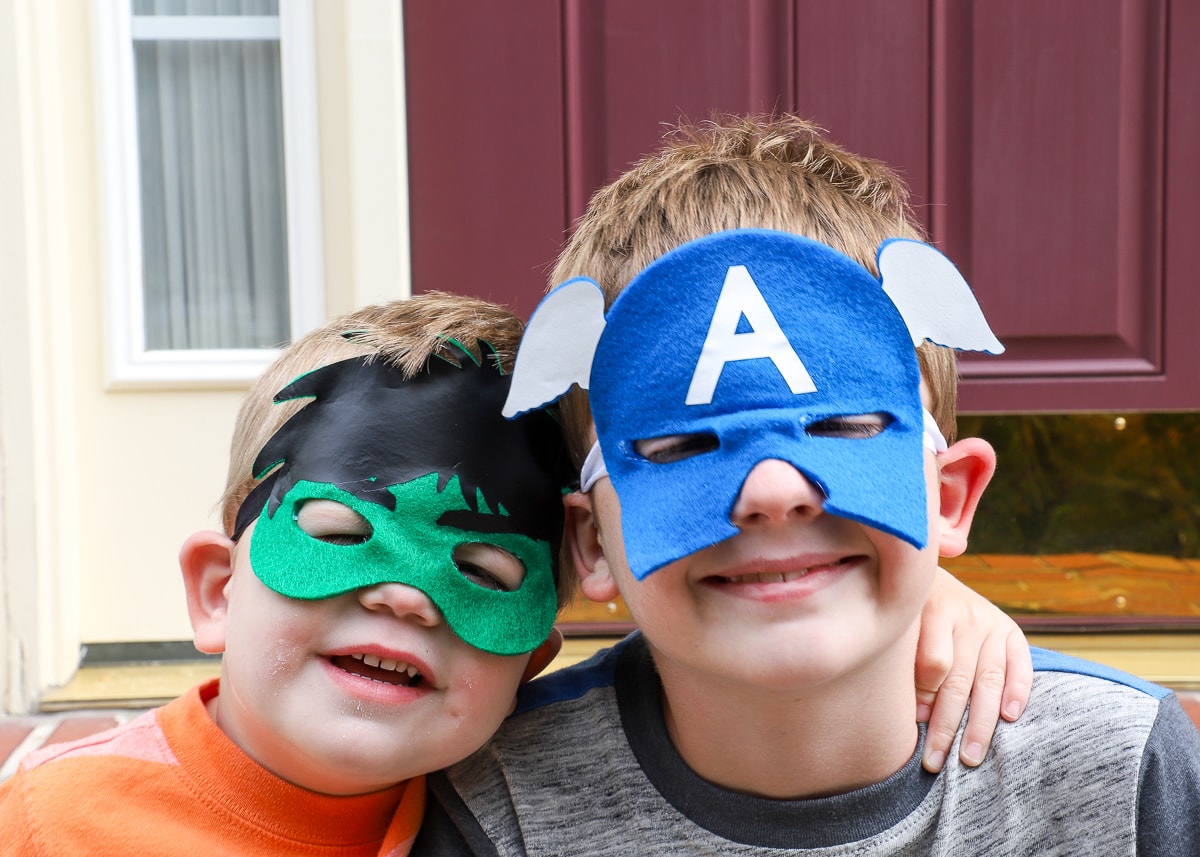
Sam, our almost-three year old, is suddenly in the dress-up phase! He’s also very in to pretending to be “Super Sam” and is constantly turning pretty much anything into a mask or cape. Since our dress-up stash was a little low, I decided to make him his own little set of super masks. Made from sturdy felt and pulled together using Cricut’s new EasyPress Mini, these no-sew DIY Super Hero Masks couldn’t be easier or more fun! Let me show you how they come together!
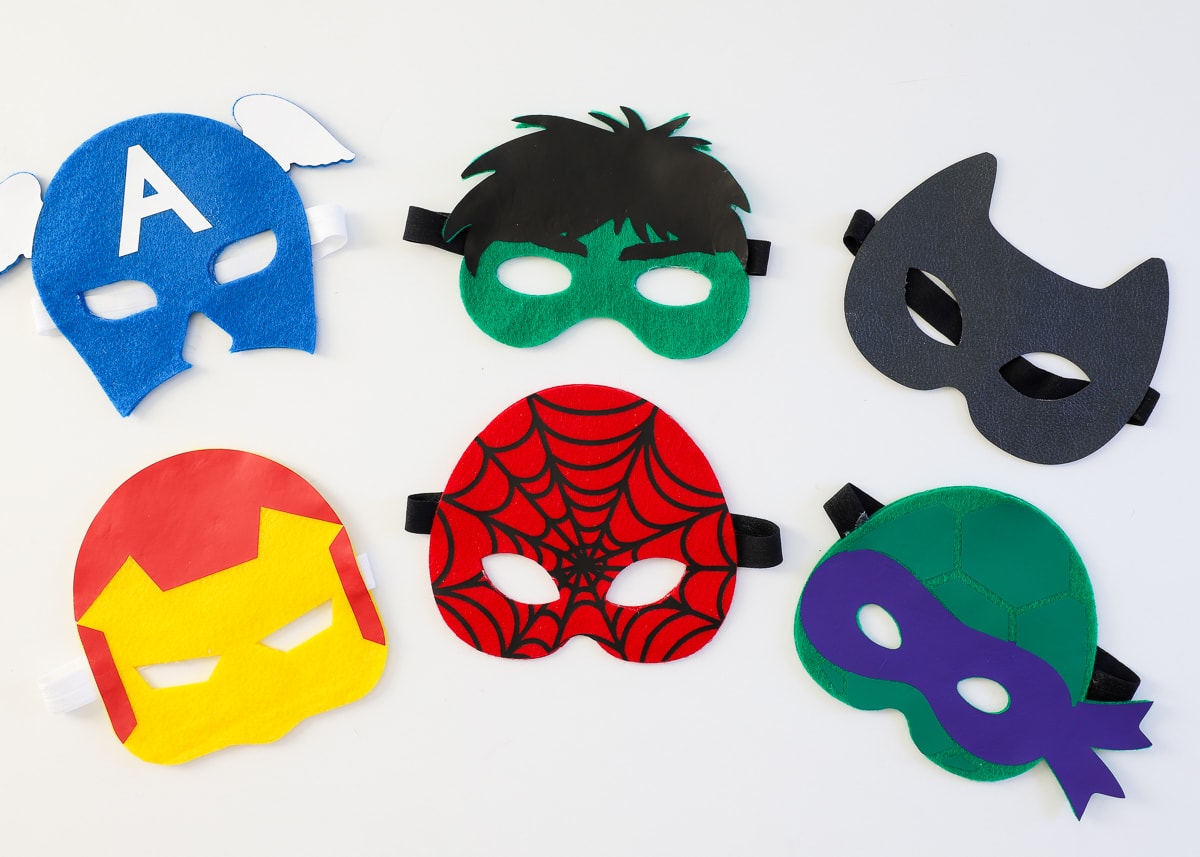
These masks slide on and off easily and cover just enough of the face! Both boys couldn’t stop trying them on as I was making them, and now they are scattered around the house!
About the Cricut EasyPress Mini
A few things made these DIY Super Hero Masks quick and easy to pull together. First, I cut all the different pieces out with my Cricut Maker, so I didn’t have to do all the precise cutting by hand. And second, I assembled them using Cricut’s brand new EasyPress Mini, which made attaching all the small details super easy!
Cricut’s EasyPress Mini is the newest addition to Cricut’s EasyPress line. It features the same dry, even heat plate as the bigger heat presses, just in a much smaller footprint and with a precision tip. Measuring only 3.4 x 2.1″, it has three different heat settings and a heat-proof base. It’s compact, easy-to-use, and is truly ideal for small and detailed projects!
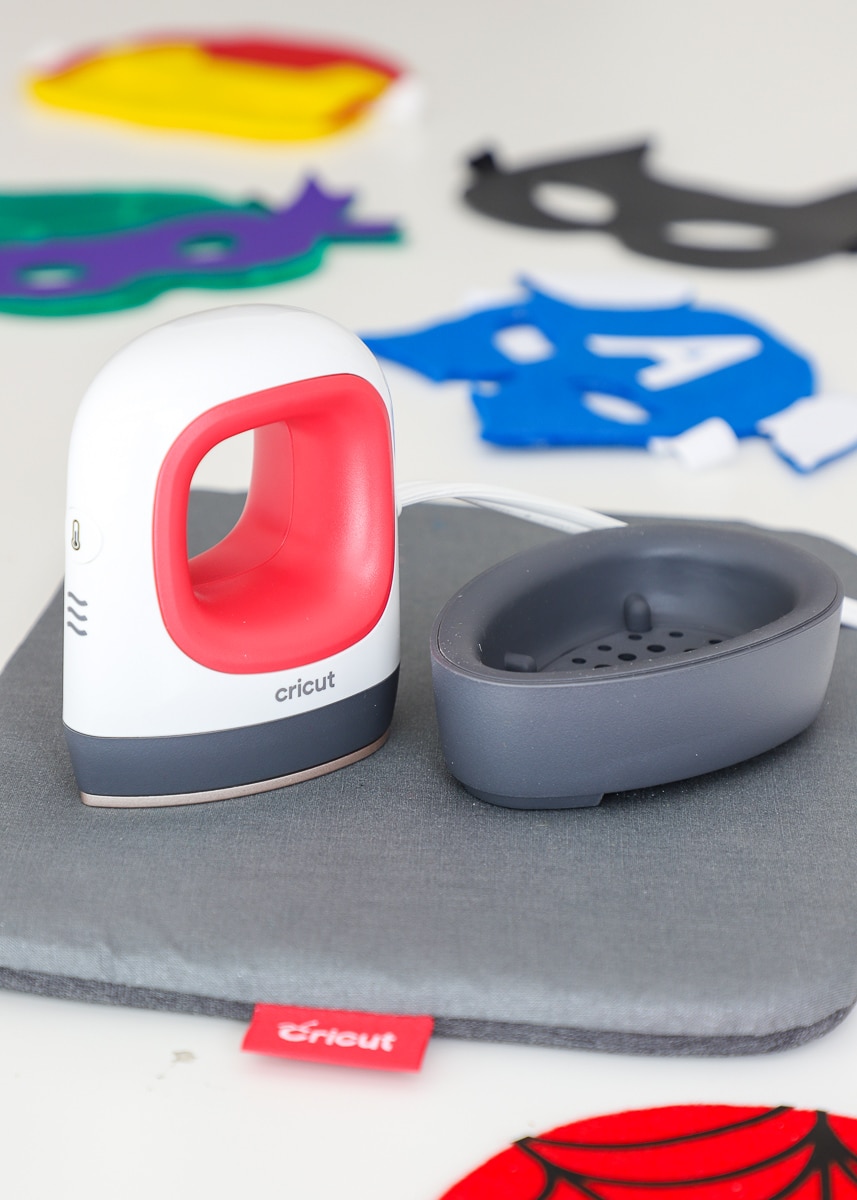
Although I could have added these small iron-on details using a larger heat press, the EasyPress Mini allowed me to work in compact areas, ensuring each tiny element was fully secure. In addition to working with small cuts like I have here, the Mini is also ideal for round objects (like shoes, hats, bows, etc) and designs in or around seams and pockets.
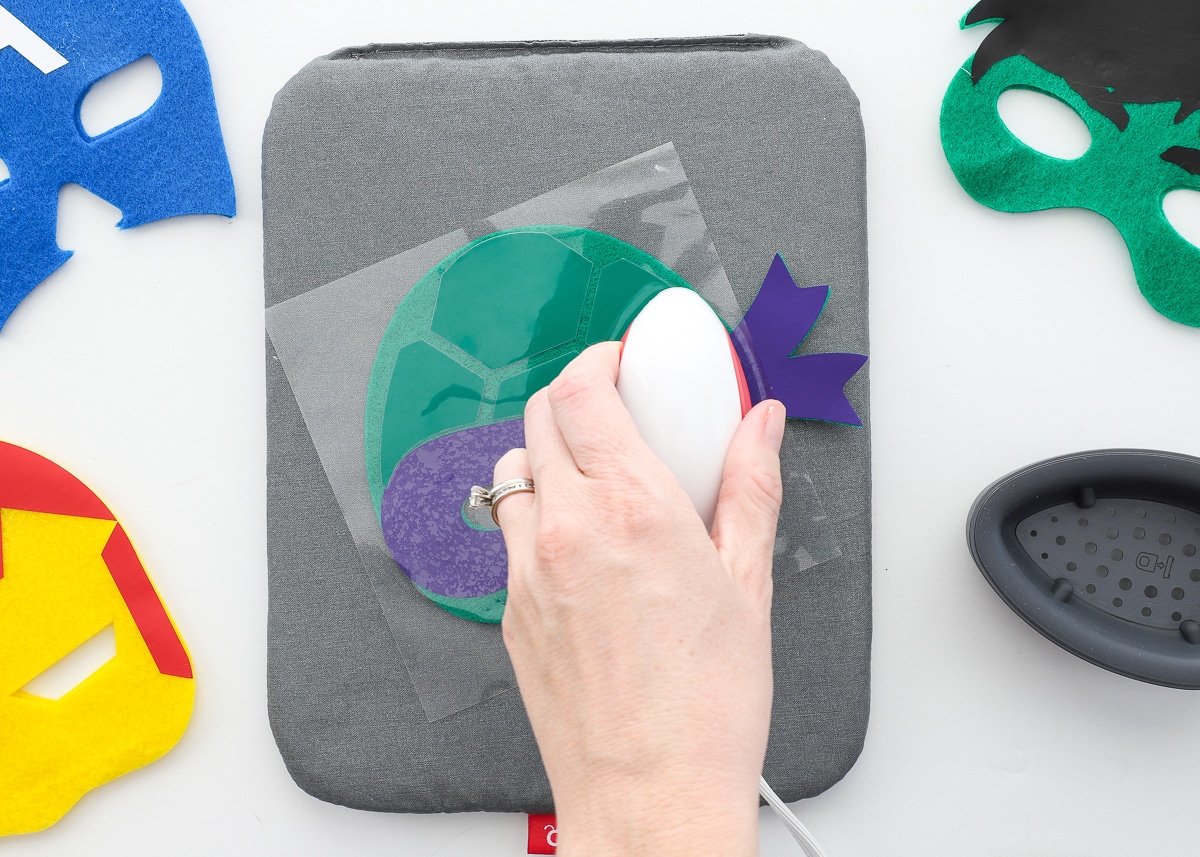
One of my favorite parts of working with the EasyPress Mini was that layering iron-on pieces was really so much easier! Instead of having to protect bottom layers from touching a larger heat press or exposing previous layers to too much heat, the EasyPress Mini allowed me to get into small areas, and heat only certain sections as needed!
Supplies Needed
These masks really are so simple to make and come together in minutes (which is why I cranked out so many!) Here is what you need:
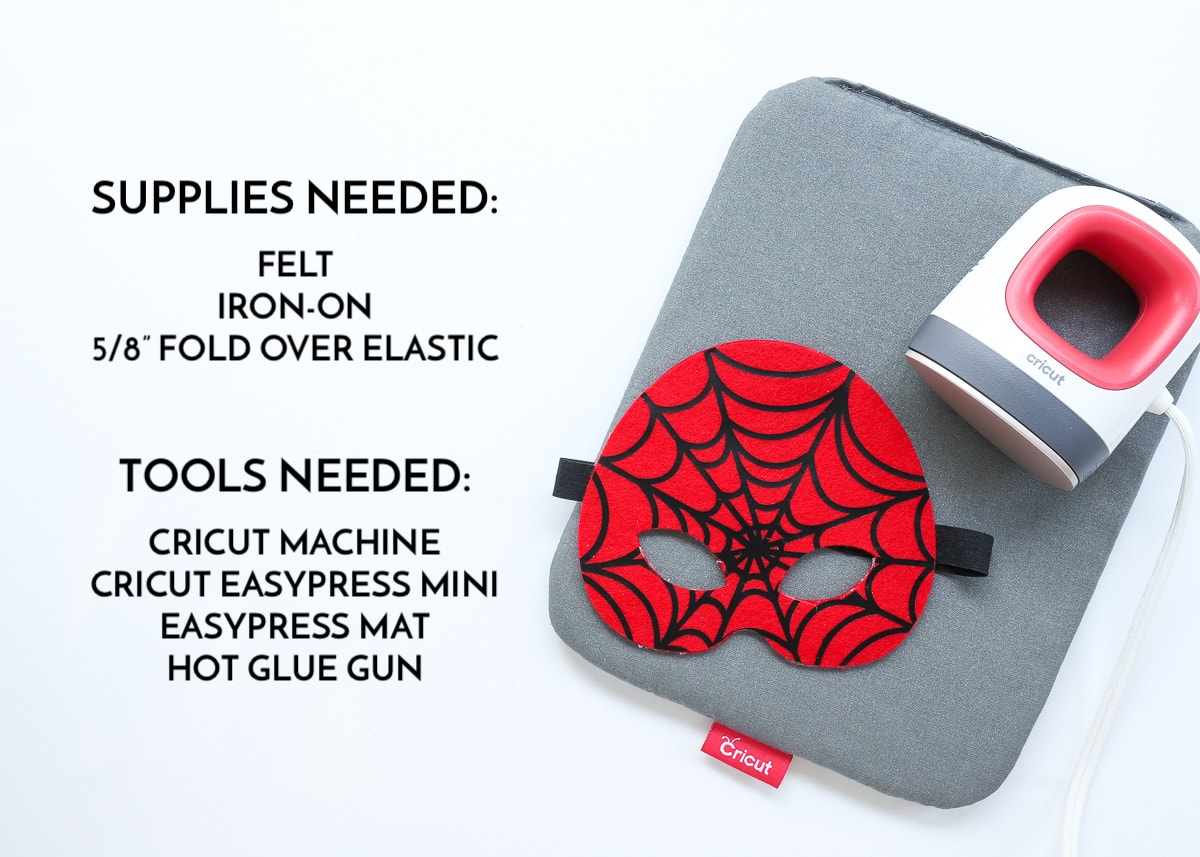
Felt | Iron-On Vinyl | Fold-Over Elastic | Cricut Maker | EasyPress Mini | EasyPress Mat | Hot Glue Gun
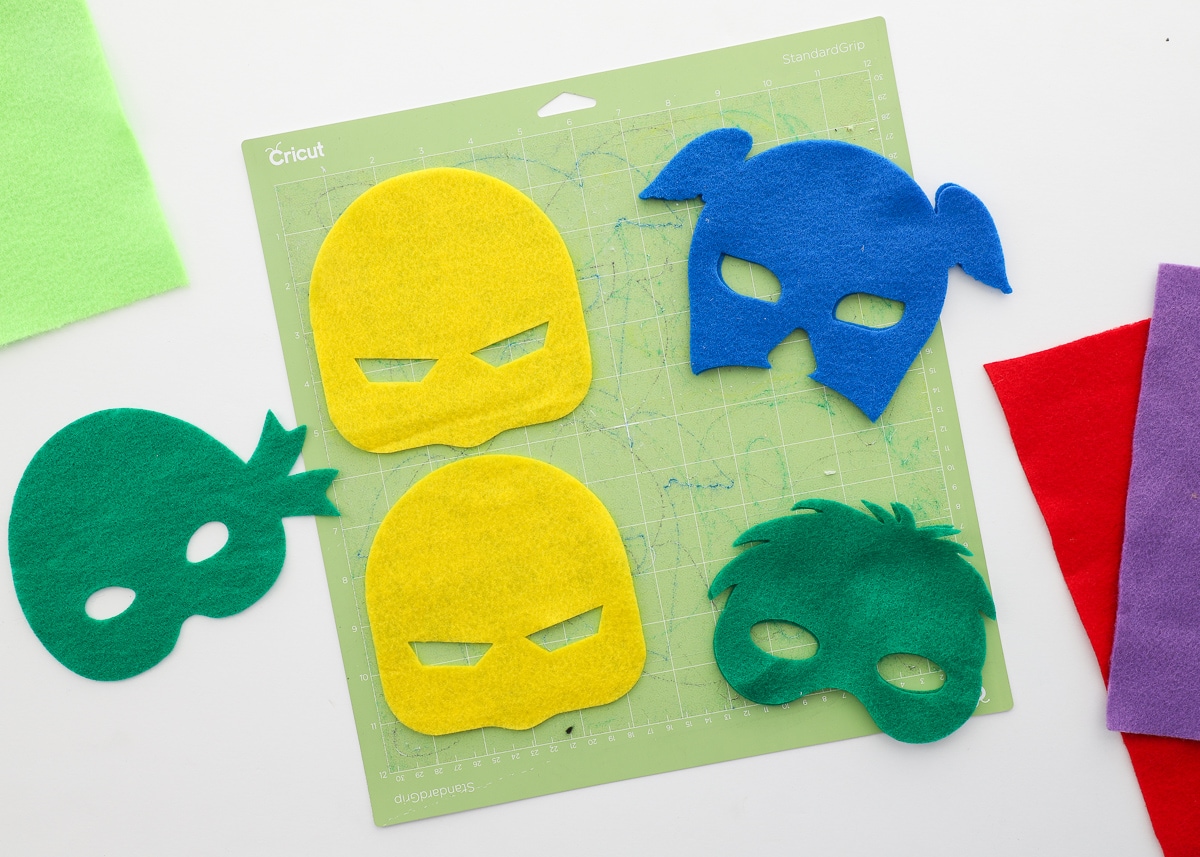
Step 1: Cut Out Mask Pieces
If you’d like to create these exact masks, you can access my Cricut Design Space file HERE! If you choose to design your own masks, just be sure to cut two (2) of the mask base layer.
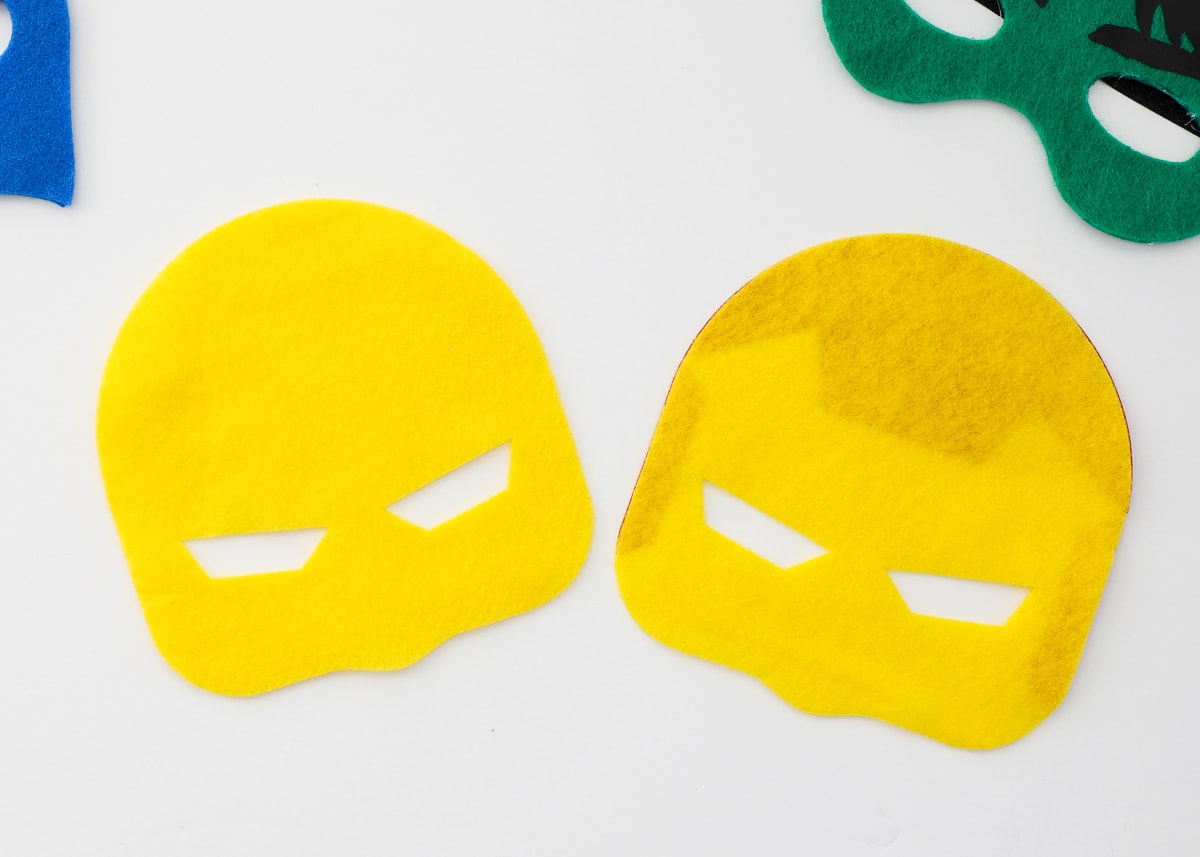
These masks are made of two layers of felt glued together, and all the “decorative” details are made from iron-on vinyl and secured to the front. Once you have your masks designed and sized to fit your child, you’ll need to cut out all the pieces using a Cricut machine.
Start by cutting out the mask bases from felt, two for each mask you’re making. Using the the Rotary Blade on the Cricut Maker results in pristine cuts from your felt!
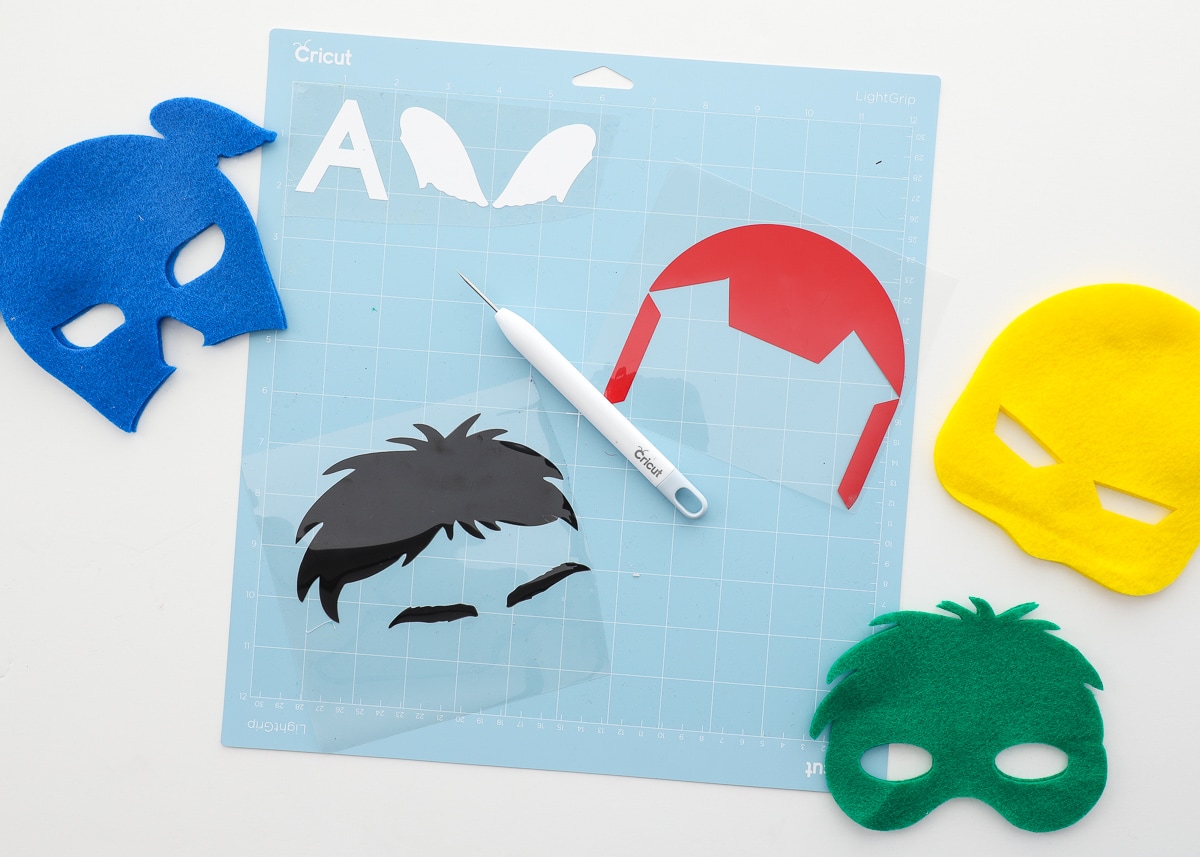
Next, cut out all the mask details from iron-on vinyl. Be sure you have the “Mirror” button selected on the cut screen, and then weed out all the negative parts of the design to prepare them for attaching to the masks. If you need help working with iron-on vinyl, see my detailed tutorial HERE.
Want to save this post?
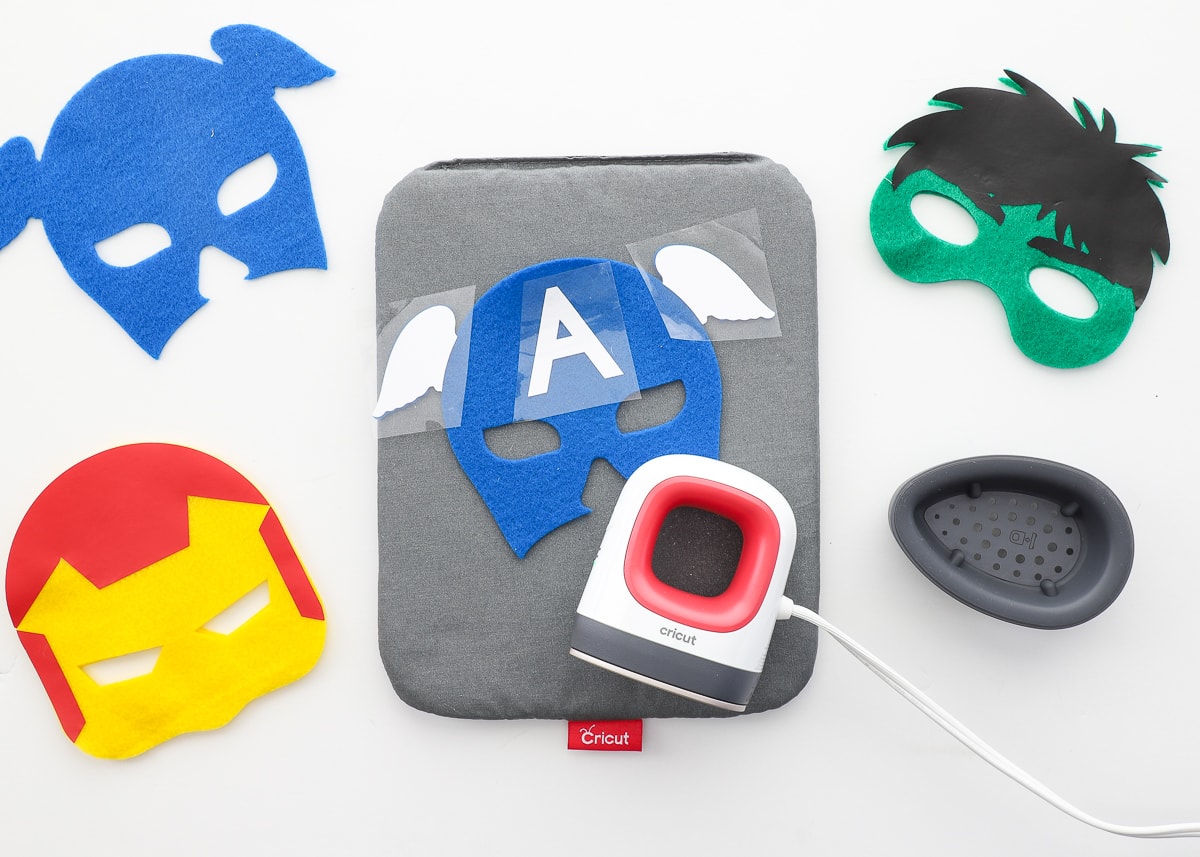
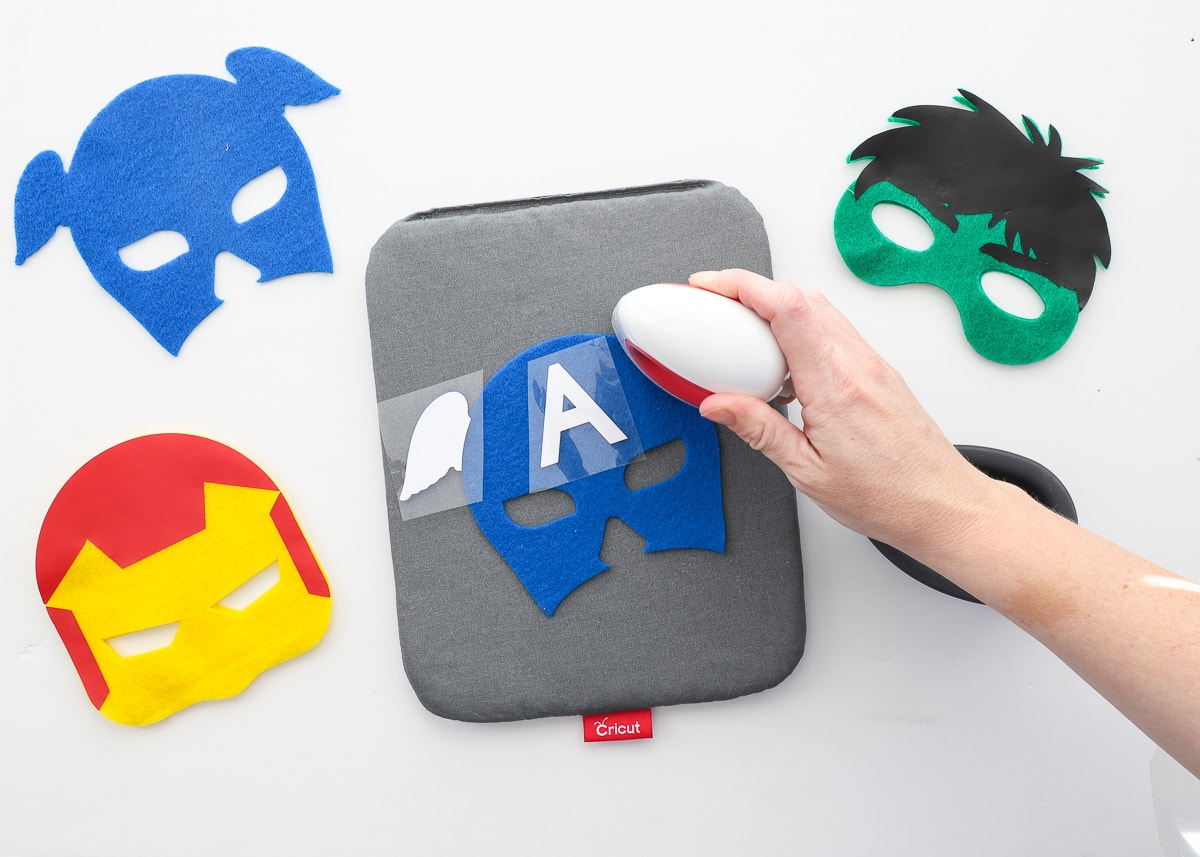
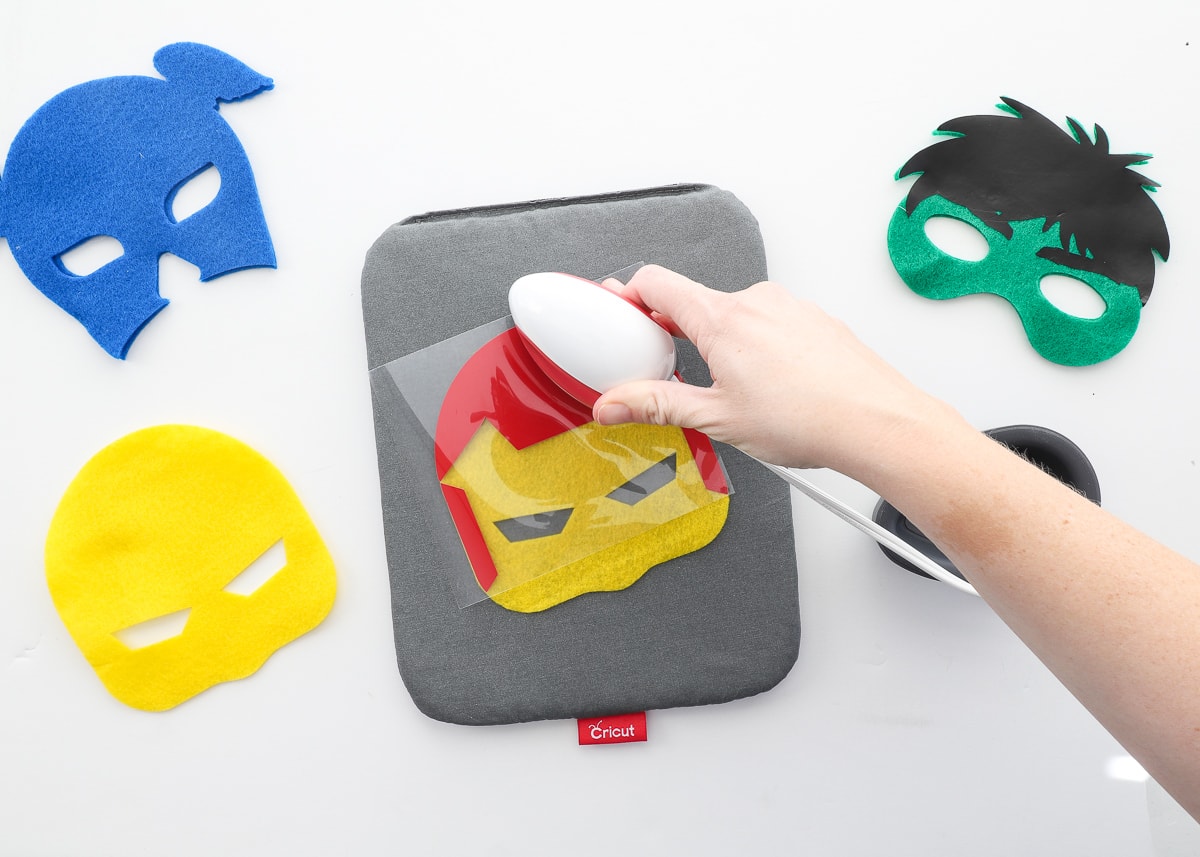
Step 2: Iron On Mask Details
Before assembling the masks, you’ll want to first attach all the iron-on details to the top layer. When working with any Cricut EasyPress, you’ll want to reference the interactive Cricut Easy Press Heat Guide to make sure you are using the right settings. By selecting the EasyPress Mini, felt as the base layer, and iron-on as the heat transfer material, it instructs me to set my EasyPress Mini to the Low setting. 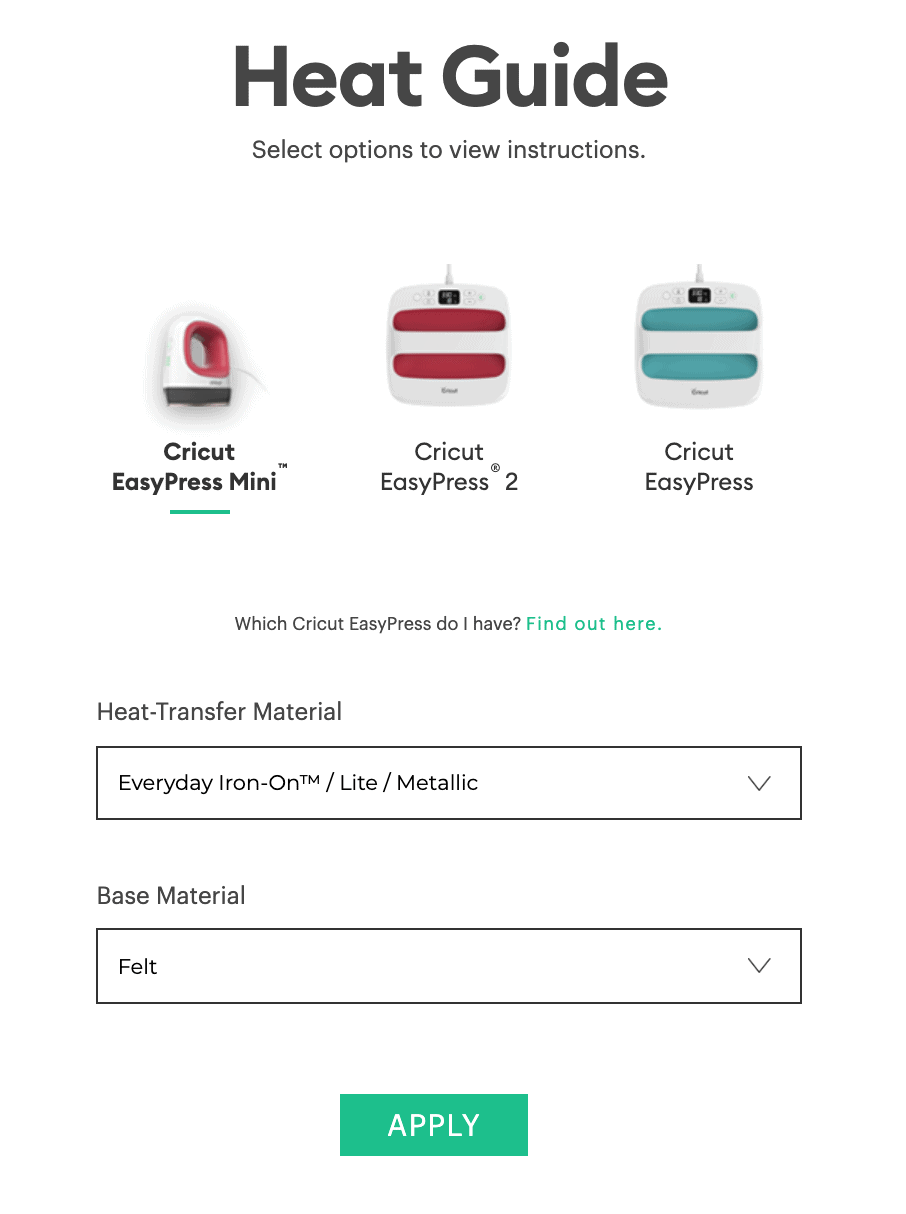 Once the EasyPress Mini is heated, pre-heat the felt mask for about 5 seconds.
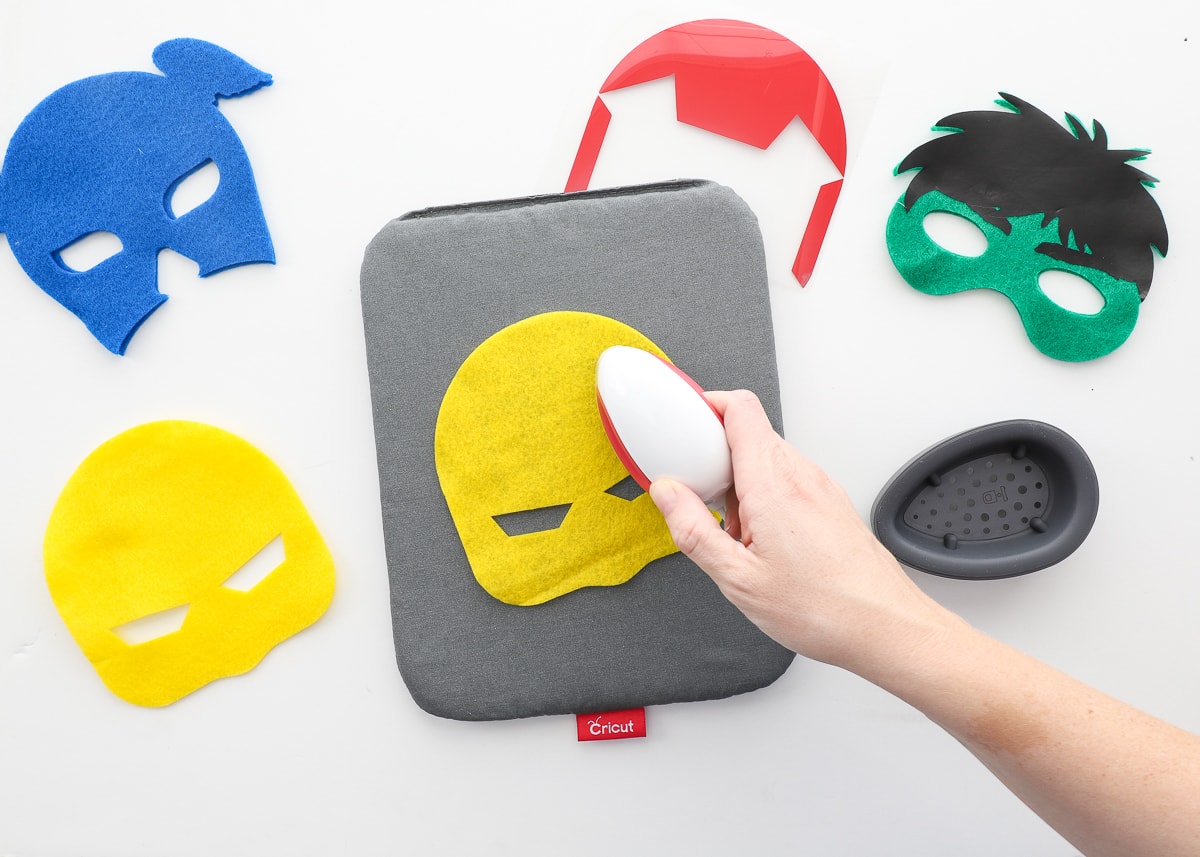
Next, place the iron-on detail on top of the mask and heat it for about 30 seconds, moving the EasyPress Mini constantly with gentle pressure. Once the mask and iron-on materials are completely cool, remove the clear transfer sheet. Continue adding iron-on details until the front of the mask is complete.
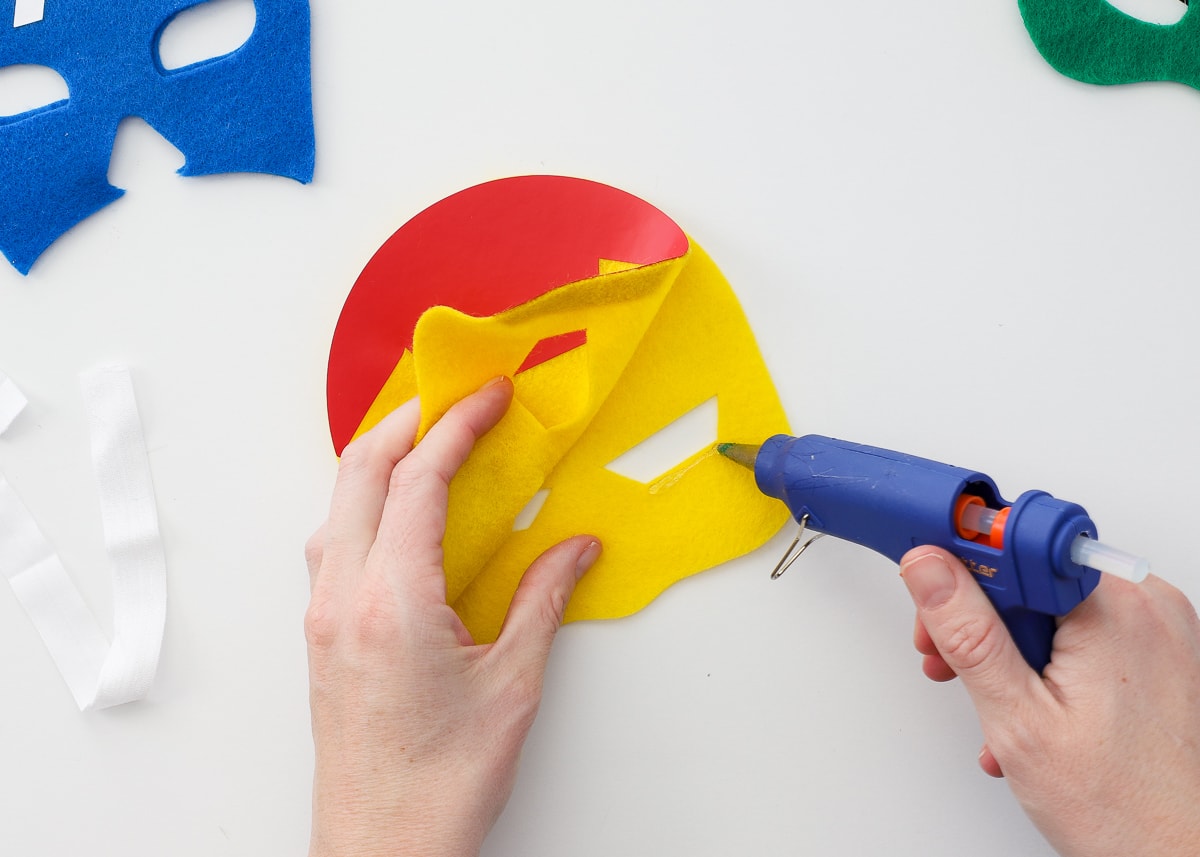
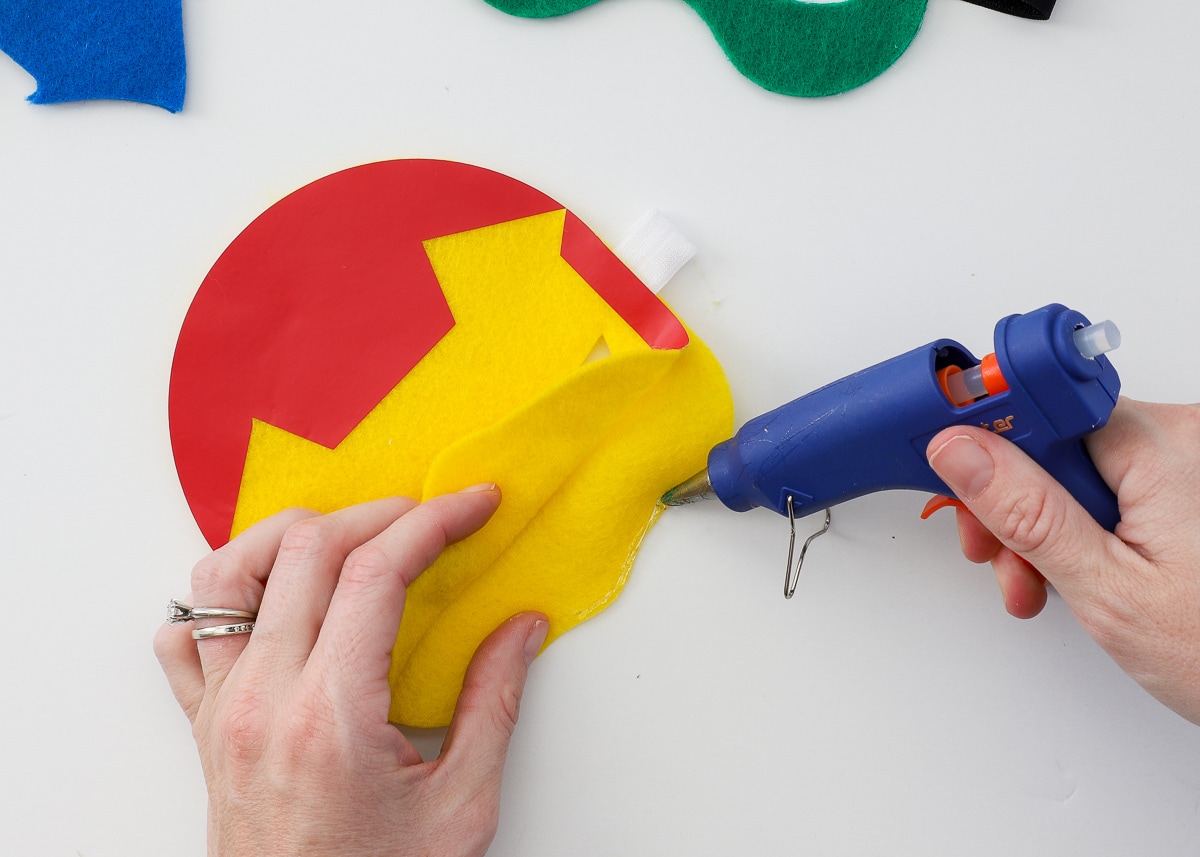
Step 3: Assemble the Mask
Once the front of the mask is complete, it’s time to assemble it! Place your two mask pieces onto your work surface, right sides down.
Start by placing a very thin line of hot glue around one eye on the wrong side of the bottom layer. Secure the top layer down, right-side-up, before the glue cools, ensuring the eye holes line up perfectly. Repeat on the other eye.
With the eyes glued shut, secure the elastic next. Do this by gluing one end of the fold-over elastic to the inside on one side…
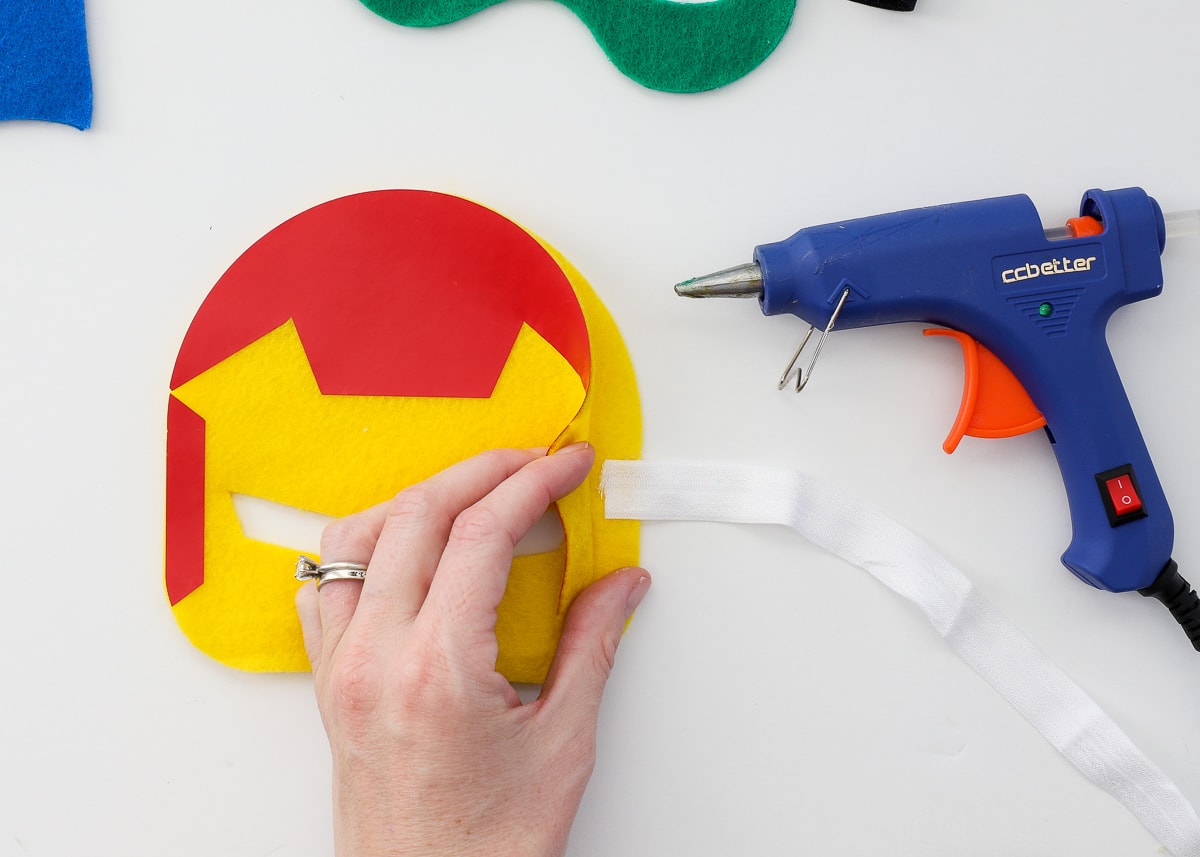
…and then the other. Make sure the elastic isn’t twisted and is long enough to fit around your child’s head.
NOTE: I made my elastic a bit too tight, which resulted in the mask scrunching around the nose. I recommend starting with at least 11″ of elastic and adding more as needed!
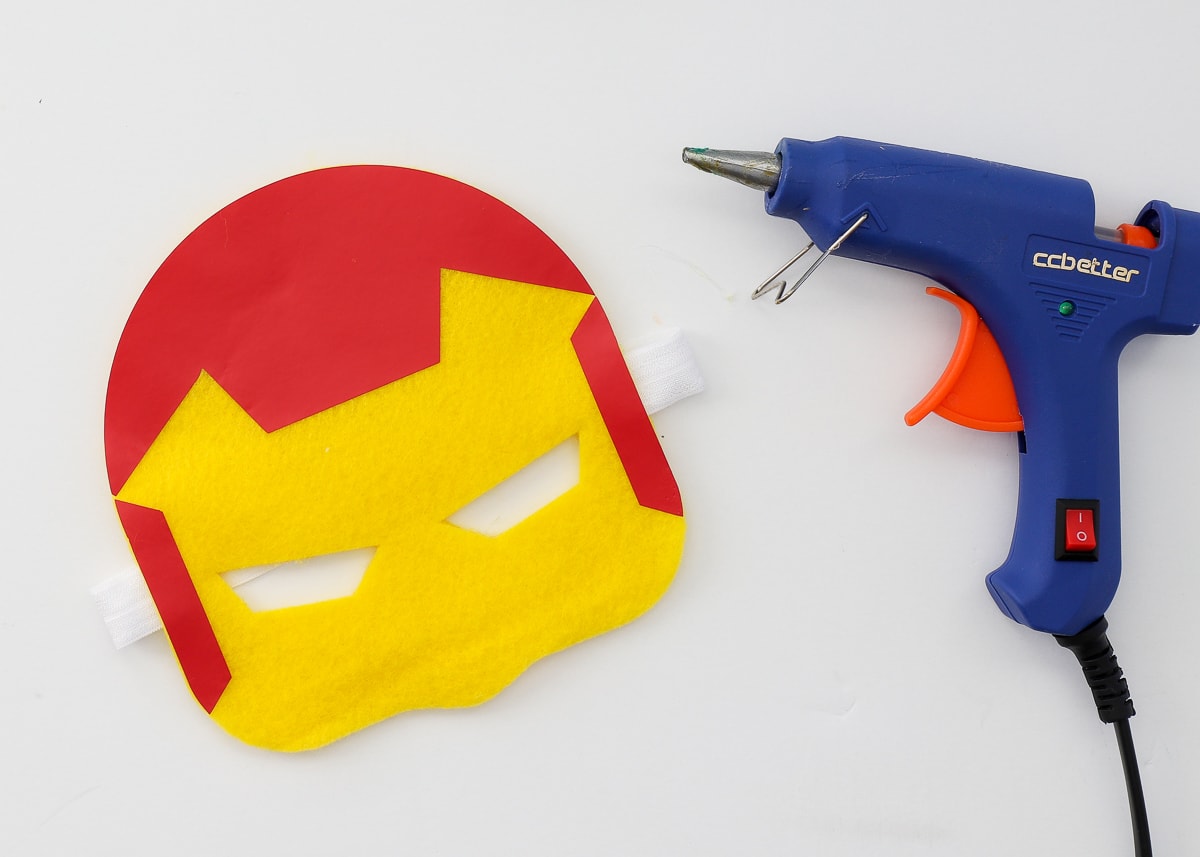
The final step is to glue the two layers together around the perimeter. By keeping the glue line very thin and as close to the edge as possible, the mask layers will appear to be one solid piece when complete!
With one mask done, repeat for as many heroes as you want to make! And then make some more because they are so quick and fun!
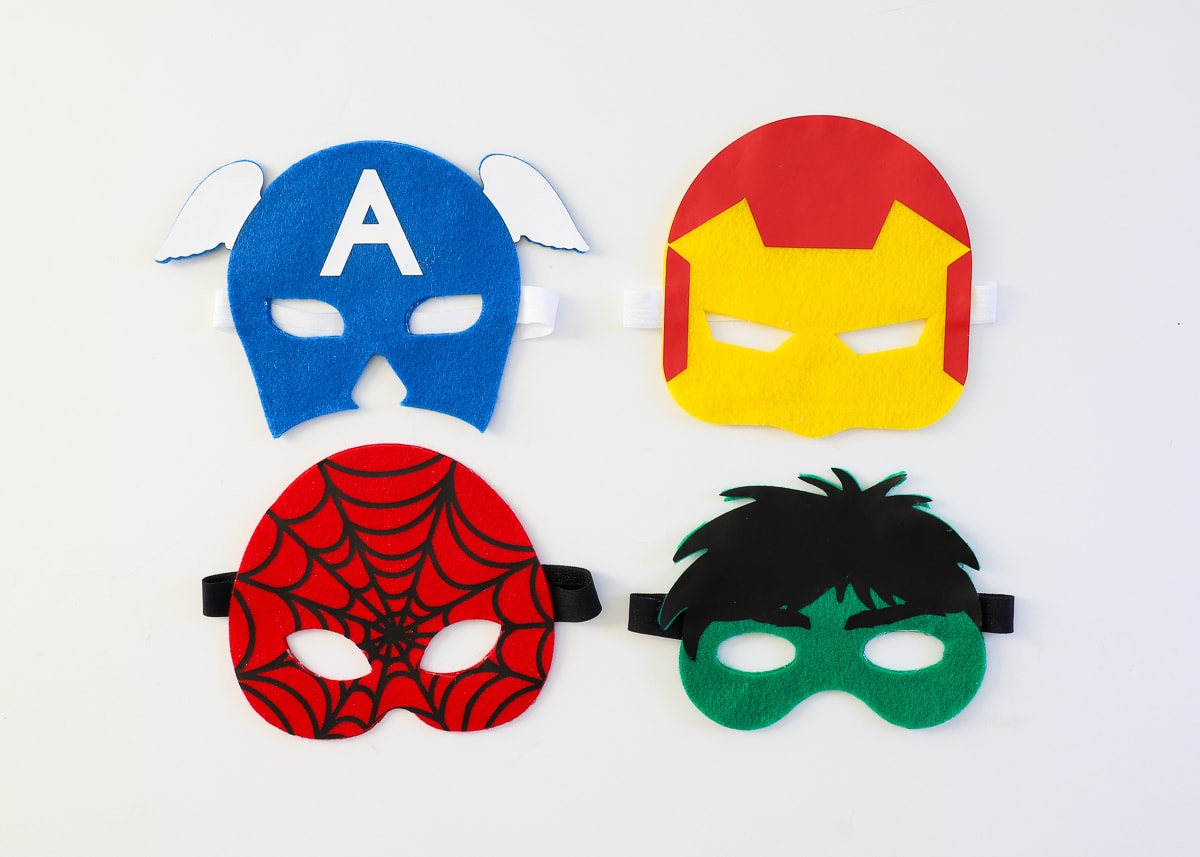
Finally, hand them over to the kiddos and let their imaginations take over!
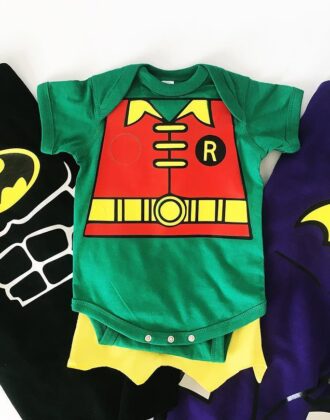
Although dress-up time is a year-round thing in our house, these masks would also be great for easy Halloween costumes. The small design, soft felt, and stretchy elastic make these ideal for little kids and babes who don’t like things on their faces. And if you’re strapped for time, their quick-and-easy assembly will help you pull costumes together in a snap (especially if you pair the masks with these 20-minute capes!)
These DIY Super Hero Masks really are so fun to make, and working with the Cricut EasyPress Mini reduces a lot of the hassle common with iron-on projects! Whether you make them for Halloween or every-day play, they’ll be well worth your time and are sure to bring big ol’ smiles to your kiddos’ faces!
Megan


6 Comments on “DIY Super Hero Masks with Cricut’s EasyPress Mini”
These look amazing! I know you mentioned that you used your Maker to cut them however I own the Explore Air 2, would I be able to cut the felt with my machine? If so, what blade should I use? TIA.
Hi Cristina,
You CAN cut felt on a Cricut Explore, it’s just a little more complicated than on the Maker…mainly because you need to “fuse” your fabric to make the blade cut a little better. Here is a good tutorial for you to check out: https://www.creativecuttingclassroom.com/blogpost/cut-felt-cricut
I have cut felt with my Explore and although you need to take that extra step, you will end up with really clean cuts!
Hope that helps!Megan
Your Design space template is saved as private. Anyway you can change it to public? I’d love to make these for my son’s bday on Sunday! Thank you!
I am unable to find these mask in Design Space. I would love to make them
Hi,
It seems I can’t access any of your super hero files throught Cricut Design Space as it says the file is Empty. How can I access this file ? please help.
I have tried to purchase & make the masks for my grandson’s birthday party. They were going to be perfect. I have the masks loaded on canva, but then I’m told they are no longer available. Help!! I have purchased the supplies & am ready to put the freezer paper on the felt. I was going to put the felt in the correct order, but it is not allowing me to make. Please advise….Kitty