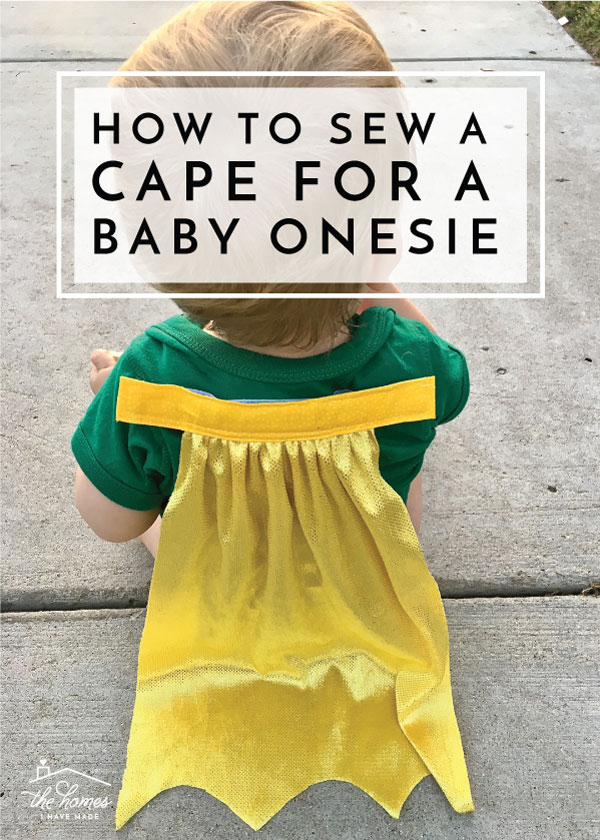
How to Make a Cape for a Baby Onesie
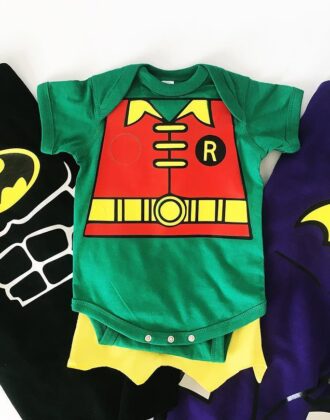
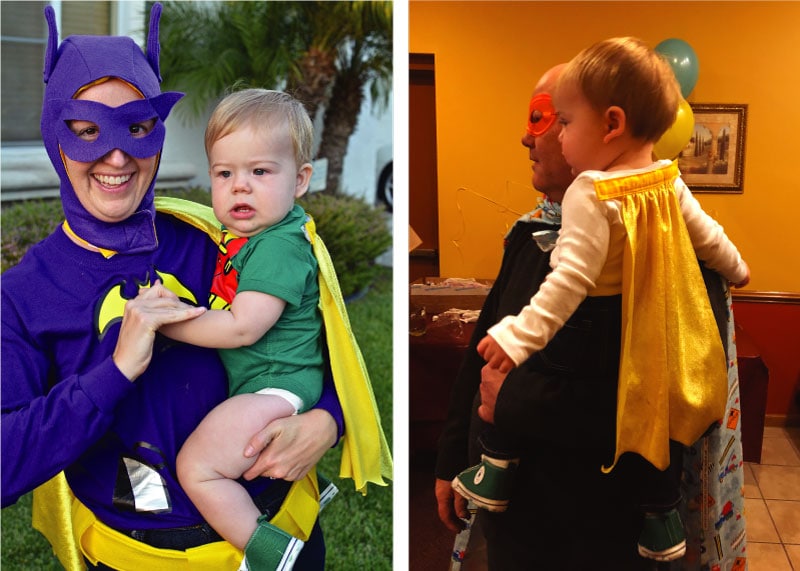
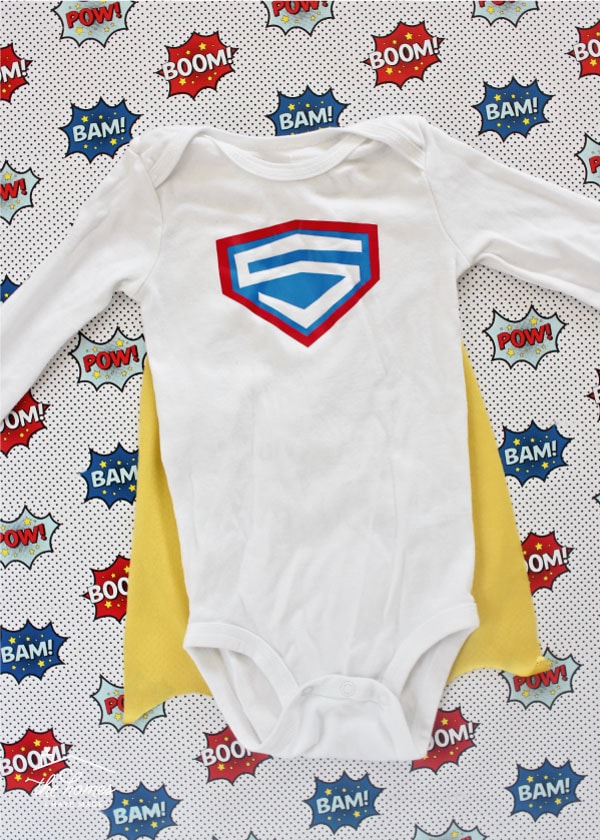
“Super” is the word that we have somehow connected to our sweet Sammy! His nursery was Superhero Themed; he was Batman’s loyal sidekick, Robin, for Halloween; and most recently we threw him a “Superhero” themed first birthday party. Well, every superhero surely needs a super cape, and I came up with a super easy way to add one to any onesie! Not only does this cape for a baby onesie come together in about 20 minutes AND look super adorable, the way it’s attached ensures it won’t bother you or your little one a bit! Let me show you how I did it!
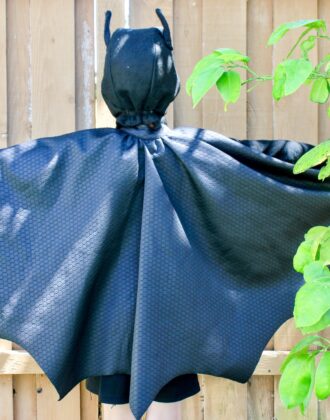
I wish I could say this cape tutorial was my first attempt at making a baby cape. I actually originally made Sam a “normal” cape (the kind that is a full half circle and fastens around the neck), but I quickly realized that 1) he’d never, ever keep the cape on; 2) it might be a bit of a choking hazard if he got tangled in it; and 3) it was simply too big for his little body. So, we tucked that cape away into the dress-up bin, and I went back to the drawing board to come up with a design that would still look like a cape but use a lot less fabric and mostly, stay out of his busy little way!

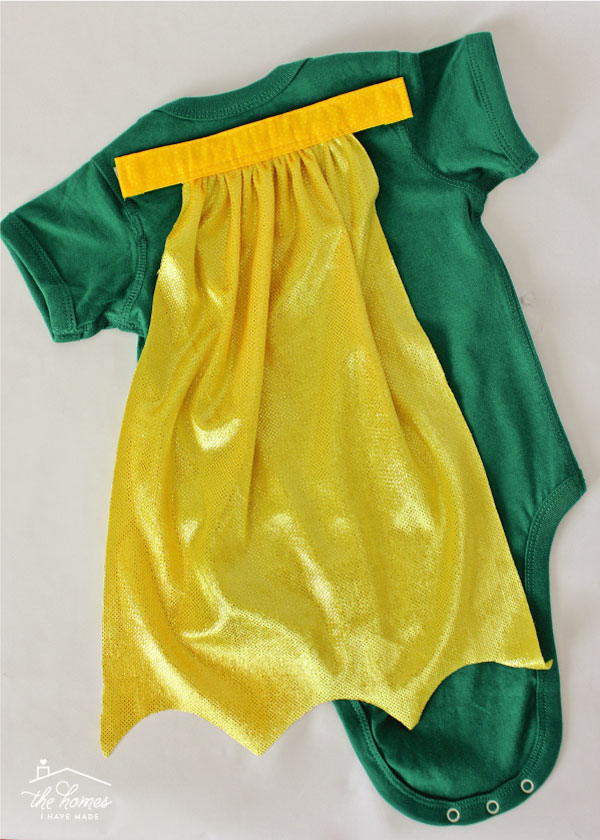
This cape, made from a simple gathered rectangle, does all those things. And because it is attached to the upper back of a onesie (via Velcro!), it’s something you could attach to any onesie or shirt at any time!
I first sewed this cape for Sam’s Robin Halloween costume, but then easily transitioned it to another onesie for his birthday party.
Even if you’re not a great sewer, this IS a project you can do! Here’s what you need:

- ¼ Yard Cape Fabric – For a single baby cape, you only need about ¼ yard. I recommend looking for fabric that doesn’t fray (because we aren’t going to hem it) and has a little something to it (e.g., shimmer, shine, sparkle, design).
- Coordinating Thread
- Coordinating Cotton Fabric – If you choose a costume-type fabric that has stretch or give for your cape, you will likely want to a coordinating plain cotton fabric for the top “collar.”
- Velcro – Velcro is certainly optional (you can always just sew the cape to your onesie), but the Velcro allows you to quickly and easily take the cape off if your little one doesn’t like it! I used sew-on Velcro, but if you’d rather a less permanent solution, try peel-and-stick!
- Not shown: Scissors or rotary cutter and ruler | sewing machine | pins | iron
If you’re not entirely sure what fabric you should get, I highly recommend what I picked out. Admittedly, it was a whim of a purchase, but it worked out brilliantly for this project. It’s called Panne (specifically, mine was Panne Foil Yellow from the costume/novelty fabrics section at JoAnns.) This fabric didn’t fray, had a lot of “body” (so it swooshed nicely), and had just enough sparkle for a cape project! You can often find it on sale or use a coupon to get it pretty cheap!
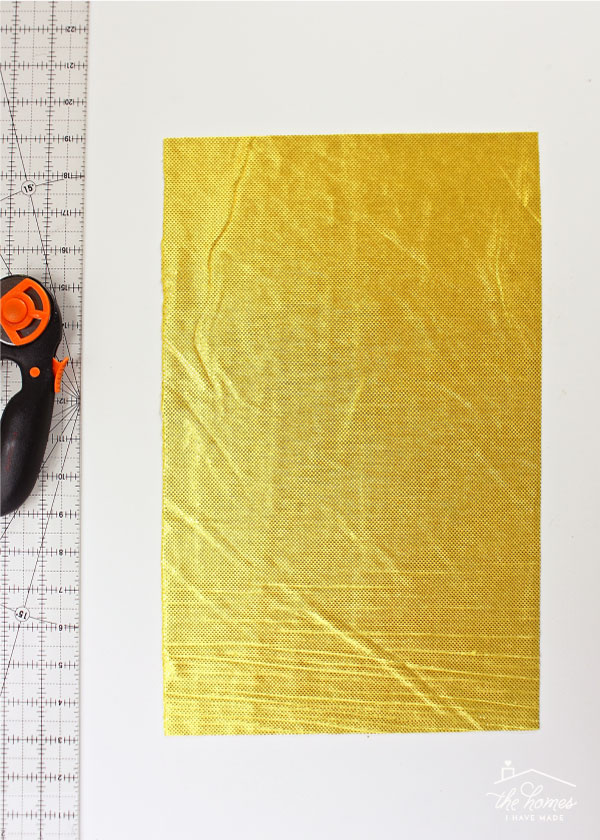
Cut Out the Cape
Start by using a scissors or rotary cutter to trim the fabric down into a ~9” x 16” rectangle. Your measurements don’t need to be overly precise, but this size works great for babies!
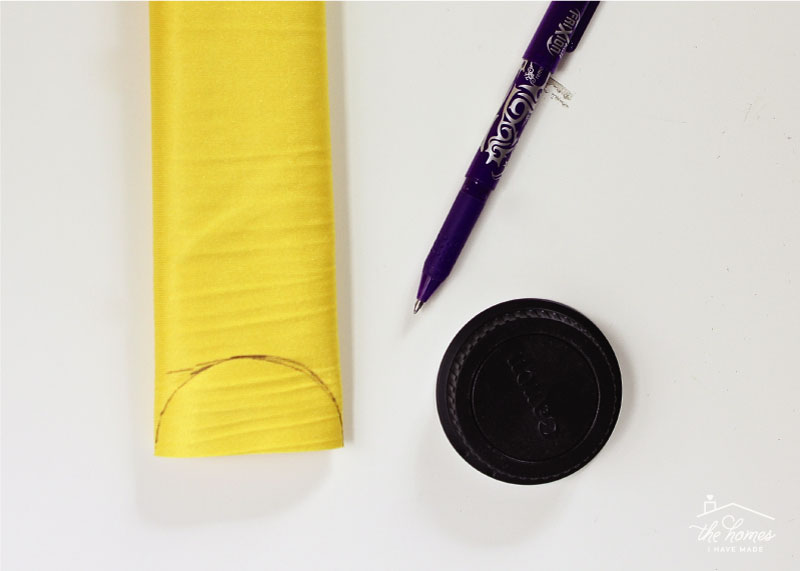
Next, we’re going to create scallops along the bottom of the cape. To do this quickly and easily, first fold the rectangle in half length-wise (below, left). Then fold it in half again (below, right).

Next, find a round glass, bowl or (in my case) lens cap that measures about 2-3” in diameter. Trace your round shape along the bottom of your folded fabric, as shown below.
Tip – I recommend making your scallop pretty “deep.” Once it is cut out, a shallow scallop is hardly noticeable!
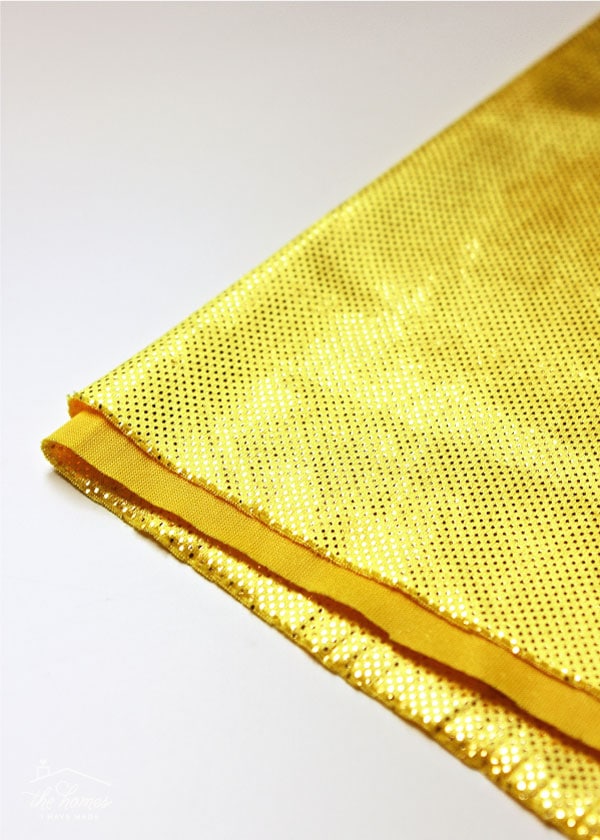
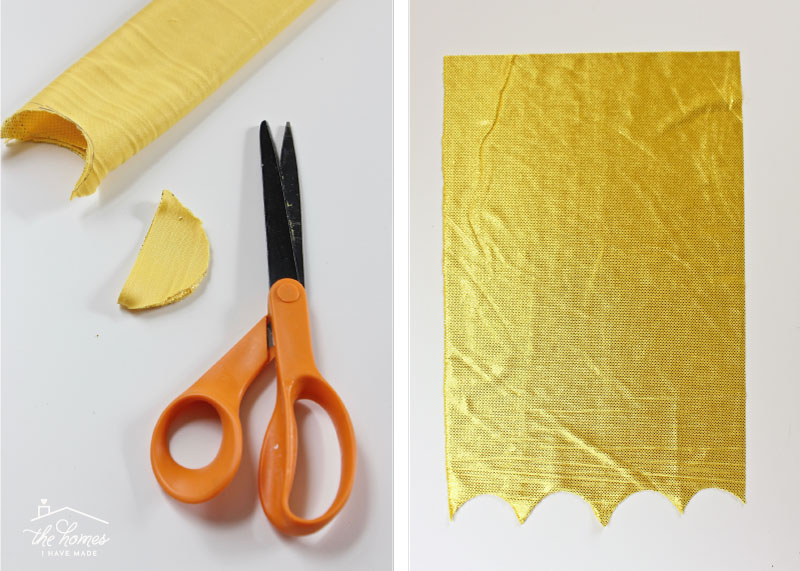
Next, use a sharp scissors to cut away the traced half-circle (below, left). When you unfold your fabric, you will have four even scallops along the bottom of your cape!
Gather the Fabric
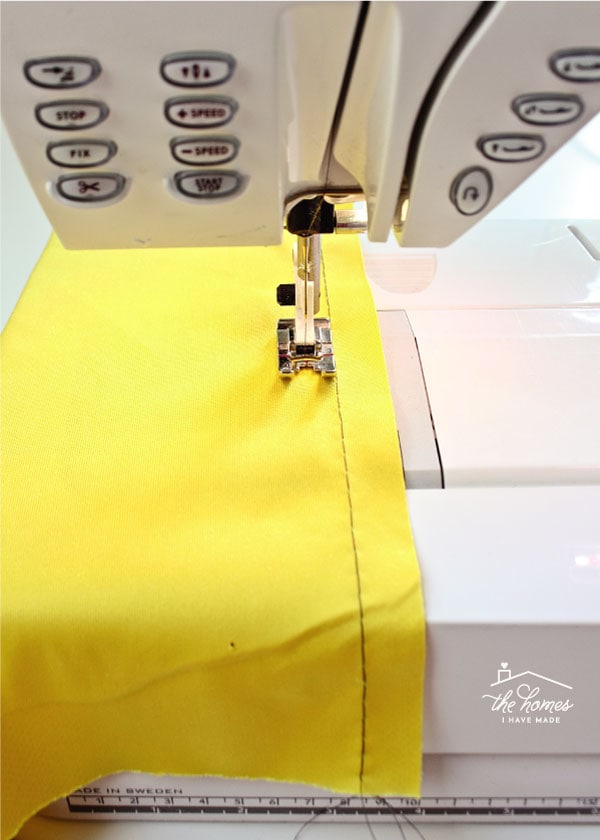
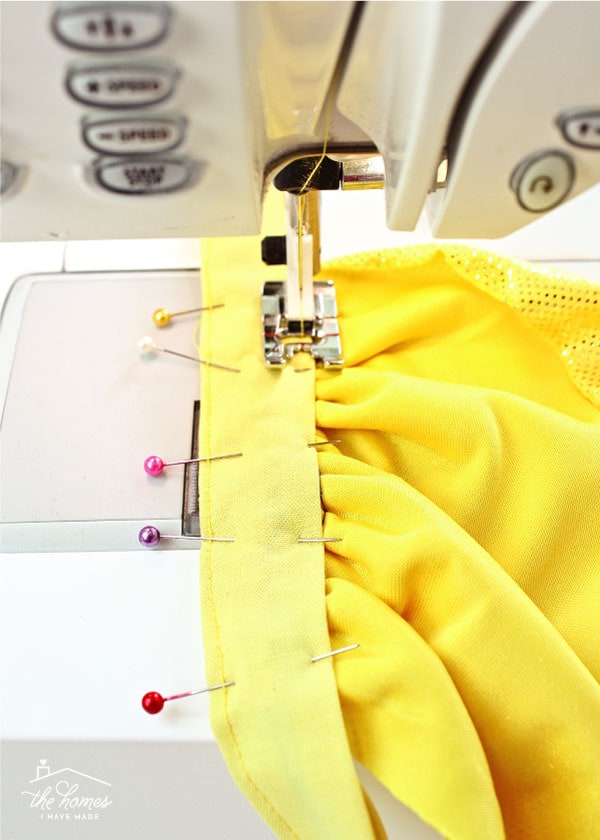
Next, you’re going to gather the fabric along the top of the rectangle (opposite of the scallops you just cut out). To do this, sew two basting lines about 1” and 1.5” down from the top of the fabric…
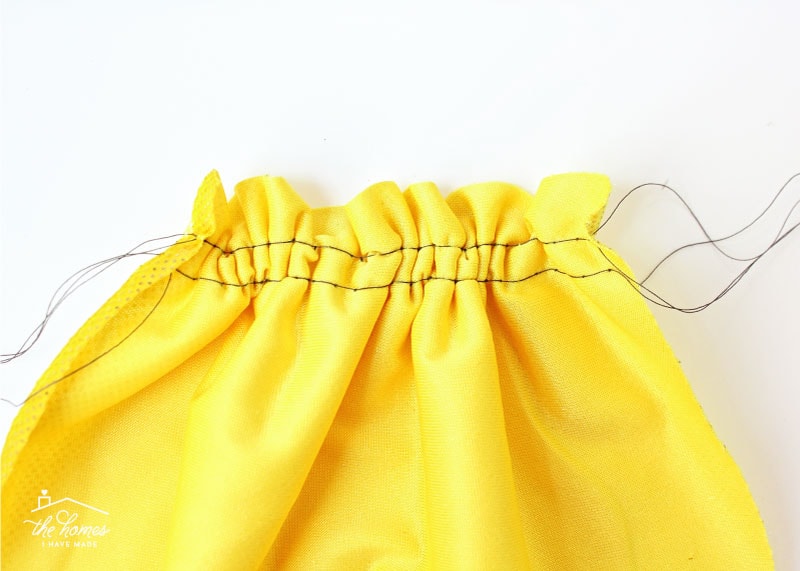
And then gently tug on the basting threads to create small and even gathers along the top of the rectangle. For more help with gathering fabric, I have a detailed tutorial for you here.
With your cape cut and gathered, you can now set it aside while we work on the “collar.”
Creating a Collar for the Cape
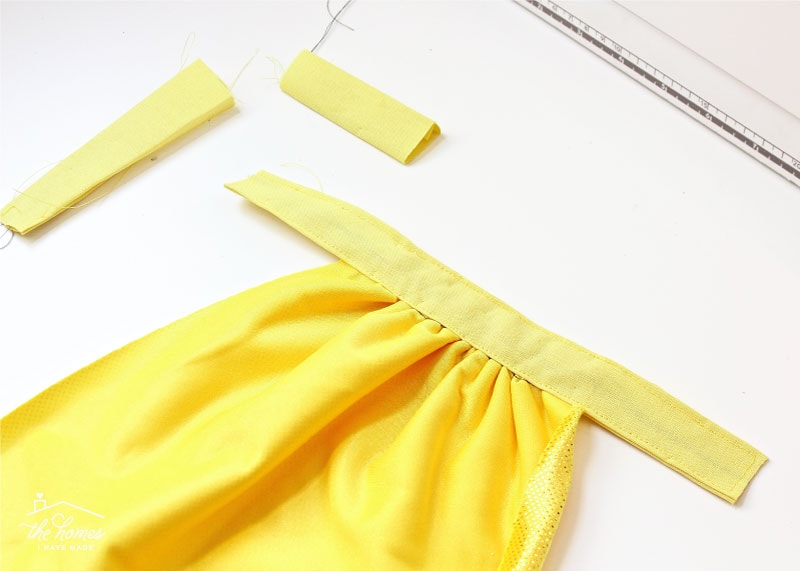
I am calling the solid strip across the top of the cape a “collar” for lack of a better term. Essentially, you are going to use a cotton band of fabric to hold the gathers of the cape in place and provide a way to secure the whole cape to the onesie.
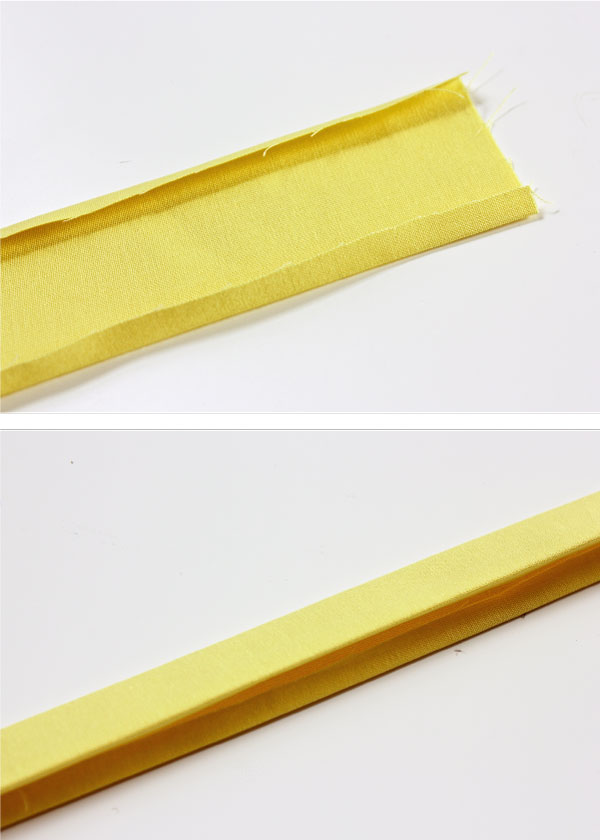
Start by cutting down a solid coordinating cotton into a 2.5” x 16” strip. Note – This certainly doesn’t have to be a solid cotton, but you want to use something that doesn’t stretch or give too much.
Want to save this post?

Next, use an iron to fold over both the top and bottom edges of the strip ¼” (below, top). Then, fold the entire strip in half, length-wise, bringing the two ironed edges together. Press the seam again (below, bottom).
Open the folded strip and find the center. Place the gathered top of your cape into the center of the strip, along the bottom half of the fold.
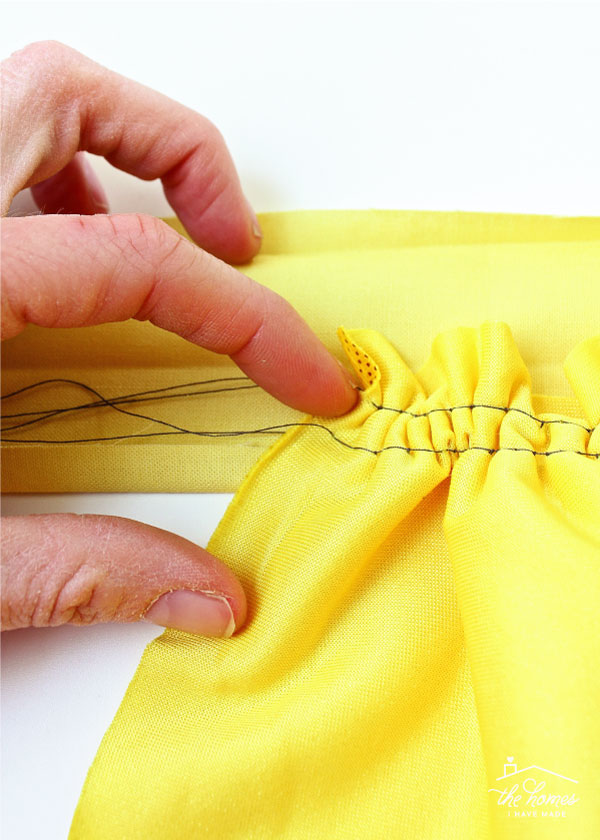
Fold the strip down over the gathers along the ironed crease, and pin in place.
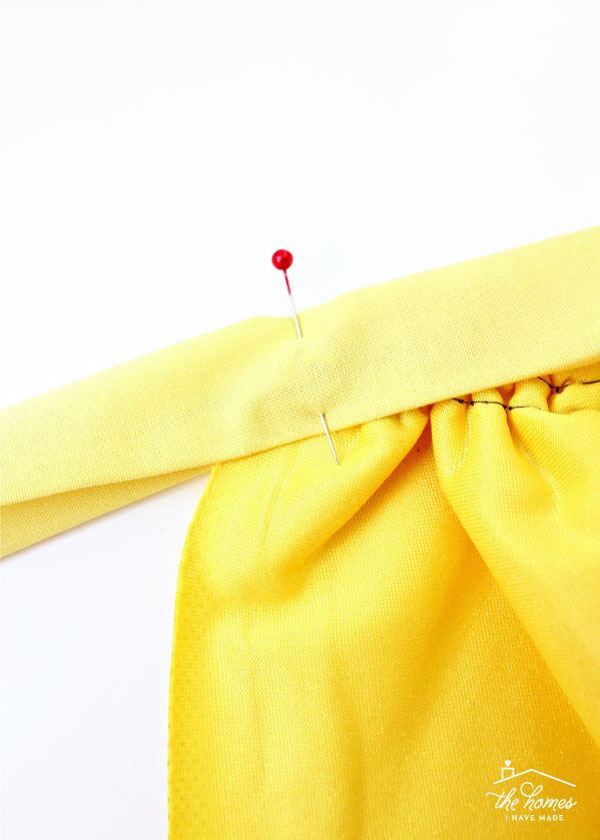
Pin the entire strip along the top of the cape, ensuring the gathers are sufficiently and evenly tucked into the fold. You don’t want those gathers to slip out as you sew, so use as many pins as necessary here!
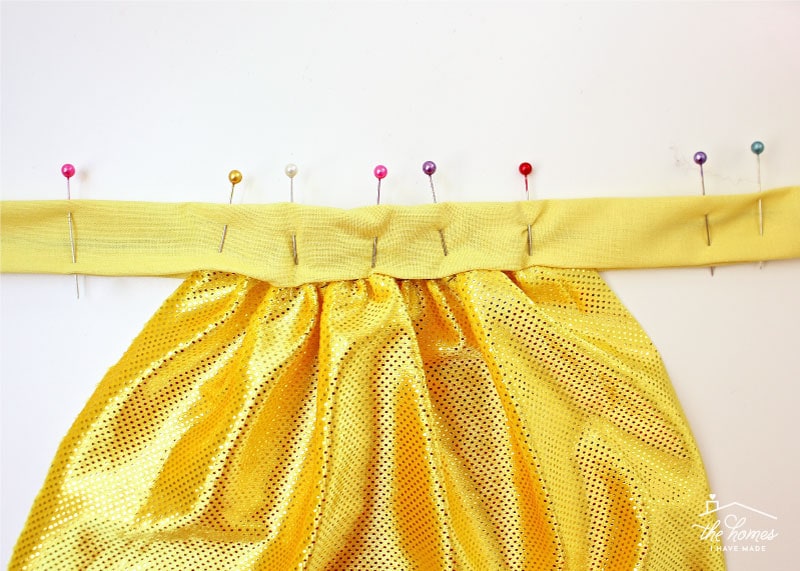
Next, use a standard stitch and coordinating thread to sew down the open length of the cotton strip. Work carefully to catch both sides of the cotton strip in your stitches, as well as all the gathers of the cape. Continue to sew up the sides and along the top of the cotton strip, so that you have stitching on all four sides of the collar.
Next, if necessary, trim down the length of the cotton strip to about 9-10”
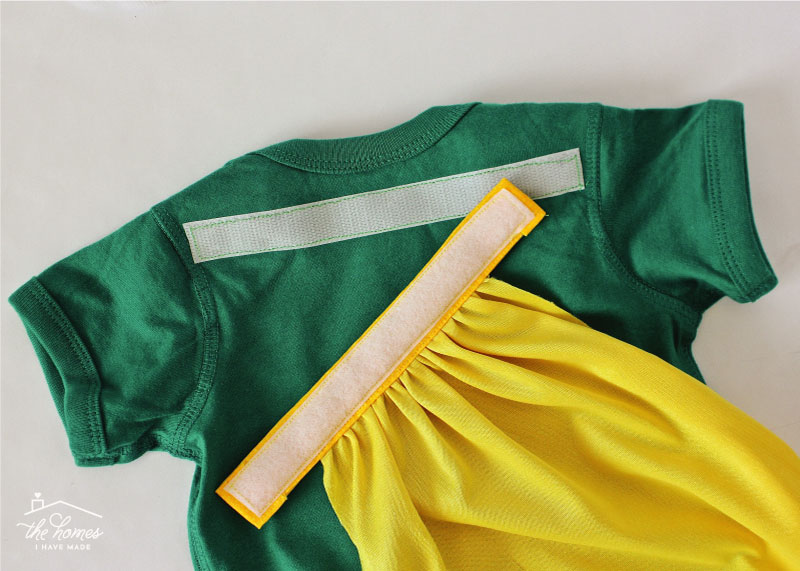
Fold over each end of the collar about ½-1” and iron in place (below, left). Before sewing, place a length of Velcro along the inside/wrong side of the collar, covering the exposed ends (below, right).
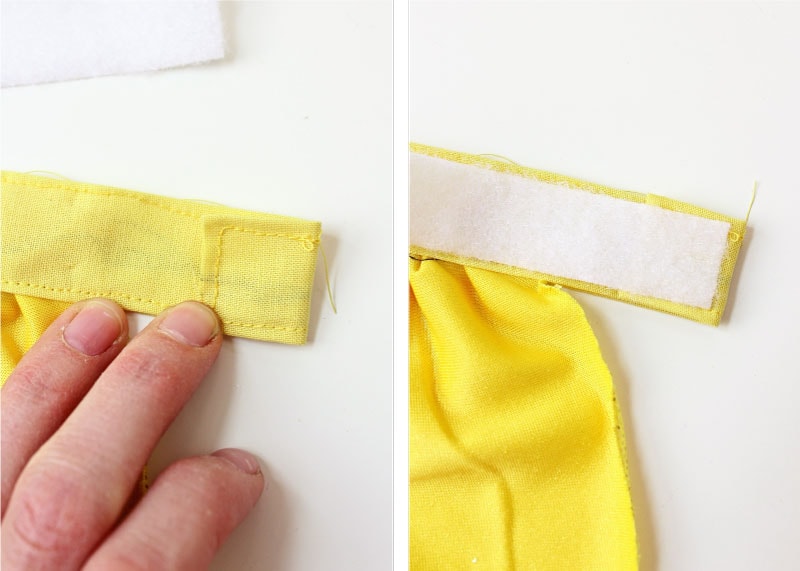
Use your sewing machine to sew around all four sides of the Velcro, as close to the Velcro’s edge as possible.
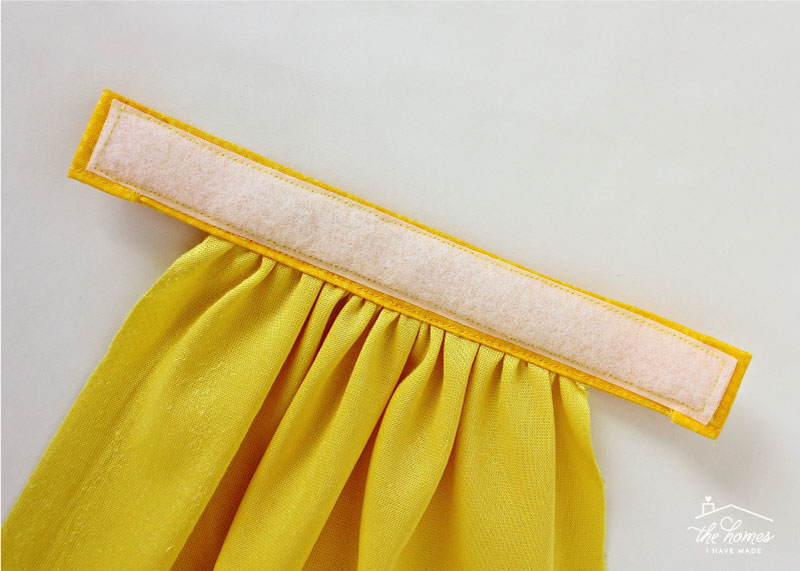
With that, your cape is done! Now it’s time to secure it to a onesie!
Securing the Cape to a Onesie
Trim down the other half of the Velcro to fit the collar on your cape (if it isn’t already cut). Pin the Velcro along the top, back of any onesie.
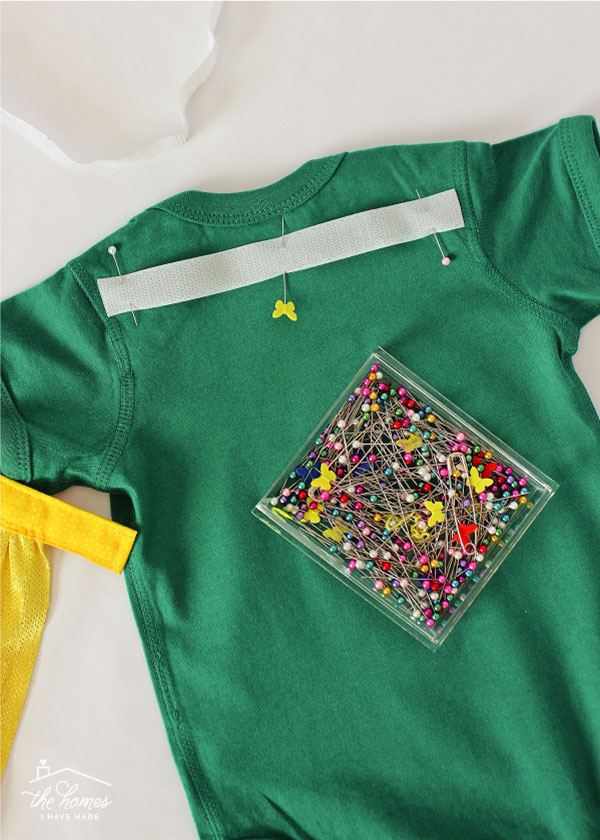
Using coordinating thread, sew the Velcro to the onesie. Note – Do not sew through the back/inside flaps of the onesie, or else there will not be enough give to get the onesie onto your child. Make sure the Velcro is ONLY sewn to the very back fabric of the onesie.
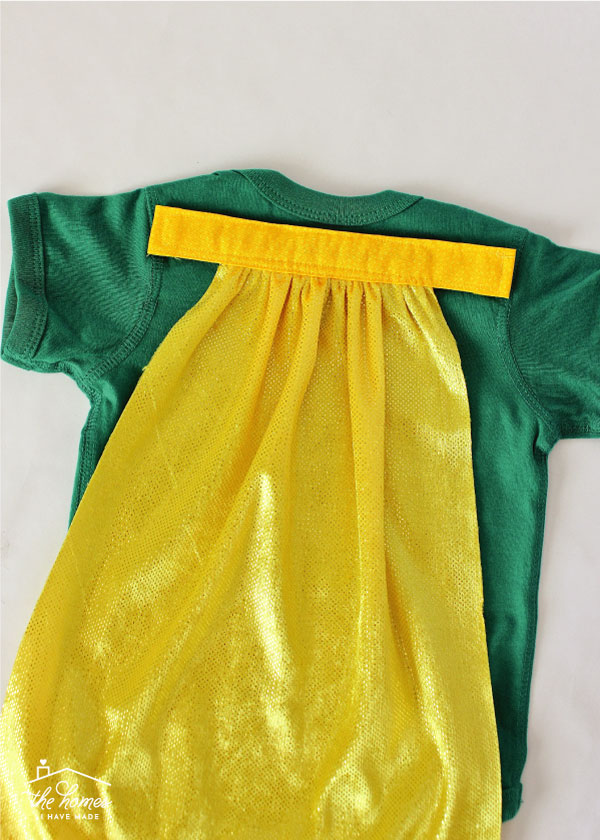
With the Velcro sewn in place, all you need to do is secure the two pieces of Velcro together and your baby Superhero is ready to save the day!
As I said before, there are a few things I really love about this cape project. One, it’s the perfect size and shape for little ones without it being in their way. Sam wore his cape for both Halloween and his birthday party; and each time, he had no idea it was there! I also love that the cape is attached to the onesie via Velcro, which means you can technically add it to any onesie and remove it when the Superhero’s day is done!
I’d love to hear if you ever give this baby cape a try! I know it’s a funny time of year to share such a tutorial so be sure to pin it now so you can find it come Halloween time!
I hope your week is off to a great start! It’s another exciting week around here…I hope to fill you in on why back here on Friday!
Megan