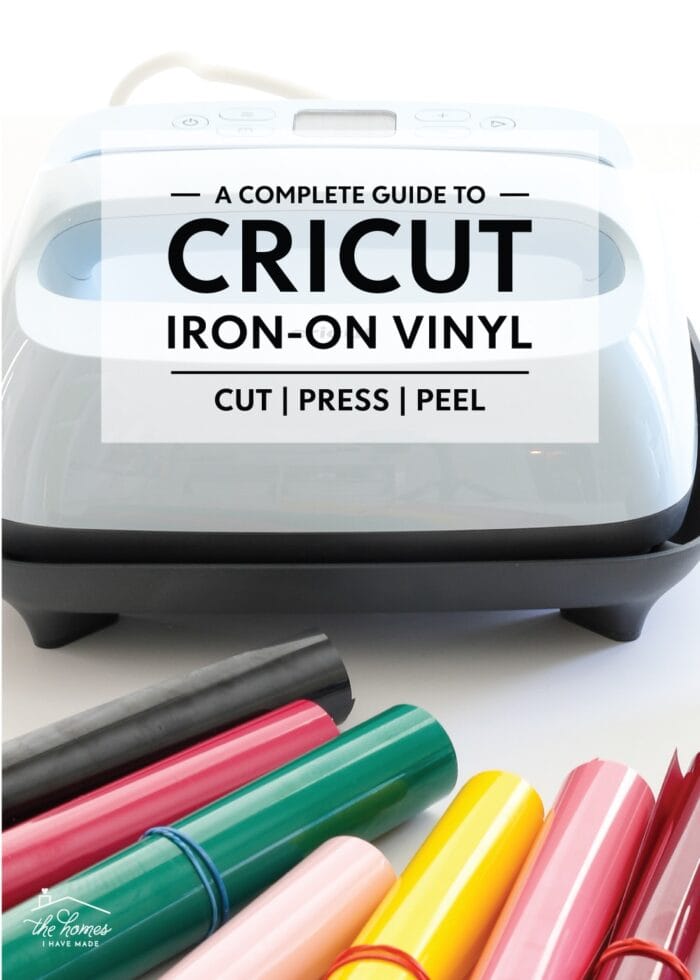
Iron-On Vinyl & Your Cricut | A Complete Guide
In recent weeks, I’ve been working with iron-on vinyl a ton! I personally love making heat-fused projects because of the permanent, professional results I can easily get right at home. And yet…although iron-on vinyl is an easy material to work with, it does require a few important modifications in order for your projects to turn out just right. This guide will teach you everything you need to know about cutting and applying Cricut Iron-On Vinyl. I can’t wait to demystify this process for you so you can start adding amazing iron-on designs to aaaalll the things!
What Is Iron-On Vinyl?
Iron-On Vinyl is exactly what it sounds like…a stretchy, vinyl-like material that you can cut into designs with a Cricut machine and is then adhered to a base (e.g., t-shirt, onesie, pillow) via heat. The vinyl essentially has a heat-activated coating on the back that allows it to permanently transfer to another material.
What’s the Difference Between Iron-On Vinyl and Heat Transfer Vinyl (HTV)?
Absolutely nothing! Iron-On Vinyl and Heat Transfer Vinyl (also referred to as HTV) are exactly the same product. Different manufacturers (e.g., Cricut, Sisser, etc) simply refer to this product by different names; and while each brand’s product may slightly vary, any tutorials, tips, and tricks you see for one will apply to the other.
What Are the Types of Iron-On Vinyl/HTV?
These days, there are tons of different types of iron-on vinyl, including:
- Cricut Everyday Iron-On
- Cricut Foil Iron On
- Cricut Sportflex Iron-On
- Cricut Glitter Iron-On
- Cricut Holographic Iron-On
- Cricut Mosaic Iron-On
- Cricut Patterned Iron-On
- Cricut Mesh Iron-On.
Although each product will require different time and temperature settings for optimum adhesion (more on this below), the process for cutting and applying them all is the same.
Why Use Iron-On Vinyl Instead of Adhesive Vinyl?
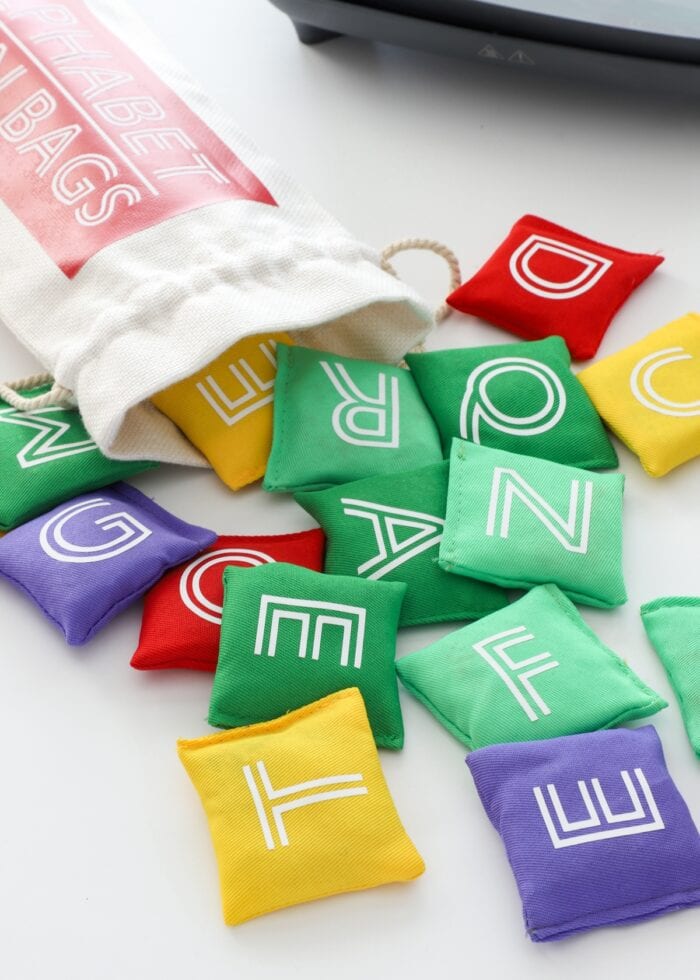
Although standard adhesive vinyl and iron-on vinyl may look identical on finished products, the primary reason you’d choose the iron-on version is if you’re working with fabric. Although standard vinyl might stick to fabric temporarily, the best way to add custom designs to t-shirts, onesies, pillows, gift bags, etc is to do so via heat application. Specifically, iron-on vinyl will adhere better, withstand machine washing, and be more permanent than its sticky counterpart.
What Can You Put Iron-On (HTV) On?
The primary use for iron-on vinyl is fabric; and that includes all varieties such as cotton, polyester, blends, mesh, neoprene, silk, leather, felt, and wool.
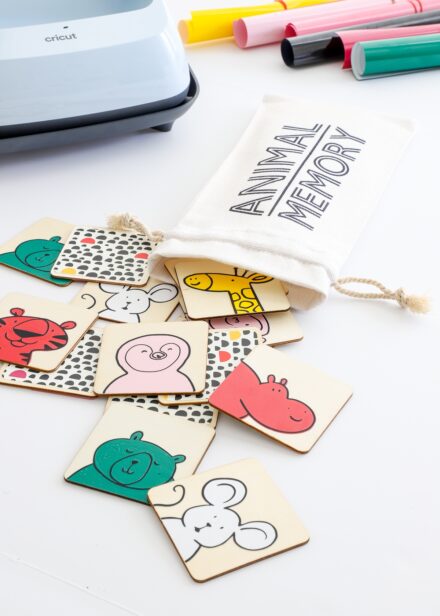
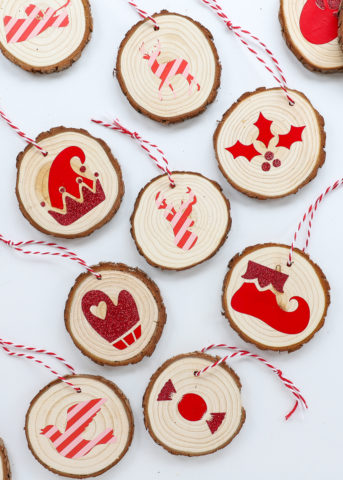
You can also put iron-on onto non-fabric surfaces such as wood, canvas, corkboard, cardstock and poster board (although the application methods might differ slightly).
Is Iron-On Vinyl Permanent?
Generally speaking, yes. Iron-on vinyl will be permanent. Although you can remove it by reactivating (and therefor loosening) the adhesive with heat, any design will most likely leave adhesive residue behind on your project. As such, it’s important to remember that you generally get one shot at applying your iron-on designs (but don’t worry, it’s actually easier than you might think!)
Is Iron-On Washable?
Again…generally speaking…yes. Iron-on vinyl is designed to endure machine washing. Over time and after many washes, you may notice your iron-on designs start to crack or peel. While iron-on products are getting better and better, the only way to get truly washable, permanent designs without cracking or peeling is with Infusible Ink.
Understanding the Dull & Glossy Sides of Iron-On Vinyl (HTV)
Before I dive into specifics for cutting and applying iron-on, I want to briefly chat about the “anatomy” of iron-on vinyl (HTV). Because although it looks, feels, and (mostly) cuts just like standard vinyl, there is one really important difference you need to fully understand.
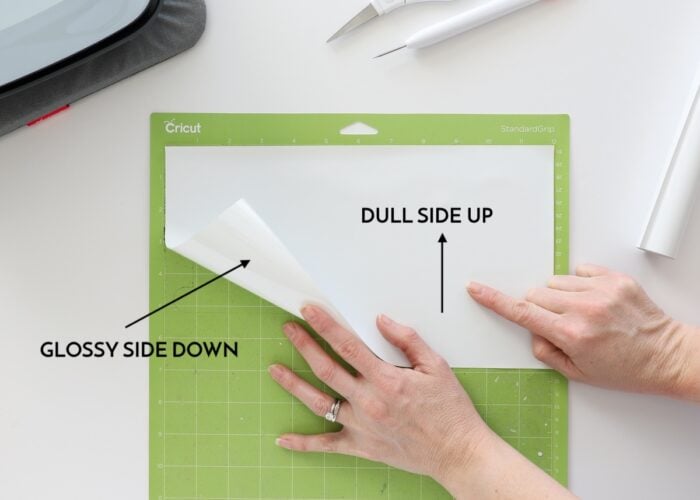
Take a look at the heat transfer vinyl below (or better yet, pull out a roll of your own and take a look). You will quickly notice that one side is super shiny/glossy and the other side is rather dull. Our instincts tell us that the glossy side is the top and the dull side is the bottom…which is technically accurate, but not precisely as you think.
- The dull side of the iron-on vinyl (HTV) is indeed the back of your design. It is the side coated with the heat-activated adhesive, which eventually goes down onto your base.
- The glossy side is the front of your HTV, but it’s covered in a clear/glossy plastic sheet usually called the carrier sheet or liner. This liner is what allows you to transfer and position your designs just right.
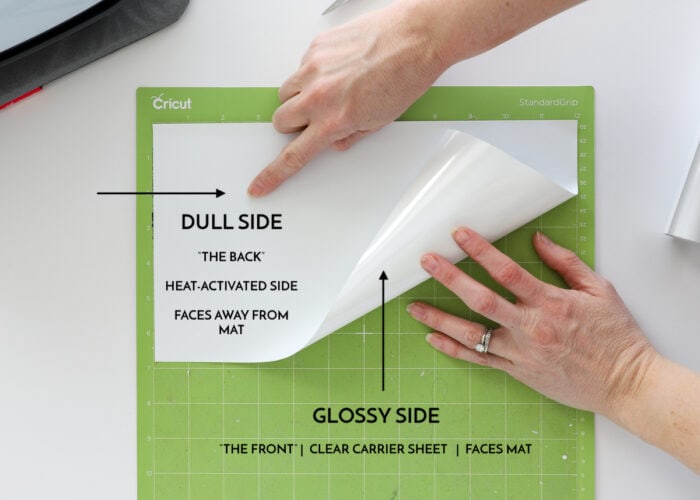
To cut out any design from heat transfer vinyl, you will place the shiny side DOWN onto your cut mat (yep, opposite of what you would normally do!) so that the dull side is facing up. You then will cut into the back of the iron-on vinyl and leave the liner layer 100% in tact.
I realize this might not be crystal clear right now, but you’ll understand once we do a sample project!
Supplies Needed for Cricut Iron-On Projects
Although there is a huge variety of projects you can make with iron-on vinyl, each one will require the same basic materials and supplies:
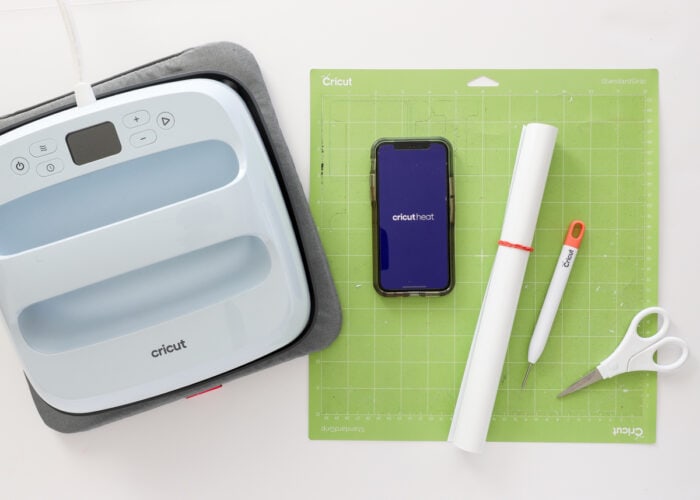
- Cricut Machine – Iron-on vinyl can be cut with any Cricut machine including the Maker series, Explore series, and Cricut Joy
- Cricut Tools
- Fine-Point Blade – the one that comes with your machine
- StandardGrip Mat
- Weeding Tool
- Iron-On Vinyl (HTV) – In whatever colors, textures, etc that you like
- A Base – The pillow, shirt, onesie, or other surface you’ll be putting the design on
- Heat Press – For excellent transfer results, a Cricut EasyPress is preferred since it provides a large, flat, even heat plate. See below for alternatives.
- Firm Flat Surface – To adequately press your designs, you will need a firm flat surface to press on. The Cricut EasyPress Mat allows you to quickly and easily press anywhere (including your kitchen table, floor, etc), but I also provide an alternative below.
- Cricut Heat App (download from your app store) or the Cricut Heat Guide
If You Don’t Have a Cricut EasyPress
The Cricut EasyPress really is the best way to get professional-level transfer right at home. If you don’t have one, you can use another commercial heat press or regular household iron. However, be sure the steam is off and you continually move around your design while heating to ensure you adequately heat every part of the design with the smaller heat plate.
If You Don’t Have a Cricut EasyPress Mat
If you do not have a Cricut EasyPress Mat, skip the ironing board. Instead, place one or two large towels (folded over several times) onto a sturdy table top, counter, or floor. This will provide a large, heat-safe surface to press your designs with even pressure and help absorb any moisture produced during the pressing process.

There are two main processes for working with iron-on vinyl:
- Cutting designs out of iron-on vinyl with your Cricut machine.
- Applying the designs to your project with a Cricut EasyPress.
Let’s walk through it all in step-by-step detail!
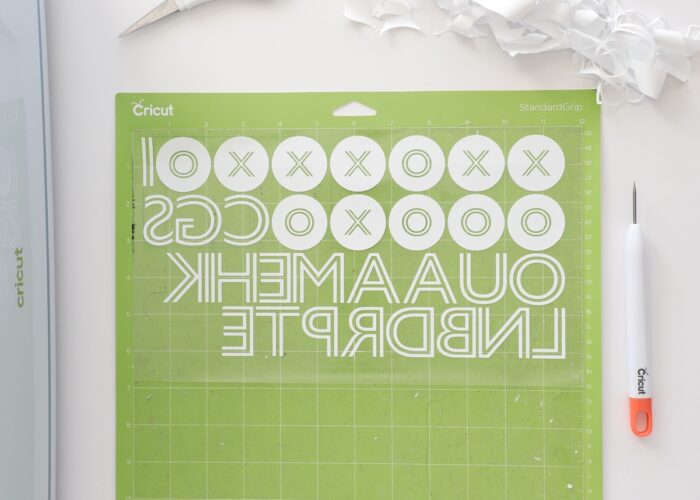
Cutting Iron-On Vinyl with a Cricut
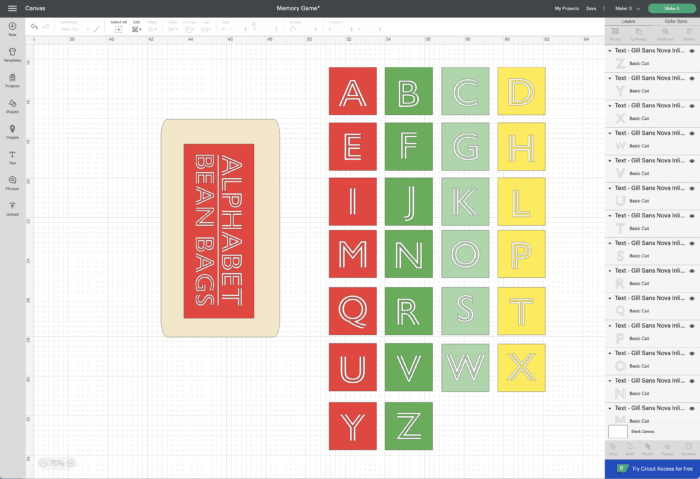
Step 1: Design Your Project
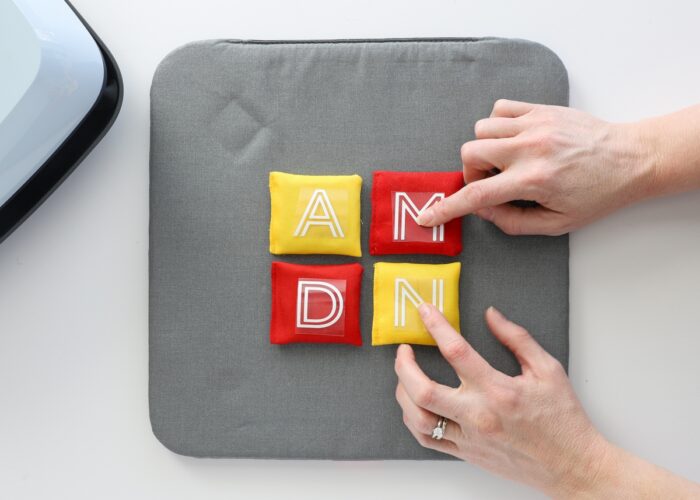
Like any project you make with your Cricut, start by creating your design in Cricut Design Space. Use the various tools to customize the size, colors, and layout to your liking. If you’re just starting out with iron-on, I recommend picking a single-layer design (one color).
When you’re satisfied with the size and shape of your design, click the green “Make It” button to send it to your machine.
Step 2: Reverse the Design
As I described above, the main difference when cutting iron-on vinyl is how you place it on the mat. Recall that you place the front of the iron-on vinyl facing down (glossy side), which means the machine will cut into the back of the material. As such, it’s imperative that you mirror (i.e., flip horizontally) your design so that it ultimately comes out correctly once applied to your project.
In order to do this, you must select “Mirror” on the first Cut Preview Screen in Cricut Design Space.
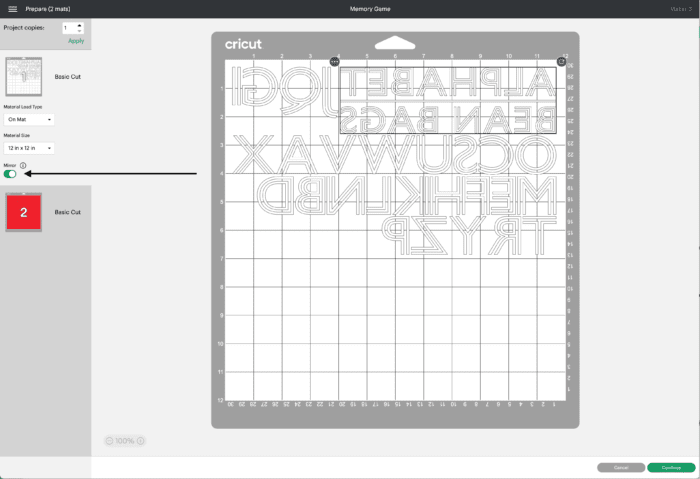
IMPORTANT! There is no “universal” Mirror setting on the Cut Preview Screen. So if your design has multiple layers, you must “Mirror” each mat individually.
TIP! If your design is perfectly symmetrical, you don’t necessarily need to mirror your image. However, I highly recommend ALWAYS mirroring your design whenever you’re working with iron-on vinyl so that you don’t forget when it really matters.
Step 3: Choose the Correct Cut Setting
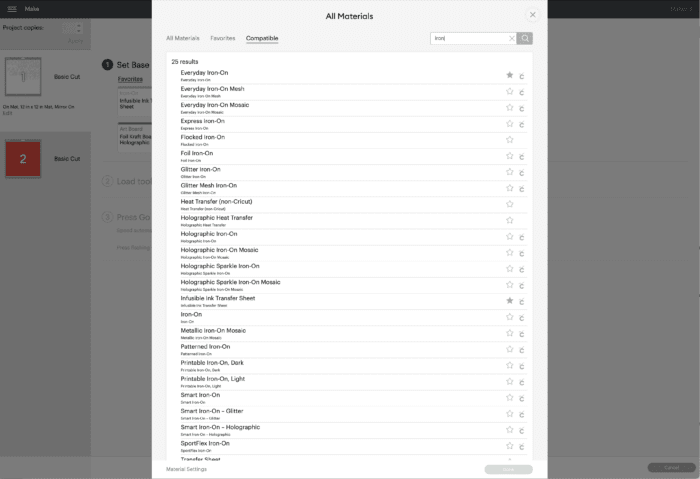
Next, you will need to choose the correct material setting for your specific iron-on and your machine:
Cricut Machines With a Dial (Cricut Explore | Cricut Explore Air)
- If working with smooth (non glitter) heat transfer vinyl, set the dial to “Iron On.”
- If you are working with glitter iron-on, set your machine to “Custom” and then select “Glitter Iron On” from the Custom Materials Menu in Cricut Design Space. (Can’t get your Glitter Iron-On to cut all the way through? See my Glitter Tips & Tricks HERE).
Machines Without a Dial
- Use the Custom Materials Menu in Cricut Design Space to select the exact iron-on vinyl you are using for your project. There are tons of built-in choices.
Step 4: Load Iron-On Into Your Cricut Machine & Cut
Cutting Iron-On With a Mat
In most scenarios, you will use a StandardGrip Mat to cut out iron-on vinyl designs with your Cricut machine. As I’ve described several times now, place the iron-on vinyl onto the mat with the glossy side down and the dull side facing up. Then use the flashing arrow button on your Cricut to load the mat and then the Cricut/Go button to start the machine cutting.
Cutting Iron-on Without a Mat (Matless)
If you are using Smart Iron-On with a Cricut Joy, Cricut Maker 3, or Cricut Explore 3, you do not have to use a mat but still need to feed the iron-on material into the machine with the glossy side down (toward the machine) and the dull side facing up. With the material properly loaded, press the flashing Cricut/Go buttons to start your design cutting.
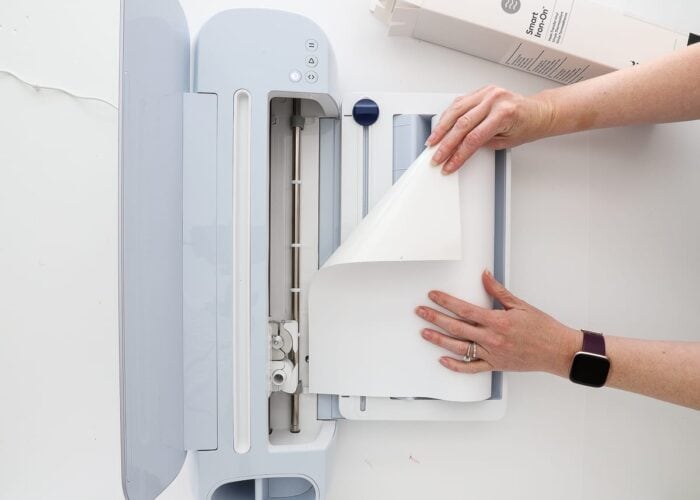
If you need more help with Smart Iron-On, refer to my in-depth tutorial: How to Cut Smart Iron-On with a Cricut.
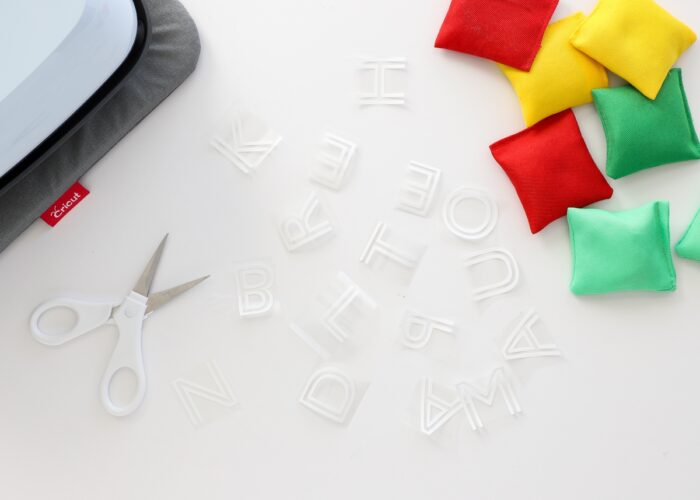
Step 5: Weed Iron-On (HTV) Design
Once your iron-on design is done cutting, you will next need to weed away all the negative aspects of your design with a weeding tool. This is the process of removing the parts you don’t want to reveal the design you do want.
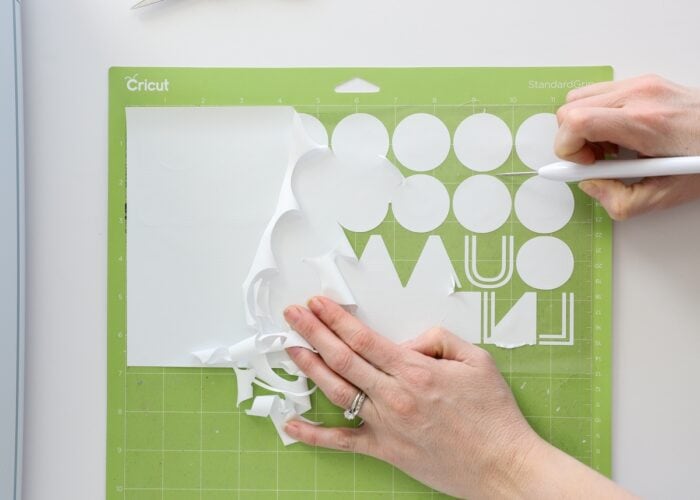
If you’ve worked a lot with standard (sticky) vinyl and dread the weeding process, you will be pleasantly surprised here. Iron-on vinyl almost always weeds beautifully, pulling away with total ease. If you need more help with weeding, see my in-depth tutorial: How to Cut & Weed Vinyl.
Want to save this post?
When you’re done weeding, your iron-on design should match your image in Cricut Design Space…although reversed and still secured to the clear carrier sheet. All the excess vinyl can be thrown out.
Step 6: Trim Around the Design
Although not always necessary, I typically recommend closely trimming off excess carrier sheet around each design element before moving onto the application process. While I certainly don’t trim apart designs that are intended to be spaced or laid out a certain way, trimming away the excess liner sheet will allow you to manually space things out on your final project just right.
Applying Iron-On Vinyl with a Cricut EasyPress
With your design fully cut out and weeded, it’s time to finally apply it to your project with heat! This step can be a little scary but is also SO gratifying when it turns out right. Let’s walk through it.
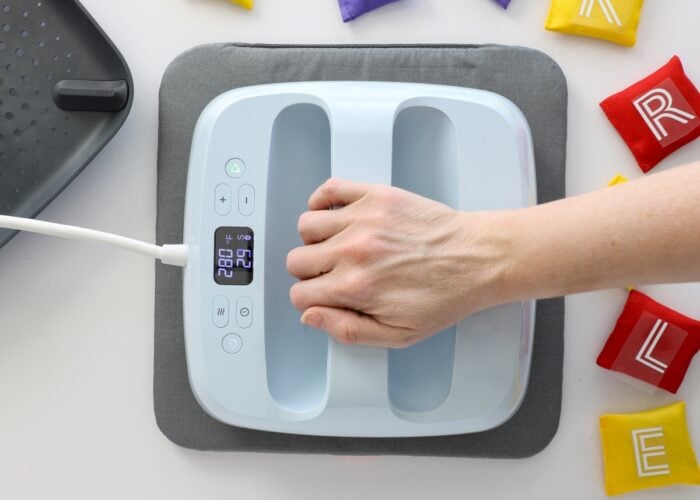
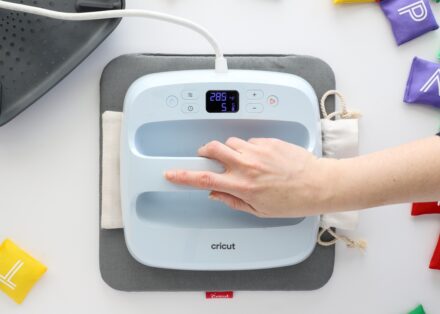
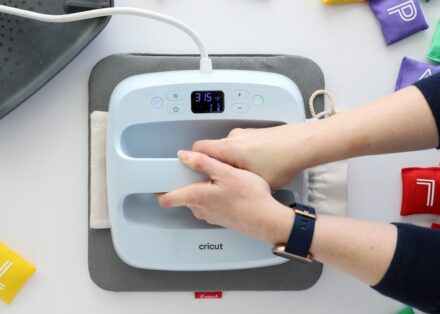
Step 7: Set Cricut EasyPress Time & Temperature
Every heat transfer material (e.g., glitter vs. mesh vs. foil) along with every kind of base (e.g., wood, cotton, silk) will require a unique combination of time and temperature in order for the transfer to turn out perfect. As such, there is no “one size fits all” formula for how long and how hot to press your project.
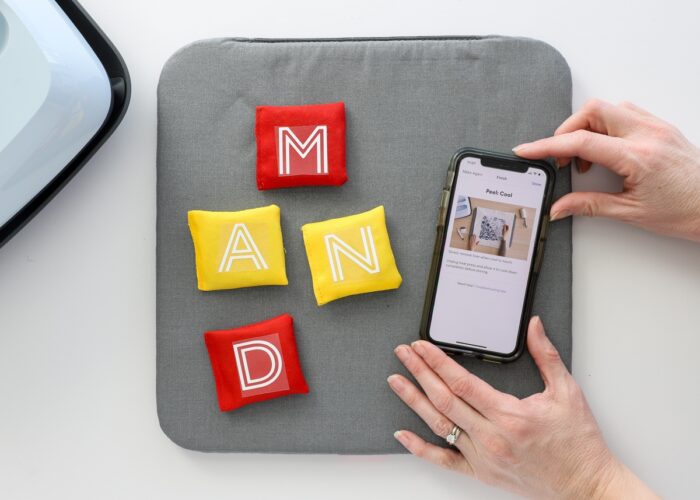
Thankfully, Cricut has now made identifying the perfect settings for your specific project super easy thanks to the Cricut Heat App or the Cricut Heat Guide. Simply select your transfer material, then your base material, and the Cricut Heat app will tell you the precise time and temperature settings for your project.
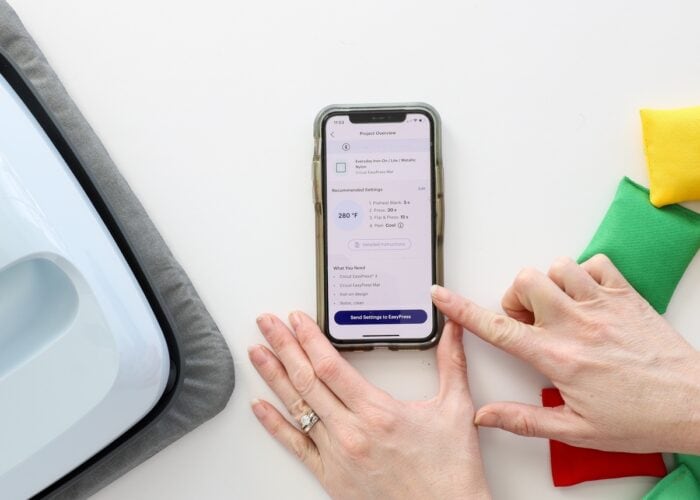
If you are using a Cricut Easy Press 3, you can send the settings directly to the press via the app. If you have an older EasyPress machine, simply set your time and temperature manually according to the app’s information.
If you need more help with the Cricut Heat app, see my in-depth tutorial: All About the Cricut Heat App.
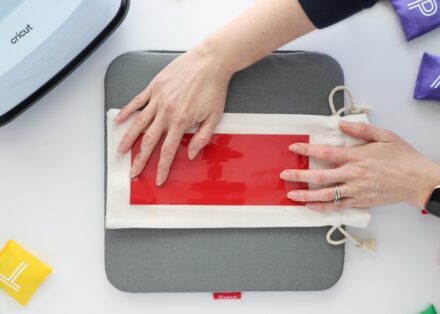
Step 8: Press Your Project
The Cricut Heat App will walk you through, step-by-step, how to fuse the iron-on design to your base. If you have access to the app, you can stop reading here and follow the in-app screenshots instead.
If you don’t have access to the app or want to understand the general pressing process, here is a breakdown:
Start by pre-heating your base without any design on it for the time recommended in the Cricut Heat App/Cricut Heat Guide. Usually, this is about 5-15 seconds. This essentially preps your material to fuse with the heat-activated coating on the iron-on design.
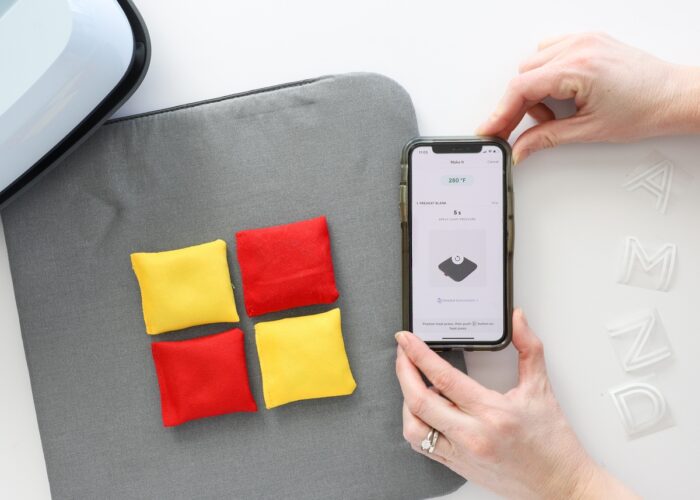

With the base still warm, place the iron-on decal onto your project. If you’ve cut everything correctly, you should be placing the dull side down/glossy liner side up, so that your design looks correct. One of the best parts of working with heat transfer vinyl is it isn’t sticky so you can play around with your placement as much as you want!
Once you are satisfied with you design, place your Cricut EasyPress directly onto the glossy liner (no pressing cloths, towels, or other barriers are needed). Apply the pressure dictated by the Cricut Heat App/Cricut Heat Guide (light, heavy, etc) and press the start button on the Cricut EasyPress. Hold in place until the timer counts down and beeps again. It is important that you NOT over-heat your project, as the iron-on vinyl is sensitive and can crinkle/melt.
If your design isn’t fully covered by the Cricut EasyPress, move systematically around your design until each part has been fully heated for the correct amount of time.
Once you’ve fully heat the front of your design, flip the design over and press from the back for the specified time in the Cricut Heat app/Cricut Heat Guide (usually about half the amount of time required for the front).
TIP! When placing your heat source onto the iron-on vinyl, it’s VERY important that 100% of the design is covered by the plastic carrier sheet. You do not want ANY vinyl exposed without a liner sheet or it will melt (and possibly adhere to your press). Whether it’s because you are layering several colors or you trimmed the liner sheet a little too close, always use scraps to cover up any HTV that is exposed.
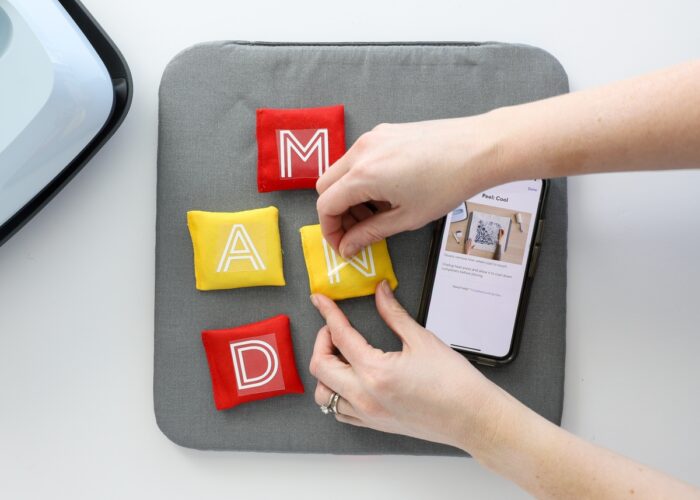
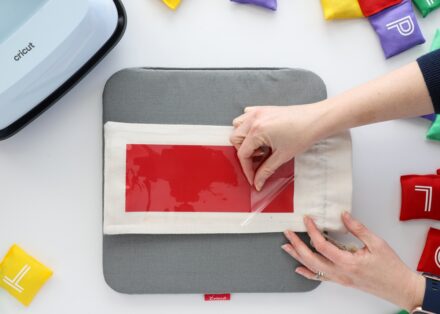
Step 9: Peel Away Carrier Sheet
Your final step is to (slowly) peel away the clear carrier sheet to reveal your design perfectly fused to your base (this is the exciting part!) But just as different materials require different temperature settings, each material will also require a specific peeling technique:
- Warm Peel – Remove the clear carrier sheet as soon as you can safely touch it.
- Cool Peel – Remove the clear carrier sheet only after the project is 100% cool to the touch.
The Cricut Heat app/Cricut Heat Guide will indicate which peel is required for your project.
TIP! If you start to peel the clear carrier sheet away and your iron-on design is NOT fused perfectly, re-place the carrier sheet and re-heat your project a few more seconds.
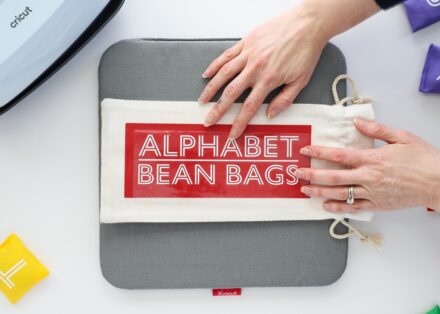
With the clear carrier sheet pulled away, your iron-on project is complete!
How to Layer Iron-On Vinyl
Layering iron-on vinyl can be a bit tricky for three main reasons:
- Because only one layer can be heat-fused at a time, additional layers will require several rounds of pressing.
- Because iron-on vinyl goes on one layer at a time, you start with the bottom-most layer and work up (instead of vice versa with regular vinyl projects)
- And finally…because iron-on vinyl is sensitive, it can easily melt with too much heat. So each time you heat a new layer, the previous one gets extra heat, which can lead to distortion and melting.
For these reasons, you have to adjust your iron-on process to accommodate for multiple layers, and therefor, all the extra heat.

Adjust Press Settings
If you use the Cricut Heat app/Cricut Heat Guide settings for a specific transfer material and base, it will dictate the correct time for a single layer. If you use those settings on multiple layers, you will melt your bottom layer(s).
As such, layering iron on is typically done as follows (but you may need to do a test cut and press with your specific materials to find a time combination that works perfectly).
- Bottom Layer: 3-5 seconds of firm pressure then a warm peel
- Top Layer: 10-15 seconds of firm pressure then a cool peel
TIP! The Cricut Heat app does not currently accommodate “layered” settings, but you can manually input them. I provide full instructions on how to manually set the Cricut Heat app for layered projects here.
Work From Bottom to Top
Start by using the Cricut Heat app/Cricut Heat Guide to identify the correct temperature setting for your specific transfer material and base; but disregard the time settings.
-

- Pre-heat the base for 5 seconds.
-
- Place the bottom-most layer onto the warm base.
-
- Press for 3-5 seconds with firm pressure.
-
- Use a warm peel to remove the carrier sheet.
Repeat the same process (3-5 seconds of firm pressure followed by warm peel) with additional layers. For the final (top most) layer…
-
- Place the very top layer onto your project (again ensuring all iron-on is protected).
-
- Heat for 10-15 seconds with firm pressure. Flip the entire design over and press again for ~15 seconds from the back.
-
- Let the entire design fully cool before removing the final clear carrier sheet with a cool peel.
-
- Enjoy your layered iron-on project!
Using iron-on vinyl is such a fun (and easy!) way to make truly unique shirts, gifts, and home decor items. But following the proper process (and heating recommendations) is key to flawless transfers instead of melted messes. I hope what I have here clears away the confusion with iron-on vinyl and empowers you to tackle your next heat project with confidence!

Megan

6 Comments on “Iron-On Vinyl & Your Cricut | A Complete Guide”
great tutorial! thanks for sharing. When buying fonts and designs I see I can do it in silhouette – but am I able to purchase designs and fonts else where? How? And how do I save them?
Megan what font did you use for the Tis the season to sparkle pillow? I love it!
Hi Karen!
It was an SVG design that I used…you can find it HERE.
Hope that helps!Megan
Thanks for this info.
I’m very new to Htv. I’m making earrings and putting it on leather and am getting the edges of the carrier sheet showing up on my faux leather. Do you know what I can do to fix this? I’m wasting so much faux leather. I’m also using an iron but I have the cricut heating pad for underneath.
Thanks
Susan
Hi Susan!
I think I know exactly what you’re talking about…a slight imprint on the faux leather of the carrier sheet edge?
My best suggestion would be to leave a larger edge of carrier sheet around your HTV so that it fully extends off the earring shape. I’m not sure that makes sense. Essentially, if you have an earing that’s 2×2″, I would center my HTV design within a 3″ square, and then trim that carrier sheet (after weeding) to 3″ so the earing is completely covered. It means you will waste some HTV but won’t have any varrier sheet edges on your earing itself.
Let me know if that doesn’t quite make sense or if I misunderstood your problem!
Good luck!Megan
Thanks for sharing all this information. I am now more confident so I might just try the HTV very soon.