Cricut Infusible Ink | A Complete Get-Started Guide!
If it feels like you are seeing Infusible Ink (or sublimation) projects everywhere you look, you probably are! In recent years, Cricut’s Infusible Ink has transitioned from a fun new product to try to a legitimate Cricut crafting staple; and there are now tons of different projects you can make with this heat-activated, permanent process. But even though you may be seeing lots of amazing Infusible Ink projects here (and all around the web), you likely still have lots of questions about what it is, how it works, and what you need to do it yourself. Today’s post is breaking down all these questions so you feel motivated and ready to finally give Cricut Infusible Ink a try. Let’s get started!
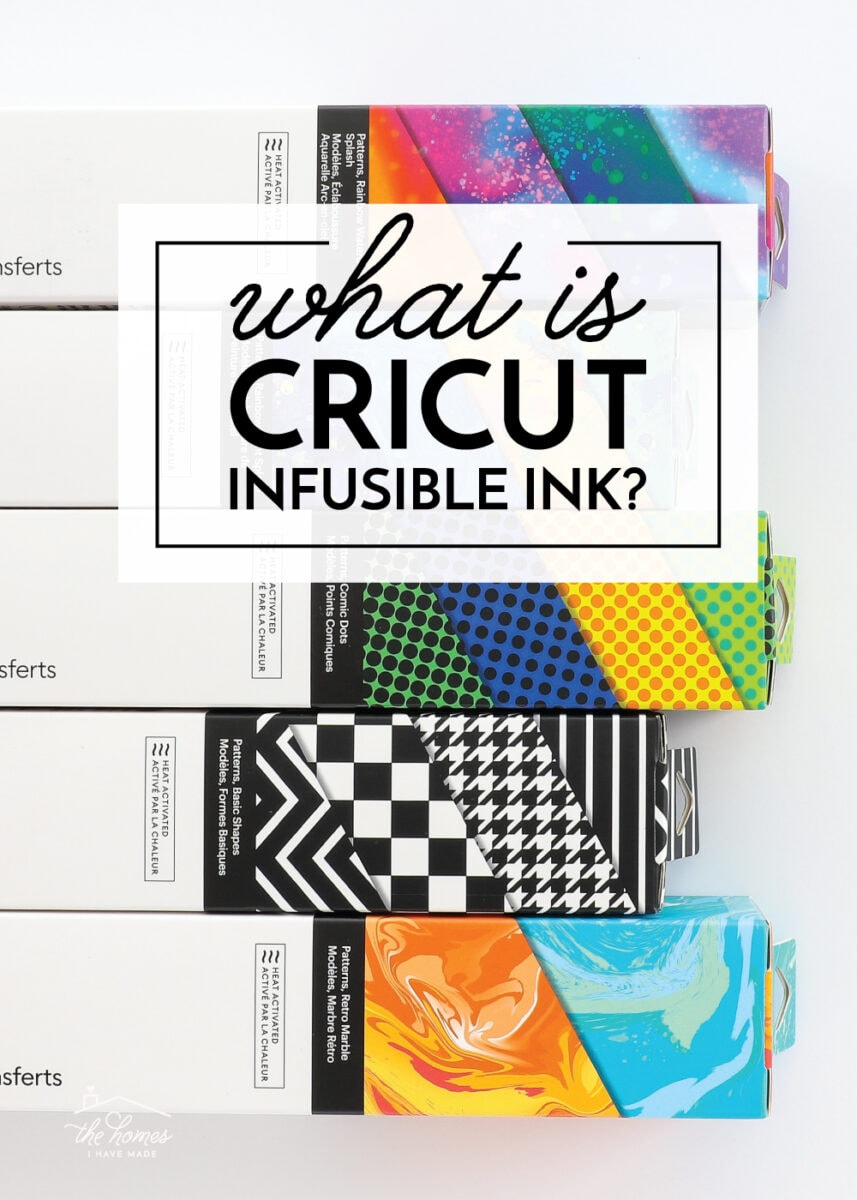
What Is Cricut Infusible Ink?
Cricut Infusible Ink is exactly what it sounds like. It’s ink – not vinyl or iron-on vinyl – that penetrates the surface (via heat) of whatever you apply it to (e.g., coasters, tote bags, pillows, zipper pouches, shirts, mugs, hats, etc).
Infusible Ink doesn’t sit on top of an item. Rather, the color/design fuses into the fabric or ceramic surface. This makes any design created with Infusible Ink permanent, with no cracking, fading, or peeling. Additionally, since these designs become part of the surface itself, Infusible Ink designs stretch, move, and wash without distortion.
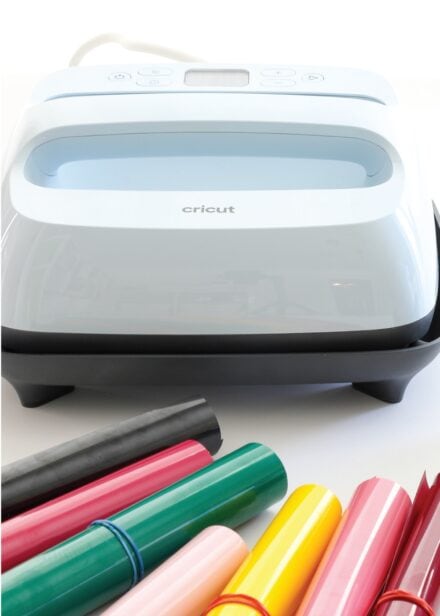
Cricut’s Infusible Ink System
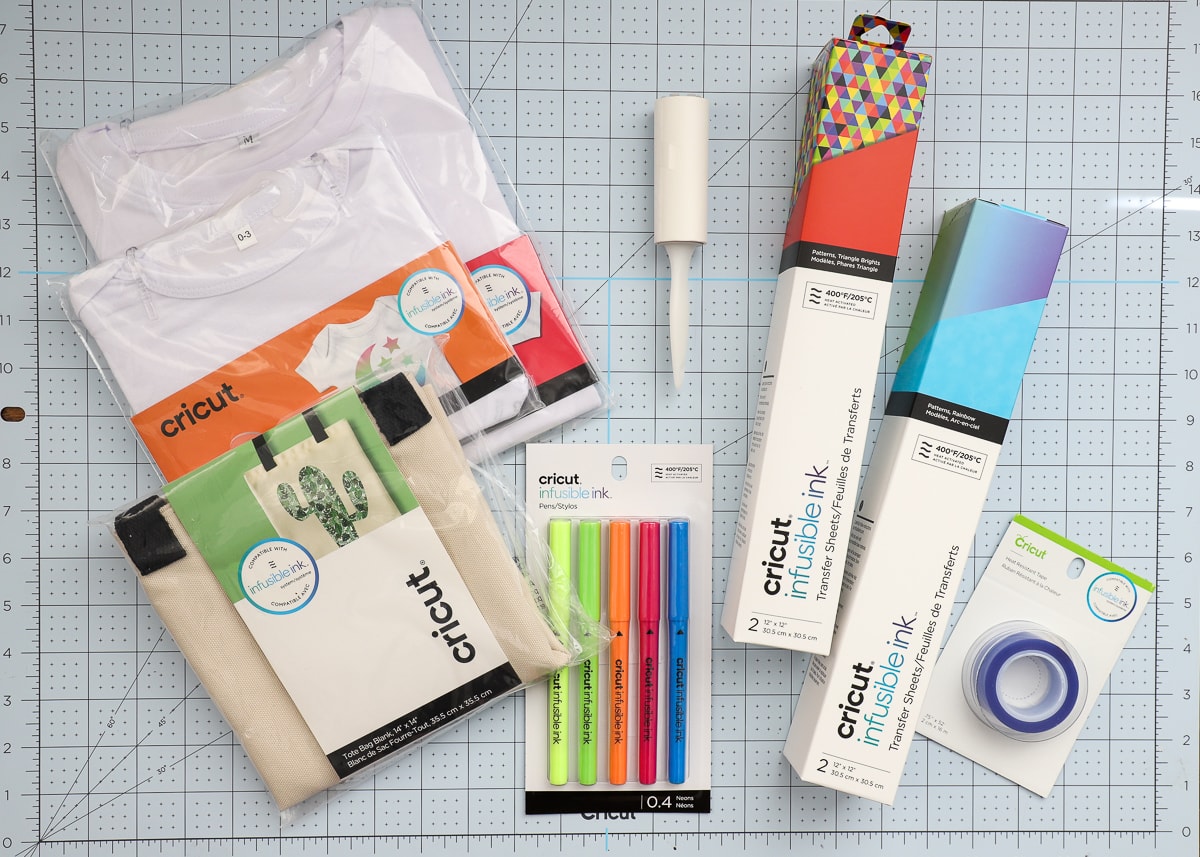
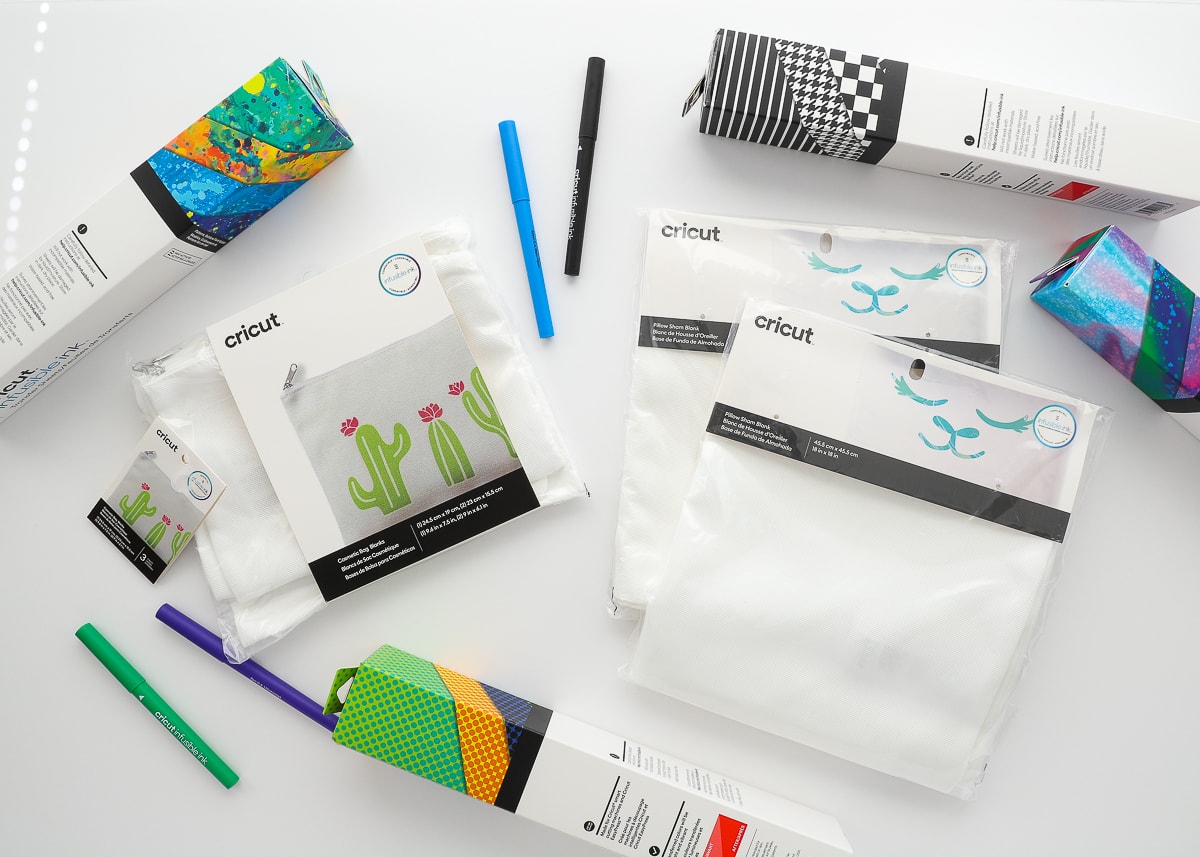
There are four main products part of the Cricut Infusible Ink system:
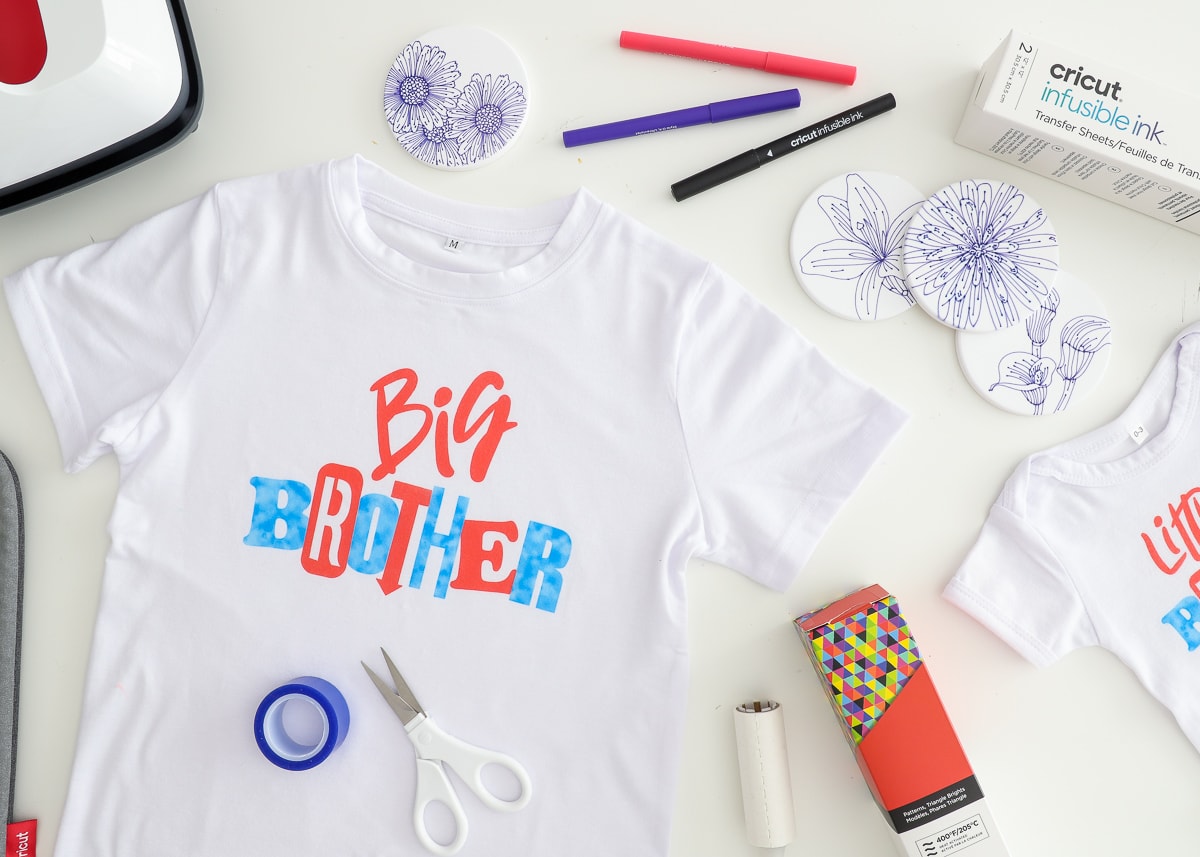
- Infusible Ink Transfer Sheets – Paper-like products used to make solid “cut out” designs.
- Infusible Ink Pens – Pens in various colors and weights used to draw or color in designs.
- Infusible Ink Blanks – Items (e.g., mugs, coasters, shirts) that have a specially-formulated base material that “accepts” Infusible Ink, making it permanent.
- Cricut Heat Presses – Specially designed heat press machines that provide the optimum temperature and pressure required for perfect transfers.
When you are shopping for Infusible Ink products, ensure they are “Infusible Ink” compatible. Although other Cricut rolls or Pens may look like Infusible Ink products, it must explicitly say “Infusible Ink” on the packaging to be used for these projects.
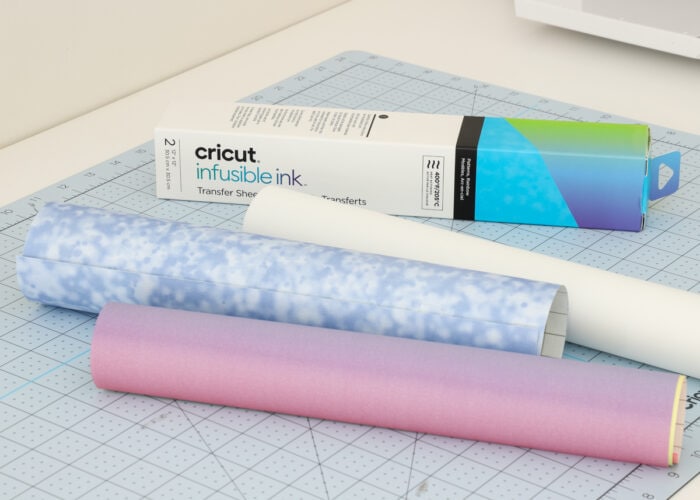
Infusible Ink Transfer Sheets
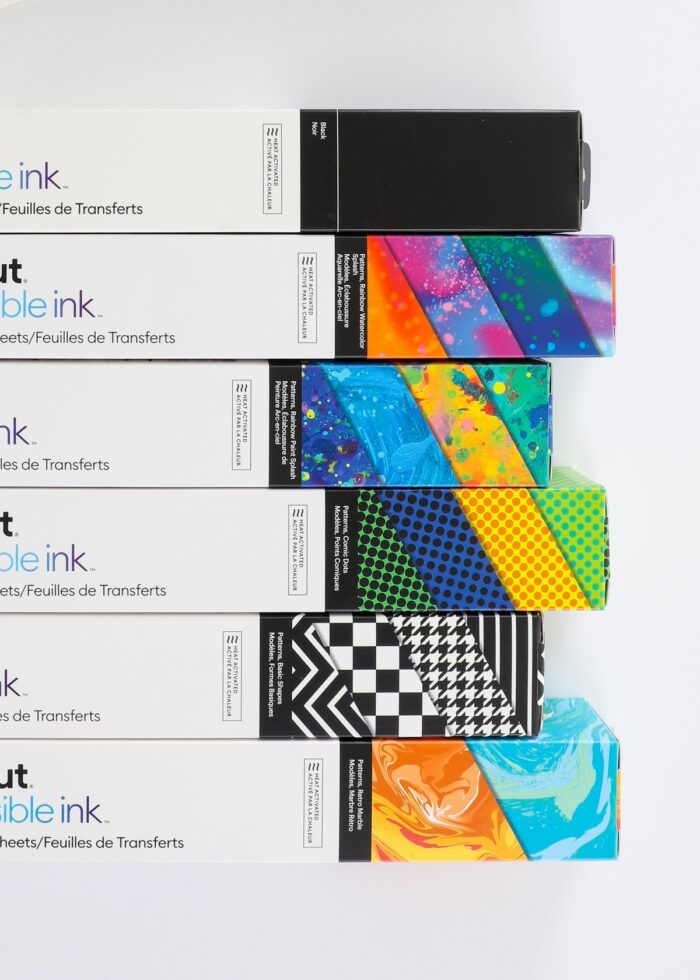
Infusible Ink Transfer Sheets currently come in boxes of 12×12″ sheets, as well as 4.5×12″ sheets for Cricut Joy. There are usually 2-4 sheets included in each box:
- Solid color boxes contain several sheets of the (same) designated color.
- Pattern boxes usually contain one sheet of up to four patterns shown on the outside of the box.
Although Infusible Ink Transfer Sheets look like rolls of vinyl, they are not! Instead, they are essentially thick sheets of paper with an ink color/pattern on one side and a clear contact paper-like backing on the other.
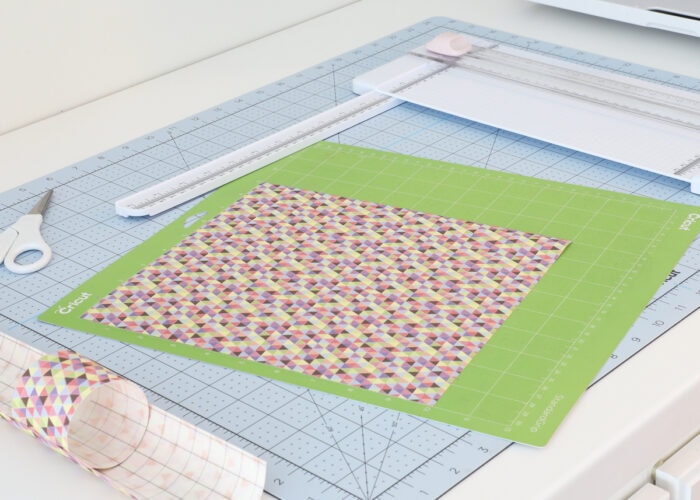
These sheets can be cut into any design with your Cricut and then secured to your blank. When the Infusible Ink Transfer Sheets are heated, the ink leaves the thick paper and transfers to your blank (hence the name “Transfer Sheets.”)
Other Things to Know About Cricut Infusible Ink Transfer Sheets
- All Cricut machines can cut the Infusible Ink Transfer Sheets (Cricut Maker Series | Cricut Explore Series | Cricut Joy).
- The ink is only on one side of the Transfer Sheet; since it is entirely heat activated, it’s not messy at all.
- The “paper” itself is not sticky (it resembles cardstock more than vinyl). As such, you can easily move it around your blank and even peel it off the liner sheet all together.
- Butcher Paper is required for all Transfer Sheet applications. A few sheets are included in each box of Infusible Ink Transfer Sheets, and you can also buy it in bulk HERE.
- When you first take the Transfer Sheets out of the box, they will appear faded. This is normal. The heating process intensifies the colors (dramatically). The colors and vibrance shown on the outside of the box is what you WILL see on your final project.

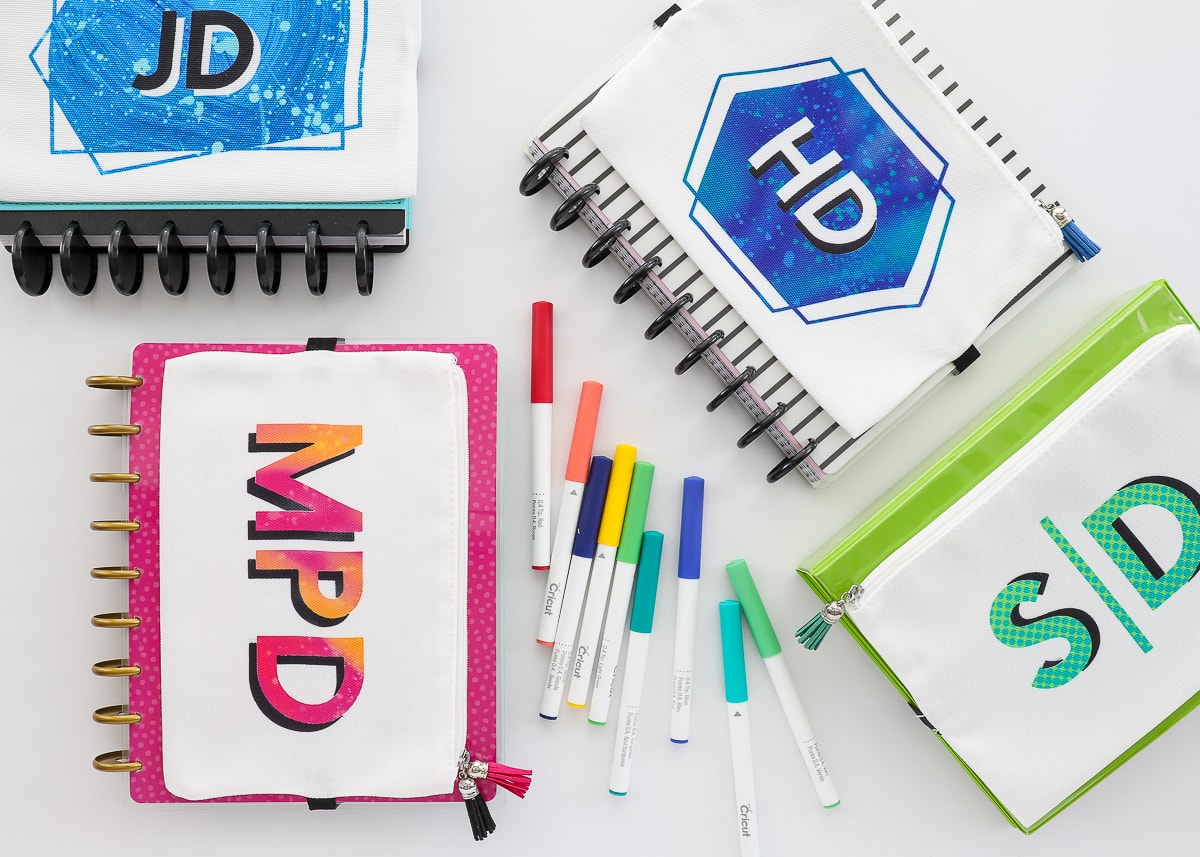
Infusible Ink Pens & Makers
Infusible Ink Pens are for applying “drawn” or “colored in” details to your projects and now come in a wide variety of colors and weights:
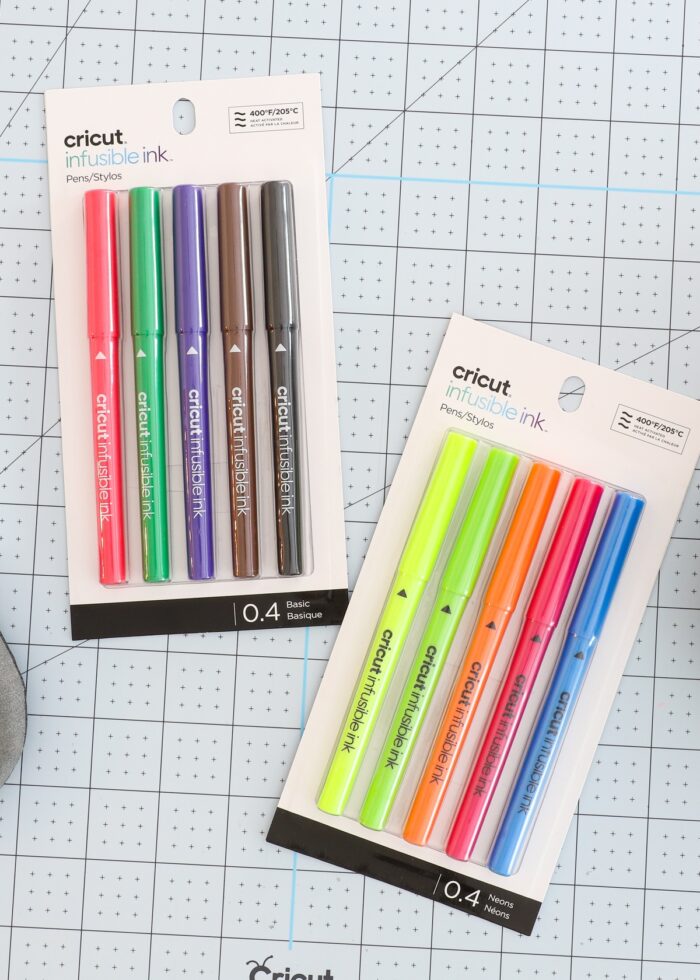
- Cricut Infusible Ink Pens (0.4 weight) can be inserted into your Cricut machine for finer pen details.
- Cricut Infusible Ink Markers (1.0 weight) can be inserted into your Cricut machine for heavier pen details.
- Infusible Ink Dual-Tip Freehand Markers do not get inserted into your Cricut machine and are instead intended for hand drawing and coloring.
Just like designs made with the Transfer Sheets, Infusible Ink Pens designs are also transferred to your blank via heat, completely fuse with the surface, and will be permanent.
Other Things to Know About Cricut Infusible Ink Pens
- All Cricut machines can support Infusible Ink Pens. However, if you have a Cricut Joy, be sure you choose Cricut Joy-specific Infusible Ink Pens.
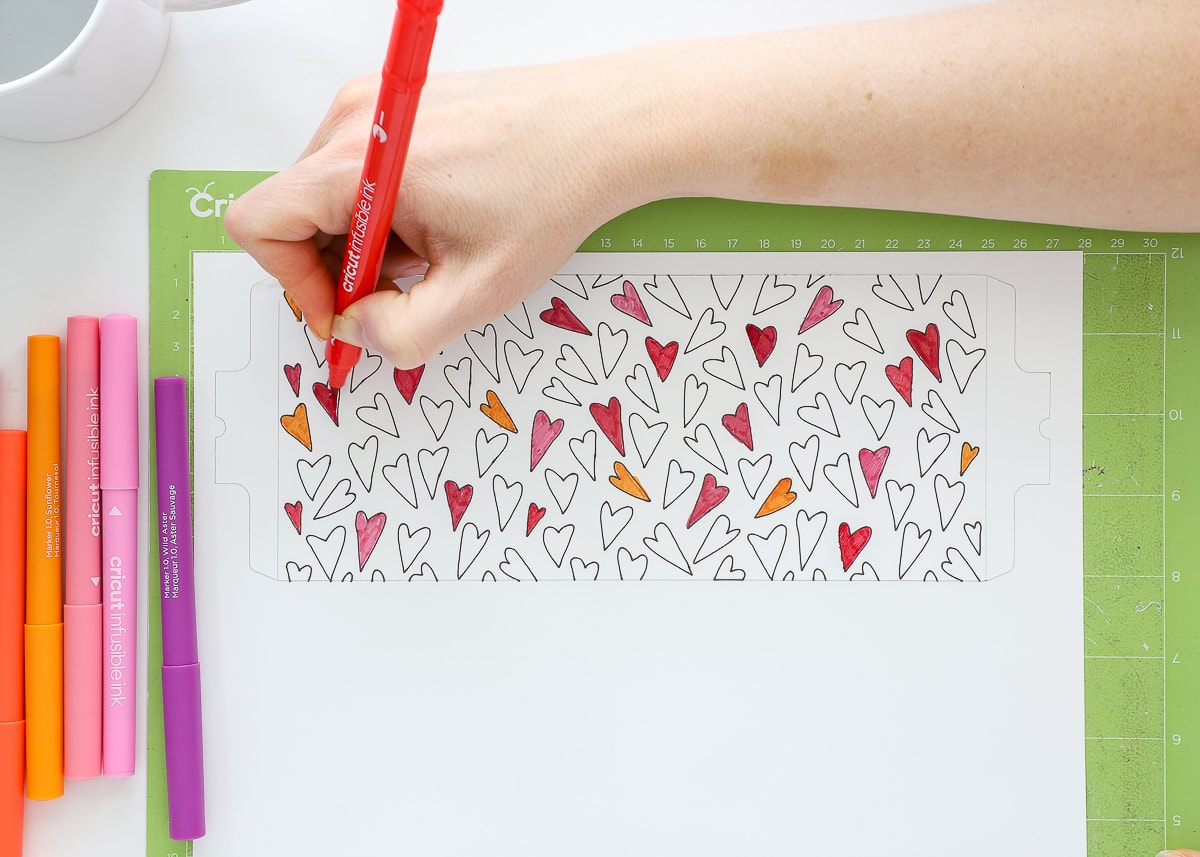
- Your Cricut machine can only “draw” designs (outlines), it cannot color in. If you want a solid color design, you need to either cut it from Infusible Ink Transfer Sheets or use the Pens to color in a design by hand.
- Designs with Cricut Pens don’t have to be created with your machine. You can draw a design with the Pens, Markers, or Free-Hand Markers completely by hand.
- You can layer Transfer Sheet designs and Pen designs over each other. It is recommended that you apply the Transfer Sheet layer first, followed by the Pen details on top. You can see detailed instructions for layering Infusible Ink Transfer Sheets with Pens HERE.
Infusible Ink Blanks
Here’s one of the most important aspects of working with Cricut’s Infusible Ink: you can only use Infusible Ink Transfer Sheets and the Pens/Markers on Cricut Infusible Ink “Blanks.” These products, also made by Cricut and labeled with “Infusible Ink Compatible,” are designed specifically to work with Infusible Ink products. Below are the currently-available products, but the collection is expanding all the time!
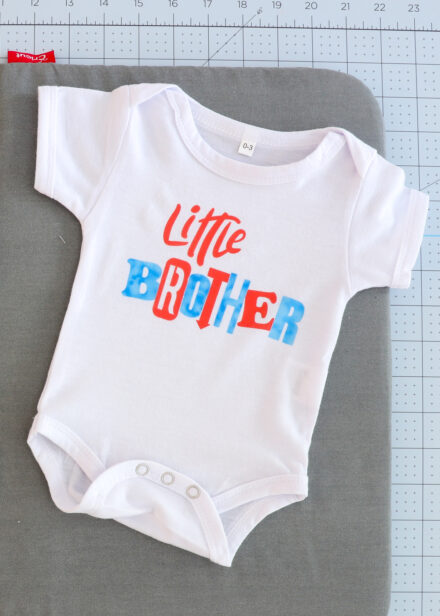
- T-Shirts
- Onesies
- Tote Bag
- Pillow Covers
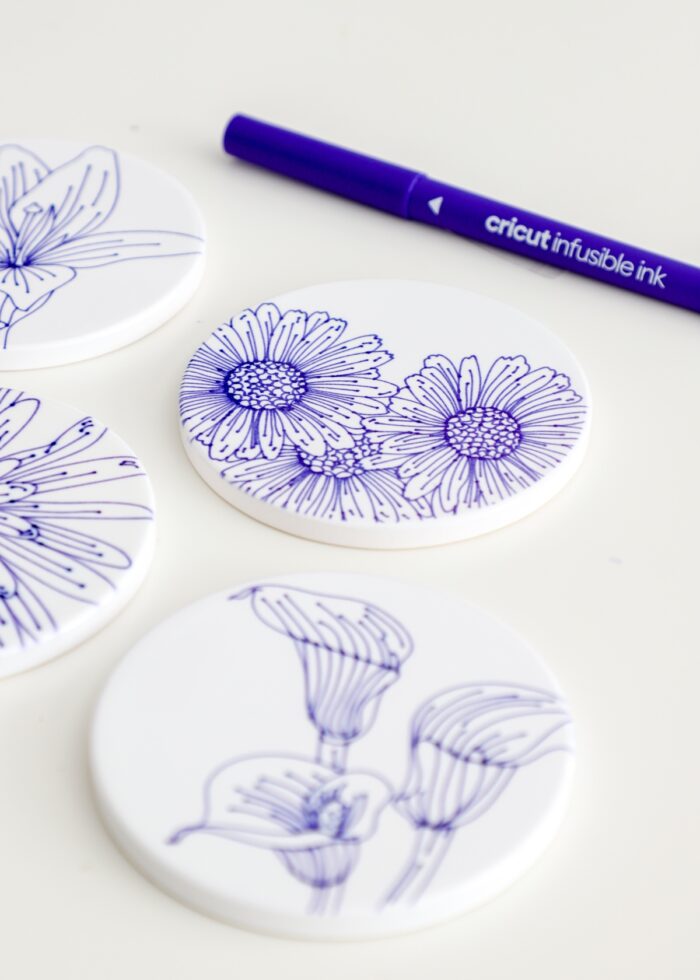
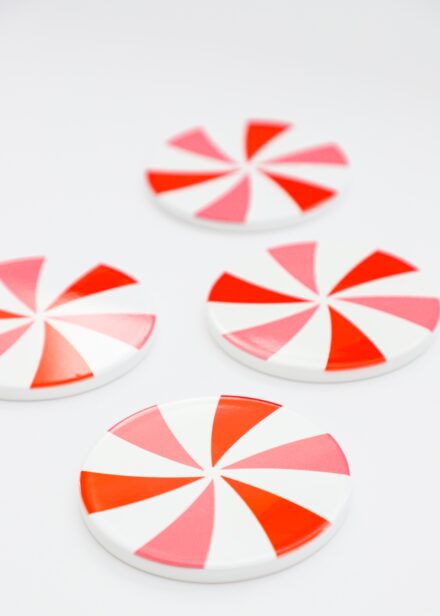
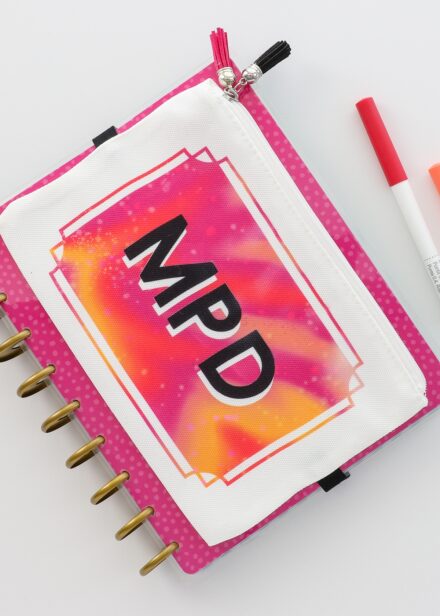
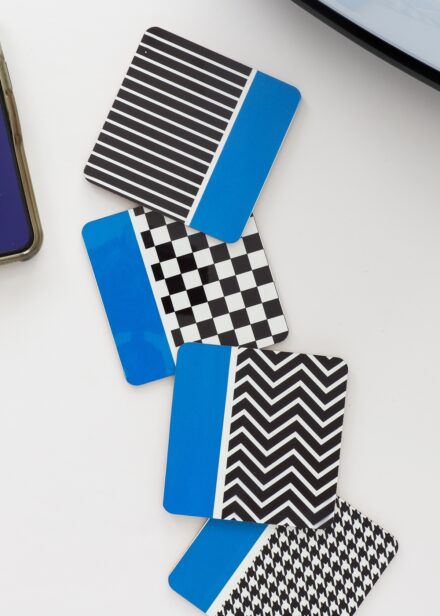
- Coasters – Square, Circle
- Wine Bags
- Cosmetic Bags
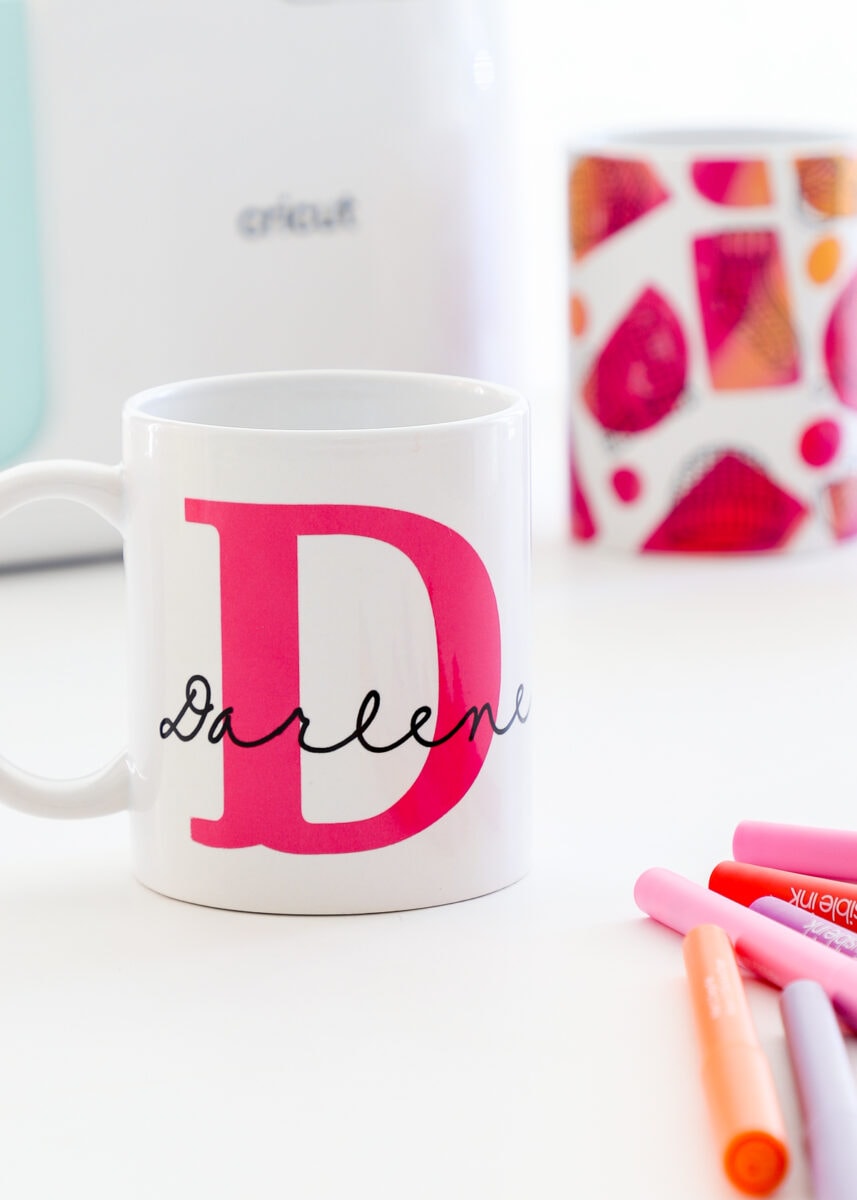
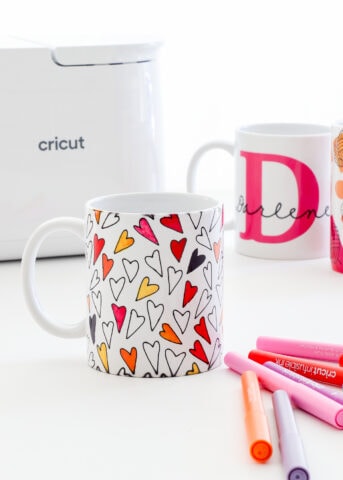
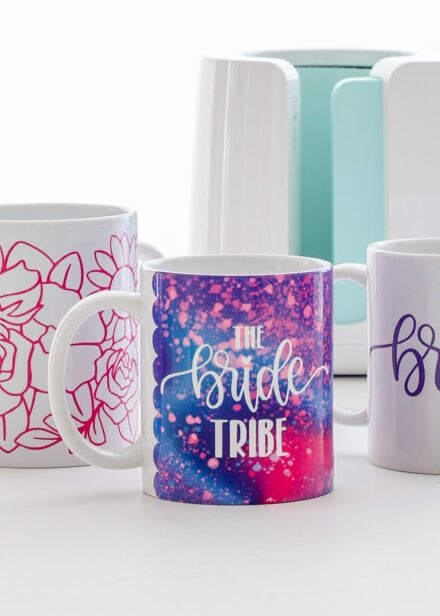
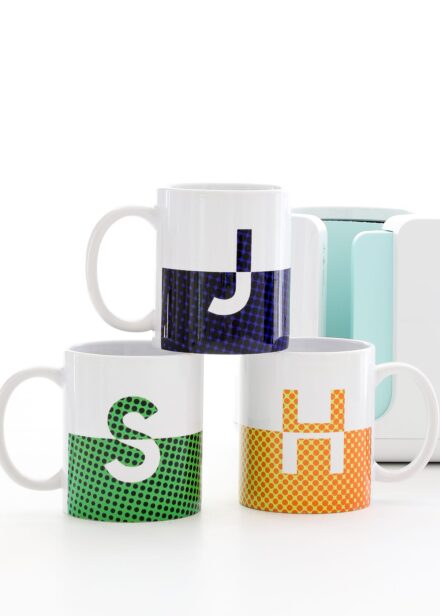
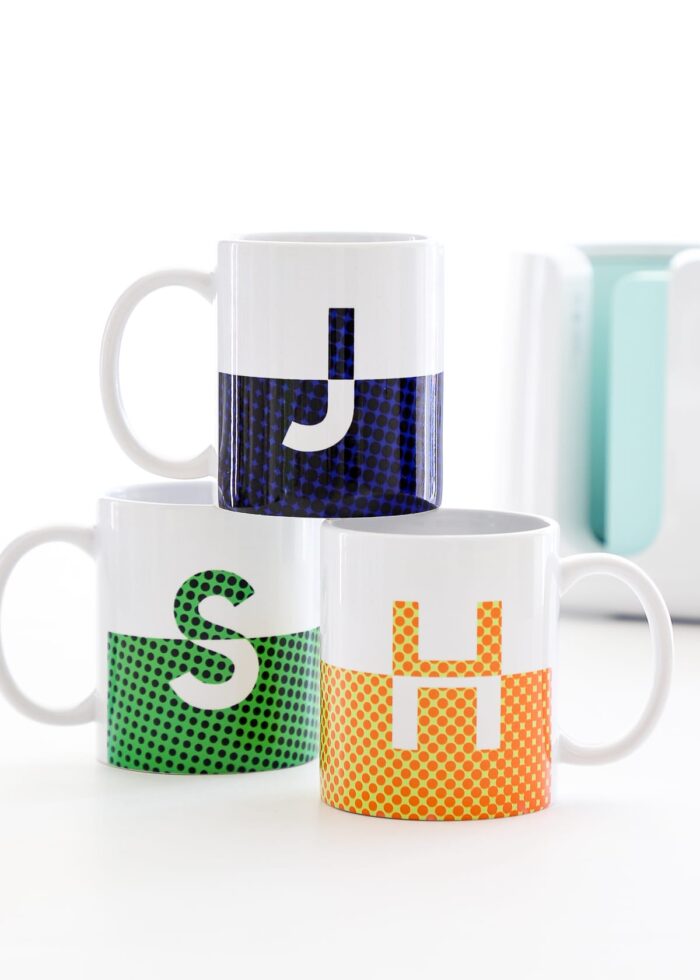
- Mugs
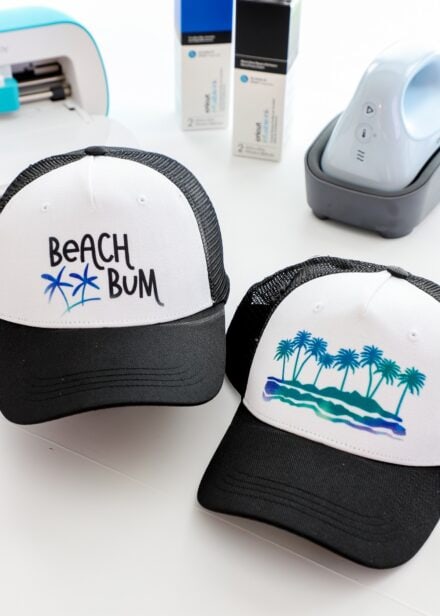
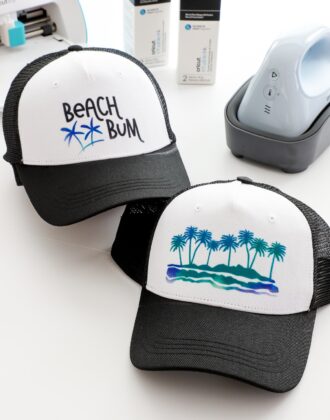
- Hats – Trucker, Ball Cap
Other Things to Know About Cricut Infusible Blanks
Because Infusible Ink products should only be used on Cricut’s blanks, you CANNOT use any ol’ polyester or cotton shirt in your drawer or mug you find at Target. Thankfully, as Infusible Ink/sublimation becomes more and more mainstream, more and more blanks are becoming available! A quick look for on Amazon will show “sublimation compatible” earrings, keychains, tumblers, picture frames, puzzles, mouse pads, and more! Yes, your Cricut Infusible Ink products will work on these blanks.
Cricut Heat Presses
For optimum results, it is highly recommend that you use a heat press (rather than an iron) on all Infusible Ink projects. Infusible Ink transfers require a higher degree of heat than can be reached with a household iron, and they also need a large, even, steam-free pressing surface.
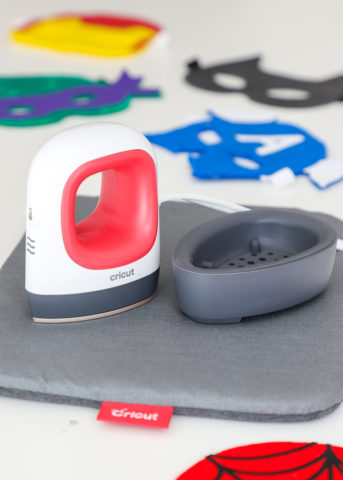
That said, not every heat press can be used to make every Infusible Ink project. Here is a quick guide of which presses can be used with which blanks:
- Cricut EasyPress (including the Mini) – T-shirts, Onesies, Coasters, Tote Bags, Zipper Pouches, Pillowcases
- Cricut Mug Press – Mugs
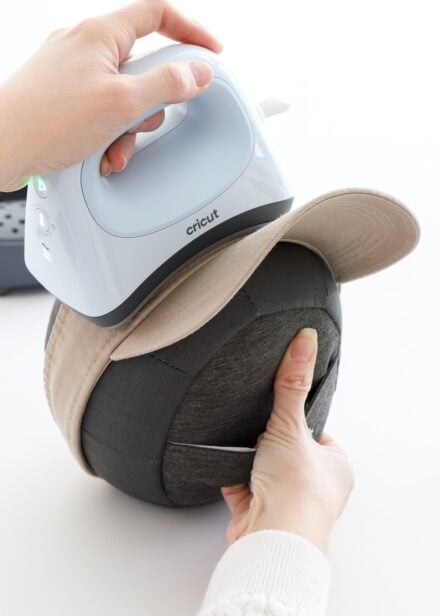
- Cricut Hat Press – Hats
- Cricut Autopress – T-shirts, Onesies, Coasters, Tote Bags, Zipper Pouches, Pillowcases
Supplies Needed for Infusible Ink Projects
Although the exact supplies needed with differ based on what kind of Infusible Ink project you’re tackling, here are the general supplies you’ll need to have on hand:
- Infusible Ink – Pens or Transfer Sheets
- Compatible Blank – Mug, shirt, etc
- Cricut Machine – Cricut Explore Series | Cricut Maker Series | Cricut Joy
- Standard Grip Mat
- Premium Fine Point Blade – the one that comes with your machine
- Cricut EasyPress – Pick the one suitable for your project
- Cricut EasyPress Mat – when using Cricut EasyPress
- Cricut Heat App or Cricut Heat Guide
- Heat Resistant Tape
- Various Papers
- White Cardstock
- Laser Copy Paper – For Pen projects only
- Butcher Paper
So…How Does Infusible Ink Work?
One thing to know about using Infusible Ink is that it requires a lot of steps that, although easy, must be done in a specific order for your project to turn out right. And more importantly, these steps vary slightly based on which Infusible Ink product you’re using (Pens versus Transfer Sheets) and which blank you’re using (coasters versus shirts versus mugs versus hats).
Because of all these slight variations, it can be really difficult to remember exactly what to do and when (even for me who does this all the time!) So whenever you’re doing an Infusible Ink project, I actually recommend pulling up step-by-step instructions directly from Cricut either at this link or using the Cricut Heat App (which also gives picture visuals alongside the instructions).
That said, let me show you (generally) how the process works so you can understand the transfer process a little better!
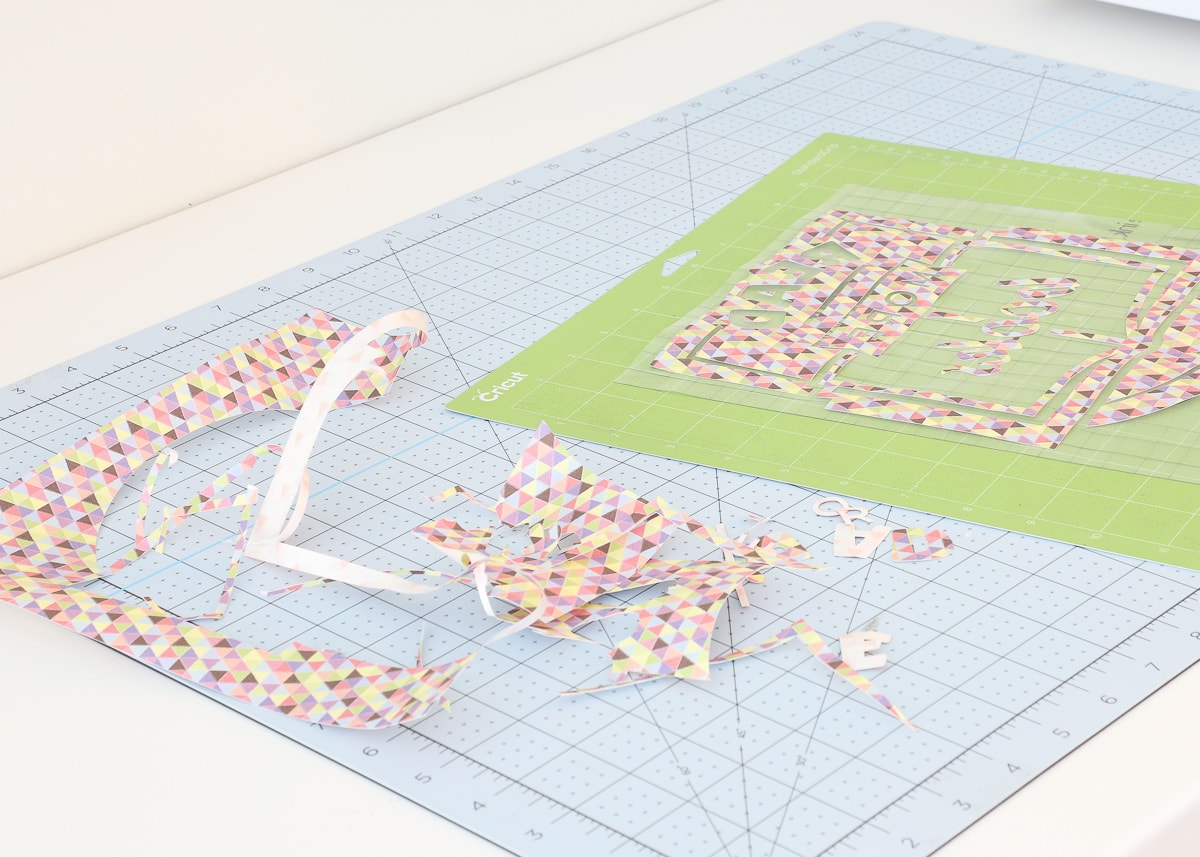
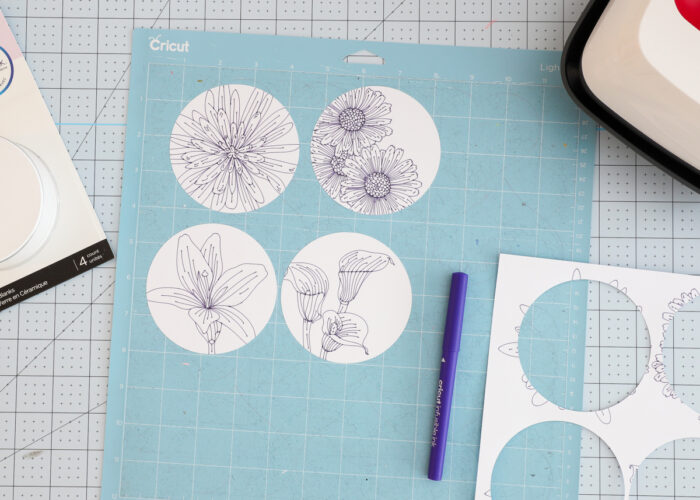
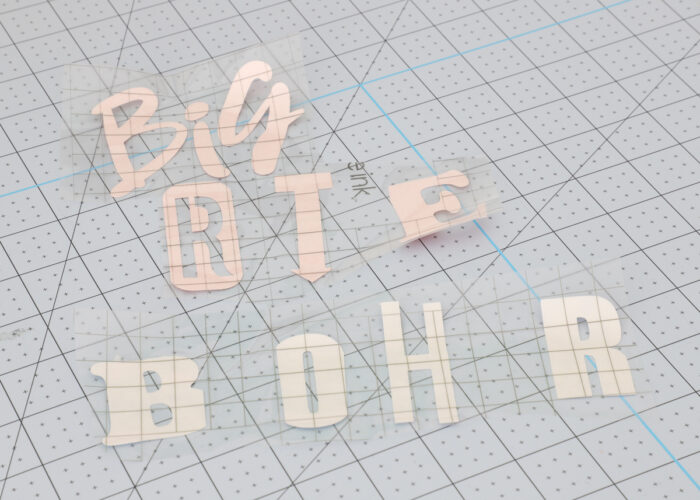
You will start by either cutting your design (from Transfer Sheets) or drawing it (with Pens) using your Cricut machine or by hand. If cutting out a design from Transfer Sheets, you’ll need to “weed” it using your fingers (not a weeding tool) and a tweezers (for little details you can’t get out by hand).
Want to save this post?
After removing any traces of debris from your blank with a lint roller (fabric items) or lint-free cloth (ceramic items)…
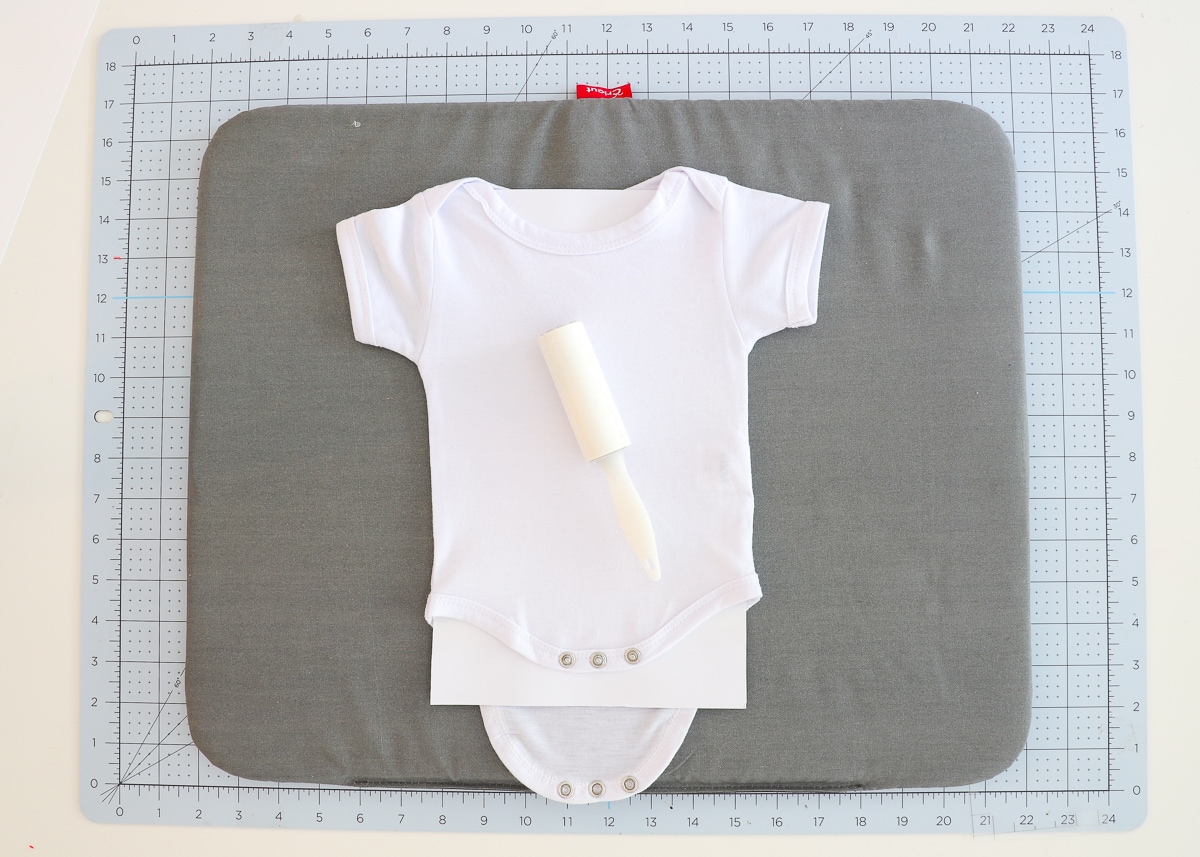
…place the design (ink-side down) onto the blank and secure it with Heat Resistant Tape.
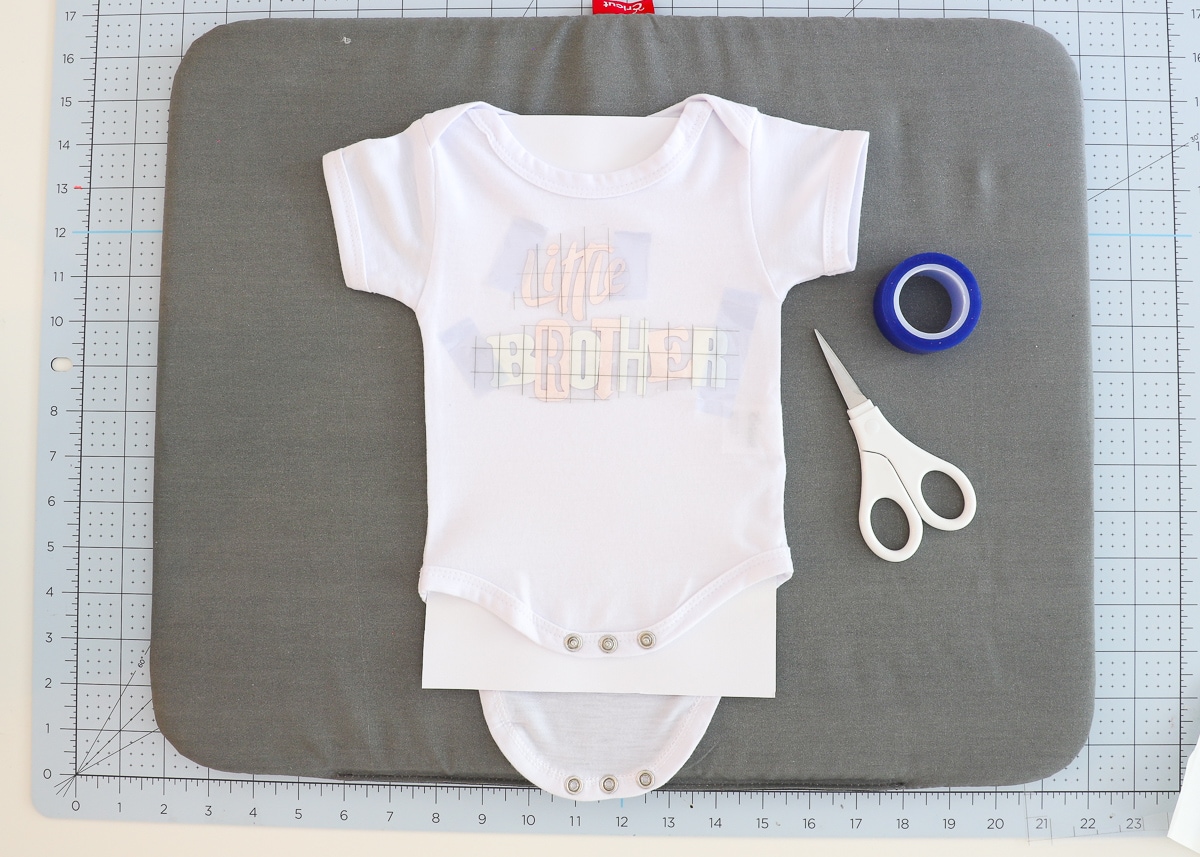
You then use a Cricut EasyPress according to the Cricut Heat Guide or the Cricut Heat App to infuse the ink from your cut/drawn design into the blank.
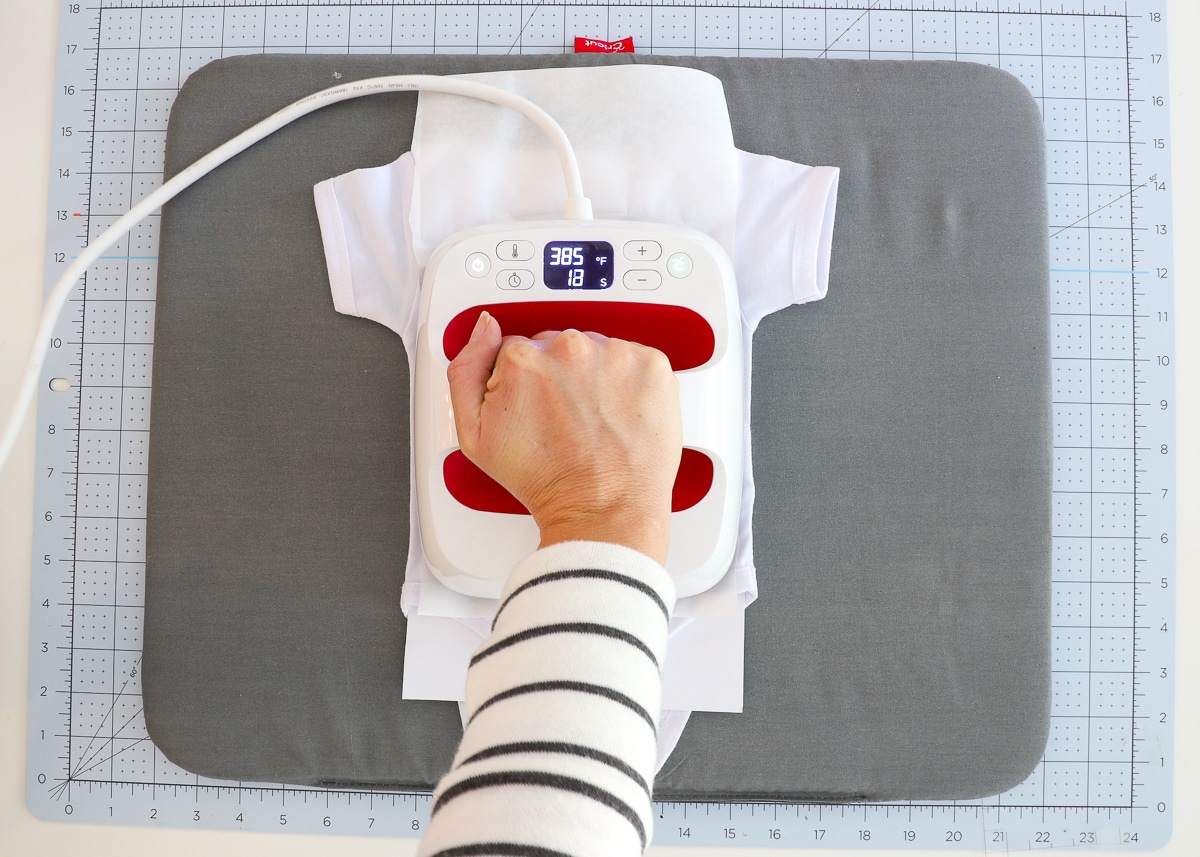
Once cool, remove the paper cut to reveal a vibrant, permanent design infused into your blank!
The Procedure Changes for Each Blank
As mentioned above, depending on what blank you’re using, the specifics of the process will change slightly. So while you may think you have the hang of how Infusible Ink works on t-shirts, you will want to pull up and review the instructions if you move on to a tote, coaster, mug, etc.
For even more help, as well as a bunch of my own tips and tricks for specific blanks, refer to my in-depth tutorials below:
- Infusible Ink Transfer Sheets on Mugs
- Infusible Ink Pens on Mugs
- Infusible Ink Transfer Sheets on Hats
- Infusible Ink Transfer Sheets on Coasters
- Infusible Ink Pens on Coasters
It’s Not As Overwhelming As It Appears
My guess is when you originally opened your Cricut machine and attempted to make your first project, you were super overwhelmed. But in no time, you (hopefully) were able to navigate Cricut Design Space and crank out projects without any trouble!
When you use Cricut Infusible Ink for the first time, it will be just like that. Your first may feel slow and tedious and maybe even a little bit scary. But after you do the first one, you’ll want to try it again (and again and again) because the transfer results are so jaw-dropping. I promise: once you get the hang of the process, all those tedious steps won’t feel like a big deal at all!
Infusible Ink FAQs
As much as I’ve covered already, let me clear up some other frequently asked questions!
Is Infusible Ink the Same as Sublimation?
Technically, yes. “Sublimation” is the exact same process of transferring permanent, long-lasting ink designs onto a compatible blank via heat. “Infusible Ink” is just Cricut’s branded version. So while Cricut recommends using their Transfer Sheets and Pens on their blanks, you can indeed use other “sublimation compatible” blanks with Infusible Ink products.
How Is Infusible Ink Different Than Iron-On Vinyl (HTV)?
Iron-on vinyl (or heat-transfer vinyl/HTV) sits on TOP of the fabric, meaning that if the shirt stretches or shrinks (from wash or wear), the design won’t. This can distort the design and cause it to wrinkle, flake, or peel. Iron-on vinyl is also suuuuppper heat sensitive. If you leave your heat on it too long, the vinyl can easily melt, wrinkle or distort. Finally, layering iron-on vinyl is quite tricky because of the heat/melting problem…lots of layers = lots of heat = melted iron-on.
On the other hand, Infusible Ink fuses with the fabric fibers themselves. This means that (even with lots of washing or wearing), if the fabric stretches, so does the design! And because the ink transfers to the blank, it’s less prone to melting. In fact, I had to re-heat and re-heat and re-heat one of my designs and there was no significant effect!
Do You Have to Use a Cricut Machine with Infusible Ink?
Nope! Both the Transfer Sheets and Pens can be used by hand. Unlike vinyl or iron-on that has to be cut with a “kiss cut” to allow for transfer, you can cut/draw stripes, dots, letters or other designs with a scissors or draw with the pens and apply the designs to your blank. In fact, many crafters are having their kids draw their own art with the Pens and Markers and fusing them to mugs, t-shirts, and more!
Do You Have to Use a Cricut Easy Press for Transfers?
Yes…this is one you do need to have. Since Infusible Ink has very precise heat, time, and pressure requirements, having a Cricut EasyPress will ensure greater success with your transfers. A household iron is not recommended since it cannot get hot enough, nor does it have a large, even heating surface.

How Do You Wash Infusible Ink Projects?
Any ceramic products (e.g., coasters, mugs) can get put right into the dishwasher and you won’t (ever!) see any fading, bleeding, etc.
To clean fabric items, such as shirts, onesies, and tote bags, machine wash on cold (with mild detergent and without bleach) then tumble dry on low. Iron if needed (medium heat, no steam) and do not dry clean.
Can You Combine Infusible Ink with Iron-On Vinyl or Vinyl?
Sure! If desired, you can combine Infusible Ink with other vinyls, including specialty versions such as holographic or glitter. When doing this, be sure to apply your Infusible Ink layer first and then top it with your iron-on or vinyl layer.
Can I Fix My Infusible Ink Project?
Admittedly, one of the scariest things for me as a crafter working with Infusible Ink is its permanence. Since this is ink and you are fusing it to your blank, you literally only get one shot. After you apply it, there is NO way to remove it, NO way to peel it off.
So while the results are vibrant and amazing and super durable, you do need to pay attention to what you’re doing (especially since the supplies aren’t exactly inexpensive). So please give it a try and please have fun, but do follow all the steps outlined here for each specific blank so you end up with truly awesome results!
Why Should I Bother With Infusible Ink?
Infusible Ink is one of those “you’ve got to see it to believe it” projects. In pictures, it can be really difficult to decipher how different Infusible Ink projects look AND feel compared to their vinyl and iron-on counterparts. But now having made mugs and shirts and pouches and coasters, I can tell you that the reveal process NEVER gets old. When you pull away the paper to reveal your vibrant, permanent design fused into your blank, you won’t believe that you can actually achieve such professional-quality results right at home!
Infusible Ink is expensive. The process can be quite tedious. And it does take practice to get really good, consistent results. But because Infusible Ink provides super vibrant and practically peel-proof and wash-proof transfers, it is absolutely my choice not just for wearables, but also for anything that goes into the dishwasher too! Give it a try once, and I suspect you’ll understand the allure of it all!
Megan
9 Comments on “Cricut Infusible Ink | A Complete Get-Started Guide!”
Hi Megan
I can’t seem to find a direct answer to my question. When using infusible ink pens, will the Cricut maker color in the design, or does it only draw the outline? Thank you
Hi Teri!
Thanks for reaching out! The answer to your question is both!
The Infusible Ink pens, when inserted into a Cricut machine, will act like any other Cricut pens. They will write, draw, and outline (as designated by the design in Cricut Design Space). If you aren’t quite clear on how pens work in general, I have a very detailed tutorial here: https://thehomesihavemade.com/2019/05/how-to-use-cricut-pens-a-comprehensive-guide/
That said, the Cricut machine will not typically “color in.” But! You CAN color in the drawn/outlined designs by hand with the Infusible Ink pens before transferring them to your project. In fact, Cricut recently released pens that are designed to do just that!
I hope that clears it up for you a little bit! Let me know if you have any other questions!Megan
Super info! Thanks. Question: can I use the infusible ink on any t-shirt? Or any item or does it have to be a Cricut blank? I am all new to Cricut still. Trying to get info on all the things I can do. As soon as I get some free time I will start playing!!
Hi Sue,
Just replying as I’ve used infusible ink myself and as long as it has a high polyester count (100%-85% from what I’ve heard), and a lighter color (white, cream, light gray) then the ink will be infused into the blank better.
I’ve used it on white 100% polyester bags I’ve purchased from Michaels and it worked great!
Thanks for that info. I wouldn’t use the infusible inks because it said they could only be used with cricut blanks, which are way too expensive for me. I might be tempted to try if I can use a cheap polyester blank.
I love the invisible ink! It’s so easy to weed and use.
Can you use infusible ink on glass and wood?
Yes, it is too expensive, and…
…No, nope, not gonna happen, no way, no how. I got all the way to You HAVE To Use ONLY CRICUT supplies. You have to have the Easy Press 2, not even “just” the original Eqsy Press, but specifically the 2, a two hundred dollar itemi. You have to have CRICUT BLANKS. These are barriers to entry for normal, everyday, users. HTV and sickly vinyl come in “generic” versions and competitor versions. This puts a downward pressure on price; and why monopolies are illegal in the US. When an eco system is locked closed it artificially increases the cost for consumers well above what they would pay in a competitive market…think Apple and how it costs more than twice what the nearest competitor charges…right down to the power block that Apple refuses to ship with new devices. This is unlike the “IBM clone” personal computers”, or PCs for short, where there is a ton of competition and you can get an entire computer for a tiny fraction of the cost of an Apple branded computers with nearly identical hardware components.
Yeah, again, NO! I’ll look for the next brand’s entry, and then wait for the whole process to become generic before I want to go near it.
Hi there!
Thanks so much for this comment! I did want to let you know that at the time this post was written (2+ years ago), Cricut was one of the few retailers who offered sublimation products. Now, there are lots and lots and lots of “blanks” available. And while Cricut still maintains that “for best results, use Cricut blanks” there are certainly other (cheaper) options to try now!
Hope that helps!
Megan