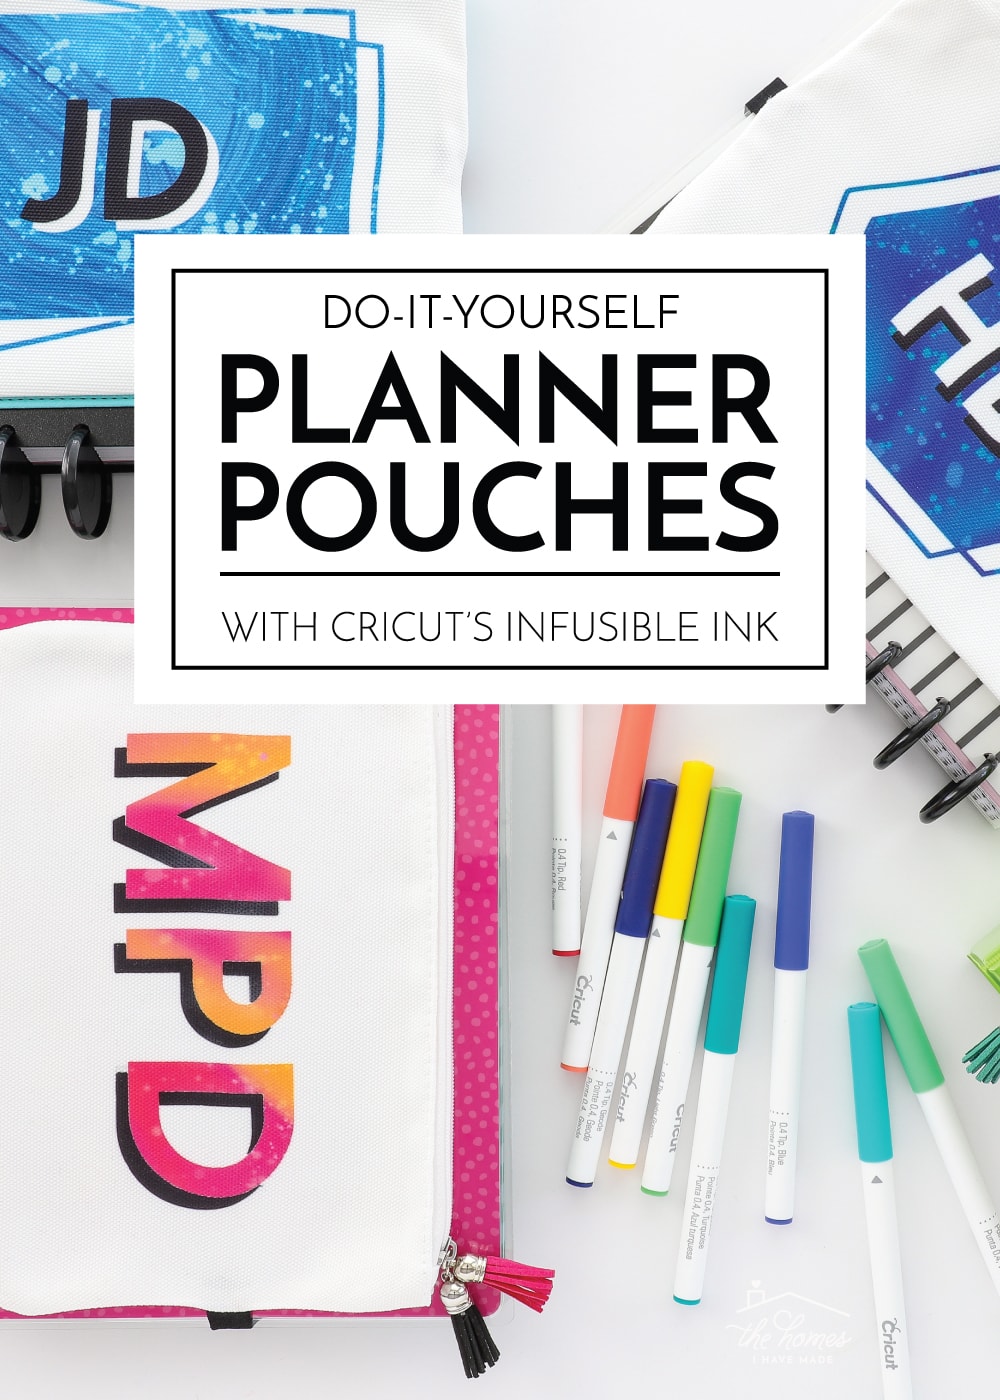
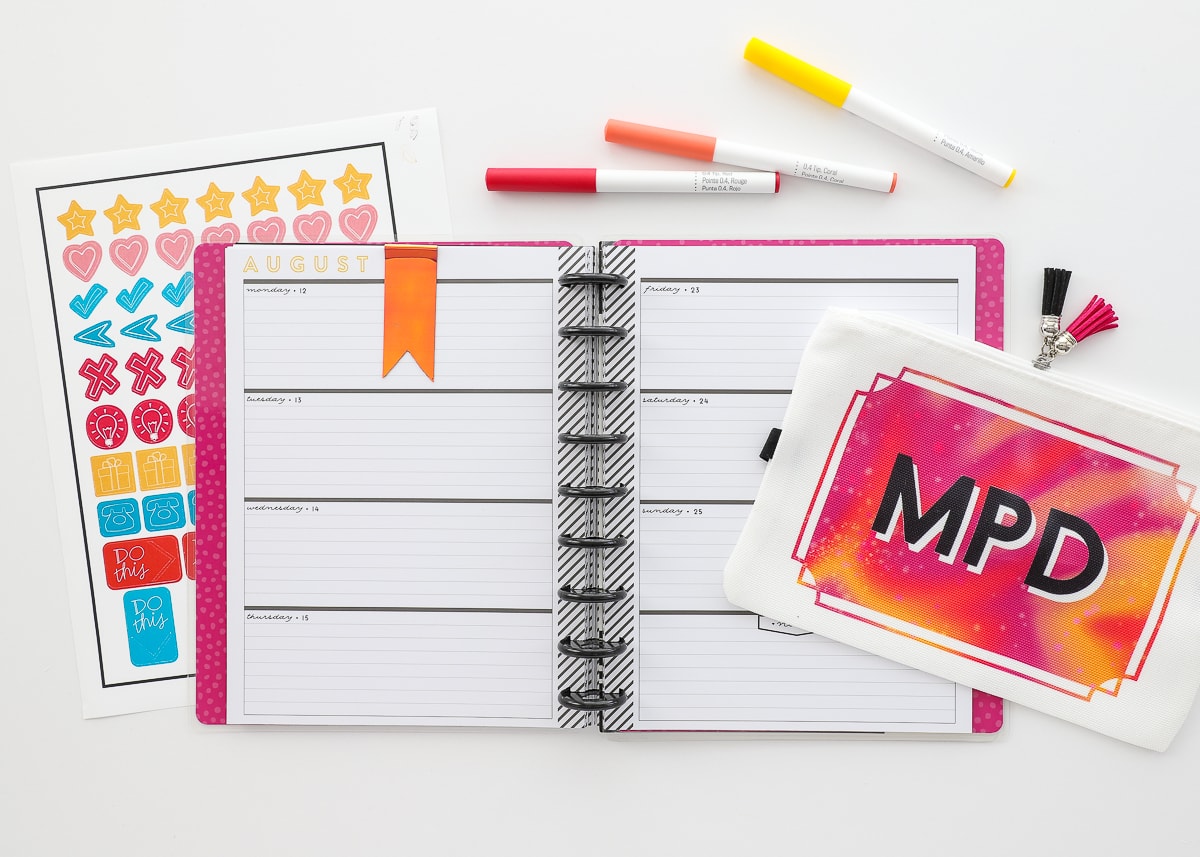
DIY Planner Pouches With Cricut’s Infusible Ink
When I learned Cricut was releasing a new line of Infusible Ink blanks (including zippered cosmetic bags, throw pillow covers and wine bags), I was so excited. And pretty much as soon as I got the new zipper pouches in my hands, I wasted no time applying some bold monograms and hacking them into super adorable DIY Planner Pouches. I’m seriously obsessed with this project and just know you’ll be able to find all sorts of uses for these stylish pouches in your life and home!
Admittedly, of all the Cricut crafts I do, I don’t work with Infusible Ink much. I first experimented with it here, making Big and Little Brother t-shirts for the boys when Jack was born. Although I was really impressed with the ease, quality, and permanence of the color transfers, t-shirts just aren’t something I make that often. So when Cricut released other blank options, I was so excited to have a reason to play with Infusible Ink some more!
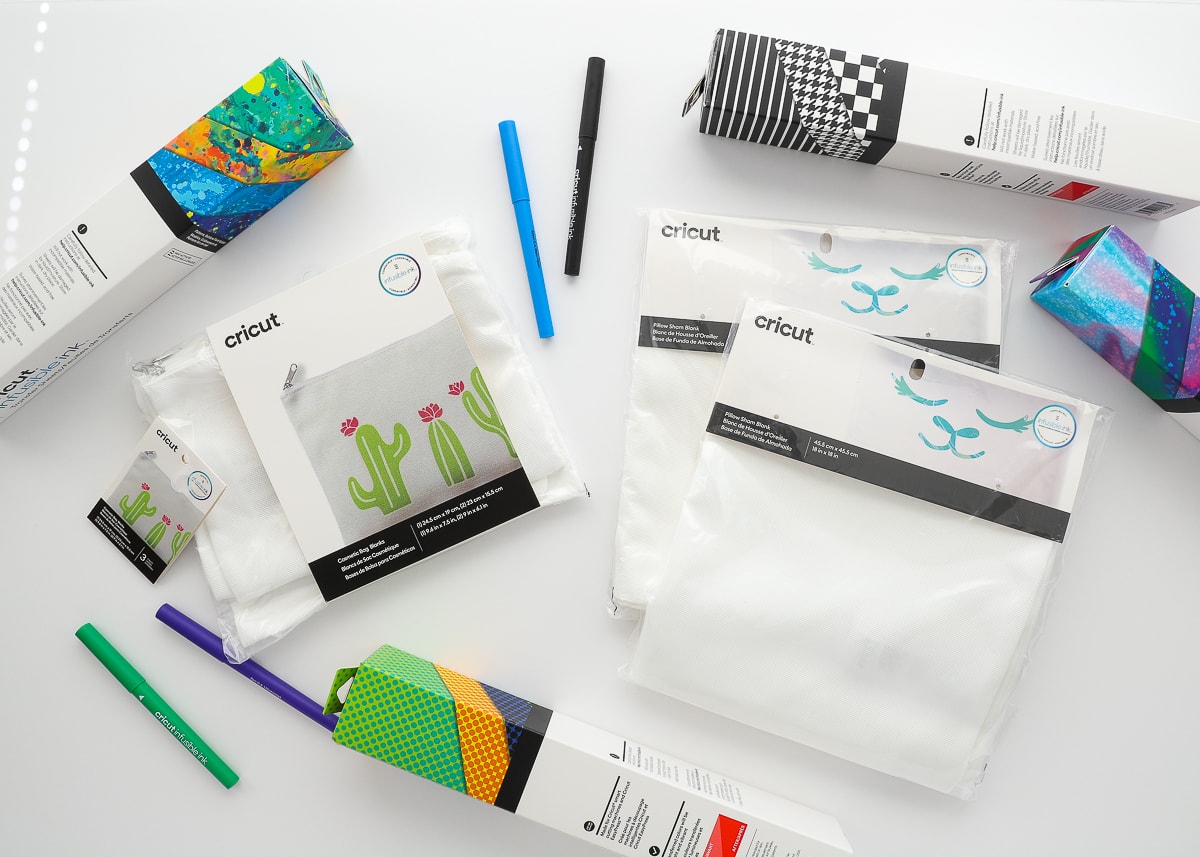
Cosmetic Bags | Pillow Cases | Infusible Ink Transfer Sheets | Infusible Ink Pens
What Is Infusible Ink?
Infusible Ink is exactly what it sounds like. Ink that infuses into your projects. Unlike standard vinyl or iron on (heat-transfer vinyl) that sits on top of the surface and is held on by adhesive, Infusible Ink designs become part of the fabric/surface and do not fade, flake, or peel. Colors and patterns are provided by transfer sheets (that you cut with your Cricut) or pens, and are fused to compatible blanks (totes, shirts, pouches, etc) with a heat source (e.g., Cricut EasyPress). If you’ve been frustrated by t-shirts, bags, or other projects where the vinyl has peeled away, shrunk or warped, Infusible Ink is definitely something to try!
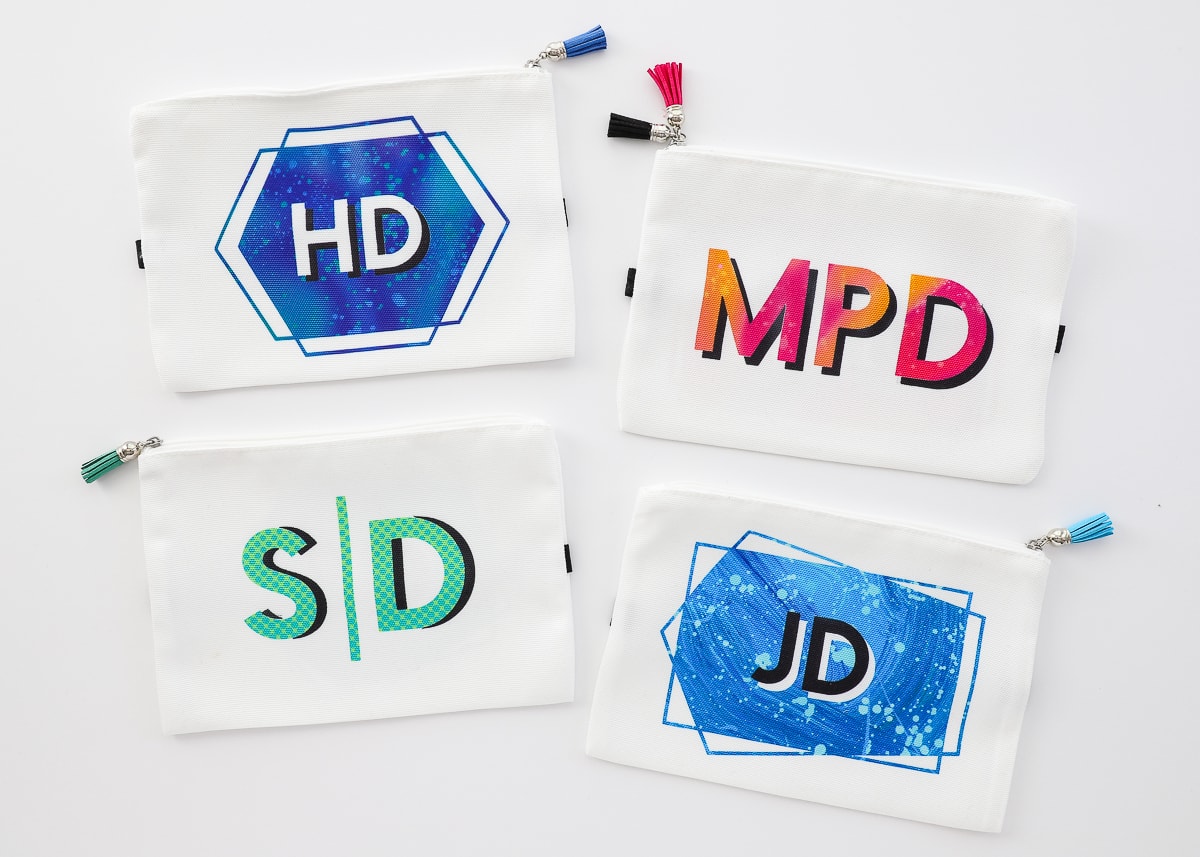
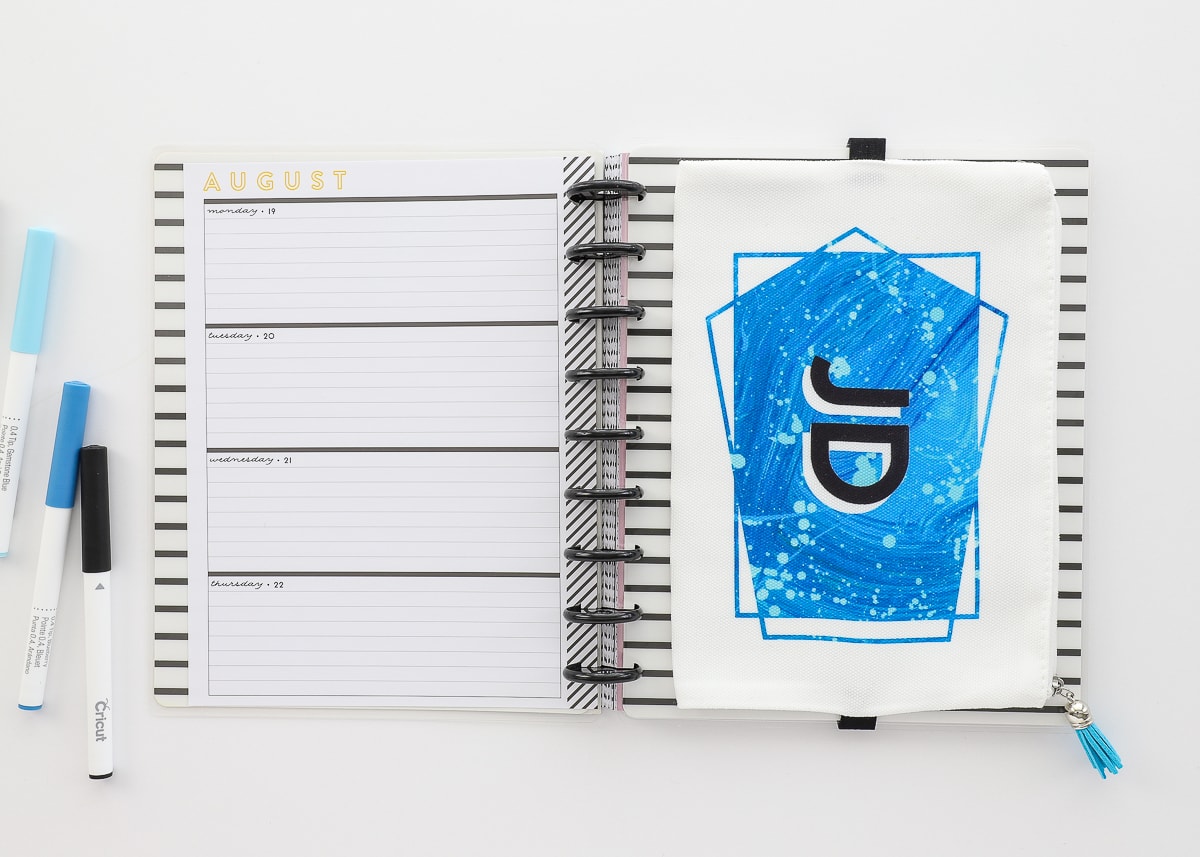
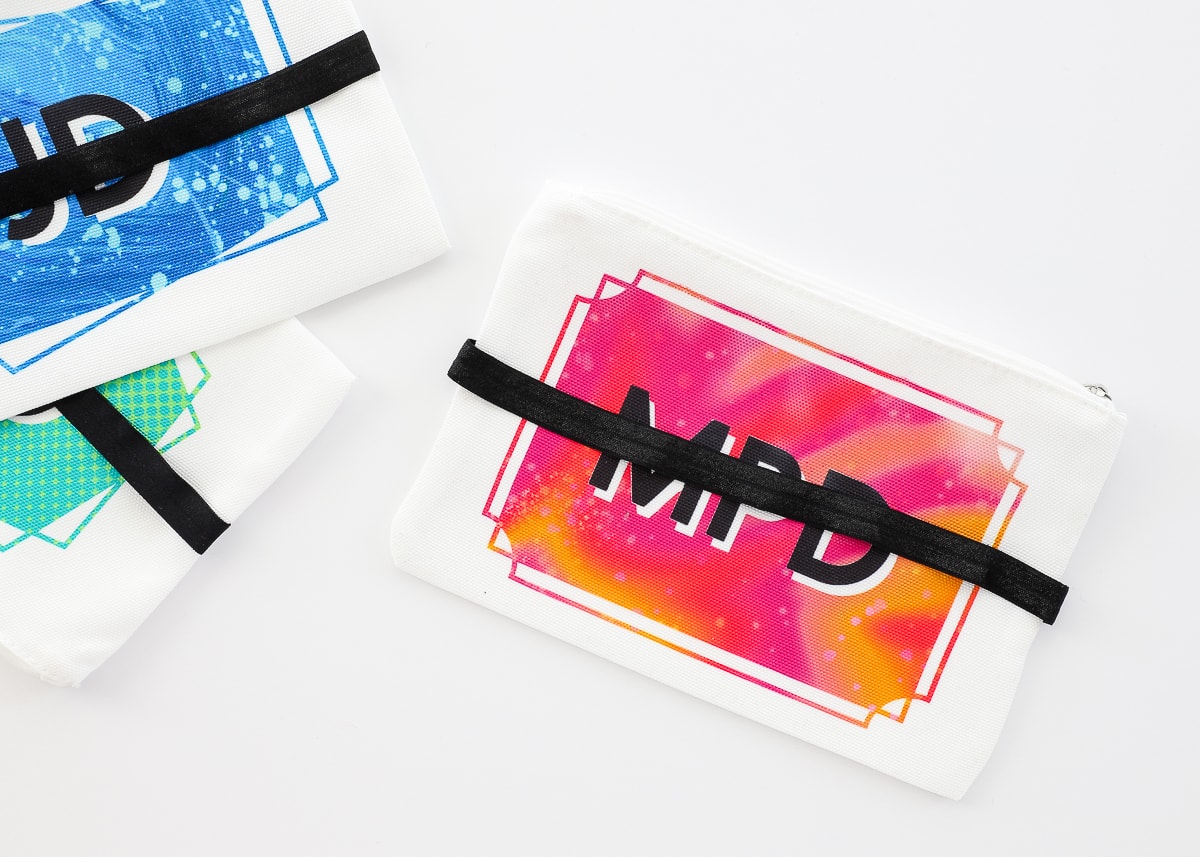
Adding vibrant, graphic monograms to the new cosmetic bag pouches was a fairly obvious and predictable choice for me. I even added different variations on each side (letters and framed letters). However, I then took the pouches a step further and added a simple elastic strap and tassel pull so they can be secured to and used with planners, journals and more!
So whether you’re a planner addict and need a stylish way to hold your pens, stickers, and other accessories…
….or you’re getting kiddos ready for school and want them to have their COVID survival supplies always at the ready…

…these DIY Planner Pouches are fun, simple, oh-so-customizable and highly, highly addicting to make! Let me walk you through it!
What You Need
Here is what you need to make these DIY Planner Pouches:
MATERIALS NEEDED:
- Cosmetic Bags – These come in sets of 3: 2 smaller and 1 bigger (I used the smaller size for this project)
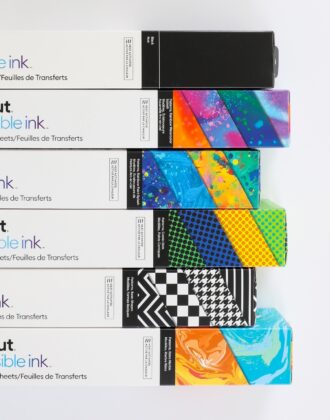
- Black Infusible Ink – The solid black creates the shadow on the letters, but any solid color transfer sheet could work
- Patterned Infusible Ink Transfer Sheets – There are so many fun patterns to pick from, a single box will usually give you several patterns to play with!
- Fold-Over Elastic – 10″ per pouch (I used this black kind, but these colors would also be super fun!)
- Mini Suede Tassels – Completely optional; use colors that coordinate with your Infusible Ink transfer sheets.
TOOLS NEEDED:
- Cricut Machine – This project is compatible with the Joy, Explore Air 2, and Maker!
- Cricut EasyPress – (I prefer the 6×7″ size)
- Cricut EasyPress Mat
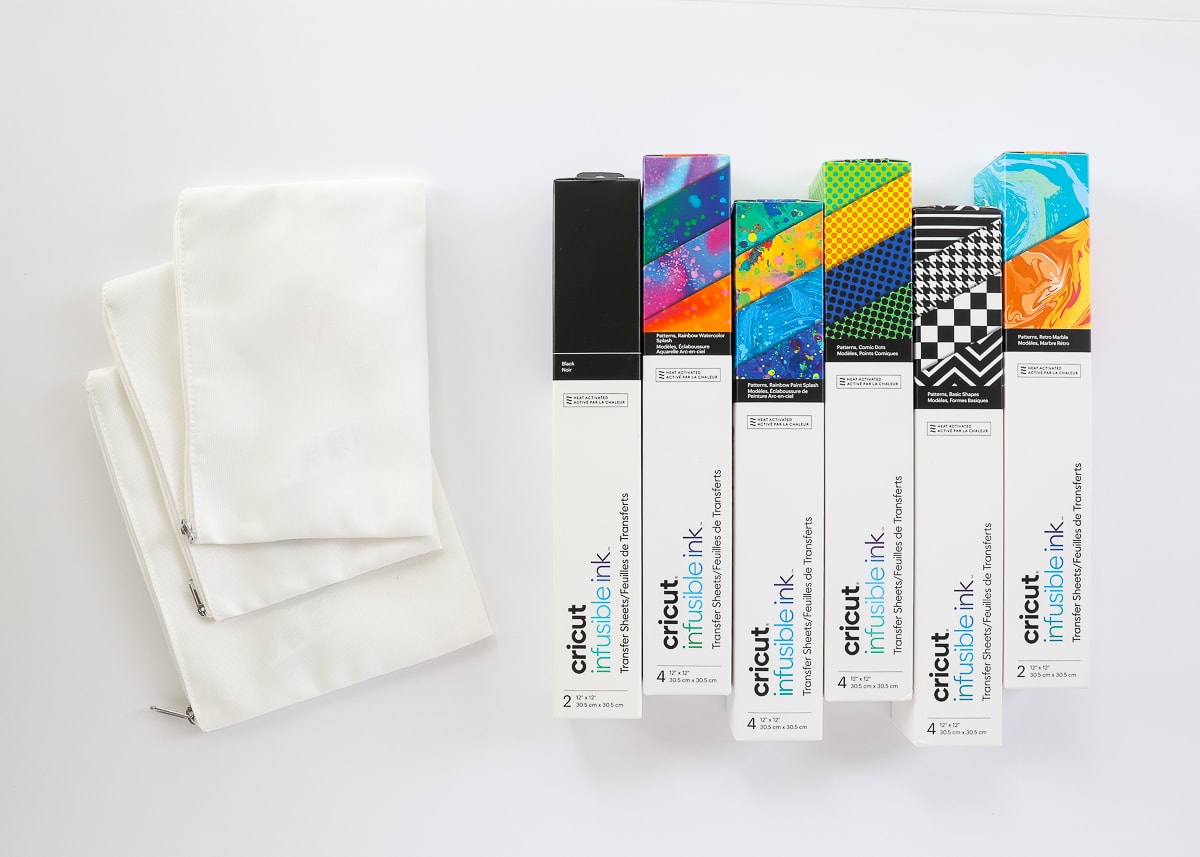
In addition to new blanks, Cricut also recently launched a whole slew of new Infusible Ink Transfer Sheets. From vibrant watercolor designs to funky dots and geometrics, there are now so many amazing choices for your projects. For me, one of the hardest parts was picking out which patterns to use!
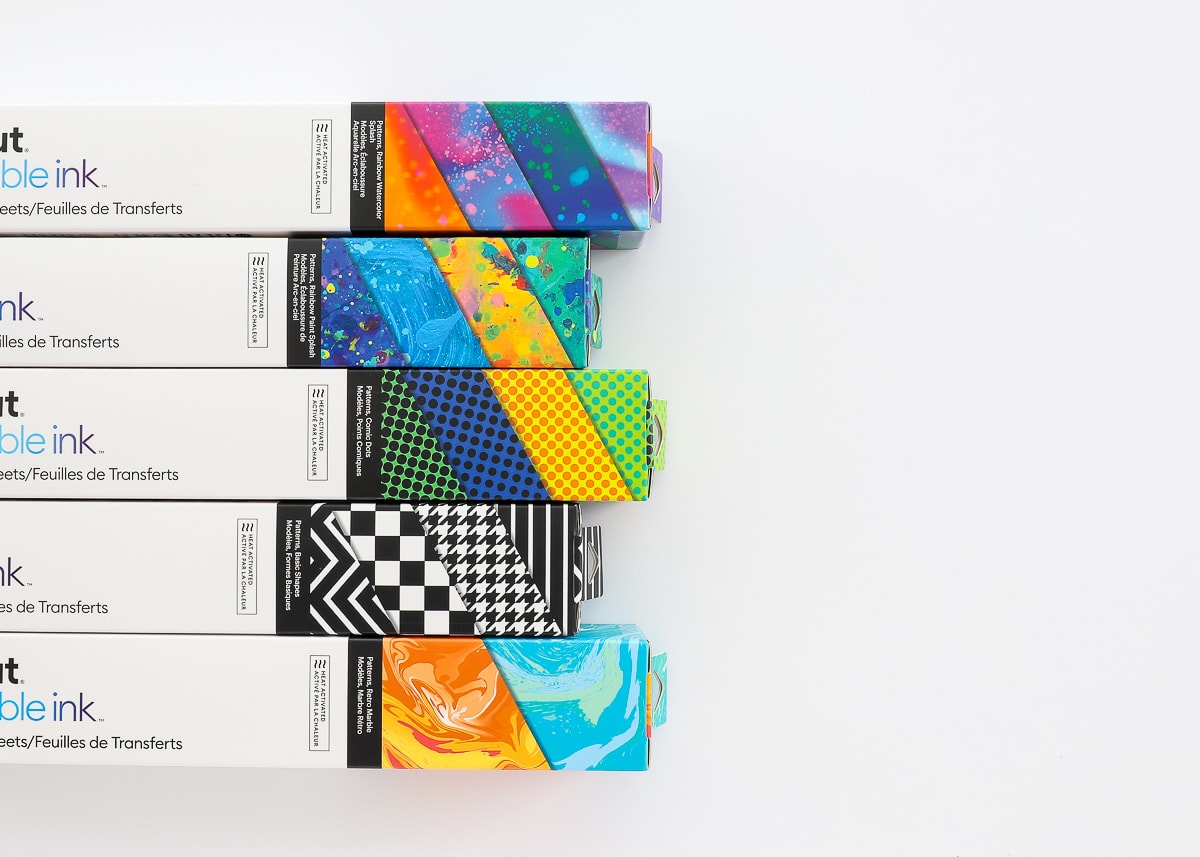 Rainbow Water Color Splash | Rainbow Paint Splash | Cosmic Dot Rainbow | Basic Shapes | Retro Marble
TIP! I always like to get boxes with 2-4 patterns included so you have lots of options for a variety of projects!
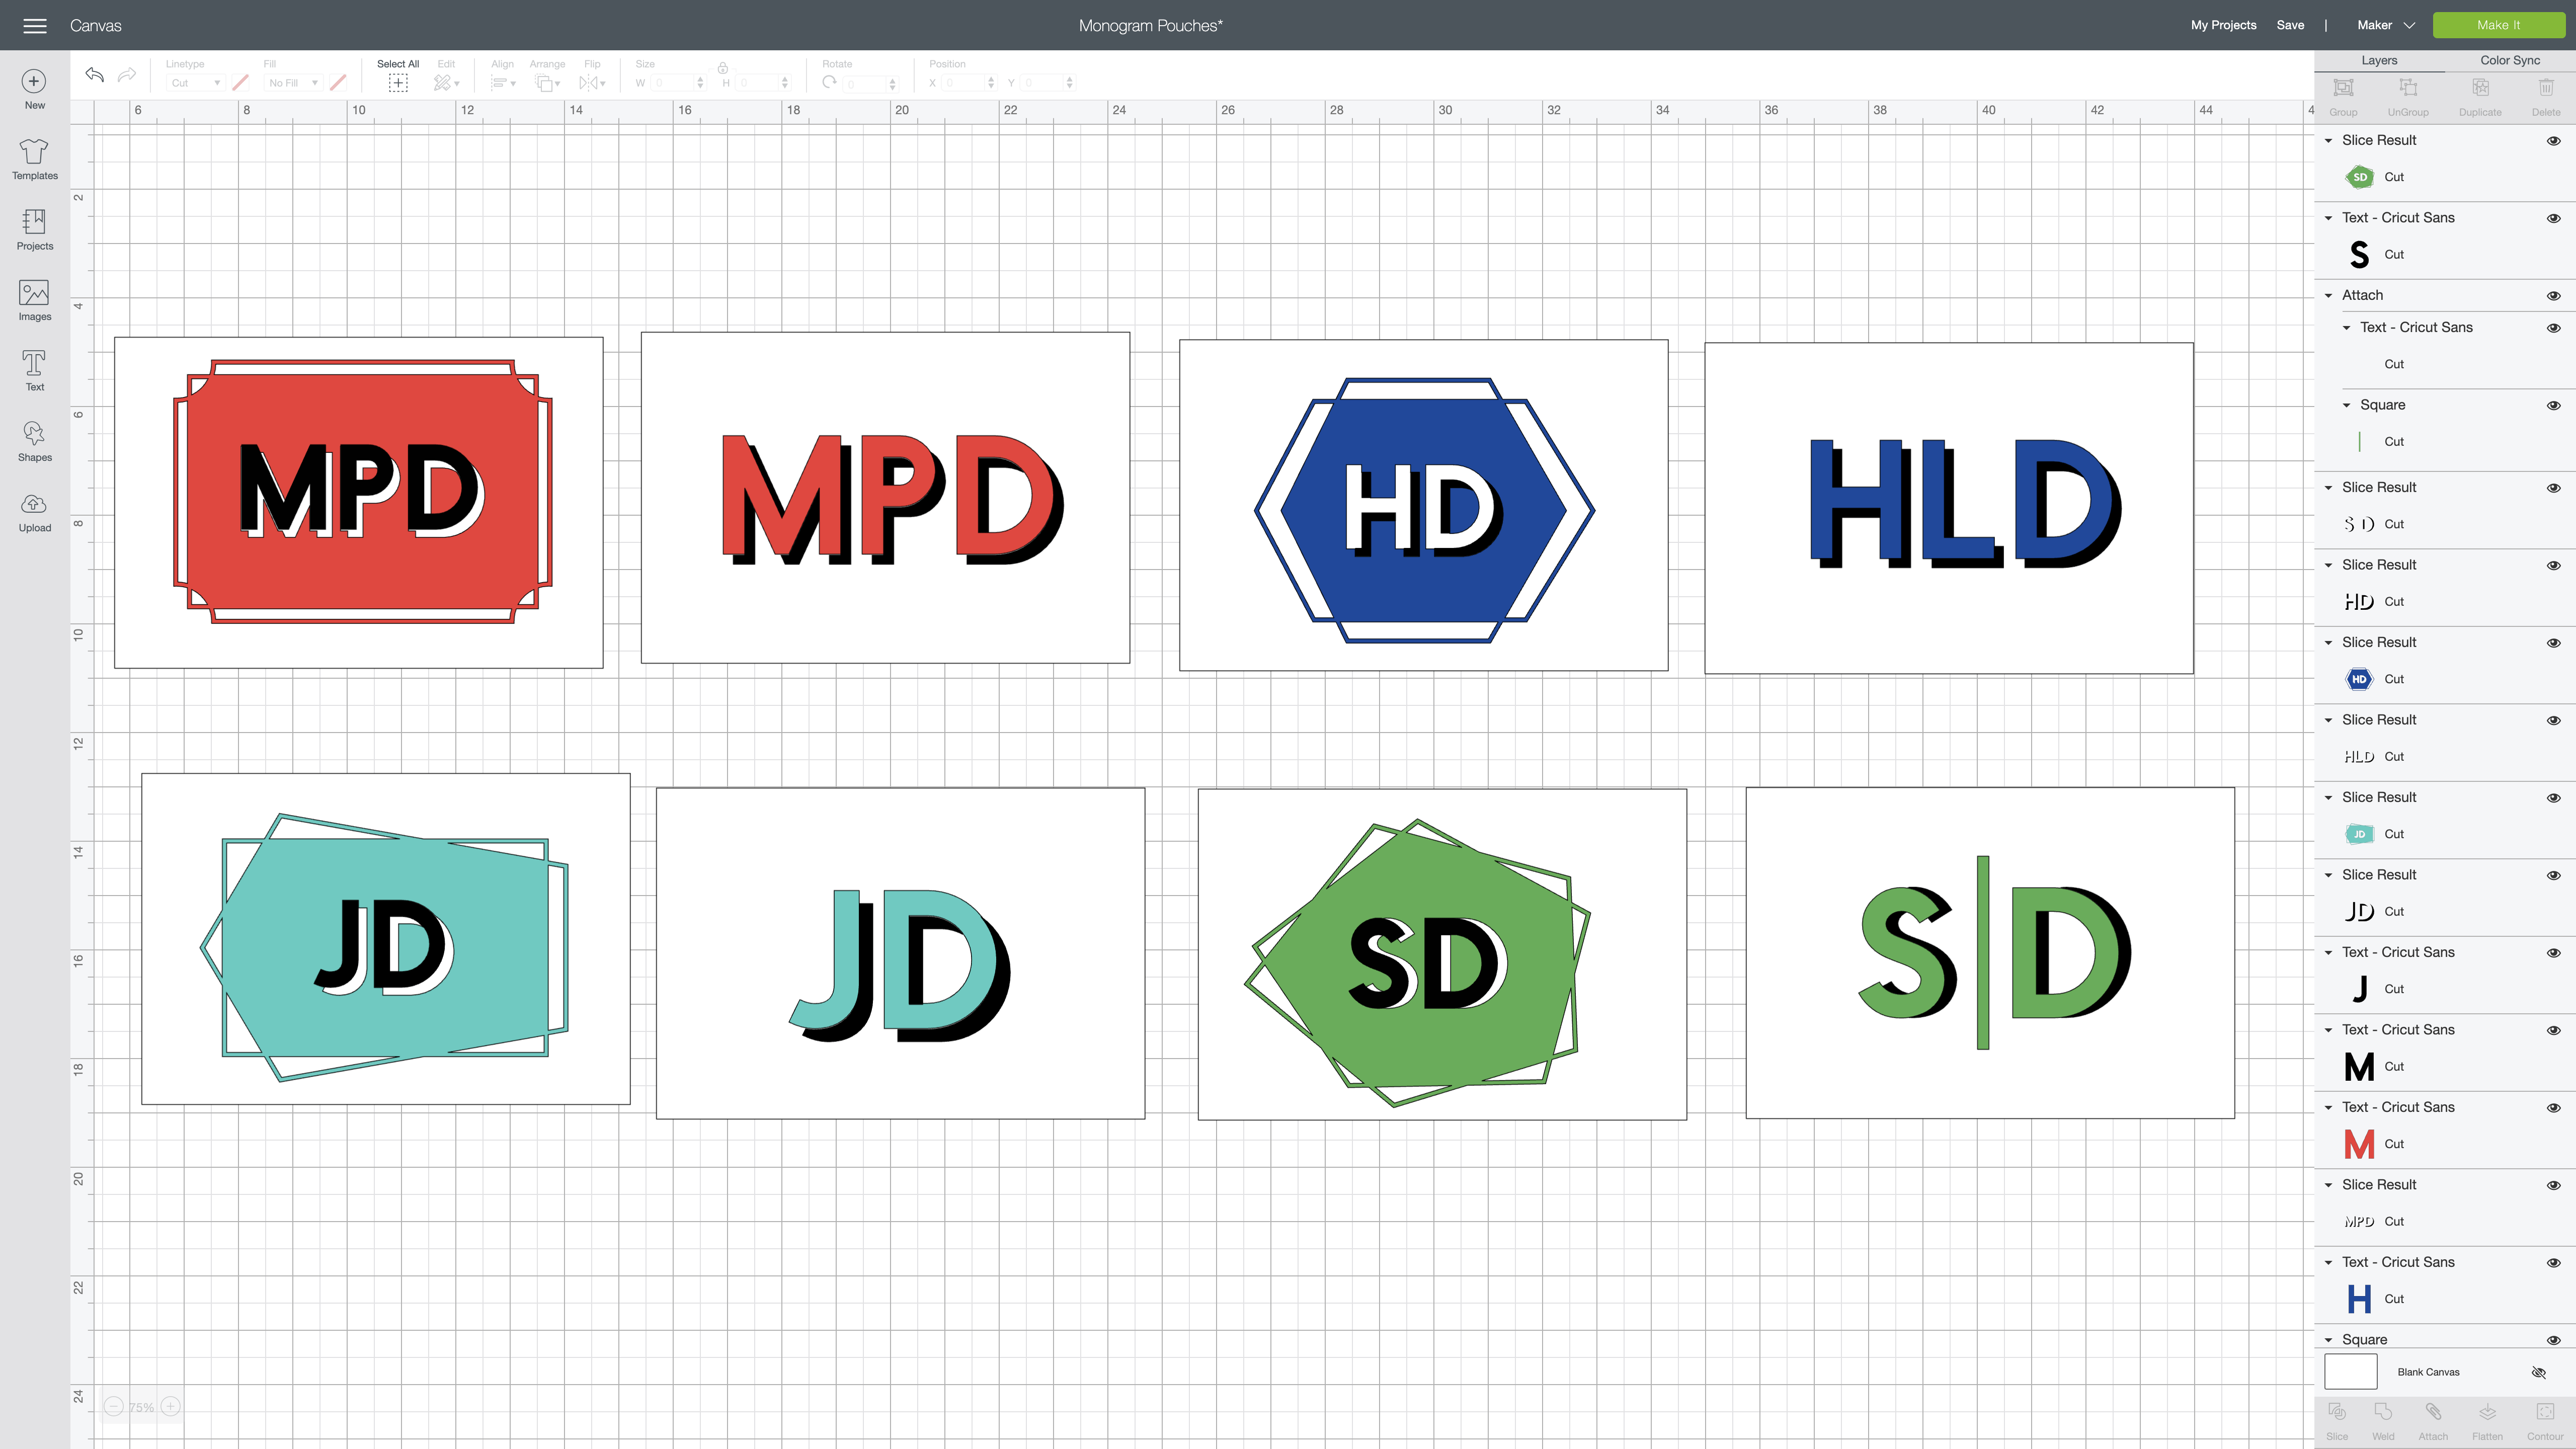
How to Design Shadowed Monograms
As always, start by creating your pouch designs in Cricut Design Space. You can certainly put any design or monogram style on your pouches. However, making these shadow monograms is super simple. Let me show you how I did it!
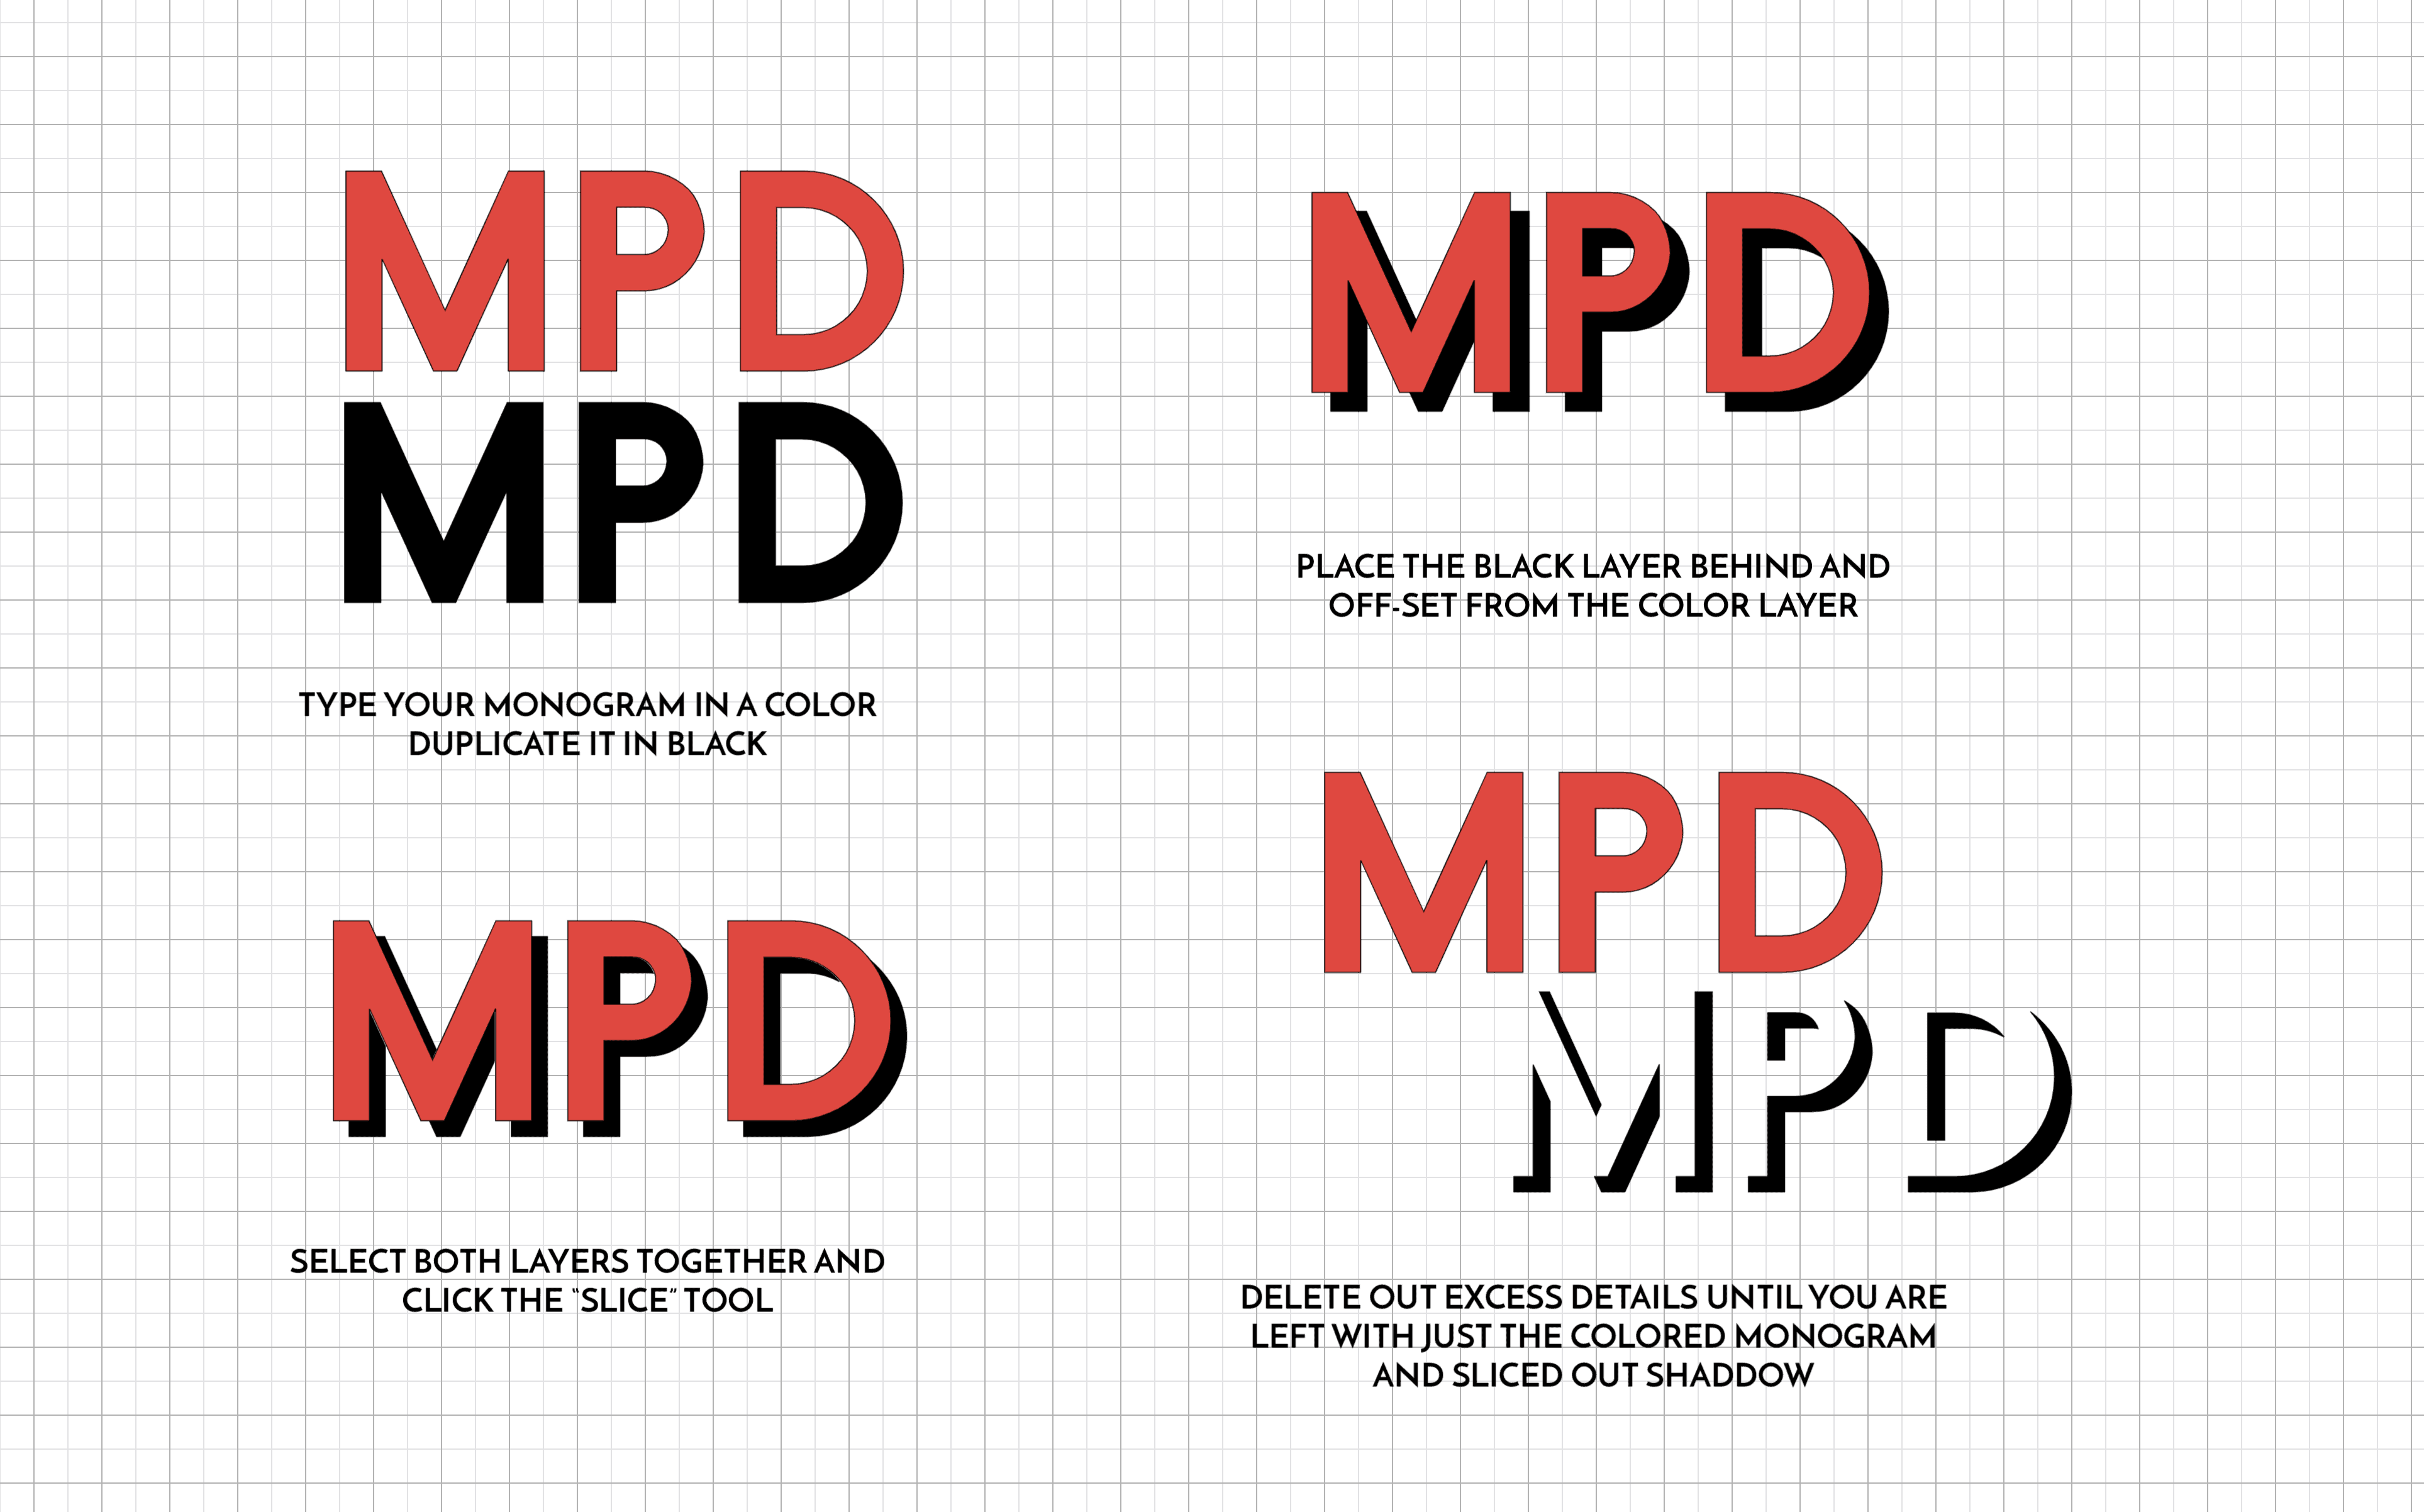
- First, type a name or monogram on the design canvas. I used the basic Cricut Sans Original font and changed it to bold, but you can use any thick, simple font you like. Next, duplicate the font and change it to black.
- Send the black layer behind the original text, offsetting it to your liking.
- Since Infusible Ink isn’t layered the same way standard vinyl or iron-on is, you need to slice the top letters out of the shadow letters. To do this, select both sets of letters and click the Slice Tool.
- Once you delete out all the unnecessary elements, you should be left with a sold monogram and black shadow cuts.
I’m not providing my exact Design Space file this time because your pouches will be different based on your own monograms. If you’d like to make the framed versions, I used the Simple Geometric Frames image set in the Design Space Library.
TIP! Use correctly-sized white rectangles as placeholders for the pouches to determine your sizing and spacing!
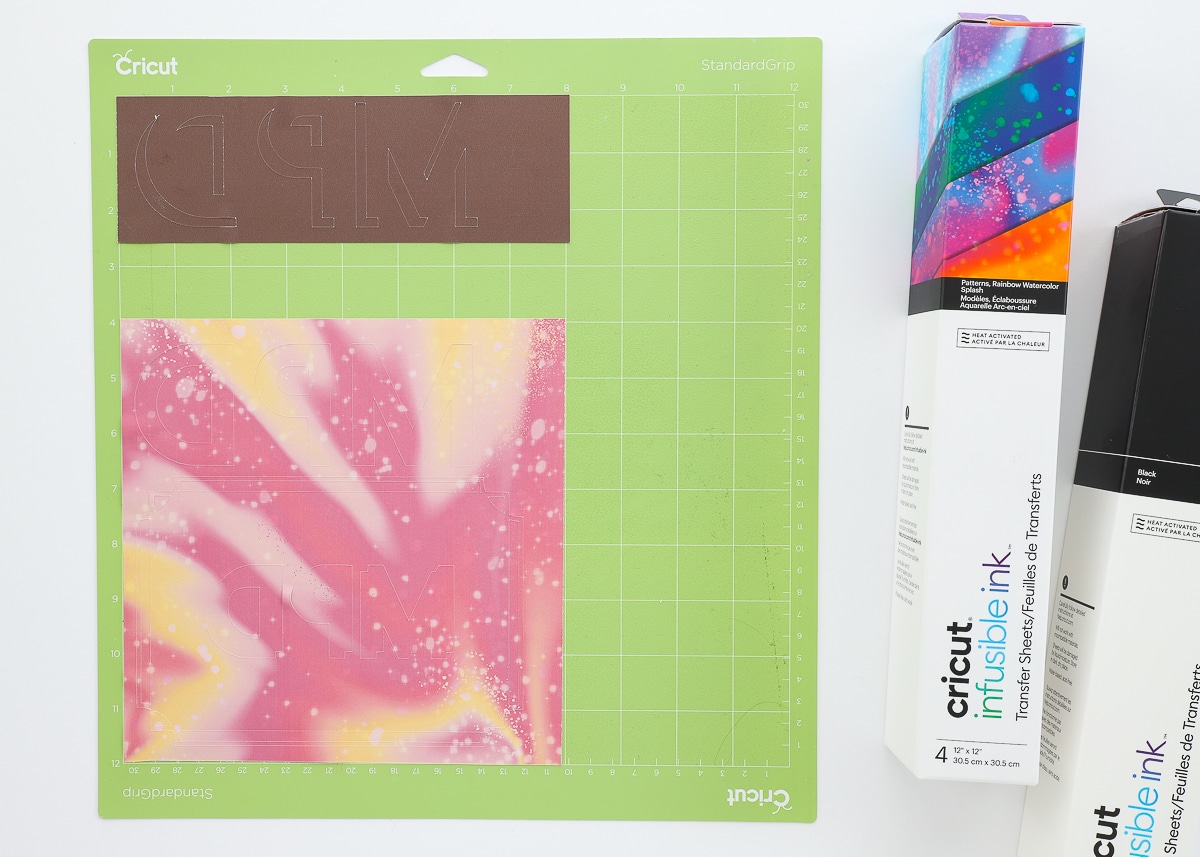
Preparing Your Designs for Transfer
Once you have your monograms designed and sized, send them to be cut with your Cricut machine (again, all three main machines can cut Infusible Ink!). Just be sure to mirror your designs, and select Infusible Ink from the Custom Materials menu.
TIP! When you pull out your Transfer Sheets, they will not look nearly as vibrant as the boxes suggest. Don’t panic, once they are heated onto your projects, the colors brighten significantly!
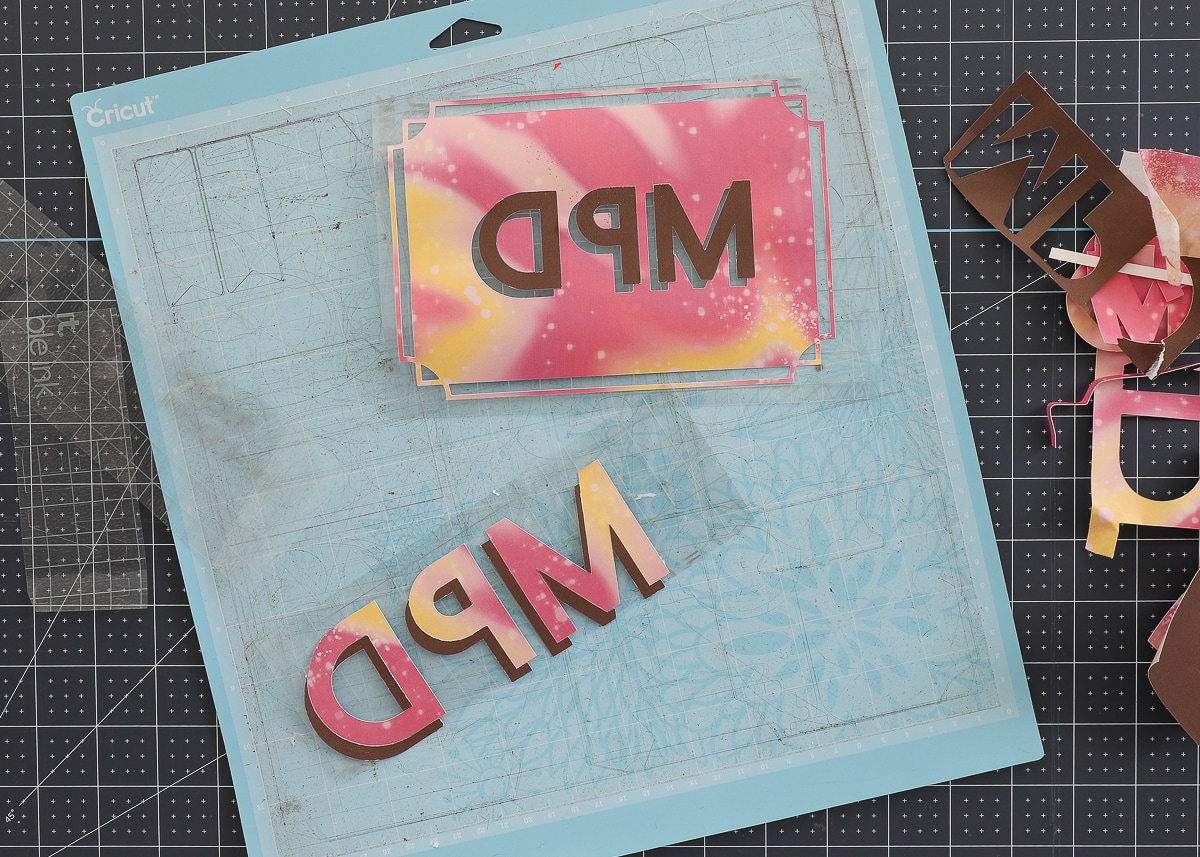
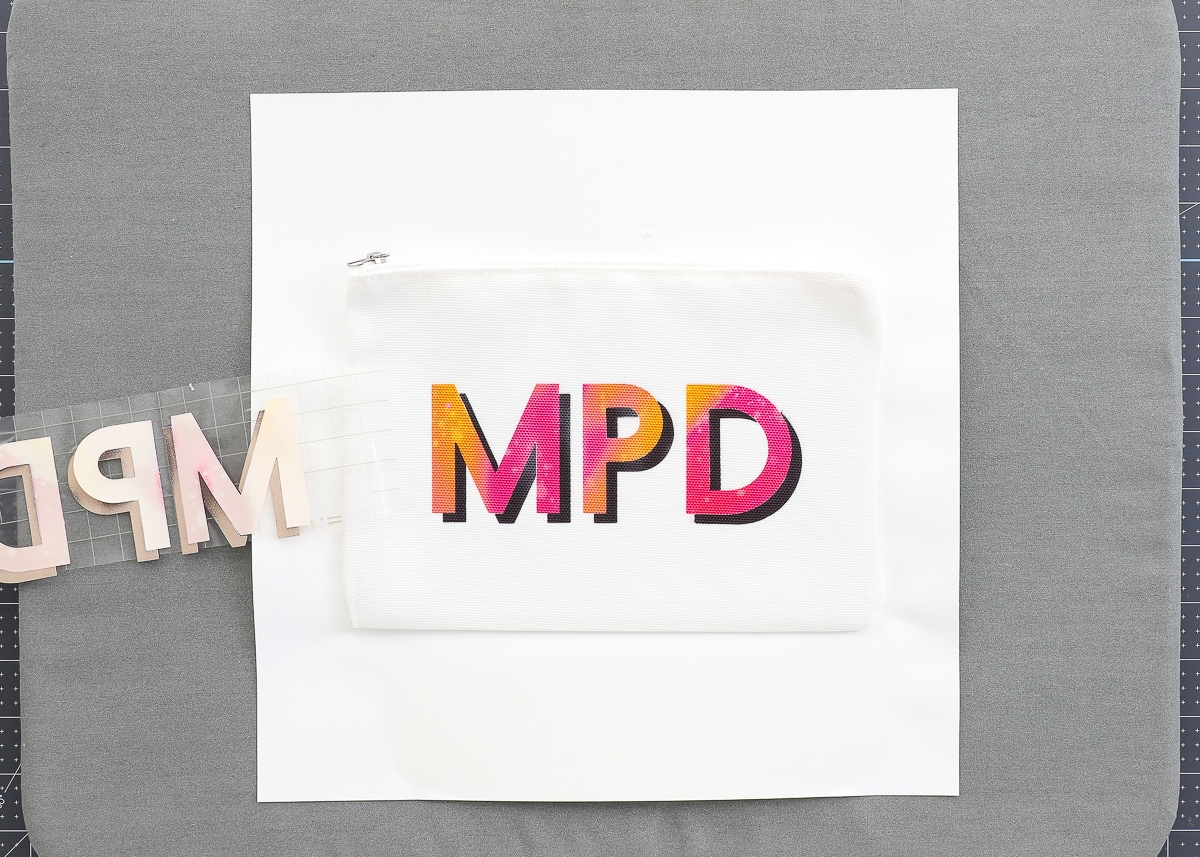
Once your designs are cut, use your fingers (not weeding tools!) to remove all the excess elements of your design.
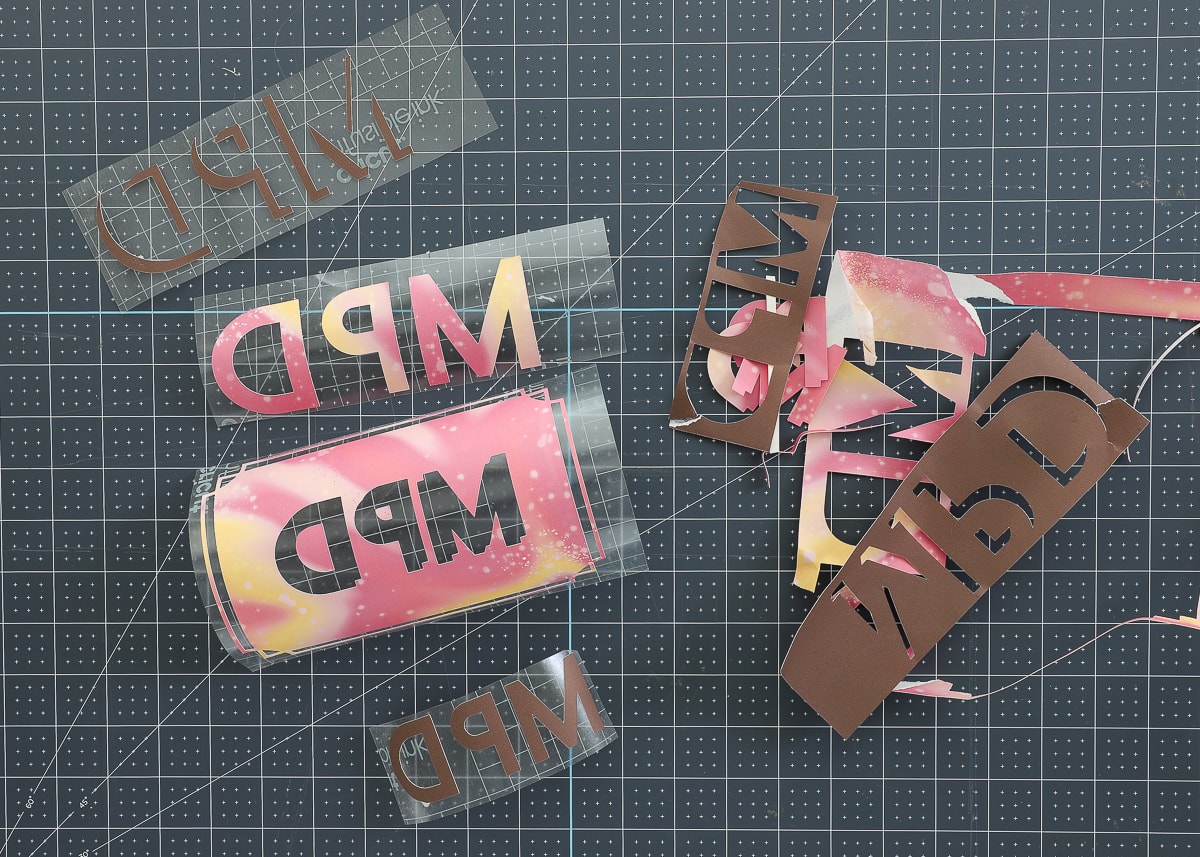
Although there are several ways to “layer” different colors of Infusible Ink, I prefer to do it all at one time. Therefor, I manually moved all the cut black details onto the pink/orange transfer sheets, referring to the original design to make sure everything ended up in the right spot.
TIP! Take your time on this step. Once the design is transferred to your pouch, there is no un-doing it!
Want to save this post?
Applying Infusible Ink Designs to the Pouches
One of the things that really struck me when first playing with Infusible Ink is that it seemed really complicated. The truth is, there are a lot of steps, but they aren’t hard; and if you follow them precisely, you’ll end up with professional-quality results.
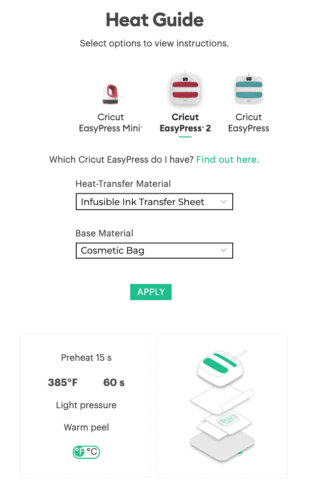
TIP! Don’t ever feel like you need to have these steps memorized; I always just pull up the Cricut EasyPress Heat Guide and it walks me through everything I need to do step-by-step
That said, here is how you add your monogram design to the pouch:
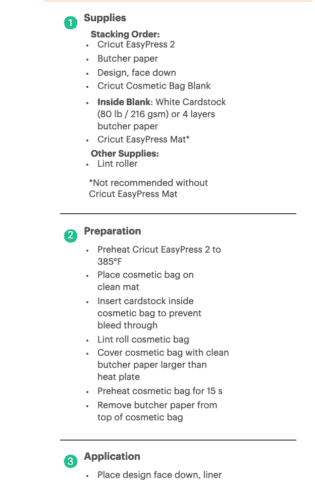
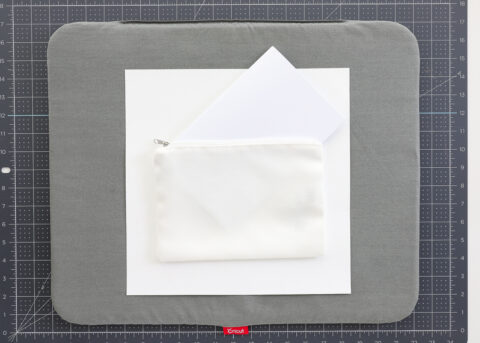
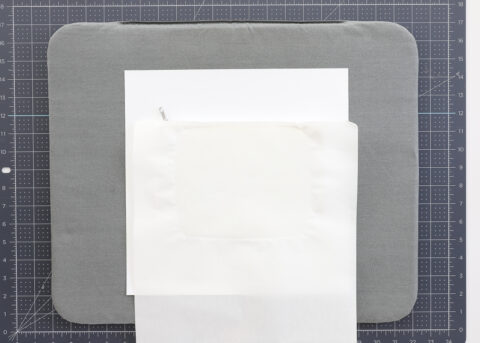
- Place some cardstock or printer paper inside the zipper pouch to prevent the ink from bleeding through. Then place the pouch on top of cardstock, on top of an EasyPress mat.
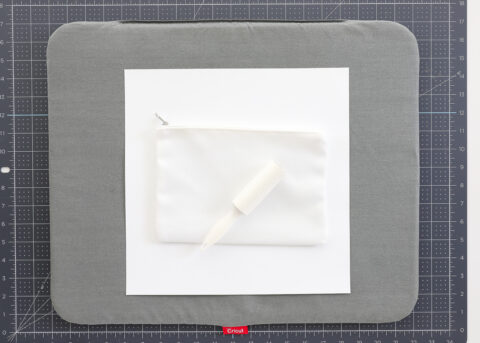
- Use a lint roller to remove any dust, threads and other imperfections from the surface of the pouch.
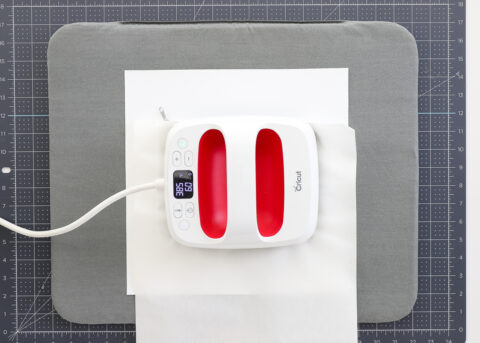
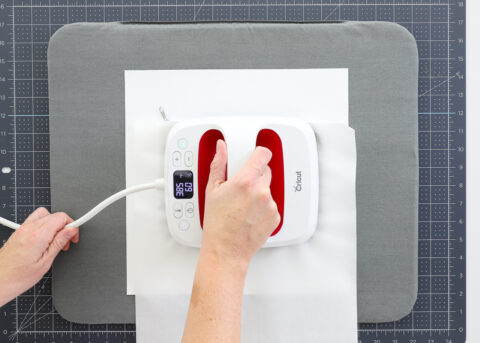
- Cover the pouch with a piece of freezer paper (included in your rolls of Infusible Ink) and preheat the pouch for 15 seconds (the Cricut EasyPress should be set at 385 degrees).
- Remove the Cricut EasyPress and freezer paper from on top of the pouch.
- Place your design, colored-side-down, onto the pouch. Make sure everything is oriented correctly. If needed, use heat-resistant tape to hold your design in place.
- Cover the design again with freezer paper, and heat with the Cricut EasyPress for 60-80 seconds (NOTE: All my pouches needed longer than the recommended 60 seconds).
- Carefully lift off the Cricut EasyPress and pull away the freezer paper to reveal a gorgeous, vibrant, fully infused monogram on your pouch!
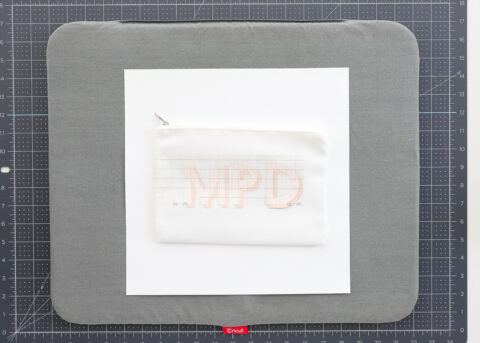
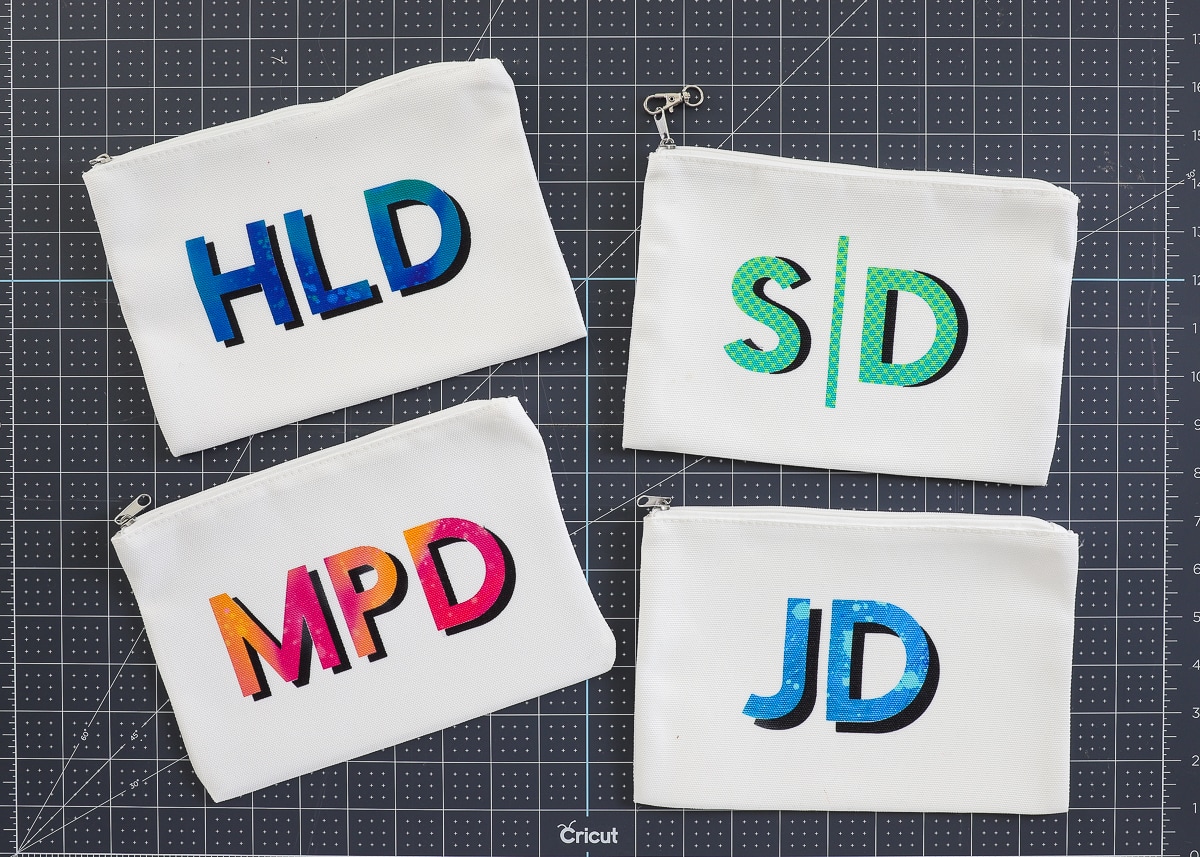
As I mentioned above, I added simple letter monograms to one side of the pouches…
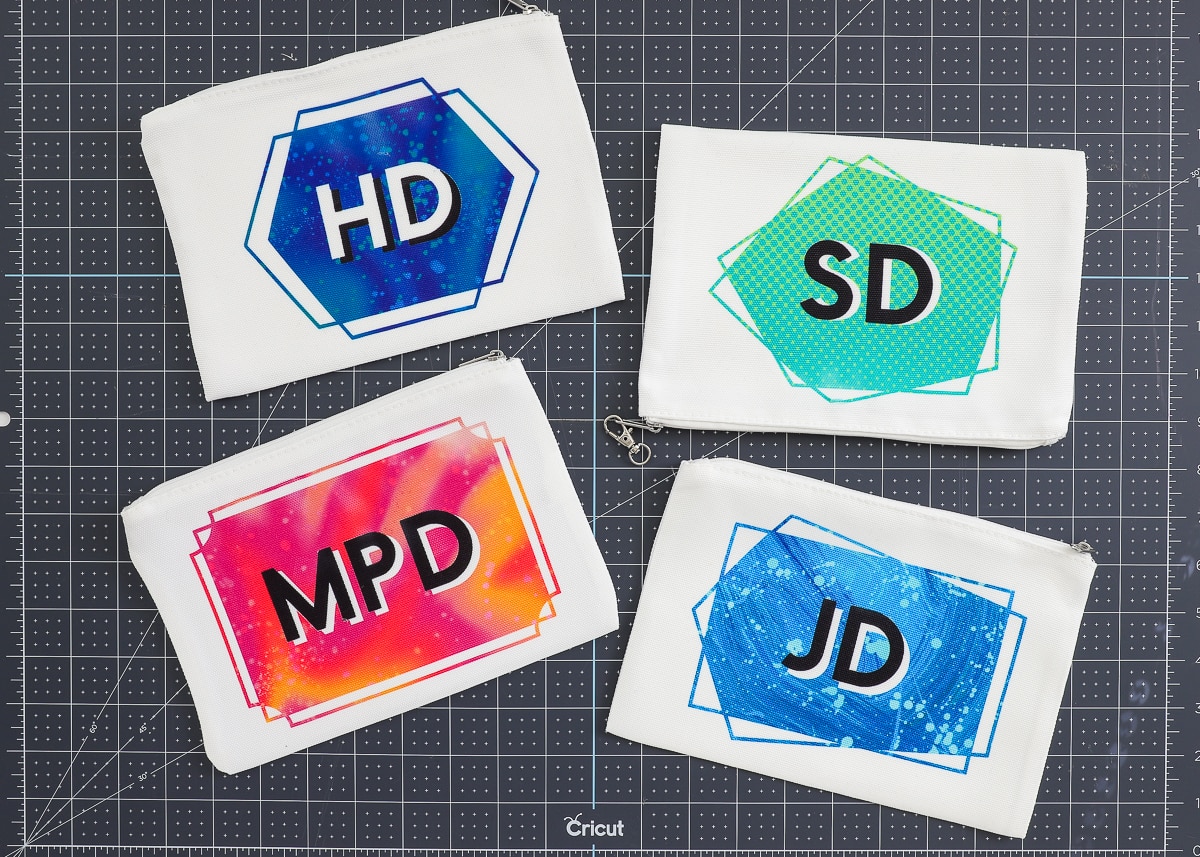
…and framed out monograms on the other side. Aren’t those colors and patterns just gorgeous!?
Hacking the Cosmetic Bags Into Planner Pouches
With the Infusible Ink steps done, all that’s left to do is add a few elements that will transform the basic cosmetic bag into an adorable DIY Planner Pouch.
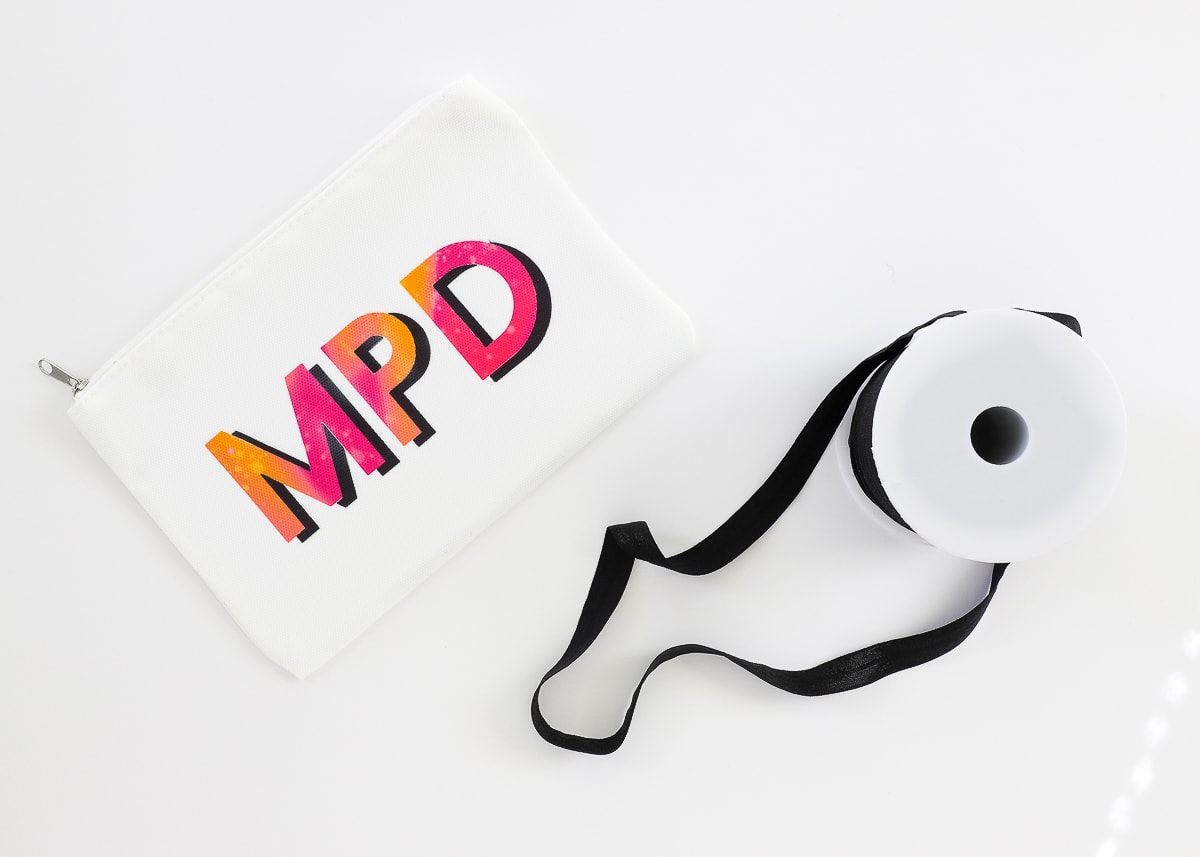
First, cut a 10” length of coordinating fold-over elastic. (I used black, but these colors would be SO fun!)
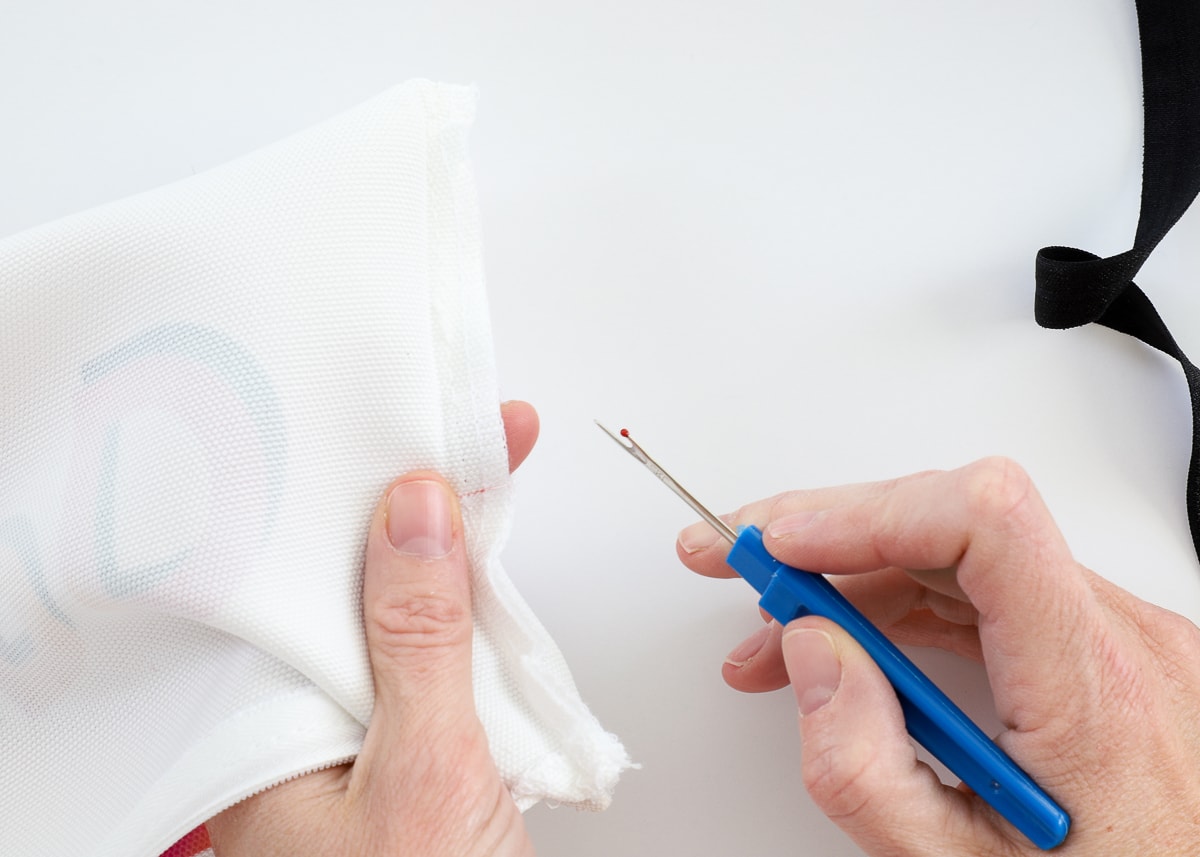
Next, turn the pouch inside out and locate the stitched seems along each side.
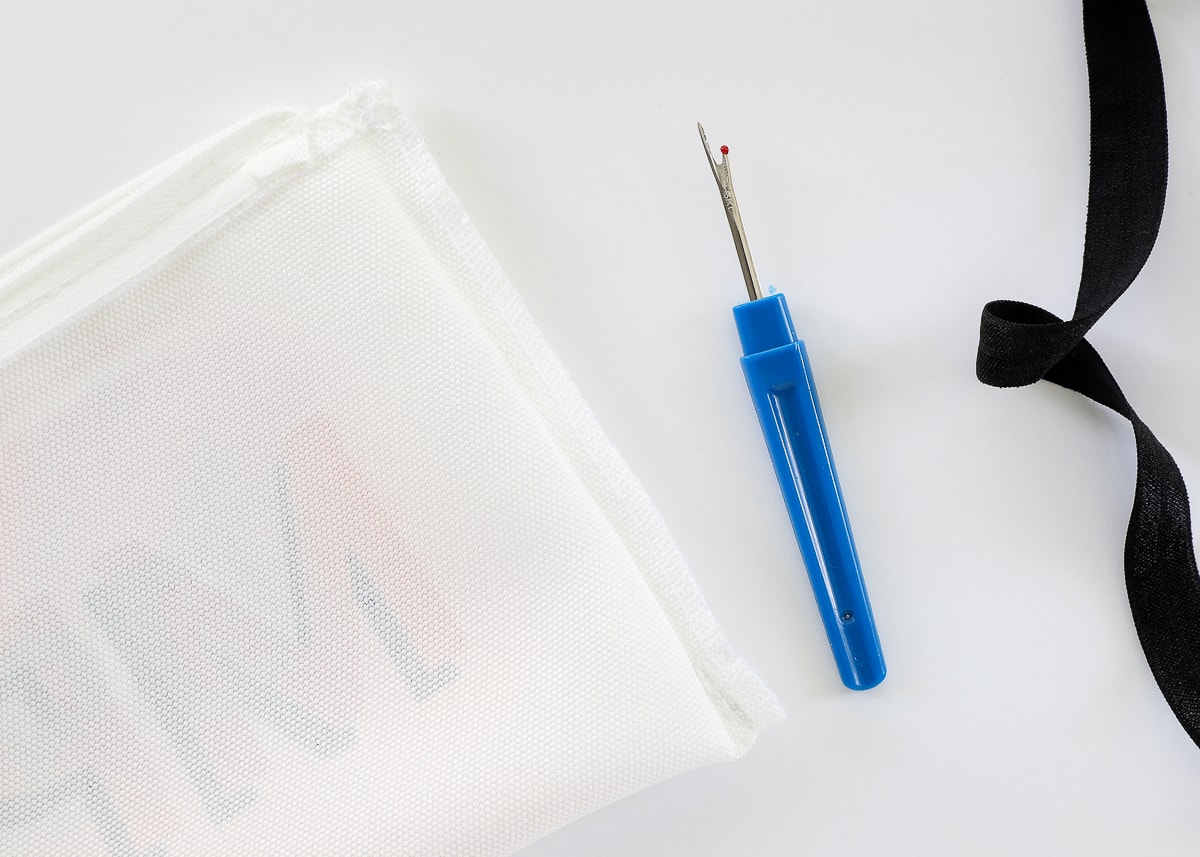
Use a seam ripper to open a ~0.75” opening on either side of the pouch. Ensure the openings are centered vertically on the pouch and are even on both sides.
Place the fold-over elastic into the pouch, and then slide the ends into the openings on each side. Ensure the elastic isn’t twisted inside the pouch.
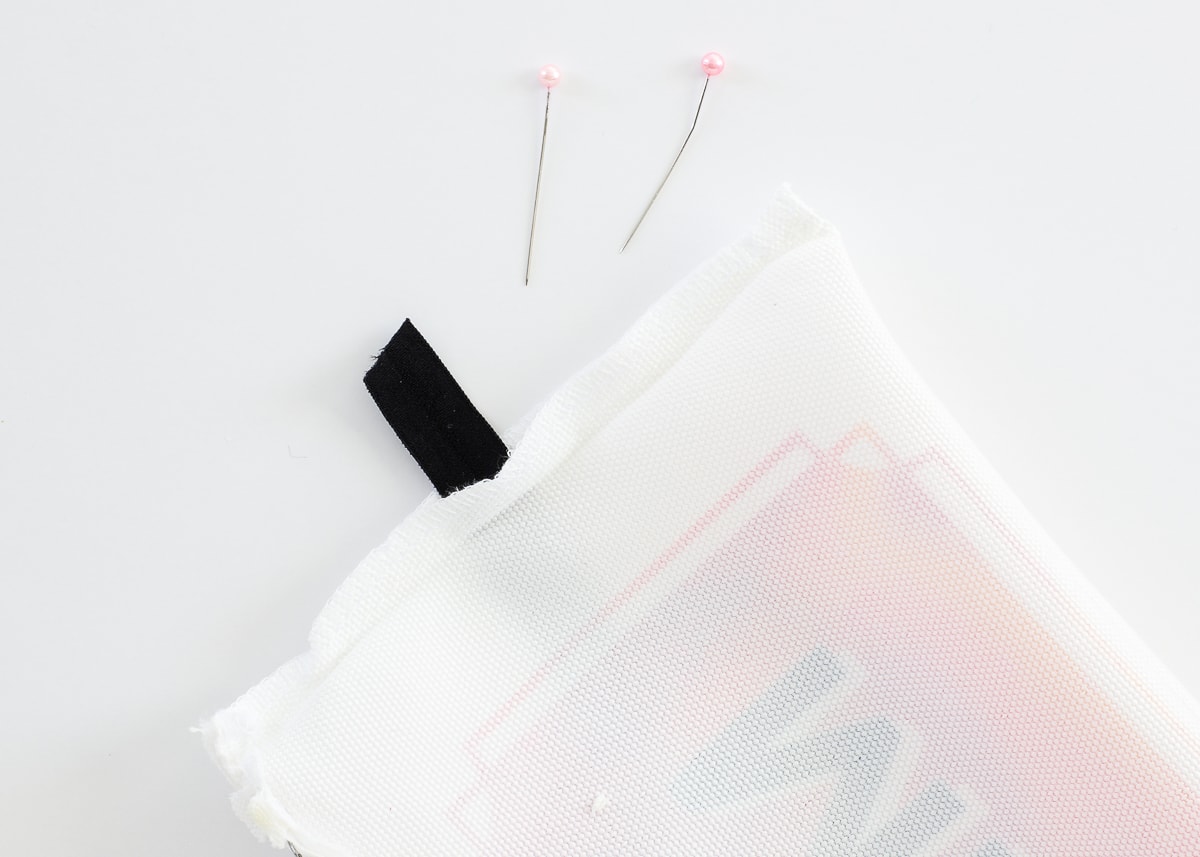
Pin both sides in place and then use a sewing machine right along the same stitch line to close the pouch back up and secure the elastic in place.
TIP! I used a sewing machine because it was handy. I do think you could use hot glue for this step if you don’t sew.
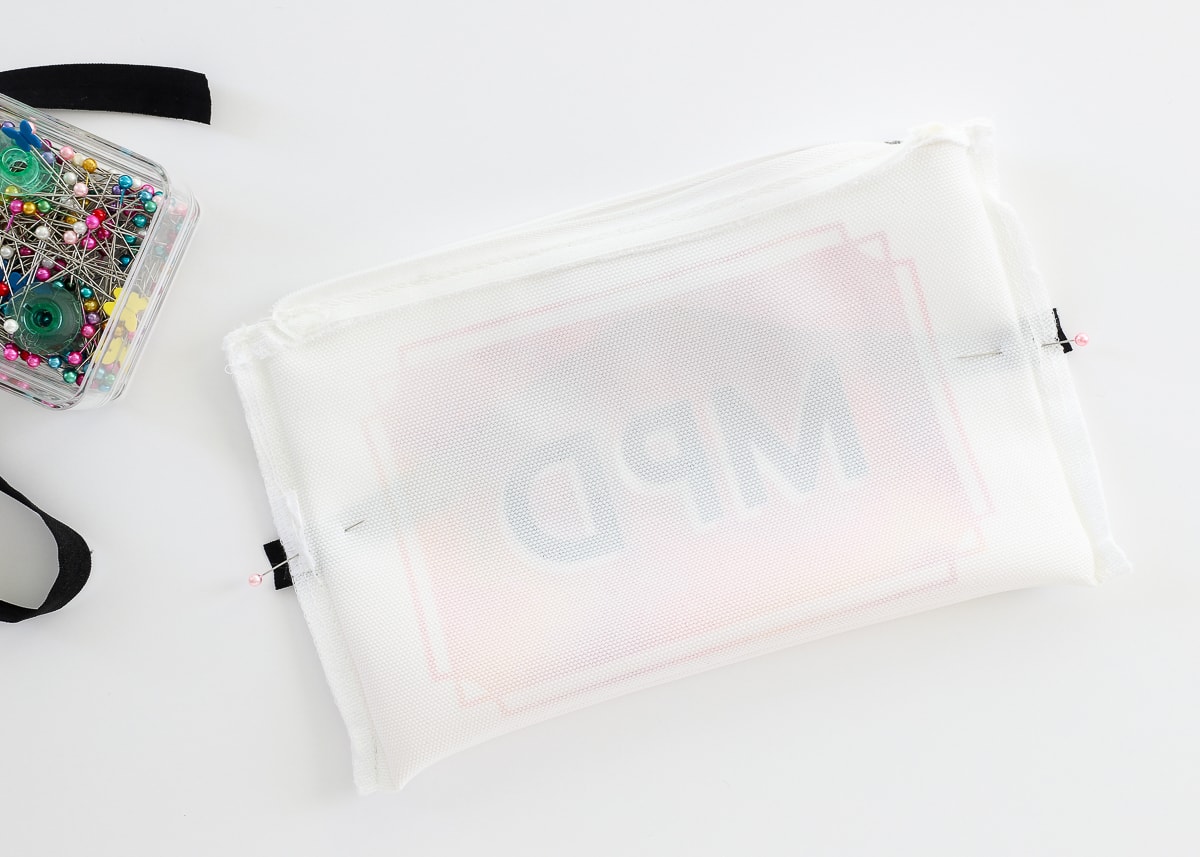
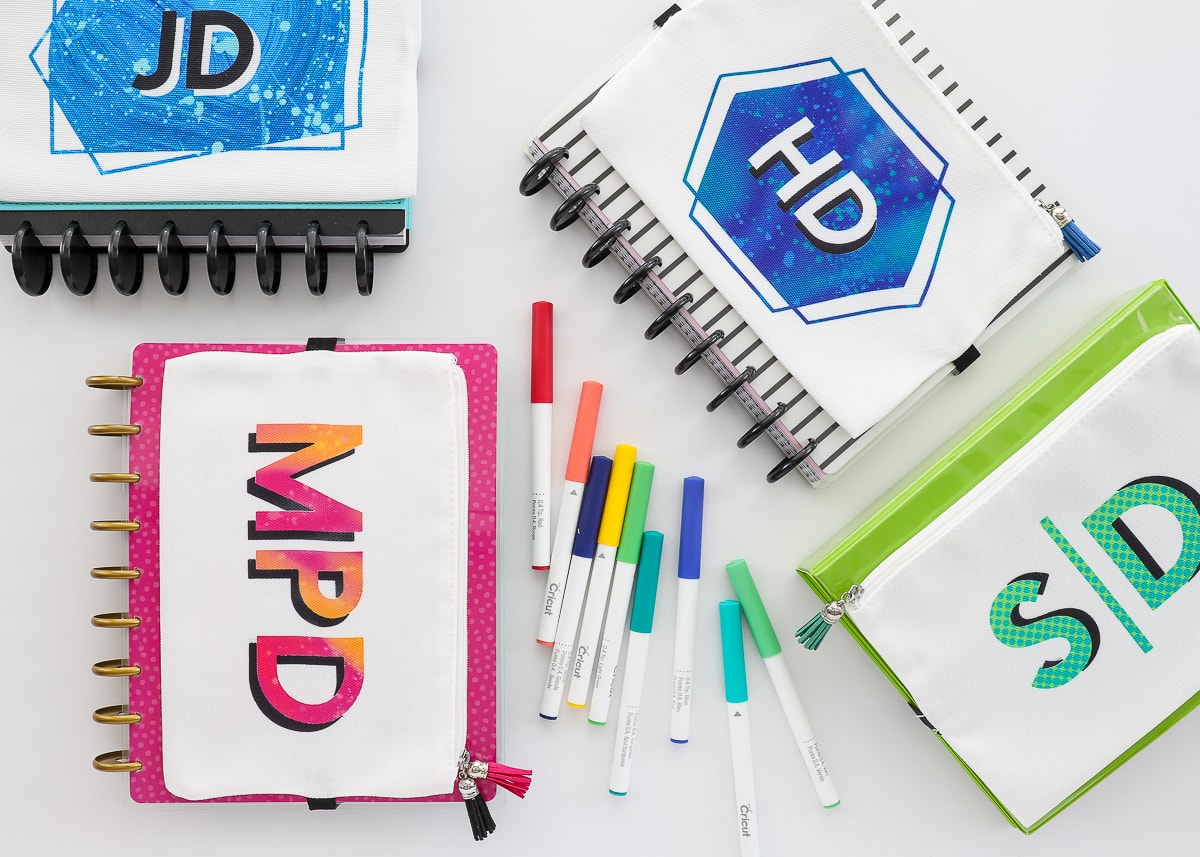
Once you flip the pouch right-side-out, your elastic band can be moved to either side depending on which design you want visible.
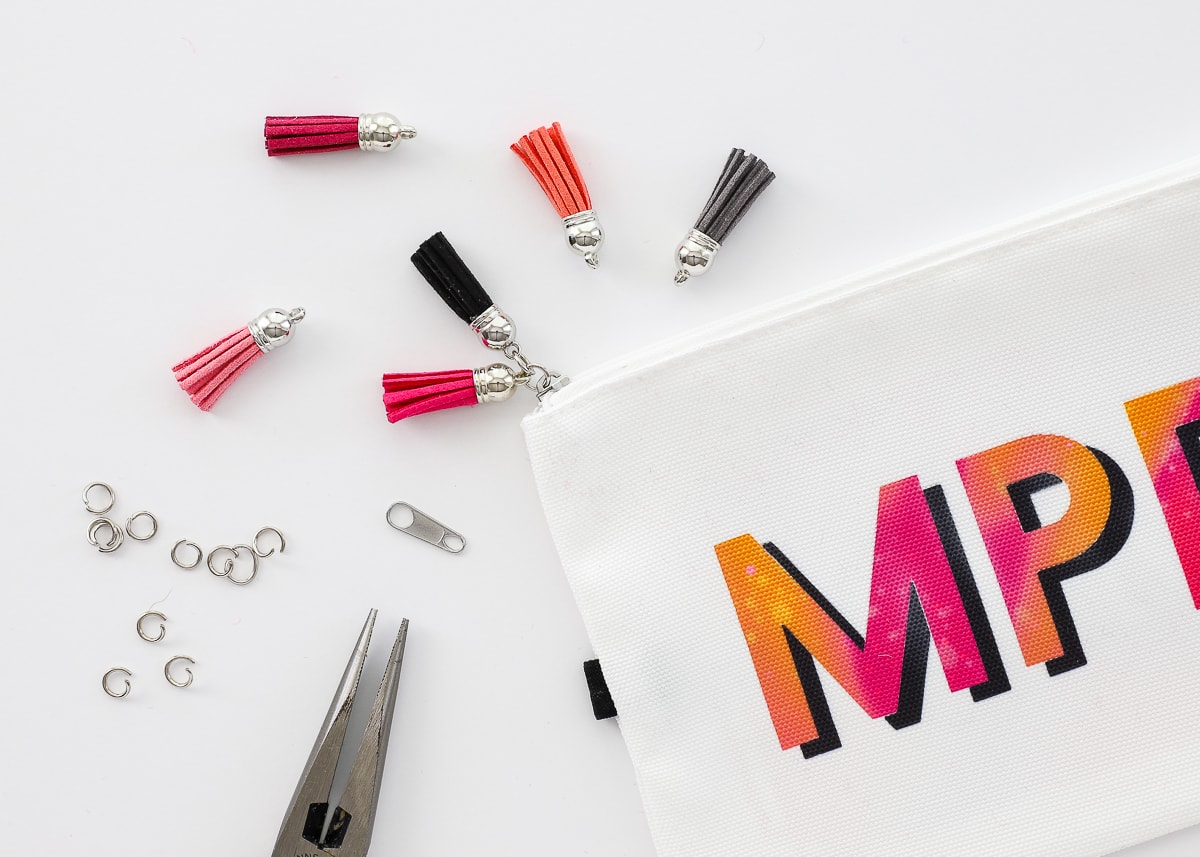
The final (optional) step is to swap out the zipper pull for coordinating mini tassels. I had these leftover from another keychain project, and they really were the perfect finishing touch! Just use a needle-nose pliers to get everything switched out and tightened back up.
With your DIY Planner Pouch complete, load it up with your favorite accessories and secure it to your planner with the elastic strap.
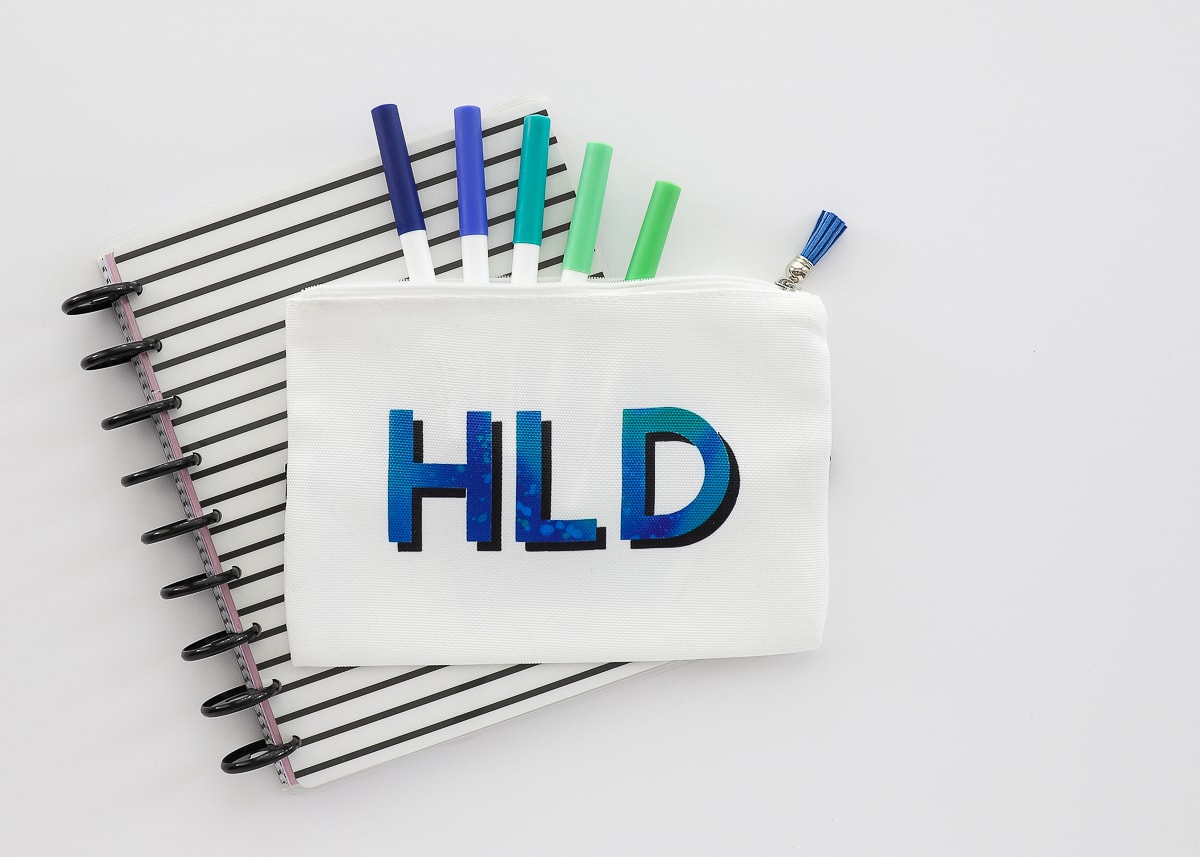
I chose to use the smaller size pouches for this project, which is still large enough to hold quite a few supplies, snacks, and even electronics.
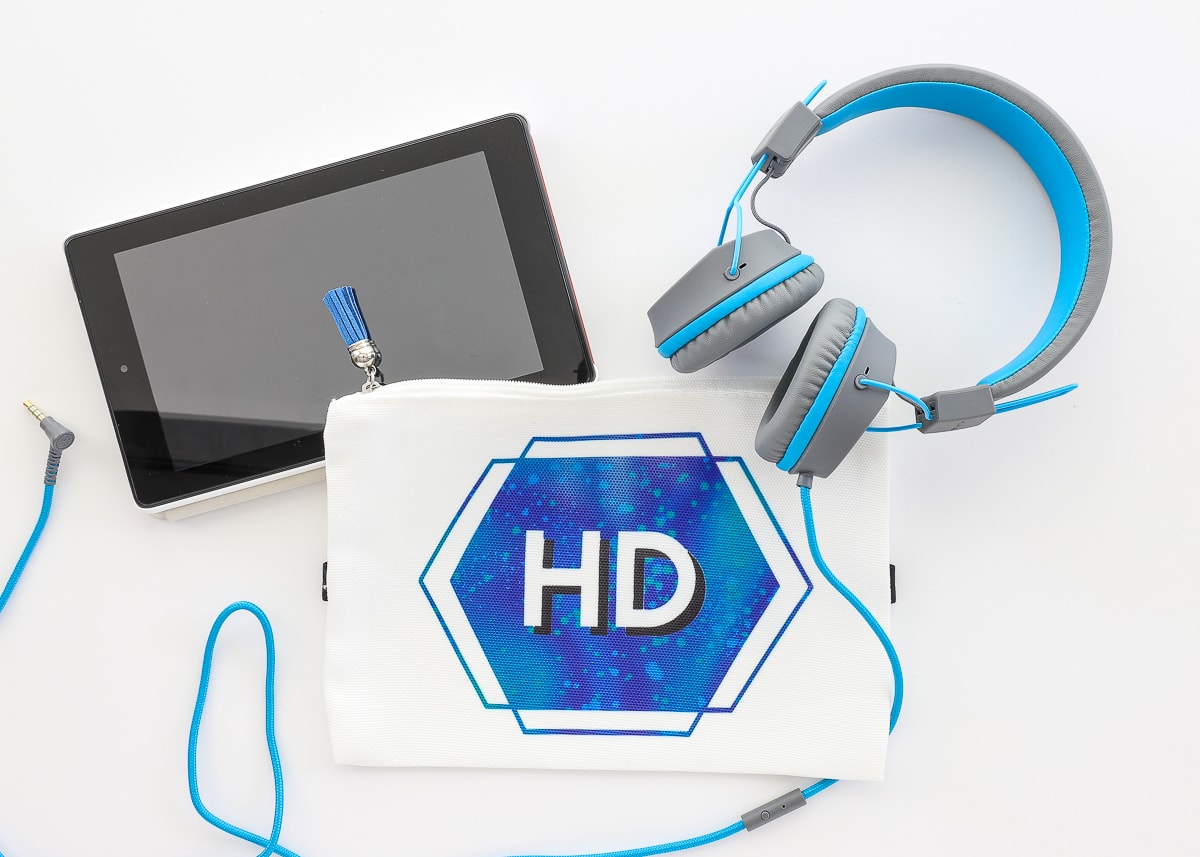
On our recent family road trip, I loaded up each boys’ pouch with their own mask, hand sanitizer, and snack and then strapped them to the head rests in front of them. I’m using mine to corral all my planner supplies. Speaking of which, boy do I have some super fun DIY planner projects coming at you in the next few weeks! Get ready to DIY your planner to a whole new level, my friends!
I seriously had so much fun making these DIY Planner Pouches and am just smitten with the results. Not only do I love anything patterned, monogrammed, and useful, but making them reminded me how much fun working with Infusible Ink can be. In fact, I’ve already moved on to those Infusible Ink throw pillows, and I can’t wait for you to see how they turned out!

Megan
3 Comments on “DIY Planner Pouches With Cricut’s Infusible Ink”
Oooh, I love them. What is that cool planner you’re using? I’m guessing you’ll tell us when we get to your planner post *rubs hands gleefully*
Hey girl!
Would you actually believe I don’t use a “normal” planner? I use my PowerSheets for long-term planning, a digital calendar for appointments, and then my Weekly print out from The Toolbox for a weekly spread. The ones in the picture are all Happy Planners…for props only 😂!
Hope you’re doing well!Megan
Love all your videos. I also was a military wife. My husband retired in 1993 after 30 yrs. Oh the joy of moving every three years😉