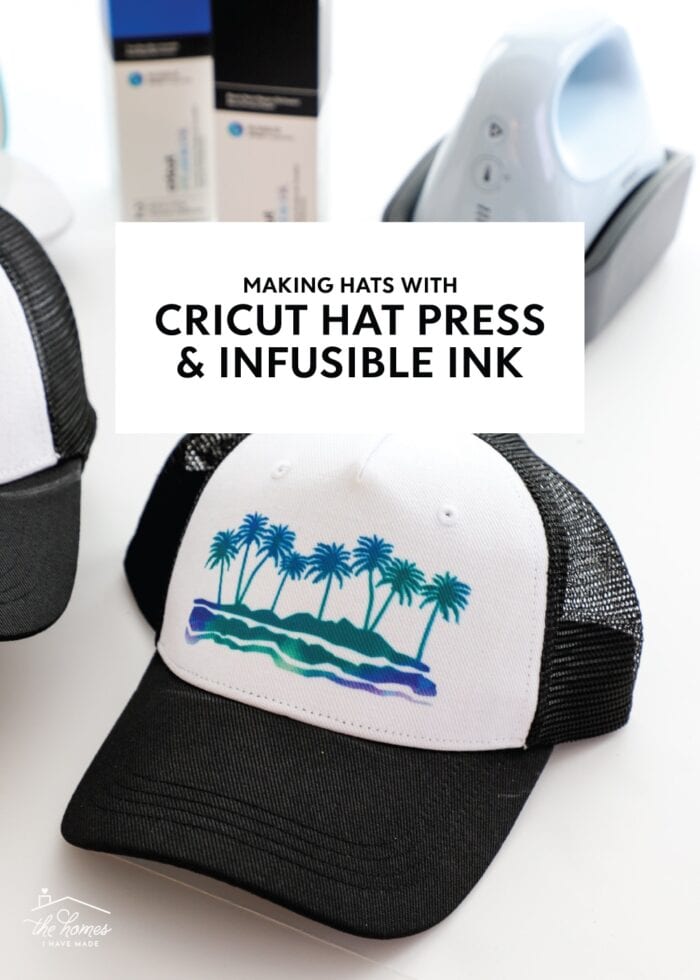
Making Hats with Cricut Hat Press & Infusible Ink Transfer Sheets
Alongside the new Cricut Hat Press, Cricut also recently released two new hat “blanks.” And not only are these hats simple and stylish for any custom design, but they are also Infusible Ink compatible. This means you can cut designs from Infusible Ink Transfer Sheets (or draw designs with Infusible Ink Pens) and fuse them directly into the hat’s surface. This produces a design that is wash-proof and longer lasting. However, the transfer process can be a little bit tricky too, so let me break down everything you need to know in order to make custom hats with the Cricut Hat Press and Infusible Ink!
Making Hats with Cricut Hat Press | Blog Series
This is the third post in my Cricut Hat Press series. Be sure to visit each tutorial in order to learn everything you need to know about making custom hats with Cricut Hat Press!
- Introducing Cricut Hat Press | Unboxing, Review & FAQs
- How to Use Cricut Hat Press with Iron-On Vinyl (HTV) | A Step-By-Step Guide
- Making Hats with Cricut Hat Press and Infusible Ink Transfer Sheets – You are here!
- Creating All-Over Hat Designs with Cricut Hat Press
Supplies Needed
When making custom hats with Cricut Hat Press and Infusible Ink, here is what you need:
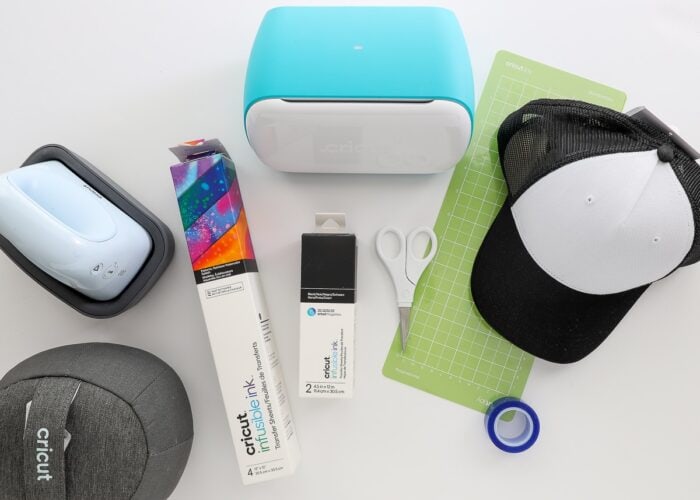
- Cricut Hat Press “Kit”
- Cricut Hat Press
- Cricut Hat Pressing Form
- Strong Heat Resistant Tape
- Infusible Ink Compatible Hat Blank
- Cricut Trucker Hat
- Cricut Grey Ball Cap
- Any hat designated as “Sublimation Compatible”
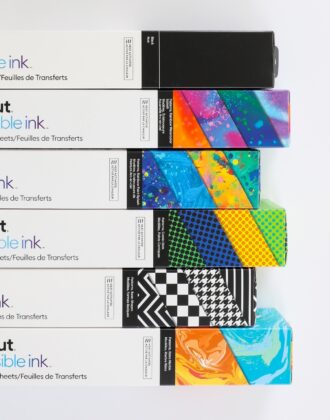
- Infusible Ink Transfer Sheets – in whatever colors or patterns you like
- Butcher Paper – also comes with all Cricut’s Infusible Ink Transfer Sheets
- Mobile Device to access the Cricut Heat app, which can be downloaded for both iPhone and Android devices from the appropriate app store (learn more about the Cricut Heat App)
- Cricut Machine & Tools
- Any Cricut machine can be used to create designs for hats (Cricut Explore series | Cricut Maker series | Cricut Joy)
- StandardGrip Cutting Mat
The “Fusible Surface” on Cricut’s Hat Blanks
Before diving into the step-by-step instructions, I want to first quickly chat about which surfaces on Cricut’s Hat Blanks you can use with Infusible Ink.
While any part of the hat can be decorated with iron-on vinyl/heat transfer vinyl, only the white front of the Trucker Hat and the cap of the Grey Ball Cap can receive Infusible Ink. Infusible Ink requires a higher degree of heat than iron-on vinyl, and it can quickly warp the bill of the hat. Therefor, when considering what designs to create with Infusible Ink, know you are limited to certain areas of the hat.
How to Make a Hat with Cricut Hat Press and Infusible Ink Transfer Sheets
Step 1: Design Your Hat
Start your custom hat project in Cricut Design Space. For optimum application, Cricut recommends your total design be no larger than 2.25″ high x 4.25″ wide (5.7 cm high x 10.79 cm wide). This size best fits under the curved surface of Cricut Hat Press, and you will have the best success with complete transfers.
Additionally, when creating designs with Infusible Ink, simpler designs will turn out better/cleaner than complicated designs. Tiny details can be difficult to “weed out” from Infusible Ink Transfer Sheets; and intricate designs can get a little “muddy” on really small designs (like those needed to fit on hats). As such, try to pick designs and fonts that are simple, clean, and can be sized down pretty small.
Step 2: Cut Out Your Hat Design with a Cricut Machine
Once you have a design you love and have ensured it is sized appropriately for Cricut Hat Press, load an Infusible Ink Transfer Sheet (shiny side down) onto a StandardGrip Mat and cut it out with your Cricut machine.
TIP! Be sure you “Mirror” your design before cutting it out.
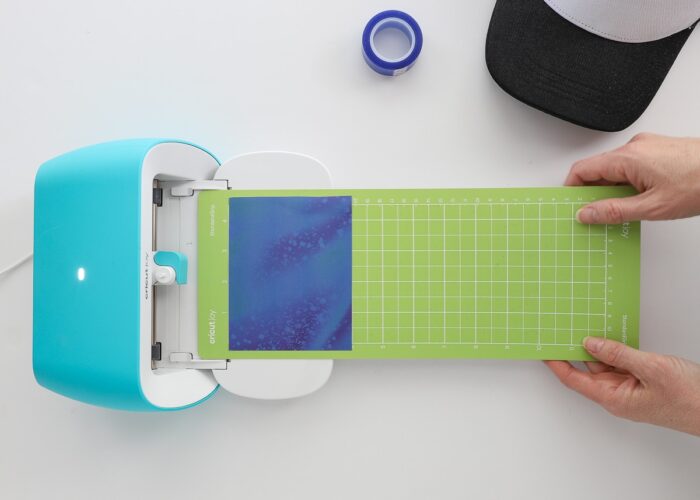

Once the design is complete, unload your mat and remove the Infusible Ink Transfer Sheet from the mat. Do not use a weeding tool to remove the excess paper around your design. Instead use the “crack and peel” technique to remove the paper with your fingers only. Before moving on, ensure that all unneeded aspects of your design are removed.
Step 3: Prep Hat for Transfer Process
Next, prepare your hat blank for the the transfer process.
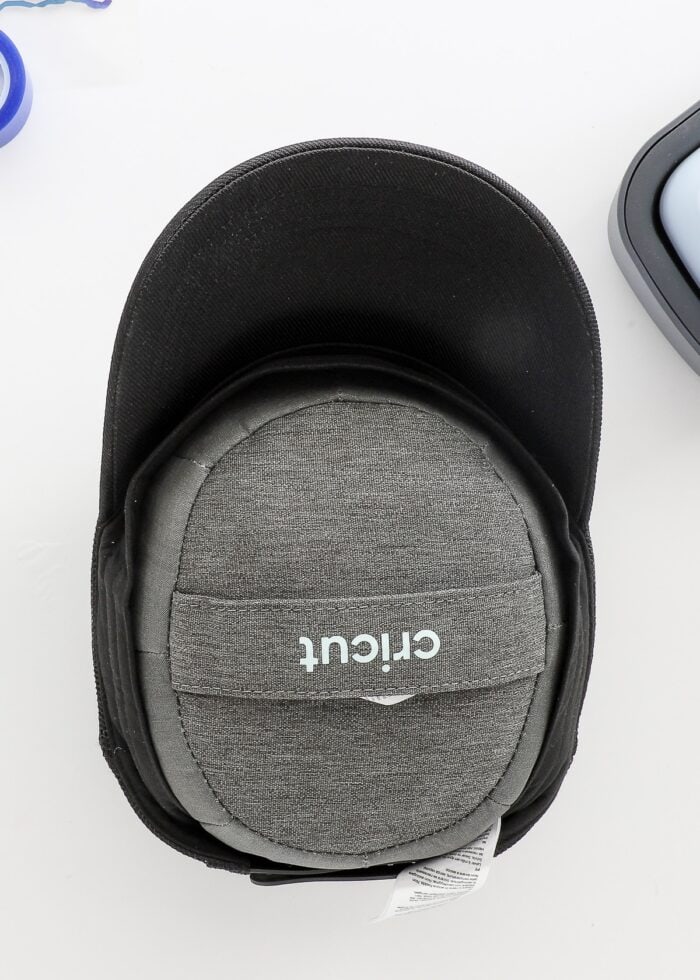
First, un-do the clasp or buckle of the hat and pull the sweat strip out and away from the inside of the hat. Secure the hat around the hat form (included with Cricut Hat Press) as tightly as possible and re-clasp the buckle to hold it firmly in place.
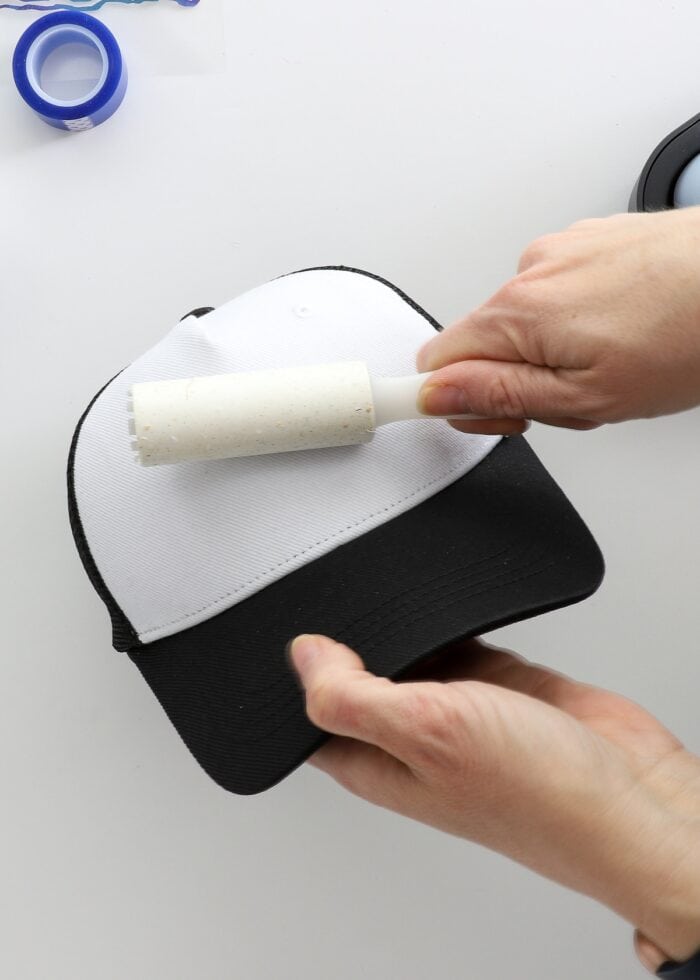
Next, use a lint roller along the front of the hat (or wherever you are placing the design) to remove any lint, threads, etc.
TIP! If you don’t have one, some Scotch tape or Transfer Tape can pick up debris too!
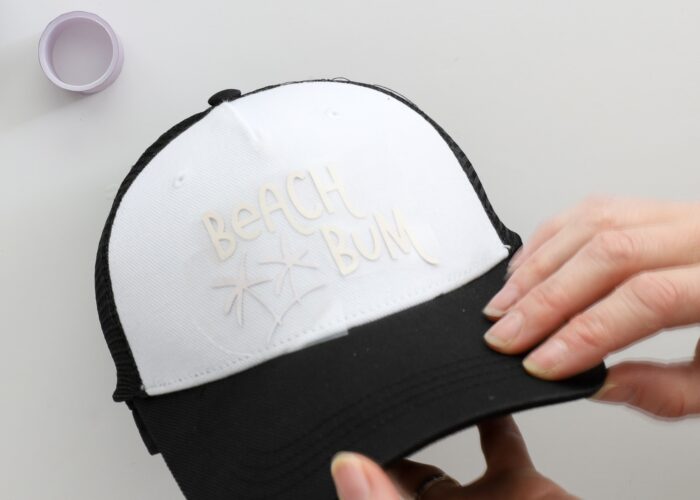
Step 4: Position Infusible Ink Design on Hat
Next, place your Infusible Ink Transfer Sheet design, colored-side down, onto the hat blank wherever you want it. The glossy clear carrier sheet should be facing up.
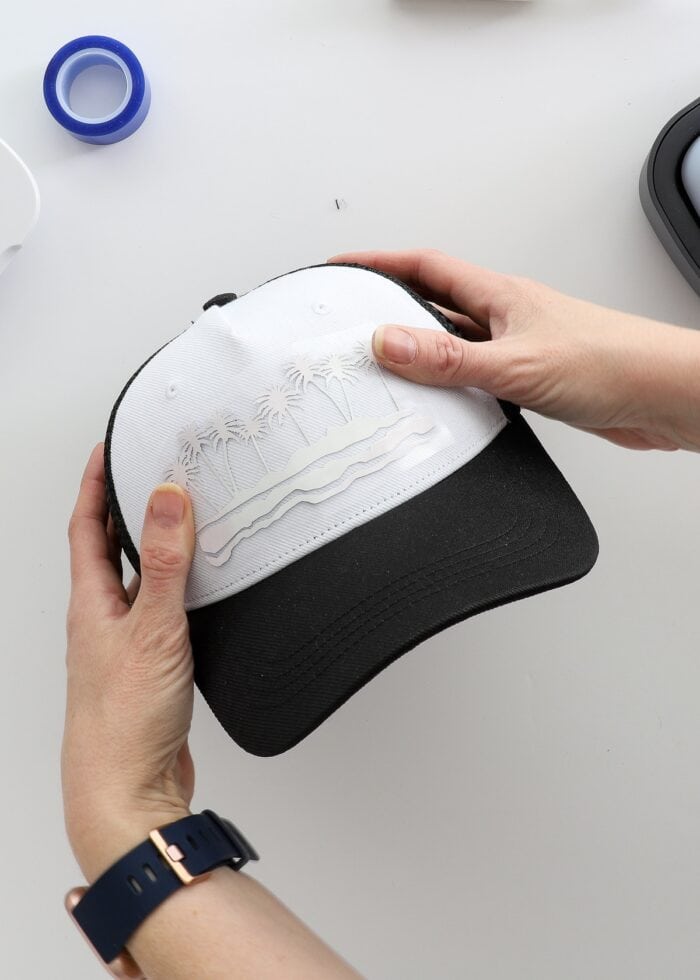
Then use an excessive amount of Strong Heat Resistant Tape (also included with Cricut Hat Press) to hold your design in place.
As you will soon see, you will move the Cricut Hat Press over your design repeatedly. If your image moves at all, it will create “ghosting” (a fuzzy image). Therefor, take your time to tape along the entire perimeter of your design so it doesn’t budge during the heating process at all.
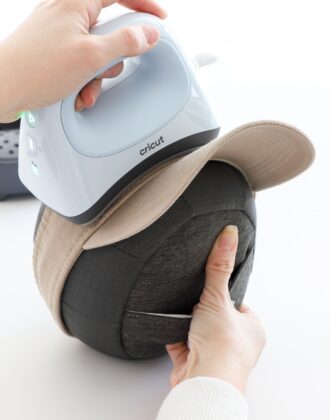
Step 5: Heat Infusible Ink Design with Cricut Hat Press
Now it’s finally time to infuse your design onto the Cricut hat using the Cricut Hat Press!
Want to save this post?
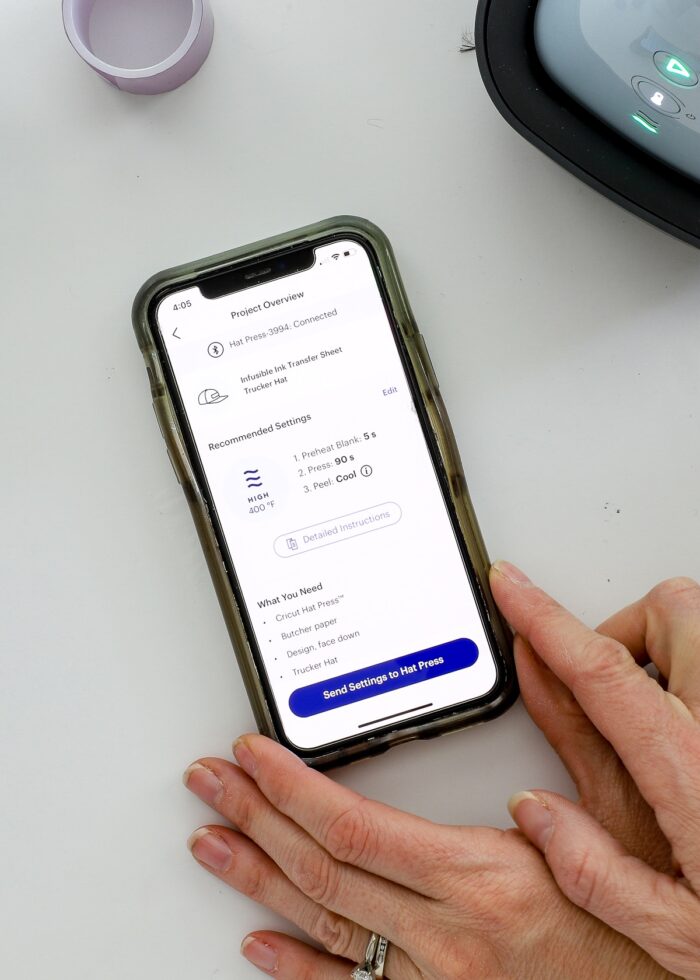
Turn on your Cricut Hat Press (via the power button) and then open the Cricut Heat App on your mobile device. Choose “Infusible Ink Transfer Sheet” as your material and your base from the “Blanks” menu. Once the Cricut Heat App auto-populates your precise time and temperature settings, click the blue button to send them to your Cricut Hat Press via bluetooth. (Need help with the Cricut Heat App? See my full Cricut Heat App Tutorial)
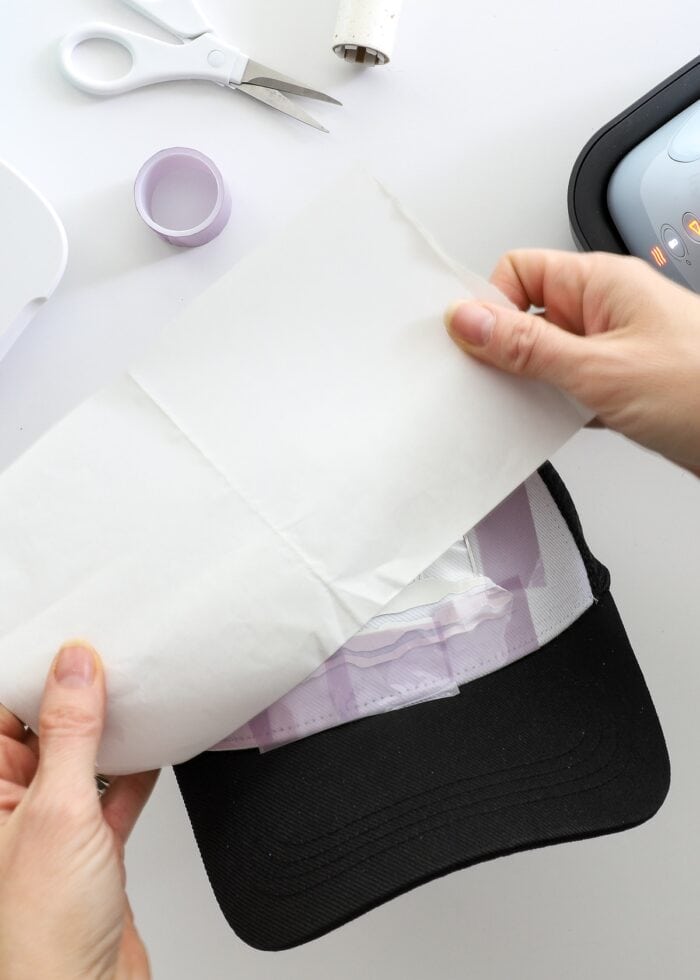
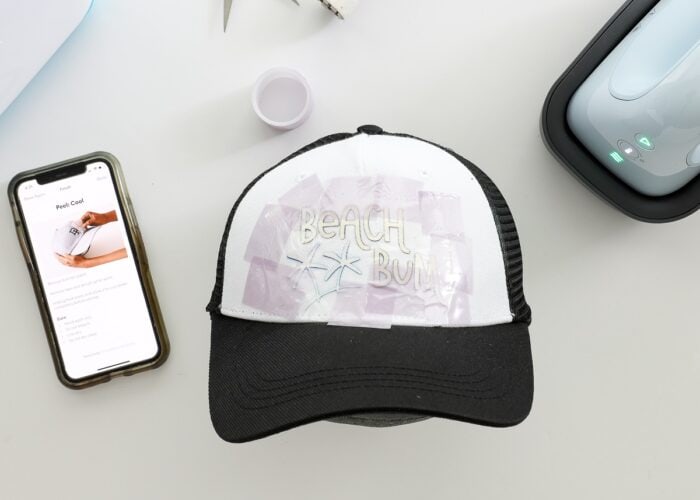
Whenever working with Infusible Ink, clean butcher paper is usually required; and hats are no different! Not only does this help create even heating, but it also ensures that no ink transfers back to the heat plate on the press itself. Butcher paper is included in every roll of Cricut’s Infusible Ink Transfer Sheets and can be purchased in bulk here.
Trim down a sheet large enough to cover your design. There is no need to tape it into place; it will stay put as you heat the hat.
For the most comfortable grip on the Cricut Hat Press, stand the hat up on its end with the bill pointing toward the ceiling. Then using firm pressure, move the Cricut Hat Press back-and-forth across the front of the hat, following the curve of the hat with the curved heat plate. Be sure to press the Start button on the Cricut Hat Press to begin the timer countdown; then keep the press moving until the press beeps again.
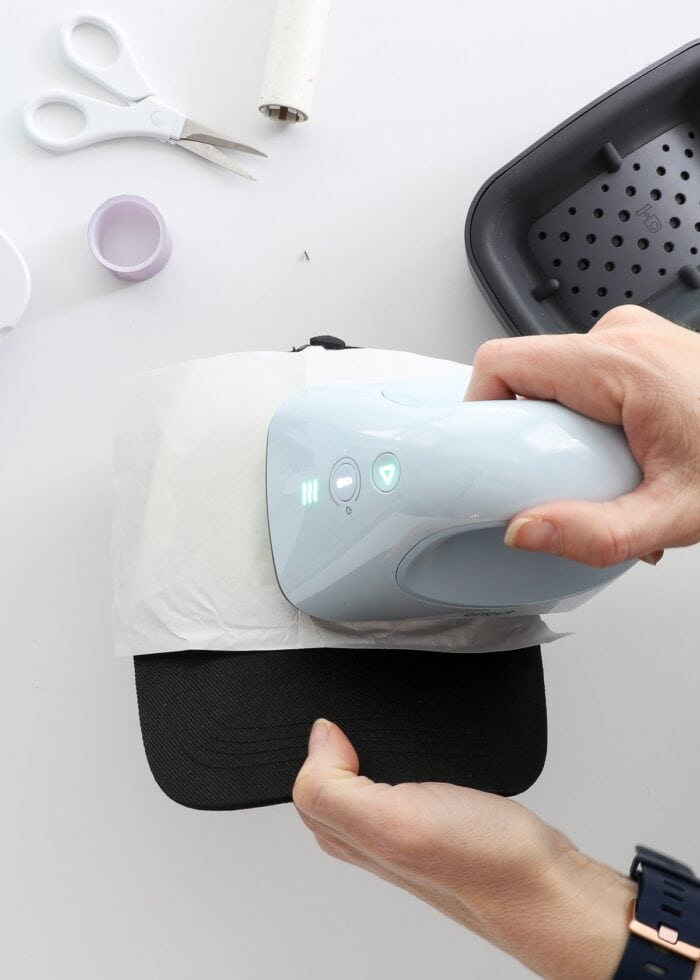
IMPORTANT! It is VERY important that you not only fully heat the far right and left edges of the design but also move the heat press down toward the bill of the hat. The edges will get the least amount of heat, which can lead to imperfect or uneven transfers. By moving both across the hat and up-and-down (from crown to bill), you will be sure to heat every aspect of the design thoroughly.
Step 6: Cool & Peel
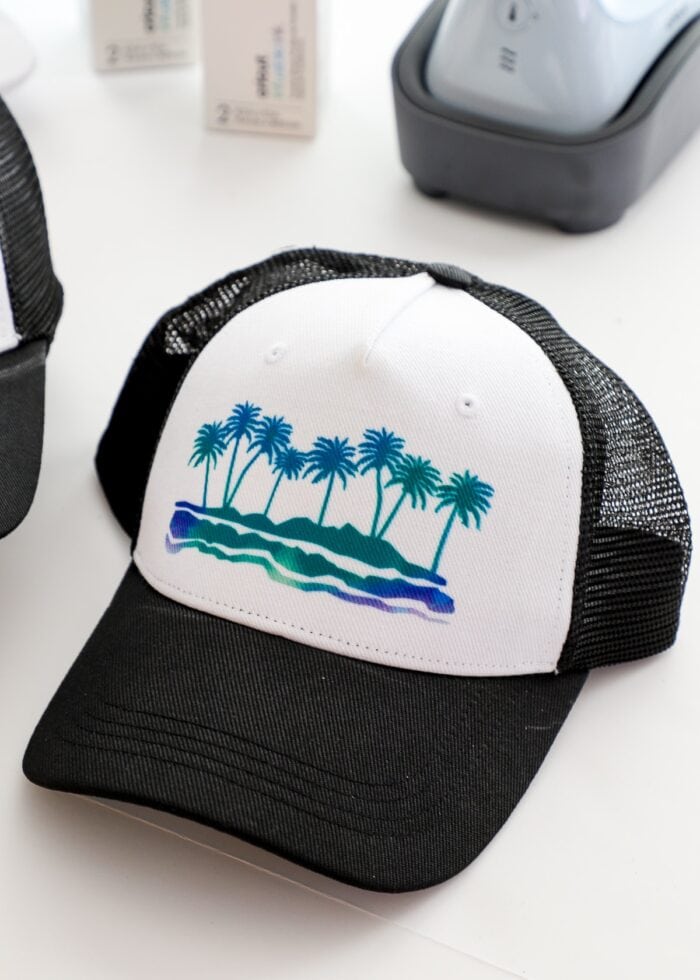
Once your hat is completely cool to the touch, peel up the tape to remove the carrier sheet and cut design to reveal your vibrant, permanent, washable design!

TIP! If you start to pull up your design and notice that it did not transfer evenly or sufficiently, you CAN place the design back down (in the exact same spot) and heat for more time. Unlike iron-on vinyl (which will melt with too much heat), you can safely re-heat Infusible Ink without damaging the design.
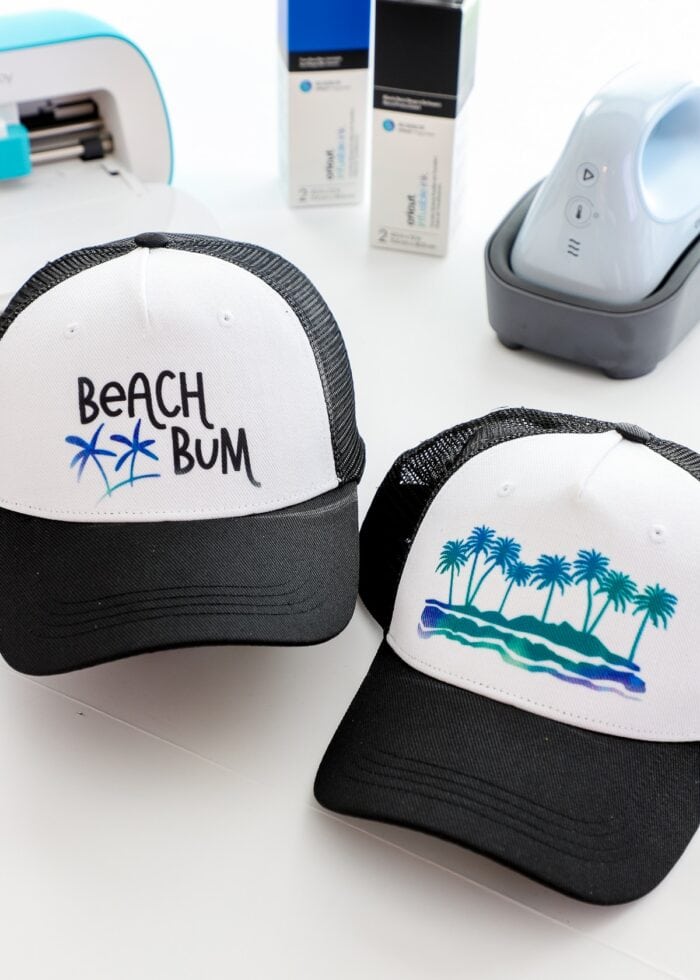
Making Multi-Color Hat Designs with Infusible Ink Transfer Sheets
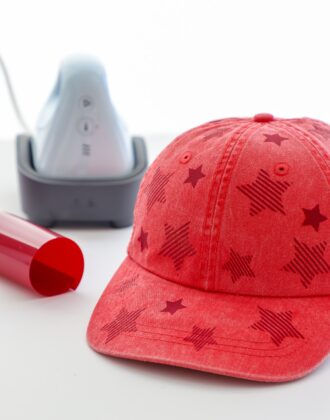
Because many of the Infusible Ink Transfer Sheets come in patterns, you can easily get a multi-color design from a single cut.
However, if you want to use two different colors (or patterns) on the same hat, here are some things to keep in mind!
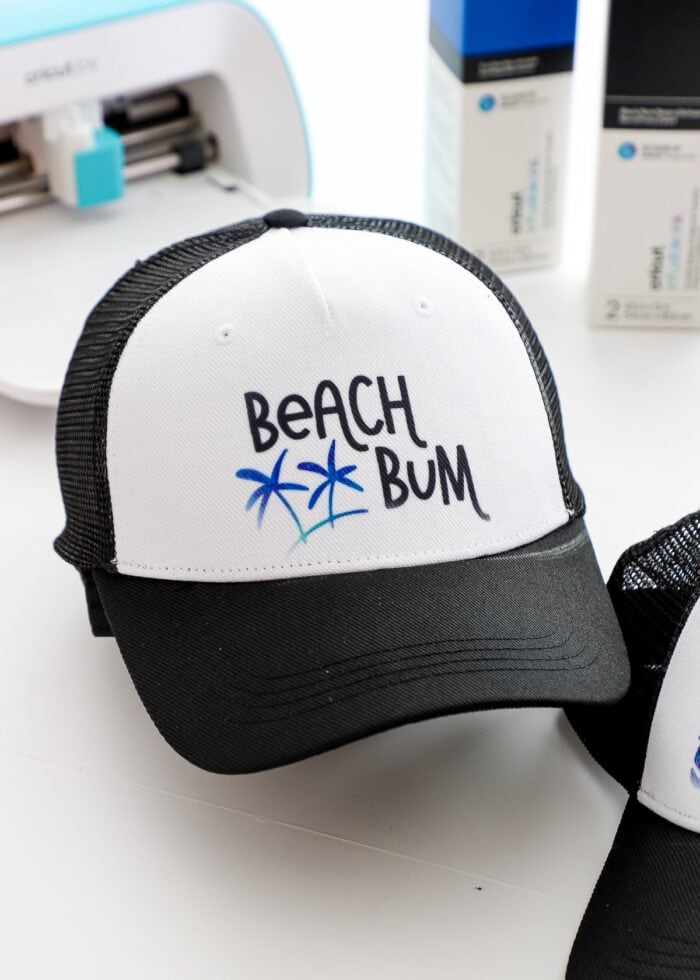
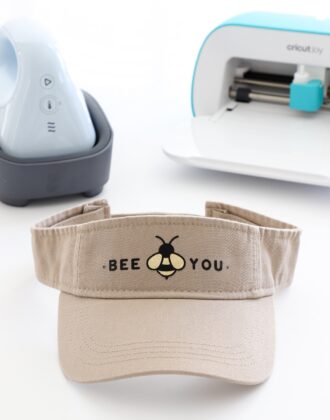
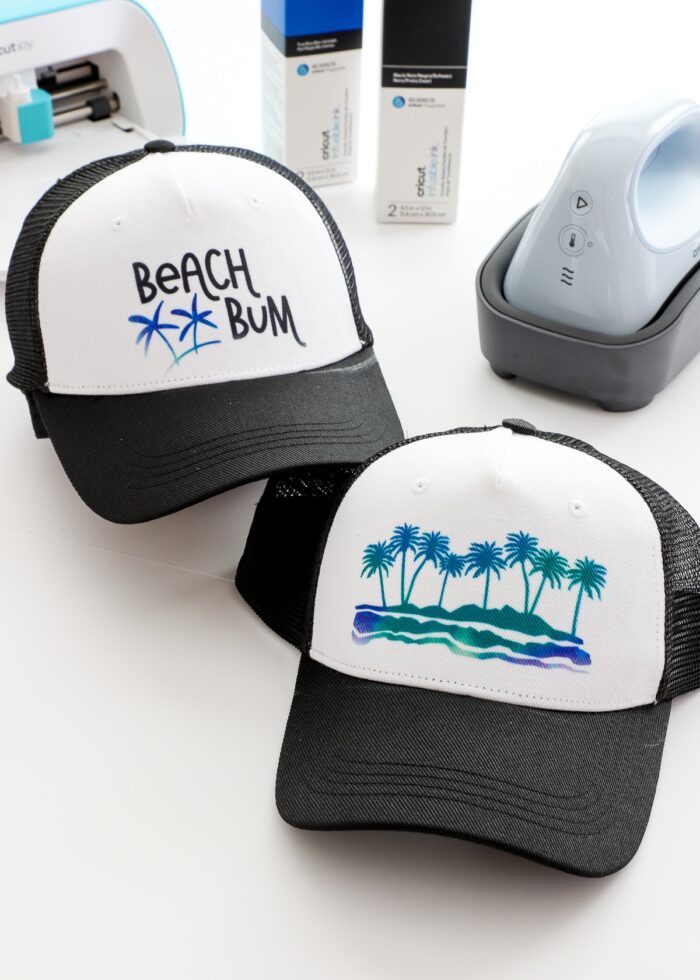
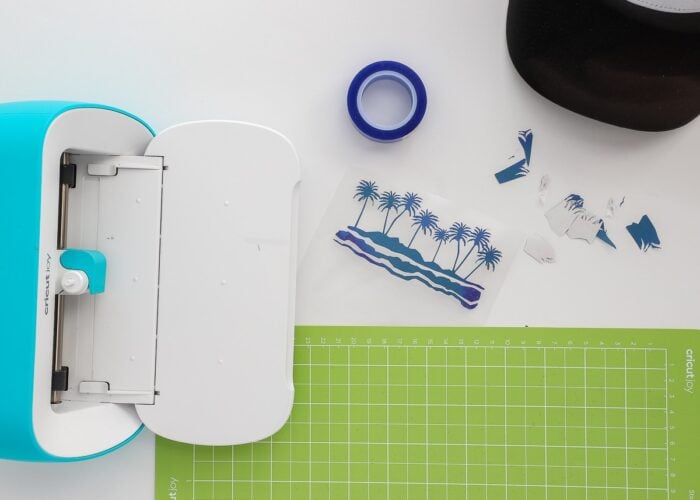
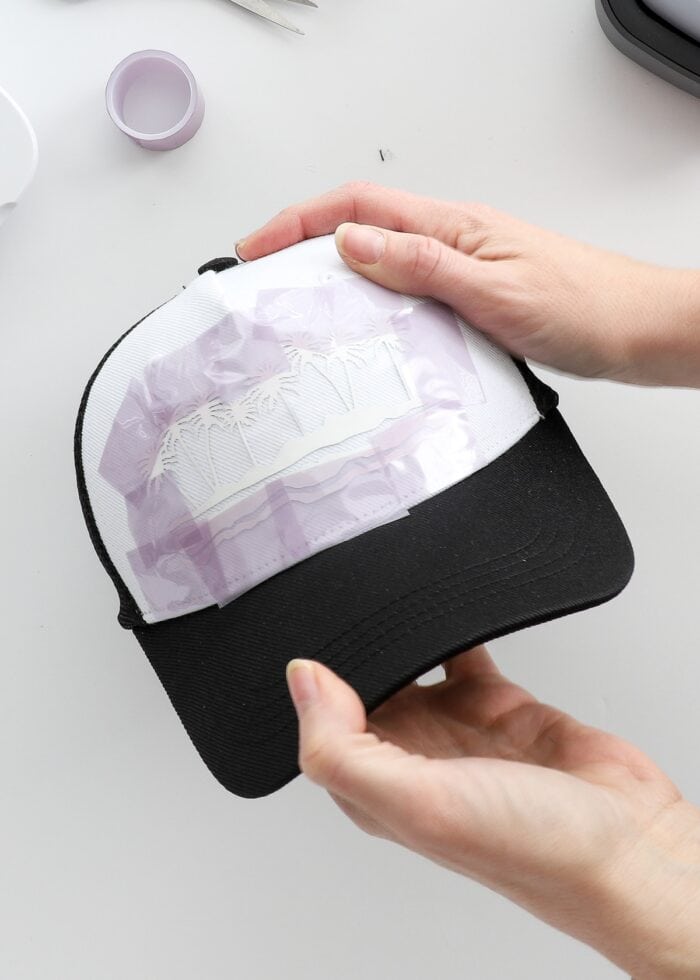
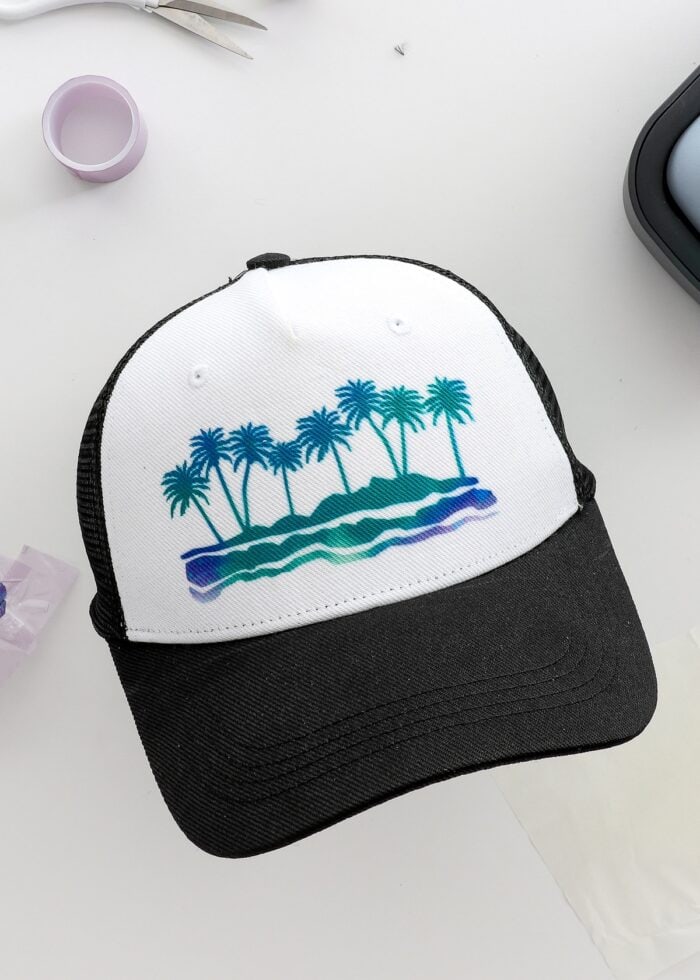
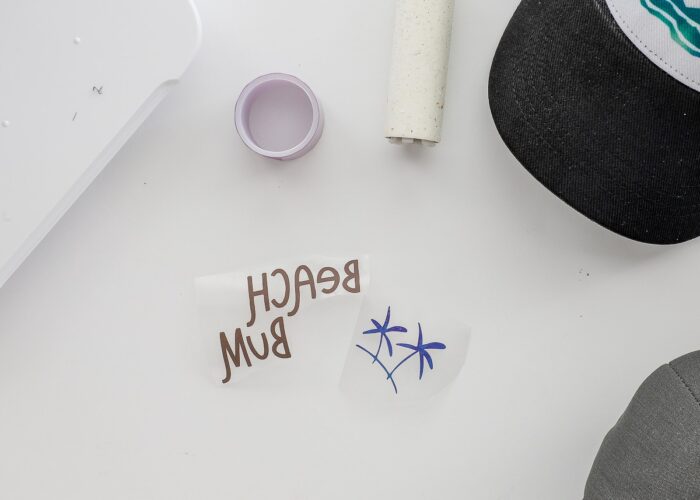
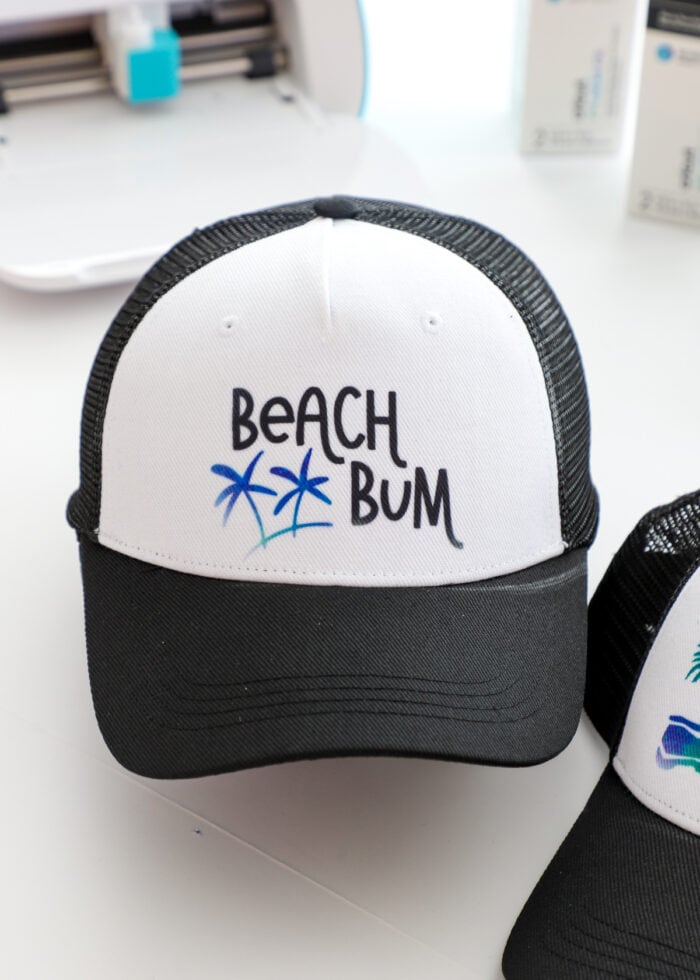
For this “Beach Bum” hat, I wanted the words in solid black and the palm tree in the watercolor blues/greens. So I cut out each part of the design from two different Infusible Ink Transfer Sheets accordingly.
To be clear, you CAN apply each element of the design one at a time. So I could have done a full application of the words first, then repeated the entire process to infuse the trees. However, anytime you double heat, you run the risk of your first infusion dulling just a little bit.
So whenever possible, I recommend fusing everything all at one time (it’s also quicker!) To do this, trim away the clear carrier sheet around each part of the design as close to the cuts as possible. This way, you can lay out the entire design at once without any carrier sheet overlapping another layer.
IMPORTANT! Before heating, triple check that every aspect of the Infusible Ink design is in contact with the hat and NOT on top of clear carrier sheet from another cut.
Like before, tape down every aspect of the design with as much Strong Heat Resistant Tape as needed to keep everything in place. Then follow the same heating method as outlined above to infuse all colors to your hat!
There are definitely pros and cons to creating hat designs with Infusible Ink compared to iron-on vinyl. While Infusible Ink will be much more durable and longer-lasting, the application process always feels a bit scary. It is all-to-easy to get uneven, imperfect transfers AND there is no way to “un-do” or remove the ink once it’s fused.
Therefor, my best advice when making custom hats with the Cricut Hat Press and Infusible Ink Transfer Sheets is to tape, tape, tape, and tape some more…and then heat every part of that design side-to-side and top-to-bottom…and maybe even a bit longer than the app recommends.
With some practice, I’ll know you’ll get the hang of it and will enjoy creating custom hats for every one in your life or every fun occasion!
Megan