How to Use Cricut Pens | A Comprehensive Guide
While most of us associate Cricut with cutting out shapes from paper or vinyl, did you know the machines can also be used for drawing and writing via Cricut Pens?!? Using pens with your machine is pretty easy and fairly straightforward, but there are some specific things you need to do when designing your projects so that they turn out just right. Today, I’m teaching you everything you need to know about using Cricut Pens. Once you master the basics outlined here, you’ll love adding “drawn” details to all your Cricut projects!
All About Cricut Pens
When to Use Cricut Pens
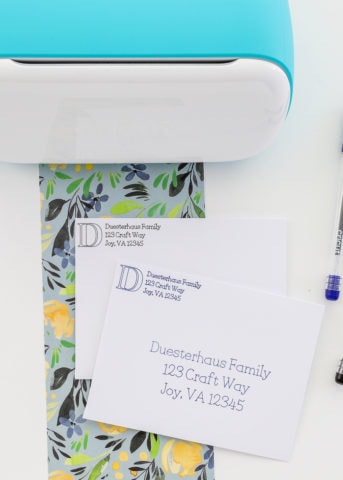
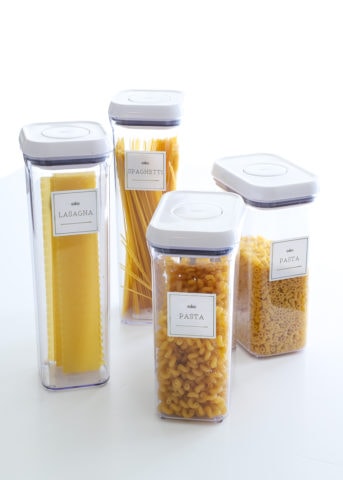
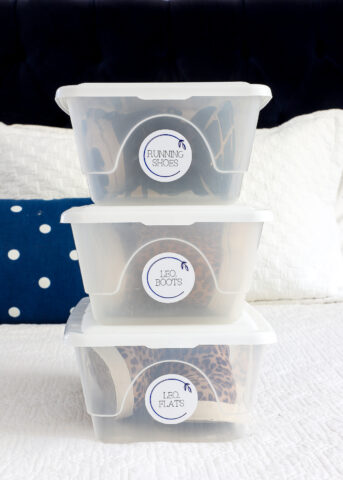
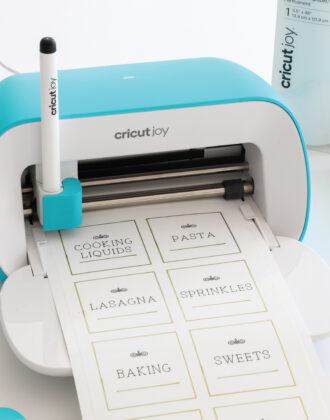
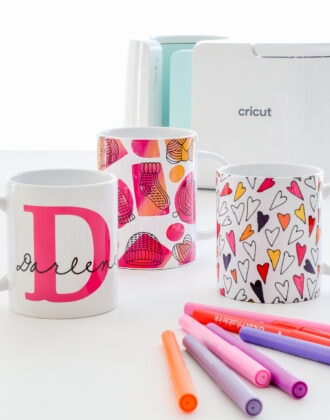
Depending on what kind of crafts you do, you may not have ventured much into using the Cricut Pens. Admittedly, I didn’t use them for a very, very long time. But over the years, I’ve discovered they are a great way to add fine-line details to craft projects, put names on gift tags, create coloring pages for my kids, and make custom labels for everything in our home!
In general, Cricut Pens can be used to add “drawn” or “handwritten” details to your projects. They are for illustrations and writing, but they cannot be used to “color in” outlines.
Picking the Right Cricut Pens For Your Machine
All Cricut machines accommodate Cricut-brand pens.
Cricut Explore & Cricut Maker. Most Cricut-brand pens are designed to fit into Clamp A on all Cricut Explore and Cricut Maker models. These pens will say “Cricut” on the side of them, and come in various colors, and weights. Ensure the packaging says, “For Explore/Maker models.”
Cricut Joy. The Cricut Joy machine cannot use “standard” Cricut Pens. The Cricut Joy pens are thicker, and are available in a more limited number of styles, weights, and colors. Cricut Joy pens will say “Cricut Joy” on the side/packaging.
There are third-party brands of pens, as well as an accessory adapter that allows you to use Sharpies and regular pens in your machine. I’ve personally never used these items, but here is a great guide for you to check out. Keep in mind though, that Cricut recommends using Cricut-branded pens for best results and this “hack” may void your machine warranty.
Picking the Right Cricut Pens for Your Project
There are now lots (and lots and lots!) of different Cricut Pens you can use on your projects. So how do you know what to use and when? Use the information below to help select the right pen at the right time!
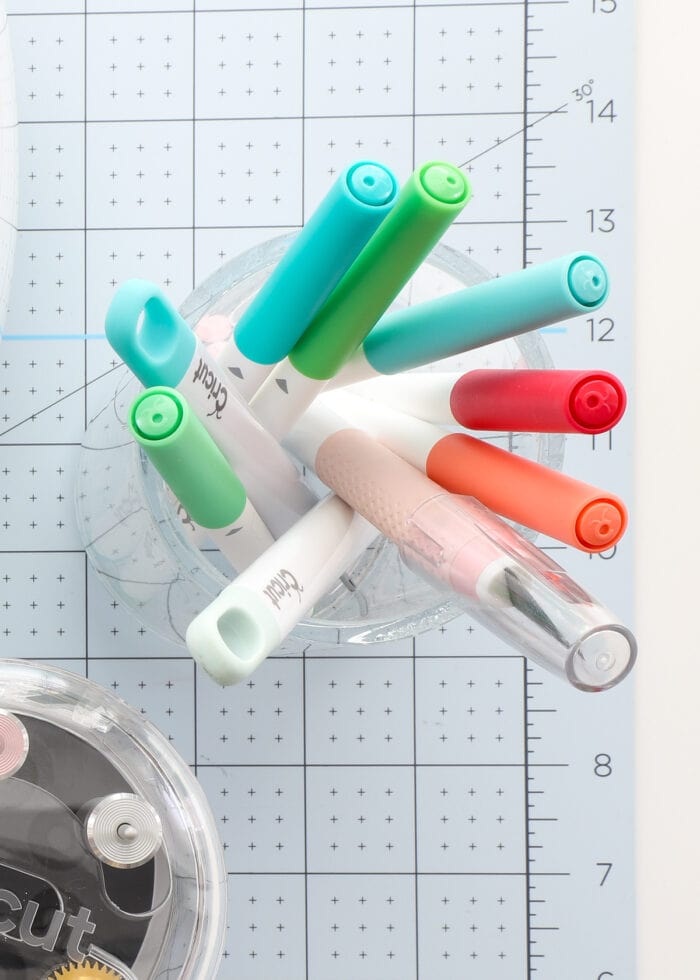
Pens. For most projects, you will use “pens.” These pens slide right into your machine clamp and come in a wide variety of colors, sheens (e.g., metallic, glitter gel pens), weights (e.g., fine point, extra fine point), and usually come in sets of fun color combinations. Pens are the most common tool for adding “drawn” details to projects.
Markers. Markers also fit into your Cricut machine just like pens, but they will have a thicker, more saturated line weight.
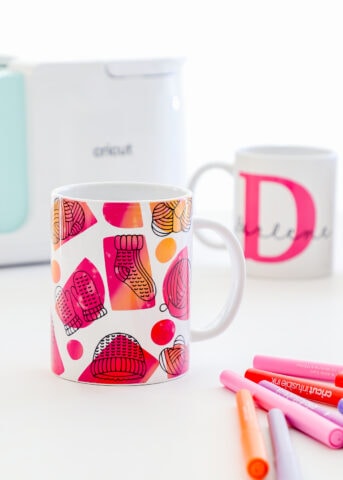
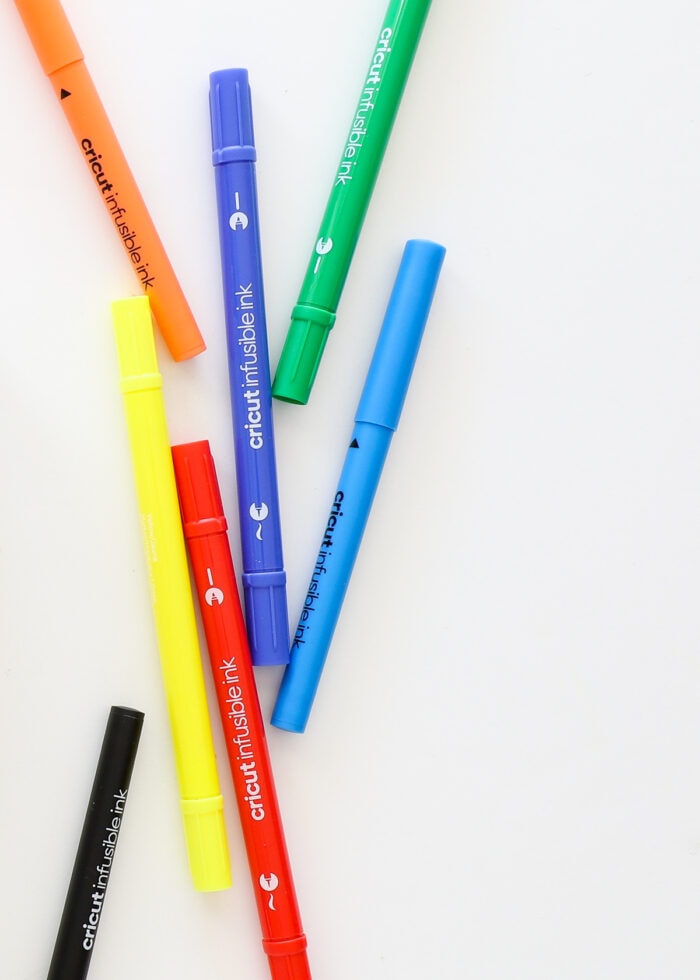
Cricut Infusible Ink Pens & Markers. These pens and markers are for adding “drawn” details to sublimation projects (e.g., coasters, mugs) with a heat press (e.g., Cricut EasyPress, Mug Press, etc). These pens should not be used on non-sublimation projects.
Free-Hand Markers. These are Infusible Ink markers that do not fit into a Cricut machine. Rather, they are intended to be used for coloring in sublimation designs by hand.
Washable Fabric Pen. This pen also fits into the A Clamp on Cricut Maker/Explore machines. It is used to “draw” important assembly details and seams onto fabric when cutting out sewing projects with a Cricut Maker.
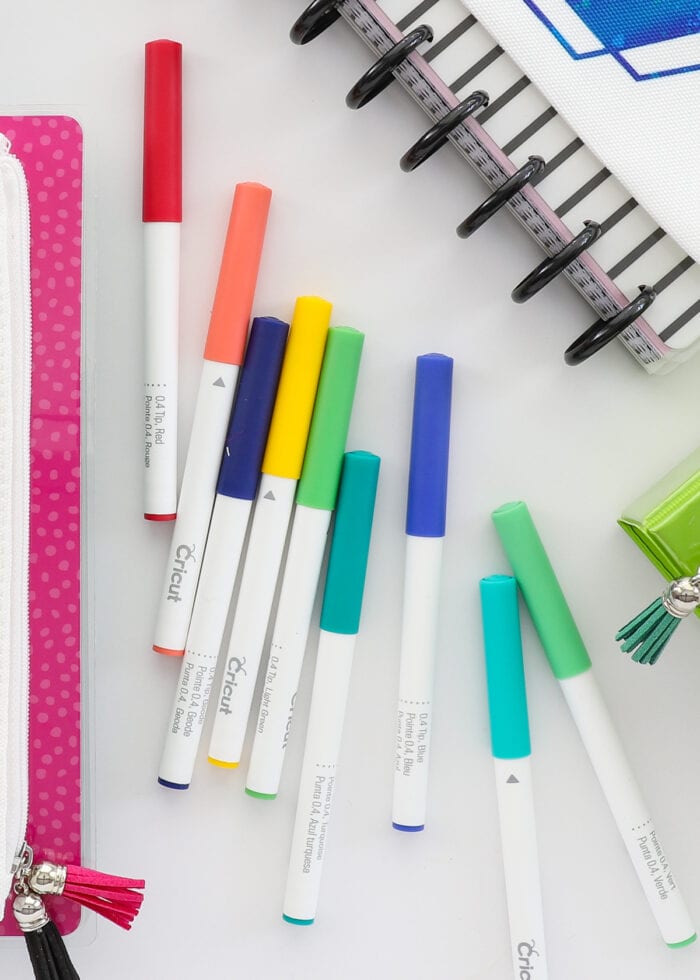
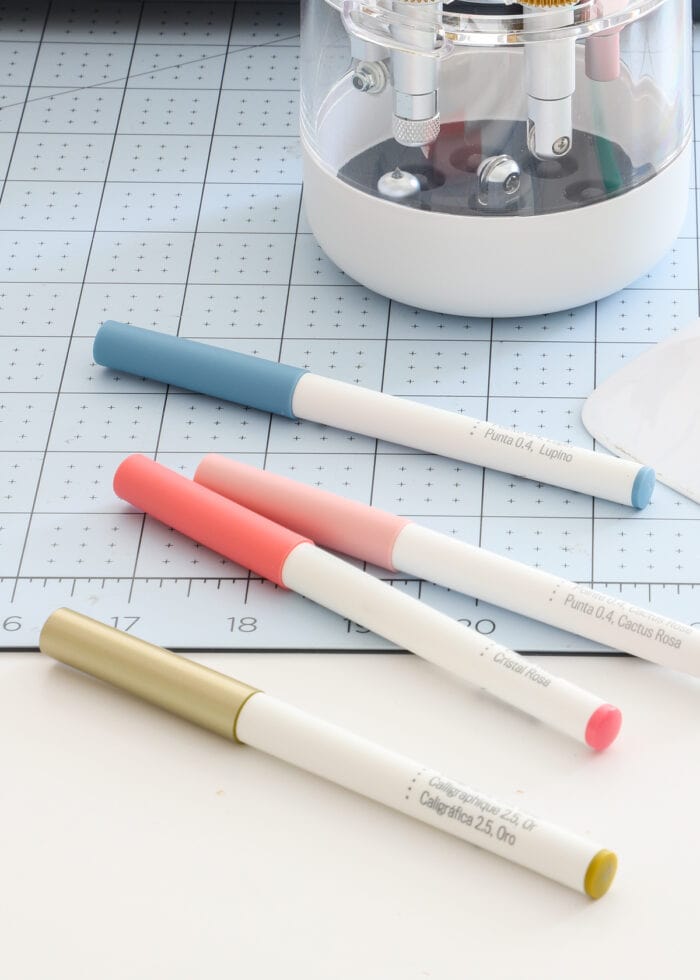
Understanding Pen Weights
Pen weights range from Extra Fine Tip (0.3) to Calligraphy (2.5), with several steps in between. The pen’s weight, as well as the color, are printed right onto the side of the pen for easy reference. The pen’s color is also represented on the cap and end of the pen.
Any pen weight can theoretically work on any project; however, after a lot of experimentation, here are some general guidelines for getting crystal clear results with the different types of pens:
- Extra Fine Point Pens (0.3) – These pens create very fine lines and are perfect for any tight, small details on your projects; they are my preferred pen weight for writing words/text.
- Fine Point Pens (0.4, 0.5) – Most Cricut Pens sets will be this weight; they produce a nice clean line that is both solid enough to see, but not too thick for finer details.
- Pens & Markers (0.8, 1.0) – These pens will create a heavier line, so they shouldn’t be used on anything tight or detailed. They are better for adding thicker lines of color to your projects.
- Heavy/Calligraphy Pens (2.0, 2.5) – These pens produce a very thick line, and some even have a slanted tip. These pens should be used when you want a thick drawn detail on your projects.
TIP! If you’re not sure which weight will look best on your project, test a small part of the design in the various pen weights to see which one looks best.
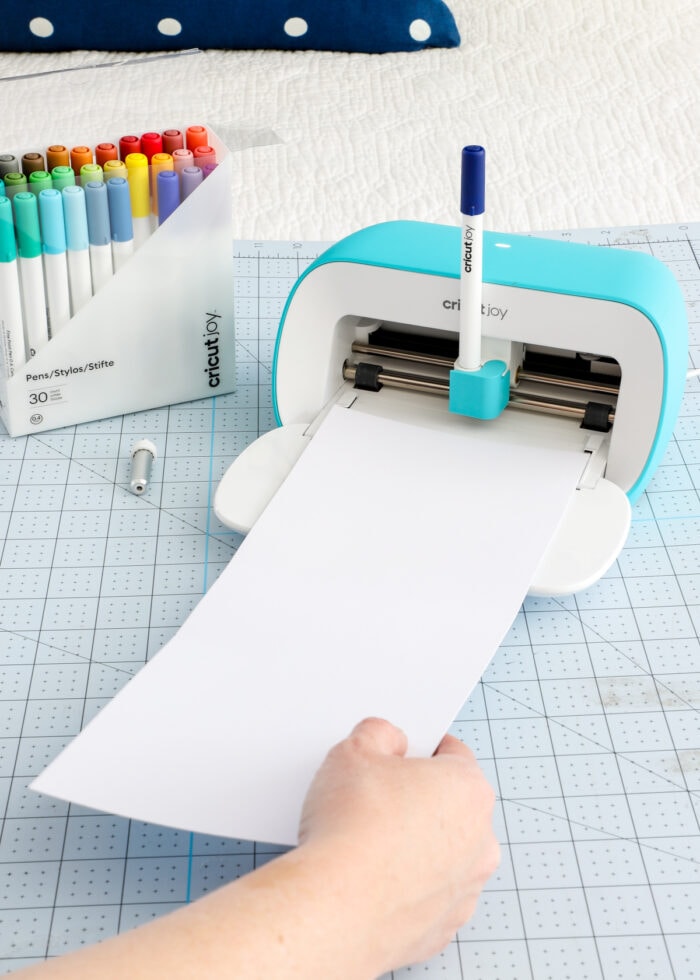
How to Load Cricut Pens Into Your Machine
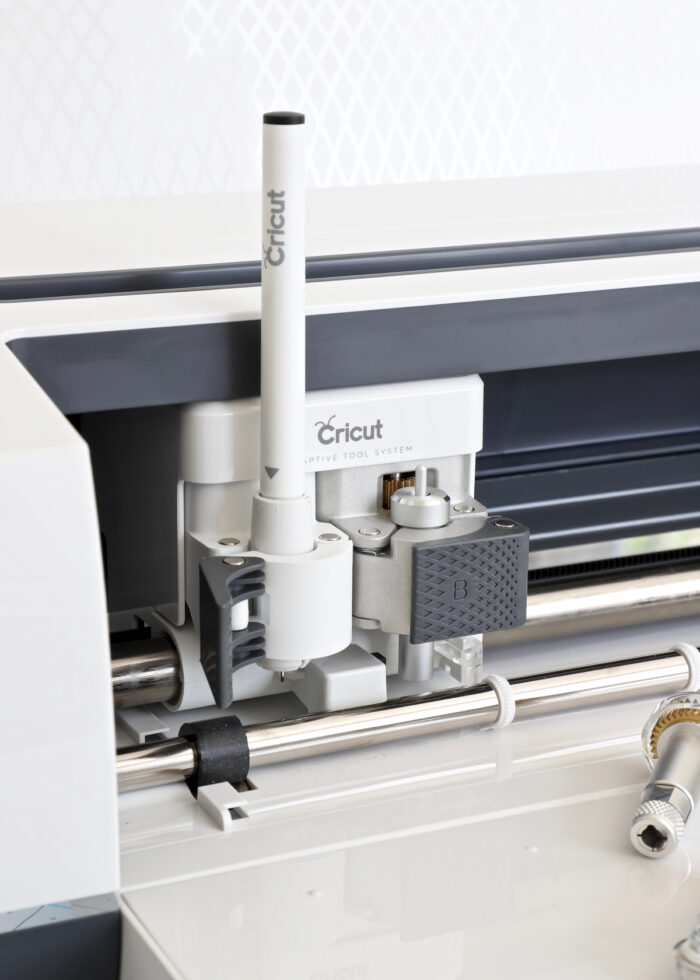
Cricut Explore/Maker Models. Both of these machines have two clamps on the cutting mechanism, the A side and the B side. The B side always holds your blades, and the A side holds other accessories, such as the Scoring Tool and Cricut Pens.
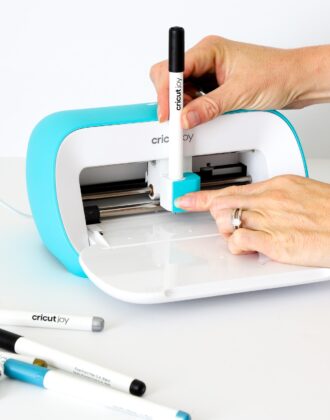
When you put the pen in, don’t be afraid to push it down with some gentle pressure until it clicks into place and the arrow on the pen itself hovers just above the clamp. Be sure to close the clamp (the grey piece with the letter A on it) to firmly hold your pen in place while the machine runs.
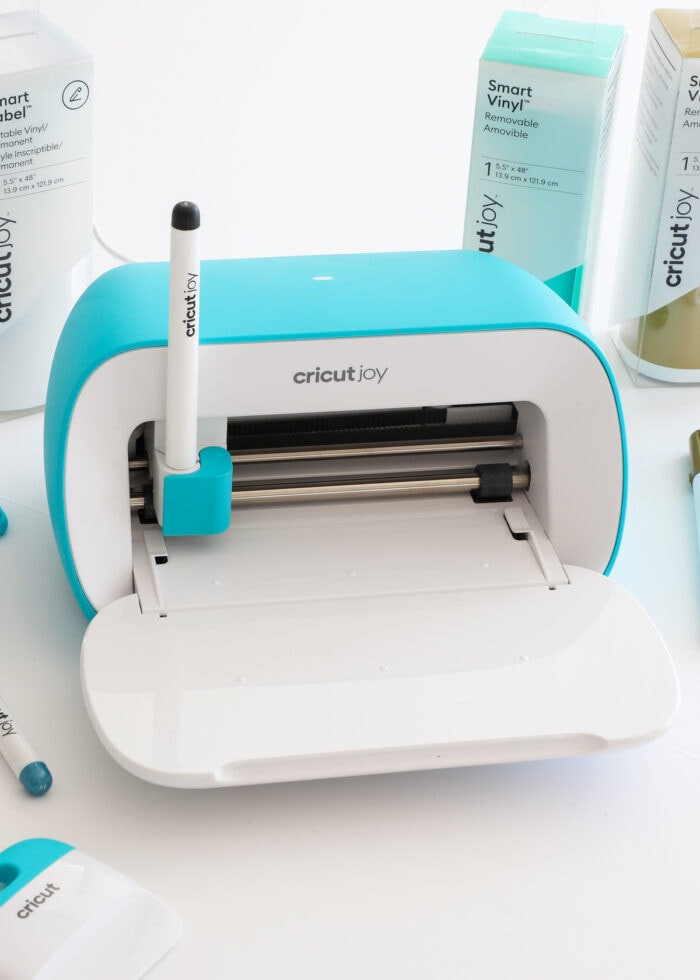
Cricut Joy Models. The Cricut Joy machines only have a single clamp that hold both the blade and the pen. When Cricut Design Space prompts you to load a pen, slide it right into the holder and close the clamp. No pressure is needed, and there will not be a “click.”
When to Load Cricut Pens Into the Machine
Almost always, any details created with Cricut Pens will be done first; other operations such as Score and Cut will be done once the drawing is complete.
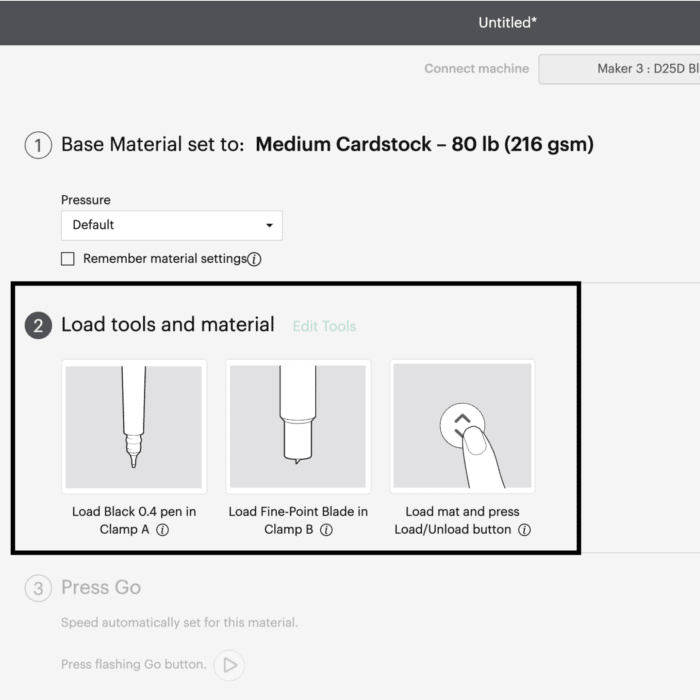
That said, you don’t ever have to guess! Although often overlooked, the final cut screen in Cricut Design Space will tell you everything you need to know about when, where, and how to load the Cricut Pens into the machine for your specific project.
Simply put: Don’t know when to load your Cricut Pen? Just wait until Cricut Design Space tells you to!
Understanding Operations “Draw” & “Pen”
What Is an “Operation” In Cricut Design Space?
There are many “Operations” a Cricut machine can perform. An “Operation” is the designation for how a particular image is created. Options are dictated by what machine you have and include things like Cut | Draw | Print Then Cut, etc.
All machines can “Cut” and “Draw” with pens, while Explore and Maker models can also perform speciality operations such as Score, Deboss, etc.
Understanding the “Draw” Operation In Cricut Design Space
“Draw” is a term that refers to non-cut lines in Cricut Design Space. These are single-line details that can be added to projects via specialty tools (e.g., Scoring Tool, Foil Tip, pens, etc). There are now many “sub-functions” to the Draw operation, including Pen | Foil | Score | Deboss | and Engrave.
On the design canvas, these lines will all look the same: just single lines. But in order for them to be created with a pen versus the Scoring Stylus versus the Foil Tip, the specific “Operation” must be designated for that particular layer. You can easily identify the operation of each layer by referring to it in the right-hand Layers Panel.
Understanding the “Pen” Operation In Cricut Design Space
Whenever text or an image (or a certain part of an image) is supposed to be created with a Cricut Pen, it should be designated as “Pen” (one of the Draw sub-functions). This tells the Cricut machine to create these lines with Cricut Pens, and the software will then prompt you to insert pens into the machine at the correct time.
How to Draw with Cricut Pens
Setting Images to the “Pen” Operation
When you place most images onto your design canvas, they will be “Cut” designs by default, meaning the Cricut machine will cut out the design rather than draw it.
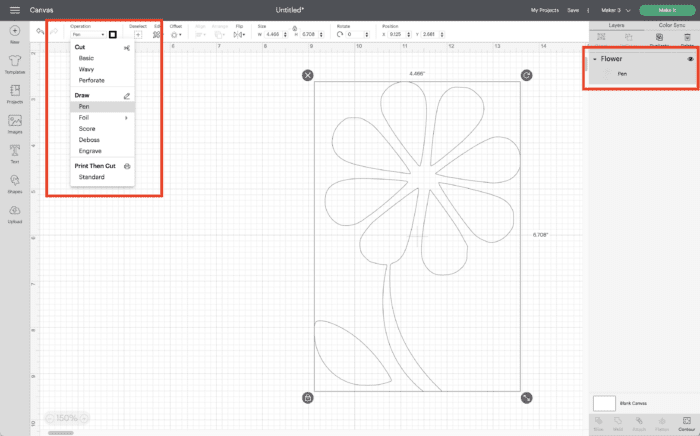
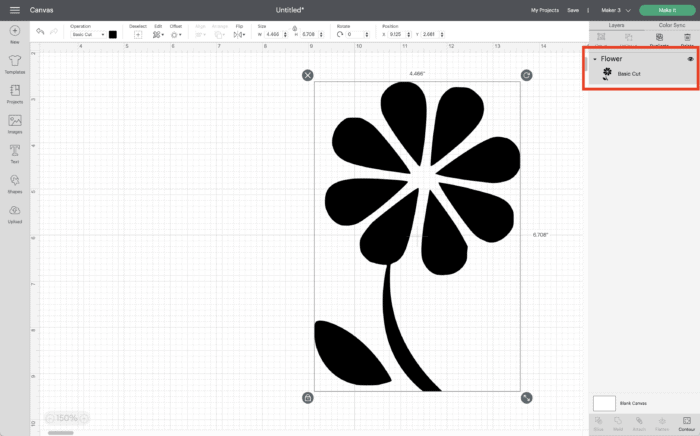
You can easily change any “Cut” outline to be drawn instead by changing it to “Pen.” Simply select the layer and click “Pen” under the Operation dropdown menu in the top toolbar.
When this is done, the “Cut” lines will simply become “Pen” lines. It’s important to understand here that no matter how “skinny” the image may have been, this will still create an outline of the original image.
Setting Text to the “Pen” Operation
By default, when you place text onto your design canvas (via the Text Tool), it will also have a “Cut” operation, meaning the machine will cut out the words from a material.

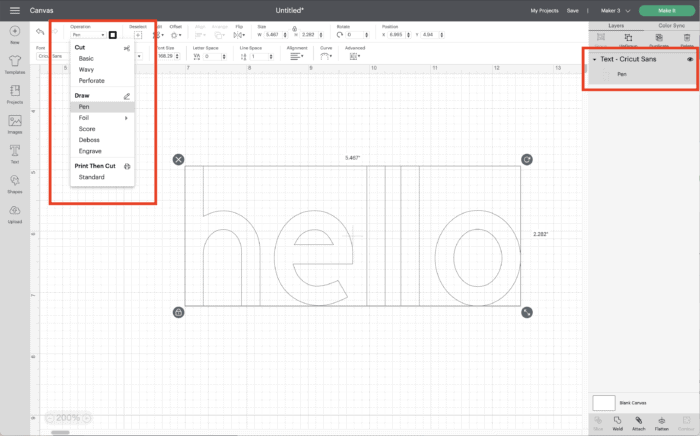
Just like described above, you can change any line of text to “Pen” by changing the operation. Select the layer, then select “Pen” from the Operation menu in the top toolbar.
Want to save this post?
However, when you do this, notice that the previous cut lines are simply changed to “Pen.” Changing the operation type creates outlines of letters; it will NOT change the font to look like writing.
How to Create “Handwritten” Text
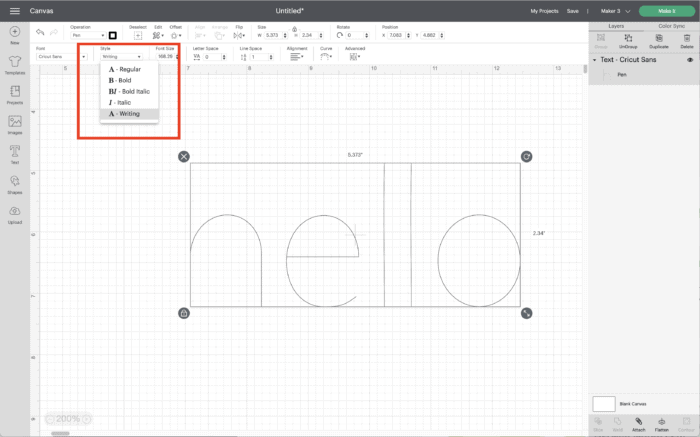
If you want your text to look written by hand (not outlined), you will need to change the font to a Writing Style instead.
With the font selected, click the Style menu in the top toolbar and look for “Writing” under Bold, Italic, etc. By clicking “Writing,” the font will change to single strokes, rather than outlines.
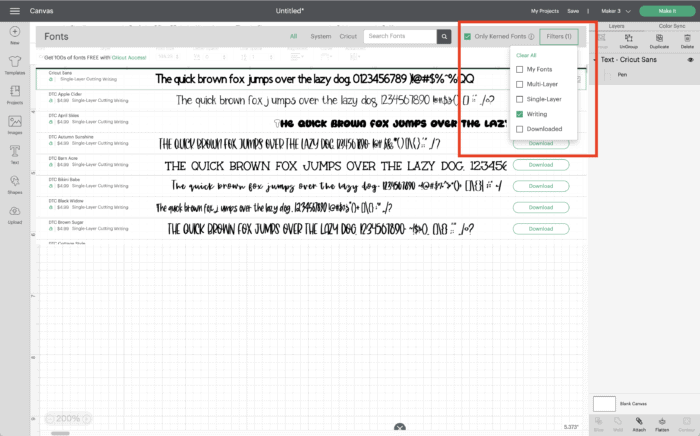
Not all Cricut fonts have a “Writing” option. So if you are working on a project that you absolutely want to have a handwritten appearance, you need to identify “Writing” fonts by filtering them within the Font Menu.
Finding “Draw” Images in Cricut Design Space
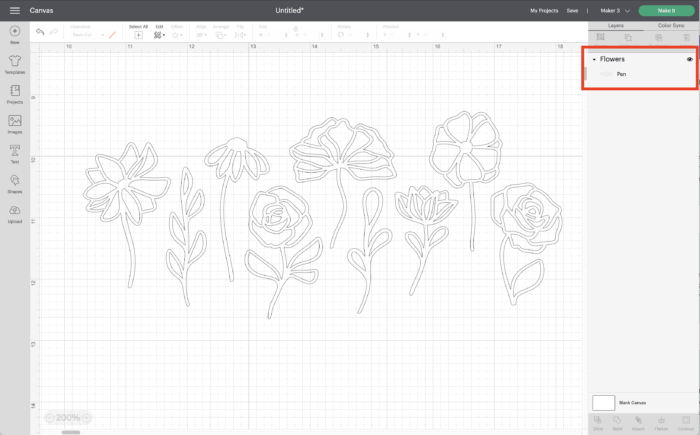
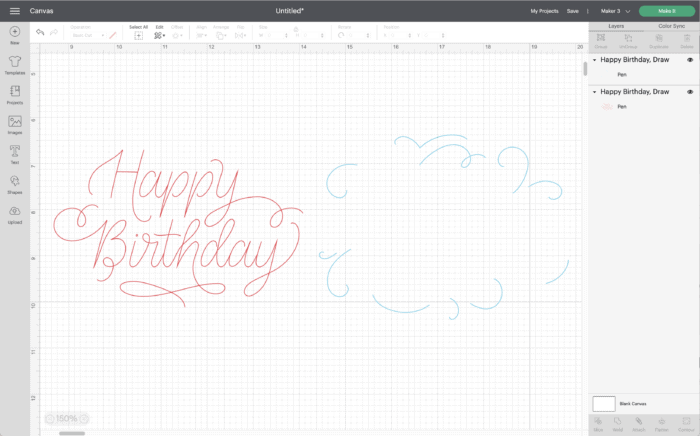
Although technically any design can be switched to a “Pen” operation, hopefully these two examples illustrate why there are now so many designs in the Cricut Design Space Image Library that are designed to be “Drawn” instead of “Cut.” Instead of outlines, these images are specifically designed to have finer details created with pens (or the foil tool, engraving tool, etc).
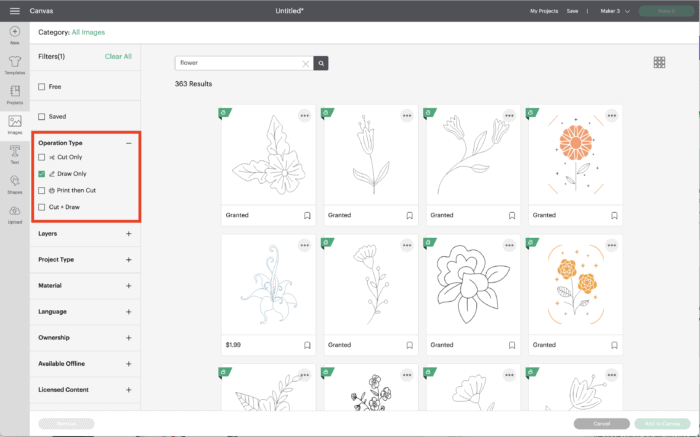
To identify these images, click the “Draw Only” filter under “Operation Type” inside the Image Library. This will yield hundreds of awesome designs that were intended to be “Drawn” without any manipulation or awkward outlines!
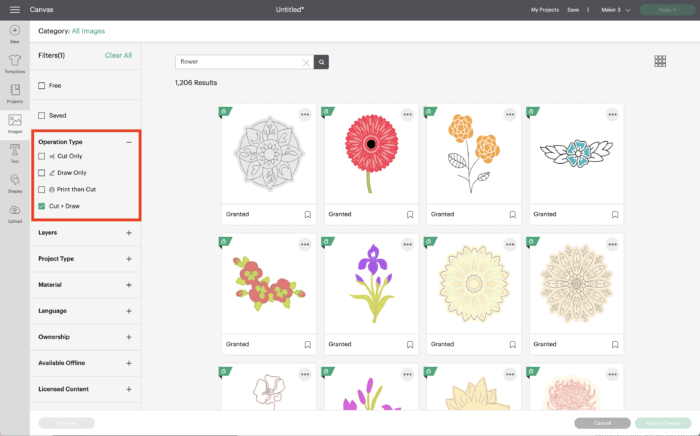
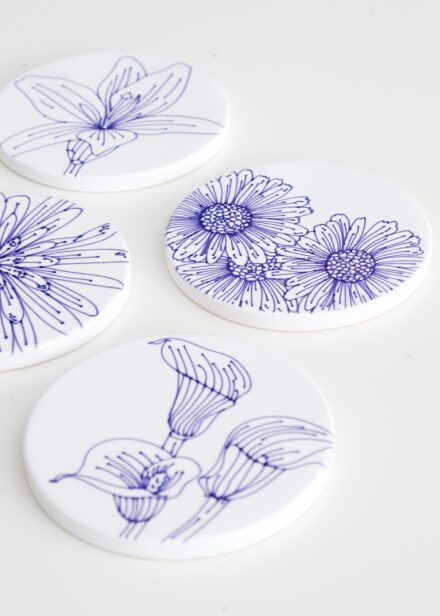
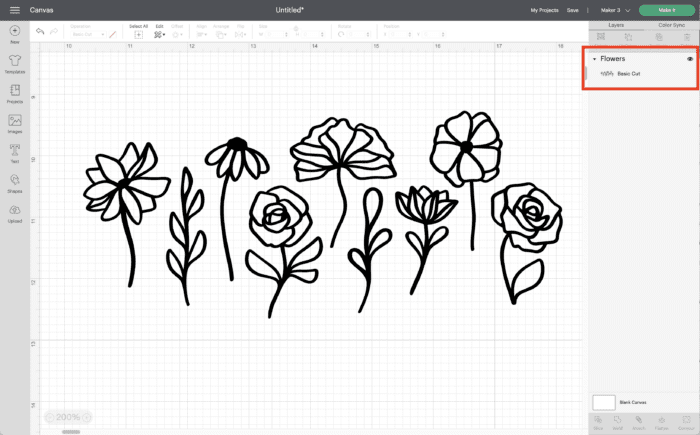
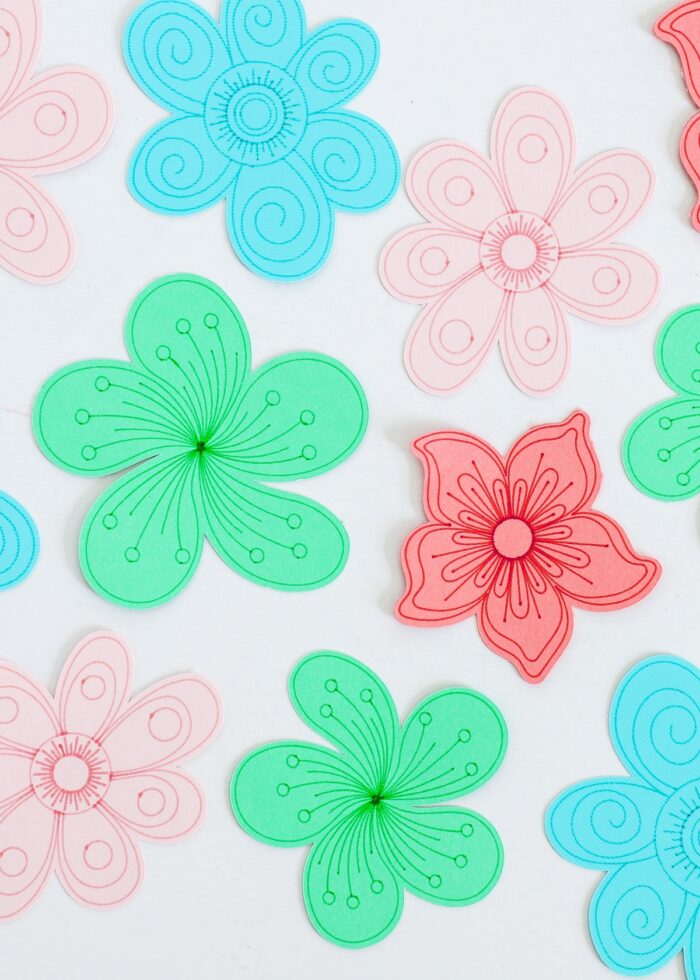
Further, by filtering for “Cut + Draw” under “Operation Type” in the Image Library, you will find images where “Draw” details are included as a separate layer on top of a matching “Cut” designs, like these flowers.
Creating Multi-Color Pen Designs
Why Designate Pen Colors/Weights
Although it is not 100% required to designate your pen color in Cricut Design Space (the software can’t control which pen you actually place in the clamp!), I do recommend taking the time to make a selection every time. Here’s why…
Although it’s easy to gloss over, the final cut screen in Cricut Design Space is filled with all sorts of helpful information to execute your project. In the graphic below, notice how it tells you exactly which pen to place into the clamp. When you designate a pen color for each element of your project, you simply need to do what it says and when!
This is especially important when you create projects with multiple pen colors, weights, etc. Cricut Design Space will actually pause, mid-project, and tell you to change to the next pen you have designated. Since it can be very difficult to predict what the machine will draw when, pre-designating colors/weights on the design canvas and following the on-screen prompts is the only way to ensure your multi-color projects turn out right!
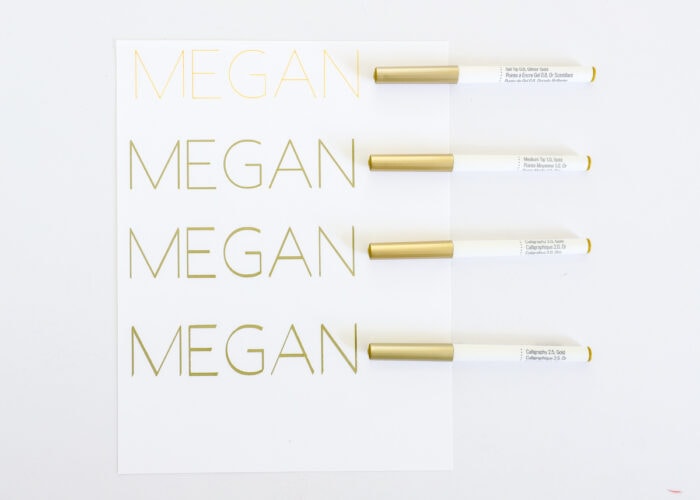
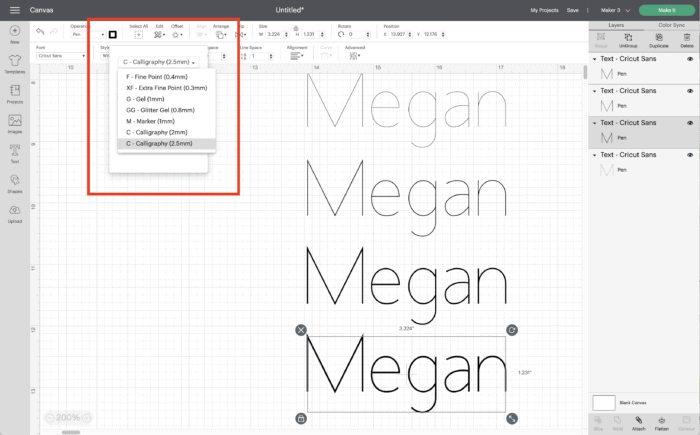
TIP! Both pen colors and weights now reflect on your virtual design canvas in Cricut Design Space. In the graphic below, I have each “Megan” set to a different weight (0.8, 1.0, 2.0, and 2.5); as such, each version looks slightly heavier than the last. This can help you better visualize the right pen weight for your project!
How to Change Pen Colors/Weights in Cricut Design Space
Select your layer in the right-hand Layers Panel and ensure it is already changed to “Pen.”
Next to the Operation dropdown, click the colored square to select precisely which pen you want to use for this particular detail (down to the color and weight.) Click on the color to make a selection.
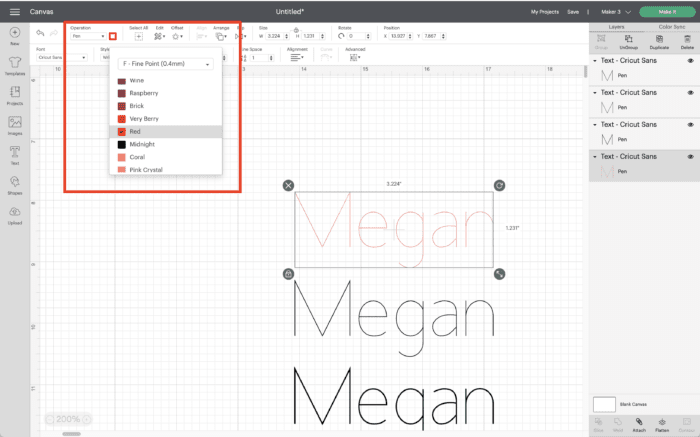
NOTE: The pens shown in the dropdown menu actually correspond to available Cricut Pens!
The layer will appear different on the canvas, and now Cricut Design Space will prompt you to load that exact pen at the right time for that layer to be drawn correctly.
How to Make Multi-Color Pen Designs
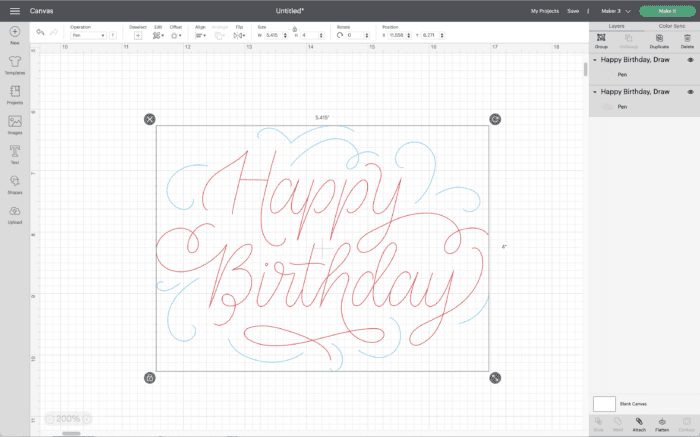
As already shown, it’s really easy to change the color of an entire layer. But what if you want to change just part of a layer? The best way to change pen colors for just some of a design is via the Contour Tool.
With an image selected, click on the “Contour” button along the bottom right-hand toolbar.

A window will open that allows you to toggle various parts of the design on/off. Turn OFF any details you don’t want a particular color (in this case, red). Then exit out of the Contour Tool.

Duplicate the image, and open the Contour Tool again. This time, toggle on/off different elements to make them a different color. Exit out of the Contour Tool and change the layer to a new color (in this case, blue). Repeat as many times as needed to change the colors of different design elements.
Finally, center the re-colored versions of the same design onto each other and “Attach” them. Now the single design will have different colored elements and Cricut Design Space will prompt you to change pens accordingly!
How to Place Text Onto a Cut Shape
When you are creating designs with Cricut Pens, you are most likely trying to put your text or drawn details onto a cut out, whether it’s a tag, invitation, label, shape, etc. Yet even if you have your text on top of a shape on the virtual design canvas, it won’t actually be executed that way unless you have the two layers attached together. Need more help? How & Why to Use the Attach Tool.
Using the Attach Tool is the final step in applying “drawn” details to your projects, so let’s work through a few examples:
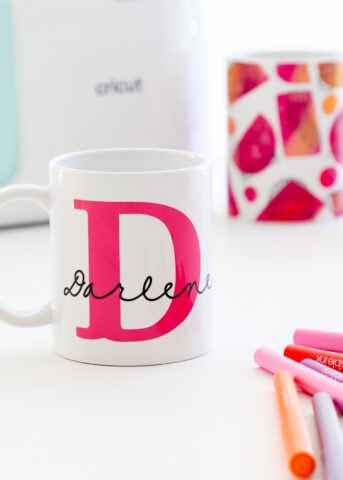
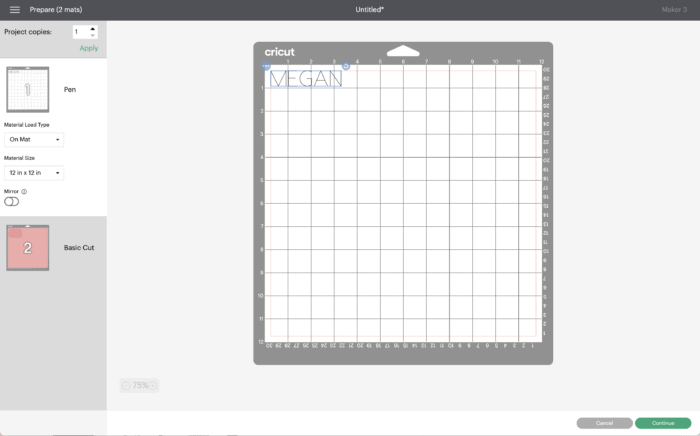
If you look at the right-hand Layers Panel, “Megan” is designated to be drawn in “Pen,” and the pink label shape is set to “Cut.” Obviously, I want “Megan” written directly onto the pink label.
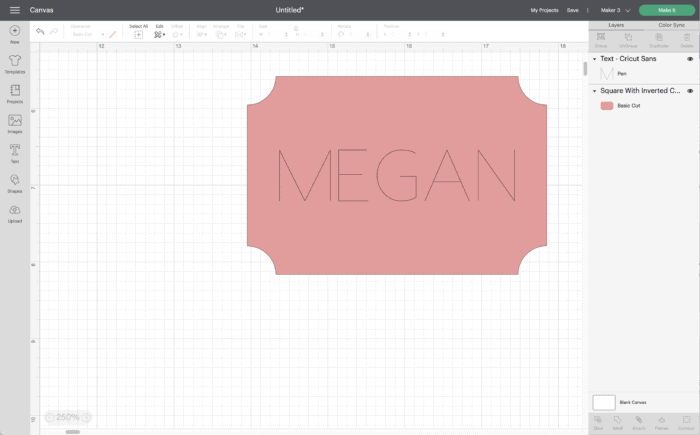
However, when I send it to be cut, the “Megan” is being drawn on a separate mat as the pink label.
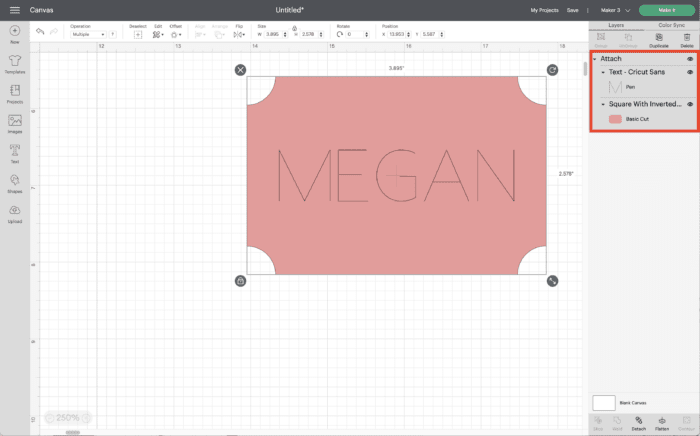
In order to get your text drawn directly onto your cut shape: select both the shape and the text, and then click “Attach” along the bottom right toolbar.
You will know your separate items are attached when:
- They are shown as an “Attached” set in the right-hand Layers Panel
- When “Attach” toggles to “Detach” in the bottom right-hand toolbar.
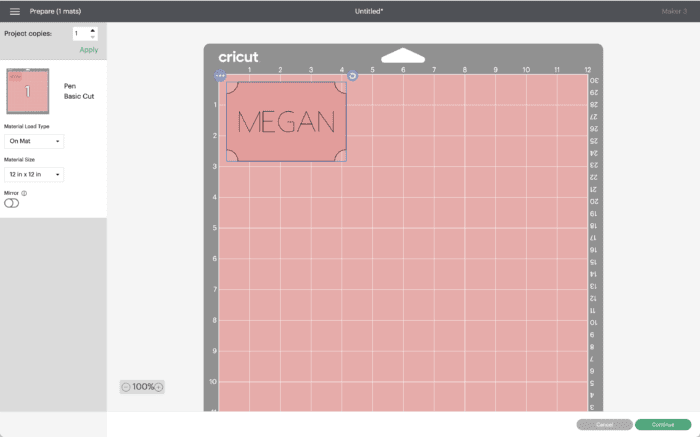
With the designs now “Attached,” you will see that the text is written directly onto the cut label on the Cut Preview screen!
I realize I opened this post saying that Cricut Pens are quite easy to use – and they are (even if this lengthy guide suggests otherwise)! If you are new to using your Cricut and/or Cricut Pens, these instructions might seem overwhelming at first. But once you walk through the steps, you’ll soon see that switching layers to “Pen” and loading/unloading your pens at just the right time is indeed very straightforward. After you give your first pen project a try, I know you’ll feel confident adding these details to your projects time and time again!
Megan
28 Comments on “How to Use Cricut Pens | A Comprehensive Guide”
This was AWESOME! Thank you so much for all the work that went into this tutorial on using pens with my cricut. Some of the basics I already knew but most of the info was new and extremely helpful. Well Done!!
Excellent article!
Hi, I am trying to write with cursive fonts in Cricut design space. I know how to move the letters closer to each other to look like one continuous stroke. But I want to know how you can do that with a pen. Because it’s very hard on the screen to connect it to look like it’s going to write smoothly once I send the project to my cricut.
Hi Laura,
You are correct. Even if you nudge your letters super close together to make them appear like a continuous stroke, the machine will likely still write one letter (in its entirety) at a time. Unfortunately, there is no way to weld letters at this time, which would be the way to eliminate any letter crossover.
At this time, your best bet is to zoom in as much as possible and line up your letters as best you can manually. Use a finer tip pen to see how you like the results!
Sorry I don’t have a better answer for you but good luck!Megan
Hi Megan!
Do you “seal” your pen creations with anything? I did a drawing on canvas and am wondering if I should use any type of sealant over the top before attaching the frame!
Thanks for some great ideas!
Hi Nicole,
Hmmm….I’ve really only used the pens on paper so I’ve never really thought about sealing them. While you certainly could, I’d be worried they might bleed. My gut says there is no need to seal it, but you could always do a test (along the side/back) to see!
Sorry I can’t be of more help on this one, but your project sounds awesome!Megan
Wow! This tutorial is wonderful! I’ve had my Maker for a while and have cut paper and vinyl but have never been able to quite figure out using the pens. I was frustrated because I knew it could do way, way more than I was able to make it do. More than ever I’m convinced that there’s NOTHING it can’t do! Thank you SO much!
I am so glad you found this tutorial helpful, Lynda!
Have fun playing with your Cricut in this new way!Megan
Hmm. I was looking for information concerning the brands of pens that fit into the Explore Air 2 and will write on glossy vinyl. I’m having a difficult time locating specific products and am trying to use what’s available at the moment.
Hi Erin,
Thanks for writing. I personally haven’t experimented with non-Cricut brand pens, but I know other bloggers have so you should be able to find some info out there. Regarding writing on Glossy vinyl, all Cricut pens will work on the “Smart Label” vinyl, whether you use it with a Joy machine or not. Something to think about!
Good luck with your project!Megan
How do I get a thicker drawn line? No matter what font I pick it’s a very thin line when I type my desired text.
Yes – all line thicknesses, in the software, are the same. In order to change the width of the line, you need to use a different pen type. Cricut has pens ranging from Extra Fine (0.3) to Markers and Calligraphy Width (2.5 I think?). By putting a thicker pen in the machine you will get a thicker line 🙂
Hope that helps!Megan
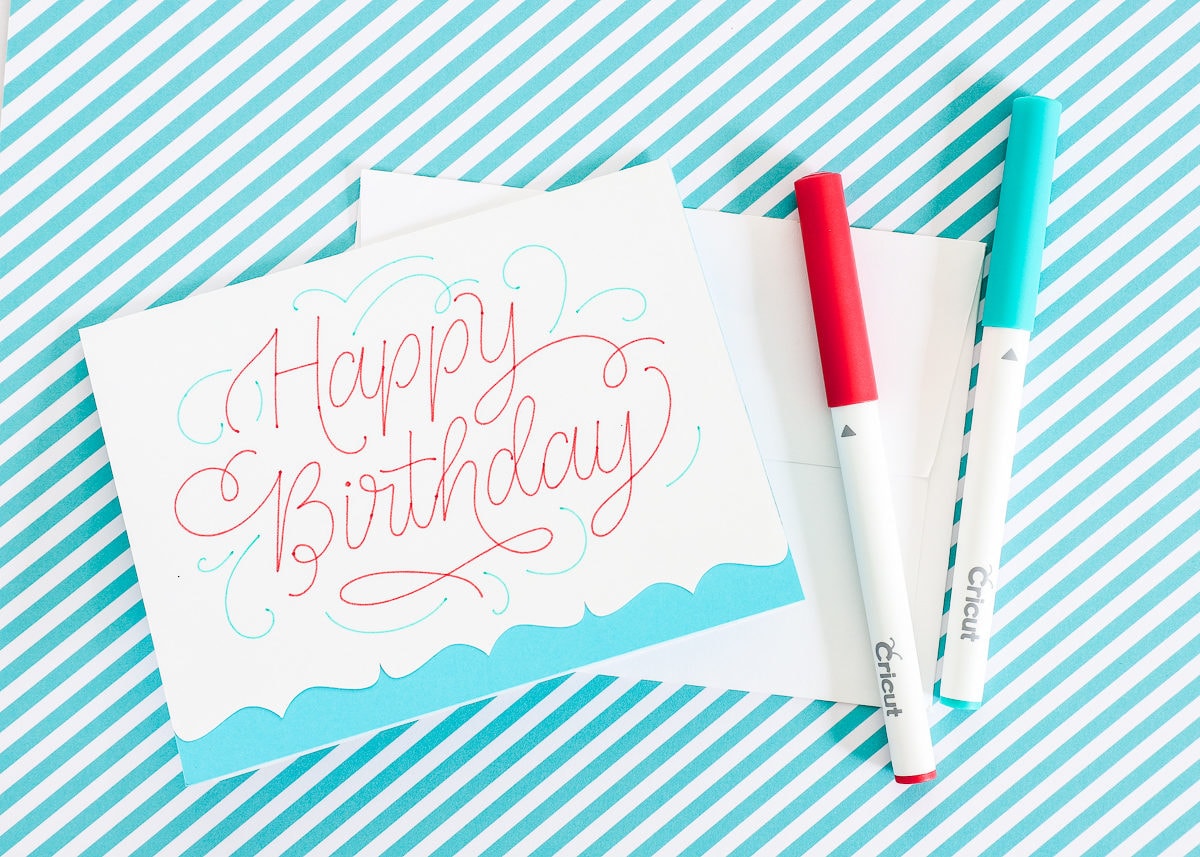
Hi! I am so in love with the happy birthday card and flowers you made here! Are they available anywhere?
Hi there!
You should be able to find the images in Cricut Design Space!
Search “Happy Birthday” and filter it by “Draw” and it should pop up!
Hope that helps!Megan
When I print with the Cricut pens on white Cricut Removable Matte Premium Vinyl, the color smudges after printing. I’ve tried black and a dark blue and it smudges on both. And the printing is not even, some of the letters come out very light and some darker.
Hi Candy,
You cannot write/draw onto regular vinyl with Cricut Pens. The only “writable vinyl” is this one HERE.
Hope that helps!Megan
I found that you can also spray it with hair spray after to get the marker to seal onto the vinyl.
Thanks Megan. So glad to have found all your cricut tips and tutorials. You make it clear and simple.
I am using the cricut marker 1.0 thickness to write my wedding cards. I’ve done just three and it looks like the tip of the marker is starting to flatten and therefore make the letters thicker. Is there anyway to avoid this or any tip you might have?
Hi Sarah!
Unfortunately, I don’t think there is really any way to avoid this. The machine will exert some pressure on the pen and blunt it a bit. You could experiment with using a lighter-weight pen (0.4 for example) and see if you like the thickness after it’s been used a few times.
Sorry I don’t have a better answer for you here!Megan
Megan, I have a cricut joy,will I be able to use this method as I have not seen the same instruction when I go to draw?
Gary
Hi Gary!
Yes, you will be able to use this tutorial with your Cricut Joy. While the software has changed slightly since this tutorial was published, the same Draw functions are there, as well as all the various pens.The Cricut Joy can do the Draw function with Cricut Joy pens inserted into the machine.
Hope that helps!
Megan
Hey, Have you ever been writing with the cricut pen and the ink gets on the roller and then “rolls” it back on the paper. I cleaned the rollers and waited days to be sure it was dry and it still is doing it.
and it is a cricut pen- the one that came with the machine.
I want white writing on black labels. Is there a way to do that?
I am so glad I read this entry. I have used pens in my projects for ages. I am pleased you showed how to use different colors in a text design by using the contour button. I have wondered how I could do this many times. I would have never thought of this myself. This will really improve my card designs. Thank you very very much for your wonderful tutorials.
Would like to Know more.
WOW! I will honestly have to view this several times over to get the hang of it all. Thanks for taking the time to work this out, especially for us “newbie’s.”