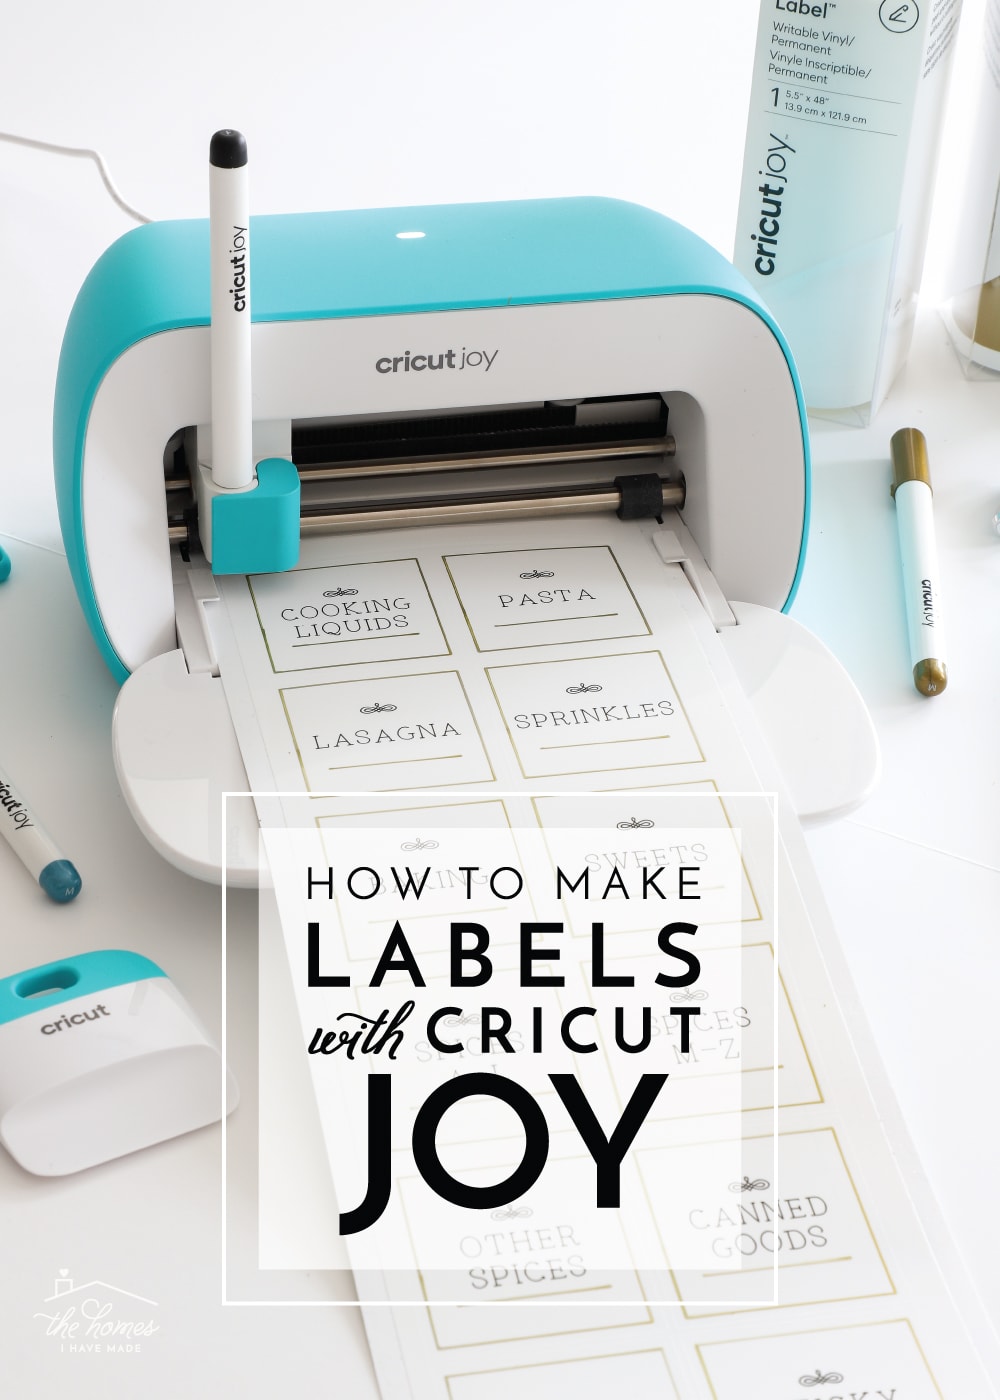
How to Make Labels with Cricut Joy
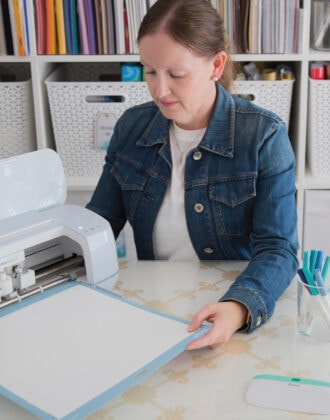
While I do love to use my Cricut machines to decorate our home and make fun arts and crafts for the kids, my primary Cricut projects over the years have been all sorts of pretty labels for practically every space in our home! And you guys can’t seem to get enough of these label projects either. Many times, I have received messages asking how to make the same gorgeous labels but without the investment of a big Cricut machine and lots of supplies. I never really had a good answer…until now. Enter Cricut Joy! Not only does this compact cutting machine make it easier to move about your home to accomplish organizing projects, but there are now all sorts of new, specially-designed materials for the Joy that make creating labels quicker and easier than ever before. Today, I want to show you how to make labels with Cricut Joy. I’m breaking down three different methods and have lots of inspirational ideas so you feel ready and empowered to start labeling aaaall the things!
How to Make Labels with Cricut Joy Smart Label
Alongside Cricut Joy, Cricut is releasing a whole host of new materials to fit the smaller machine. And the one I am MOST excited about is the new Cricut Joy Smart Label. Smart Label is quite possibly the easiest and quickest way to make gorgeous written/drawn labels for your home (even beyond printable or print-then-cut versions), and I am so over-the-moon to be able to tell you all about it because it’s a serious #gamechanger for us label lovers!
First, What is Cricut Joy Smart Label?
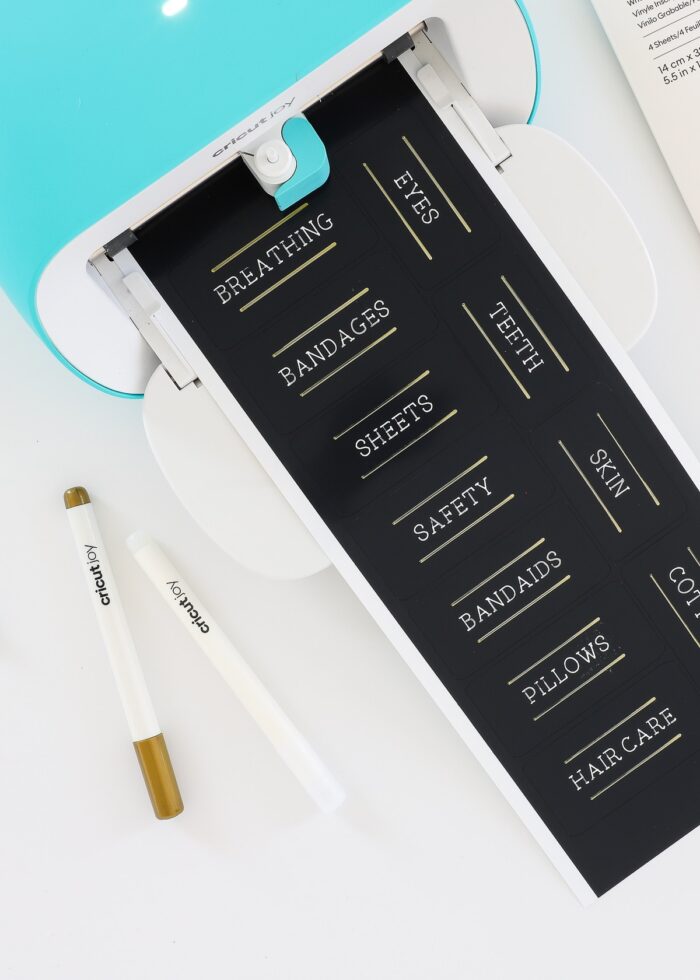
Cricut Joy Smart Label looks and feels a lot like a roll of white Smart Vinyl. It’s white…it’s vinyl…and it feeds directly into Cricut Joy without a mat. However, unlike white vinyl, Cricut Joy Smart Label is specially designed to be written on with the Cricut Joy pens. Yes…you read that right: Cricut Joy can right/draw directly onto the Cricut Joy Smart Label, and it won’t smear, smudge or fade.
This means you can design a label in any size, shape and style and put anything on it. Cricut Joy will write and cut it, and then you can literally just peel and stick it…without transfer paper…on to your containers.
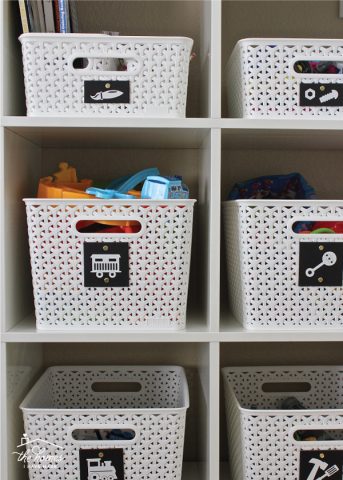
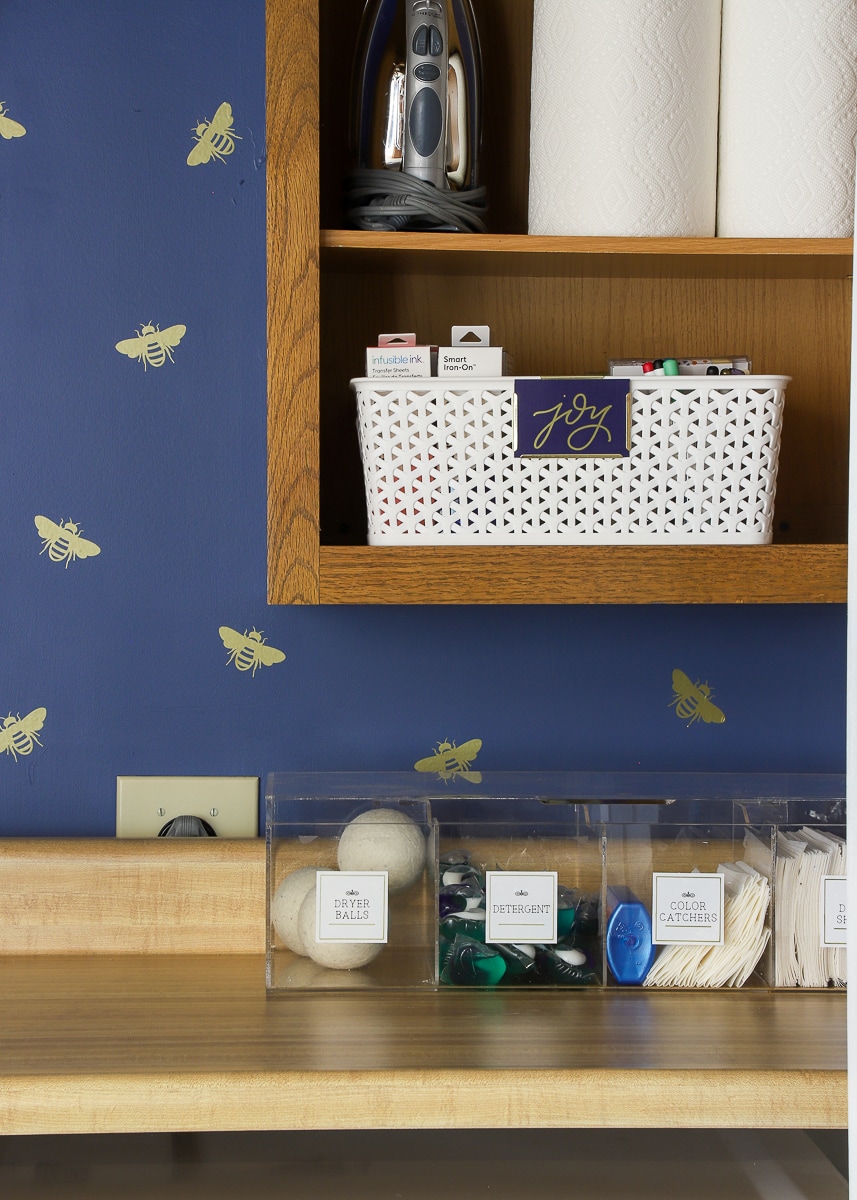
I’m going to break down every step for making these gorgeous pantry labels, but please know you can apply this tutorial to pretty much any label you want to make! Here’s what you need:
Supplies Needed
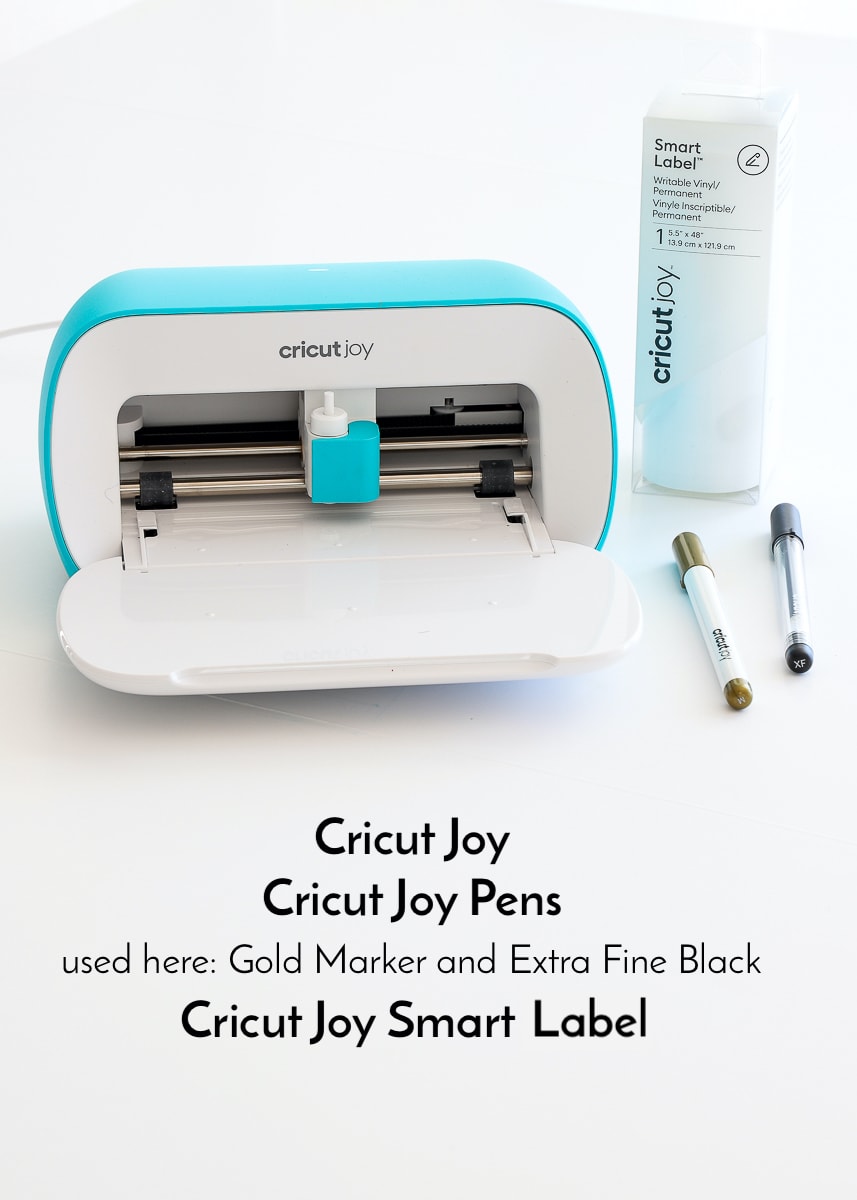
Cricut Joy | Cricut Joy Markers | Cricut Joy Extra Fine Pens | Cricut Joy Smart Label
Accessing My Pantry Labels
Cricut recently added a whole host of ready-to-go label shapes to the Design Space Library. More than ever before, it is SO quick to find a label shape you love, add some words, and then write/cut it with your Cricut Joy machine! However, I always like to do my own thing, so I came up with this label design myself using a bunch of random shapes/elements I found in the Design Space Library.
If you’d like to make these exact labels, you can access both the square and circle templates HERE!
Designing Your Own Labels
If you want to make your own label design, here are some quick steps to follow:
- Select a shape from the Design Space Image Library (ANY shape can work!) for your label and place it on your canvas; make sure it is designated to CUT in the right-hand layers menu
- Insert text onto your canvas using the Text tool along the lefthand tool panel
- Set your label font, text size, and alignment using the Text menu along the top toolbar
- Make sure the text is set to DRAW; and select the pen color you want to use (these designations can also be made along the top toolbar)
- Place the text on top of the label shape
- Use the Alignment tools along the top toolbar to center your label+words as desired
- Attach the text and label together by selecting both and clicking the “Attach” button (in the bottom right-hand panel)
Helpful Label Design Tips
A few things you need to remember when working with any Cricut pen:
- When using different pen colors on a single design, you need to set the pen color for each element on your design canvas (use the toolbar along the top). This is the only way Cricut Joy will stop and prompt you to change pen colors so that your design details are all drawn in the correct colors.
- After you edit the text and all the various drawn elements, you MUST Attach all the elements on a single label together. You can read more about why and how here, but this is the only way to get the words/details drawn directly onto the label shape.
If you’re having some trouble with the pen details on your labels, I strongly suggest you read/review my Guide to Cricut Pens post HERE. This post breaks down how to find drawn shapes, change pen colors, attach all your shapes together, and more so your designs come out exactly as you want them!
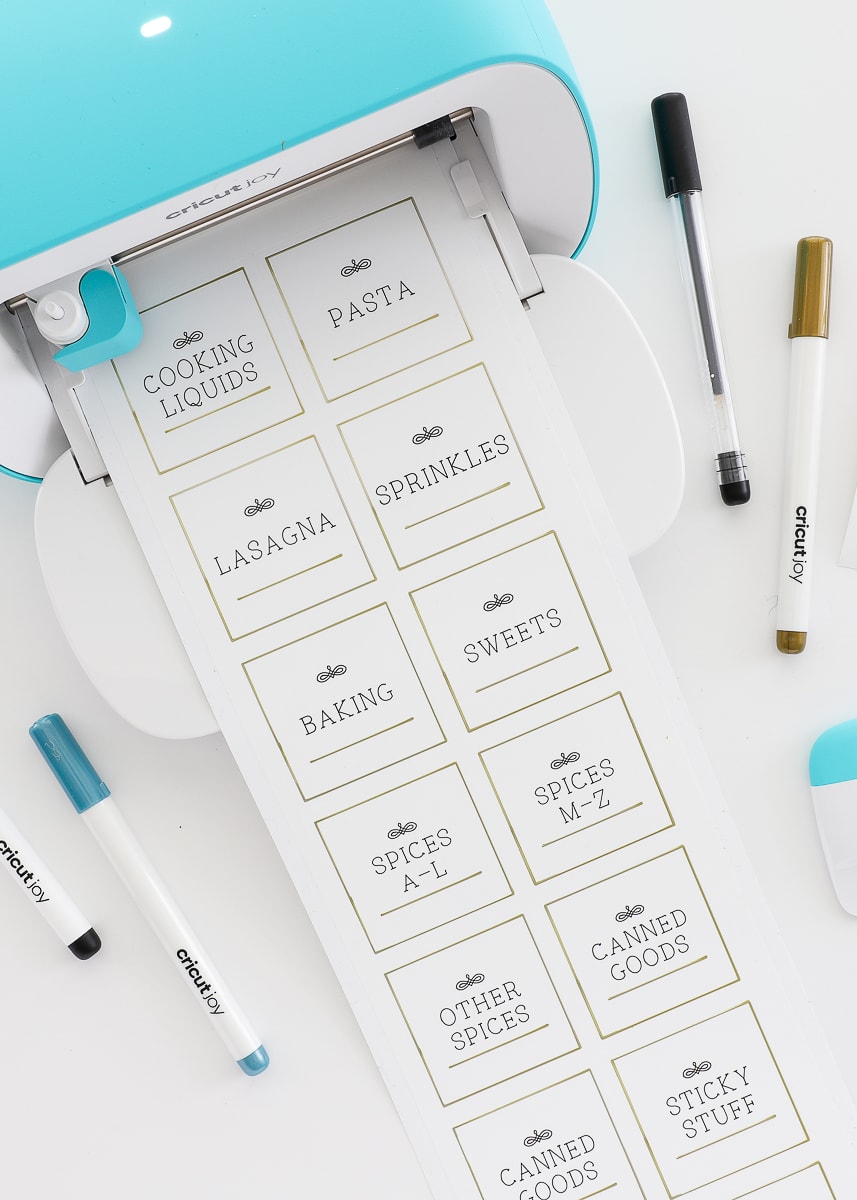
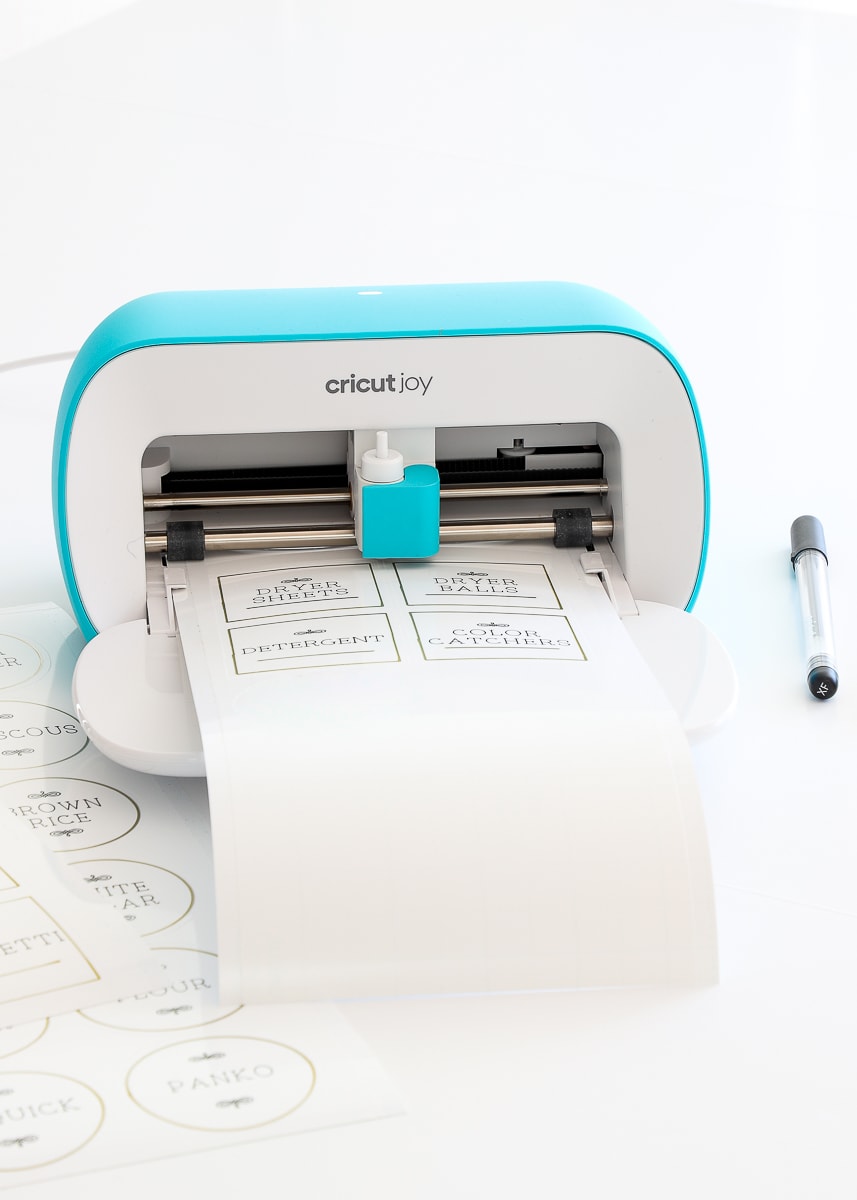
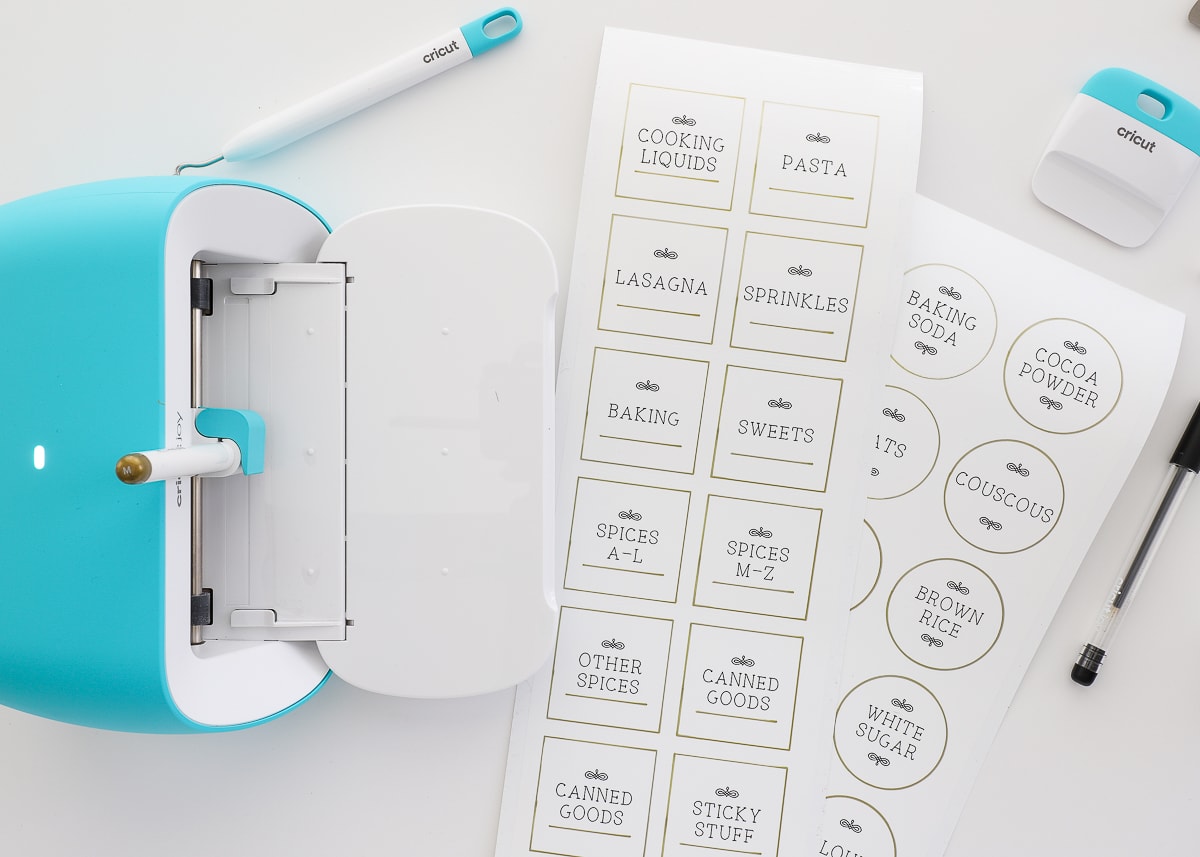
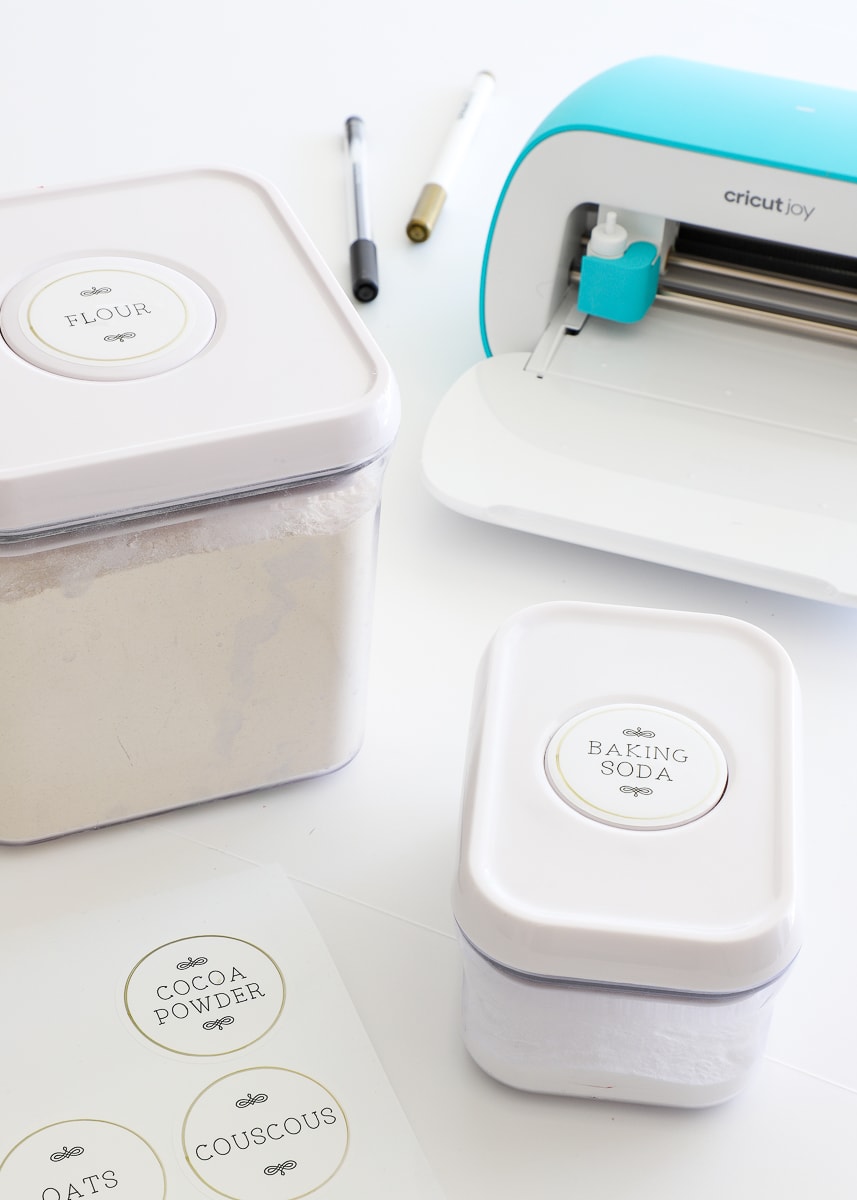
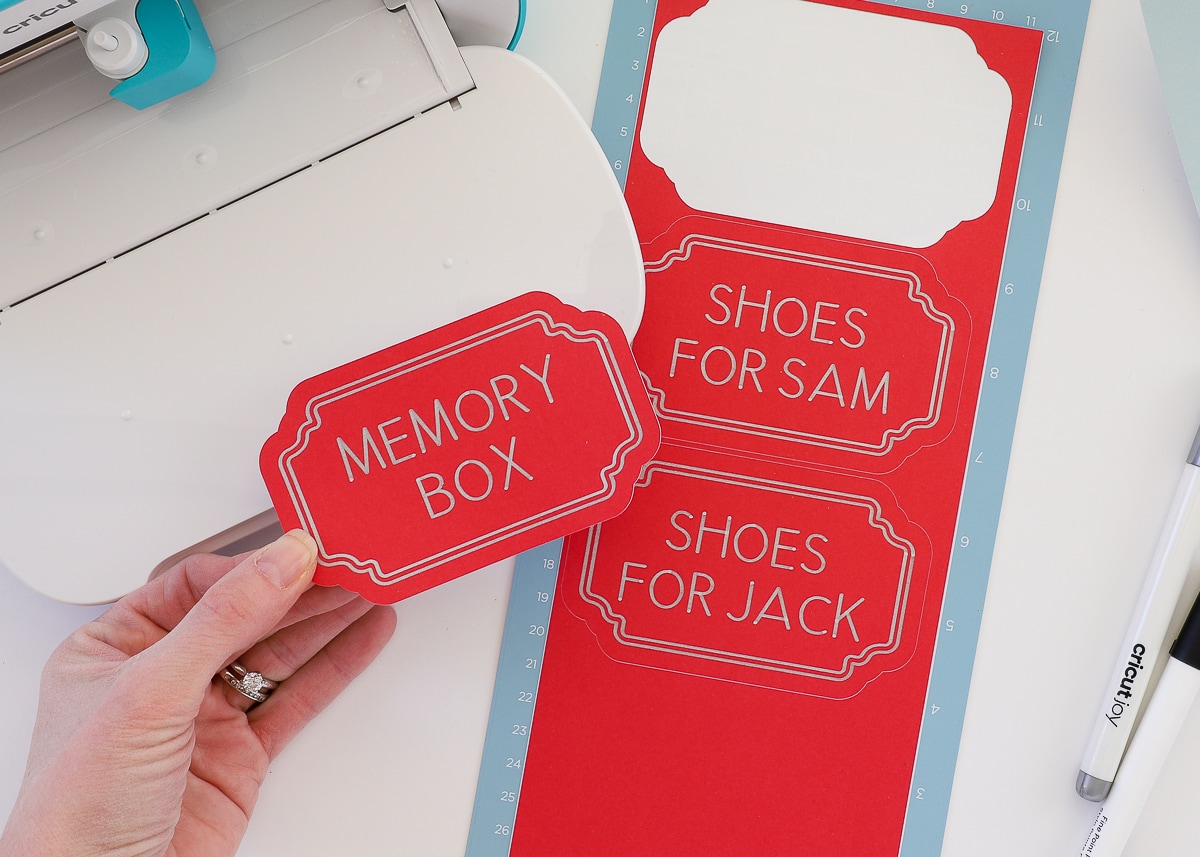
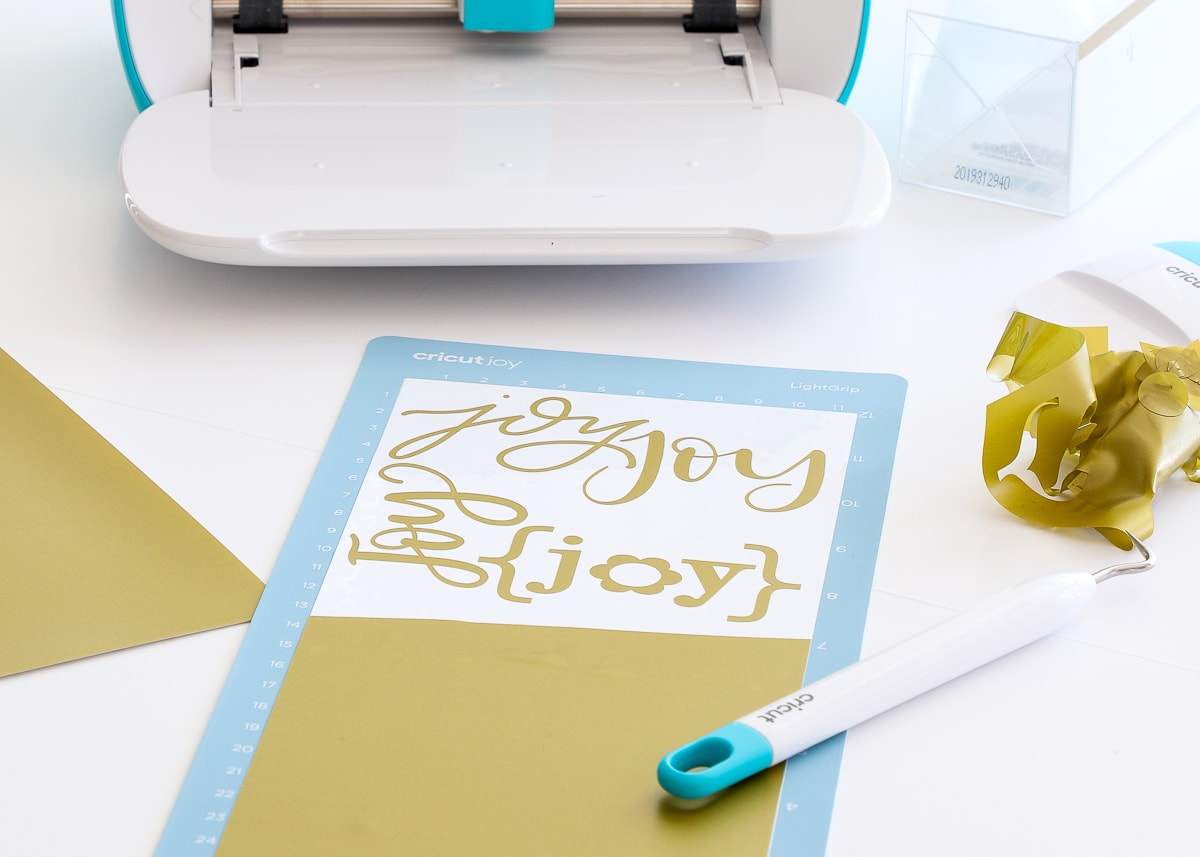
Cutting the Smart Label on Cricut Joy
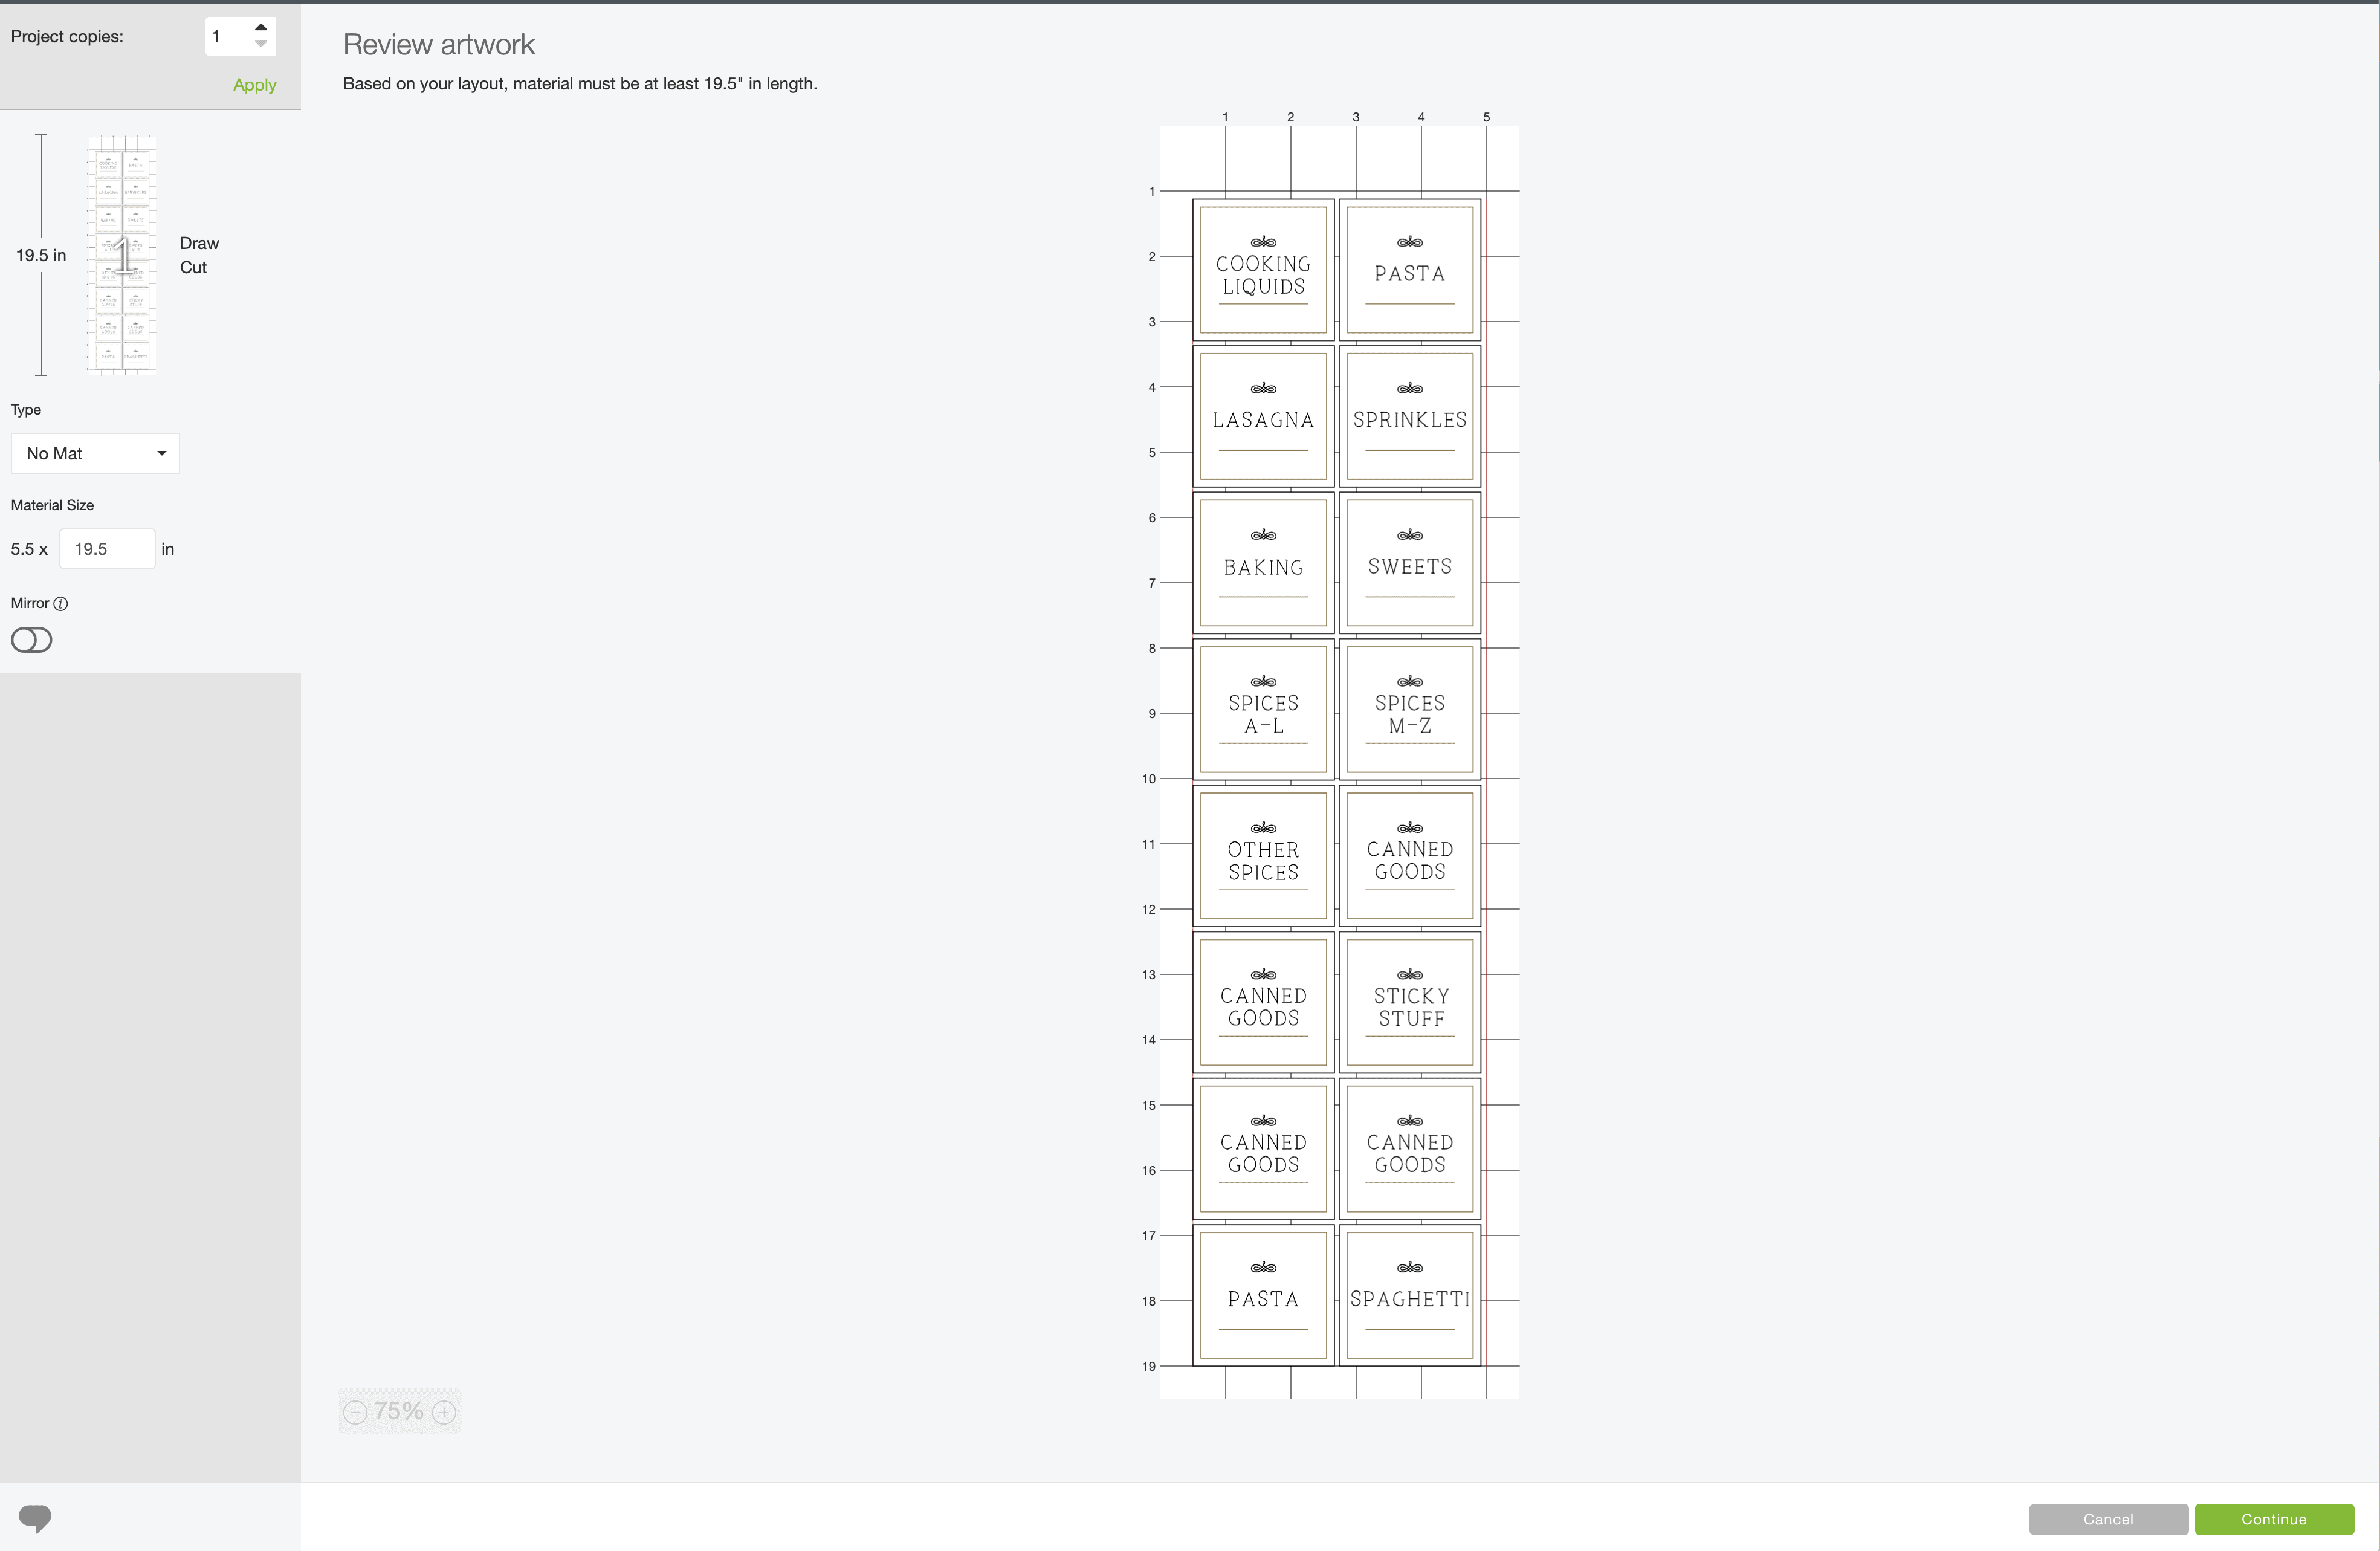
After adjusting all the names of the labels and attaching each one together (or making your own labels), click the green “Make It” button. Below you can see how the labels fit onto the Cricut Joy Smart Label. I have them sized to fit perfectly, 2 across, so no label material goes to waste!
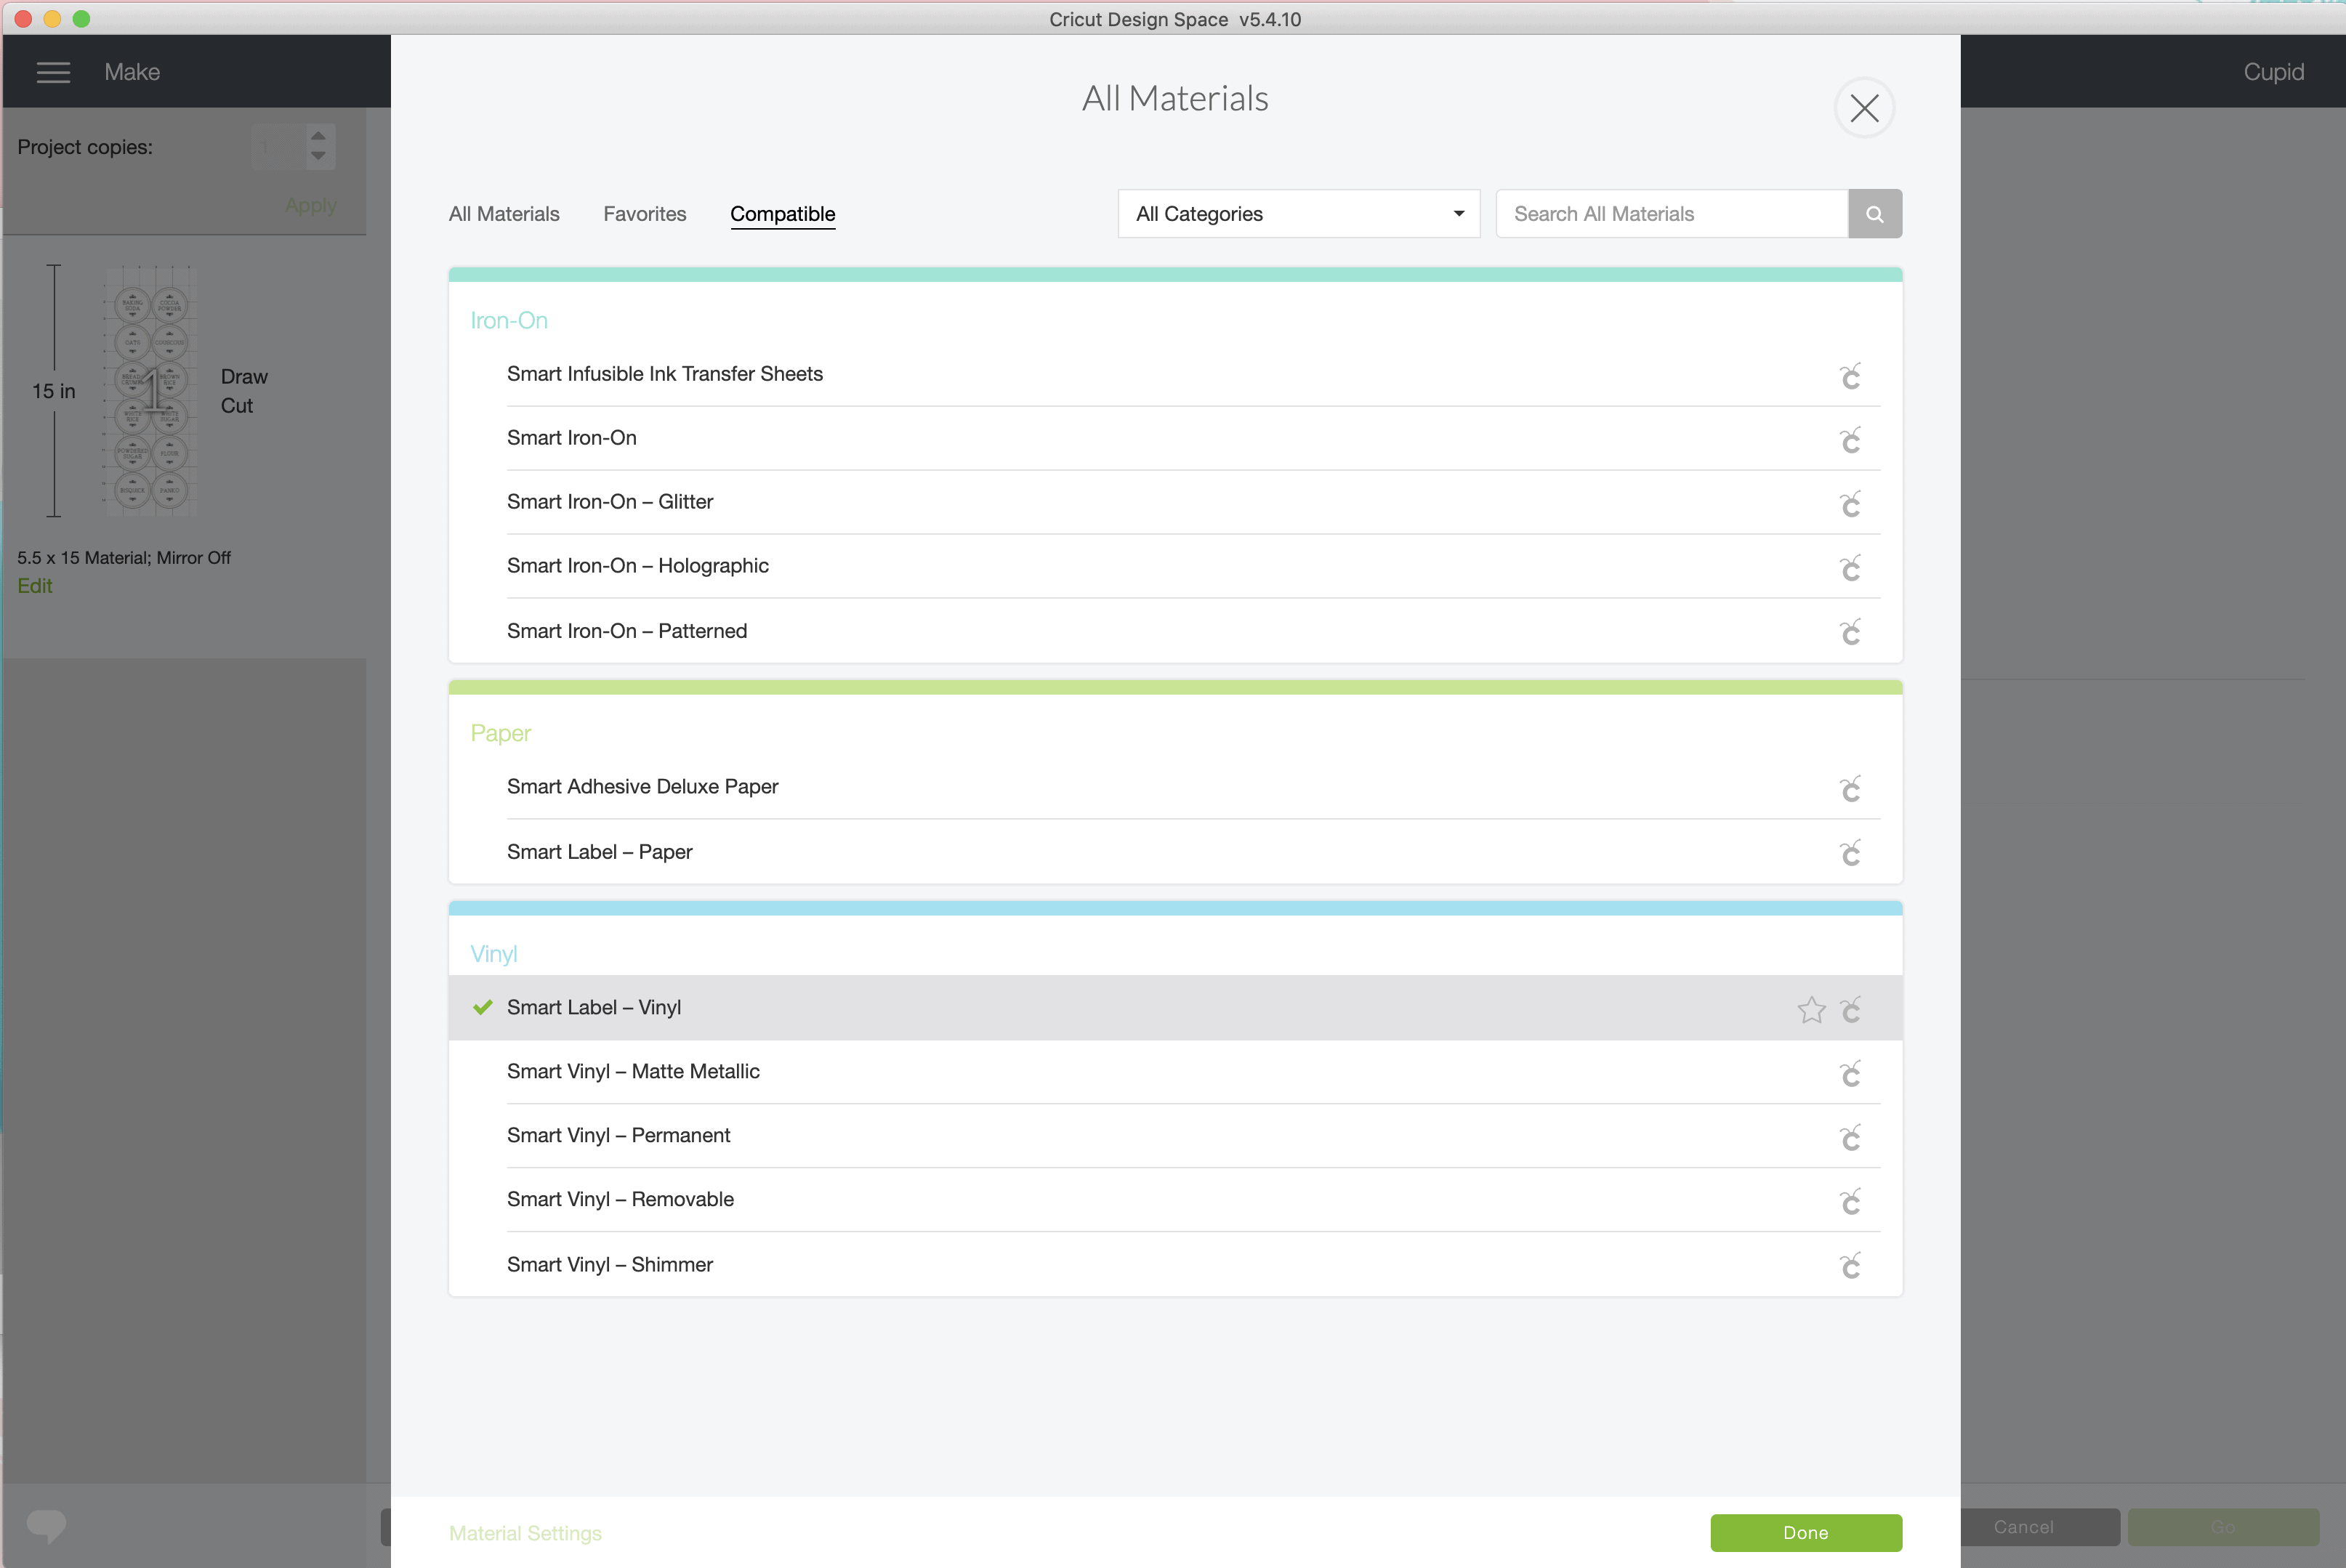
After hitting the green “Continue” button, select Smart Label – Vinyl from the materials menu.
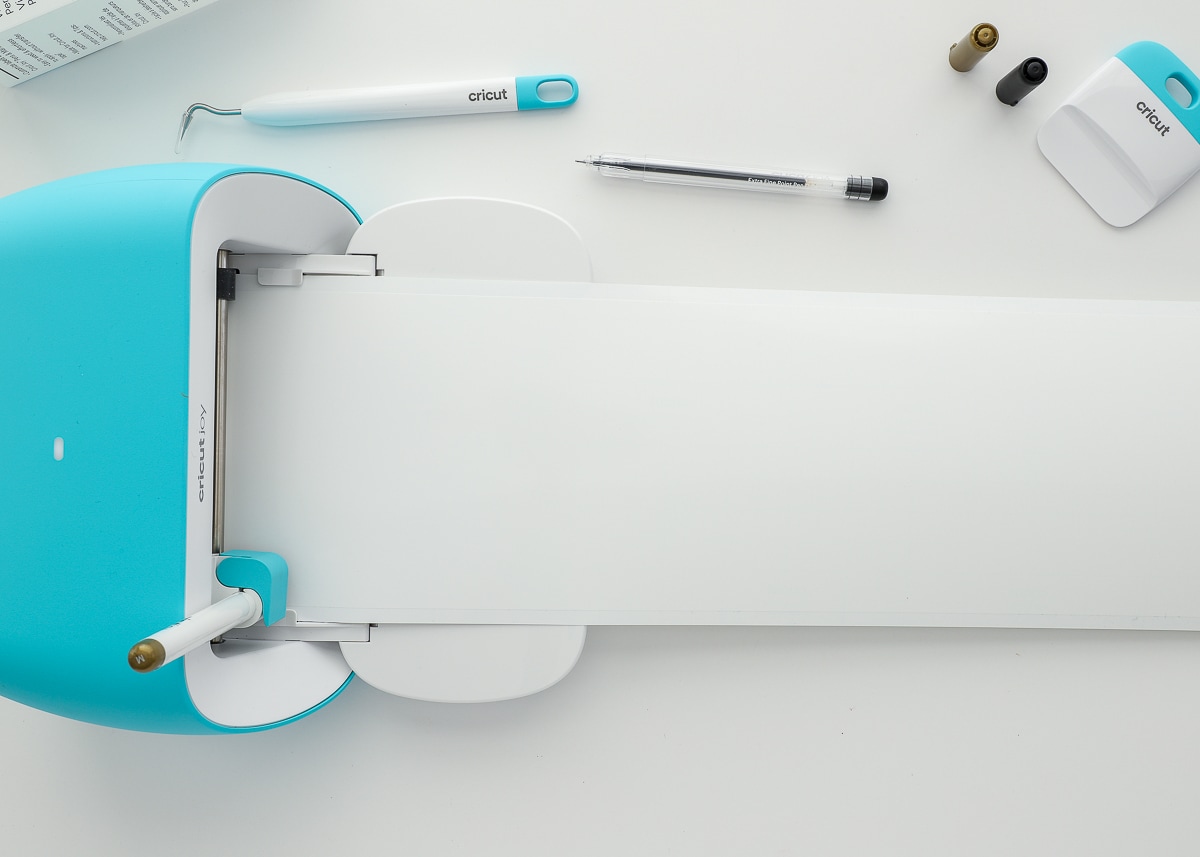
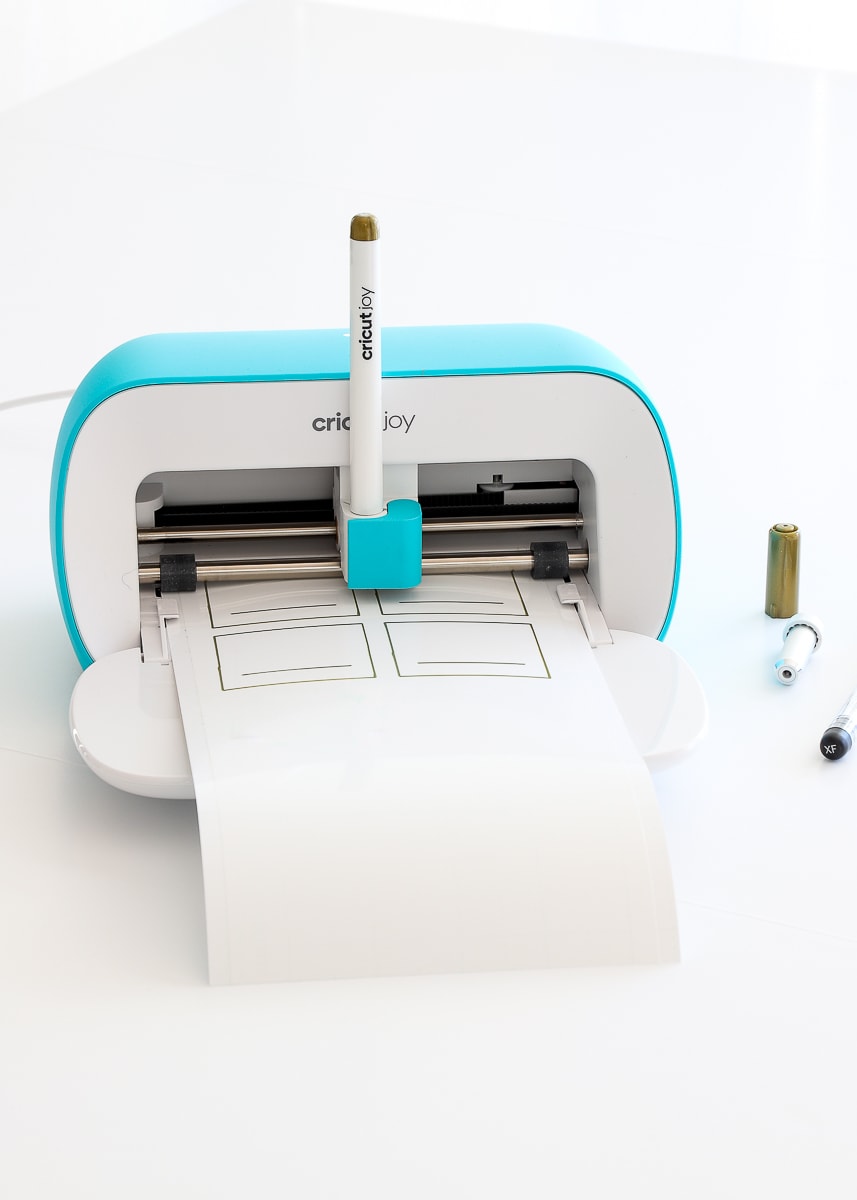
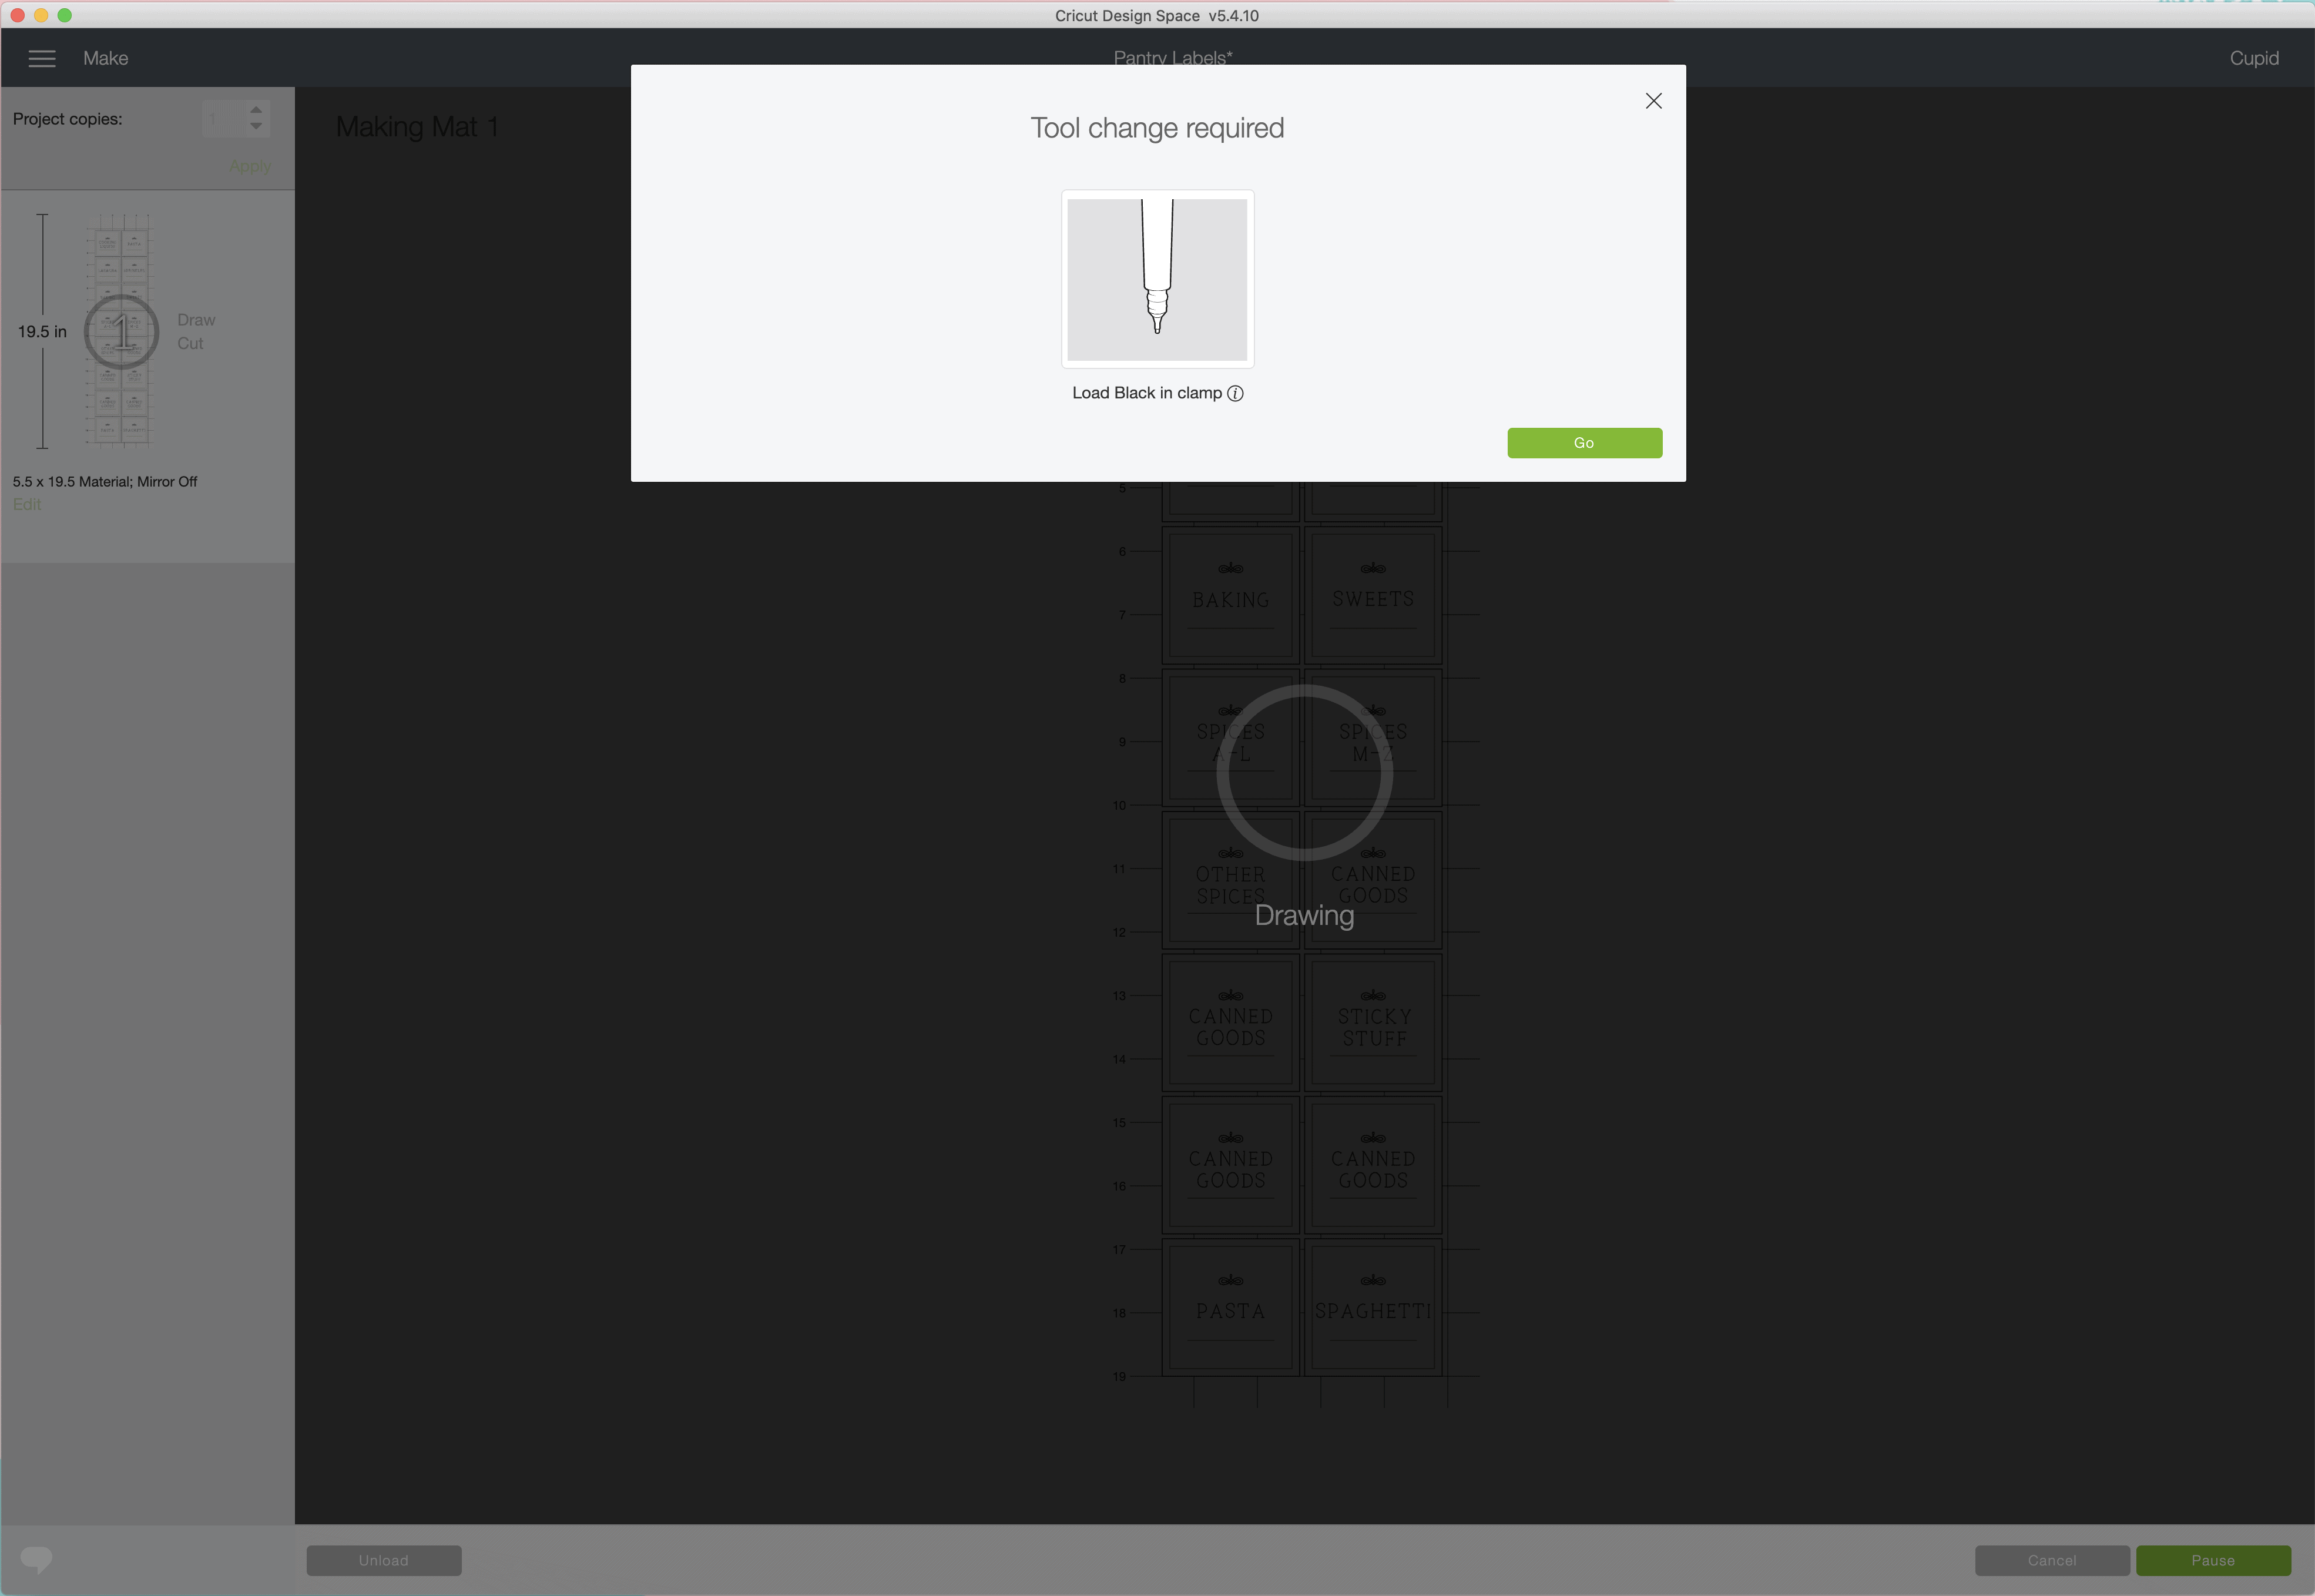
On the final cut screen, you will see what supplies you need for your project and which one should be loaded first. This label project requires the gold marker to be loaded in the clamp; the black pen and Fine-Point Blade will also be used.
NOTE! Pen details will ALWAYS be drawn before any of the cuts are made.
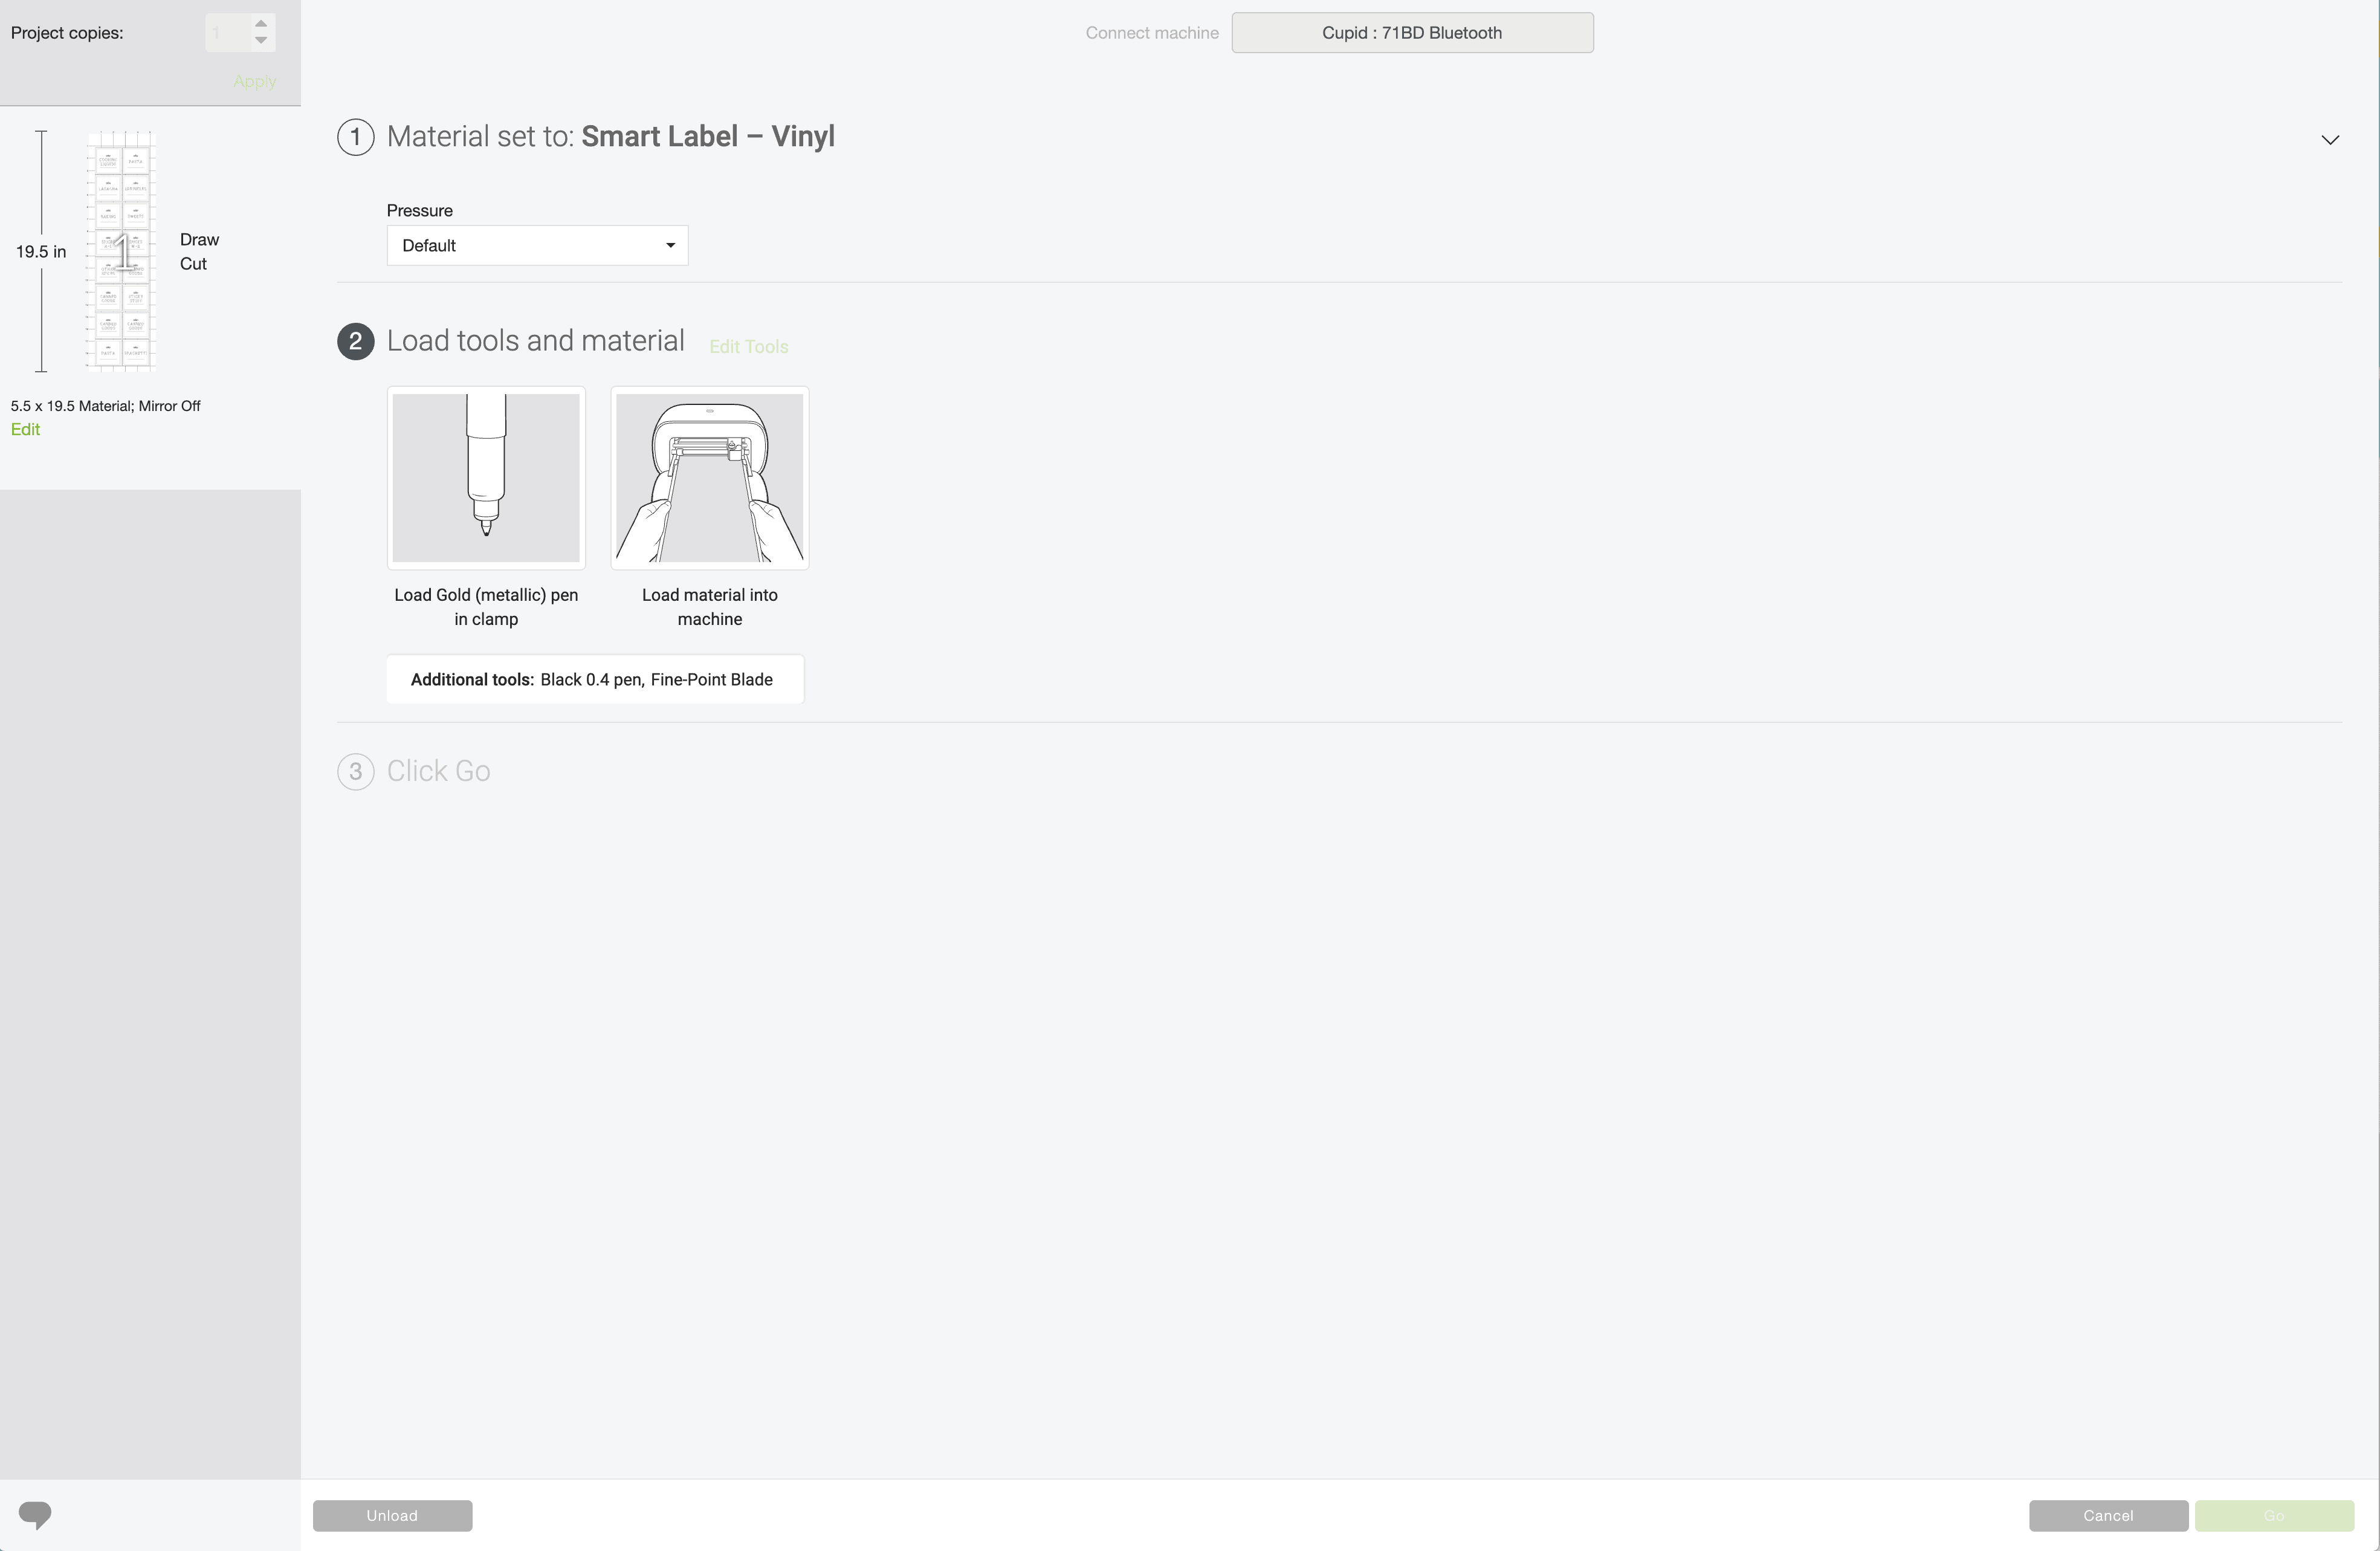
Following the screen prompts, load the gold marker into the clamp and hit the green “Go” button in the software/app.
Once the gold aspects of the design are drawn, the software/app will prompt you to swap pens:
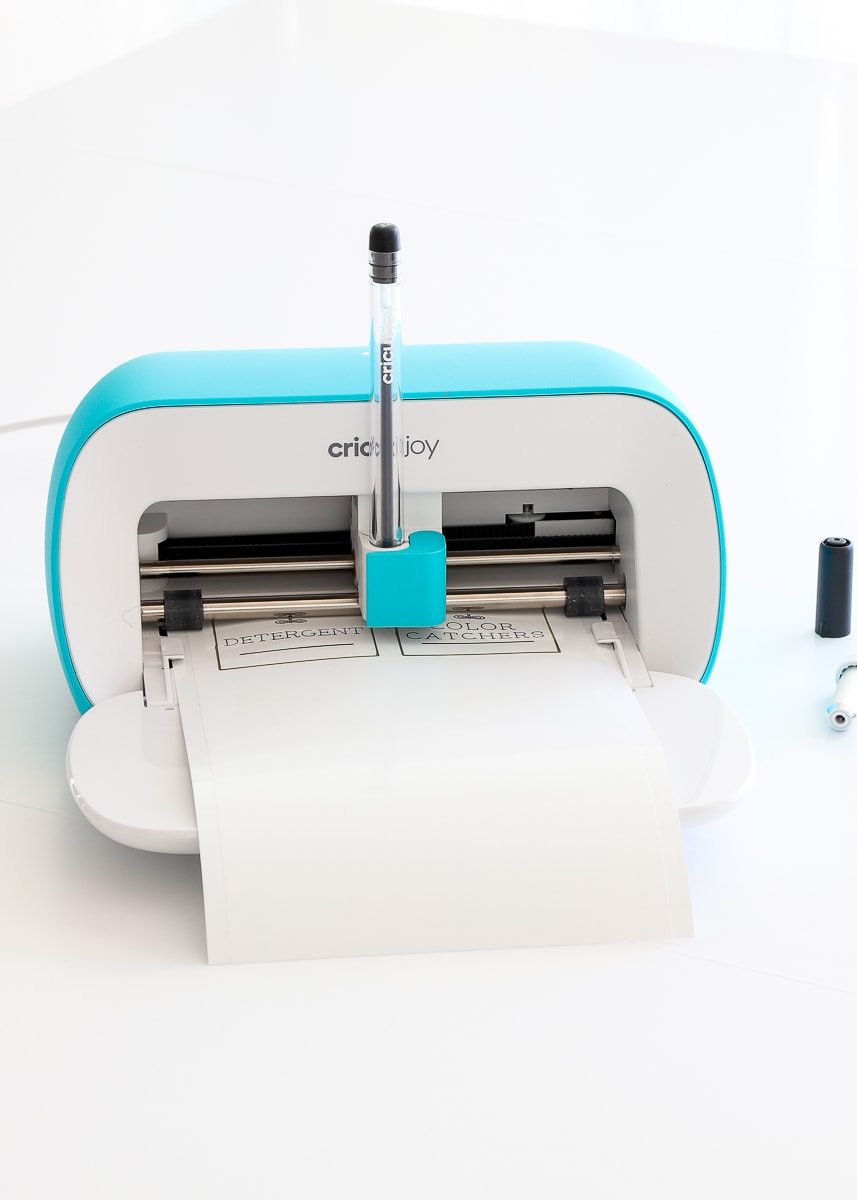
Cricut Joy will then complete all the black details.
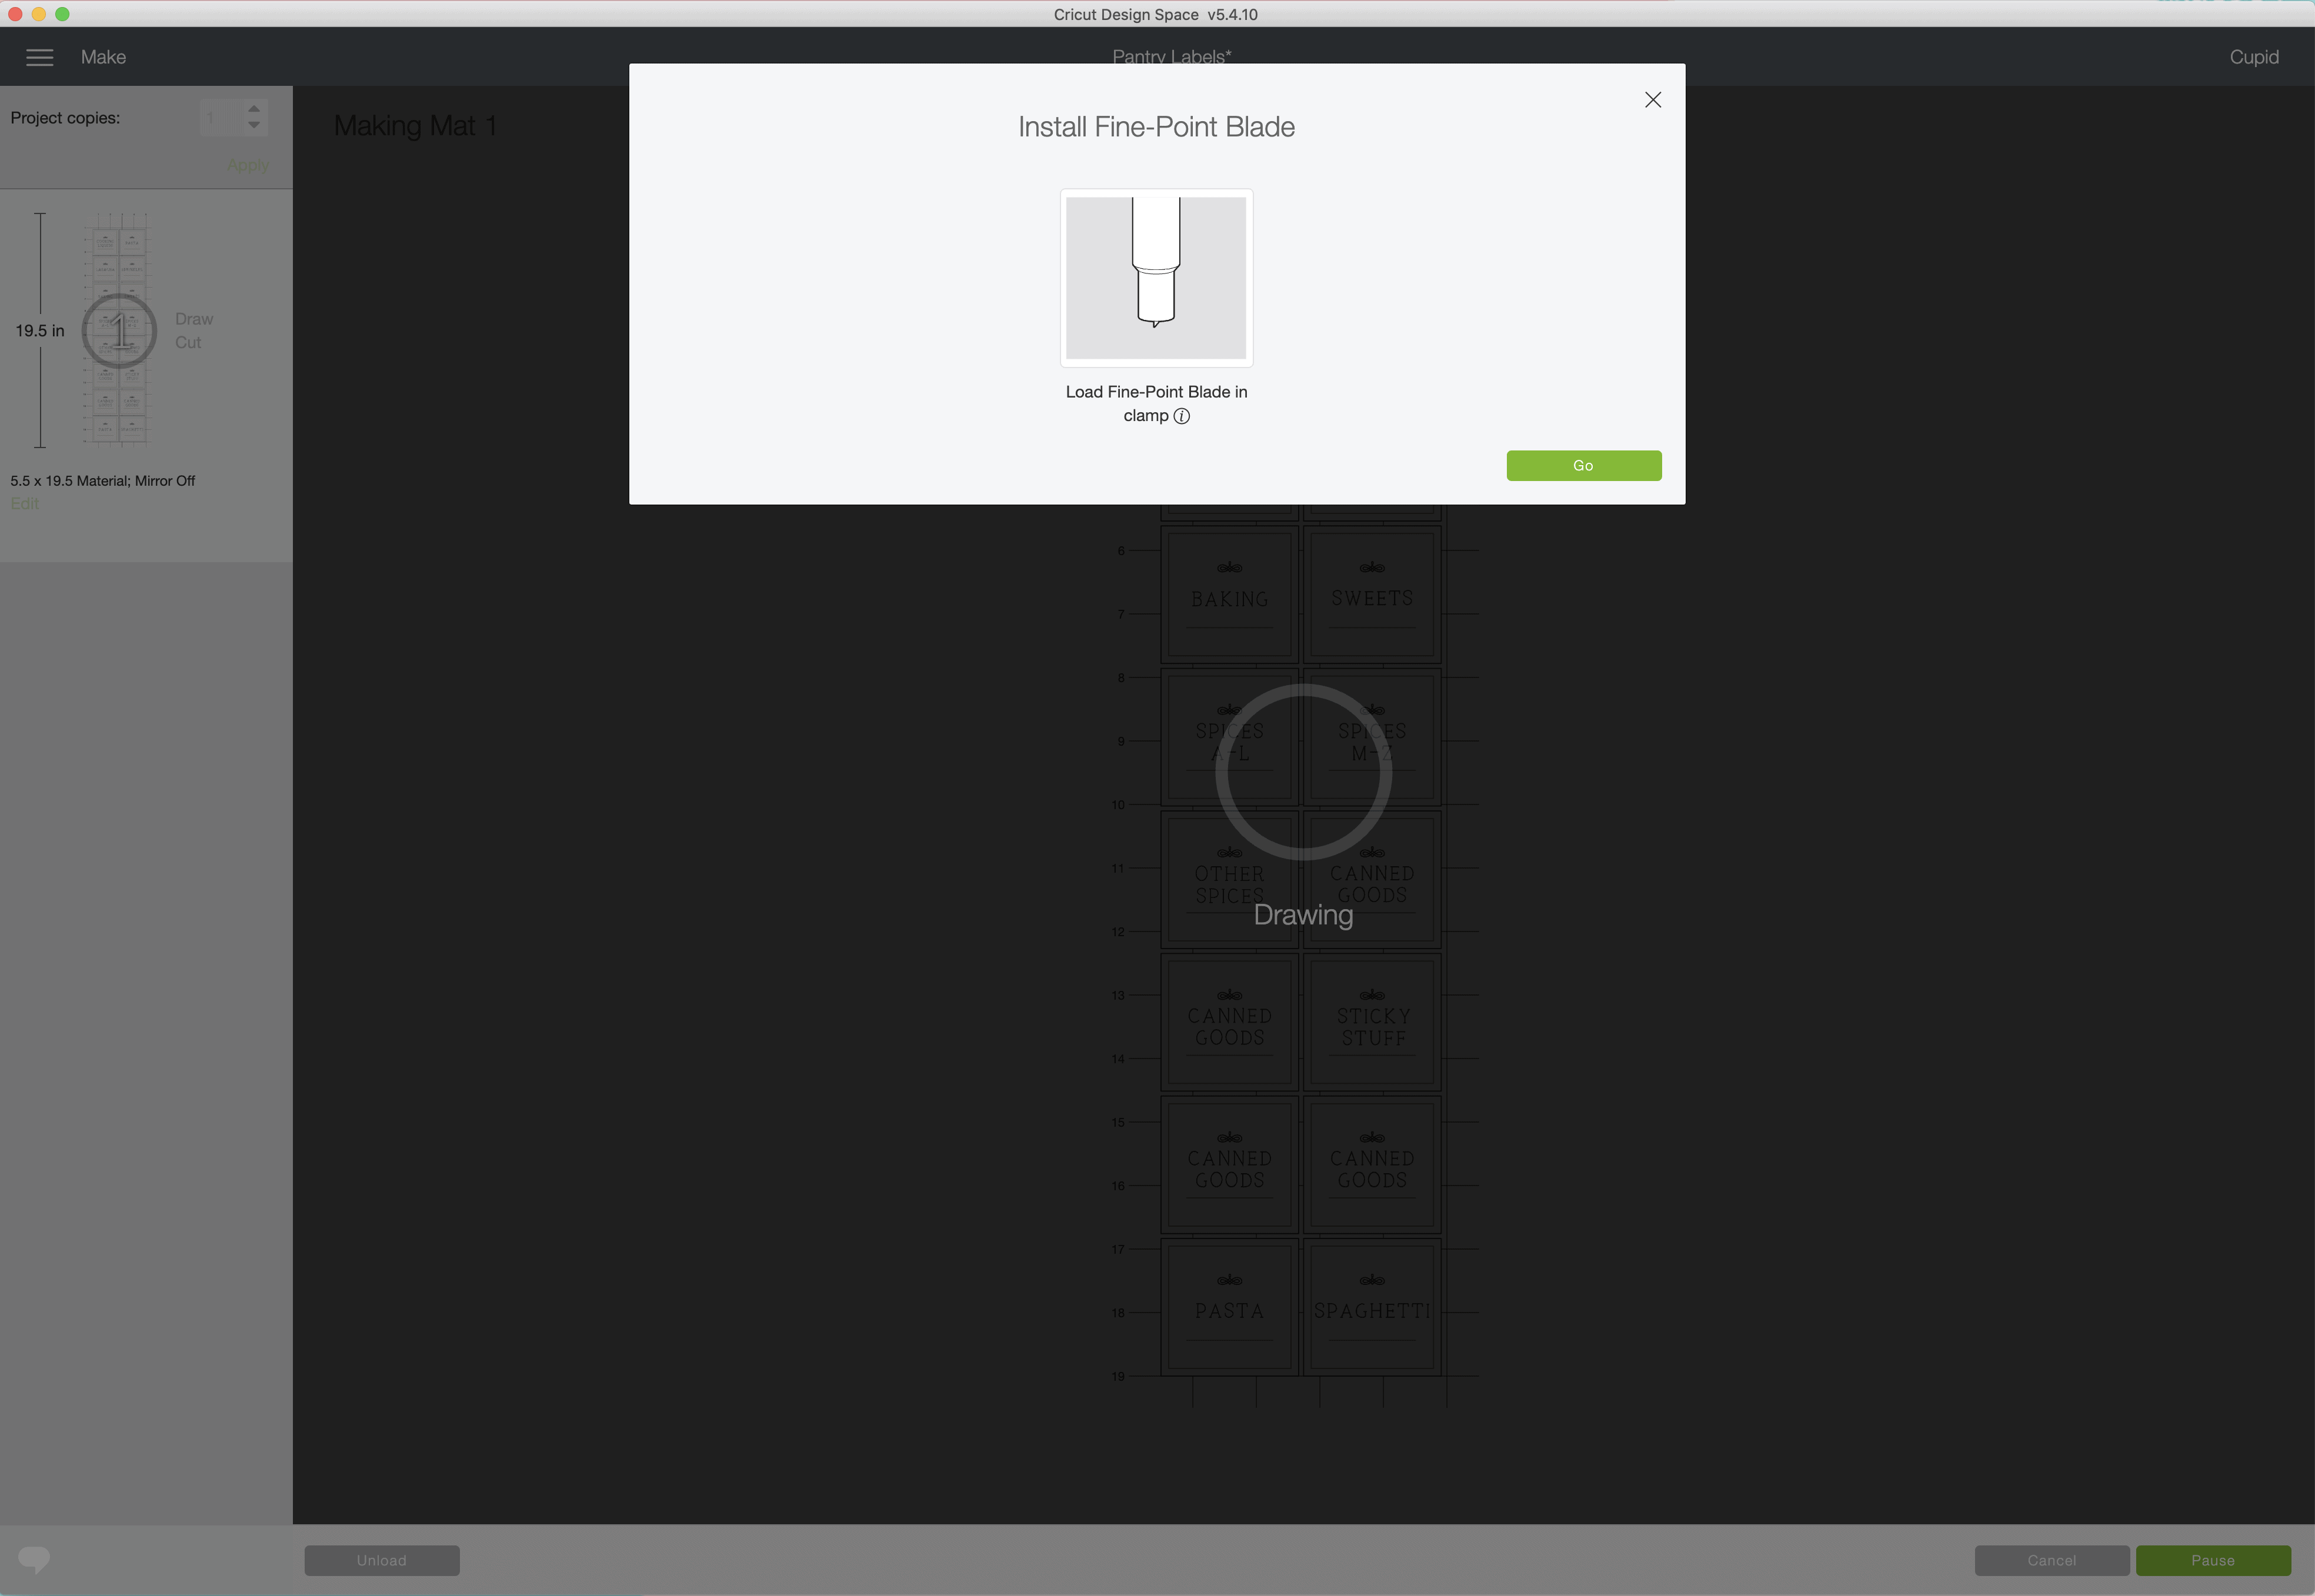
Finally, the software/app will prompt you to insert the Fine-Point Blade to cut out the label design.
Once your design is done, unload the Cricut Joy Smart Label via the software/app.
Although it might be obvious, I want to point out that I chose squares and circles for a clean-looking design, but you can really cut ANY shape you desire! And the 48″ long Cricut Joy Smart Label makes cutting all your labels at once a true snap!
Need more help with Smart Label? See my full guide: Everything You Need to Know About Cricut Writable Vinyl
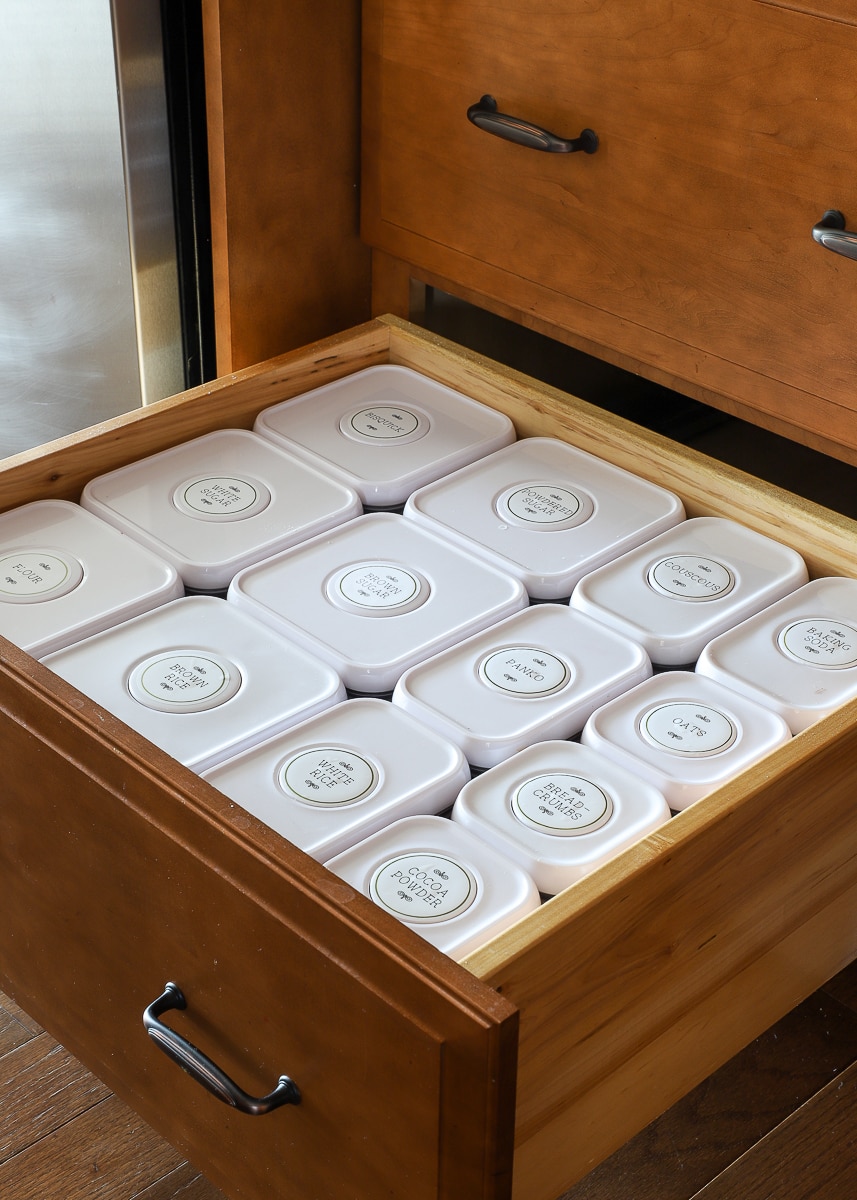
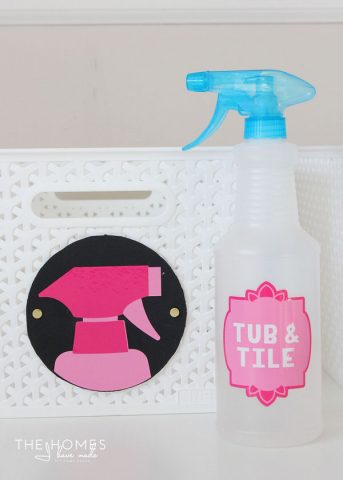
Applying Cricut Joy Smart Label to Your Containers
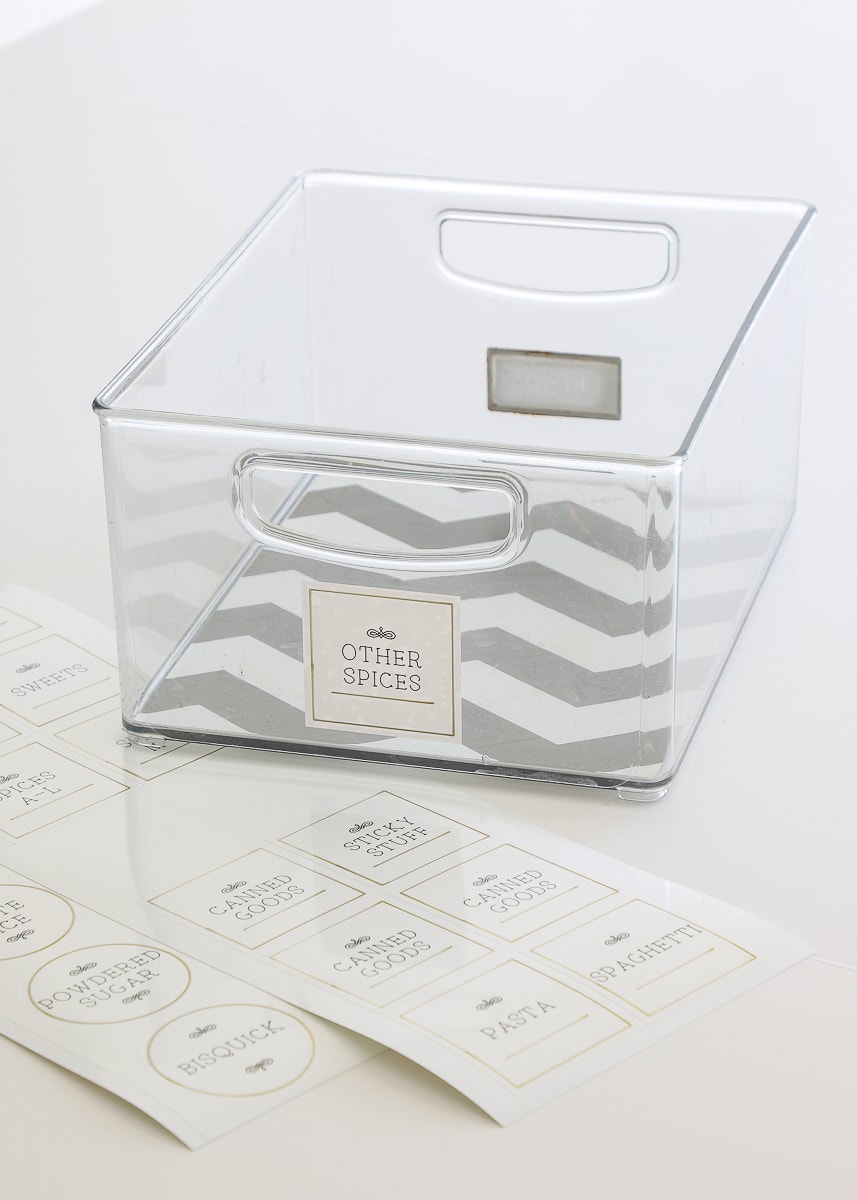
As I mentioned before, Cricut Joy Smart Label doesn’t require transfer paper. You can just peel them up and transfer them to your containers. I personally found it easiest to remove all the negative/excess vinyl first, and then lift up each one by the corner.
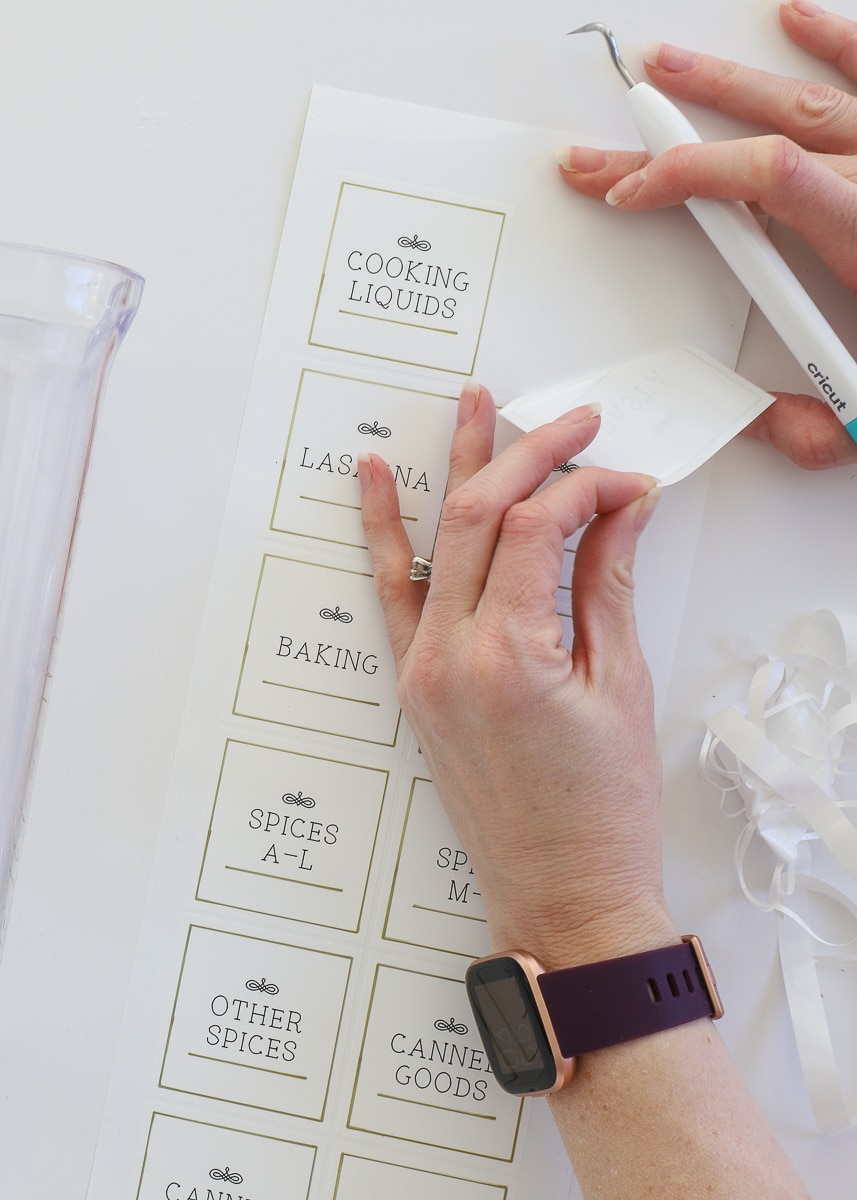
Make sure your containers are nice and clean before applying and take your time laying down each one to reduce wrinkles or bubbles.
If you do end up with a bubble, you can gently peel up the Cricut Joy Smart Label and re-lay it down…it won’t stretch or warp the way traditional vinyl does!
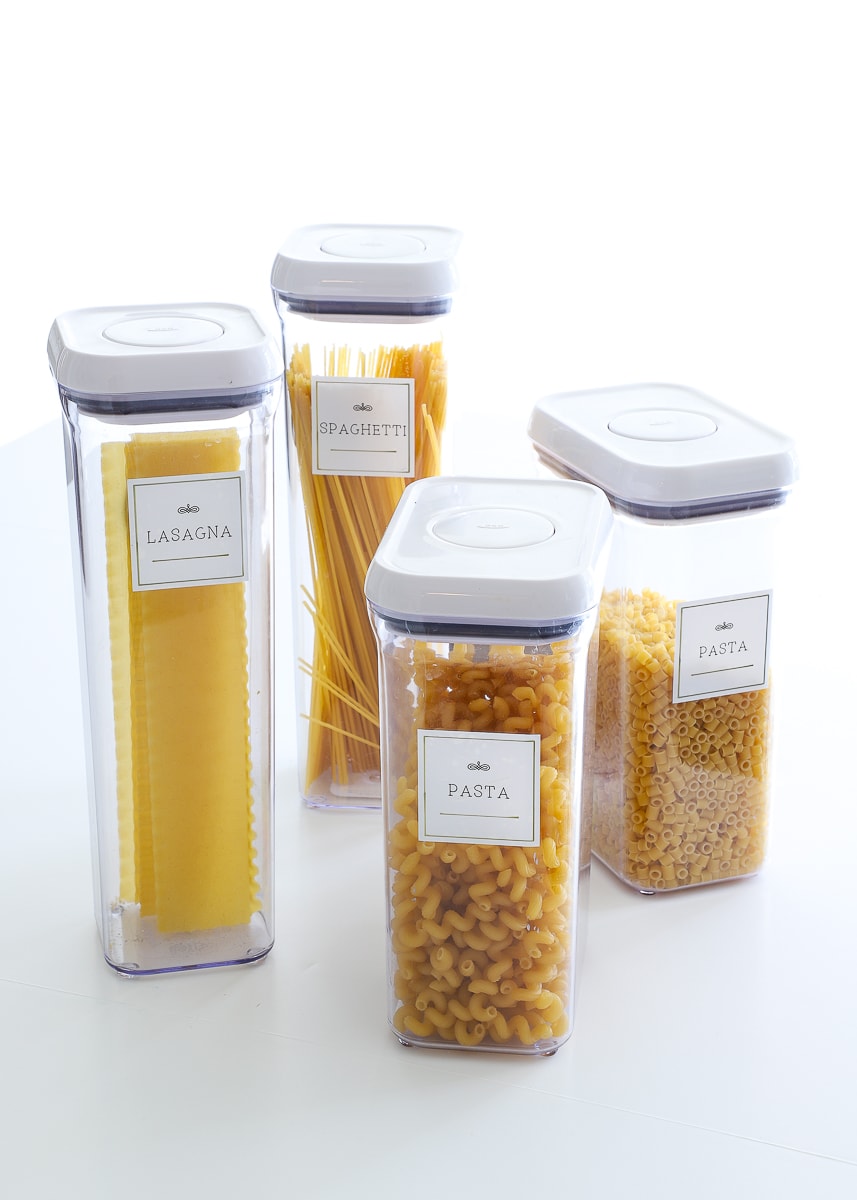
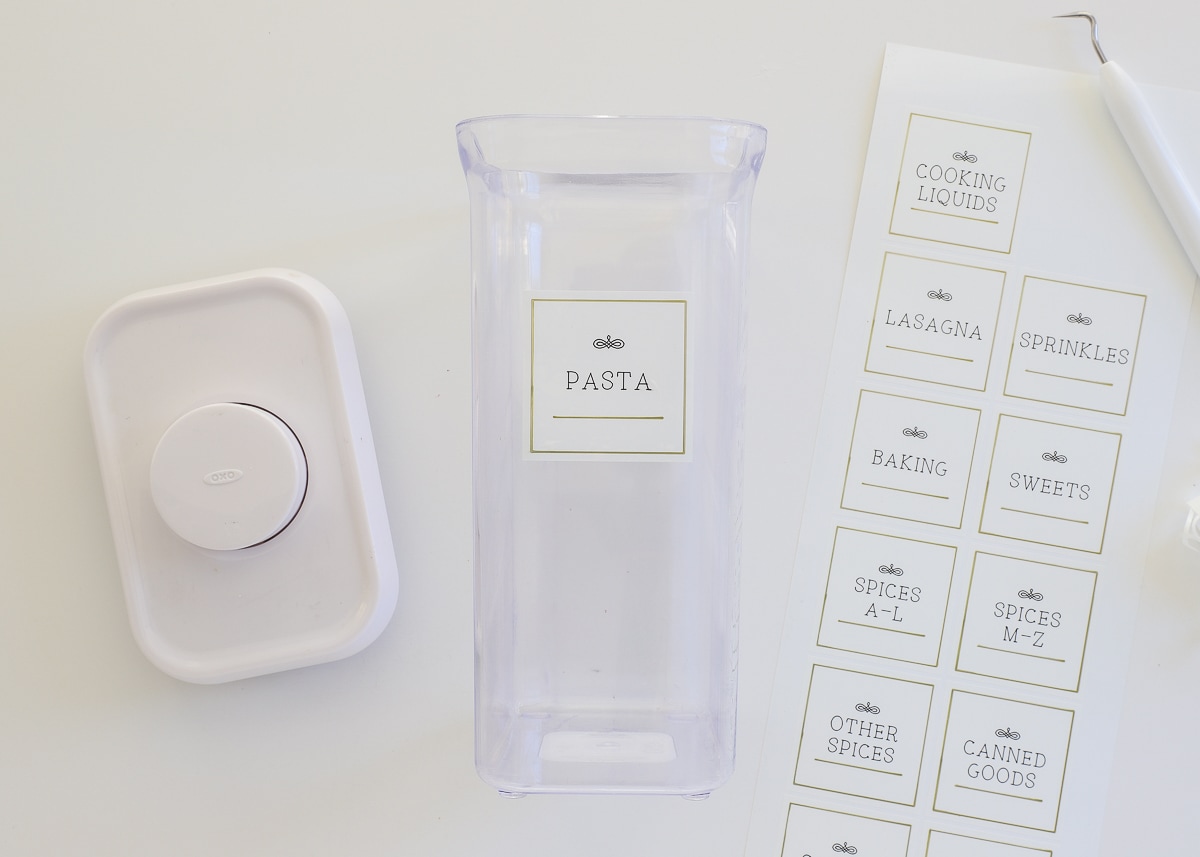
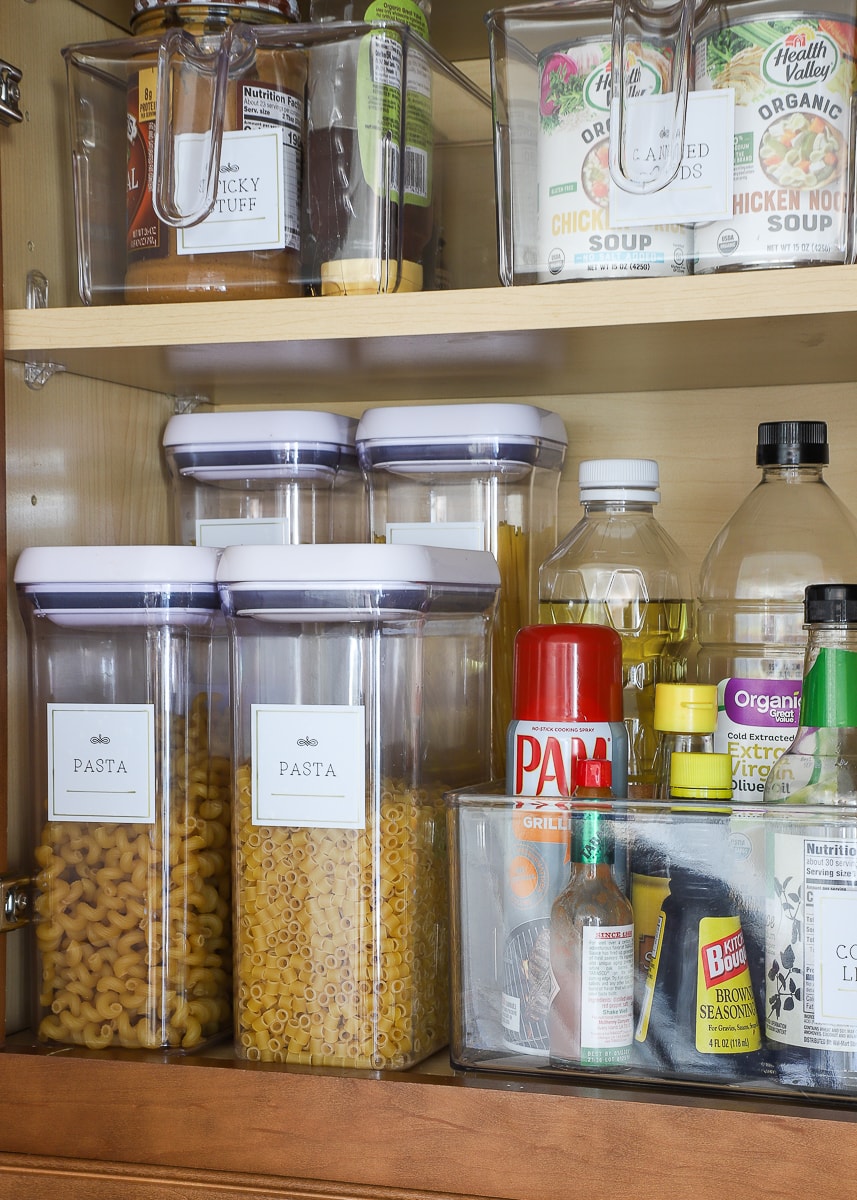
These gorgeous labels sure look great on clear containers, don’t they?!? (Full pantry tour coming up in a few weeks!)
I used the round versions of the same labels on the tops of our OXO containers.
Want to save this post?
I’ve been pressing the buttons to open and close these containers for weeks, and my labels still look fantastic!
The new Cricut Joy Smart Label material really is a game-changer for those of us who like to label everything. I do want to point out that the “smartness” of the Smart Label (loading into the machine without a mat) is unique to the Cricut Joy machine. However, I suspect Explore and Maker users could load Cricut Joy Smart Label onto a mat to take advantage of the same writable, quick-dry technology (although I have not yet tested this myself). Get ready to see a lot more projects with this fun new product in the coming months!
FAQs About Cricut Smart Label
I have put the new Smart Label to the test and am answering all your FAQs about this product (e.g., Is it waterproof? How do I cut it on my Maker? etc!) See it all here: Everything You Need to Know About Cricut Writable Vinyl
How to Make Labels with Cricut Joy Adhesive-Backed Deluxe Paper
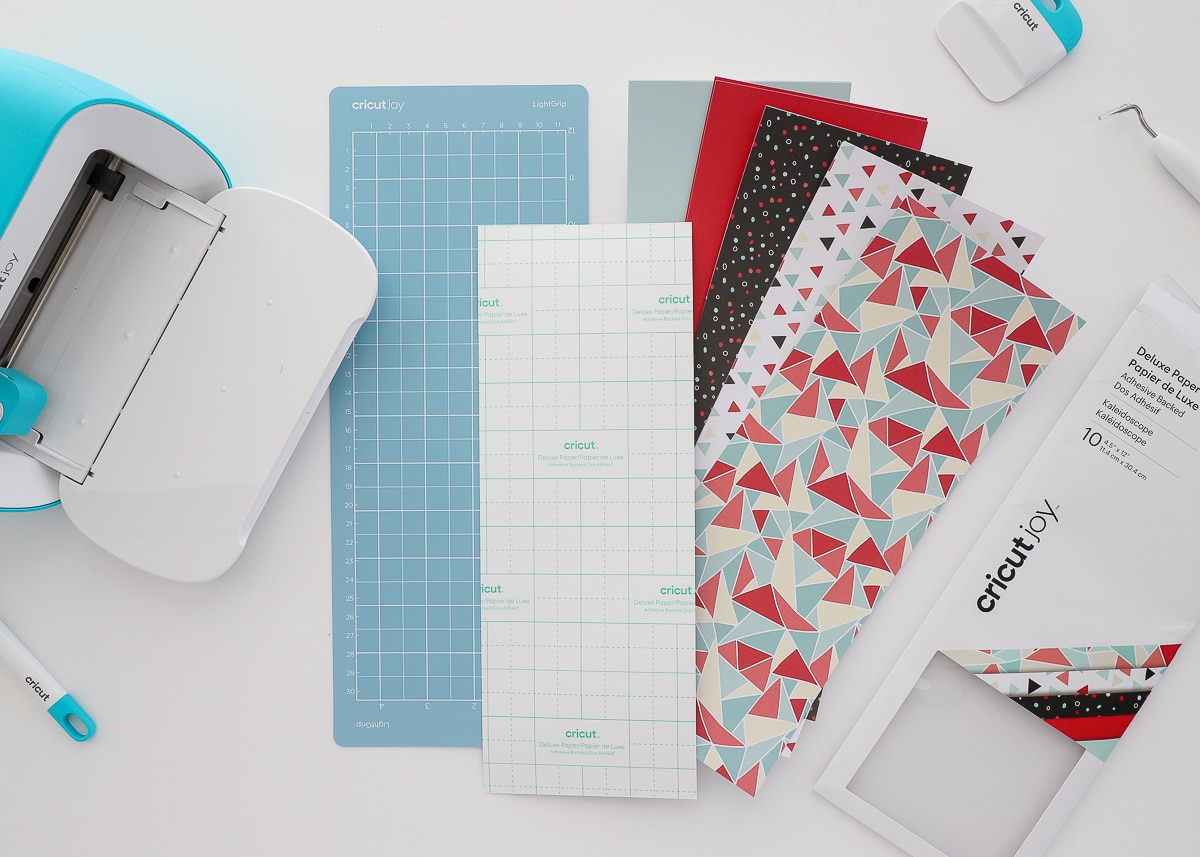
One other brand new material for Cricut Joy is the Cricut Joy Adhesive-Backed Deluxe Paper, which is essentially sheets of thick, patterned/colored sticker paper. When I first saw it, I thought it would most appeal to crafters and scrapbookers (since it eliminates the need for glue/adhesive on paper projects). But then I started experimenting with making labels with it, and it might just be one of my favorite Cricut products ever.
A single pack of Cricut Joy Adhesive-Backed Deluxe Paper comes with 10 sheets measured to fit directly onto the 12″ Cricut Joy mats. Most include a combination of patterns and solids, 2 sheets of each. The patterns are great for making your own stickers and paper crafts, but the solid sheets are ideal for vibrant, ready-to-stick labels!
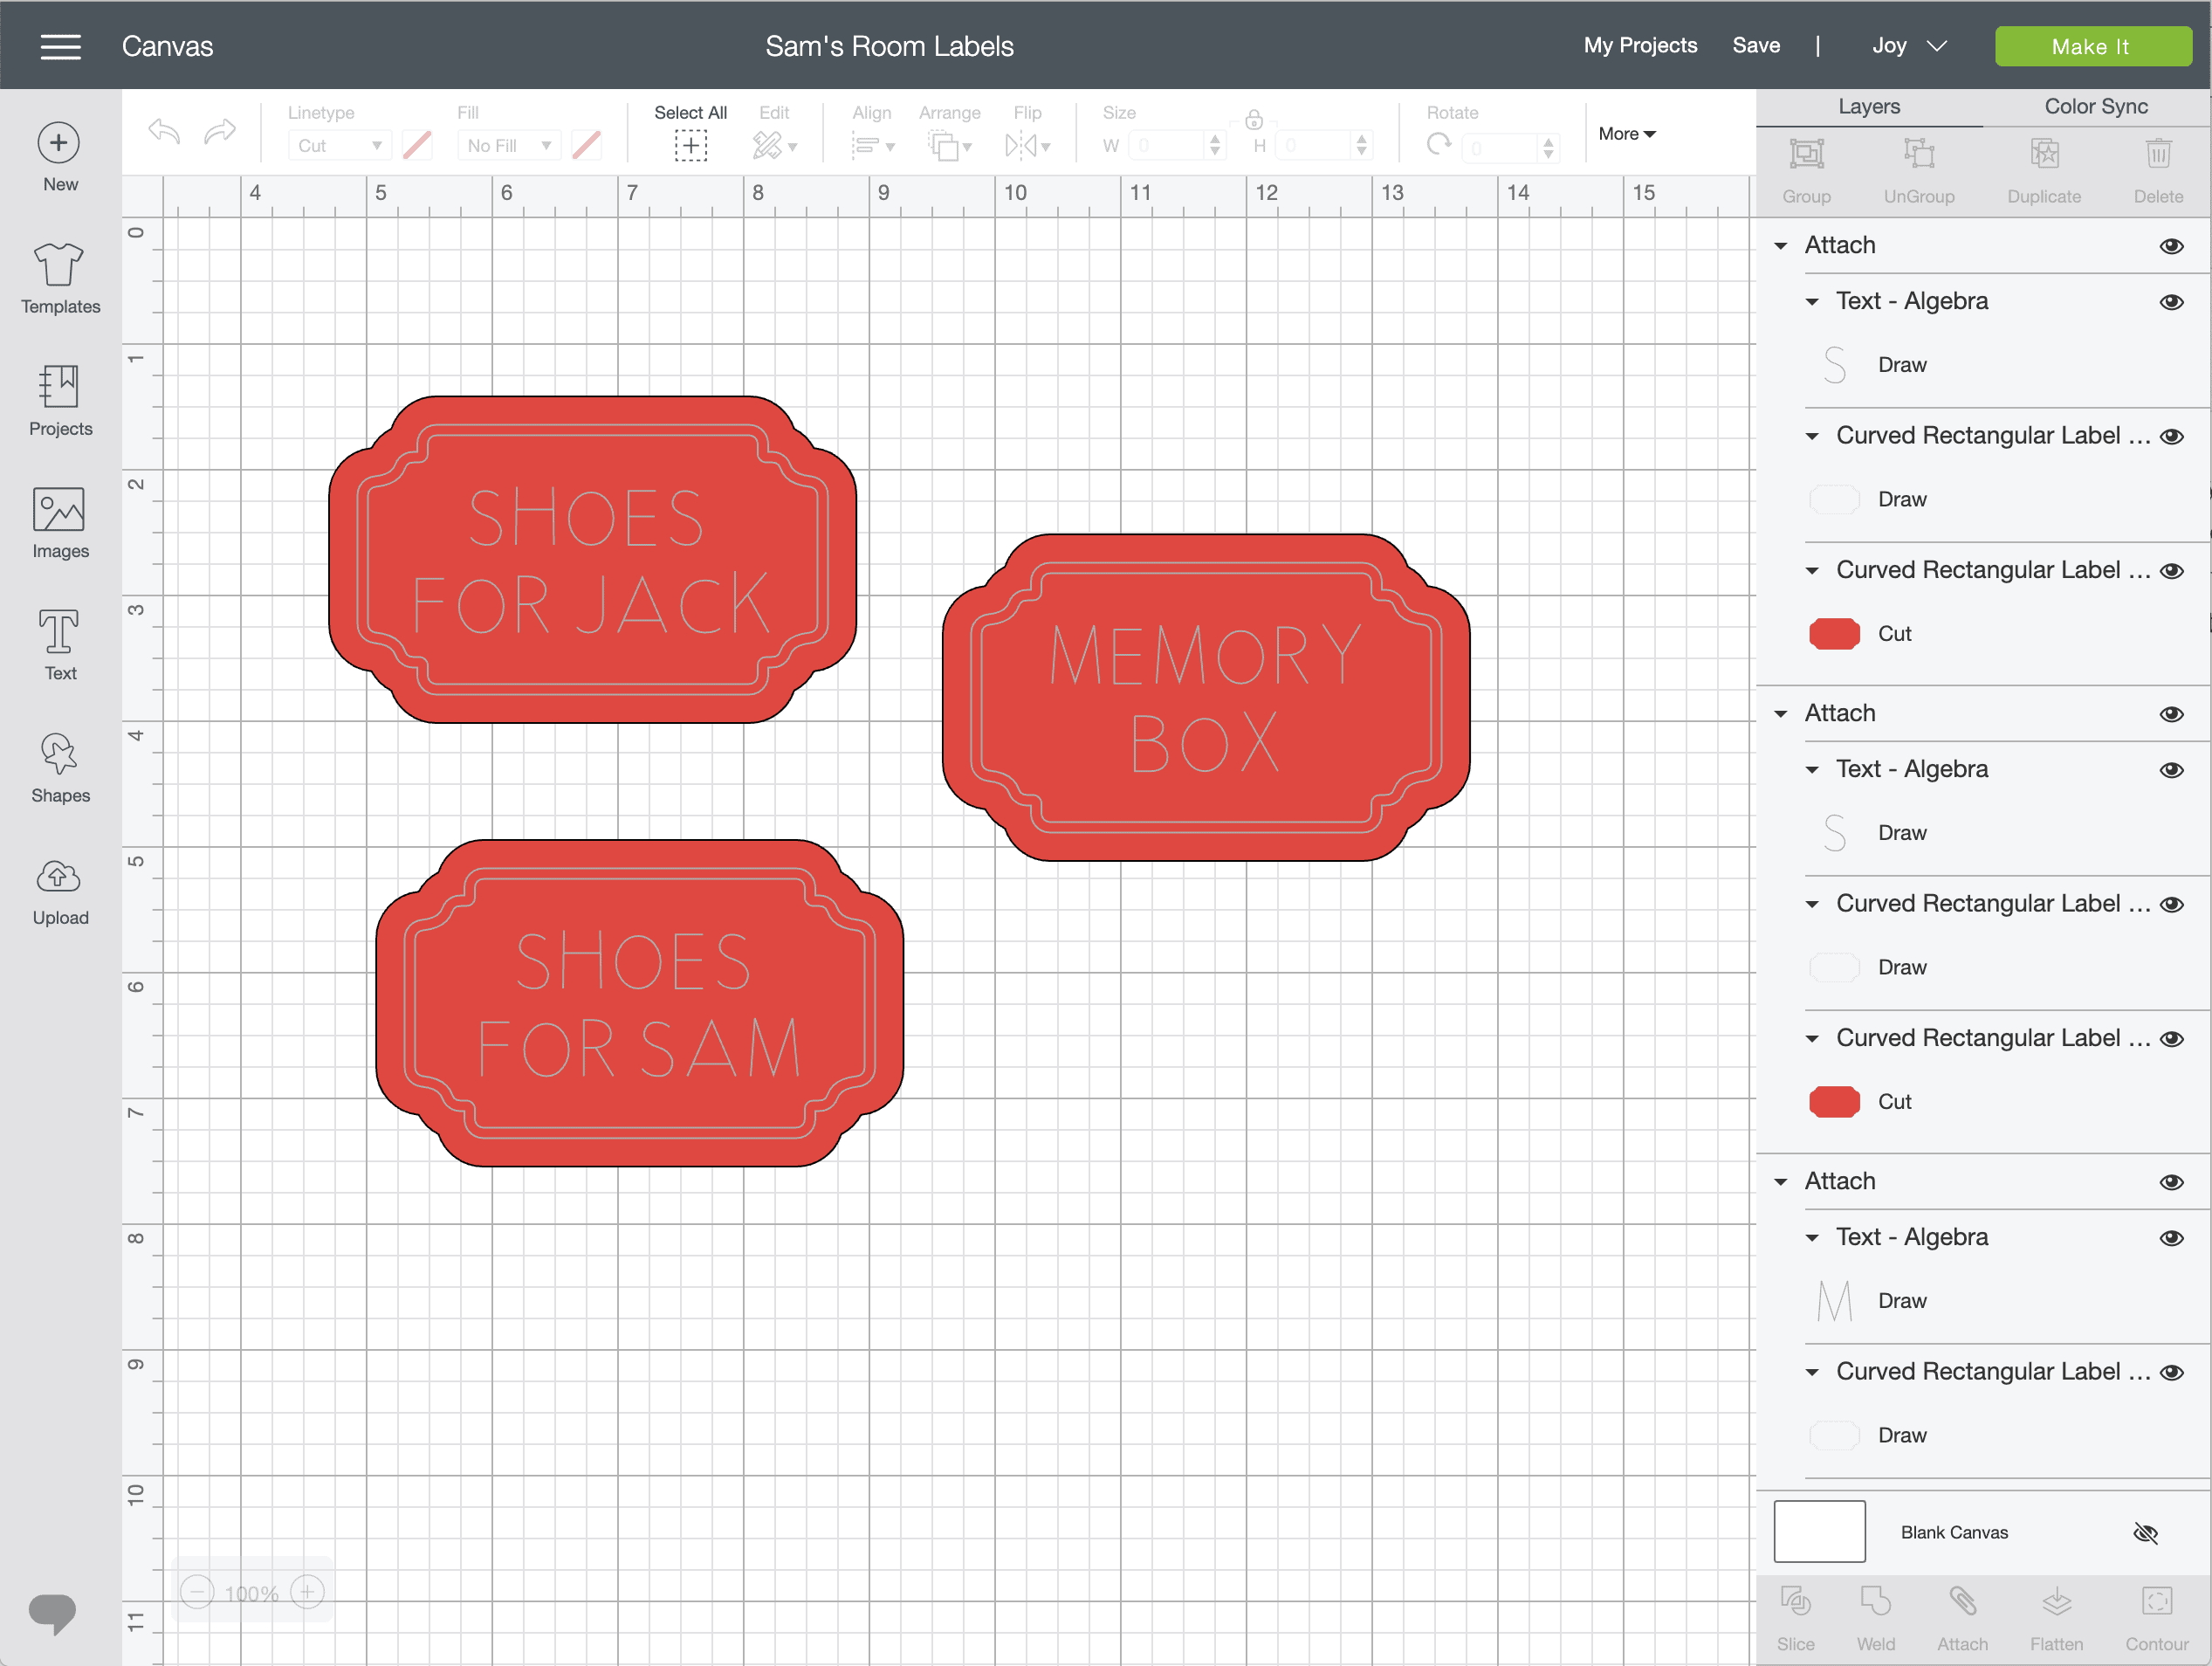
On my design canvas below, you can see how I used a pre-designed label shape and added my own words. As I outlined in the directions above, the decorative lines and words are set to be “Drawn”, and the outline label shape is set to be “Cut.”
With my design complete, I simply applied some Cricut Joy Adhesive-Backed Deluxe Paper onto a mat and loaded it into Cricut Joy. Like the Smart Labels above, Cricut Joy prompted me to swap pens and blades so that when complete, I had fully drawn and cut labels ready to go in just a few minutes!
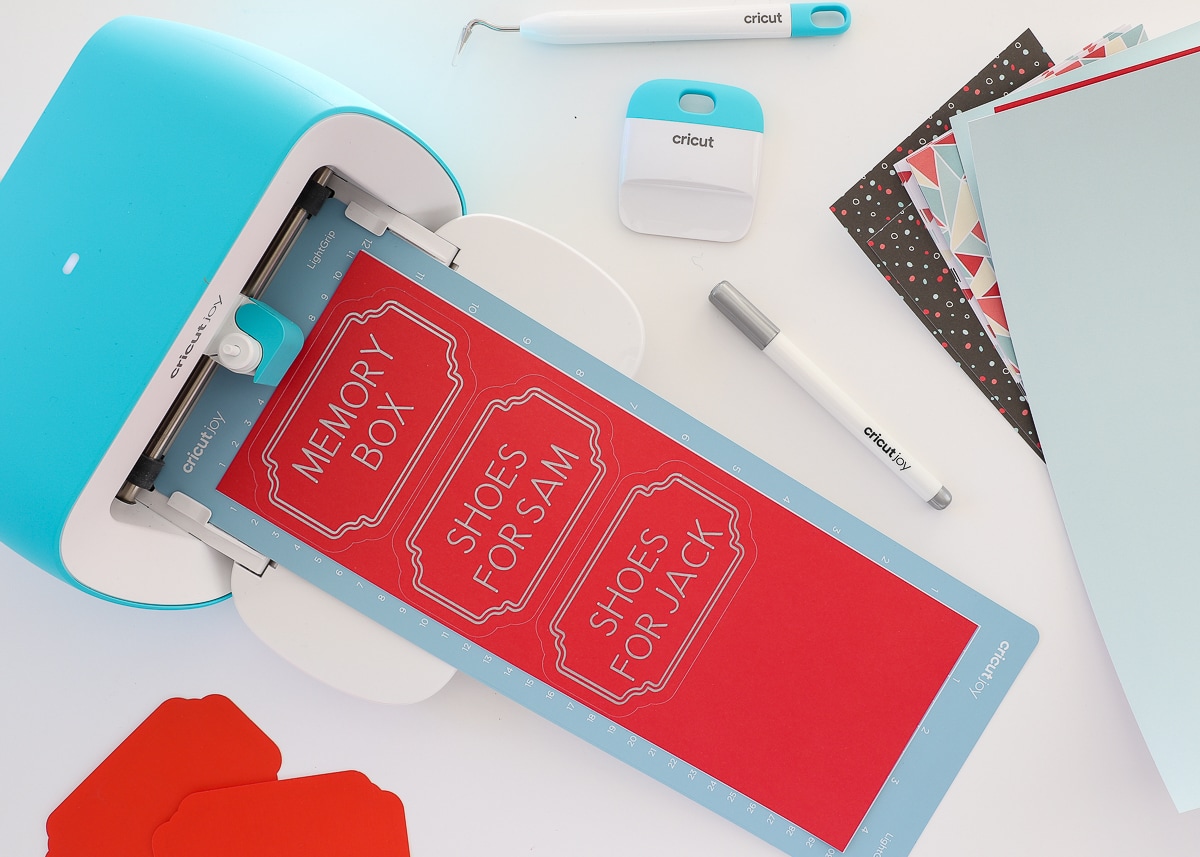
Shown: Silver Marker on Red Cricut Joy Adhesive-Backed Deluxe Paper
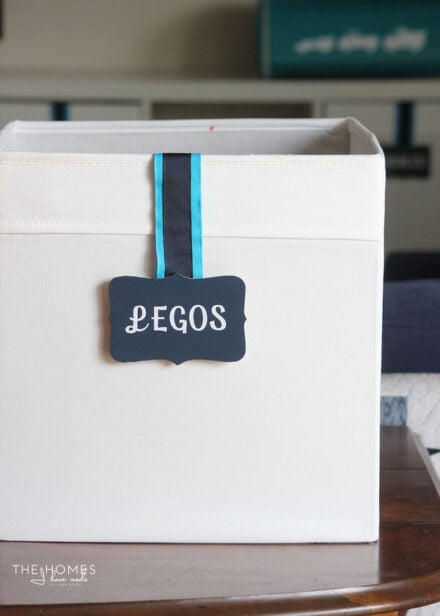
I could most certainly use this same technique on cardstock or paper. However, because these labels were cut from the adhesive-backed paper…
…I don’t need any label holder or laminator or tape or anything. I can just peel the label off and stick it directly to my box or container. In fact, the Adhesive-Backed Deluxe Paper stuck beautifully to the fabric IKEA DRONA bins I’m using in Sam’s closet!

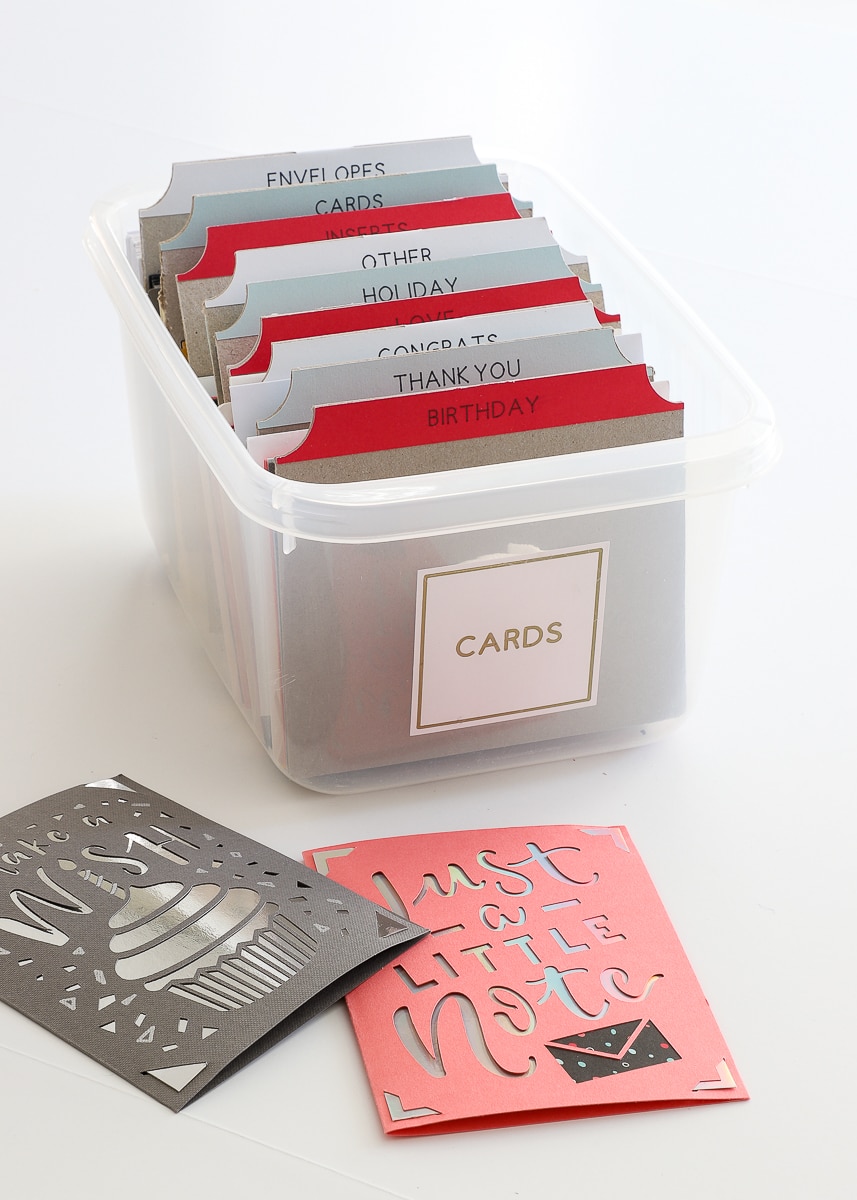
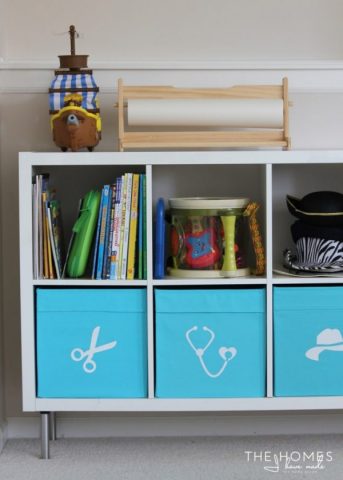
When vinyl pictures aren’t quite sufficient to convey what’s in a container…OR when vinyl words are too tedious to cut and transfer…OR when you want a little more color than the Smart Labels provide…labels cut from the pretty and vibrant adhesive-backed paper is a quick and gorgeous solution! Below, I used more of the adhesive-backed paper (with black pens) to make labeled dividers in my new card organizer! From bins and baskets to boxes, binders, planners, and more, this new paper has so many labeling possibilities that I pretty much want it in aaaallll the colors!
How to Make Vinyl Labels with Cricut Joy
While I’ve shown you two ways to make labels with Cricut Joy using brand new materials, I do want to point out that you can still make the very tried-and-true vinyl labels too!
Over the years, vinyl is the most common medium I have used to make labels. It can be cut in pretty much any size and shape (including both words and pictures). It’s available in a huge variety of colors and finishes (so you can easily find something that works with your space), and because it’s self-adhesive, labeling items in your home is as easy and peel-and-stick! Below are just a few examples of my favorite vinyl labels. Although I didn’t make these projects with Cricut Joy, I could have made each and every one if the machine was available back then 😉

I wanted to make a quick label for the basket that holds all my Cricut Joy supplies, and a vinyl label was a great option for the dark blue paper background.
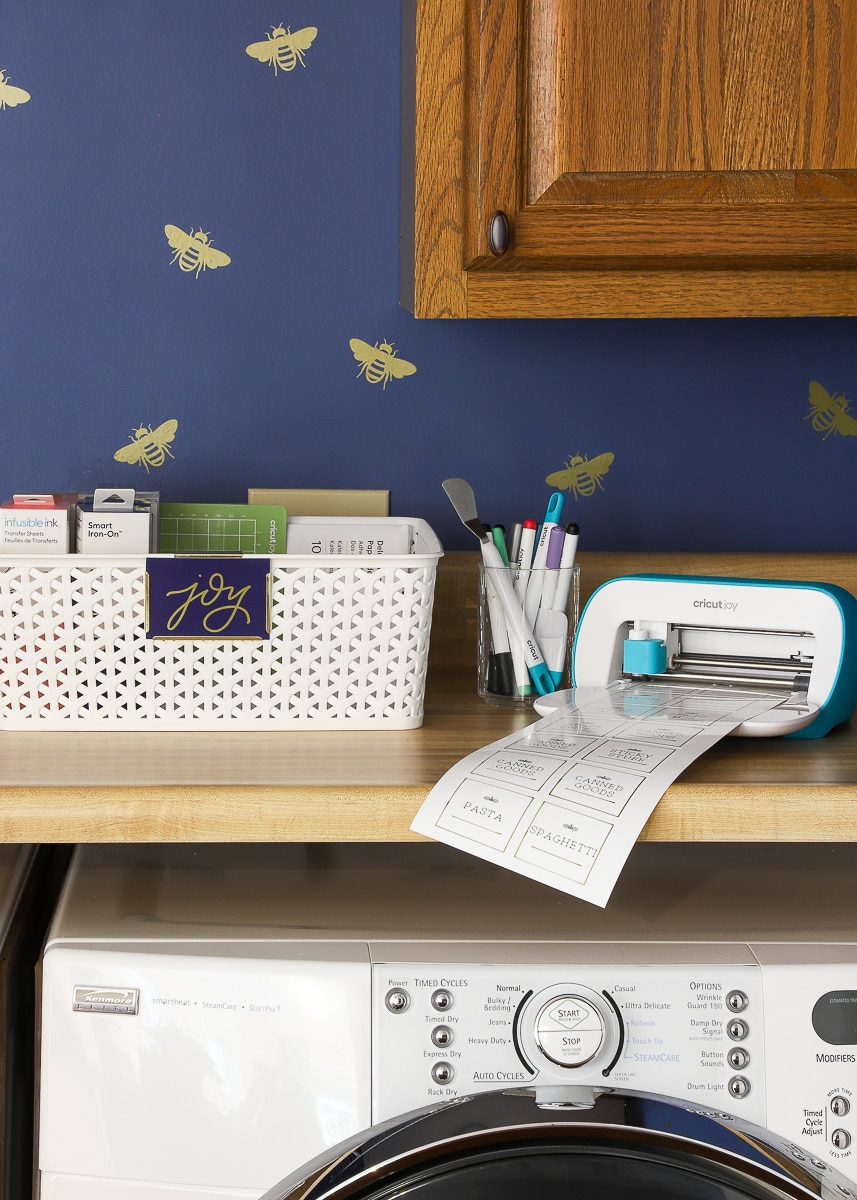
I started by creating my label in Cricut Design Space. Since “Joy” is a word common in holiday graphics, I opted to use some pre-designed words rather than typing my own. Once you find pictures or words for your vinyl labels and have them sized for your container, click the green “Make It” button.
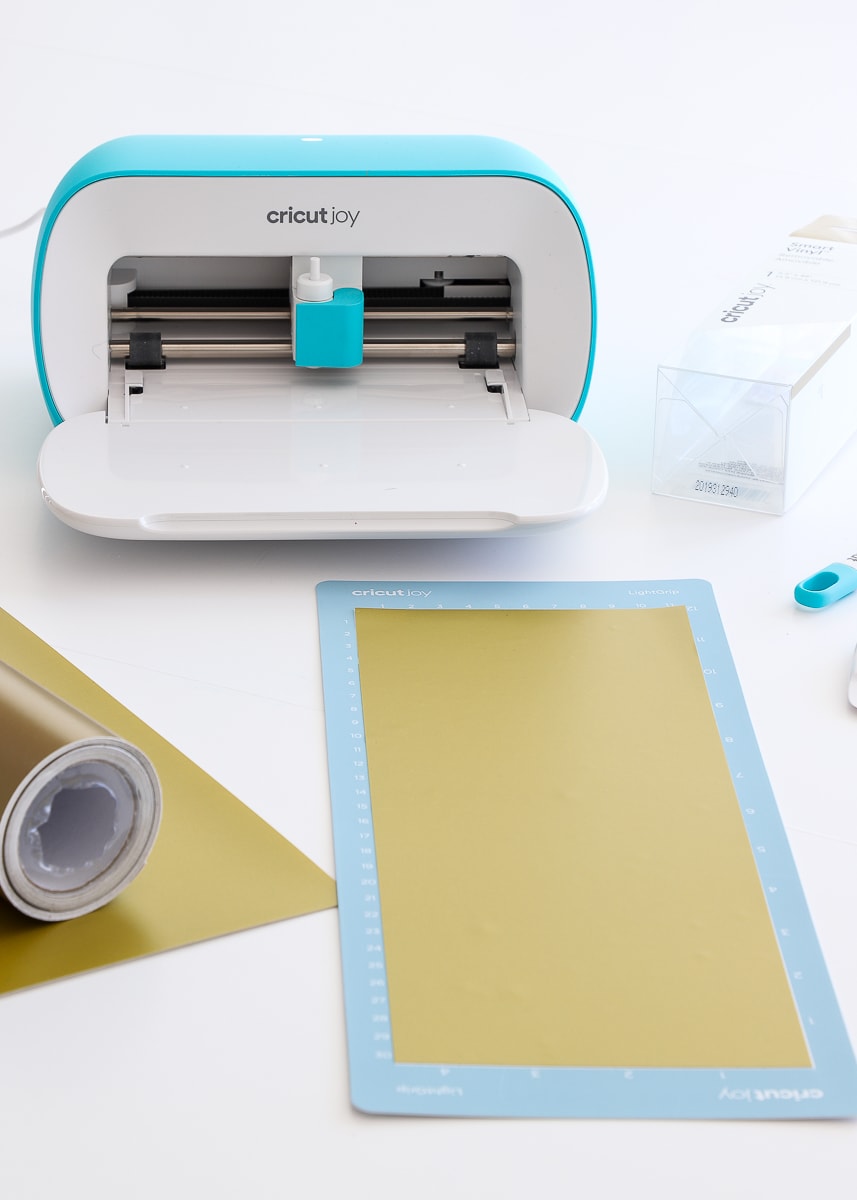
If you’re using Smart Vinyl, use the instructions I have here to load your machine and cut your design. If you want to use non-Smart Vinyl you already have on hand, simply load the vinyl onto a Cricut Joy mat and feed it into the machine.
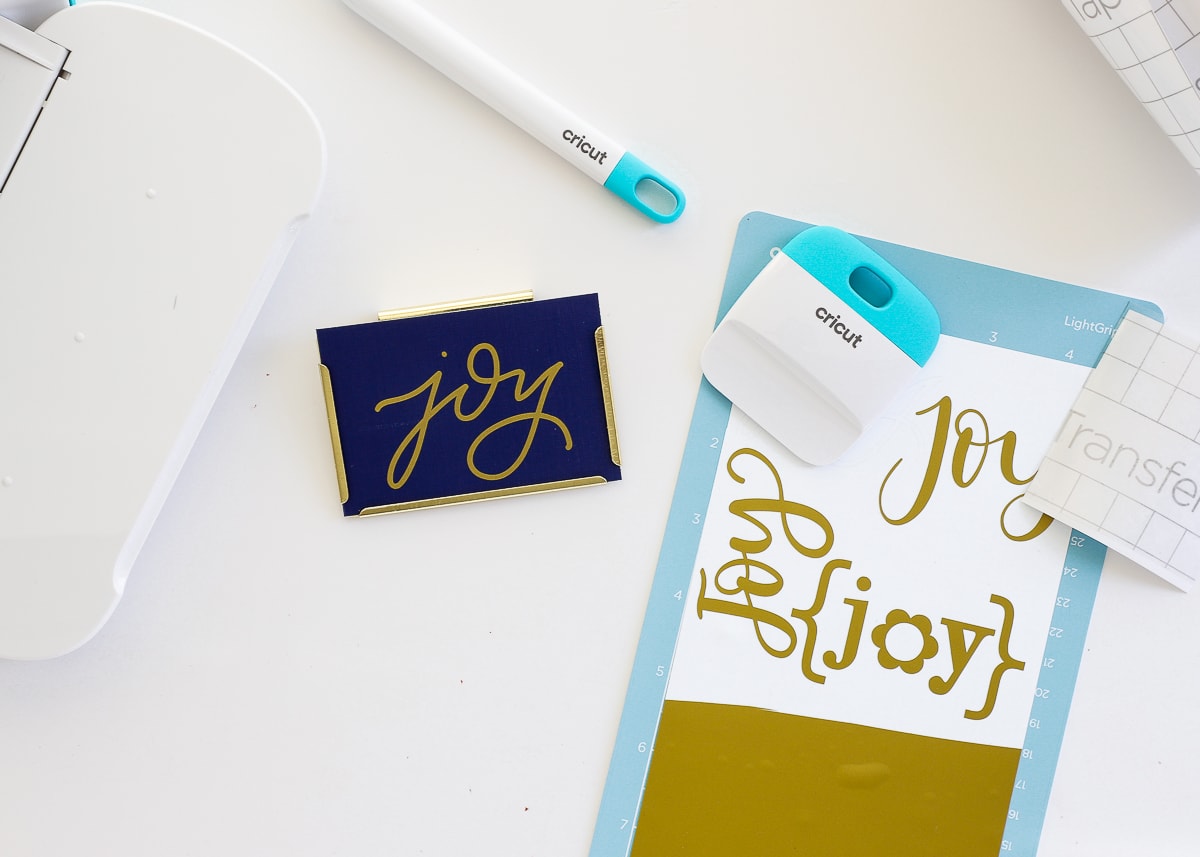
Once Cricut Joy is done cutting, unload the machine and use the weeding tool to remove all the “negative” aspects of the design. If you need more help with weeding, see my tutorial here.
If you have a small, solid design, you likely don’t need to use transfer paper to move it to your container (see what I mean in this post). However, words and large images will most often require Transfer Paper to maintain their spacing and reduce the chance of bubbles/creases. You can see my full step-by-step for using Transfer Paper here.
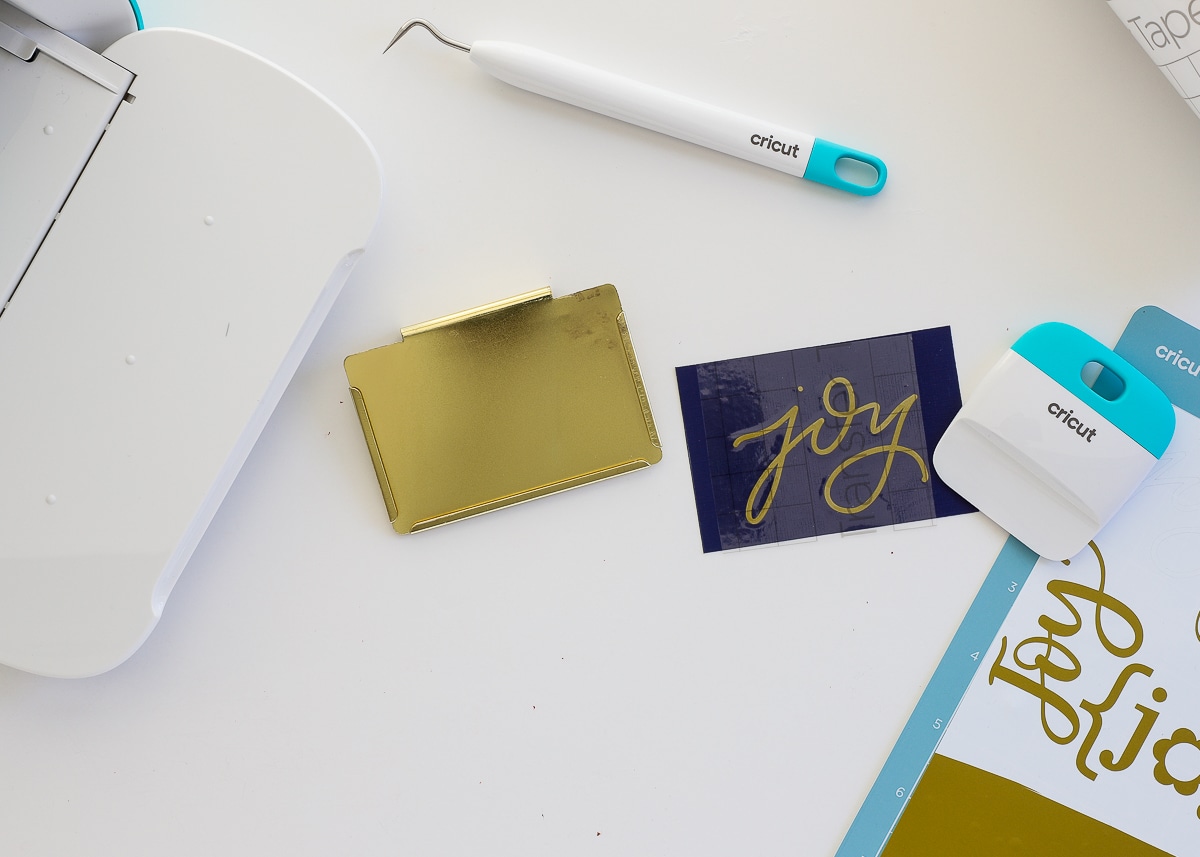
I simply transferred the gold vinyl “Joy” onto some navy blue cardstock and slid it into my favorite basket holders.
Vinyl is especially great for large, graphic words and shapes/icon-style labels. It can be applied directly to solid containers (glass and plastic are best, although I have applied regular vinyl to fabric too!), and can also be added on top of labels made from paper, chipboard, cardboard, etc. With a single roll of vinyl, you can label a wide variety of surfaces in a matter of minutes…although most will require weeding and transfer paper!

How to Make Labels with the Cricut Joy App
Since the Cricut Joy’s release in early 2020, our friends at Cricut have now released a compatible app that allows you to make custom labels, from your smart device, in a matter of minutes. No computer, no fancy software needed…and it’s amazing! See how it works in this follow-on tutorial: How to Make Labels with the Cricut Joy App!
A few months ago, I got a note from a professional organizer who was looking to create custom labels in her clients’ homes. She wanted to know how “quick and easy” the Cricut Explore/Maker machines were to use for this purpose. I hated that I had to tell her that although the Explore/Maker machines would give her and her clients the pretty labels they wanted, it wouldn’t exactly be a quick or easy process, especially on the scale she needed (lots of clients = lots of rooms = lots of labels). Lugging the machine and large supplies alone would likely be prohibitive, and the weeding and transfer paper process would be incredibly time consuming.
But Cricut Joy has changed all that!
I can’t wait to reach back out to her and say…here…this is the machine you want to use with your clients! Not only is Cricut Joy small, portable and lightweight, but it offers so many capabilities for quickly and easily creating custom labels for pretty much any surface in the home.
For those of you who write to me and say “I want labels like yours but I don’t want/can’t have a huge Cricut machine,” my answer is the same. This is the Cricut machine for you 🙂
I have been having so much fun labeling space after space in our home, so look for more labeling inspirations in the future! However, to wrap up my Cricut Joy introduction, I’ll be back here on Friday giving you a look at that fancy DIY Card Organizer and all the amazing cards contained within it! See you then!

Megan
16 Comments on “How to Make Labels with Cricut Joy”
I just received a Cricut Joy for Mother’s Day. After “finally” having enough confidence to take it out of the box, I couldn’t use it because my laptop wasn’t Bluetooth compatible. That was something I didn’t know I needed!! I ordered a Bluetooth Adapter and today I was finally able to access the Joy! I did the “sample” (which was easy) and I tried to make one for myself (a dog heart, of course). NOPE!! This is the 20th time I’ve wanted to return it already! I’m not “computer smart” and this was harder than I thought. Then ~~~ I came across YOU! I signed up for the “cheat sheets” and I will watch all your tutorials. You do it step-by-step, and “hopefully”, I can “get it”. It’s pretty hard to learn, when you don’t have any instructions. I wanted to print my “dog heart” on cardstock. NOPE. It said I needed 6 (I forgot the word, but 6 different items to feed) and it only printed on the mat!!! That’s where I said I need to FIND a step-by-step process to this machine. I look forward to learning from you, all that I can. “Thank You” to your husband (and all of you) for his Service. Proud AF mom here 🙂
Hi Karen,
I am sorry to hear you’ve been so frustrated with your machine. Once you get the hang of the software, you will find it really is easy and will become second nature.
I did want to clarify something for you. The Cricut Joy cannot do the “Print-then-Cut” feature (only available on the Maker and Explore machines). As in, you cannot print something and have the Joy cut it out. If you want a “drawn” or “line” design on your card, it will need to be done with the pens.
I encourage you to work through all my Joy projects, and by then, I think you’ll have a pretty good sense for how things work. You can find them all here: https://thehomesihavemade.com/category/cricut-explore-101/cricut-joy/
Good luck!Megan
Oh my gosh. I have been on the fence about getting a Cricut. I saw this article and decided to go for it. My little Cricut joy arrived earlier this week, along with extra supplies for this project. I sat down last night to whip out my labels. Lol. Well I didn’t quite whip them out, as I had to do a crash course on Design Space. But wow! My labels came out so beautiful! Thank you so much!
How do I create clear labels on a cricut joy? Can I print directly on the transfer tape or do I need to buy the clear sticker paper, as I currently can’t find any smart label that is clear, or transparent.
Hi Becky!
Sorry for the delay in getting back to you. Unfortunately, at this time, there is no great way to make CLEAR labels with Cricut Joy and pens. I thought Cricut had some clear sticker paper in the works, but it still hasn’t been released as far as I can tell.
You can certainly try using Cricut pens on clear sticker paper, but I’m not sure if it will smear or not (there’s a good chance it will). Right now, I make clear stickers with my printer…you can see how here: https://thehomesihavemade.com/diy-gold-foil-labels/
Hope that helps!
I love these labels. I got a CricutMaker. Are these labels still possible?
Of course! You’ll just need to put the Smart Label on a mat instead of using the “mat-free” option!
Did you pay extra for the pantry labels you show created? I’m new to the Cricut Joy game and the learning curve is harder than I thought! I mostly purchased for in home projects and labels. Would love to see in more detail how to started that labels project, from start to finish!
Hi Hannah,
I’m not entirely sure what you mean about “pay extra”? I designed all the labels you see in this post myself, so I didn’t pay for any design or fonts…I just used Cricut Design Space images I know there is a lot packed into that post, but I break down exactly how I designed the labels under the heading “Designing Your Own Labels.”
Working in Cricut Design Space does have quite a steep learning curve, but once you master the basics, you’ll be well on your way!
If you need more information about making basic vinyl labels, see my tutorial HERE (it applies to ANY Cricut machine).
If you need more information wall decals with Cricut Joy, see my tutorial HERE.
Finally, if you haven’t seen it, get my free Design Space Cheat Sheets HERE and check out my Cricut Beginner Bundle, which breaks down a lot of the Design Space skills you need to make your own labels.
Hope that all helps a bit!
Megan
Hi Megan,
This was a very helpful post! I just received all these fun things for Christmas and am so excited to start making labels!
My question is, what size did you size each label, so they would fit perfectly on the 2×2 smart label paper?
I read over the post multiple time, and probably still missed it, but I couldn’t quite tell the dimensions from the pictures. I love how you were able to have them all on the same sheet. I am all for not wasting any materials!! 🙂
Thank you so much for the help,
Elizabeth
Hi Elizabeth,
How exciting to get a new Cricut Joy!
It may be a bit hard to visualize/understand until you get your machine setup and into the software, but I designed the labels to be 2×2″ squares. So the blade on the machine cut 2×2″ squares from the 5″ wide label vinyl.
You can cut the label vinyl into any size/shape (that fits, obviously) – to learn a bit more about this product, check out this post: https://thehomesihavemade.com/everything-you-need-to-know-about-cricut-joy-smart-label/
Hope that helps some!Megan
Thank you so much, Megan, for the response!
That totally helps. I can’t wait to get started on it today.
Take care,
Elizabeth
Your site is awesome. Thanks for all the good info. I signed up, and looked through the PDF bundles you have and will definitely be back tomorrow to purchase them.
I did have one question. Are making chalkboard labels done as the others you showed? “With the sticky backs??
I am very much enjoying your content! I just purchased a Cricut Joy and am looking forward to making labels. I downloaded your file and have opened it in DesignSpace. When I type in my label names, they don’t center properly. I’ve tried ungrouping to no avail. I’ve tried using the alignment function – which does something, but not align. 🙂 It seems to put a centering crosshair on the image. Can you offer any suggestions?
Hi Megan
I love your inspiring articles and immediately jumped to make my labels and was duper excited how professional they looked, but after a few washes the printed labels have faded an some are now illegible. Very disappointed.
Thank you for such a thorough post on the topic of labels! It is very helpful and is making me confident that I can make these labels easily. I have had Joy machine for years and have been intimidated by it, well not anymore. Thank you again.