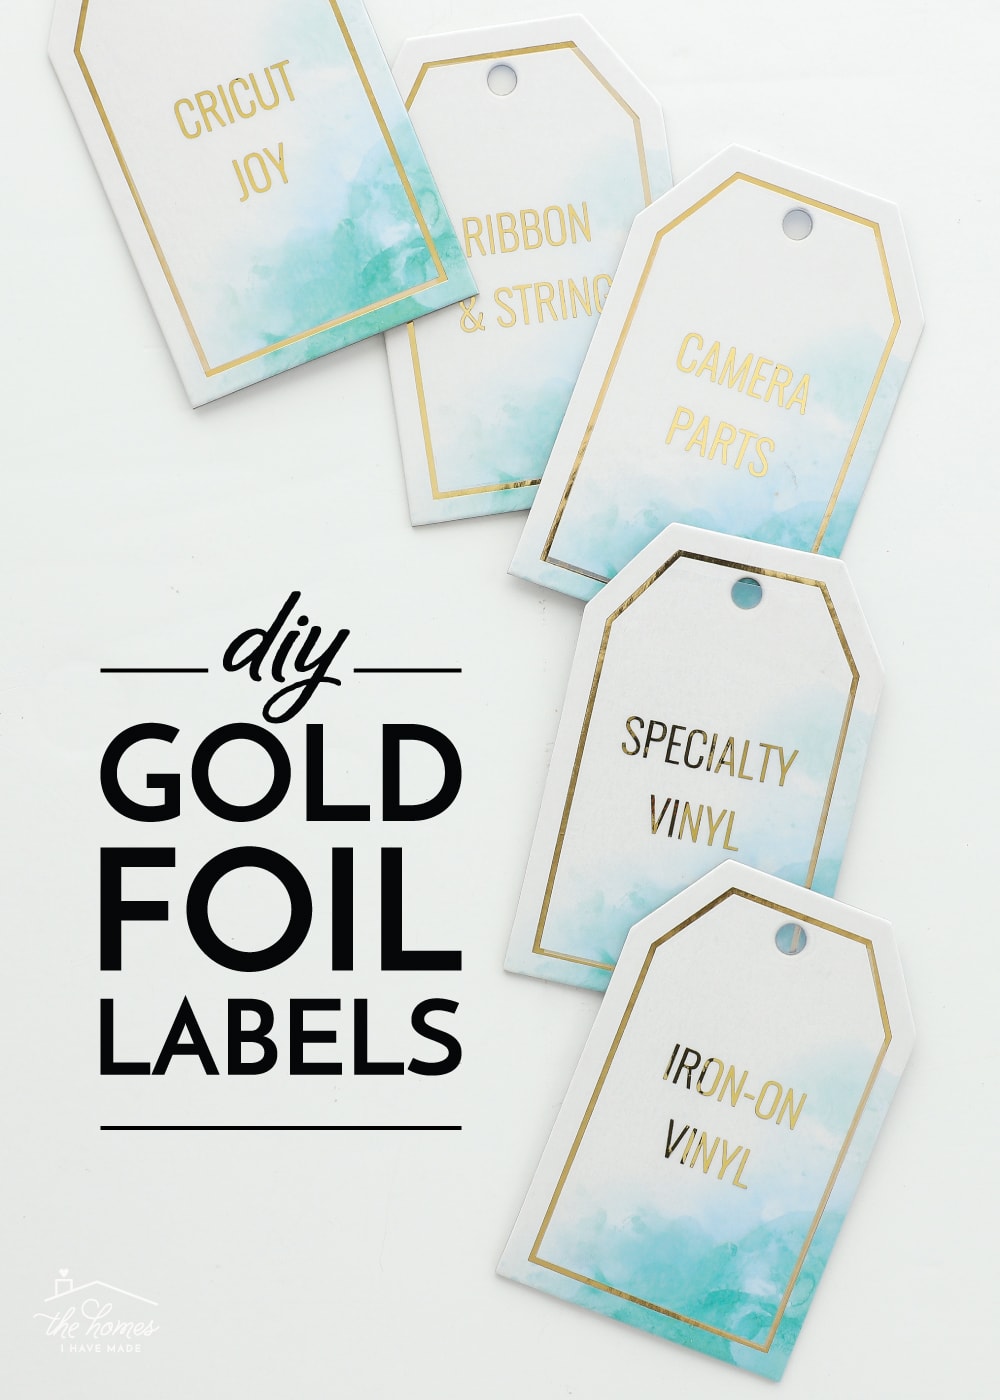
DIY Gold Foil Labels
In general, my DIY philosophy is “done is better than perfect.” But every now and then, I have a vision in my head that I just can’t shake, so I work and work to make it happen. For years now, I’ve wanted to figure out a way to DIY Gold Foil Labels. Not just because I am ga-ga for everything shiny and metallic, but also because that finish better matches the label holders, frames, lamps and other things already in our home. Until now, I’ve only been able to put flat, matte gold writing onto labels, but I recently figured out how to re-purpose an old crafting technique in order to add that warm sheen to pretty much any label (without super fancy supplies or tools)! Let me break it all down for you!
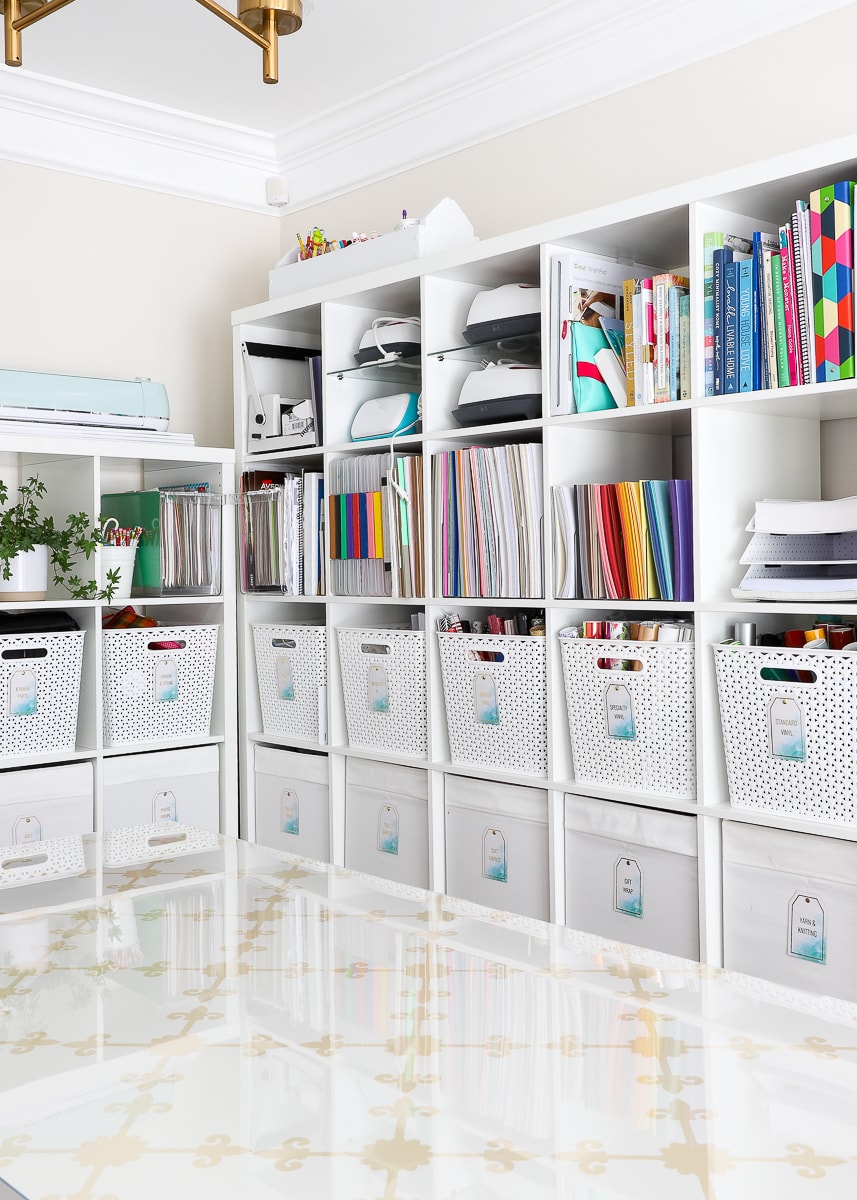
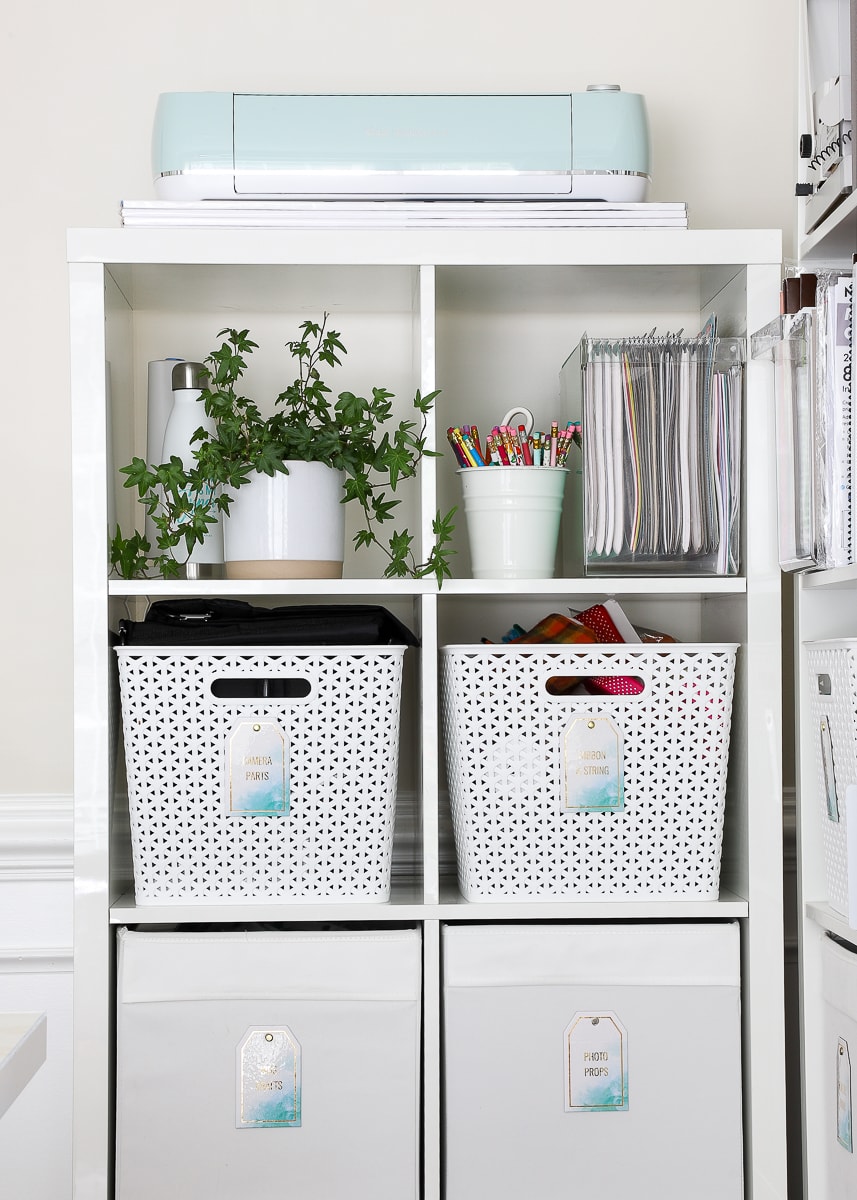
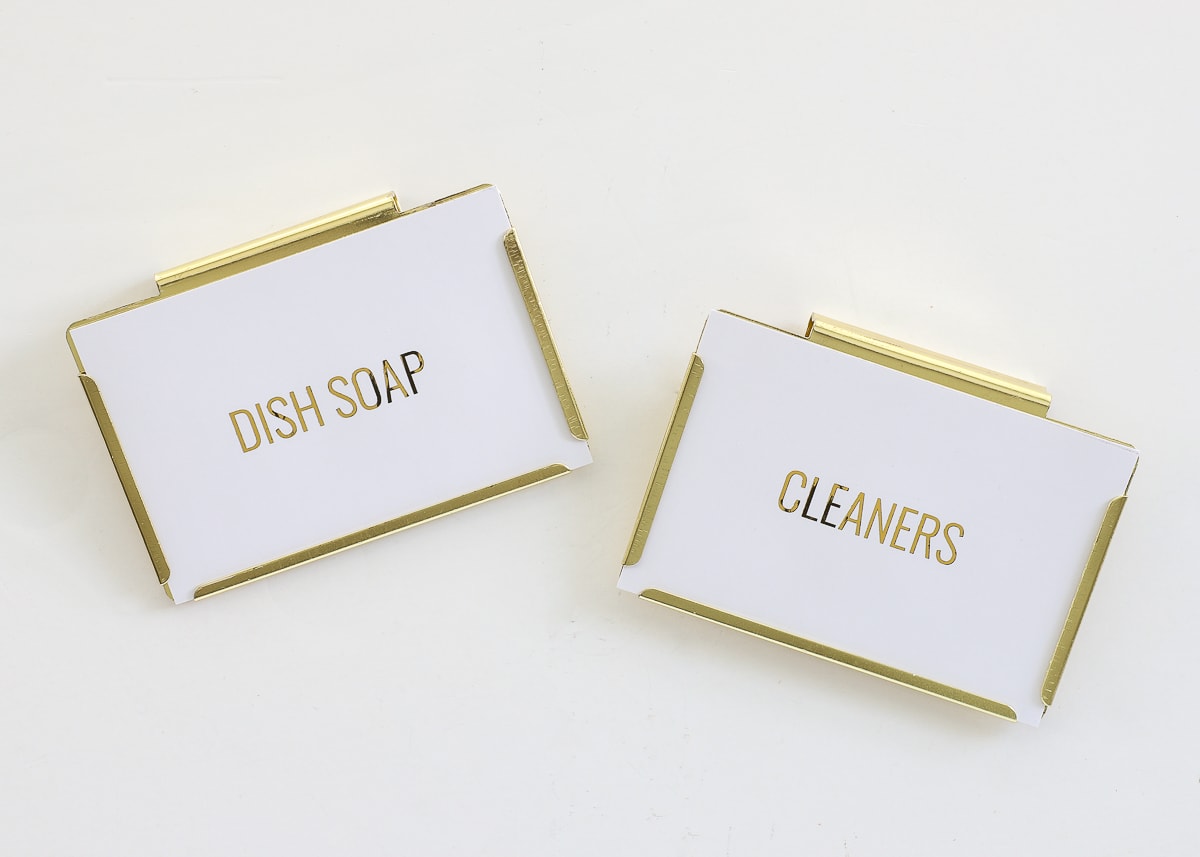
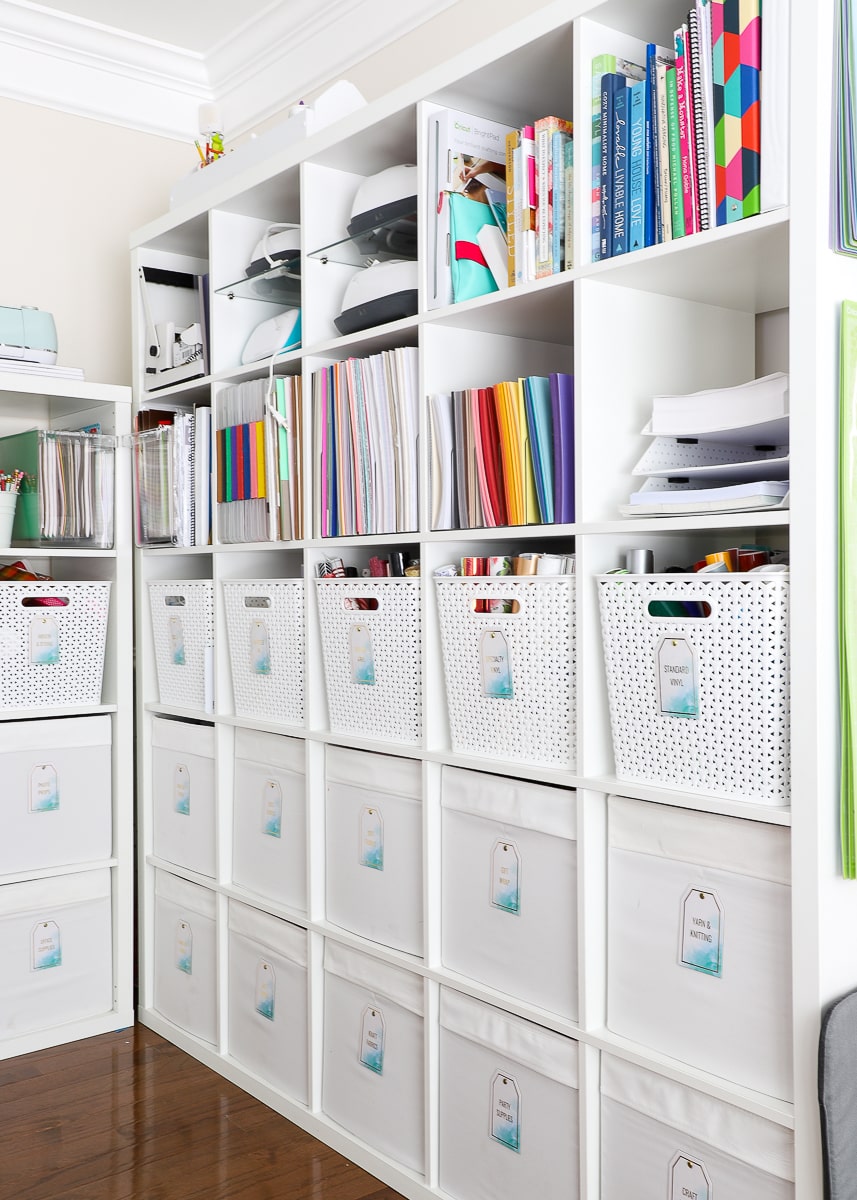
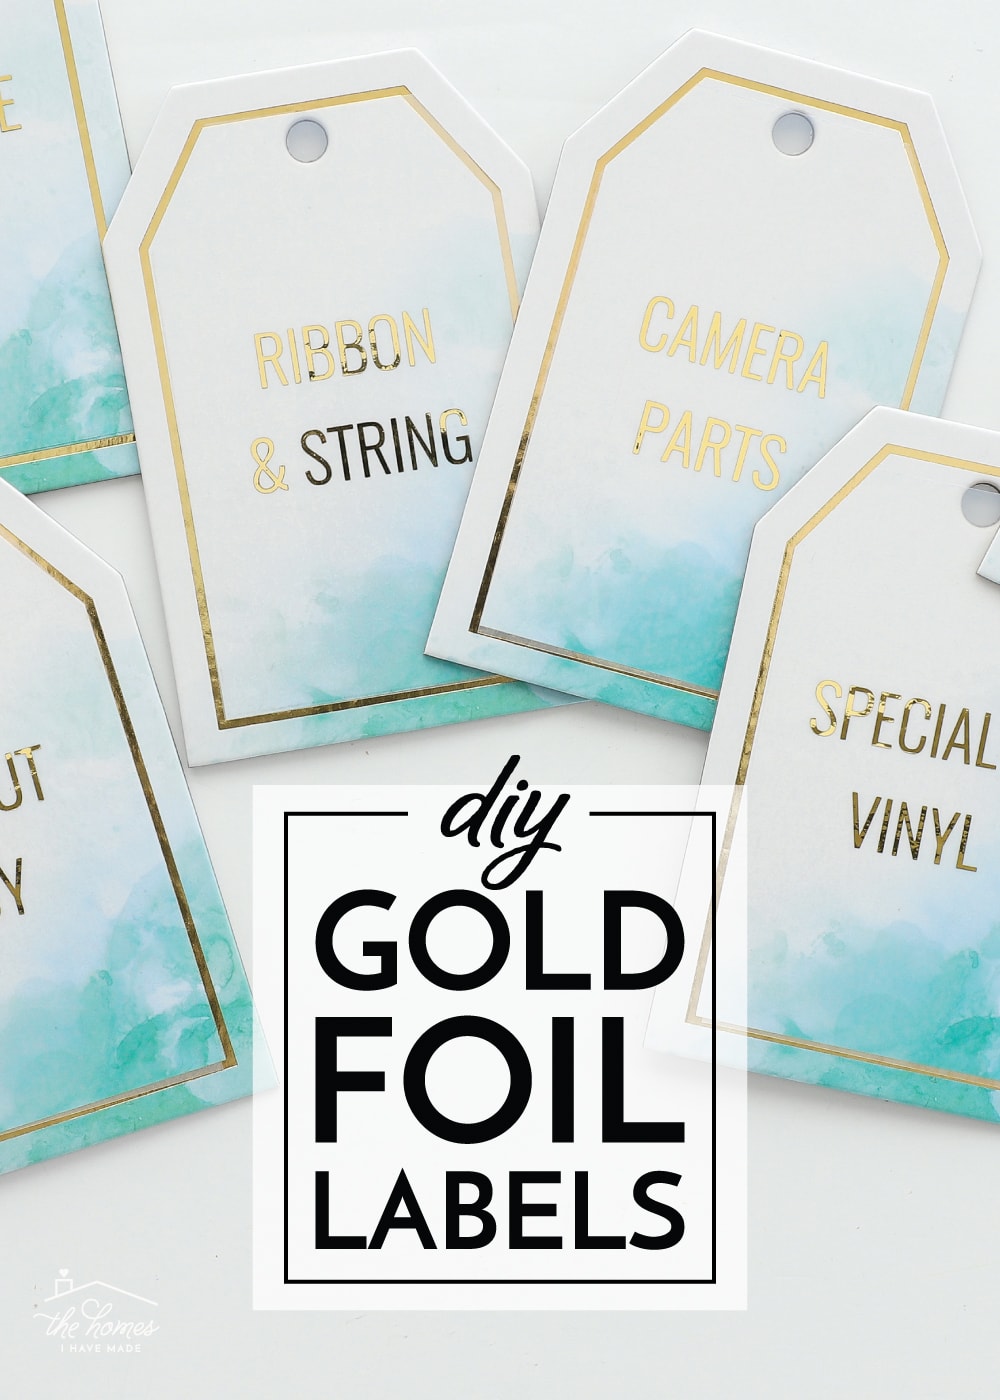
When I revealed our updated craft table last week, you might have noticed my baskets have pretty new labels on them:
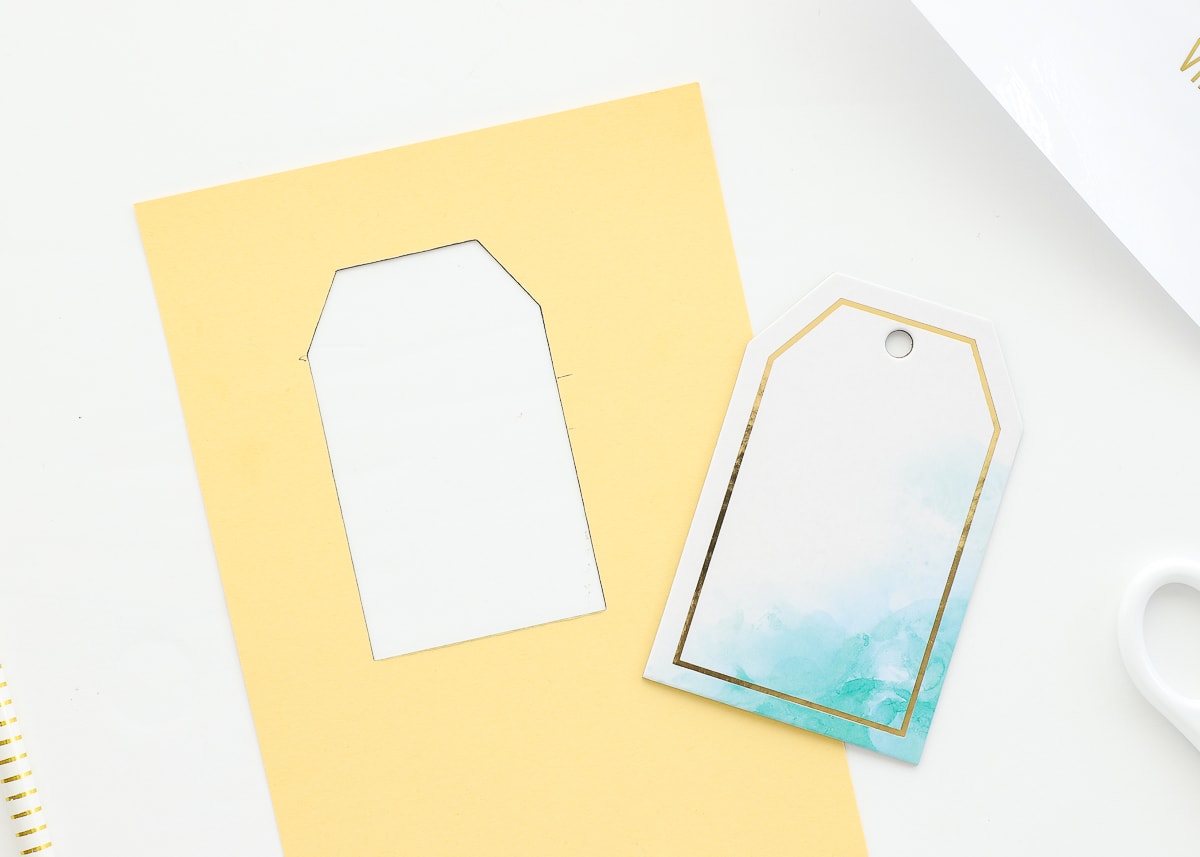
I stumbled upon these inexpensive boxes of gorgeous tags at Michaels a while back now (there’s lots of varieties, wait until they go on sale!) and wanted to use them in pretty much every room in our house. But I couldn’t figure out a way to add gold, foiled, removable labels to them…until now!
I mean… 😍😍😍…right?
View this post on Instagram
The DIY Gold Foil Labels “Recipe”
Die-hard crafters will likely be familiar with this easy foiling technique. My sister (who is big into stamping and card-making) was explaining the process to me, and I thought she had gone crazy. After trying it for myself (and picking my jaw up off the floor), I knew I had to foil all the things and show you how to do it too. Here’s the “secret” recipe:
Labels (or art or gift tags, etc) printed with a laser printer + Foiling Sheets + a regular ol’ Laminator = Gorgeous DIY Gold Foil Labels
Editable Labels | Gold Foil Sheets | Laminator
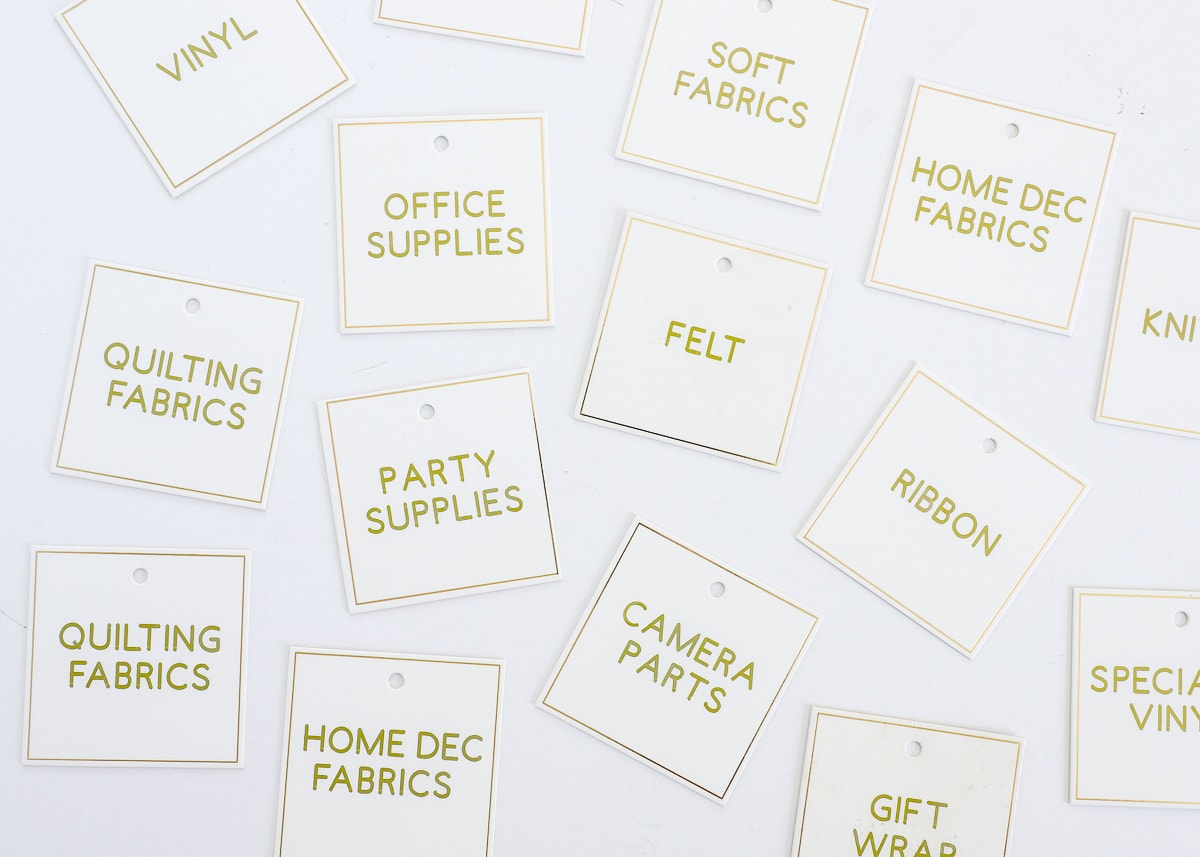
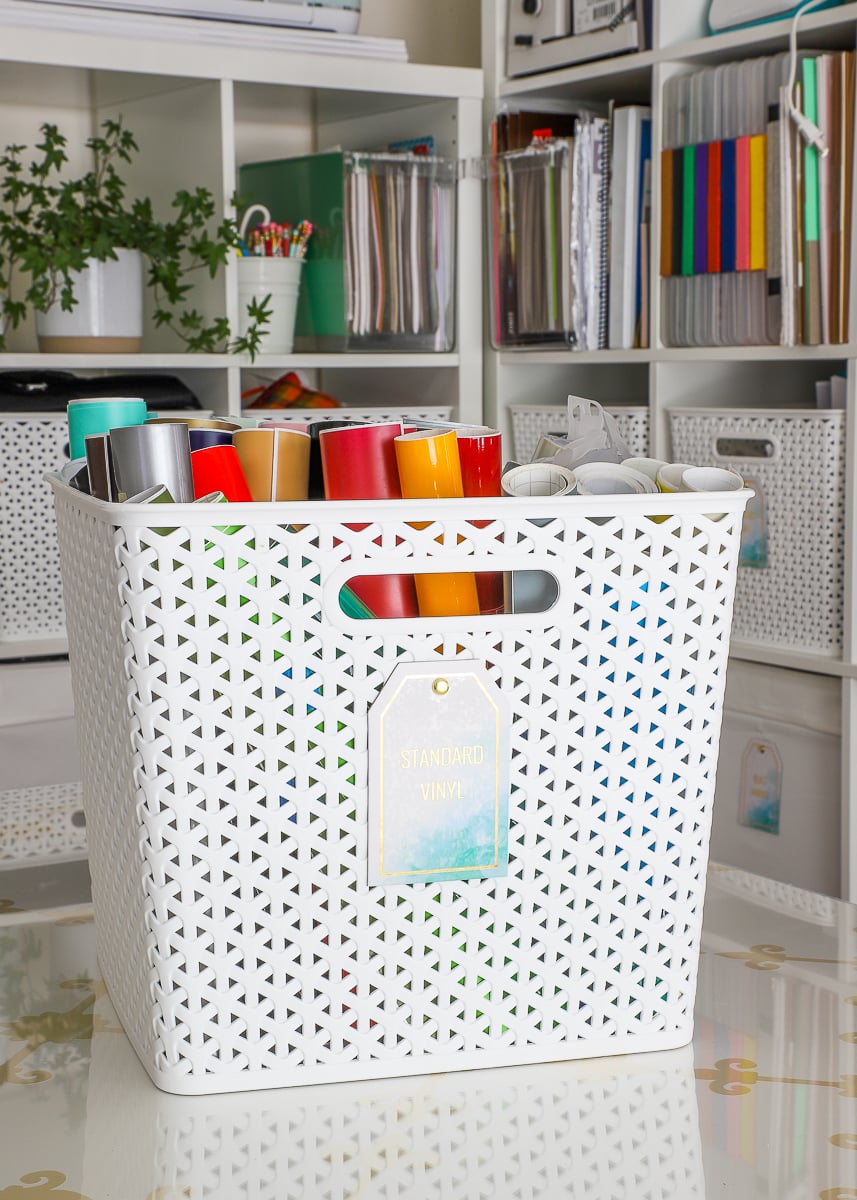
Yep – that’s it! I’m going to outline the DIY process below, but I want to emphasize here that you can do this with any labels printed from a laser printer. Above are labels direct from The Organization Toolbox. Below, I used the same (blank) templates to make some inserts for the baskets under our kitchen sink. My point here is that while I’m going to show you how to make clear gold foil labels to add to tags, this process can be used with plain paper, cardstock, etc and put on any basket, in any label holder etc!
Why Removable?
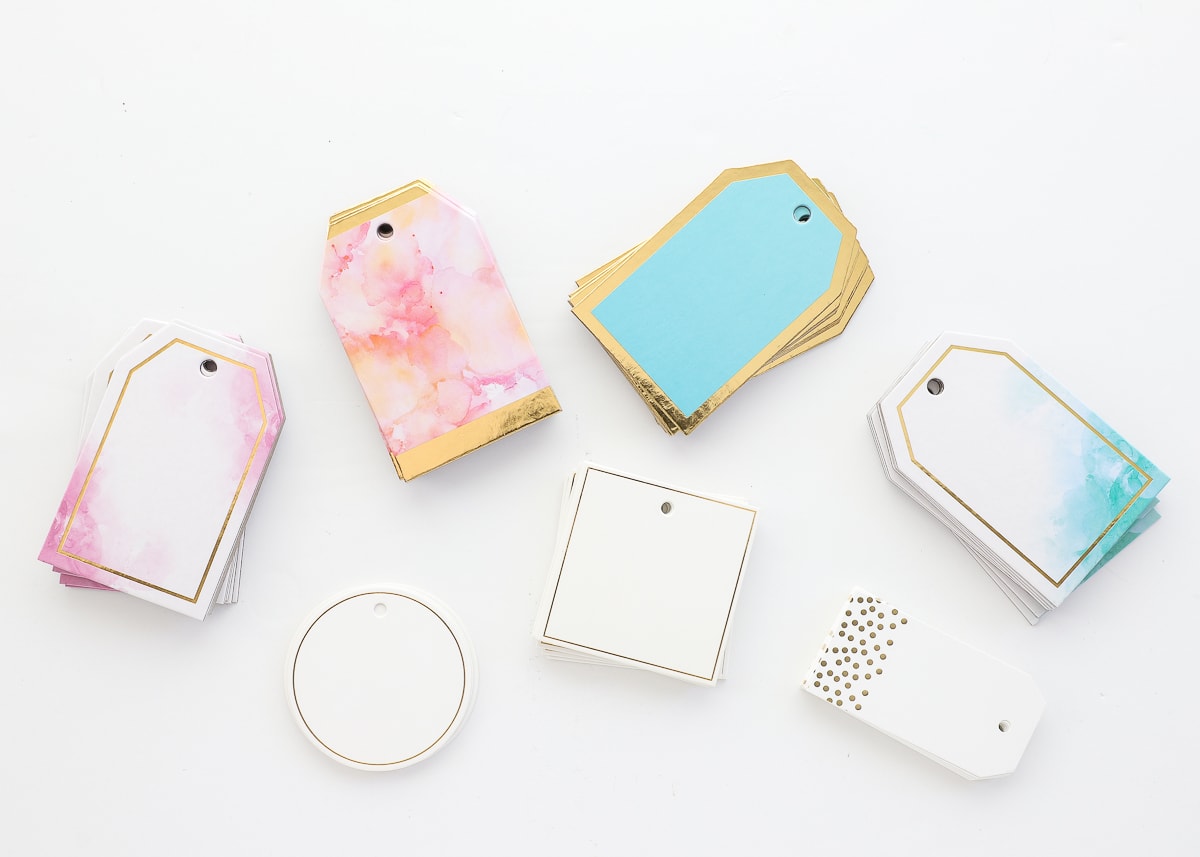
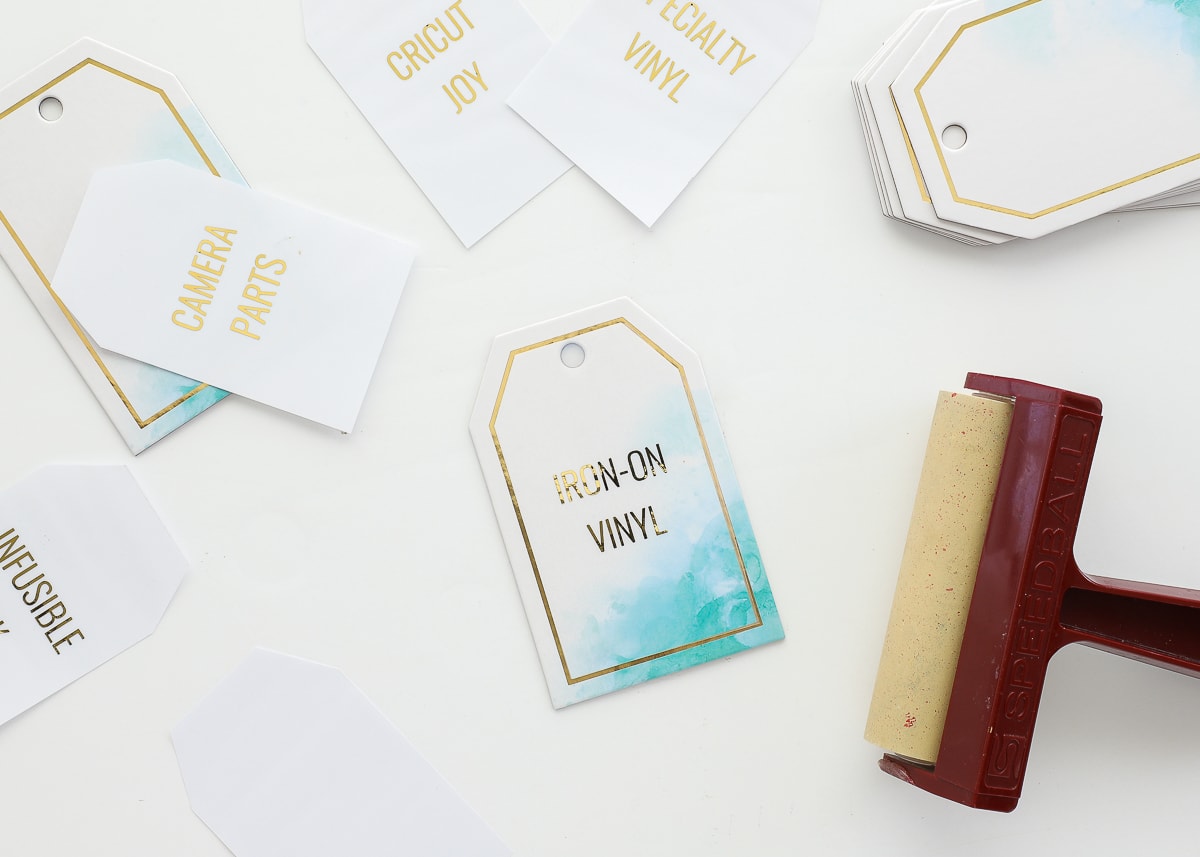
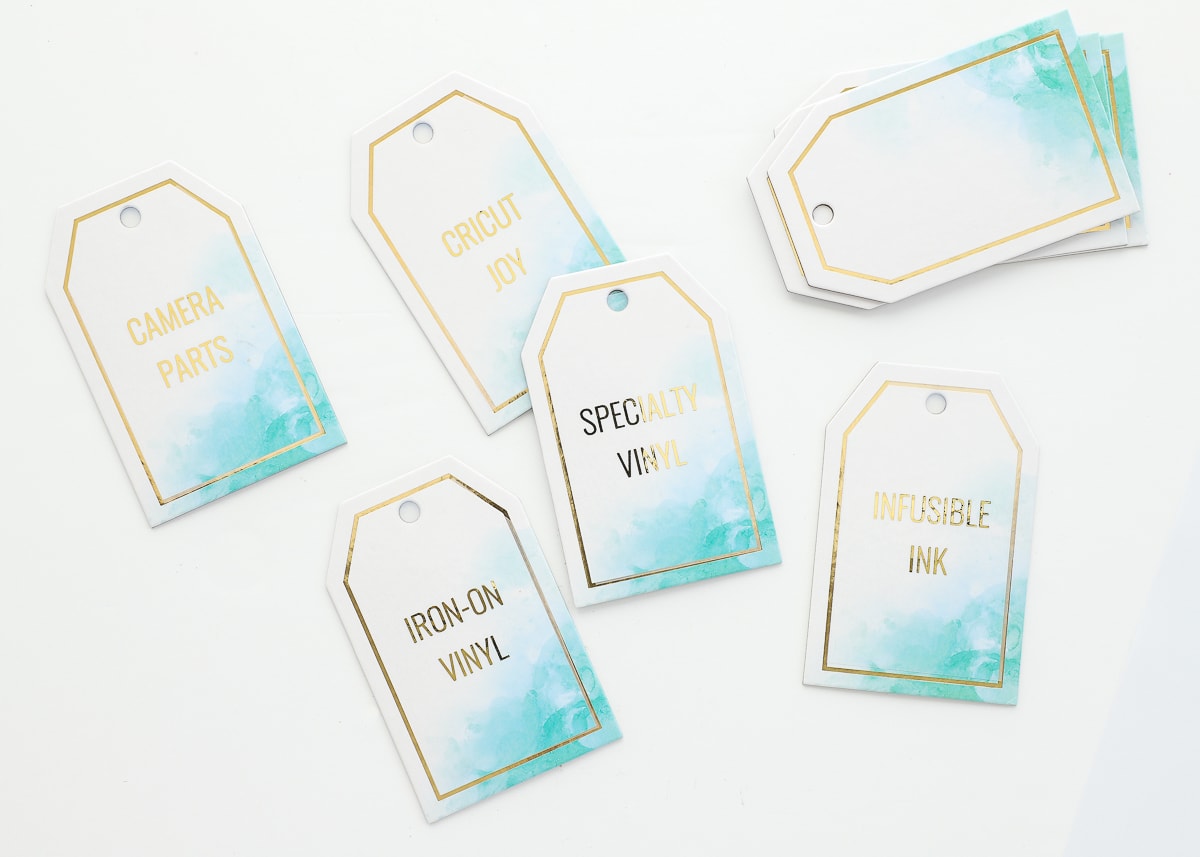
One of my favorites ways to labels baskets, as you guys know, is to use pretty chipboard tags and labels I find at the craft store (all of these below are from Michaels).
Until now, the only way I could figure out how to label them (in a way that looked really nice) was using my Cricut pens. You can see exactly how I did this here.
But I never liked that the gold ink wasn’t “shiny” (like the edge detail on the tag). And then lo and behold when I re-organized some of my baskets, I could no longer use these labels since the writing was on them permanently. As such, I have been on a mission to figure out how to add metallic text to these tags in a way that looks flawless but is also completely removable.
Materials Needed
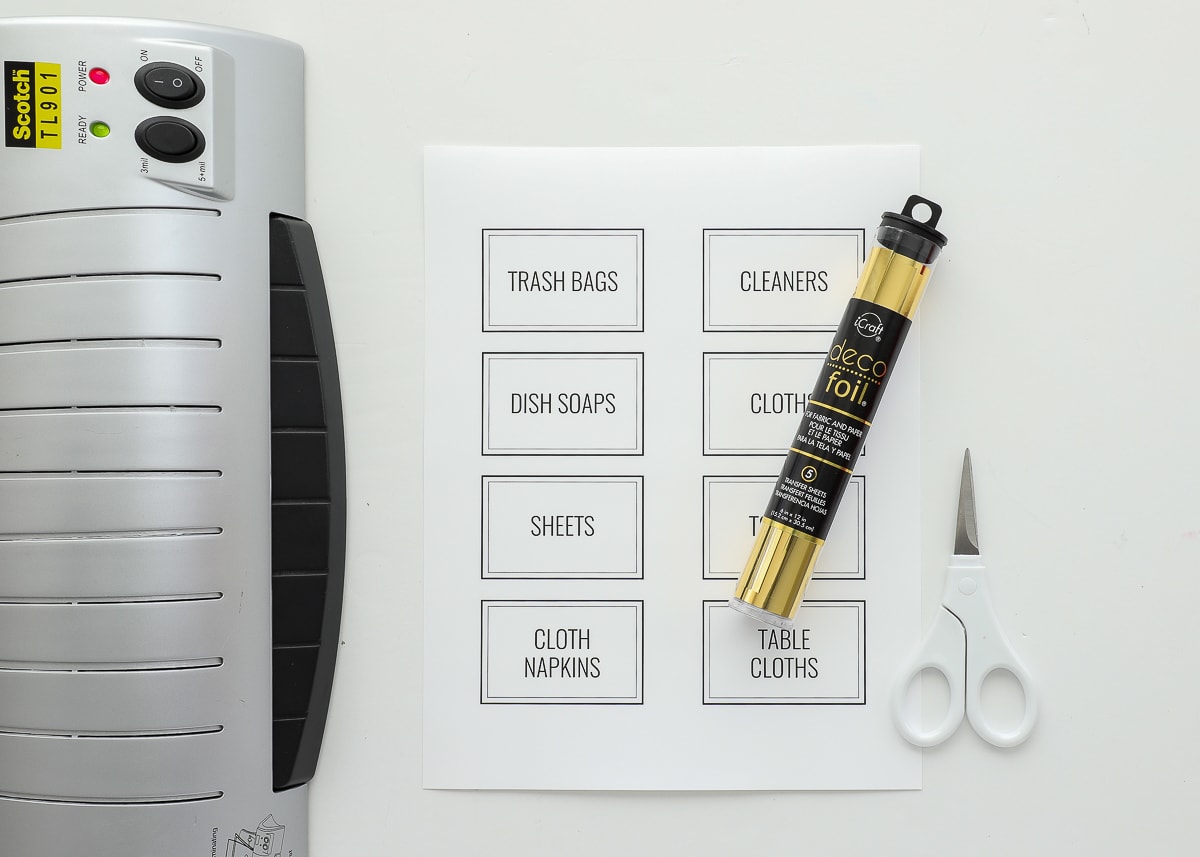
Here are the supplies and tools used for this project:
- Laser printer – this is the one we have, but see my notes below about some other options if you don’t have a laser printer
- Foiling Sheets – Metals | Pastel Tones | Vibrant Colors
- Dryer Sheet
- Laminator
- Printed labels on…
- Copy paper or cardstock in color of your choice, OR
- Sticker paper – for this project, I like this white one and this clear one
- Single sheet of plain, blank copy paper

Things You Need to Know Before Starting
Again, the foiling process I am going to outline below will work on pretty much any “normal” copy paper or cardstock. So if you want plain white labels to put into a holder, or red cardstock tags to fasten to a basket, this tutorial will work. But after testing lots of different clear sticker papers, here is exactly what you need to make clear, gold foil stickers:
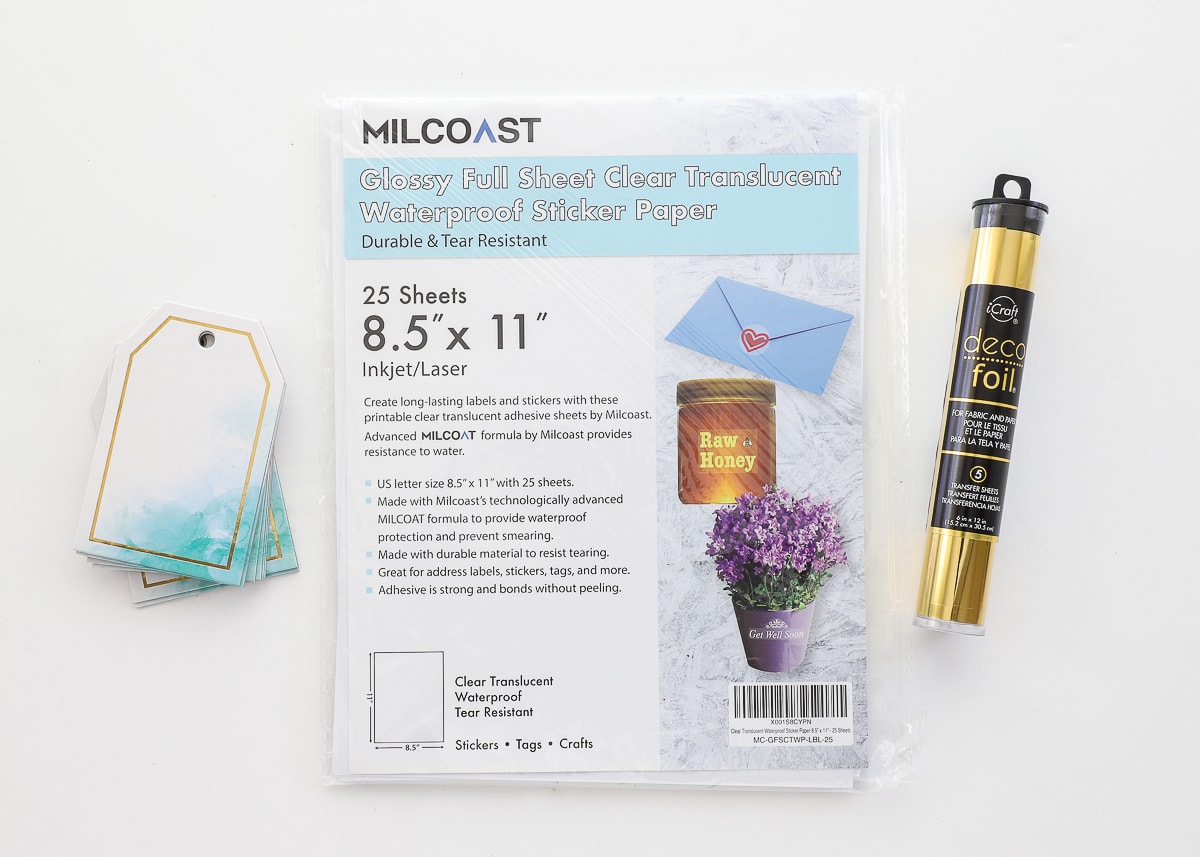
Chipboard Tags | Milcoast Clear Sticker Paper | Foiling Sheets
You guys know I am a die-hard Avery devote when it comes to printable papers and labels. But when I tried this technique using my beloved Avery clear glossy paper and labels, it either 1) melted the paper or 2) didn’t transfer the foil. I’ve been stocking up on a variety of the Milcoast waterproof papers for other projects (coming soon!) and am LOVING these products. If you want to do this technique to make clear stickers, this is absolutely the paper I recommend.
The other product you will need here are foiling sheets. These seem really scary and overwhelming, but I promise you they are not. Not only do you get a ton of foil per tube, but it comes in lots of colors. I bought this metallic set for this project, but I’m planning on grabbing this set to do some holiday projects later this year! If you aren’t a craft hoarder like me, you just need a single tube in the color you use most!
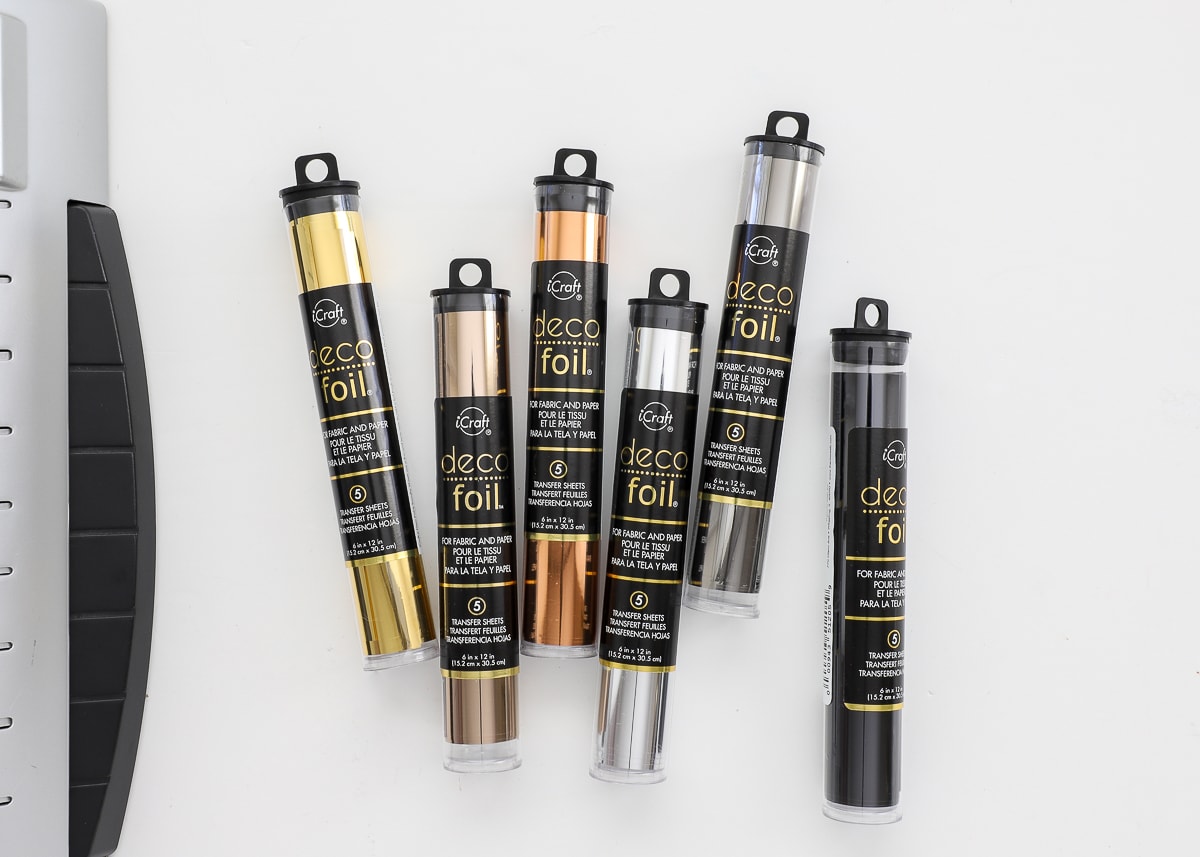
Foiling Sheets: Metals | Vibrant Colors | Pastels
Finally, notice I keep saying this will technique will work on anything printed from a laser printer. I don’t understand the science behind why the foil needs the laser toner, just trust me on it. We have a laser printer here at the house because I work so much with printables. If you don’t have one, I recommend first asking around. You might be surprised who has one at home or in their office. If all else fails, copy centers print everything on laser printers and since you just need black-and-white, it will be super affordable!
Alright…let me show you how this works!
How to DIY Gold Foil Labels
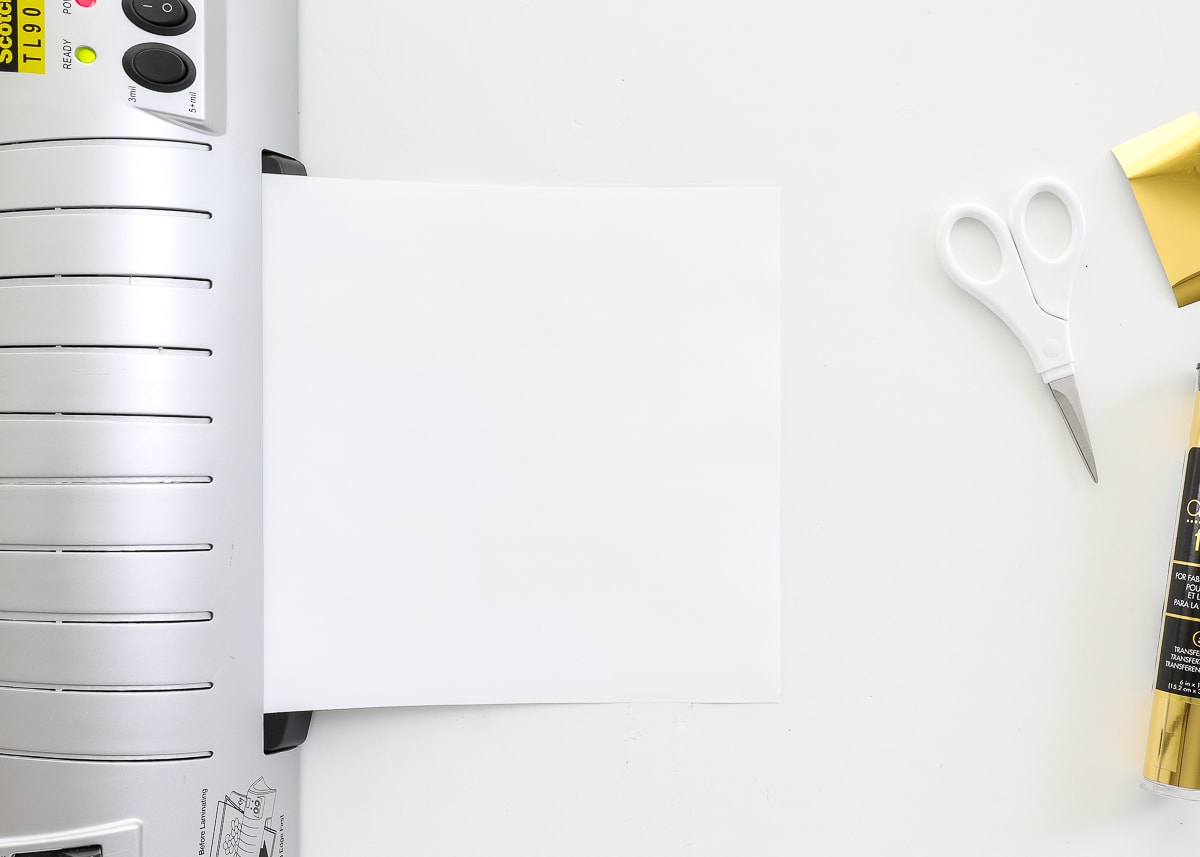
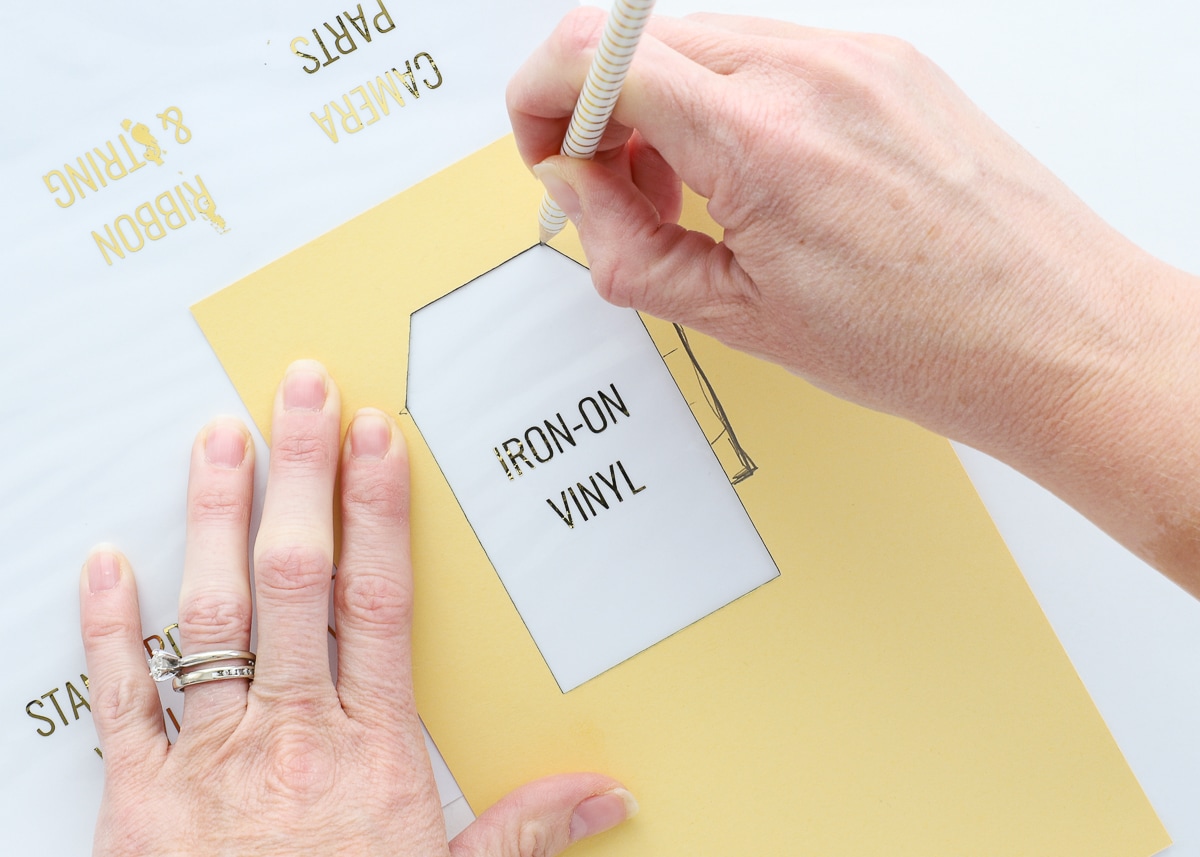
Start by typing your label names into a word processing software or set of templates. When setting the spacing, ensure you have enough margin around each set of words to cut them apart in the size you need. With the layout finalized, print the labels out onto the Milcoast Clear Sticker Paper (or other desired paper) according to your printer specifications.
Want to save this post?
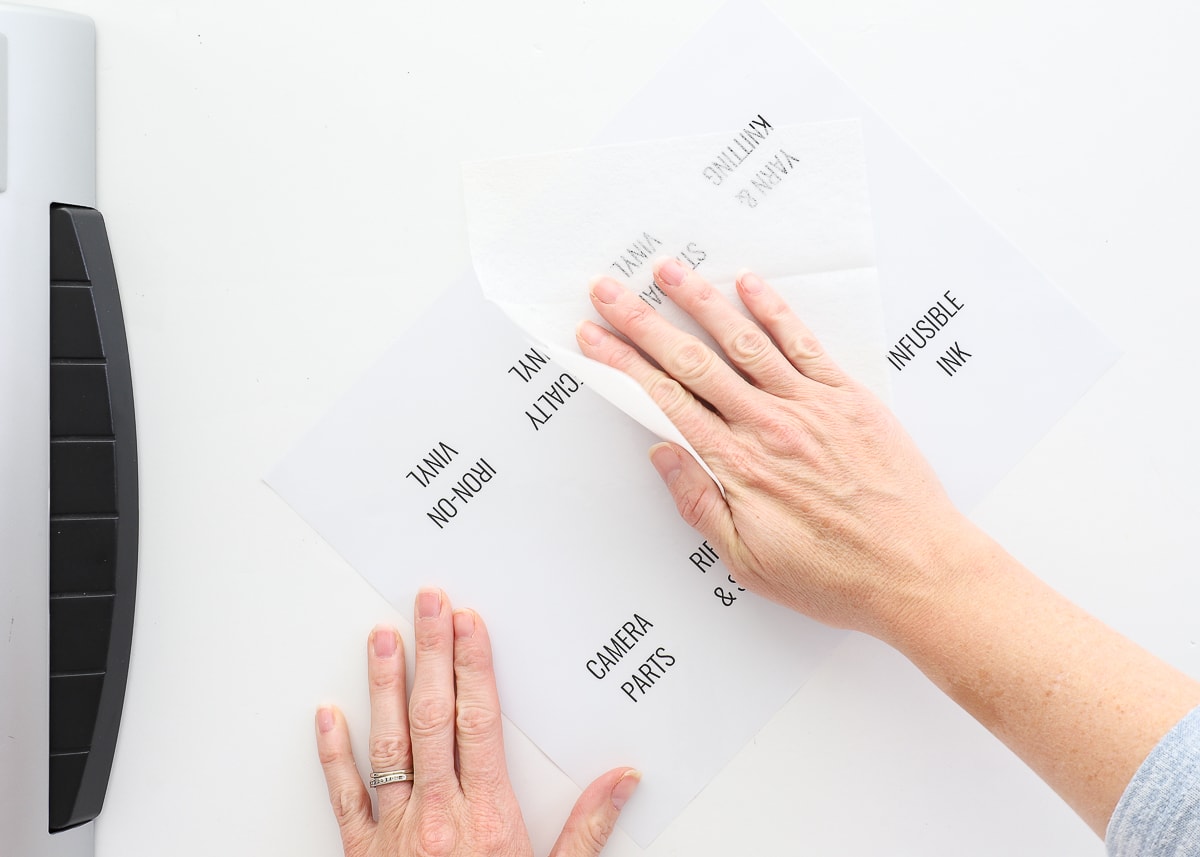
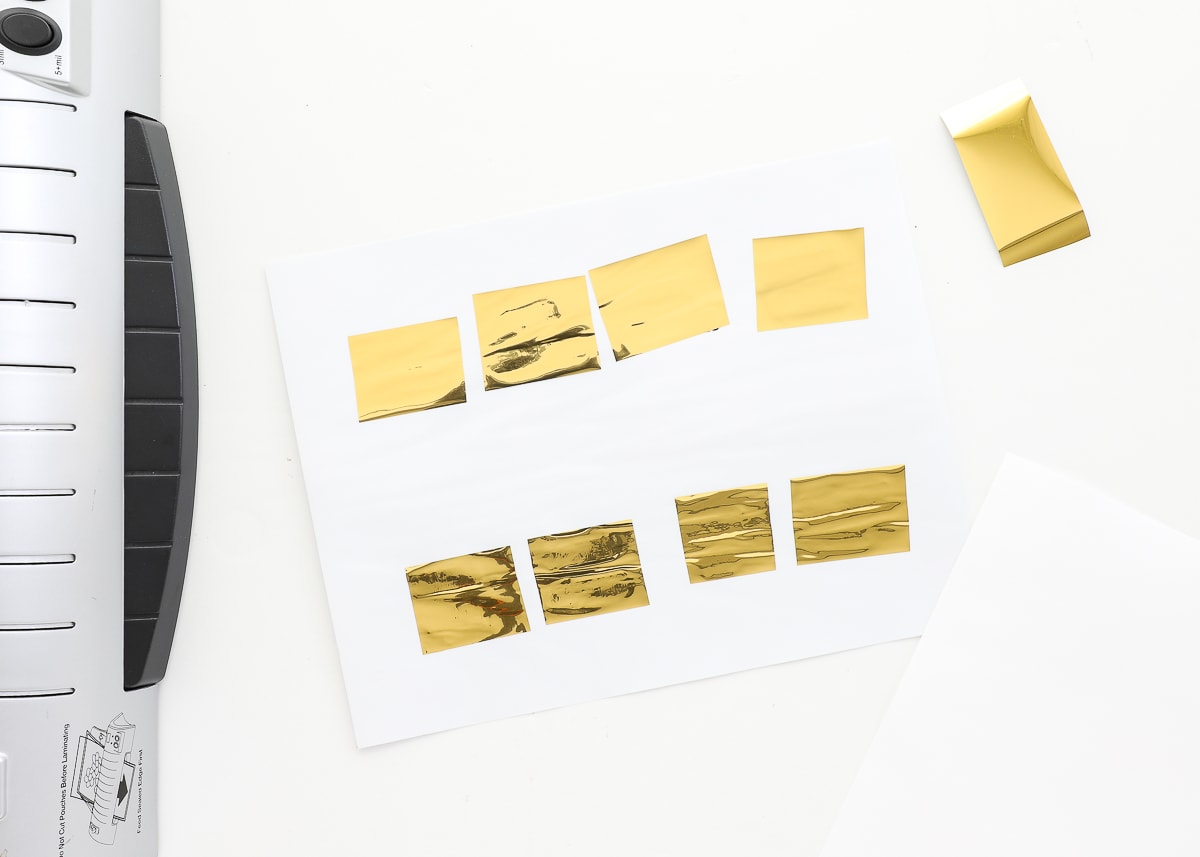
Once printed, wipe the labels down several times with a fresh dryer sheet. Just rub the dryer sheet all over the paper. The gold foil will attach to any lint, dust or particles on your paper (even if you can’t see them) and this step is SUPER important to get clean foiling on your words only.
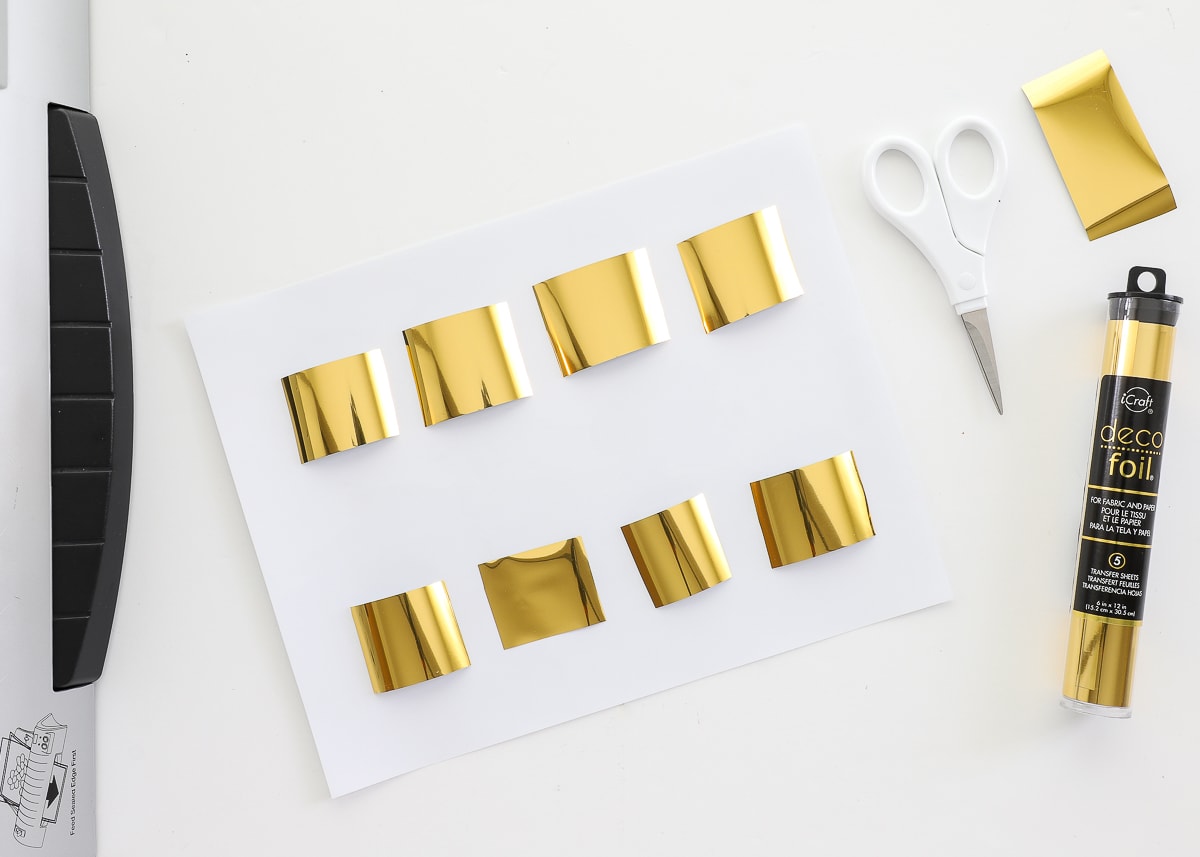
Next, cut a single sheet of foiling paper down into strips that cover your words only. While this isn’t technically necessary, it reduces the risk of getting foil all over the rest of your paper and (more importantly) conserves your foil for future projects. That said, you don’t have to be super precise here…just make sure each cut fully covers each set of words.
NOTE: You don’t secure the gold foil to the printed labels in any way. Just lay the strips over the printed words. If your foil sheets curl up a little bit, don’t worry, we will get them to lay flat in the next step.
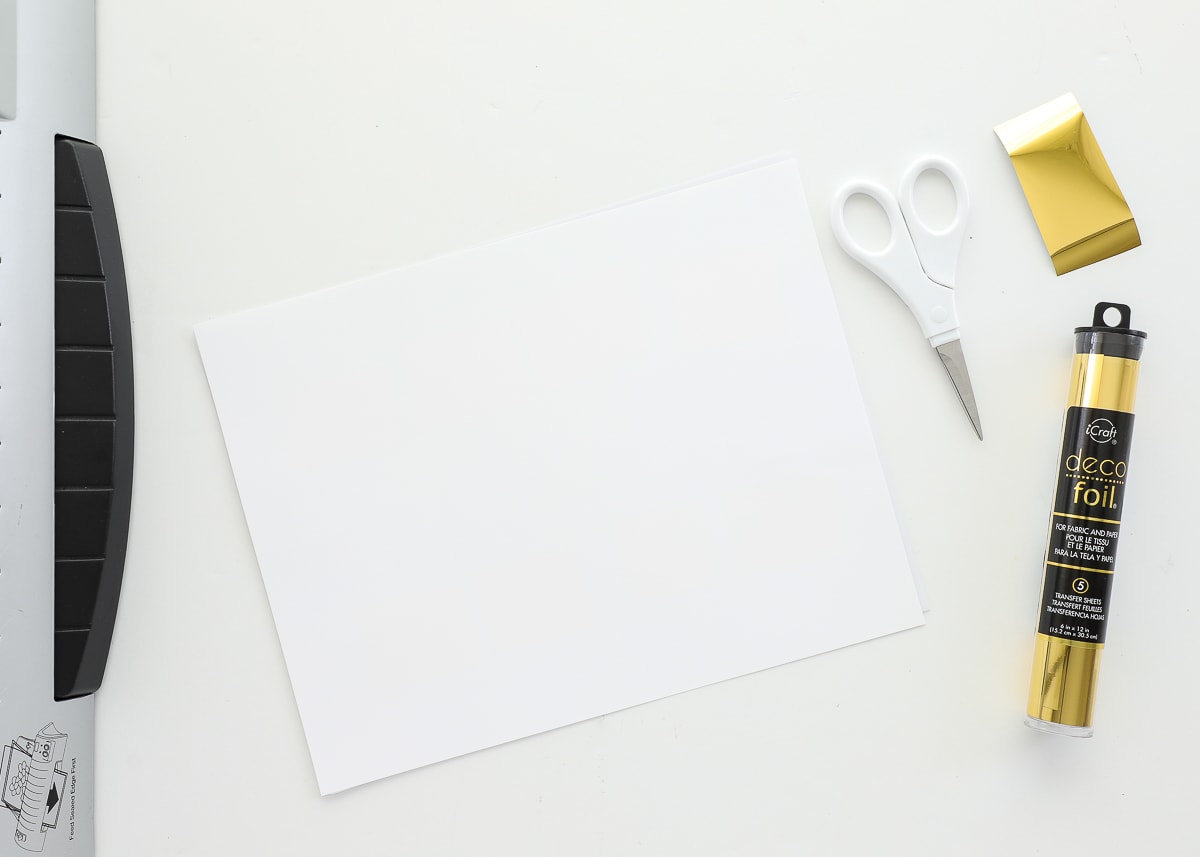
Next, lay a clean sheet of regular copy paper over your printed labels and gold foil strips. As you do, ensure the gold foil strips don’t shift around off the printing. I realize this part of the process seems a little haphazard (it is), but getting the gold foil to cover the words and the paper to cover the foil is really quite easy. Just take your time.
Next, feed your paper sandwich (paper labels + gold foil + clean paper cover) through a standard laminator TWO times.
Once your labels have come out of the laminator the second time, go ahead and remove the clean blank cover paper. You should see that the foil is slightly “melted” down onto your printed words.
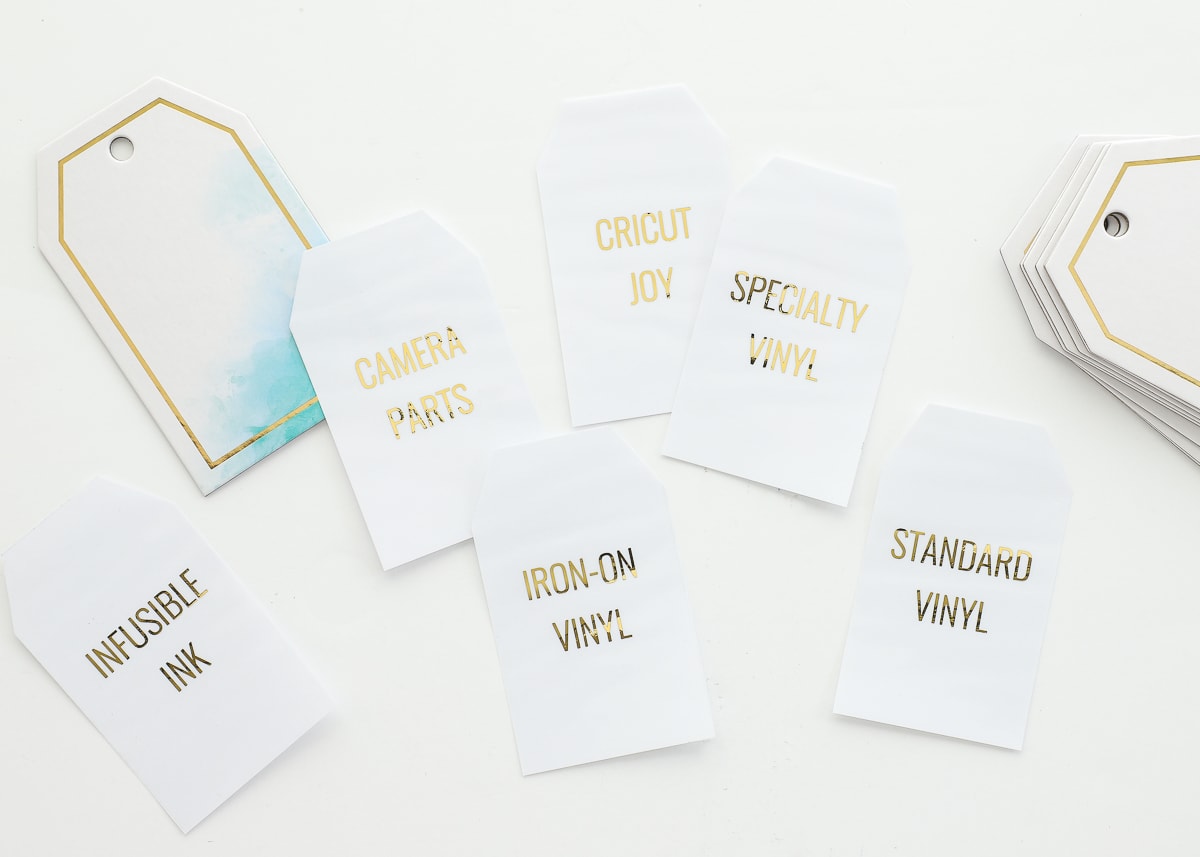
Here’s where the magic happens! Simply peel up your gold foil cuts, and you’ll see (and squeal) that the foil has been transferred to your black letters!
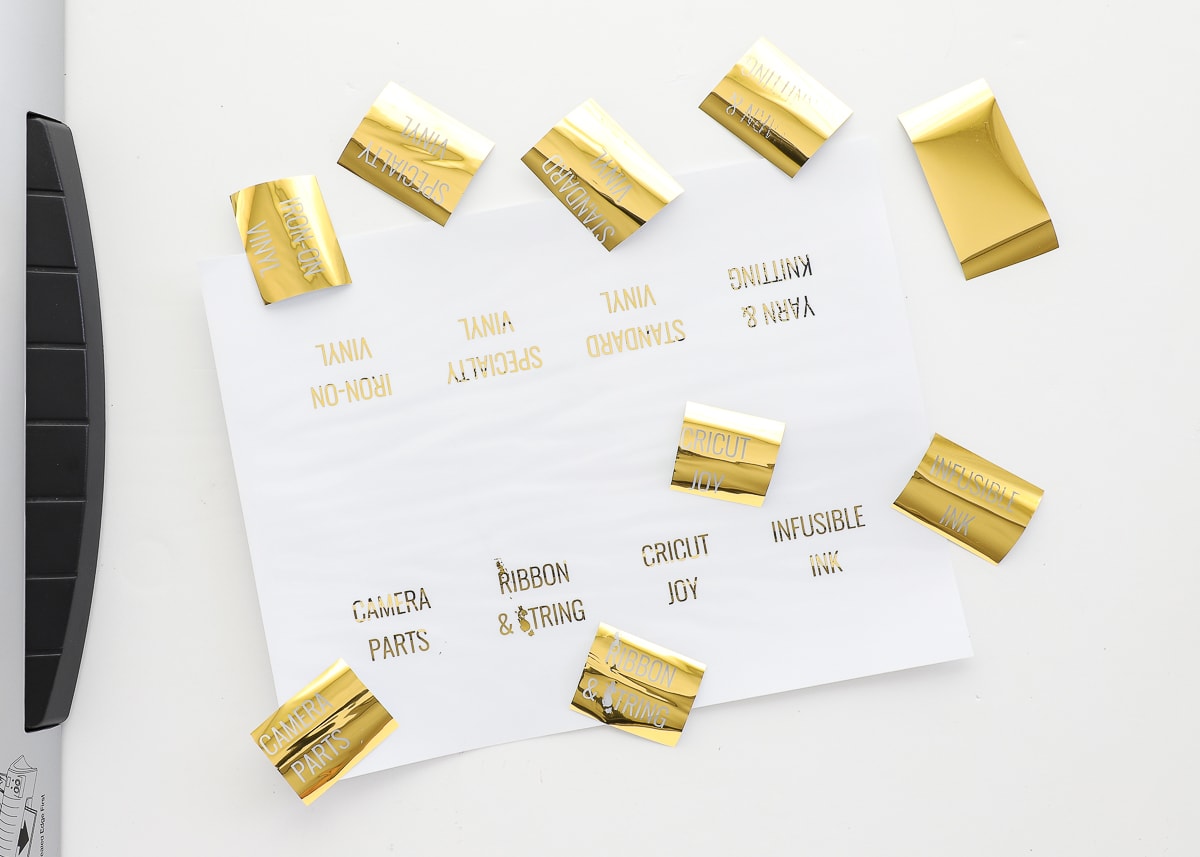
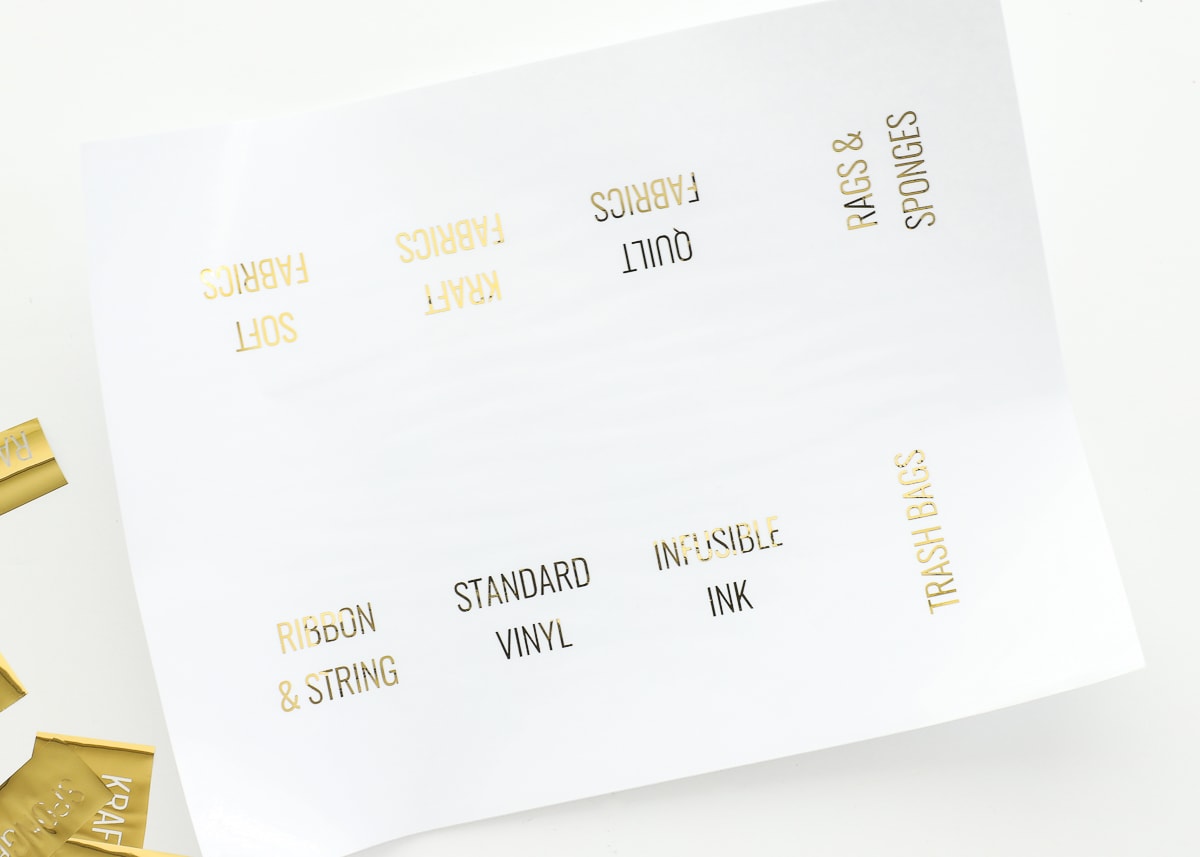
TIP! I included the above picture for a reason. Check out the “Ribbon & String” label, as well as a few labels on the top row. The above sheet is the very first one I did. I didn’t use the dryer sheet thoroughly, nor did I run the labels through my laminator twice. As a result, I got very inconsistent foiling results. After refining my process (to what I have outlined in this post), I made page after page with flawless results (below). I didn’t get a single foil speckle on my labels, and the foil transferred perfectly across all the letters (the black you see below is actually the reflection of my camera!).
Cutting & Transferring the Gold Foil Labels
The gold foil will not be wet or smudge. So all that is left to do is trim them apart and add them to your label holders or baskets. If you want to fit sticker labels to a tag, here is how I recommend doing it:
Create a cardstock template based on the tag or label you are trying to use.
Use the template to trace the tag shape onto each label, centering the words to your liking.
Cut the labels apart along the lines you just drew, using either a scissors or paper trimmer.
Then just peel off the paper backing, center the sticker on your tag…
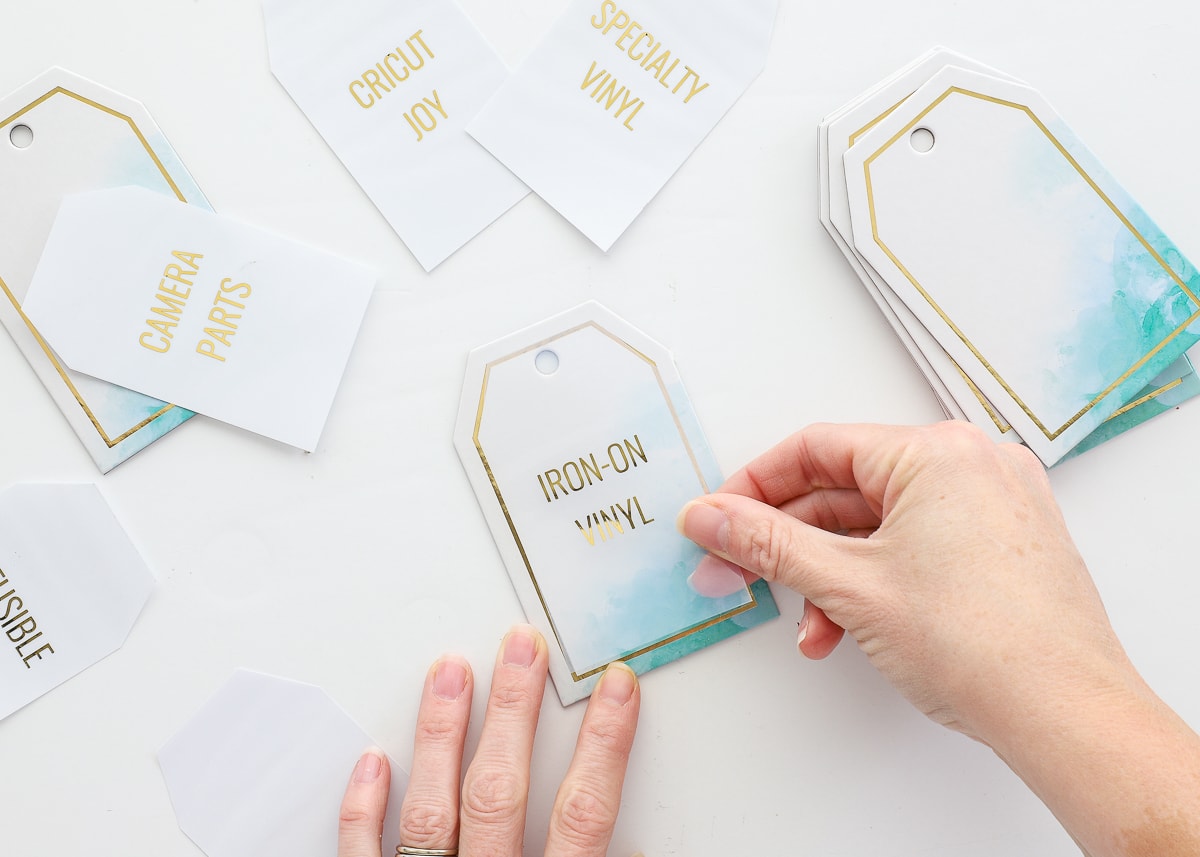
…and smooth down.
Not only does this sticker paper take the foil really nicely, but it’s also very translucent so the edge of it is fairly undetectable!
The final step is to secure your gorgeous tags to your basket. Paper fasteners are my preferred method!
When I first found this box of tags, I knew they were perfect for adding a splash of color to my fairly neutral home office. But until I could figure out a way to label them that looked amazing and was removable, I kept them tucked away. I can’t tell how how giddy it makes me to see them all done and looking mighty shiny!
The foiling process I have outlined here might seem a bit cumbersome, especially for silly little labels. But that’s only because I broke it down into each and every step. I made over 20 labels start-to-finish in less than an hour, because once you are in the mode of printing and foiling and cutting, it goes super quick! Although it’s a bit more work than handwriting labels with a sharpie or using a label maker, the customizable, flawless results are so worth it!

After doing these DIY Gold Foil Labels, you better bet my head is reeling with endless ideas for using this foiling technique in other ways around the home. I’ve got some Gold Foil Art and Foiled Holiday Gift tag projects coming your way in the next few months! C’mon friends…let’s foil all the things!
Megan
13 Comments on “DIY Gold Foil Labels”
Imagine the Christmas possibilities! Great tutorial! I’m usually a plain-black-ink for labels kind of gal, but for holidays or just for fun, what a great idea! (How is it removable, though?)
Hi Debra!
Yes – I’m so excited about Christmas tags too!
Since the label is printed on clear sticker paper, I can just peel off the sticker to use the tags for something else 🙂 The gold foil is not technically removable, but the stickers on the tags are!
Happy Sunday!Megan
Hi Megan!
I was waiting for this tutorial! Thank you so much. My craft room cubbies look a lot like yours and the final touch my bins need are the tags. I am copying this down to the same tags! Thank you, I LOVE them. I am such a craft materials hoarder too (LOL). Your projects are so inspiring, thank you again!
Hi there, Flavia!
I hope the labels work out for you – I am so addicted to this process!! Have fun!Megan
How did you manage to get the paper fasteners through the fabric bins? I can see the holes on the plastic bins but will this work if my bins have fairly sturdy sides?
Hi there!
I decided to just poke a hole through the bin with a sharp weeding tool (it looks like a pointed dental instrument!) The IKEA DRONA bins have thick “cardboard” sides, so it wasn’t too hard to poke right through it. Keep in mind though, that once the hole is poked, you’re committed!
Hope that helps!Megan
P.S. You might want to check out this post for other labeling ideas on sturdy bins with no holes! https://thehomesihavemade.com/2020/08/creative-ways-to-label-ikea-drona-bins/
I wanted to put gold foil designs on black cardstock. I found that when I printed the words in yellow instead of black, the gold color came out much brighter!
That is such a GREAT tip, Claire! I’ll have to give it a try since I didn’t love how the black would sometimes show through!
Thanks for sharing!Megan
Hi Megan! Just came across your post, and absolutely LOVE this idea! I appreciate all the little details, and figured I’d give this a try for my own little labels!
Question! The Milcoast sticker paper is completely sold out everywhere right now, any others you’ve come across that might work with the laminator?
thank you!
Hi Gina!
So glad you’re excited about this project.
It’s been a while…I remember trying the foiling on Avery’s clear sticker paper and it did NOT work but I don’t recall trying any others. Unfortunately, you might have to buy some and see. I know Cricut’s clear sticker paper is crystal clear and so is Neato-s. Might a good place to try.
Sorry I am not more help on this one – I’m bummed those Milcoast papers are out of stock because I LOVED them!
Good luck and keep me posted if you do try something that works (or doesn’t!)~Megan
A huge thank you for being so generous and sharing your brilliance. I wondered if something like this is possible, and boom. . .here it is. I cannot wait to try this. Thank you!!
So if I want to print name tags and then foil them, when they go through the laminator, the sticky label will stay sticky? The heat will not damage the adhesive?
how would I do this if I wanted gold lettering over an image? wouldn’t the gold stick to everything? how would I get the gold on just the lettering and not the background?