Your Complete Guide to Cutting Vinyl with a Cricut
There are so many things a Cricut can cut; and next to paper, the main thing I use it for is vinyl! From wall decals and furniture updates to labels and personalized gifts, cutting vinyl is seemingly a weekly occurrence around here (if not more!). But if you’re just getting started cutting vinyl with a Cricut, you might quickly realize that it’s not quite as easy to do as you fist thought. Vinyl can indeed be easy to work with, but once you know what you’re doing! So in this post, I’m breaking down everything I’ve learned after years and years (and dozens and dozens) of vinyl projects. My tried-and-true process and simple tricks will not only save you time and stress, but ultimately help your vinyl projects turn out just right! Let’s dive in!
What Is Vinyl?
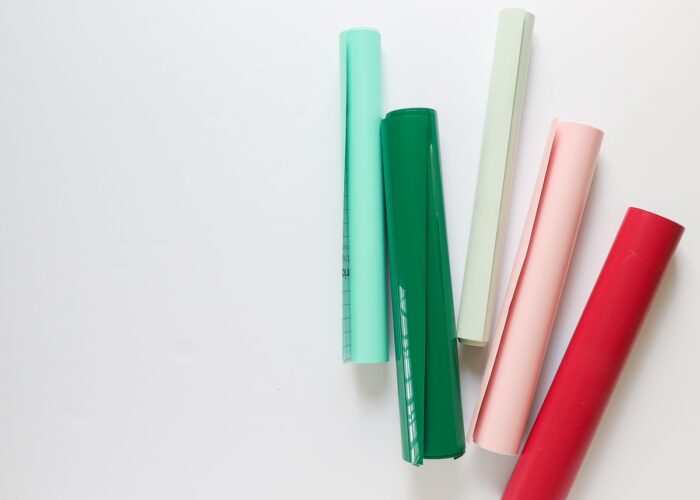
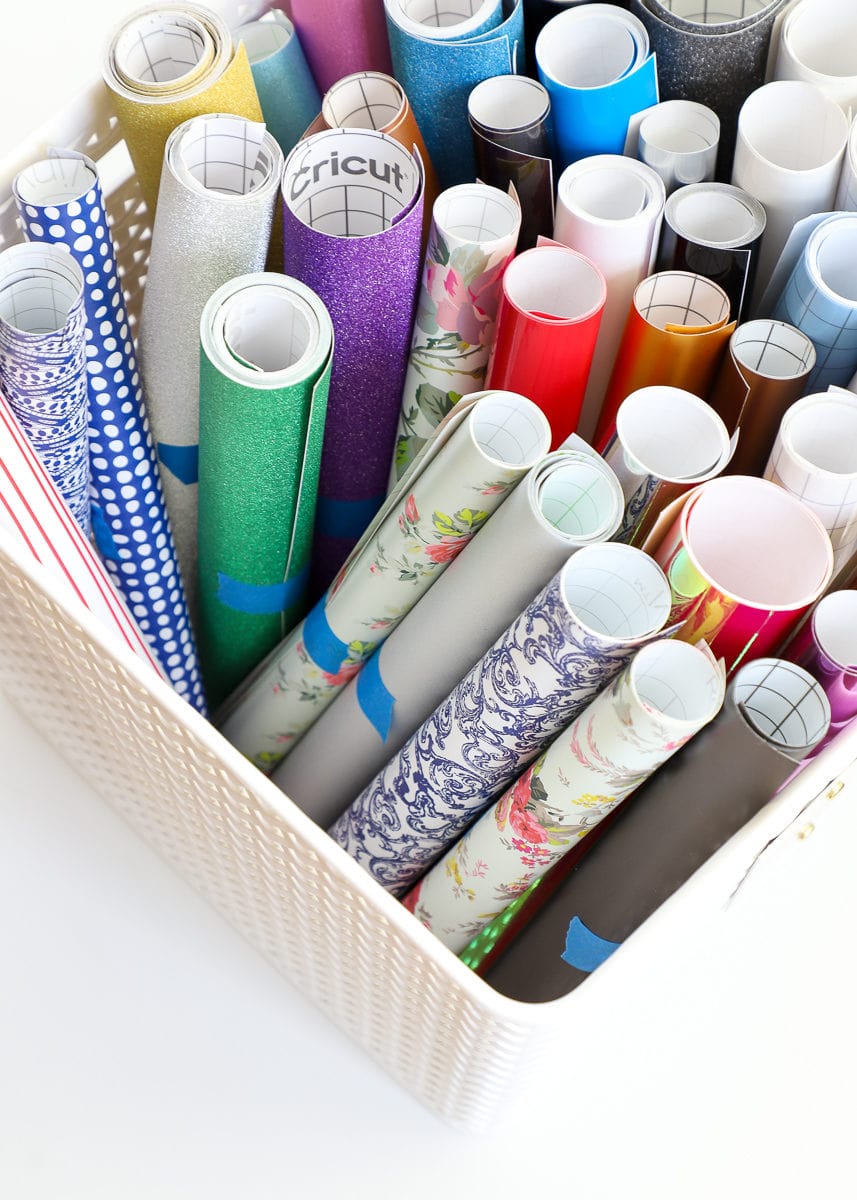
Vinyl is a plastic, film-like product with an adhesive backing much like contact paper, peel-and-stick wallpaper, and shelf liner. It comes in countless colors, sheens, textures, and patterns and ranges in size from 4.5″ wide strips to 75′ rolls (and lots of dimensions in between). Vinyl typically comes in rolls, but it is also available by some brands in stacks of flat sheets.
Since vinyl is essentially a large, solid sticker sheet, it can literally be cut into pretty much any design and placed onto a wide variety of slick, smooth surfaces such as cups, cars, windows, signs, and so much more!
When To Use Vinyl
Vinyl is most often cut into shapes or words (i.e., decals) for the purpose of decor or labeling. Examples include monograms on a water bottle, school logos on a car windshield, names on pencil boxes, or labels on pantry containers.
Vinyl is best used on smooth, non-porous surfaces such as plastic, metal, and glass. You can also apply standard adhesive vinyl (not iron-on) to wood, canvas, and fabric, although you might not get optimum adhesion. Again, because anything cut from vinyl is like a big sticker, it should be considered a temporary product that can peel off (either intentionally or over time).
Types of Vinyls
There are two primary kinds of vinyl you’ll use on Cricut projects:
- Adhesive Vinyl – These are peel-and-stick products for hard, non-porous surfaces. In addition to solid colors, this category also includes specialty vinyls such as chalkboard vinyl, outdoor vinyl, holographic vinyl, foil vinyl, stencil vinyl, and more. This tutorial is exclusively for these kinds of vinyls.
- Iron-On Vinyl – These are heat-activated vinyls (via a heat press) that are better suited for fabric/t-shirts, wood, and canvas. The instructions in this post do not apply to iron-on vinyl. Instead, see here: A Complete Guide to Iron-On/HTV and Your Cricut
What Is the Difference Between Permanent & Removable Vinyl?
As you shop for vinyl, you will come across the descriptions “Permanent” and “Removable.” However, it’s important to know that (technically) all adhesive vinyl is removable.
- Permanent Vinyl – It has stronger adhesive than removable vinyl; it will be harder to remove from surfaces; and it may leave residue behind. But it CAN be removed.
- Removable/Repositionable Vinyl – It does not have as strong of adhesive as permanent vinyl, but it will still stick nicely to nonporous surfaces. These decals will remove easier and should not leave residue behind.
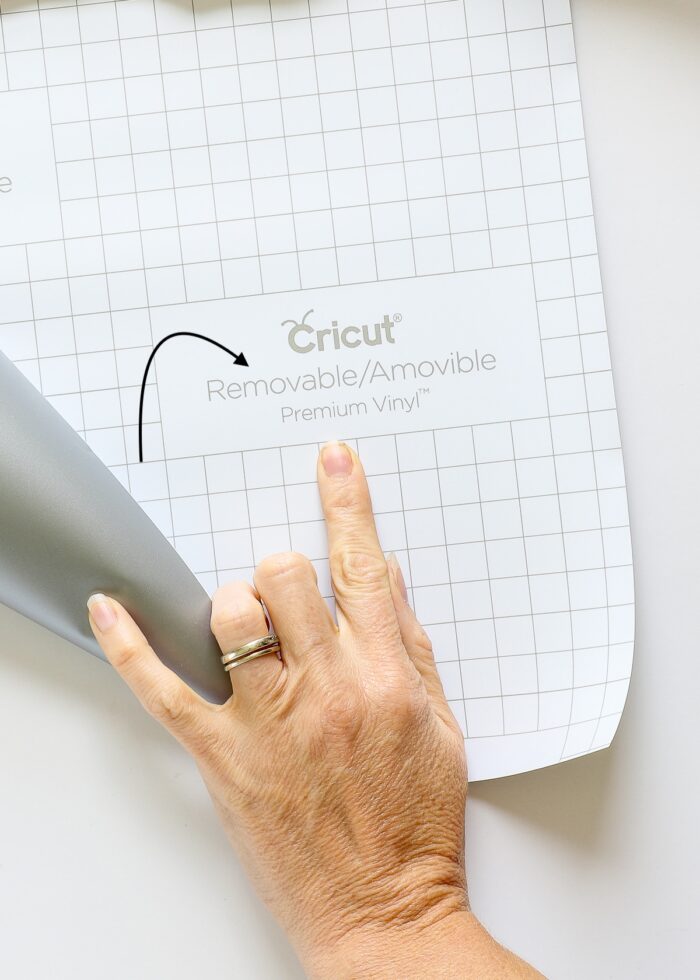
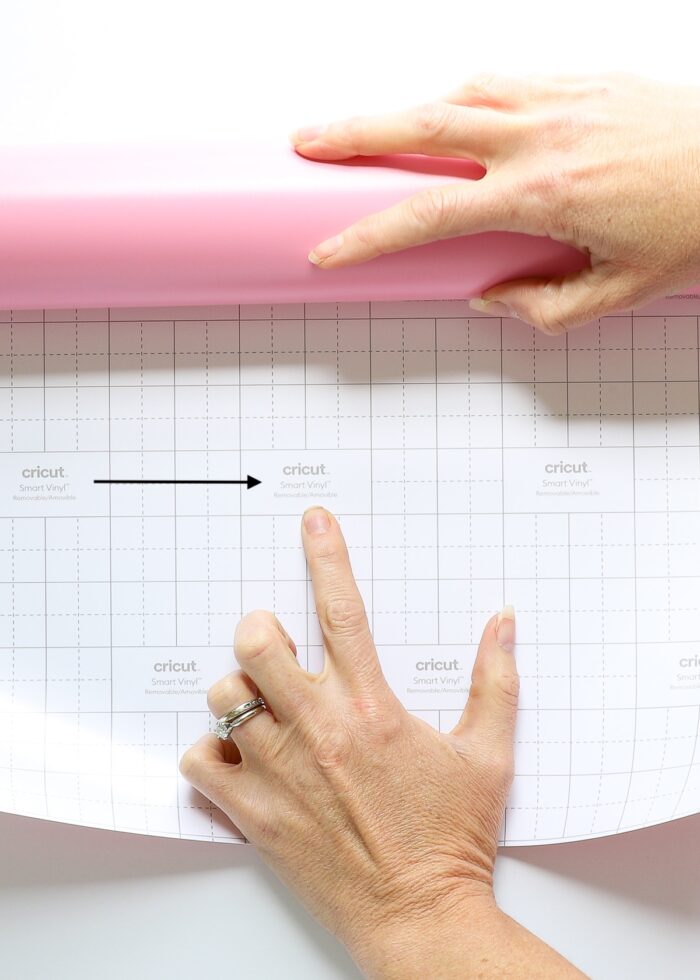
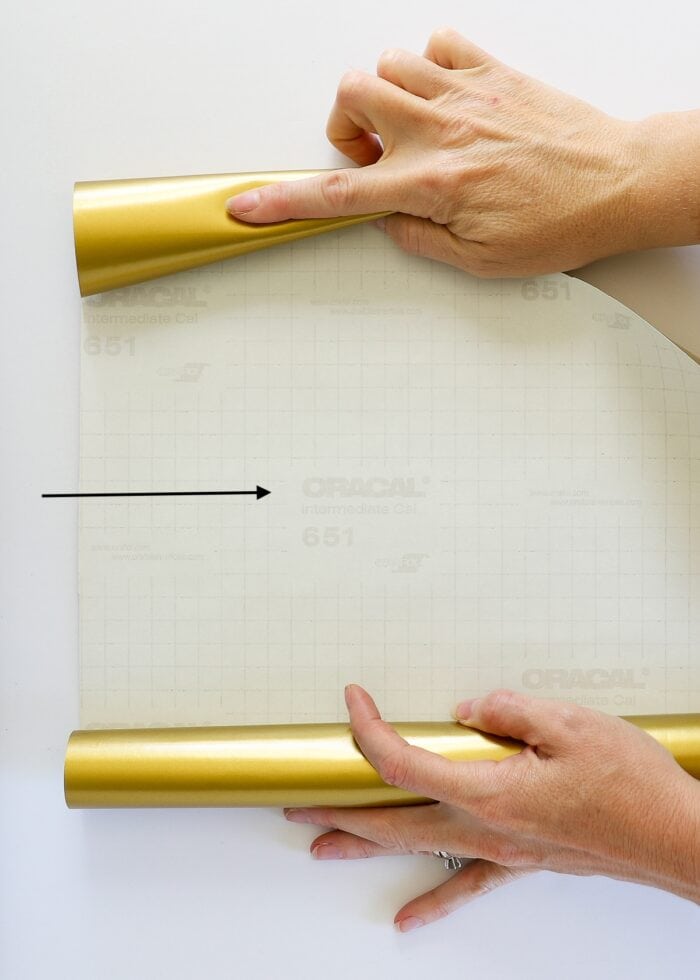
TIP! These days, you can easily distinguish the type of vinyl you’re working with by the label printed on the white paper backing.
What is the Difference Between Vinyl and “Smart” Vinyl?
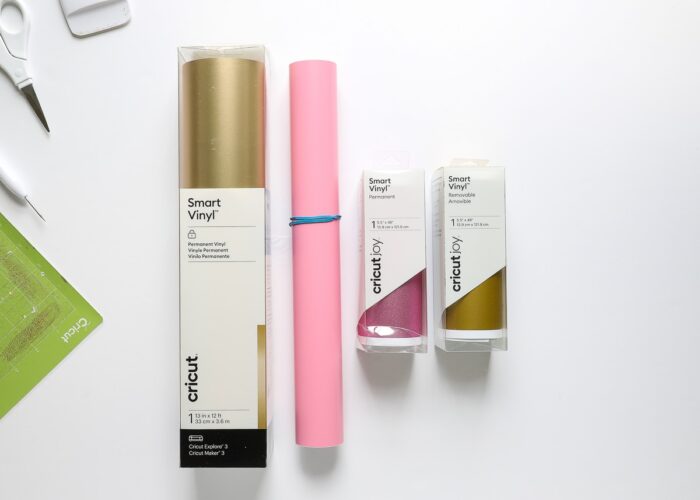
Smart Vinyl is a newer version of vinyl created by Cricut specifically for the Cricut Joy, Cricut Explore 3, and Cricut Maker 3 machines. This type of vinyl is designed to be cut “mat-less,” meaning it doesn’t have to be put on a mat in order to be cut.
Currently, Smart Vinyl comes in 13″ and 5.5″ wide rolls. You will know it is “smart” by the outer packaging and the label on the white paper backing.
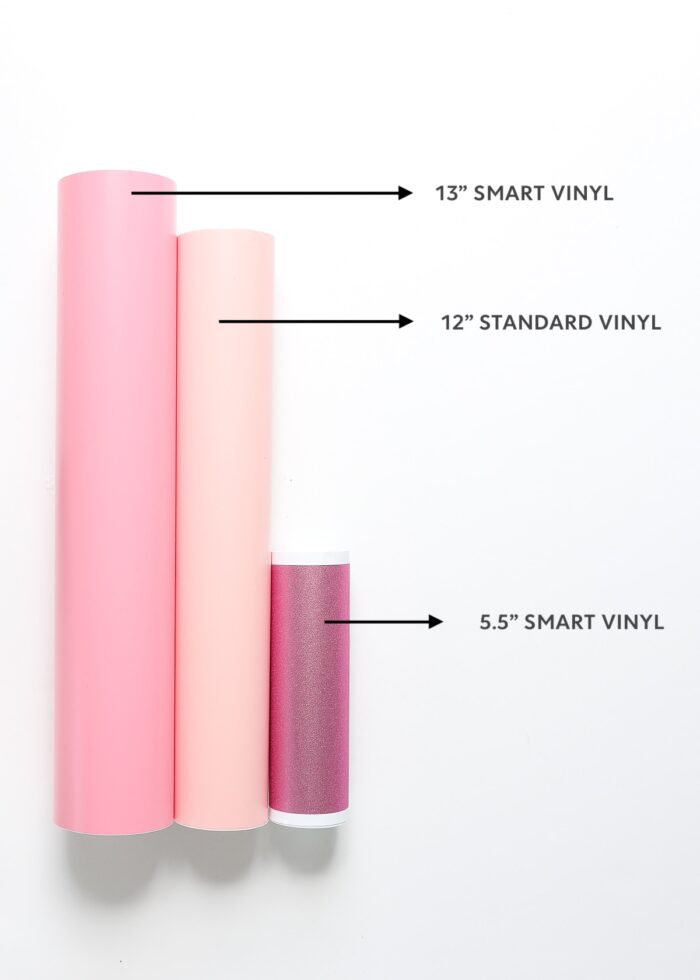
This tutorial does not cover working with Smart Vinyl. If you need help with your Smart Vinyl, see here: How to Use Smart Vinyl on a Cricut Maker 3.
My Favorite Vinyls
After years and years of making vinyl decals, I have two favorites that I reach for over and over again:
- Oracle 651
- Pros – This durable, high gloss vinyl cuts, weeds, and transfers like a dream. It has excellent staying power on your projects and is my #1 choice when I need shiny, durable decals. You can buy it in short rolls, long rolls, or even multi-color packs.
- Cons – This vinyl isn’t carried “on the shelf” by most craft retailers (Michaels does carry a limited selection), so it usually involves ordering it (which isn’t great for last-minute crafting). It also doesn’t come in the “prettier” styles like glitter, holographic, foil, patterns, etc.
- Cricut Premium Vinyl
- Pros – Cricut vinyl now comes in countless colors, textures, sheens, and patterns. With so many options, you are much more likely to find the precise color/look for your project. Cricut vinyl is also now available from most major craft retailers (i.e., Michaels, JoAnn, Walmart, Target, Hobby Lobby, Amazon) and goes on sale frequently, making it quick and easy to get.
- Cons – Cricut vinyl cuts beautifully and will have great adhesion on your projects; however, I do find that it doesn’t transfer easily. Getting transfer tape to pick up Cricut vinyl requires a good bit of “coaxing,” making it sometimes frustrating and time-consuming to work with.
- See more: 10 Reasons Why I Choose Cricut Vinyl for My Projects
Supplies Needed for Cutting Vinyl with a Cricut
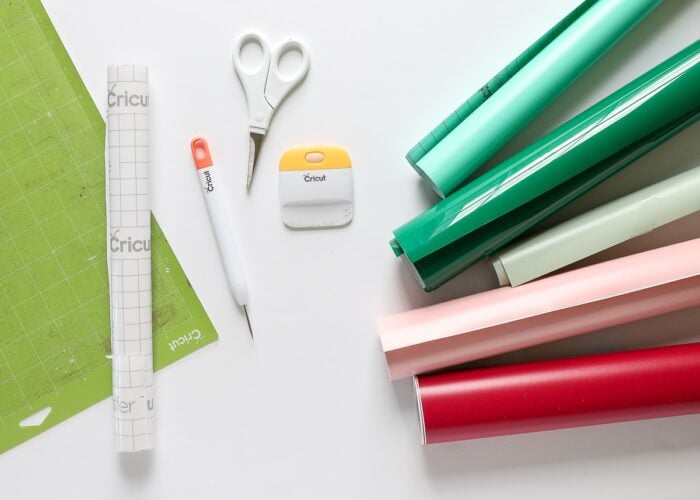
Here are the basic supplies you will need to make a vinyl project with a Cricut:
- Cricut Machine – All Cricut machines cut vinyl including the Cricut Explore line, the Cricut Maker line, and the Cricut Joy.
- Premium Fine-Point Blade – The one that comes with your machine.
- Cricut Cutting Mat – (A newer) LightGrip Mat or (a broken in) StandardGrip Mat – Both work well with vinyl.
- Vinyl – Whatever color, style, texture vinyl you want for your project.
- Transfer Tape – The Cricut brand is my favorite because it’s clear with helpful grid marks and good tac.
- Weeding Tool – This is needed to remove excess vinyl around your design; if you don’t have one, a seam ripper works well.
- Scraper – This tiny tool is absolutely necessary in order to seamlessly place vinyl designs onto your projects.
Common Vinyl Terms to Know
Kiss Cut
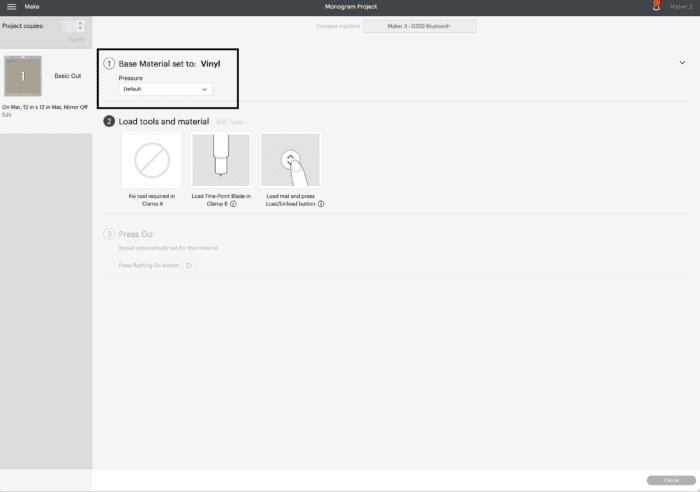
All adhesive vinyl will come on a paper backing (just like shelf liner or contact paper). In order to cut out vinyl designs and transfer them, your Cricut machine will “kiss cut” the vinyl, which means that it will apply just enough pressure to cut through the vinyl but not the paper backing. In order to get a proper kiss cut, use the “Vinyl” setting on your Cricut machine (either via the knob or Materials Menu in Cricut Design Space).
- If your vinyl doesn’t pull away effortlessly when weeding, you need more pressure.
- If your machine cut through both the vinyl and the paper backing, you need less pressure.
Adjustments can be made on the final cut screen via a dropdown menu that has pressure options for Less, Default, and More.
Negative Space
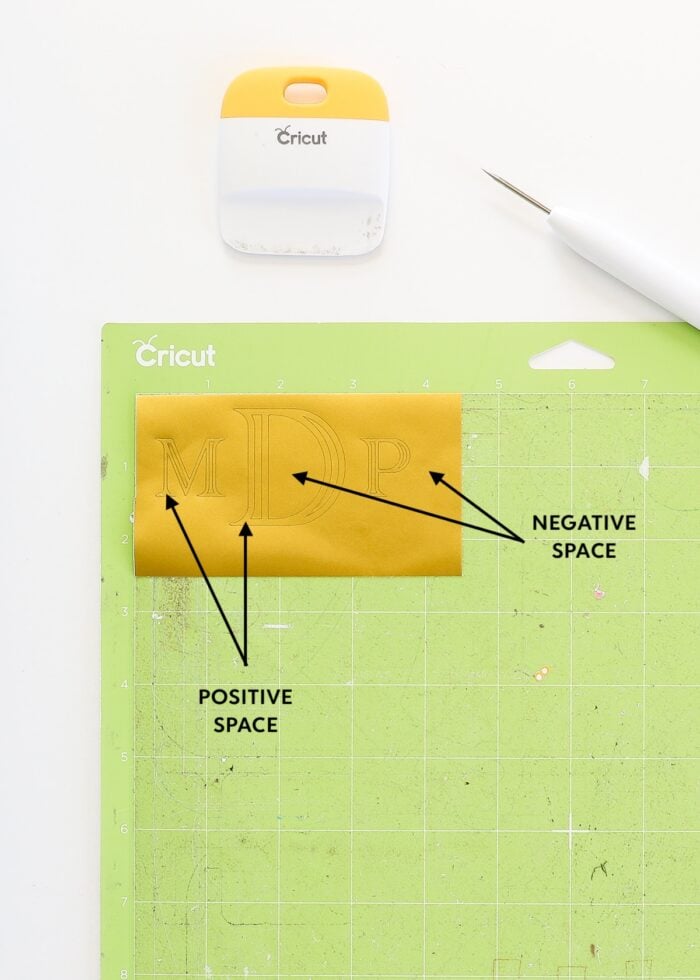
Negative space refers to all those areas of vinyl that are not part of your design…the vinyl on the outside and inside of the cut lines. Before transfer, you will remove the “negative” parts of the design to reveal the “positive” parts of the design.
Weed
Weeding is the process of removing all the “negative” areas around and within your cut design. This includes all the vinyl surrounding your design’s outer border, as well as inner elements (e.g., inside letters).
Weeding is typically done with a weeding tool (a seam ripper works too!), and your goal is to ultimately pull away any vinyl not part of your design so that it matches what is shown on your screen in Cricut Design Space.
Transfer Tape
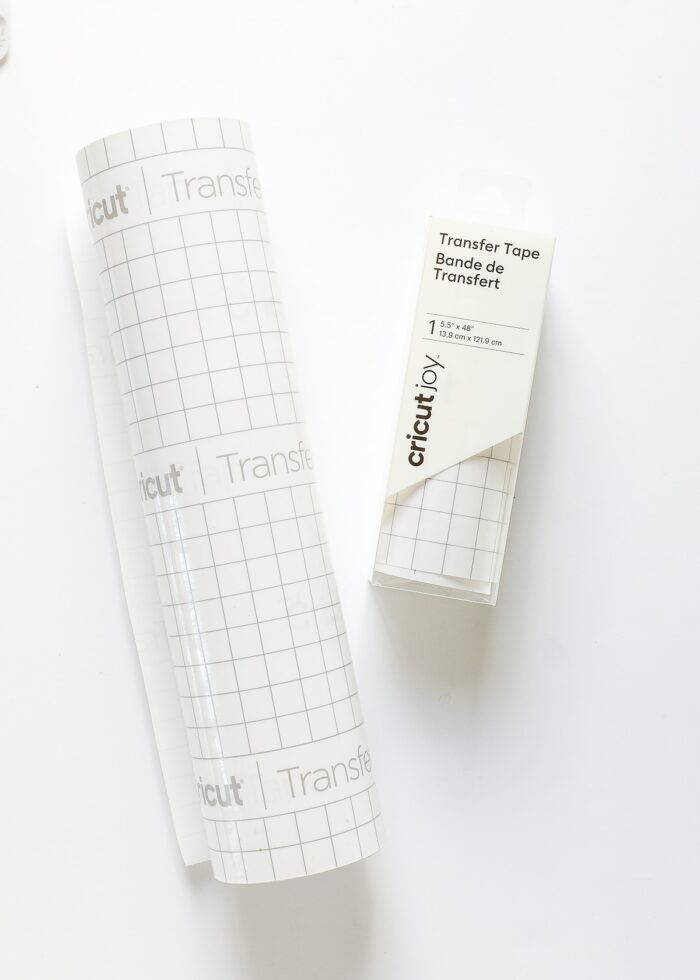
Transfer tape (also called transfer paper) is the product you use to move a cut and weeded design from the original paper backing to your final project (hence the name: transfer tape).
Transfer tape is similar to contact paper, with a non-sticky side and a low-tac sticky side. You use the low-tac side to lift your cut design off the paper backing, all at one time, and move it to your project (full instructions shown further down). It’s the best way to ensure your design transfers without any bubbles, wrinkles or distortion.
TIP! Transfer tape really is the best product to use for flawless transfers; but in a pinch, you can also use painter’s tape or contact paper.
How to Cut Vinyl with a Cricut
Follow these steps to make a basic vinyl project with your Cricut machine.
Step 1: Create Your Vinyl Design
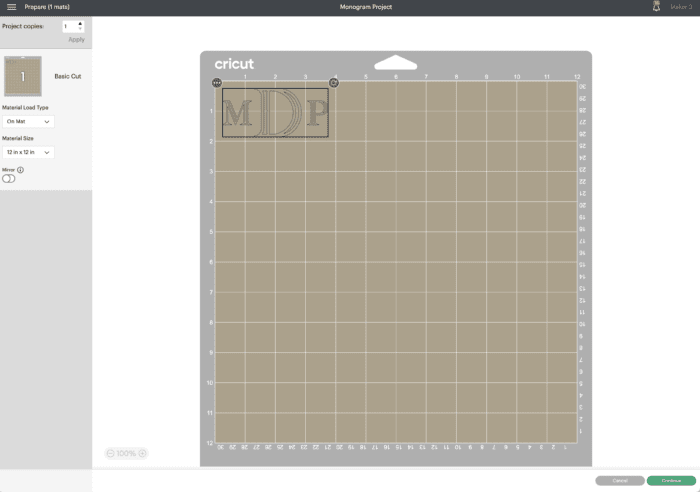
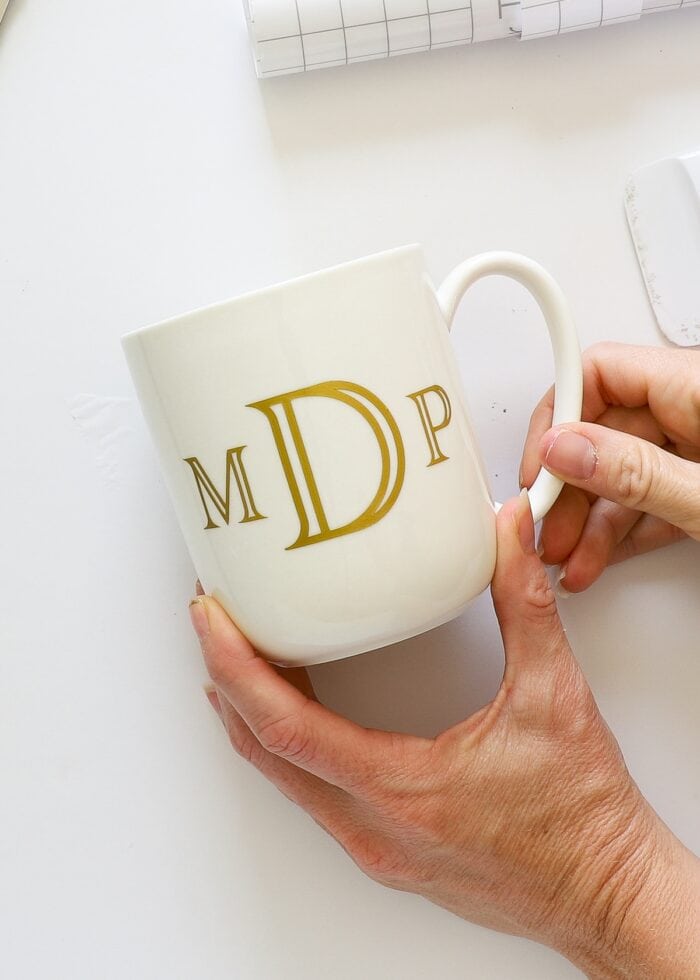
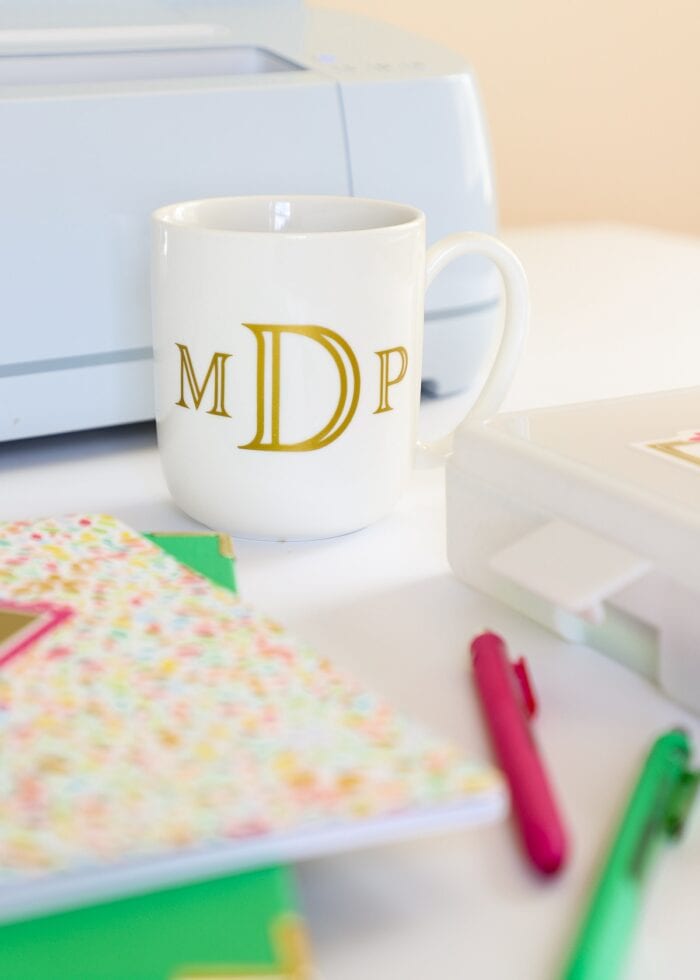
Open Cricut Design Space and start a new project. Select an image for your vinyl decal from the Cricut Design Space Library or upload your own SVG/PNG file. I made this monogram using the Cricut Monogram Maker! Be sure to take into account the size you need for your final project and adjust accordingly. When you’re satisfied with your design, click the green “Make It” button to send it to your Cricut machine.
Step 2: Material Selection
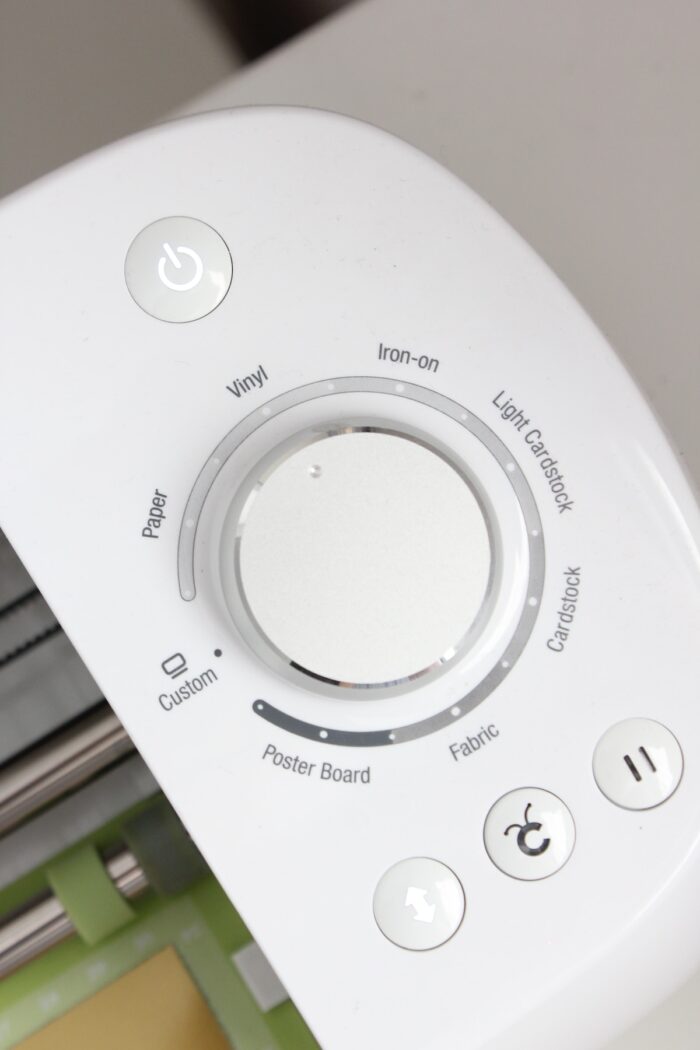
If you are using an earlier Cricut Explore machine (Cricut Explore or Cricut Explore Air 2), set your machine’s dial to “Vinyl.”
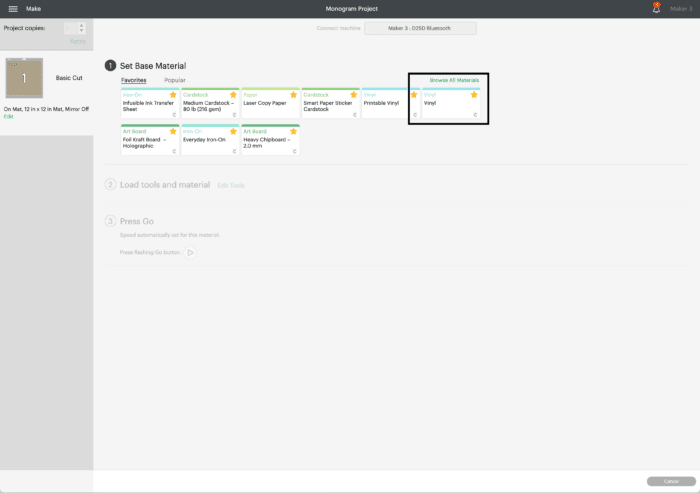
For any other machine, choose the exact type of vinyl you are using from the Materials Menu in Cricut Design Space (e.g., Chalkboard Vinyl, Glitter Vinyl, etc).
Step 3: Place Vinyl Onto Your Mat
Next, you will place your vinyl onto either a (newish) LightGrip Mat or a (broken in) StandardGrip Mat.
Why? To avoid frustration but still end up with clean cuts, you want a mat that is sticky enough to hold the vinyl firmly in place, but not too-sticky that the paper backing is impossible to remove once you’re done. Brand new LightGrip Mats are ideal, or StandardGrip Mats that have been used several times already.
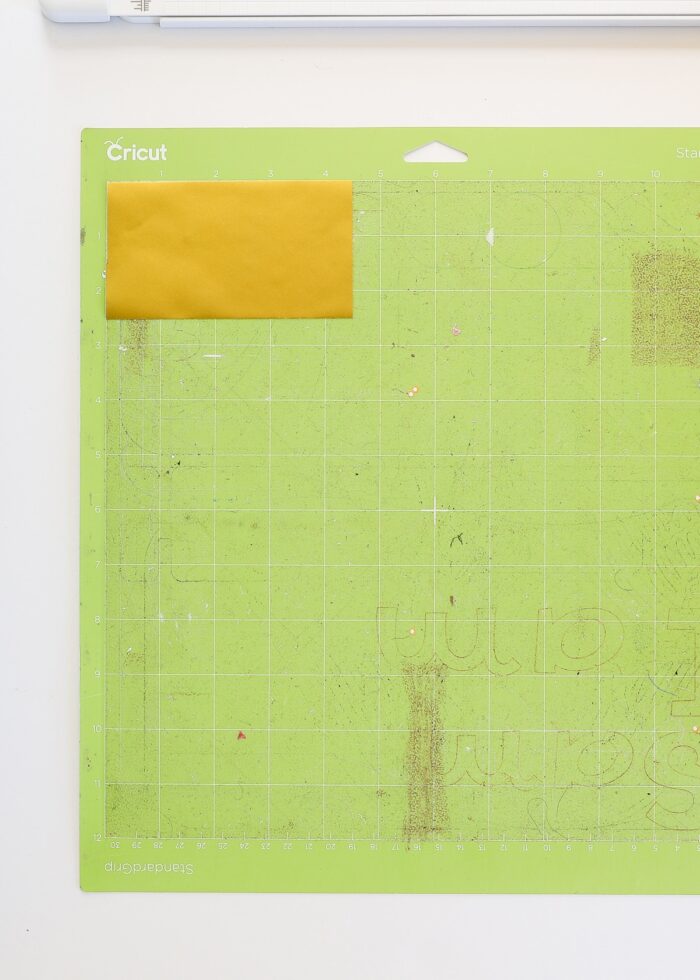
In most instances, Cricut Design Space will automatically place your design in the upper left-hand corner of the mat. As such, you will need to place your vinyl in the exact same place.
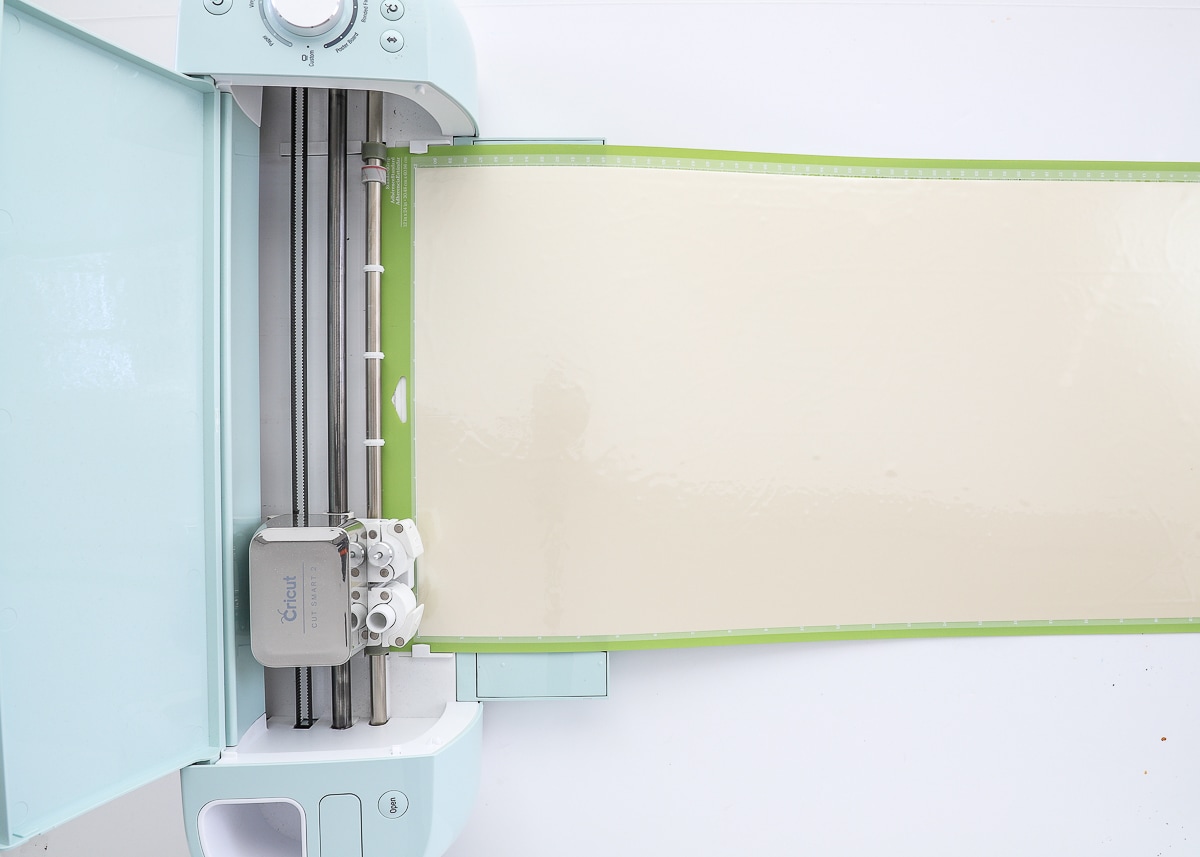
Put the vinyl, paper liner side down, onto the mat, lining up the straight edges of the vinyl along the white printed grid on the mat. Press down firmly (you don’t want the vinyl moving at all during the cutting process), and smooth out any wrinkles or air bubbles with your hands, a scraper, or a brayer.
Do You Need to Pre-Cut Your Vinyl?
Not really! It all depends on how you like to work.
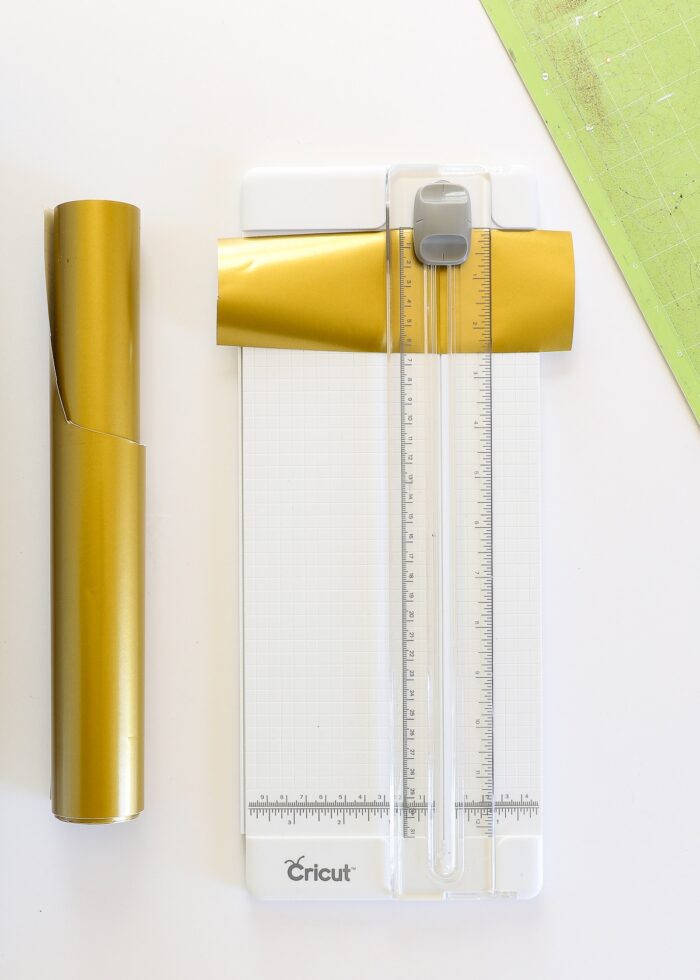
Some crafters prefer to trim down a slice of vinyl that matches the size of the design being cut before placing it on the mat. While this often reduces the amount of vinyl you have to wrestle onto a mat and minimizes the vinyl that is weeded away, it also requires extra time and attention to ensure you don’t cut too small.
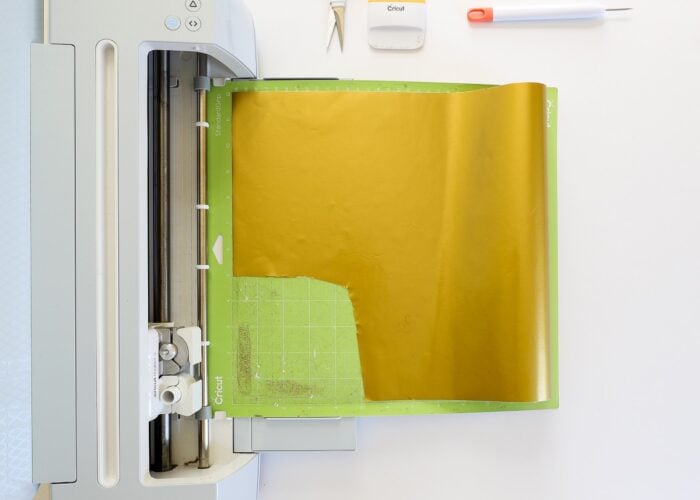
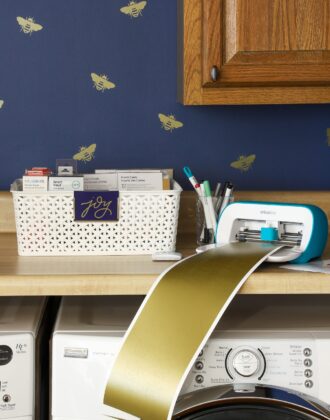
On the other hand, some people (like me) just load a stretch of vinyl onto a mat without cutting it down (see below how the remainder of the roll is stuck to the end of the mat). After the Cricut cuts out the design, you can then trim it out with a scissors. This is a little quicker, and ensures your vinyl is always big enough for your design.
There is no right or wrong here…I suggest you experiment to find your own workflow.
Step 4: Cut Out the Design
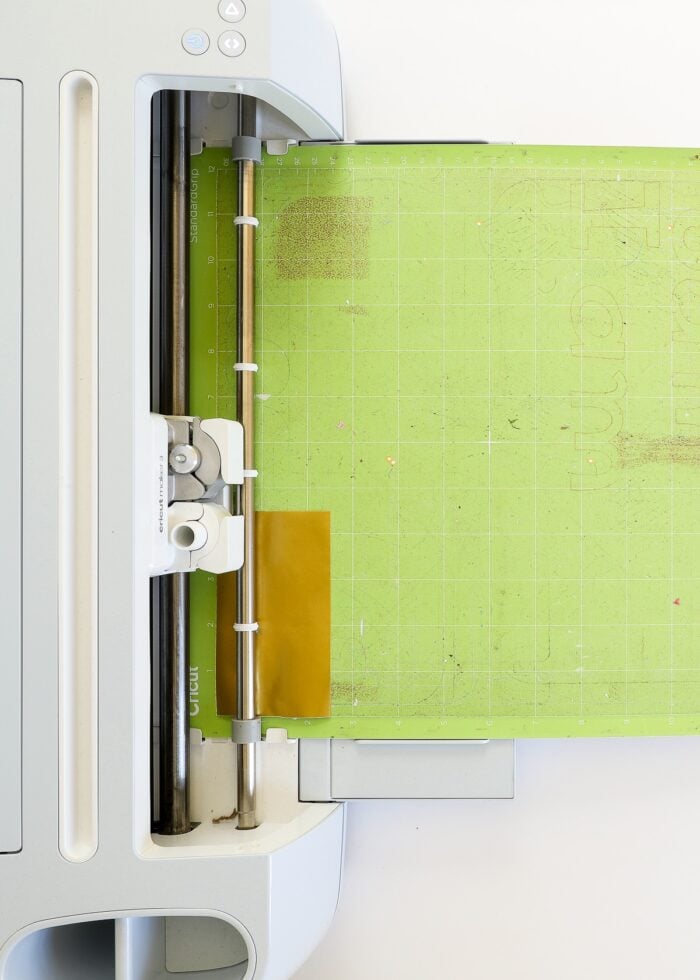
With your design ready to go, your machine set to Vinyl, and the vinyl properly placed onto your mat, load the mat into the machine and start it cutting by pressing the flashing buttons. When the machine finishes cutting, unload the machine by pressing the load/unload button.
Step 4: Weed Your Vinyl Design On the Mat
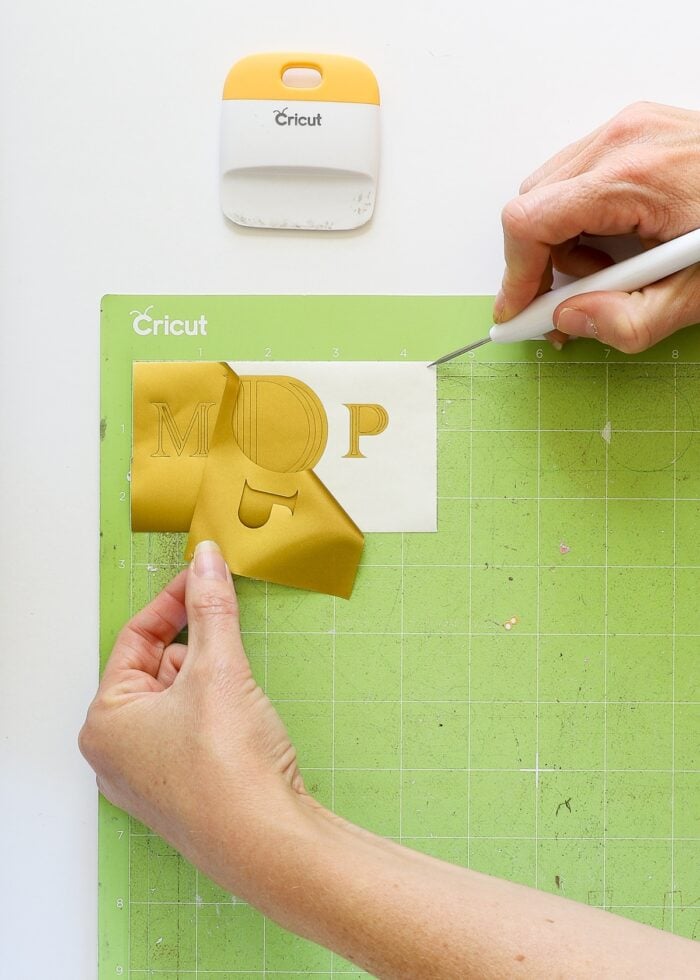
Most vinyl comes on rolls, so once you remove your cut design from the sticky mat, there’s a very good chance it will roll back onto itself, making it very difficult to weed. So one of my very best tricks is to keep your cut on the mat for weeding. By leaving the cut design on the mat, it remains perfectly flat so you can easily work on the design to prepare it for transfer.
To weed the image, pull away all the “negative” aspects of the design by “jabbing and pulling” with a weeding tool. If you used the correct vinyl setting AND had your vinyl fully secured to the mat, your vinyl should pull away easily (without ripping or tugging).
Here are some other weeding pointers:
- Take your time so that you don’t accidentally pull off small details that are meant to stay in place.
- Constantly refer back to the original design in Cricut Design Space so you keep/remove all the correct details.
- As you weed away larger areas, don’t let the sticky side of the vinyl touch any part of the final image. Vinyl is very hard to un-stick from itself, and pulling it apart can often distort your design.
If you go to weed your vinyl design, and the excess vinyl does not pull away effortlessly, you most likely need to re-cut your design with a “More” pressure modification.
Step 5: Pick Up Design With Transfer Tape
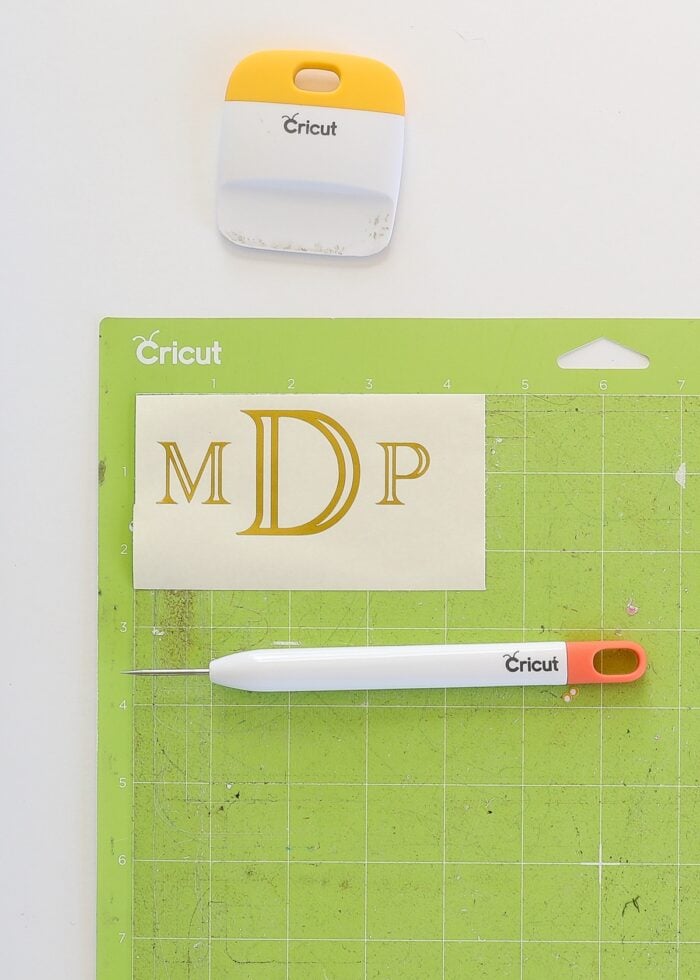
Once your image is fully cleaned up and all the negative elements have been pulled away, it’s time to transfer your design to your project!
When I first started working with vinyl, I used to painstakingly transfer one piece of my image at a time (by hand!) This method often left me with distorted shapes, bad wrinkles, and poor spacing. The key to perfectly transferring your image from the cut mat to your project is to use transfer tape. This process may seem tedious, but after your first few projects, you’ll get the hang of it!
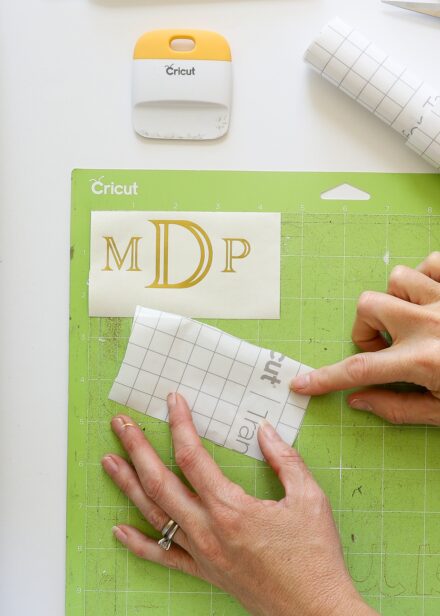
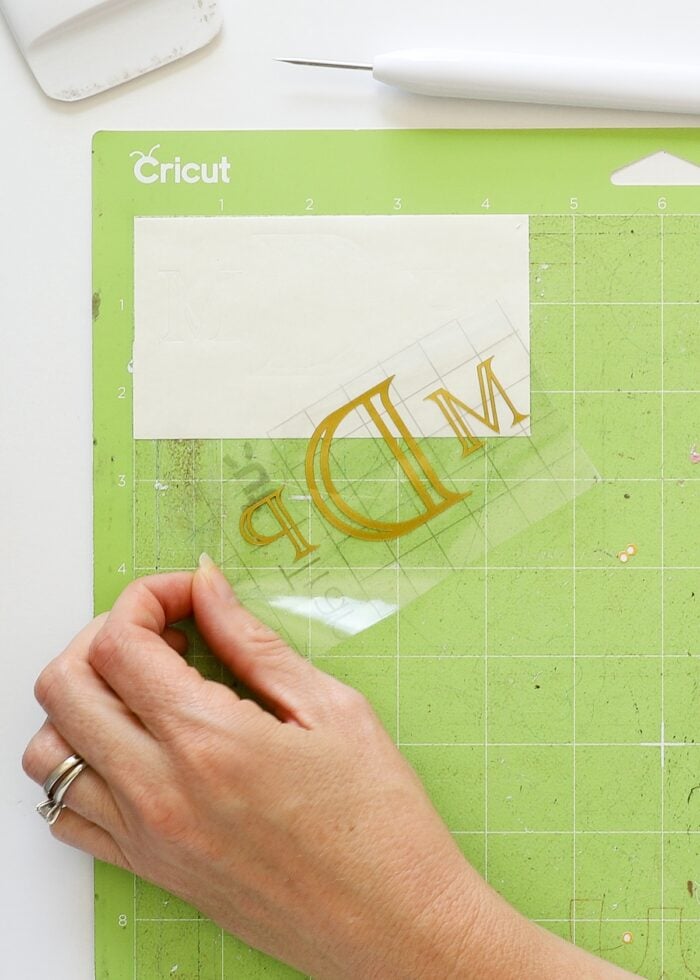
- Cut down a piece of transfer tape to fit over your ENTIRE vinyl design.
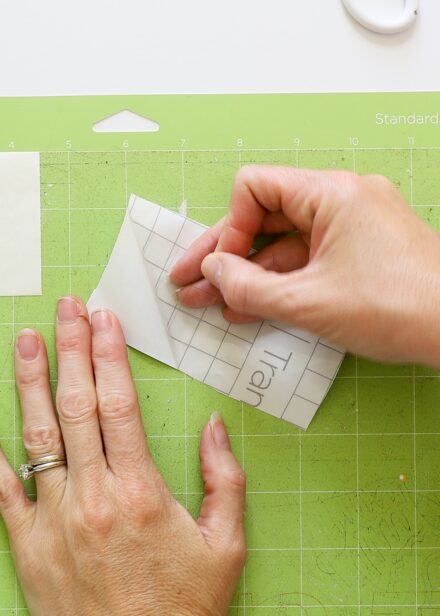
- Peel off the paper backing on the transfer tape.
- Place the transfer tape, sticky-side-down, onto your cut image. Wrinkles and bubbles in the transfer tape can lead to wrinkles on your final design, so take the time to lay the transfer tape down flat and smooth!
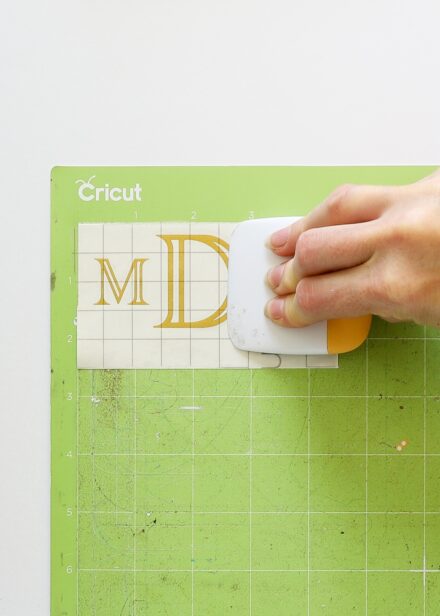
- Once in place, use a scraper tool to vigorously rub all over the transfer tape+vinyl design in every direction. If you think you’ve rubbed enough, rub some more. Your goal is to get the transfer tape to attach to the vinyl design.
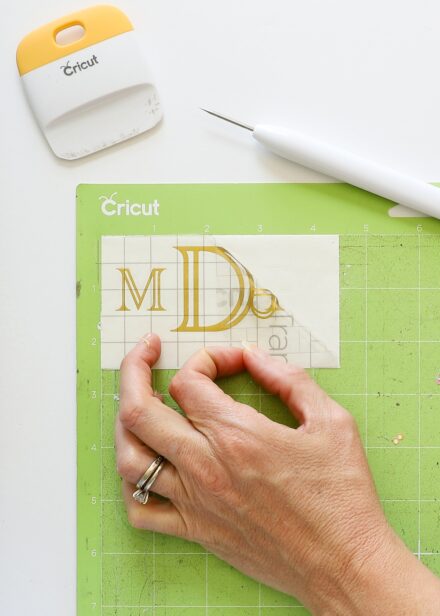
- Once adhered, carefully and slowly peel up the transfer tape (starting from a corner), with the vinyl image attached to it.
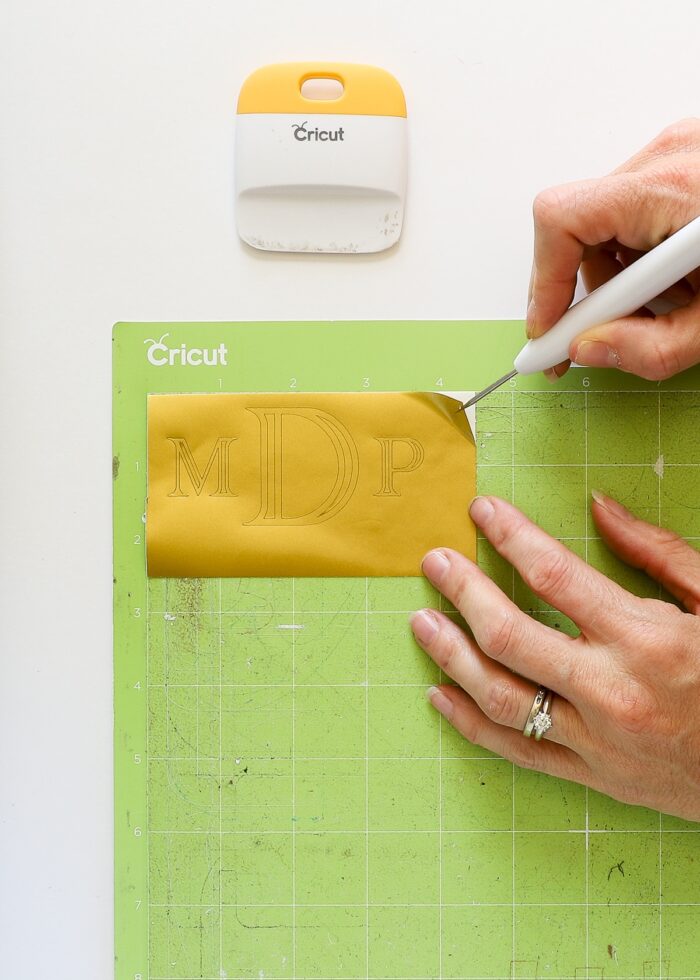
TIP! If you peel back the transfer tape and your vinyl is still stuck on the original paper backing, re-place the transfer tape and rub some more with the scraper. If you still can’t get the transfer tape to pick up your vinyl, use a weeding tool to carefully lift a corner of your vinyl design to get it to stick to the transfer tape. With that leading edge connected, you should be able to pull the rest of the design up with ease.
Step 6: Place the Vinyl Design Onto Your Project
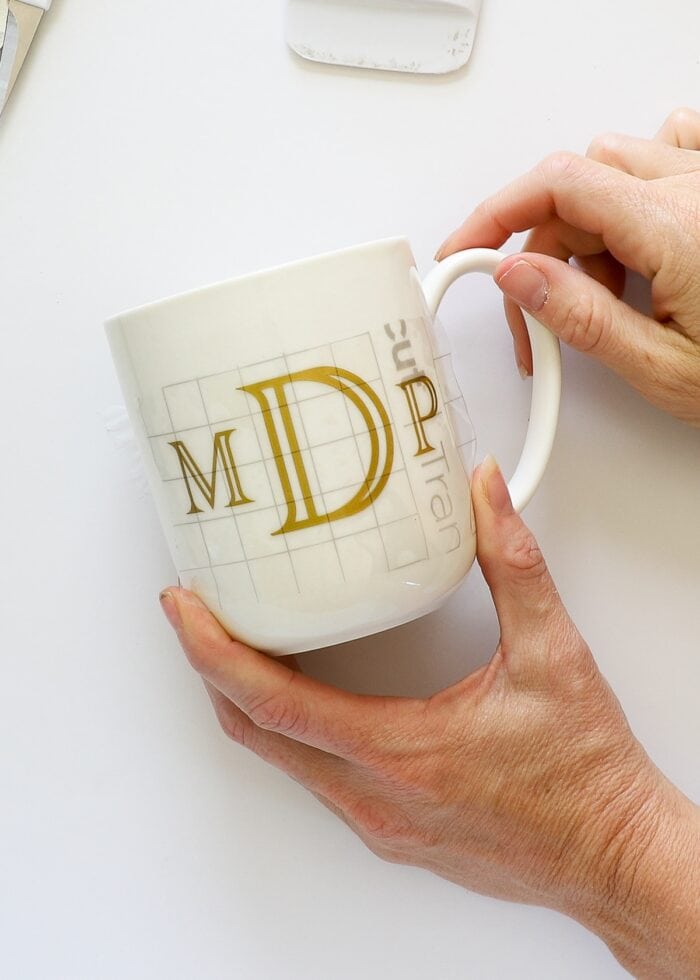
With your entire image safely on the transfer tape, you can now put it wherever you want! Keep in mind that your vinyl design is very sticky, so you typically get one shot at this. Here is how I I recommend placing down your design:
- Place down just a leading corner or edge of your design onto the clean, dry surface.
- Ensure your placement is correct before proceeding. If adjustment is needed, do it now while most of the design is still not stuck in place.
- From that leading corner/edge, slowly and carefully lay down the rest of the design onto your surface, smoothing it with your hand as you go.
Step 7: Remove the Transfer Tape
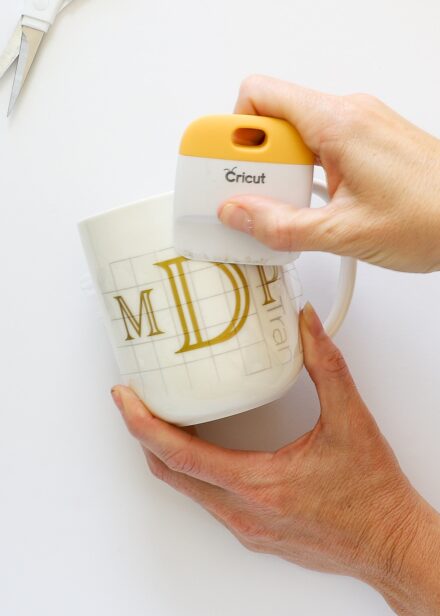
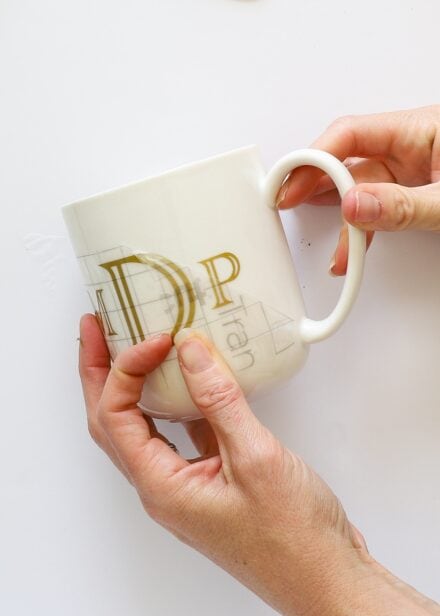
With the design fully in place, you now need to get the transfer tape to “let go” of the vinyl design so it can stay on your project surface. To do this, again use your scraper to vigorously rub the transfer tape+vinyl combination in all directions. Once you suspect the vinyl has adhered to your surface, carefully peel away the transfer tape to reveal your design.
When peeling the transfer tape away, move slowly and keep your hand perfectly flush against your work surface so the tape pulls back at 180 degrees. If at any time, your vinyl isn’t stuck to your project, re-place the transfer tape and rub some more!
TIP! Transfer tape can be used 3-5+ times before it looses its tac and needs to be discarded. Even if you don’t need to use it again for your current project, re-attach it to its paper backing and save it for a future one.
Step 8: Practice Makes Perfect
As I said at the beginning, cutting vinyl with a Cricut is not difficult…once you get the hang of it. Admittedly, working with vinyl can be very frustrating, especially for beginners. My best advice is to keep at it. Practice really does make perfect, and before long you’ll be able to quickly and easily make vinyl designs for any surface!
5 (Easy) Ways to Design Stylish Monograms for Your Cricut
Advanced Vinyl Techniques
Once you get the hang of cutting vinyl with a Cricut, there are some more advanced techniques you can try, such as layering different colors of vinyl together, making custom labels, and more! Here are some follow-on tutorials to explore when you’re ready:
- How to Layer Vinyl | 4 Techniques That Work
- Complete Guide to Making Household Labels with Vinyl
- How to Make Vinyl Wall Decals (with video tutorial)
- How to Put Vinyl On a Canvas
- How to Make a Vinyl Tile Backsplash with a Cricut
FAQs About Cutting Vinyl with a Cricut
What Cricut Machines Cut Vinyl?
All Cricut machines can cut vinyl including the Cricut Explore series, the Cricut Maker series, and the Cricut Joy.
What Machine Setting Do I Use to Cut Vinyl?
If you are using standard adhesive vinyl on a Cricut Explore or Cricut Explore Air 2, set your cutting machine dial to “Vinyl.”
If you are cutting specialty vinyls on a Cricut Explore or Cricut Explore Air 2, set your cutting machine dial to “Custom” and then choose the specific vinyl from the Materials Menu.
For all other machines, choose the exact type of vinyl you are using from the Materials Menu in Cricut Design Space when prompted (e.g., Chalkboard Vinyl, Glitter Vinyl, etc).
Which Way Does Vinyl Go On the Cricut Mat?
When cutting adhesive vinyl, the paper backing goes down onto the mat with the colored vinyl side facing up.
Why is My Cricut Not Cutting Through Vinyl?
As you start to work with vinyl more and more, you will likely come across cuts that don’t go through cleanly. Here are the usual reasons and how to fix them:
- Start with Your Mat. Is it sticky enough? An insufficiently sticky mat will lead to poor cuts. Swap for a new one or learn how to re-stick yours here: How to Re-Stick Cricut Mats.
- Increase Your Cutting Pressure. In Cricut Design Space, you can add more or less pressure (compared to the default) right on the final cut screen. Switching to “More” will usually give you enough added pressure to create clean cuts.
- Double Run. If you have a type of vinyl that just doesn’t cut all the way through on the first cut, try a double-cut. Don’t unload the mat after the first cut is done. Instead, hit the (non-flashing) Cut/Go button to re-run the cut. This second run will likely be enough to cut through the vinyl. Once complete, unload your mat.
- Swap Your Blade. Finally, if you’re still not getting clean cuts, it might be time for a fresh blade. Your blade will last a very long time, so this should be your last trouble-shooting step!
Does Cutting All Vinyl Follow the Same Process?
Everything I’ve covered in this post about cutting vinyl with a Cricut directly relates to standard, adhesive-style vinyl. And while these instructions apply to most vinyls, there are some types that require slightly different techniques to get great results. Here are some specific tutorials to check out to ensure your projects turn out just right!
- How to Cut Glitter Vinyl with a Cricut
- How to Cut Holographic Vinyl with a Cricut
- How to Cut Stencil Vinyl with a Cricut
- How to Cut Window Cling with a Cricut
- How to Cut Smart Vinyl with a Cricut
- How to Cut Iron-On Vinyl (Heat Transfer Vinyl) with a Cricut
- How to Cut Color Changing Vinyl with a Cricut
- How to Cut Writable Vinyl with a Cricut
Can You Use Other Vinyl Brands with a Cricut?
Absolutely! The Materials Menu within Cricut Design Space includes a wide variety of Cricut and non-Cricut vinyl settings. While the Cricut-brand vinyl settings might be a bit more accurate, you can always adjust the pressure for any vinyl setting to work with any brand product you load into your machine!
How Should You Store Vinyl?
I’m so glad you asked! I have a whole post on how I like to store vinyl. Check it out here: How to Store Vinyl Rolls
The Cricut Beginner Bundle
Looking for A Complete Guide to Cutting Cricut Vinyl in a print-friendly format? Get the PDF version inside the Cricut Beginner Bundle!

By far, cutting vinyl is the most common and popular project for Cricut crafters…and for good reason! Once you get the hang of the process, adding custom-cut decals, names, monograms and more to a wide range of surfaces is not only quick and easy but insanely gratifying too! I hope all the tips and tricks I share here get you off and running on your first few vinyl projects…I can’t wait to see what you make!
Megan






64 Comments on “Your Complete Guide to Cutting Vinyl with a Cricut”
This is such an awesome & descriptive tutorial page! I am definitely convinced I need a Cricut!!
Hi, is that gold you use or the copper ?
I was looking to buy that same color shade but hard to tell on amazon
Thank you!
Hi Natalia!
The color is gold! I bought it on Amazon, but if you’re buying the Oracle 651, I’m sure it will be the same color! Hope that helps!
Megan
Love this! So you do Design Space turorials? I would love to learn how to do offset cuts to do vinyl sealed applique
Hi Donna!
Thanks for your comment. I’ve published a few Design Space tutorials…you can see the whole series here (and I have another one going live tomorrow):
https://thehomesihavemade.com/category/cricut-explore-101/
I am always looking for more tutorial topics that will benefit my readers, but I must admit I am not familiar with what you are looking for. Do you have a link or image you can show me?
Thanks, and have a great night!
Megan
Hi Megan, I received my Cricut Explorer for Christmas 2015. I finally pulled it out this weekend to do some magic. I am stumped on how to make my own design, and cut it out in vinyl. Every time I press go, the machine starts, but stops before it cuts to tell me I need to print my design on white paper. What step I’m I doing wrong? If I print my design on white paper, how will I cut it out on vinyl. PLEASE HELP, I am at my wits end.
Hi Cynthia,
I am sorry you are so frustrated. It sounds like whatever you are trying to cut from vinyl is actually a “Print and Cut” image which is why it’s telling you to print on paper first. Do you mind sending me the link to your Cricut Design Space project so I can see what you’re trying to do?
I’ll try and help if I can!
Megan
Hi,
Where did you purchase the plastic container for all of your vinyl?
Hi Jackie,
I honestly don’t remember 🙁 It’s been so long and used for so many different things over the years, but I want to say Target.
I’m sorry I can’t be of more help – good luck!
Megan
Thanks for the great info! I have vinyl but haven’t tried it yet as I felt a little intimidated with the material.
With reference to water bottle, does the vinyl stay put when washed repeatedly? Or does it need to be sealed? Thanks again for your great blog!
Hi MK,
I have found that the vinyl stays put on water bottles, and holds up to regular washings. That said, you should probably test the specific products you’re using to make sure!
Good luck!
Megan
Hi Megan!
When you put the vinyl in the Cricut… do you put it in upside down? Or does it print regularly, not mirrored?
Hi Aleigh,
You place the vinyl onto the mat right-side-up (paper backing side down). The machine will cut it regularly unless you tell it to cut it mirror image. When you are working with vinyl fabric transfer, you cut it backwards…but for regular cutting, there is no need to adjust beyond the basic machine settings.
Hope that helps!
Megan
I’m sorry if this has been asked before. As I’m trying to hold my 10 month old and go through these instructions at the same time lol. My question is can you use the regular 651 vinyl on fabic? or can I only use the heat transfer vinyl do you know? I want to make a quick thanksgiving onsie for my baby and only have the 651 oracal vinyl on hand. Thanks for you help!
Hi Jan!
You can certainly try it, but I’m not sure how well it will work and/or how comfortable it would be? My suggestion would be just to try it (don’t iron or wash the vinyl; I would just stick it on like a sticker). If you don’t like the way it looks/feels, I would grab a roll of the iron-vinyl.
Hope that helps, and good luck!
Megan
I just got my first Crichton and I am kind of intimidated. Your info has been so enlightening. Thank you so much.
You are most welcome! I am glad you find my Cricut Tutorials helpful If you think of any topics you’d like to see covered or more info on, please let me know!
Megan
Thank you for your informative series on using the Cricut Explore. I’ve been “borrowing” my mother’s Cricut, and have to this point only made stencils on freezer paper for t-shirts. I’m looking forward to working with vinyl next.
I have one question: when using vinyl on washable items, such as coffee cups and stainless steel tumblers, which type of vinyl should one use? And would gloss vs. matte make a difference in durability of the vinyl to last through washes (hand-washing with dish soap)?
Hello!
Thank you so much for your comment and great question! I have used the glossy Oracle 651 for cups/tumblers without an issue. I’ve both hand-washed them and run them through the dishwasher. I personally find the glossy is a bit more durable than the matte, but that is just a casual observation. Like with anything, I would try a test before doing a big project.
Hope that helps!
Megan
What transfer paper do you recommend for glitter vinyl? I know the cricut glitter vinyl comes with one sheet of stronger transfer paper but I can’t find anywhere to buy that on its own. And for the 651 glitter vinyl I’ve been using clear packing tape so that it sticks but that’s not really ideal. Normal transfer paper and contact paper aren’t strong enough. Help!
Hi Suzanne,
Thanks so much for your comment! I’ve actually never worked with glittery vinyl (I need to soon!), but my sister has lots of experience with it so I asked her. Here is what she wrote:
*******
I use two things to transfer, painters or scotch tape or this:
https://www.amazon.com/Vinyl-Ease-Application-Transfer-Silhouette/dp/B008CEQR26/ref=sr_1_4?ie=UTF8&qid=1480955442&sr=8-4&keywords=transfer+paper+roll
I think this is the right one. Glitter vinyl is very resilient and strong, most of the time I peel it up and use it like a sticker, unless it’s a big image. Glitter iron on is different, and I also have not used the new cricut glitter vinyl…it hasn’t been on sale, haha. My glitter vinyl is perfectly smooth though, not rough like glitter iron on or glitter card stock. Wasn’t so expensive I would probably use it for everything . I love it.
*****
I am sorry I can’t be of more help, but if I come across something, I will be sure to let you know!
Megan
Great tips! I’d like to give you a few – when you store your vinyl in a roll, try to keep the roll 3″ or bigger – tighter rolls tend to make the vinyl not want to go flat any more.
Also, many sign shops will discard smaller pieces of vinyl. If you contact one in your neighbourhood, they may be willing to save the scraps for you if you promise to pick them up regularly.
🙂
Thanks for all the tips! I needed the help after my fail with vinyl today. Any other tips for how you keep it from bubbling when you put it on the mat?
I’m sure this question is stupid but I just received my Cricut…I have no idea what to do with it. I have been serching the web, not for projects but when do I use what material on what? I can think of a million projects. Vinyl is sticky on its own? Is vinyl used for shirts? Also I hear a lot of people talking about mirror image. When do I have to use a mirror image? You gave great tips that I will use just as soon as I figure out what material is used on what projects. I just don’t know where to start. I think I am most interested in making shirts & onesies but do not want to limit myself. Any help you can offer would be greatly appreciated.
Hi Sharla,
Thanks for your email and I am sorry it’s taken me so long to respond (this comment came in the day I was in the hospital giving birth!).
In short, you can make anything with the Cricut! Vinyl is sticky and not laundry safe so it is best used for home decor and kid projects. It can be used to personalize things like water bottles and school notebooks etc. For fabric, there is specific iron-vinyl, which would be better for onesie type projects.
The best thing to do is just get your machine out of the box and start playing. No need to limit yourself, but after playing with it, you’ll find what you enjoy best!
Hope that helps!
Megan
Hello Megan, I received a cricut for a gift and it doesn’t have a “key pad.” Where do I type my info? Also, I find your info much more helpful than the actual cricut site. Hands down they should hire you. Happy New Year and please keep posting. Debbie
Hi Debbie!
Thank you so much for this – I am so glad you find my tutorials helpful! I am always looking for post ideas, so if there is something you need help with as you learn your machine, please be sure to let me know!
As far as a keyboard, the old machines had a keypad, but the new machines run completely off the computer software. So you design online and send your files to be cut either through a cord or wirelessly. If you let me know which machine you received I can point you to some more help!
Good luck!
Megan
I got a cricut explore for Christmas with the intention of making stencils for etching on glass. My thought was to use the vinyl to make a stencil, but I’m wondering if there is a better option. I haven’t tested it too much due to time but do you have any tips/tricks or recommendations?
I use clear contact paper for making stencils to etch on glass. It’s very inexpensive ( I buy mine at dollar tree). Before you put the contact paper on the glass, I always clean the glass and wipe it with rubbing alcohol first to make sure there is no dirt or oil. Rub the stencil onto the glass really well. I use a popscile stick or the cricut scraper and run in on the stencil to make sure it’s on really well before I apply the etching cream. It works like a charm every time!
oh girlfriend stop spending your money on cricket transfer paper. go to the dollar tree and buy rolls of clear shelf paper liner it works absolutely beautifull and you can also reuse it several time if you decide to reapply it back onto the paper it was attached too.
Hi,
You have been so helpful. I got my machine for Christmas and I am just starting to warm up to it. I am having a hard time lining my vinyl up on my block of wood. I think I’ll try the contact paper stencil and paint it on.
Linda
I have the original cricut and I use it to cut vinyl. Recently I was doing a job and weeding it was insane. Had to make some letters over as it would pull them up off or mess them up. GRRRRRR.
You could have saved the cross instead of weeding it away, never know when you would need a cross. Good tips. Had no idea you could reuse the transfer tape. Thanks you.
This was awesome! I just got an explore 2. This has been so helpful! Thanks so much
Seriously this is the easiest tutorial to understand. I love it and found it very helpful. I have seen so many tutorials and no one shows you how to put the vinyl on the mat. What I’m struggling on isn’t Heat Transfer Vinyl. Do you put the shiny side up or down. For purpose she of transfer tape do I put it underneath the vinyl ( I read on another tutorial of someone doing that) I’m so confused. Do you have any tutorials on HTV.
Hi Bianca!
I am so glad you found this tutorial helpful! As far as HTV, I haven’t worked too much with it, but am planning a few tutorials for the coming months. Typically, you need to put the shiny side up, but always check the package instructions. Keep in mind, especially if you’re using text, you need to cut the image “mirrored” so it ends up right when you iron it on. Stay tuned for a more detailed tutorial.
For transfer tape, I’ve never put it under and can’t really think of why you would do that. I always use it exactly as I show in this post (and the way the video demonstrates).
Good luck!
Megan
Hello! Thank you for the tips. When using transfer tape, I am having difficulty removing It once the letters are down. The transfer tape sticks to the letters and they rip off. Do you have any suggestions?
Thanks!
Hi Shana!
Yes – sometimes it can be tricky to get the vinyl to stick to your surface. First, I’d make sure whatever you’re sticking the vinyl to is as clean and dry as possible. Then, you may have to take the time to really press each and every letter/element before removing the transfer paper. Do you have the Cricut tools? The little scraper (looks like this) can help get the vinyl adhere it to your surface.
Hope that helps and good luck!
Megan
Hi Megan, I’m brand new to Cricut. Just tried using Cricut’s roll vinyl to cut some small crab shapes. Followed your directions to the “T”, but when applying the crab to a cardboard popcorn box, the transfer paper did not release the crab. I do notice that it says “Transfer TAPE” and strong grip. Am I using the wrong “Transfer PAPER”?
Hi Janis!
Sometimes it can be difficult to get the transfer paper to “let go” of the vinyl. Especially if it’s brand new. I would use the “scraper” tool (if you have it) – it looks like this: https://www.google.com/search?q=cricut+scraper+tool&source=lnms&tbm=isch&sa=X&ved=0ahUKEwjU7efrrKzVAhUI7mMKHVtOAbYQ_AUICygC&biw=1760&bih=1200#imgrc=dbEQo36TQsJYQM:- to really go over the transfer tape over and over again to smooth the vinyl onto your project. Then as you peel the transfer paper away, pull it at a very “sharp” angle…almost flat against your project. As you pull, you may need to “help” the initial edge/corner of the vinyl stick to your project. Once you get a little part to stick, the rest should stick as you peel the transfer paper away. You can then smooth down from there.
I think they just started making different grip transfer papers. I would think yours’ will be fine but it might take some extra “coaxing” to get it to release! If it seems super duper sticker, you can try putting the sticky transfer paper onto your carpet or towel before using it. The little bit of dust and lint on the paper can reduce it’s stickiness!
Hope that helps!
Megan
Great guide! I agree, it can be really intimidating cutting vinyl for the first time, but you’ve just got to jump in and give it a go. Your guide definitely helps newbies to vinyl cutting get some confidence and give it a go.
thanks!
Can you cut stencils on vinyl ?
Can you cut vinyl on a circuit personal.
Megan… I just found your blog and could spend the whole day reading it… I am in love with labels and you must be my twin! 😉 Your Cricut mat looks much longer… Do they make mats that are bigger than the 12 x 12, and if so, where did you find it?
Hi Sara,
I am SO glad you found me too! Yes – my mats are 12×24″, which are a must for big projects. You can get them here: http://amzn.to/2zvNxuL (as well as on Cricut’s website!)
Hope that helps!
Megan
Great tips without a lot of fluff (people like sarcasm but some of these have more than they do instruction)
One of the most helpful sites I have found so far…Thanks for sharing!
I LOVE the seem ripper tip!!
The Cricut weeder does not seem to work well for me, especially on smaller more intricate cuts.
I’ve been using a large needle, but it’s awkward to hold.
Thanks!