Vinyl-Covered Dresser
Over the last few weeks, I’ve been giving 1 IKEA Tarva Dresser different makeovers…all that are totally temporary! I’ve already experimented with washi tape and fabric to create adorable makeovers (that I truthfully didn’t want to un-do). However, I’m on a mission to achieve a variety of looks on the same dresser, so last week’s fabric came off, and I started again! This latest makeover was all achieved with vinyl…and while this one was a bit more time intensive than the past two, the results were more than worth the effort!
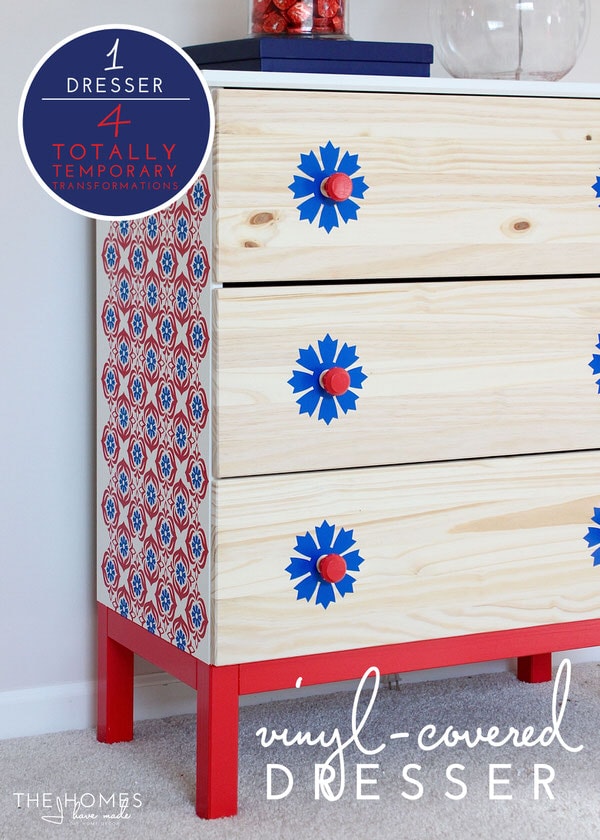
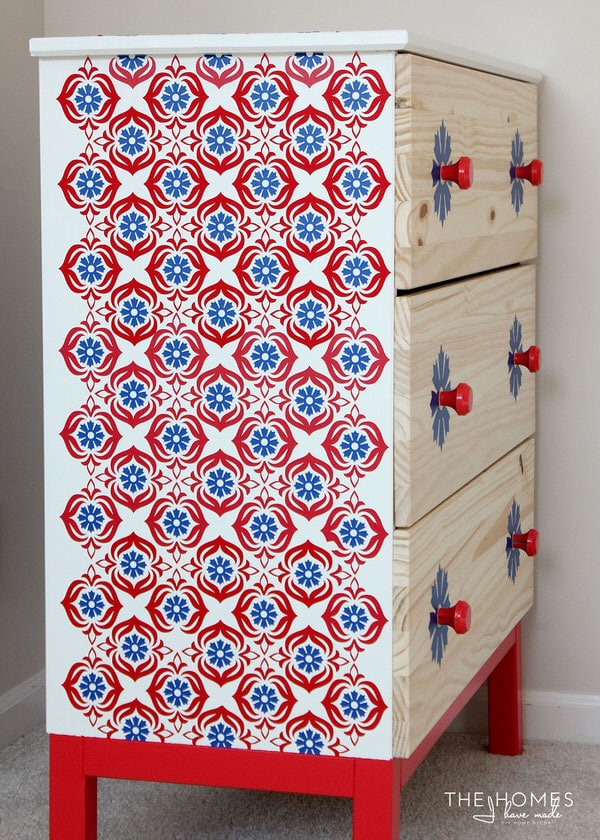
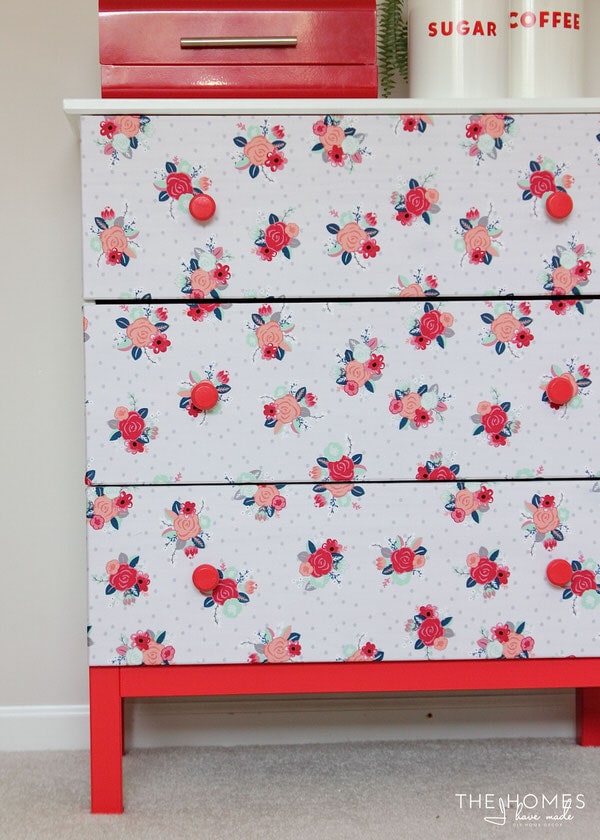
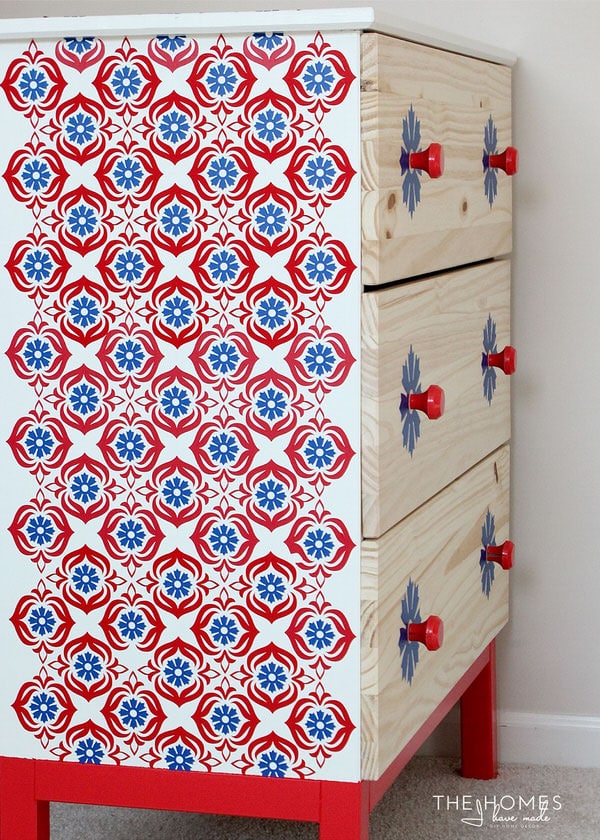
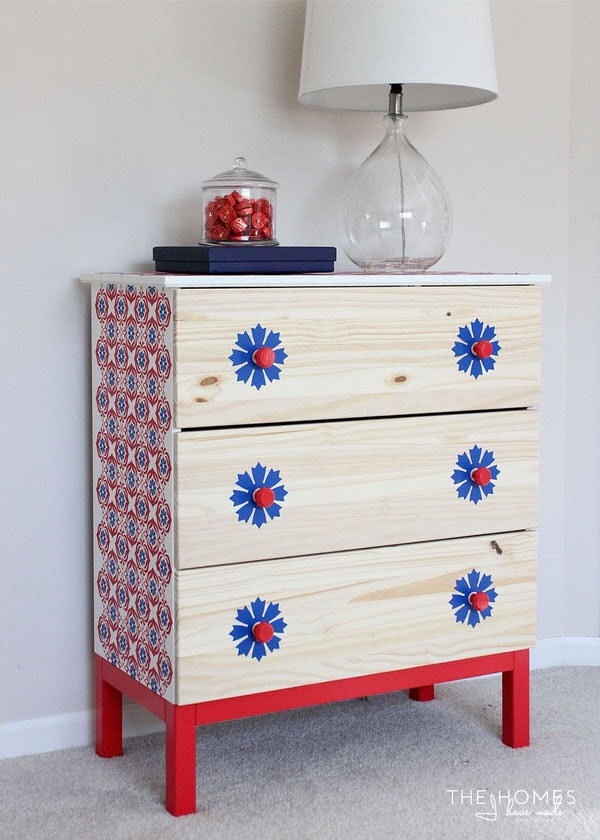
From the front, this dresser looks fresh and spunky, but rather simple…
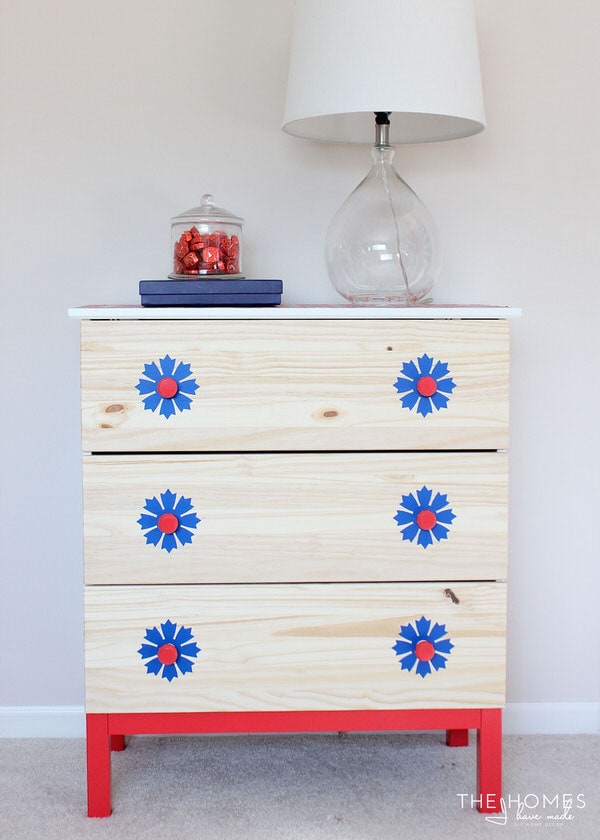
But beyond the hot red base and eye-popping pulls…
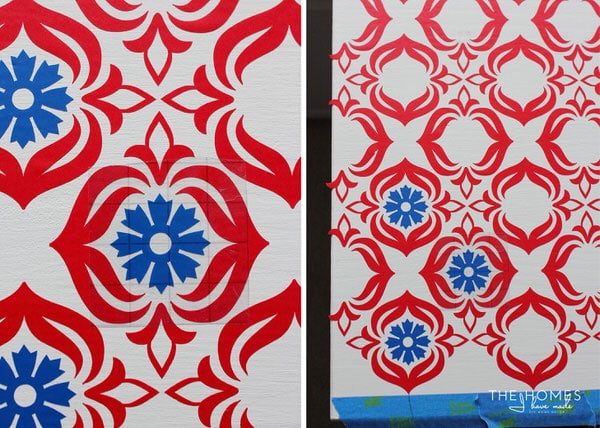
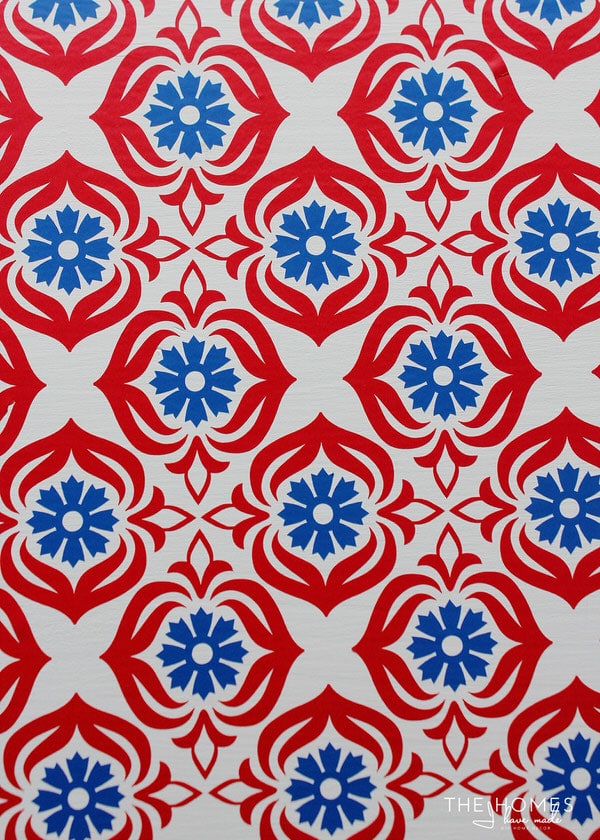
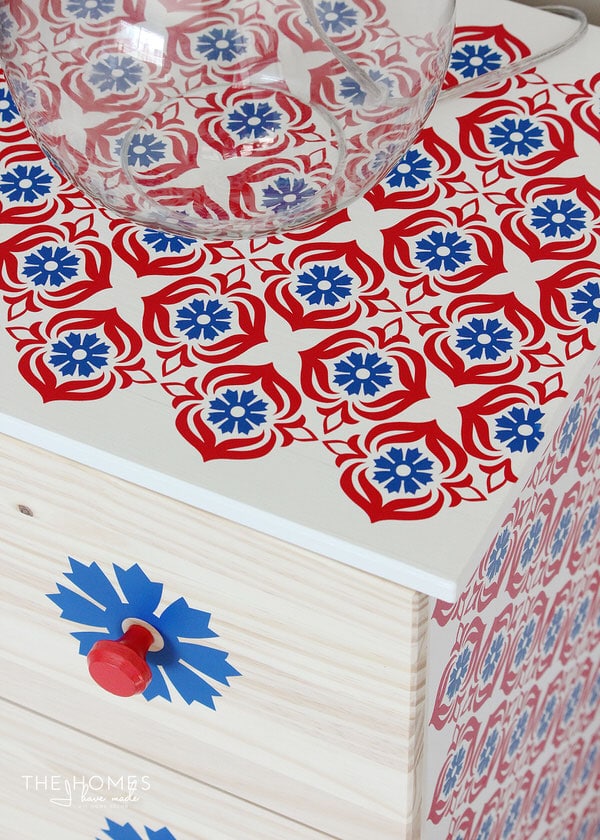
…a major pop of pattern and color is revealed when you get up close or view it from the side!
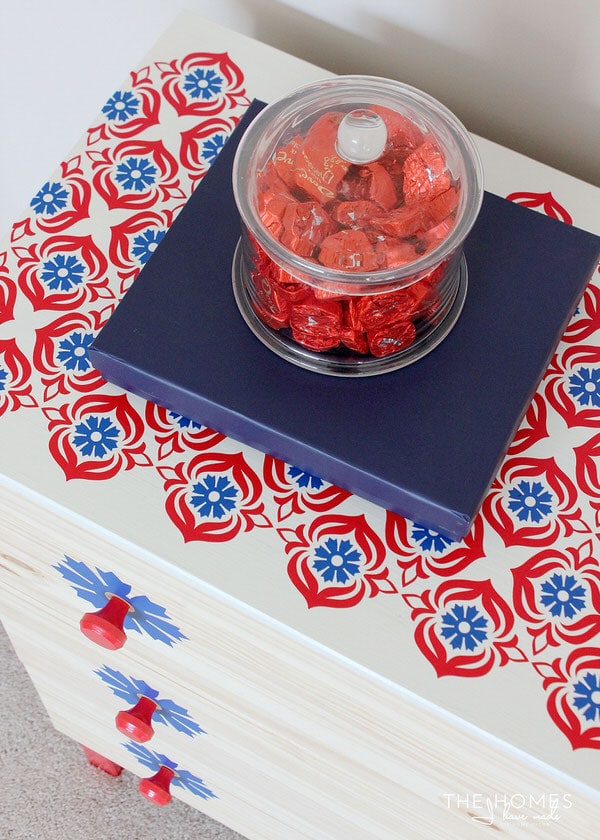
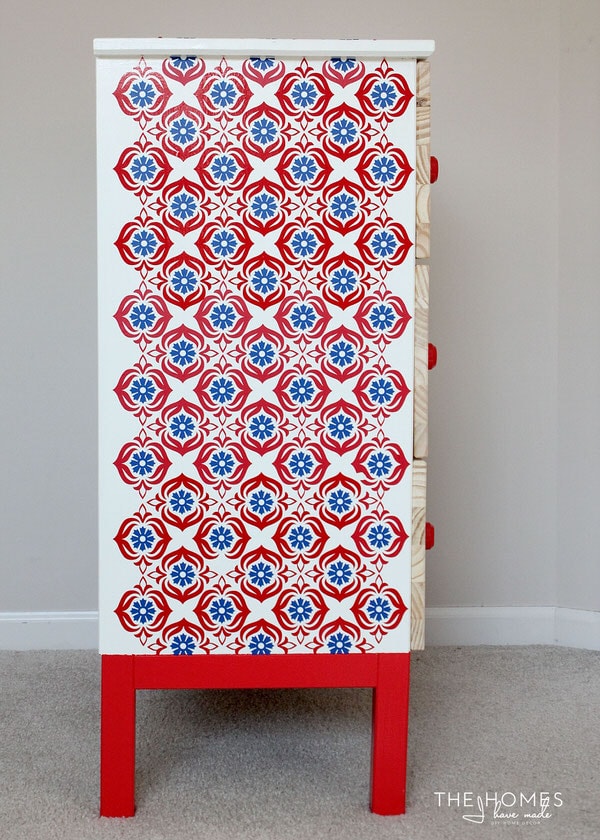
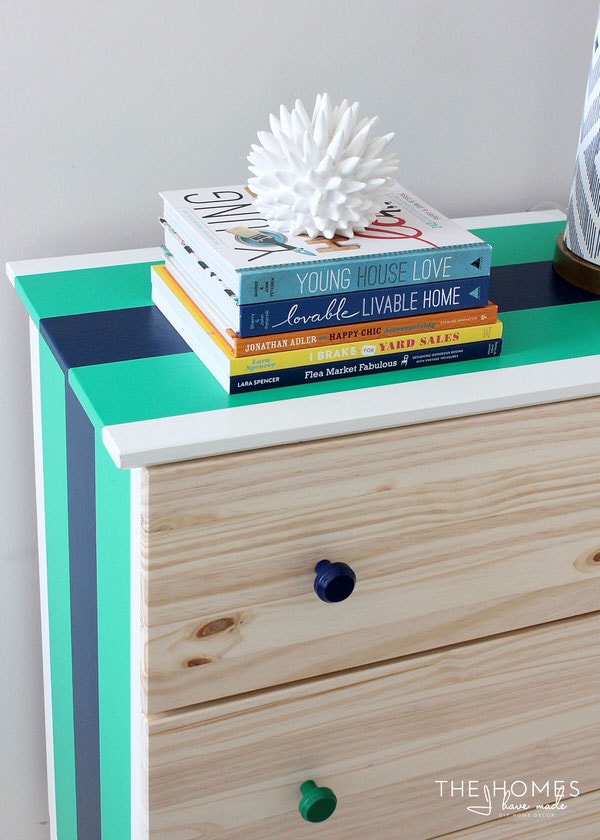
Like the stripes in the first makeover, I choose to keep all the pattern play along the top and sides for this update. The result is a fantastically whimsical piece that is calm enough to work in a variety of spaces!
Catch Up!
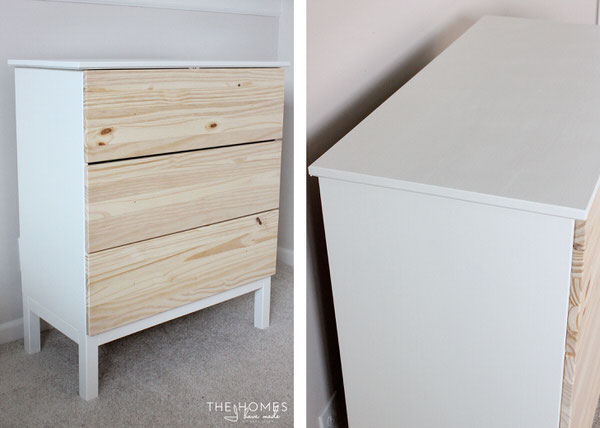
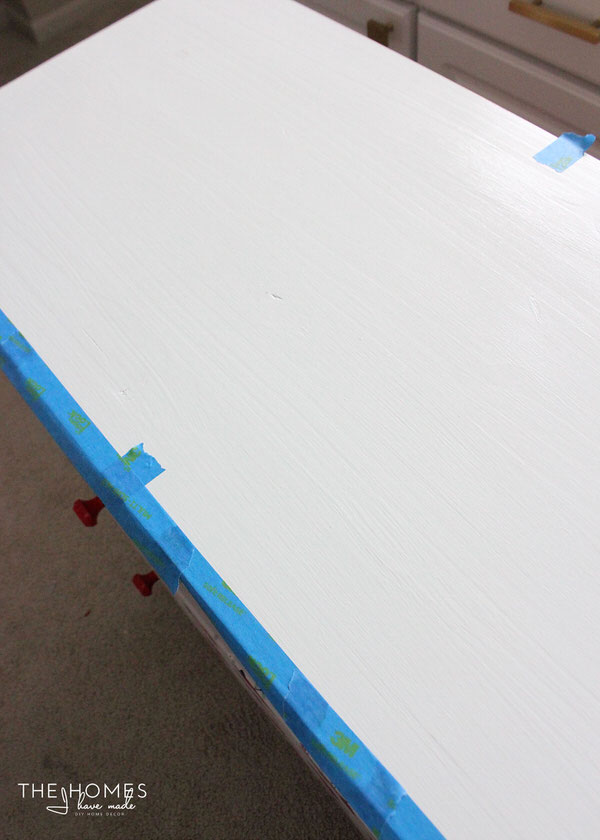
For those of you just joining in this series today, I started with an IKEA Tarva dresser that I assembled and painted white (the outside frame only). You can read more about my painting process on this dresser here.
I then gave the dresser it’s first makeover with washi tape…read all the details here!
Last week, the tape came off, I painted the base red, and covered the drawers with a pretty floral fabric. You can see more of the results of this easy transformation here!
Truth be told, I really loved that fabric-covered dresser and would have been content to keep it just as you see it above. But I had more ideas up my sleeve, so I pulled the fabric off the drawers (more on that below) and got to work on the next makeover!
Vinyl-Covered Dresser Makeover
For this kind of makeover, you will need:
- A piece of furniture in need of an update (flat, non-detailed pieces work best)
- Repositionable vinyl
 in the color(s) of your choice
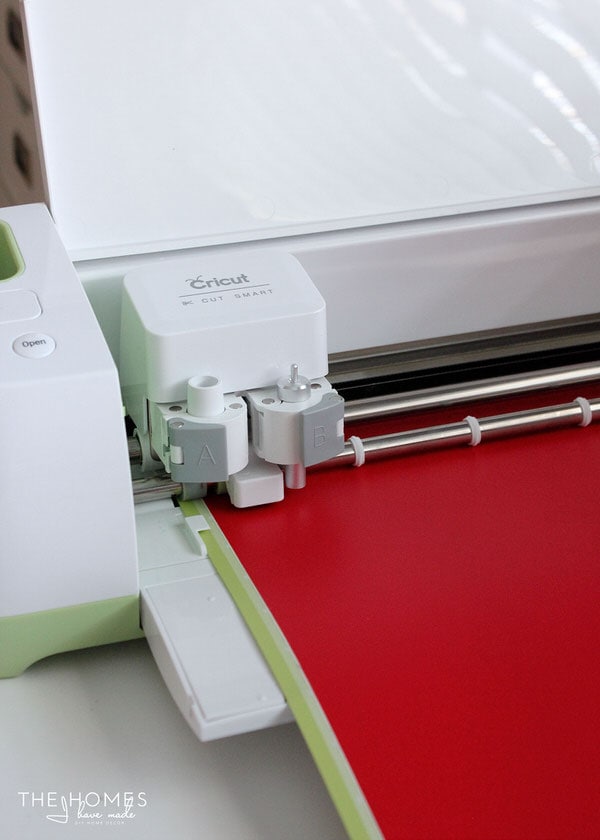
 - E-cutter with design software (I use a Cricut Explore with Cricut’s Design Space software)
- Transfer paper (using clear paper makes this project much easier!)
- Tools: scissors, measuring tape, painter’s tape, pencil, craft knife
 in the color(s) of your choice
 (using clear paper makes this project much easier!)
Tip! If you don’t have an e-cutter, you can still pull of this kind of makeover by buying pre-cut vinyl decals (the kind typically made for walls) from shops on Etsy. Just make sure the vinyl shapes you order will fit on your piece of furniture AND is removable…or else this makeover won’t be very temporary 😉
The first step is to design your vinyl overlay pattern. Today’s post is already quite lengthy, so I am planning an entire post down the road about the details of designing and making your own vinyl overlays…it’s fun to do and not that hard, but has a few steps I’d like to cover in more detail. For now though, I basically picked an image out of the Cricut Deign Space library and played with the directions, patterns, and colors until I had an overall design that looked the way I wanted it and fit the dimensions of my dresser.
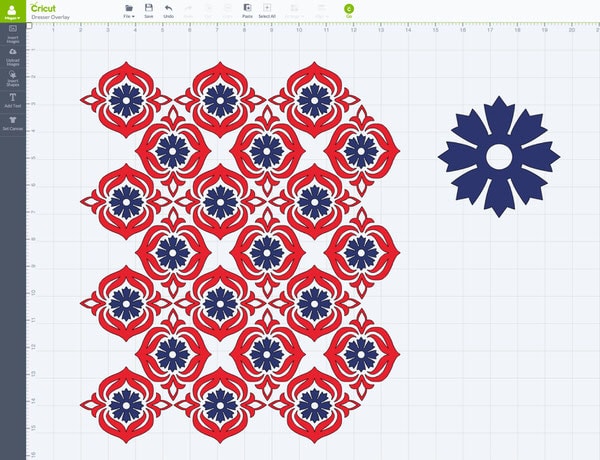
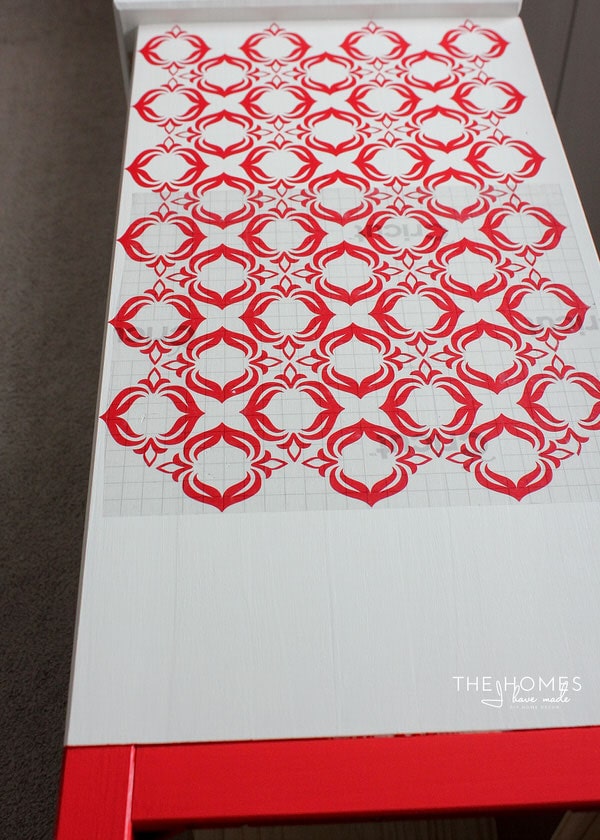
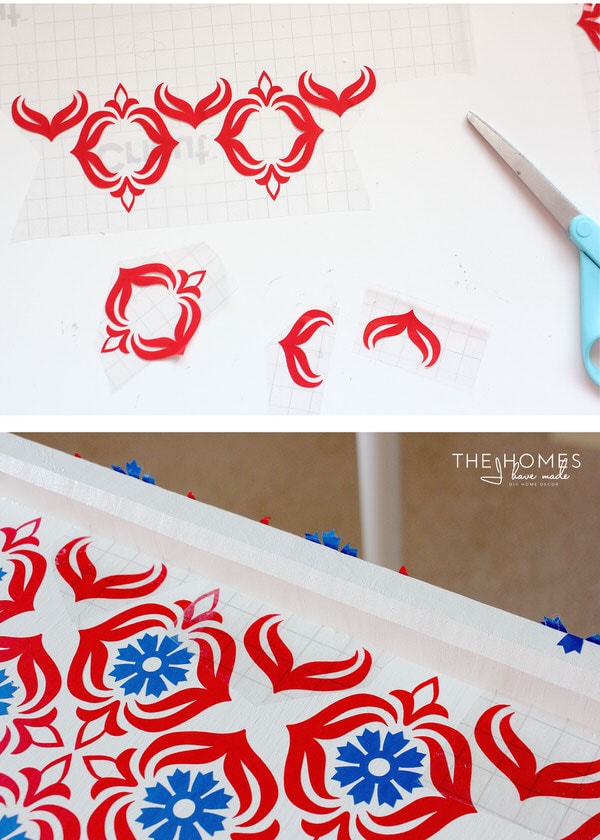
Once you have your pattern designed, cut it out (using the “Vinyl” setting on your e-cutter), as many times as you need, to cover your entire piece of furniture. I cut my single pattern 8 times.
I’ll cover this in more detail in another post, but I specifically created a design that didn’t require a lot of “weeding” (pulling out all the excess vinyl that is not part of my design). This project was tedious enough, I didn’t want to spend hours getting my vinyl ready for transfer. In this pattern, I only had to remove the dots in the blue flowers, and the diamond shape out of each mini flower on the red pattern. Everything else pulled away in a single sheet. My best tips for weeding vinyl quickly are these:
- Use a seem ripper. I know the Cricut Toolkit comes with a weeding tool, but I like the way the seem ripper works better…and I always have it on hand 🙂
- Weed while your vinyl is still on your cutting mat. The adhesive keeps everything laying flat so you can weed everything out without the paper rolling on you! I also recommend transferring your pattern to the transfer tape while it’s still on the mat…again, because it keeps it from rolling!
 comes with a weeding tool, but I like the way the seem ripper works better…and I always have it on hand 🙂
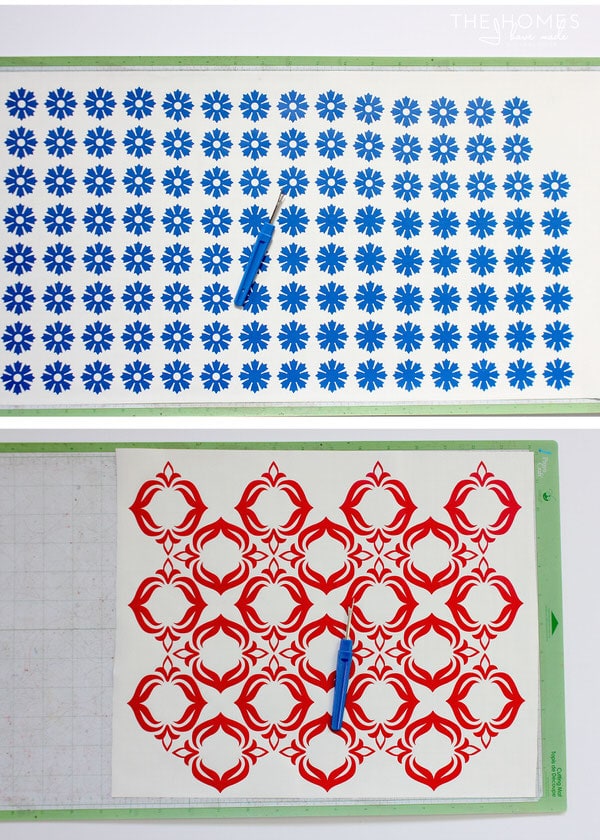
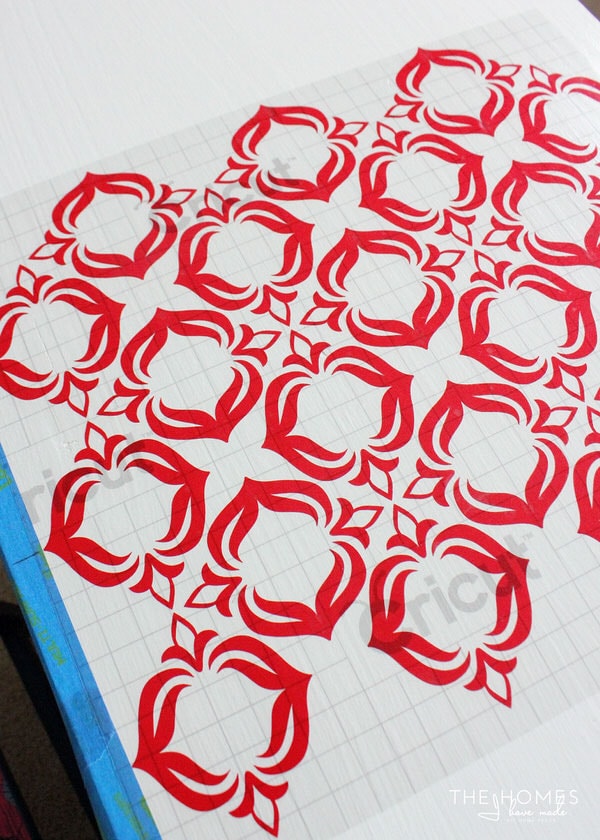
The next step is to determine where the vinyl will go on your piece of furniture. I designed my pattern to be 11.5″ wide by 14″ deep…based on the dimensions of my dresser top and the margins of my cutting mat. To ensure my design was centered, I marked the center lines with some painter’s tape. To give myself a straight edge to line up each set of vinyl, I also added a tape line along the front of the dresser.
I recommend placing your vinyl pattern at the center of your piece and working out so the pattern starts/ends the same. Using transfer tape designed for vinyl , remove the white backing from the weeded vinyl pattern and place the vinyl onto the center your piece. Take care to line up the edge of the vinyl with any guides (like the tape line) you placed. Smooth the vinyl down with a scraper and carefully peel off the transfer paper.
Want to save this post?
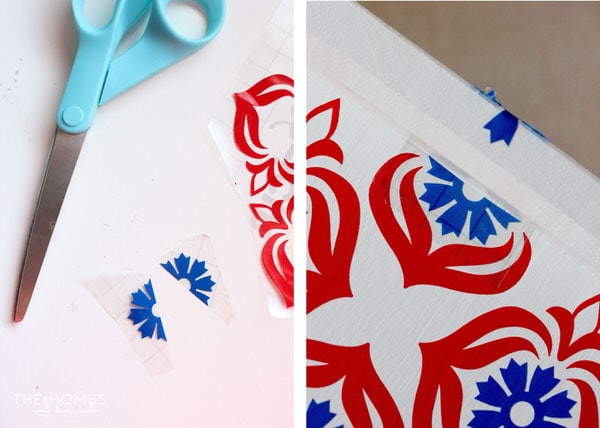
With the first set of vinyl down, all you have to do is work outward. To ensure correct placement, I flipped the transfer paper over so that the sticky side was facing up. This allowed me to move the pattern around, check placement and make any necessary markings (with a pencil) before flipping it over and sticking the pattern to the dresser.
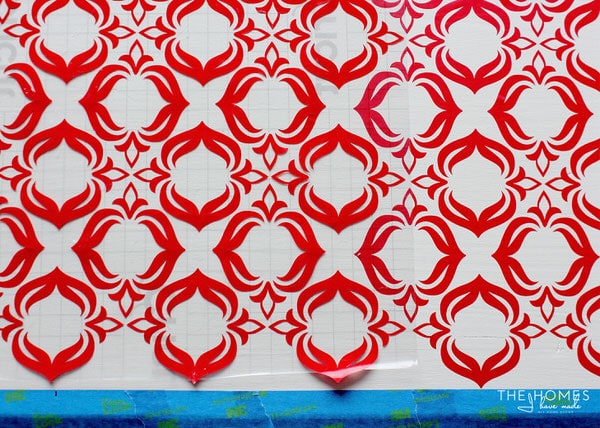
The red pattern was designed to apply all at once…in a single rectangle sheet. So as not to waste vinyl (and save myself the headache of lining everything up right) I chose to place the blue flower shape one at a time (again, using transfer paper). It was a bit tedious, but I actually preferred not wrestling with a large sheet to get the placement just right.
I was hoping to be able to work around the beveled edge of my dresser top, but the vinyl was having a hard time sticking to my glossy paint around the edges. I ultimately chose to leave the edges free of pattern and continued the pattern down the side of the dresser, picking up the pattern just under the top lip. I found laying the dresser on its side allowed me to line up and transfer everything with better control.
Once you have your entire piece of furniture covered in the larger sheets of pattern, you may want to go back through and add smaller pieces of your pattern into the gaps to make the pattern look more seamless.
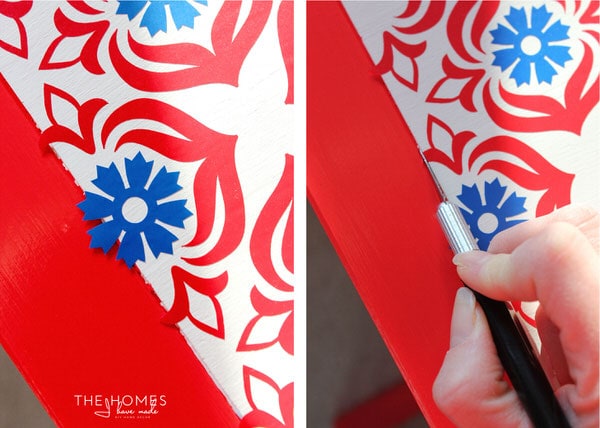
Vinyl is a very imperfect medium. And even when an e-cutter does a beautiful job cutting it all, sometimes weeding the vinyl can leave you with imperfect designs. I suggest keeping all the “bad” or “imperfect” cuts and using the good parts to fill in areas that didn’t transfer just right or where there are gaps in the pattern like shown above. To continue the pattern all the way up to the dresser edge, I trimmed the cuts down with a scissors and placed them by hand, mimicking the spacing as best as possible…
Another option is to carry the larger pattern as far to the edge as you possibly can and then trim away the excess with a sharp craft knife to make a clean line.
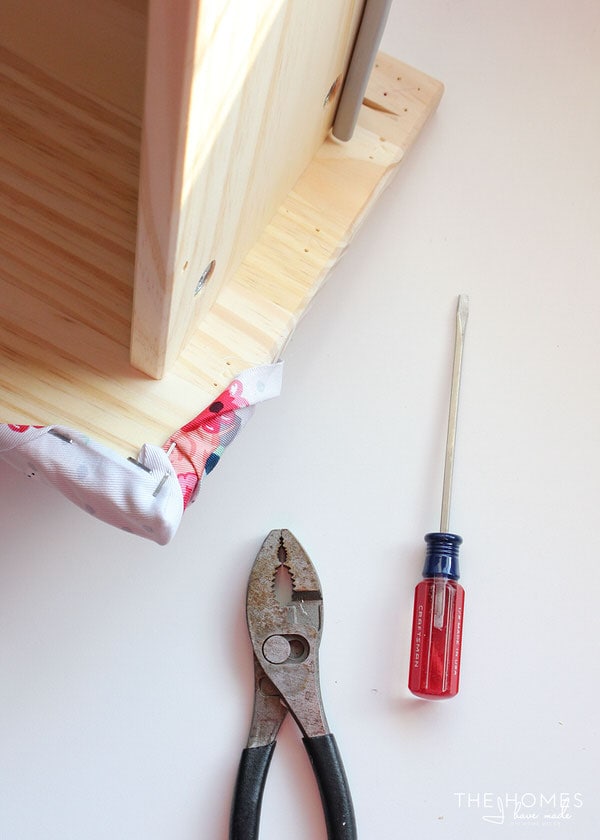
For the drawers, I started by removing the fabric from my previous makeover (admittedly, one of the more tedious parts of this makeover!)…
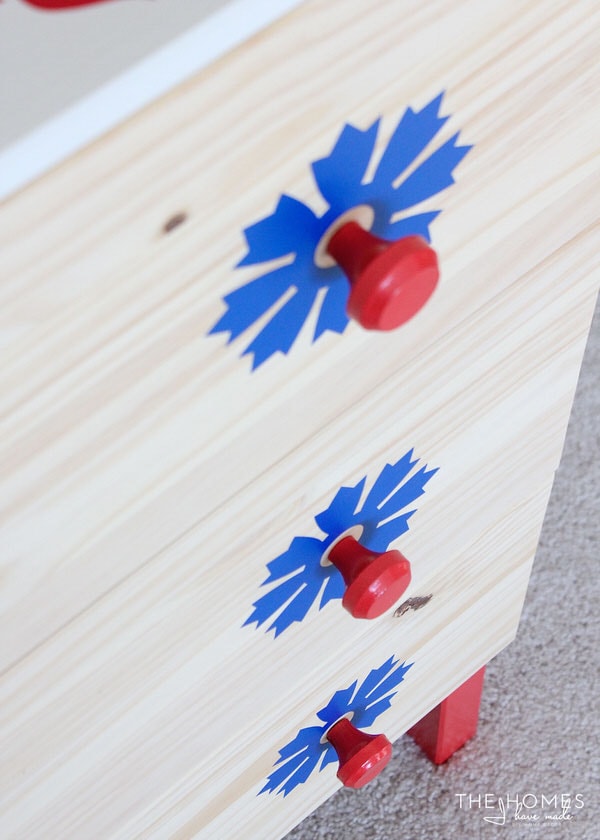
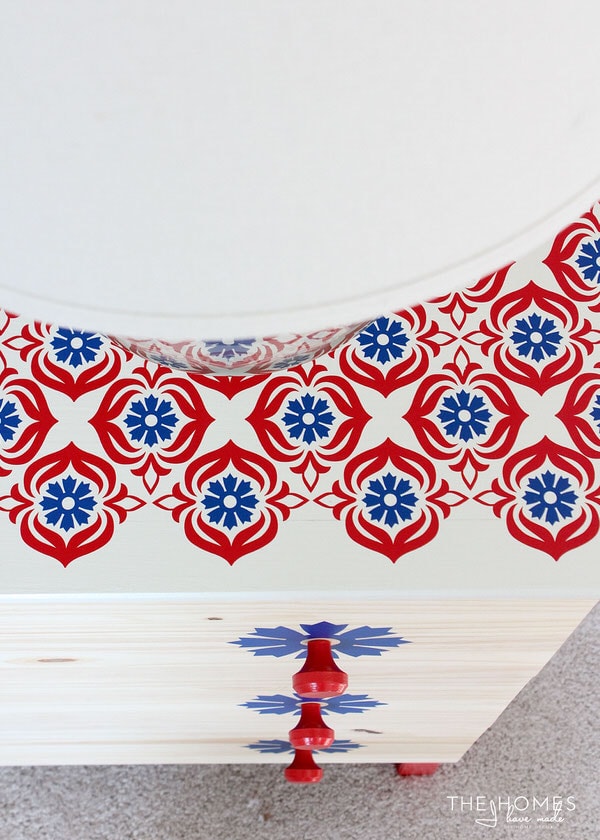
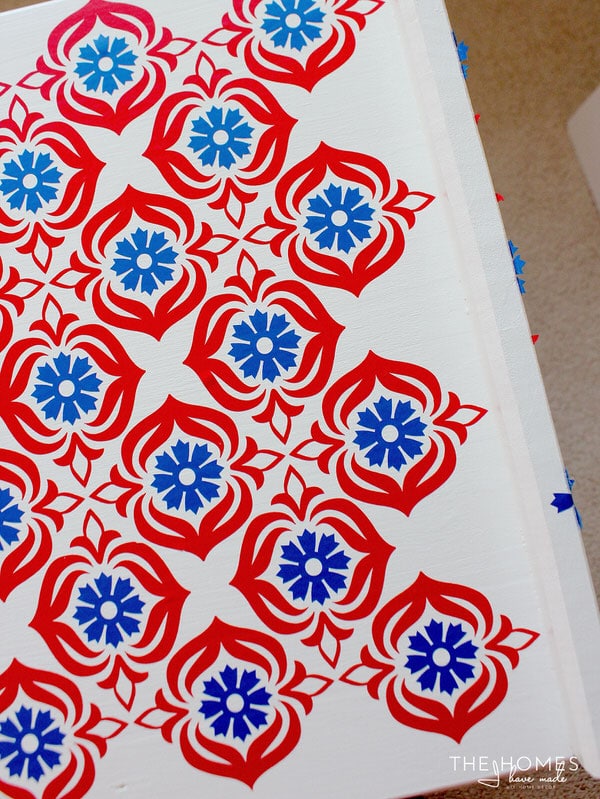
I then placed larger cuts of the blue flower shape around each knob hole and added the red knobs back on.

After sliding the drawers back in, the dresser was complete!

This design feels so fun and fresh and somewhat Scandinavian to me, so it really works well with the clean lines of the IKEA dresser. I also love the contrast of the simple wooden front drawers with the busier pattern along the side! If you want to update something you have, don’t feel like you have to cover the entire piece. Sometimes pattern in just a few spots is more impactful than all over!
I have a bad habit of saying projects are “quick and easy,” but you will not get those words out of me on this one. Admittedly, this project was tedious and time-consuming and there were times I wondered my sanity. I chose to make a relatively small pattern that had lots of little pieces, so even though I transferred large sections at a time, I had to pay close attention that each little detail made it onto the dresser. Also, my red vinyl was actually pretty old and wasn’t peeling away from the paper backing the way vinyl typically does, requiring a lot more work to get each pattern set ready for application. I sure was relieved to see the drawers in and have it finished!
If you want to give this makeover a try, here are a few last tips:
- Giving yourself plenty of time. Turn on a good movie or music station and just take it one section at a time.
- Buy extra vinyl for those cuts that do get messed up…and be prepared to cut a few extra sections to fill in gaps in the pattern or pieces that get torn during the transfer.
- Use transfer paper for each and every piece. Do not try and transfer vinyl, no matter how big or small a piece, by hand. It stretches and you will ultimately end up with bubbles, tears, or a misshapen design.
- If you have a child who likes to pick/peel things, this might not be the makeover for you. Henry came into my office to see what I was doing and almost started peeling up the pattern without me even noticing!
- Place the first section carefully. Your entire design will likely be placed off your initial pattern, so make sure your first one is straight, even, and exactly where you want it!
- It’s just vinyl. If something didn’t transfer right or a pattern gets turned around, peel it off and just do it again.
Yet again, I’ve pulled off another “temporary transformation” that I’m completely smitten with. It seems such a shame to pull off all that vinyl (and a huge pain too!), but I do have one more transformation up my sleeve. Be sure to come back next Thursday to see the final transformation!
I’d love to know what you think about this makeover? Have you ever put vinyl on your furniture? Do you think I’m crazy for giving such an ambitious pattern a try? Tell me your thoughts in the comments below!

*affiliate links used
Megan
10 Comments on “Vinyl-Covered Dresser”
I love this. What a simple update to a “generic” dresser. Almost every store sells something like this dresser. What a fun way to get a big impact. My girls would love something like this in their room. Now to convince my woodworking hubby to let me paint the wood!
PS If I lived closer I’d just buy you a new dresser and seal this one! I really love these colors.
It looks awesome! What a different look from last week, but I admittedly think this pattern was a bit crazy for me! You defiantly get bonus points for taking this on!
Lauren | Lovely Decor
xx
What an amazing transformation! You are uber creative:) Love it!
Hi Megan
I would never work so hard, I must admit and most of all for a temporary transformation ! 🙂 I must admit too that I was really smitten with the fabric on the drawers. I’m wondering what project you still have for this dresser. It’s quite nice to see the four different ways which can give us ideas for a furniture makeover. Have a nice week-end. Michèle
Megan, I am just loving this series! Your creativity never ceases to amaze me. I totally believe you about this project being time intensive, but the result has total wow factor. The flowers around the knobs are my favorite detail. Excited to see what you come up with next!
This is beautiful! You are so talented! I have a Cricut and do not know how to do things like this, can you come teach me?!
oooh! That’s a super interesting pattern. Very folk-ish.
Gotta love the classic colours!
I love this red/blue one! It reminds me of a Swedish dala horse. Love how you used the Cricut to make it!
Hey Nina!!
I do love this makeover too. The pattern turned out so great, but man, it was a ton of work! Although I peeled it right off for another makeover, it was worth it…I know have so many more ideas for making over furniture in the future!
Hope you’re doing well!
Megan