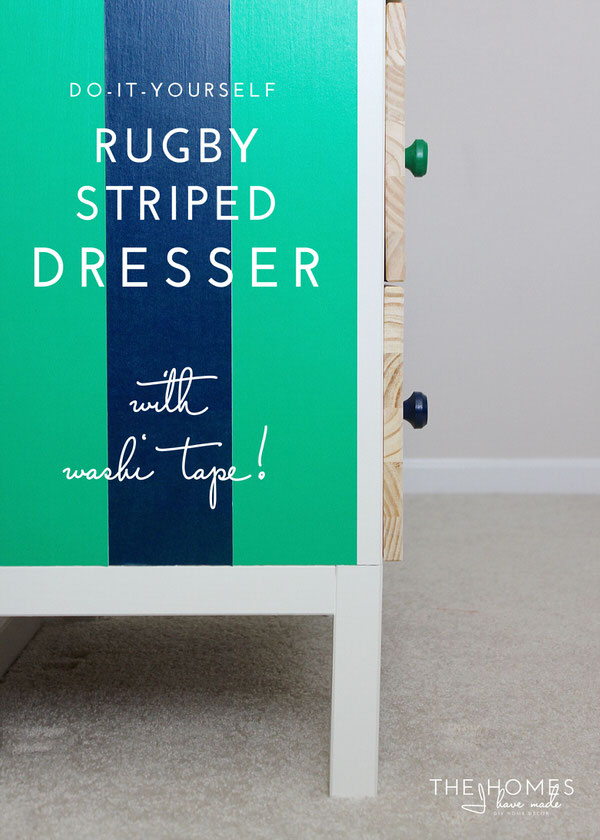
Rugby Striped Dresser with Washi Tape!
Boy, oh boy…do I have an awesome treat for you guys today! In recent weeks, I’ve teamed up with 5 other bloggers in a collaborative group where we are sharing strategies and supporting each other in our blogging journeys. In addition to supporting to each other behind-the-scenes, we also thought we’d have a little fun and challenge each other on some creative pursuits. Over the next year, we’re going to be participating in 6 different creative challenges, and lucky for you guys….you get to visit us all and soak up a ton of great new ideas! This month, we challenged each other to use washi tape in a fun and creative way…and my project was to create this FABULOUS rugby-striped dresser!
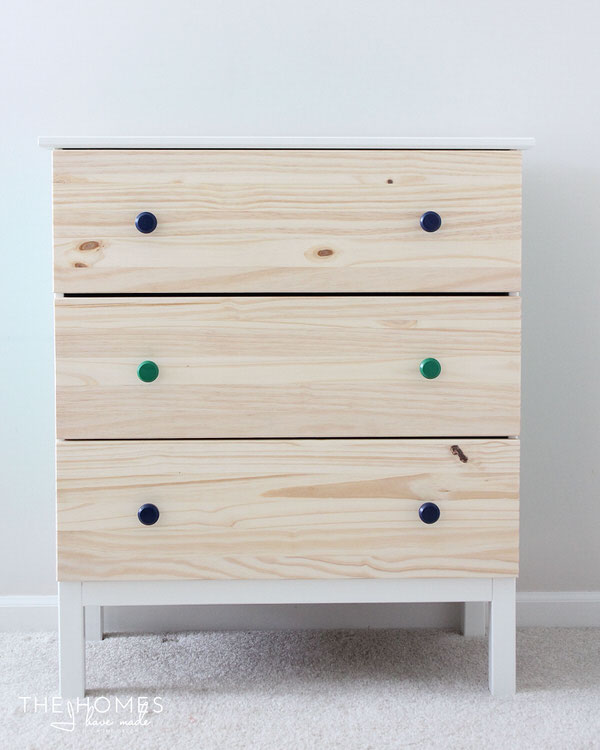
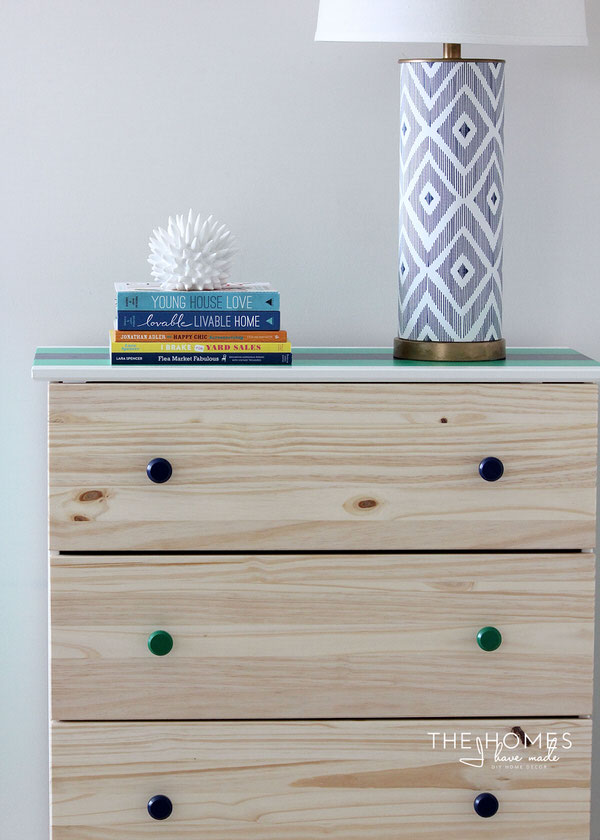
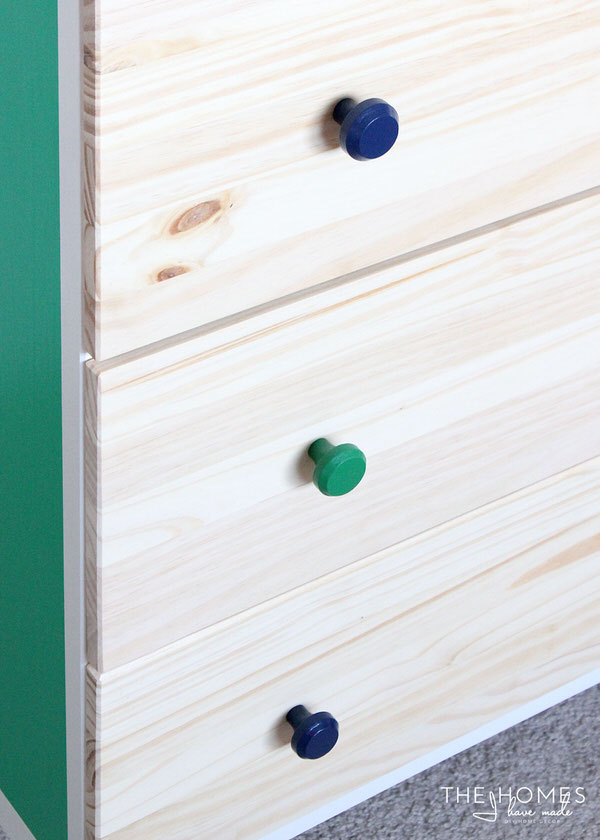
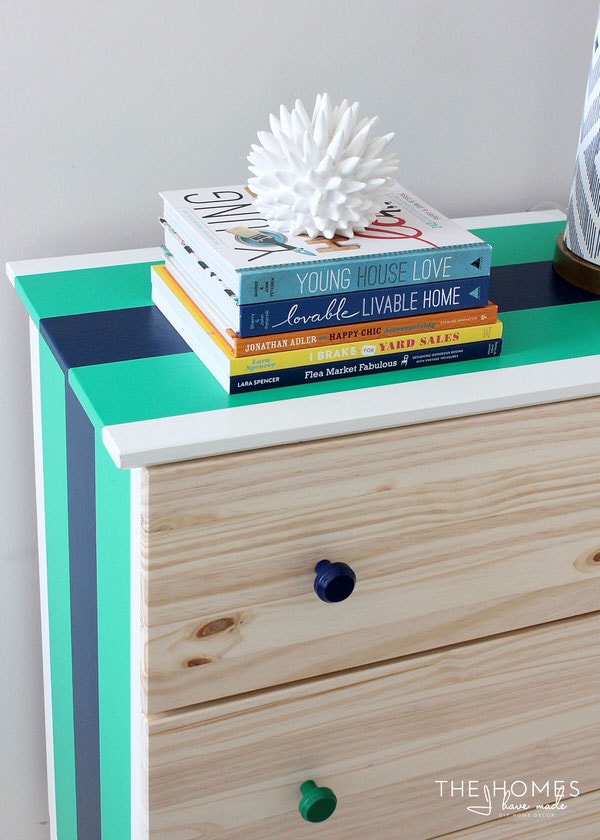
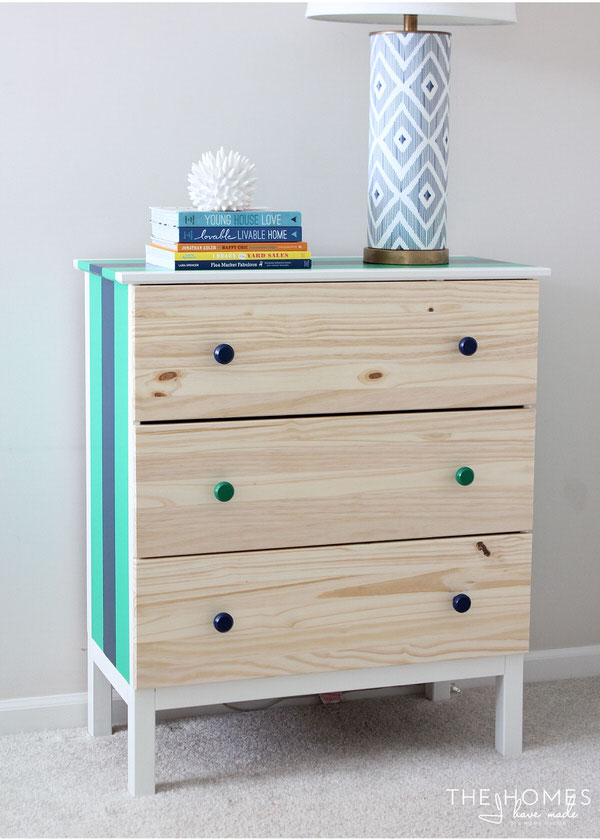
I started with an IKEA Tarva dresser…and one thing I love about this makeover is that from the front, this little guys looks like a plain pine dresser with some happy pulls.
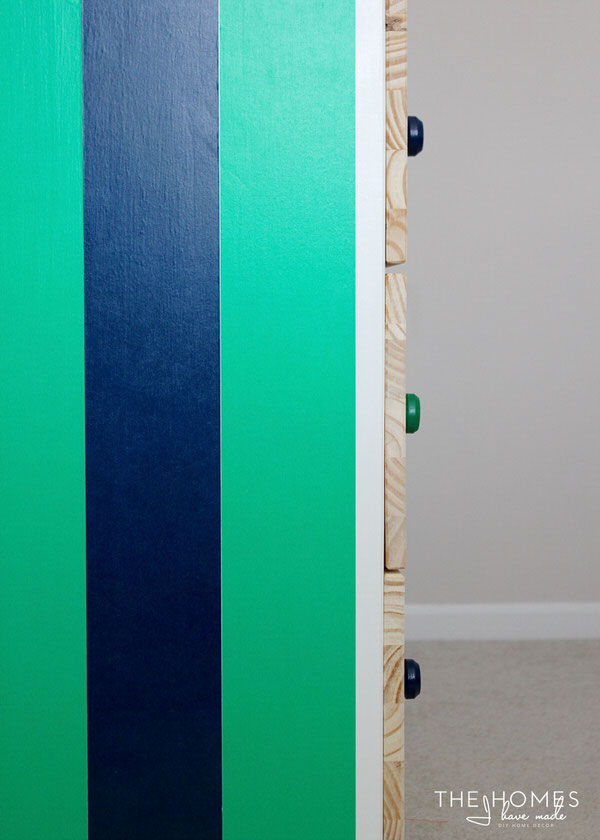
But if you get closer or catch a glimpse from the side, you will see there is SO much more!
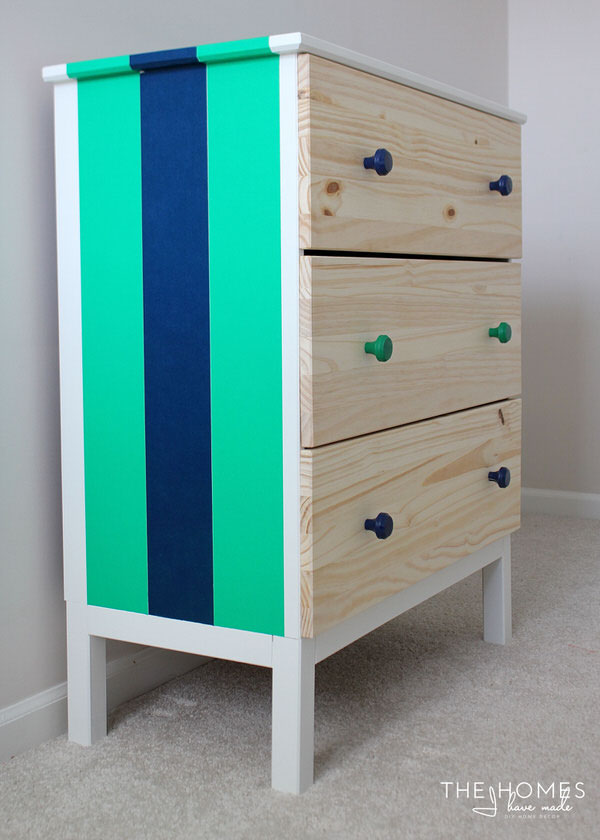
Oh….be still my stripe-loving heart!
I have never been one to shy away from painting furniture, but these bright and bold stripes were instead achieved in about 20 minutes using extra-wide washi tape. The colors are bright and saturated, and the tape is completely removable and won’t damage your furniture. I can’t really think of a better way to quickly change the look of your furniture, can you?
I haven’t taken on a true furniture makeover in SO long, and this project was truly good for my soul. If you’d like to give it a try, here is how to do it:
What You Need:
- A piece of furniture in need of new life (I used an unfinished IKEA Tarva Dresser)
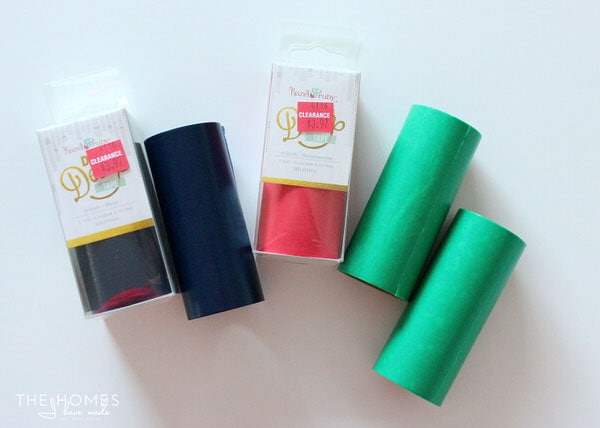
- Washi tape in the size, color, pattern you wish (I used 4″ rolls of tape by Hazel & Ruby (Jade
 and Navy) that I found on clearance at JoAnn Fabrics)
 - Paint in the color of your choice (optional)
- Tools: Ruler, scissors, X-acto knife, screwdriver (if changing hardware), paint brush/tray (if painting)
 and
and  ) that I found on clearance at JoAnn Fabrics)
Instead of updating a piece of furniture I already had for this makeover, I decided to “invest” in a Tarva dresser from IKEA (I have big plans for this baby, so stay tuned!). I started by assembling it according to the instructions.
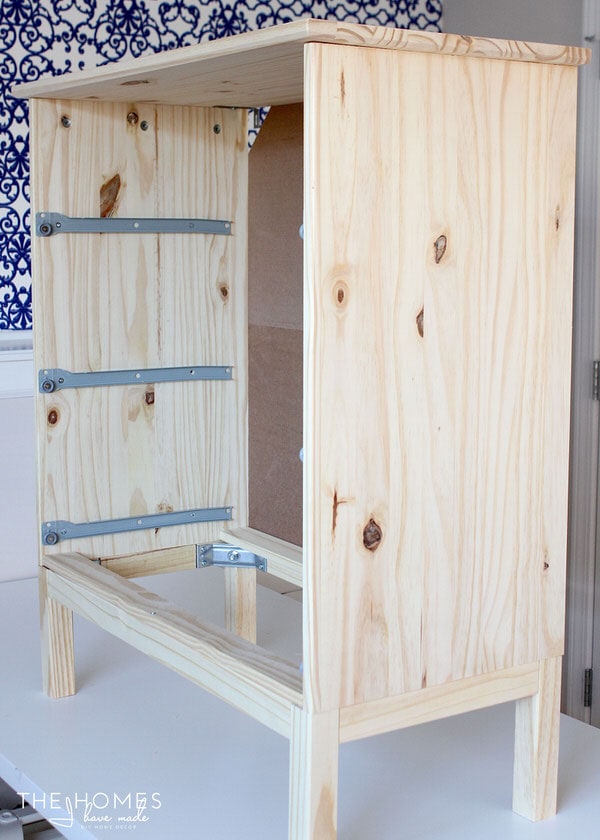
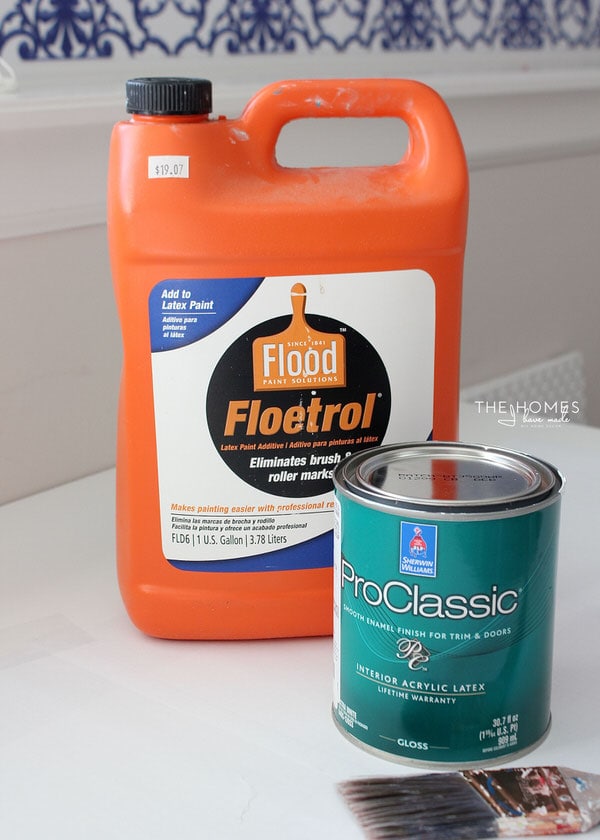
Although the piece was new and unfinished, I still gave it a light sanding with 220 grit sandpaper and wiped it clean of dust. I then turned to my tried-and-true white furniture paint: ProClassic by Sherwin Williams in Allabaster White. I chose not to prime this piece since it was unfinished, but I still treated the paint with Floetrol to help with brush strokes.
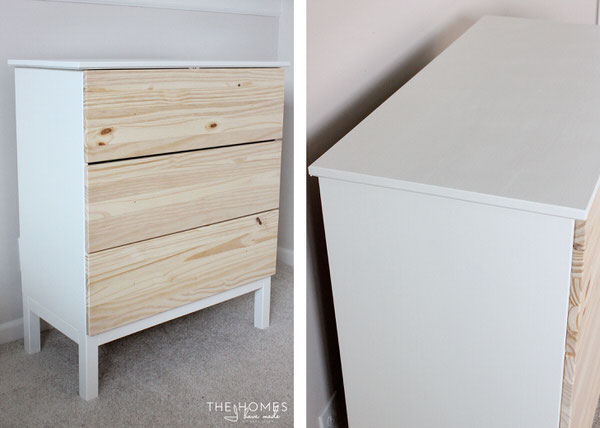
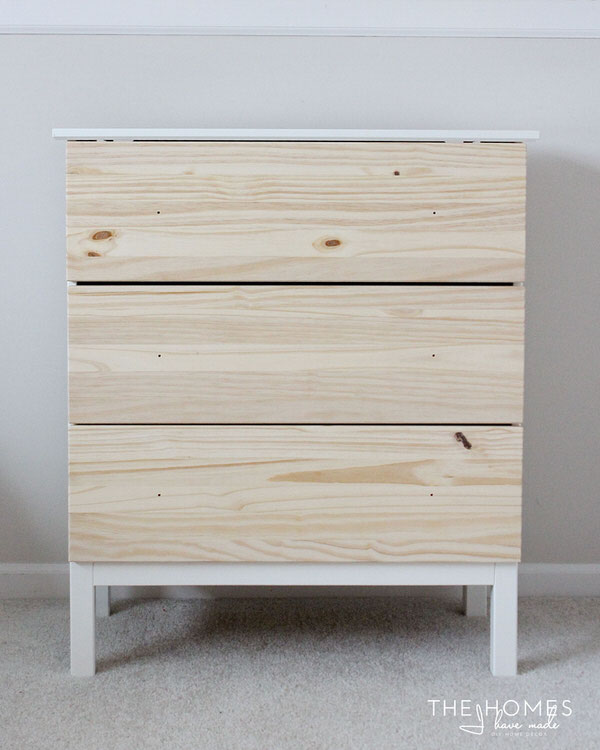
I gave the base and all three sides of the dresser three coats of white paint. I was pleased to see good coverage after two coats (even without primer), but decided to give it one more just in case! #bettersafethansorry. I left the drawers plain for a few reasons. One, I liked the contrast of the wood with the white. Second, I’m going to be giving this dresser several different makeovers in the coming weeks and wanted to be able to play with both painted AND wood surfaces. You can see below what a blank and boring canvas I started with!
As many of you guys know, I am constantly shopping the clearance section in all my favorite craft and home stores. It’s always there that I find some of the best deals and coolest products. Our JoAnn Fabrics had a huge display of this Hazel and Ruby tape on clearance for weeks. Each time I went in, I would look at it and was sure I could use it for something, but would never buy it. Finally, I stocked up on 6 rolls and tucked it away for a “someday” project. When my friends and I decided to challenge each other to make a project using washi tape, I knew exactly what I was going to use. While it may not look like the small washi tape you find at the craft store, it looks, feels and works exactly the same. So even if you can’t find this extra-wide tape, you can get the same effect using a bunch of smaller versions! (By the way, I am SO glad I scooped up this tape. After seeing it at work on this project, I am hankering to go back and buy some more! #notsponsored)
Want to save this post?
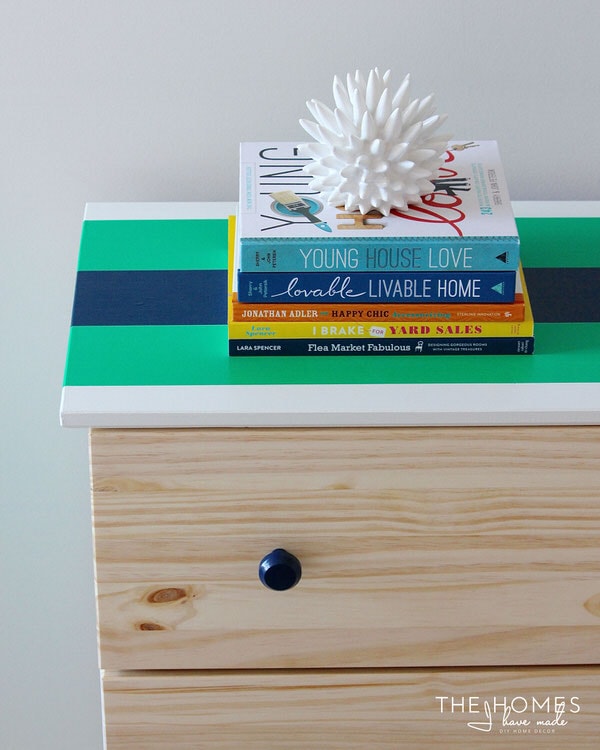
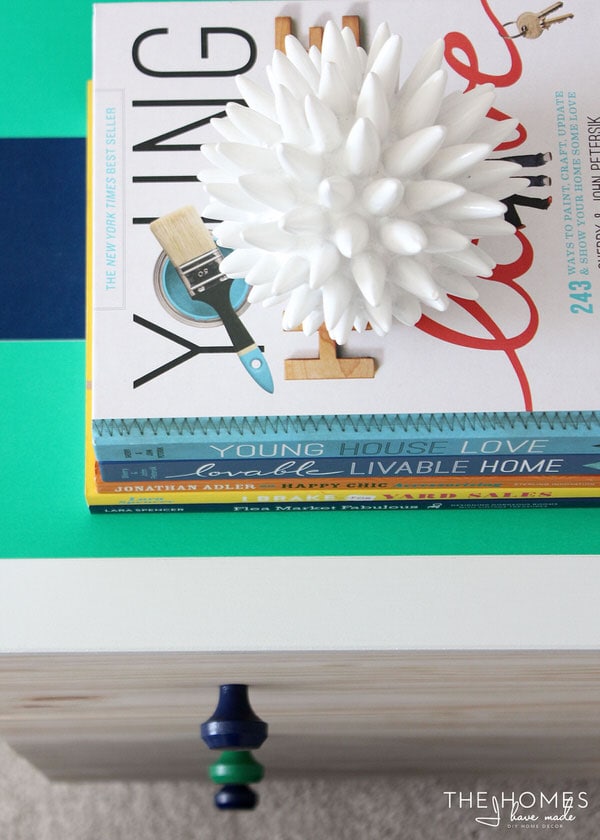
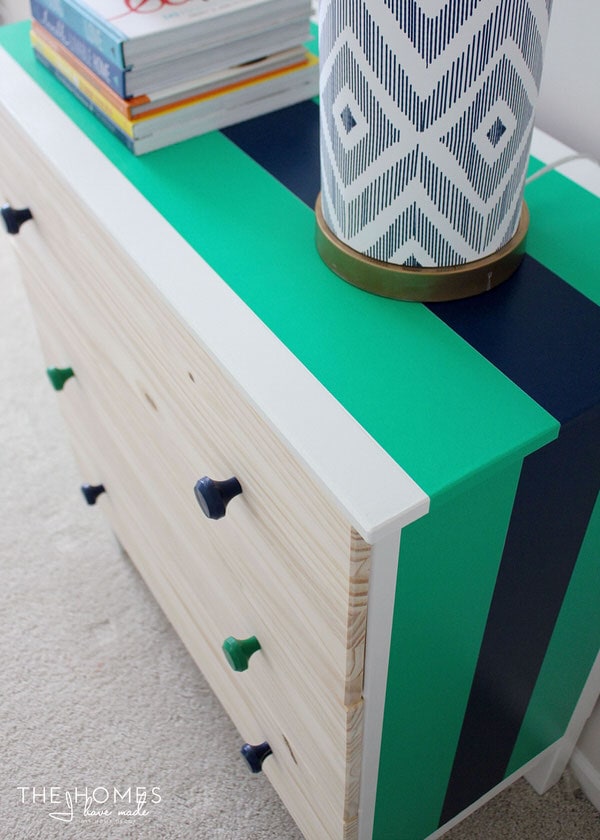
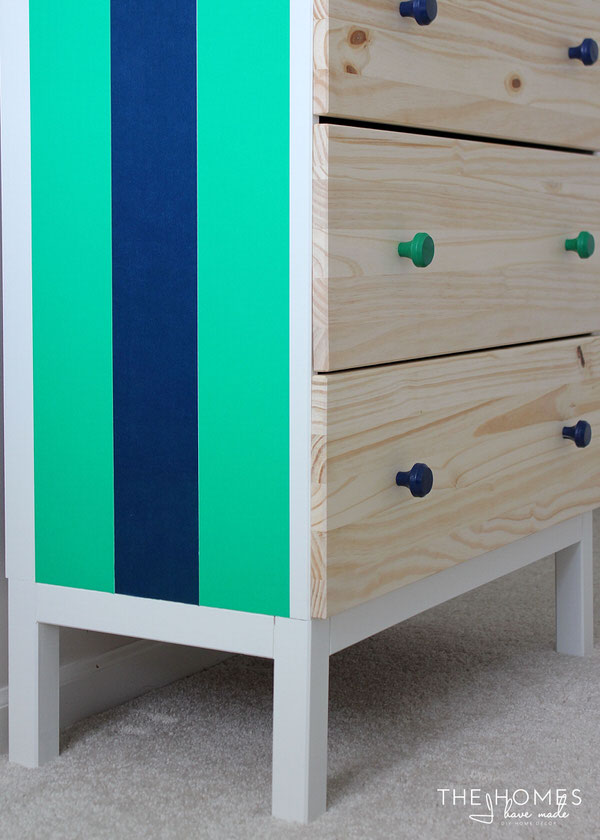
When it came time to figure out how to use the tape, stripes were the obvious choice. I started by measuring the top of the dresser to figure out how many stripes I could fit and how they needed to be spaced.

After some quick calculations, I concluded I could make three stripes and still have 1.5″ leftover on each side. Using a pencil, I drew a faint line 1.5″ in from the front edge of the dresser, then got to rolling on my tape…
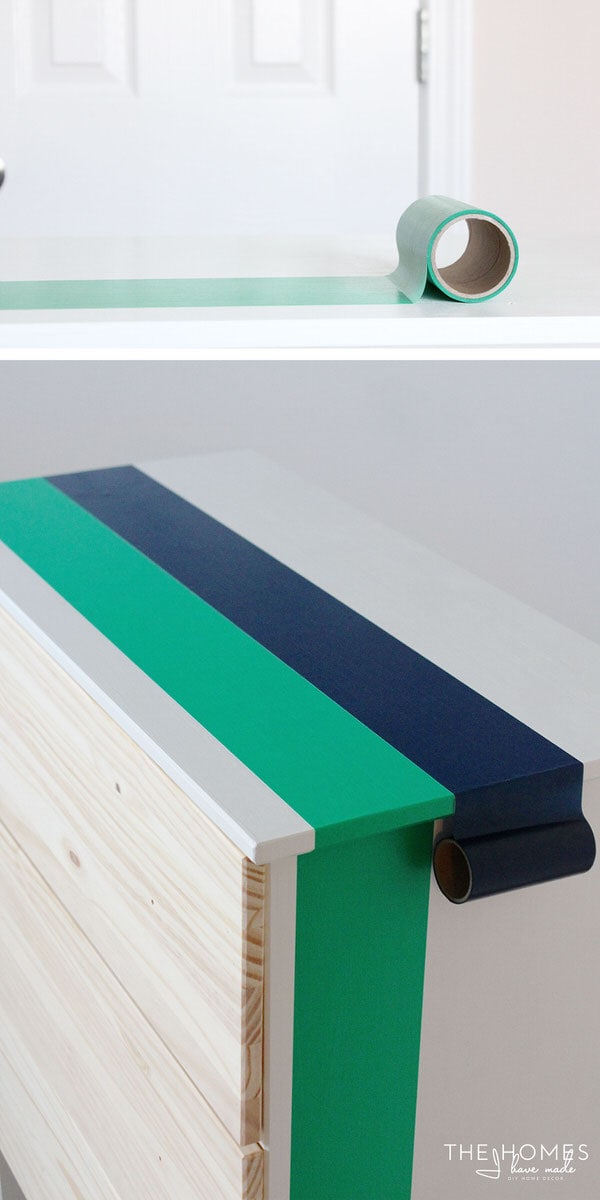
You guys…I mean it when I say I am so smitten with this stuff and want to get more. It rolls on smooth, the color is bright and saturated, it’s easy to maneuver, easy to cut, strong enough to tug and pull, and you can peel it off and re-place it as many times as you need to get it right. Oh gosh…the possibilities! As you can see, I rolled right up, across and down the dresser with each roll of tape. It clings tightly to the surface, so I had no bubbles and it hugged the routered edge so well. It took a little bit of a patience and re-positioning to get the edges all lined up, but within about 20 minutes, I had some bright and bold stripes running across my dresser! So much quicker and easier than paint!

To keep the front of the dresser from looking too plain, I painted the included wooden knobs with some paint samples picked to match the tapes perfectly. Painting objects like this can be messy and tricky…but kabob skewers and a shoebox sure make it clean and easy!
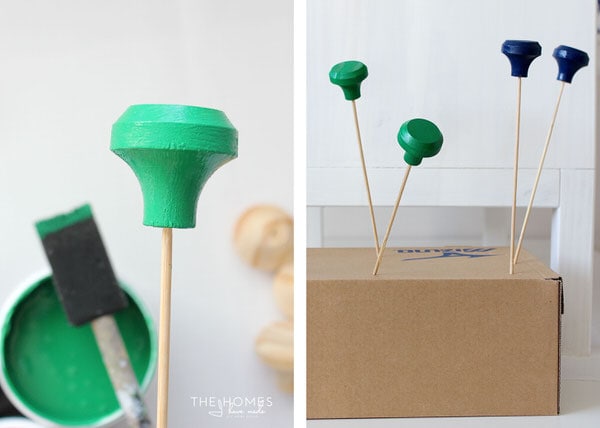
After two coats of paint and some drying time, the knobs were screwed onto the drawer fronts, and the dresser was done!
I still can’t get over how great this dresser looks in person. It was really hard to photograph and get the colors/sheen right. The green is much more of a Kelly Green…and combined with the navy and bright white, my preppy-loving heart is just singing!

So what about the durability of it? Well…I can tell you I slid those books and lamp on and off the dresser about 50 times during the course of the photo shoot, and the tape didn’t peel, pucker, rip or budge! That said, it IS just tape without protective coating, so I am not sure I would use it on a high-traffic piece!
If you have a piece of furniture that needs a lift, but your not up for the commitment or hassle of paint, I strongly encourage you give washi tape a try! It’s been my experience that Duck Tape and Vinyl can peel a paint finish right off, but this tape comes off clean and smooth. Don’t believe me? Come back next week and I’ll show you 😉
Are you guys ready to check out 5 other awesome washi tape projects? My girls REALLY delivered, and there are some great ideas to go see! Just click on the image below to jump right to the posts, and be sure to let them know Megan sent you!
Megan
13 Comments on “Rugby Striped Dresser with Washi Tape!”
This is amazing! I love the bright blue and green combination. The whole dresser is stunning! I have to say, from a fellow home decor bloggers stand point your pictures and lighting are perfection!
Hi Emily!!!!
Thank you so much for this super kind comment! It totally made my day. I’m pretty smitten with this tape, and as a renter, I can think of so much fun ways to use it! And thanks for your compliments on my photos…our house has such funny light so getting “the” shot seemingly takes forever. Appreciate your encouragement!
Happy weekend!
Megan
Hi Megan
What a nice idea to use these lovely washi tapes ! I’m not sure to be able to find some wide or not. It gives me once again nice ideas. I’m also longing forward to seeing your linen closet. I hope you spend a good week. Michèle
Hi Michèle!
Thank you so much – yes, this tape was such a fun find and I love the way it looks on the dresser. As a renter, I can think of so many great ways to use it now. Hope I can find some more!
Hope you had a great weekend. Look for that Linen Closet post in the coming weeks!
Megan
Oh my goodness Megan!!!! JUST. GORGEOUS. I had to look twice, then a third time once I started reading your post – I could’ve sworn you’d painted those stripes! I thought at first you must’ve used the washi tape like painter’s tape to mark out your lines. I can’t believe the stripes are actually tape! It looks AMAZING. Those colours are to die for! Beautiful job!! xo
Thank you so much, Karen! I’m pretty much obsessed with this tape. As a renter, I can think of so many cool possibilities for it! I’m so smitten with how this dresser turned out…happy to hear you love it too!
Hope you had a nice weekend!
Megan
Love it! I had no idea you could get washi tape that big! Having played Rugby for years, I can thoroughly appreciate a good rugby stripe. Well done 🙂
Thank you so much Ariel! I’m pretty much obsessed with this tape and want to use it all over my house. It’s such a great solution for renters, except that it’s so expensive 🙁 This challenge was so fun…looking forward to the next round already!
Happy weekend!
Megan
I so admire your use of bright colors and these stripes are the icing on the cake. What a fabulous dresser makeover – and who would guess you did it with tape?! Great project, Megan! Thanks for joining in on the washi tape challenge!
Thank you so much, Emily! Yes…colors are my jam and I don’t hesitate to use them…I struggle more with finding ways to use them correctly so as not to overwhelm a space or my family 😉 This challenge was super fun and I loved seeing everyone’s projects! Can’t wait for the next round!
Happy weekend to you!
Megan
Great little project. I LOVE washi tape, it is really addicting once you start using it
Lauren | Lovely Decor
xx
Hi Emily,
Great tutorial. I am thinking to use washi tape on my dining table, would it be worn out by time? would you recommend sealing it with something?
Hi Emily,
I would definitely call this a temporary or “for fun” upgrade. With heavy use, the edges of the tape might start to peel up but I can’t say for sure. You can always seal it with some clear poly, but if you’re going to do that, you might as well just paint the stripes on!
Hope that helps a bit!Megan