DIY Heart Artwork (Made with Vinyl on Canvas)
Next to organizing drawers, the other topic I write about quite frequently here on the blog is DIY artwork. Because of how often we move in and out of different homes, I am usually reticent to invest in expensive wall art. So with lots of walls to fill on the cheap, I like to go the DIY route (see all my DIY artwork ideas here!), adding a lot of visual interest to our walls using materials I already have on hand. This latest DIY Heart Artwork has been on my mind for ages. I finally brought it to life way quicker than I ever imagined (and with really awesome results!) by putting vinyl on canvas. This is a great beginner project that can be done without any fancy tools or skills and provides a ton of color on any blank wall!

Quilt Designs as Art
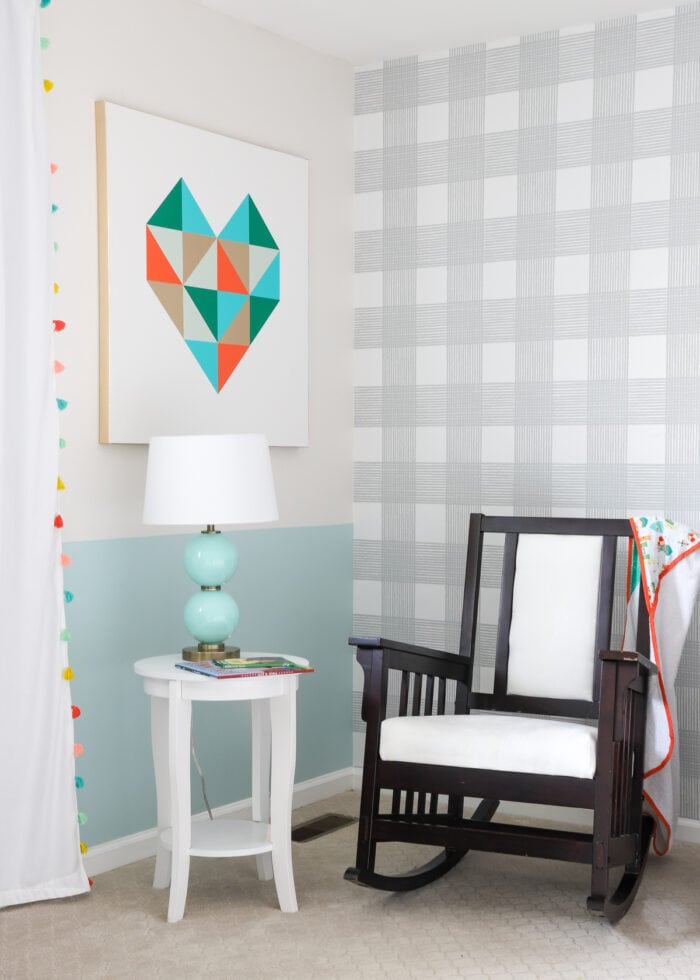
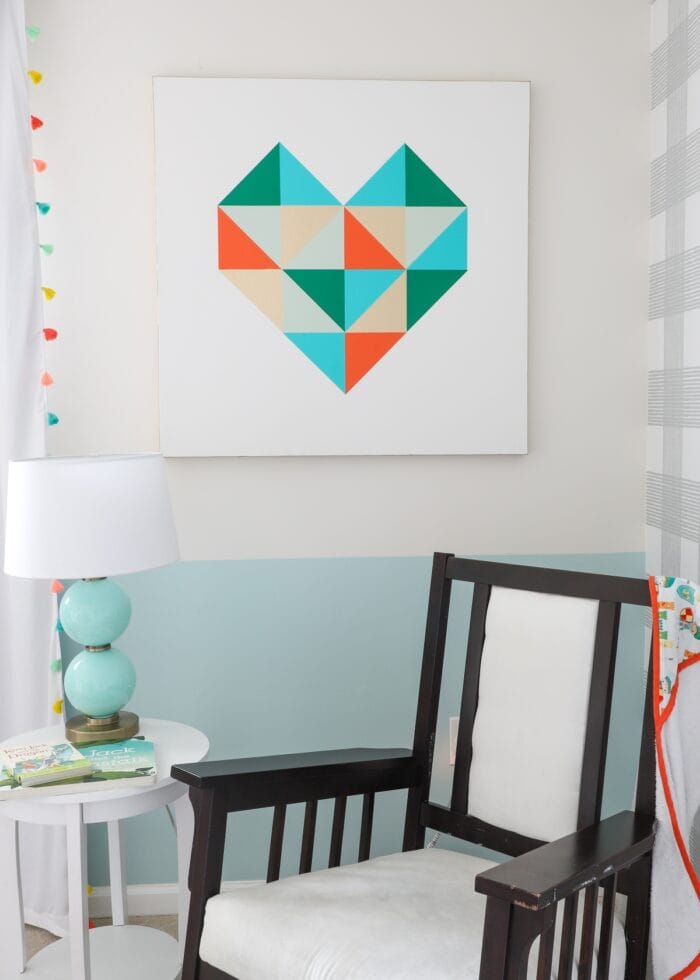
This DIY Heart Artwork hangs in the corner of my son’s recently finished nursery. For the longest time, I wanted something over-sized and colorful in this corner, but I just could’t find something that was the right size, colors, and theme.
As creative as you may perceive me to be, I lack any real ability to paint my own artwork. So I often look for designs, images, or patterns I can create with simple shapes cut either by hand or with the help of my Cricut machine.
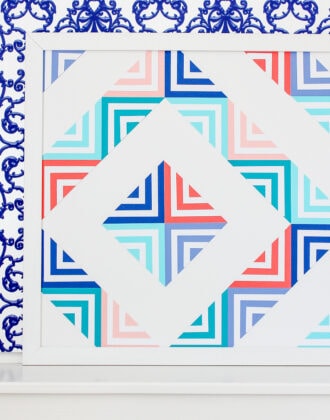
Quilt patterns are an excellent source of inspiration since they usually bring colors, shapes, and patterns together in really interesting ways. Quilt designs are also typically easy to recreate using materials other than fabric, like I did with paper both here and here.
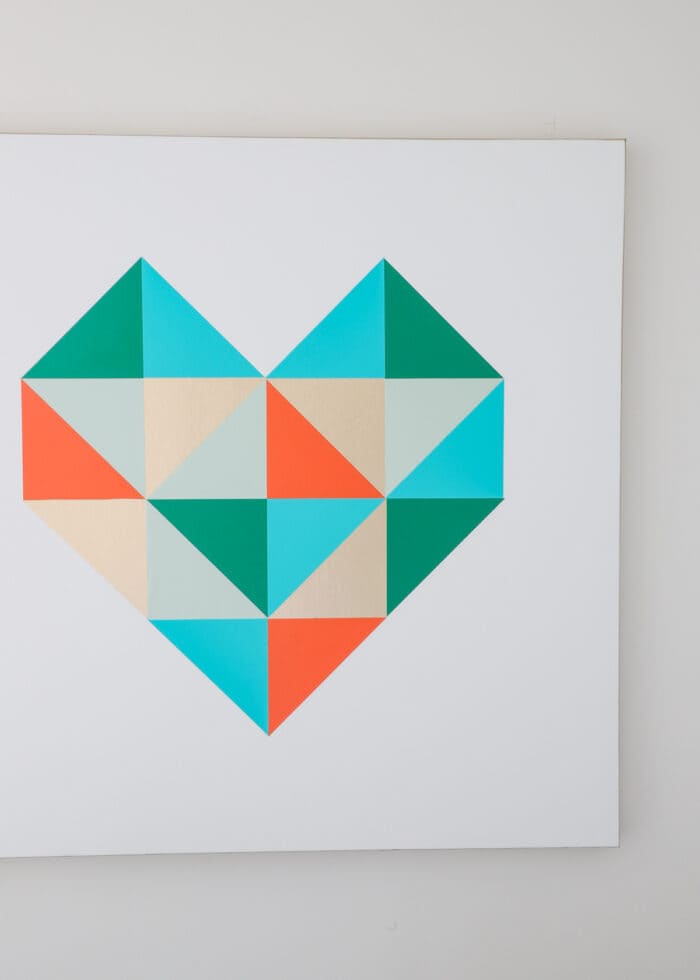
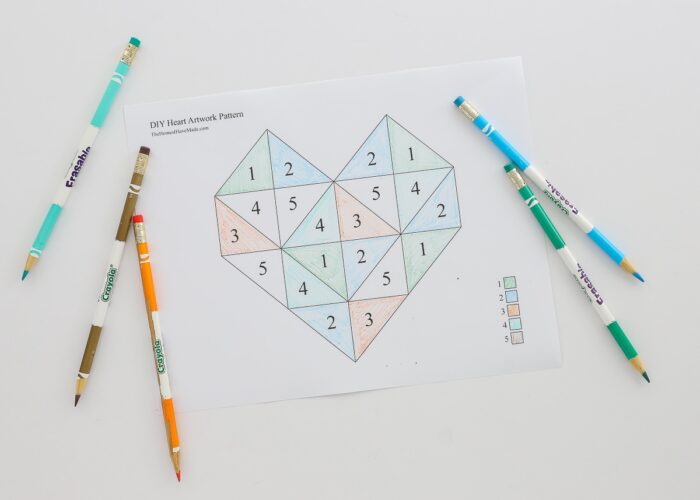
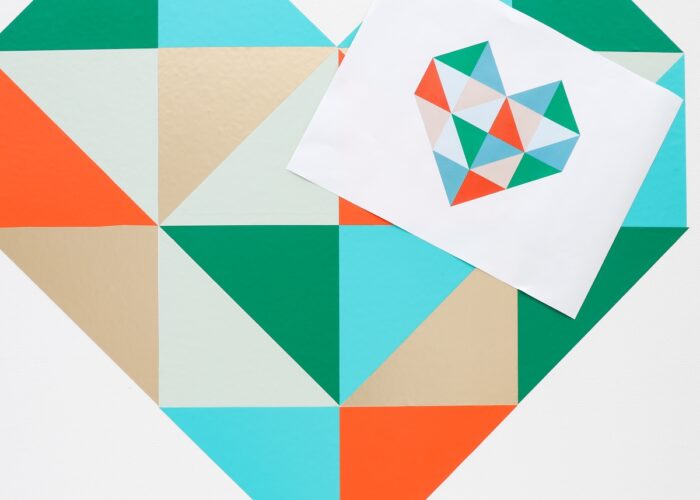
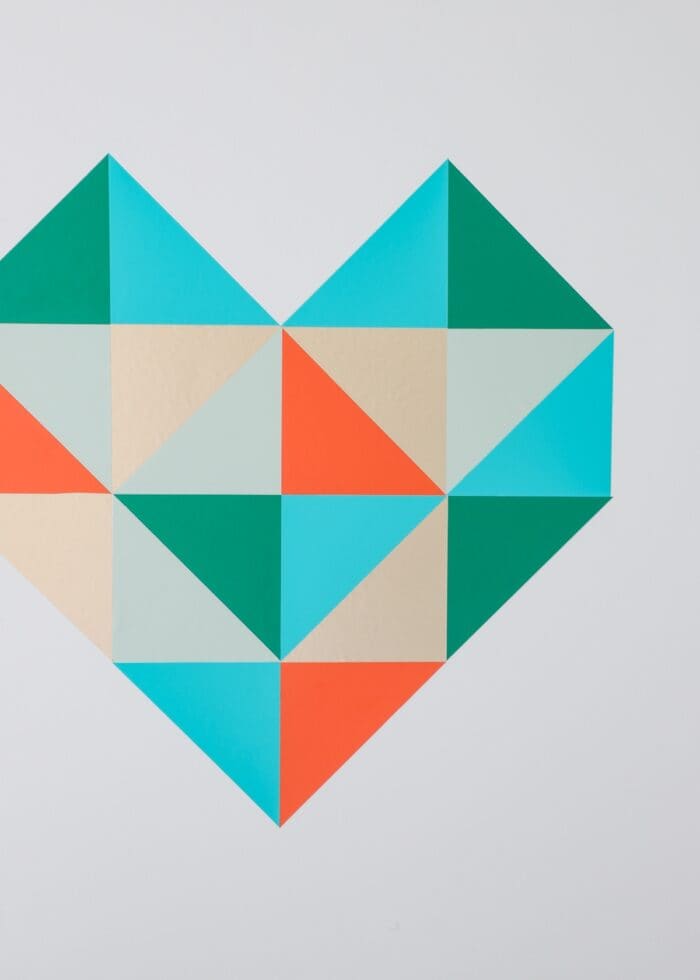
This Heart Artwork is a common quilt pattern for wall hangings, placemats, and pillows. If you look closely, you’ll see it’s simply a series of triangles (half-square triangles, to be precise!) laid out to create a geometric heart. It can easily be customized in any size and colors, and it fits with a wide range of interior design styles. Whether it’s for a foyer or nursery, basement or bedroom, this is an easy artwork project anyone can tackle!
Why Use Vinyl On Canvas?
As I will soon show you, this DIY Heart Artwork is created using standard adhesive vinyl on a big, blank white canvas. And you might be wondering why I made that choice. For a few reasons, actually!
- Creating a geometric design with paint can be quite tricky. Even with drawing lines or using tape, you run the risk of less-than-perfect lines on a design that is intended to be very precise.
- Cutting vinyl into triangles is much quicker and a lot less messy than painting them.
- Vinyl allows me to peel the design right off (and re-use the blank canvas!) when we no longer need this particular artwork in our home. For our gypsy lifestyle, being able to easily re-use and re-purpose items is key!
Simply put…when you’re not a naturally gifted artist or need something just for now, being able to cut a design from vinyl and place it right onto a canvas is an easy solution that provides great results!
Does Vinyl Stay On Canvas?
For optimum adhesion, adhesive vinyl should really be placed on a flat, smooth, non-porous, hard surface. A stretched canvas, however, is none of these things. The canvas itself is fabric-like, with texture and give. And since it is stretched over a wooden frame and held in place via staples, you certainly don’t have a firm surface to adhere vinyl to.
In my experience, the process of getting adhesive vinyl to stick to an unpainted canvas, particularly when applied via transfer tape, can indeed be tricky. Usually, the vinyl will not stick to the surface of the canvas well enough to allow you to pull the transfer paper tape away. (Which is why you’ll see that I don’t use transfer tape for this project!) However, once you do get vinyl decals onto the canvas, I find they stay in place quite nicely! I didn’t have any occurrence of bubbles, wrinkles, peeling, or the triangles falling off this artwork!
TIP! If you are trying to put a vinyl design on canvas that really needs transfer tape for application, painting your canvas before placing the vinyl decal will help the transfer tape process work better!
What About Using HTV On Canvas?
One of the best ways to get vinyl on canvas is to use Cricut Iron-On Vinyl (heat transfer vinyl/HTV) instead. Like adhesive vinyl, HTV can also be cut into any precise shape with scissors or a machine; but its heat activation (using an iron or Cricut EasyPress) improves adhesion on fabric-like surfaces.
However, while getting HTV to stick to canvas will be easier and longer-lasting than standard adhesive vinyl, it will also be permanent.
I wanted to be able to easily remove my vinyl heart and use this canvas again, so I opted for vinyl. But this same project can indeed be done with iron-on vinyl for longer-lasting results if needed.
Supplies Needed
Here are the supplies needed to make this DIY Heart Artwork using vinyl on canvas!
- Blank Canvas – in the size needed for your wall
- I recommend buying canvases at Michaels when they are on sale
- This canvas can be white or have a painted background color
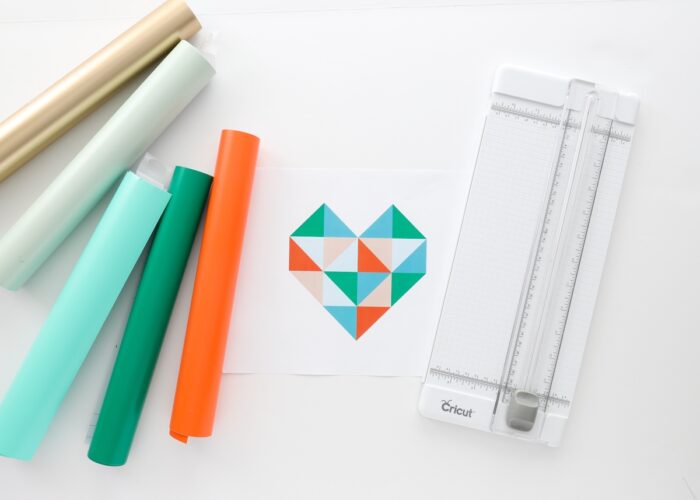
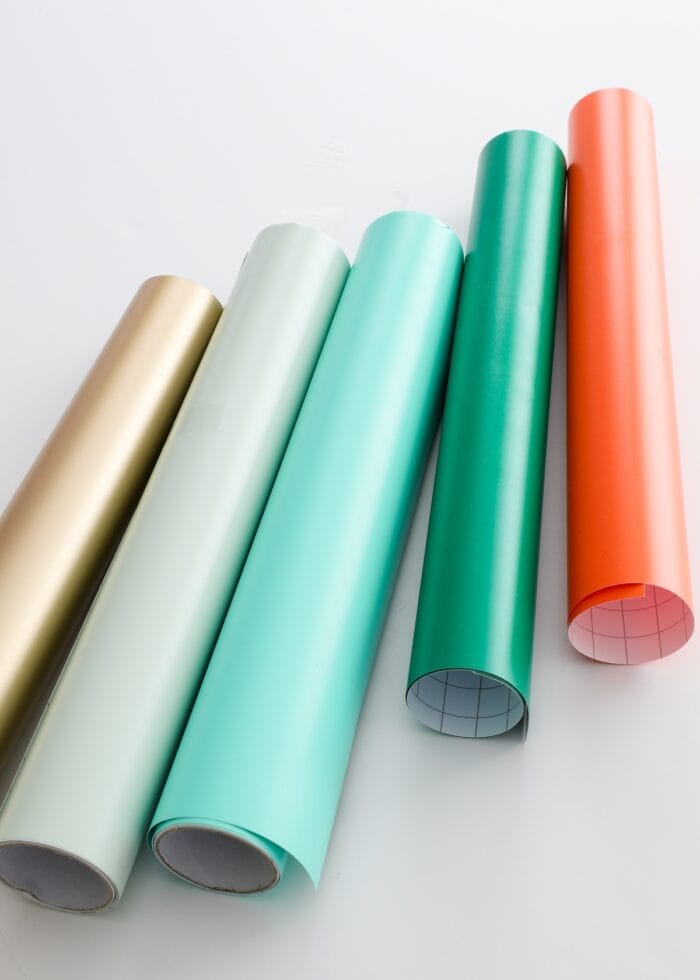
- Permanent Adhesive Vinyl (Cricut vinyl or whatever kind of vinyl you prefer) – in 5 different colors
- My triangles measure 6″ wide by 6″ tall, requiring just 6×12″ of vinyl in each color (less than 1 sheet!) You may need more/less vinyl depending on how big of a design you make.
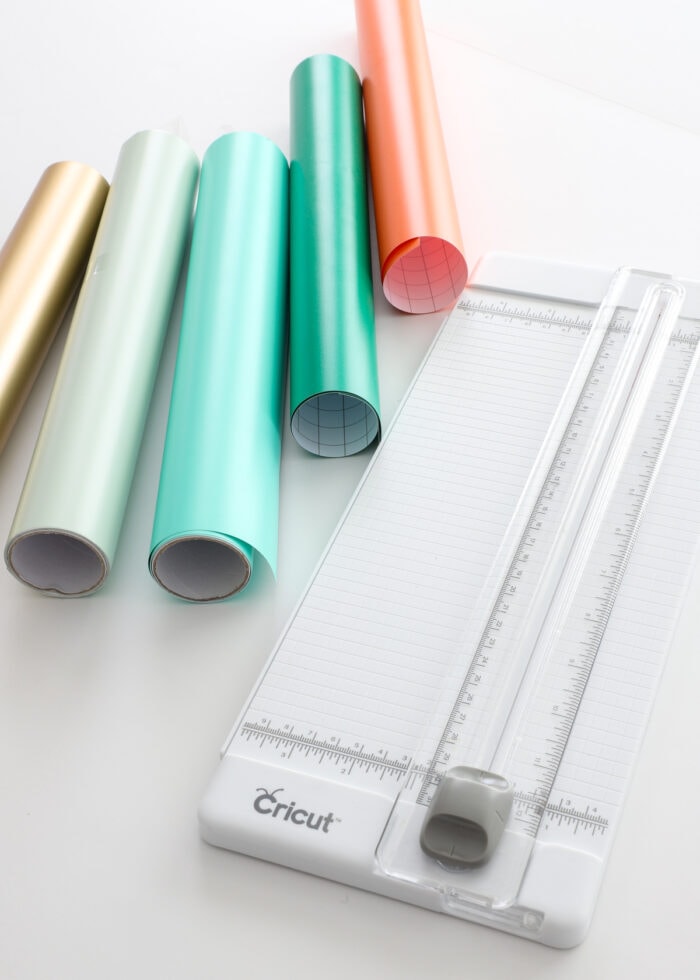
- Paper Trimmer
- Printable Heart Artwork Pattern
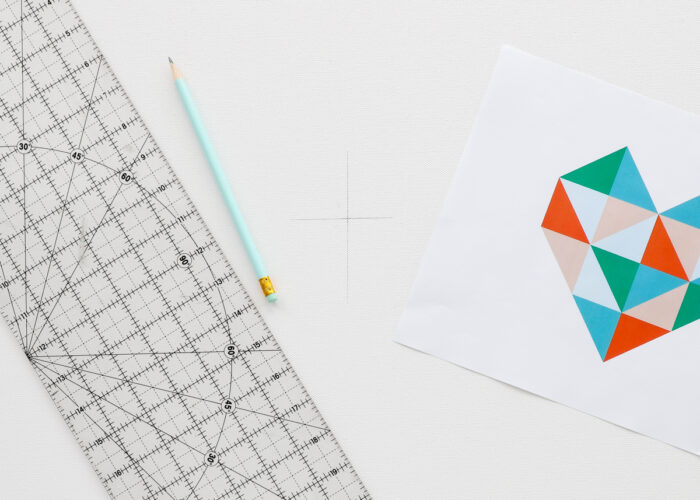
- Ruler & Pencil
NOTE: These instructions don’t require an electronic cutting machine. While you are welcome to use a Cricut or Silhouette to cut out the triangles, you’ll soon see that cutting them by hand is just as easy and probably quicker!
Step 1: Pick Your Colors
Start by printing out the included Printable Heart Artwork Pattern and determining which vinyl colors you will use where. I recommend using colored pencils to color in the pattern because you will reference it often as you assemble the artwork.
Step 2: Cut Vinyl Into Triangles
Determine Triangle Size
Before you start cutting triangles, determine how big you need them for your particular artwork. The heart design is 4 triangles wide by 4 triangles tall, so you can scale the overall dimensions to your desired finished size.
My canvas measures 36″ wide, so I originally planned for each triangle to be 7″ wide (creating a 28″ wide/tall heart with a 4″ margin on every side). But since vinyl comes on 12″ rolls, this would waste a lot of vinyl. I ultimately made my triangles 6″ wide x 6″ tall since those dimensions fit nicely into 12×12″ vinyl sheets.

Cut Vinyl Into Half-Square Triangles
With your triangle measurement settled, all you need is a sharp paper trimmer to slice up the vinyl into the correct size!
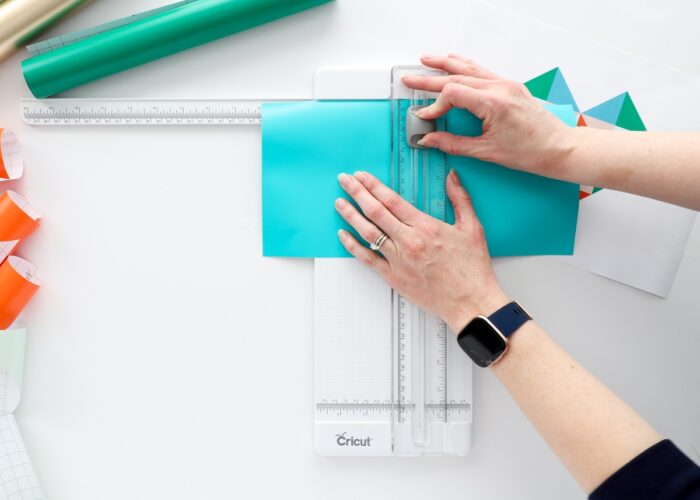
Start by cutting your first color of vinyl (with the paper backing still on) into exact squares in the same dimensions as you want you triangles.
Want to save this post?
For example, since I wanted 6″ wide triangles, I first cut the 12″ tall vinyl into a 6″ wide strip. I then rotated the cut and sliced it in half again to create two 6″ squares (shown below).
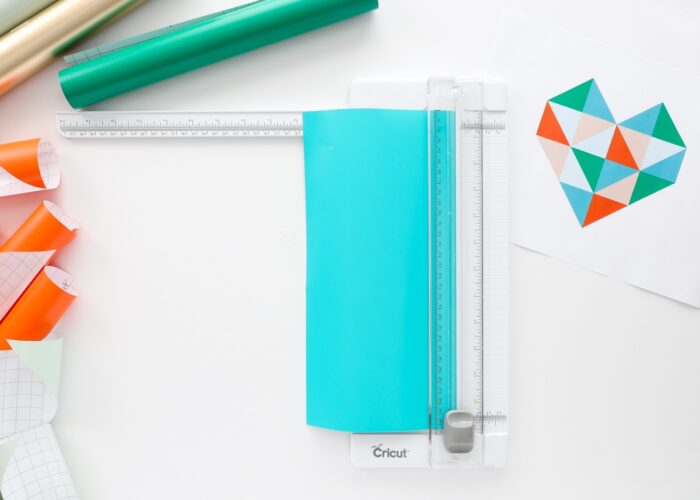
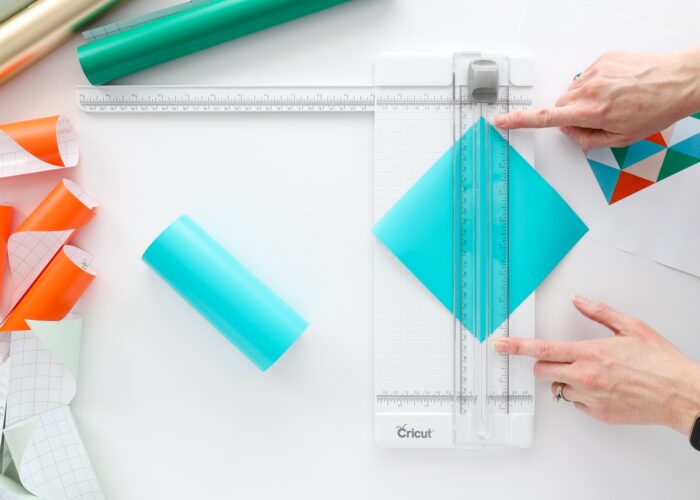
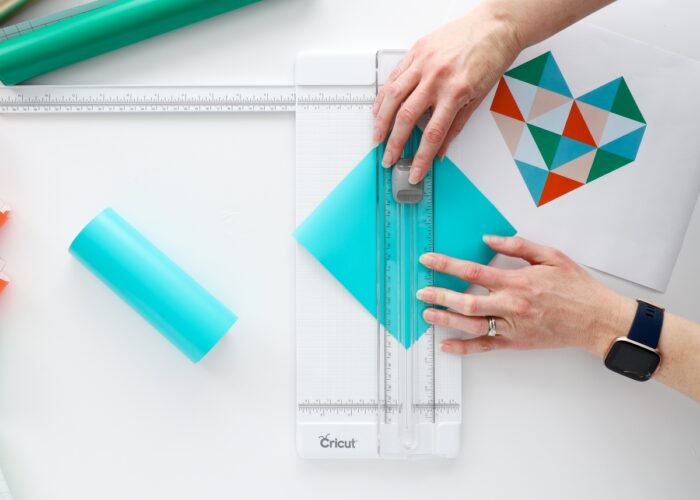
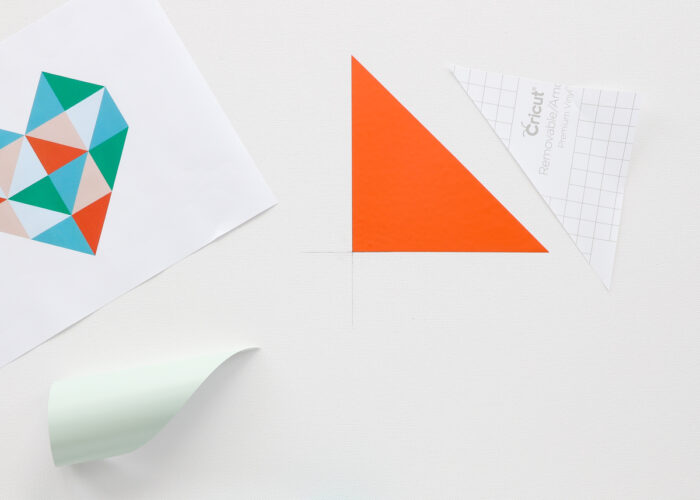
To make the triangles, rotate the square 45 degrees so that the top and bottom points are perfectly centered within the paper trimmer. Slice down the center of the square to make two perfect triangles!
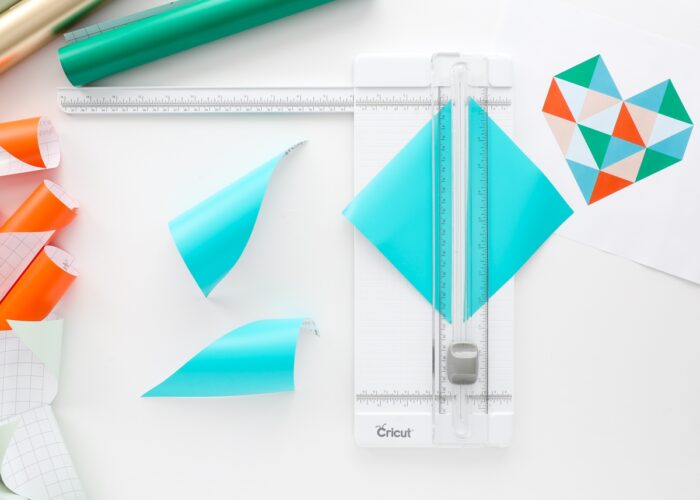
Keep cutting the vinyl into triangles until you have the correct number of each color for your finished design.
Step 3: Find Center On Your Canvas
To ensure the heart ends up perfectly centered on the canvas, you’re going to build it from the middle point out.
Use a long ruler to measure in from each side in order to fine the exact middle. From that middle point, create a vertical and horizontal line (parallel to the canvas’ edges), extending about 2″ in every direction. It’s important that these markings be both centered and level, as they serve as the starting point for your entire heart design.
Step 4: Place Center Triangles
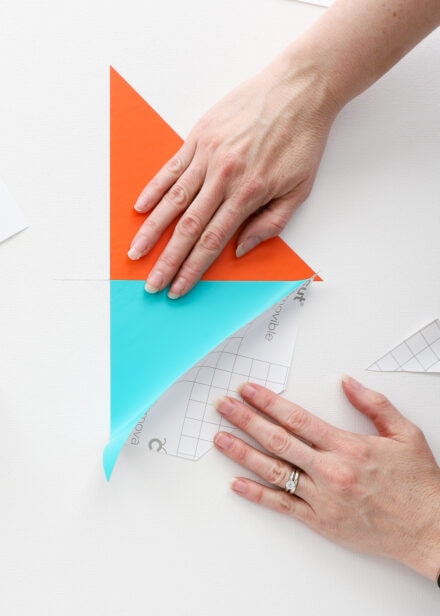
You’re now going to place triangles onto the canvas, one by one, to build out the heart design.
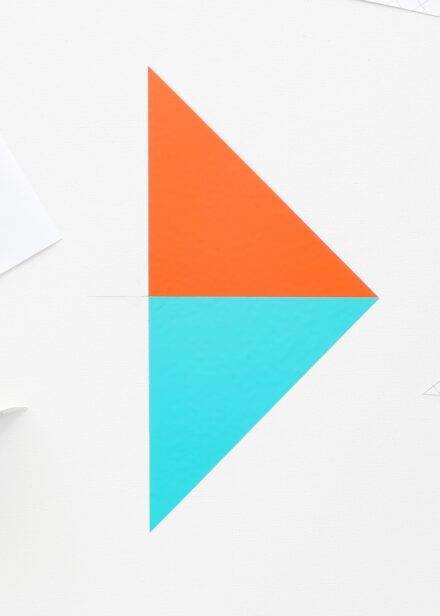
Start by peeling off the paper backing of the first triangle (the upper right triangle in the center of the design). Line up the two edges of the triangle with your pencil lines and smooth the vinyl down. Take care to get this initial placement as perfect as possible, peeling up and re-placing if needed.
With the first triangle down, you’re then going to work around the center of the heart design to place the four inner triangles.
-

- Trim away the paper backing from just the top corner of the triangle.
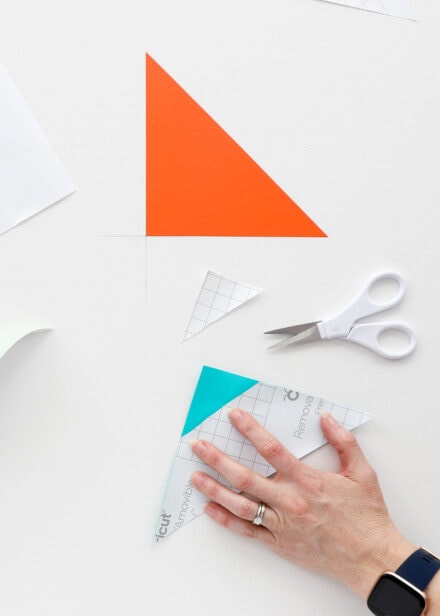
-
- Line up the seams and then press the exposed corner into the canvas to hold the triangle in place.
-
- One positioned, remove the rest of the paper backing…
-
- …and smooth the triangle down onto the canvas.
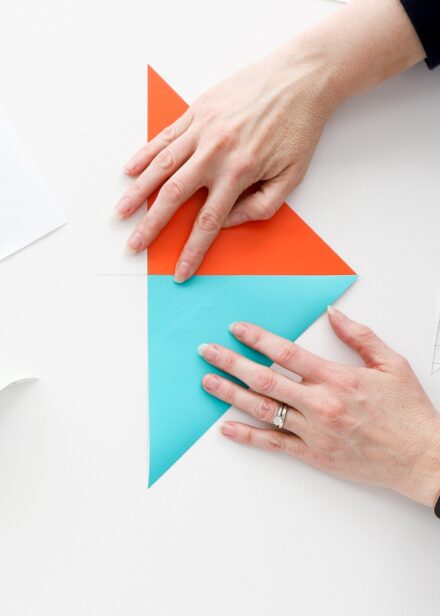
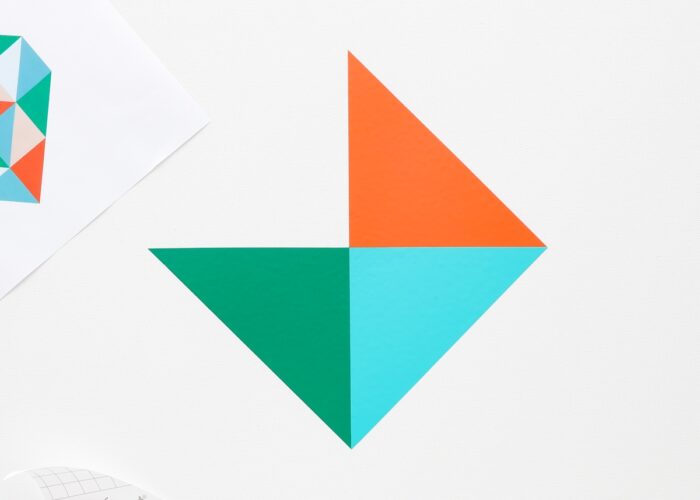
Keep adding triangles, lining up all the points and seems, until the center four triangles are in place.
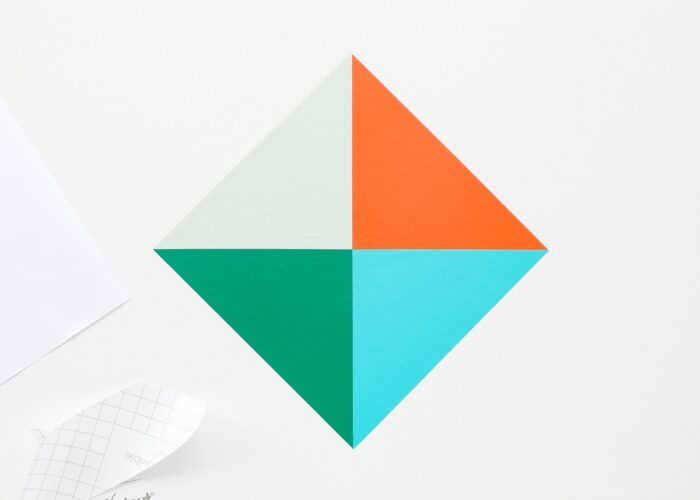
Step 5: Build Out
With the four center triangles in place, build out the rest of the heart design, one triangle at a time. It doesn’t matter which direction you work in. Just peel and stick each one, constantly referring to your pattern and lining up seams as you go.
I thought for sure placing these triangles by hand would result in a crooked, wonky mess. But sure enough, each one laid down beautifully, and I had the entire heart assembled in under 30 minutes!
TIP! Never hesitate to re-lay a triangle if it’s not lining up correctly or has wrinkles or bubbles. It will only get worse as you continue to build out, so fix problems as you encounter them before moving on!
Step 6: Finish the Edge
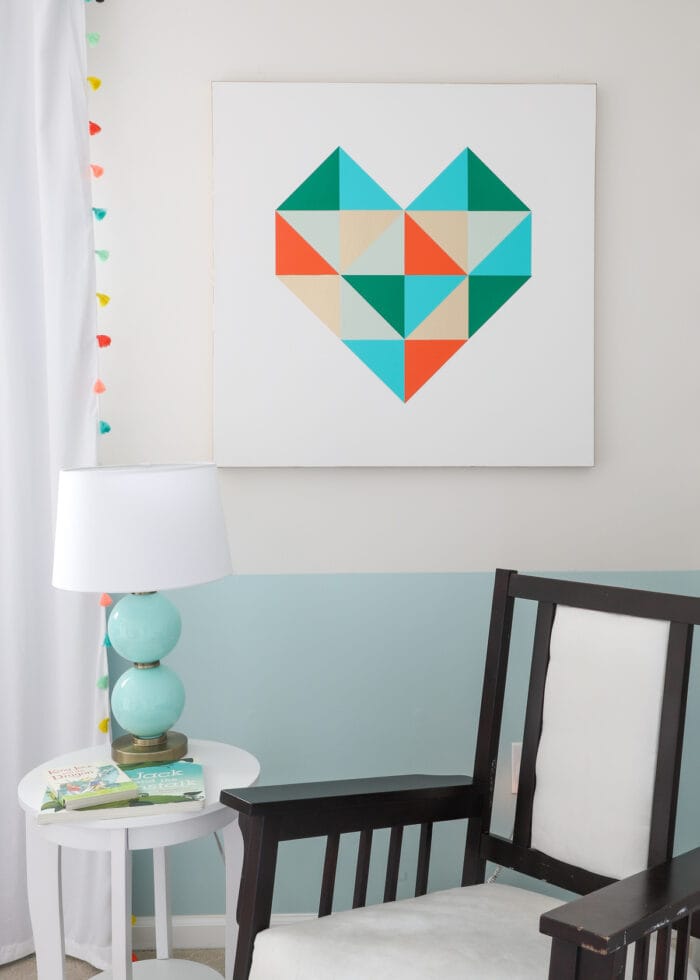
Once I completed the heart design, I felt that the edges of the canvas needed some color. While I certainly could have painted the edge or framed it out like I show here, I instead cut more gold vinyl down into 2″ strips and stuck them to the edge of the canvas all the way around.
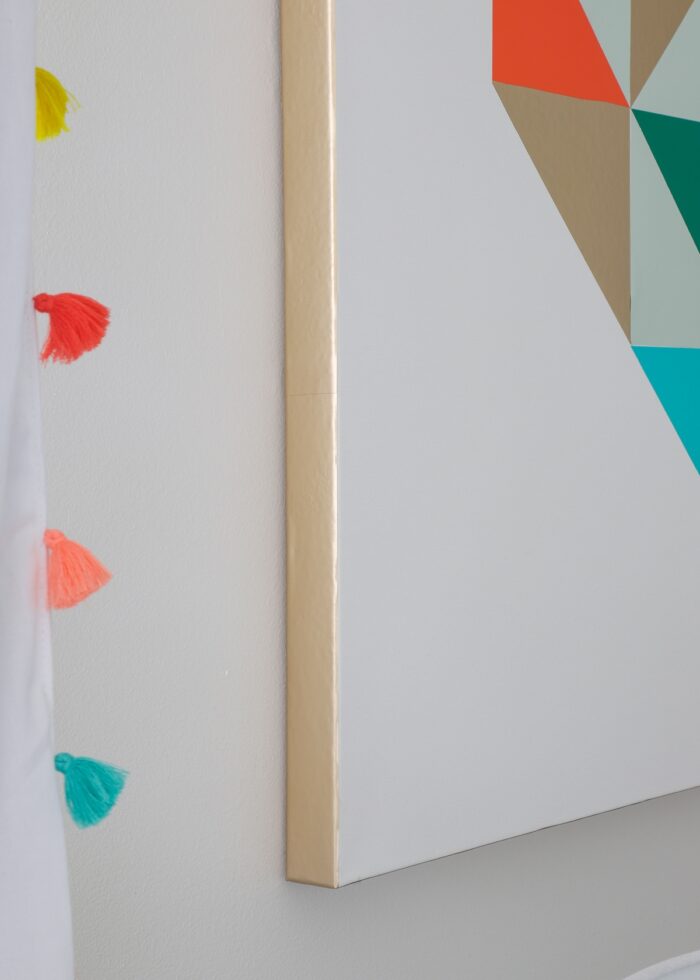
Not only did this nicely finish off the artwork, but it also gave the appearance of a thin gold frame around the entire canvas!
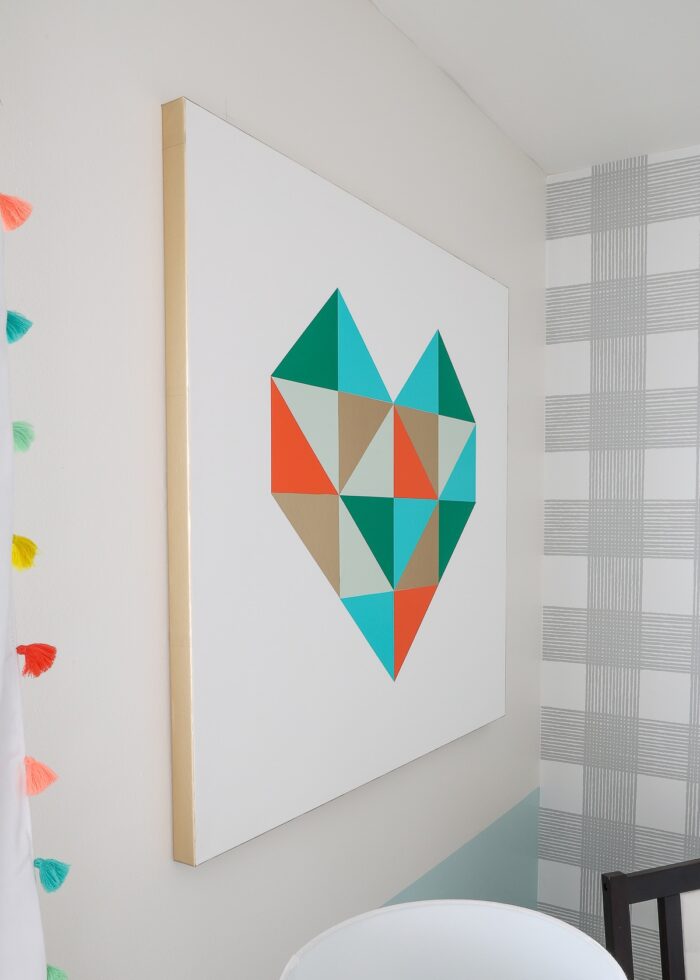
This DIY Heart Artwork made with vinyl on canvas turned out better than I ever expected! I honestly wasn’t sure if I’d be able to cut the triangles straight enough by hand and place them consistently, or if the vinyl on canvas would actually stay put!
Everything went incredibly smoothly, so I was ultimately able to create this extra large artwork, using materials I already had on hand, in under an hour! If you need a quick and easy way to fill up a big spot on your wall, I hope this project inspires you to look at vinyl in a whole new way!
Megan
3 Comments on “DIY Heart Artwork (Made with Vinyl on Canvas)”
Vinyl as a “frame” is sooooooo smart! I admit I have wanted to frame my canvases but keep putting it off — this method seems way easier!
I am so excited to try this project! I, too, have a space in mind that has been difficult to find art work for in terms of color and size. This design will work perfectly and is something I can manage. Your directions are simple and understandable, even for working out the math! Thanks for sharing.
Nice idea!
Note that there are canvases which are fabric glued on thick, rigid cardboard. Much thinner than regular ones, so you can’t do the trick of framing with vinyl, but at least, it addresses the problem of swaying a bit.
And as you said, you can put a layer or two of gesso, the matter used as base of painting to reduce the texture of the fabric, to have a smoother background.