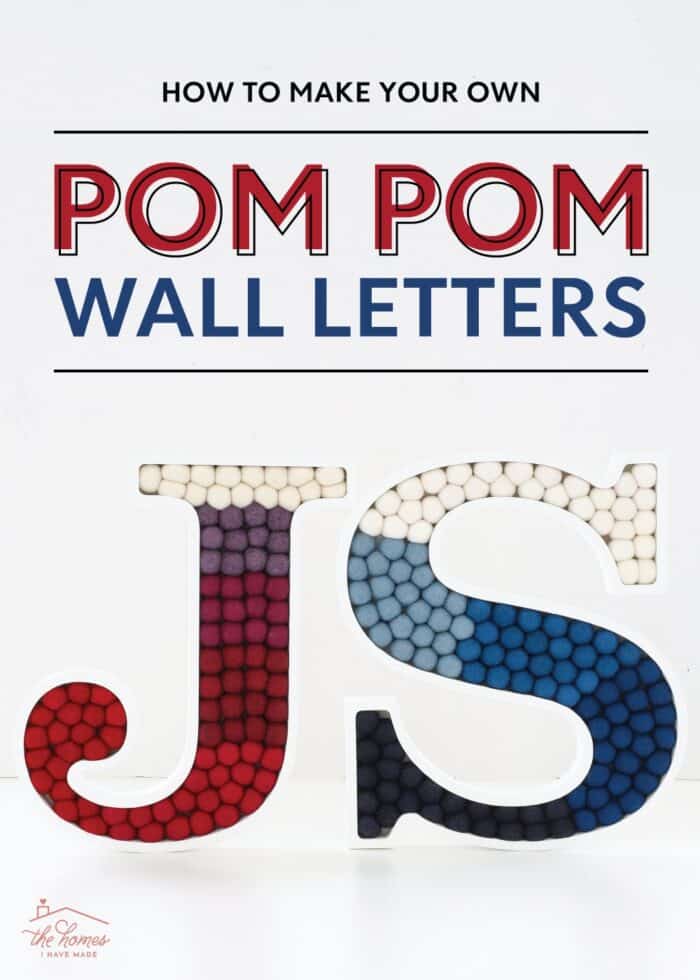
How to Make Your Own Pom Pom Letter Wall Art
I have long loved the pom pom wall letters trend, but admittedly couldn’t stomach the steep price tag of custom-made versions. So when I knew a pair of letters would be the perfect finishing touch for my sons’ shared bedroom, I set out to see if I could DIY my own for a bit cheaper. Read on to learn exactly how to DIY pom pom letters (and if I saved any money too!)
A Trend Worth Following
I pride myself on keeping away from Pinterest and Instagram (as much as possible) so that I can confidently say that the ideas you see here on the blog are completely and originally mine. But that is not at all the case with these pom pom letters. I stumbled upon the concept a while ago and have pretty much pined for some in our home ever since. I mean…they are just sooooo cute, right?!
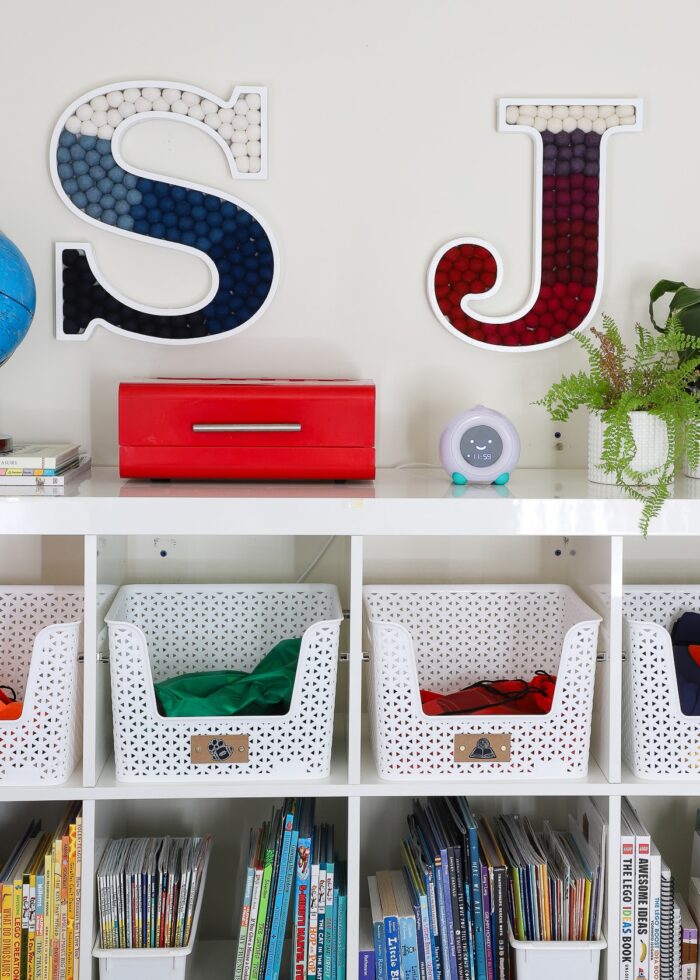
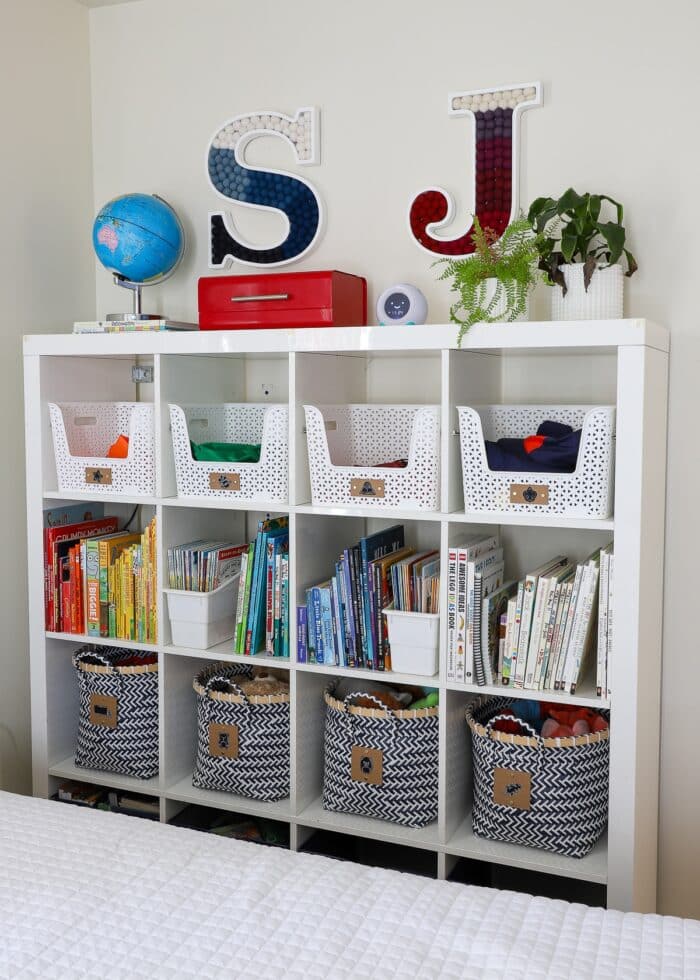
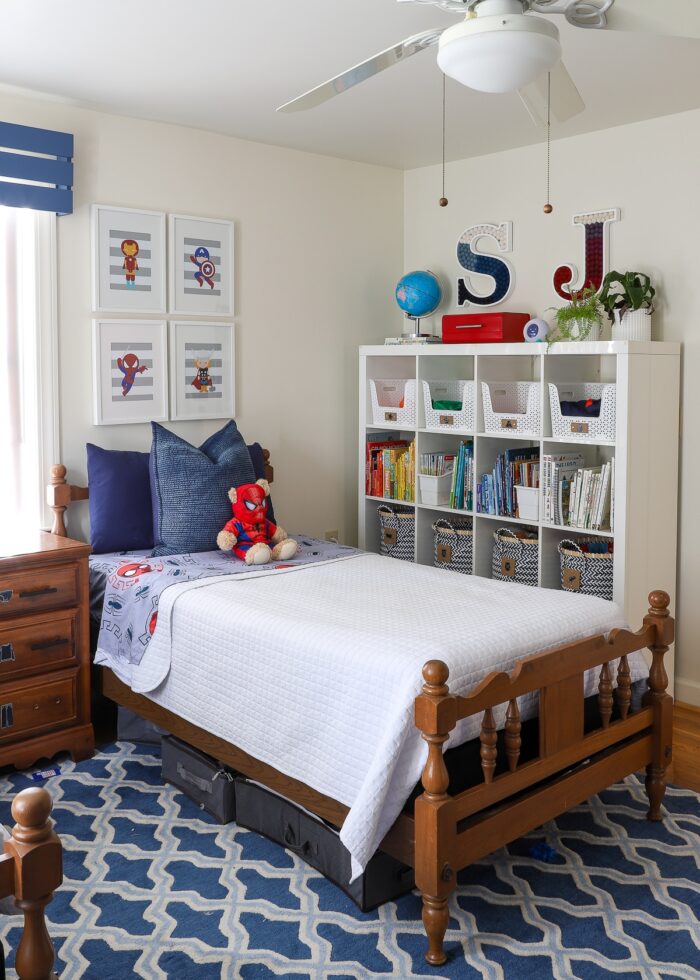
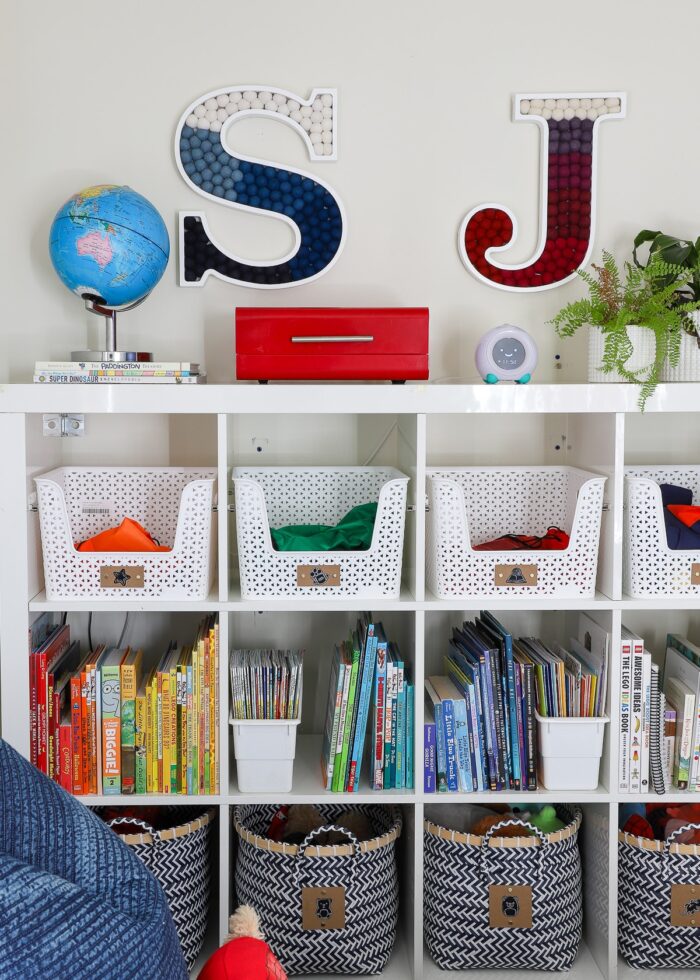
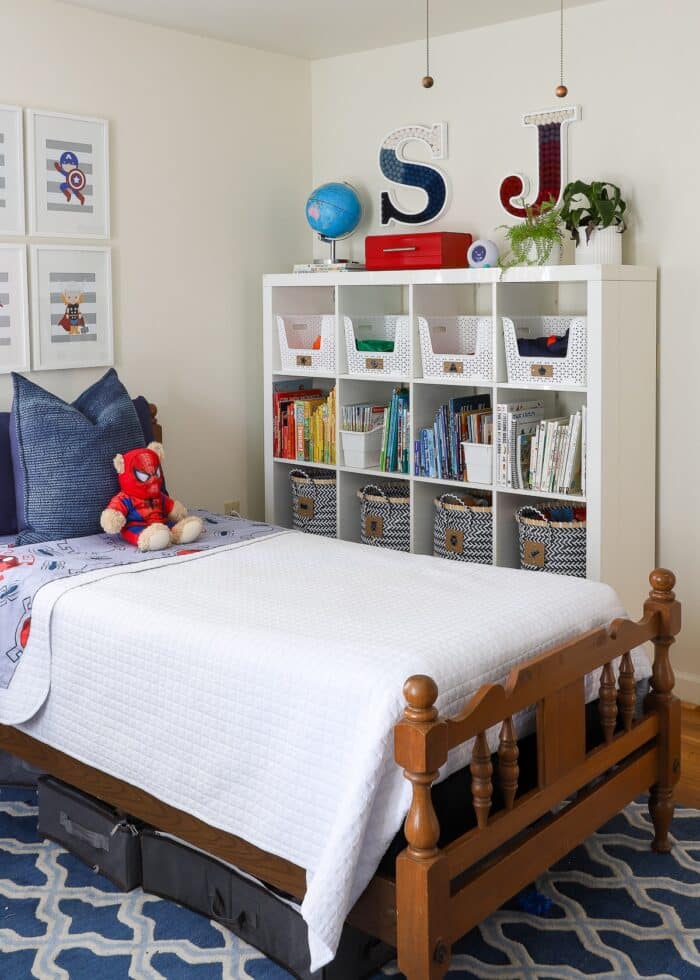
When I was trying to come up with something for above the bookshelf in our boys’ shared bedroom, my mind kept wandering back to these adorable, colorful, textured initials. But every time I looked up custom options on Etsy, I was taken aback how expensive they were.
To comfortably fill the space between the shelf and the ceiling, I needed big letters. But everything I found in the 15-20″ size were priced in the $100-$150 range (per letter) with fairly limited color choices.
So in true Megan fashion, I thought “Surely, I can make my own for cheaper!” Plus, I loved the idea of being able to pick my own colors, size, font, etc.
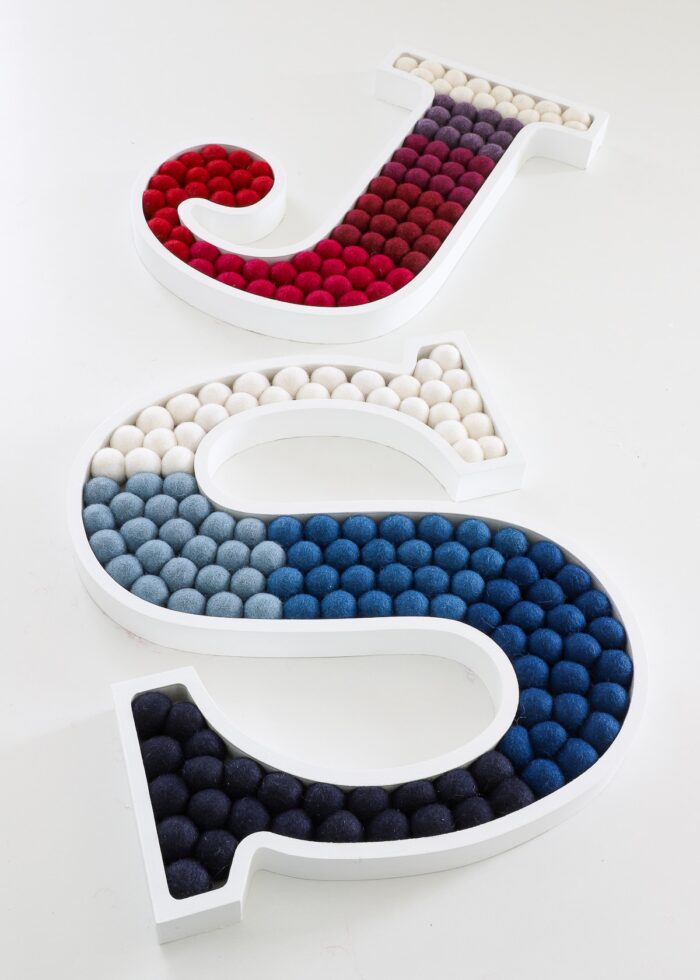
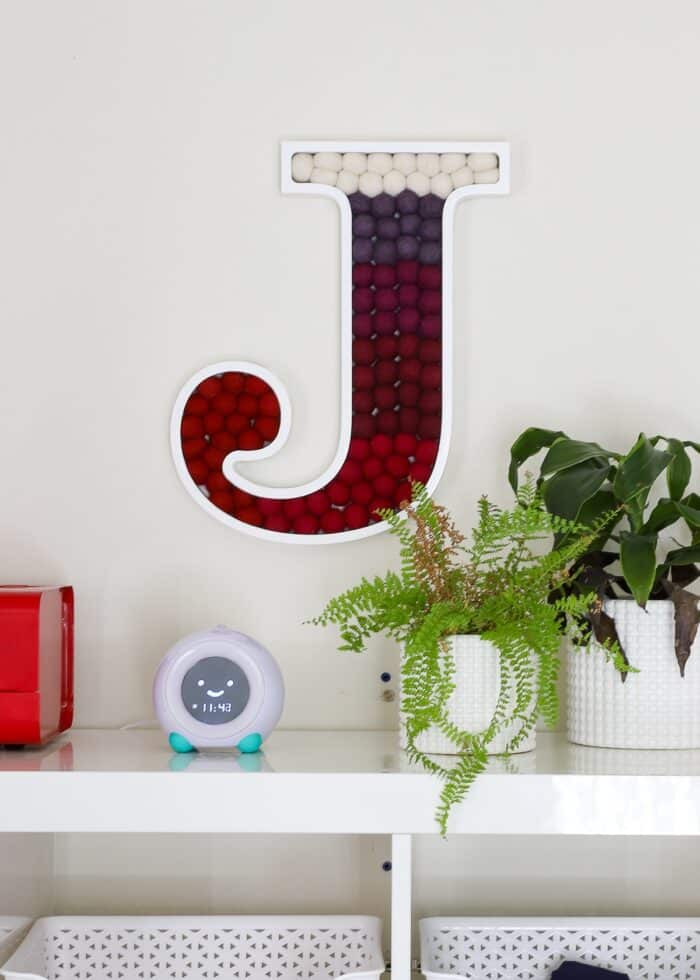
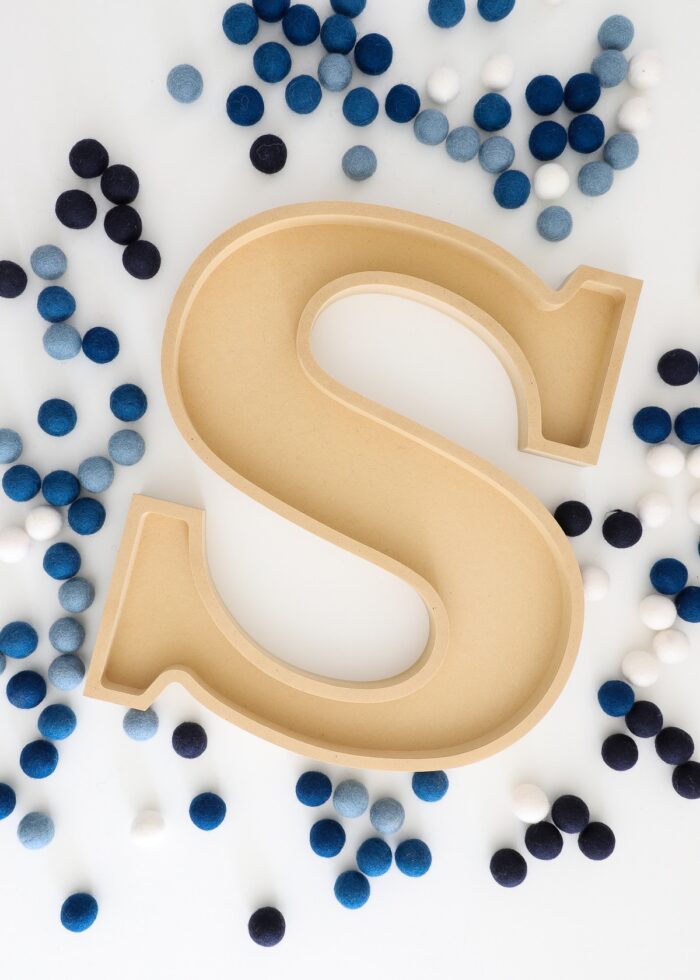
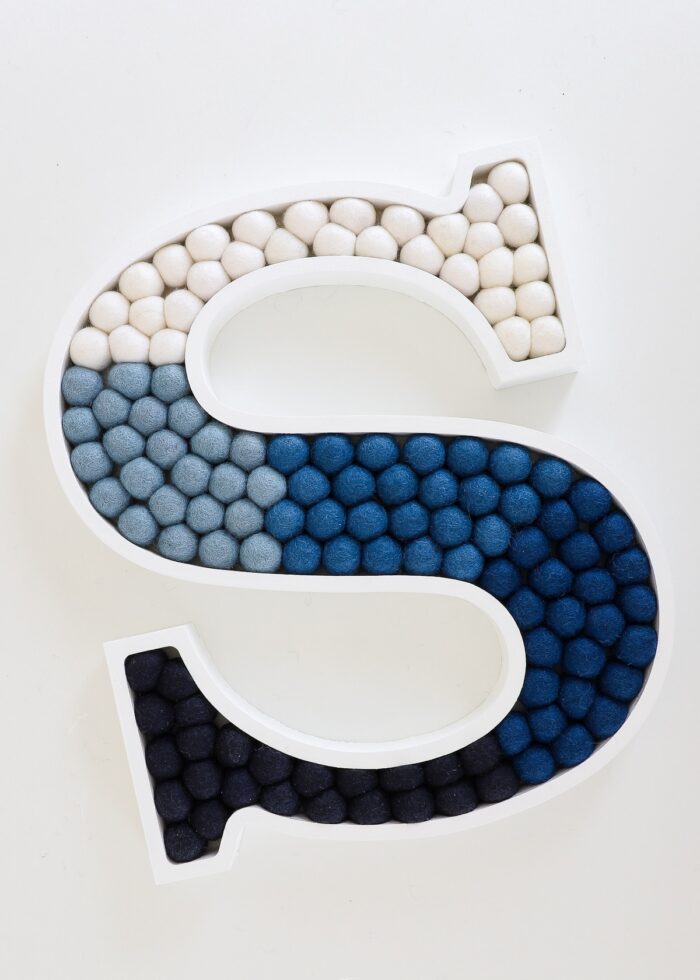
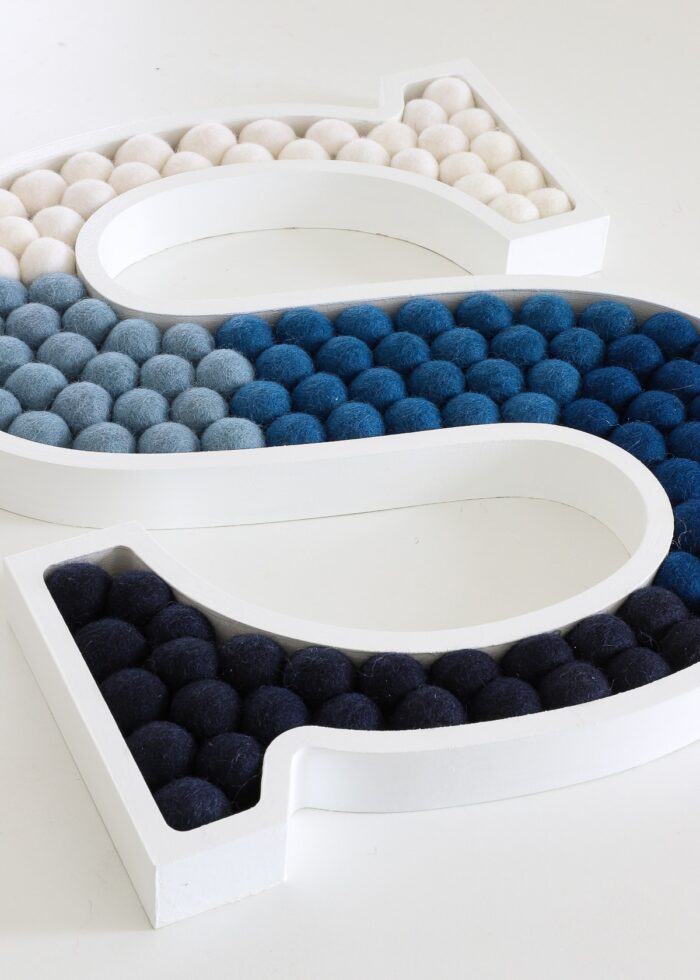
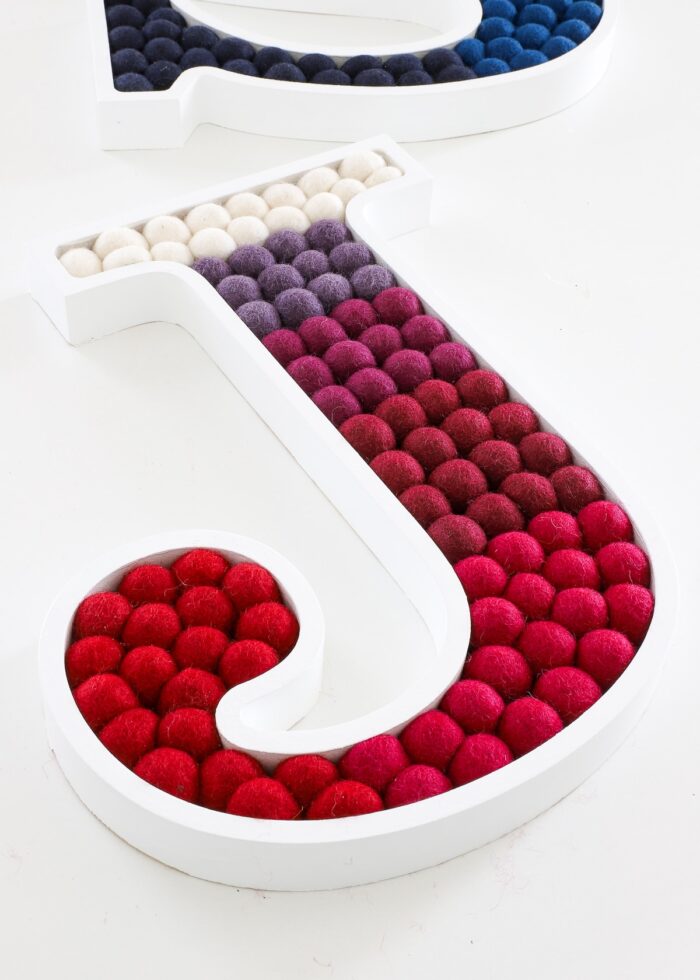
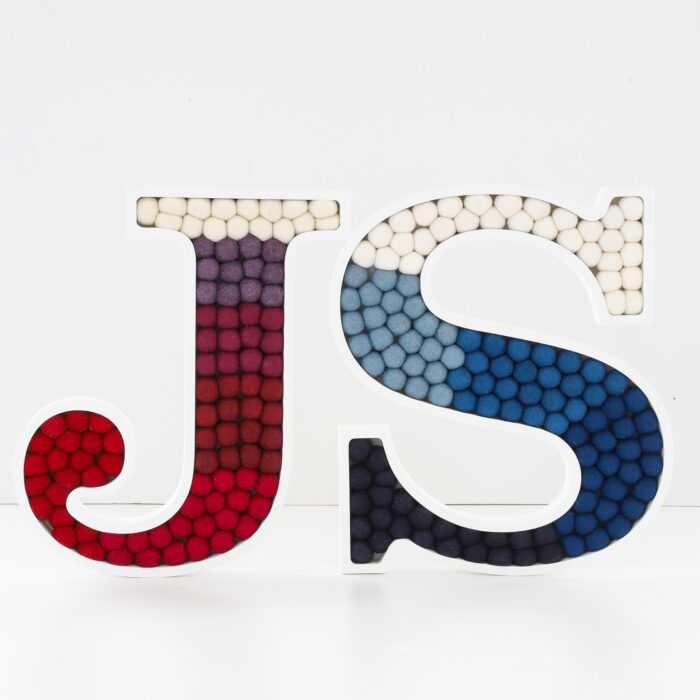
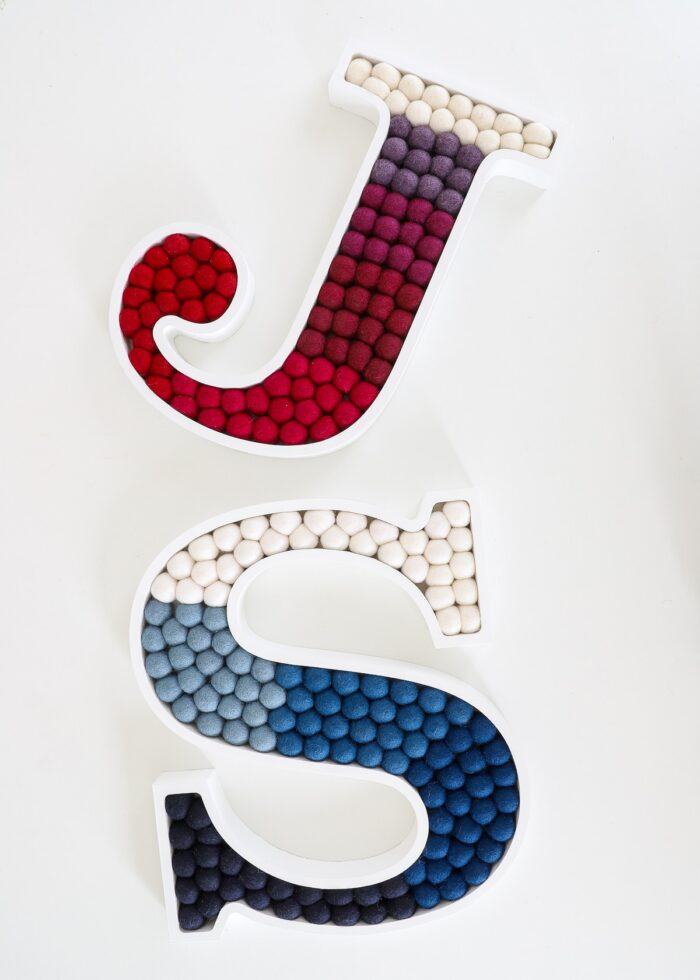
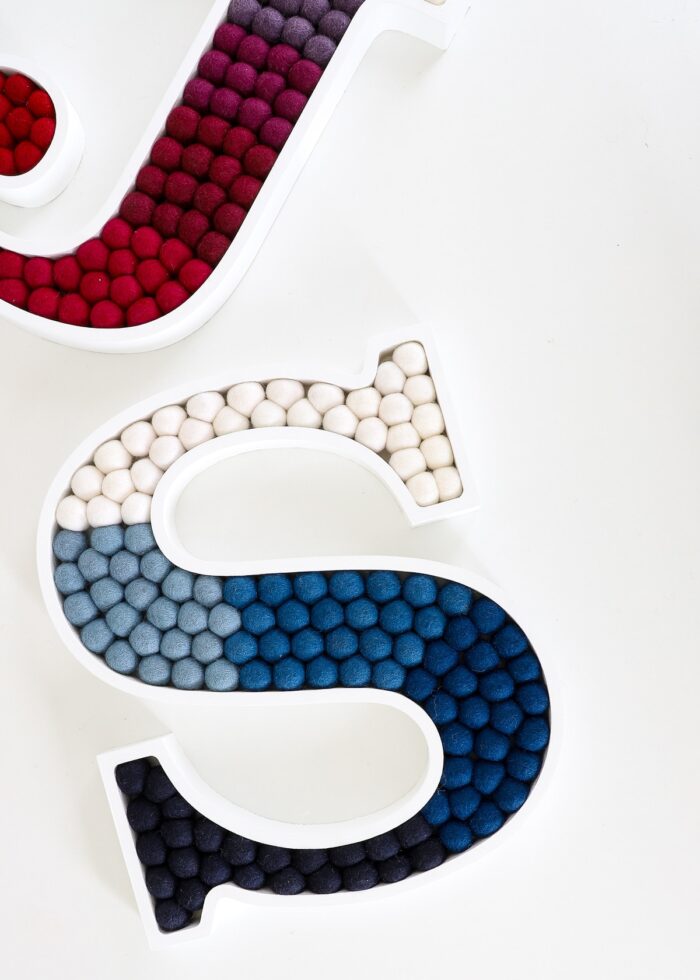
Once I sourced the supplies and picked my colors, I got to work making the first initial for each boy…an ombre blue “S” and an ombre red “J” to match their super hero-themed bedroom.
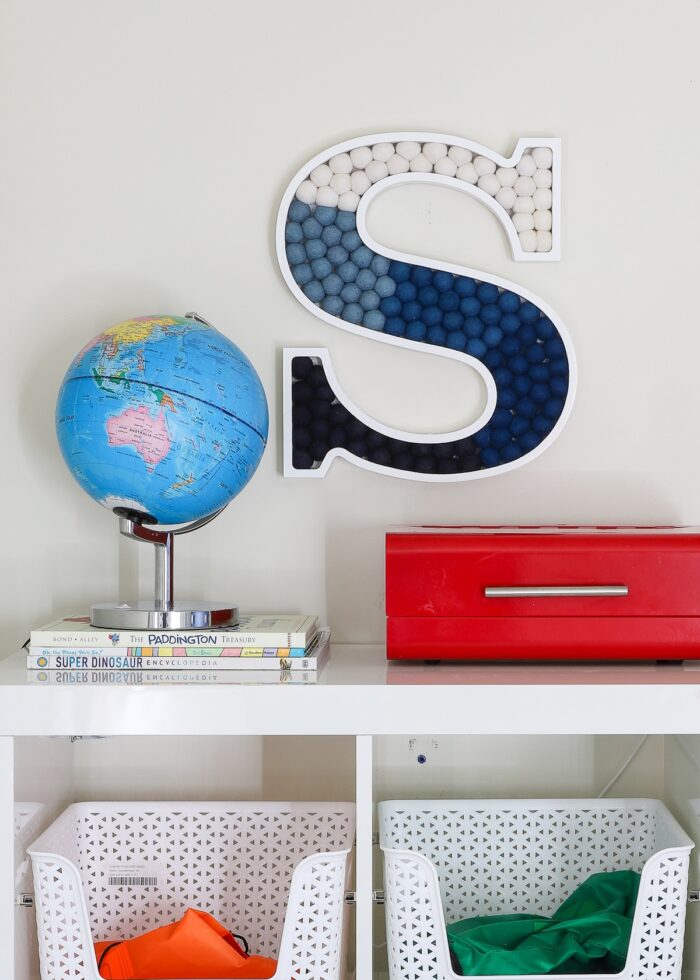
My letters measure 15″ tall and 1.25″ deep; and each one ended up costing about $70 total. (The felt balls are where the cost really adds up; and the bigger the letter, the more balls you need.)
So while I may have saved myself some money (and got the exact colors I wanted), I wouldn’t exactly consider this one a “budget-friendly” wall art idea (despite being ridiculously cute!)
That said, these letters were super fun (and easy!) to make, are the perfect finishing touch to this shared kid space, and about the cutest things in our home…
So if you love the idea of making your own and want to save (a little) money too, let me break down exactly how these fun DIY pom pom wall letters come together!
Supply List
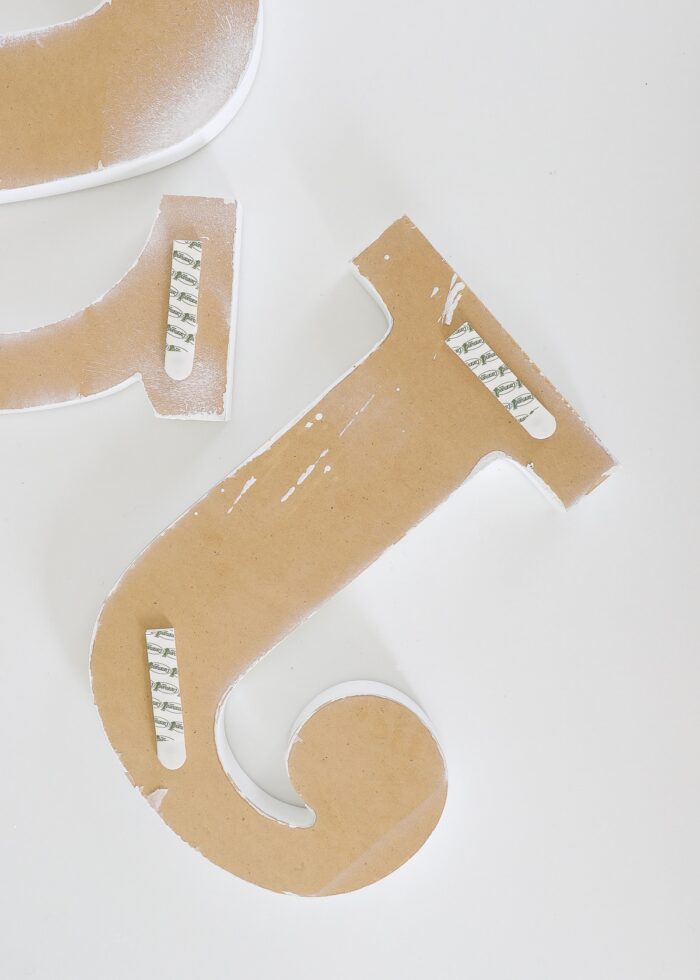
- Letter Tray – After lots of research, I eventually landed on these letter trays because I could choose from a wide range of sizes, depths, and fonts. I was extremely pleased with the quality.
- My letters: Clarendon Bold URW font at 15″ tall, 1.25″ deep, unpainted.
- TIP: You can save money by using cardboard letters or paper mache letters instead.
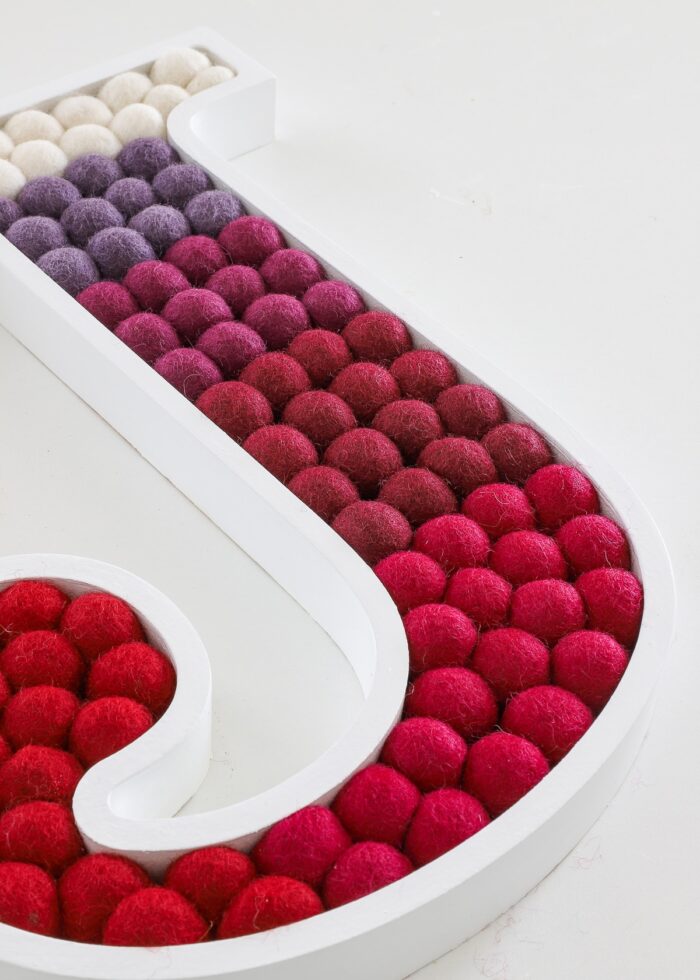
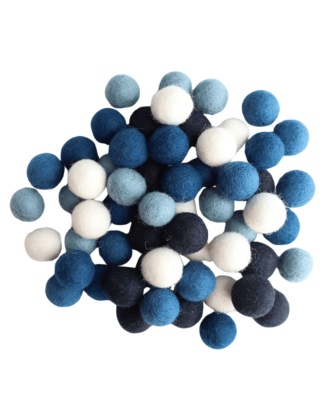
- Wool Felt Pom Pom Balls in the color of your choice. I like that these wool pom poms were affordable and pre-packaged in an ombre palette. The bigger the letter you make, the more balls you’ll need. For each letter, I used almost the full 120 count pack (plus some extra whites for the “S”). Even if ombre isn’t the look you’re going for, the Mini Felt Factory has lots of fun color options!
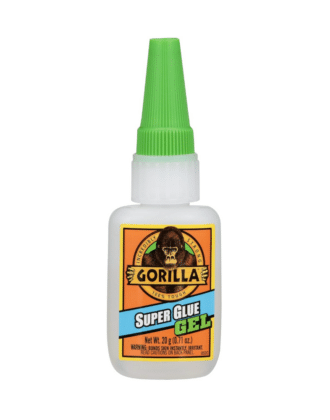
- Clear Gorilla Glue – Both the blue cap and green cap versions work well for this project.
- Paint – In the color and sheen of your choice (if you purchase an unpainted letter tray).
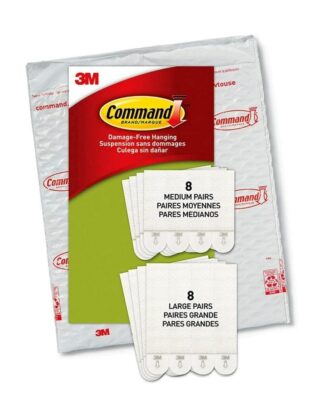
- Command Strips or other hanging hardware.
Video Tutorial
If you’d like to watch these DIY pom pom letters come together, below is a short video of the entire process. Photo instructions are below the video. (If the video isn’t loading, you can watch it on YouTube.)
DIY Pom Pom Monogram Letter | Step-by-Step
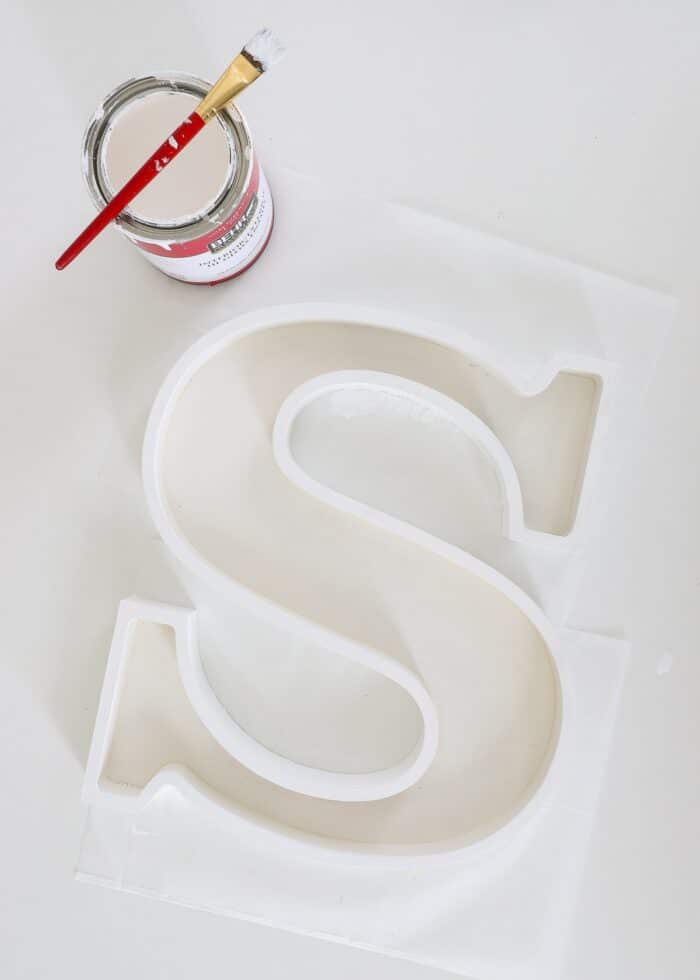
Step 1 – Prime & Paint the Letter Tray
If you purchased an unfinished letter tray, your first step will be to paint it. I had hopes of using basic acrylic craft paint for this step, but the raw MDF just soaked it right up.
Instead, I recommend spraying your letter(s) with spray primer and a high-gloss spray paint or a primer+paint in one.
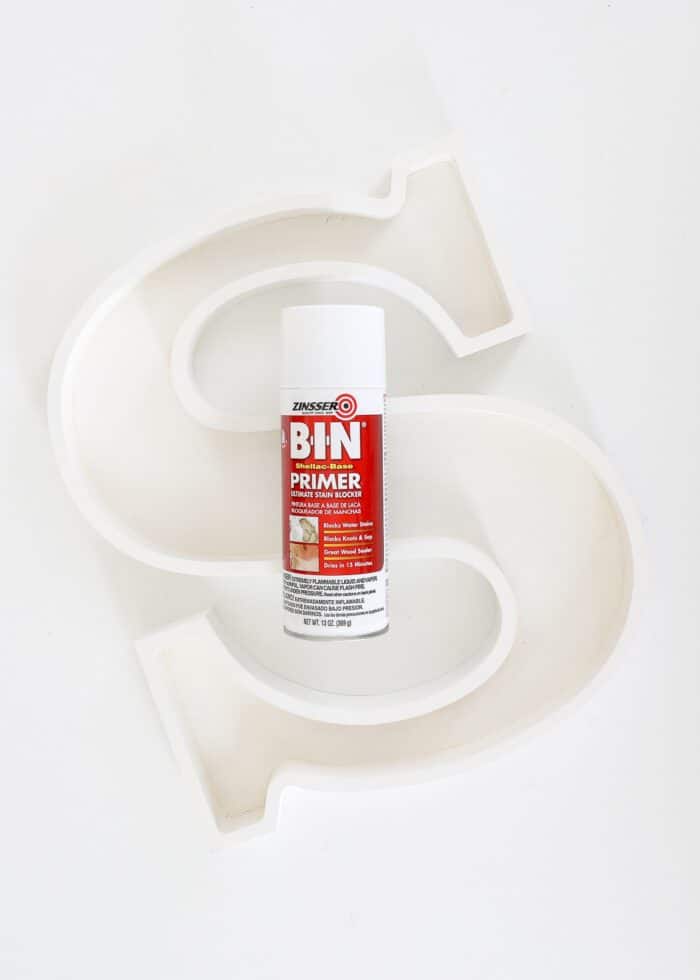
I was trying to use products I already hand on hand; so after spray priming the letters, I gave them each two coats of high-gloss latex wall paint with a paint brush.
NOTE: I didn’t bother painting the inside of the tray (beyond the initial primer). I just painted the tops and sides of the wrap edge around the letter.
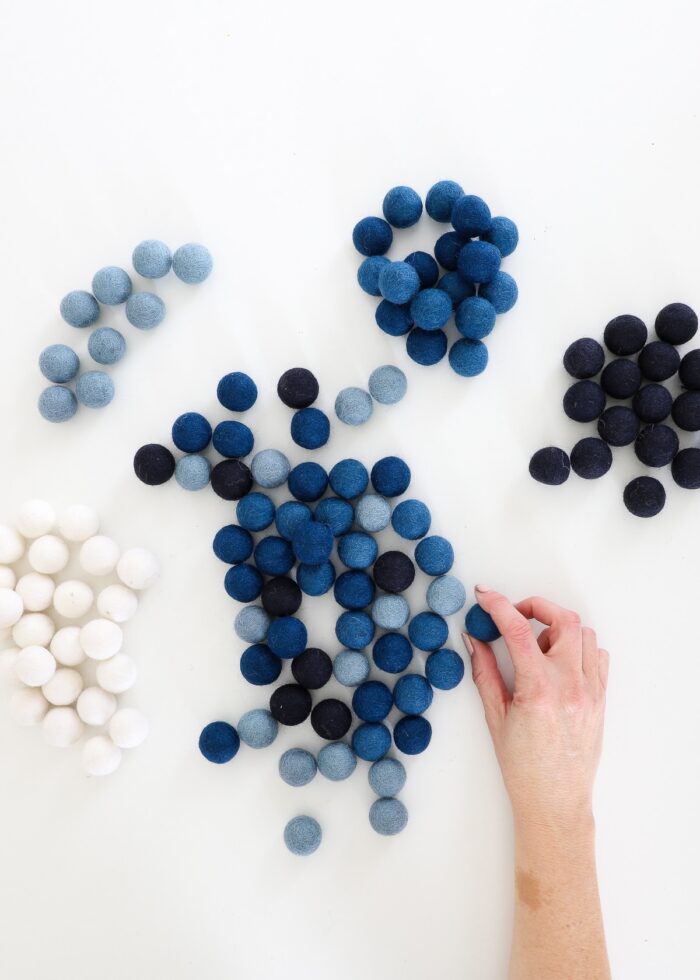
Step 2 – Sort Pom Poms By Color
While your letters are drying, sort your felt pom poms into color groups. Whether you’re doing an ombre design or a random one, having the colors sorted will ensure an equal spread of shades.
Want to save this post?
Step 3 – Load Pom Poms Into Letter Tray
When the letter tray is completely dry, load the felt balls into the tray in the order/pattern of your preference. Admittedly, this might take some trial-and-error, but here are a few tips to help:

- Don’t hesitate to try out different arrangements to see what you like best (e.g., mixed, horizontal ombre, vertical ombre, stripes, etc). Without any adhesive in play, it’s easy to pop the balls in and out.
- Don’t over-think it. I tried to be very precise with my ball placement but found it was just easier to “stuff” the balls into the tray based on appearance rather than a set number or measurement.
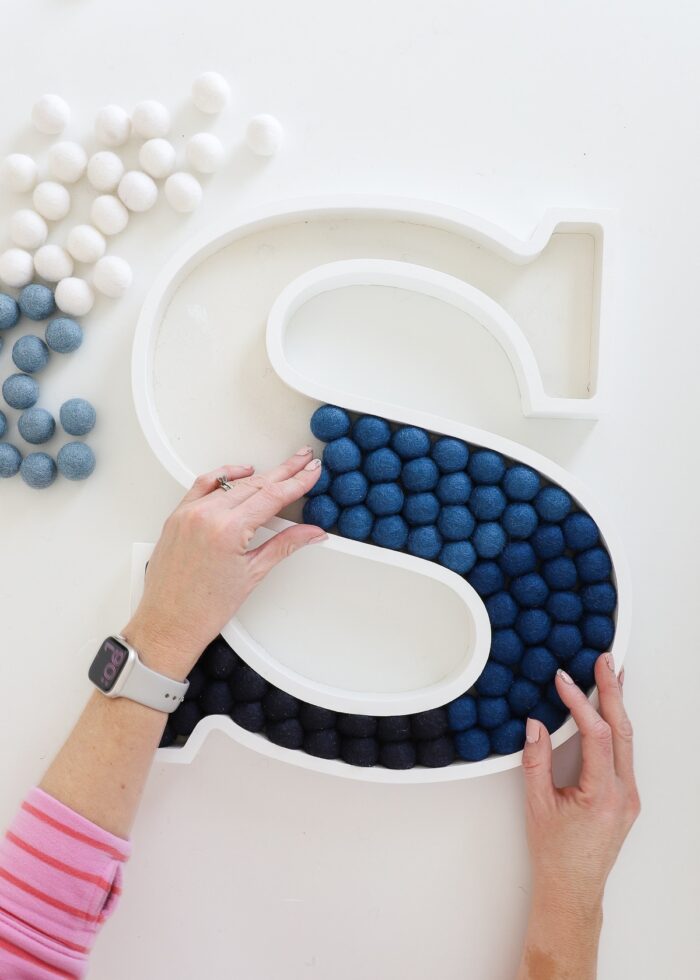
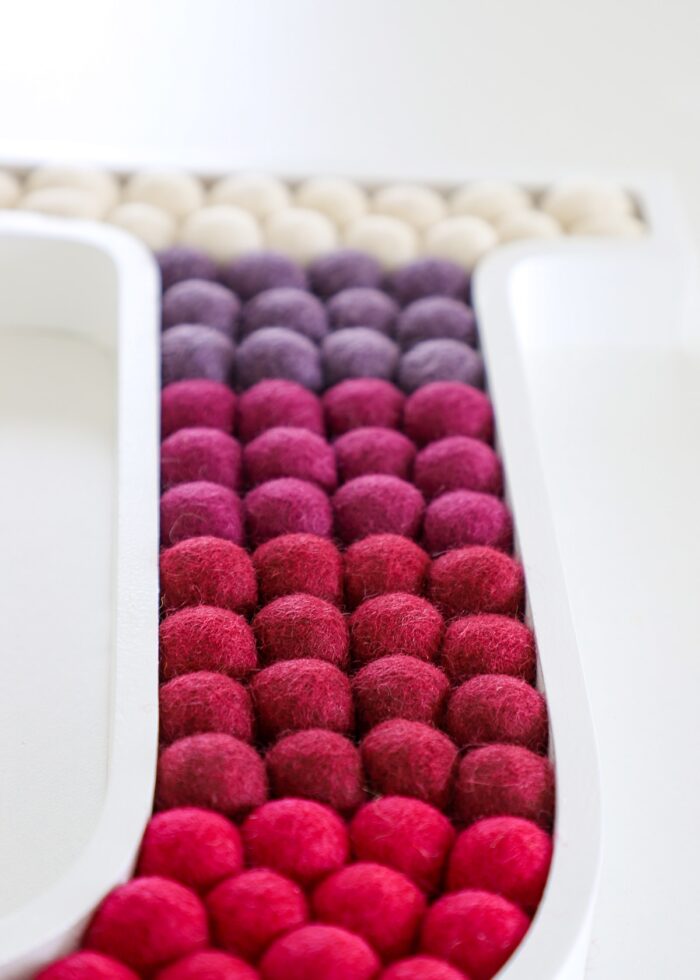
- Make your balls as tight as possible to fill in all the background color and give the letters as much texture as possible. With some squeezing, you’ll be amazed how many pom poms you can fit into a tight space.
- You will absolutely need more felt balls than you think. I thought for sure I’d have leftover balls to make a Christmas garland, but I used almost all of the 120 balls in the “J” and even had to get some extra whites to finish my “S.”
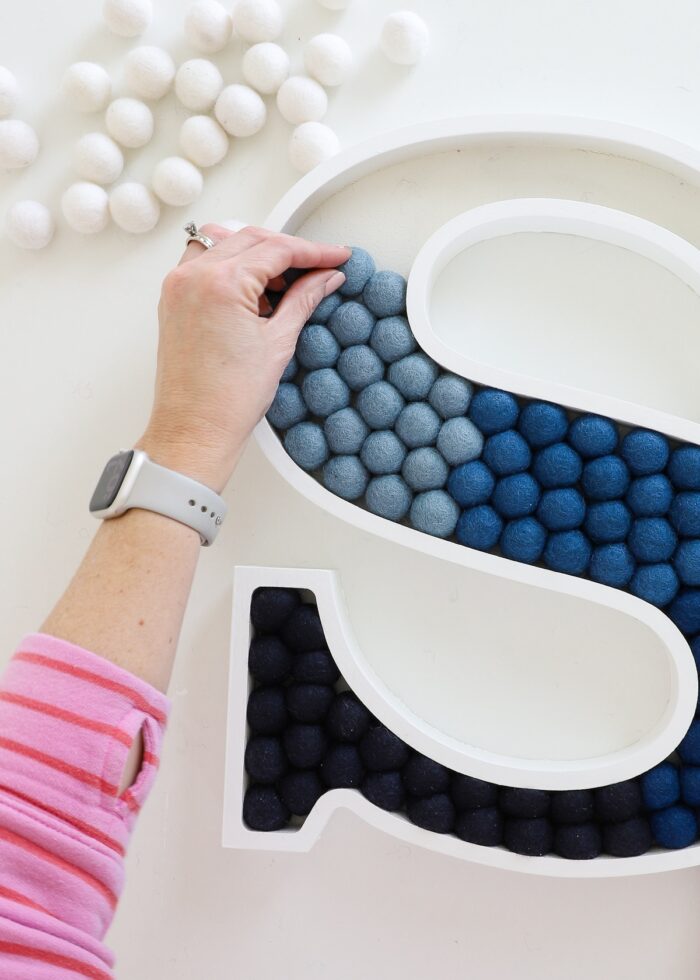
Step 4 – Finalize Design & Spacing
Once you have the letter tray as full as you can get it, continue to adjust the spacing to make rows look more even and reduce crowding in other areas. Keep pushing and pulling on the balls until you have an arrangement you are happy with.
Step 5 – Glue Pom Poms Into Place
With the felt balls exactly where you want them, the next step is to glue each one into place. Yes, it’s a bit tedious to glue one at a time, but I quickly determined it’s the best option. Just put on some good music and work your way across the entire letter. This is my very favorite glue for precision projects. A little drop goes a very long way with practically no mess.
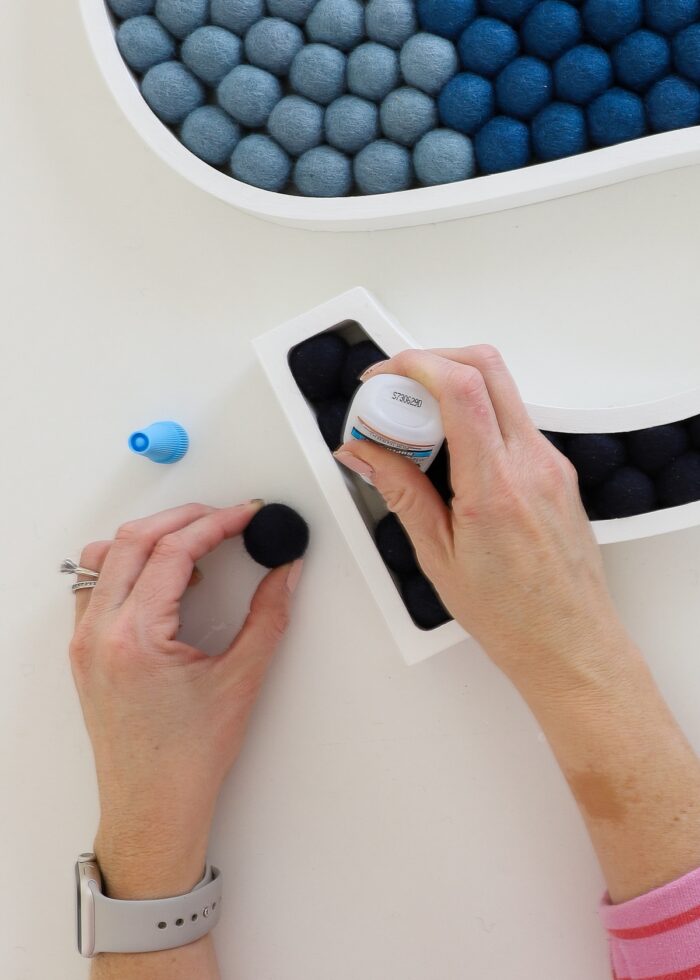
Why Glue the Balls After They Are In the Tray?
In order for the letter tray to look full of color, you really need the pom poms tight up against each other. There is really no way you would be able to glue each ball as you place it in initially, as you need the pressure on all sides to hold each one in place. Sure, you could use faster-curing glue (like glue sticks with a hot glue gun), but then you’d be dealing with lots of messy strings. I played with several different assembly methods and really think you’ll get the best results with the place first, glue second process.
Do You Really Need to Glue the Balls Into Place?
My felt pom poms were very tight in our letter tray; and I’ll admit, I was tempted to skip the glue. There’s a very good chance none of them would ever budge. But in the event one ball does eventually pop out from the pressure, every single ball would follow suit. I had visions of walking into my kids’ room with 120+ felt balls all over the floor…so I decided to go ahead and just glue them all in!
Step 6 – Repeat with Additional Letters
If you are spelling out a word or making monograms for multiple people, repeat the entire process with the follow-on letters.
NOTE: I was surprised how different the “S” came together compared to the “J.” I highly recommend playing with the ball layout for each new letter in order to figure out what looks and works the best.
Step 7 – Hang Pom Pom Letters on the Wall
My specific letter trays didn’t come with any holes or hardware for hanging, so I just used some large Command Strips in lieu of attaching brackets or D-rings.
Feel free to use whatever hanging method you prefer in order to secure the letters to the wall in whatever arrangement looks the best!
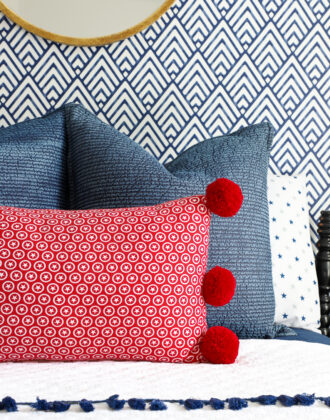
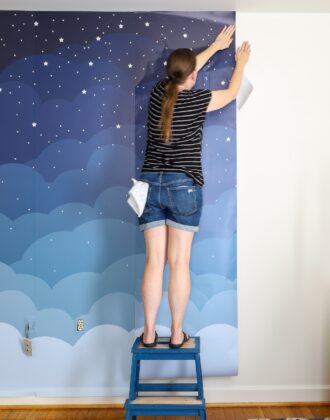
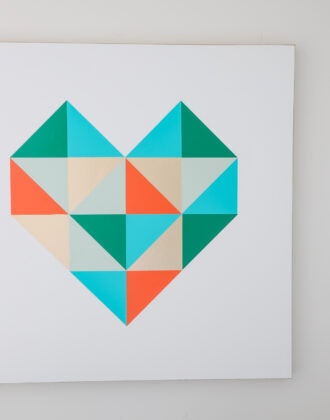
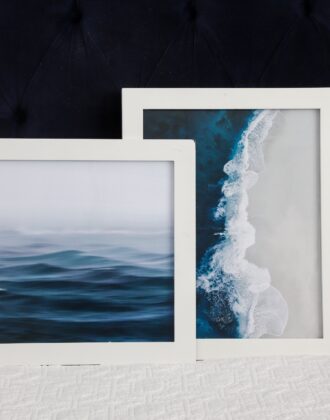
Other Wall Art DIY Projects
Looking for other stylish DIY ways to fill your walls? Here are some more wall art projects we love!
- DIY 3D Paper Wall Flowers
- Easy Geometric Heart Artwork
- Easy Chevron Artwork
- How to Make a Paper Quilt Artwork
- How to Frame Wallpaper as Artwork
- DIY State Silhouette Artwork
While I didn’t quite save as much money as I hoped by DIYing these pom pom letters myself, I’m still thrilled with this new decor! Nothing beats the joy of making something yourself, and I simply adore the ombre effect I used for these letters. If you too have seen and loved the pom pom letter trend, I hope this post gives you the confidence and knowledge necessary to give this easy project a try!
Megan

2 Comments on “How to Make Your Own Pom Pom Letter Wall Art”
This is the cutest thing I have ever seen. What a lovely space you have created for your small but powerful superheroes! I am sure you are their superhero – their Mom can make anything!!!
I fell in love with felted wool balls when I saw (and immediately purchased) a felted wool ball trivet with a ton of rainbow colors. I loved it so much, I bought one for each of my teenagers for their future homes (which they love to tease me about, being teenagers.) This project is tempting me to buy a bunch of felted wool balls, just for fun.
Thanks, Megan! You are awesome!
These are adorable! And worth every penny.