How to Store Scrapbook Paper Scraps
In a craft room, you can usually find reason to keep pretty much anything. After all, practically any button, string, bauble, and scrap can be transformed into something amazing, right?!? But without a good organization system in place, it can becomes too difficult to actually use all these “little leftovers” on future projects. Years ago, I stumbled upon a really easy and SUPER effective way to sort and store scrapbook paper scraps. So now, not only are my paper scraps easy to pull out mid-project, but the system can’t really get out of control. Let me show you!
What Is Considered a “Paper Scrap”?
Each crafter likely has their own definition of what they consider a paper scrap. For me, a paper scrap is any “standard size” piece of paper that has already been cut into.
I store both 12×12″ scrapbook paper and 8.5×11″ paper in vertical organizers at all times. As soon as these original dimensions are cut in any way, the paper no longer gets put back into my vertical organizers and instead becomes a “scrap” that I sort and store differently.
How Small Is “Too Small” To Keep?
This answer will be different for every crafter and is influenced by the kinds of crafts you do. My best guide here is: Can you reasonably use this scrap of paper in your normal craft projects? If the answer is “Yes,” keep it!
Remember: the more paper you keep, the harder it will be to sort, store, and organize…which means it will ultimately be harder to use. Get in the habit of throwing away any paper that is too small, wrinkled, damaged, etc so that you can better organize the paper you’ll actually use.
Why Organize Paper Scraps?
If you’re just getting into paper crafting (e.g., scrapbook paper, Cricut crafts, cardmaking, etc), you might be able to toss your small scraps of paper into a drawer or shoebox and pull it out whenever needed.
But as you get deeper into crafting and start to accumulate lots of scraps, your collection can quickly spiral out of control. Without some way to sort and store scrapbook paper scraps, you can easily waste time, waste paper, and create a bigger paper organization problem!
Save Time
One of the biggest benefits to organizing your scrapbook paper scraps is to save time! If you need a red cardstock circle for the front of your card, you could spend a lot of time digging through a big catch-all basket. But with your scraps sorted, you will be able to quickly find the perfect addition to your project!
Save Paper
If paper scraps are all thrown together in a big messy box, they are much less likely to be used. Whether it’s because you can’t find anything easily or the paper eventually gets damaged, you won’t be able to effectively repurpose the paper for your new project. As a result, when you need a small paper detail, you’ll be more likely use a full, fresh sheet of paper. This habit can quickly dwindle your paper stash!
Preserve Good Paper Organization
Finally, the main reason I prefer to keep my paper scraps separate is to preserve the tidiness and usability of my “good” paper storage. Whether you store scrapbook paper vertically (see how I do it) or horizontally, it stands/lies best when all the sheets are the exact same size. But when you start inserting pieces that don’t match, you quickly end up with uneven piles and papers that are too hard to get in and out.
As such, I highly recommend separating out your “un-cut” fresh papers from your smaller scraps and organize the latter into a system that is both useable and maintainable!
Tour this full Craft Room HERE!
The Best Way to Organize Scrapbook Paper Scraps
Whether you use the box system I’m going to show today or a similar version using folders, bins, storage boxes, or binders, my number one recommendation for organizing and storing scrapbook paper scraps is to do so by COLOR.
Yes, you can more narrowly separate out your papers by categories (e.g., glitter cardstock, adhesive papers, patterned paper, etc); but it has been my experience that the more complicated the filing method, the harder it will be to actually find what you need.
Want to save this post?
Think about it. Typically, when you are working on a craft project, you envision a particular color before anything else. For example, let’s say you need a pink flower for the front of your card.
Instead of pulling out the Glitter file folder and the Metallic file folder and the Patterned Paper file folder to see what options you have, you can instead pull out the Pink box and see all your options at a glance. Yes, it does mean that in this one box you have various paper types…but you will save a lot of time shifting through papers in one box versus many!
How to Organize Your Scrapbook Paper Scraps
Step 1: Determine Your “Keepable” Size
In order to organize your scrapbook paper scraps, I first recommend setting a size standard: a minimum and maximum size for anything you keep. Not only will this help drive what containers you use for your paper scraps, but this will also give you a definable metric to make decisions against. This is especially helpful if you can justify keeping every last inch of paper!
Step 2: Sort By Color
On a flat surface (preferably, a big table), sort all your scraps into main color piles: Reds, Oranges, Yellows, Greens, Blues, Purples, Pinks, Whites, Blacks, and Browns.
Resist the urge to break down into more categories. Silvers and greys can go into Blacks; golds can go into Yellows; and clear papers can go into Whites. Don’t overthink sheens or textures or patterns. Simply place each paper into its broader color pile.
Sorting Patterned Papers
I don’t personally work with a ton of patterned scrapbook paper so most of my stacks are solid sheets of paper. When sorting patterns, you can do one of the following:
- Use the most dominant color in the pattern to determine which color pile it goes in.
- Create a single box of all patterned scraps.
Step 3: Purge Out Unusable Papers
As you sort, make sure you take the time to purge out any unusable papers. Toss scraps that don’t fit within your “size requirements,” as well as anything that is wrinkled, dated, or faded.
I also like to trim off long skinny edges that just can’t be used. It will help your scraps fit nicer in containers and can also keep your entire collection from growing unwieldy.
Step 3: Contain
With all your scrapbook paper scraps sorted, it’s time to contain them into individual bins, boxes, folders etc. What you use here will greatly depend on the kind of space you have, how the rest of your craft papers and supplies are organized, and how easily accessible you need your paper scraps (as in, how frequently do you access them).
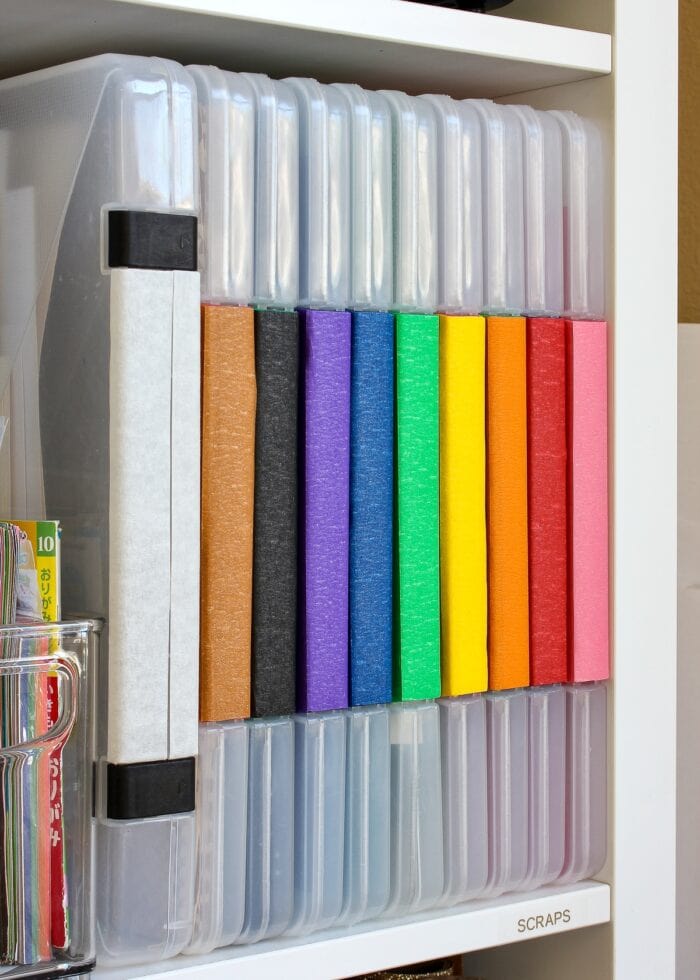
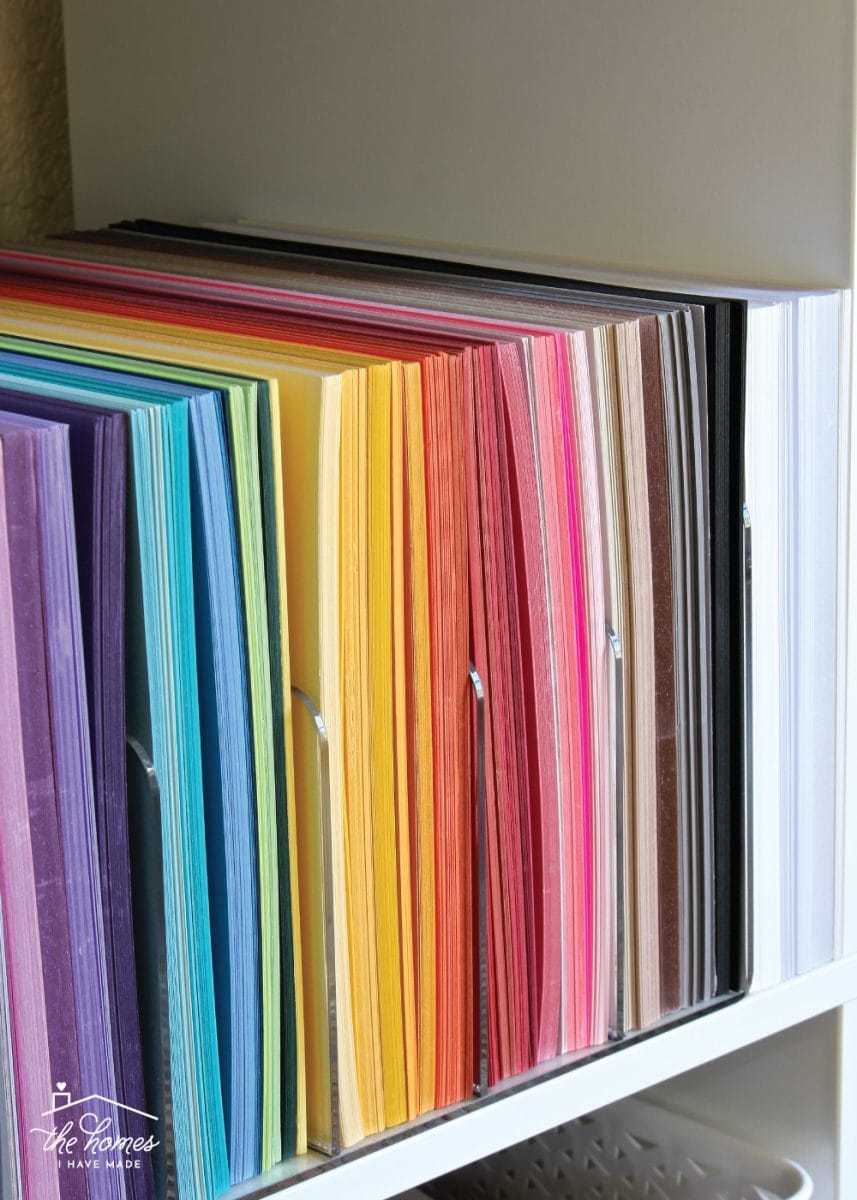
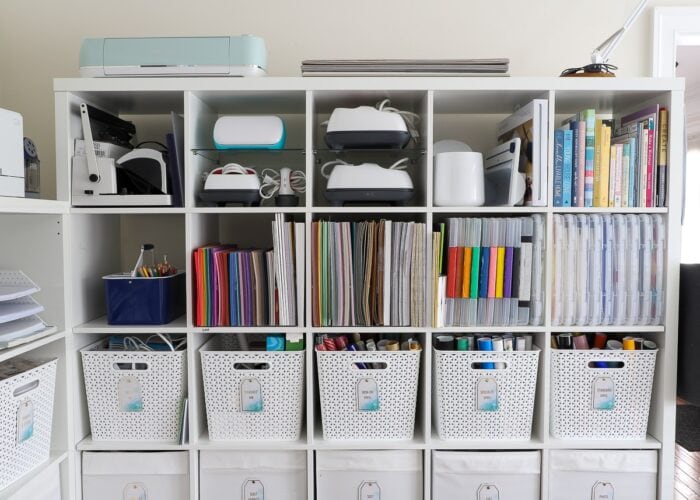
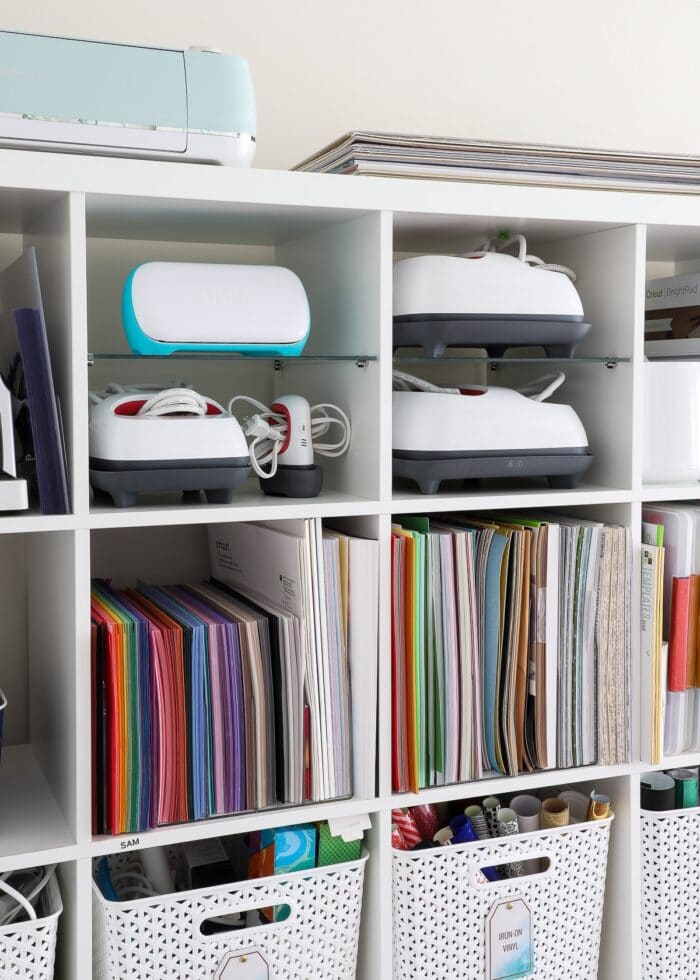
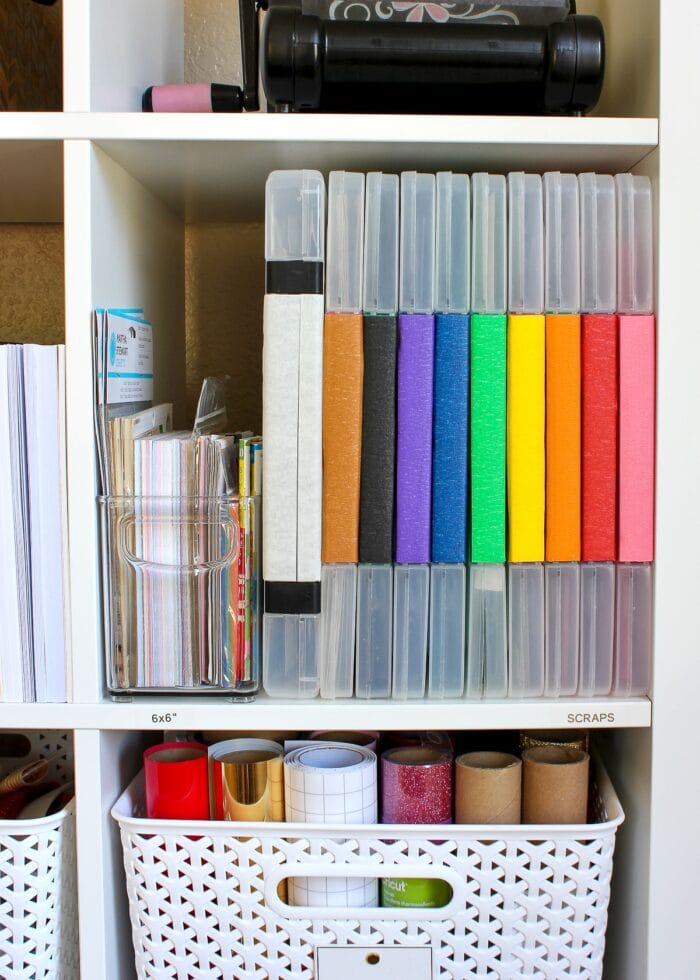
I organize all my paper in vertical organizers on IKEA Kallax shelf unit. Paper is one of the main materials I use, so I prefer to keep my 12×12″ sheets, 8.5×11″ sheets, and scraps all visible and handy.
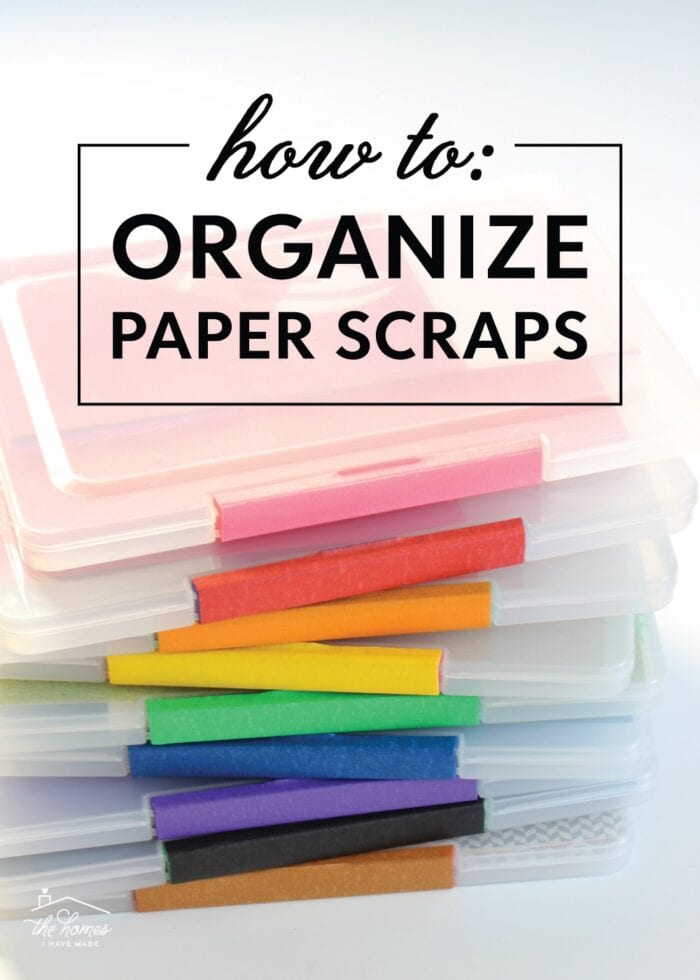
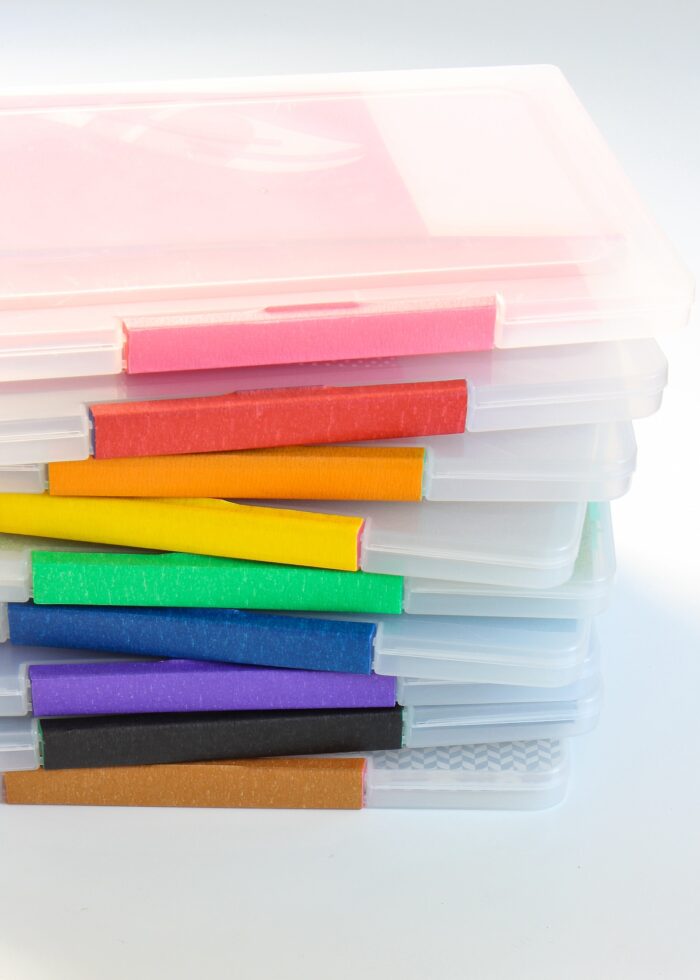
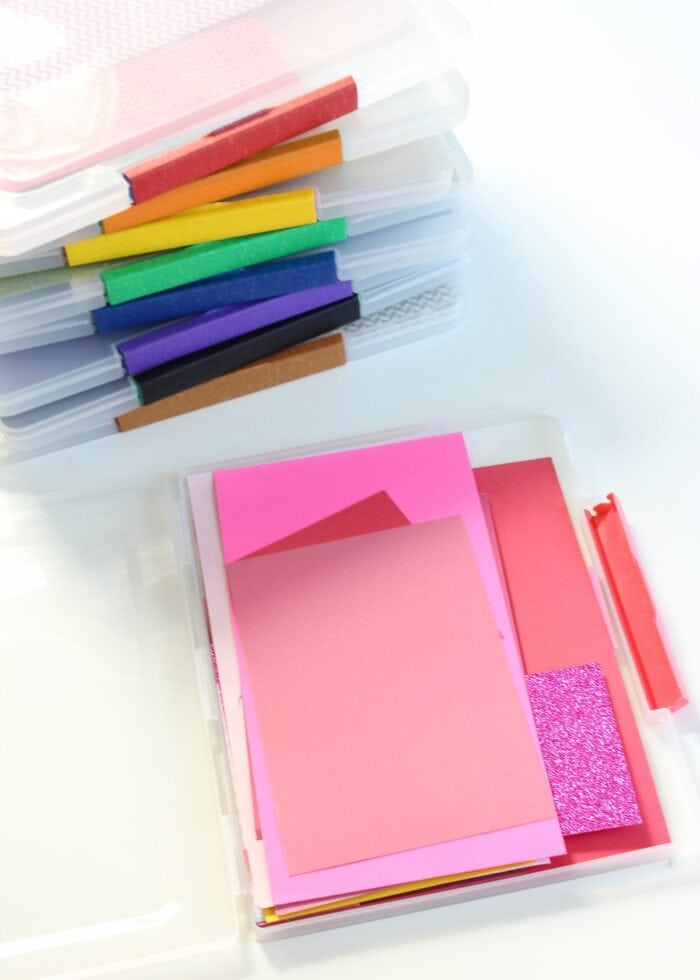
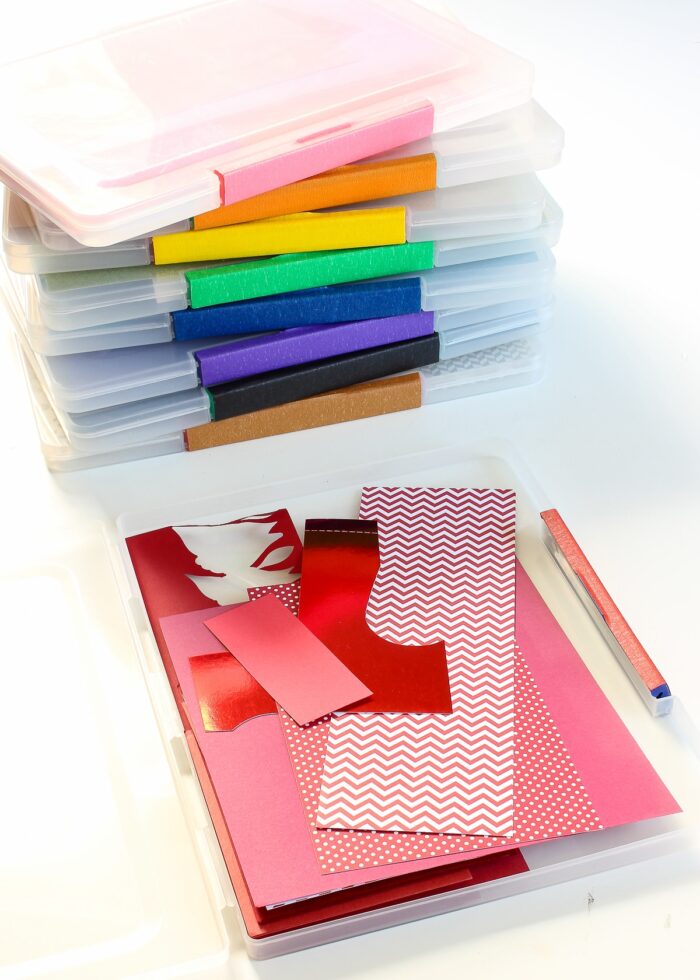
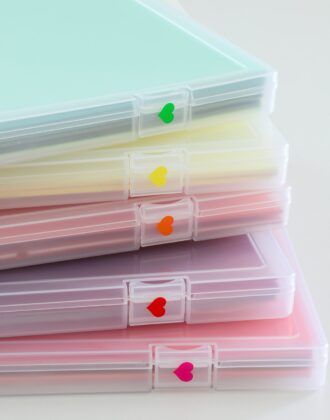
Since I want all my paper together AND store it vertically, I chose dedicated plastic document cases for each color (I also really love these similar boxes too).
I like using document cases for many reasons:
- The boxes can stand up on their own. So it’s easy to pull one (or several) out without disrupting the rest.
- The hard plastic keeps my paper safe from curling, fading, and crumpling.
- The boxes are 12.5″ high, and are therefor big enough to hold longer scraps.
- The boxes open completely flat, so it’s simple to open them and rifle through what I have.
- (And most importantly), the boxes provide a finite amount of space. When I can’t fit any more paper into the box and close it nicely, it’s time to purge out my scraps!
This paper scrap storage system been working beautifully for me for years; and if you haven’t found paper holders that work for you, I highly recommend giving the document boxes a try. Although color sorting could also be achieved with paper trays, sheet protectors, or even plastic envelopes, this is the only system I’ve found that allows you to easy sift and sort through your paper scraps without having to pull everything out at once!
Step 4: Label
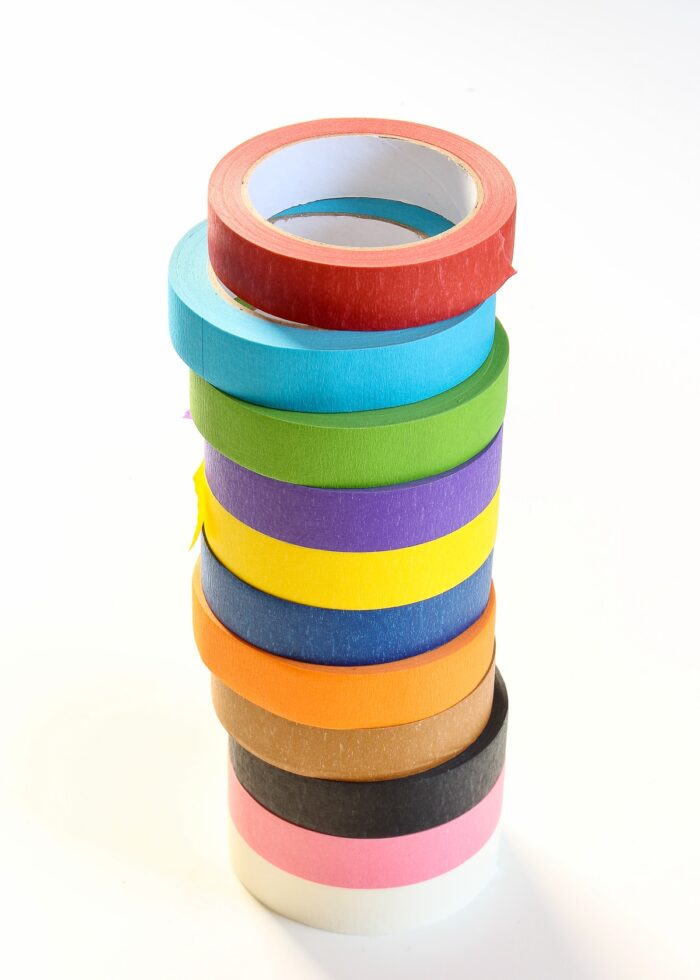
Before you put your paper scraps away, you most likely will need to label them so you can easily find what you need mid-project. I chose to cover the plastic box latches with colored masking tape, but you could easily add tabs, circles, or other simple labels with matching vinyl, tapes, stickers, cardstock, etc.
Other Craft Storage Solutions I Love
I pride myself on finding craft storage solutions that look good and work great too. Here are some other favorites for you to check out!
- Easy Sewing Machine Feet Storage Solution
- How Best to Store Craft Paper of ALL Shapes & Sizes
- How to Store Scrapbook Paper Scraps
- Easy & Practical Ideas for Storing Vinyl Rolls
- A Perler Bead Storage Solution That Works!
- An Easy (& Clever!) Way to Store Kinetic Sand
- How to Store All Your Cricut Supplies
- The Best (& Easiest) Way to Store Cricut Mats
- How to Organize Ribbon | My Favorite Solutions!
- How to Store Wrapping Paper (& All Your Gift Wrap Supplies!)
- How to Organize Sewing Thread
- How Best to Store & Organize Fabric
- How to Deflate Mylar Balloons (So You Can Save Them)
- I Downsized My Craft Room – Here’s How!
Organizing my paper scraps using these plastic boxes has been such a functional success in my craft room, that I am eager to implement the same system for my vinyl scraps (which are all currently dumped into one practically-impossible-to-use bin). If your scraps are taking over your craft space and you can never find what you need, I hope what I’ve shared here has inspired you to get them under control in this simple-yet-functional way!
Megan
3 Comments on “How to Store Scrapbook Paper Scraps”
Great article, as usual Megan. I have been storing my card scraps in Lever-Arch folders with plastic pockets. It is fiddly and time-consuming to find what I am looking for. Guess who’s heading to the shops to buy document boxes! Love your articles. Kind regards, Frances from Melbourne, Australia.
Hi Megan! Great ideas here! I do not have sufficient shelf space to store my papers vertically as you do. However, in going through my organizing supplies, I found a multi-file organizer that hangs on the wall. Each of the plastic subfolders is a different color, so I put my paper scraps in the corresponding colored file. While not as easy to go through as your boxes, it certainly is a MUCH better solution than having all paper scraps in one big file! Awesome! Now I can easily find the color in searching for!! Thanks for the great idea!!
Got the docume the files and I am starting to sort scraps. I believe this is going to work really well. Thanks for this method for sorting scraps!