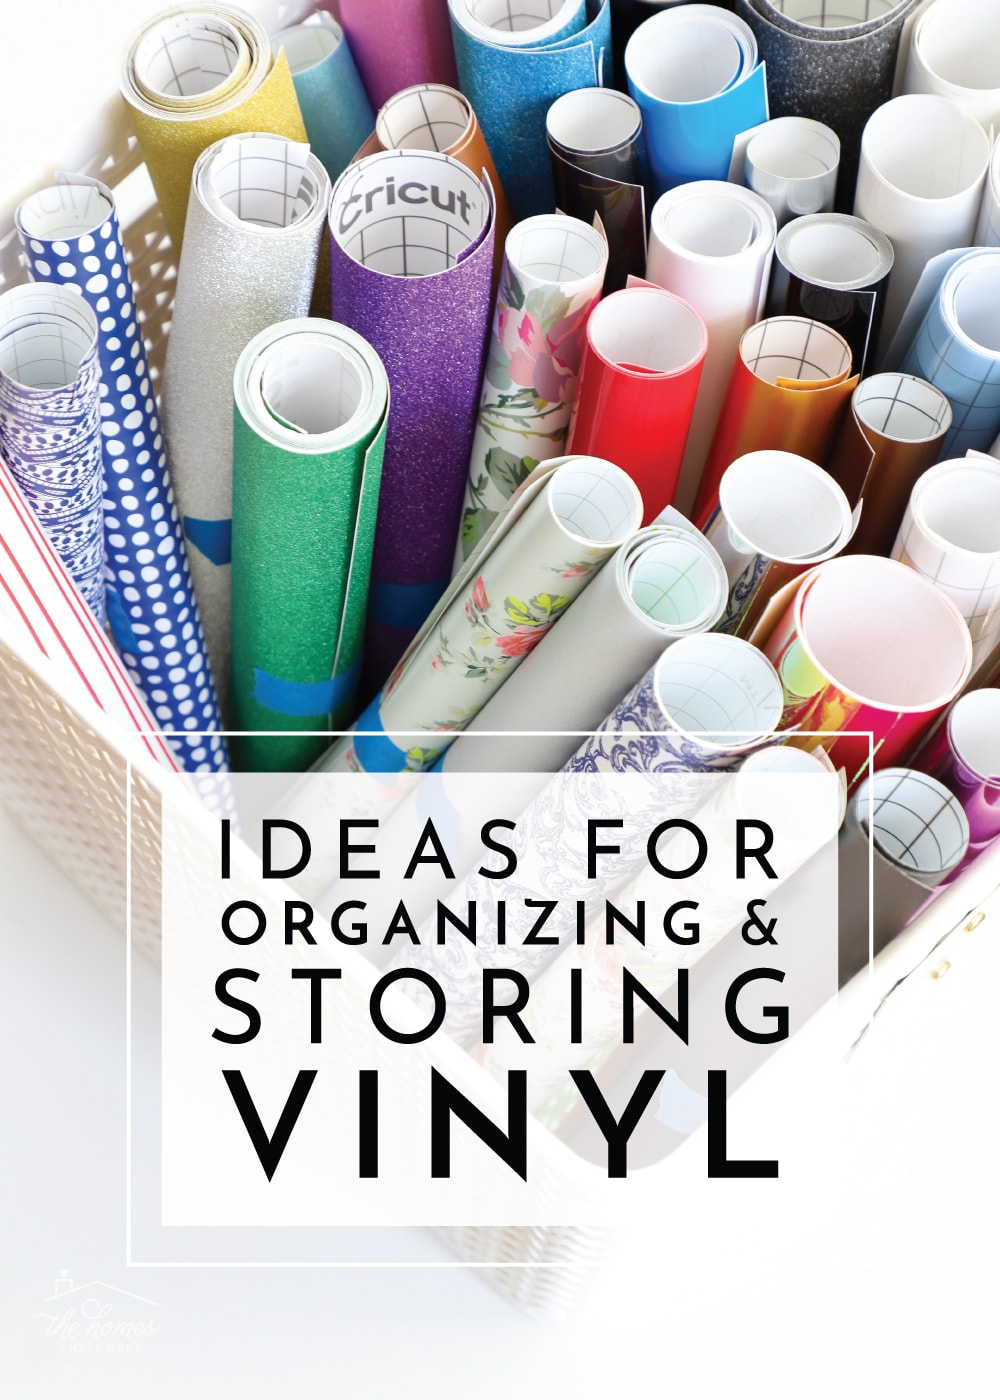
Easy & Practical Ideas for Storing Vinyl Rolls
It’s always a little funny to see what organizing projects rise to the top when unpacking a new house. While there are many things that are given a “that works for now” solution, there are others I feel compelled to address right away. As I was putting away my craft room in the new house, I decided to take the opportunity to fix a few of the storage solutions that weren’t quite ideal in my CA craft room…one of them being my collection of vinyl rolls. Today, I want to show you how I’m now storing vinyl rolls, as well as a bunch of other smart solutions that might work in your own craft space!
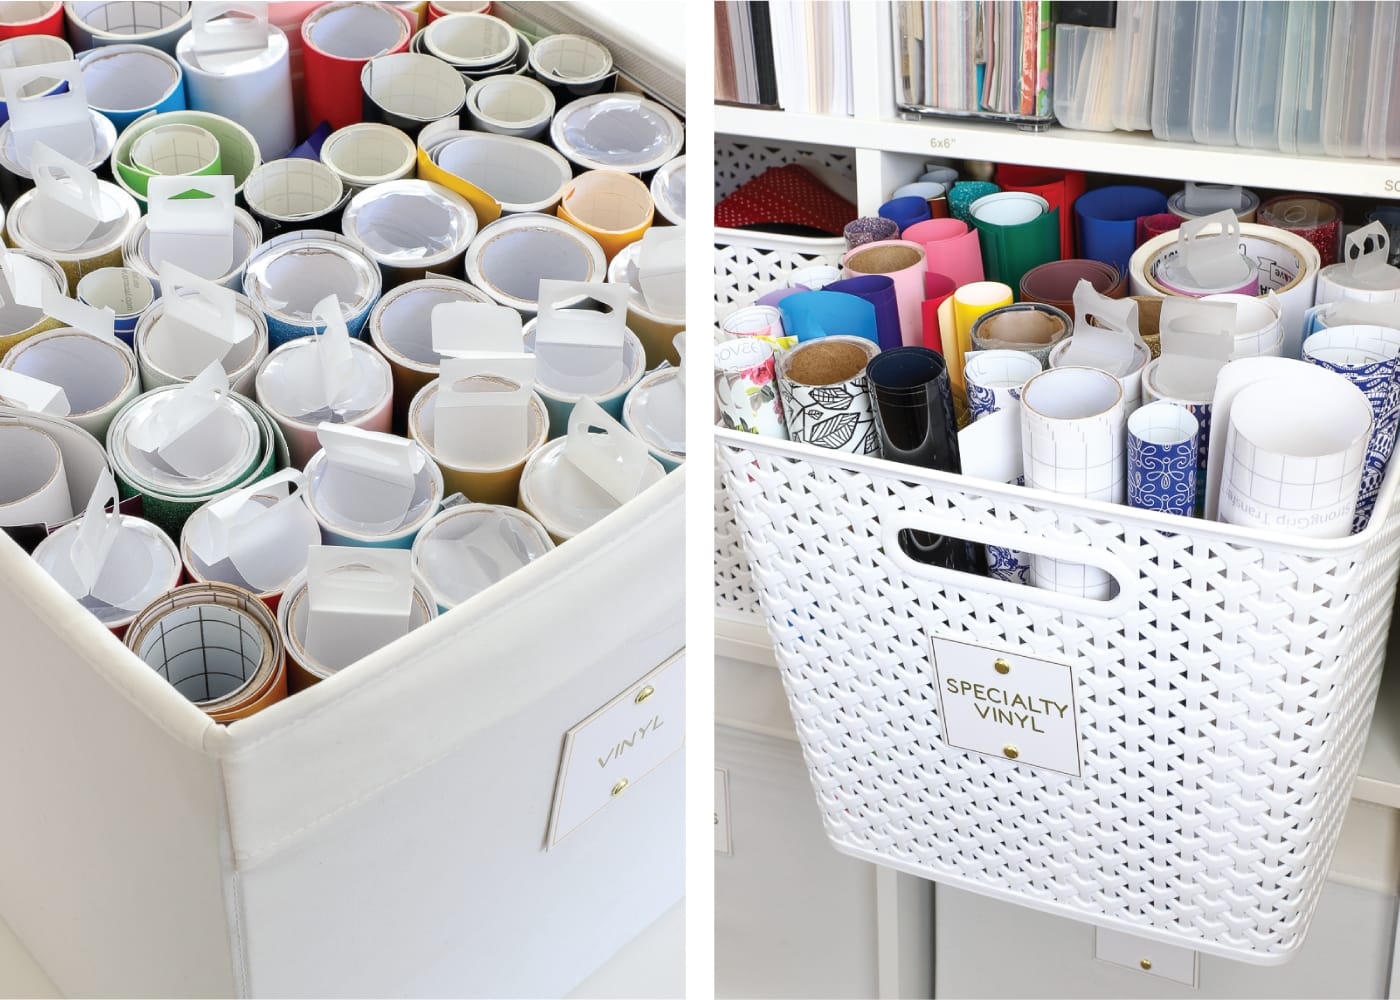
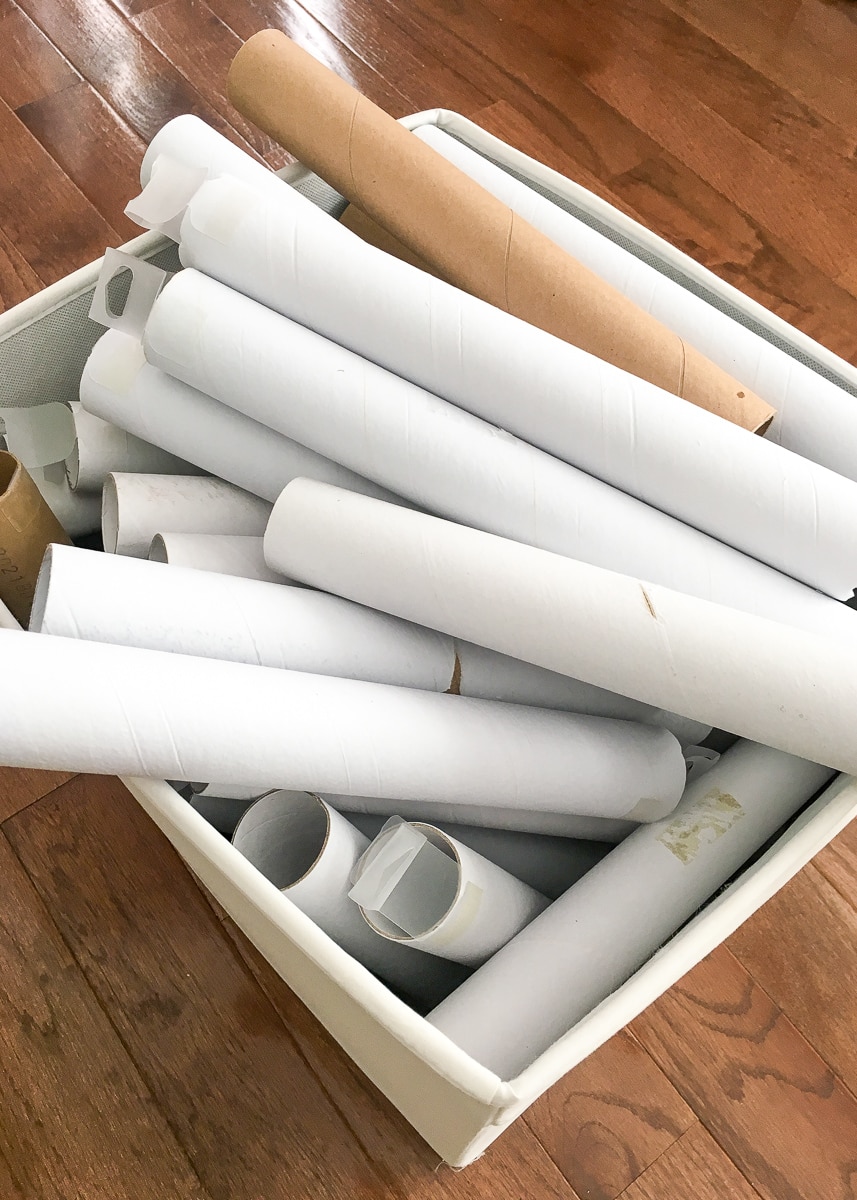
For the last few years, I’ve been storing my vinyl in two different bins in my craft room. All of my “standard” vinyl was stored in a large DRONA bin, and I loved that I could fit a ton of rolls standing on their ends (shown below, left). I then placed rolls of iron-on, patterned vinyl and other “speciality” items such as transfer paper, stencil paper, etc into a separate basket. While this simple categorization generally worked and the vertical storage maximized space, over the last few years my collection (especially of various vinyl types) has grown considerably. As a result, it was becoming VERY cumbersome to see what I had or find what I was looking for. Since vinyl is a medium I work with a lot, finding a better storage solution was a priority.
Having everything in just two bins posed a few problems:
- There are now so many different vinyl types available that just two basic groups (standard and everything else) wasn’t quite sufficient.
- I had many duplicate rolls of the same color, yet they weren’t being stored together. As such, I often ended up opening a new roll unnecessarily simply because I didn’t see or couldn’t find the already-opened roll.
- Finally, those sturdy cardboard tubes that vinyl comes on take up a lot of space, and I knew I could significantly increase how much vinyl I could store in each basket by eliminating them!
Step 1: Sort
I started by sorting my vinyl into three categories based on what I have and use the most: standard | iron-on | everything else (which includes patterned, glitter, holographic, chalkboard, stencil, dry erase, etc).
Step 2: Re-Roll Vinyl
I quickly determined, that although it would be a bit time-intensive, I could gain a lot of efficiencies by re-rolling all my vinyl. First, this allowed me to remove the cardboard tubes and eliminate wasted space. Second, I could consolidate duplicate rolls of colors, thereby creating even more space!
I didn’t do anything fancy here. I just unrolled the vinyl, removed the tube, re-rolled the vinyl as tight as possible, and secured it with some painter’s tape. On the occasion the vinyl type wasn’t evident (like dry-erase vinyl or outdoor vinyl), I would write the type onto the painter’s tape (not shown).
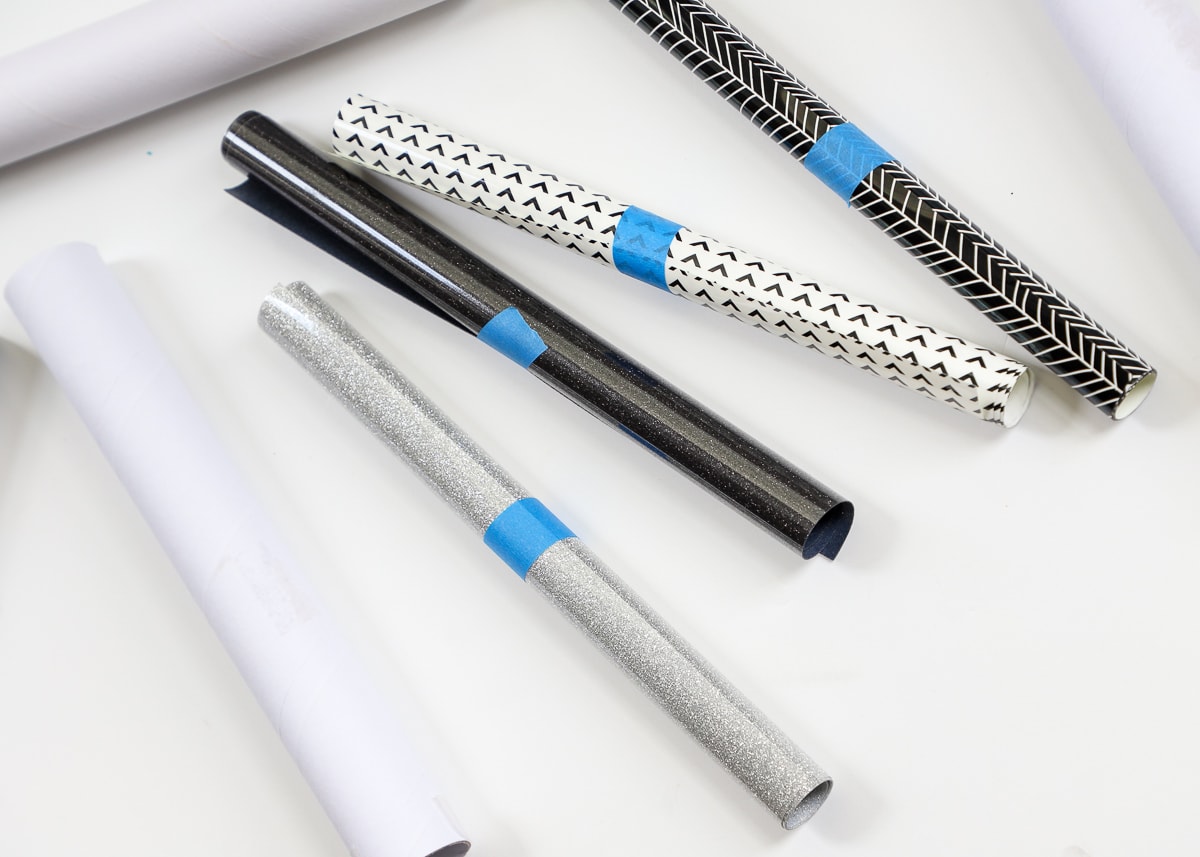
While re-rolling, I took the time to roll duplicate rolls together into one large roll. This not only included rolling (sometimes up to) four rolls into one, but also breaking apart “combo” rolls and rolling each color individually.
Re-rolling the vinyl does take a bit of time, but look at all that space saved!
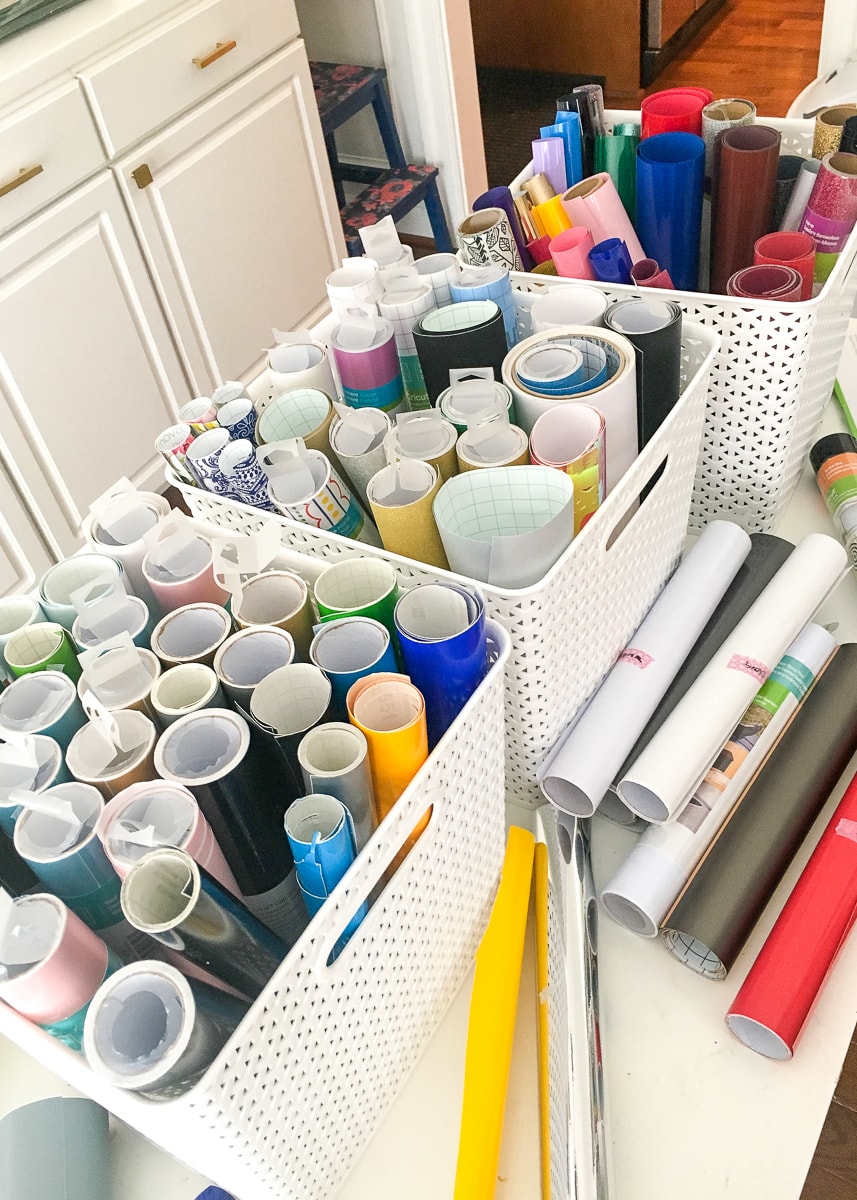
Step 3: Contain
There are lots and lots of brilliant solutions for storing vinyl rolls that involve shelves or cubbies or boxes or rods. It’s probably no shock to regular readers that baskets are the way I prefer to go. I personally like my craft supplies concealed (rather than on display or down a wall); and I find vertical storage within a basket maximizes space while still allowing me to see and pull out what I’ve got.
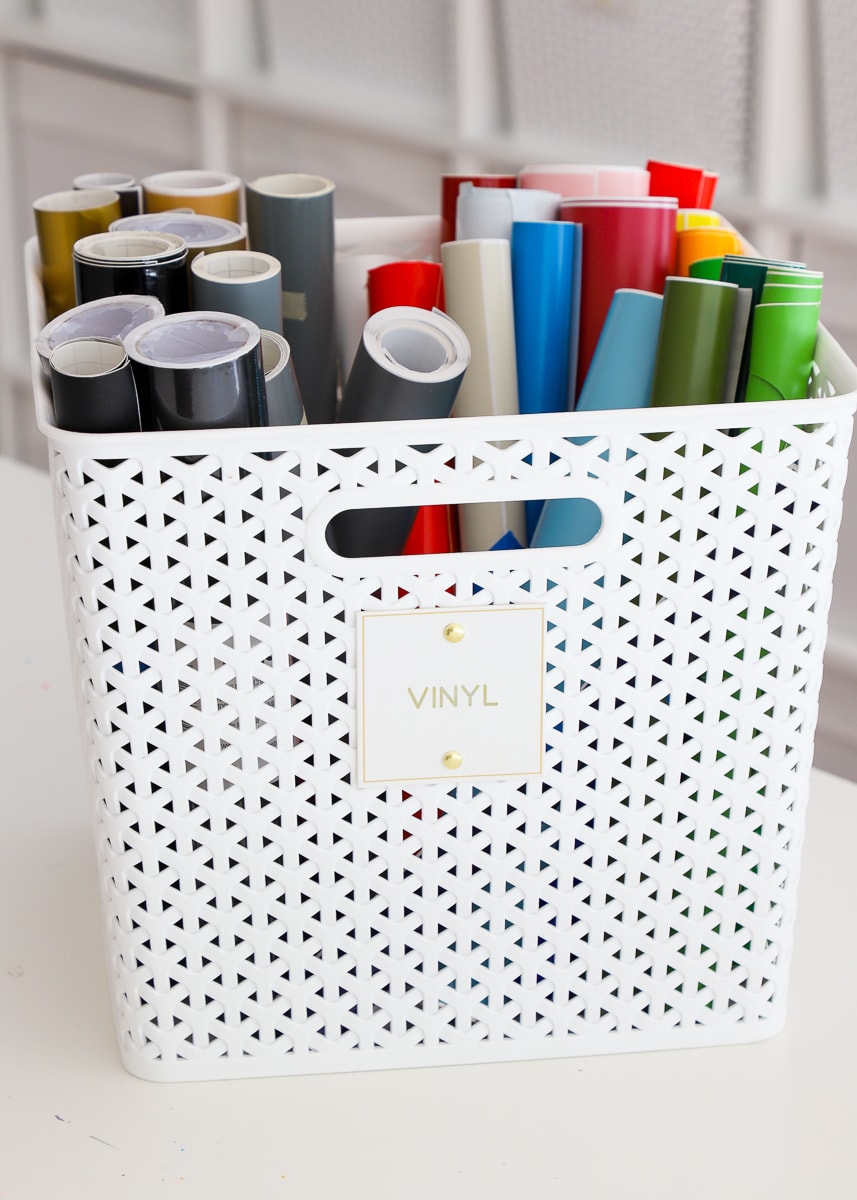
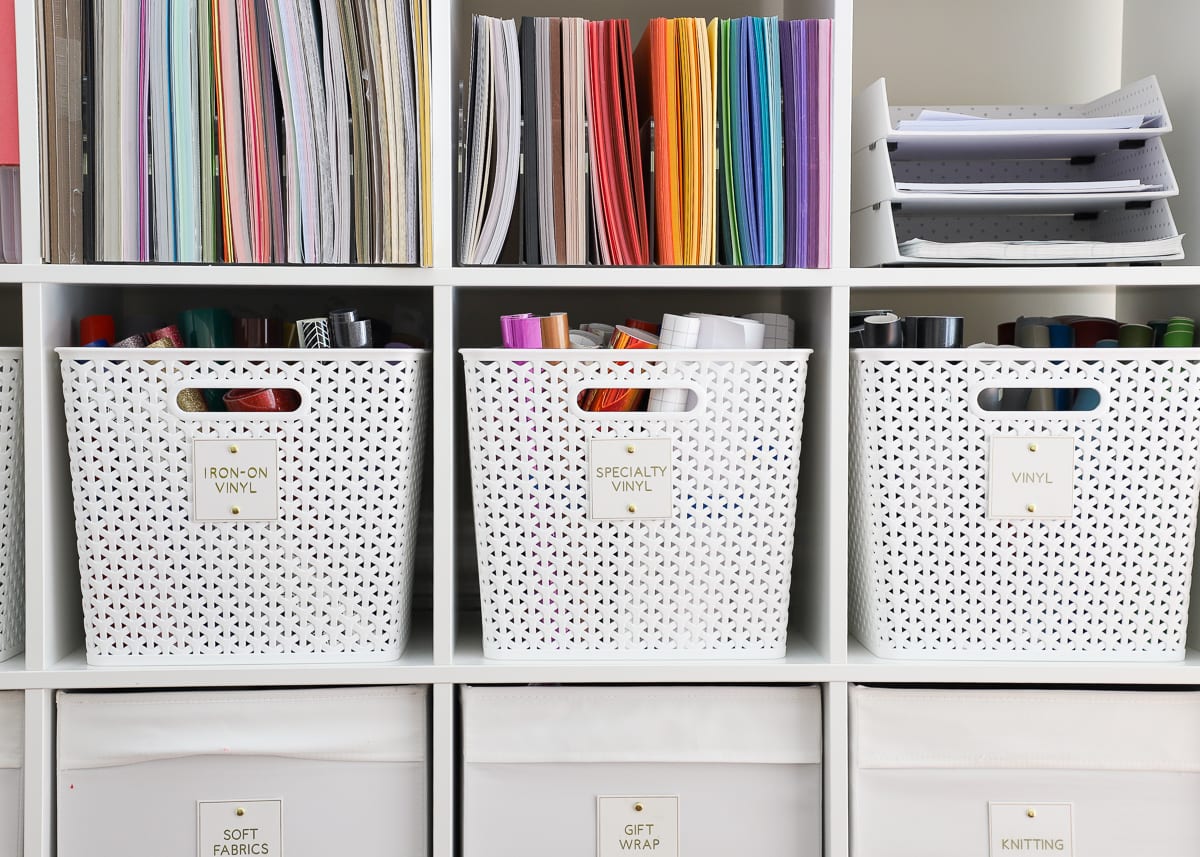
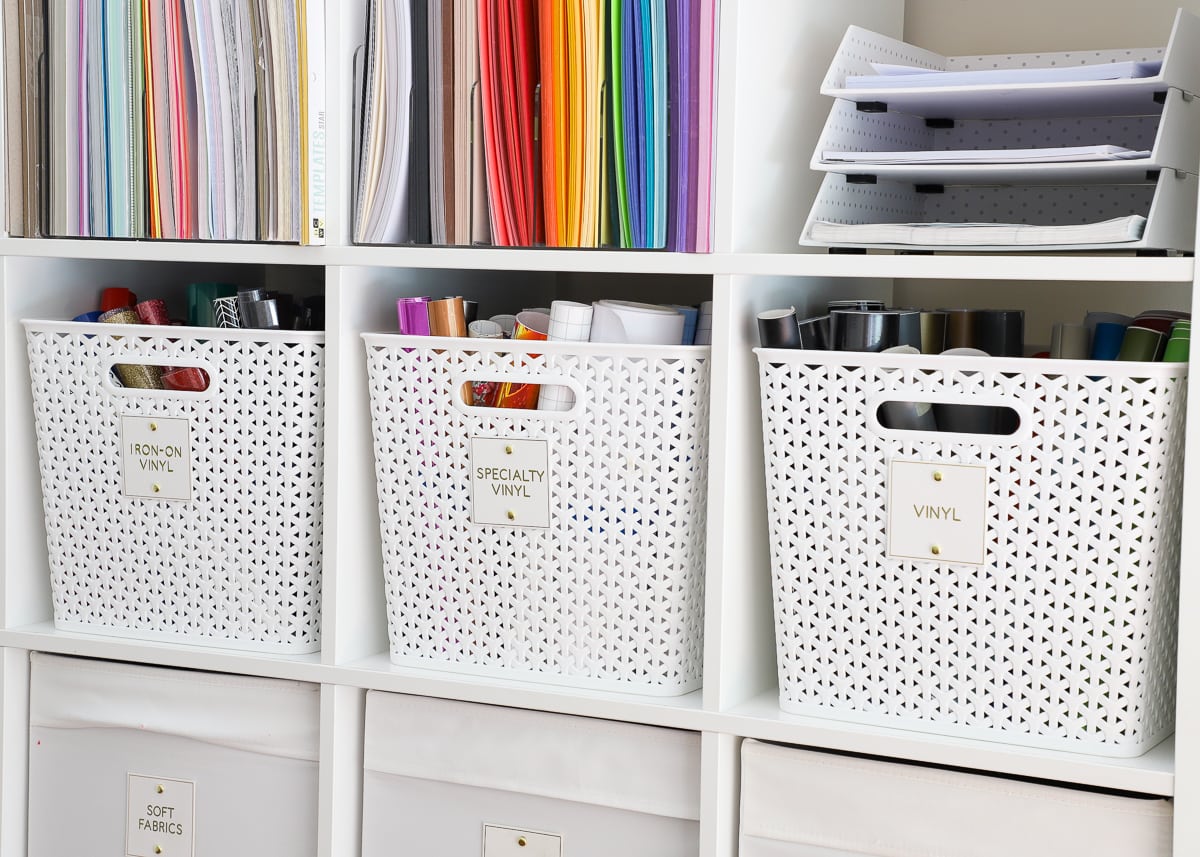
With a majority of my rolls re-rolled, I then loaded them into three different Y-weave baskets. With all the vinyl consolidated, sorted and labeled accordingly, I am now able to easily find exactly what I’m looking for!
Want to save this post?

“Vinyl” includes both matte and glossy versions of standard craft vinyl, including both Cricut and Oracle brands.
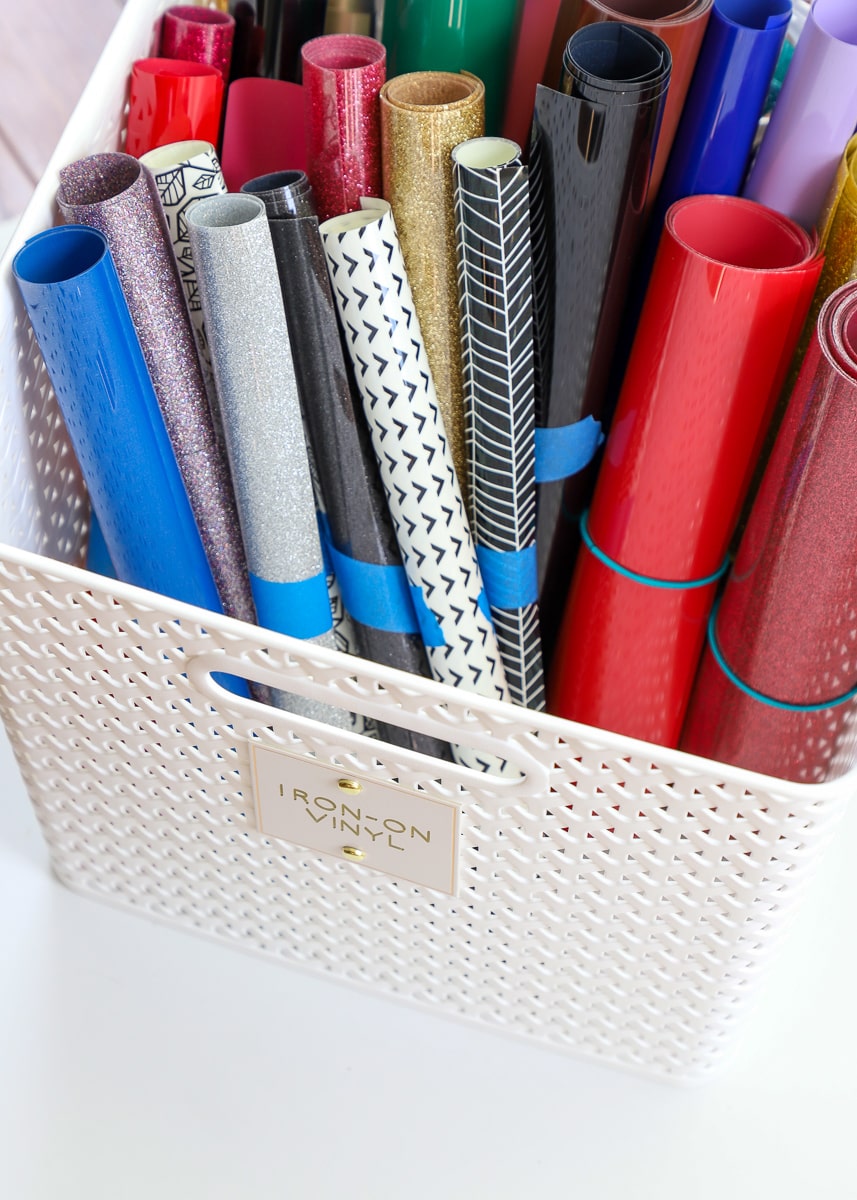
“Iron-On Vinyl” includes any and all heat-transfer vinyl, including patterned, glitter, etc in an array of brands. It’s really, really nice seeing all of my HTV products at one time so I know what I have to work with for iron-on designs!
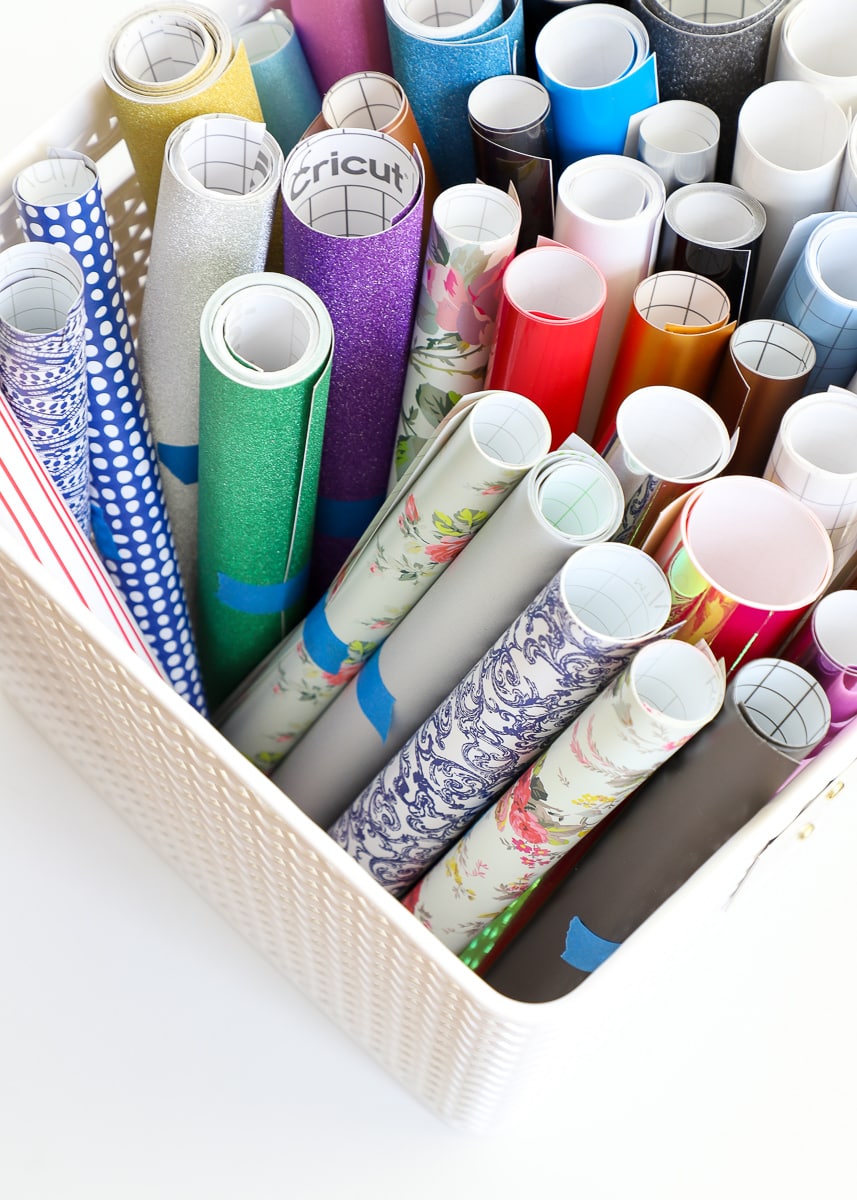
“Specialty Vinyl” includes pretty much everything else: glitter, patterned, stencil, outdoor, dry-erase, etc.
The three baskets tuck perfectly into my craft room shelves…concealed yet oh-so-easy to pull out and craft!
Having all these various rolls consolidated, re-rolled and sorted in this way not only eliminates the headache that was the big ol’ bin of vinyl, but provides ample space should my collection continue to expand…not that that will happen 😉
Other Smart Ideas for Storing Vinyl Rolls
Storing vinyl rolls on their end in a concealed basket works great for me, but I realize that might not be the right solution for every home or craft space. Here are some other storage ideas that I think are particularly clever!
- The IKEA trash bag holders are a VERY common solution and great if you have a small-to-medium collection – see it here! This same idea can be used for large collections too, but it sure requires a lot of wall space – see a pretty inspiring collection here!
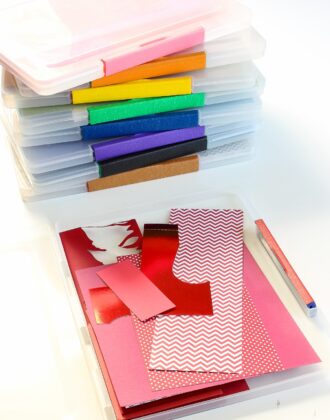
- Cori also un-rolls all her vinyl but stores them flat in labeled drawers – see it here
- Little shoe cubbies are another great solution for sorting by color – see it here
- Although this keeps vinyl on display, it’s a super user-friendly system – see it here
- Another practical take on the three basket system – see it here
Other Craft Storage Solutions I Love
I pride myself on finding craft storage solutions that look good and work great too. Here are some other favorites for you to check out!
- Easy Sewing Machine Feet Storage Solution
- How Best to Store Craft Paper of ALL Shapes & Sizes
- How to Store Scrapbook Paper Scraps
- Easy & Practical Ideas for Storing Vinyl Rolls
- A Perler Bead Storage Solution That Works!
- An Easy (& Clever!) Way to Store Kinetic Sand
- How to Store All Your Cricut Supplies
- The Best (& Easiest) Way to Store Cricut Mats
- How to Organize Ribbon | My Favorite Solutions!
- How to Store Wrapping Paper (& All Your Gift Wrap Supplies!)
- How to Organize Sewing Thread
- How Best to Store & Organize Fabric
- How to Deflate Mylar Balloons (So You Can Save Them)
- I Downsized My Craft Room – Here’s How!
Storing rolls of vinyl can be a little tricky and even exasperating. While you want to keep them on hand and easy to access, they can also be rather bulky and cumbersome, especially if you have a sizable collection. I hope what I have here gives you some ideas for storing vinyl rolls so you can keep the clutter and hassle to a minimum and spend more time and energy making the vinyl projects you want!
Megan
25 Comments on “Easy & Practical Ideas for Storing Vinyl Rolls”
Those rolls inside are perfect for STEM activities. We collect them at my school for marble tracks. Especially at Christmas time.
Sometimes the most obvious solutions we look at them as time consuming, which initially they might be. But long term, it will be a few minutes to put the new rolls with the existing rolls. Now I’m trying to think of new solutions for what is just hanging around.
So, do you sleep? Ha! I am so impressed with your time management, especially with a new baby in your house! Thanks to you, my new house, after flooding and moving in Houston, is filled with Y baskets and decanted products and and a new craft room/office. Thanks so much! Great ideas. Thanks wish I had had this when I was teaching!
Holly
Hi Holly!
Ha – I love this comment!!! It makes me smile to know I’ve thoroughly spread my love of Y-weave baskets 😉
And yes…I do sleep…but hubby has been home so I’ve still be able to keep the blog ship afloat. He headed back to work today (AHHH!) so we’ll see how things go from here….eek!
Have a great rest of your week!Megan
I like your vinyl box idea. Silly question, I’ve never used vinyl? What are it’s uses? Why so many?
Hi Nancy,
Vinyl is a craft medium that can be used, often i conjunction with a Cricut machine, to decorate pretty much any surface (cups, mugs, walls, furniture, signs, etc). I use it for all sorts of home decor, gifts and more. You can see what I mean here: https://thehomesihavemade.com/2016/07/cricut-explore-home-decor-part-2-working-vinyl/
Thanks,Megan
Wow! That’s pretty a lot of pieces of vinyl you had out there. I only had two so far and wanna get more. Love the way how you organize them.
Where are the labels from on the front of the baskets?? are they stickers?
Hi Lexi,
The tags are from Michaels and I wrote on them with my Cricut Pens – you can see more here: https://thehomesihavemade.com/2019/07/how-to-write-on-tags-labels-with-cricut-pens/
Hope that helps!
Megan
I actually did the exact same thing last night accept I used searan wrap and store then the same it takes a good bit of time but very spacious. I notice your sew machine feet I bagged them and labeled in jewelry bags and placed in a sealed container yesterday also. Your vinyl can go bad which is why I opted for the wrap
Thanks for sharing Carlene!
I haven’t had any vinyl go bad (and I’ve had some for years), but that’s a great solution in case anybody ever encounters that!Thanks!Megan
Hi Megan,
Thanks for your great ideas! I have moved and had to downsize my craft space significantly! 🙁 I like your Y-Weave baskets as they are also very pretty and keep the vinyl concealed but easy to look through. (Although I’ll be on the hunt where to purchase them in Ontario Canada!) I was wondering if your storage cabinet (cubbies) was from IKEA? If so, could you please share the unit purchased? Many thanks!
Hi Lisa!
Thanks so much for stopping by! Yes, my storage shelves are all IKEA Kallax units. We have them in a variety of sizes…the one in my craft room is the 5×5. You can see the full selection here: https://www.ikea.com/us/en/cat/kallax-series-27534/
Hope that helps!Megan
I love this. I have tried several ways to store my vinyl but can’t find the right way for me. I have had them stored in file boxes but they are too small for the amount I have. I think I need to go with something like this. Thank you for sharing!
I do have a question …how do you store the scraps of vinyl?
Thanks again!
Kathy
Hi Kathy!
Sorry for the delay in getting back to you but I wanted to answer your question.
I store scraps in a flat, lidded box. You can see them at the bottom of this post: https://thehomesihavemade.com/2019/05/how-i-store-aaalll-my-craft-supplies/
Hope that helps!Megan
Hi my question is if you store all your vinyl together do you store permanent and removable together as well? I’m trying to decide how to sort my vinyl.
HI Myra!
I do…Cricut vinyls have the type printed on the inside, and I know that all my Oracle is 651. You could always use different rubber band colors or tapes to distinguish different kinds.
Hope that helps!
I’m just a little late to these comments, but I LOVE this idea! I have way too much vinyl (is that even possible??), so taking the rolls off their tubes and rolling tighter, plus consolidating multiples, is brilliant. Thank you for thinking of that so I don’t have to! 😁
You are most welcome! I did this years ago and I’m not sure why it took me so long. STILL loving this solution! Hope it works for you!
~Megan
I find when rolling my vinyl it causes creases when I go to uses it again. It is not to user friendly after that.. help.
I love the Ikea plastic bag holder idea as well as the pegboard! I have them in my Ikea cart as I’m typing this! I’ve only had my Cricut since Christmas, but I love it and finding ways to organize my growing collection of “stuff” is important. My crafts and hobbies, along with my home office, are now occupying two rooms of my house! Thanks for the great tips!
I would prefer them flat but can’t do that in my space or with long rolls because I have a hard time getting it to lay flat on my mat without masking tape. Using your method I would need to reverse the roll I think.
Baskets look nice. I don’t have much wall space but have lots of vinyl. I got an over the door shoe holder. It has two columns of slots, right and left. It holds 4 boxes of vinyl for Cricut Joy or 2 full size or 1 jumbo in each slot. It has around 50 slots. My door opens and closes with it on so it’s easy to see everything with the clear vinyl storage holes, sturdy and doesn’t take up floor space which is very limited. Small multipurpose room.
Be careful with the painters tape. I definitely use it as a multiple use product at our house but it left a residue on my vinyl rolls. Every. Single. One of them. I took scrap paper and wrapped the vinyl and used the painters tape to close the paper so it would enough to keep it in rolls without the residue from the tape.
Hi there, love your blog and all the handy ideas for storage. I am wondering about the baskets you use for your vinyl storage. The link provided takes me to the XL y weave baskets however those have a curved edge. The ones that are shown in your example are a straight edge. I am wondering if you used the large or indeed the XL and they have just changed the design.
Hope this makes sense :). Thanks in advance!
Hi Kelly,
Thanks for reaching out on this. Unfortunately, the baskets shown in my pictures (with the flat top/front) are the very original Y-weave baskets that Target released ages ago. And along the way, they changed the available sizes and they are no longer available. I’ve never really looked for similar versions at Walmart or Amazon (the y-weave pattern is fairly common), but that could be an option if you really want that look.
Sorry I don’t have better news here – but good luck with your storage!
Megan