How to Organize Ribbon | My Favorite Solutions!
Of all the various items in a craft room, I find ribbon to be some of the most challenging to organize effectively. Because ribbon typically comes on bulky rolls in a wide variety of sizes and lengths, it is really difficult to find a “one size fits all solution.” And then since ribbon isn’t exact a “use every day” product (unless you’re a bow maker!), it can be tricky to determine how accessible you really need it. Today, I want to share some of my favorite ribbon storage ideas I’ve used over the years, and show how I’ve recently refined my ribbon storage even more. If you are trying to figure out how best to organize ribbon, I’ve got ideas that can help!
Why Is Ribbon So Tricky To Organize?
One stroll through the ribbon aisle at your local craft store will show that ribbon now comes in pretty much every length, width, color, texture…and most importantly: spool size. And although spools are ideal for packaging and using ribbon, it’s this exact variety that make it so difficult to organize ribbon…especially in a way that is completely user-friendly but also nice and tidy to look at.
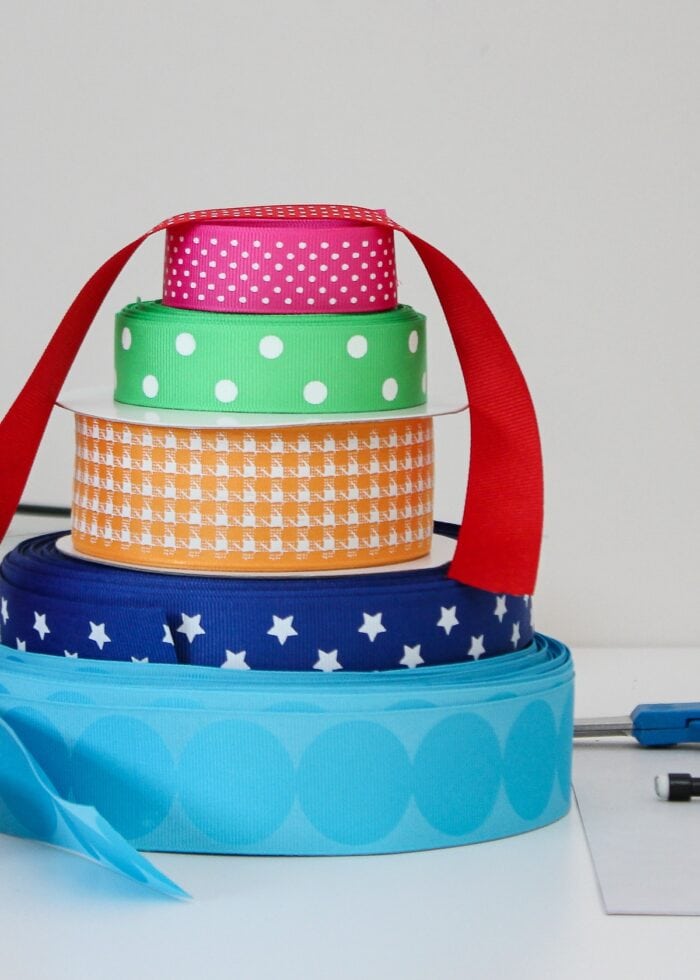
Not only is it rare to find a ribbon storage organizer that will perfectly hold all your various spool sizes (because eventually, you will have one that doesn’t fit!), but the spools themselves are also incredibly bulky and take up a lot of space. In fact, if you think about your own ribbon collection, it’s likely taking up far more room than it needs to, and I have an even stronger hunch that it’s all just thrown into a single bin or basket. Because really…how else do you deal with all the awkward roll sizes and different ribbon lengths?
My Favorite Way to Organize Ribbon
Of all the different ribbon organization solutions I’ve tried over the years, by far my favorite has been a trick I actually use all over my home: ditch the original packaging and re-load the item(s) into standard, consistent organizers.
In the kitchen, this is called decanting (where you pour all your different bags of rice, sugar, flour, etc into matching containers), but the concept can apply anywhere in the home. And when it comes to ribbon, I’ve found no better solution than the bobbin!
Not only are bobbins fairly easy to buy (or make!) in pretty much any size you need, but they are quick to wind (and un-wind) when you need ribbon for craft projects. Bobbins eliminate all the wasted space usually taken up by cardboard spools, hold any width and length ribbon in a really compact footprint, and can be easily stored in drawers, boxes, rods, plastic baskets, etc.
Although getting your rolls of ribbon sorted and wound onto consistent bobbins does take some work, I think you’ll love the efficient use of space it creates, and how much easier it will be to find and use your ribbon whenever needed.
How to Organize Ribbon onto Bobbins
What You Need
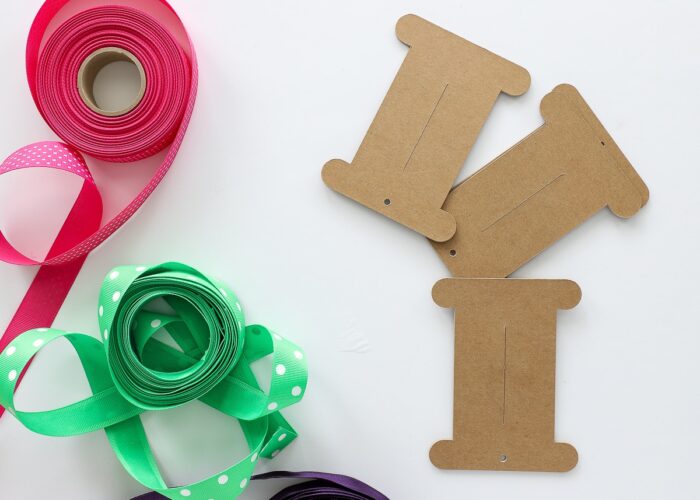
- Ribbon – Any length, width, and type can benefit from this storage method; and this project can even be extended to yarn, twine, cord, bias tape, thread, lace, etc.
- Bobbins – Bobbins can now be found/made in a wide variety of sizes; see more information on sizing and where to buy them below.
- Rubber Bands or Bobby Pins – To secure the ribbon around the bobbins.
- Entertainment – You’ll likely want a good movie, podcast, or audiobook to keep yourself entertained while you wind, especially if you have a big collection!
All About Bobbins
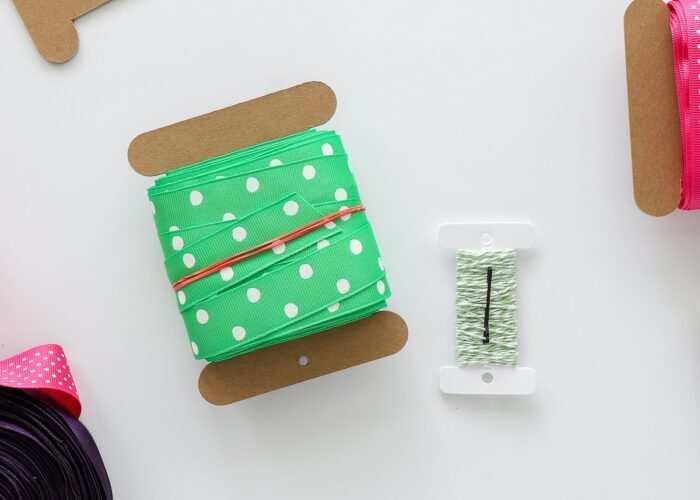
When I first organized my ribbon onto bobbins 10 years ago (yep, you read that right!), I found and used the awesome plastic bobbins shown below. In all the years since, they have been pretty much impossible to find (and trust me, I’ve looked!)
Well, leave it to my fellow creators to fill a void in the craft world, because there are now lots of bobbin options available on both Etsy and Amazon. Not only can you get pre-made versions in lots of different sizes, but you can also get SVGs to make your own with an electronic cutting machine such as a Silhouette or Cricut (which is how I made mine – tutorial coming soon!)
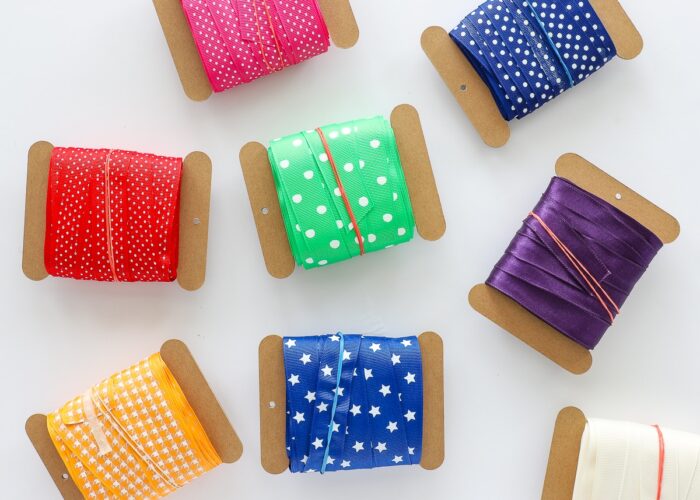
If you don’t want to make your own, I recommend these cardboard bobbins on Amazon. Not only are they made of nice thick chipboard, but they also come in a variety of sizes to choose from and are a really reasonable price for a large set.
What size you need very much depends on the width/length of the ribbon in your collection, as well as where you want to store it (as in, if you need the bobbins to fit into a particular drawer, basket, etc). Based on my own experience, here are some general guidelines to help you:
- My 3″ tall plastic bobbins nicely hold ~3-5 yards of ribbon.
- My 5″ tall chipboard bobbins easily hold ~15-25+ yards of ribbon.
How to Wrap Ribbon onto Bobbins
Wrapping ribbon onto bobbins is not hard, it’s just time consuming. I suggest you find somewhere comfy and settle in to wind and wrap away.
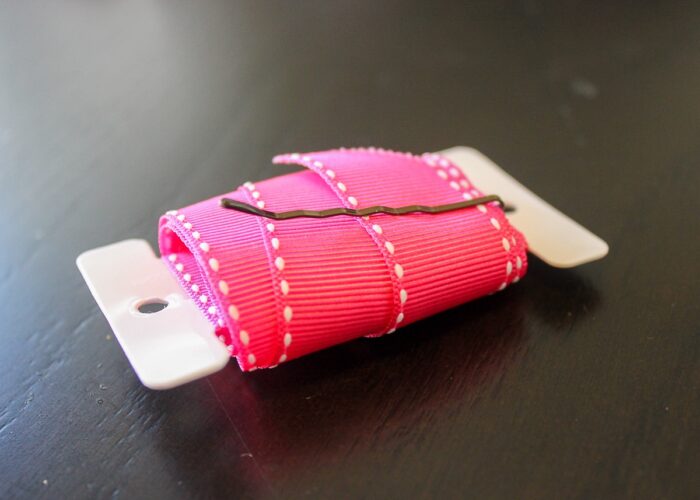
I made my bobbins to have a slit down the center to firmly hold the leading edge.
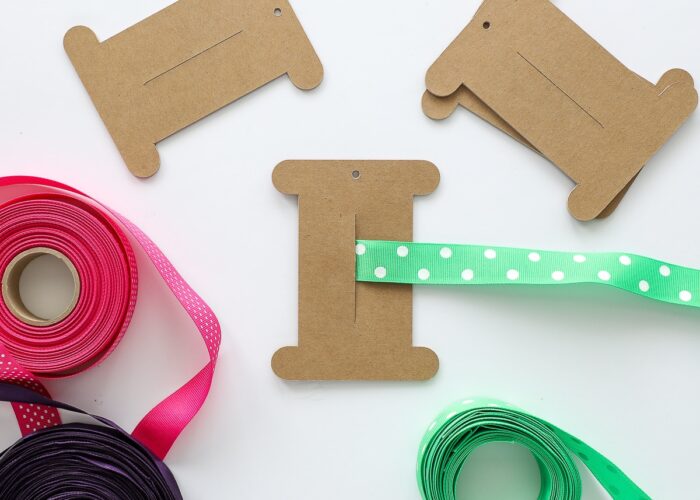
Once inserted, just wrap and wind so the ribbon lies as flat and even as possible up and down the entire bobbin.

Once you’ve wrapped the entire length of ribbon, secure it with either a straight pin, bobby pin, or rubber band.
Theoretically, you can wrap your bobbins as thick as you’d like them, but it will influence how nicely they file/stack if you plan to load them into a box or drawer.
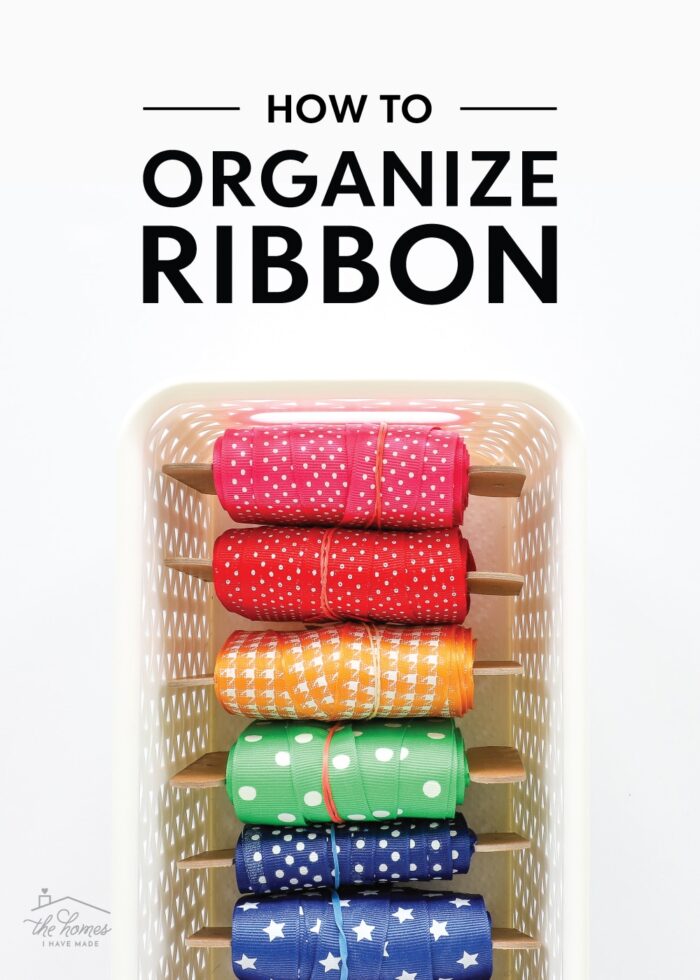
How to Organize Ribbon Bobbins
Once you have all your ribbon wrapped onto matching bobbins, you’re not entirely done. After all, you still have to figure out how best to store all the bobbins. And what specific bin, basket, rod, or ribbon holder you choose greatly depends on:
- How many bobbins you have
- How big they are
- How easily you need access to your ribbon
- What kind of space you have
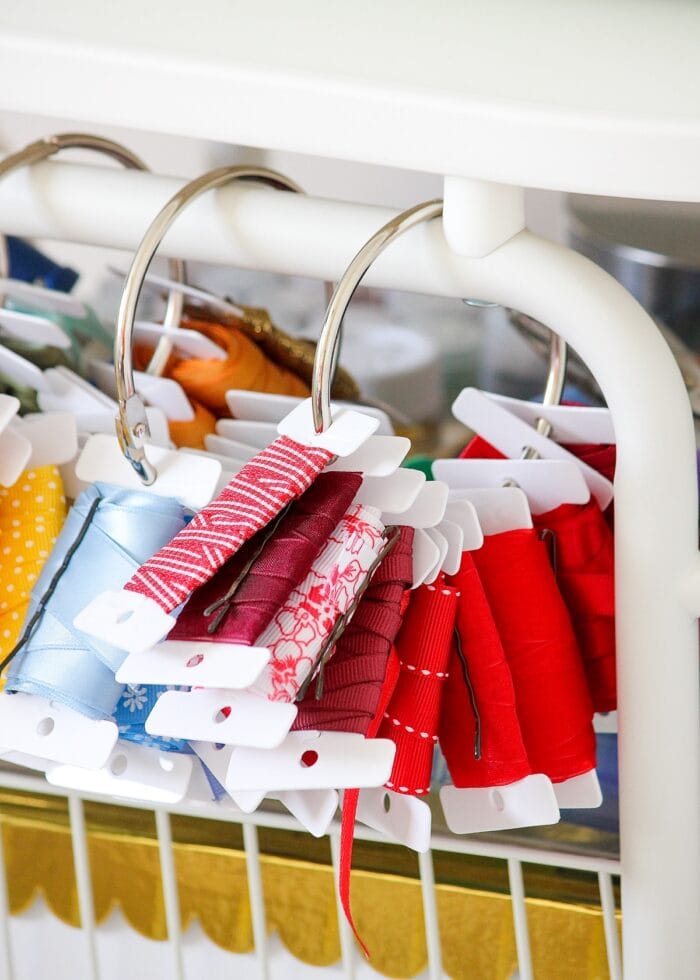
On Book Rings
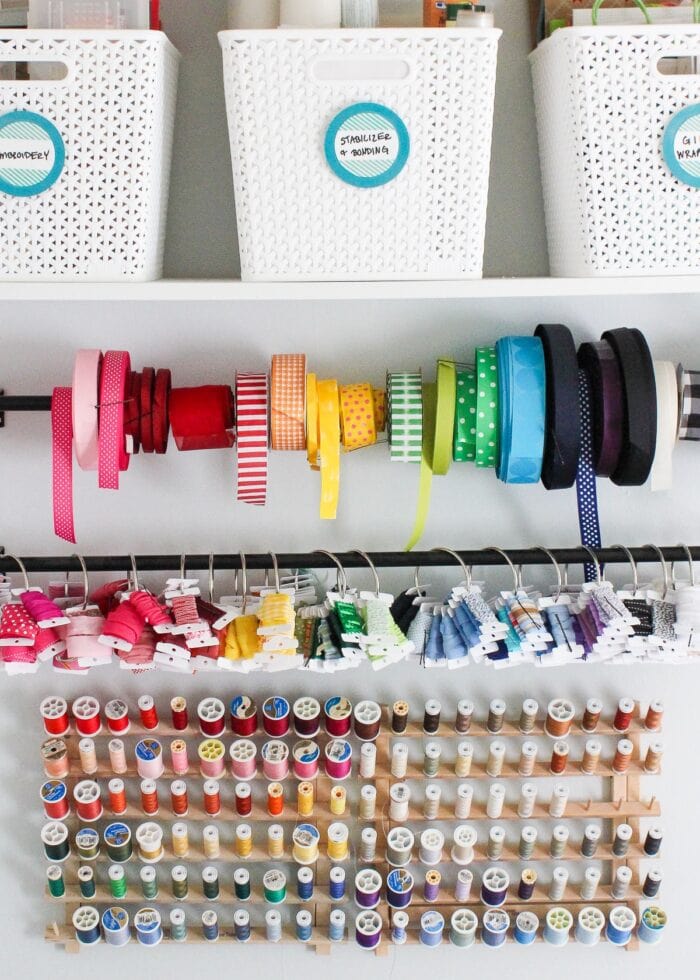
When I first wound my ribbon bobbins years ago, I was heavily into “small crafting” and wanted my ribbon visible and easily accessible at all times. So I loaded the small bobbins onto large book rings organized by color and then clipped the rings onto a wall-mounted curtain rod.

Not only did my rainbow-loving heart love the look of this ribbon organization solution, but (at the time) seeing all my ribbon at a glance was perfect for my productivity.
Want to save this post?
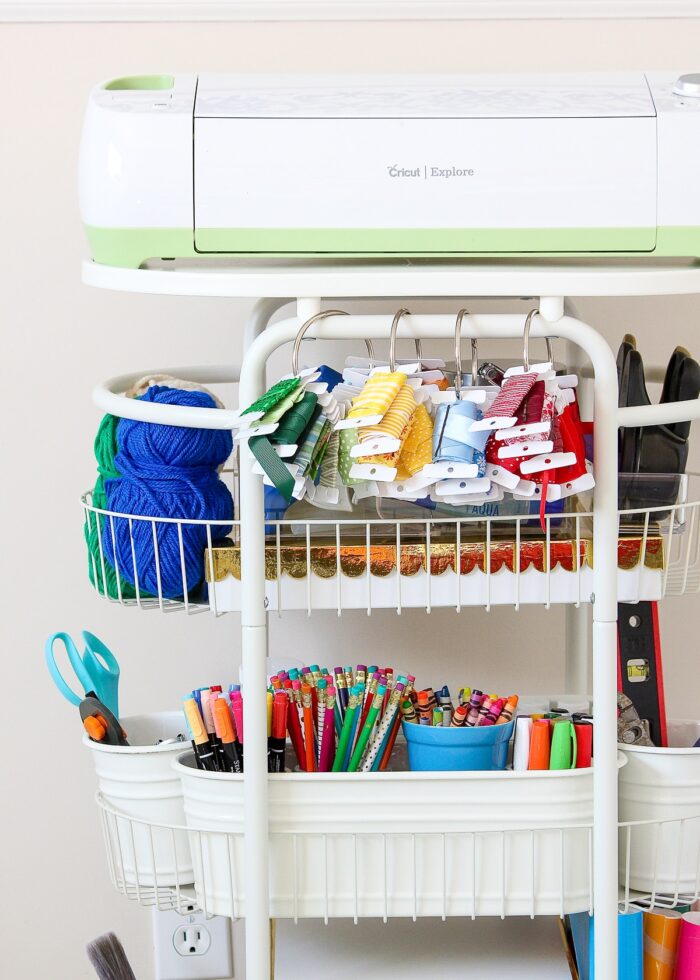
Even if you don’t want or need to mount ribbon to your wall, the book ring solution is still a handy one to consider, as they can be clipped onto anything (like the cart below) or even just thrown into a bigger basket (which I also did for many years). Since the rings are sorted by color, it’s easy to grab all your blue or pink or green ribbon to see what you have for a particular project!
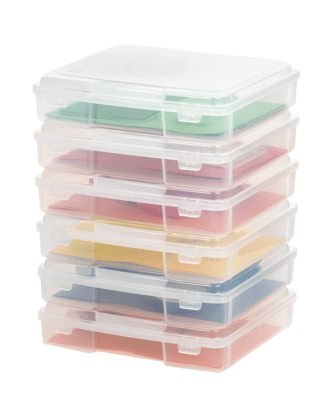
Filed Into Drawers or Boxes
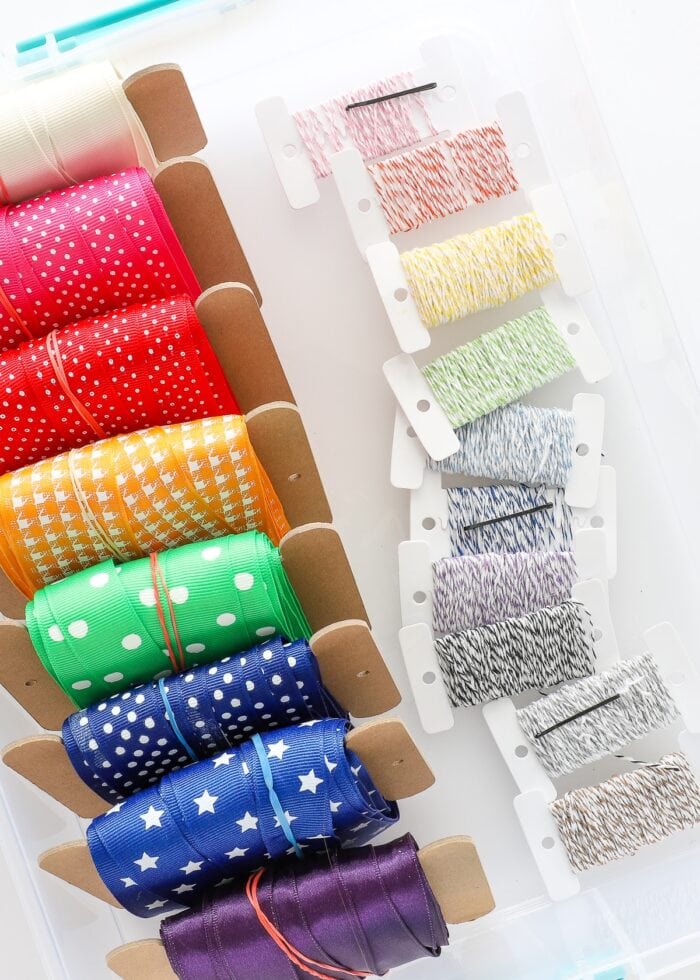
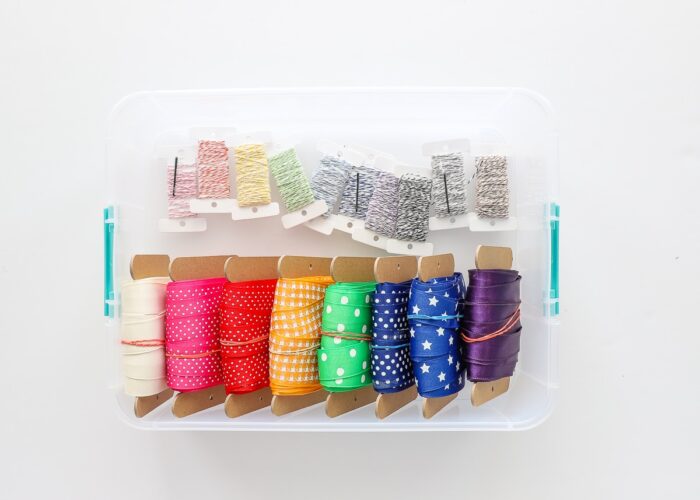
If you don’t want or need your ribbon collection so easily accessible, bobbins are also easily “filed” into baskets, drawers, totes, and other containers.
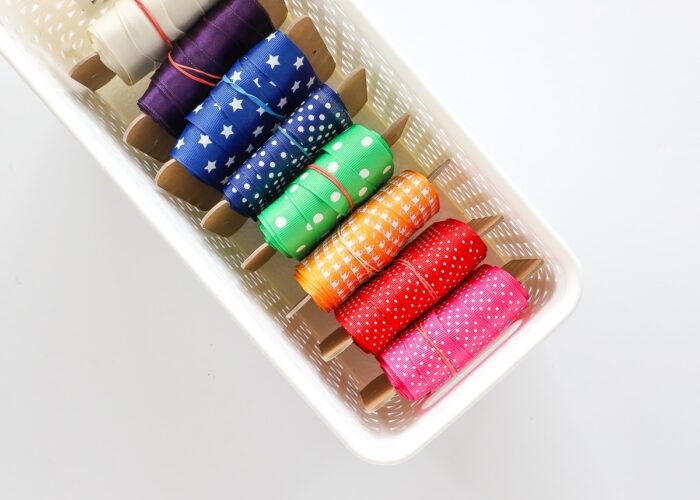
Since all the bobbins are the same size, it is easy to organize ribbon in a really compact footprint while still being able to see and access each and every one!
What to Do About Large Ribbon Spools
Without a doubt, the bobbin solution for organizing ribbon is a very solid one. And for most hobbiests, they will provide more than enough storage spaec (mine hold 15+ yards of ribbon, after all!). But bobbins do have a limit: they are not ideal for really, really, really long/large spools of ribbon.
Years ago, I visited a “ribbon outlet” with my Mom, where we bought 100+ yard spools of ribbon for cheap (really cheap). Not only would re-winding 100+ yards of ribbon onto smaller bobbins be time consuming and largely unnecessary, but they’d create super huge bobbins that would be no easier to store.
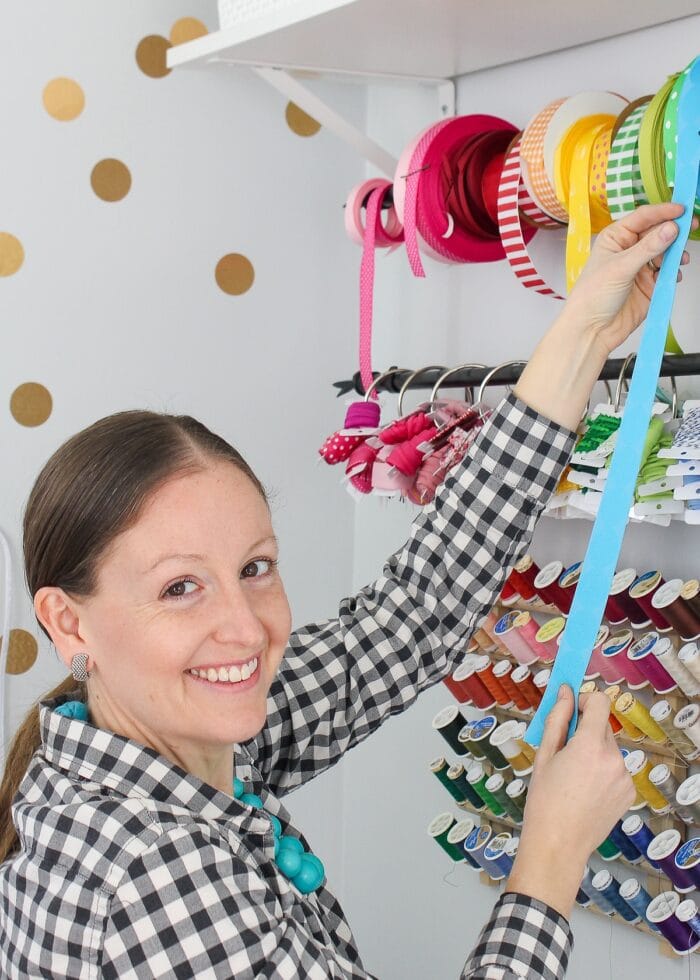
Wall-Mounted Ribbon Storage
Although I have recently donated most of these large spools (because I simply don’t use them), there are certain crafters that do have (and use!) large spools of ribbon on a very regular basis (e.g., bow makers, gift wrappers, etc). If this is you, I very much recommend storing ribbon on some sort of wall mount rod system.
I actually prefer this solution to the various DIY storage racks and dispensers I’ve seen around the web. Because this setup is nothing more than a few curtain rods mounted to a wall (instead of above a window), it is very budget-friendly, easy to install, and highly customizable for your space and your ribbon stash.
You can install this setup on a craft room wall, in a closet, over a counter, or even mounted to the underside of a shelf. You can install one rod or multiples; organize ribbon by type, color, size, etc; and even pick a width that best fits the space you have. The key here though is to use deep enough curtain rod brackets that allow the rod to sit far enough away from the wall so that the spools spin freely.
(And keep in mind that spools are somewhat “trapped” on the rod. The only way to replace spools is to take down the rod and take spools off until you can reach the one that needs replacing!)
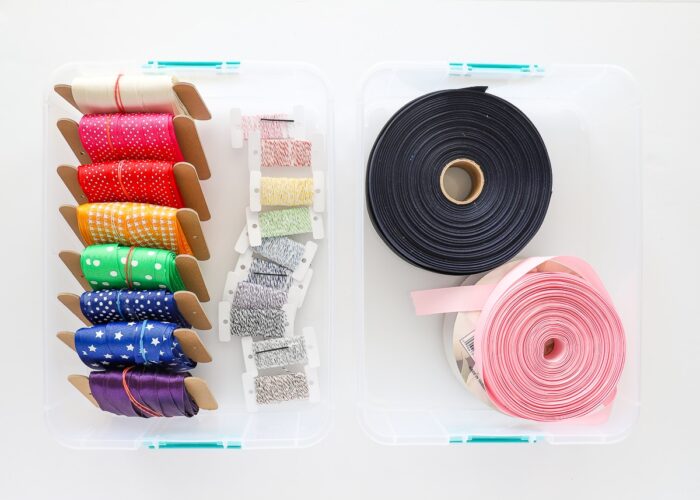
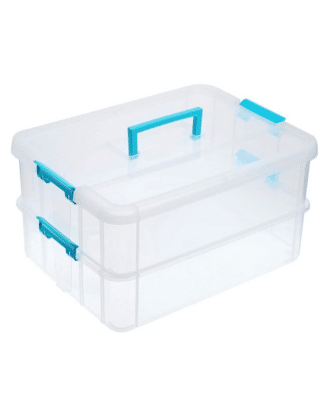
Ribbon Rolls in Boxes
Perhaps you don’t have an extensive collection of large rolls, but still have enough that can’t/shouldn’t be re-rolled into smaller bobbins. In these instances, using a multi-tiered tote (top tier for bobbins and lower tier for larger rolls) is a great alternative.

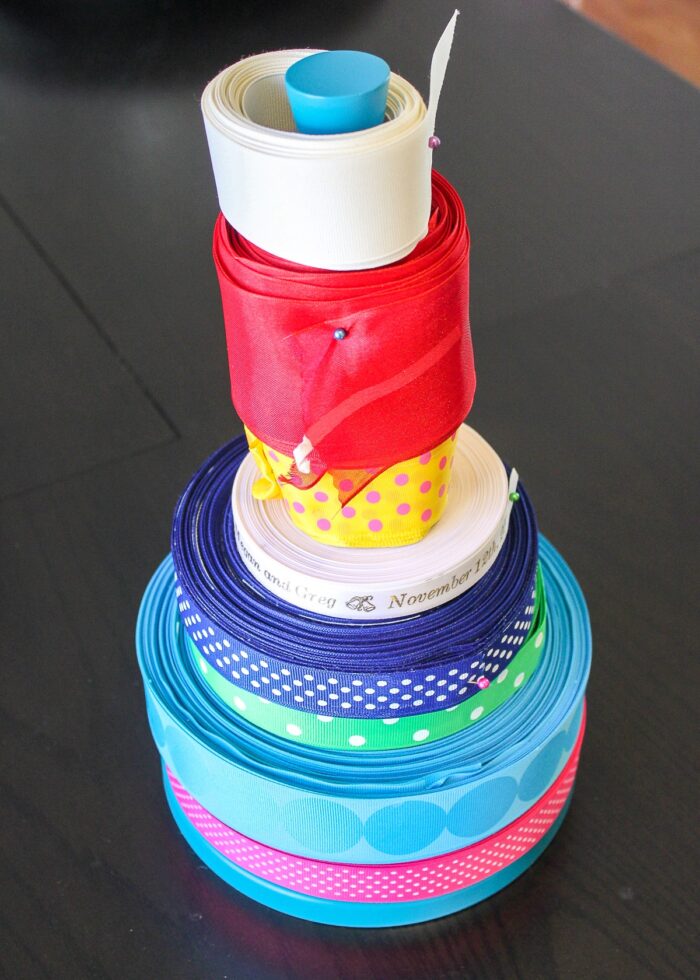
And finally, if you still prefer just a few rolls out in the open so that you can easily pull off yardage at any time, I’ve had a lot of luck with stacking a few rolls on a paper towel holder!
Figuring Out the Right Ribbon Organization Solutions for You
In order to figure out how best to organize ribbon in your craft room, you need to consider three factors:
- How much ribbon you have and (generally) how long it is
- How frequently you use ribbon
- How you typically use ribbon on your projects
For example:
- Most hobbiests and crafters who purchase spools in the 3-20 yard range and use ribbon on a project-by-project basis will likely benefit more from re-rolling their ribbon stash onto standard bobbins and storing them all together in bins, shallow drawers, or totes.
- Professional crafters who purchase 100+ yard rolls and use feet/yards of ribbon at a time on a very regular basis, storing rolls on a wall-mounted system is ideal.
- Crafters who have combination of both short scraps and very long rolls may benefit from using a tiered tote that provides the flexibility to store both compact bobbins and over-sized rolls in one easy-to-grab solution.
What My Ribbon Storage Looks Like Now
Throughout our home, I typically try to have “all of one thing” stored together. In general, that makes it easier to know precisely where things are (i.e., all the ribbon is in a single ribbon basket!). However, I recently decided to split up my craft ribbon, gift wrap ribbon, and holiday ribbon since they really have different applications and storage needs.
Crafting Ribbon
Over the years, I have slowly purged my rolls and ribbon scraps down from the hundreds to just a few dozen (see more: How I Decluttered My Craft Supplies). And until recently, the remaining bobbins and rolls were all tossed into a single basket in a cubby on my craft room bookshelves.
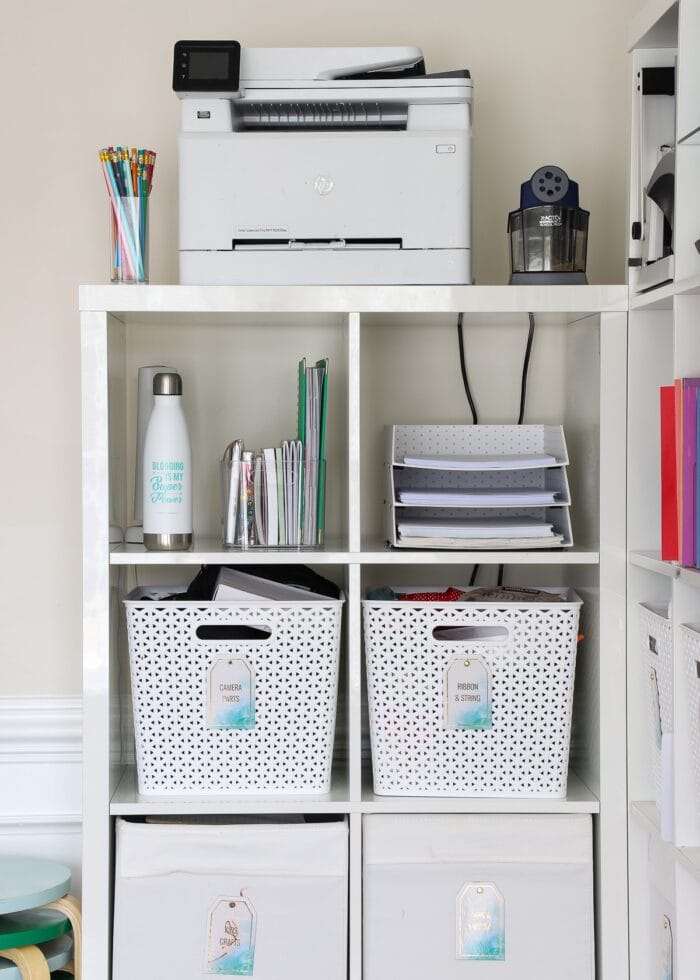
For as much as I use my ribbon (or don’t, actually), this single basket was serving me fine. But then as I was preparing some of the older ribbon pictures for this post, I realized most of the rolls were the exact same size…meaning, I haven’t used any of the ribbon in all these years.
So I got real with myself once again. I loaded 10-25 yards of ribbon onto the custom cut bobbins, and I now have them all tucked into a single plastic tote under my cabinets.
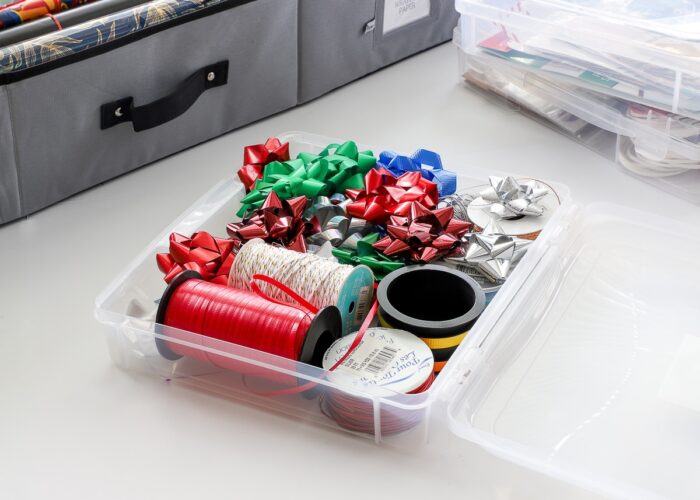
Gift Wrap Ribbon
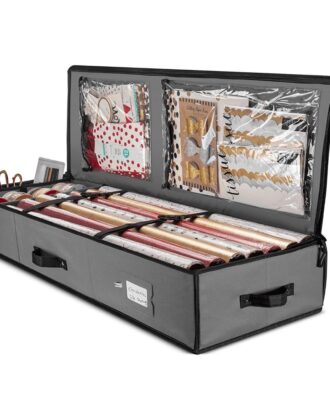
As I showed a few months ago, I have all of our gift wrap loaded into a single plastic box contained within our wrapping paper organizer (see more: How to Organize Wrapping Paper). I chose not to re-roll any of this ribbon since we tend to go through it faster than craft ribbon. This single plastic box is great at accommodating all the various-sized spools in a way that still keeps them contained yet easy to access and use.

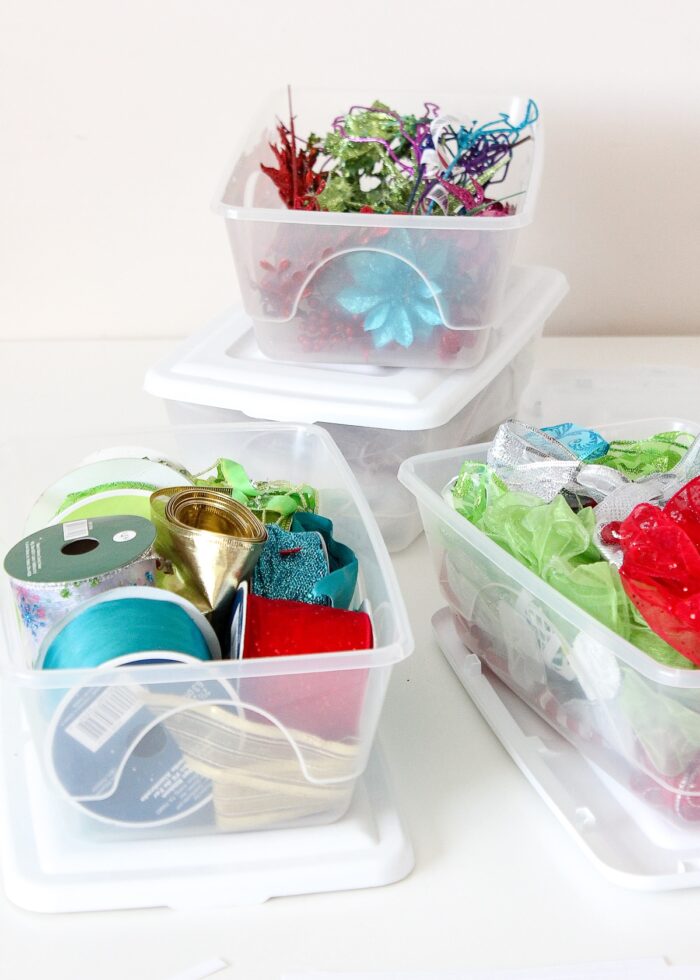
Holiday Ribbon
Likewise, our holiday ribbons (for wreaths, tree bows, etc) are tucked into plastic shoeboxes within our holiday storage bins (see more: How to Organize Christmas Decorations). Like our gift wrap, this kind of ribbon is not something we use so frequently or buy in such vast quantities that I need a specific ribbon organizer for it. Keeping the large bulky rolls tucked into smaller shoe boxes inside our larger totes works perfectly for us!
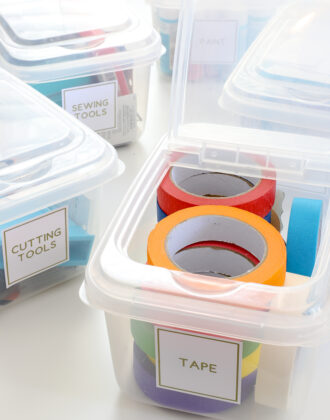
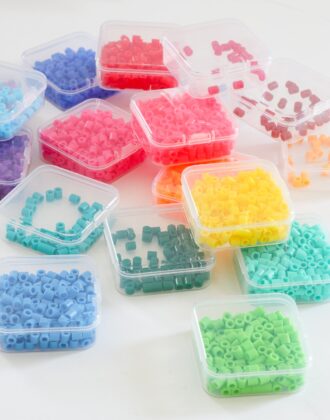
Other Craft Storage Solutions I Love
I pride myself on finding craft storage solutions that look good and work great too. Here are some other favorites for you to check out!
- Easy Sewing Machine Feet Storage Solution
- How Best to Store Craft Paper of ALL Shapes & Sizes
- How to Store Scrapbook Paper Scraps
- Easy & Practical Ideas for Storing Vinyl Rolls
- A Perler Bead Storage Solution That Works!
- An Easy (& Clever!) Way to Store Kinetic Sand
- How to Store All Your Cricut Supplies
- The Best (& Easiest) Way to Store Cricut Mats
- How to Organize Ribbon | My Favorite Solutions!
- How to Store Wrapping Paper (& All Your Gift Wrap Supplies!)
- How to Organize Sewing Thread
- How Best to Store & Organize Fabric
- How to Deflate Mylar Balloons (So You Can Save Them)
- I Downsized My Craft Room – Here’s How!
Phew – who knew there was so much to know about organizing ribbon, right!?! The truth is, ribbon is tricky! And how much you have and how much you use it will directly influence what kind of storage solution will work best in your craft space. I hope the solutions I’ve outlined here help you identify the best and most effective storage for your ribbon so you can see, use, AND put it away with ease!
Megan
23 Comments on “How to Organize Ribbon | My Favorite Solutions!”
This is such a great way to store ribbon! I love that it's available to see what you have, and it's pleasing to the eye … thank you for sharing!
Genius!!! Plus is decorates the room at the same time!!!! I wish I had a stash of ribbons just like yours!!!
Please come over and share this at The DIY Dreamer! 🙂
http://thediydreamer.blogspot.com/2012/03/from-dream-to-reality-linky-party-7.html
This is such a creative idea. I would love for you to link up at my Linky Party via: http://www.ourdelightfulhome.blogspot.com
PS: I am your newest Linky Follower!
Mrs. Delightful
http://www.ourdelightfulhome.blogspot.com
This is absolutely ingenious – especially since you group by color family, so you can see right away which colors are low. And a couple of other things – any night with Downton Abbey is a good night! And "rotund"? pure awesome. I need to start using that word again.
http://www.onedogwoof.blogspot.com
Such a great idea! I love how organized it is!
Applause, great ideas!! Hugs and happy weekend wishes. P.S>Happy St. Pattys Day
Super duper smart! I love this idea, and it also acts as artwrok on your wall, how cool is that?
This is wonderful. I love how the bobbins save space; no more bulky rolls. Now you could even hang the bobbins from those lined picture racks (not sure what they're called — the ones that you use the clipped hooks) from Ikea.
Oh, it's actually called a curtain wire rod, and the hooks are called curtain ring clips (similar to those used on clip it up).
I love all your posts 🙂 Amazing is just a word that describes them all 🙂
Thank you! I was searching for those exact bobbins and couldn't figure out what they were called, then I found your site! Genius! I love it!
Love it!! Where did you find the spools to put the ribbon on?
Hi Misti! Looks like the site on the other end of my link has changed – boo. Not sure where else you can find them, but I found them while searching for "plastic bobbins." Sorry I can't be of more help! Good luck.
I use bobbins like this to otganize my embroidery thread, only they were made of cardboard. A plus here is that I can write the color/lot number right on the bobbin.
I tried this method, but my ribbons came out dented/creased. Does yours do that, too? Thx…
Hello, Grest idea on the plastic spools for the ribbon. I am looking for the same thing can you tell me where you purchased them? I have only been able to find the small ones. Thanks.
Hi Rosa,
Thanks for your email, and unfortunately I don’t think I can be of much help. I bought them years ago, and I recall them taking forever to find. I never recorded the name of the source and after searching a bit just now, I can’t seem to find them myself. I have seen people make similar ones from cardboard, so that might be a place to start until you hunt them down.
Sorry I can’t be of more help! Good luck!
Megan
Pingback: - Home Decor Ideas
I live this idea for storing all my ribbons. Can you share where you got the plastic bobbins from? They are taller than the ones that i can find on line. Thanks!
Hi Tracy!
Unfortunately, this post is pretty old and these bobbins I think are long gone. I recommend checking Etsy to see if any sellars have cardboard versions that are similar!
Sorry I can’t be of more help here!Thanks,Megan
I recently moved and am now trying to make sense of my craft supplies. I have a cricut and am going to make (or maybe buy) some of the bobbins to get my ribbon in hand. It is not a large collection, so it will be a good one get done, and then I move on to other projects. Thanks for the inspiration!!
Thank you so much for this thorough article, I saw your photos referenced on DIY sites and finally decided to click through to the original, it’s so informative and helpful! It really shows that you speak from experience. <3 Also, especially thank you for the bobby pins idea!
SO helpful. Thank you. I had no vision for doing this, and you have supplied that. I’m going to make my own bobbins though out of the 8 million cardboard boxes I currently have lying around. But I never, ever would have thought of this solution on my own! Genius.