Organize This: Fabric
When I asked you all on the Reader Survey to pick your favorite series on the blog last year, I wasn’t too surprised to see the “Organize This” Series as the top choice. I love these simple yet impactful organizing projects, and I couldn’t wait to pick this series back up in the New Year! I’m hoping to bring you at least one of these projects a month this year. We’ve tackled a range of areas so far, and today, I’m showing you how I organize and store my (ever-growing!) fabric collection!
Organizing fabric is not a new topic around here on the blog! Over the last 4+ years, I’ve stored my collection in a variety of ways. When we first moved to North Carolina 4 years ago, I started wrapping my fabric onto mini bolts…a habit I’ve stuck with because it works so well. Originally, I displayed all my fabric like books…

While it was fun to look at, my collection started to grow as I started to craft/sew more. Eventually I started stacking my bolts into color piles. While it was a bit of a nuisance to pull the piles down and/or dig out a specific pattern, I did like that this solution kept all my fabrics sorted, accessible, and visible!
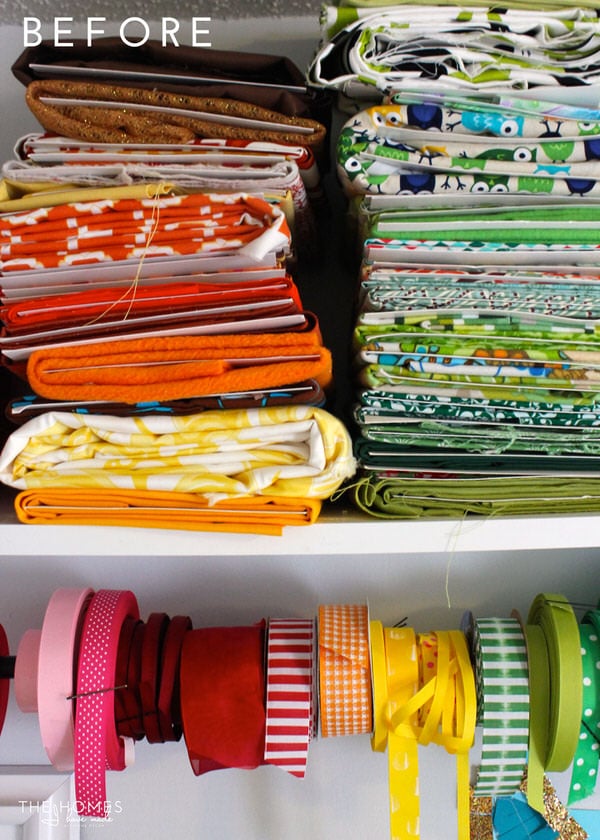
After a while, the piles became a nuisance too, so I moved all my bolts onto the cube shelves we had in our old office/craft room closet. I LOVED the mini bolts stored this way. Not only could I see everything at once, but taking out and putting away fabric was easy-peasy. What I didn’t love? All the wasted space in the back and top of the cubbies. I knew I could store more in a smaller footprint, but since I wasn’t able/willing to find baskets to fit these specific shelves (they are IKEA look-a-likes from Okinawa), I settled for the wasted space but with good functionality!
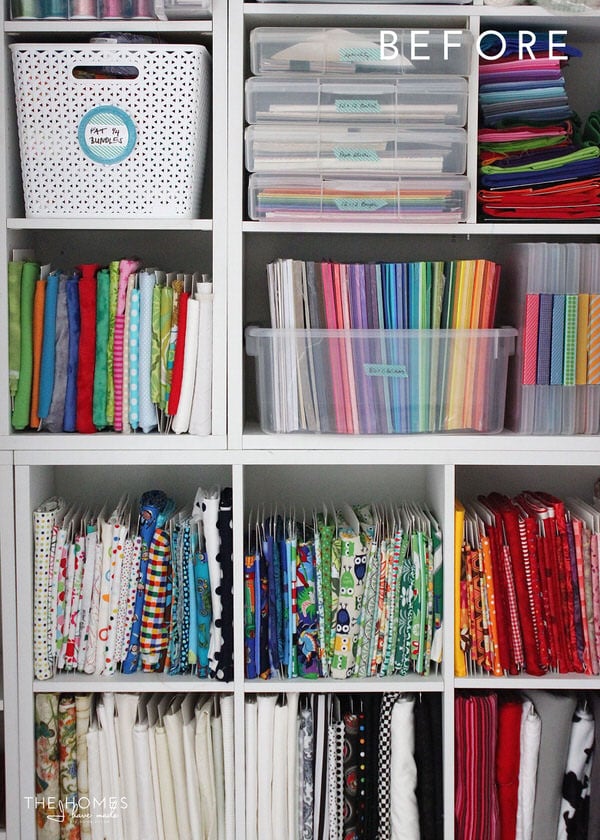
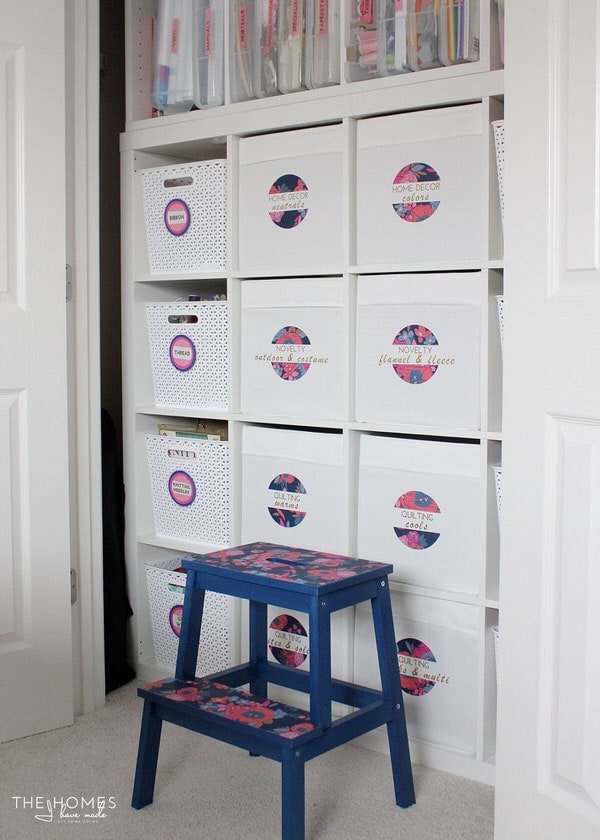
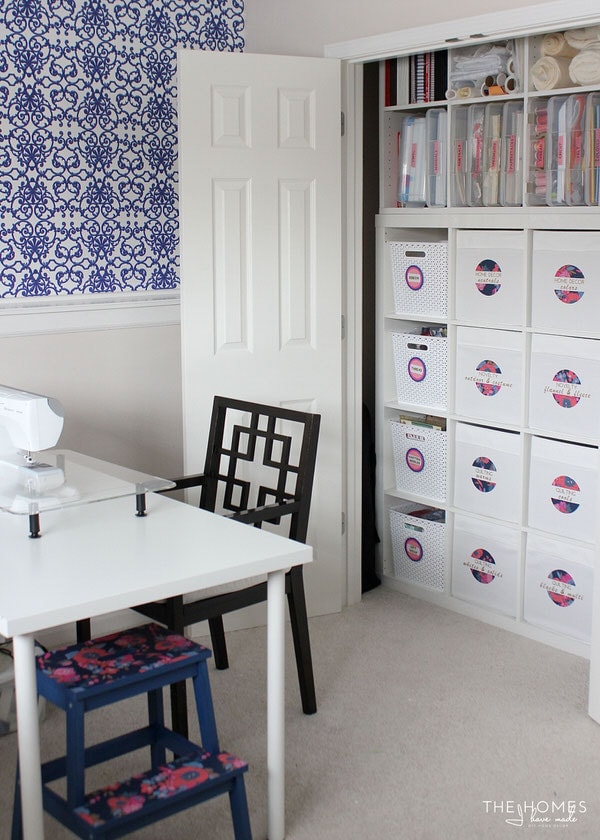
When we moved into this home last year, I knew even before we arrived that I wanted all of my fabric and craft supplies concealed and put away (rather than out on open shelves). In order to make the most out of my office closet, we removed the standard wire shelving that was installed (and stored it safely so it can be put back before we move out!), moved our old toy Expedit into the closet, and stacked our old Okinawa cube shelves on top to create 22 different shelves for storage. Not only did using the Expedit allow us take advantage of the entire closet, but we were also able to buy perfectly-shaped baskets to fill up every available inch of usable space!
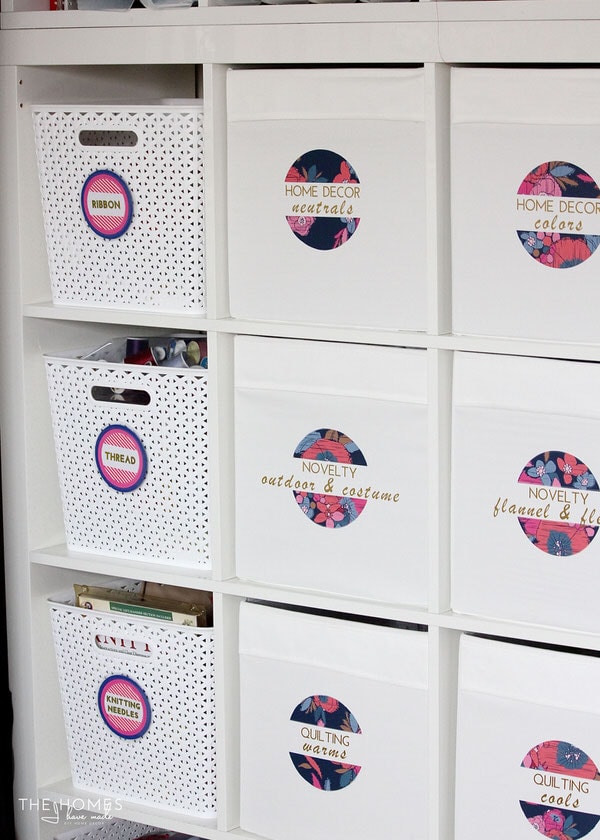
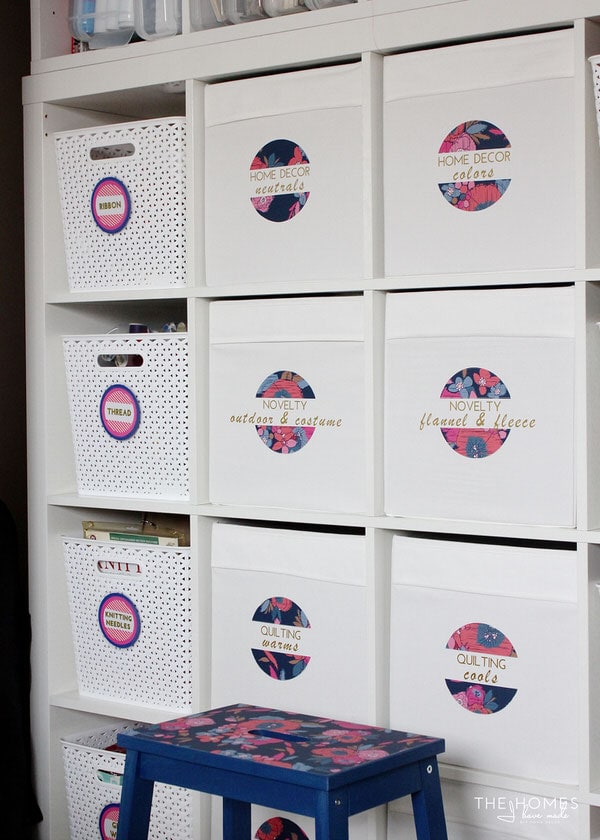
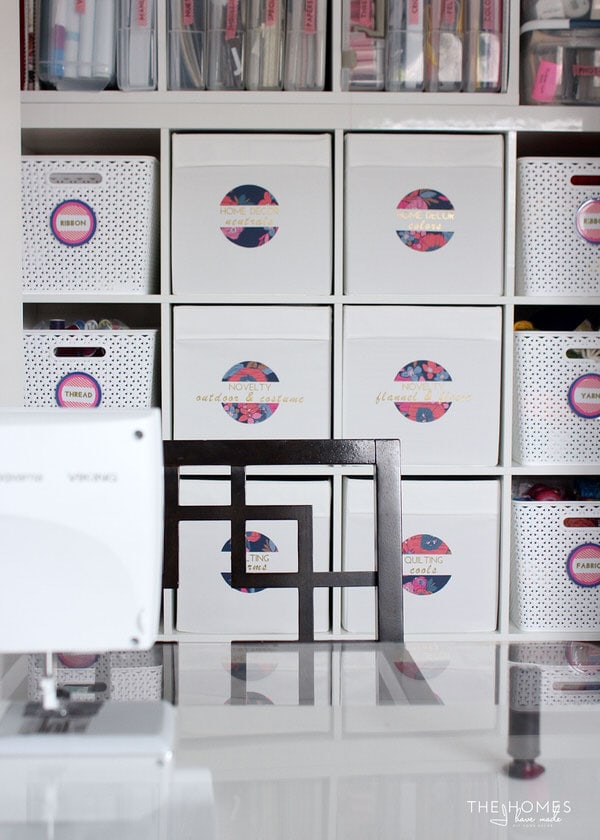
Shortly after moving in, I sorted and organized this closet. All the solid white bins hold fabric, the woven baskets hold notions, wrapping, ribbon and other supplies, and the tupperwares above hold papers. Truth be told…this closet looked exactly like this from the week we moved in until just this week!

It’s times like these when I’m thankful to have the blog to push me to take on projects because with just a few hours of time…here is where we’re at now!
I’ll show you guys the rest of my craft storage solutions another time because today I want to focus on how I am sorting and storing my fabric! Admittedly, my collection continues to grow. I LOVE colors and great patterns and being able to go into my stash to pull together fabrics for my next project without having to go to the store. In order to keep my love of fabric under control though, I’ve committed to keeping it contained to these 8 bins. That already feels like too much fabric for a girl who isn’t sewing very much right now, but I just can’t bring myself to get rid of it (there are just too many possibilities!). Despite my best efforts, fabric is THE hardest thing for me to purge, and it was starting to stack up in every corner of the office. So this week, I forced myself to purge, re-sort, and re-organize, and now my fabric is once again contained as it should be!

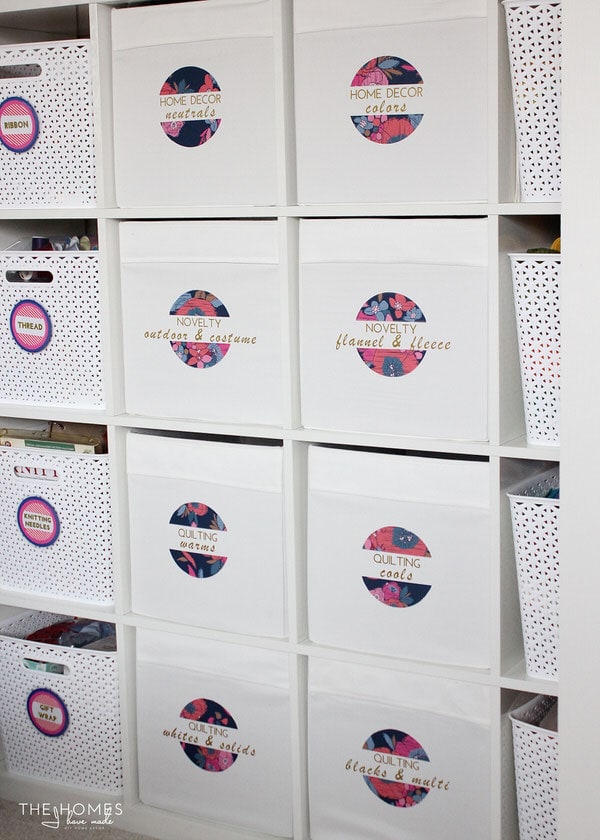
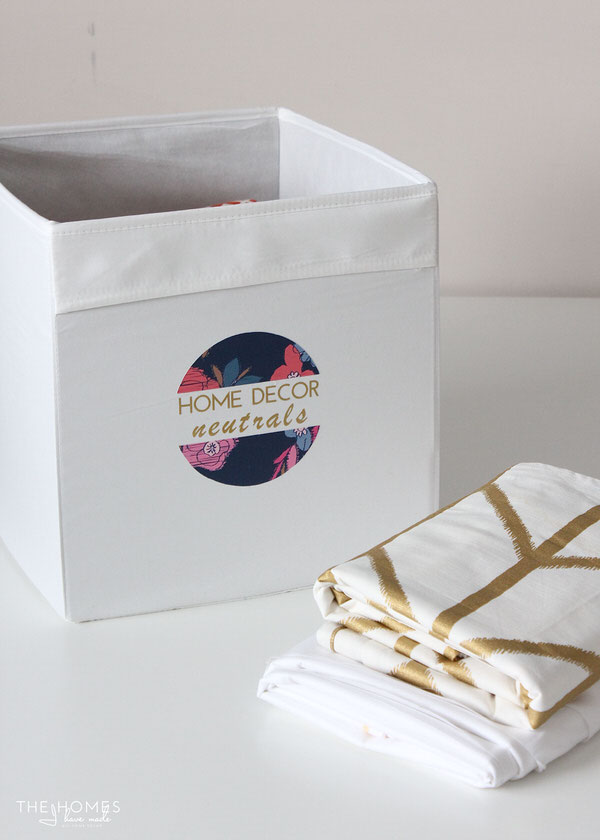
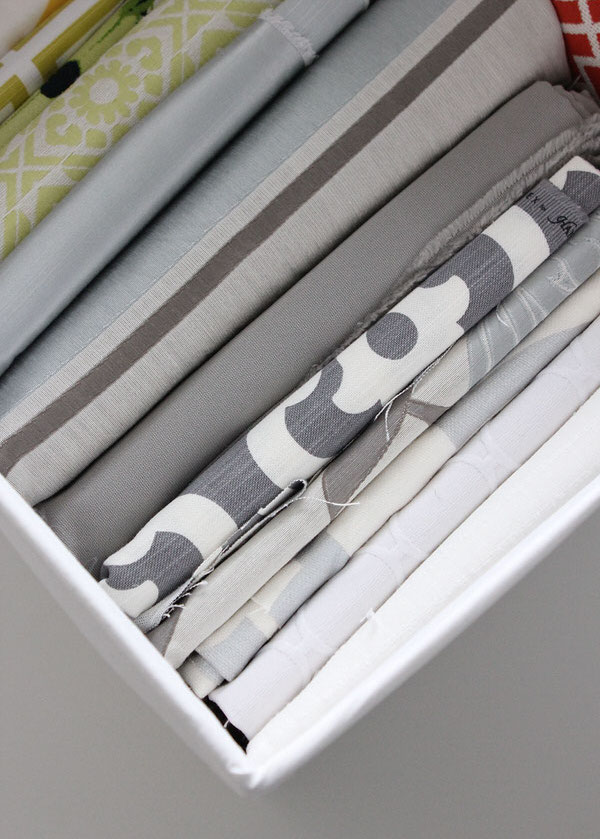
I’ll show you the insides of the baskets in just a minute, but one of my biggest challenges was deciding how to categorize the different fabrics. By color? By type? By use? By project type? I ultimately decided to sort my fabrics in the ways I typically go looking for them: by type and then by color. I primarily have Home Decor and Quilting fabric, but I’ve also accumulated a good bit of outdoor, fleece, and costume-style fabrics as well. Here is how my baskets are now categorized:
- Home Decor – Neutrals
- Home Decor – Colors
- Quilting – Warms
- Quilting – Cools
- Quilting – Whites and Solids
- Quilting – Blacks and Multi
- Novelty – Outdoor and Costume
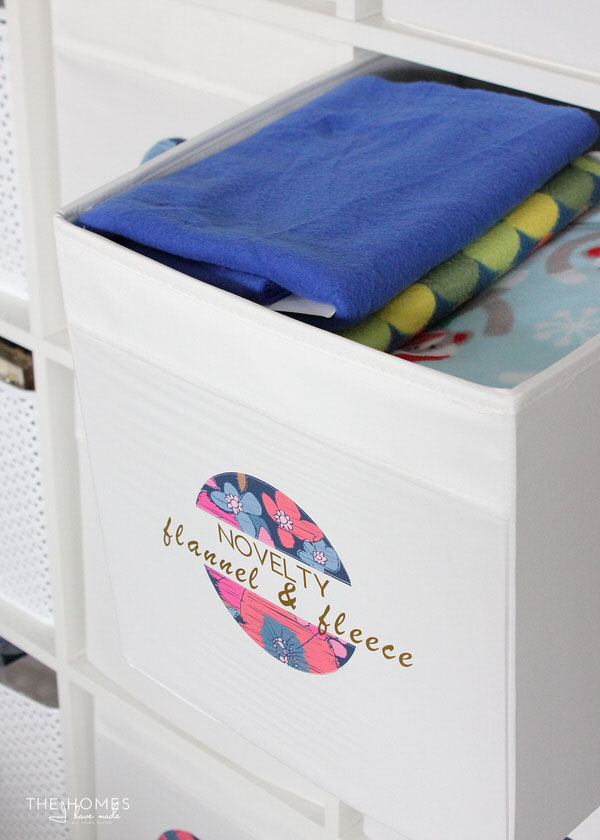
- Novelty – Flannel and Fleece
As you can see, I’m using two different basket types on our Expedit. The Y-weave baskets are from Target. They don’t take up the whole cubby space or hold as much as the white IKEA bins do, but their smaller size and bendable structure allow me to easily wiggle them out of the shelves, even with the closet door frame slightly in the way!
These DRÖNA bins from IKEA are so, so, so great. We use them in our playroom too, and I just love their generous size! They can hold so much! The Expedit/Kallax shelves are also quite deep (as are the bins), so they essentially function as drawers!
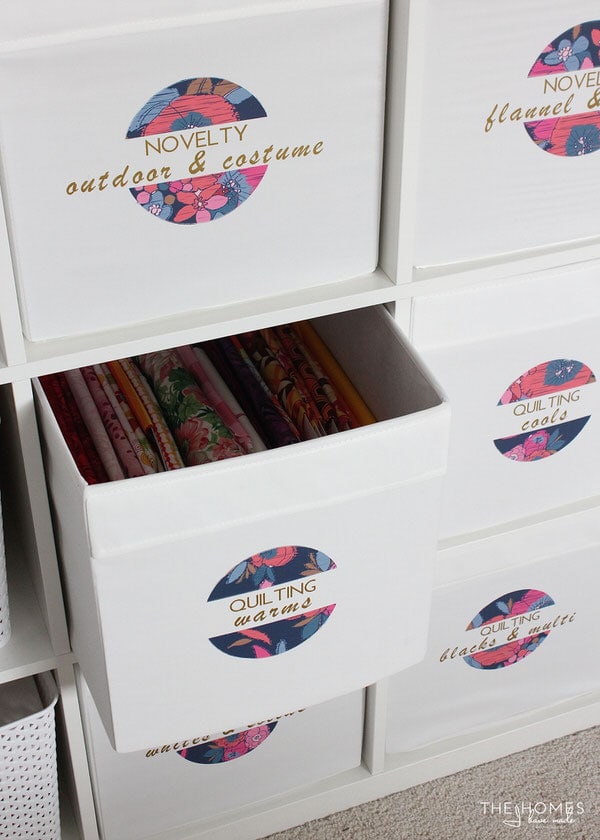
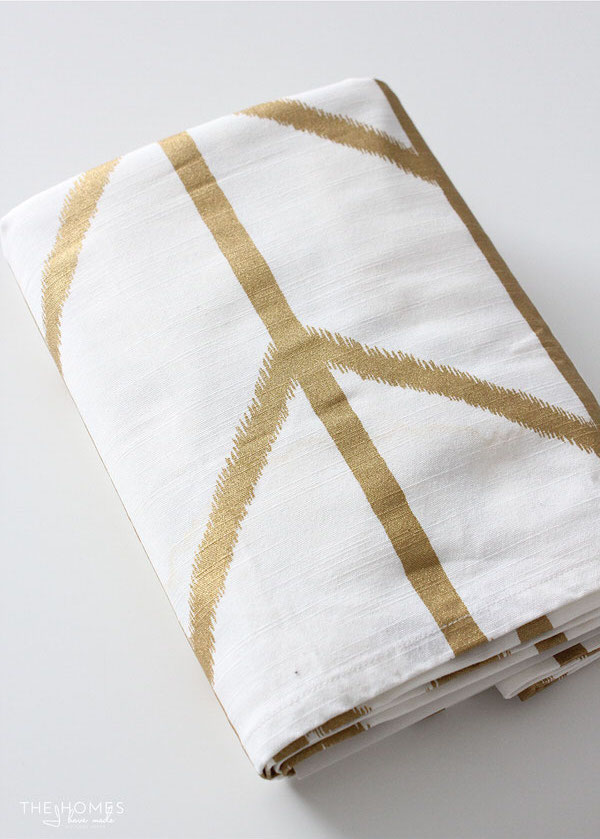
When storing my fabric, my two criteria are 1) I want to be able to see what all I have, and 2) I want to be able to easily get it out and put it back. For these two reasons, I’ve kept my mini bolt system, and they work great for keeping my bins orderly!
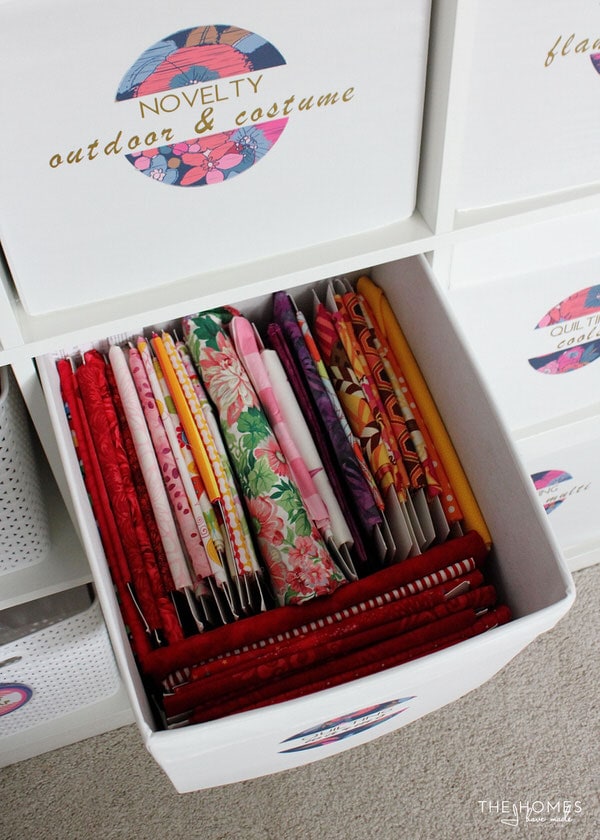
I tried hard to get all my bins purged down to a single layer of bolts, but I just couldn’t do it in all of them. A few of my bins have a few bolts stacked on top, but they all close comfortably, and I can easily access the bolts below.
I mostly use the bins as drawers, but I also like that I can easily take out a whole bin if I need to root around and play with a variety of fabrics at once.
Want to save this post?
If you’ve never stored your fabric on mini bolts, I suggest you give it a try! Whether you have little cuts or large, I find the cardboard sheets ideal for keeping fabric folded, stackable, and orderly. Yes, it can be a bit of a pain and quite time consuming (depending on how much fabric you have!) to get it all done at the start, but I’ve been doing it for years now and it makes such a difference. I even convinced my sister to do the same, and I think she’s a convert now too 🙂
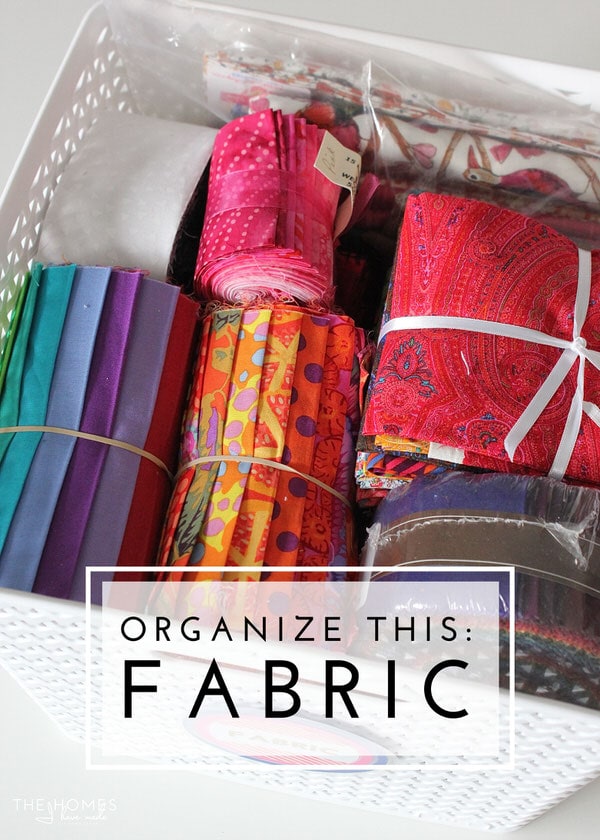
To wrap my fabric, I use these comic book cardboard boards. (If you have a good-sized fabric stash, order a few packs. You’ll be amazed at how quickly you use them up!) I start by folding the fabric down into a strip that is the same height as the cardboard sheet (10″).

I then fold the board over itself and keep wrapping until all the fabric is wound up. Depending on the type and amount of fabric, these bolts can get quite large!
I then load the bolts into the IKEA bins on their sides so that I can easily see at a glance what fabrics I have!
Keeping the fabric on mini bolts helps make the most of every inch inside the bins. They also eliminate messy piles and digging and rummaging, since everything is easy to see and grab!
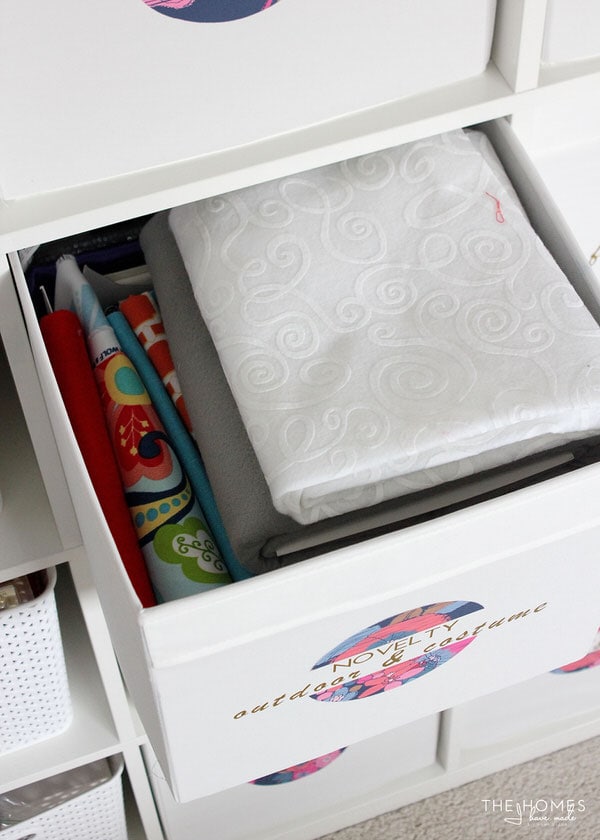
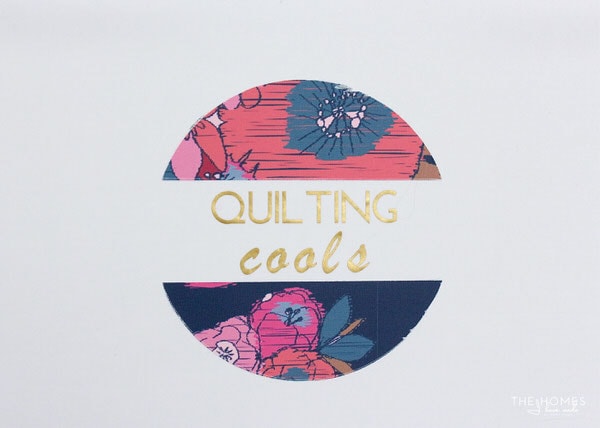
I am going to share more about my labels next week, but wanted to quickly point out that I labeled both the type and color family onto each bin. Now finding just what I need is intuitive and easy!
I did want to point out that not every piece of fabric can be wrapped onto mini bolts, namely pre-cut packages. I do keep these all thrown into one of the woven baskets. Rubber bands and Ziplock bags keep sets together when necessary!

Not only is it so nice to finally have my fabric bins neat and tidy, but this happy splash of pink and blue on the inside of the closet sure makes me want to keep the doors open a lot more!
I am just so smitten with how this office/studio space is coming together. Adding in the raspberry pink with the cobalt blue was just the jolt the room needed, and I feel like it’s finally coming together to be the bright, happy place I want to work and create! Two more projects for this room, and then I may have to call it “done for now!”
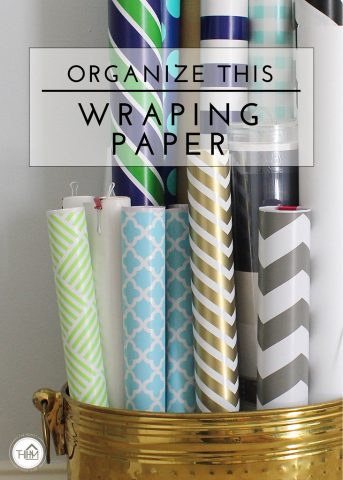
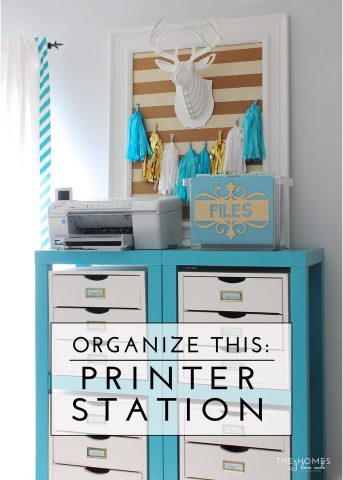
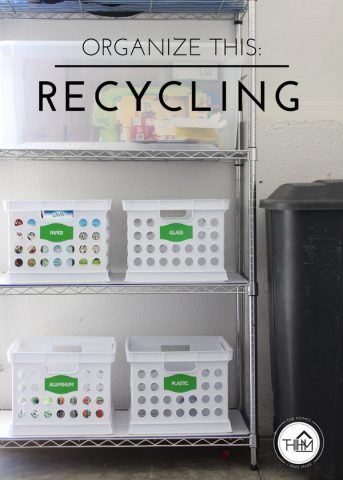
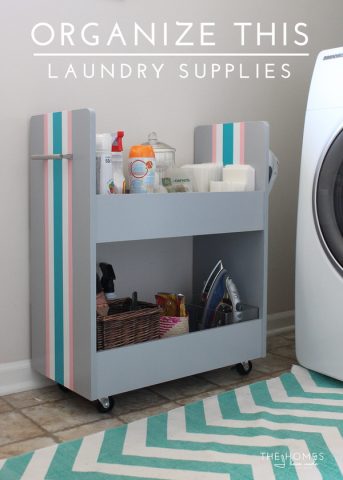
Organize This
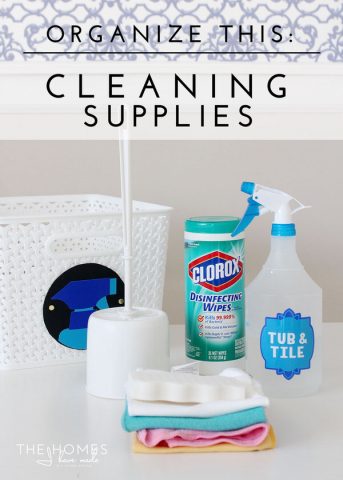
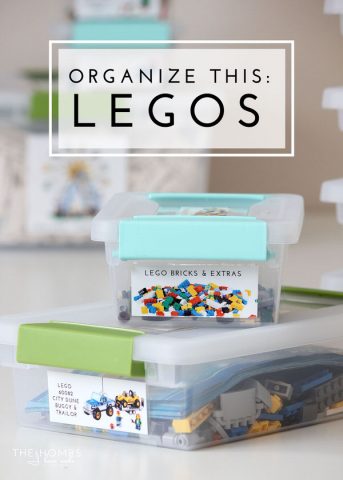
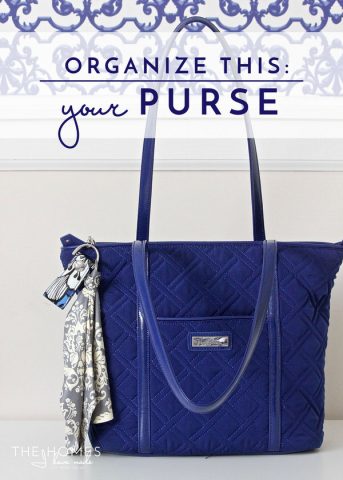
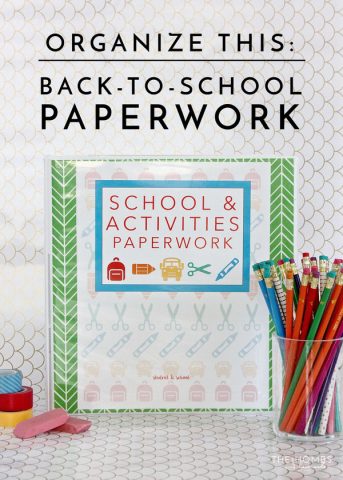
My Organize This series is all about (relatively) simple and quick organizing projects that make a big difference in your day-to-day life. These aren’t intended to be large overhauls, but rather quick sessions you can accomplish in an afternoon or weekend! Catch up on other projects in this series by clicking on the pictures below:

I’d love to know how you store your fabric? Do you have as tough a time letting great fabric go as I do? How do you keep your fabric contained yet accessible! Spill your secrets in the comments!
See you back here Saturday with a dirty little secret 😉

Megan
10 Comments on “Organize This: Fabric”
I have tried the bolts, but I just can’t fit my fabric into my space using the bolts. Plus I have SUPER deep shelving and so it makes it hard to get to it all on the bolts. I also have lots of big cuts, so I just stack those in the back and then put my smaller cuts in front.
The sewing room is one room of mine that needs desperate help. I started in there last week, but just haven’t made it back. And it is such a shame to not be able to work in there! I do need to go through all my fabric and clean out what I won’t ever use. And my patterns. Maybe this weekend, in between all the other things to do!
Hey Kristie!
I was having trouble with the bolts sliding to the backs of shelves too, which I why I implemented the bins. Admittedly, with LOTS of fabric or bulky fabric, the bolts aren’t very helpful. I have a few stretches of fabric that are 6+ yards…I have those folded and stacked in my closet 🙂 My craft space is in constant rotation of utter disaster and totally picked up. No in between! When I’ve got a lot of projects going, I can’t keep it pulled together. Then I reach a breaking point and have to pick it all up…and it stays that way for about a day 🙂 It’s the constant struggle of crafters, I think!
I need a way to organize spools of ribbon – lots of spools. I love the look of them on a rod, but need them to be easily accessable to take with me, so I don’t want to have to take all of the spools off to get to the ones I want. I looked for containers, but most are not deep enough or too deep. Something 3 1/2″ or a tad bigger would work.
I love the small bolt of fabric idea!
Hi Michelle!
Hmmmmm…have you looked at THESE boxes? Might be too big? I also always thought this was a clever solution: https://www.pinterest.com/pin/232076187017529827/
If I think or come across anything, I will be sure to let you know!
Megan
Hi Megan
What a lovely post and your photos are so colorful. I don’t have a single fabric as I don’t sew but you know your closet, your cubbies, your bins, yous labels they all give me a lot of ideas for other items so thanks a lot to share ! Michèle
I forgot to tell you that the stool add to the beauty of the organization !
The space looks great! Besides the laundry room this is turning out to be a favourite of mine too!! Love the color combo it defiantely adds personality to the space. That’s a great easy little project to save tons of time in the long run. Looks awesome too!
Great Work 🙂 P.s your stool matches perfectly with the labels 😉
Lauren | Lovely Décor
http://www.lovelydecor.co
xx
Hello, I inherited my mother’s stash- probably 60 cubic feet (which I have diminished by 1/2 ) with yardage of all kinds, quilting, heirloom, silks, ultrasuede, linen, minke, knits etc. You name it she had it. I currently have the colorful quilt cottons out of the sun by color on open shelves but everything else is is in bins/boxes by type, including unknowns. How should I store the really large pieces ? Unless I get rid of clothes I don’t have a closet, although ideally that is where I would like to store most of it. I have a utility shelf in one room with a schematic for what is on each shelf(backing, interfacing, Christmas, minke), and boxes in the hallway, guest room, and one other room. Is this the best I can hope for?
I love how the closet is organized. How do you get the things down from the very top? I.e. the binders on the row with the batting? Is there enough room between the shelf and the front of the closet?
Where did you find the labels? And the stool?
Hi Kendall!
Yes, there was plenty of clearance between the shelf and the door frame to get items up and down. It may not appear that way in photos, but I’m constantly making sure items are both accessible AND look good!
I made both the labels and the stool. You can see them here:Labels: https://thehomesihavemade.com/2016/01/3-creative-ways-make-labels-cricut-explore/Stool: https://thehomesihavemade.com/2016/01/diy-wallpapered-stool/Hope that helps!Megan