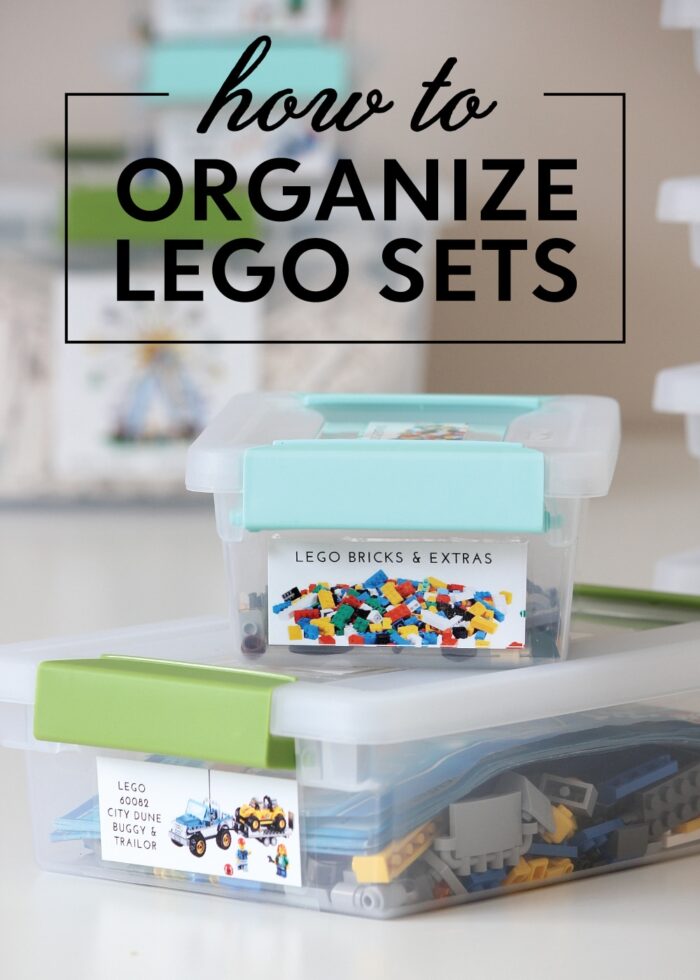
A Smart Way to Sort and Store Those LEGO Sets!
With three young boys (and a kid-at-heart husband!), you better bet we are constantly swimming in LEGO bricks. Now having “fought the good fight” over LEGO organization for almost 10 years, we have implemented a variety of organization solutions to keep sets together, manuals from being destroyed, and pesky bricks out from under tender, innocent feet! Today I want to dive into one of the solutions we love: an easy way to sort and store LEGO sets.
No “One Size Fits All” LEGO Organization Solution
Before I dive into how to sort and store LEGO sets, I first want to briefly chat about the overall concept of organizing LEGO bricks.
Now more than ever, I am convinced there is NOT a “one size fits all” solution to LEGO organization. What works for you (or your family) will greatly depend on:
- how many bricks/sets you have
- how your kids play with them
- how accessible you want everything to be
- and how much time/effort you want to put into maintaining your LEGO organization
If you search for LEGO organization ideas online, you will find everything from set storage (like this post!) to bricks sorted by colors into drawers, bricks sorted into size and shape into containers, and on and on and on.
All of these solutions work, and none of them work. It all depends on how you build:
- If you or your child really likes to build sets…as they are designed, packed, and sold by LEGO…storing by set is a great solution.
- If you or your child likes to free-build creations from their own imagination, storing by color might work better.
- If you or your child, is really into creating masterpieces that require very specific bricks, storing by size and shape is the way to go.

All that said, there is one more important element to consider: if you do not have the time, patience, or interest in keeping up with LEGO organization, none of these methods will work. Because unless you build models and never, ever touch them, LEGO bricks are toys (meant to be played with) and therefor fall apart and get re-built, over and over Which means that any system you put in place is prone to being un-done. So if you or your family doesn’t have the time or interest in keeping your LEGO bricks organized, you might just want to stop now and throw them all into a big bin (just speaking from experience!).
When To Organize LEGO Bricks By Set
All that said, as long as there are LEGO bricks, there will always be Moms, organizing geeks, and enthusiasts out there looking for the best way to organize them. And sorting and storing by set can be a great solution in these circumstances:
- You have lots of brand new and/or un-built sets and the original packaging is destroyed
- You or your child primarily builds according to instruction manuals
- You or your child likes to build and then re-build the same sets over and over
- You have large, complex sets that can’t be/aren’t on permanent display (e.g., Ferris Wheel, Christmas Train, etc)
- You want/need to store LEGO bricks on a shelf (instead of drawers, a LEGO table, etc)
Since we have 6 years between our 2 older sons, we have many (smallish) LEGO sets that our oldest built (and have since been dismantled) but the younger one now wants to build. Having all the pieces sorted and sorted with the manual into storage bins has been the best way for us to make these “old” sets brand new again!
How to Organize LEGO Sets
If you have determined that organizing your LEGO bricks by set is a good solution for your home, here is the process that worked great for us!
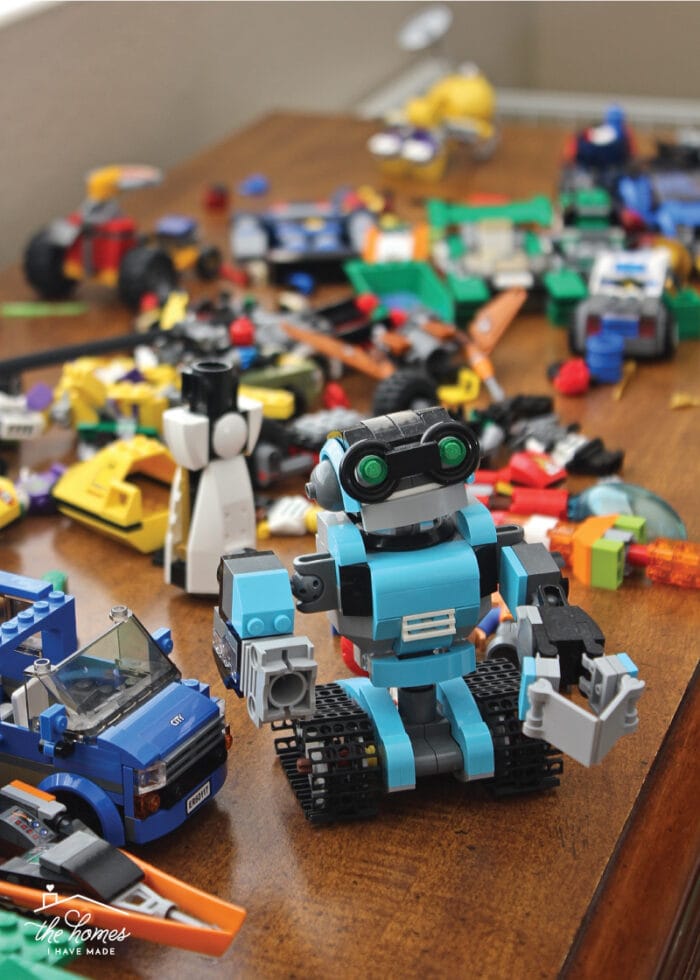
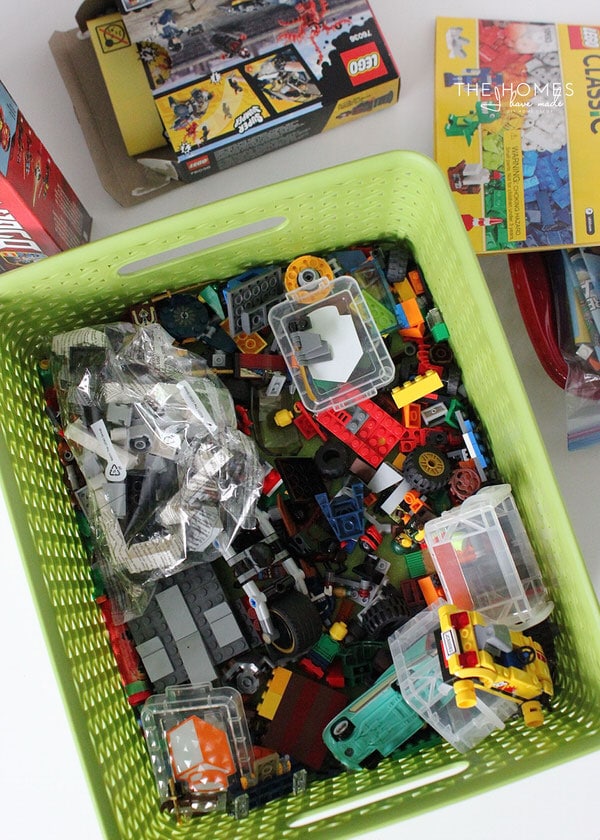
Step 1: Gather All the LEGO Bricks
Start by gathering up ALL the LEGO bricks around your house. This can include unopened boxes, built items (only if they are going to be broken down), partially-built items, random bins/bowls/trays of bricks, and loose bricks that are under couches, in cushions, etc. Do your best to get all your LEGO bricks in one spot.
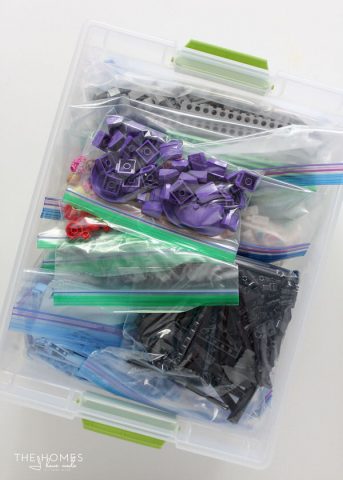
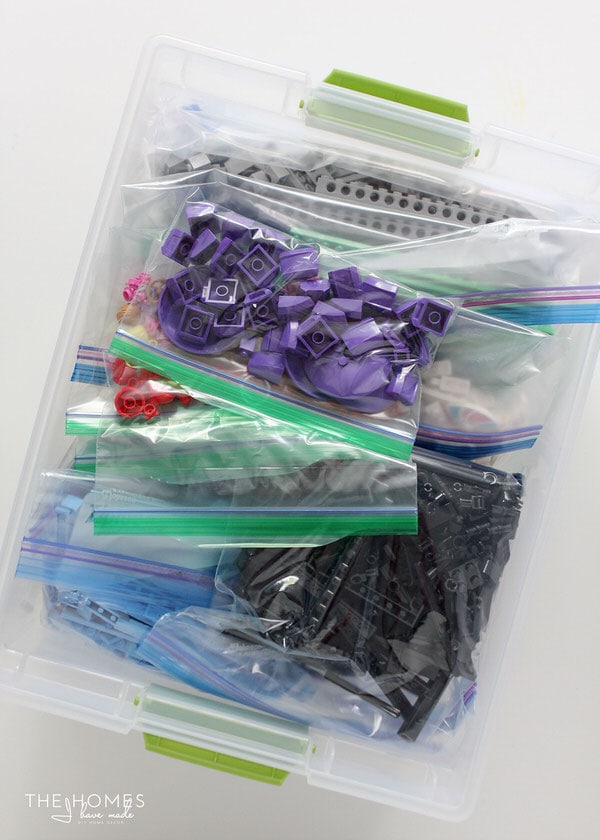
TIP! If you still have pieces in unopened plastic bags directly from the box, keep them that way! You’ll figure out what they belong to in the sorting process!
Step 2: Gather All The LEGO Manuals
Next, gather up all the instruction manuals. The instructions will not only help you find everything needed for a particular set, but will also give you a good sense of what you own. Spend some time going through the manuals to determine which kits you want/need to reassemble.
TIP! Any remaining manuals, inspiration books, print outs, etc can be loaded into its own storage bin or binder as needed.
Step 3: Sort and Re-Assemble Kits (If Needed)
Now it’s time to painstakingly sort all your LEGO bricks back into their original sets. Get comfortable, recruit the family to help, and put on a binge-worthy series or podcast because this will take a while.
Sort out bricks using the inventory in the back of every LEGO manual. The inventory lists out all the bricks for that set, as well as their color and how many are included. If you are missing manuals, you can now find PDF versions HERE.
No matter how many LEGO sets you have, this is going to be time-consuming and tedious. Here are a few tips that helped us:
- If you’re serious about ensuring sets are complete, disassemble everything that is already assembled so you can accurately account for each and every piece.
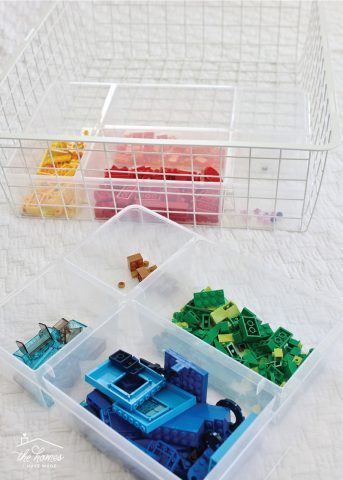
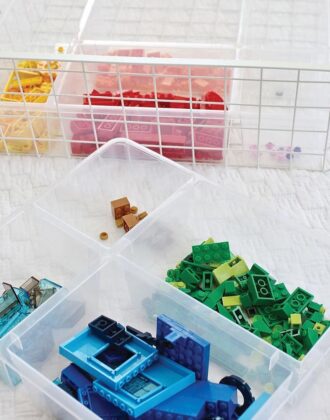
- If you have a lot of jumbled up kits as we did, it helps to sort out the LEGO bricks by color first before you start assembling kits. As you need to find pieces, it’s quicker to start in the right color pile then and narrow down from there.
- Use small buckets, bowls, or trays as you work to keep sets separate and distinct.
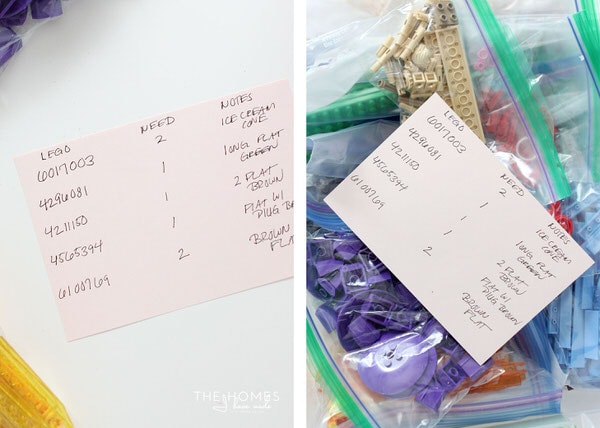
- As you get most items sorted, note which pieces are missing (more on this below.)
Step 4: Load Kits Into Good Storage Containers
It is clear to me that LEGO doesn’t really intend their boxes to be used for storage after they are opened. They don’t close up nicely and can be tricky to stack thanks to all the various shapes and sizes. As such, for long-term storage, I recommend loading your LEGO sets into durable storage containers.
For LEGO sets, you want to use boxes that:
- have good-fitting, snug lids
- are easily stackable
- comfortably fit the entire LEGO set and manual
- come in a variety of sizes (to hold a variety of sized LEGO kits)
- are common and easy-to-find (so you can buy more down the road as needed)
- are inexpensive
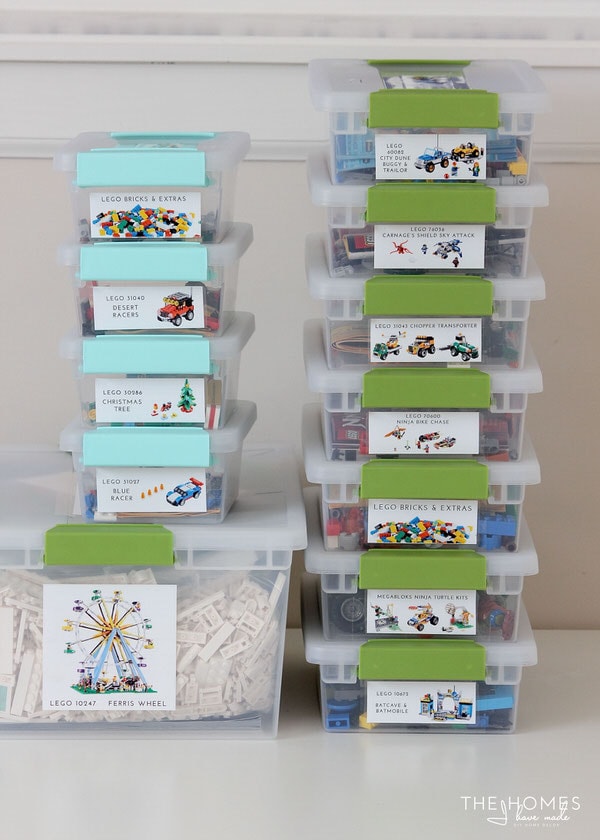
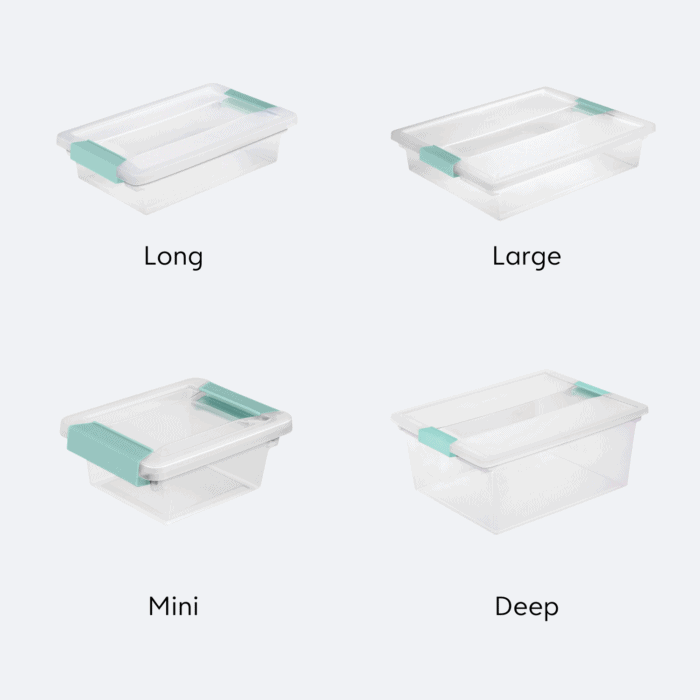
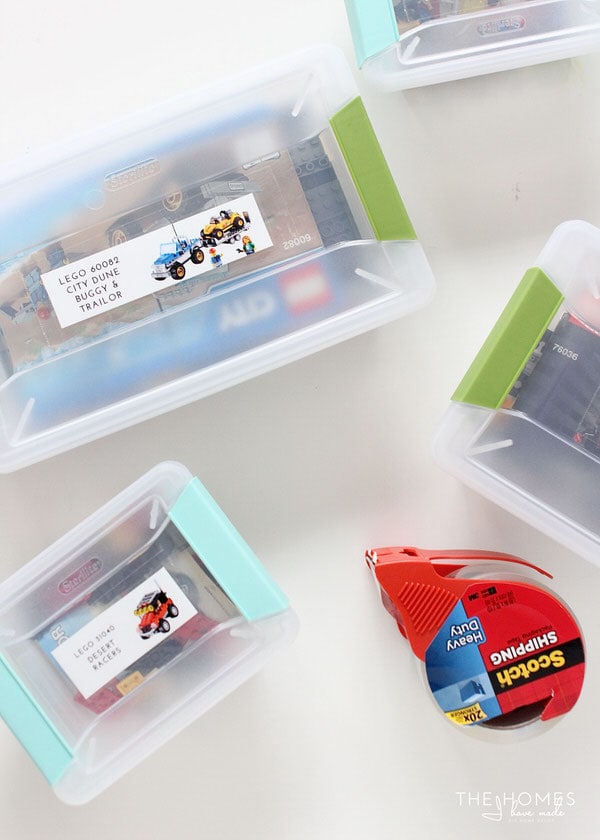
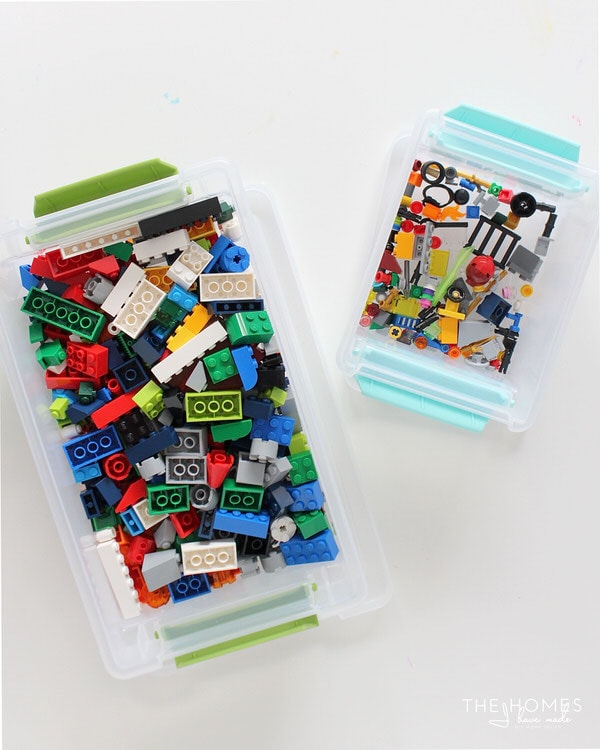
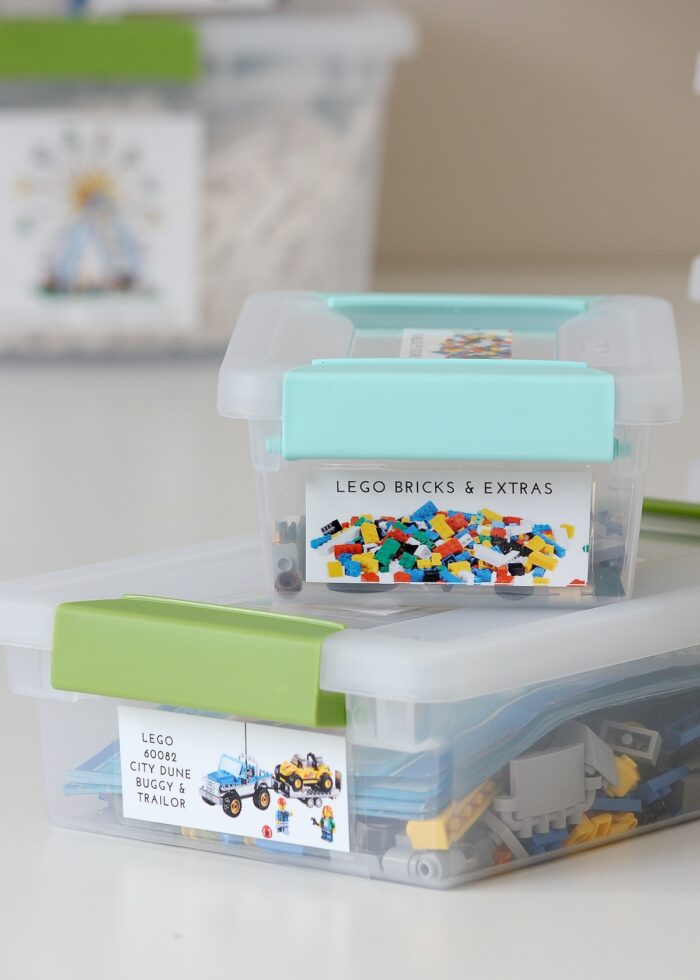
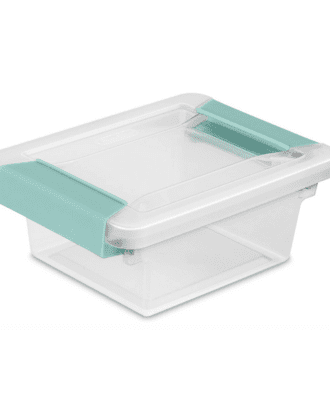
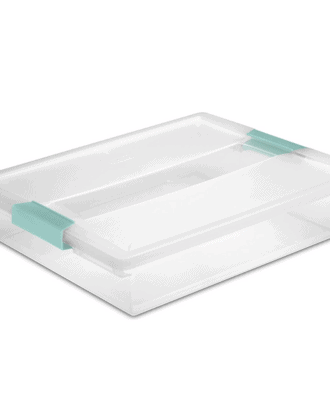
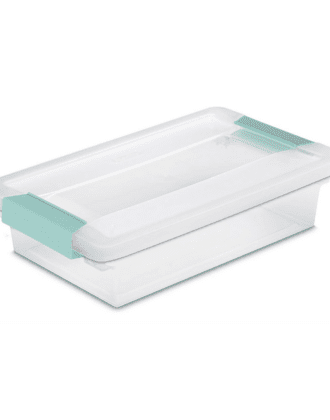
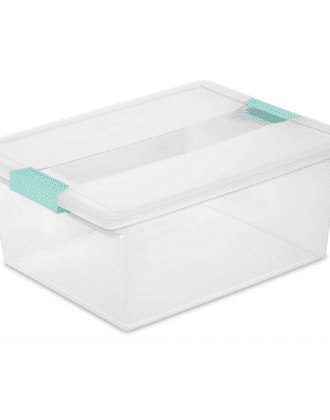
After searching extensively, I landed on Sterilite® Clip Storage Totes because they checked all of these criteria and more. Both Target and Amazon have carried these clear plastic bins for years in a wide range of sizes, and they hold up great.
Here are the specific sizes I recommend for LEGO sets:
- “Long” & “Large” – both of these long flat versions will fit most “standard” LEGO kits
- “Mini” – these really small boxes are great for smaller LEGO sets, as well as extra minifigures, props, wheels, etc
- “Deep” – these deeper boxes are great for really large or “Creator” sets
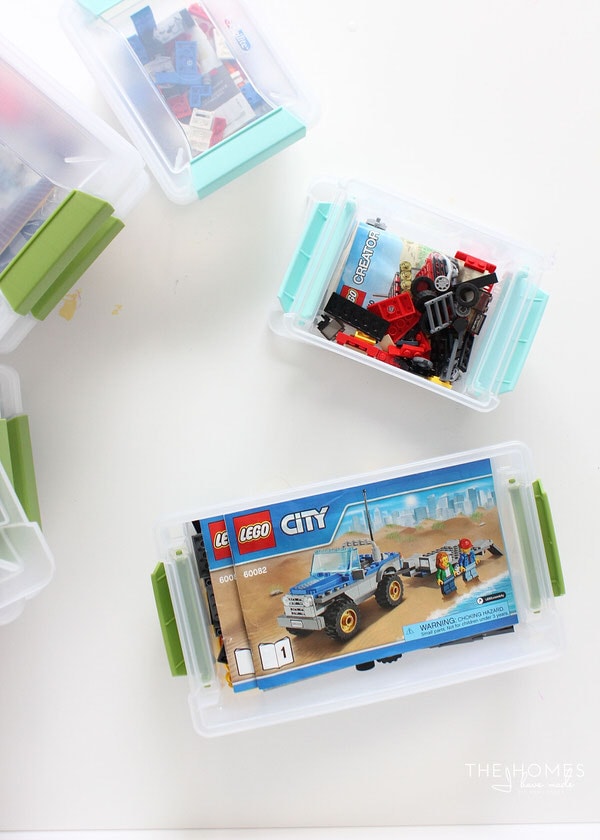
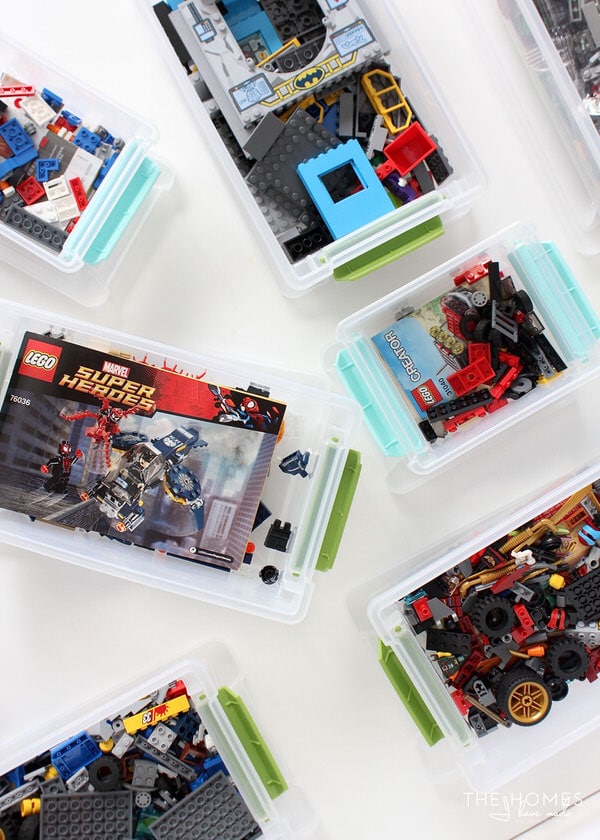
Once you have all your kits sorted and reassembled, load them into the best-size boxes and be sure to include the instruction booklet.
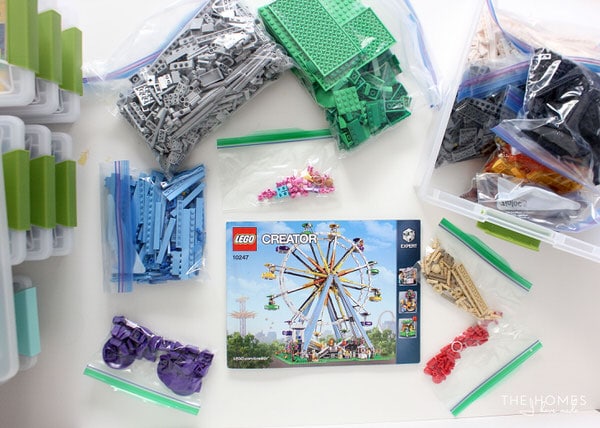
TIP! For VERY large sets that you hope to someday build or re-build, consider sorting your bricks down even further within the storage box. Bagging up bricks by color or size can make re-assembling these complex kits quicker and easier.
Want to save this post?
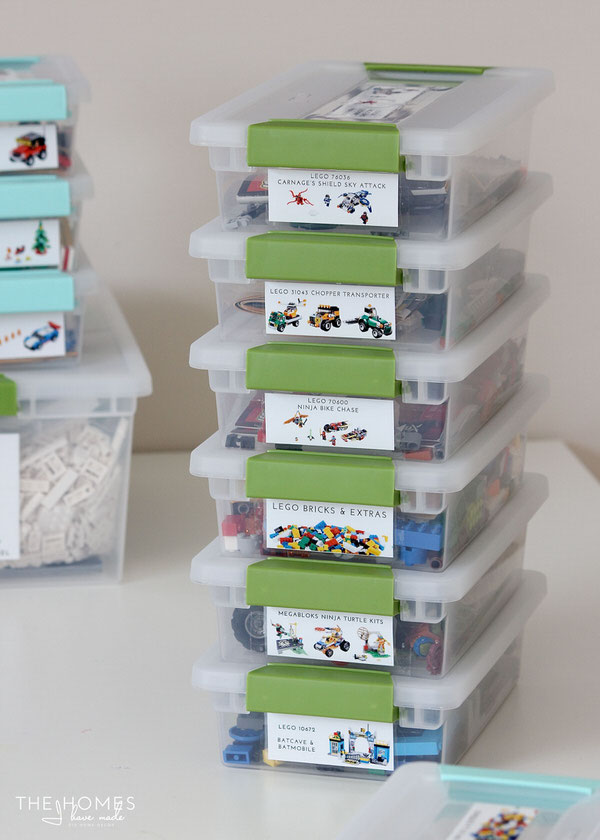
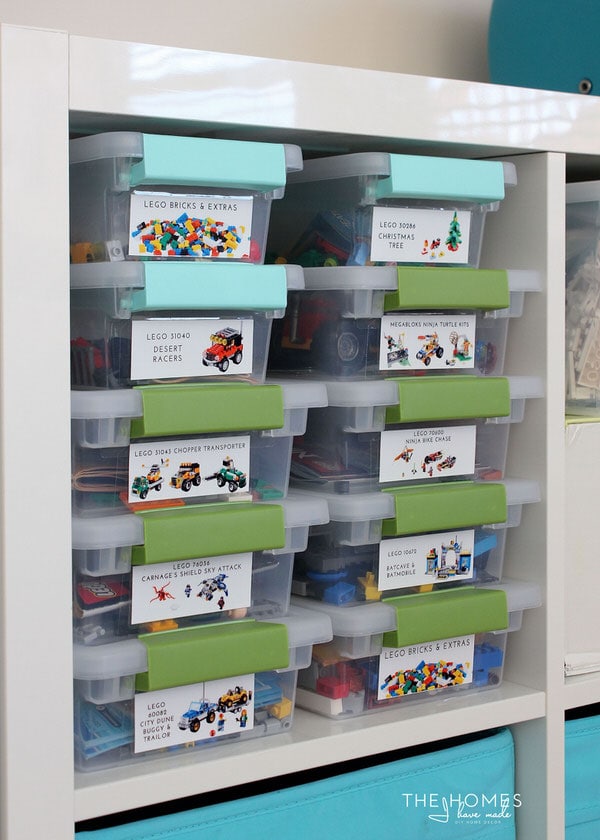
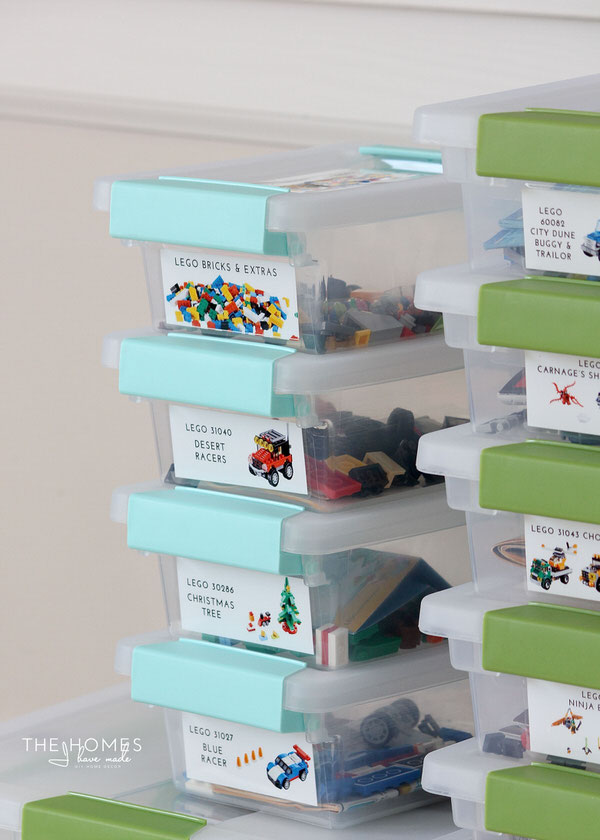
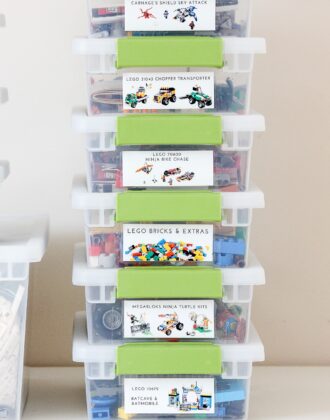
Step 5: Label the LEGO Kits
So that you can easily identify what kit is where, the next step is to label each box. You can certainly do this with a label maker or even cut off the flap from the original box and tape it to the inside. However, if that original box is long gone, you can easily DIY your own!

No matter how you make labels, I highly recommend printing out pictures of the sets so both kids and adults can see, at a glance, which kit is what.
I have been asked for years and years how I made my labels; and you can now see the full tutorial on how to make LEGO box labels HERE.
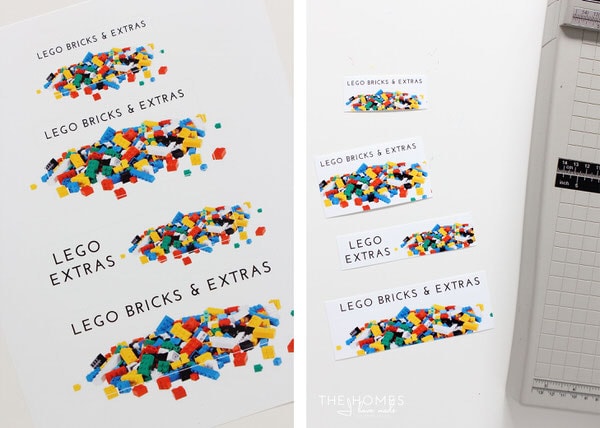
In the meantime, here is the gist of it:
- Measure the tops and sides of your specific boxes to determine the best label sizes.
- Use Google or the LEGO site to find and save images of your LEGO kits.
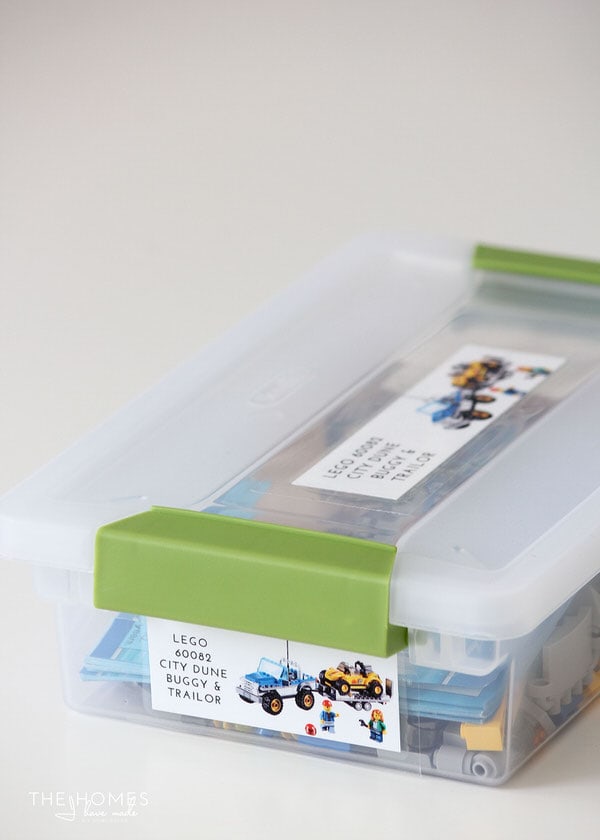
- Use a graphic design program like Canva to make labels that include the LEGO set name and number, as well as the picture (if desired). TIP! You can grab my LEGO Labels Templates HERE!)
- Print the labels onto cardstock or photo paper and trim down with scissors or a paper trimmer.
- Secure the labels to the boxes with clear packing tape.
TIP! Consider adding a label both to the lid and the base. This helps keep everything together and allows you to easily see which kit is where when they are stacked up on a shelf.
Step 6: Order Missing Bricks (If Needed)
If, in your sorting, you identify (important) pieces that are missing, keep a running list so you can order replacement bricks directly from LEGO. This might not always be necessary (especially since you can likely swap bricks of different colors from your “leftovers/extras” box), but if needed, the process is easy, inexpensive, and efficient.
In our sorting, we discovered that ALL of our little kits were complete (which is a true miracle!) and only 8 pieces were missing from the big Ferris Wheel set! We ordered replacements and have since been able to re-build the Ferris Wheel completely!
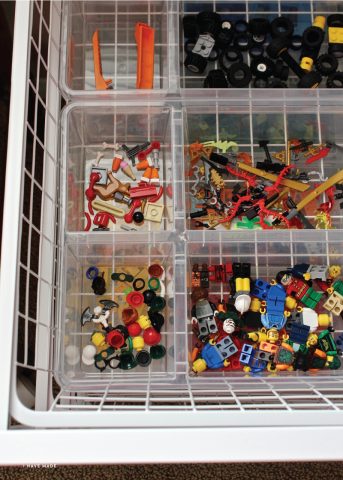
Step 7: Create an “Extra LEGO Pieces” Box
Whether you decide not to reassemble every last kit or you find yourself with lots of extras (which you will!), I recommend also including an “Extras” or “Leftovers” bin as part of your LEGO organization system.
Choose a bin that fits what you have (with room to grow) and label them accordingly. These “spare” bricks are great for free-building and also serve as a landing spot when you have the inevitable leftover bricks from new sets.
Step 8: Find a Home for Your LEGO Collection
Your final step is to find a spot for your newly-sorted LEGO sets. If you used stacking boxes, open shelving is a great solution, although you can also load the boxes into trunks, boxes, or closets.
Although it was somewhat of a happy accident, we discovered that the Sterilite boxes fit perfectly on the IKEA Kallax shelves in our playroom. While this might not be the ideal solution for homes with little kids, the Sterilite boxes+IKEA Kallax system sure make for an ideal LEGO display and storage central!

Does This LEGO Organization Method Work?
Right Away
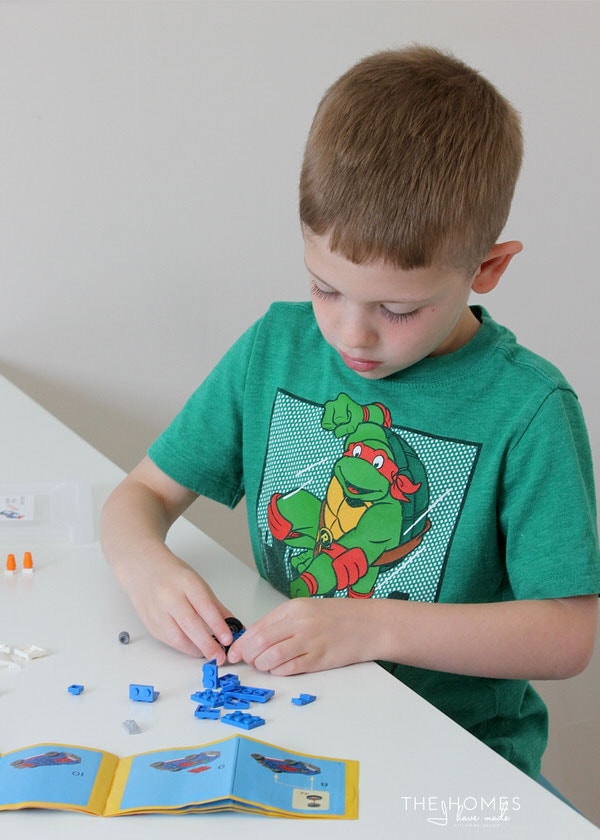
Half disassembled and parts spread across the house, there was literally no way for our sets to be reassembled with relative speed or ease. My primary goal was to get our LEGO kits back to a state where our son could build them again.
Literally, within minutes of placing all the sorted LEGO kits on the shelf…Henry brought the little blue car kit into my office and asked to make it. Because of this organizing project, he could easily see and remember what he had again. We sat right down to make the car, and boy was it so nice to be able to easily complete it without having to rummage around or hunt for missing bricks.
This organizing project certainly met the goal of organizing our LEGO sets in a way that made them storable and buildable.
And Years Later?
Oh boy. Do you remember that part waaaaay back at the beginning of this post where said ANY system you put in place requires diligence to KEEP it in place?
Yea, about that…
More Great Toy Storage Solutions
Looking for more great toy storage solutions? Here are just a few of our tried-and-true favorites:
- The Best Toy Storage Solutions for Every Item In the Playroom
- Sneaky Toy Storage Ideas for the Living Room
- How to Store Tiny Toys
- How to Store Wooden Kid Puzzles
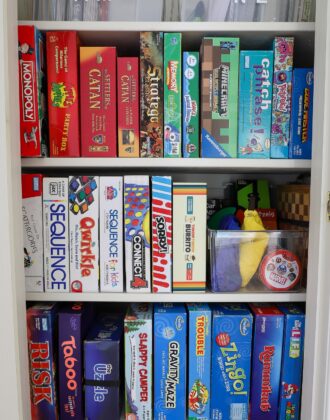
- The BEST Way to Organize Board Games
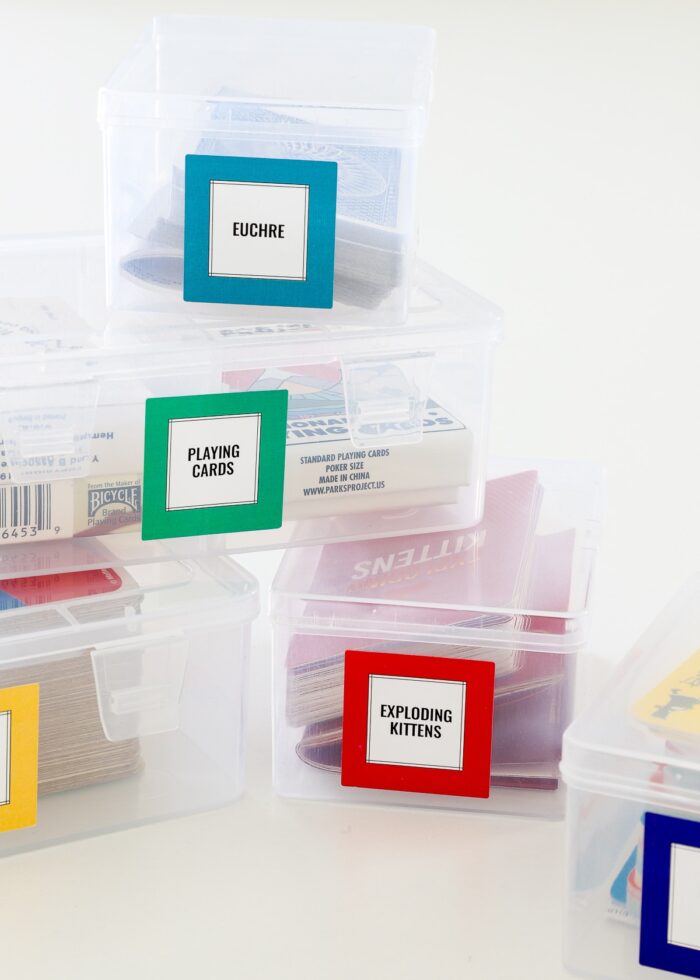
- How to Organize Small Card Games
- How to Organize Play Food
- Device Charging Station in a Drawer
- DIY Dress Up Station for Kids
- How to Sort and Store Those LEGO Sets
- How to Store Kids’ Sports Equipment
- How to Setup a Kids Art Station
- How to Store Kinetic Sand

In the years since first organizing our LEGO sets, we’ve moved twice and added two more young boys to the family. Keeping our LEGO collection under control pretty much stopped being a priority. And then as we gained more and more sets, it became too difficult to rain the chaos back in.
Now…all that said, our oldest has stopped playing with LEGO bricks (and therefor has stopped disassembling things all over the house) and our middle son is now 5 and VERY eager to create all the projects in the manuals we have amassed. You better bet I WISH we had our sets assembled and ready to go. So although I am not sure we can carve out time right now to re-assemble all of our kits (because we do have so many), I STILL believe it is the best LEGO storage solution when you want to be able to build very specific creations direct from LEGO.
They key to this particular system working is building maintenance into it. So every time you get, open, and build a new kit, you have a bin and label ready to go too. Think of it more as “LEGO maintenance” rather than “LEGO organization”…now that is another LEGO post all of its own!

Megan
59 Comments on “A Smart Way to Sort and Store Those LEGO Sets!”
One other thing we found while sorting these LEGO bricks; the colors can be difficult to distinguish on the page. Especially if they are transparent. Recommend sorting in a well lit area, comfortable clothes for crawling around on the floor to find dropped pieces, and with your favorite adult beverage.
Good tips, Babe! Should have consulted you during drafting 😉
This and the board games blog have been very useful. I’m going to try and find the same or similar storage boxes here in the UK. I’m going to organisie every room in the house and the kids room was already giving me an headache because it never looks completely tidy with how things are stored right now.
Thank you
Hi Megan
What a lovely post once again !
I still have the Legos of my daughters at home but it is easier as they only had two buckets which are sturdy and easy to be filled. You only have to put everything inside.
They didn’t have any kit so the situation is not at all the same.
Have a nice week.
Michèle
Hi Michèle!
Yes – when we were kids, there weren’t many kits and you just played and built out of big buckets! I think Henry will get there eventually, but right now, the kits and the directions make it easier for him to play!
Hope you’re having a great week!
Megan
Hi!
I think this is the first time I’m commenting on your blog. I love this idea.
The only advice I have for down the road (I have a 21 yo and an almost 16 yo that amassed an amazing amount of legos) is to store the manuals in 3 ring binders using clear page protectors. It made a huge difference in our being able to find the manuals and not have them be destroyed. I wish I had gotten the idea sooner as many manuals are in the binders in pieces. As the boys got older they learned to put them in the binders as soon as they finished the initial build.
Now I just have to face the HUGE tubs (each one has a Christmas sized tote on wheels) full of legos. But I have 2 daughters (9 and 7) and a young son (4) that may someday be willing to tackle a huge sort like this.
I’m going to try to catch the younger ones sets using this system before it becomes such a huge project. This is so inspiring!
Jenn
Hi Jenn!
Thank you so much for taking the time to say hi – I am so glad you did! I love hearing ideas from Moms who have older kids…since Lego play is so unique by child and by age! Transferring manuals to a binder is a brilliant idea…especially when kids phase out of wanting to keep kits together! Thanks for sharing…I’ll definitely be using that down the road!
Good luck with your Legos and thanks for stopping by!
Megan
What an awesome idea! I consider myself very organized and on top of things, but I admit… The gigantic tub overflowing with crushed Lego boxes, half assembled airplanes, combines, police stations, coast guard helicopters – you name it, was completely overwhelming. Thanks for the starting point and sanity saving tips! (Gonna miss you in Kansas!)
Hi Janet!
Good to hear from you! Yes – I hear you about feeling overwhelmed. I can’t tell you how long I’ve been looking at our stack of boxes trying to figure out with a way to deal with them. I promise it wasn’t that bad once we started…and was oddly therapeutic to count out 20 purple 2×2 bricks etc 😉
Our time in Kansas is indeed drawing to a close…we’ve enjoyed it far more than I thought we would!
Hope you’re well!
Megan
You are a far better mom than me. Most of the booklets are lost and ripped. I couldn’t tell you where anything else is. But this does inspire me to sort and help the kids keep their sets separate. Thanks for sharing a great idea. Now to find the manuals online. 🙂 I’ll be checking out that link you listed above. Thanks!
Definitely not a better mom…maybe just more of a neurotic one 😉 Henry is not much of a builder without directions, so I knew I had to get them under control if he was ever going to play with them again. As he gets older, keeping them in sets will likely become less important…but for now…this has been awesome!
Finding the manuals online was a huge relief! Good luck!
Megan
Hi Megan. Great post for corraling those wayward Lego pieces. While reading your post I thought of my sister and all the Lego kits from her 3 kids. When they outgrew them, they sorted each kit’s components into zip top bags and then put those bags into a large tote bin for storage. Not quite as modular as your system, but your son will still play with his kits for a long while. Go mama!
Thanks Laurie!
Yes – there are so many different ways to store Legos…and it mostly depends on your kid(s) and how they play with them. Down the road, it may not be worth keeping them separated out by kits, but for now…that’s the only way Henry understands how to play with them. He’s not quite ready to build his own creations…yet! When he gets there…we’ll re-assess!
Hope you’re having a great week!
Megan
Hi Megan – My son is way past Lego’s (26!), but I still remember the crashing sound from when he would up-end the plastic tote box we stored them in. It was a warning to watch out for the little pieces! I read quote somewhere that the there were three levels of pain: pain, excruciating pain, and stepping on a Lego. I don’t miss that!
Looking forward to hearing about the upcoming move – hope you get to enjoy the transition time.
Aloha, Tenney
I love the idea of having the legos organized this way. Right now, all of our lego sets are broken apart and mixed together with random headless characters in 3 separate containers the size of large shoeboxes. I am not sure I will ever tackle those with this system, but I can tell you that when I buy new legos, I will definitely be buying them a plastic storage container to go with and labeling that sucker up. Thanks for sharing.
This is a great post! Thank you so much for sharing! I spent most of my son’s spring break simply sorting his legos by color. It was exhausting. He has over 45 kits. I love the way you have organized them with the labels and appropriate sized boxes!!! Well done. Loved your tips!
this is exactly what I’m trying to do with grandsons many junior lego sets 4 yrs.
How do you print lables with picture of set for the box though.
Thank you will save your post.
how do you print labels for the set in the boxes.?
My kids just went to visit their dad for the summer & I can’t wait to sort two full under-bed boxes back into sets. A lot of them are random parts from yard sales–which helps fill in missing pieces.
My advice: use Contact paper cut an inch or more larger than your label. My daughter just turned 12 & they still peel right off the plastic bins I did when she was a toddler. Of course, your boxes probably won’t be repurposed, but when your LEGO collection grows you may end up combining set types/themes like we do in our Iris/Sterilite drawers.
This is fantastic advice, however, my grandson has hundreds of sets. The methodology is perfect for a small number of Lego sets to organize, but when pieces from many more sets become jumbled, I’d be curious to know whether you think your solution works as well. In the meantime, I’m staring at a monumental task!
I was commenting on this post and saw your comment from 2017. I was saying that I use those same clip boxes, but the larges size they make. Then each of my boxes has a few sets per box, and they’re sorted by theme. For example, I have a Batman box, Toy Story box, Lego movie box, vehicles box, Spider-Man box, etc. I have a block box and a people box. I actually go through and get rid of all those random extra pieces occasionally. I’m so OCD about it. But the kids can grab one or two boxes and it limits the mess.
Megan, I love your Lego labels! They are perfect! Their size, color, print, description, and graphic design. With the millions of Lego users you’d think that someone would be able to make them. It would be so nice to be able to contact that person and order them. Do you know what I mean? To be able to get two labels for a reasonable price would be good…
My husband and I just spent the last three days almost non-stop sorting Legos by color and then extracting 7 Star Wars sets (most around 500-900 pieces) while documenting the missing pieces to order from Bricks and Pieces on the Lego website. This is not how i imagined spending my time, but I look forward to this fall when it will be like Christmas with the “new” lego sets. And we still have so many pieces left in the color coded bins. So many more sets to go… Thanks for the storage and labeling idea. The pieces are already in the same bins!
Hello! I really love this way of organizing a smaller amount of lego sets. I use Canva….recommendations on size and font you used to create the labels? You don’t happen to have free printable option to change image and title? (long shot, but love exactly how you created). Thank you!
You are my favorite person!! I decided to do this with my kids legos after it took us an hour to find one piece! I should have done this much much sooner, I didn’t realize until I started that my kids have 21 sets and according to the brickset site, this equals over 5500 pieces!! Took me a little longer than yours, but it was way worth it!!!
So, 3 years after this initial post, are the lego sets still nice and neat in their boxes? Do the kids keep them that way, or do you have to organize for them? I’m trying to find a good way to organize that my kids can keep track of their own stuff.
Hi Christine!
Thanks for reaching out about this! I actually wrote a follow-up post to this post a year or so later…you can see it here: https://thehomesihavemade.com/2017/09/organizing-legos-by-color/
Now that it’s been another few years, I can tell you this: my 8 YO son loves the IDEA of having his Legos color sorted, but is incapable of maintaining it that way. We still have a lot sorted by color, but it was pretty hard to maintain (since he wasn’t putting pieces back) and now we have the “dreaded” box of all mixed and random pieces. He keeps asking me when I’m going to sort the big box back into color groups bc I do think he likes to be able to find what he’s looking for…the next time I have a TV series I want to plow through, maybe I’ll plop down and work through the box…but I’m not convinced it’s worth my time 🙁
Hope those few insights help!
Megan
Hi Megan! Just found your post, and it’s so helpful for our family! Do you by chance remember what font you used for the labels? Thanks so much!
Pretty sure this is the font I used: https://www.fontsquirrel.com/fonts/josefin-sans
Good luck!Megan
Hi Megan! Can you please tell me the dimensions of the sterilite containers you used. I bought a bunch but I’m not sure they’re the same! I love the looks of yours! Mine seem smaller. I tried to go the the link on amazon but it failed me! Thanks!
Hi Mandy,
I used these. They are the “small” size.
Hope that helps!Megan
Hi Megan! Which program did you use to make the labels? Mine are very blurry and I am wondering if you have any program or printing tips!
Hi Mandy,
Thanks for writing and I am sorry to hear you’re having trouble with your labels. I used Adobe Illustrator, which I realize most people likely don’t have access to. If you are using large, good resolution images, you really shouldn’t have any problems (unless it’s program related). I would actually try to make labels in Word to see if you have better luck!
Megan
I just want to say this might possibly be the most useful thing I’ve ever learned on the internet. Thank you! Pure brilliance. I love my new LEGO storage!
Hi Megan,
I’d love your permission to link to this from a post about LEGO organization on my site.
Thanks!
Hi! I just came across this post and I love it! We actually use the same bins for our LEGOs and I was searching for a good way to label them. Do you happen to remember the dimensions you used for your labels??
HI there!
I am so sorry, I don’t have the file anymore and we’ve actually starting using a different method for storing our Legos (and have since re-purposed all these boxes.) In general though, I think they were similar dimensions as the sides and tops of the boxes.
Sorry I can’t be of more help but good luck!Megan
I noticed your post since I sort my kids legos similarly. I actually use the large clip boxes and put themes together. Like recently, all our toy story sets are in one box. I try to keep them as together as possible within the box. We also have Jurassic World box, Trolls Box, Lego Movie Box, Batman Box, etc. I have one for just vehicles and one with just people alone. (I’ve been collecting since before I had kids, lol!) Organizing is key as you get more and more sets!
Hi,
Thank you for some nice tips! We have plenty of sets so we try to find now the way how to organize them!!! very nice article by the way 🙂
Thanks so much! Good luck with your LEGOs!
~Megan
Megan, what are you using for LEGO storage now?
Hi Shirley!
Thanks so much for sharing your story, I love it! My 82 year old Dad has always built LEGOs, and has built SO many new things during COVID. in fact, he just started some fancy race car last night!
It’s funny you ask about how we organize our LEGOs now. I was getting ready to write a new post called “Why We No Longer Organize Our LEGOs,” because both our kit system and color-coding system fell apart. However, our middle son then discovered all our manuals and wanted to build some of them. We determined sorting out the LEGOs by color (again) was really the only way to salvedge the kits we already had, so we embarked on sorting them out by color again. Sure enough, since doing that, we’ve re-built about 5 or so kits we already had.
So…color sorting seems to be what works best for us…at least right now!
Hope that helps!Megan
We have over 108 Kits to sort. Dont know for sure because some manuals are definitely MIA. Looking for advice.
Hi Natalie,
Sorry for the delay in getting back to you here. I actually JUST updated that LEGO Organization Post with some helpful information about if you *should* organize LEGO sets. You might want to check it out again.
Unfortunately, after spending a lot of time getting our sets organized…now years later…they are all a mess again because it takes some effort and maintenance to keep them that way.
That said, our sets are essentially un-buildable because the pieces are so jumbled up so we are considering going back through the effort again.
If you decide to organize by set, I recommend sorting by color first. Once you have those big piles sorted out, it’s much easier to go kit by kit and find what you need!
Hope that helps!Megan
I started building and collecting used LEGO sets during the height of COVID. (I’m 70+). It gave me a neat connection with my LEGO addicted grandkids, and filled many empty hours. As you can imagine, used sets are often missing parts. I get my replacement parts from ToyPro online. They have quick and efficient service, and let you add to your order over a few days.
Thanks for the organizing tips. They’re very helpful!
Thanks SO much for this post. We’re also a Lego family. We’re quite fanatical about them actually. 😜 We recently moved, and our sons have at least six HUGE Sterlite bins with their Legos in their room, not to mention my three vintage Lego sets from the 80s that I passed down to them. I’ll be getting those smaller boxes to put their and my sets in.
Boy to I appreciate your honesty! The best I could ever do was remind the kids that any stray LEGO pieces might get sucked up by the vacuum … which at least kept them contained to ONE large open dishpan. Of course that was back in the day when sets were not so specialized and came in various sized builder sets. The biggest problem was to keep track of the wheels….
Yes…wheels are still a hot commodity for sure! LEGO organization is SOOOOO hard. We’re now stuck at home with COVID and my 5 YO wants to build AAAALL the things…so wishing we had maintained this from the get go!
Hi Megan! This post has found me at the perfect Time. My 5 year old has just 3 Lego sets and is excited about more so I can start with the containers and plan for room to grow. Love you and this blog!
Thank you so much for this post! It is EXACTLY what we need in our house of three girls, the old two (7.5 and 5) are Lego fanatics. After 1/2 of the 5yo’s new “Doggy Day Care” kit was added to the general bin by Dad (causing many tears), I committed to making our Lego storage easy for my girls to access and clean up on their own, since my Ziploc system was not working. I was already stressed about it, and Voilà! I found your post! I’m off to figure out how many bins to order and labels to make. Thanks for such a great resource to guide my journey… 🙂