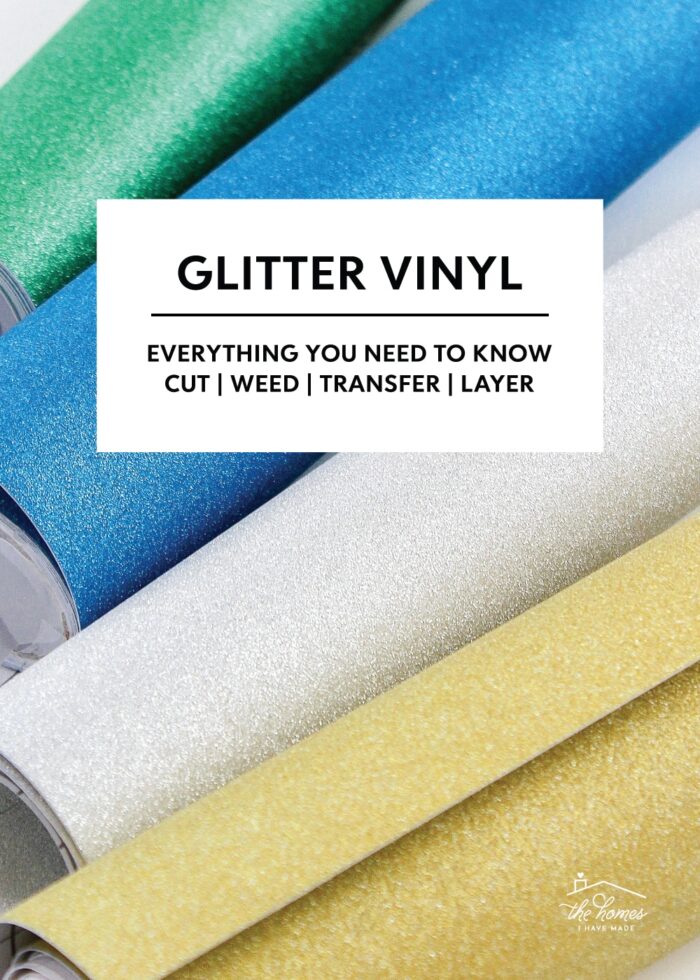
Cutting Glitter Vinyl with a Cricut | Everything You Need to Know
As many of you know, I rely on my Cricut machines to make a variety of projects week in and week out, including decor, gifts, labels and more. And one of my very favorite things to create with is vinyl! Many people feel intimidated to work with vinyl, and for good reason: it can be tricky to cut, weed, and apply…and all that is most true when working with glitter vinyl. After years of receiving many questions from exasperated readers about the nuances of glitter vinyl, I finally figured it was time to share some of the best practices I’ve learned when creating super sparkly projects. If you’ve found yourself frustrated when working with glitter vinyl or have been too scared to give it a go, here are my best practices and troubleshooting tricks for cutting glitter vinyl with a Cricut!
What Is Glitter Vinyl?
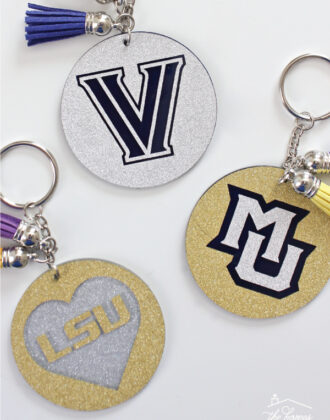
Glitter vinyl is exactly what it sounds like…glittery, sparkly vinyl. You use it in mostly the same way as adhesive vinyl. But rather than a matte or glossy finish, glitter vinyl gives a pretty, sparkly sheen to your designs. Like standard vinyl, it comes in an array of colors and can be cut with any Cricut machine (Cricut Maker family | Cricut Explore family | Cricut Joy) to make any design you can dream up!
Although the sparkly texture of glitter vinyl sure gives your projects a wonderful, unique finish, it can also be really frustrating and tricky to work with. From finding the perfect cut setting and difficulty seeing weed lines to getting your images to stick to transfer tape and layer correctly, here are my best practices, tips, and tricks for perfect glitter vinyl results…every time!
NOTE! Although this tutorial is geared specifically toward Cricut glitter vinyl, the same tips, tricks, and settings can be applied when working with Glitter Iron-On | Glitter Heat Transfer Vinyl | Glitter HTV | Shimmer Vinyl, etc.
Once you’ve designed your project to be cut from glitter vinyl in Cricut Design Space, click the green “Make It” button to send it to your Cricut machine. Then use the following information to ensure your cuts turn out just right!
Loading Glitter Vinyl Into a Cricut Machine
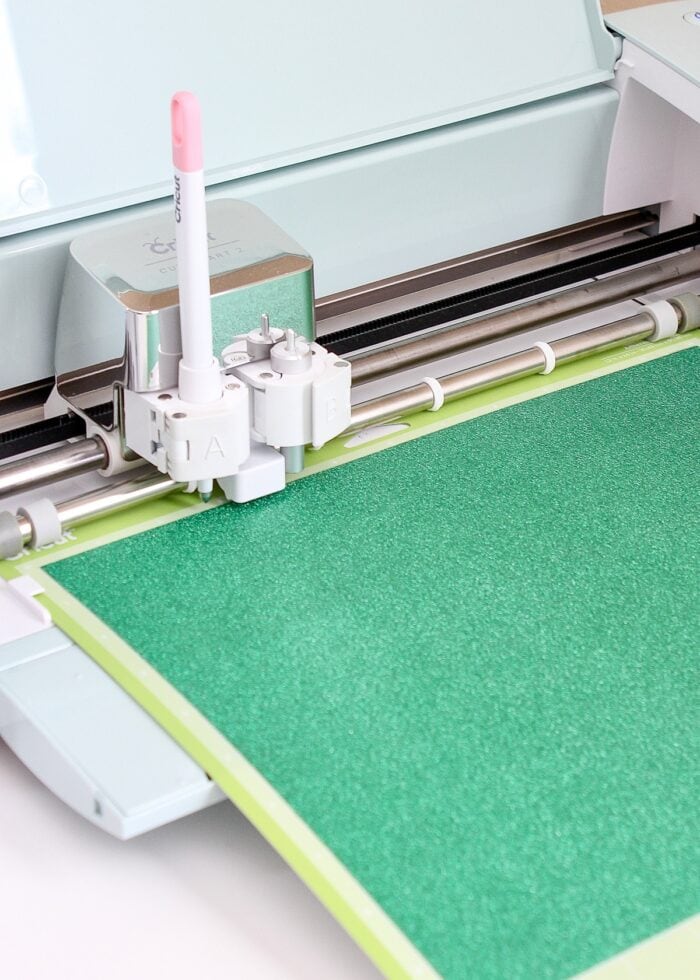
Loading Glitter Vinyl On a Mat
Place the glitter vinyl onto a very sticky mat with the glossy carrier sheet toward the mat and the glitter surface facing up.
Glitter vinyl is a bit stiffer than standard vinyl, so you need to ensure the glitter vinyl is firmly secured to the mat before you start cutting:
- You may notice your glitter vinyl has a strong tendency to curl back on itself. Gently bend the glitter vinyl backwards to help relax it a bit or consider storing it flat.
- Be sure you use a very sticky mat for glitter vinyl. A new mat with a strong stick will keep the sturdier vinyl nice and flat so your designs cut with precision. If you don’t have a really sticky mat, use these tricks to re-stick older mats or try a gently-used Strong-Grip Mat (purple) instead.
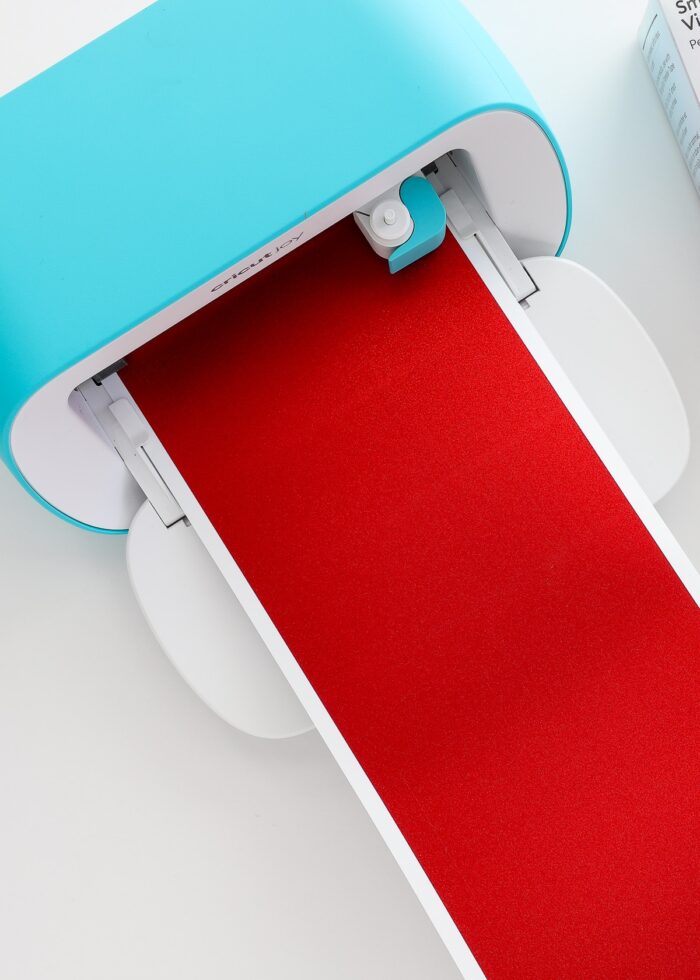
Cutting Glitter Vinyl “Mat-Less”
If you are using a Cricut Maker 3, Cricut Explore 3, or Cricut Joy, you can use Smart Glitter Vinyl and feed it directly into your machine (without using a mat).
Ensure the glitter side is facing upwards when you feed it into the machine, with the glossy liner toward the machine. Select “Smart Vinyl – Shimmer” (or Smart Iron-On – Glitter) from the Materials Menu; and if needed, use the same recommendations outlined below to adjust blade depth for cleaner cuts.
Selecting (& Adjusting) the Right Glitter Vinyl Settings
Because of the sparkly, rough texture of glitter vinyl, it can be tricky to get it to cut perfectly clean through. Selecting (and often adjusting) your machine’s settings is almost always required!
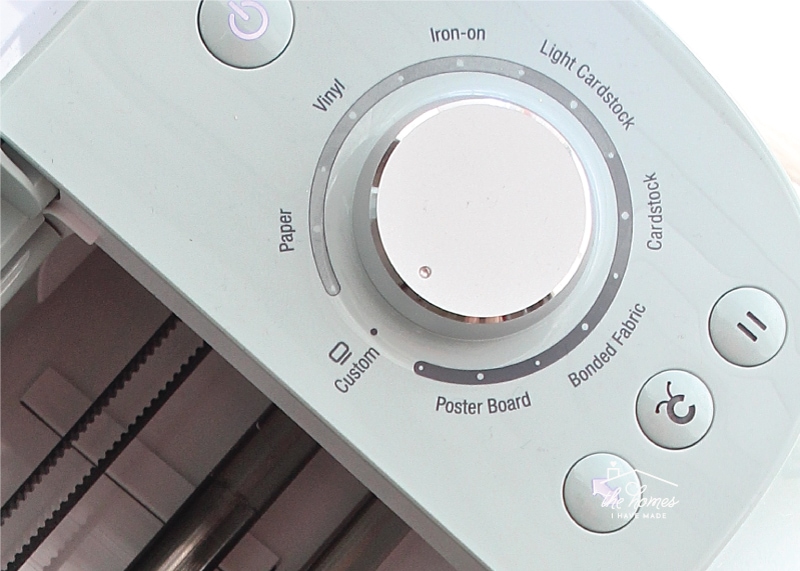
Proper Dial Setting
If your machine has a Smart Set Dial (Cricut Explore & Cricut Explore Air 2 models), do not use the “Vinyl” setting. Instead, set your dial to “Custom,” and then use the instructions below for the right blade settings for glitter vinyl.
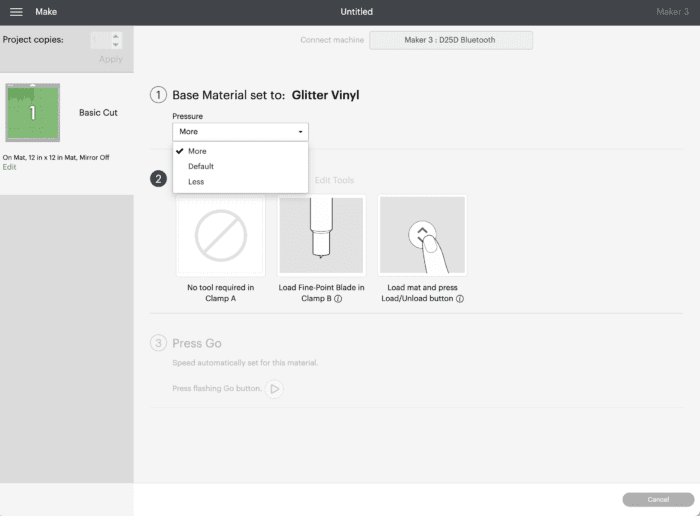
Choose “Glitter Vinyl” from Materials Menu
For all other machines, you will be prompted to select your material from the “All Materials” menu on the final cut screen in Cricut Design Space. Glitter vinyl requires more blade pressure than standard vinyl, so be sure you browse through and select the exact glitter vinyl you are using (e.g., Shimmer, Glitter, Iron-On, etc).
Increase Default Pressure
Selecting the right material is a great first step, but you may find this still isn’t quite enough to get clean cuts on your glitter vinyl. So your next step is to increase the blade pressure to “More” (located on the final cut screen in Cricut Design Space). For me personally, this simple increase in pressure is usually enough to get clean cuts on my glitter vinyl designs.
Manually Adjust Custom Material Settings
However, if you still can’t get perfectly clean cuts on your glitter vinyl, you may want to manually adjust the custom vinyl settings even more:
- On the final cut screen, select “Materials.”
- Select “Browse All Materials.”
- Down at the bottom, in small green letters, it says “Material Settings.”
- Select “Glitter Vinyl,” increase the pressure and/or pass count, and then save the cut settings.
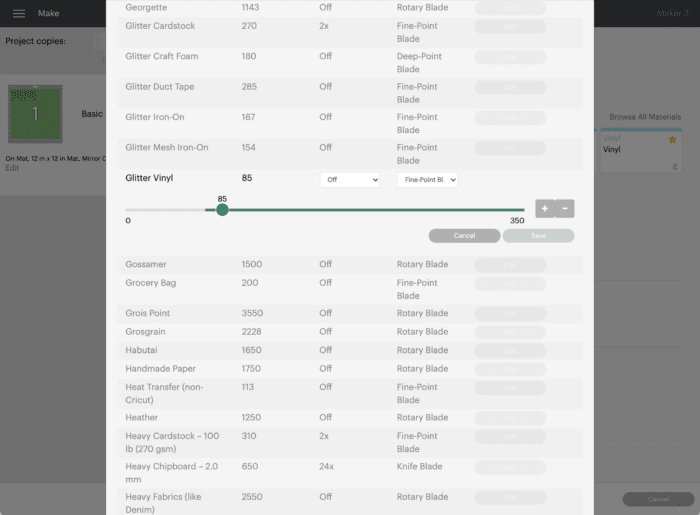
NOTE: If you choose to do this, you may have to run a few test projects until you find the right depth and number of pass for your specific machine.
Always Check Before Unloading
Finally, I always always always recommend quickly checking your cut before unloading mat/material from the machine.
Simply use a weeding tool to lift up a part of your project (usually the top left-hand corner of the mat)…
- If the design separates from the surrounding vinyl cleanly and without tugging, go ahead and unload your project and proceed with weeding and transferring.
- If the glitter vinyl does not seem perfectly cut through (it sticks or pulls), re-run your project (by clicking the Cricut/Go button) at least one more time before unloading. Keep checking before unloading until you get the cut results you want.
Once you get your glitter designs perfectly cut through, you might think you’re in the home stretch. However, it’s in both the weeding and transferring of glitter vinyl designs that most run into trouble.
Weeding Glitter Vinyl
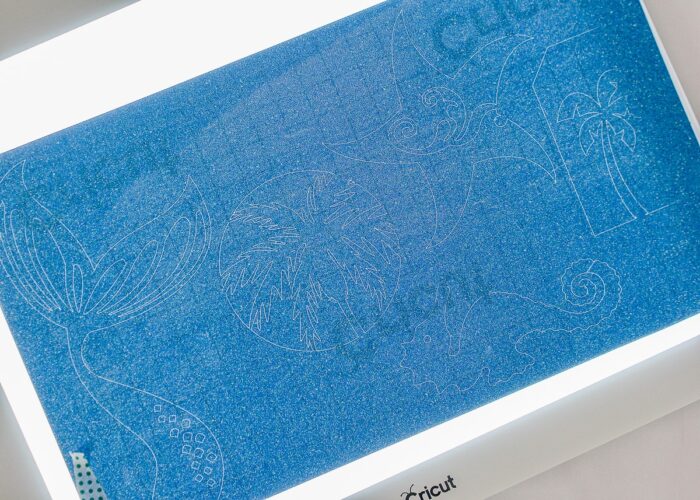
That sparkly texture that makes your projects look so great is also what makes your cut lines VERY difficult to see, which in turn creates quite the weeding challenge. Since it is so frustrating to accidentally poke or weed out parts of the design you actually need, try these two methods to “light up” those lines:
Use a Window
One of the best (and free!) ways to illuminate your cut lines is to use a window. After your design is cut, remove the entire sheet of vinyl (backing and all) from the mat and hold it up to a window (during daylight).
- If your design is simple, holding it up to quickly see the cut lines is usually sufficient.
- If your design is complex, tape it to the window using scraps of StrongGrip Transfer Tape and weed it entirely.
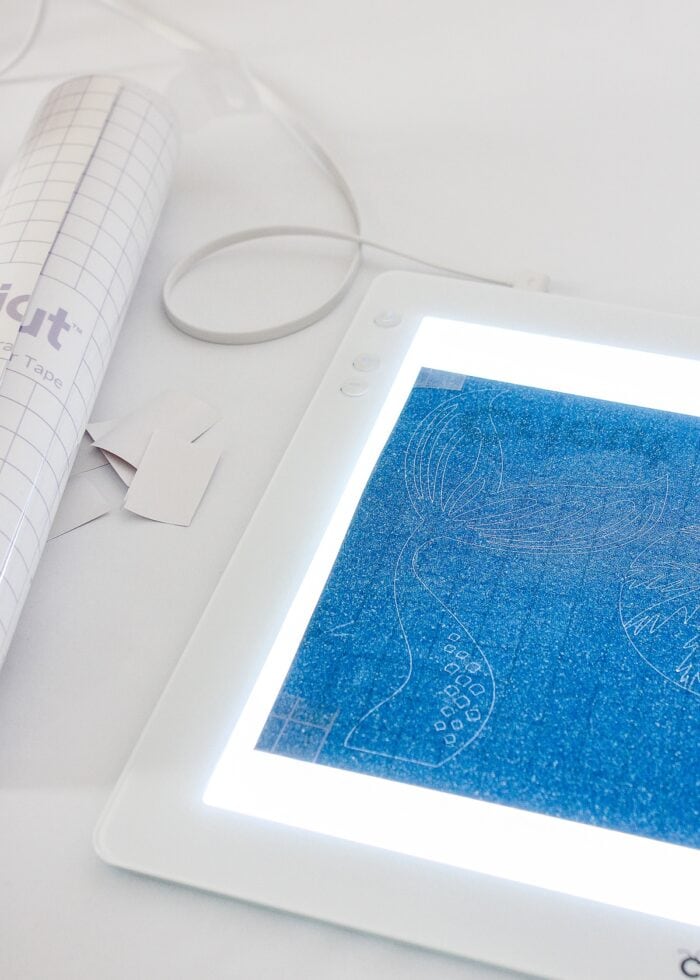
Use Cricut’s Bright Pad
If you plan to work with glitter vinyl a lot, you might want to consider investing in Cricut’s Bright Pad or Bright Pad Go (a cordless version!)
Admittedly, I didn’t think I’d use this gadget a whole lot, but I LOVE its sleek design, ease of use, and how well it lights up projects. All those intricate cut lines become perfectly illuminated, making them a breeze to weed!
Want to save this post?
TIP! Use extra scraps of StrongGrip Transfer Tape to secure your design to the Cricut Bright Pad in order to keep it still/flat while weeding.
Transferring Glitter Vinyl
Do You Have to Use Transfer Tape with Glitter Vinyl?
One of the coolest things about glitter vinyl is that you don’t necessarily have to fuss with transfer tape! The stiffer, firmer texture that makes it so tricky to cut actually helps glitter vinyl act more like a sticker than standard vinyl. Meaning? Glitter vinyl isn’t nearly as flimsy as regular vinyl, so it won’t fly around, distort, create bubbles, or stick to itself in the same way.
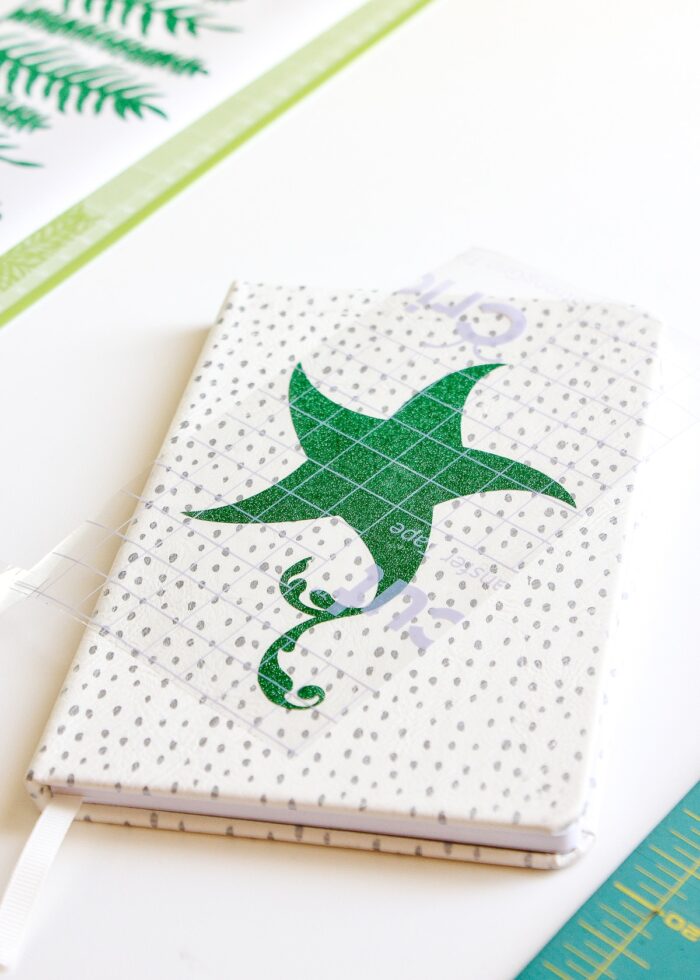
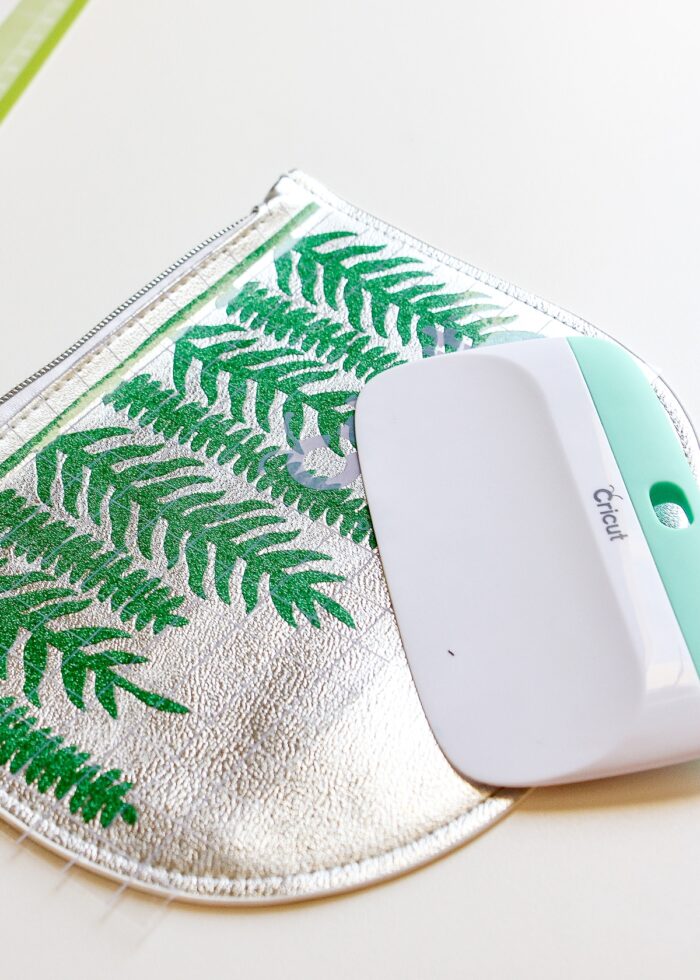
If you have a fairly simple design that doesn’t require precise layering or spacing, you likely don’t need to use transfer tape. Simply peel it up off the paper backing (use tools if necessary to lift up a leading edge), and place it as you would a sticker (see image below).
I cannot tell you exactly when you do and do not need to use transfer tape on glitter vinyl projects, but here’s a good guideline: if you can easily peel up the entire design without ripping or distorting it, you likely don’t need to use transfer tape.
However, if you can’t lift your design easily, Strong-Grip Transfer Tape will be required.
All About StrongGrip Transfer Tape
There may be times when you absolutely should use transfer tap with glitter vinyl. Some examples include:
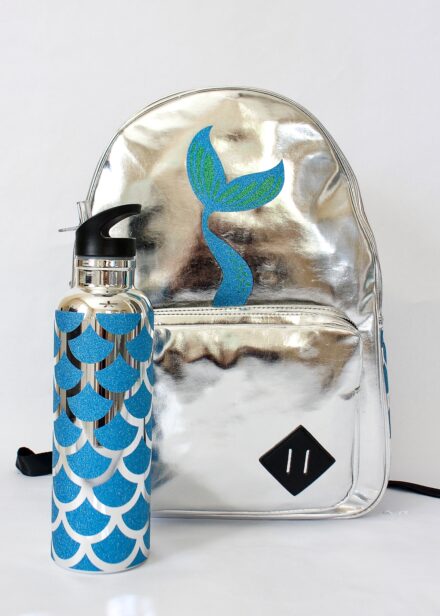
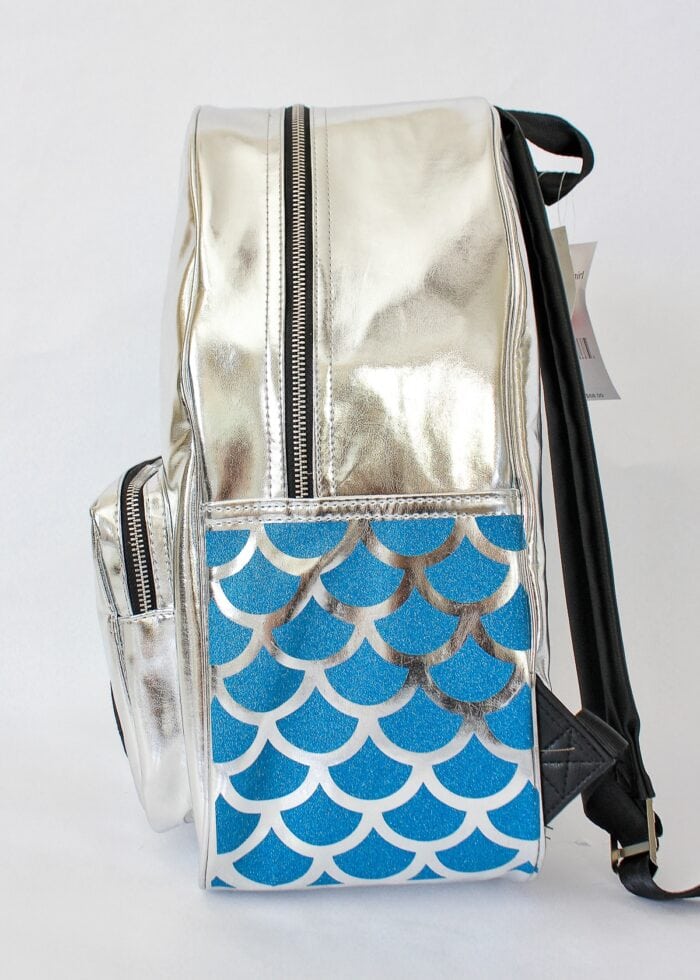
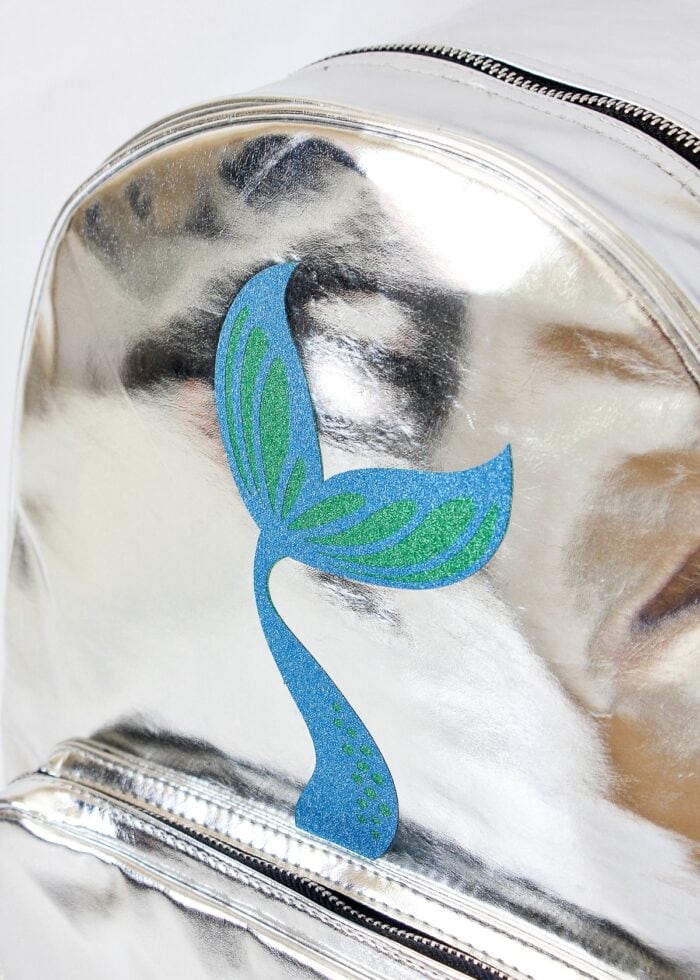
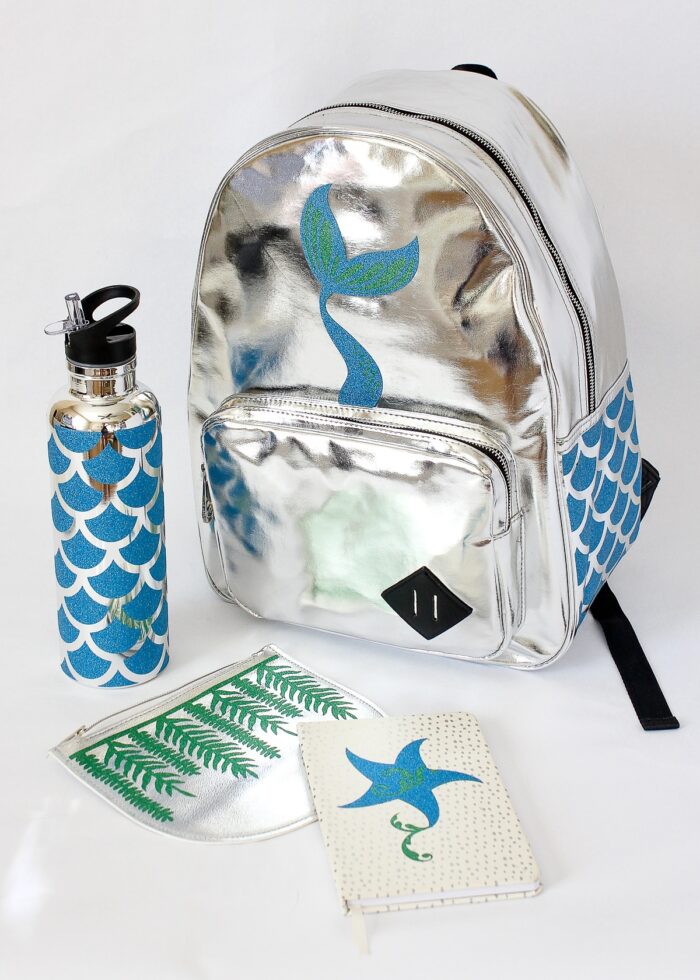
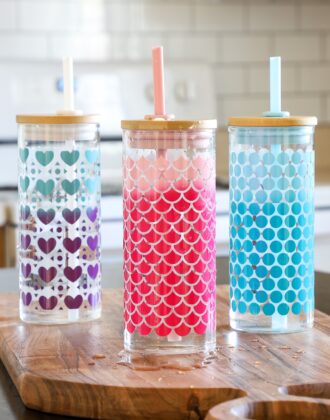
- A project that requires very precise spacing (like my mermaid backpack)
- Designs that have disconnected elements (also, like the mermaid scales)
- Small details that could easily rip/distort
- Multiple layers
In these instances, transfer tape will enable you to move the design from your cut mat to your final project with much better results.
BUT!!!! You can’t use just any old transfer tape you have lying around! That same gritty texture that makes glitter vinyl difficult to cut and weed also makes it more difficult to pick up with traditional transfer paper.
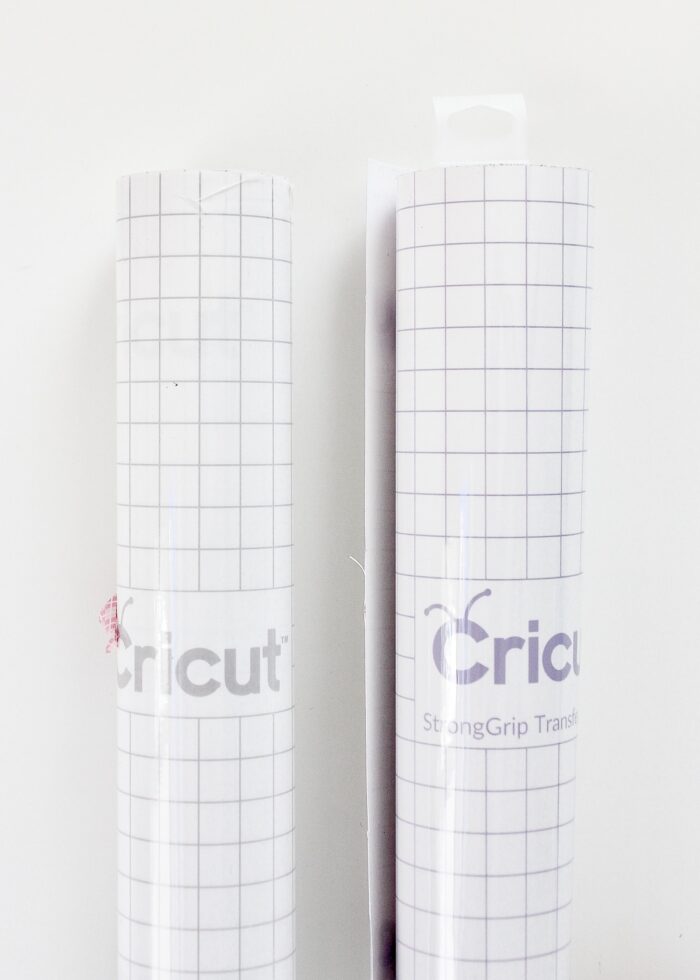
Therefore, Cricut makes a StrongGrip Transfer Tape specially designed for glitter vinyl projects.
Every roll of Cricut-brand glitter vinyl comes with a sheet of Strong-Grip Transfer Tape inside the roll. If you find you need more than what is provided, you can also buy it by the roll.
NOTE: The difference in “stickiness” between regular and StrongGrip Transfer Tape is significant. If you are working with regular vinyl and cannot get the transfer tape to let go of your project, double-check that you aren’t using the StrongGrip version. It has purple gridlines and will say “Strong-Grip Transfer Tape” right on the roll!
How to Transfer Glitter Vinyl
Once you have StrongGrip Transfer Tape in hand, the transfer process is the same as any other vinyl project. If you need help with this, see my comprehensive application instructions here: How to Transfer Vinyl
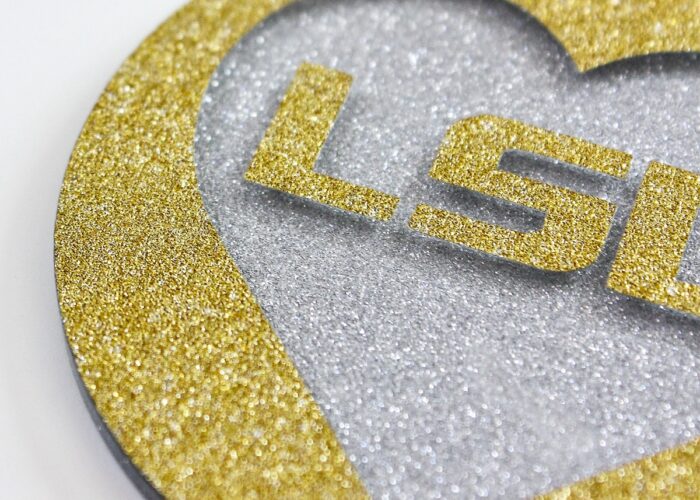
Can You Layer Glitter Vinyl?
Technically speaking (direct from Cricut itself), it is not recommended to layer over glitter vinyl. Because of its sparkly texture, it can be difficult to get really good, clean adhesion that holds in place long-term.
That said, if you really want to use glitter vinyl in a layered design, use these tips:
- Use regular vinyl for all bottom layers and glitter vinyl for the top-most layer only.
- Use StrongGrip Transfer Taper to layer designs with precision (see more: How to Layer Vinyl Projects)
- Only layer 2-3 colors together because the design can get quite thick.
- If you do layer glitter over glitter, use a scraper to vigorously rub the two layers together to improve adhesion.
My Best Transferring Advice
I’ll be honest with you: working with glitter vinyl and StrongGrip Transfer Tape requires patience...a lot of it. Here’s why: the StrongGrip Transfer Tape is VERY sticky, so getting it to pick up your glitter vinyl design isn’t too hard. But getting it to “let go” of your vinyl design onto your final project can be very, very challenging. Here are some things to keep in mind:
- Don’t rush.
- Take a deep breath.
- Don’t work with children underfoot. Seriously.
- Use your scraper tool with a lot of pressure, on the outside of your transfer tape, to really stick the vinyl to your project.
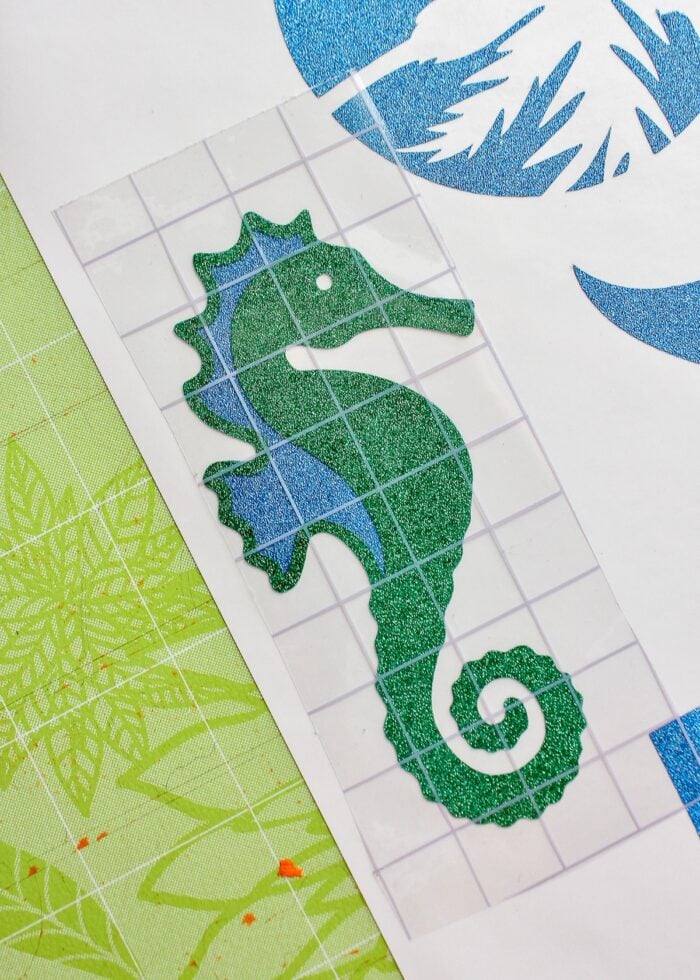
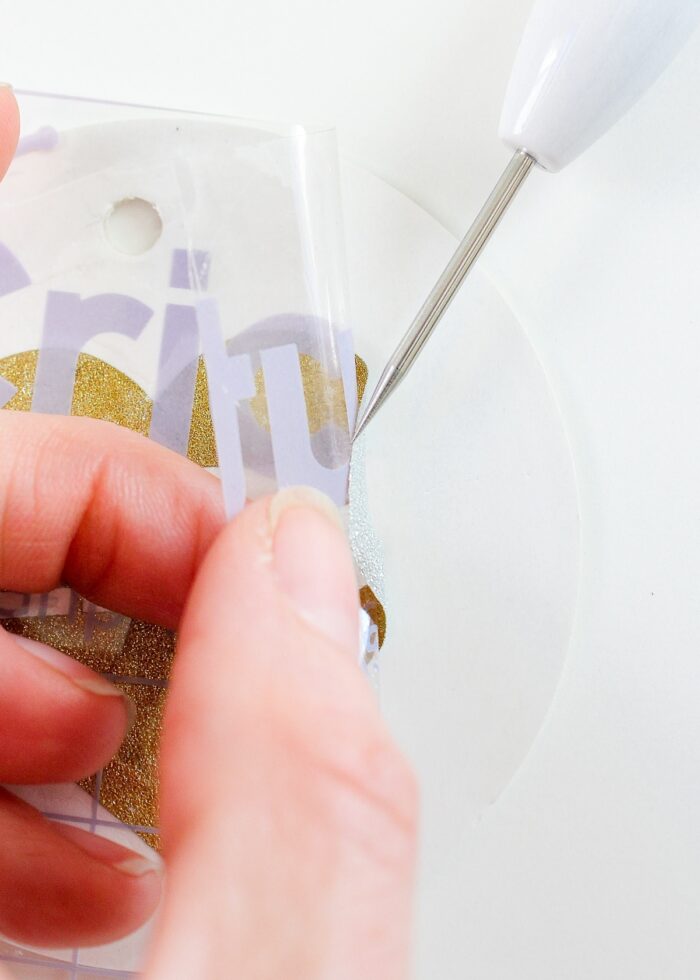
- Use your weeding tool to carefully separate the lead edge of your design from the transfer tape. Once the lead edge of each element is stuck to your project, it will usually separate from the transfer tape as you carefully pull it away (shown below).
- Don’t rush. Yes, I repeated this on purpose.
- Feeling frustrated? Just step away. Take a deep breath, and come back when you’re ready.
Troubleshooting Your Glitter Vinyl Projects
Tip 1: Check Your Mat
If your mat is not sufficiently sticky, you will not get clean cuts (no matter how much pressure you use). Use these tricks to re-stick your mat or consider opening a fresh one for your glitter projects.
Tip 2: Check Your Blade Condition
Glitter and other rough textures can gum up and even dull your Premium Fine-Point Blade. If you are using a clean mat, have adjusted your settings as described above, and ensured you have a clean blade free of debris, consider swapping out your blade for a fresh one.
TIP! Sill having trouble? Try switching to a Deep Cut Blade Housing. Although it’s not technically necessary for glitter vinyl, I find that this stronger, deeper blade always gives me great cuts, no matter what I’m working on!
Ready to Master Other Cricut Materials?
Once you giveHolographic Vinyl a try, go on and master these other Cricut vinyls with my comprehensive guides:
- How to Cut Vinyl with a Cricut
- How to Cut Holographic Vinyl with a Cricut
- How to Cut Iron-on Vinyl with a Cricut
- How to Cut Smart Label Writable Vinyl with a Cricut
- How to Cut Stencil Vinyl with a Cricut
- How to Cut Color Changing Vinyl with a Cricut
Glitter vinyl is a great medium for adding pretty, sparkly details to your projects. But that gorgeousness comes at a price: glitter vinyl can be very trick to cut, weed, and transfer. I hope all the tips, tricks, and best practices I’ve outlined here bring you frustration-free success on your next glitter vinyl project. And remember, above all: patience and practice are key…you can do this!
Megan
28 Comments on “Cutting Glitter Vinyl with a Cricut | Everything You Need to Know”
Very informative. I agree with the patience and don’t rush when working with glitter, I’ve made many ornaments using glitter vinyl. For me, the frustrating part is getting the Strong Grip to pick the design off the backing paper. I use an exacto knife to get a corner lifted up and then it will usually detach. Took me a lot of time to figure out to work it. but worth the effort. If you want to see what I have done, go to the Etsy link http://www.etsy.com/shop/FlowerchildCreates
I have made several glitter tumblers with glitter vinyl. I always use the strong transfer tape but have the problem of getting the vinyl to adhere to the transfer paper (particularly with lettering) I find if I use my weeding tool to adhere one letter, the rest follow. Then I have trouble when I transfer the vinyl to my cups. The transfer tape holds onto a layer of the glitter but not uniformly so some letters are super glittery and some have a layer of glitter gone. I’ve noticed the problem mainly occurs with the gold glitter vinyl. I also have trouble with the black glitter vinyl “running” when I put on the epoxy. I’ve tried setting the vinyl with a clear acrylic spray. While that improved it slightly, the black glitter vinyl still “ran” on my next cup.
Hi Megan,
I’ve been working on travel cups ( shiny metal ones) for My daughter. I have had a super difficult time getting the vinyl to adhere to this slick surface. Turns out if you warm the surface moderately ( I used my blow dryer) then apply the glitter vinyl, when the cup cools completely, the vinyl sticks !! Small contribution here. But maybe helpful ;}
Thank you thank you thank you! I’ve done several non-glitter projects and couldn’t figure out why I couldn’t get the transfer tape to stick! Imagine my joy to find the hidden treasure of the strong grip tape in the roll of glitter vinyl!
Hi there I’ve tried two different types of glitter vinyl and I have found that it doesn’t stick well to itself. I’ve been making peacock feathers so using four or more layers. I’ve tried heating it but nothing seems to make it stick to itself. Any tips?
Hi Jenny,
I’m not sure I’ve got great answers for you…technically glitter vinyl isn’t supposed to be layered. In fact, Cricut has asked us bloggers NOT to layer glitter vinyl since it’s not the intended method! I’ve successfully layered 2 layers of glitter vinyl, but that’s about it! A better bet might be to slice your layers out of each other and then load each layer into itself so it lays flat and is all secured to your bottom layer (does that make sense?)
Sorry I can’t be more help on this one but good luck with your project!Megan
Has anyone worked out how to seal the glitter without the colours running, we’ve tried lots of things but require it for outside and the spray adhesives seem to make it run and ruin the project?
I’ve personally never sealed glittery vinyl – have you tried a Mod Podge-like product that is intended to work over such things?
Sorry I can’t be of more help here!Megan
how do you get regular vinyl to stick on glitter vinyl
Hi Laura!
Unfortunately, you don’t! In fact, Cricut recommends that you not layer OVER glitter vinyl since it doesn’t give good or consistent results. Glitter should always be the top/final layer.
I haven’t played with it enough to come up with a “hack” but I am sure other bloggers have. I am sorry I can’t be of more help here but good luck with your project!
Megan
Please help ! I’m really struggling, I’m quite new to this and have Cricut glitter vinyl in gold and silver and Cricut Strong transfer tape, but I just can’t get the transfer tape to pick up my letters. They just won’t seem to stick at all. The words and letters just seem to lift straight off and move around if I can peel them off the backing creating uneven designs. Once I stick them down on the surface they are fantastic and stick well but I can’t get them on the transfer tape at all. What am I doing wrong please ?
The glitter vinyl and transfer tape are both new so not an issue with age and losing stickiness I don’t think.
Thanks
Hi there!
So sorry for the late response, but I’ll do my best to help!
Picking up glitter vinyl, even with strong-grip transfer tape, can be a bit exasperating! My first suggestion is to REEEEEAAAALLLY work your scraper tool on top of the transfer paper+glitter vinyl. Push really hard and scrape back and forth in every direction for longer than you think you should have to. Next, when you peel back the transfer paper, if your design is still not sticking, use a sharp weeding tool to gently lift just one edge of your glitter vinyl off the paper backing. By releasing just a tiny edge and getting it to stick to the transfer tape, the rest of the design will usually follow. Finally, sometimes bending the paper backing backwards away from the design will also help release it.
Working with glitter vinyl sure does take some patience, but you’ll get the hang of it!
Good luck!Megan
Help… not one tiny bit of my image cut from my glitter vinyl. I pulled the whole roll off the liner. I’m redoing and going to cut twice, had it set on custom glitter vinyl and still do. Any thoughts?
Hey Karen!
I am likely way too late to help, but if your’re still having trouble, here are some things to try:Increase your pressure from Default to More (on the final cut screen).BEFORE unloading your mat, do a tiny test by pulling up some of the vinyl. If it’s not cut clean, run the cut again WITHOUT unloading your mat (just hit the flashing C button again). Change your blade – if you’ve been using your machine for a while, a new blade might be needed. A deep-cut blade can also be helpful here!Hope that helps with your glitter projects!Megan
Hello! I have been working with glitter vinyl since Nov last year. I recently have issues with putting mod podge over glitter to seal it and the glitter is not glitter anymore. Is there something else I should use? I do have a tip getting sticker to transfer to transfer tape. After rubbing with scraper too I work with the transfer tape side down and gently peel off the back using scraper tool to help vinyl adhere to tape… slow process but it works to keep words in line!!
Hi Wendy!
Thanks so much for sharing that tip!
As far as sealing glitter vinyl, I’ve actually never done that so I don’t have any tips for you. Have you tried a spray or paint-on polyurethane??
Good luck with your projects!~Megan
Thank you. Precise and right to the point. I’ve been working with glitter for a couple of years now and still have problems! My biggest problems are having it cut properly and then weeding no matter what I’ve tried. Thank you again. PS – I love how you say “don’t rush”. True that!
I made the HUGE mistake of using shimmer smart vinyl for a very big, very elaborate project, and I’m a beginner user. Your tips are spot on, the most effective being “take a breath”. I figured out the strong transfer tape thing on my own, but had a terrible time getting the vinyl to release again. I’m going to add my own tip here – go ahead and use shimmer and glitter, but the simpler the design, the easier it will be. Anyone who is in a hurry or is easily frustrated by inanimate objects (like myself) should only use it sparingly.
Hi Molly!
I am so glad you found these tips helpful for your project…I know working with glitter/shimmer vinyl can be SOOOO frustrating. And yes, I completely agree that anything with really small details will require MUCH more work – thanks for adding that!
Despite the frustration, I hope your project turned out great!Megan
Haha…I should have read this first. I am currently distressing from a solid 6 hours of failing at glimmer paper ornaments. I will try again tomorrow using your suggestions but I already decided intricacy and glimmer do not mix! There is no font that works with glimmer paper that I can fit on an ornament unless I plan on reinforcing the Christmas tree branches. How do people make it look so simple!
i had a tshrt company make me elvis shirts, they happened to use glitter vinyl. but it seems so dull ,almost like they left the clear backing on the top of image. . Its so dull ,is there a way to put a clear gloss on top.. melody 480 986 9315
I have glitter vinyl but the glitter keeps fading and the color is too. How can I seal the design to make the color and glitter stay?
Hi Rose,
Thanks for reaching out about this. I’ve personally never run into that problem – can you tell me what kind of glitter vinyl you are using?
~Megan
Do you need to mirror the cut? Or can you just cut normally?
Hi Kelly,
If’s “regular” shimmer/glitter vinyl (with adhesive, sticky backing), then no…you don’t need to mirror. You ONLY need to mirror if you are using glitter iron-on/HTV.
Hope that helps!Megan
Great tips and very easy instructions to follow. All around great tutorial and reminder for those who do not work with glitter often.
Thank you so much. I have ruined much glitter trying to figure this out. Today I did it first time perfect using your tips. I am very happy with result. I haven’t ironed on yet, so do you have any tips for that?
Thanks again
You are my hero
I have checked and checked and my design space on windows doesn’t have the menu button, nor does it have the option to manually adjust materials. I am so frustrated because this site made it so simple and clear. I am working with a Maker 3. Any help would be so appreciated.