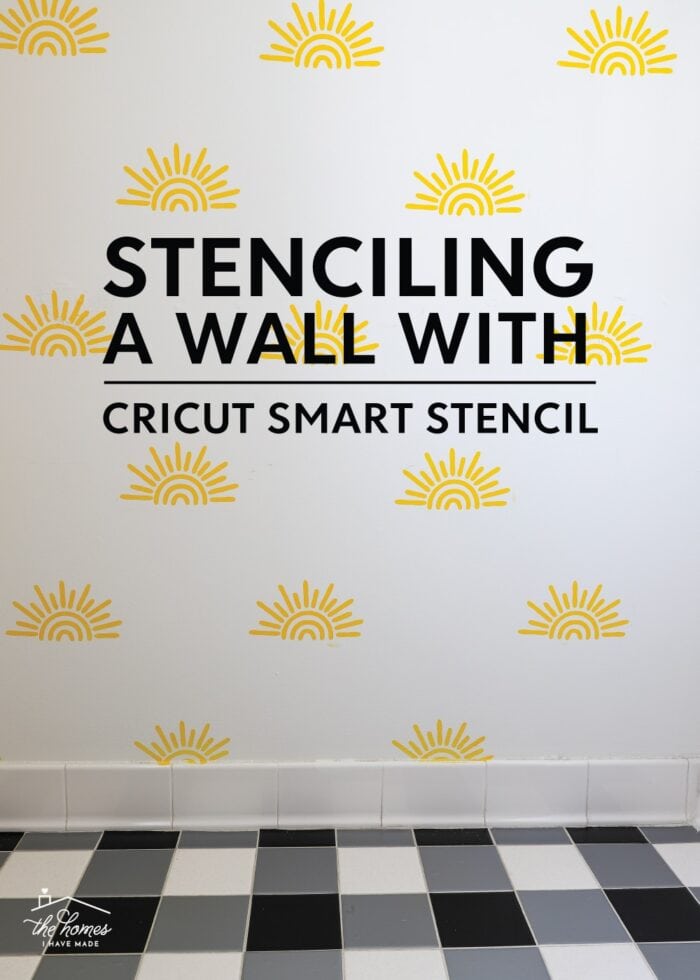
Stenciling a Wall Using Cricut’s Smart Stencil
Without a doubt, one of my favorite things about owning a Cricut machine is the ability to bring pretty much any idea to life with my own two hands, right from the comfort of my own home. When Cricut recently released a new stenciling product…Smart Stencil…in lengths up to 12 feet (!!!)…you better bet I was chomping at the bit to use it somewhere in our newest rental home. But it actually took me a lot of experimenting to find the best and most practical ways to use it. So today, I’m sharing a bunch of dos and don’ts when working with Cricut Smart Stencil, and showing exactly how to use it to make your own stencils for wall projects! Let’s go!
Thank you to Cricut for providing the materials for this project. I only work with brands and products I fully support and that make sense for my home, my family, and this blog. All opinions are 100% my own.
What Is Cricut Smart Stencil?
Cricut Smart Stencil is a new vinyl-like material designed to help you create your own custom stencils with the ease and precision you’ve come to expect from your Cricut. Available in both 13″and 5.5″ widths and longer lengths (3′ and 12′), it is uniquely compatible with Cricut’s smart cutting machines (the Cricut Joy, Cricut Maker 3, and Cricut Explore 3).
Using a vinyl-like material to create stencils often produces a cleaner result (compared to plastic stencils), since it adheres tightly to your project’s surface (through a lightweight adhesive). Further, the vinyl’s flexible nature allows you to maintain that adhesion around curves and into corners; and the longer lengths mean you can cut long stencils for bigger projects such as signs, walls, and furniture.
Cricut Stencil Vinyl vs. Cricut Smart Stencil
Years ago, I discovered and fell in love with Cricut’s Stencil Vinyl. The thick sturdy vinyl was the perfect way to create custom stencils for small projects; and I even had really good luck peeling up and moving the stencils over and over (without transfer tape!) See More: How to Cut Stencils with a Cricut | Everything You Need to Know!
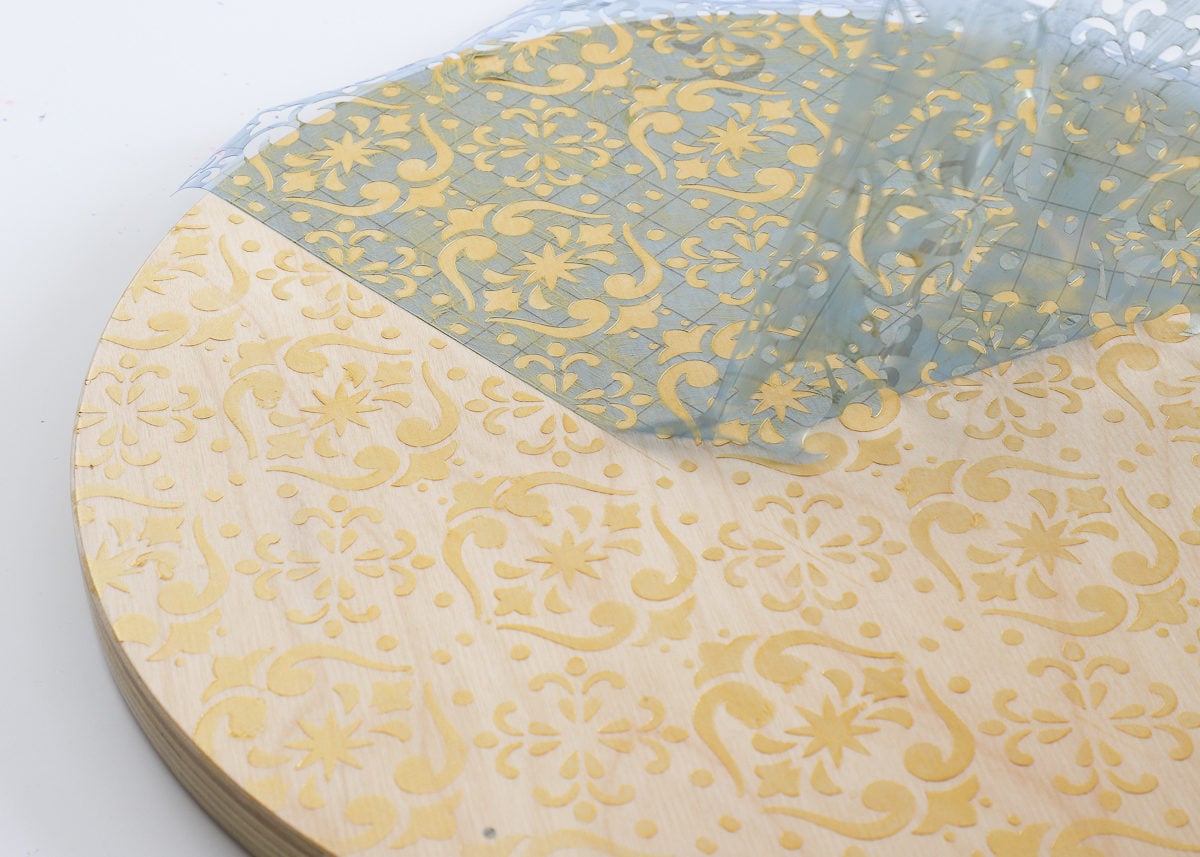
So when Cricut released Smart Stencil, I assumed it was the same sturdy stencil material…just in a 12 foot roll. I thought I had the perfect way to create my own DIY stencil for the massive wall surrounding our fireplace in our living room. My plan was to cut a single 10 foot long stencil of a faux brick wall pattern, and use it over and over again across the span of this 14 foot wall.
Before diving into this massive project though, I decided to do a quick test (which I ALWAYS recommend when working with a new product!); and in doing so, I quickly discovered that the new Cricut Smart Stencil is much lighter and more flexible than the original Stencil Vinyl. While this makes for beautiful cutting and seamless weeding, it also means the stencil doesn’t hold its shape on its own.
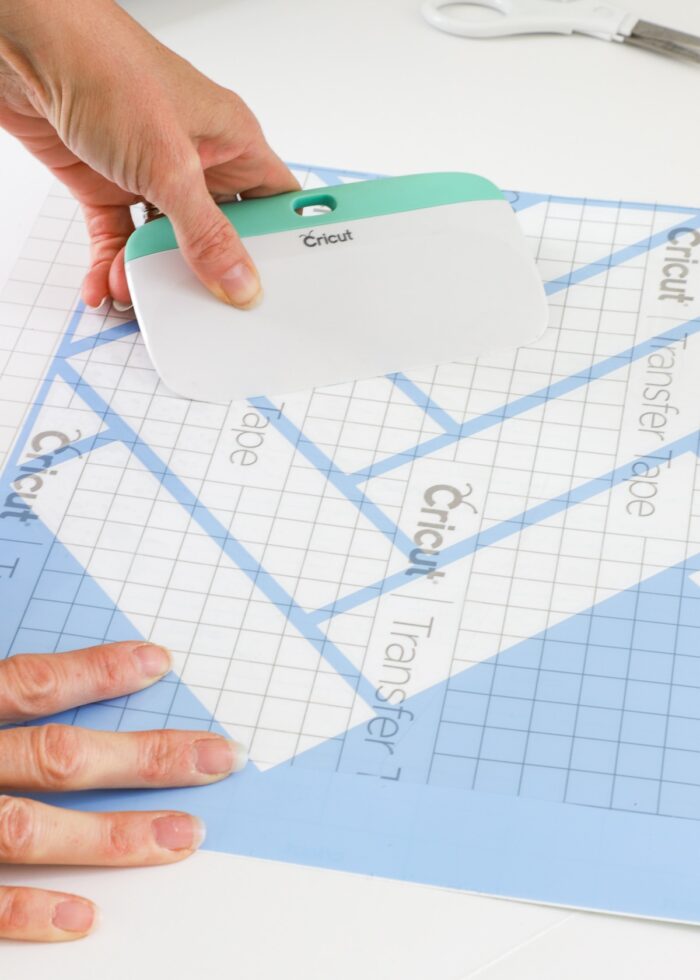
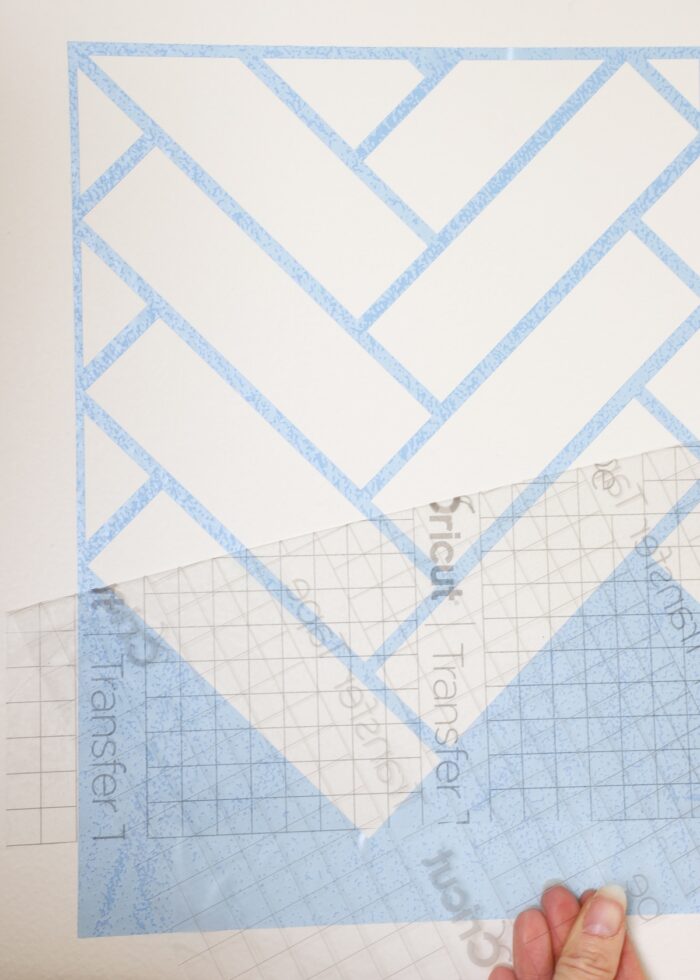
In fact, the only way to move my large stencil from the paper backing to the wall was with the help of a large stretch of transfer tape.
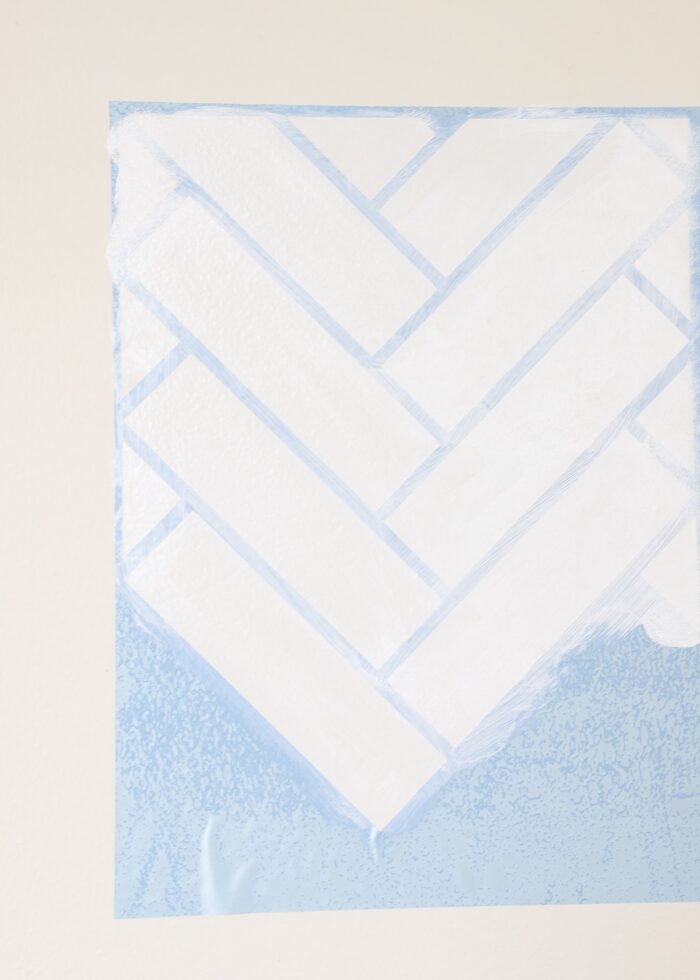
But once I had the stencil in place and smoothed down firmly on the wall, I was able to give it a quick cover in basic acrylic paint just like a normal stencil.
After the paint dried however, and I went to remove the stencil…I discovered that, unlike Stencil Vinyl, Smart Stencil is very much a one-time use product. The vinyl is so lightweight, that it easily tears upon removal.

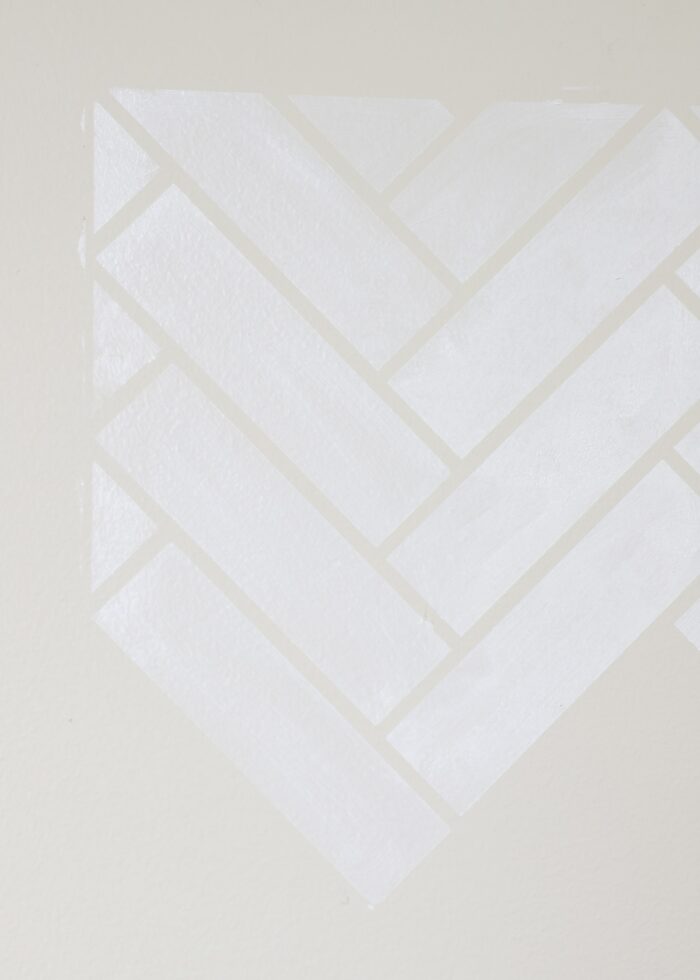
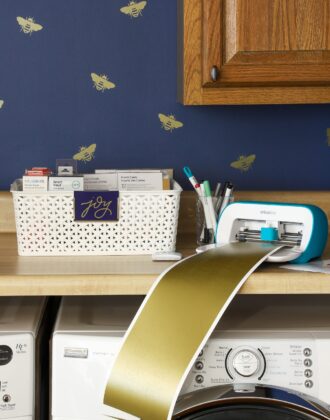
So while the new Smart Stencil did indeed allow me to create a beautiful, large custom stencil AND left behind a practically flawless paint job (below), I quickly determined that this product would not work to create an all-over “tile” pattern on my very large fireplace wall. Cutting a fresh stencil every time would not only require many rolls of Smart Stencil but also prove time-consuming and tedious.
I’m including this background story because I want to make a very specific point…
Smart Stencil does indeed allow you to make large custom stencils with your Cricut that result in practically flawless paint transfers. But because this product requires the use of transfer tape and cannot be re-used, it is not be the ideal product for every single stencil project:
- If you are doing a single, large application…like on a table, or sign, or single length of wall…Smart Stencil is a great option.
- If you are hoping to stencil an entire room or accent wall in a tight repeating pattern, you cannot use Smart Stencil to create a large reusable stencil. (Wondering what you should use? I did eventually stencil my whole wall using a traditional wall stencil! See How: Look for Less: How to Stencil a Wall to Look Like Wallpaper)
So then…can Smart Stencil be used to stencil a wall at all?!? Sure it can!
Picking the Right Wall Design for Cricut Smart Stencil
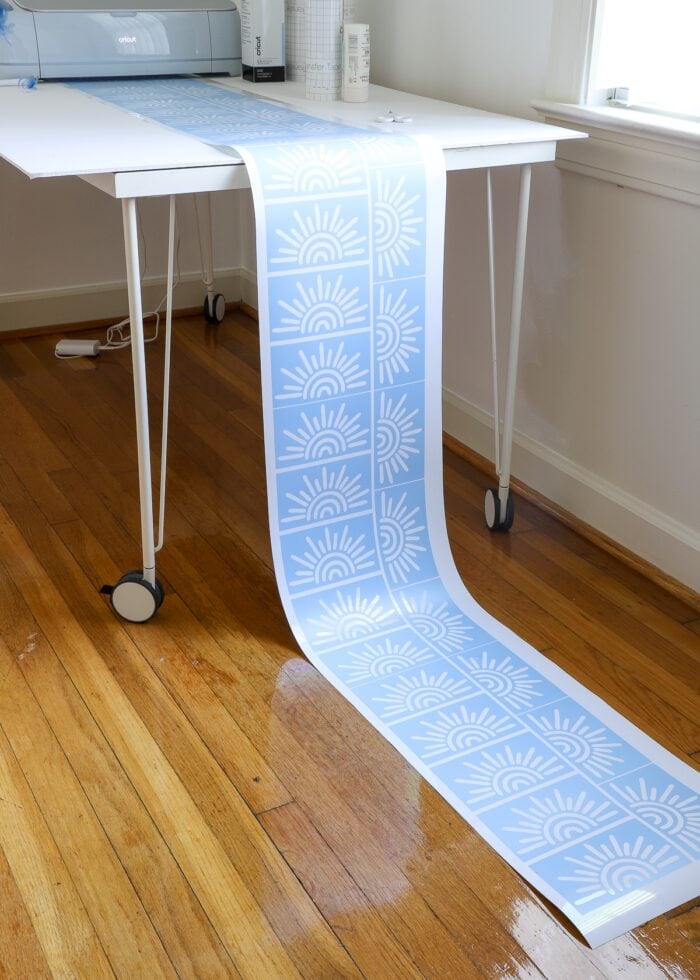
After my test with the herringbone tile pattern, I quickly realized that a much more effective way to create an all-over wall design using Cricut’s Smart Stencil is to make lots of little stencils that you can lay out in your own pattern.
The allure of using a 12′ roll of Smart Stencil is that you can cut out lots of stencils at one time.
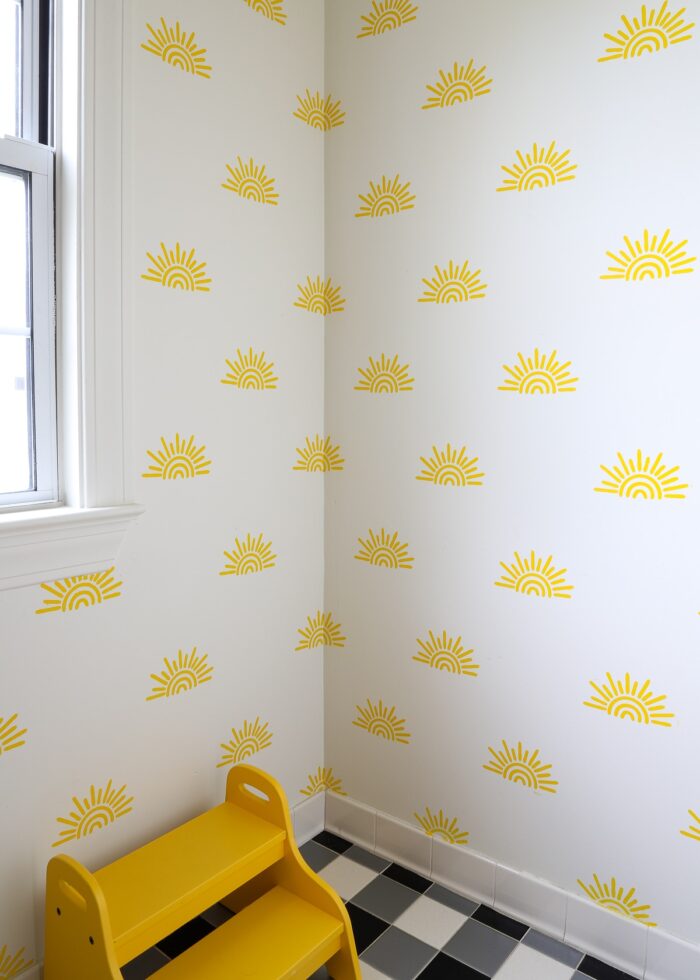
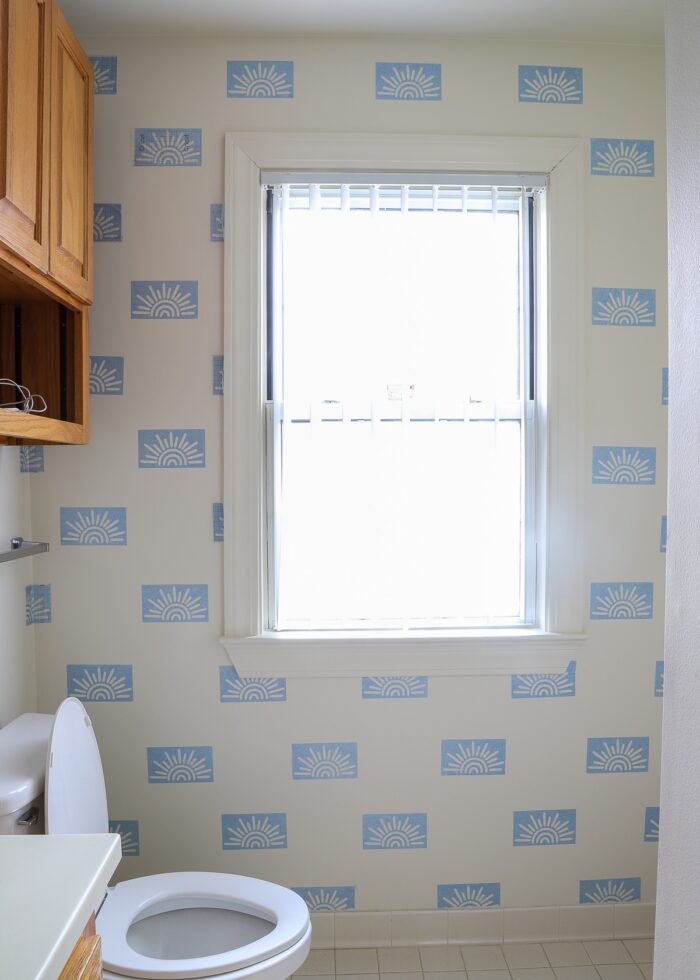
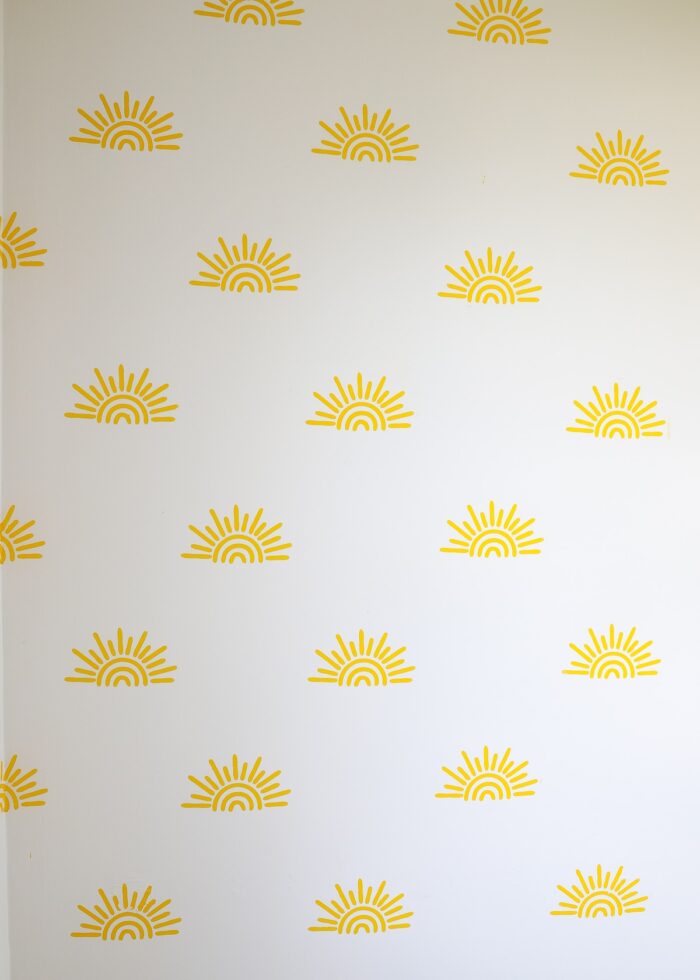
So sure enough, in just a few hours, I was able to transform my boys’ plain little bathroom from this bland cave…

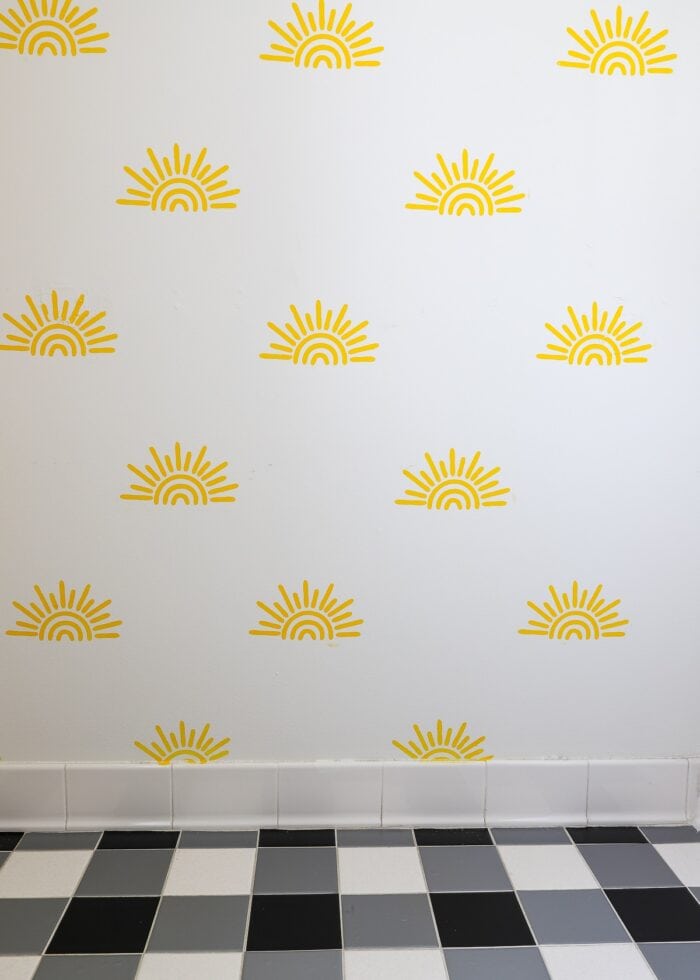
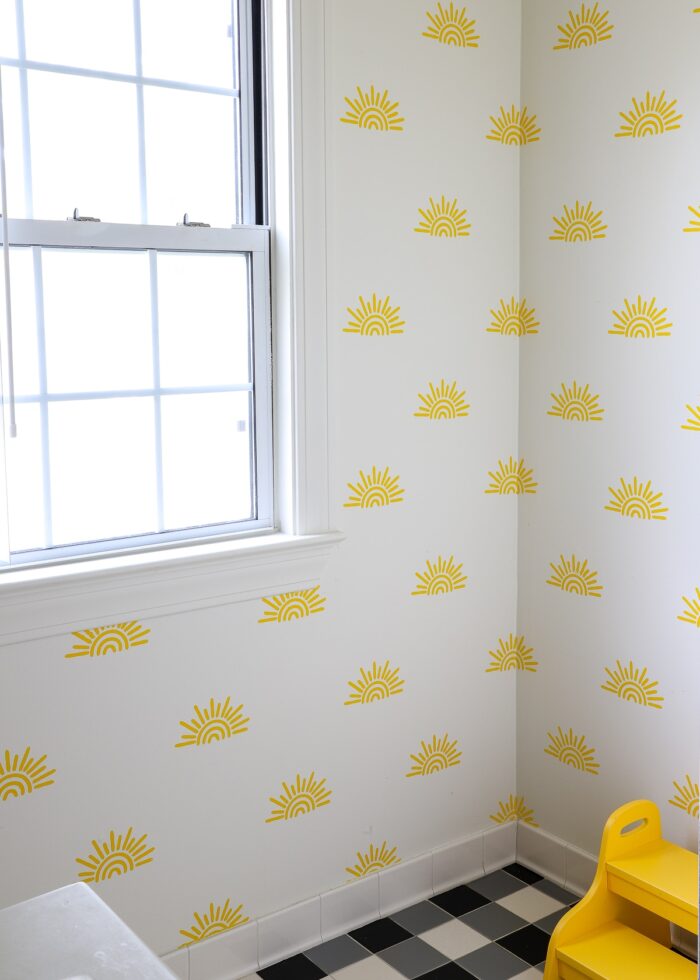
…to this cheery space!
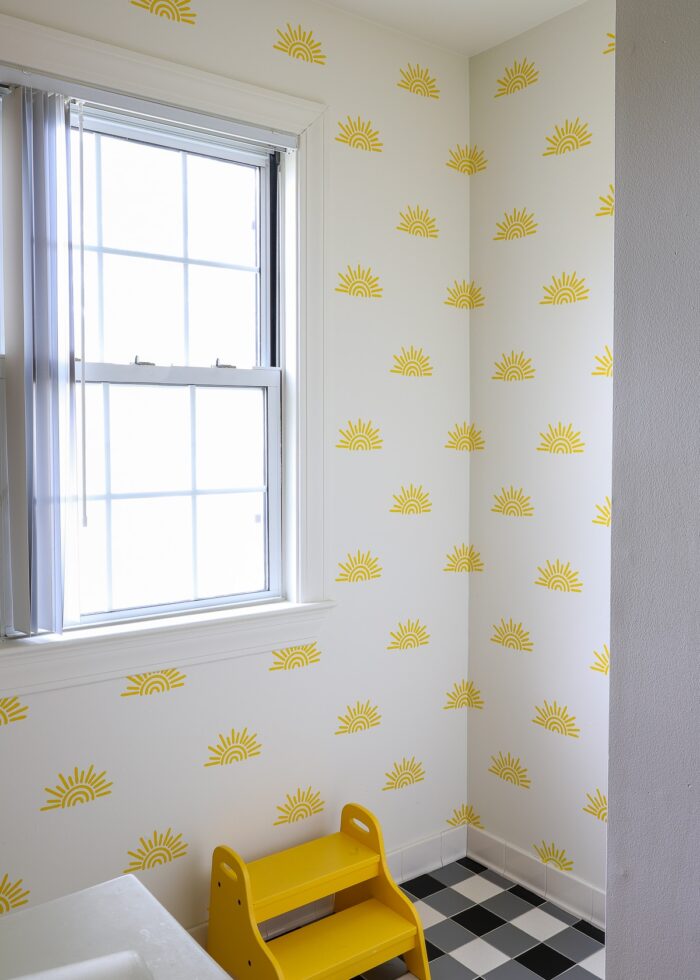
With the help of my Cricut Maker 3, a single 12′ roll of Cricut Smart Stencil, and a bottle of yellow craft paint, I was indeed able to achieve an all-over wall transformation after all!
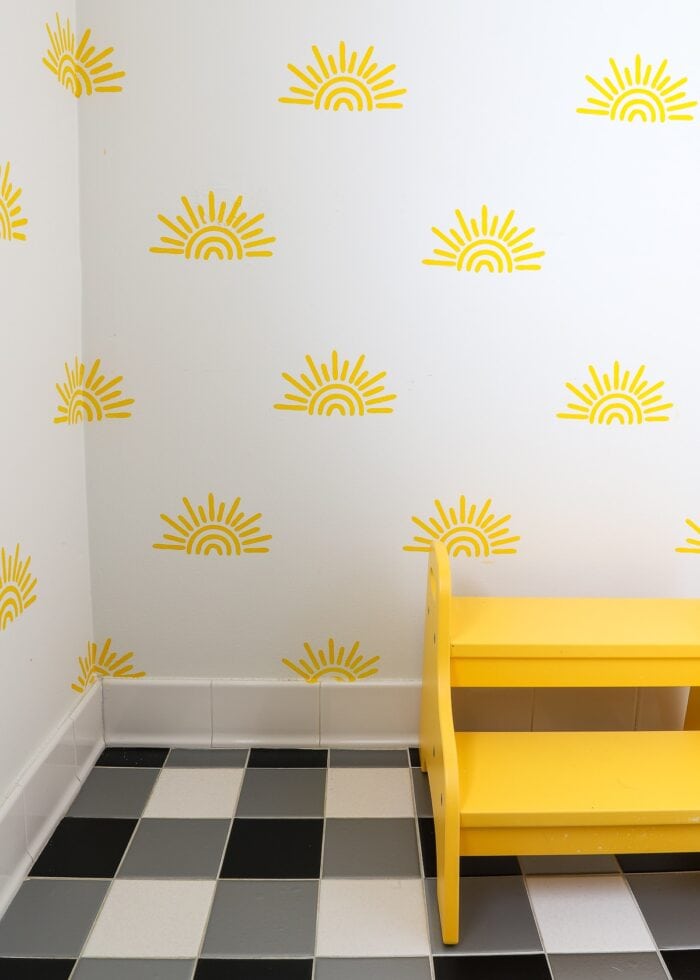
It’s just about picking the right stencil design. Instead of a large single-use stencil, instead make lots of small ones that can be spaced out. This makes for easier transfers and allows a single roll of Smart Stencil to stretch across bigger spaces.
Choosing Between Stenciling & Applying Vinyl Decals
So before I get into the full how-to on how to use Cricut Smart Stencil on a wall, I want to first discuss the obvious.
This same adorable sunshine wall pattern could have more easily and more quickly been achieved via vinyl decals, right? So why bother with stenciling at all?
It’s true…cutting out, weeding, and applying the sunshine design from vinyl is MUCH quicker. (See More: How to Make Vinyl Wall Decals With a Cricut)


But you know what’s not quicker? Removing the vinyl decals when you’re ready for a change!
Sure, simple vinyl decals like circles or stars are easy to pull off in a single tug. But this particular design would need to be peeled off one skinny strip at a time. For a large application like I did in this bathroom, the removal process would be long, tedious, and frustrating.
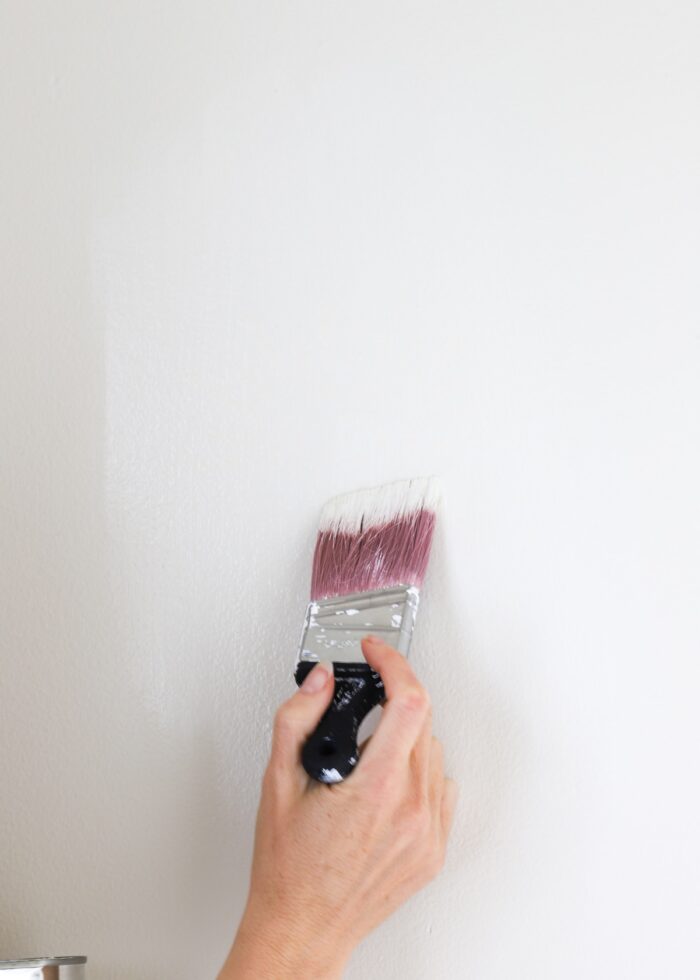
On the other hand, painting over the sunshines is super quick and easy (but only if you have the matching wall paint of course!) After experimenting with different yellow paints for this project, I simply used some matching wall paint to cover them up.
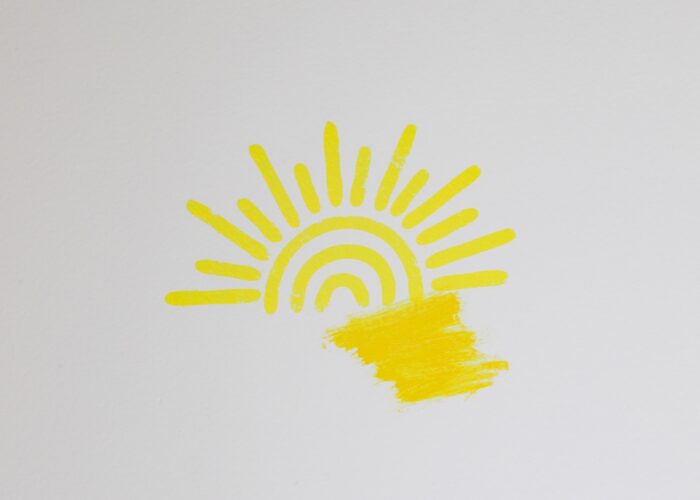
It took seconds and there was zero evidence the sunshine (and smudge) were even there!
So yes, while you can achieve the same overall wall design via both stenciling and vinyl decals, there are reasons why you might pick one versus the other:
Choose Stenciling When…
- You don’t like the look of vinyl on the wall
- The color you want is not available in vinyl
- The vinyl design is too hard to transfer or remove
- You want to keep the project cheaper (Smart Stencil + paint will be a fraction of the cost as the same amount of vinyl or wallpaper required to cover the wall)
Choose Vinyl Decals When…
- You want the project done quicker
- You don’t want to have to paint over when you’re ready for a change
- The shape/design is easy to transfer, reposition, and remove
Phew! Now that you understand what Cricut Smart Stencil both can and cannot do, as well as when you should use it in comparison to regular ol’ vinyl…let me break down exactly how this adorable sunshine wall comes together!
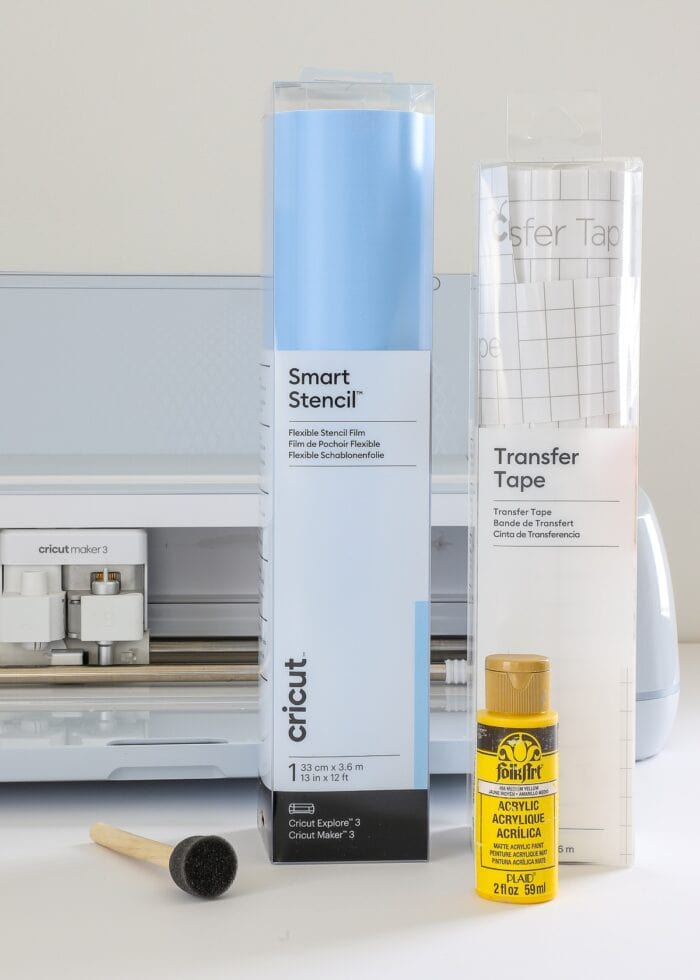
Supplies Needed
Here is what you will need to stencil a wall using Cricut Smart Stencil:
- Cricut Cutting Machine – any machine can cut Stencil Vinyl (on a mat), but to use the mat-free Smart Stencil, you will need a Cricut Joy, Cricut Maker 3, or Cricut Explore 3.
- Cricut Smart Stencil – pick the size and length for your machine and project
- Transfer Tape – if doing a large wall installation, consider buying a bulk roll
- Weeding Tool
- Brayer
- Scraper
- Acrylic Craft Paint – in the paint color(s) of your choice
- Paint Daubers (or Stencil Brush)
- Painter’s Tape – if doing a wall stencil
Video Tutorial
The full project instructions are detailed in pictures below, but here is a quick 5-minute video version of the entire project from start to finish! (Video not loading for you? You can watch it HERE.)
How to Stencil a Wall Using Cricut Smart Stencil
Step 1: Pick Your Wall Stencil Design
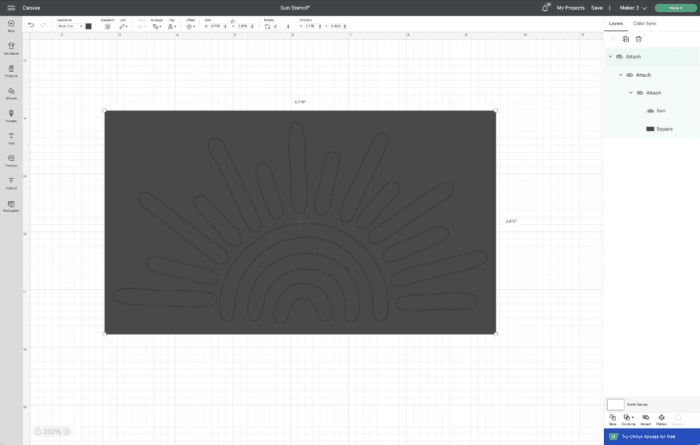
Start by selecting a wall stencil pattern. While you can technically pick any image you like, keep in mind that you will have to weed it (potentially over and over if you are doing a full wall/room) and transfer it via transfer tape. Simple designs with few small details will prove less tedious and time-consuming.
On the design canvas in Cricut Design Space, size the image to your desired dimensions; and I recommend placing a weeding box around it. While not technically necessary, the square really helps with achieving an even, level application on the wall.
Step 2: Cut Design from Cricut Smart Stencil
Once you are satisfied with your design, send it to your Cricut machine via the green “Make It” button.
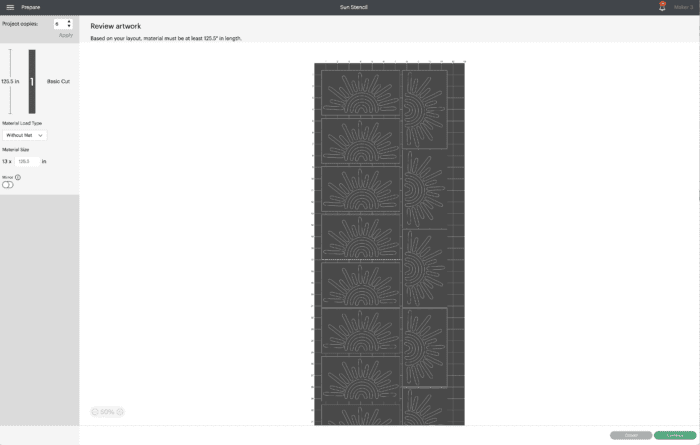
In order to take full advantage of the Smart Stencil’s length, increase the project copies to fill up the entire 12′ roll.
NOTE: This is only necessary when you’re cutting a stencil for an all-over application. If you are doing a one-time stencil, there is no need to increase the Project Copies.
Want to save this post?
Select “Smart Stencil” from the Materials menu, and then load the roll of Smart Stencil material into your machine via the Load/Unload button.
TIP! If cutting a full roll of stencils, the Cricut Roll Holder is quite helpful!
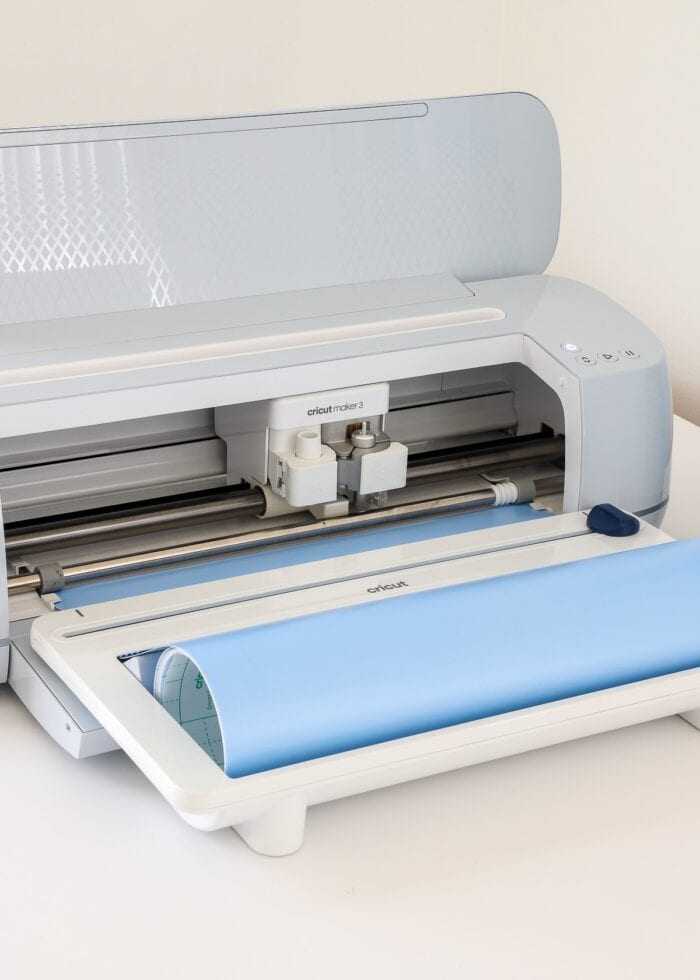
Then press the flashing “Go”button to cut out all your stencils at one time!
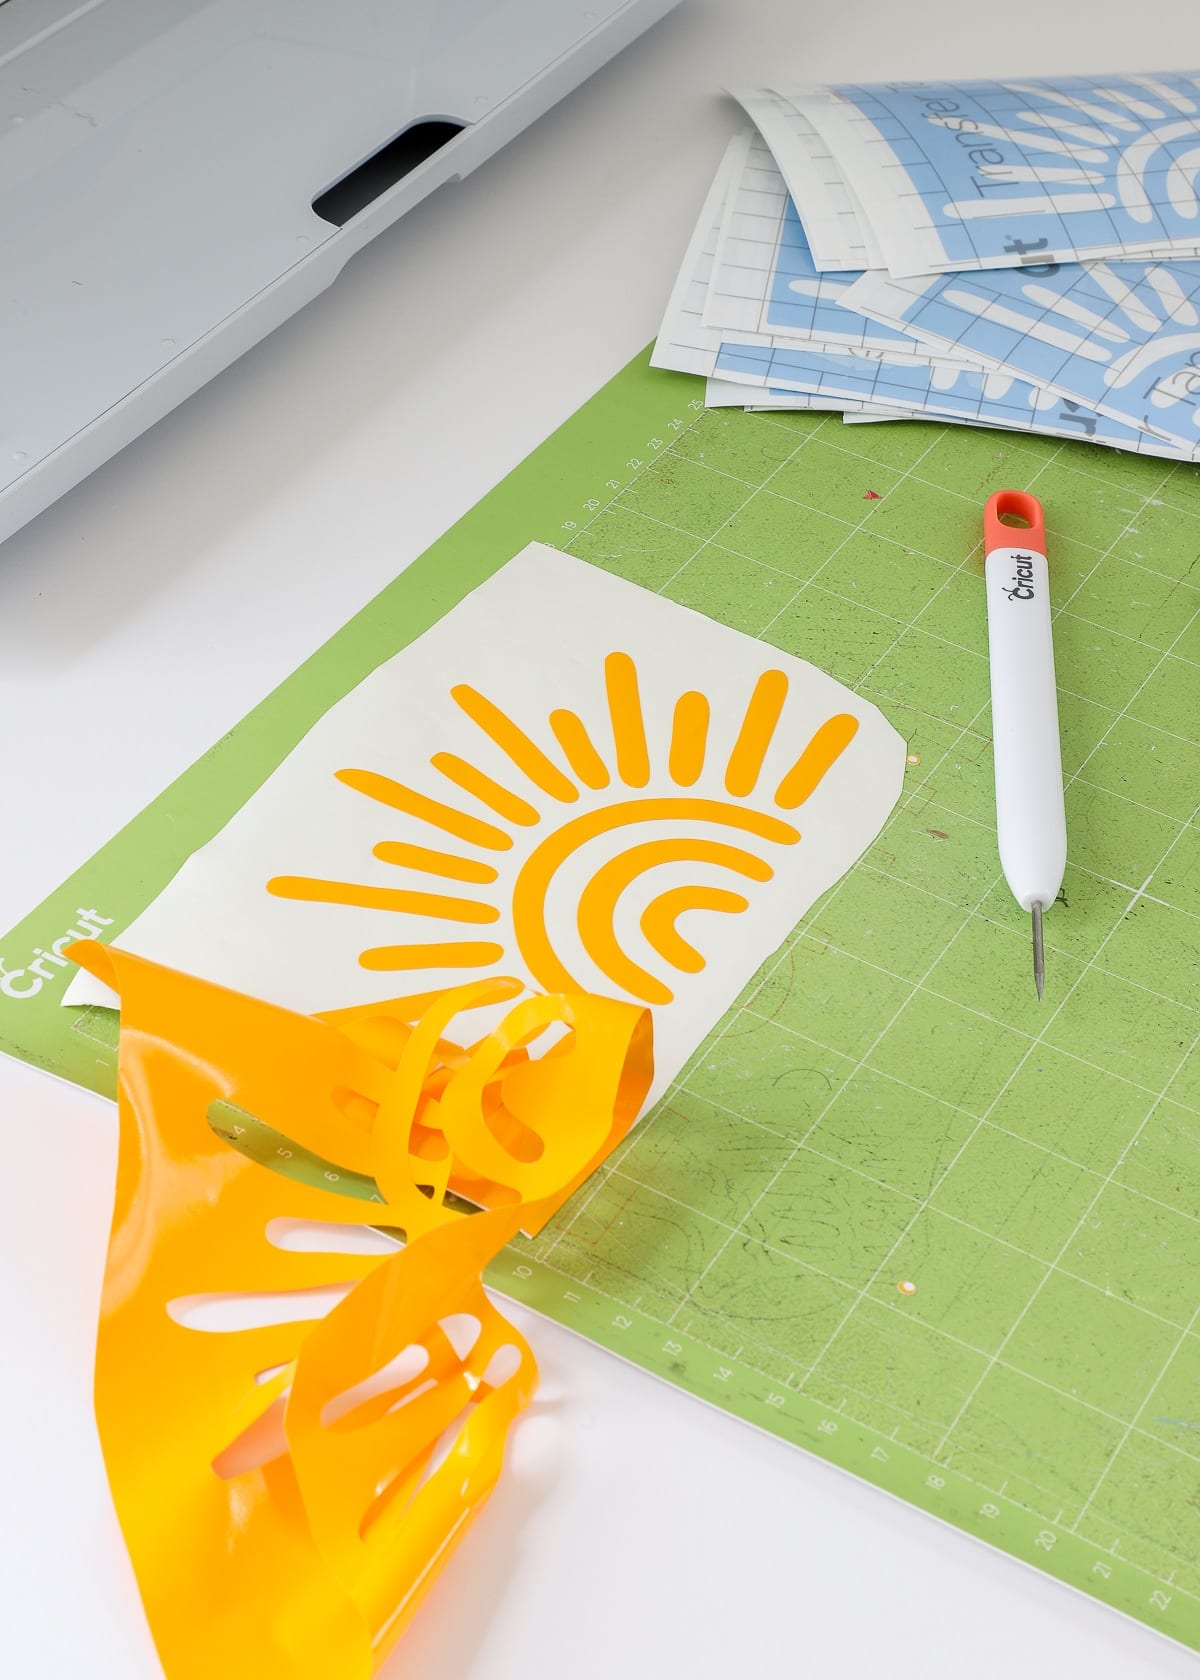
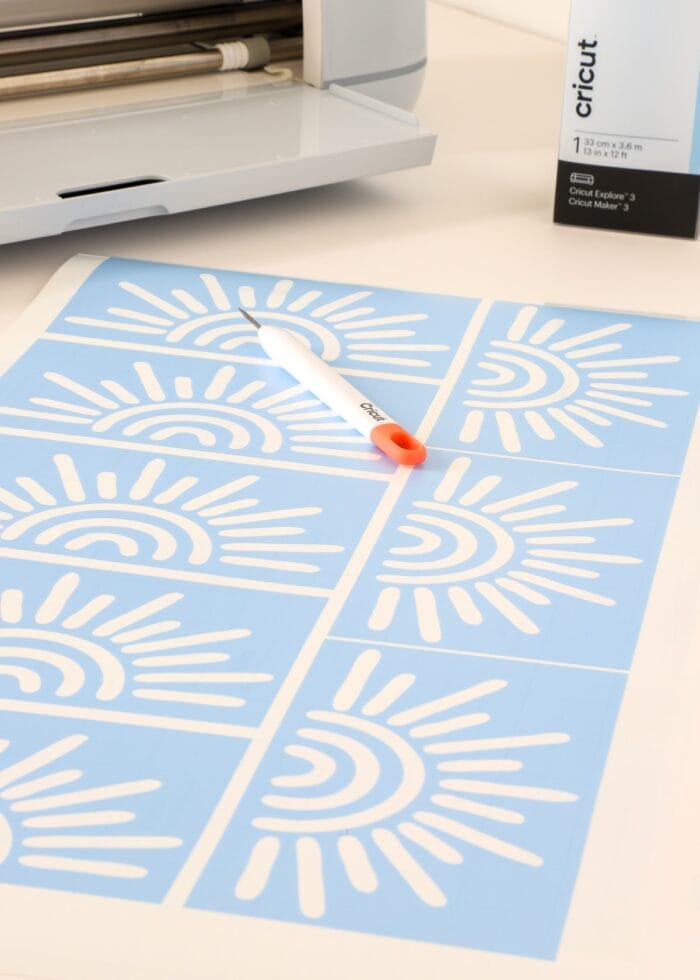
Step 3: Weed the Stencil(s)
Once cut, use a weeding tool to remove all the un-needed vinyl. Start with the vinyl surrounding the boxes, and then pull out all the interior details.
NOTE: Unlike weeding regular vinyl, where you remove the “negative” parts of the design and leave behind the “positive,” you will do the opposite for stenciling. You will want to remove all the elements of your actual design because that is where the paint will go. So in my case, I removed all the sun details and left behind the surrounding rectangle. If you need more help with understanding the different aspects of stencil designs, see here: How to Cut Stencils with a Cricut | Everything You Need to Know!
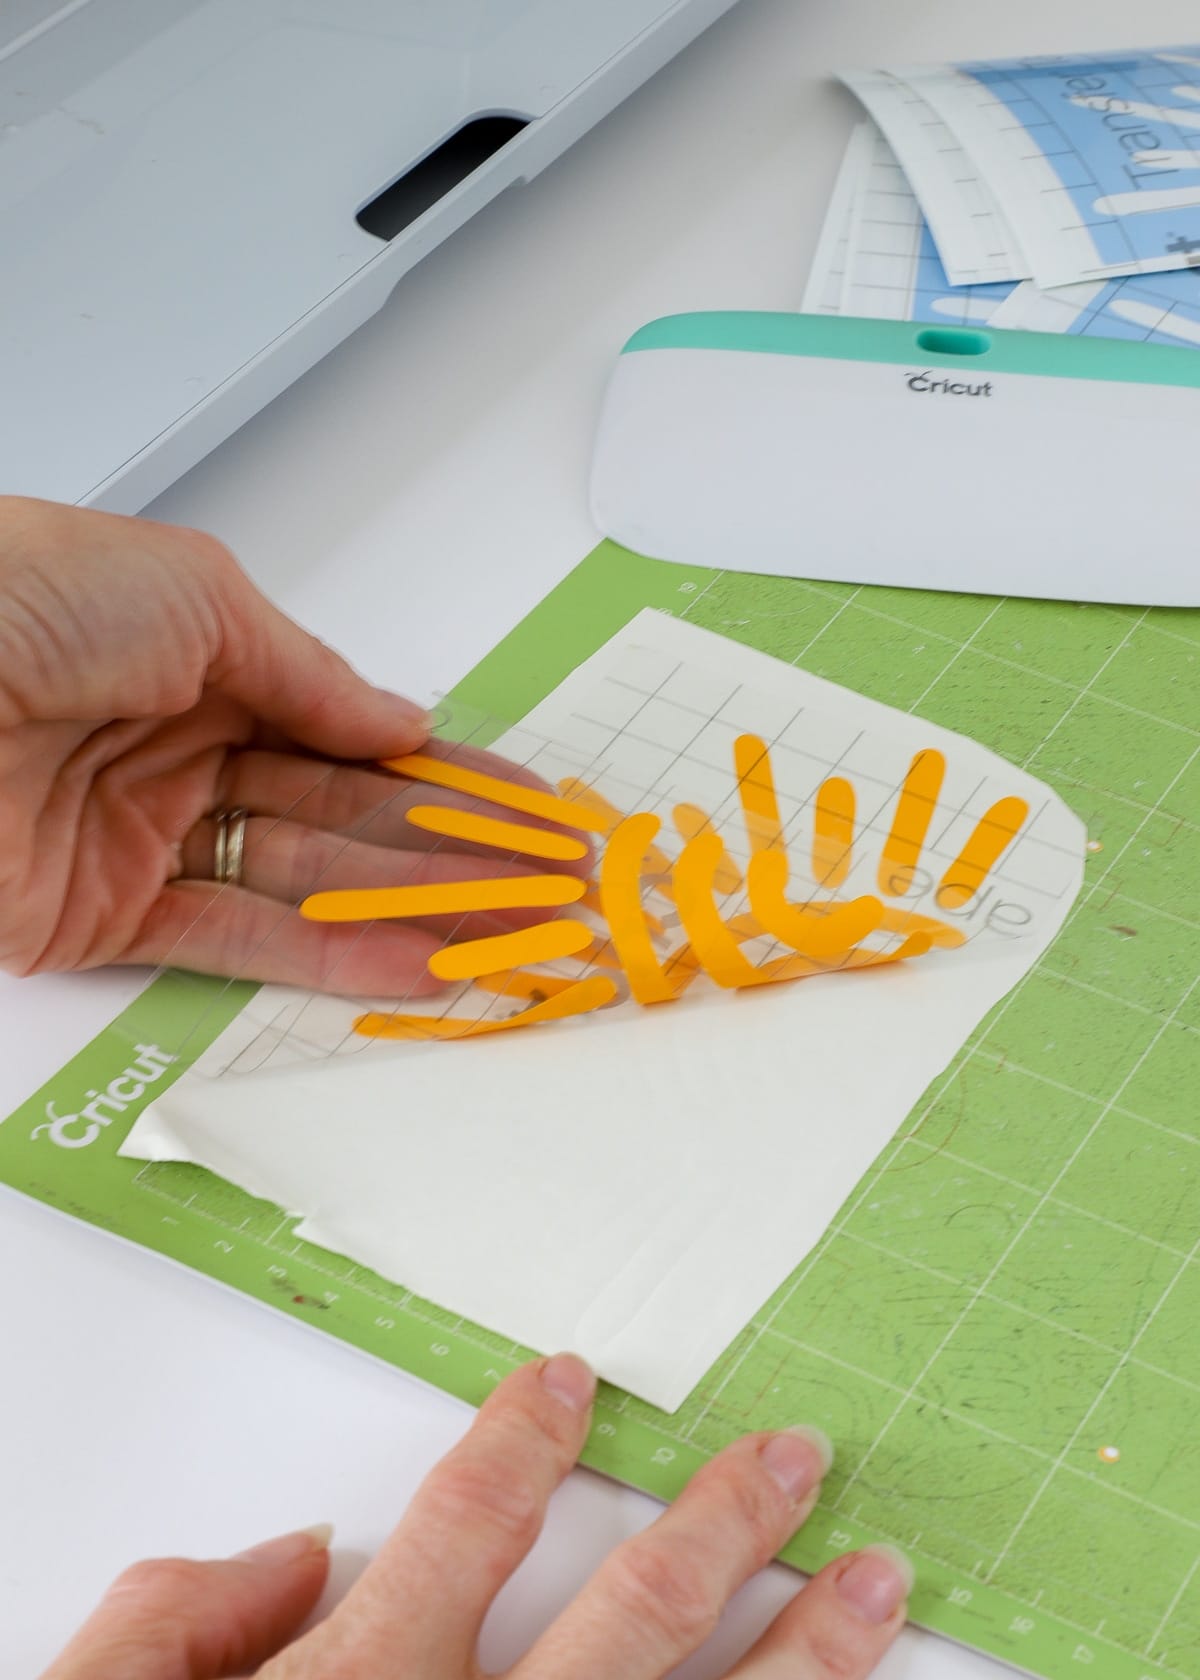
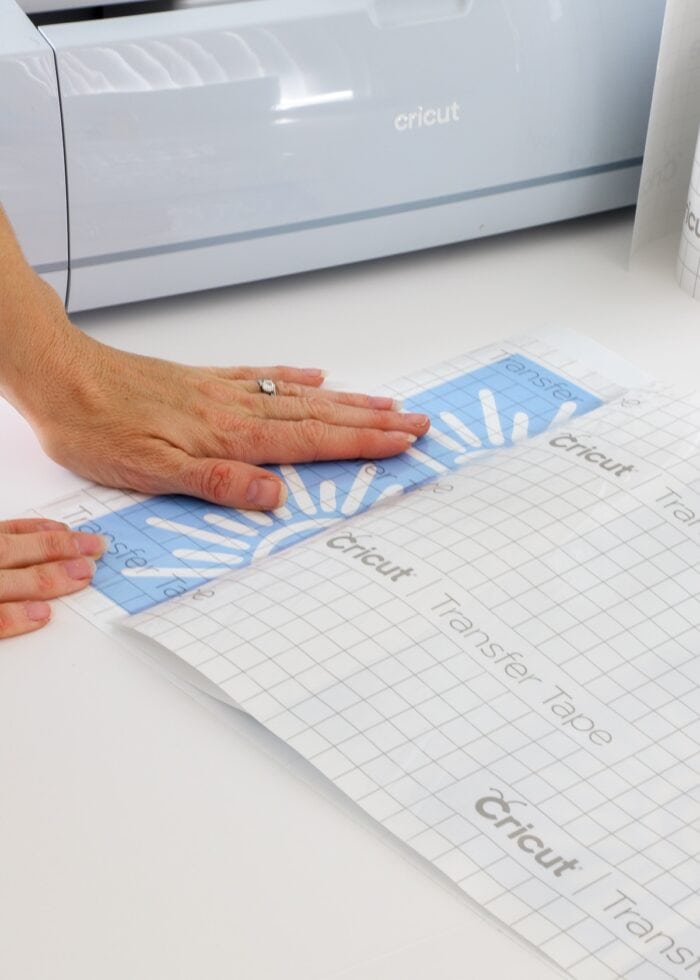
Step 4: Apply Transfer Tape to Stencil(s)
As mentioned at the beginning of this post, transfer tape will most likely be required in order to move your stencil(s) from the paper backing to the wall (unless you pick a very very tight stencil design). My sunshines weren’t very flimsy, but I couldn’t get them to lay flat on the wall without transfer tape.
To do this efficiently, I recommend laying down a full length of transfer tape over all your cut stencils at one time…
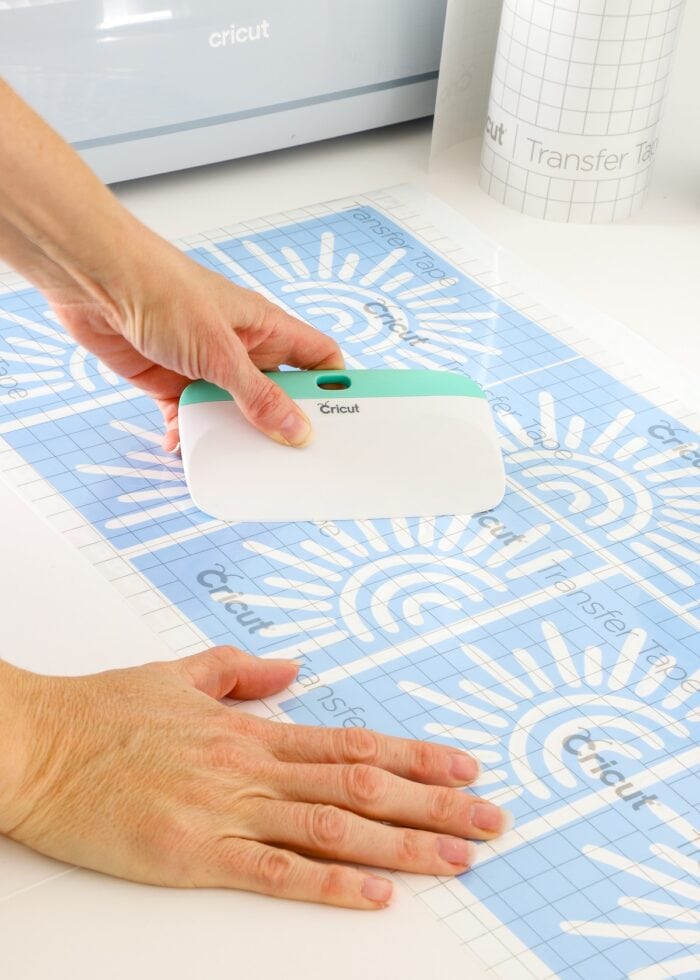
…then smooth the transfer tape down with a scraper…
…and trim down each stencil+transfer tape combo.
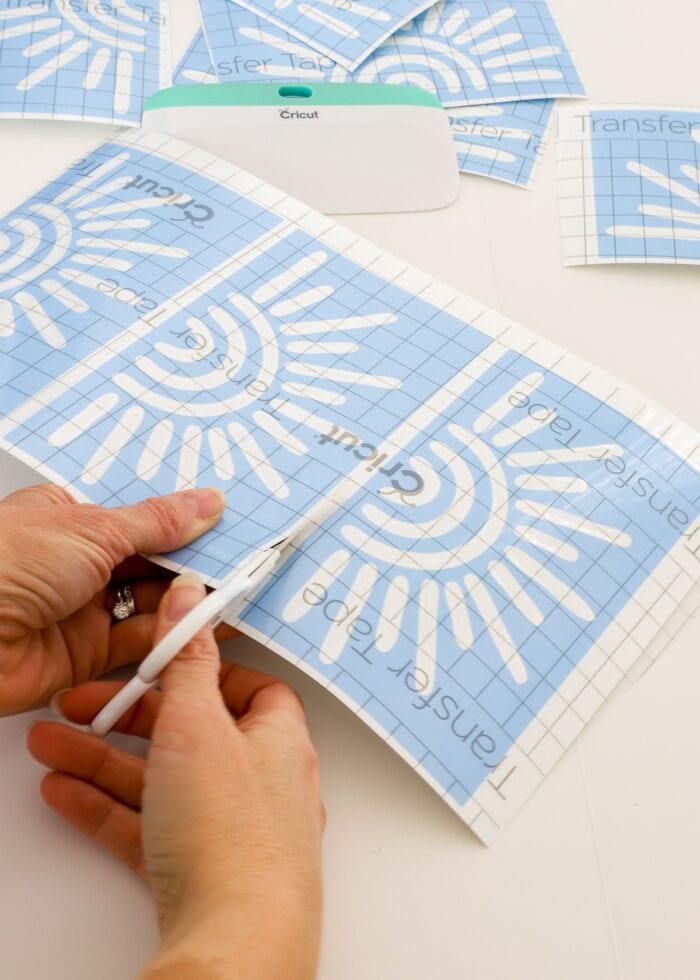
Although cutting apart your individual stencils from the long sheet isn’t technically necessary, I found this easy step really made peeling off the paper backing quicker and easier.
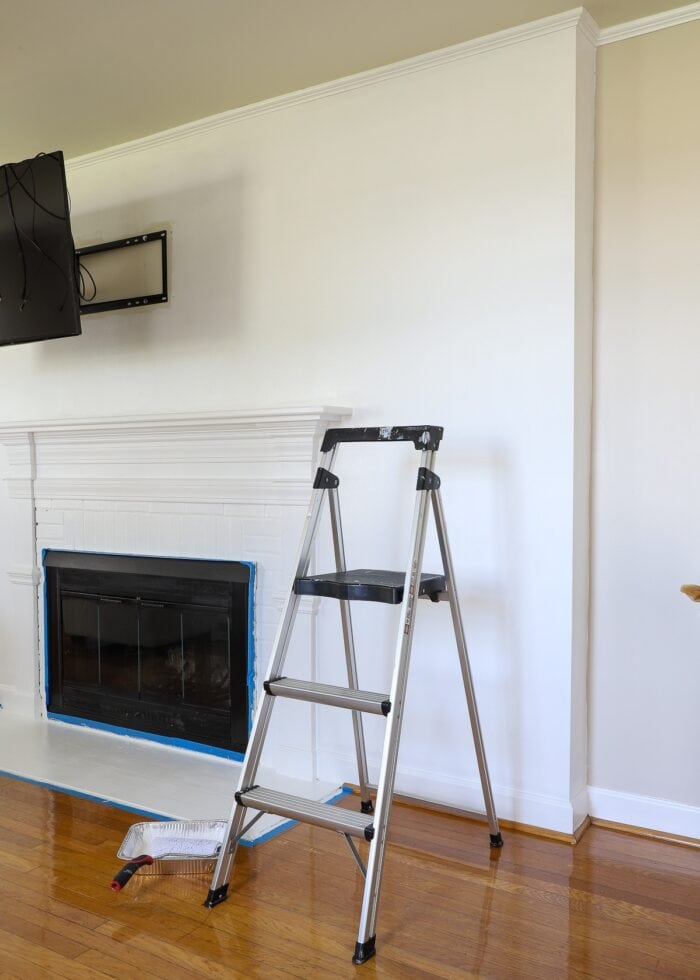
Step 5: Prep Wall for Stencils
Before placing your stencils onto the wall, I recommend doing a quick wipe down to remove any dust, chipping paint, grease, or dirt. This will help both your stencil and the paint adhere better.
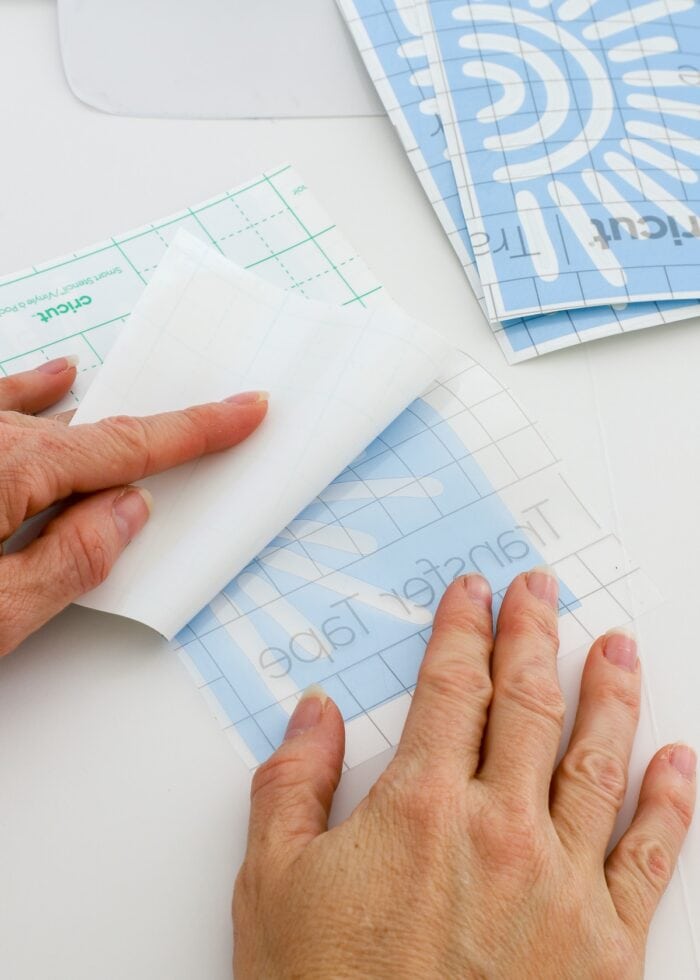
Step 6: Peel Off Paper Backing from Stencil
When you’re ready to start placing your cut out stencils on the wall, flip the stencil+transfer tape combo over and pull the paper off the stencil. Doing it this way (versus the other way around) helps the Smart Stencil stick to the transfer tape quickly, without needing to do all the excess burnishing (rubbing) that you might be used to with regular vinyl transfers.
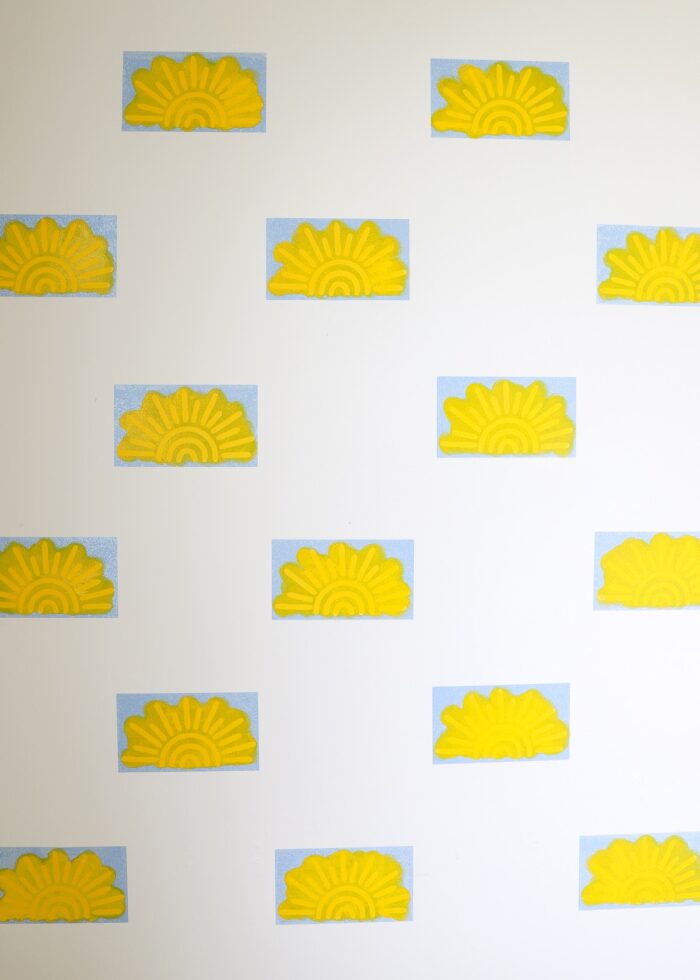
Step 7: Place Stencils
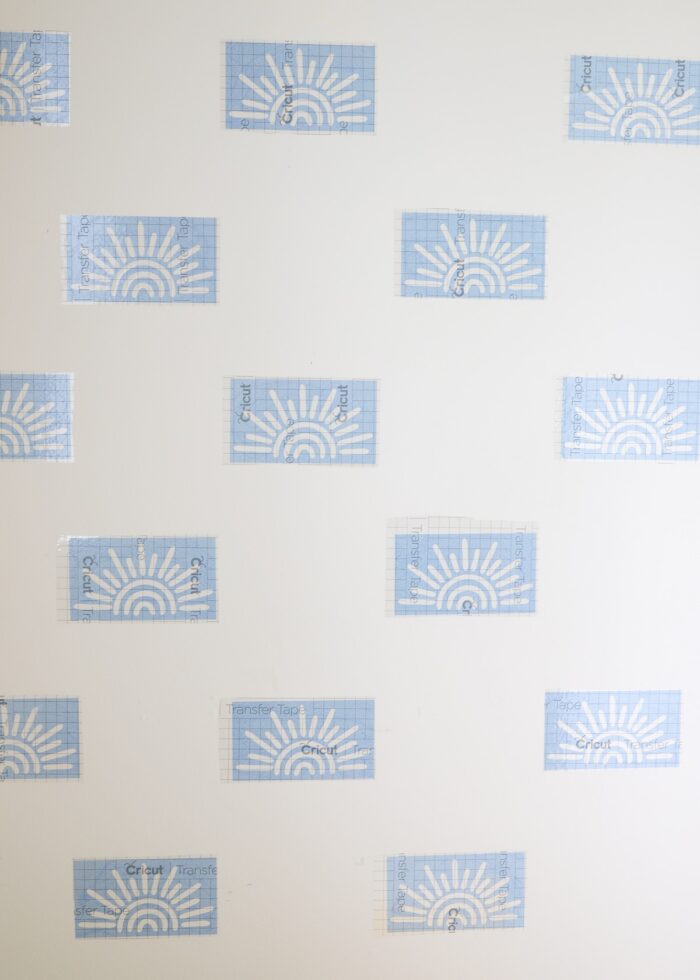
Then…just start sticking your stencils to the wall wherever you want them! You can choose a random design or a very precise pattern based on the overall aesthetic you’re going for.
TIP! While you can certainly measure out the placement of each stencil with a ruler and level, you don’t have to. I eye-balled my sunshines, stepping back regularly to make sure everything was even and level.
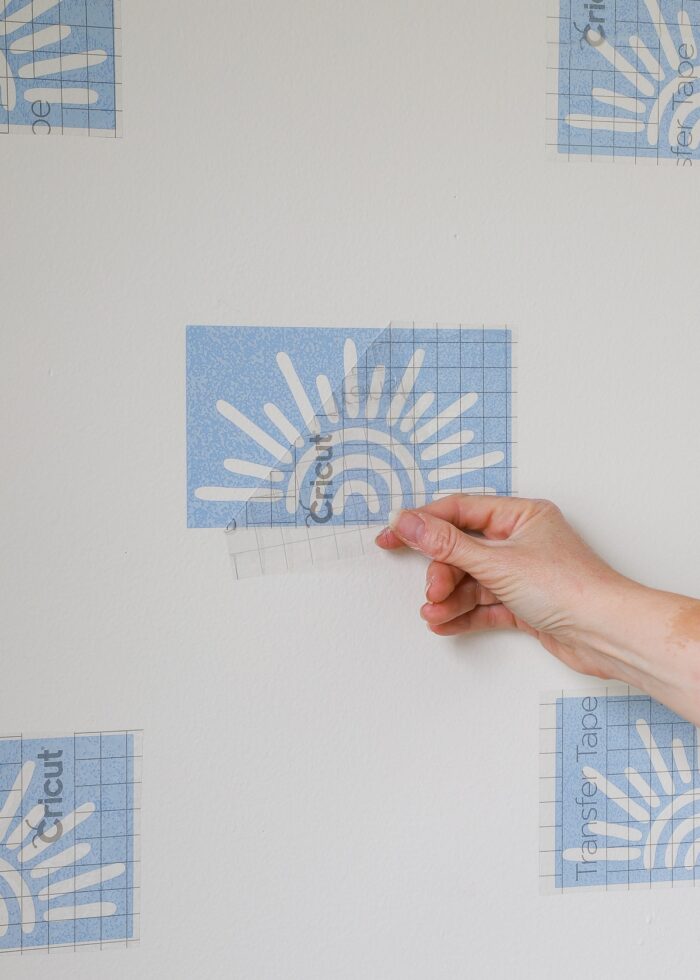
If You Need to Move a Stencil…
Notice in the picture above, the transfer tape is still on all my sunshines. That’s because the only way to move a stencil after you place it on the wall is with the transfer tape still on. If you determine you need to move a stencil, slowly peel up the stencil+transfer tape combo (ensuring everything is still snugly attached together). Then re-place as necessary before removing the transfer tape for good.
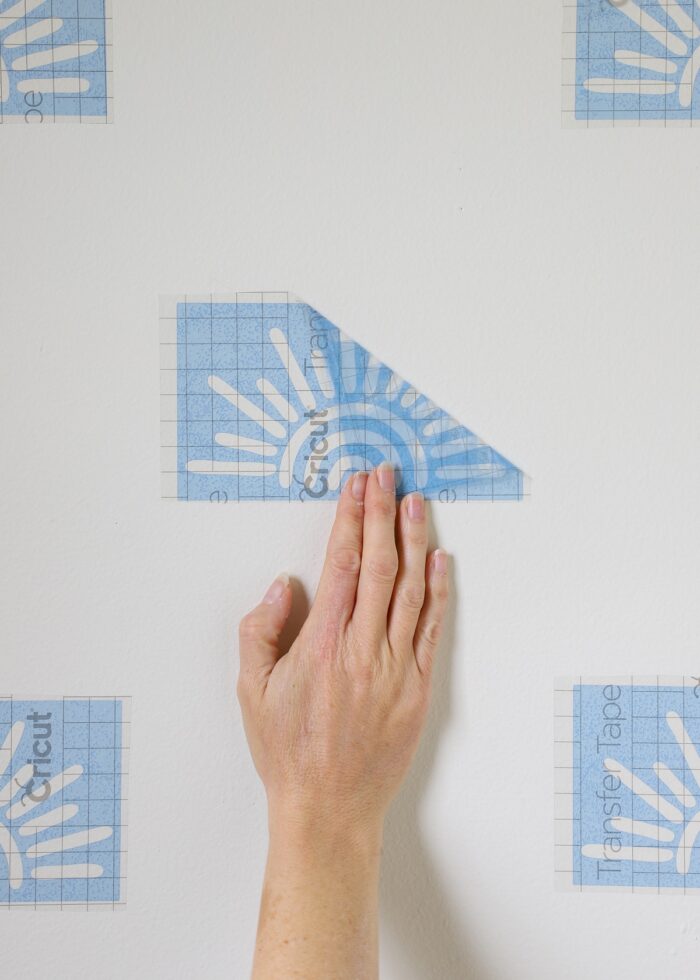
Step 8: Remove Transfer Tape from Stencils
Once you are satisfied with the placement of all your stencils, go ahead and remove the transfer tape by slowly peeling it back at a 180 degree angle (as shown below).
TIP! You WILL be able to re-use the transfer tape if needed, so considering working in sections. I applied all the sunshines to one small wall, removed all the transfer tape, then used the same transfer tape to add more sunshines to the next wall. So while I used an entire roll of Smart Stencil, I only used about 3 feet of transfer tape to place all the sunshines.
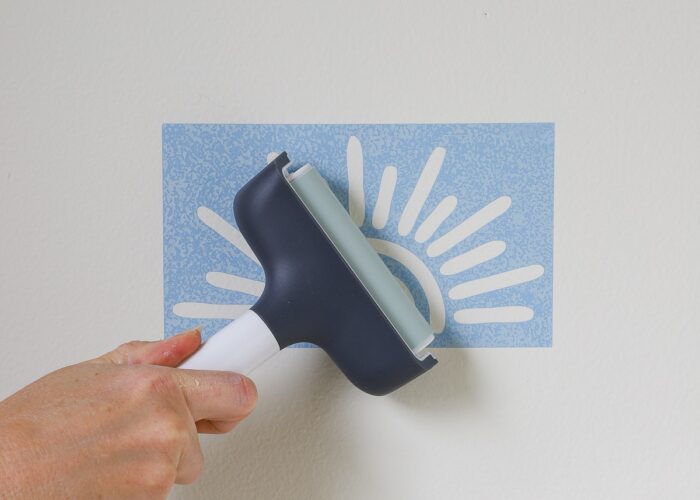
Step 9: Smooth Down Stencils
One of the most beautiful things about using stencil vinyl (instead of a plastic, non-adhesive stencil) is that it sticks tight to the wall, preventing paint seepage under the edges. But to really ensure you have no bleeding, I recommend using a brayer to smooth down any bubbles and really ensure the vinyl is flat on the wall in every angle.
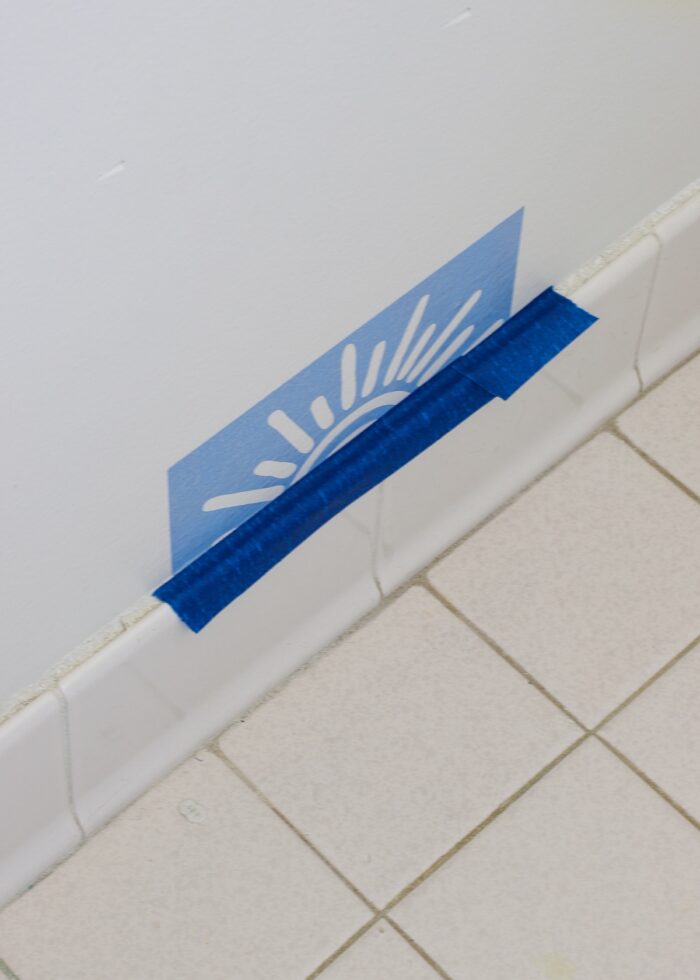
Step 10: Tape Off Edges
Finally, before moving onto the painting step, take a few minutes to tape off anywhere your design meets an edge or corner. A single stretch of tape (across the top of the stencil vinyl) will act as a double mask, and give you a crisp line on the stenciled image.
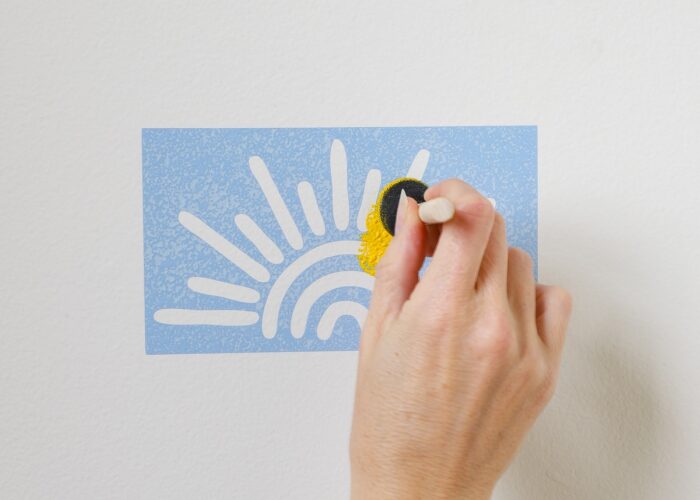
Step 11: Paint!
Phew! It’s finally time for paint.
I recommend using basic craft acrylic paint for your stenciling project. Not only is it cheap and comes in pretty much any color you can imagine, but you’ll get nice saturated color without any “puffiness” or texture. When you peel away the stencil, the design will feel smooth underhand (which is why when you paint over it, you don’t see it!)
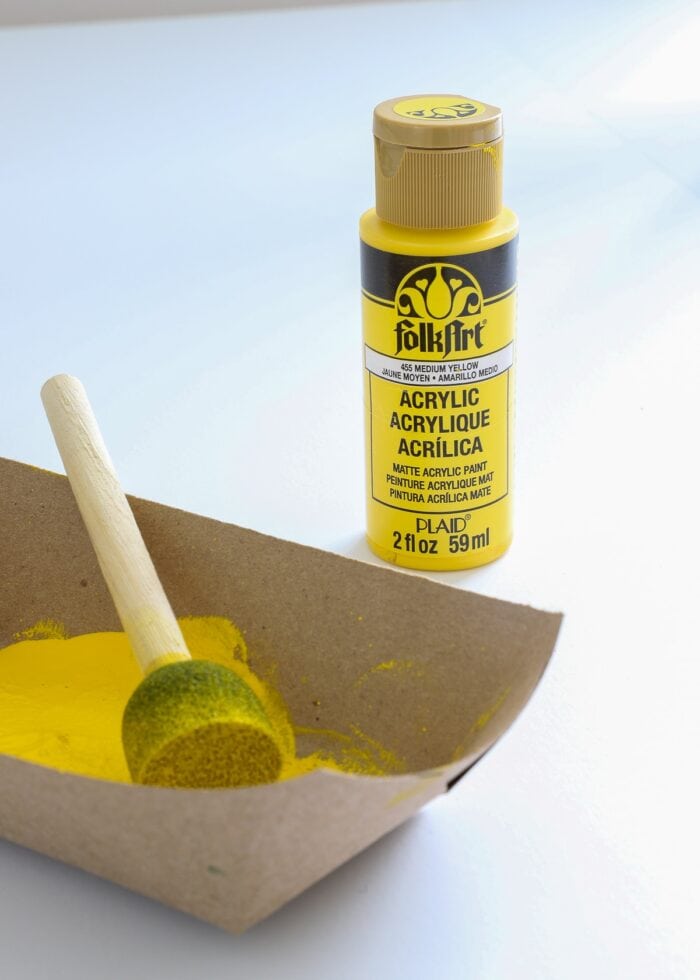
When applying paint to a stencil, less is always more. Simply load up a sponge dauber with a little paint and “pounce” all over your design in a straight, level, back-and-forth motion. Don’t swipe, brush, or rub…as that can lead to paint getting under the edges.
TIP! Take care as you get to the edges of your stencil. When working quickly, it can be all-too-easy to paint right off the side!
Keep working stencil-by-stencil until they are all painted in!
TIP! My stencil designs were small, so a dauber was efficient enough. If you are doing a large or long stencil design, consider using a small foam roller for quicker application.
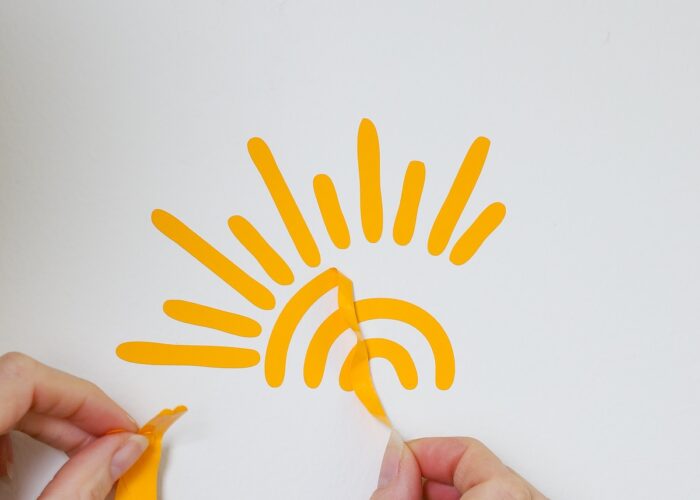
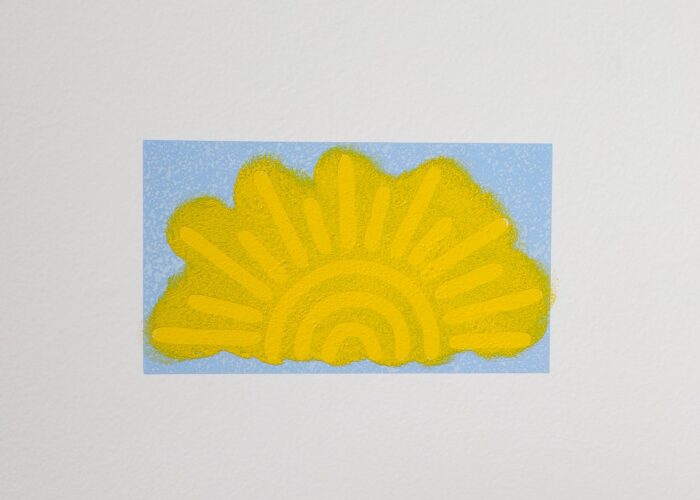
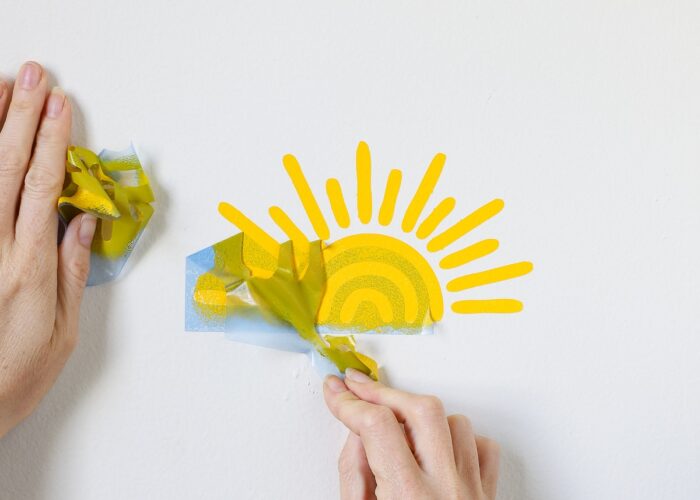
Step 12: Peel Off the Stencil(s)
Another great thing about using acrylic paint is that it dries quite quickly. In just about 30 minutes (or less), the paint will likely be dry to the touch…which is when you can remove the stencils! Simple peel each one away to reveal your perfectly-painted design.
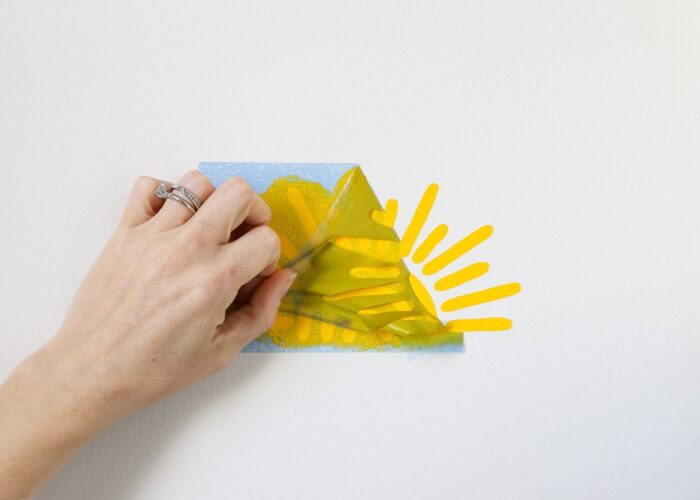
NOTE: As mentioned above, the Smart Stencil will NOT pull off in one clean sheet. Take your time, and be sure to pull out any small details that tear off during removal.
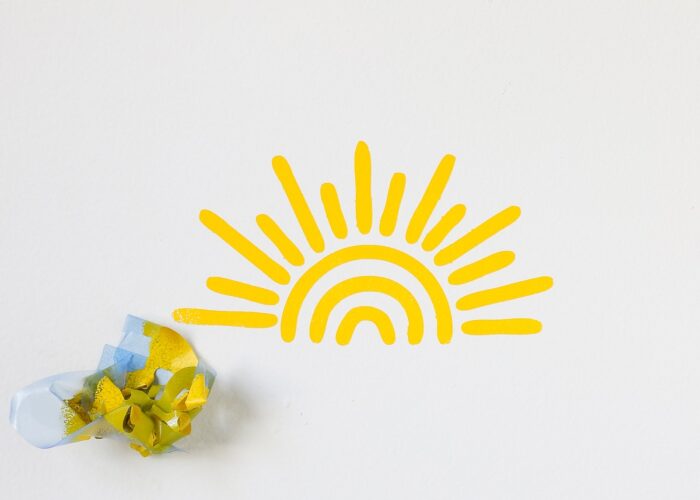
Once you remove all your stencils, your dazzling wall design will be instantly revealed!
I will admit…when my first attempt as stenciling the wall around the fireplace didn’t quite work, I was feeling pretty defeated. But after thinking through what Cricut’s new Smart Stencil can and cannot do, I went back to the drawing board…which is when this darling project came to life.

Knowing a product’s capabilities and intended uses is imperative to your project turning out right. So while using Smart Stencil to create a tight, complicated, overall pattern on a large wall just isn’t practical, it CAN be used to cut lots of small stencils that (collectively) will create a stunning design all the same.
Smart Stencil Take-Aways
In conclusion, here are my main takeaways after working extensively with Cricut’s new Smart Stencil:
- Smart Stencil is super lightweight and flexible. It cuts beautifully and weeds easily and is ideal for curving around surfaces and edges.
- Smart Stencil is a great product for making a single-use stencil, especially one that is large or long.
- Smart Stencil cannot be used to make reusable stencils.
- Smart Stencil requires transfer tape for precise placement.
- If you want to use Smart Stencil for a wall treatment, your best bet is to make small, single-use stencils that can be manually placed by hand to create an overall pattern.
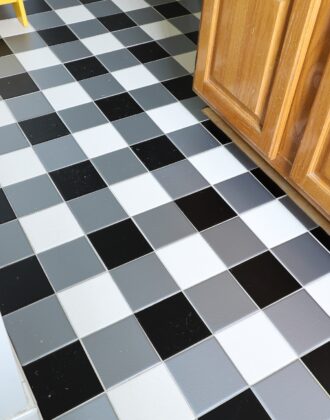
Without a doubt, this room is the cheeriest in the house; and the little boys are constantly running in to check it out. I have some other projects to finish up in here before I show you the whole room (sneaky peek of that floor!), but for now…I’m “walking on sunshine” on how great this Cricut wall stencil project actually, finally turned out!

If you’re not sure whether Cricut’s new Smart Stencil is the right product for your wall project…or if you have questions about anything you see here…don’t hesitate to drop a comment, and I’ll do my best to help! For now, I’m off to finish that fun floor installation next!
Megan
5 Comments on “Stenciling a Wall Using Cricut’s Smart Stencil”
Wow, such a fun room! Your boys are so lucky. The memories you have made for them creating a home everyplace you go, will no doubt be the thing they remember in life. Not the challenges of moving. Way to go Mama!
That looks great and made the space so cheerful! Thanks for sharing your makes, the material comparison and how to diy. I enjoy your blog. You’re an excellent writer!
Do you think the smart stencil will work on doing house numbers on a large flat rock? The flat rock is rectangular about 2’ long and 20” wide. would stand straight up. I would also like to put a kokapelli. So my four numbers would be diagonal with kokopelli in upper right corner.
Since these are numbers would I need to mirror them? I’m very new to cricut. I have a maker 3. Your instructions above are great!!
Hi Kris!
Yes, I do think that would be a great use for the Smart Stencil! And no, you will not need to mirror your stencil.
Hope that helps!
Megan
Great post!
How do you go from “blank wall” to “I need yellow sunbeams?” What was your inspiration for something so far from your normal decor?