Easy DIY Board & Batten Accent Wall (Even Renters Can Do)
I am constantly pushing the envelope on what I can and cannot do in our rentals, especially when it comes to the walls. Today’s project is one I’ve been wanting to try for a long time; and even I was pleasantly surprised by how simple it was and how truly renter-friendly it can be. If you want to add some major style to your bland or boring walls, this easy DIY board and batten accent wall is a budget-friendly solution with super stunning results!
Our Master Bedroom Wall | Before & After
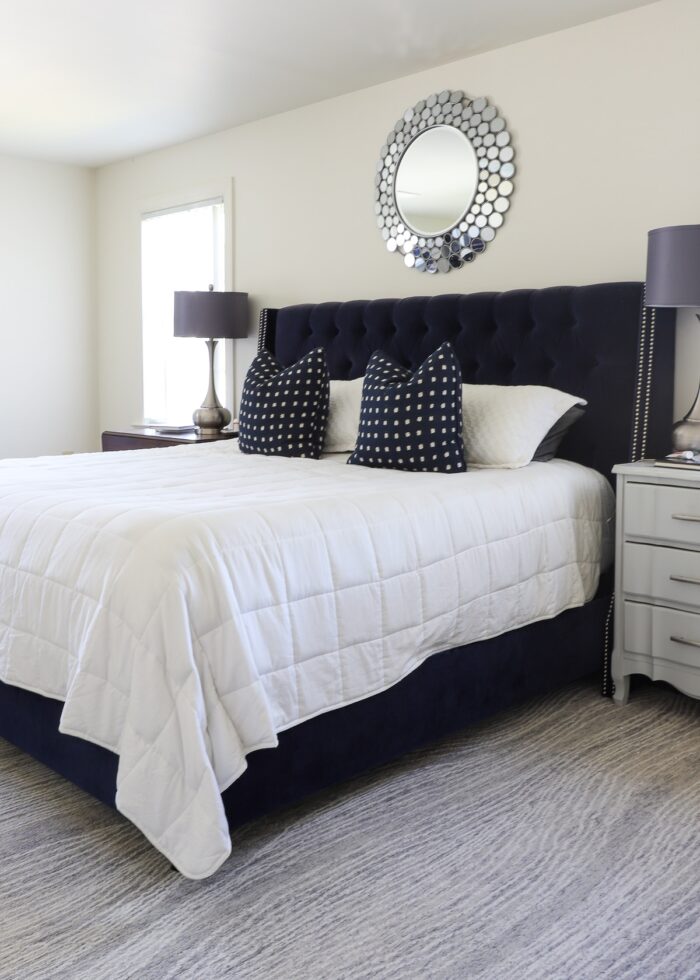
For most of the last year, our Master Bedroom has looked like this: standard yellowy-beige paint on the walls, and our usual bedroom furniture situated on top of a gorgeous new rug. And that’s about as far as I got. And about as far as I thought I’d go, honestly.
I had some fun ideas for this room simmering in the back of my mind. But after a year of non-stop projects throughout the rest of the house, my motivation was seriously starting to wane. I was actually contemplating just shutting the door and letting this room go un-project-ed until we move out.
But when a friend offered to help me paint, I suddenly had the motivation to not only (finally) refresh our bedding and clean out all our closets and drawers, but install the renter-friendly board and batten accent wall I’d been scheming for this room from day 1!
Last summer, before moving into this home, we stayed in a variety of beach houses. And almost all of them had a variation of this simple plank wall treatment. At first glance, I knew this was something I could easily do in a rental with fairly minimal damage to our existing walls.
I was much more focused on the process of this project (how to do it with basic tools, minimal damage, and on the cheap) that I didn’t give much thought to what it would look like in the end.
So color me very surprised and super excited when this simple $100 installation turned out to be breathtakingly transformative…in the very best of ways.
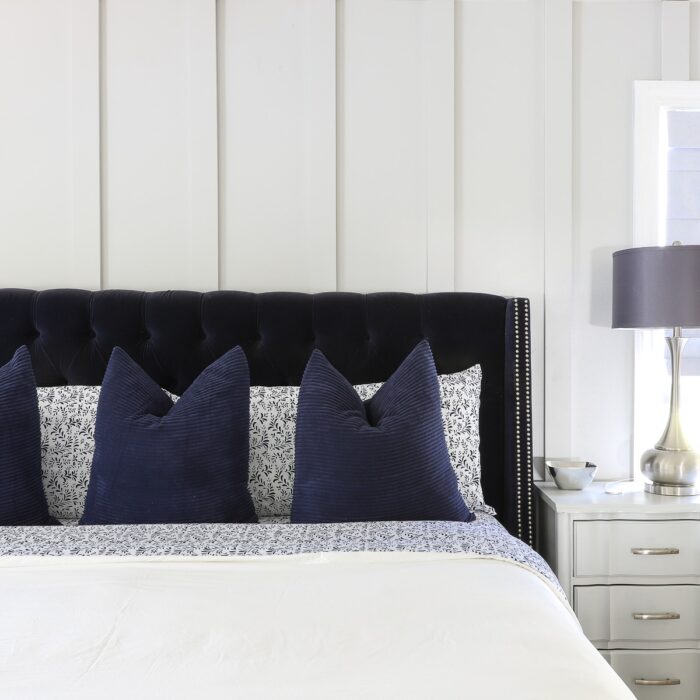
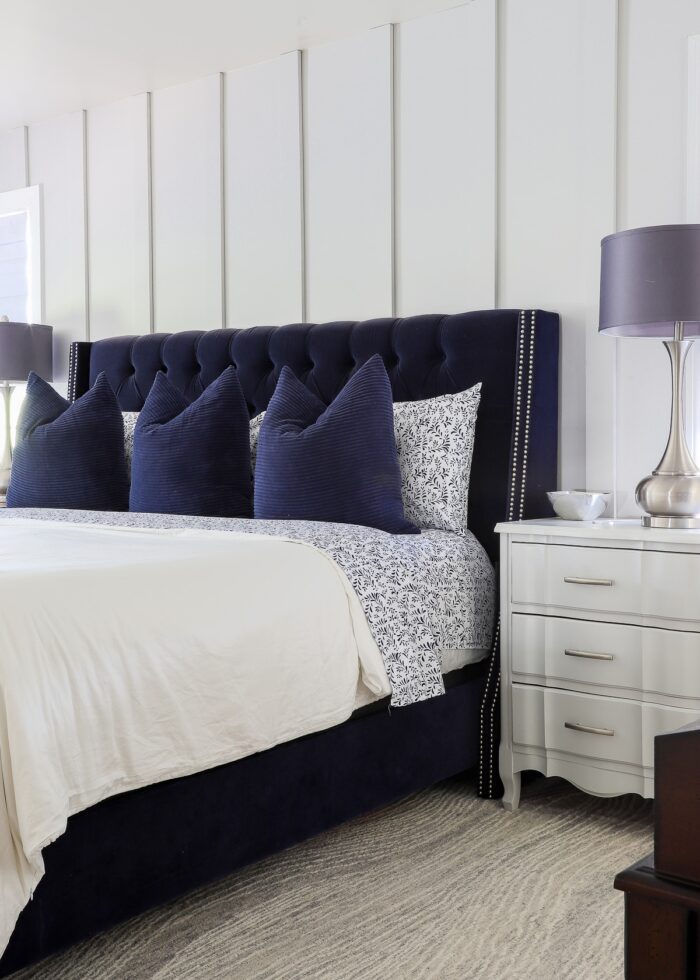
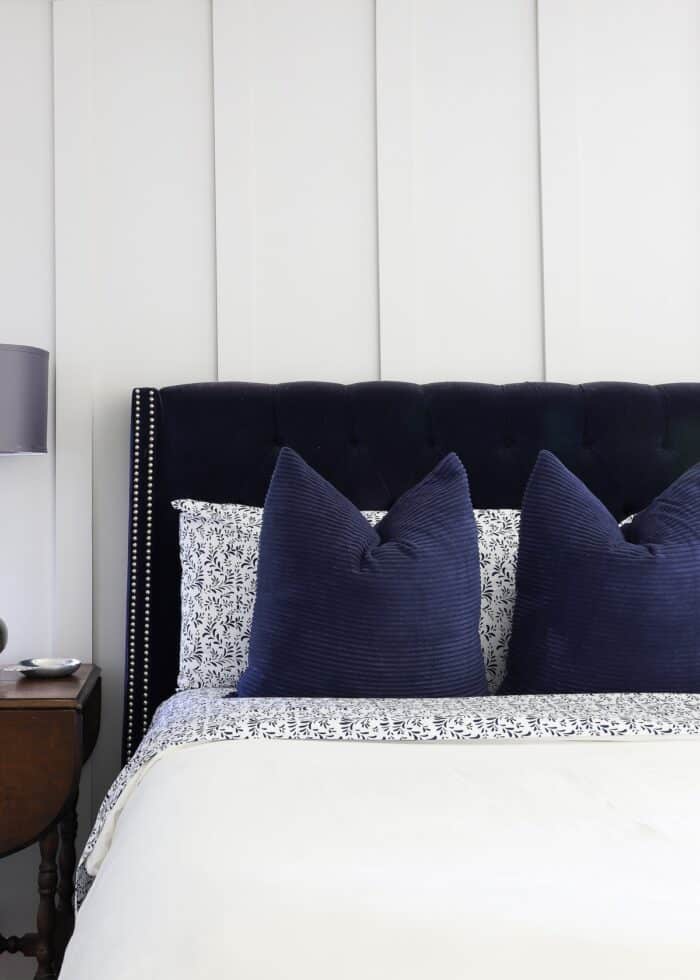
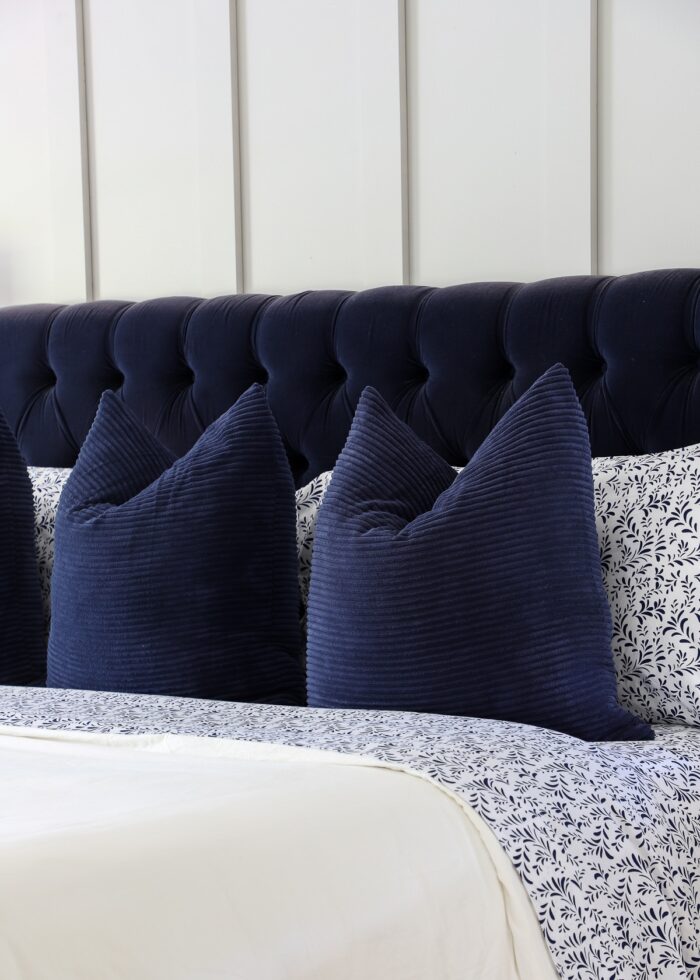
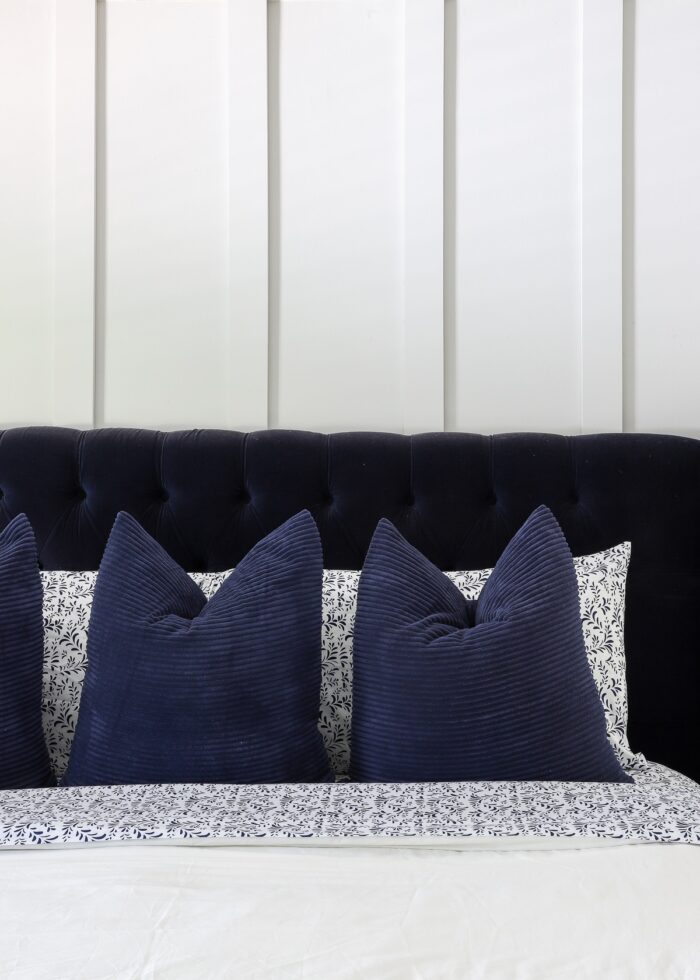
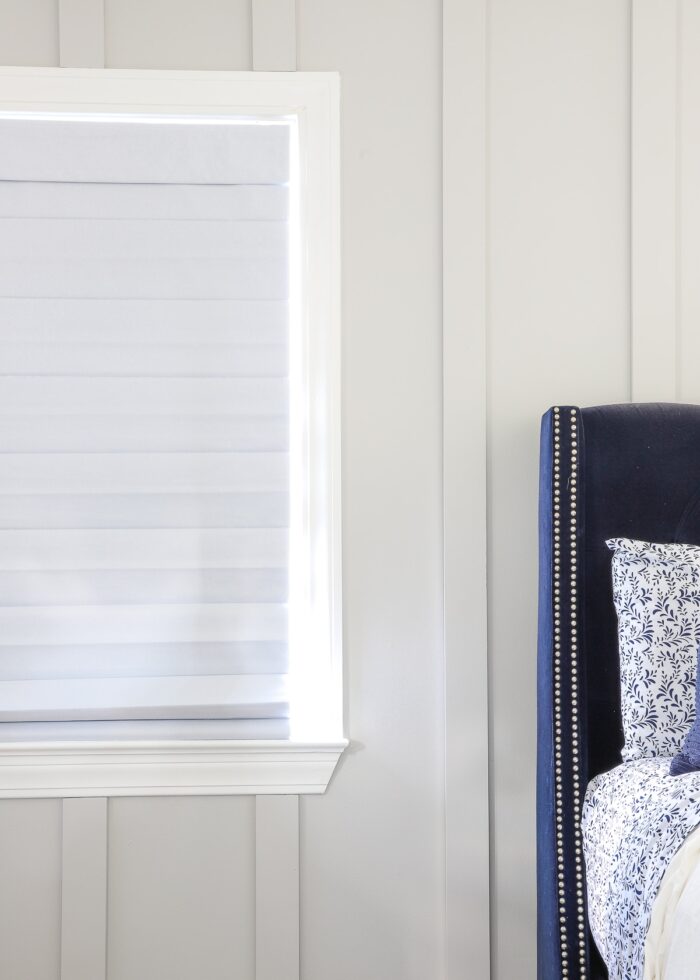
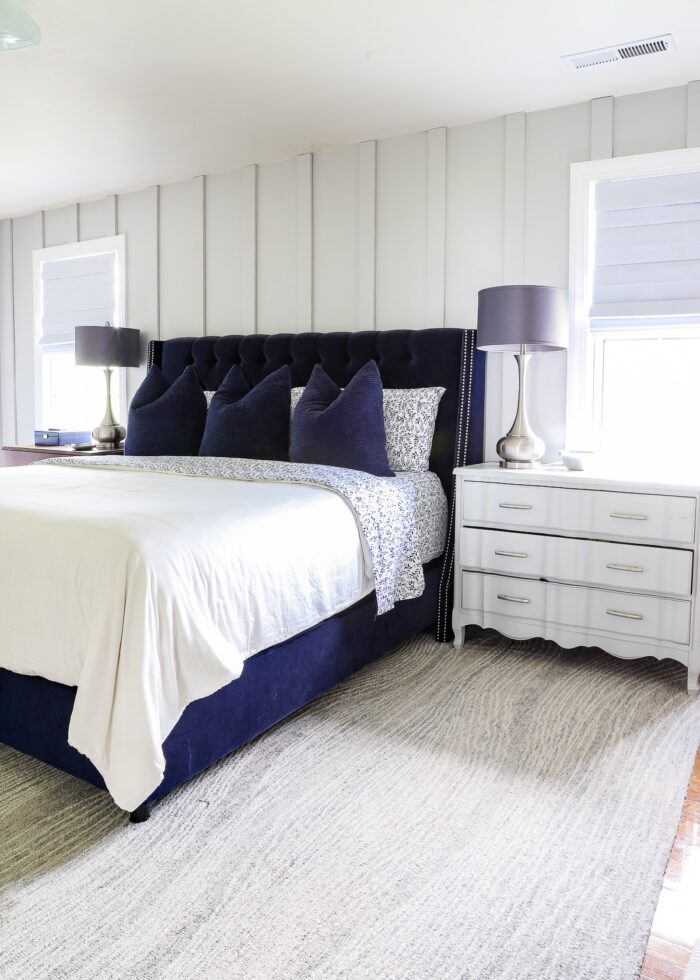
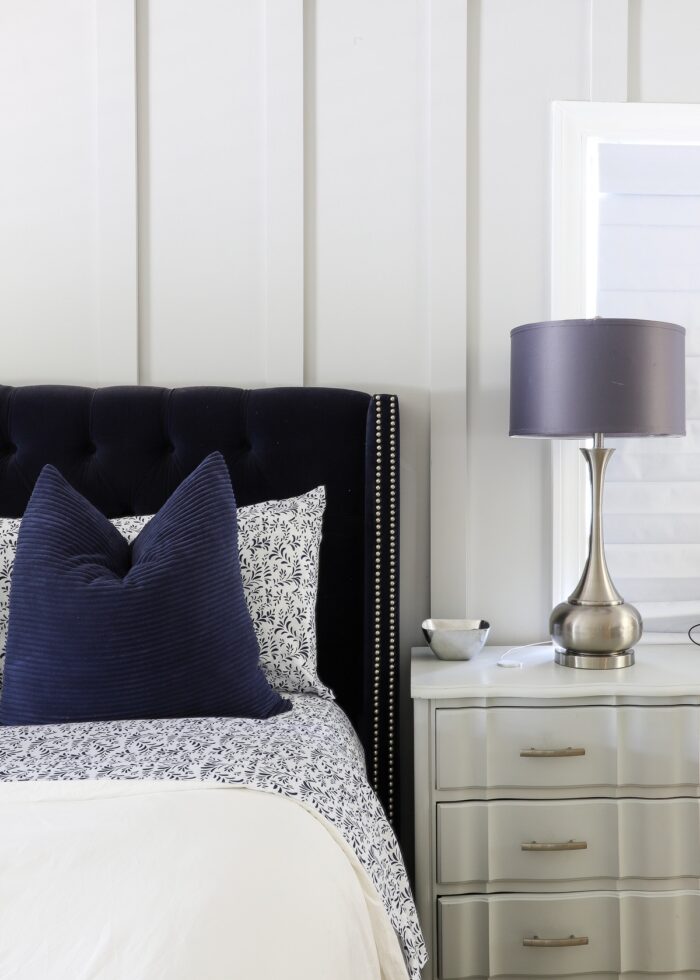
The crisp grey paint combined with the sleek, simple panel effect creates a retreat-like space that feels so calm, so soothing. It commands attention yet also fades into the background; so much so that I suddenly abandoned all my plans for curtains, patterned throw pillows, and even the mirror I always hang over our bed.
Single-handedly, this project completely changed the look, feel, (and seemingly the size, too!) of this entire room.
The ease and transformative effect of this project makes it a must try for anyone looking to add some serious visual interest to a room. But the cost-effectiveness and renter-friendly nature of it now make it one of my favorite wall makeovers of all time! One that I’ll be surely trying again.
Let me break it aaaaall down for you!
(This room makeover is now done! Take the full room tour here: Our Serene Navy & Grey Master Bedroom Reveal)
Things to Consider Before Installing Board & Batten (Especially If You’re a Renter)
Do You Have Beveled Baseboards or Crown Molding?
I am very much an experiential learner. I rarely do pre-project reasearch and often just jump in and figure things out as I go.
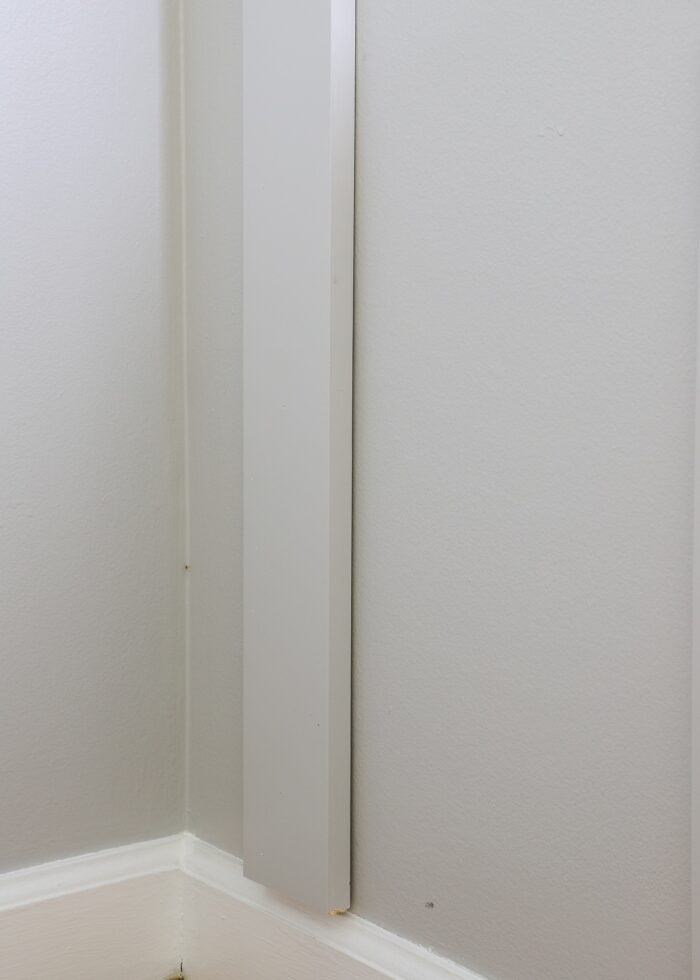
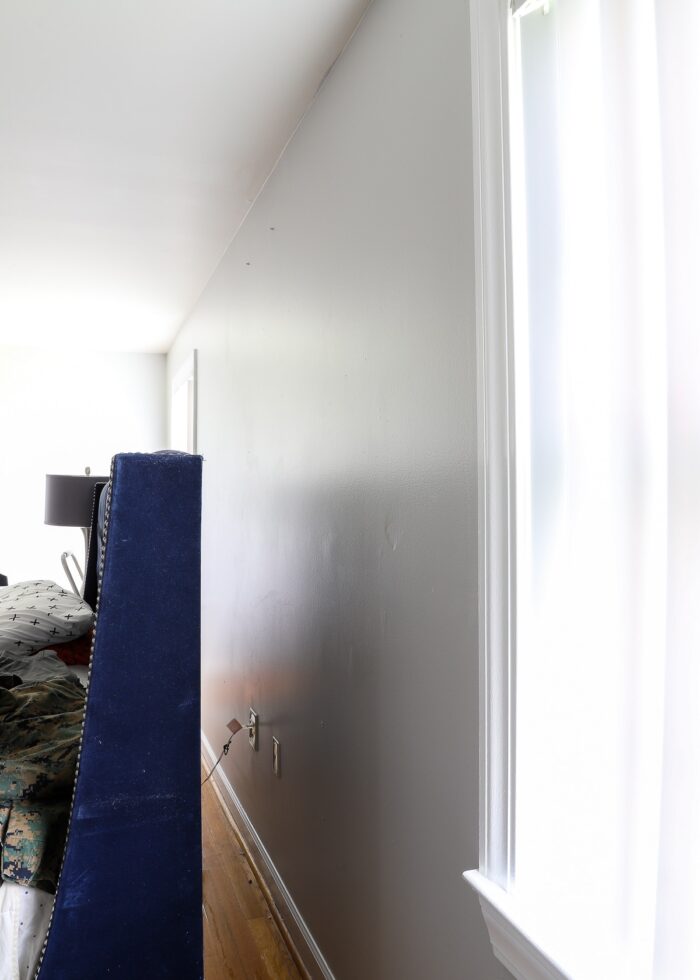
I had this project all worked out in my head and even bought and painted the wood boards before I realized we have pretty chunky, beveled base boards around the perimeter of our bedroom. As such, the blunt, square ends of the wood boards do not, at all, sit flush against the existing baseboard.
Whoops!
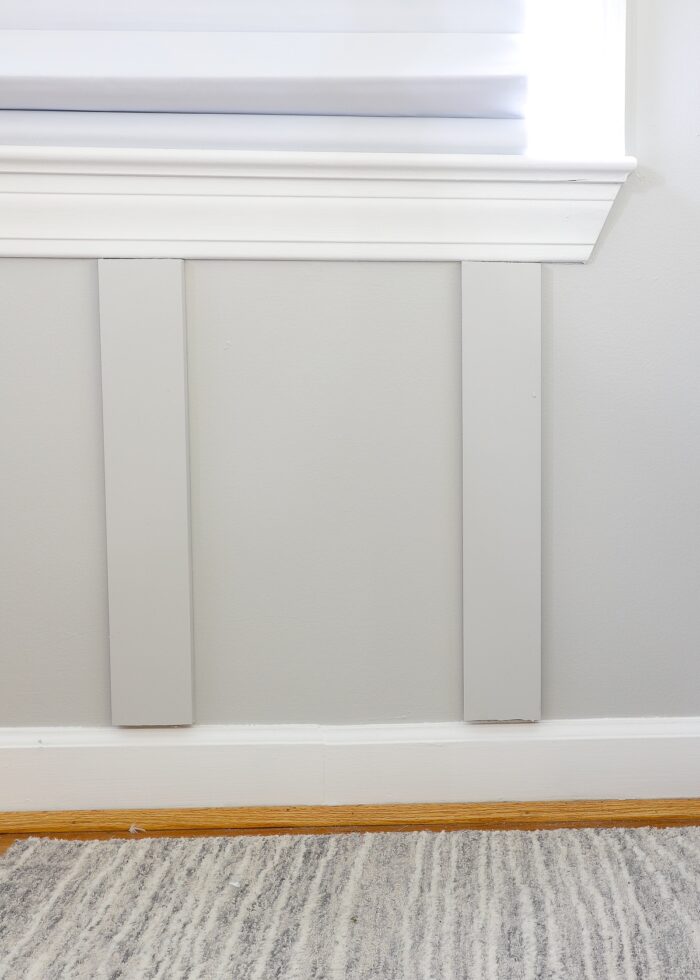
If I had realized this ahead of time, I’m not entirely sure it would have stopped me from doing this project. Most of the baseboards are covered by furniture; and the whole-room effect of the wall far outweighs this issue.

In a forever home…or even a home that I own…I’d go through the work to remedy the baseboards situation. But we’re really short timers, and I wanted to keep this project cheap. So I’m chalking it up to a learning experience that I know not to repeat.
But I’m sharing this situation here so that you’re more aware of it than I was.
If you have beveled base boards or beveled crown moulding (as in, they curve and are not flat), you may want to consider removing them, replacing them with flat moulding, finding a different accent wall idea, or just ignoring them (like I’m doing!)
Do You Want to Put Holes In Your Wall?
The next thing you need to consider is how big of a deal it is to put holes in your wall. Lots of them.
While I offer some alternative installation options below (e.g., Command Strips), the quickest and easiest way to install the wood boards is with nails and a pneumatic nail gun. Each board has about 5 nail holes behind it, leaving about 60ish (tiny) holes in our walls.
If you own your home, this is likely not a big deal. But if you’re a renter who is responsible for patching holes, this is something you’ll need to consider.
To Caulk or Not
Most “real” board and batten installations involve caulking the seams where the board meets the wall (and then painting over it). This gives the wall a very clean, polished appearance that is (quite obviously) ideal for long-timers and homeowners.
If you are a renter or someone who likes to change their decor/walls frequently, I recommend skipping the caulking step as it can significantly damage your wall in a way that’s not easily un-doable.
Yes, your boards may have a tiny gap (usually depending on the flatness of the wall, the boards, or both), but it’s not something you really notice when you visually take in the wall as a whole.
Do You Really Need to Reach the Floor?
Finally, before getting into the step-by-step, I want to bring up one more lesson learned.
I chose to run our boards from the ceiling all the way to the floor, across the entire expanse of wall, even though a very large section of wall is covered up by our very large bed. In hindsight, I could have easily used half as many boards, and only run them just below the top of our headboard.
If you’re looking to save as much money as possible on this project, figure out precisely how long you need each board in comparison to your furniture layout. Just remember: this means you won’t be able to re-arrange your furniture!
Supplies Needed
If you’re ready to install a board and batten wall, here is what you’ll need:
- Wood Boards – more information below
- Wall Paint
- Wall Painting Supplies such as tape, tarps, paint roller, paint brush
- Small Foam Roller for painting the wood boards
- Circular Saw, Table Saw, or Miter Saw
- A way to secure boards to the wall, more information below
- Command Strips, or
- Nail Gun with Nails
- Tape Measure
- Microfiber Cloth
- Small Level
- Paintable Spackling or Wood Filler
- Two People – yes, this is very much a four-hands project!
What Wood Boards to Use
Wood boards come in lots of different lengths, widths, and quality. And what you choose will very much depend on the look you’re going for (thin versus thick), as well as how much you want to spend and how long you want the project to take.
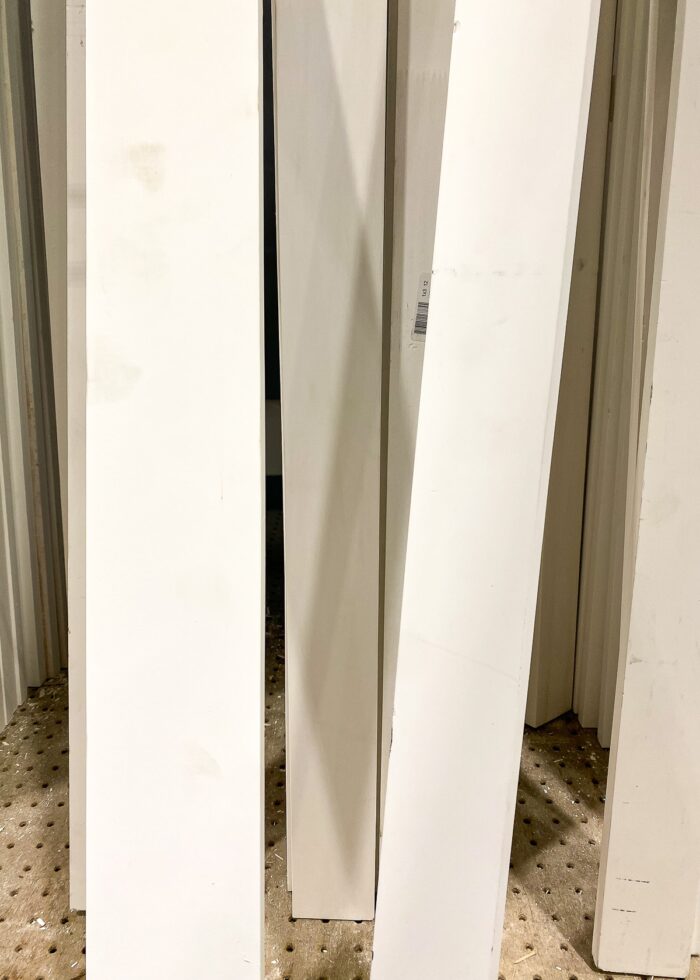
Unfinished pine simple board is usually the cheapest option. But these boards often require a significant amount of sanding and priming just to get a nice, smooth surface that’s ready for paint.
As such, I highly recommend using pre-primed pine boards or primed MDF boards (these are the exact ones I chose). Not only do these boards come ready for paint, but they will most likely also be free of nicks, splinters, cracks, and other blemishes.
When pricing out our wall, I determined these boards were worth the (slightly) added cost to save me the step of sanding and needing primer.
TIP! By buying in bulk, you qualify for the “contractor’s discount,” which brings each board down even more!
Nails Versus Command Strips | How to Choose
Admittedly, my original plan for this project was to use Command Strips to hang the wood boards. But I opted not to, for three main reasons:
- Command Strips are just about 1/4″ thick, which means the boards will not sit perfectly flush to the wall; there will be a more-noticeable gap.
- Command Strips aren’t exactly cheap. Our boards would have required about 50+ Command Strips, which would have easily added another $40-50ish to this project.
- We aren’t charged for nail holes in our walls, nor do we have to patch them. So adding tiny holes up and down our wall isn’t an issue in our particular situation.
For us, using nails was a no brainer. But there might be times to consider using Command Strips instead, such as:
- If you are not allowed to put holes in your wall.
- If you are required to patch all holes in your walls.
- You don’t have access to a nail gun (which, as I discuss below, really makes a difference).
- You want the boards to go up and come down really quickly.
Nail Gun Versus a Hammer
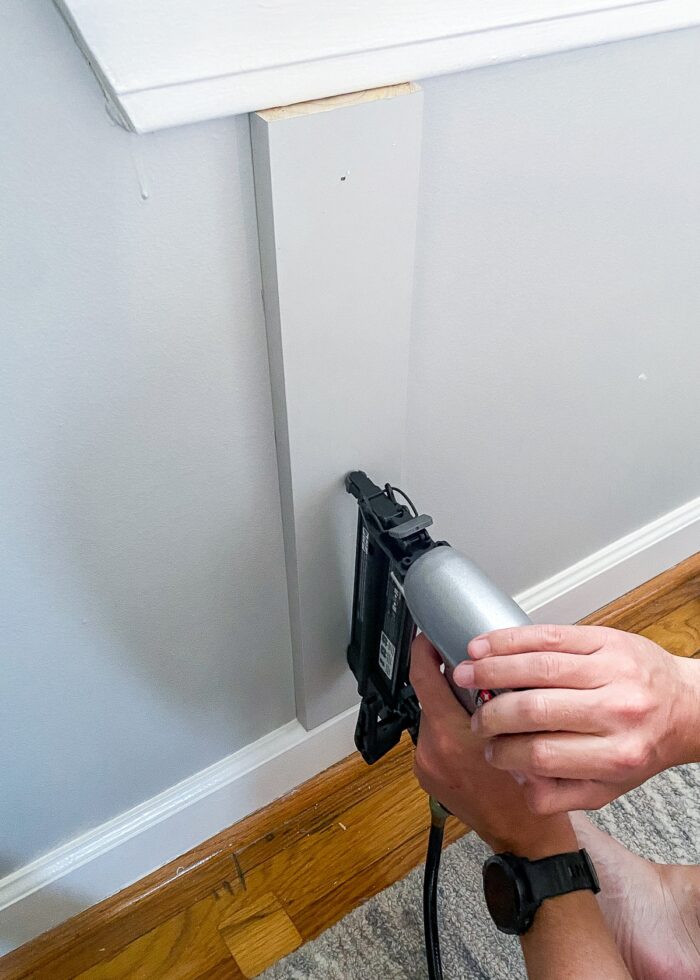
This 16′ wall installation only took a few hours primarily because we used a nail gun. As you’ll see, with each board properly positioned, securing it to the wall took just a minute or so thanks to the quick, clean power of the nail gun.
Without a doubt, the installation would have been much more difficult if we’d used a hammer instead. Not only does banging each nail into place require a good bit of effort. But the banging can 1) cause damage to the boards, that you’ll then have to patch; and 2) can cause the board to shift position during installation (since we’re not using adhesive to hold them in place).
While using a hammer instead of a nail gun is certainly possible, I don’t recommend it if you can avoid it.
Can You Use Screws?
I actually don’t see why not, but these will definitely be harder to install and will make a bigger mess of your wall. If you do opt to use screws over nails, you will likely need to pre-drill through the painted boards, potentially install dry wall anchors (if you don’t screw into studs); and countersink the screw holes to give a smooth appearance from the front.
That said, you’ll be able to get the boards nice and snug to your wall without needing a nail gun!
How to Install a Board & Batten Accent Wall | Step-By-Step
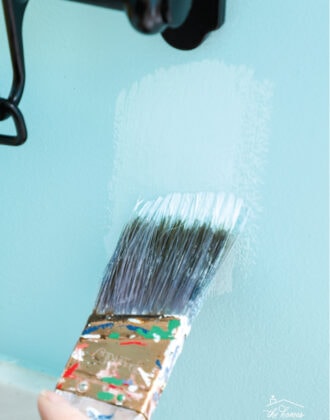
Step 1 – Paint the Wall
The subtle charm of a board and batten accent wall is largely attributed to the tone-on-tone effect of the wall and the wood boards being painted in the same color. So before you even get started with the wood board element of this project, first paint your wall(s) your selected color.
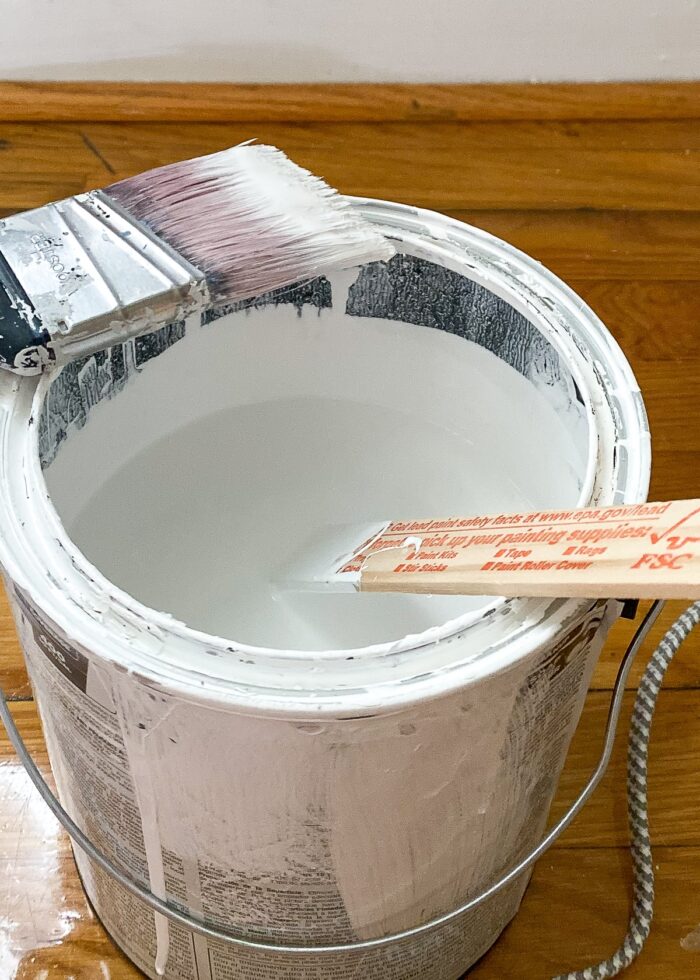
I painted our walls in On the Rocks (by Sherwin Williams) for two main reasons:
- This is an “approved” paint color by our rental management company, meaning we will not have to paint it back to the original color before we move out.
- I chose the grey (over the approved beige that’s seen throughout the rest of our house) because of the grey dressers and silver finishes elsewhere in the room. (In fact, our grey dressers are an almost-perfect match which, all together, gives the room a very cohesive, serene feel.)
Step 2 – Design Your Batten Spacing
While waiting for paint to dry (quite literally), spend some time planning out the layout for the vertical boards. Where you start/finish and how far apart you space your boards is completely up to you and the aesthetic you’re trying to achieve.
Here are some tips to help you:
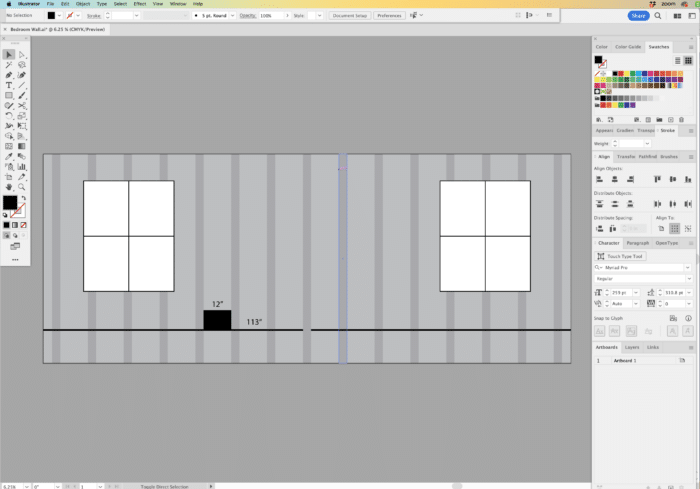
- Use graph paper or a virtual canvas to make a mockup of your wall (we used Adobe Illustrator). Input the exact measurements of your wall length and width, as well as the boards themselves, in order to play with different looks and identify accurate intervals.
- Be sure to add windows, doors, furniture, electrical outlets, and other features you’ll have to work around to your mockup.
- When deciding where to place your wood boards, minimize as many “awkward” cuts as possible around these features.
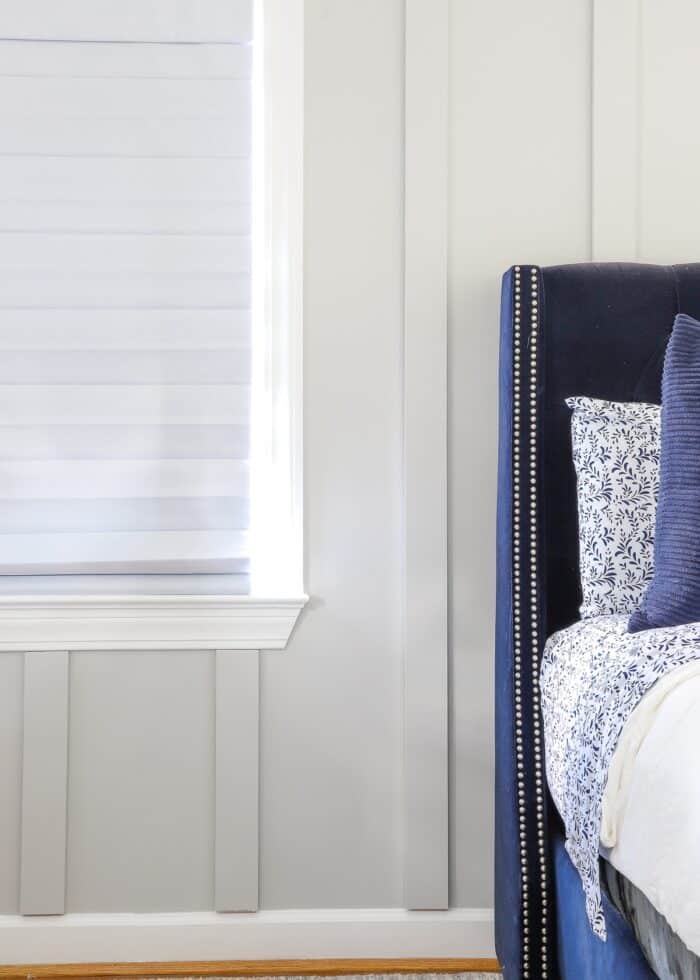
We originally planned to place the end boards all the way into the corners. But we quickly realized that 1) our corners aren’t vertically level, which would have caused an unsightly gap between the wall and the board; and 2) this placement would require us to vertically trim our boards to fit around the windows. By shifting our farthest-out boards in by just 4″, we avoided awkward cuts around our windows entirely.
Step 3 – Cut Wood Boards to Size
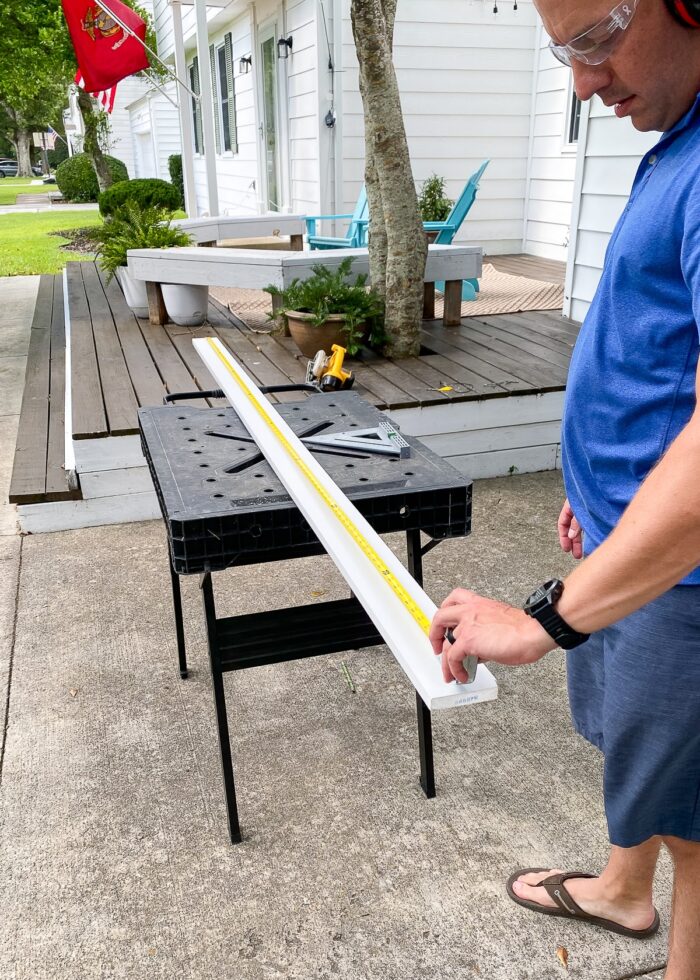
Once you have your layout set, you should know exactly how many boards you need and what dimensions they should be cut down to.
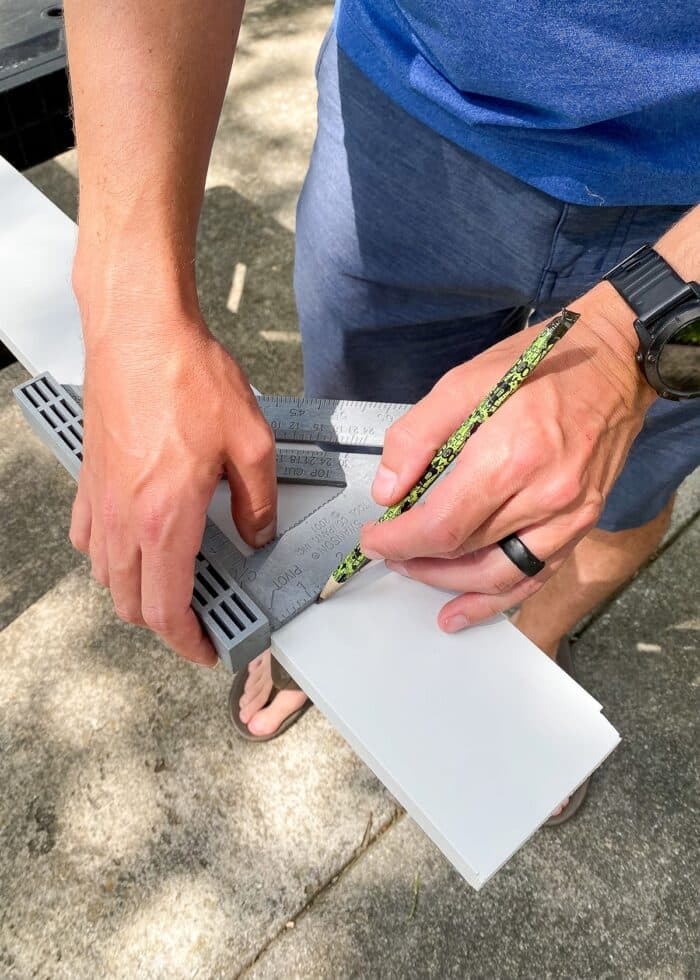
Measure and mark each board, then cut them down to size using a miter saw, table saw, or circular saw.
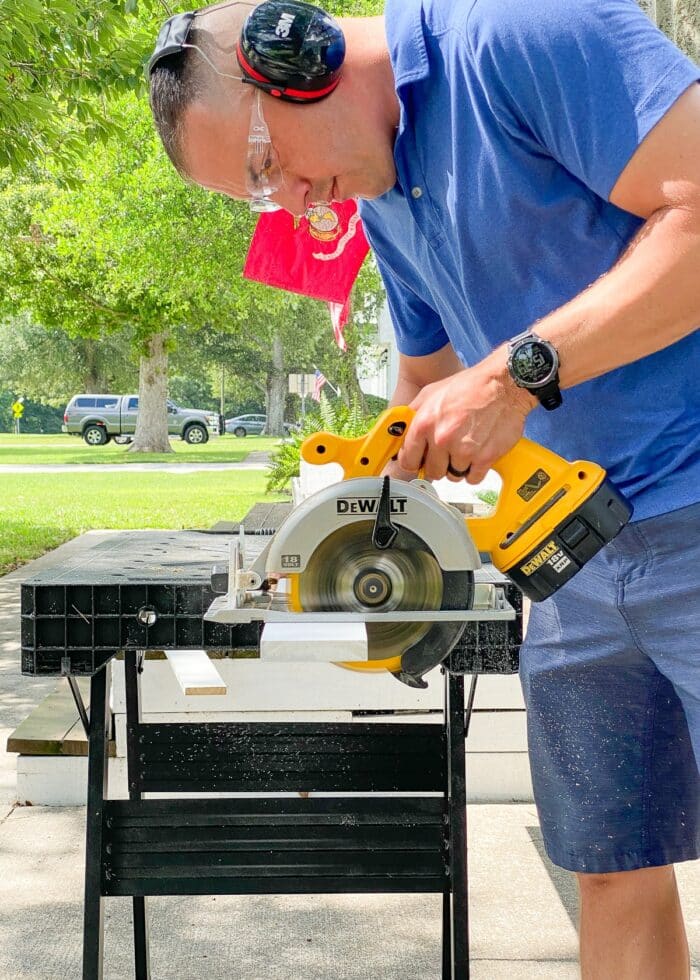
TIP! If your floors/ceilings aren’t perfectly level, you might NOT want to cut all your boards at the same time, and instead measure and cut as you go. This is an installation where you want the top and bottom edges of the boards to be perfectly flush with both the ceiling and the floor/baseboards; and if your floors aren’t even, you can end up with unsightly gaps.
Step 4 – Paint Wood Boards
Whether you paint your boards before or after they go on the wall is completely up to you. I wanted this project to be as efficient as possible, so I opted to paint my boards prior to installation (therefor avoiding having to paint all the edges with a brush).
Want to save this post?
Before painting, sand off any splintered edges and wipe clean with a microfiber cloth.
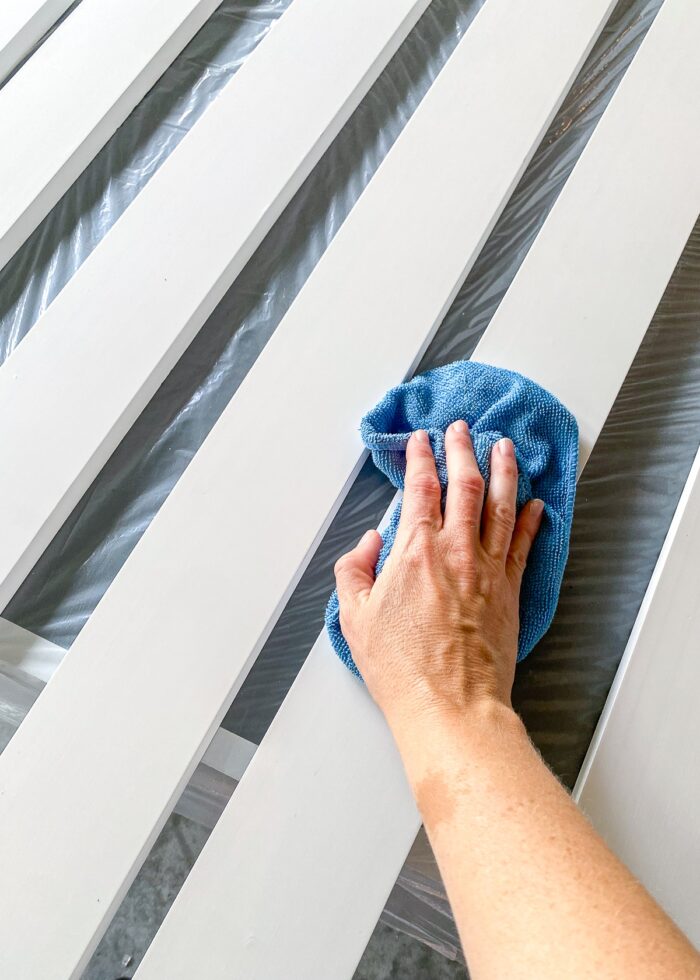
Painting the boards can feel a bit tedious. Here’s how I did it.
Place your boards between two saw horses or on a long table. Flip a board onto its edge and paint the side with a small foam roller.
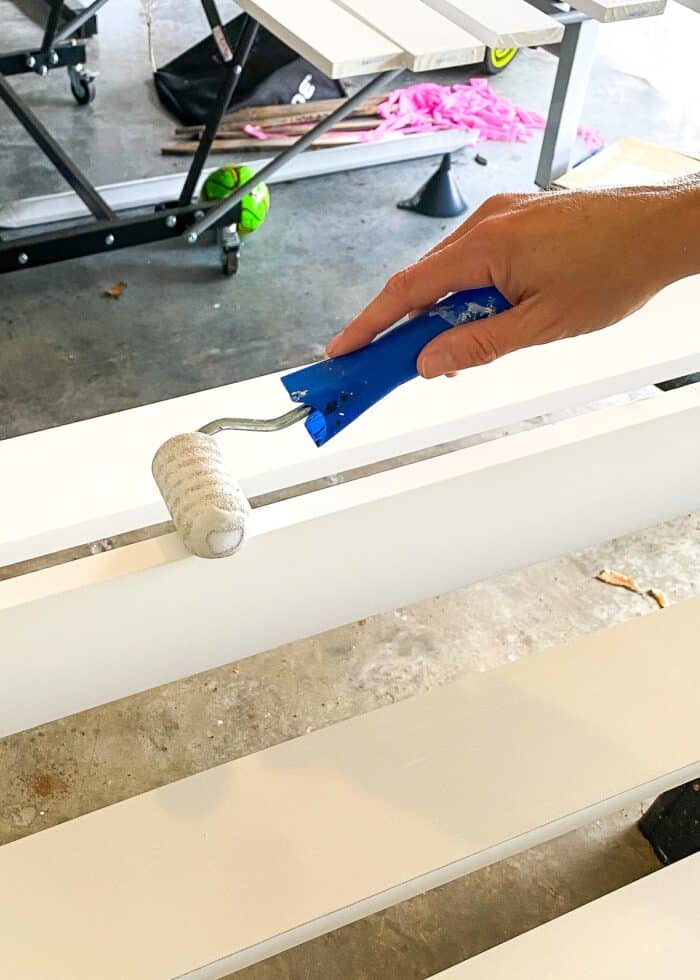
Then carefully lower the board back flat and paint the front-facing surface.

Once this first coat is dry, position the board so that the other (unpainted) edge is facing up. Paint the edge, flatten, and give the front-facing side a second coat of paint.
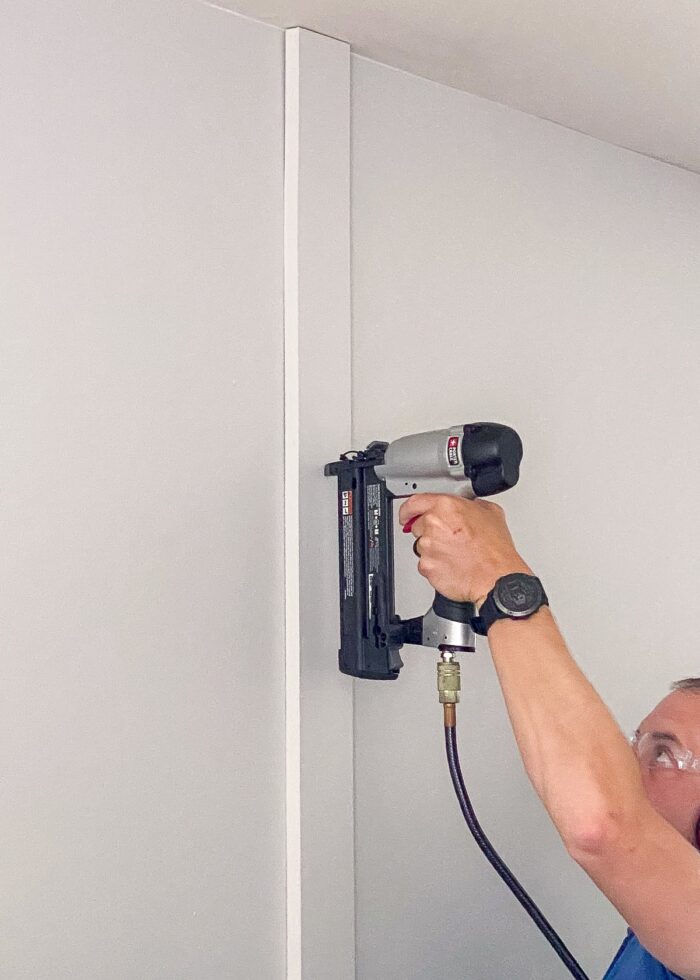
Step 5 – Place Center Board
Once your boards are completely dry, it’s time to hang them on the wall! (This is the fun part!)
Use a measuring tape to find the location of your center-most board(s). Place a level alongside the board to ensure it’s perfectly straight.
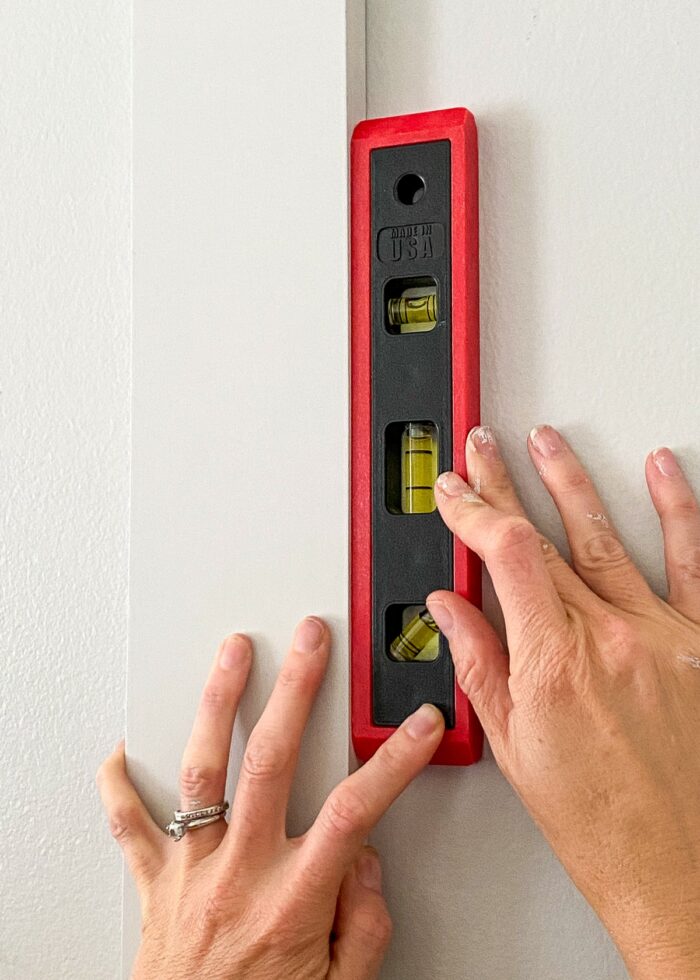
While one person holds the board in place, the other person secures it to the wall using a nail gun (or alternative hanging method). For these 7.5′ (ish) boards, we used ~5 nails down the length of the board.
NOTE: Many tutorials suggest using Liquid Nails or construction adhesive to hold your boards in place while you nail. I’m sure there are benefits to doing that in a home you own; but honestly, I’m not sure I’d glue my boards down even if we did own this house. The nails hold the boards pretty firm to the wall; and adhesive would cause unnecessary damage should I ever want/need to remove them.
Hanging Battens with Command Strips
If you are using Command Strips to hang your boards, I recommend using (at least) 3 Command Strips (horizontally) on each board.
- Remove the paper backing from the middle strip and secure the board to the wall in the correct position.
- Checked the vertical alignment with a level with the paper still on the remaining strips.
- Once level, remove the paper backings and secure the board completely to the wall.
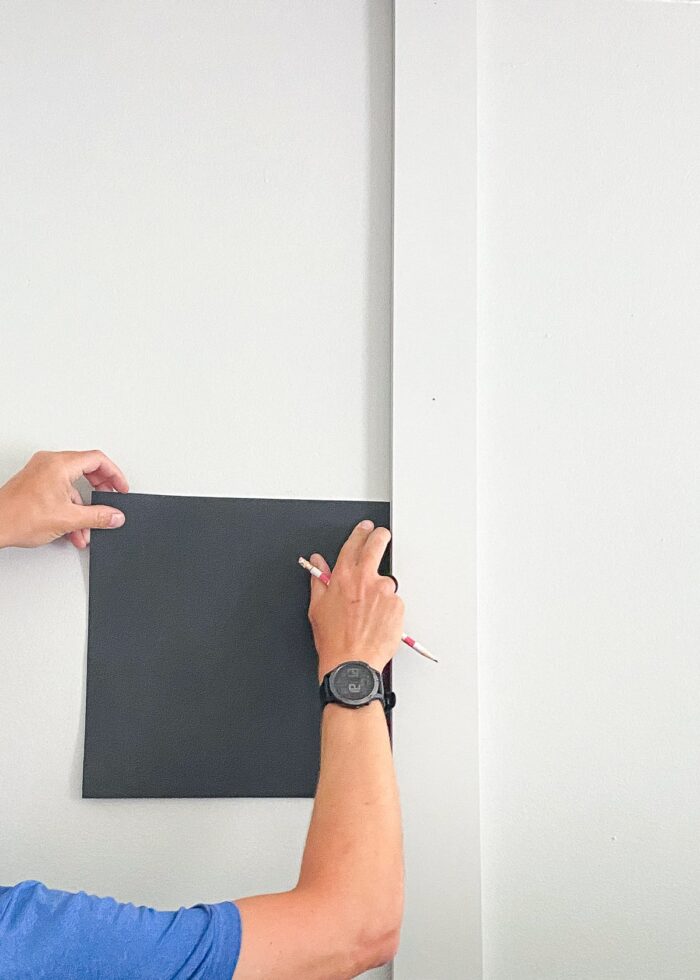
Step 6 – Work Outward from Center
Once your center board in place, start working outward toward the corners.
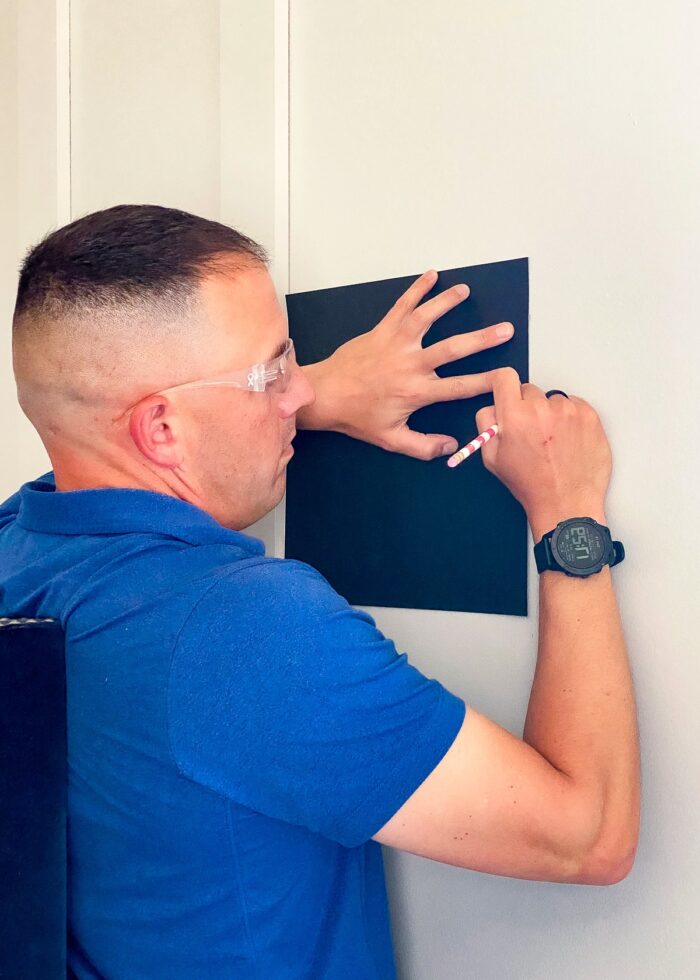
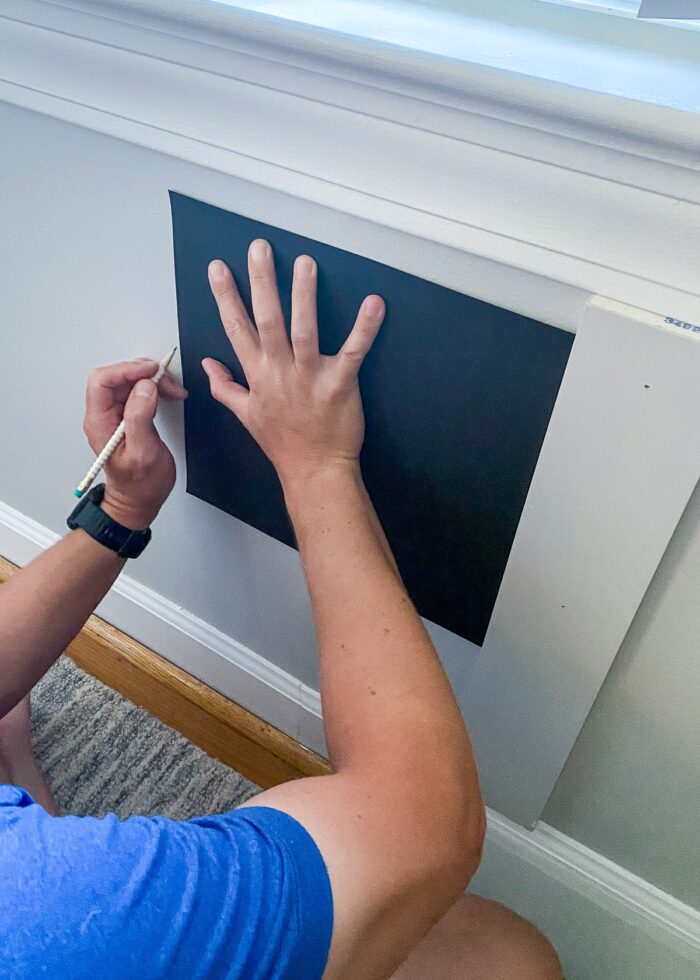
Although you can certainly use a ruler or measuring tape to identify your intervals each time, we found it most helpful to trim a piece of cardstock down to our needed measurement between boards (essentially making a spacer board).
To use, just line up the edge of the cardstock template with the edge of the already-installed board and draw a faint line on the wall with a pencil.
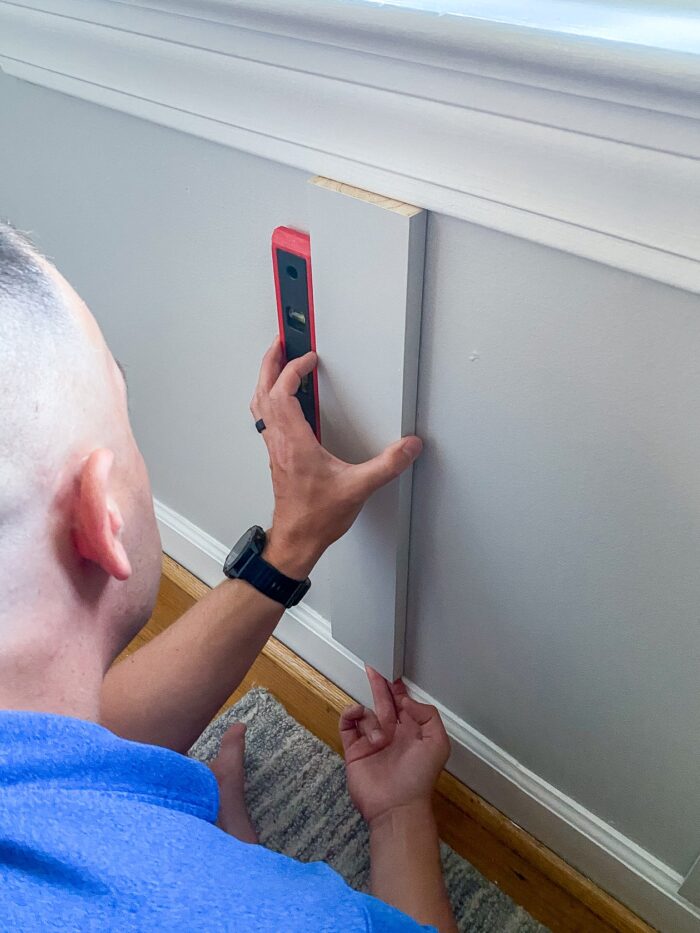
Then line up the edge of your next wood board with the pencil line, check the straightness with a level…
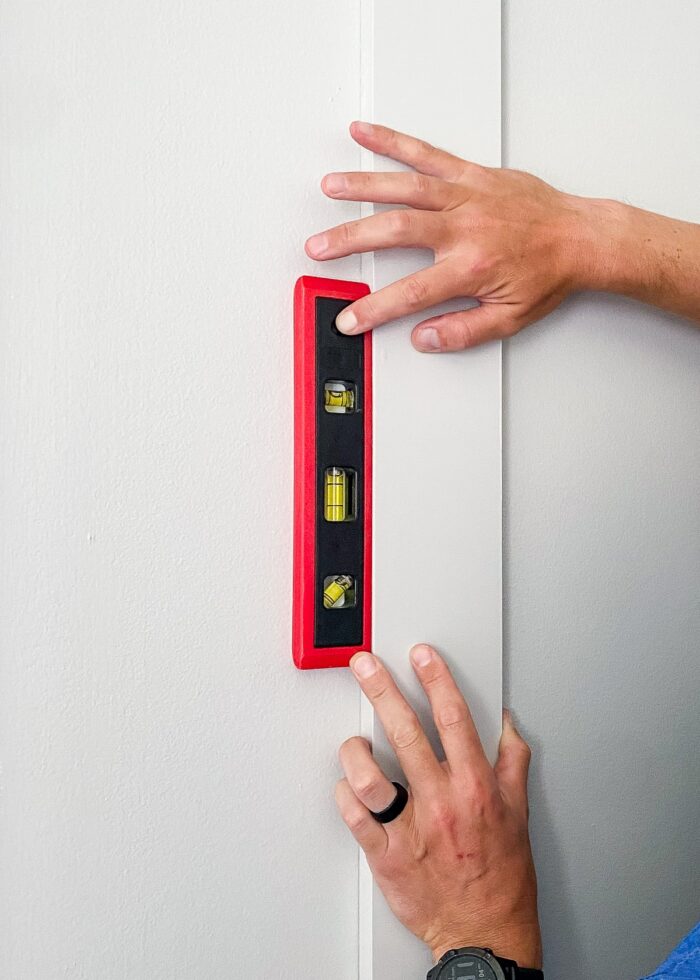
…and secure to the wall.
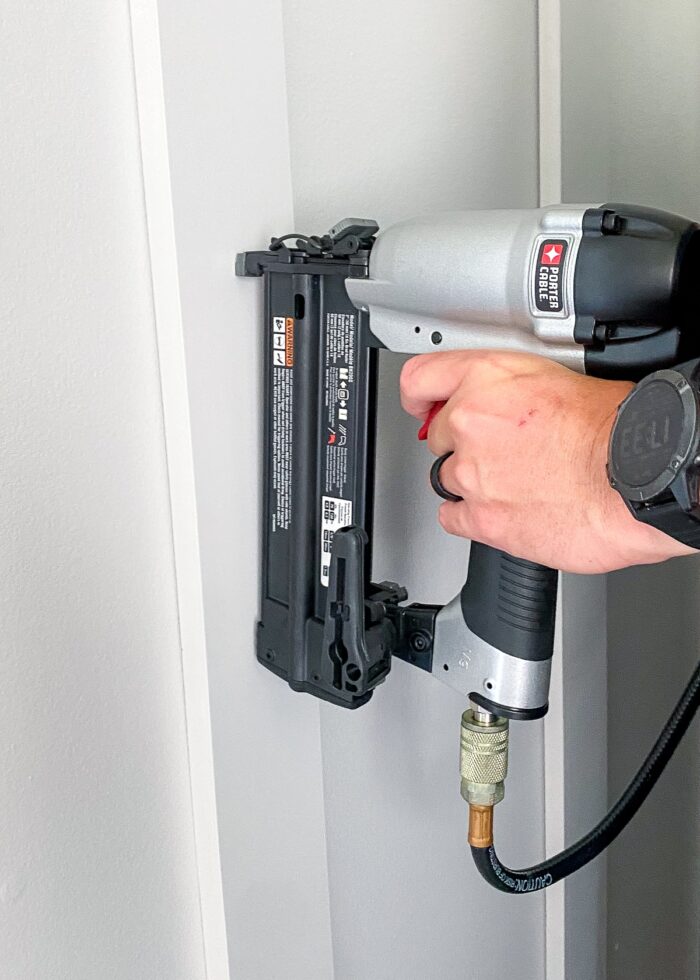
Repeat in the opposite direction…
Here are our first three vertical battens fully installed (in just a few minutes!)
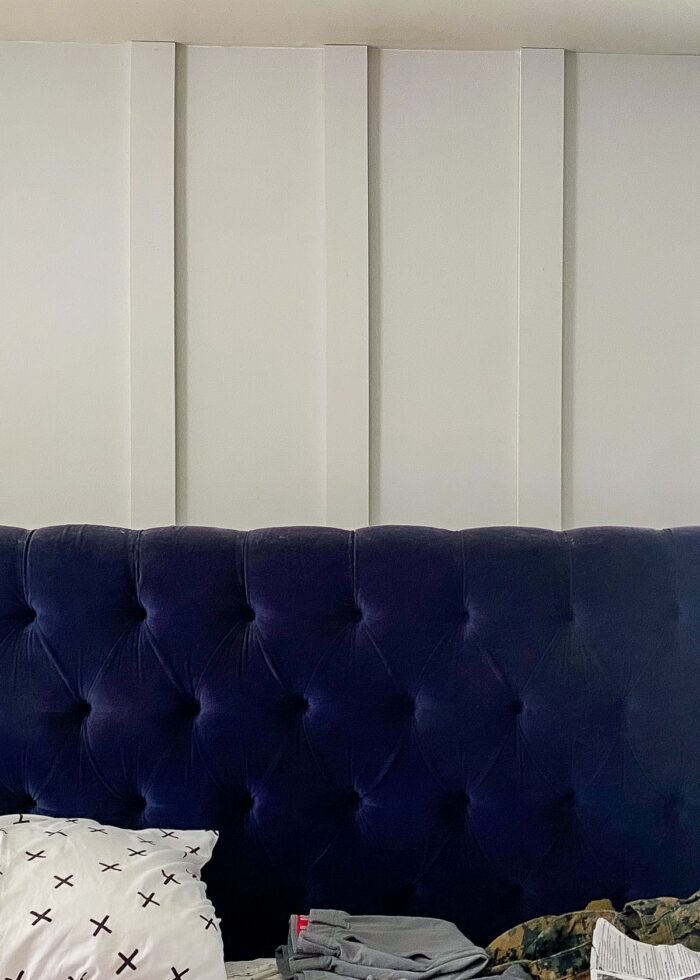
Keep working outward until all your panels are secured to the wall at the proper intervals.
Step 7 – Working Around Windows/Doors
Admittedly, this project would be quite easy if your wall doesn’t have any windows or doors. But in the event you do have to work around some features, you pretty much proceed the exact same way, except that your cut lengths will be shorter and you’ll need to install boards both above and below features separately.
Just as before, identify the proper placement using a measuring tape or template…
…level your (shorter) pre-painted and pre-cut board…
…and secure to the wall. If working around a window, you’ll need to repeat along the top of your window as well.
If your holding true to your template/measurements, the boards installed above and below the window should be in a perfectly straight line.
Step 8 – Conceal Nail Holes
At this point, all your wood boards should be secured to the wall at the proper intervals. Before moving on, check that each and every board is level and secure; make any adjustments as needed.
If you used Command Strips for your installation, you won’t have any holes or paint to touch up, so consider yourself done!
However, if you did use nails or screws to secure your boards, you’ll want to cover each nail hole with some spackling, sand it smooth, and then add touch up paint on top.
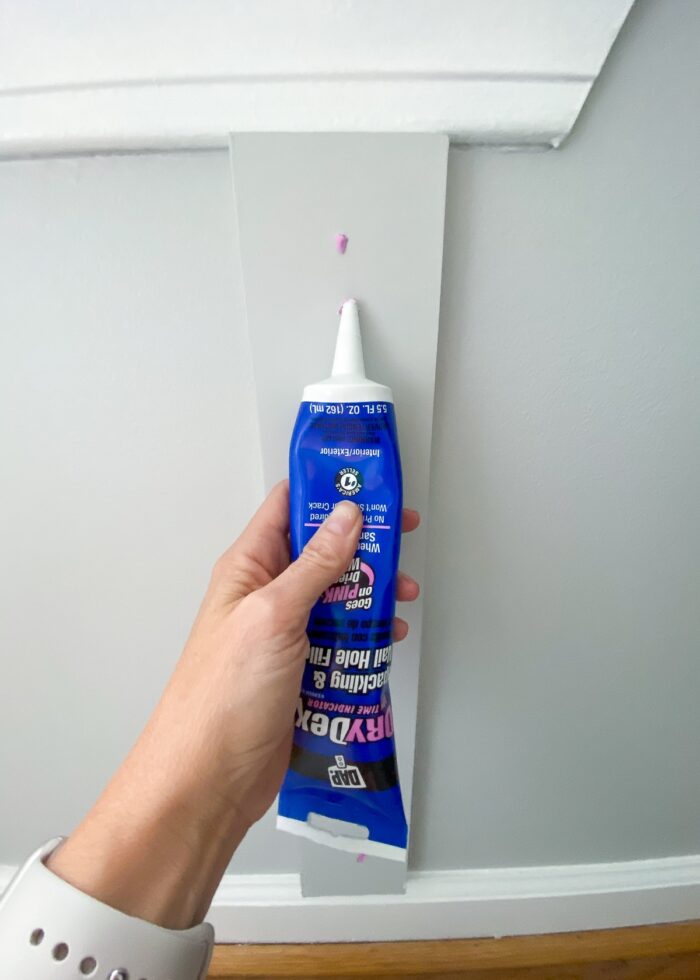
The nail holes were so tiny and seemed to blend in with the grey paint from a distance; so I was initially tempted to skip this final step. However, once I did, I was taken aback at how much cleaner the entire display became!
Step 8 – Caulk & Paint Seams (For Non-Renters Only)
Last but not least, this is when you’d typically fill all the open gaps between the wall and the wood boards (using caulk loaded into a caulk gun) and re-paint the seams. This will undoubtedly give a more polished “installed” appearance to your wall feature.
However, if you are a renter or someone who changes their mind frequently, I would skip this step entirely. The nails/Command Strips are plenty strong to hold the boards in place; and caulk will make it much more difficult to remove the boards without damage.
Our walls are not perfectly flat or smooth. But the nails keep the boards plenty flush, and the tiny gaps are hardly noticeable at all!
FAQs About Our Board & Batten Accent Wall
How Long Did the Board and Batten Installation Take?
Quicker than I expected!
We already had the room painted before we started. I went out to purchase the boards in the morning and painted them before lunch. We started cutting/installing around 3:00 and had all the boards up by dinnertime. I patched and painted the holes and raw edges the next day, which took about another hour.
How Much Did This Project Cost?
Just over $100 out of pocket. We already had all the tools and supplies, including the paint; and we borrowed a friend’s nail gun. So our only expense was for the 11 boards at $9ish each.
Why Didn’t You Add a Top Horizontal Board?
Many board and batten accent walls will have you add a horizontal length of wood across the entire edge of the ceiling to give a flat, clean appearance along the top of each board. We skipped this step for three reasons:
- Our window frames sit pretty high on the wall. I thought adding 4″ of trim would have made the entire arrangement look crowded above the windows.
- I didn’t want to add more cost to this project since I determined the visual payoff wasn’t really worth it.
- The junction of the vertical panels against the horizontal board would have been quite noticeable; and since we were trying to avoid caulking seams, I didn’t want to introduce an element that might ultimately look messy.
That said, if you don’t love the look of the wood boards flush against the ceiling, adding a horizontal board along the top will give you a cleaner, framed-out appearance.
Are the Boards Really Removable?
Oh yes. The nice thing about using a nail gun for installation is that the holes are really tiny. So while the boards are held pretty firm to the wall, we can pry them up and the nails easily slide right out of the drywall (yes, we tested it).
If you use Command Strips to hang the boards, you can see how to properly remove the boards and the strips in this tutorial: How to Remove Command Strips (Without Damaging Your Walls!) | Video
How Do You Patch the Holes Before Moving Out?
We will not have to fill or patch these holes before moving out. But if we did, I’d do it exactly as I break down here: How to Fill Nail Holes In Your (Rental) Walls
Sometimes I get an idea, and bringing it to life is anything but quick or easy. But not this time! Besides the little hiccup with the baseboards, this board and batten feature wall came together quite efficiently from start-to-finish and we couldn’t love the results more.
And like so many other times, this DIY project was the catalyst to finally pull the rest of the room together into a beautiful, cohesive retreat. To think, I almost didn’t do it at all!
Megan

3 Comments on “Easy DIY Board & Batten Accent Wall (Even Renters Can Do)”
Really nice! I love your projects.
Great Job!!
I absolutely love everything about this website