How to Remove Command Strips (Without Damaging Your Walls!)
I love using Command Strips to hang pictures in our homes. Beyond the fact that I just find it easier to peel-and-stick a frame on the wall (rather than measure for precise nail placements)…the damage-free technology is certainly an attractive feature to this perpetual renter. But perhaps you or someone you know has used Command Strips, only to discover they damaged the wall upon removal. While this can happen, Command Strips usually only cause damage when removed incorrectly. Today, I’m showing you how to remove Command Strips the right way…so you really can experience the damage-free hanging they are so well-known for!
I LOVE Command Strips!
Even if we weren’t renters, I’m pretty certain we’d use Command Strips in our home. I love being able to slap some strips on the back of a frame and literally just peel-and-stick our artwork wherever we want it. And despite dry and humid climates, smooth and textured walls, glossy or flat paint, we’ve never had an issue with our art staying 100% put on the wall using Command Picture Hanging Strips.
See my process: How to Hang a Gallery Wall with Command Strips

But the ease of using Command Strips to put frames up is just half of their appeal. The other (and more important) feature is that they…theoretically…come down without damaging your walls. But if you or someone you know has ever used them, you likely have been cautioned with horror stories of peeling paint and torn up dry wall, possibly scaring you away from this awesome product.
In the 5+ years I’ve been using Command Strips in our homes, yes…I have had some peel up paint. But most often, they come off the wall 100% clean, without any damage left behind. The trick is fighting your instincts to just yank them off and instead remove them the way 3M tells you to.

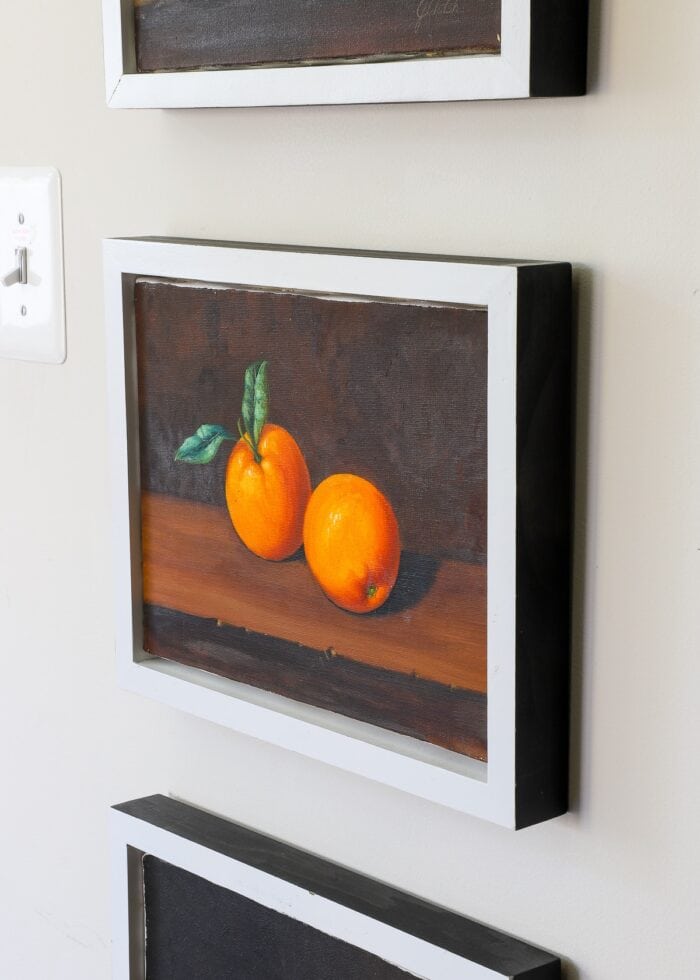
About 90% of the frames hung in our VA home were done so with Command Strips (even heavy pictures!) So to show how we removed them prior to moving out, I’ll demonstrate on this series of paintings (by my talented mother!) that were in our dining room.
There are two distinct phases of removing Command Strips, and I’ll share my best tips for each:
- Part 1: Taking Down a Frame Hung with Command Strips
- Part 2: Removing the Command Strips from the Wall
NOTE: Although I am demonstrating the process using picture hanging strips, all 3M Command technology uses the same removal process. So whether you have smaller hanging strips or large strips, strips behind frames or under curtain rod hooks, thin clear strips or thick maximum strength strips, they should all come down the same way.
Part 1: How to Take Down Frames Hung With Command Strips
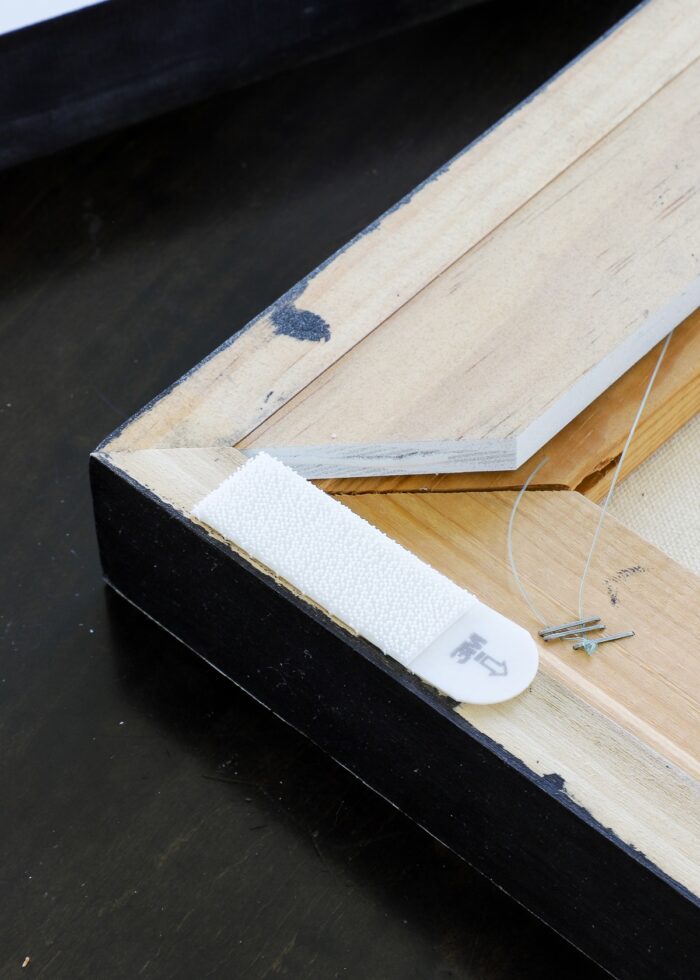
If you’ve never used Command Strips to hang frames, you might not have a good sense for how secure they are to the wall. If hung correctly, frames will essentially have a 2ish” strip of “Velcro” on either side, holding it snugly to the wall. Depending on what size strips you use and how heavy your frame is, the connection can be pretty tight.
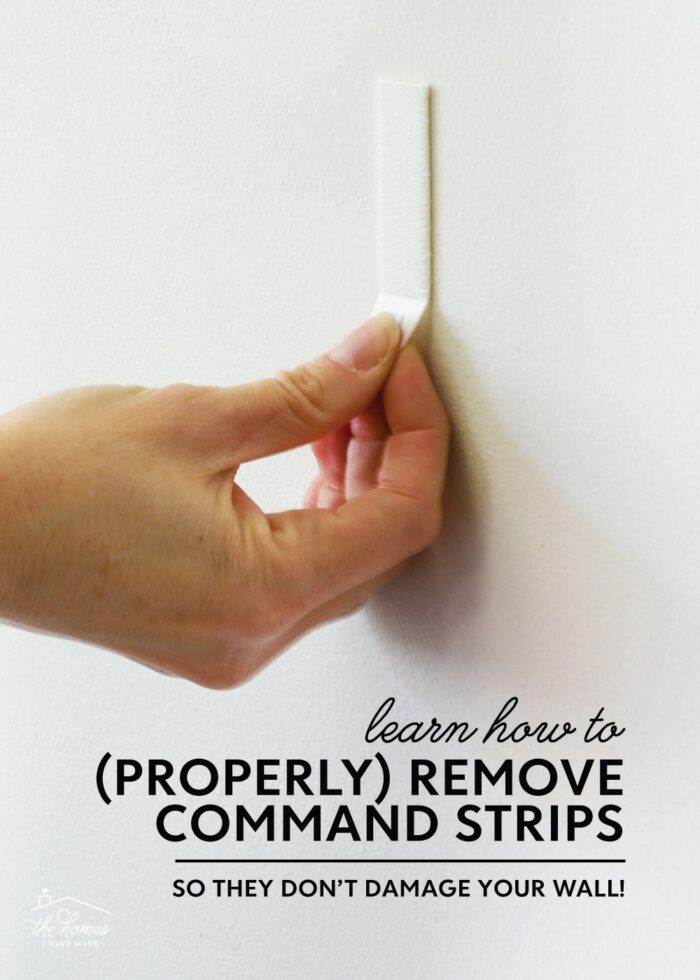
In order to take down the frame, you will first need to separate the two sides of the Command Strip: the side that’s stuck to the frame, and the side that is stuck to the wall. To do this, wiggle the tips of your fingers under the bottom corners of the frame.
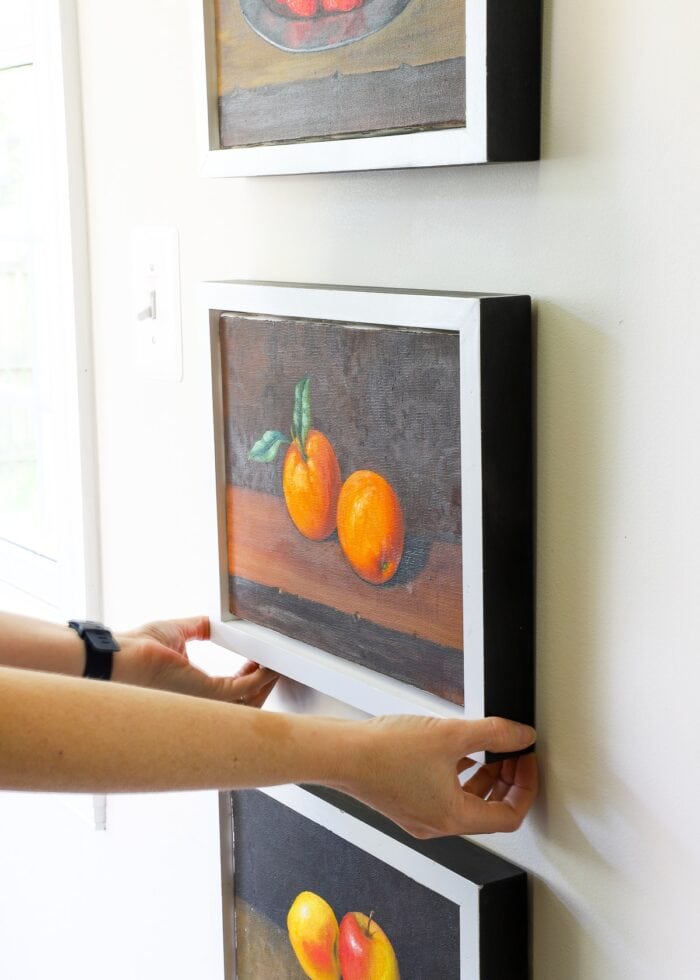
Then pull the bottom of the frame toward you, up-and-away from the wall. When you first pull, you will likely hear a “snap.” Don’t panic. This is the two sides of the Command Strip pulling apart (not the strips tearing off your wall!)
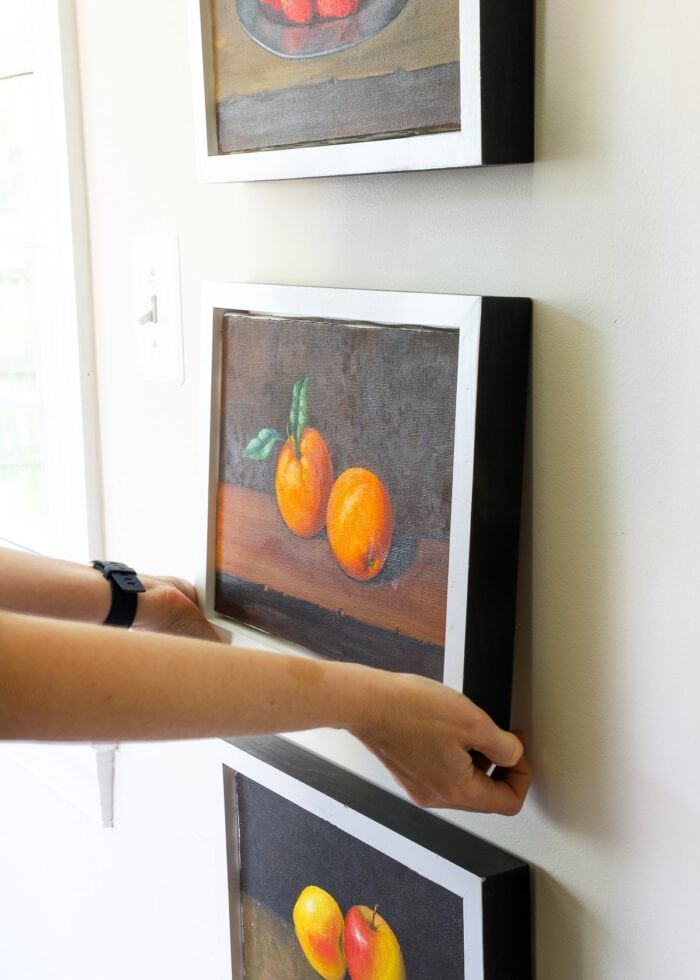
Keep pulling upward, using the top edge of the frame as a pivot point, until the Command Strips are fully separated and your frame is off the wall.
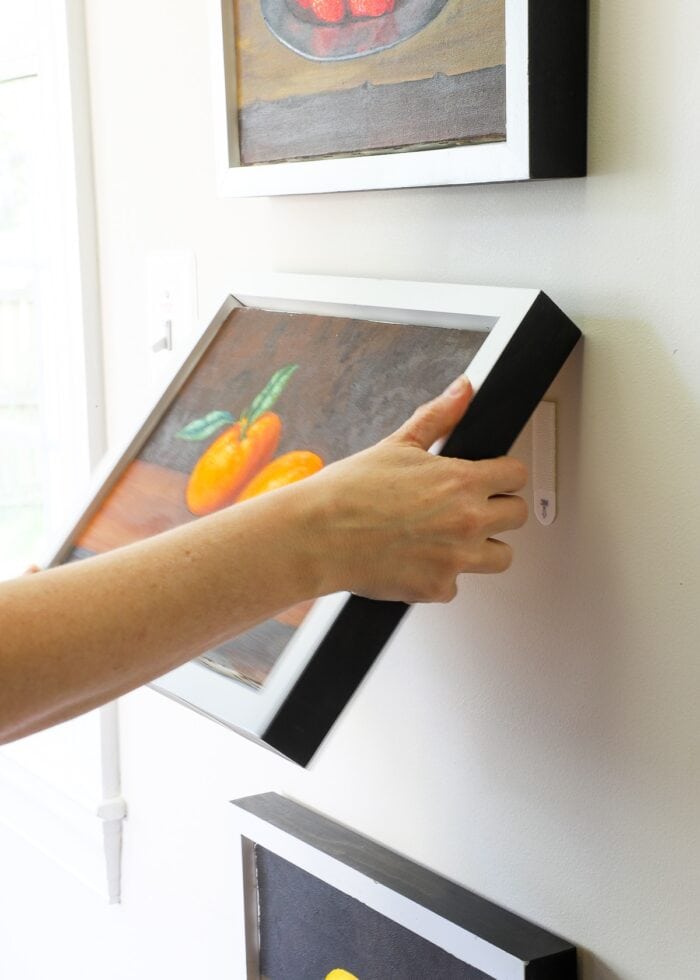
Pulling the frame off the wall like this ultimately allows the two halves of the Command Strip to separate cleanly, leaving one half on your frame and one half still stuck to the wall.
Part 2: How to Remove Command Strips (Properly)
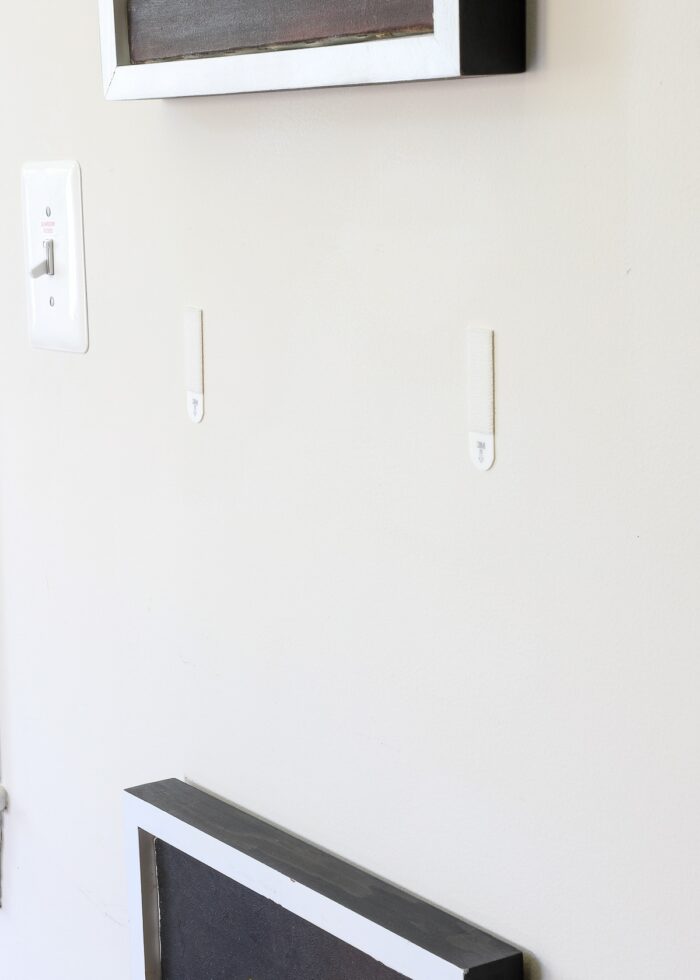
Phew! With the frame off the wall, you are halfway there. But removing the sticky strip(s) still attached to the wall is where most people get into trouble.
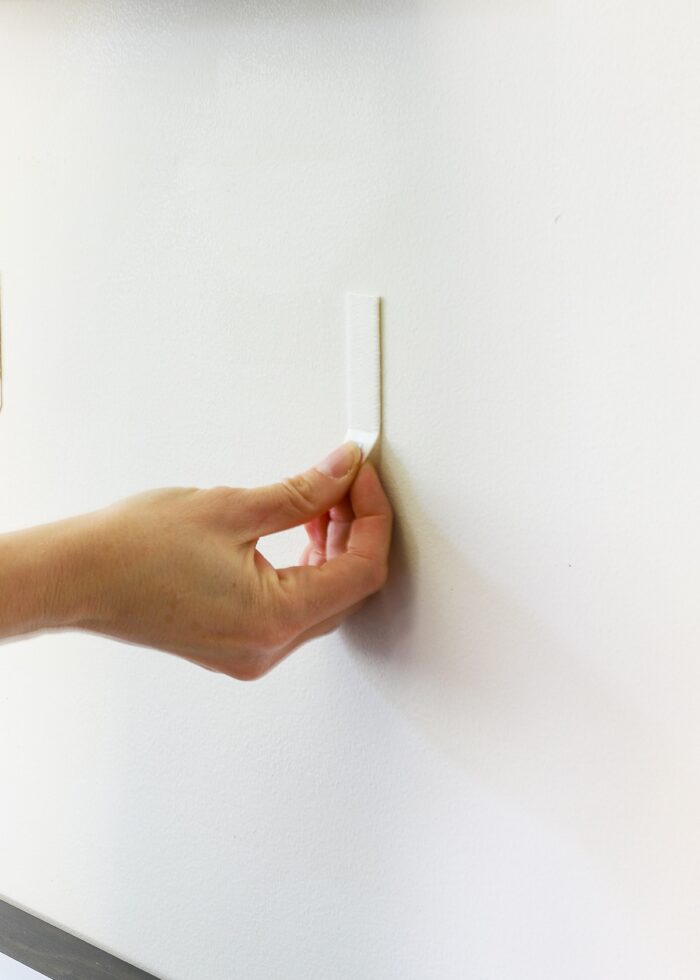
Resist the urge to grab the loose tab (at the bottom of the Command Strip) and pull or peel up.
Want to save this post?
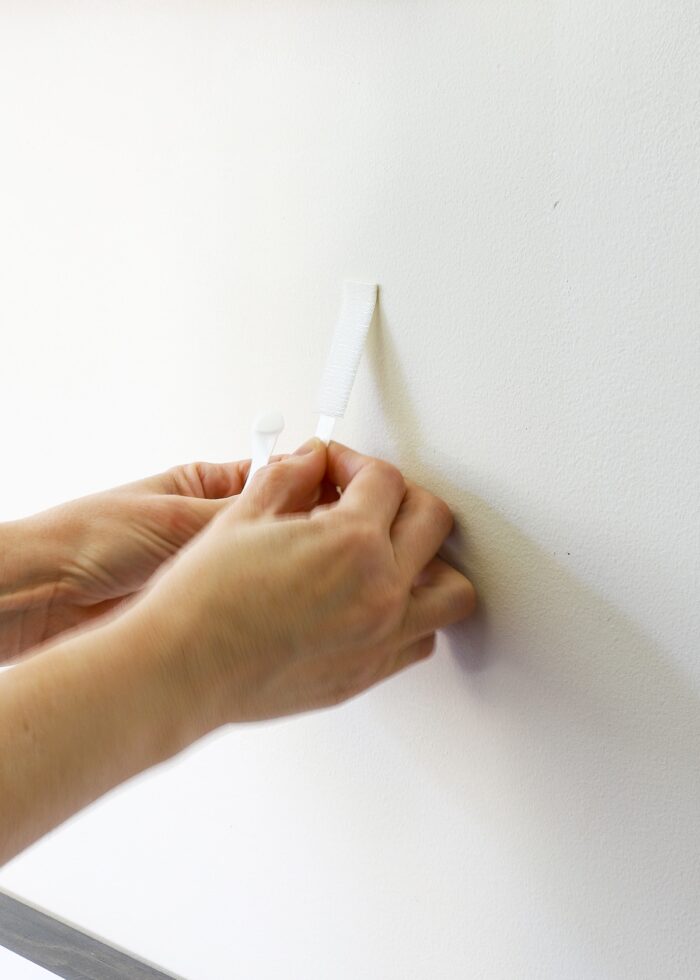
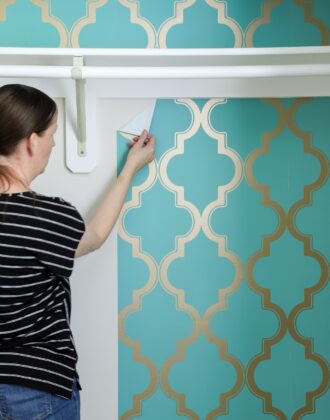
Instead, grab the loose tab and pull straight down, letting your hand skim down the wall as you pull, if possible.

Most people have problems because they stop pulling too soon. The adhesive bond under the “Velcro” strip will eventually stretch very long before the hook releases from the wall. If you need to reposition/cinch up your fingers/hands as the strip stretches longer, do so. But no matter what, continue to pull straight down.
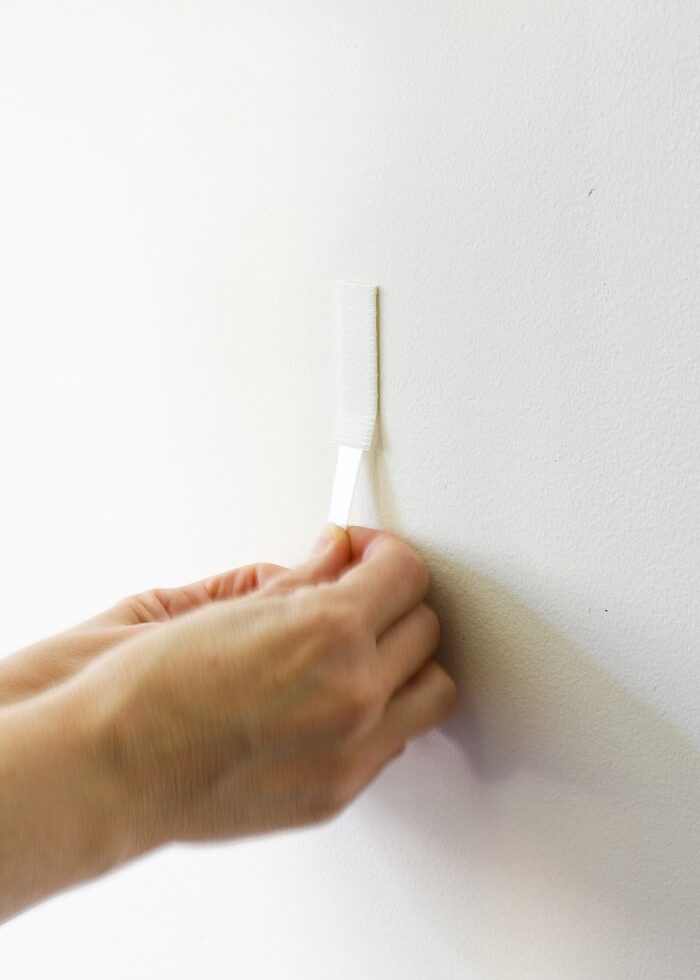
As you pull the stretchy strip down, you will see it detaching from the wall underneath the Command Strip. This is what you want. Keep pulling straight down until the final edge suddenly “snaps” off the wall cleanly!
As long as you keep pulling in a downward motion, the entire strip should come off the wall without peeling paint or damaging dry wall. There will be no slippery residue, no remnants of sticky strip…in fact, you shouldn’t be able to tell anything was there at all.
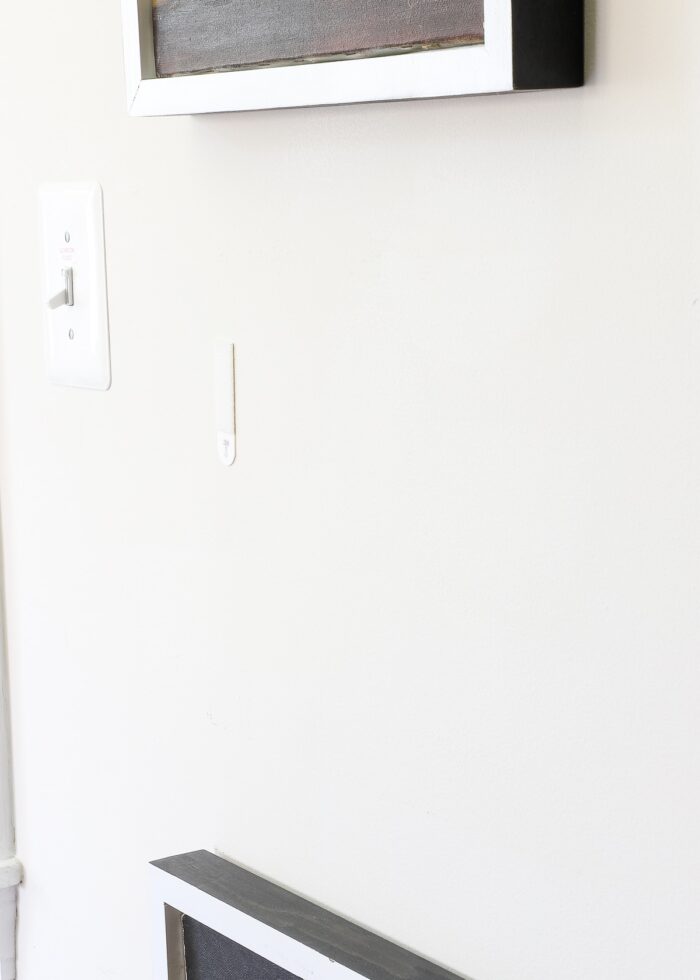
These four frames hung in our dining room for three years, and all of them came down perfectly using this exact method!
Watch the Video
Still having trouble understanding how the downward pull releases the Command Strip? Watch how the onion print came down in the short video below. (Video not loading for you? You can watch it HERE.)
FAQs About Removing Command Strips from the Wall
Do Command Strips Damage Walls?
If you pull the Command Strips up (instead of down) or ignore the pull tabs all together, yes…they can damage your walls. In my experience, the worst they will do is peel up the top layer of paint. I’ve never had Command Strips pull up drywall.
What To Do If a Command Strip Snaps
The most common problem you will encounter when removing Command Strips is that the sticky strip can snap, making it much more difficult to pull down enough to release the entire strip from the wall.
If this happens, resist the urge to then just peel the Command Strip off your wall. Here is what I recommend instead:
- Check to see if there is still a tiny bit of the sticky strip (under the Velcro strip) that you can grab onto. If you can grip onto it, resume pulling down as shown above.
- If you can’t pull any more strip, grab your hairdryer or heat gun to apply some focused-but-intense heat on the Command Strip. With the adhesive softened, you can then likely peel off the strip without damaging your walls. In this instance, you will have better luck peeling the strip from the top down to the bottom.
What To Do If Command Strips Damage Your Walls?
If you follow these proper removal techniques, you shouldn’t end up with significant damage to your wall paint. If necessary, a little perfectly-matching touch-up paint can help cover small spots.
However, if something really goes awry and you end up with a large strip of peeled paint, you can use my Hole Patching Instructions to fix it.
Can Command Strips Be Re-Used?
Yes and no.
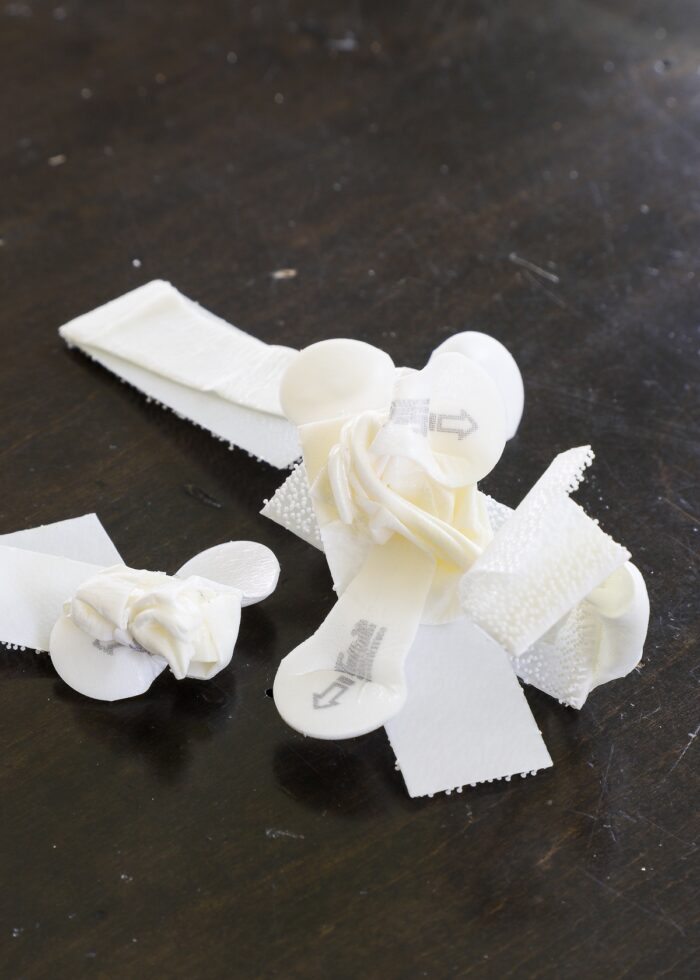
When you pull the Command Strips off the wall (pulling the tab waaaaaaay down), they will distort and stretch significantly, rendering them essentially useless. Any strips from the wall side should just be thrown out.
However, the other half of the Command Strip is a different story!
When you lift your frame up and away from the wall, the (half) Command Strip will most likely stay firmly affixed to the back of your frame. If you plan on re-hanging the frame in another spot/home, there is no need to remove it. The two halves of Command Strips are identical, so you can just use a fresh half on top of the existing strip to re-hang the frame again!
I realize peel-and-stick technology is scary for a lot of renters (and even some home owners!) But keep this in mind: hanging frames using traditional methods (e.g., nails, wall anchors, etc) will absolutely create holes you will then have to fix/fill. So while there is always a risk of Command Strips damaging your walls, you have a better chance of them not compared to common hanging methods.
So I encourage you not to be scared of them. Just know the risks, follow the removal instructions, and exercise some patience when taking them down. More often than not, you’ll never know your art was on the wall in the first place!
Megan

5 Comments on “How to Remove Command Strips (Without Damaging Your Walls!)”
If you ever try and like the Walmart brand ones, please update for your readers that buy everything you tell us to, in the hope that one day our house will be as organized as yours.
(I may still have an unopened Cricut in my craft room that I won’t let myself touch until I have my basement looking like yours in VA).
Hi Megan, I loved your idea of hanging curtain roads with command hooks. So I did it in our bedroom in Cuenca, Ecuador where we are setting up a condo. I took photo but I see you cannot upload it. It didn’t work probably because there is a big at least four inches lintel which I attached it to. The curtain scrapes on the wood, so it didn’t work. I was very disappointed. But that is life. I still think out is a great idea. I am a photographer so I am going to hang my canvas art here on the walls with command strips.
Not going to lie, that reassurance at the end gave me the drive to actually try out the command strip + hook. Thank you Megan, and you’re absolutely right; small risk is better than guaranteed damage from nails, etc.
I finally used Command strips, and was worried about removing them. I searched online, and when I saw that you had an article and video, I knew I could rely on your advice (since I am a regular reader of your blog.) I followed your directions, and easily removed the white board from my mother-in-law’s nursing home room (she’s coming home!) with no damage. You would never guess it had been on her wall. Thanks, Megan!
There was a YouTube video about using Command Strips to install a smoke alarm to the ceiling. I tried it and the Command Strip pulled off the drywall. I called Command Strips (3M) and they said you’re never supposed to use Command Strips on the ceiling, although their packaging does not mention this. They refunded the cost of the Command Strips, which was about $4, but I have a hole in the dry wall that would probably cost $100 for someone to fix it.