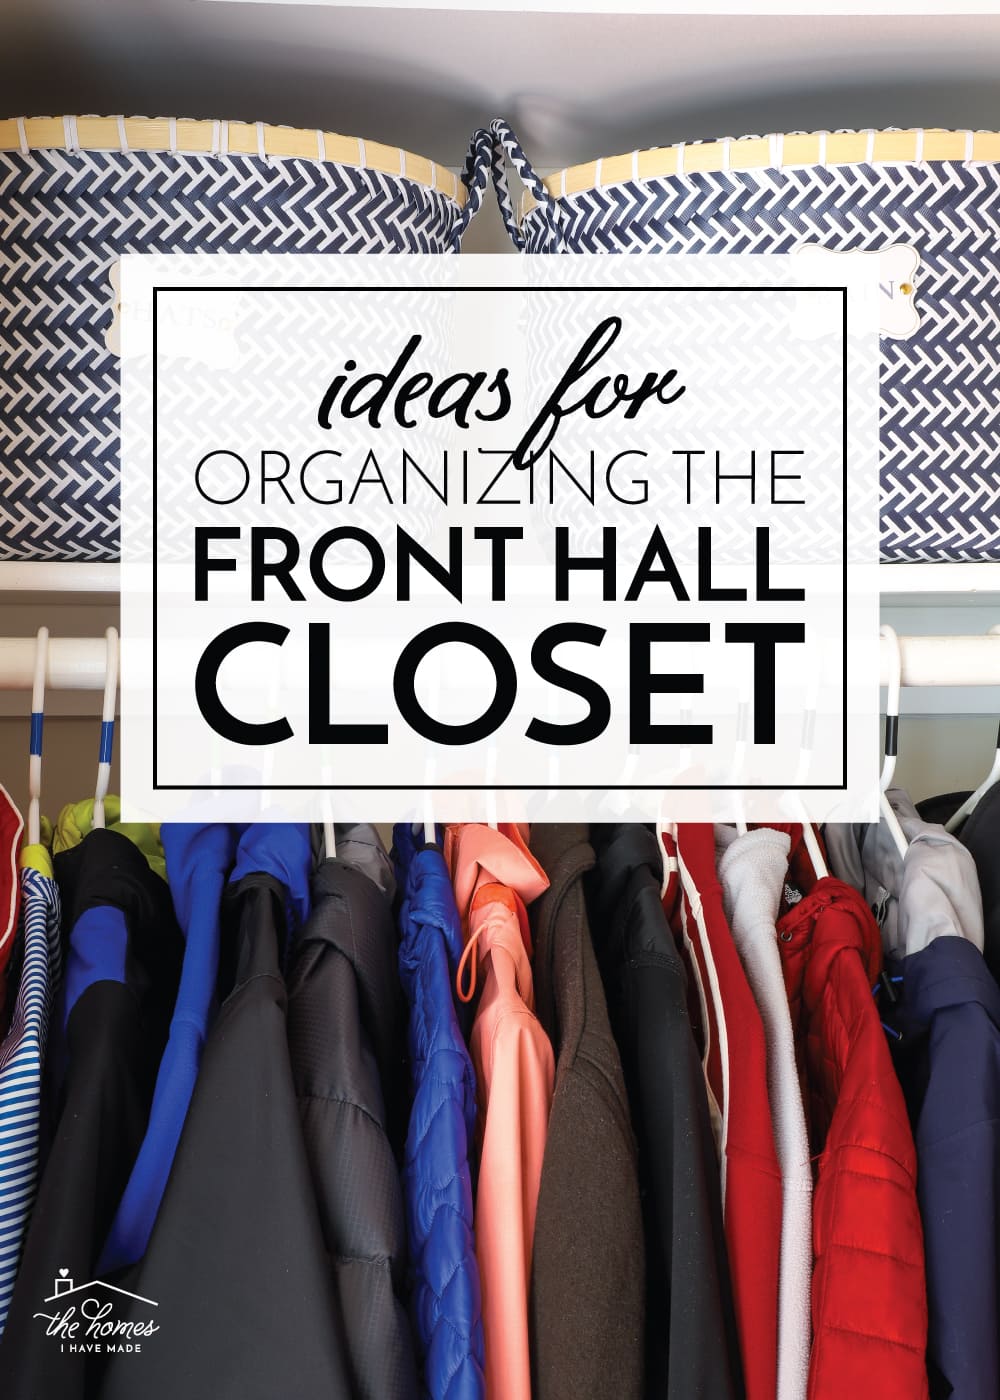
Ideas for Organizing the Front Hall Closet
Little by little, I’ve been working my way through our first level, streamlining, organizing and decorating each and every space. One spot that has needed the very most attention since the minute all the boxes were unpacked last summer was our front hall closet. Transitioning from a massive foyer full of storage in our California home to this single coat closet was a challenge in and of itself, but then we were also accessing cold and wet weather gear far more than we were used to. All that combined with the lack of good storage systems led to a complete and total disaster, as well as a lot of exasperation and wasted energy every time we (dared) opened the door. Truth be told, organizing the front hall closet took just an afternoon, and we’ve been reaping the benefits of more function and less chaos every day since. Let me show you everything I did to get this small closet functioning for our family of 5!
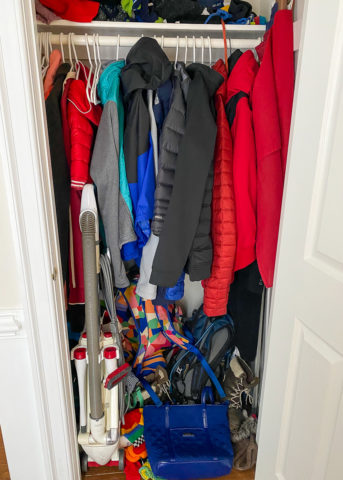
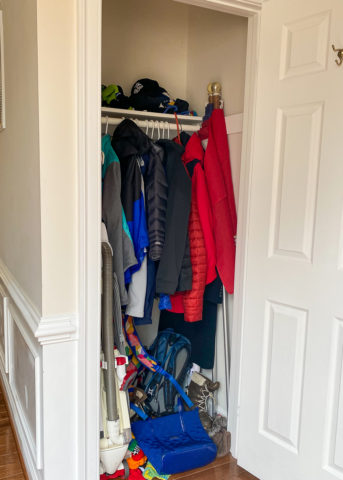
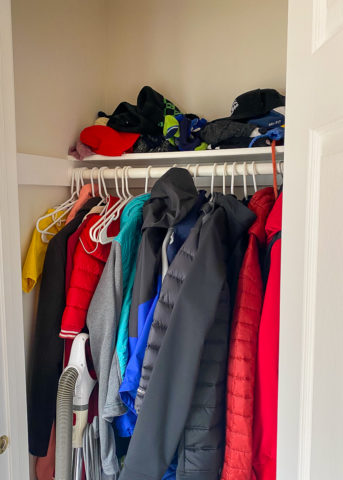
The Front Hall Closet | Before
Let’s start with some embarrassing before photos, shall we? Once the moving boxes cleared, everything that “logically” went in this closet landed here. However, I never really got around to adding baskets, shelves…anything…before Jack was born, the holidays, etc. As a result, the disaster just grew. Getting anything in/out was a total pain, finding the right hats/gloves for each person was an exercise in perseverance, and the lack of any storage system meant everything was stuffed…literally…on the floor.

Since I interacted with this mess multiple times a day, I knew intimately what needed to be fixed. As such, I had four main priorities when organizing the front hall closet:
- The closet needed to store the items we use daily (e.g., coats, hats, gloves, umbrellas) in a very accessible way.
- The floor needed to be clear so that getting the vacuum and ironing board in/out was possible/easier.
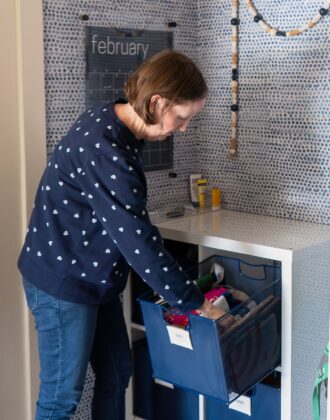
- We needed a dedicated spot for the diaper bag since it was always landing on the kitchen/family room floor and getting tripped over.
- We needed to be able to easily close the closet door.
I knew by taking better advantage of both the back of the door and the space above the existing shelf, I could accomplish all four of these goals. Here is where we ended up!
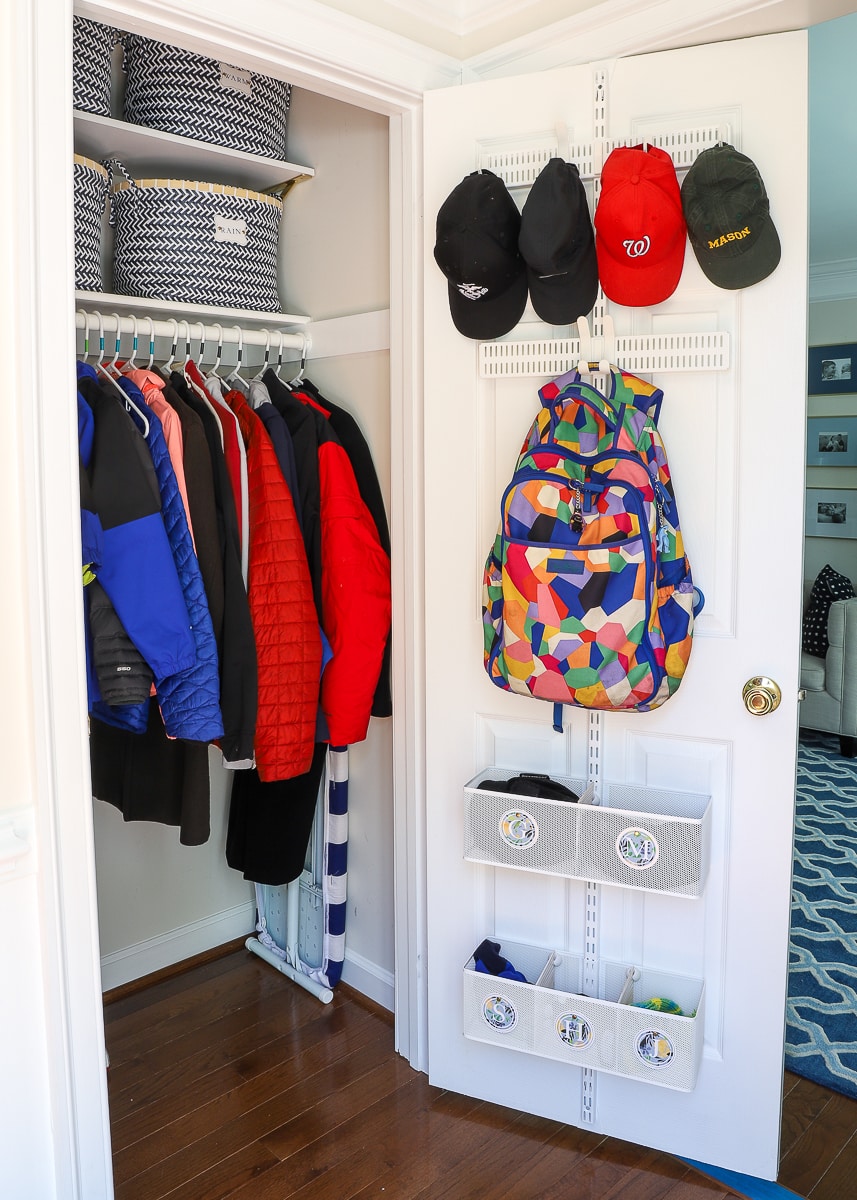
Yes, I sure do love how neat and tidy this closet looks, but the greater reward has been the positive impact of less stuff and better storage. After months of wrestling items in and out of this space, it’s such a treat to have a place for everything and everything in that place. Annnnd…the door closes without curse words. That alone is a huge victory! Let me break down what all we did!

Utilize the Back of the Door
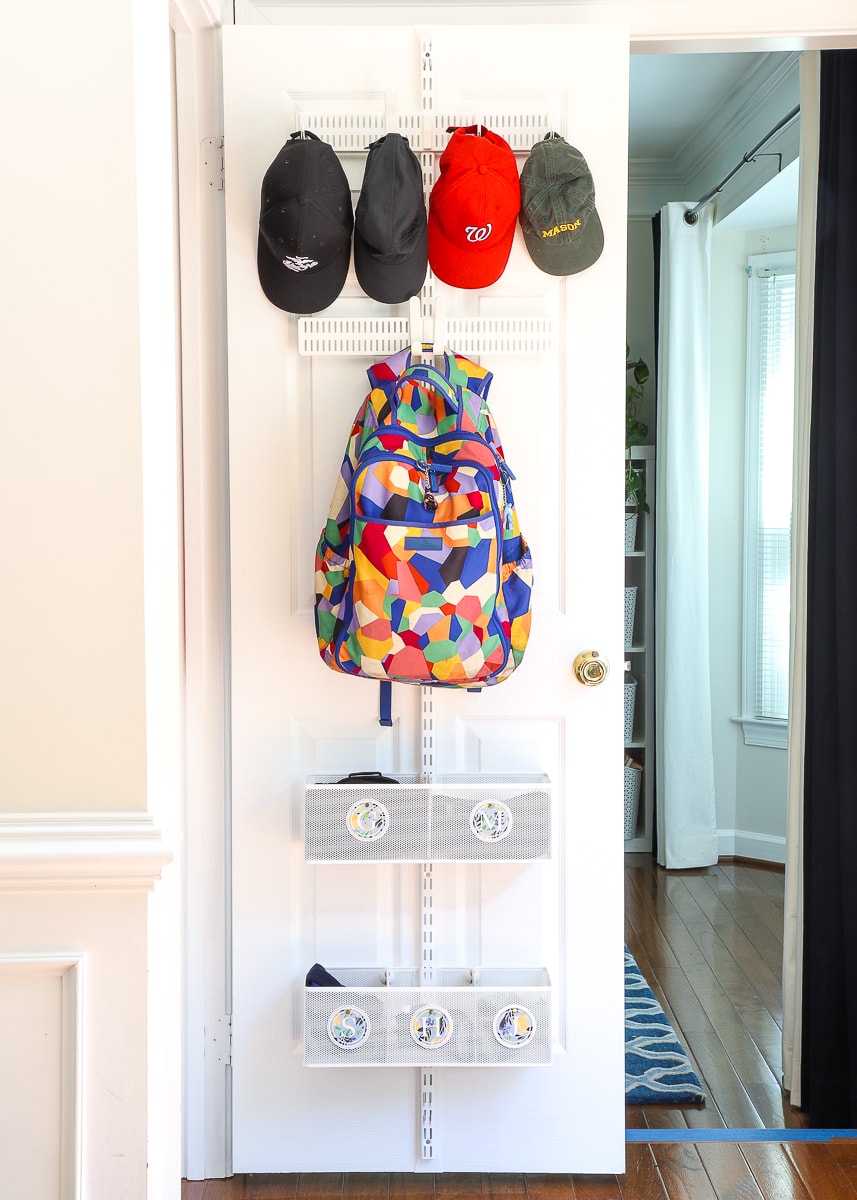
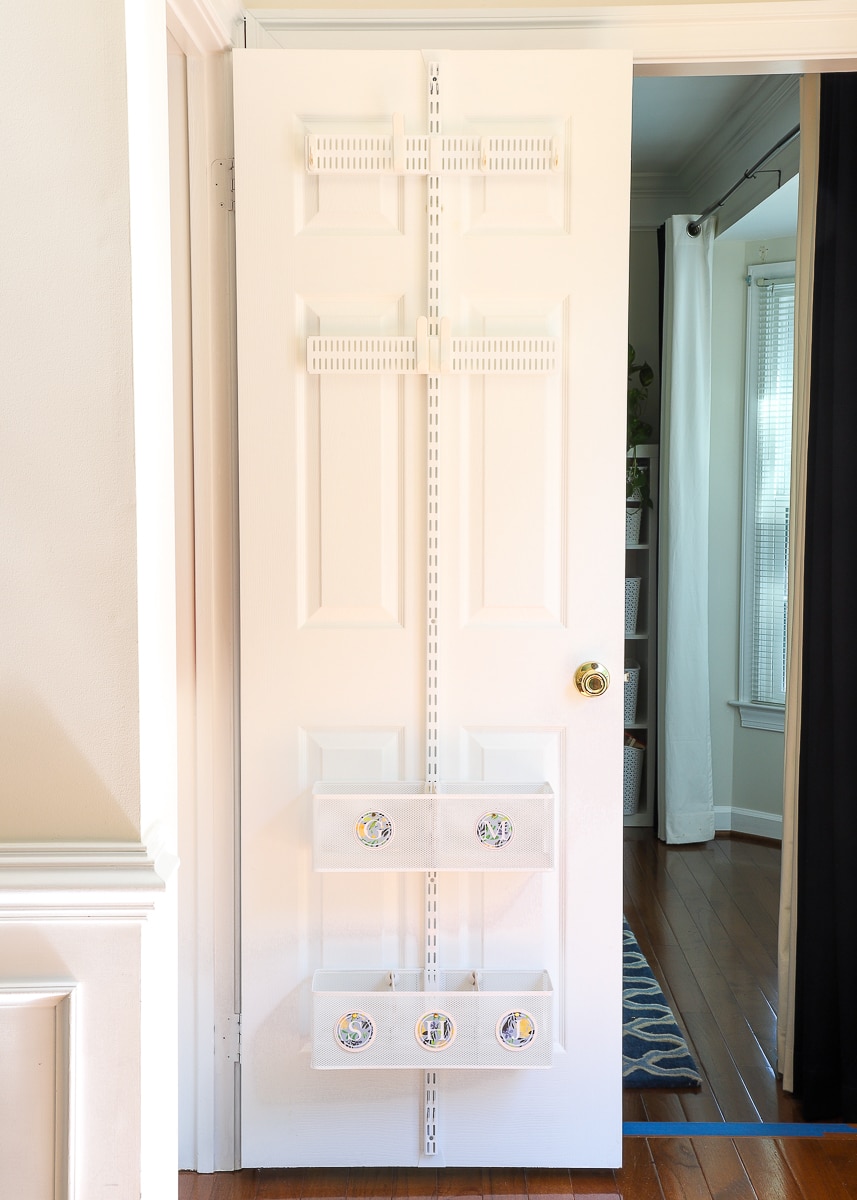
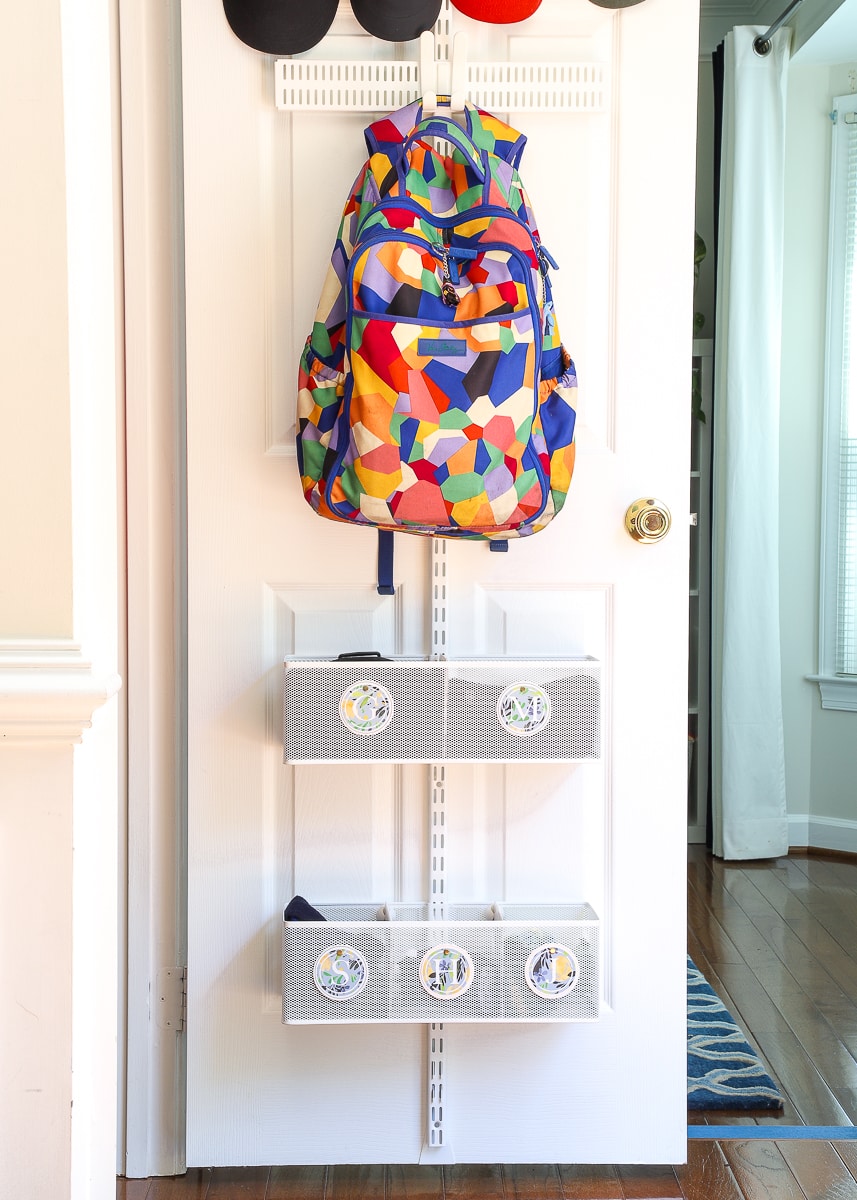
As I said before, we transitioned from a foyer with 16 storage cubbies to this single closet, so I knew I’d needed to carve out some additional storage somewhere. Since I really wanted an easy way for each family member to grab their own hats/gloves/sunglasses as we are walking out the door AND I wanted to keep the floor clear, back-of-the-door storage was the obvious solution.
I have long loved the streamlined look and impeccable functionality of the Elfa System (at The Container Store), but have never really had reason to give it a try. I knew they had lots of options for behind-the-door storage, and once I discovered these systems were 100% renter-friendly (it’s all hung via tension, no screws or drilling!!!!), I was totally in.
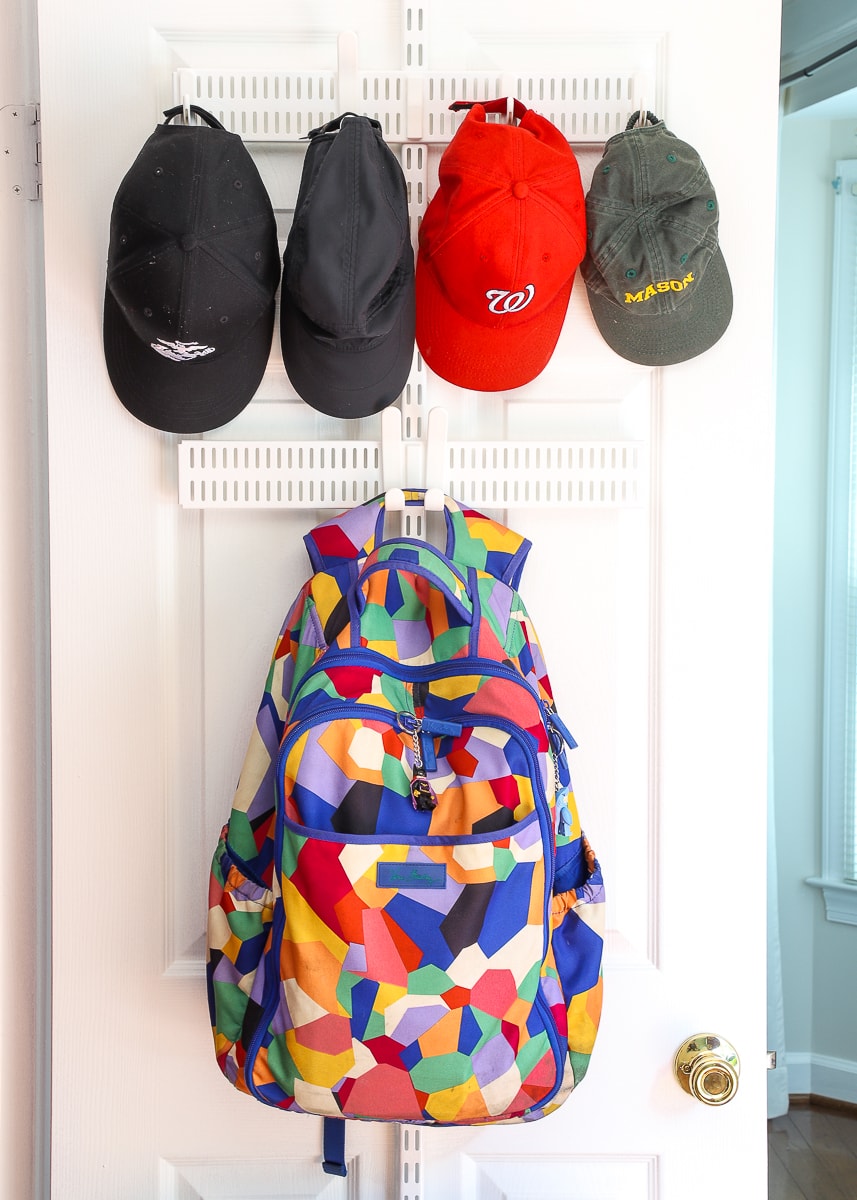
I evaluated aaaallll the various door options against the specific functionality we needed. Although I would have loved to trick out our door with every basket, board and hook available, my priorities were 1) spots for the most-grabbed items (hats, gloves, sunglasses, earphones) and 2) a spot for the diaper bag. I ultimately landed on this arrangement, but since I wanted it in white, I had to shop for each piece individually. Here’s what I bought:

With two 2.5″ tall boards outfitted with hooks, we were able to designate places for baseball caps and the diaper bag on the top half of the system. My original hope was to use a hook on either side of the lower board for both my diaper bag and Henry’s school backpack; but right now, there is no school backpack, so I am using up all the real estate.
I opted for the two deeper baskets on the bottom of the installation to give us each a mini “cubby” to catch those things we are always grabbing/leaving on the counter and floor.
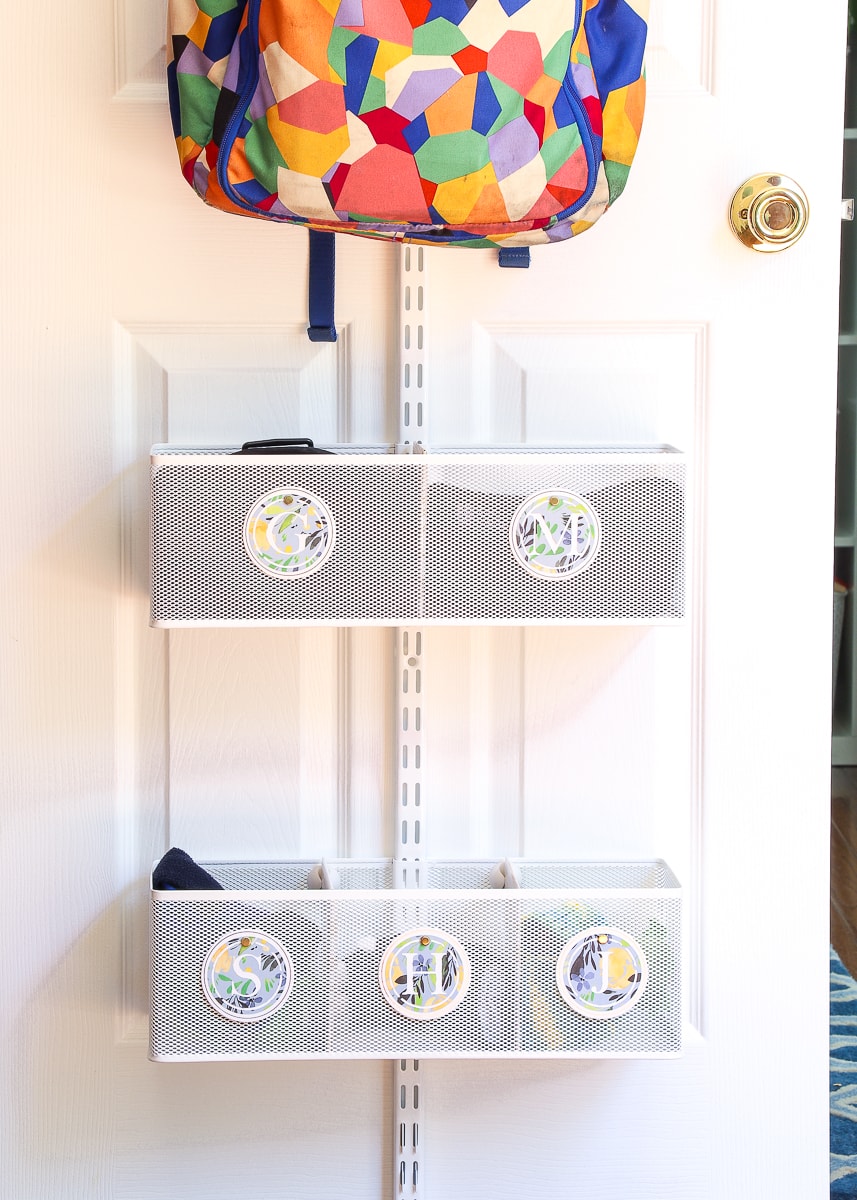
Since they are a generous size and positioned down low, my hope is that the kids will (ultimately) be self-sufficient as we’re getting out of the house. Right now, we still have hats and gloves in them because winter just doesn’t want to seem to leave, but other things like water bottles, earphones, phone holders, keys etc often land here as well!
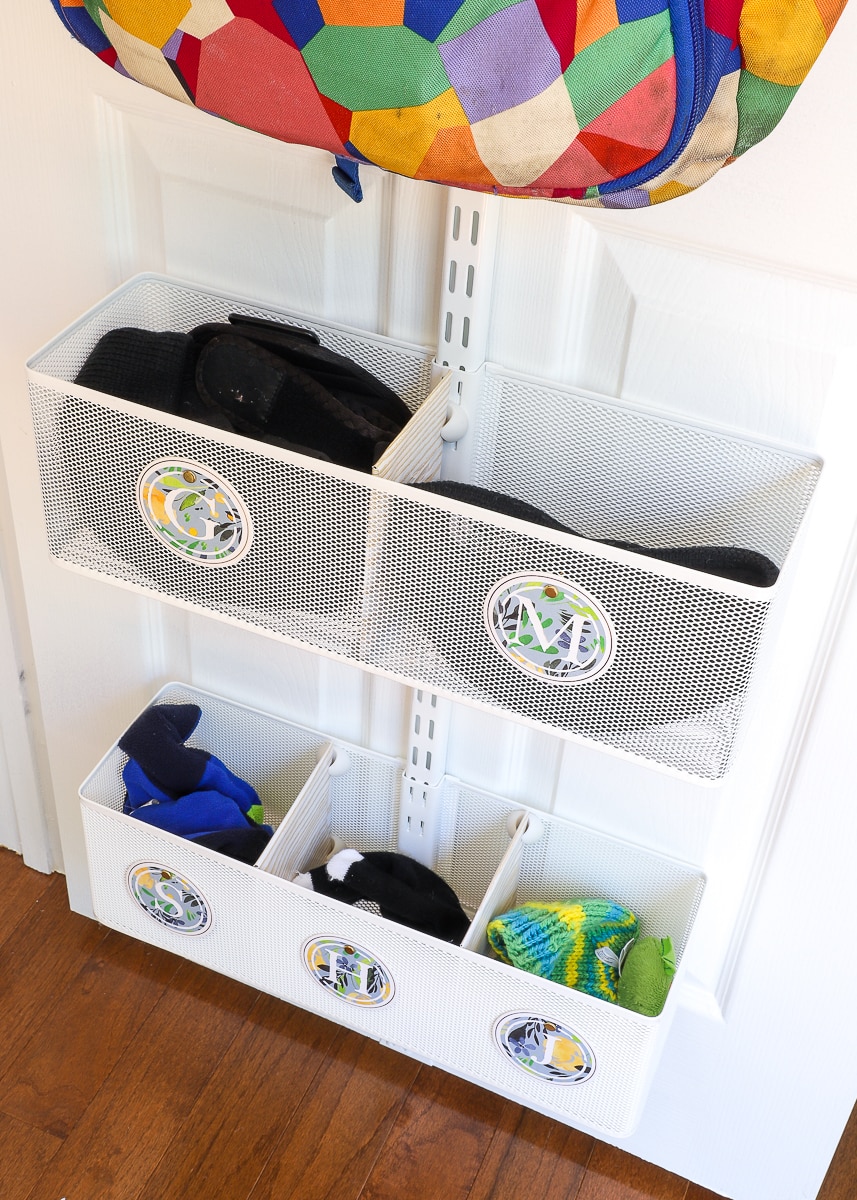
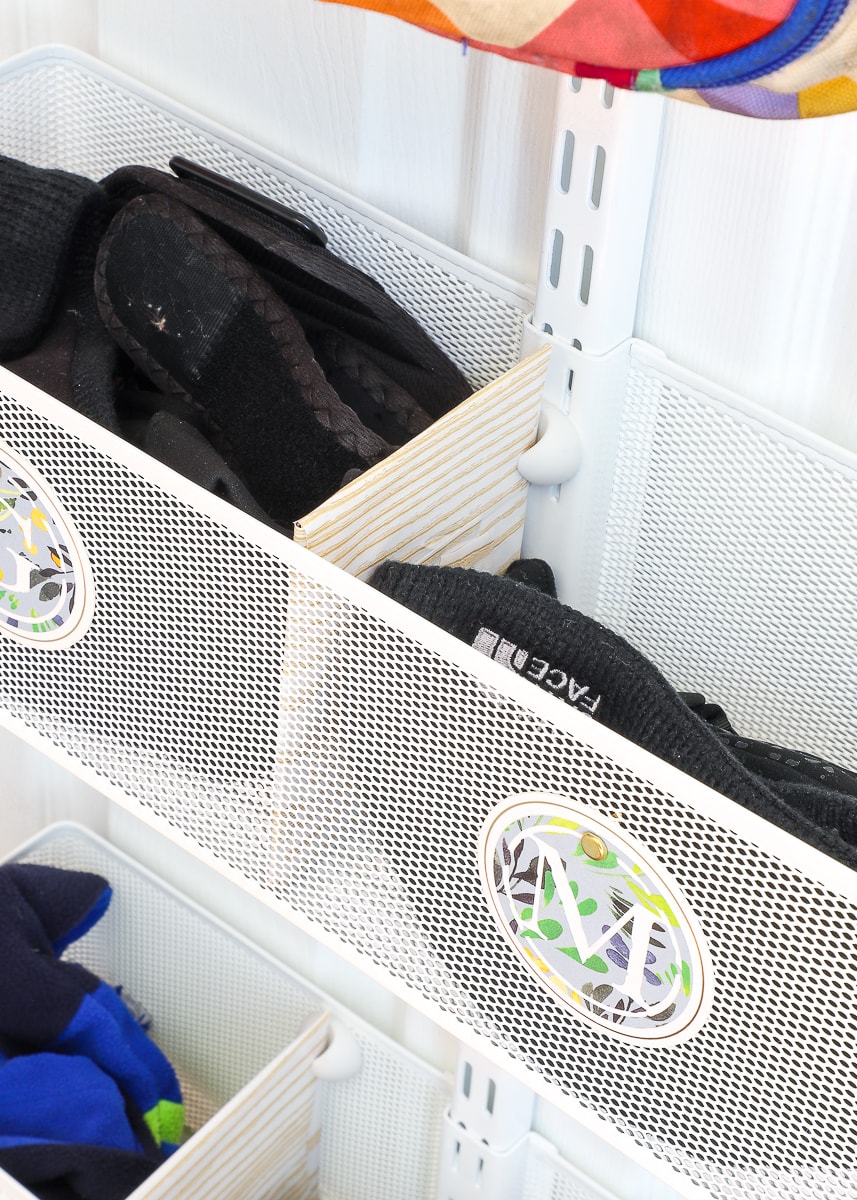
No, Elfa doesn’t make segmented baskets. I just used my trick of pairing cord holders and cardboard rectangles wrapped in pretty paper to make surprisingly sturdy dividers!
Want to save this post?
After installing this savvy little system (in about 15 minutes by the way!), our most-used items now had easily-accessible homes, so I could turn my attention to improving the look and function of the rest of the closet!
Take Advantage of All the Height
The other thing I did to help achieve my main priorities was to take advantage of all the empty space in the top 1/3 of the closet. For the life of me, I don’t understand why closets have a huge open space above the shelf. Nothing really fits “well” there, and you almost always end up with either 1) wasted space or 2) things stacked precariously on top of each other.
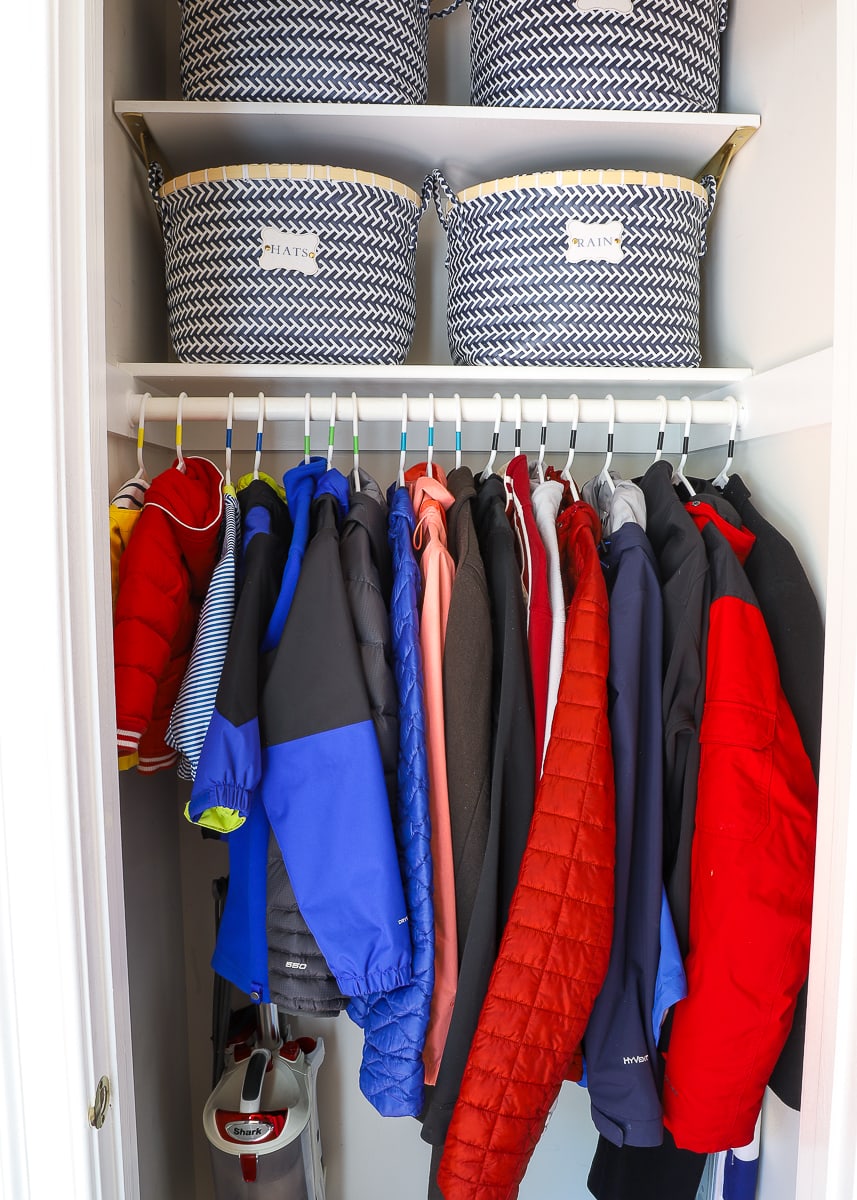
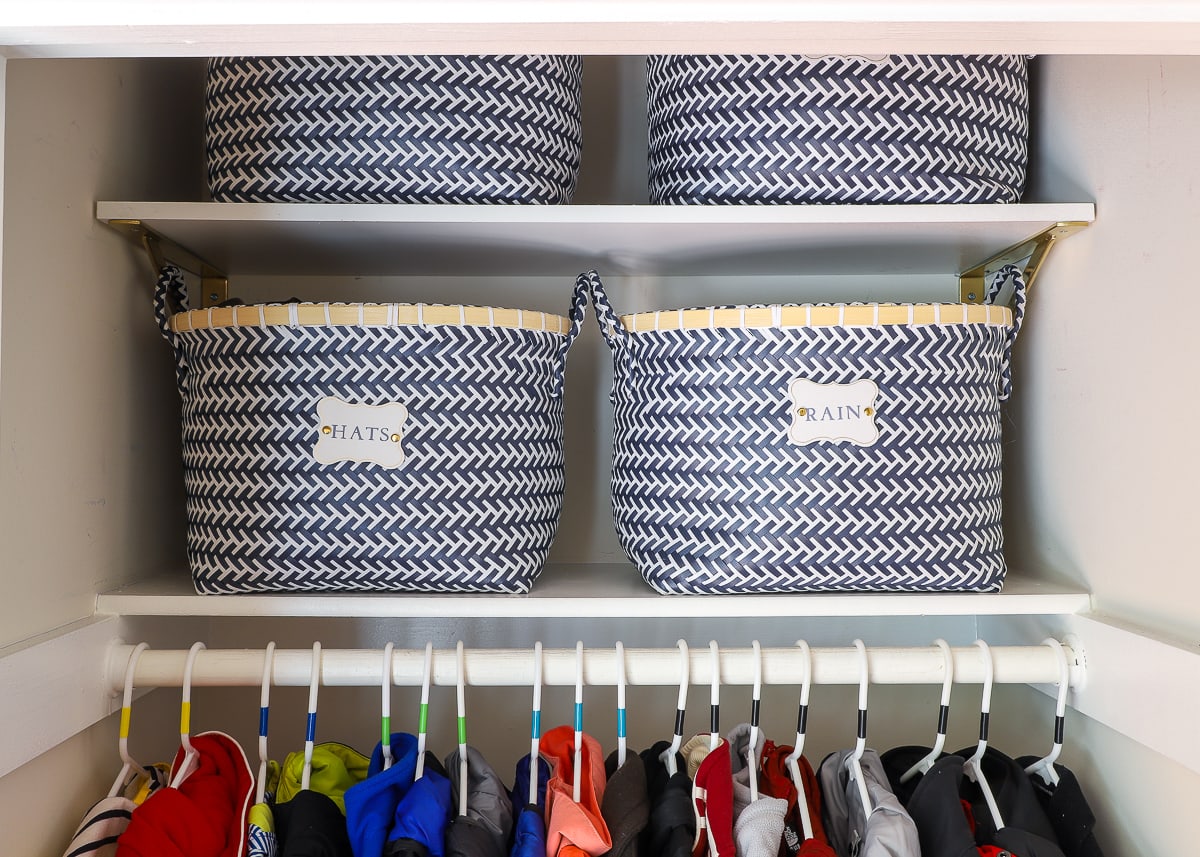
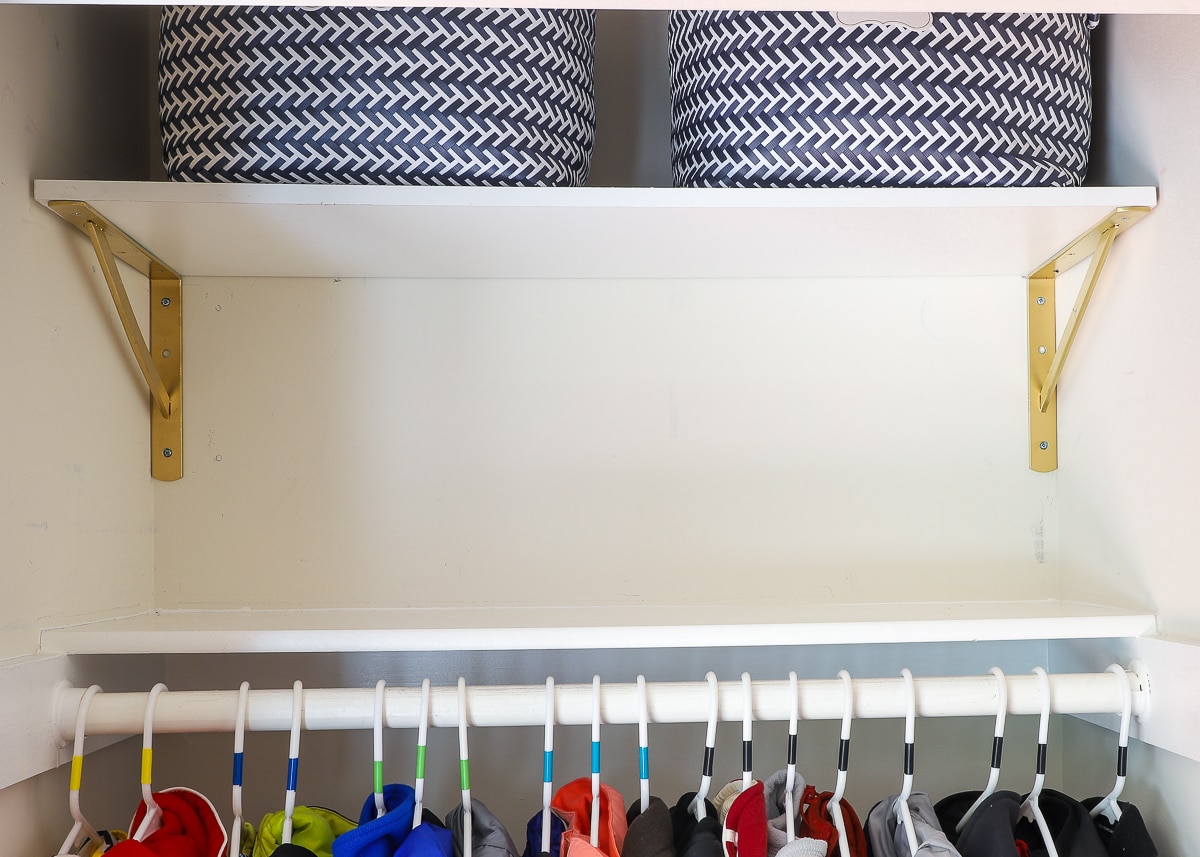
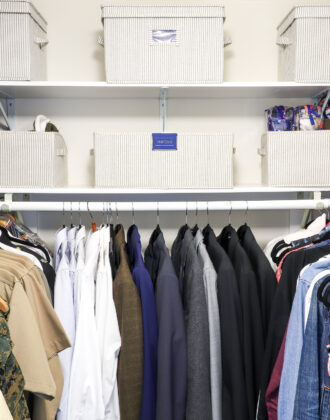
Adding a shelf halfway between the existing shelf and the ceiling meant that we could not only store things all the way up, but nothing was stacked on top of each other…ultimately making everything much easier to get down.
This shelf is nothing fancy. In fact, we’ve used these same brackets+shelves over and over in home after home. I did need to get a new board cut to fit the closet’s width; but otherwise, I just spray painted a pair of brackets we already had on hand.
When hanging an additional shelf using brackets, there are a few things you need to keep in mind:
- Place the shelves a height that will allow you to store what you need to store. I wanted to re-use the blue baskets from our last foyer, and made sure there was clearance both above and below the shelf.
- If you are hanging a shelf with brackets, make sure their placement doesn’t interfere with what you want to place on the shelves. The only way for my baskets to fit was to place the brackets all the way against the wall.
- Make sure you have clearance depth-wise between the shelf and the door frame to get items down. If the shelf is too deep, it will be too complicated to get items up/down, defeating the purpose of putting a shelf up there in the first place.
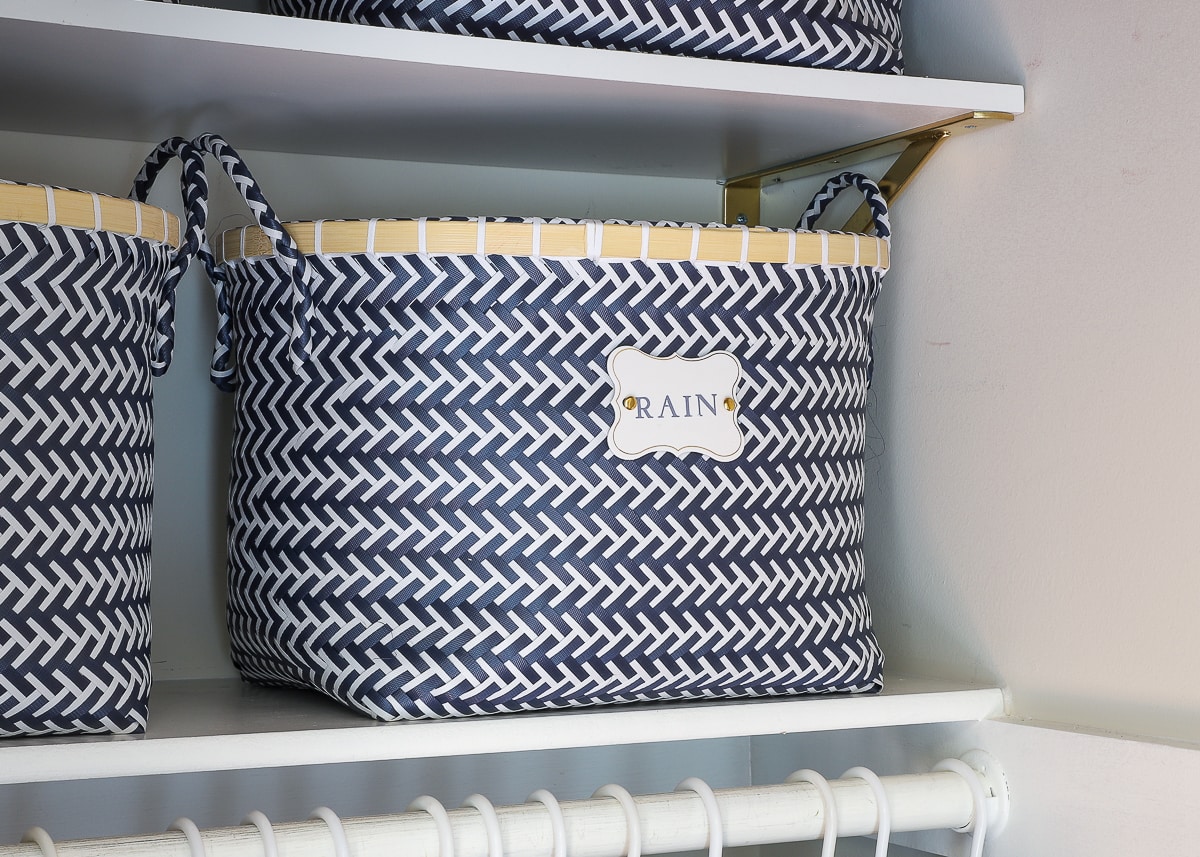
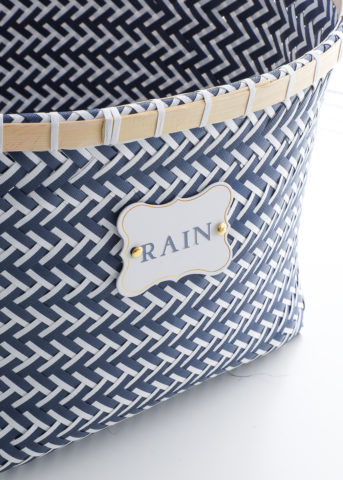
This extra shelf is high, so we primarily use these baskets to store things we don’t need super-frequent access to. Currently, the Hats and Rain baskets are down low, and the Warm (gloves, scarves) and Swim baskets are up higher. As the seasons change, we can swap baskets to the lower shelf as needed.
Hang What Is (Really) Used
Finally, let’s chat quickly about what the closet is really intended for: coats! Having lived in CA for the past few years, we had gotten really out of the habit of needing various coats based on the weather. So when we first moved in, we put every last coat we owned in this closet. But the reality is, we each tend to grab the same few coat for various weather events (e.g, cold weather, rain, workout, etc). So we all purged down our coats to the ones we really wear and now only store those in this closet. This quick “get real” decluttering session reduced what’s stored here down to a much more manageable level.
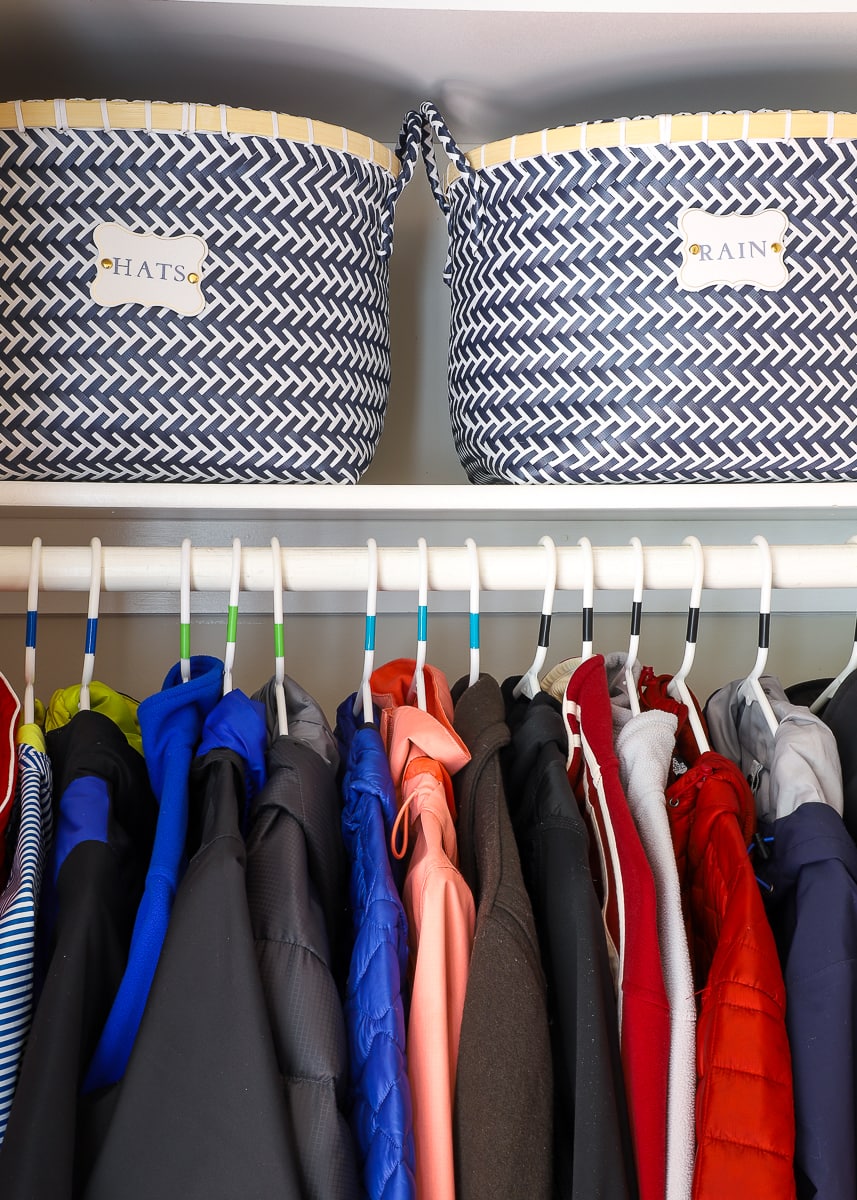
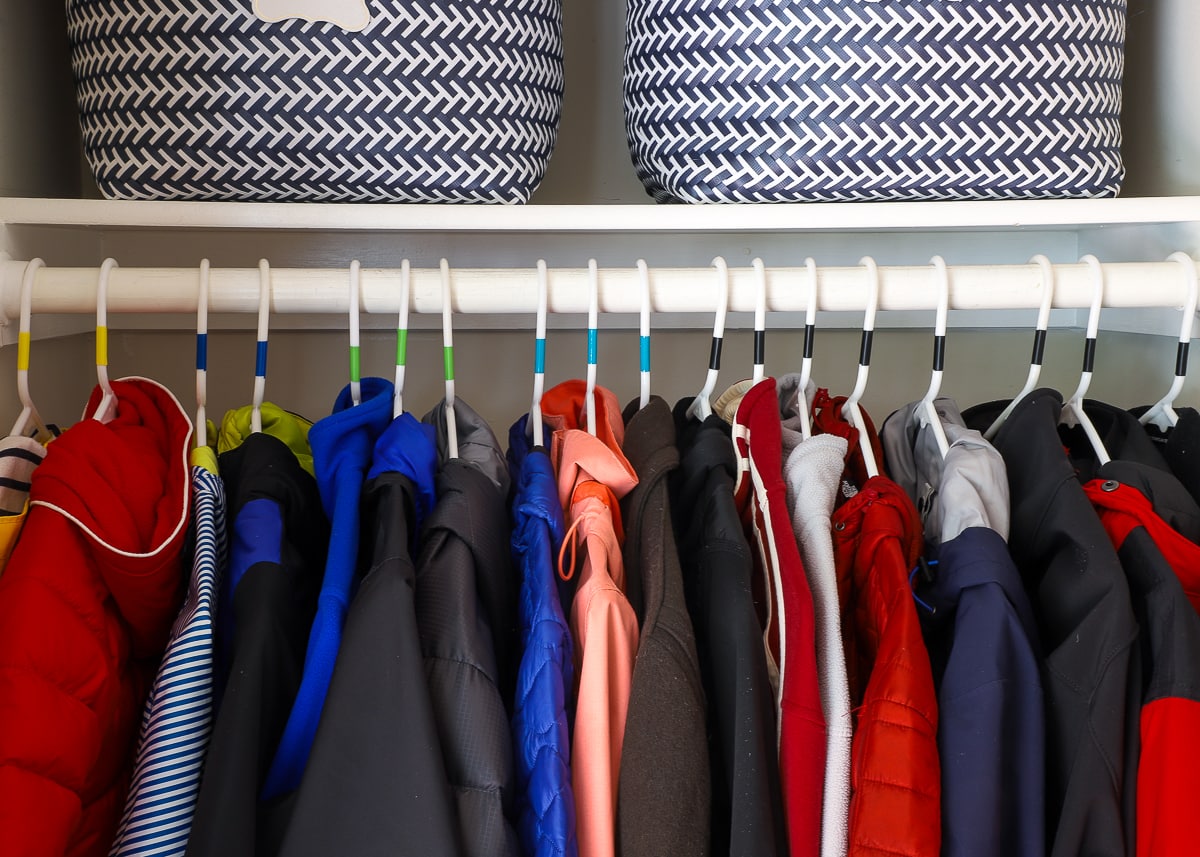
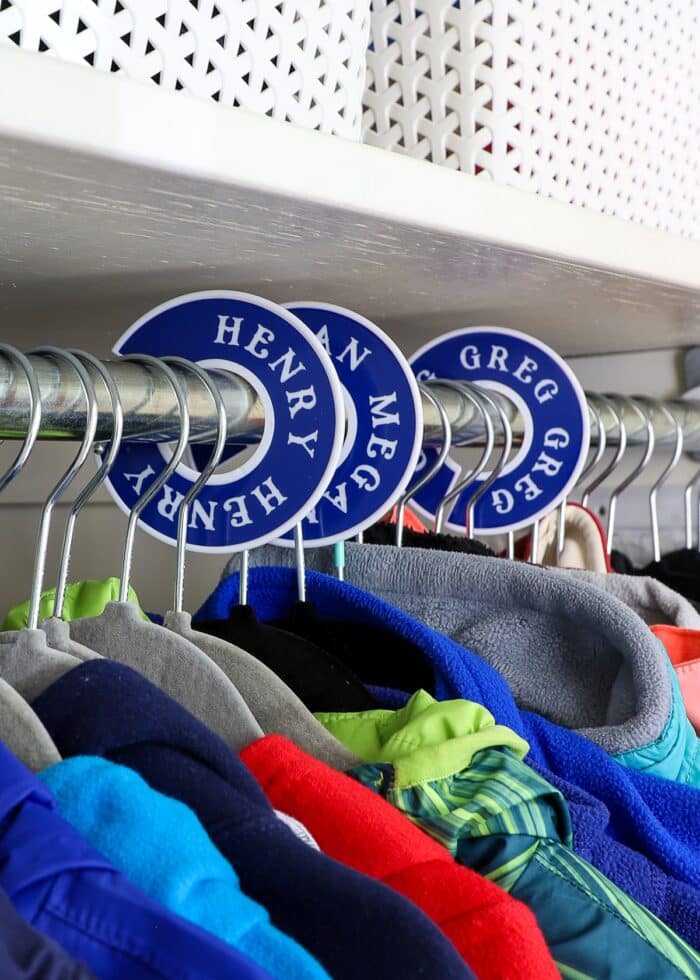
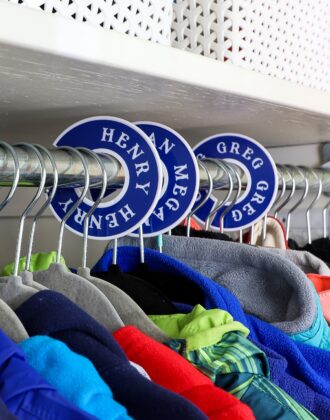
We have three boys…and we somehow have lots of blue coats. While it might seem a bit silly, we were having trouble with the right person grabbing the right coat (especially when we were hurriedly trying to get to the bus stop). So that each person can quickly and easily identify which coats are theirs, I wrapped small scraps of color-coded vinyl around each hanger. This not only identifies the coats, but also helps us to quickly group the same person’s coats all together if the closet gets jumbled!
Psssst – I just implemented a NEW solution for separating out our coats, see it here: Round Closet Divider Labels with a Cricut (+ SVG File)
Label Love
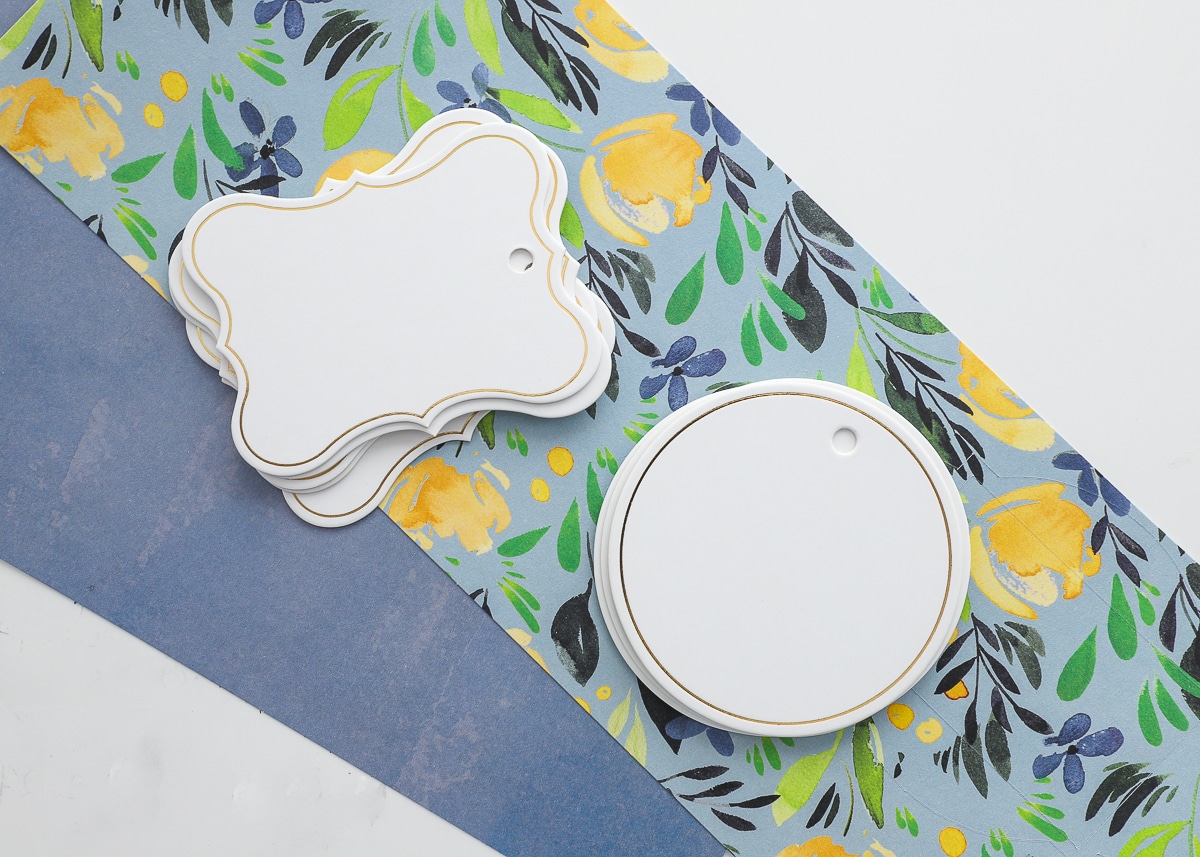
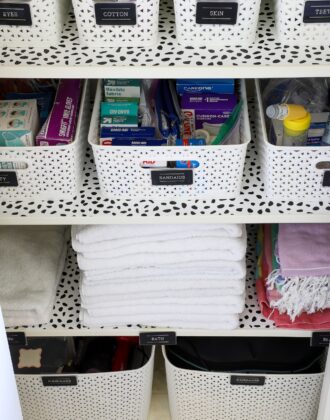
With the blue baskets being opaque and the white cubby baskets being prone to confusion, labels were a must. I simply used some of my favorite white+gold tags from Michaels and labeled them with words/monograms cut from Adhesive-Backed Paper on my Cricut Joy (you can see how I did it here).

Other Closet Problems Solved!
Looking for more great closet organization solutions? Check out these other posts full of tips and tricks for getting the most out of your closet spaces!
- Bathroom Closet Organization Ideas
- Master Closet Organization Ideas
- Front Hall Closet Organization Ideas
- Nursery Closet Organization Ideas
- Linen Closet Organization Ideas
- Laundry Closet Organization Ideas
- How to Put a Dresser Inside a Closet
- How to Put a Dress-Up Station Inside a Closet
- How to Turn a Closet into a Mudroom Drop Zone
- How to Max Out the Available Space In Your Closet
- DIY Round Closet Dividers
- A Clever DIY Shoe Shelf for Your Closet
I said it already but just to reiterate…I really should have done this closet makeover so much sooner. At least before winter when we were digging through it every.single.day. Now to have it so easy-breezy and functional is such a game changer. This project was such a great reminder to me (and hopefully to you!) that the benefits of organizing projects are almost always increased time and reduced frustration…well, the good looks certainly don’t hurt either 😉
Megan
22 Comments on “Ideas for Organizing the Front Hall Closet”
This is beautiful! I love my over-the-door Elfa system for my entryway closet. I do have one question, though. Have you had any trouble with the hooks falling out? Our small hooks are constantly falling out and I’m wondering if I somehow installed them incorrectly. I think you just kind of push them onto the rack, but maybe I’m missing something.
Hi Lisa!
So far so good on this side. And yes, you’re right, they pretty much just pop in. Maybe try installing a new set in case they’ve worn down a bit and aren’t holding as tight?
Sorry I don’t have more help here!Have a great week!Megan
This looks great! I have a question about the labels- what are the gold fasteners used to attach the labels to baskets?
Thank you.
Hi Vicki!
I usually just use brass paper fasteners…you know, from the office section 😉
I ran out though but had these on hand ( https://rstyle.me/+bBpG_gl95micZaBqCtBOMw )…they worked great too!
Hope that helps!Megan
Such a smart idea to install an extra shelf – I’m always in the stacking-things-precariously camp. Also, why do husbands always seem to have way more coats than other family members? 😛
Seriously 🙄 And this was AFTER he paired down quite a bit!!!!
The shelf has been a game changer for sure…something I will be doing in future houses!
Hope you’re having a great week!Megan
Must be a universal mystery. When my ex-husband left for parts unknown and I had to clean out his closet, I found 17 jackets and coats. 17! When I donated them to the homeless shelter, they thanked me for taking the time to hold a coat drive.
The closet looks great, Megan! I LOVE Elfa. I was a loyal Container Store customer for about 5 years before I decided to try it, and now I have some in every room. I rent also, so the freestanding shelves are amazing! Really clever way to make those dividers. I need to try that!!
Ha! I love this comment Theresa! Thanks so much for sharing your experiences! Yes, I really wish I had discovered the Elfa door systems sooner, would have helped me out in so many other homes! But now I’m wiser 🙂
Hope you’re having a great week!Megan
Such an improvement! I have a great front entry closet, but it’s not near our main door for entry and exit. I am still struggling to figure out the best way to get from the garage to the entry closet to get the family to hang things up (no room near the garage door – who deigned this house?!). I am going to see if I can use some of these ideas for both the closet and the limited room we have near the garage. Where do you keep all the shoes and boots?
Hey Nicole!
Admittedly, we have a similar problem. The front hall closet works great for catching items (when we come in the front door) but when we come in via the garage, shoes and coats definitely land in the kitchen/family room area until we intervene and ask everyone to put their stuff away. I wish I had a better answer about shoes. In general, we each only wear a single pair most of the time, so the kids shoes tend to sit right in a “hole” between our couch and wall (you can likely see it in our home tour post). It’s not perfect but it at least gets them out of the middle of the kitchen floor!
A catch-all basket might work right outside the garage door?
Good luck and keep me posted on what you figure out!Megan
Where are the blue baskets from? Thanks!
I haven’t seen your cord holders + pretty cardboard dividers trick before! BRILLIANT! And life changing! And I’ve always admired the ELFA back of door system, but never looked into because I assumed you had to drill into the door. So glad to know you don’t! Thanks!
I’m totally in the same boat – I dismissed the Elfa system for SO long because I figured it was screwed into the door. I now want them for pretty much every closet we have, lol!
Realmente HERMOSO y sumamente práctico; como todo lo que tu haces. Te FELICITO. From Argentina send you hugs
Wonderful ideas. Thank you for the inspiration.
Megan, THIS IS MY CLOSET!!!! You’re so smart!! I’m doing this! Thank you, thank you!!
Carol
Where did you get the blue and white baskets in this post?
Hi Rebecca!
I bought them a while ago at Target, and unfortunately are no longer available. These are the closest they have now, though the color and style is slightly different.
Sorry I can’t be of more help on this one!Megan
I’m curious what you store in the top two baskets! Just out of season items you don’t need to access?
Thank you for sharing your organizing tactics. You have convinced my husband to take on the hall closet.
LOVE this idea!! My closet looks just like your “before.” Sent to order the items from the container store. Wondering what hook you used for the backpack. The link took me to the small ones it looks like you used for hats but I don’t see the larger one. Also, what did you use as dividers for the metal baskets?
Thanks for the inspiration!!
What are the pieces you bought at the container store? It won’t let me click the link of what you bought exactly from there.