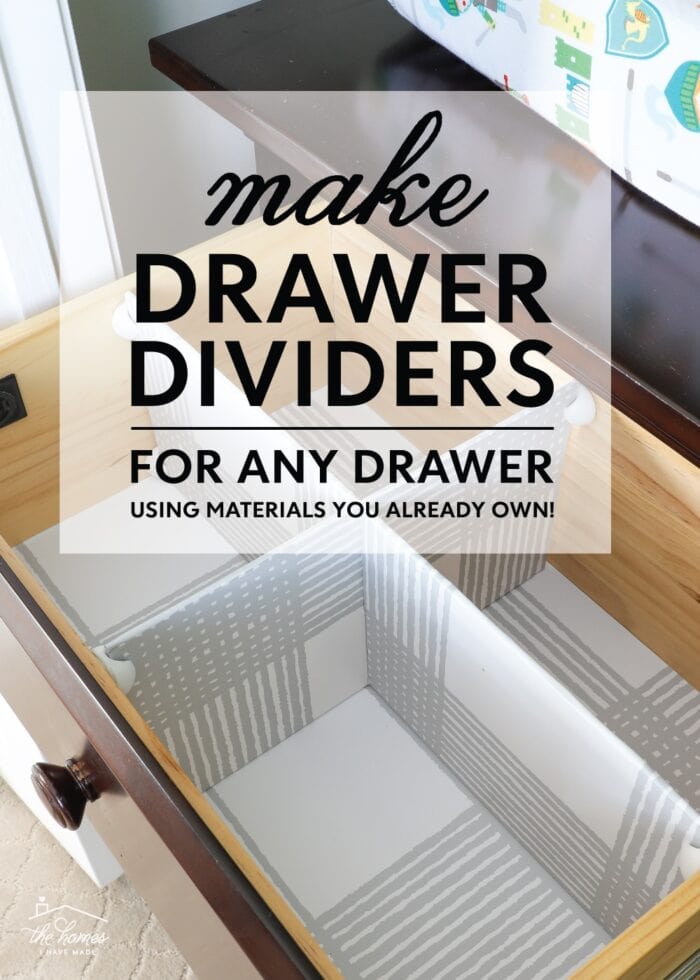
Easy DIY Drawer Dividers (Using What You’ve Got!)
Almost nothing beats a perfectly organized drawer. But since drawers come in all shapes and sizes, it can be tricky (and expensive!) to outfit each and every one with store-bought organizers. Thankfully, making your own is a quick and easy DIY project that works in any drawer, every time! Today, I’m breaking down my very favorite way to make DIY drawer dividers…a process I’ve perfected across (at least) 5 different sets of drawers! Let’s get to it!
Why DIY Your Drawer Dividers?
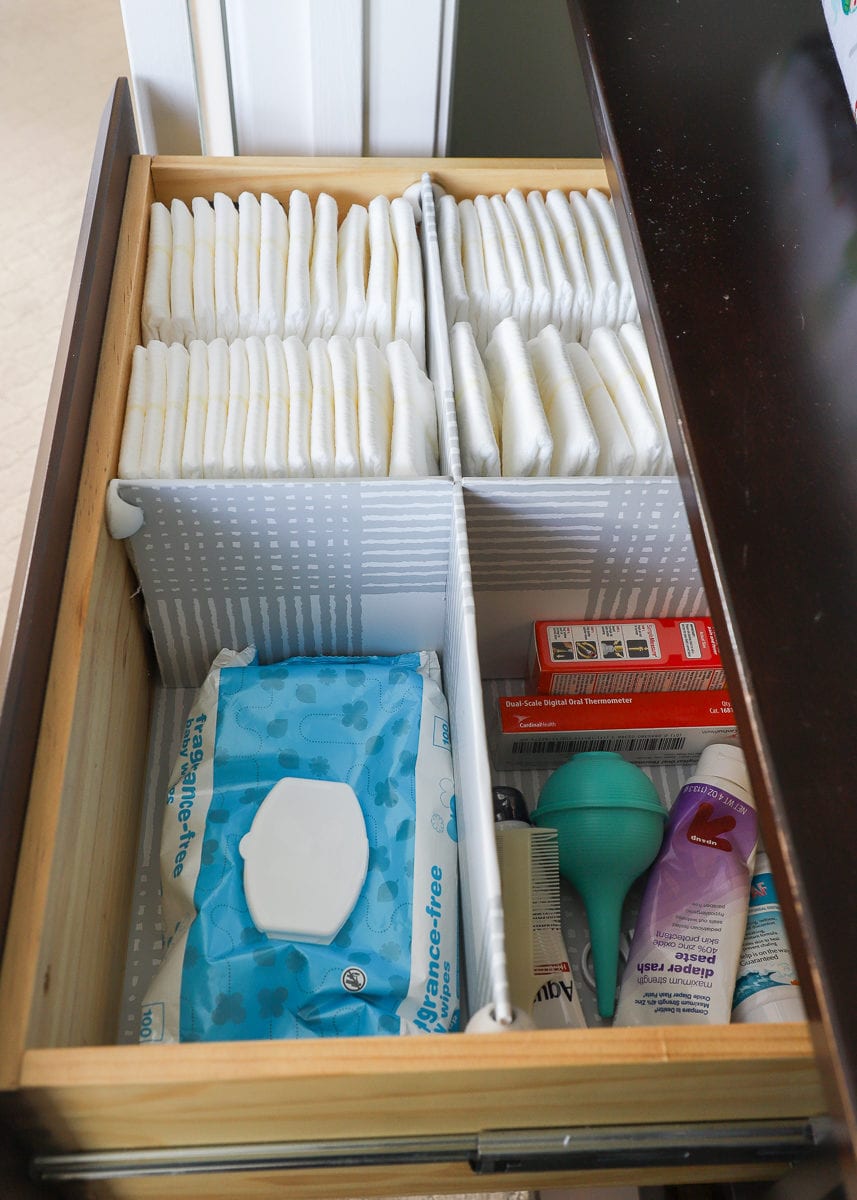
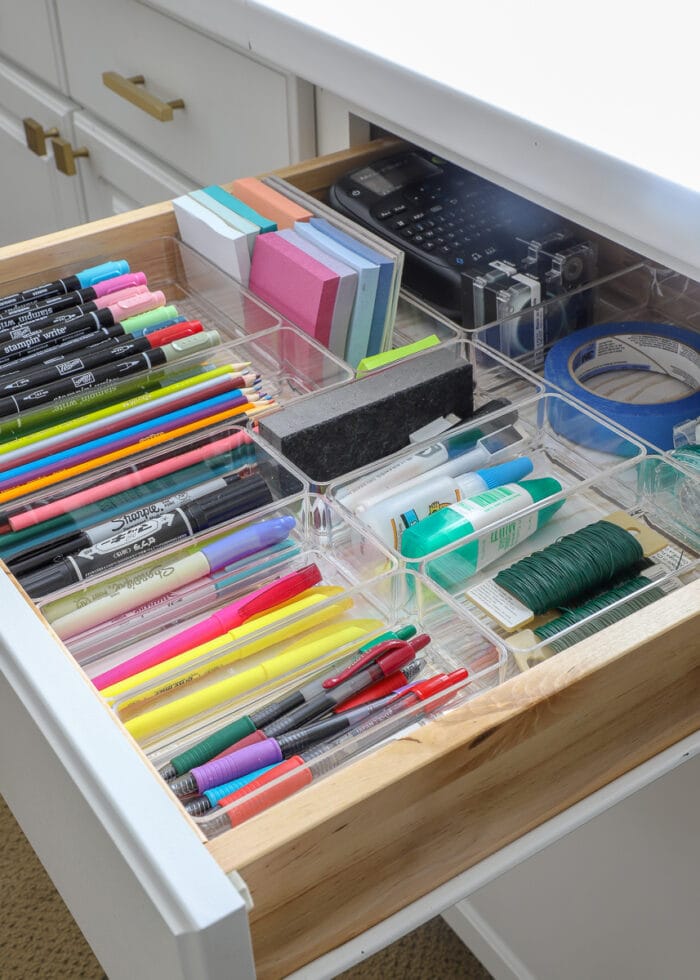
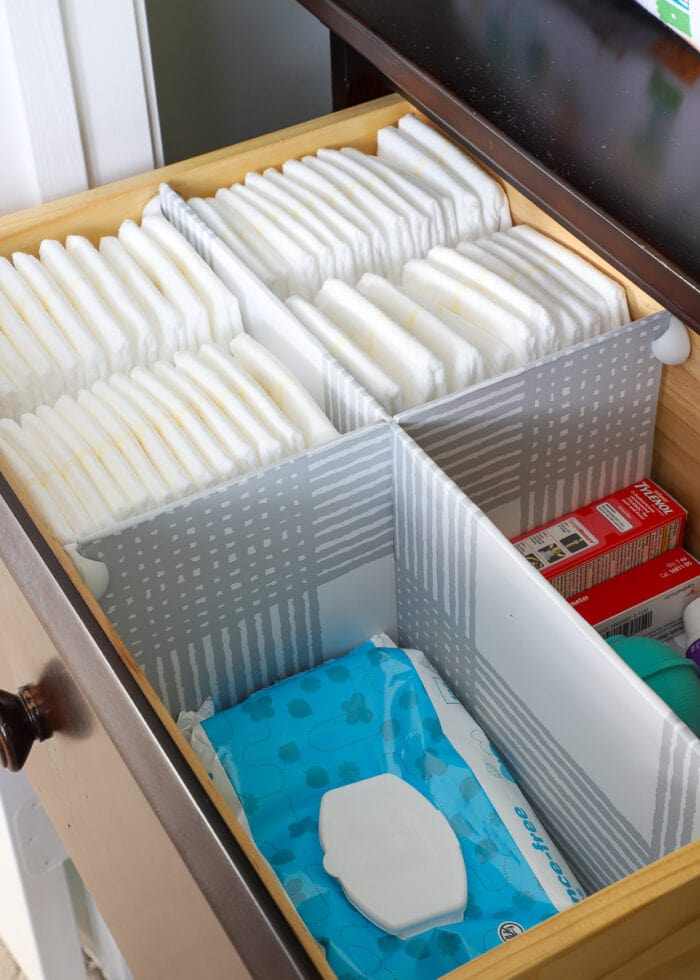
Making DIY drawer dividers is my very favorite way to carve out better organization in practically any drawer. From deep and wide to small and shallow, dividers can help you organize nursery supplies, clothing, art supplies, small toys, kitchen utensils, and so much more!
Cost
Without a doubt, one of the best reasons to make your own drawer dividers is to save money. Custom plastic, acrylic, or wood drawer organizers aren’t super expensive but they aren’t inexpensive either (especially when you need to outfit lots of drawers at once). Comparatively, DIY drawer dividers made from cardboard or foam board range from free (if you use your leftover Amazon boxes) to just a few dollars per drawer!
Customization
Whether you need a wide expanse of dividers for a kitchen utensil drawer or deep dividers for dresser drawers full of clothes…making your own means you can create the exact storage you need without having to scour the depths of the internet for ones that are the “just right” size.
Further, cutting your own allows you to determine the best layout and fit for your precise drawer, meaning no leftover space or awkward slots you can’t use.
Reuse & Recycle
Whether you move a lot like we do or your needs for a particular drawer simply change with time, DIY drawer dividers are much more disposable than their store-bought counterparts. Not only is my version made with cardboard you likely already have around the house; but if you no longer need a particular divider, you can simply toss it into the trash/recycling instead of having to store, sell, or donate the non-disposable version.
Supplies Needed
Ready to make some DIY drawer dividers for your junk drawer, silverware drawer, socks drawer, bathroom drawers, or other spot?!? These are the basic supplies you’ll need:
- Foam Core or thick, sturdy Cardboard – be sure to measure your drawer(s) first to find the widest measurement you’ll need!
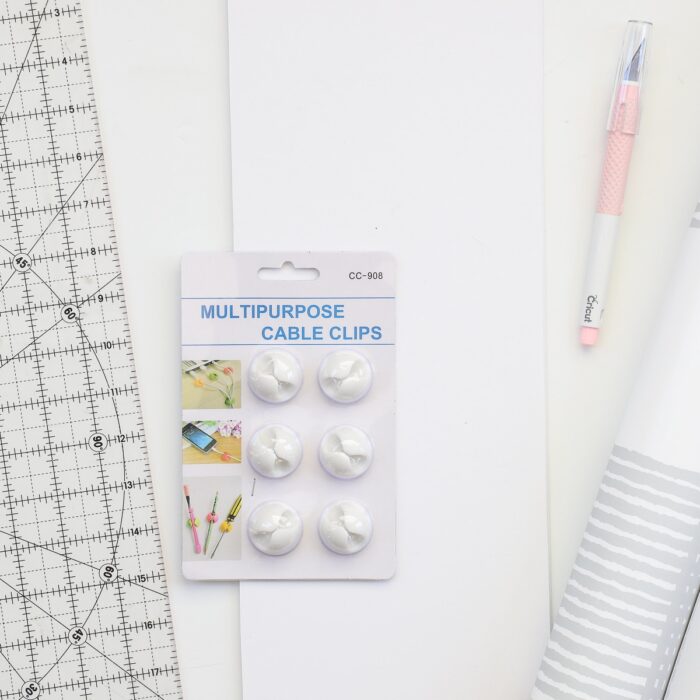
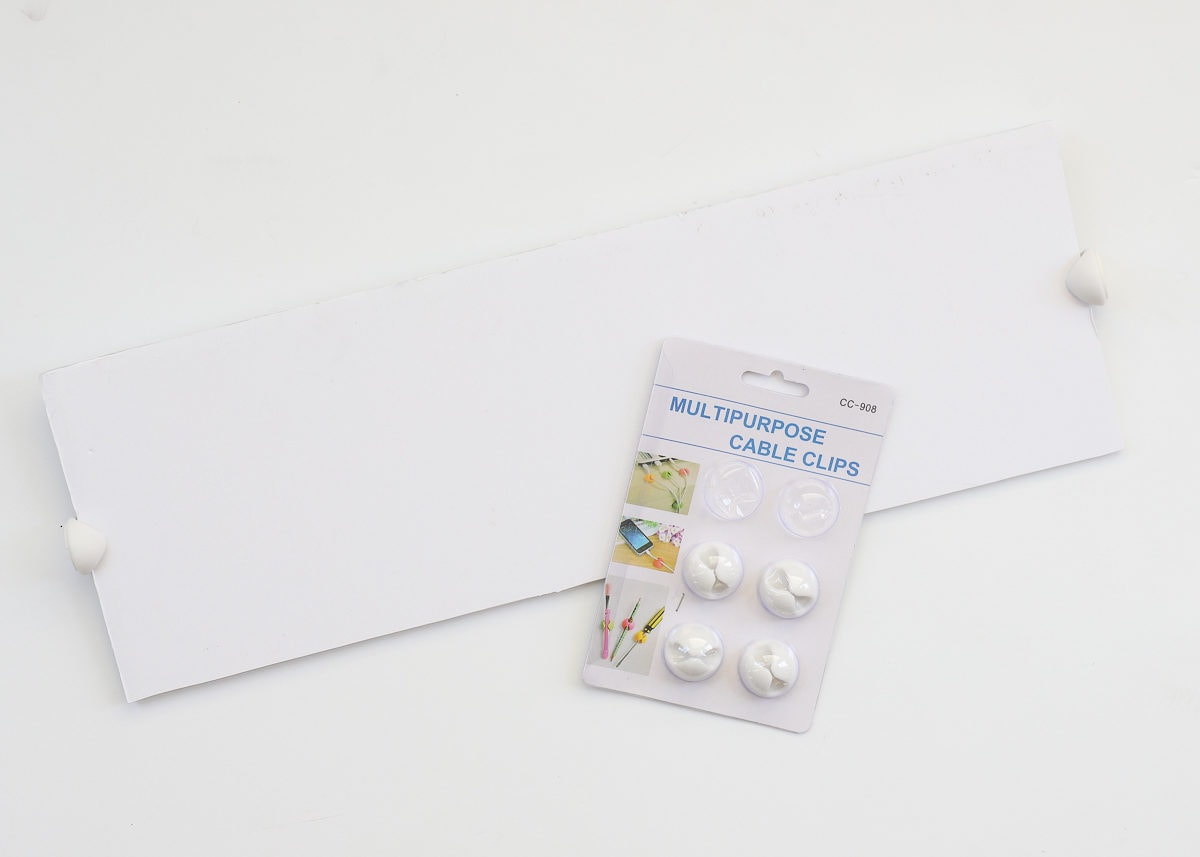
- Multipurpose Cable Clips– more information below
- Decorative Contact Paper, Shelf Liner, or Peel-and-Stick Wallpaper to cover dividers (optional but recommended)
- Flexible Tape Measure
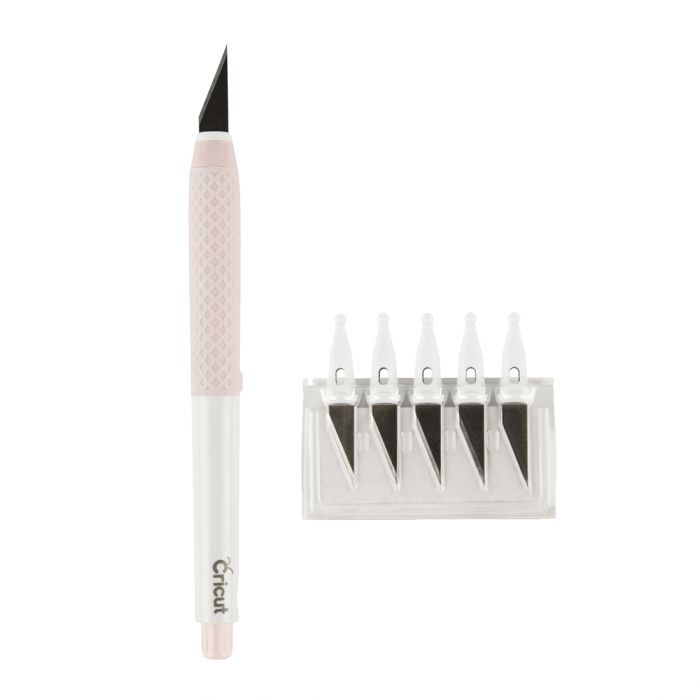
- Sharp Craft Knife or Rotary Cutter
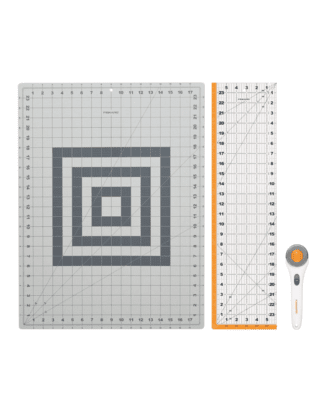
- Ruler with Self-Heating Mat
- Pencil
Do You Have to Use the Cord Clips?
This DIY drawer divider tutorial is the culmination of several iterations over the past 10+ years. Each time I’ve made these dividers, I’ve refined the process in order to make them as crisp, clean, and sturdy as possible.
The very first few times I made these dividers, I did not use cord clips to hold the dividers in place.
And while I was (ultimately) able to size my cardboard panels so that they fit snug inside our drawers, it didn’t take much for them to shift around or all-out collapse.

Over the years, I’ve learned that adding the cable clips makes a significant difference in the sturdiness of the dividers. They will allow a bit more “wiggle room” when it comes to cutting your dividers (i.e., they won’t have to be so precise), and they significantly help the overall longevity of this project. So while you don’t have to use the cable clips, I strongly recommend them!
NOTE: This project will demonstrate two cable clips on each side of the divider; however, one clip per side is likely sufficient for stability (especially if your dividers are short!)
If you really don’t want to use cord clips for this divider project, I have a DIY version you can try instead using some folded paper! See here: How to Make Your Own Box Dividers
Video Tutorial
If you’d like to see how these DIY drawer dividers come together, below is this entire project in about 5 minutes! (Video not loading for you? You can watch it HERE.)
How to Make Easy DIY Drawer Dividers to Fit ANY Drawer
These drawer dividers are not only super inexpensive and easy to make, but they stand tall and firm and do wonders for keeping drawers compartmentalized. Below are the step-by-step instructions!
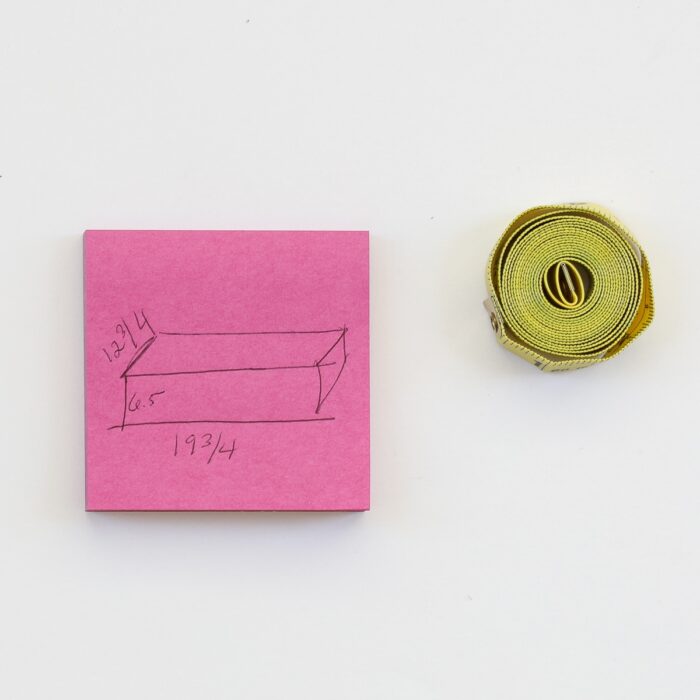
Step 1 – Measure Your Drawer(s)
Start by measuring the height, width, and depth of the drawer you want to outfit with dividers. Be as precise as you can.
- HEIGHT – Base of drawer to top edge of drawer
- WIDTH – Right-to-left dimension
- DEPTH – Front-to-back dimension
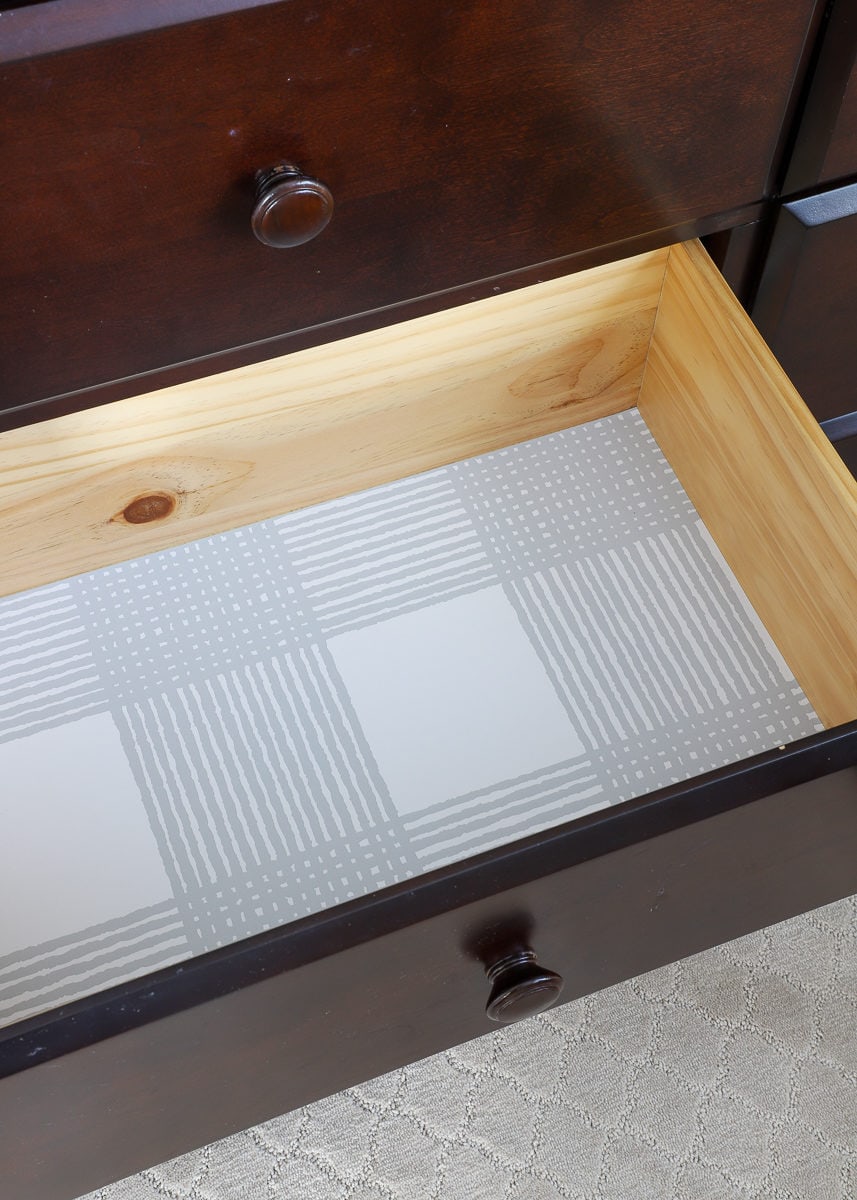
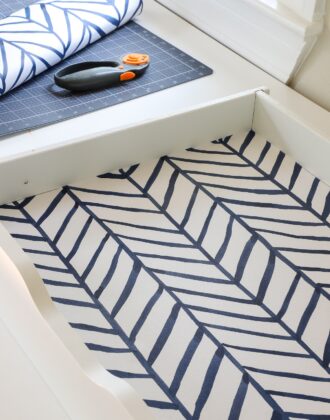
Step 2 (Optional) – Line Base of Drawer
Next, if desired, line the sides and/or bottom of the drawer with contact paper, shelf liner, peel-and-stick wallpaper, etc. This is an optional detail, but it goes a long way in making your entire drawer look clean and cohesive.
Learn exactly how to do it here: The Best Way to Line Drawers & Shelves with Pretty Paper
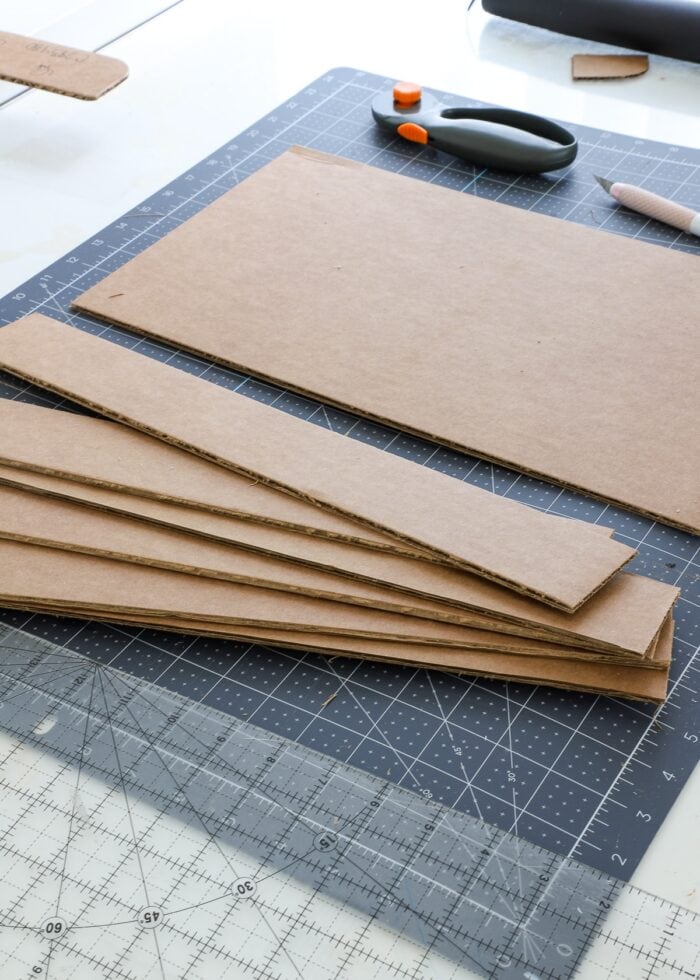
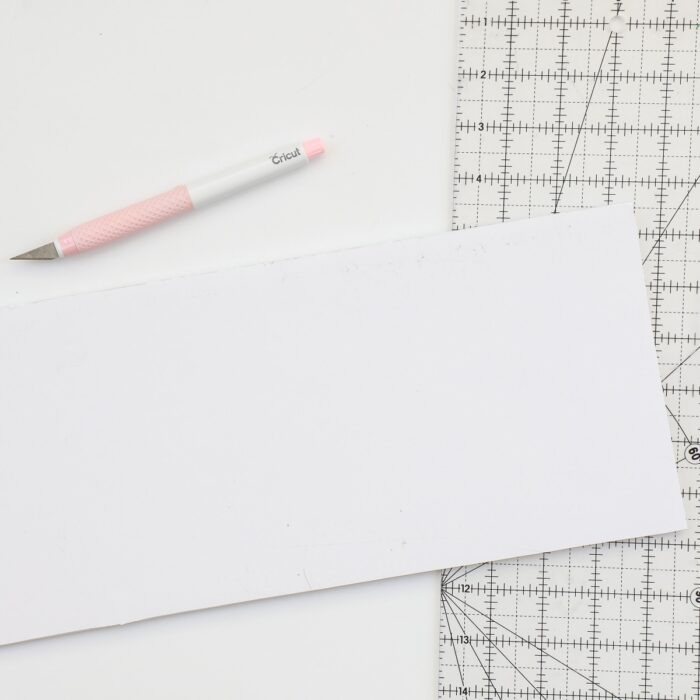
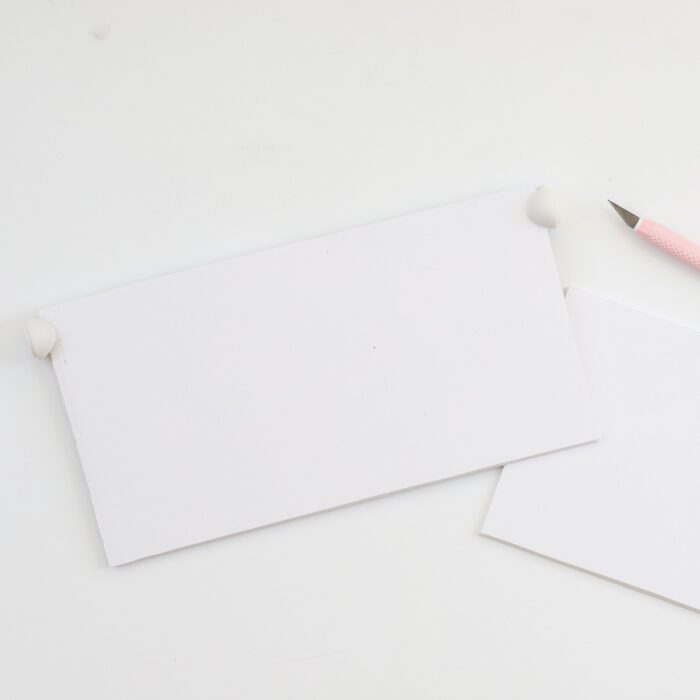
Step 3 – Cut the Divider Boards
Next, you will use a ruler and sharp craft knife to cut your foam core board or cardboard down to the correct dimensions for your particular drawer. Use the following equations to guide you:
Cut 1: WIDTH of drawer – 1/2″ X HEIGHT of drawer
Cut 2: DEPTH of drawer – 1/2″ X HEIGHT of drawer
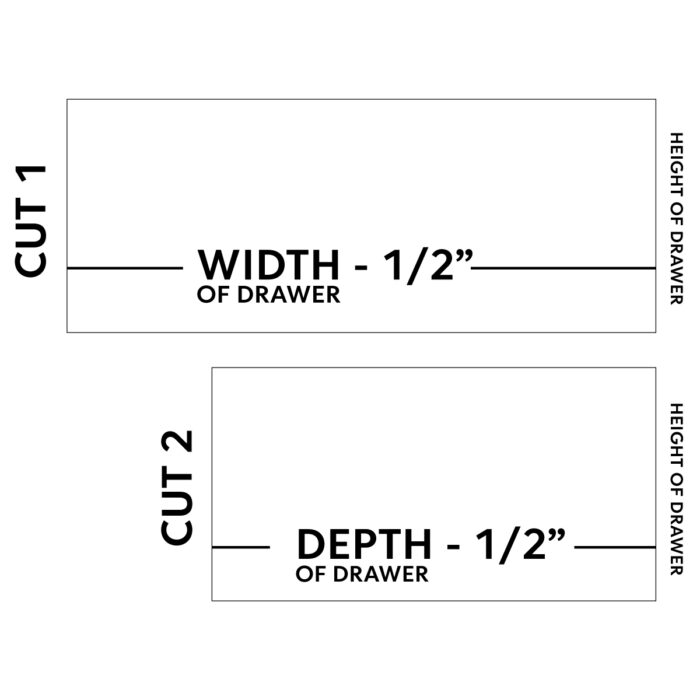
NOTE: Taking 1/2″ off the width/depth dimension allows room for the cable clips. If you do not plan to use cable holders, do not subtract the 1/2″. Instead, you’ll want your boards to be the exact width/depth of your drawer, if possible.
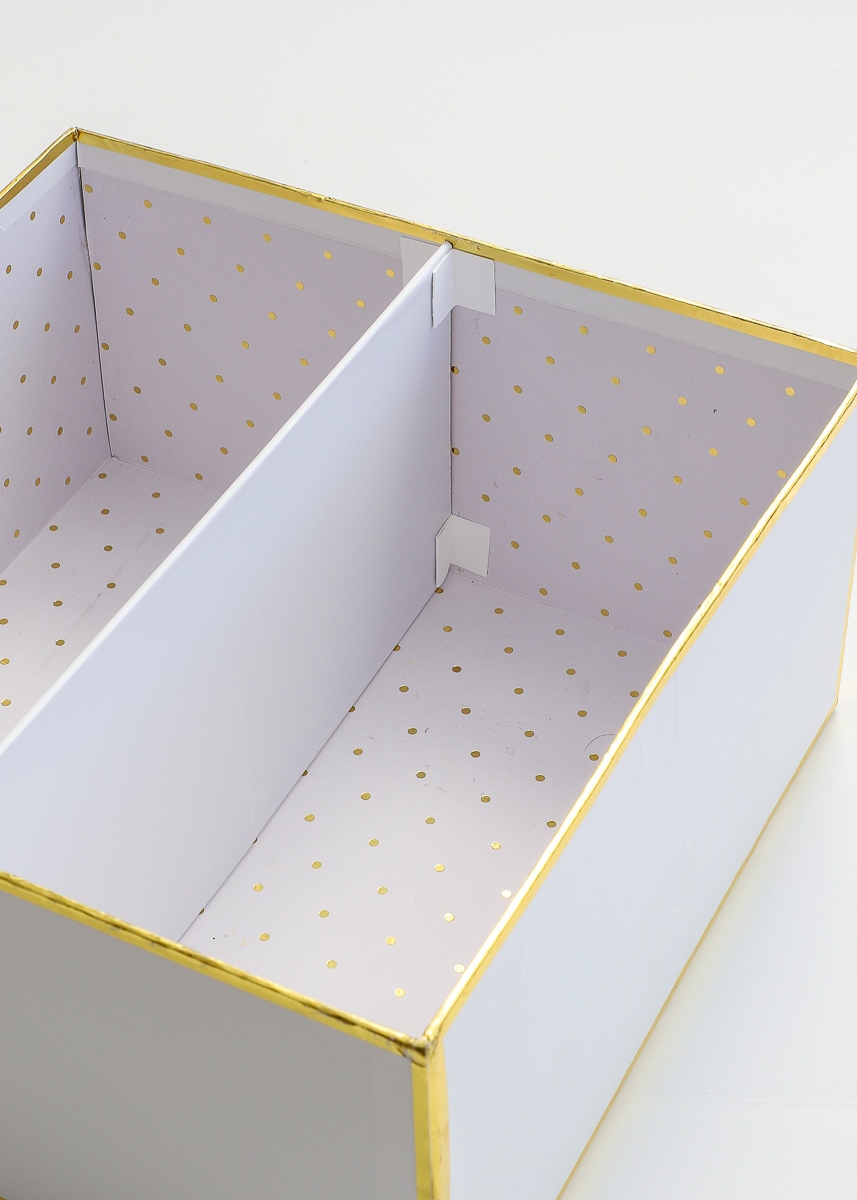
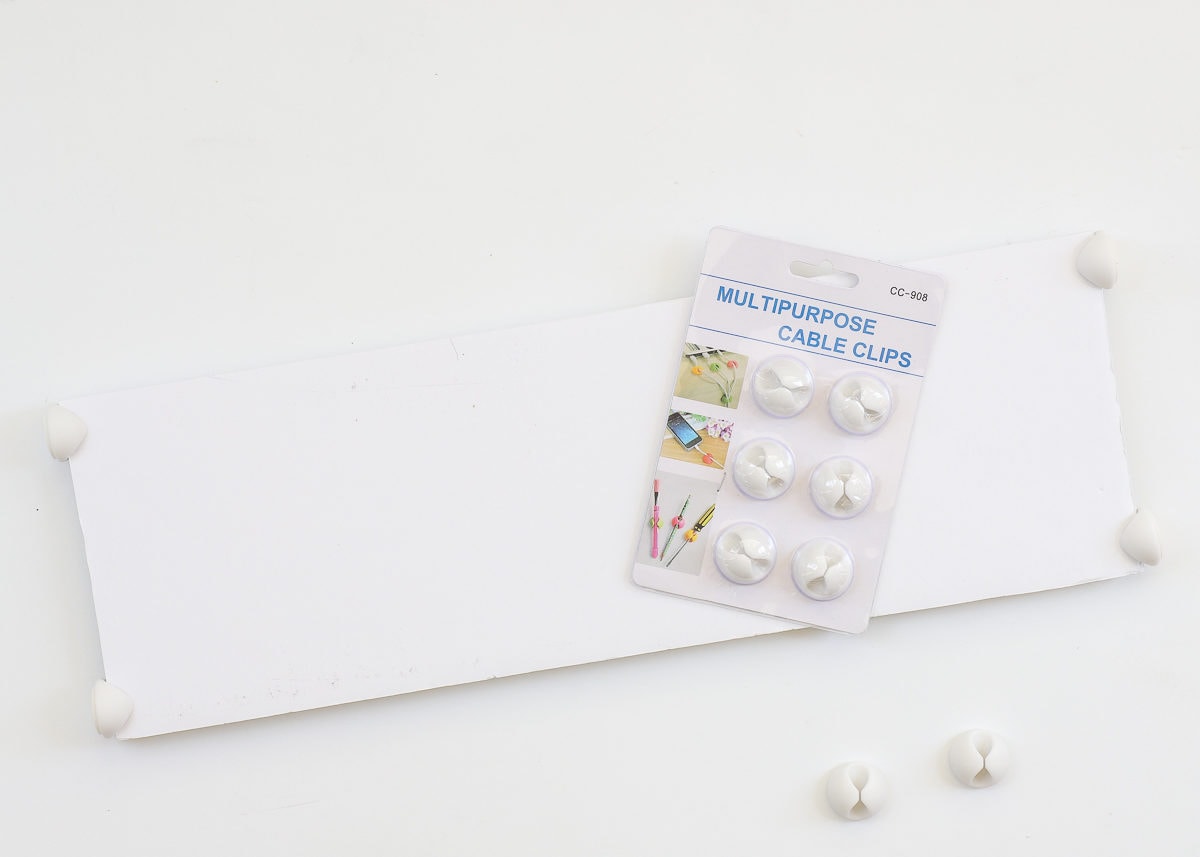
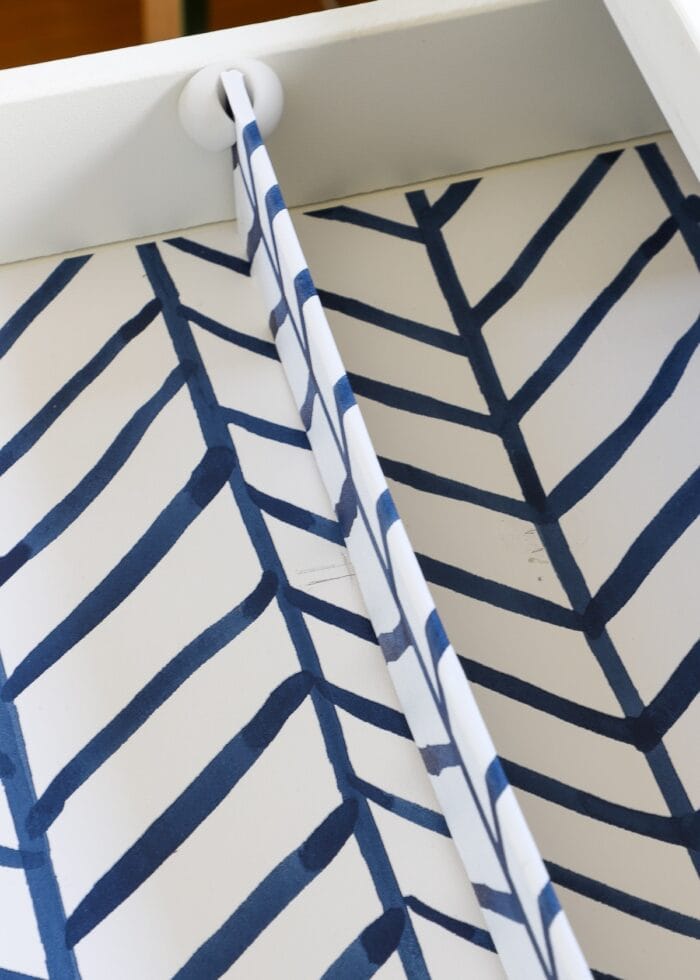
Step 4 – Place Cable Clips
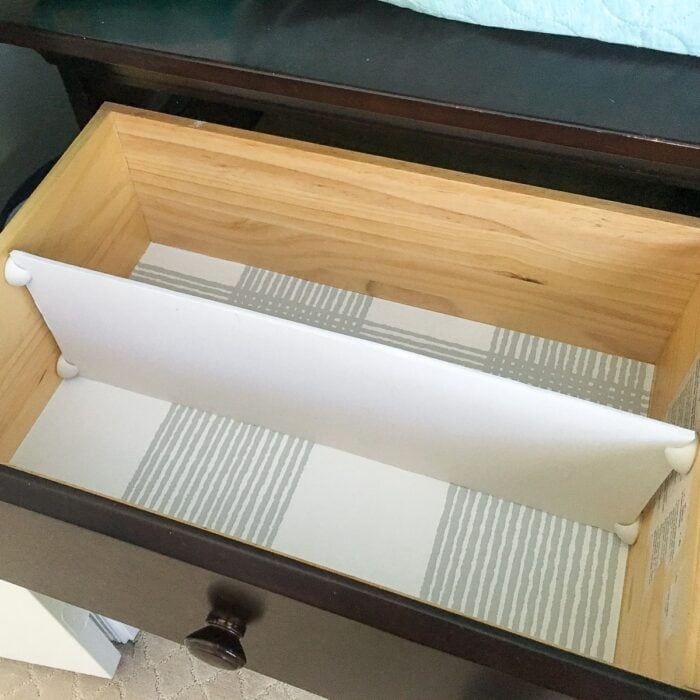
Next, you will “dry fit” your boards into your drawer in order to 1) ensure they fit just right, and 2) identify the right placement for the cable clips.
To do this, place one or two cable clips on each side of the horizontal divider (as shown in the two photos below). Do NOT remove the paper backings off the cable clips yet.
With the clips on the board but the paper backings still on, slide the divider into your drawer, ensuring it’s exactly where you want it and completely upright.
Then, use a pencil to trace around all the cable clips.
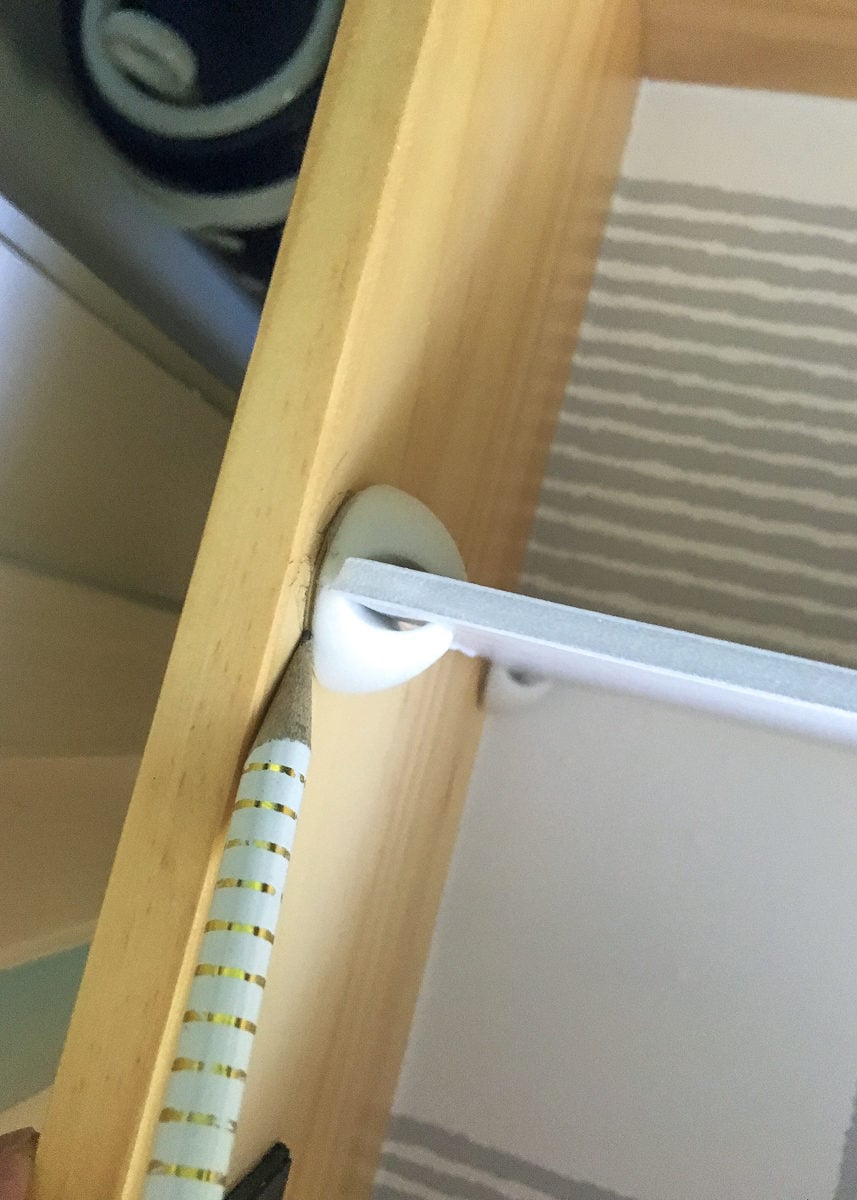
With the locations of the cable clips marked, remove the divider from the drawer and the clips from the divider itself. Now you can remove the paper backings off the cable clips and secure them to the sides of the drawer according to your pencil markings.
Want to save this post?

Now the clips are perfectly positioned to hold the first board. Do NOT yet place the board back into the clips. Instead, repeat the exact same process with the second board, this time positioning it vertically (front-to-back) in the drawer (rather than side-to-side).
When finished, all your cable clips should be perfectly positioned to receive the dividers.
Step 5 (Optional) – Cover Divider Boards
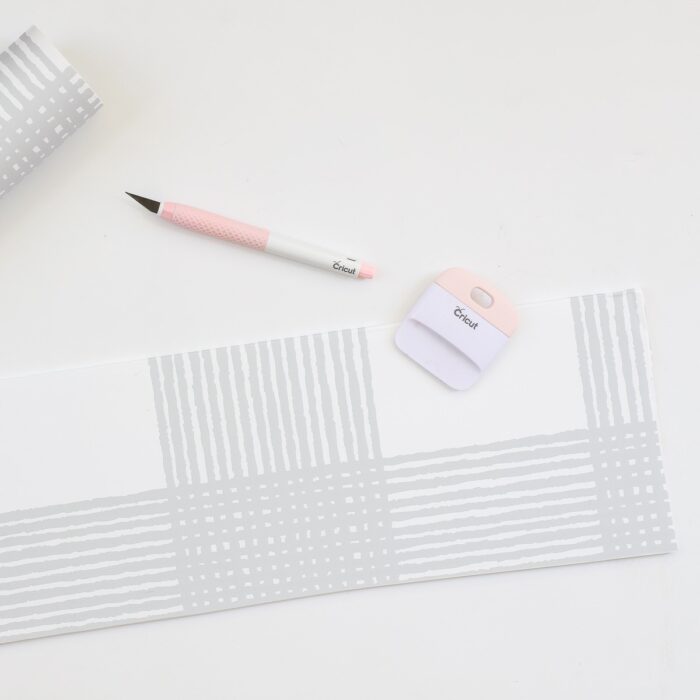
With the two organizer pieces cut to size and dry-fitted to the drawer, you can cover them in a decorative wrapping paper of your choice (ideally, whatever you used to line the drawer itself).
To wrap the board, I find it easiest to cut a piece of shelf liner/contact paper as follows:
WIDTH of your drawer organizer + 1″ X (2 x HEIGHT of your drawer organizer) + 1″
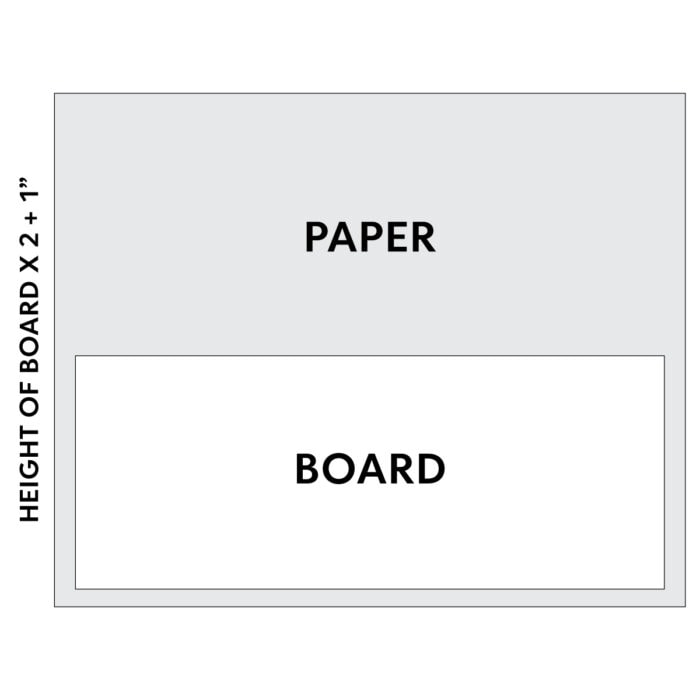
Then, fold the adhesive-backed paper over your foam divider and trim away all the excess edges with the craft knife. (Watch the video tutorial to see exactly how I wrap the boards.) Then repeat the process on the other/shorter divider.
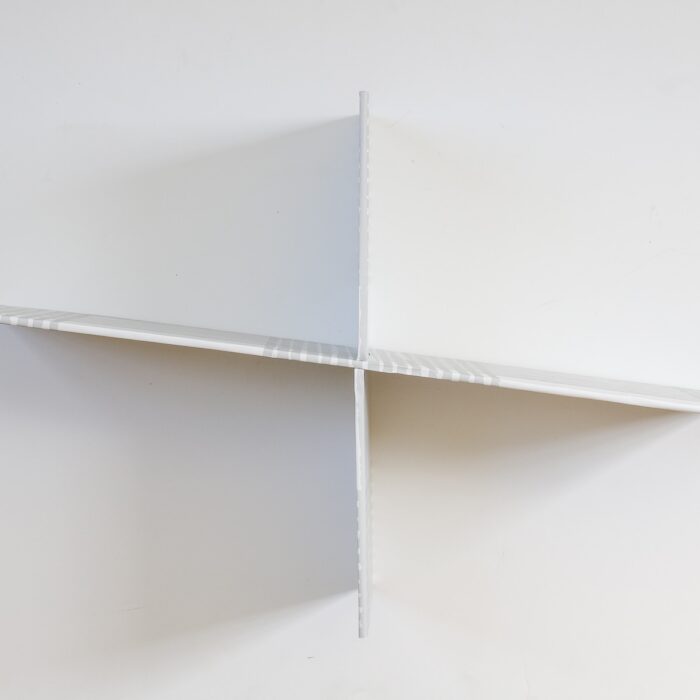
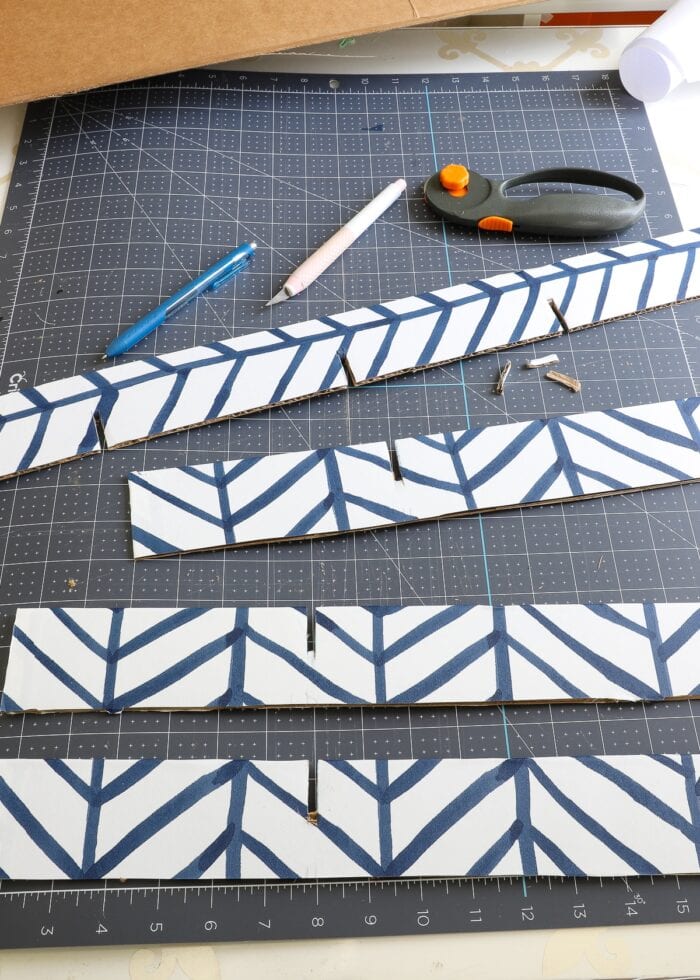
Step 6 – Cut Out Intersection from Each Board
Finally, so that your dividers fit together, you need to cut out where the two boards will intersect. Use the craft knife to cut a 1/4″ wide slit halfway down the exact middle of one board and halfway up the exact middle of the other (as shown below).

NOTE: For thick cardboard or foam core, this will be more than just a straight slit. You will need to remove about 1/4″ or so (depending on the thickness of the boards you’re using) to allow the two pieces to fit into each other, as shown below.
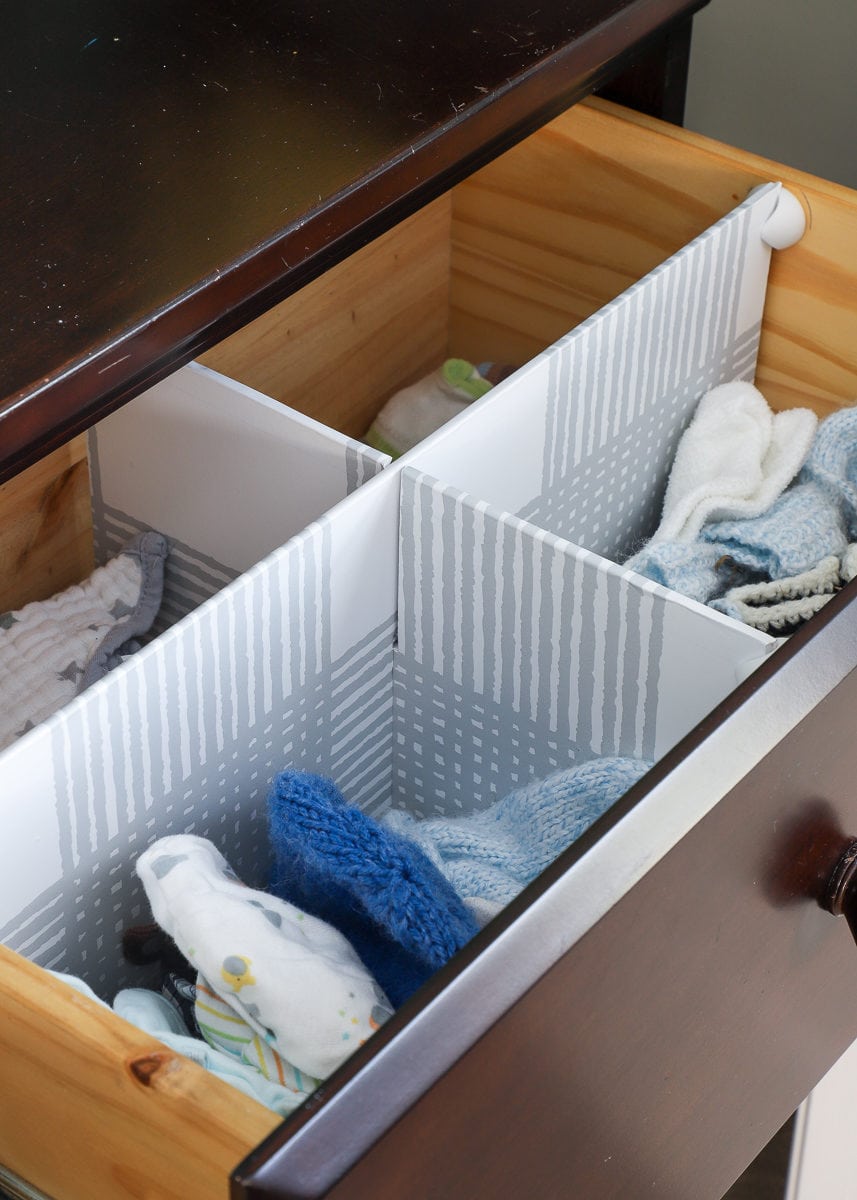
Step 7 – Insert Completed Divider Into Drawer
With your dividers papered and fitting into each other nicely, all you need to do is slide them back into the cable clips you’ve already secured to the inside of your drawers! If needed, adjust the intersection slits so that the boards sit flush with the drawer and each other.
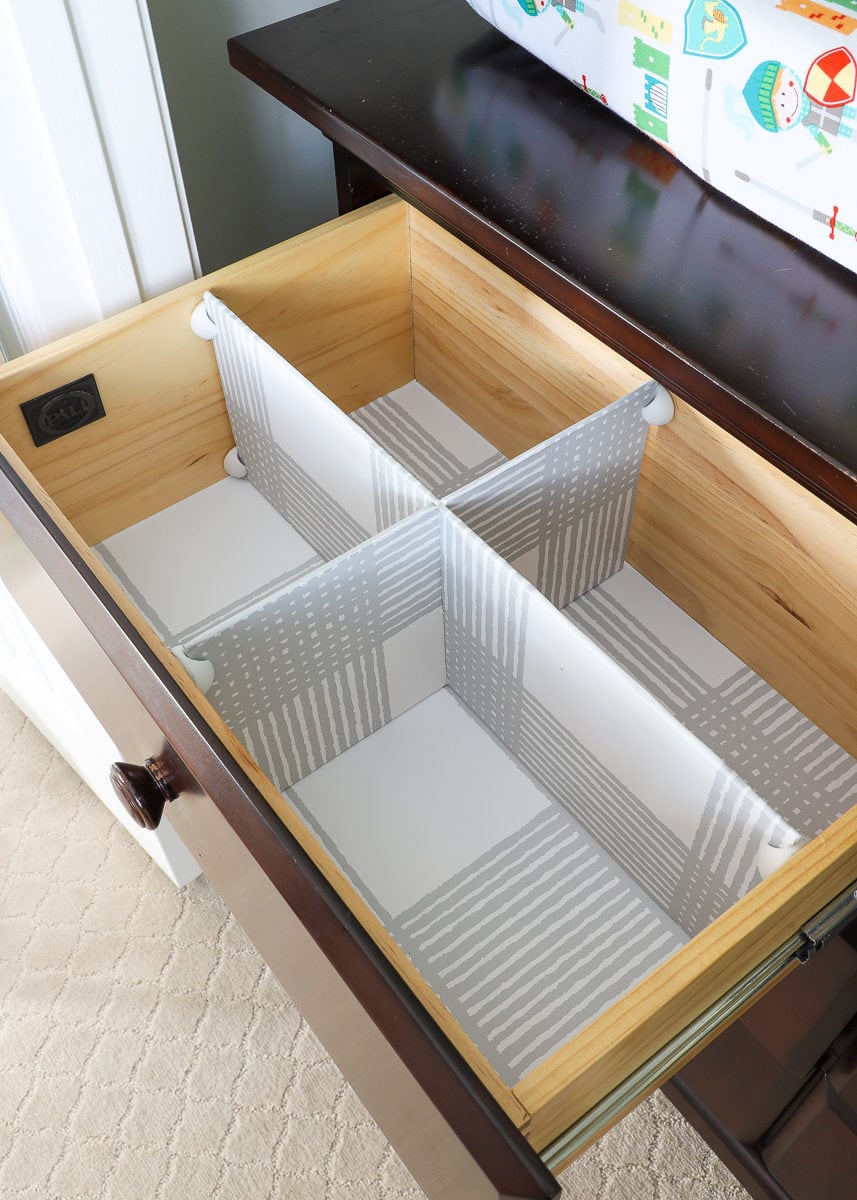
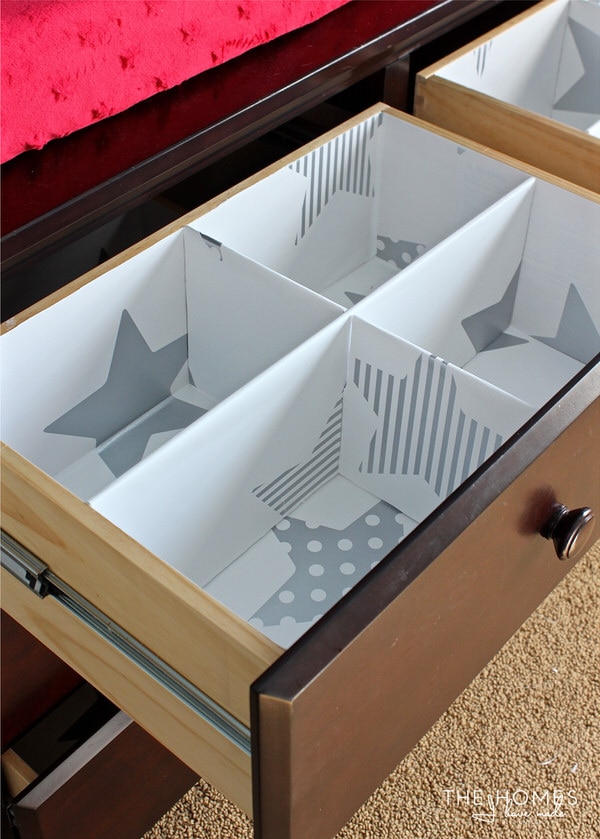
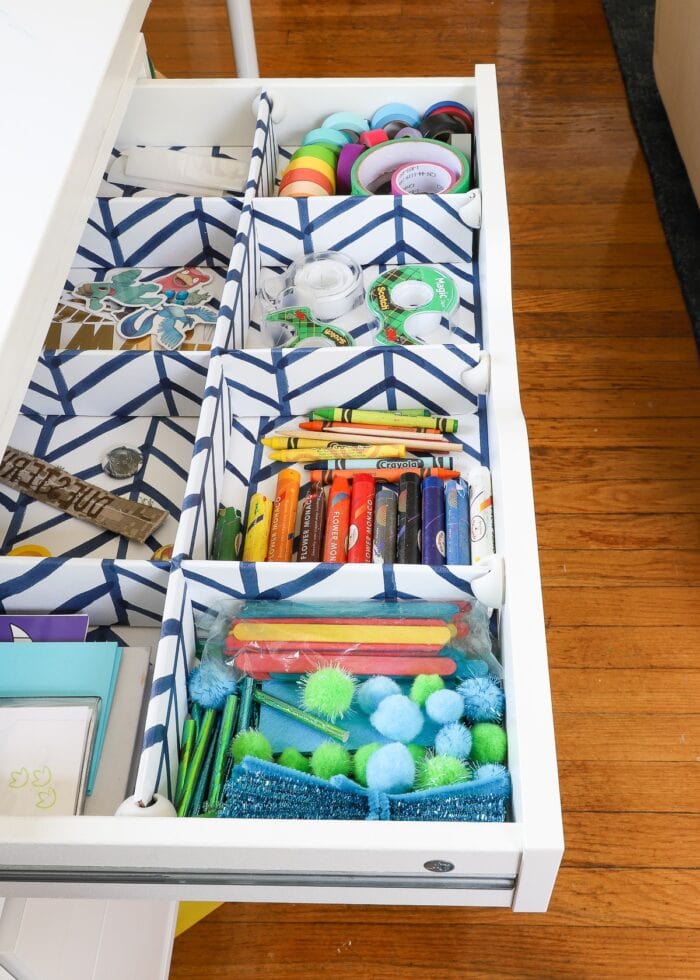
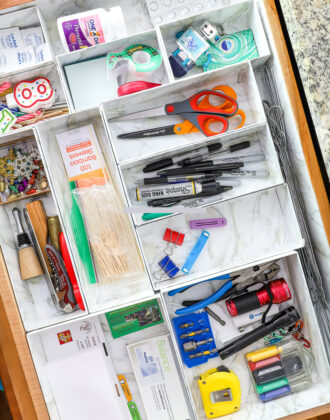
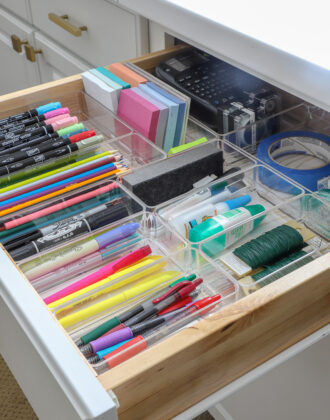
Step 8 – Get Organizing!
With your perfectly-fitting cardboard dividers in place, now it’s time to organize to your heart’s content!
Adapt & Expand
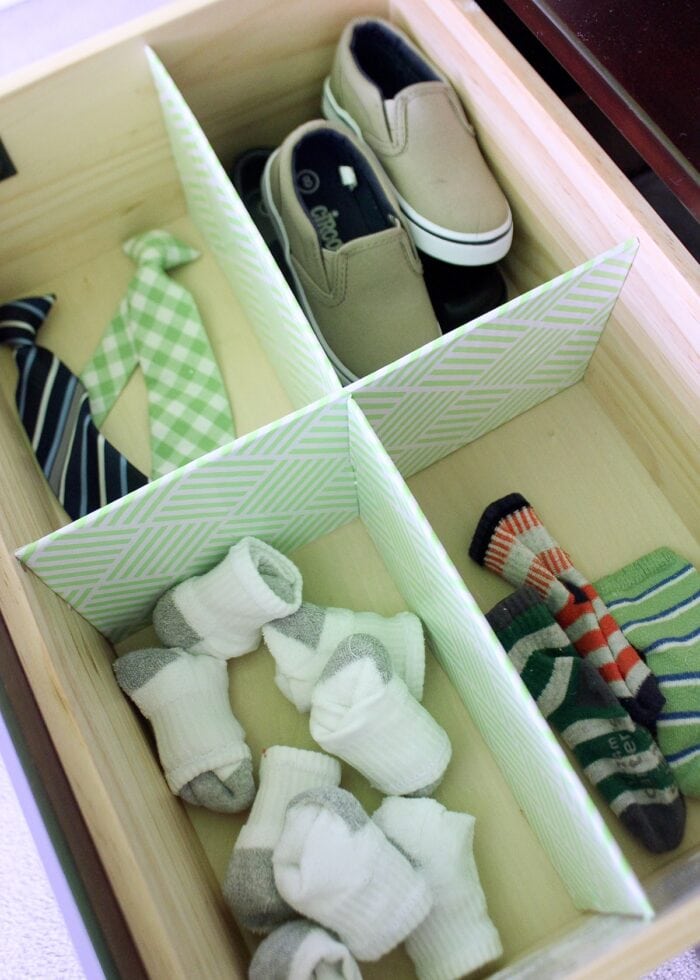
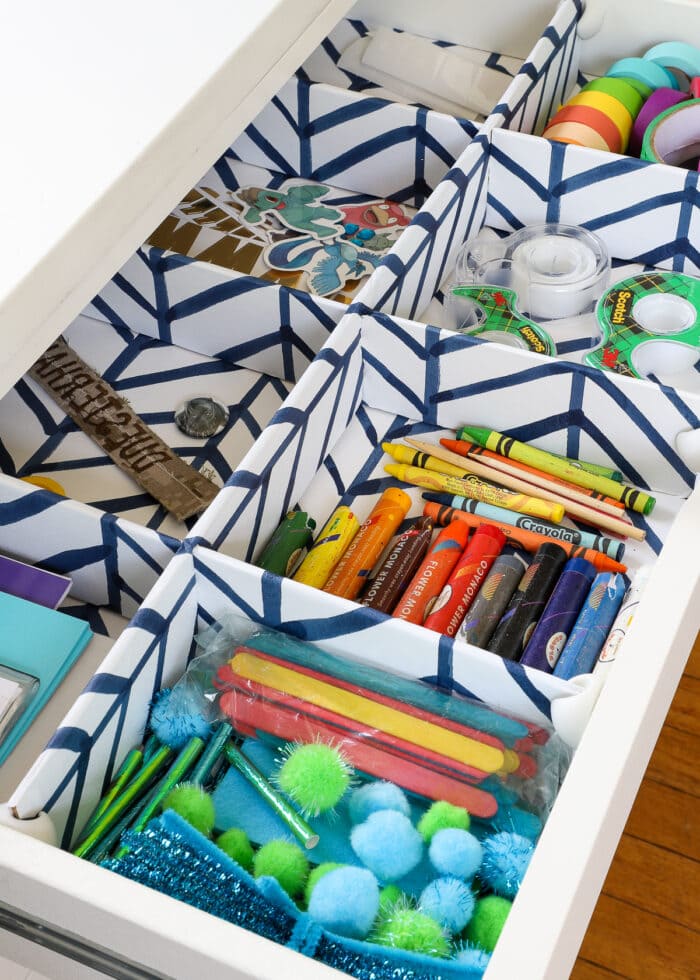
One of my very favorite things about making your own drawer dividers (besides using up leftover cardboard!) is that you really can adapt them to any drawer and any layout you need!
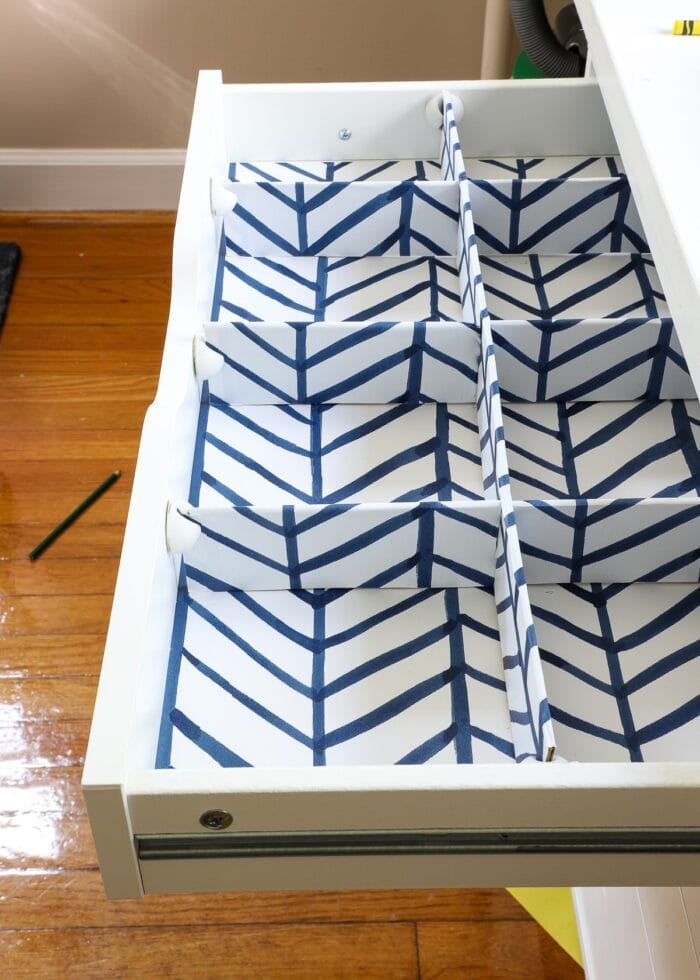
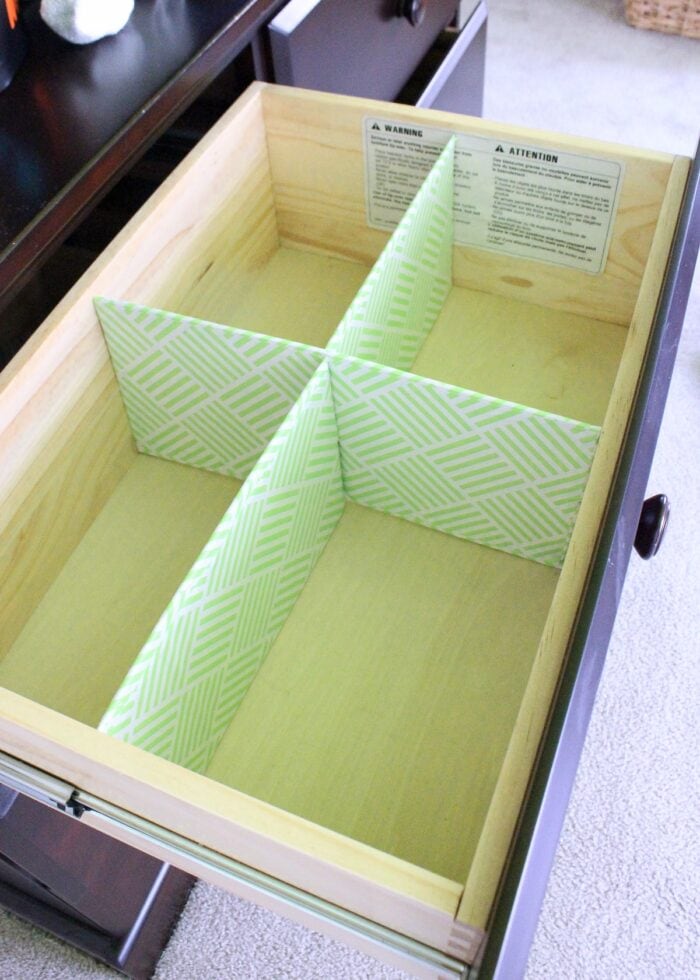
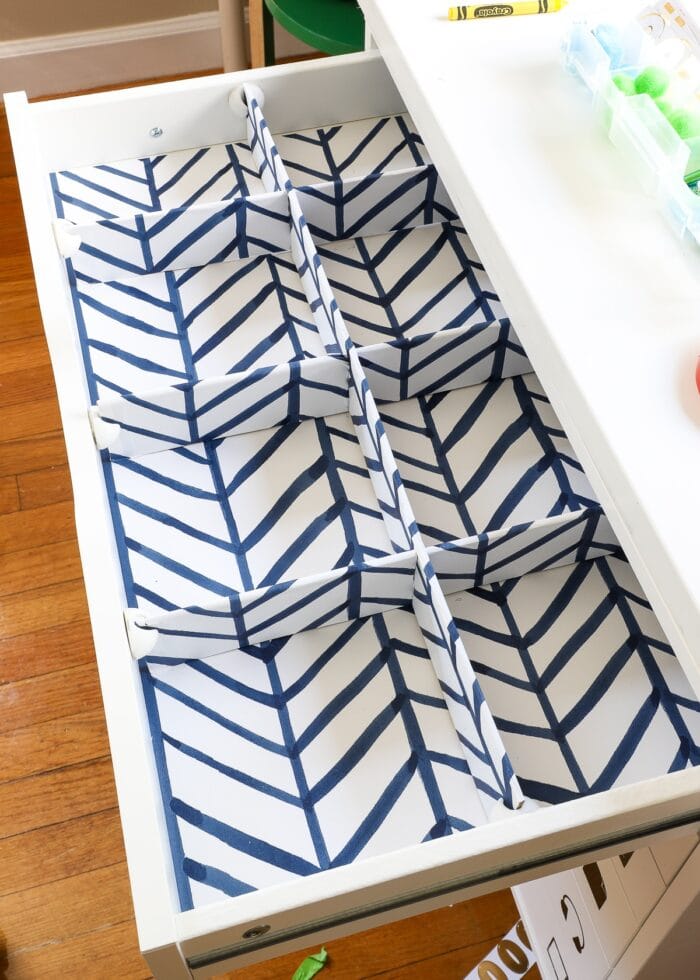
I was having trouble organizing the super wide-but-shallow drawers in my son’s art table.
Instead of the basic “+” formation of the dividers, I instead make six different compartments. As shown below, the single “horizontal” divider was notched out three times to accommodate three different “vertical” slats.
If you are creating a layout beyond the basic “+”, I recommend placing your “vertical” slats first and notate their location right on the bottom of the drawer. Then place the “horizontal” board separately and mark where each perpendicular slat is located onto the slat itself (see pencil markings below).
Once notched out, your dividers will connect together in just the right spots!
FAQ About These DIY Drawer Dividers
Can These Drawer Dividers Be Used In Shallow Drawers Too?
Of course, just see above! You simply adjust the HEIGHT measurement to be anything you wish (so a shorter drawer will just have shorter dividers).
Which Material Do You Recommend Most?
I have made these drawer dividers using both thick corrugated cardboard and foam core. While both work very well, I do find that foam core dividers have a bit more rigidity to them comparatively.
Can You Make Drawer Dividers Out of Wood?
If you have access to a miter saw, circular saw, or jig saw, you can use this same tutorial to make dividers out of wood (e.g., thin plywood, MDF, balsa wood, etc)
Where Can You Buy Drawer Dividers?
Not up for a DIY solution this time around? Then I encourage you to check out these drawer organizers. They come in a wide range of useful sizes; they are affordable; and they are super sturdy! Next to the DIY solution shown in this post, they are my other favorite way to organize the drawers all over our home!
More Great Drawer Organization Ideas
- The Easiest Way to Organize Any Drawer In Your Home
- Easy DIY Drawer Dividers (For Any Size Drawer)
- The Best Way to Line Drawers & Shelves with Pretty Papers
- How to Line Drawers with Wallpaper
- How to Put a DIY Charging Station In a Drawer
- How to Make Drawer Organizers with Cardboard Boxes
- Top 10 Tips for Organizing Kitchen Drawers
- 3 Ways to Organize Cords in a Drawer
- How to Organize Pantry Drawers
Making your own custom drawer dividers is an exceptionally gratifying project. Not only can you create the exact size and layout you need for ANY size drawer, but using free/cheap materials makes this cost-effective and environmentally friendly too.
Next time you wish you had a few more compartments in a messy drawer, I hope you give this quick and easy project a try!
Megan


51 Comments on “Easy DIY Drawer Dividers (Using What You’ve Got!)”
Thanks for this post. So simple and just what I've been looking for. I'll give it a try… 🙂
excited to try this! I have tons of fabric that I don't use
Great DIY post! We just shared it on our Pinterest board for bedroom drawer organizers. Thanks!
Pingback: An Organized Sock Drawer - Sock Dreams
Pingback: DIY boat drawer organizer | Blue Turtle Trawler
Pingback: Organization Hacks for Everything that Baby Needs
Pingback: 15 Clever and Inexpensive Drawer Organization Ideas | The Crafting Nook by Titicrafty
Pingback: 30 DIY Ideas and Tutorials for a Cute Baby Room - Crafts Booming
Pingback: An Overview to Organizing – SEEK Ottawa
Love this, time to makeover my kitchen drawers!!
Pingback: 10 Genius Organization Ideas For Small Spaces | Coffee Breaks and Pinching Pennies
Pingback: 10 Genius Organization Ideas For Small Spaces | Coffee Breaks and Pinching Pennies
Pingback: 20 Life Hacks for Your Home - Home Stories A to Z
Pingback: 30 DIY Drawer Dividers To Inspire Your New Project - Lemon Slide
Pingback: How to Prepare for Baby -
Pingback: How to Prepare for Baby -
Pingback: Minimalist Décor: How to Simplify Your Home – Modern Architecture Concept
What is variegated cardboard? Do you mean pre-printed with a pattern? If you are going to cover it why does it need to be variegated? Thanks.
Pingback: Declutter Challenge Week 10: Tidy the Whities – Allsorts Organising
Pingback: 7 Effective Ways to Easily Organize Your Home – Shabby Chic Boho
Pingback: 8 Incredible Walk-In Closet Ideas for Your Closet Makeover! | 180 Closet Design
Pingback: Pantry Organization: 5 Reasons Why Organizing Your Pantry Is Important
Pingback: Nursery Organization: Your Complete Guide | Clutter Keeper
Tried this problem was the first layer of contact paper did not stick to the cardboard ,so i had to tape it.
Pingback: 14+ Contact Paper DIY Projects That Can Refresh Your Space
Thank you for sharing this, it was very helpful! I’m getting ready to have a baby soon and getting his dresser organized. The only glitch I had was that once I started using them, none of them stayed in place perfectly in the drawers, like in your pictures. They would either be a little too long and bend one direction or the other to fit in or I would cut a tiny sliver off and then they were a tiny bit too small, and slide around. I’m probably gonna tape them to the inside of the drawer of something. But this was very helpful, saved me a lot of money, thank you for posting!!
Pingback: 10 DIY Home Organizers You Can Make Instead of Buy! - Full of Fortunes
Pingback: Storage Ideas For Small Spaces On A Budget – Tired Mom Supermom
Pingback: 20 Amazing Organization Hacks That Will Transform Your Bedroom - Organization Obsessed
Pingback: 27 Bedroom Organization Hacks That'll Transform Your Bedroom