My Top 10 Tips for Organizing Your Kitchen Drawers
The alternative title for this post could have been “Don’t Underestimate the Power of Organized Kitchen Drawers;” I just thought that was a little dramatic. But, really…it’s so true! Since the kitchen is one of the few places in the home that we spend a lot of time in day-in and day-out, you really feel the impact of poorly-organized drawers when you constantly can’t find what you need. But now having lived in 9 different homes with 9 different sets of kitchen drawers, I’ve learned that kitchen drawer organization is incredibly specific both to the person and the kitchen space itself. So today, I’m sharing my very best tips and tricks for organizing kitchen drawers, whether you have 2 or 20, wide, deep or skinny. Let’s get to it!

Tip #1: Get Rid Of The Clutter
There is no point organizing kitchen drawers if they are filled with a bunch of stuff you don’t want or need. And it’s really amazing what kind of gadgets we collect over the years, isn’t it?!? So even before you start to organize your drawers, take some time to go through each and every item and determine two things:
- Do you still want or need the item?
- Should the item be stored in your kitchen drawers?
Decluttering your drawers doesn’t have to be tedious or painful. Just go through each one and toss wine charms you never use, broken bag clips, random kitchen gadgets you rarely touch, worn oven mitts, etc. Once all the junk is cleared away, you’ll have much more success organizing whatever is left!
Tip #2: What Can (and Can’t) Be Stored in Kitchen Drawers?
When most people think about organizing kitchen drawers, they likely envision silverware, cutlery, and small kitchen gadgets. But these days, kitchen drawers come in a wide variety of shapes and sizes and can hold all sorts of kitchen items.
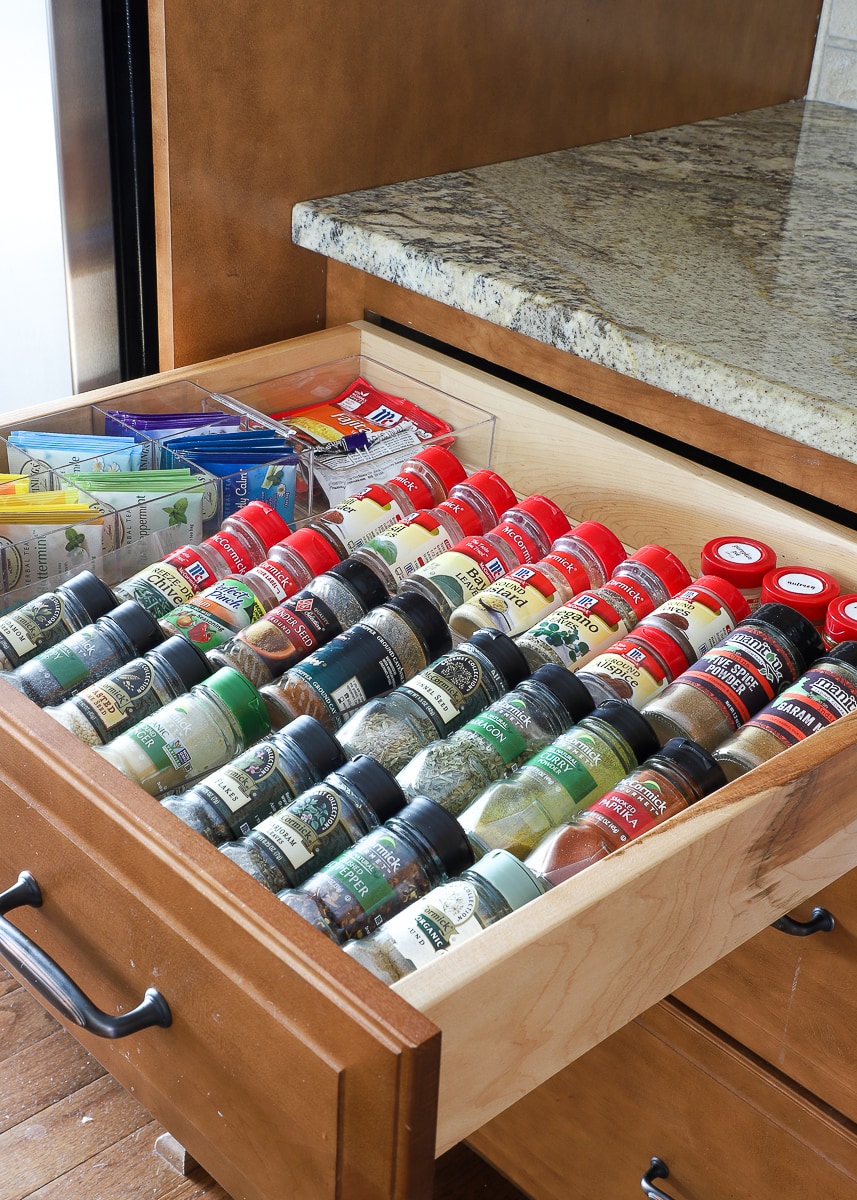
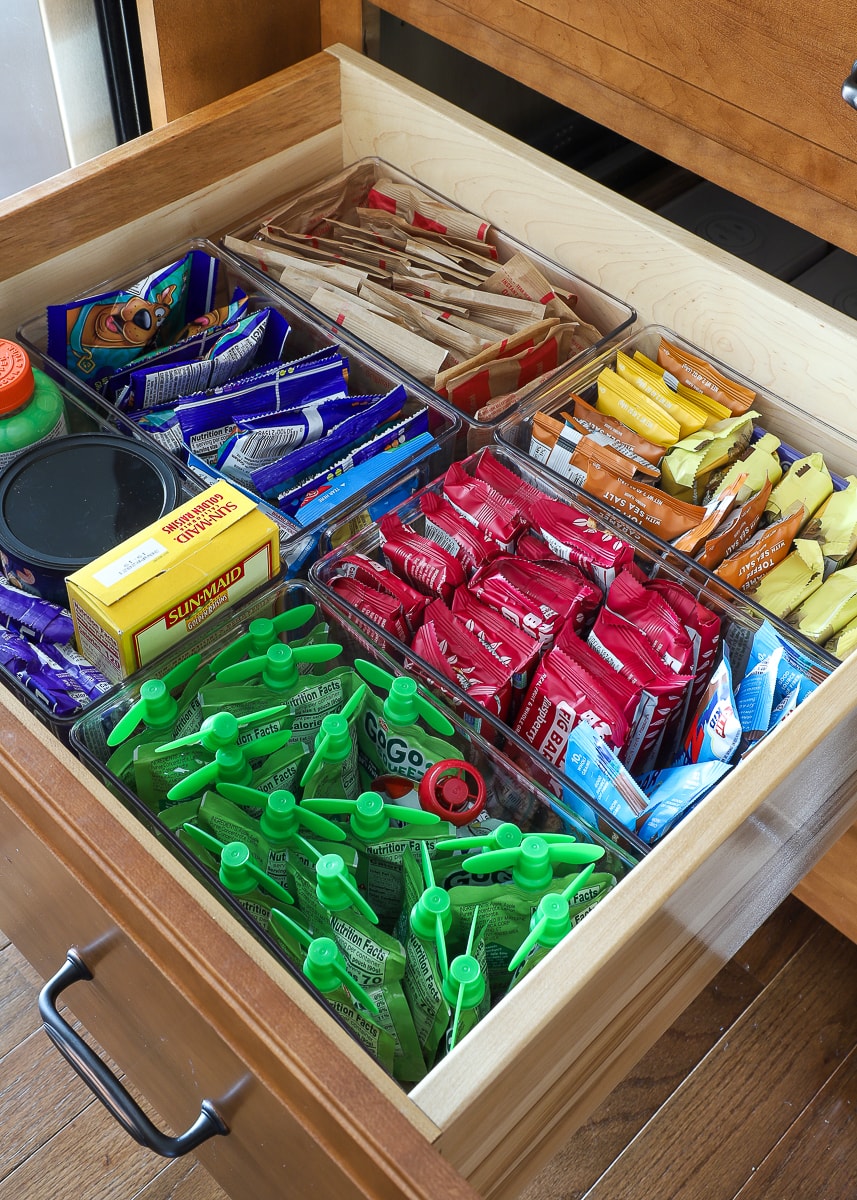
When you’re trying to figure out what to put where in your kitchen, consider what does and does not fit inside your drawers…even if the items aren’t typically stored that way. Here are some non-traditional things that can be put in drawers instead of on shelves:
- Spices
- Coffee/Tea Supplies
- Dishes
- Snack Foods
- Pantry Canisters
- Small Appliances
- Pots and Pans
- Knives (in an in-drawer knife block)
- Linens
If you have unusual items that actually fit in your drawers, give it a try. Not only might this take better advantage of the drawer space you do have, but it may also free up some precious counter or cabinet areas!
Have deep kitchen drawers? Be sure to check out this follow-on post: How to Organize Deep Pantry Drawers
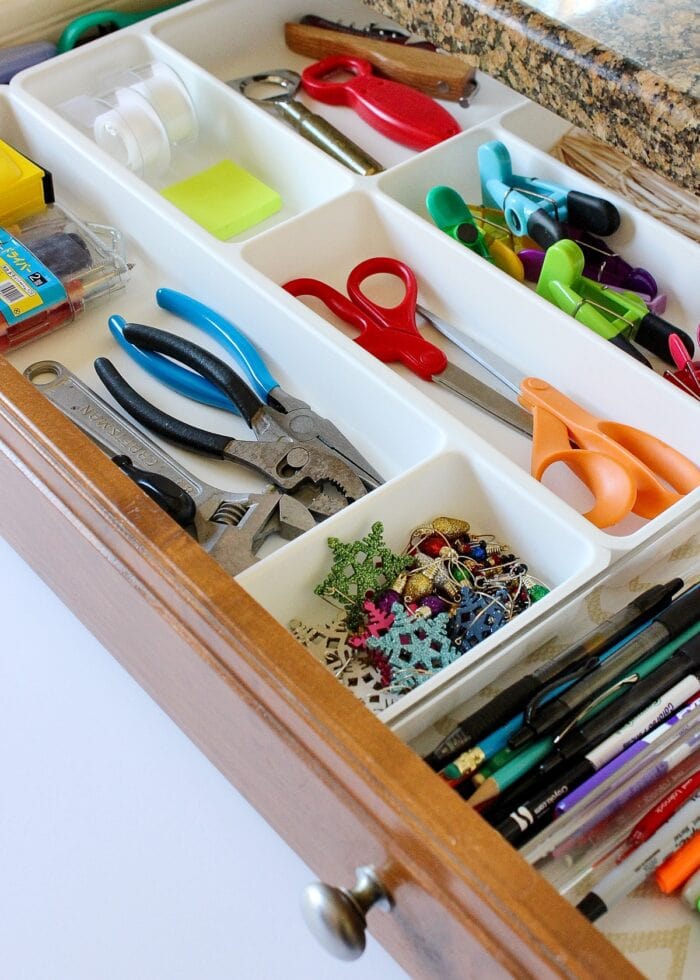
Tip #3: Find The Right Organizers for Your Drawers
Drawer dividers are the ideal way to create order out of drawer chaos. Sure…they aren’t always necessary or effective for some items. But for large, spacious drawers (where things can float around too easily) or drawers that hold lots of little things, dividers are typically worth the investment.
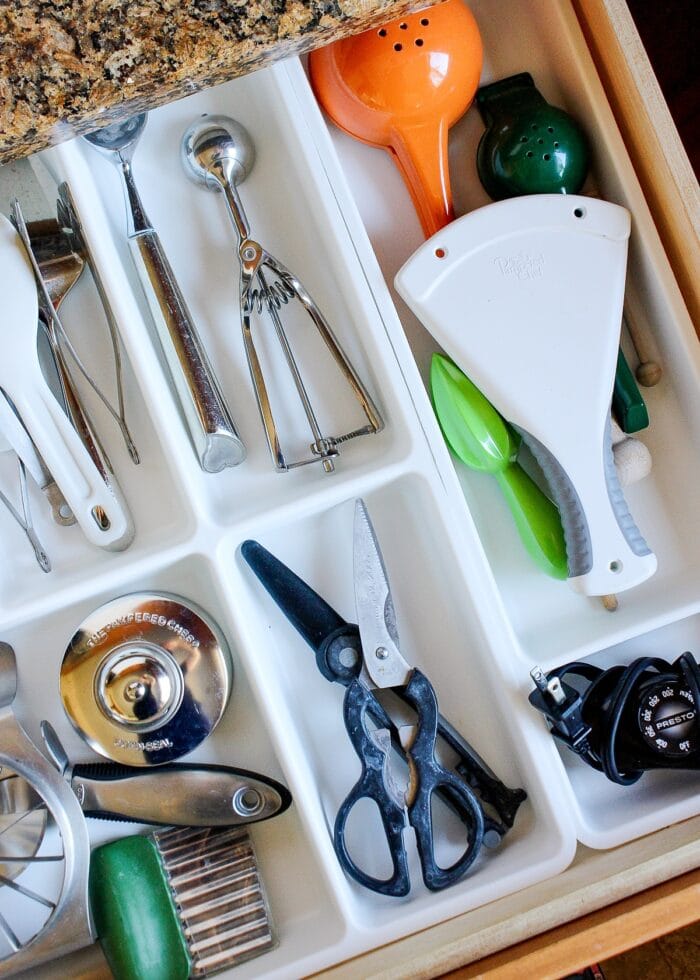
That said, drawer organizers are not created equal, so part of effectively organizing kitchen drawers is finding the “right” ones for the drawers in YOUR kitchen (as well as what you’re storing). Primarily, you want to focus on three main factors:
- Does the organizer properly fill up your drawer (without leaving lots of unusable space)?
- Are the compartments big enough to hold what you need them to? (Consider large kitchen gadgets and collections of items)
- Is the organizer well-suited to hold what you need it to? (E.g., silverware tray for flatware; bottle holders for spice jars)
There is nothing worse than having a bunch of pretty kitchen drawer organizers that are too small to hold anything comfortably. So when you are on the hunt for the “right” organizers, I always recommend first measuring the dimensions of your drawers, then planning out what you need, shopping around a lot, and only settling once you find something that will hold everything just right.
In 9 different homes, we’ve encountered (what feels like) countless drawer sizes, shapes, quantities, and layout. As a result, I am constantly on the lookout for great dividers that allow us to use up every inch in really smart ways (but without breaking the bank). While I am a huge fan of DIYing my own out of cardboard boxes, here are some of the best kitchen drawer organizers available!
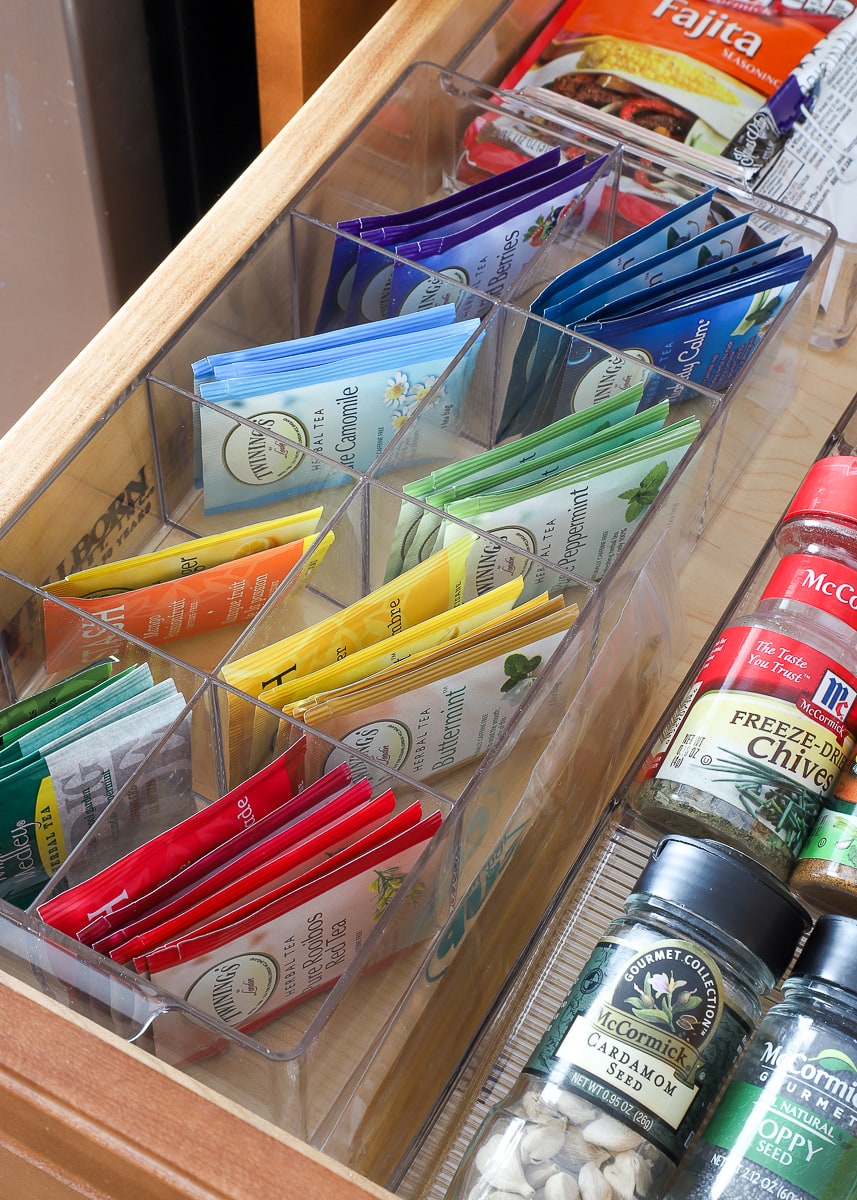
1 & 2 – IKEA STÖDJA Trays | 3 – Expandable Utensil Organizer | 4 – Clear Acrylic Expandable Tray | 5 – Stori Clear Modular Drawer Organizers | 6 – Acrylic Baggie Organizer | 7 – Tea Bag Organizer | 8 – Spice Drawer Organizer | 9 – Macbeth Drawer Liner
Tip #4: Use All the Available Space
Even with really precise measuring, planning, and shopping, it’s pretty rare to find off-the-shelf organizers that fit your drawers perfectly. But this isn’t something to get frustrated over, since there are easy things you can do to make that empty space actually usable!
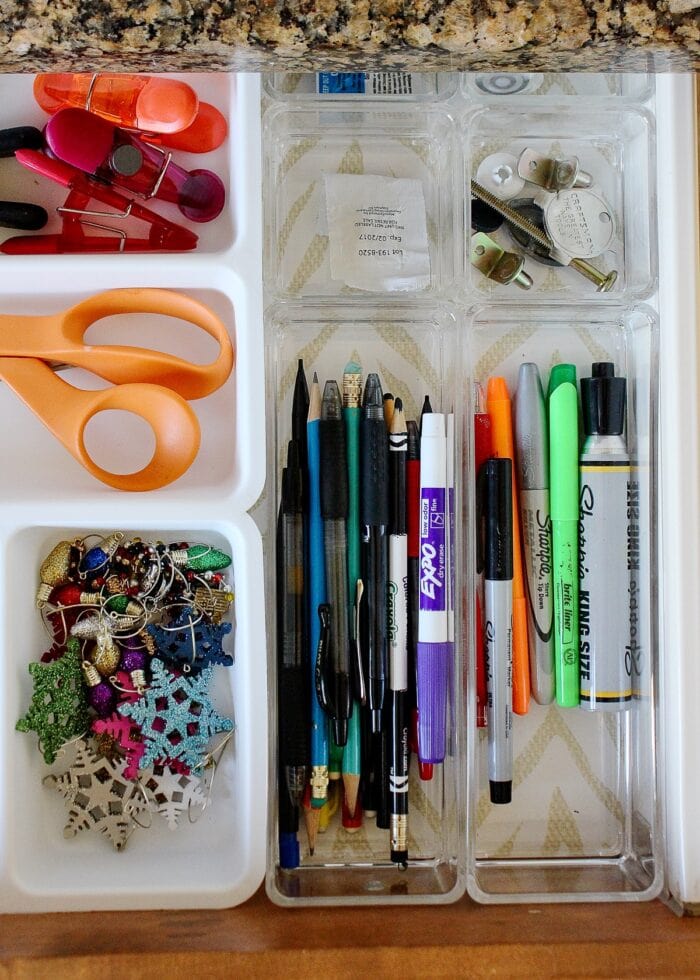
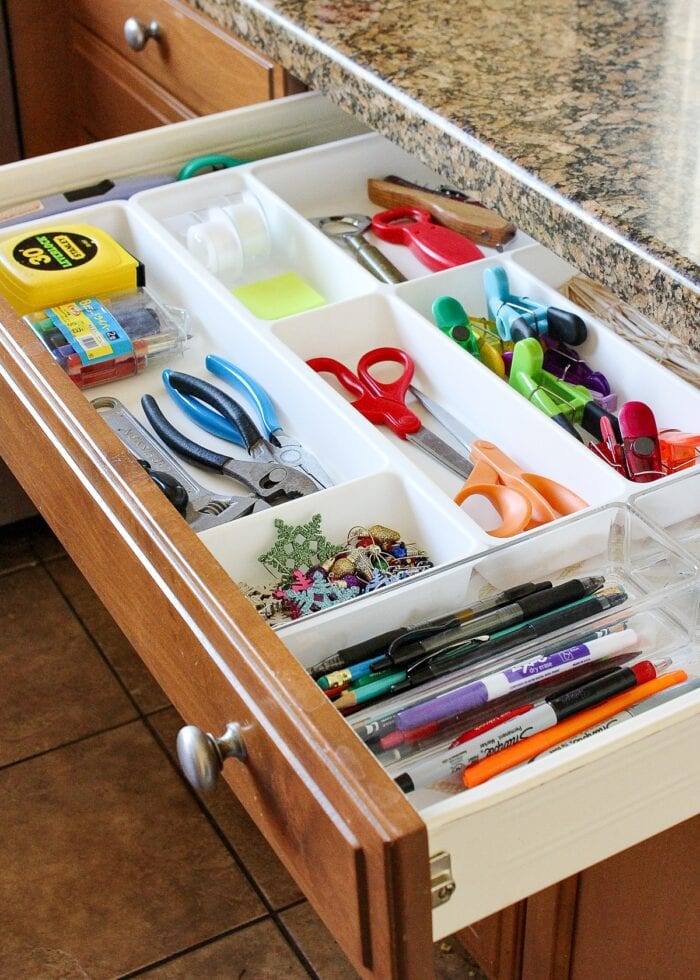
Play Drawer “Tetris”
First, rotate your organizers in every possible configuration to find a solution that uses the most amount of space. Then, see if you can add in other trays, bins, boxes, or containers to fill up empty spots.
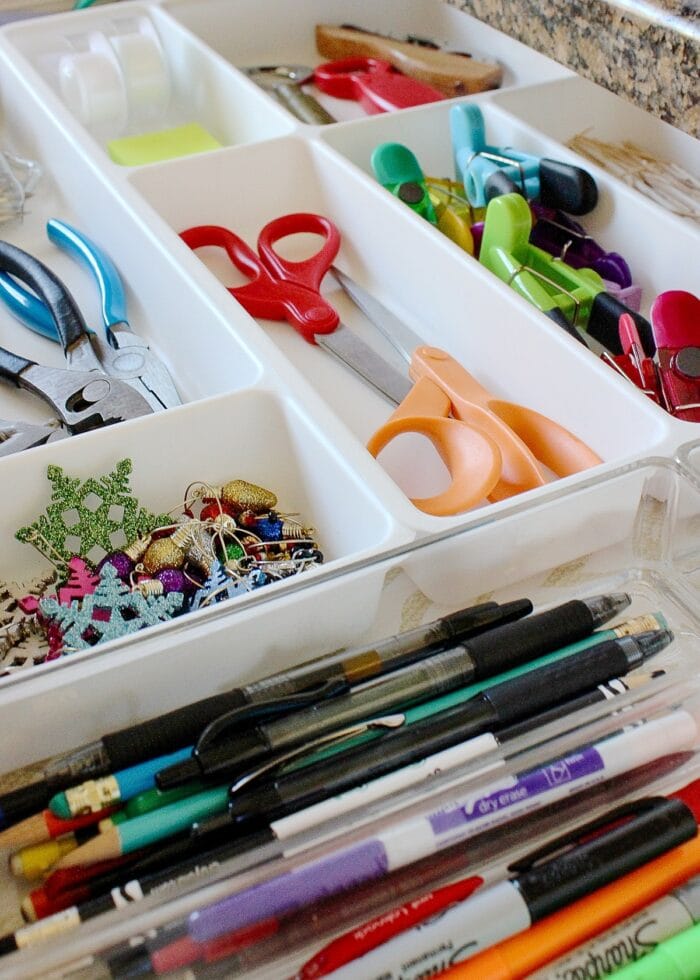
In the junk drawer below, the IKEA organizer (rotated sideways) left quite a bit of room…but not enough room for a second organizer. So I rummaged through our stash and discovered these clear acrylic organizers fit really well. So instead of having a big, open channel, the smaller organizers provided even more slots to sort pens/markers and other odds and ends.
Intentionally Create Channels
You don’t have to fill up every inch of your drawers with plastic organizers in order for them to be useful. Even empty channels, when created intentionally, can be really functional.
In the image below, notice the “channel” along the left side of the drawer. Yes, I could have shoved the drawer organizer all the way to the side, but by “floating” the organizer a few inches out, I created a slot that perfectly holds fire starters.
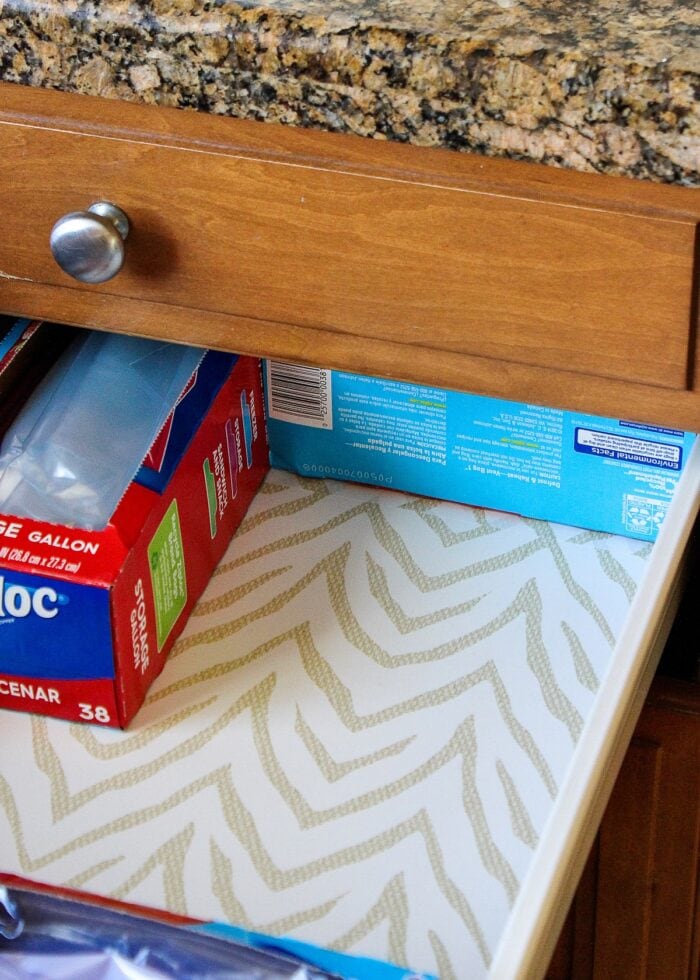
Don’t Overlook Inaccessible Spaces
Some kitchen drawers don’t pull out ALL the way out. While it can be annoying, don’t consider these hard-to-reach areas off limits. In fact, they can be great spots for storing things you definitely want to keep but don’t use very often.
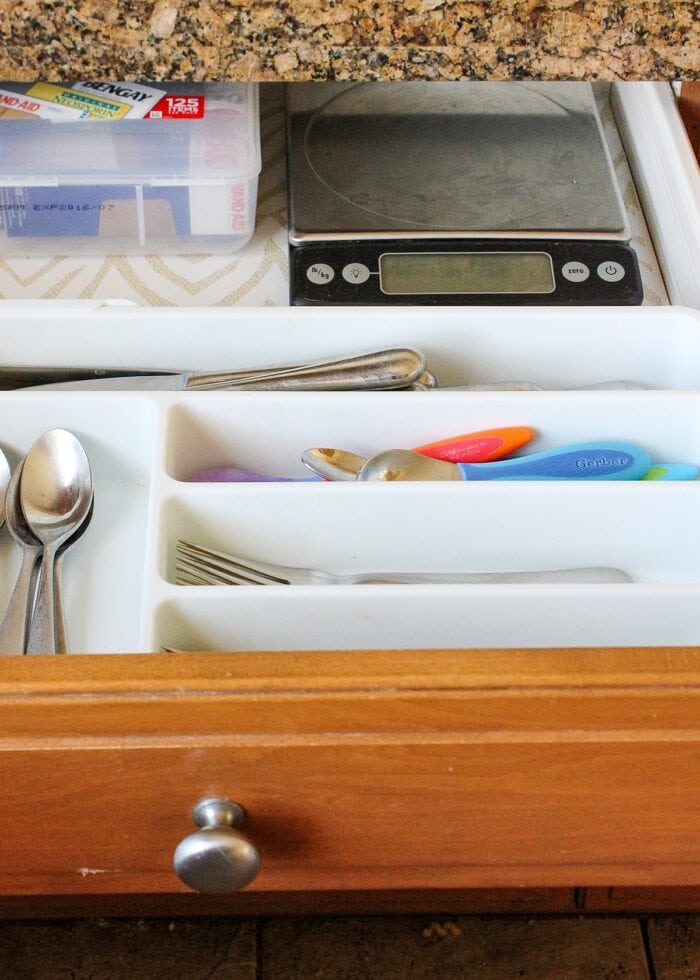
In the silverware drawer below, I realized that placing the organizer in the usual (vertical) configuration left us with two problems: 1) too much wasted space on the side, and 2) we couldn’t easily get to the items in the back of the organizer.
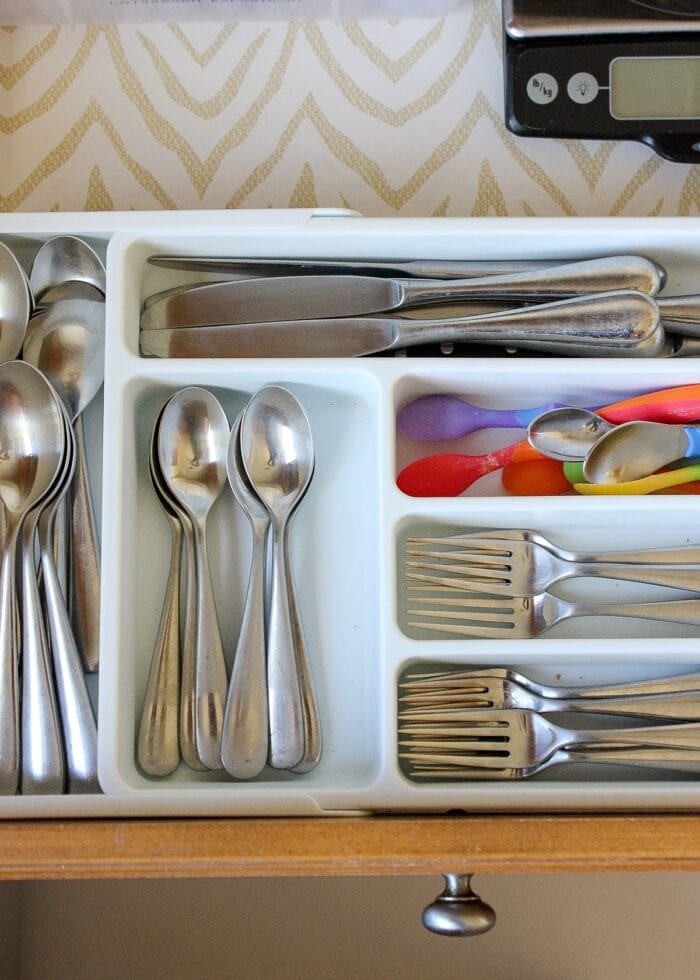
But once I rotated the organizer sideways (which we had never tried before), it opened up the whole back of the drawer for larger items. Suddenly, our food scale and first aid kit (neither of which had a logical place before) had a handy yet out-of-the-way home!
Want to save this post?
Make Things Snug
It really bothers me when I pull a drawer open and everything slides around. So for most of our drawer organizers, I use thick double-stick tape to keep them secured to the bottom of the drawer. But sometimes tape isn’t necessary or practical; so I instead try to arrange the items so they don’t slip around at all.
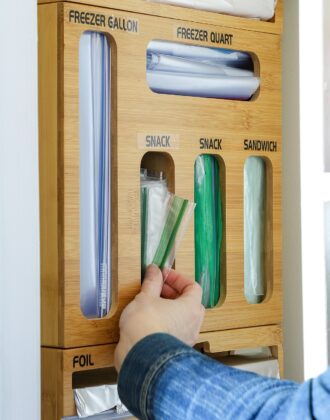
Don’t have drawer space for Ziplock bags? See how I organized ours on the wall instead! How to Organize Ziplock Bags (With or Without a Drawer!)
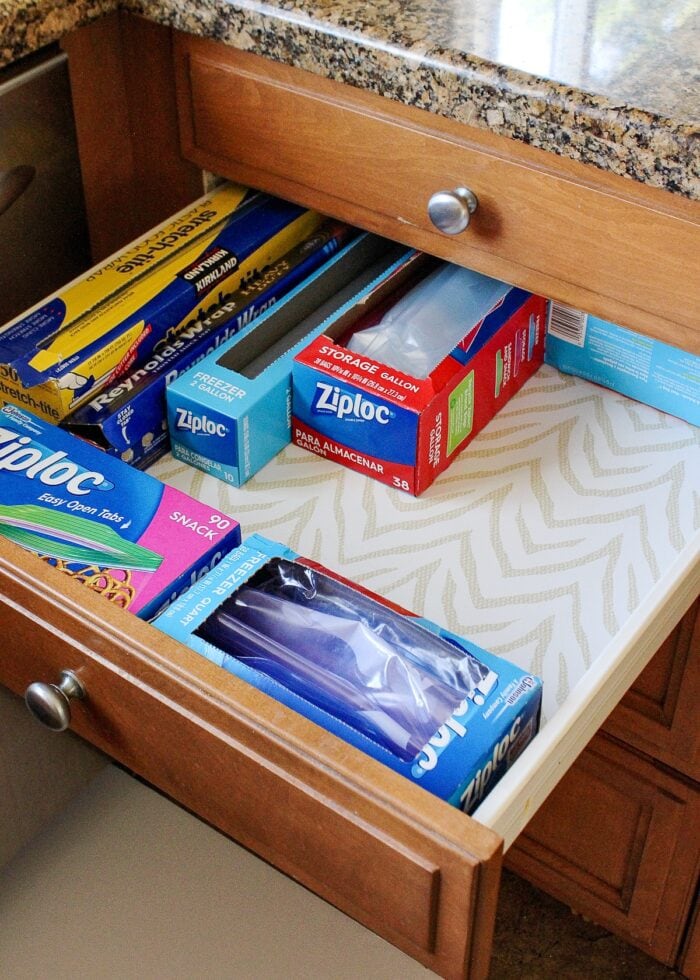
In this Ziplock bag drawer, I used an extra/unopened box of baggies tucked into the back to hold all the other boxes snug in place. This isn’t hard or complicated; but this simple trick does wonders for keeping drawers tidy no matter how much (or how forcefully!) they are opened.
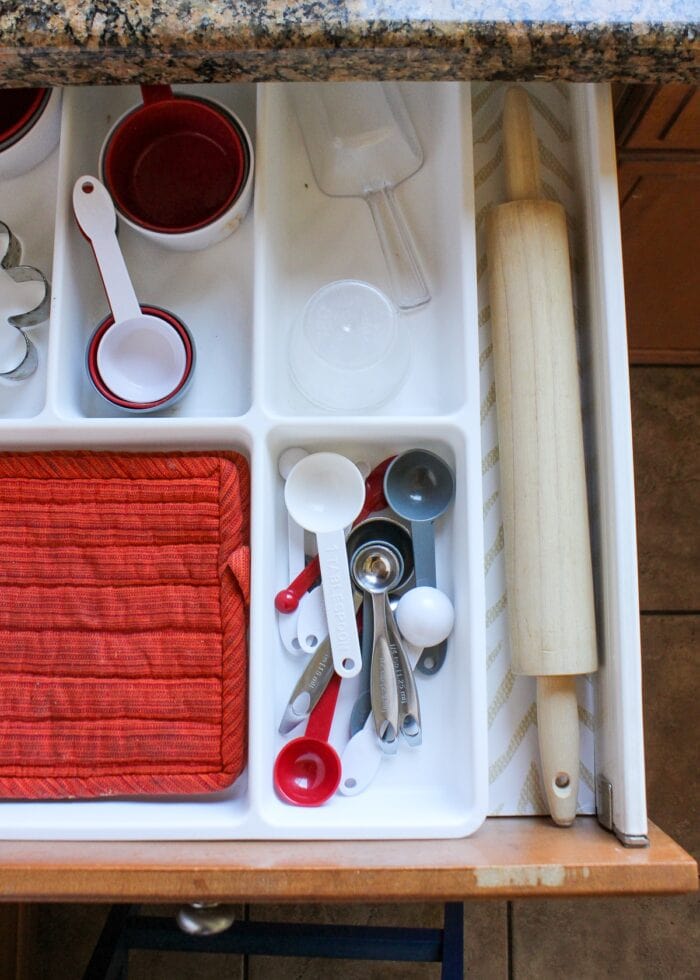
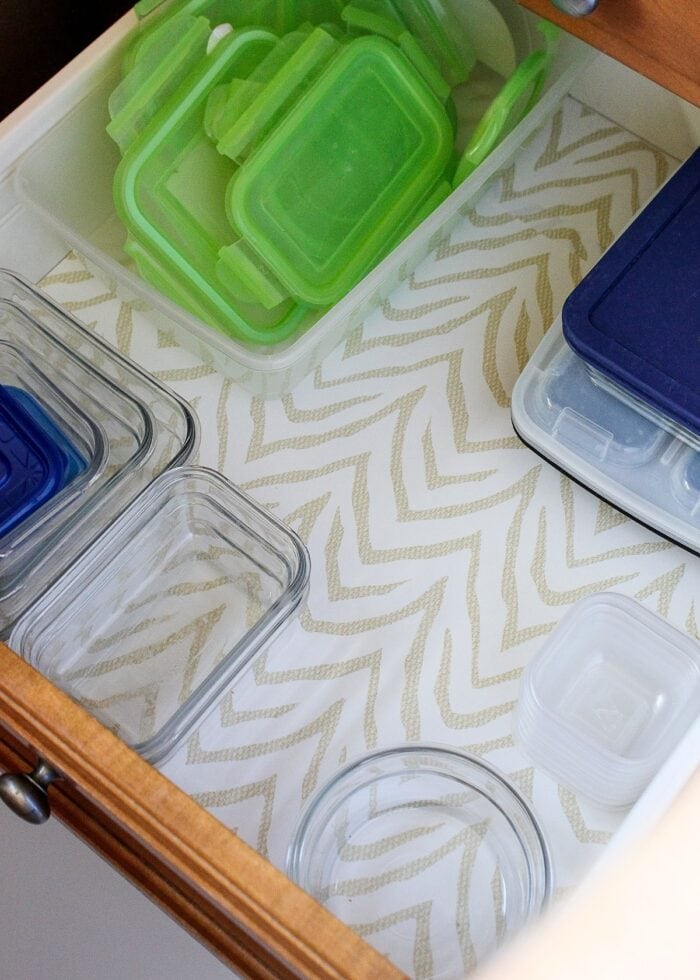
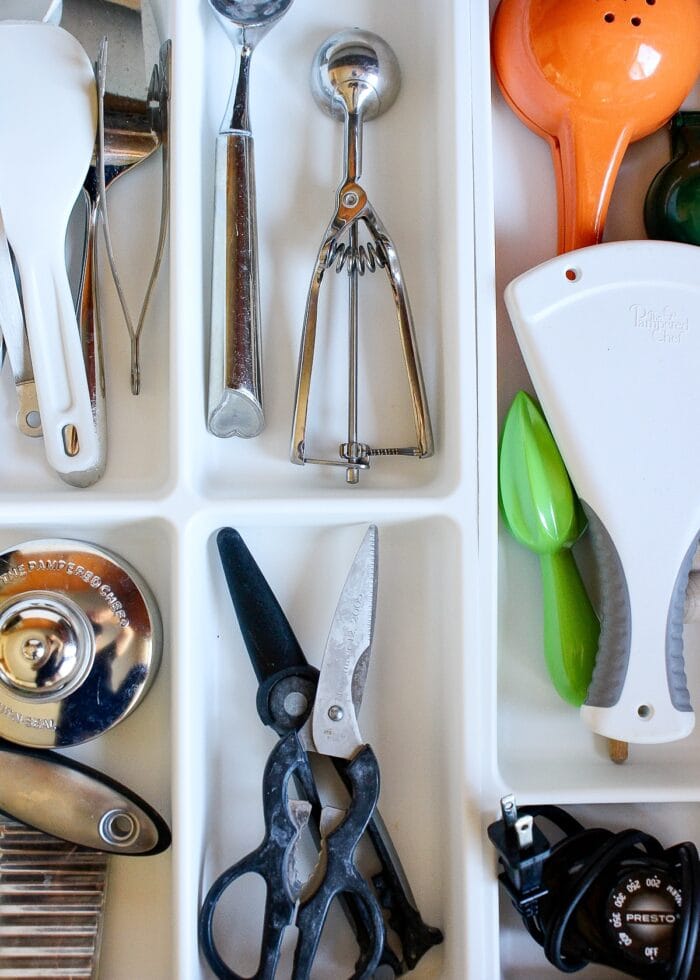
Tip #5: Store Like Items Together
When organizing kitchen drawers, try to create general categories or “zones.” Put serving utensils together, juicers together, cutting utensils together, measuring cups and spoons together, etc.
Not only does storing like items together tend to create tidier spaces (because they are generally the same size), but this also helps you (and everyone in the household!) find items quicker since you can likely visualize and remember the location of larger groups of tools.
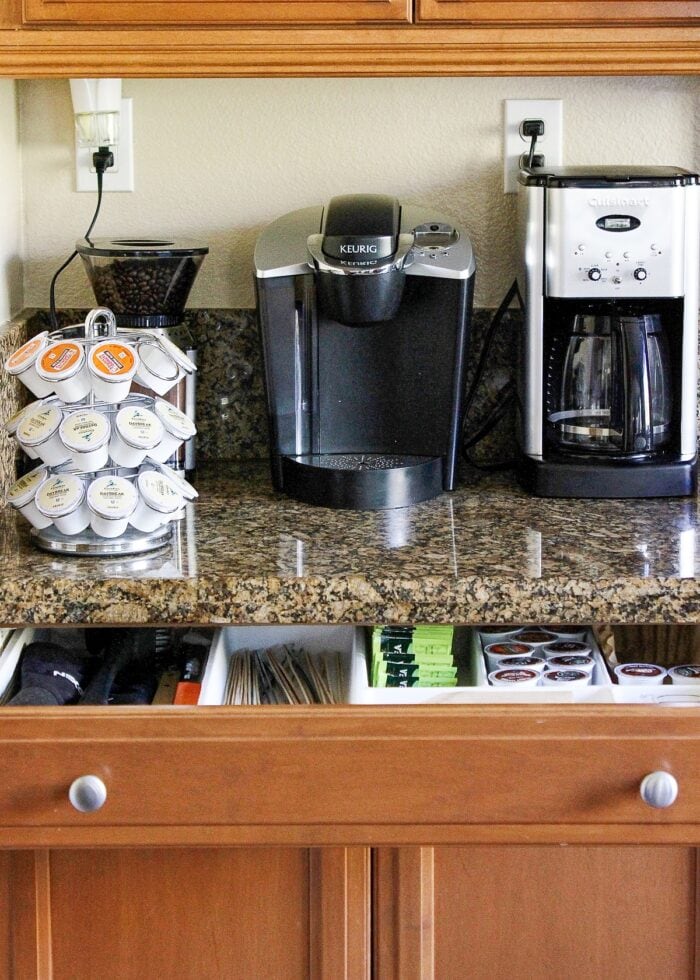
Tip #6: Keep Items Close To Where They Are Used
When deciding what things should go in which drawers, think about how you use and move throughout the space.
- Where do you pack lunches? Put baggies and lunch containers close.
- Where do you meal prep? Put wooden spoons, spatulas, and measuring cups nearby.
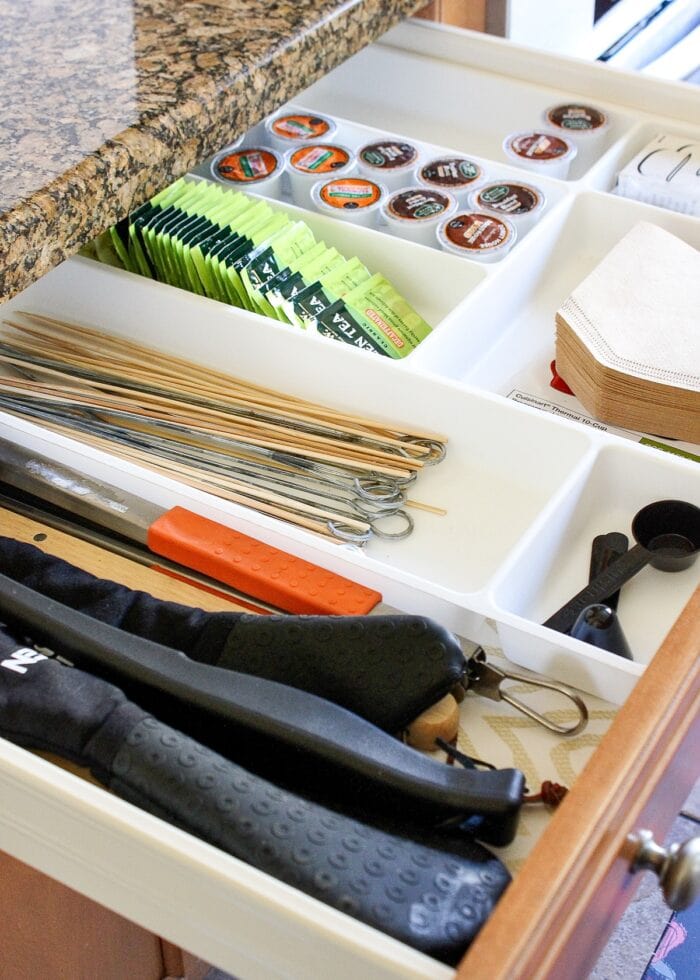
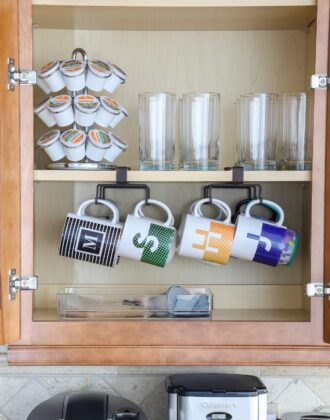
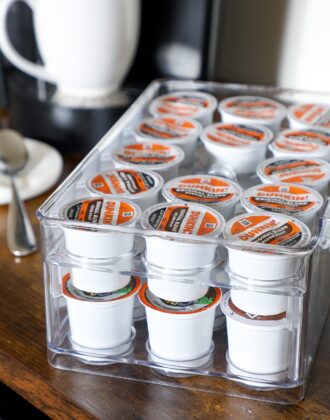
- Where do you make coffee? Corral the coffee, scoops, and filters in a drawer beneath the coffee pot. Learn more: Where & How to Store Coffee K-Cups (In Any Kitchen Layout!)
If you’ve lived in your house for a while, you should have a pretty good idea where you do certain tasks. If you are just moving in, I recommend living in your house for a few months before organizing kitchen drawers “for good.”
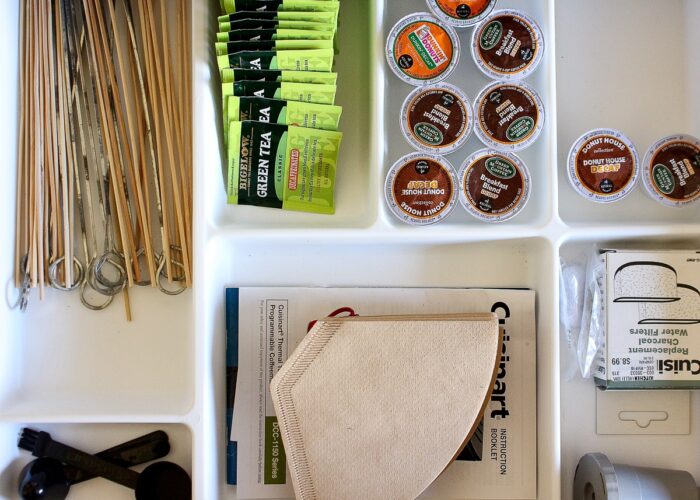
Tip #7: Remove Bulky Packaging
In some cases, it helps (both visually and spatially) to remove commercial packaging. I try to get rid of packaging in our pantry whenever I can, but I find it can also be helpful in drawers too.
For example, by taking the coffee filters, tea bags, and extra K-cups out of their bulky boxes, they fit better into the drawer organizer (when we would have otherwise had to dedicate pantry space to these items). Plus, with things out of packaging, it’s easier to see when you are running low or out of a particular item!
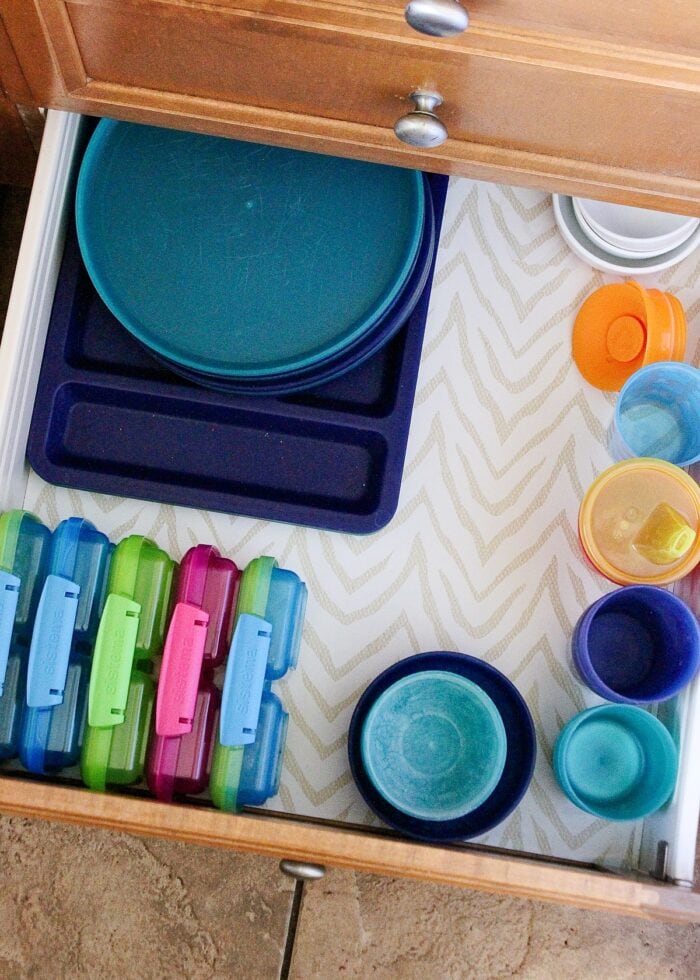
Tip #8: Think About The Kids
If you have kids in the family, think about the items they use and if you want them to have easy access to them.
Sometimes, it can be really helpful to have kid-safe bowls, plates, and cups in a lower drawer. This can give little ones something to play with during meal prep time; OR it allows kids to be self-sufficient in getting their own items when setting the table.
On the other hand, you might not want kids to have easy access to certain items, so make sure you place those in drawers that are higher or have latches.
Tip #9: Make It Pretty
When organizing kitchen drawers, I always find it’s worth the extra effort and time to make our drawers pretty with peel-and-stick shelf liner (this is the brand I usually use). And for a few reasons!
- Liners helps keep drawer surfaces clean from daily wear-and-tear. Not only is contact paper typically more wipeable than most interior drawer surfaces (which tend to be wood); but when it’s time to move out, we can just peel and go without having to worry about cleaning the inside of each drawer.
- Liners can cover up unsightly surfaces. Whether the bottoms of the drawers are damaged, stained, or simply worn out, pretty papers make everything look and feel fresh again.
- And finally, I simply enjoy seeing a pop of pretty when I open drawers. It’s an easy detail that makes each house feel more like our own!
Learn how to do this here: The Best Way to Line Drawers & Shelves with Pretty Paper
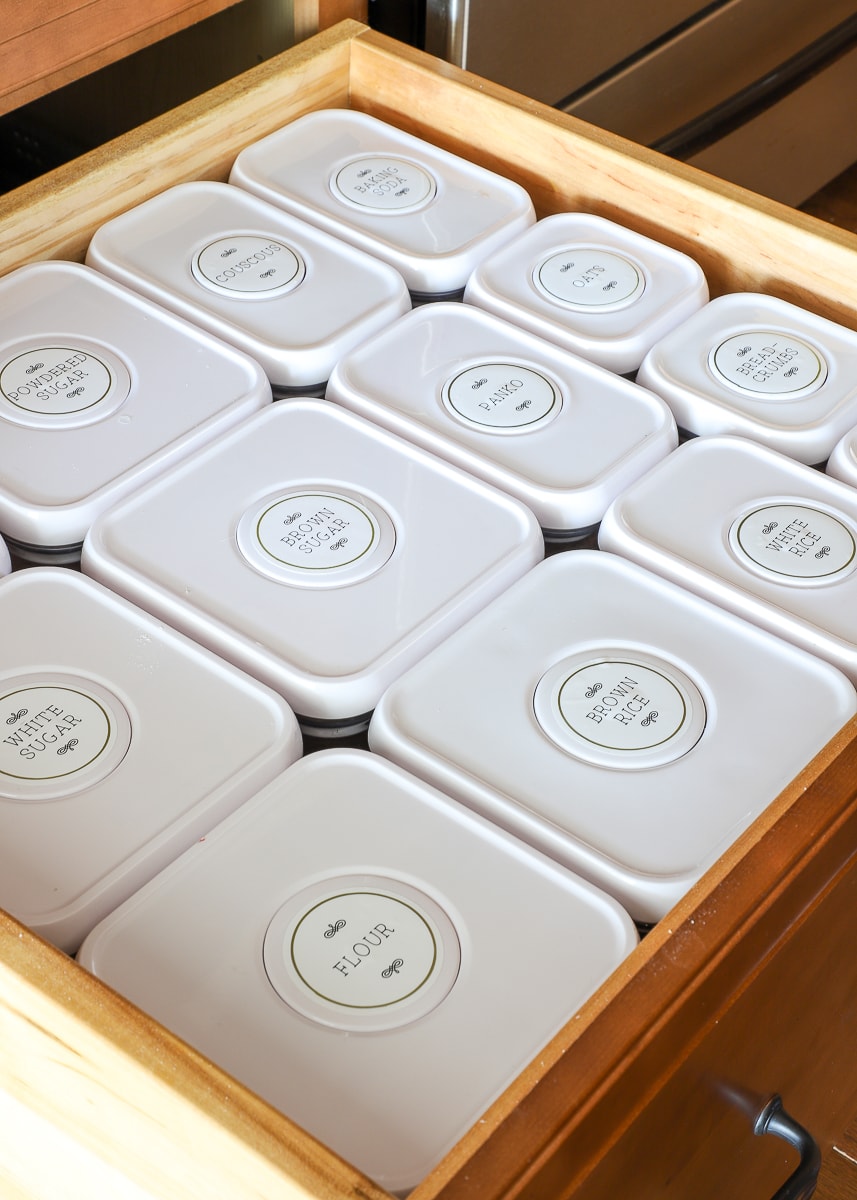
Tip #10: Label as Necessary
Labeling the items inside your kitchen drawers isn’t always necessary, but there are two situations where it can be especially helpful.
Pantry Items
The first is if you are using drawers for food/pantry storage. In deep kitchen drawers, it can be incredibly difficult to tell what is where (especially if you can’t see the sides of the canisters). Labels on lids can save you valuable time and frustration.

Grab my easy-to-print Pantry Labels HERE!
Put-Back Reminders
If you (or anyone in your household) has difficultly remembering where items go back in your now perfectly-organized drawers, labels in the bottom of drawer dividers can work wonders. A simple peek-and-stick label reminds you where the kitchen sheers or can opener or corncob holders go. This is especially helpful if you have kids or teenagers emptying the dishwasher!
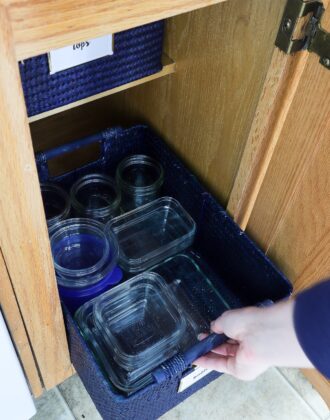
Other Great Kitchen Storage Solutions
Ready to organize the rest of your kitchen? I’ve got you covered with more easy solutions!
- How to Make Pantry Labels
- How to Organize a Pantry
- How to Organize Baking Pans
- How to Organize Kitchen Drawers
- How to Organize Corner Kitchen Cabinets
- How to Organize Upper Kitchen Cabinets
- How to Organize Cabinets Under the Kitchen Sink
- How to Organize Small Appliances Inside Kitchen Cabinets
- How to Organize Spices
- How to Organize Coffee Mugs
- How to Organize K-Cups
- How to Organize Recipes
- How to Organize Ziplock Bags
- What to Do with Dirty Dish Towels
Having organized kitchen drawers can really makes a huge difference in your day-to-day life. Beyond looking tidy, it can save you serious time and sanity to be able to find exactly what you need whenever you need it. And thankfully, organizing kitchen drawers isn’t really hard, nor does it take a lot of time. What it does require is considering the drawer space you have and thinking about how you specifically need to use it…and a few great drawer organizers surely help too!
Megan
14 Comments on “My Top 10 Tips for Organizing Your Kitchen Drawers”
My husband would probably say that your drawer glides are too short for the drawers, that is why they don’t open up all the way.
I second your husband’s statement. Opening the drawers (or cupboards) and not wondering if you will have to go searching for what you need is a great feeling. Now to find some time to get my kitchen done. Maybe just one drawer at a time. Thanks for sharing some simple and practical solutions to common house problems!
Hey Kristie!!
It didn’t even occur to me to check the drawer glides, lol! Such a good tip! I hear you on finding the time. I kept putting it off but committed an afternoon to just knock it out – man it made such a difference!
Hope you’re doing well!!!
Megan
Yay!!! I recently did a post on kitchen drawer organization because ours were a MESS!!!
http://www.designinsidethebox.com/2016/09/26/taming-kitchen-cupboard-madness/
Great tips! (P.S. Hope you’re feeling well! Pregnancy was tough on my body and sleep was always my top wish list item! LOL)
Love, Love your wide kitchen drawers, I wish I had them in my kitchen. Our kitchen is very small with only 4 very narrow drawers for the basics, so I’ve had to store most everything else in clear flat (labeled) storage containers in a narrow bookcase in the garage along with canned goods. Living in earthquake area and going thru one where all glass broke, baggie boxes are now housed in cabinet above stove range hood and all plastic containers in top cabinets. Ceramic and glass bottom cabinets – it’s the only way to stay safe and have installed earthquake(proof)latches. But I sooo love your organized your kitchen. Thank You for the post.
Hi, I’d like to suggest one more thing in the kitchen – manuals for kitchen appliances/electrics! I’ve stored them all in one of my kitchen drawers. Whenever one of the appliances does not work right, I go straight to that drawer and get it’s manual to look at the troubleshooting, before calling the repairman.
Hi Megan
What a lovely post, the pictures are showing so lovely drawers ! It’s simply wonderful and so nicely organized ! I would like to be able to use your tips but we only have two yes two little drawers in our kitchen so I do the best to organize them using containers of course and no empty space but in one of them I have to put things one upon the other. So I had a great time reading and admiring your drawers. Hoping you’re feeling well.
Michèle
After 20 years of moving and 13 different homes you would think I had the proper organizing solution for every situation (you’d be wrong!) Organizers are the one thing that I never purge between moves (unless they break) as you never know what the next house will bring.
This last move to our last (knock on wood) military base house we had the narrowest drawers of any place (including my first college studio apartment!) Our WIDEST drawer was 9.5″, for reference spread your hand wide, that is about 9″. Not one single one of my organizers would work! We ended up buying only two new organizers for our silverware, the rest of the drawers are so narrow and small that they stay relatively organized.
I am so excited for our “forever” house. We are going to be renovating an existing home and planning out the perfect kitchen has been so much fun.
Hi Megan!
This is random, but I noticed you have a (Febreze?) plug-in by your coffee station. Do you find that having it located under a cabinet causes any buildup of oil above the plug-in? I had that happen with an Air Wick one in our last kitchen (it actually built up on the underside of the overhead cabinet, then dripped down and messed up the counter a little!), and I’ve been paranoid about it ever since! It might be a defect of the certain brand, but it’s worth monitoring! 🙂
Hmmm.. Plug-ins. Why not use a diffuser and essential oils. So much healthier and the scents are all real.
wow, cannot help notice you use a ton of plastic, the amount of container’s, zip lovk bag’s, coffee pods – I found a bit heavy.
Your tips purely use ready made plastic trays, to be truthful- anyone can just go buy a heap of plastic , if they can afford .
Great that you are delighted though, whatever makes you happy 😉
Hi Megan,
Thanks for posting so many great tips!!! Love them all!!! We’ve been in our home about nine years and although my drawers are quite organized, our needs are changing and I’m thinking abut switching some things around… Imagine my surprise when I saw you are using my beloved IKEA organizers! LOL they are the best!!!!
Anyhow, I normally don’t comment; I just peruse and read; browse through, take note of what I like, pass by what I don’t care for.
HOWEVER, I wanted to offer you some encouragement after reading some snarky, highschool-ish, troll comments on your post.
Apparently, grown women tearing each other down, and publicly shaming in a passive aggressive tone is all the rage lately.
Ignore the negative comments; keep spreading your joy of organizing and home-keeping. Normal women like me appreciate your energy and efforts 🙂
I also use oil plug-ins. AHHHH the horror, I know!
Jennifer, I know this isn’t directed at me, but I had the urge to comment for the exact same reason!
Everyone seems so quick to judge lately. Suggestions and ideas are always nice but a snarky comment to go with it is likely not going to change someone’s mind!
(Also, Megan, I love your site and its helpful tips and tricks! Will definitely be taking a look at organizing my wayyyy overstuffed drawers in my tiny kitchen!)
Hey Sam!
Thanks to you too for chiming in here. It’s so funny what posts attract ugly comments and which ones don’t. In general, my readers tend to be incredibly kind and I don’t deal with too much negativity as a whole. But for some reason, this post attracts the nay-sayers 🤷🏼♀️ I’ve gotten pretty good at letting them roll of me at this point!
So glad you can find nuggets in my posts to use in your home!
Megan
Although you have great suggestions for organizing kitchen drawers, I recently ran into a simple tutorial for the best way to organize them. It is done with poplar or balsa wood slats 3 inches high which is the width of our drawers. And then placing them as needed (kinda of like Tetris…) depending on the stuff you would like to organize. DecorChick has the instructions and after following her instructions, I would not go back to any other store-bought separators. And as a bonus, they were super cheap!