How to Organize Ziplock Bags (With or Without a Drawer!)
Plastic food bags (like Ziploc bags, sandwich bags, snack bags, etc) are something many of us interact with on a daily basis. So organizing them into a streamlined storage system can not only save you serious kitchen space but also valuable time too! Whether you have available drawer space for a ziplock bag organizer or not, let me show you my new favorite way to store these household staples!
Why Organize Your Ziplock Bags (& Other Food Storage Products)
All throughout our home(s) but especially in the kitchen, I am a big fan of “decanting,” which is the practice of taking items out of their original commercial packaging and transferring them to permanent (and often prettier) storage containers. See more: Practical Tips for Decanting Pantry Items
Whether it’s your rice and flour or (in this case) plastic bags, tin foils, and baking papers…there are some really functional reasons to ditch the cardboard boxes and load these items into a dedicated ziplock bag organizer:
- Cardboard boxes take up a lot of space. By tossing them, you can store more in the same footprint.
- Cardboard boxes are busy. By eliminating the excess color, text, and patterns, you reduce visual clutter which in turn helps everything look and feel more tidy.
- Cardboard boxes are all different sizes, making them difficult to load uniformly into drawers or stack on shelves.
- Cardboard boxes are closed off and opaque, making it difficult to easily assess your stock. How many times have you reached your hand into a box only to discover it’s empty!?
- Cardboard boxes are flimsy, so they get damaged and lose their shape quite easily.
Our Ziplock Bag Storage Situation
Our current kitchen doesn’t have an abundance of kitchen drawers. And the ones we do have are pretty small. Not only did our plastic bags and wraps not fit quite right, but I had other items that were far more appropriate for drawer storage (e.g., gadgets, utensils, etc).
So when moving in and getting settled, I threw our bags and wraps on the pantry shelf, knowing I’d figure out a solution…eventually.
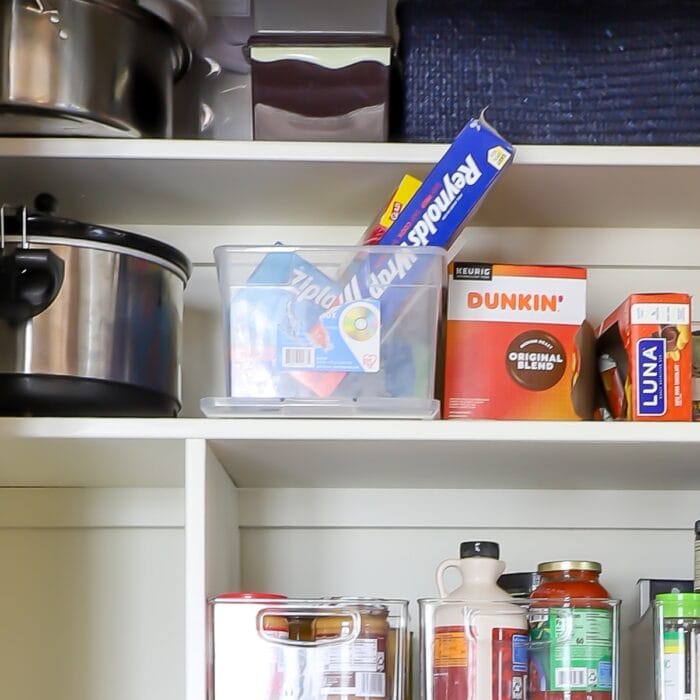
When I was recently organizing our pantry (reveal coming soon), it was time to find a better solution for all the plastic baggies and wraps. The up-high bin wasn’t at all ideal and our drawers were still out of the question. But then I realized we have this narrow side compartment in our pantry that was practically sitting unused.

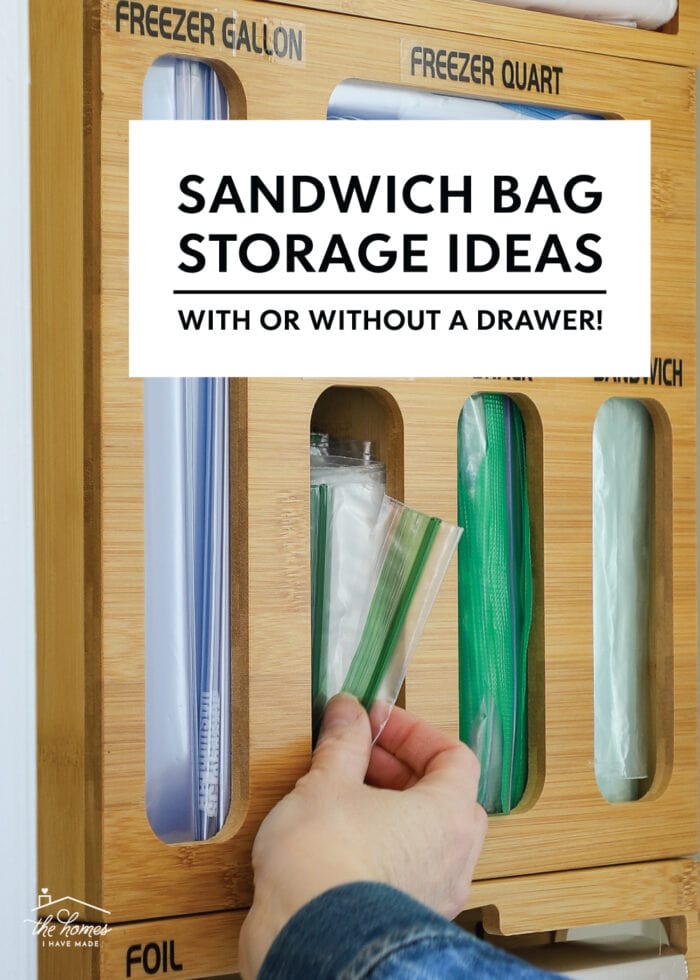
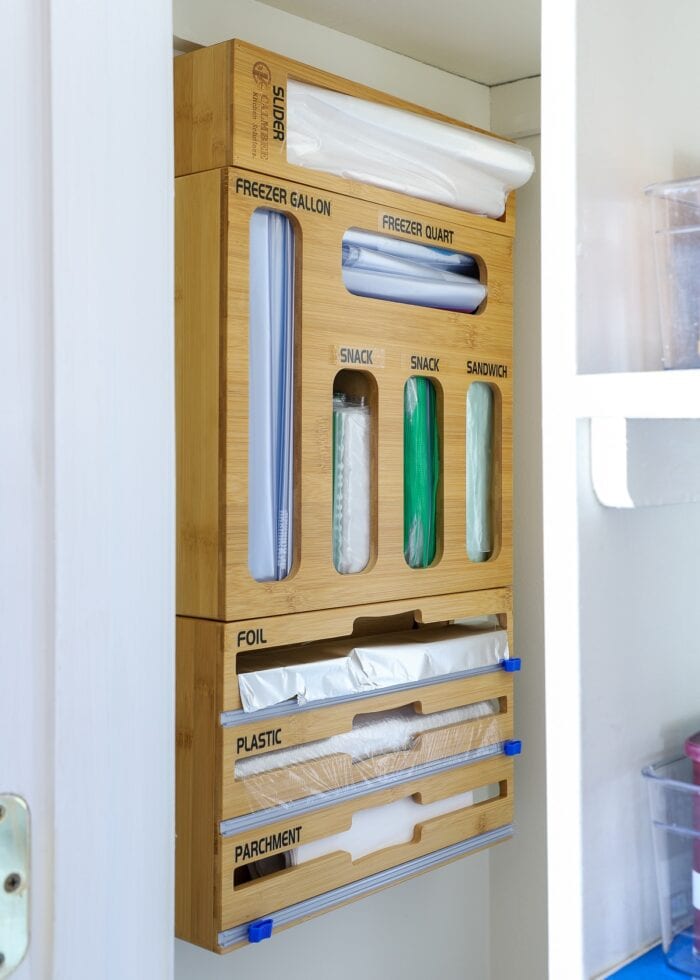
After doing a good bit of research to find the perfect ziplock bag storage organizer for this specific spot, we now have everything we use condensed into one location and mounted on the wall right inside the pantry door.
Personally, I find it easier to get items in/out of a wall-mounted ziplock bag organizer. And since a wall isn’t nearly as limited by size as a drawer, you can easily store everything all together. And best of all: this solutions keeps precious drawers and pantry shelves free for other things!
Let me show you how to create a similar setup in your own kitchen…whether you have the drawer space or not!
Video Tutorial
If you’d like to watch this organization project come together, here is a 3-minute video of the entire process. Full picture/text instructions are below the video. (Video not loading for you? You can watch it HERE!)
How to Organize All Your Ziplock Bags
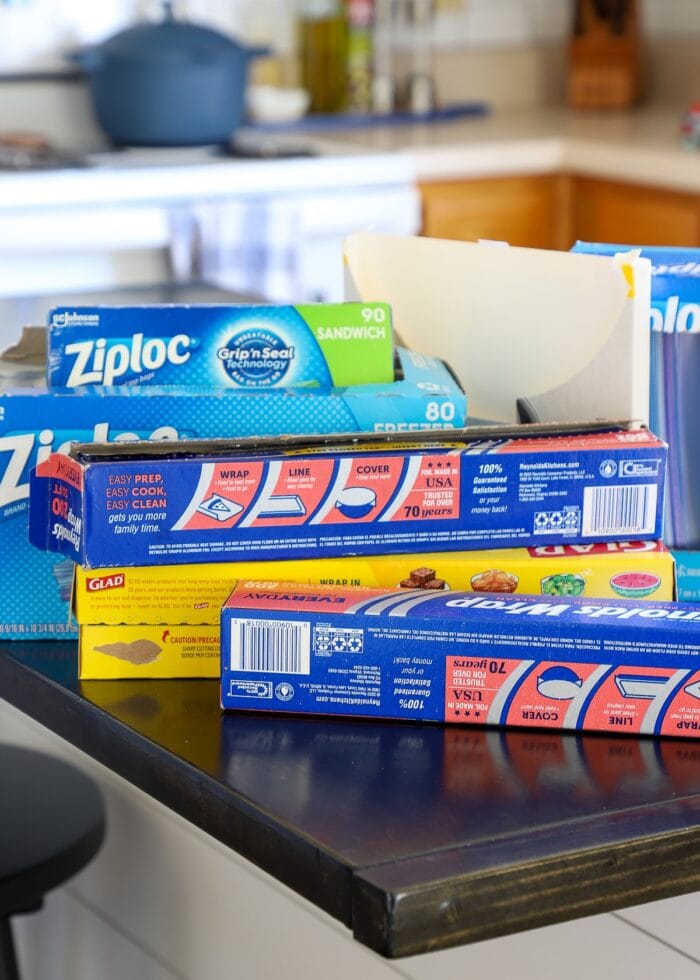
Step 1 – Gather All Your Bags and Wraps
Before you embark on organizing all your ziplock bags, plastic wraps, tin foils, parchment papers, and more…first gather them all into one spot. Yep…dig through your cabinets, drawers, pantry, and other storage areas to find everything you keep on hand.
Further, I highly recommend re-stocking everything you typically use before you start this project. Why? You don’t want to create a system that doesn’t have space for an item you purchase regularly but forgot about!
Step 2 – Determine the Best Storage Location In Your Kitchen
Ziplock bag organizers are available in a wide variety of sizes for both drawer and wall installation. So in deciding how to store your collection of disposable products, you first need to figure out the best location in your particular kitchen.
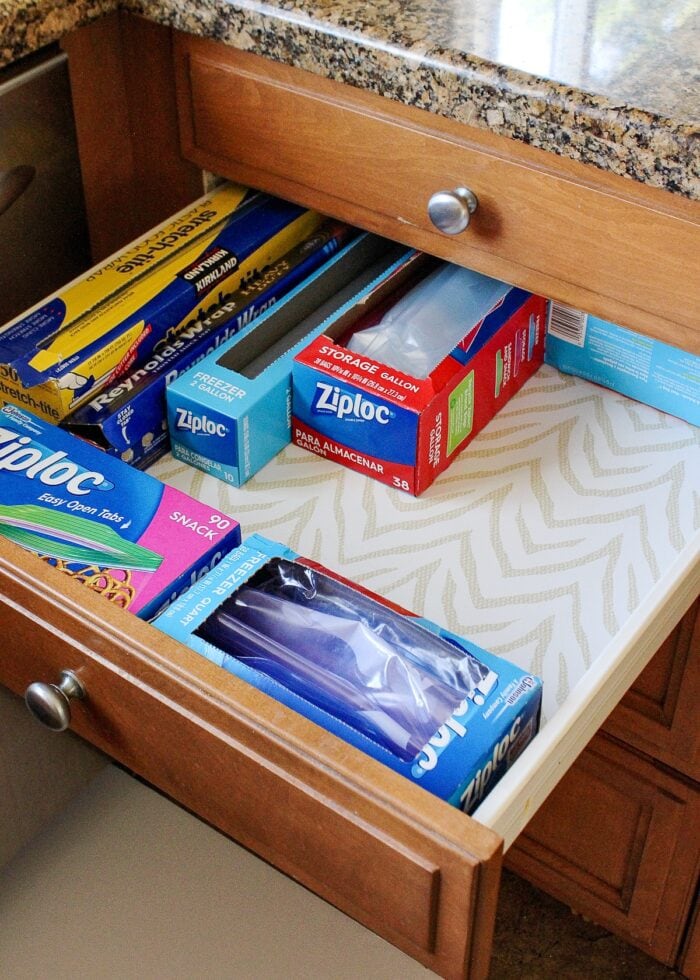
The over-sized kitchen drawers in our California rental had plenty of space for numerous products!
Here are some things to consider:
- Where do you pack up lunches or leftovers?
- Are your drawers big enough to hold large rolls, gallon bags, etc?
- Do you keep a lot of products on hand (so you’ll need a lot of space) or just a few (so a small drawer might be sufficient)?
- Do you have an easy access wall nearby (e.g., pantry, closet, laundry room, storage room, etc)?
- Do you prefer concealed storage or open storage?
Although drawers are indeed the most common place to store ziplock bags, don’t hesitate to think “outside-the-drawer” to identify a location that works best for your kitchen and your items!
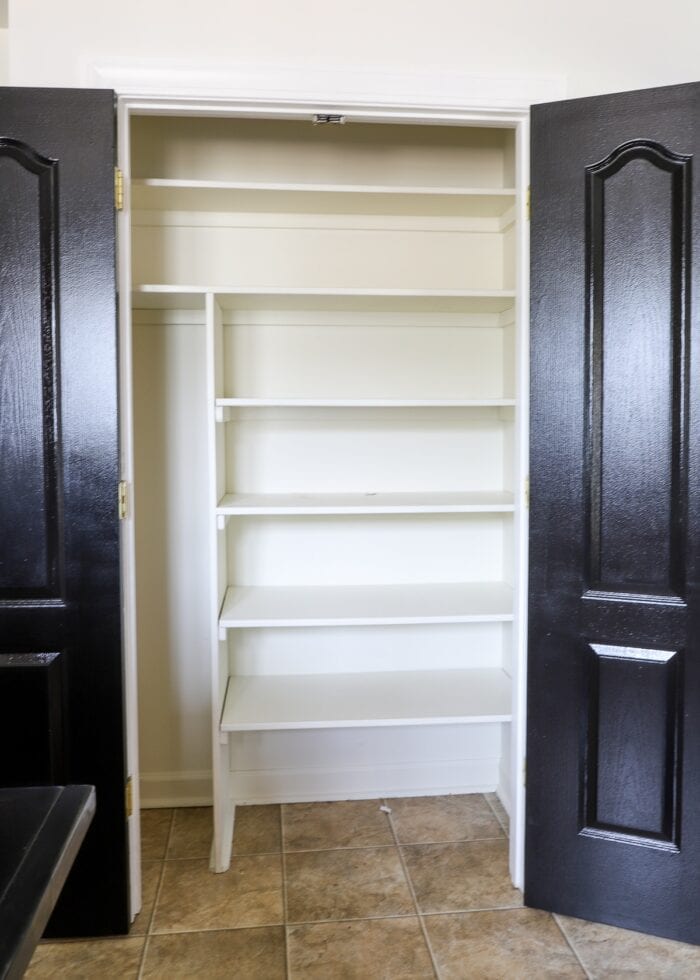
The full size pantry in our North Carolina rental has more space than we need for food storage, making it an ideal location for these other items!
Step 3 – Research Organizer Options
Now armed with two pieces of information…
- How many different products you want/need to store
- The location of where you want to store them (including the wall or drawer size)
Want to save this post?
…you can then shop around for the best organization solution that meets your budget, layout, and installation needs.
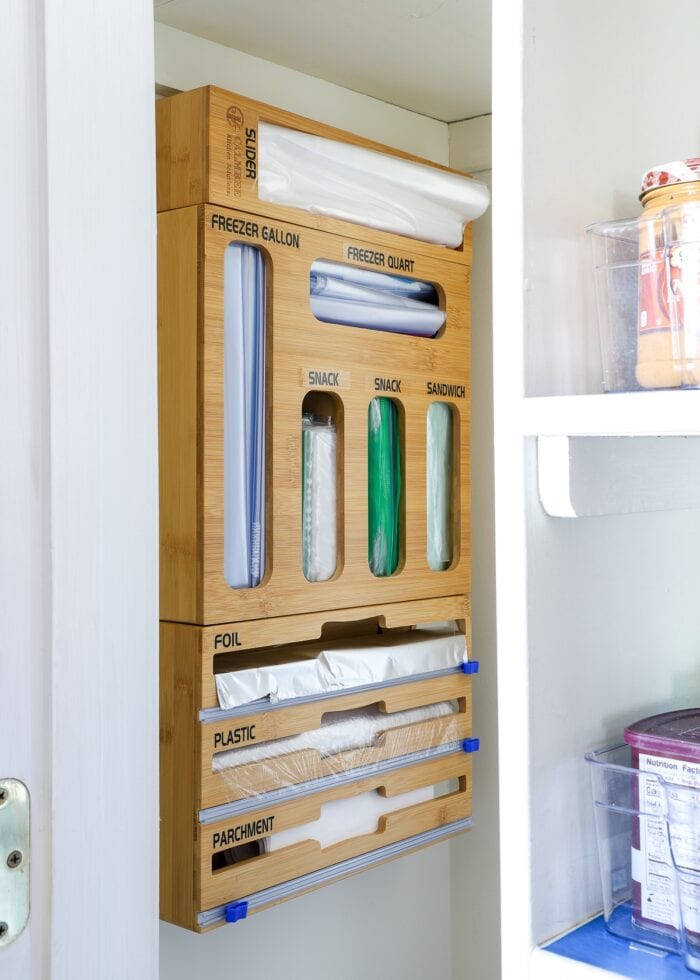
My search led me to this wooden Ziploc bag organizer, which I ultimately chose for these reasons:
- It has enough spots for all the various size bags and wraps we normally keep on hand, and it does so in just a few units (instead of a collection of many individual boxes).
- It is the perfect size for the side nook in our pantry.
- It accommodates both in-drawer and wall-mount installation (I like having flexibility for future homes).
- Its design is simple and streamlined, and the color matches the existing oak cabinetry.
- It comes with clean, simple labels (saving me a step!)
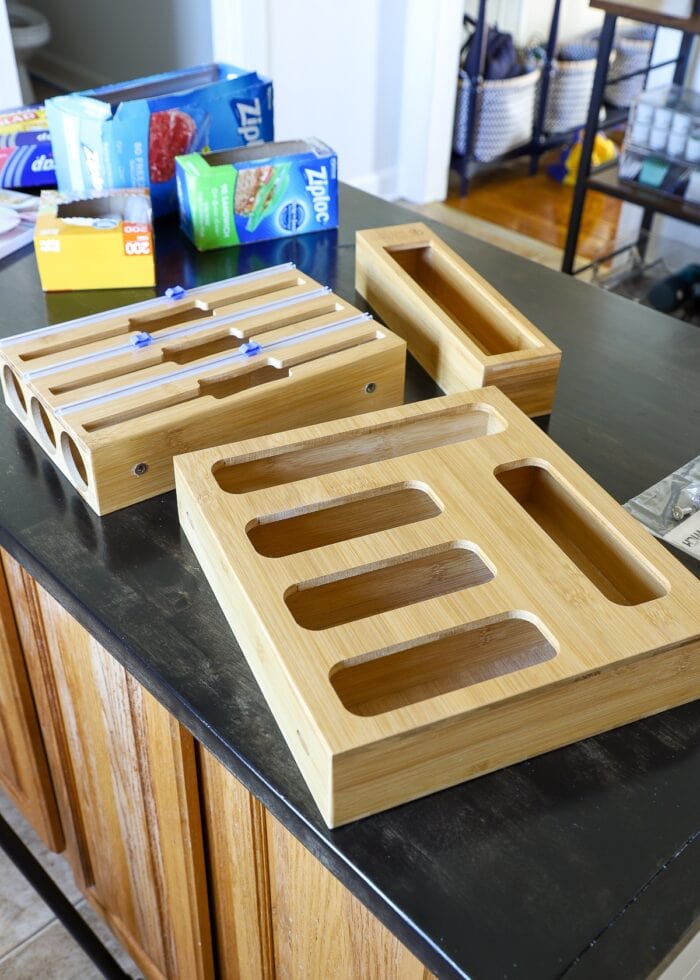
NOTE: Very rarely am I SOO impressed with a product as I am with this one. Not only are the compartments spacious and the construction high quality, but I LOVE how the sizes line up perfectly (no matter how you lay it out), and that you are given assembly options (e.g., rolls on top, rolls on bottom, side-by-side, etc). It also comes with ALL the assembly hardware, drawer hardware, wall-mounting hardware, AND labels…essentially providing everything you need to take this project from start-to-finish.
(Not at all sponsored…just totally impressed with this great product!)
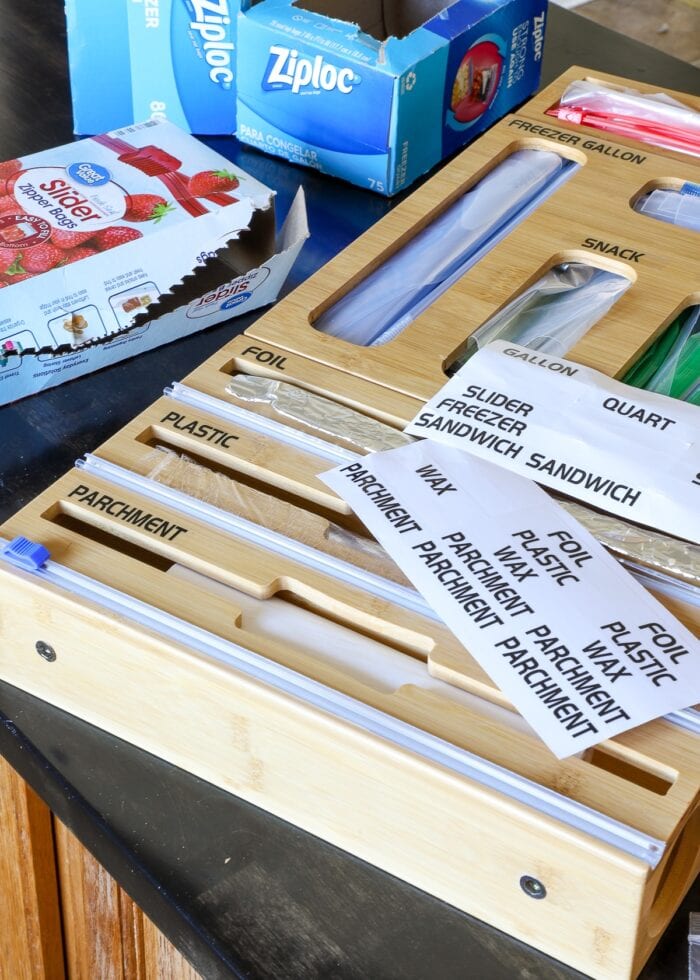
Step 4 – Load Bags & Wraps Into Organizer
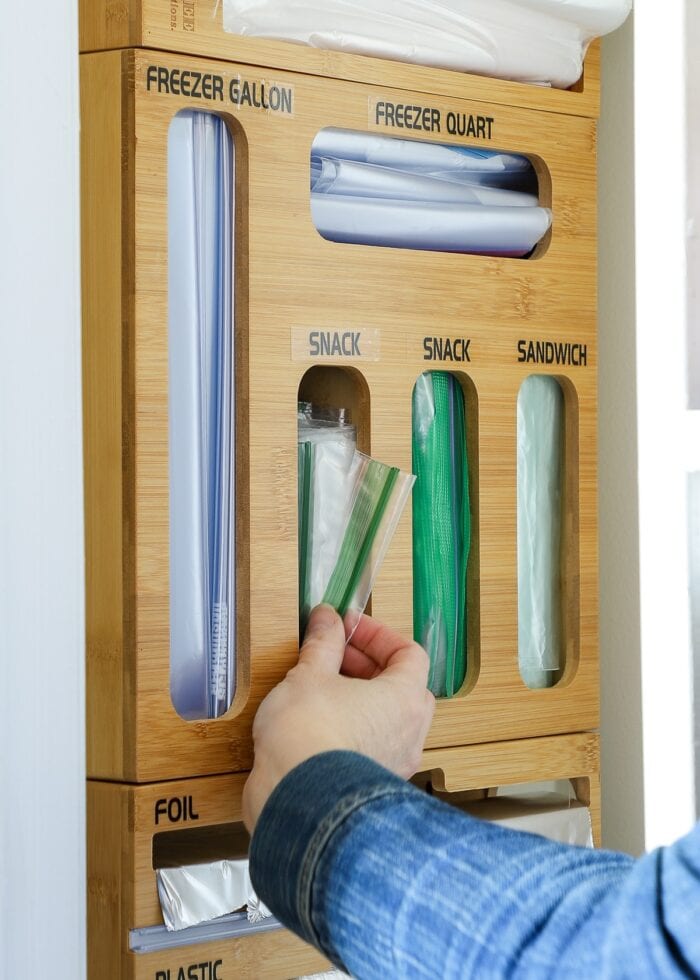
Once you have a baggie organizer in hand, it’s time to start loading in your various food storage bags. It might take a little trial-and-error to figure out what fits best where and what order you prefer everything in.
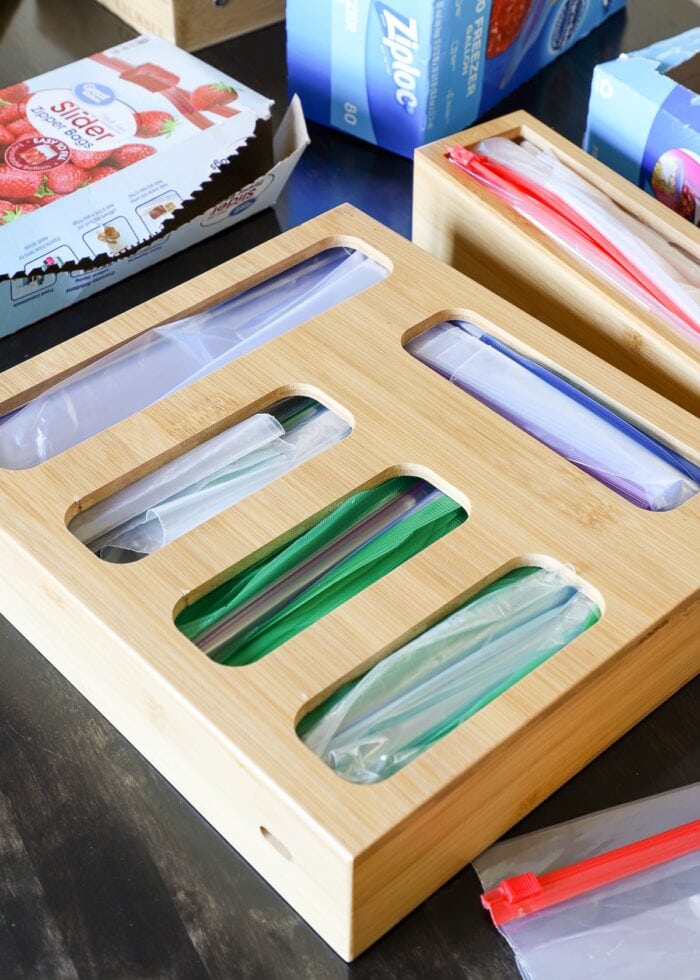
For this particular organizer, I found that standard boxes of Ziploc bags fit comfortably in the compartments. If you prefer to buy in bulk, keep in mind that you will likely have to store overflow elsewhere.
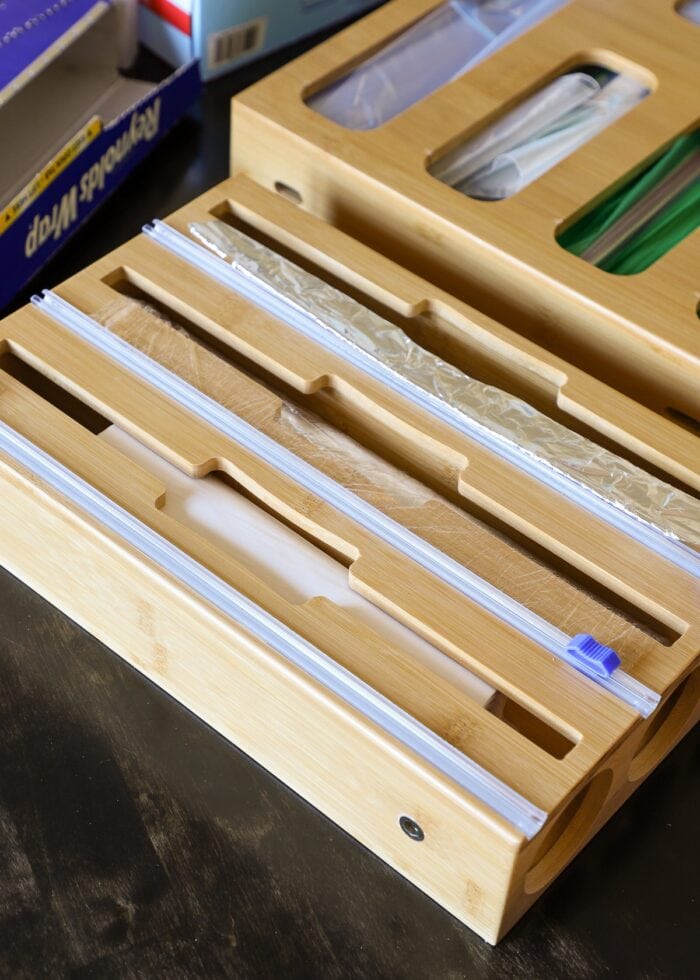
For the rolls, the compartments are quite spacious, but the holes (where you load rolls in/out) are fairly narrow. As such, these only accommodate regular-size rolls as well. If you buy in bulk, be sure to look for organizers that can accommodate thicker rolls.
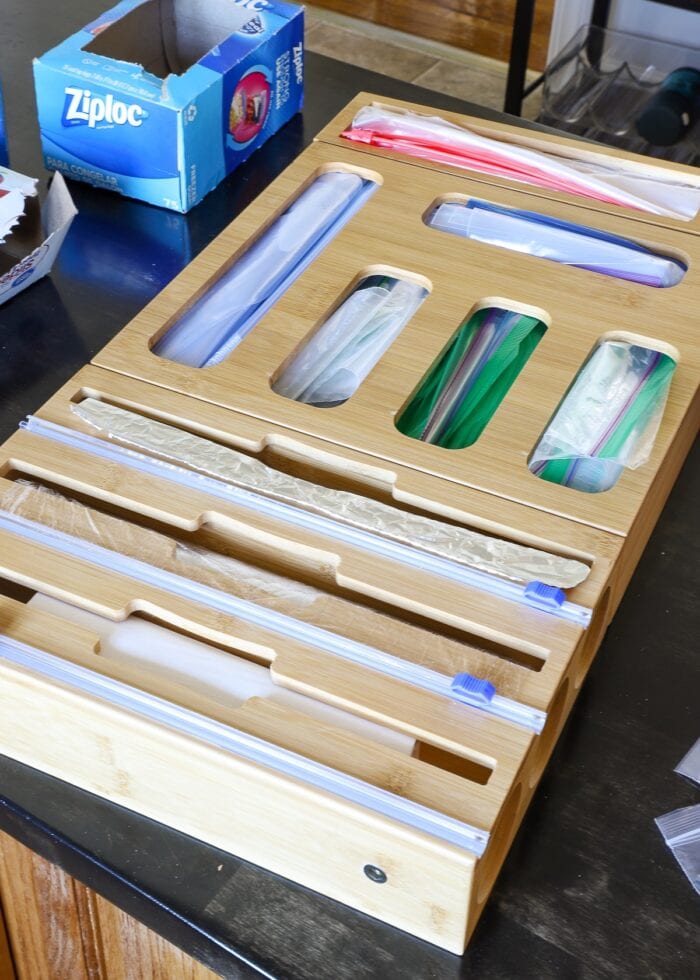
I always recommend getting the layout exactly right before you assemble, mount, or label anything. It’s much easier to re-orient the layout or move items around without everything screwed/stuck into place.
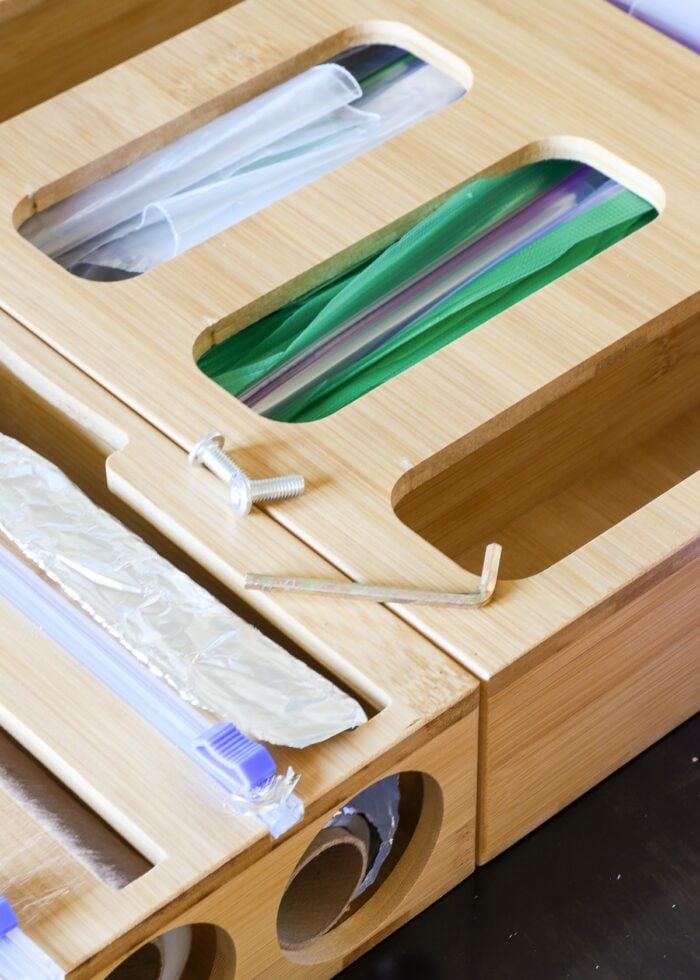
So once the layout is exactly right, proceed with any necessary assembly. I used the included hardware to screw the three various sections into a solid (hangable) unit.
NOTE: The long skinny box along the top of the organizer is technically a “clip box” instead of a bag holder. I wanted the extra compartment for slider bags so I used some screws to secure that box to the rest of the unit, as shown above.
Step 5 – Label Storage Bag Organizer
Before you place your organizer in a drawer or mount it to a wall, label each bag/wrap type. Even if you think you know where everything is, labels help family members, friends, guests, babysitters, etc in finding exactly what they need!
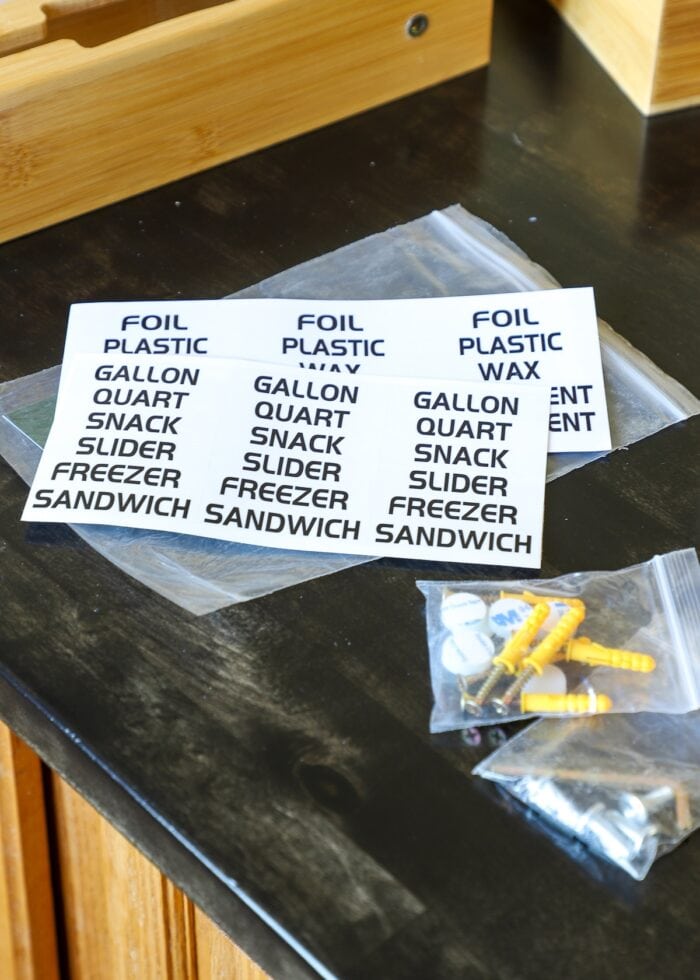
This organizer includes all the necessary labels for the products we buy, but you can always print your own using an inkjet or laser printer onto crystal clear sticker paper if needed!
Step 6 – Put Away Storage Bag Organizer
The last step is to put away your ziplock bag organizer, wherever you decided to place it!
If placing in a drawer, I recommend using the (included) sticky tabs to keep the organizer from sliding all around.
We used the included drywall anchors and screws to mount the organizer on the inside wall of our pantry.
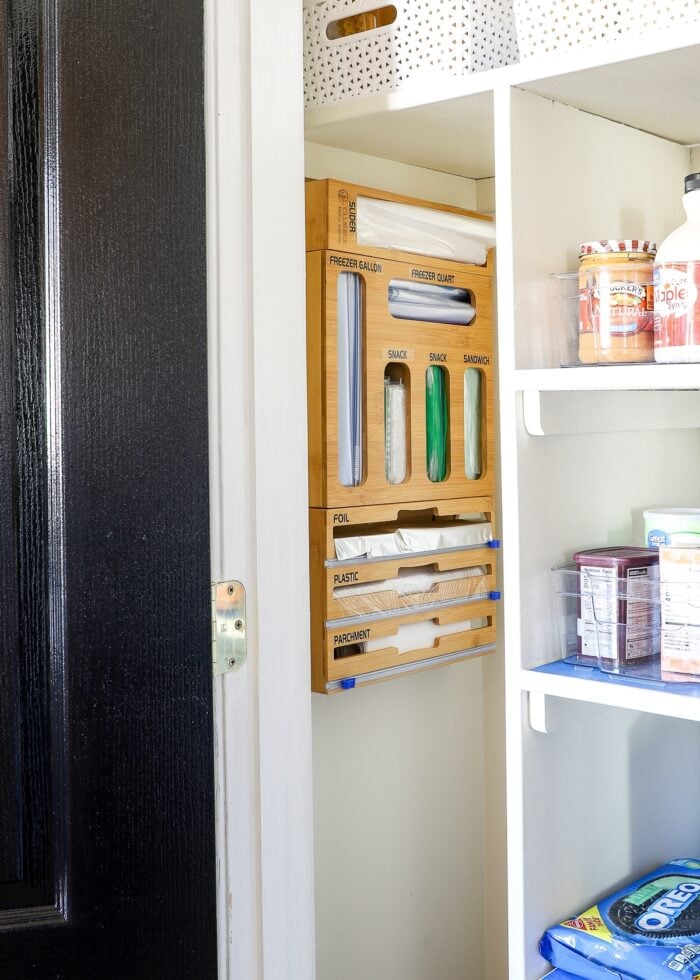
Although this side compartment is technically meant for a broom/mop (I assume), we don’t keep ours here. So I’m practically giddy about using up this otherwise unusable space for something so handy!
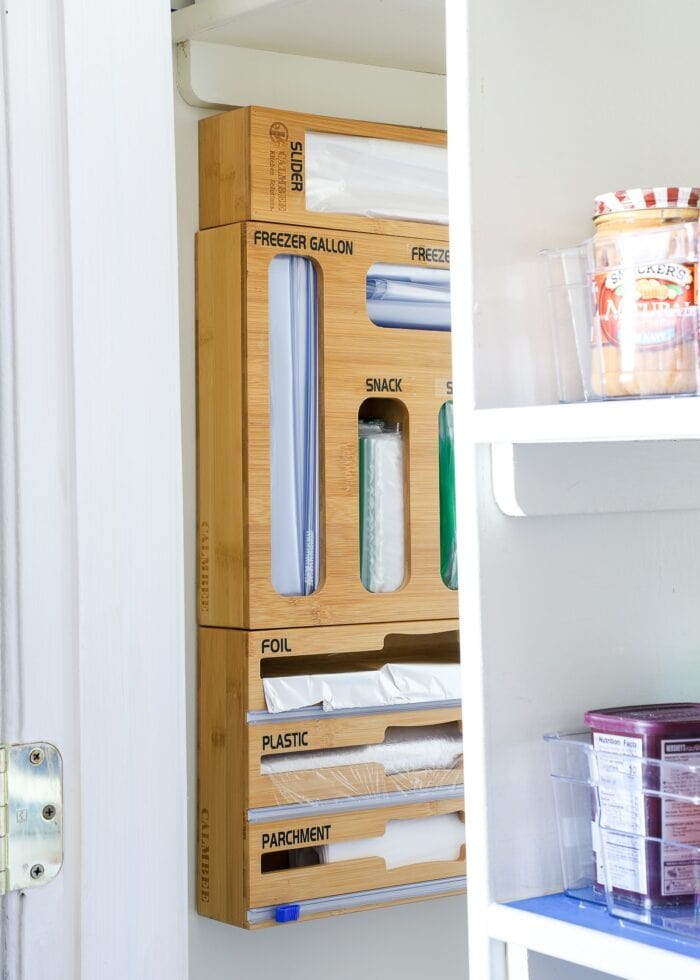
It may appear a little tight in pictures, but I assure you it is not! I have plenty of room to reach in and grab bags or pull out wraps (and trim!) as needed without any hassle at all!

That said, I do want to point out one final thing to consider when mounting such an organizer to the wall: re-stocking.
While loading up the baggie compartments with additional bags is no problem, the holes for the wraps face the wall and are completely inaccessible. As such, to load in new/more wraps, we’ll have to lift the entire organizer out, replace the rolls, and then put it back on its screws.
If that strikes you as a total nuisance, be sure to mount your organizer in a way that allows you to more-easily access the side openings.
Other Great Kitchen Storage Solutions
Ready to organize the rest of your kitchen? I’ve got you covered with more easy solutions!
- How to Make Pantry Labels
- How to Organize a Pantry
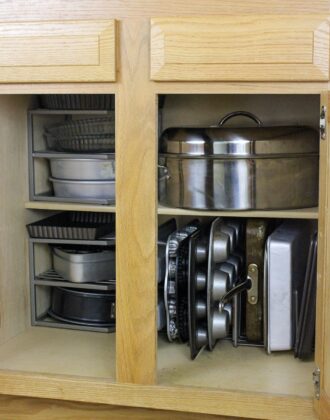
- How to Organize Baking Pans
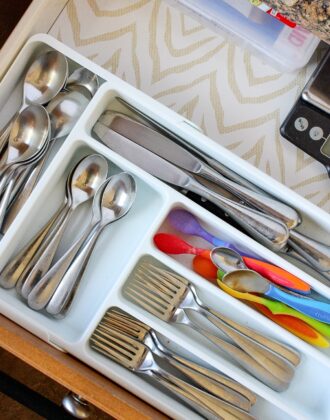
- How to Organize Kitchen Drawers
- How to Organize Corner Kitchen Cabinets
- How to Organize Upper Kitchen Cabinets
- How to Organize Cabinets Under the Kitchen Sink
- How to Organize Small Appliances Inside Kitchen Cabinets
- How to Organize Spices
- How to Organize Coffee Mugs
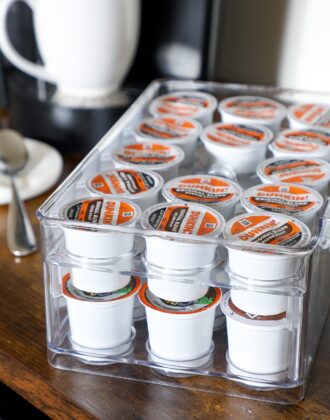
- How to Organize K-Cups
- How to Organize Recipes
- How to Organize Ziplock Bags
- What to Do with Dirty Dish Towels
I have seen these new-ish ziplock bag organizers on Amazon and social media for a little while now. But without a lot of drawer availability, I discounted them as a viable option for our particular kitchen. When I discovered many of them can be mounted to the wall instead, I couldn’t wait to give them a try…and I’m totally smitten with the functionality!
Whether you use a drawer or a wall, condensing your ziplock bag storage down into an all-in-one organizer will ultimately save you space and time…keeping everything handy and accessible in one mighty-fine-looking spot!
Megan
6 Comments on “How to Organize Ziplock Bags (With or Without a Drawer!)”
What a fantastic idea. I have space on a pantry wall and may have to do this.
Where can I purchase the bag organizer?
It’s a shame you’re promoting single use plastic. So many better options. Our Earth is polluted enough! This is a serious problem in the United States. I will be unsubscribing.
I wash and reuse many plastic bags. I only use the freezer type that can take re-use. We throw away too many items that can be reused. When a bag is no longer food-worthy, I pass it along to hold sewing items, and countless other household items. Then it eventually goes to plastic bag recycling at a local store.
Only see the press close plastic bags.
Will the Zipper, bags fit ?
Thank you so much!I have learned a lot! I stumbled into your site while looking for storage ideas. I am planning a complete redo kitchen and I have tossed my plastic and into glass which does not stack well.