How to Address Envelopes with Cricut Joy
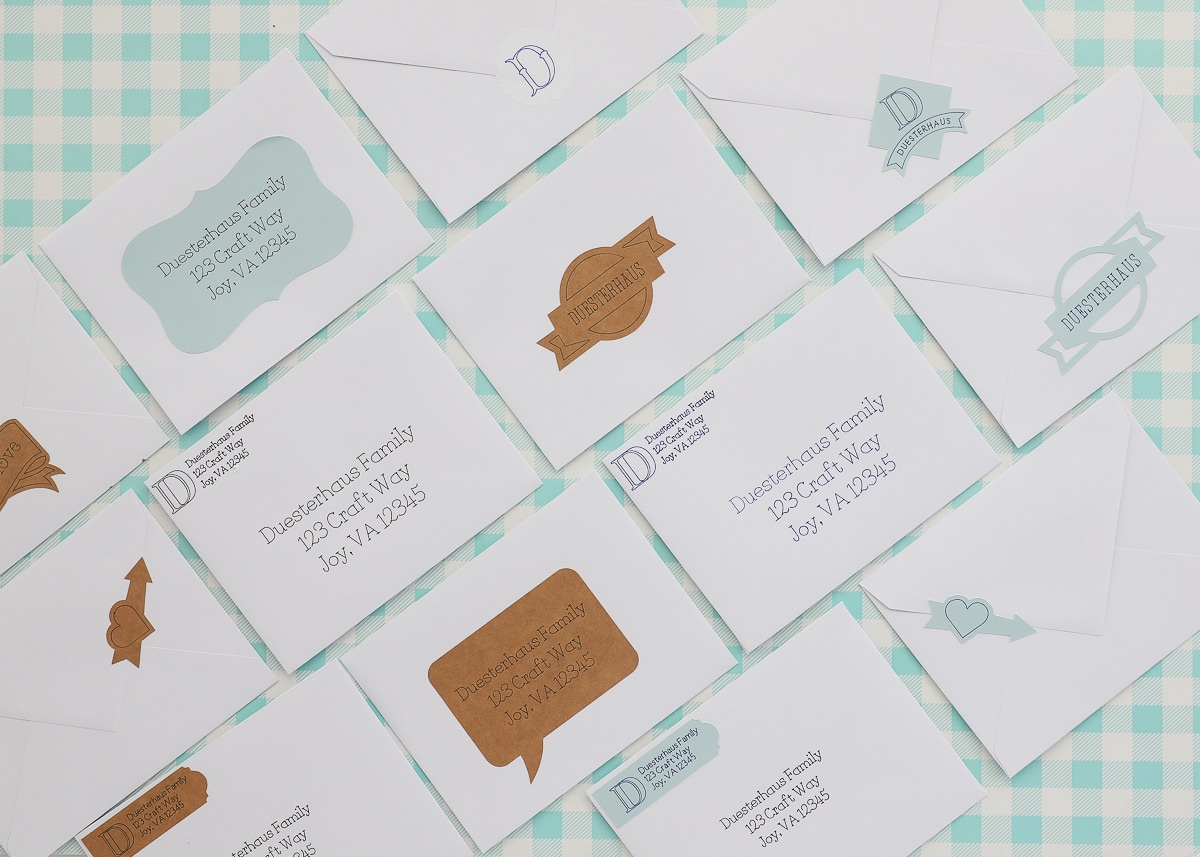
I’ve been making homemade cards more than ever thanks to my Cricut Joy, but today I want to show you how to take your mail up a notch by learning how to address envelopes using this clever machine! You are going to love how easy it is to make your mail look ah-mazing (especially if you hate your handwriting!), and just wait until you see all the adorable monograms and stickers I made to decorate my envelopes even more! I’ve never been more excited to send some homemade cards!
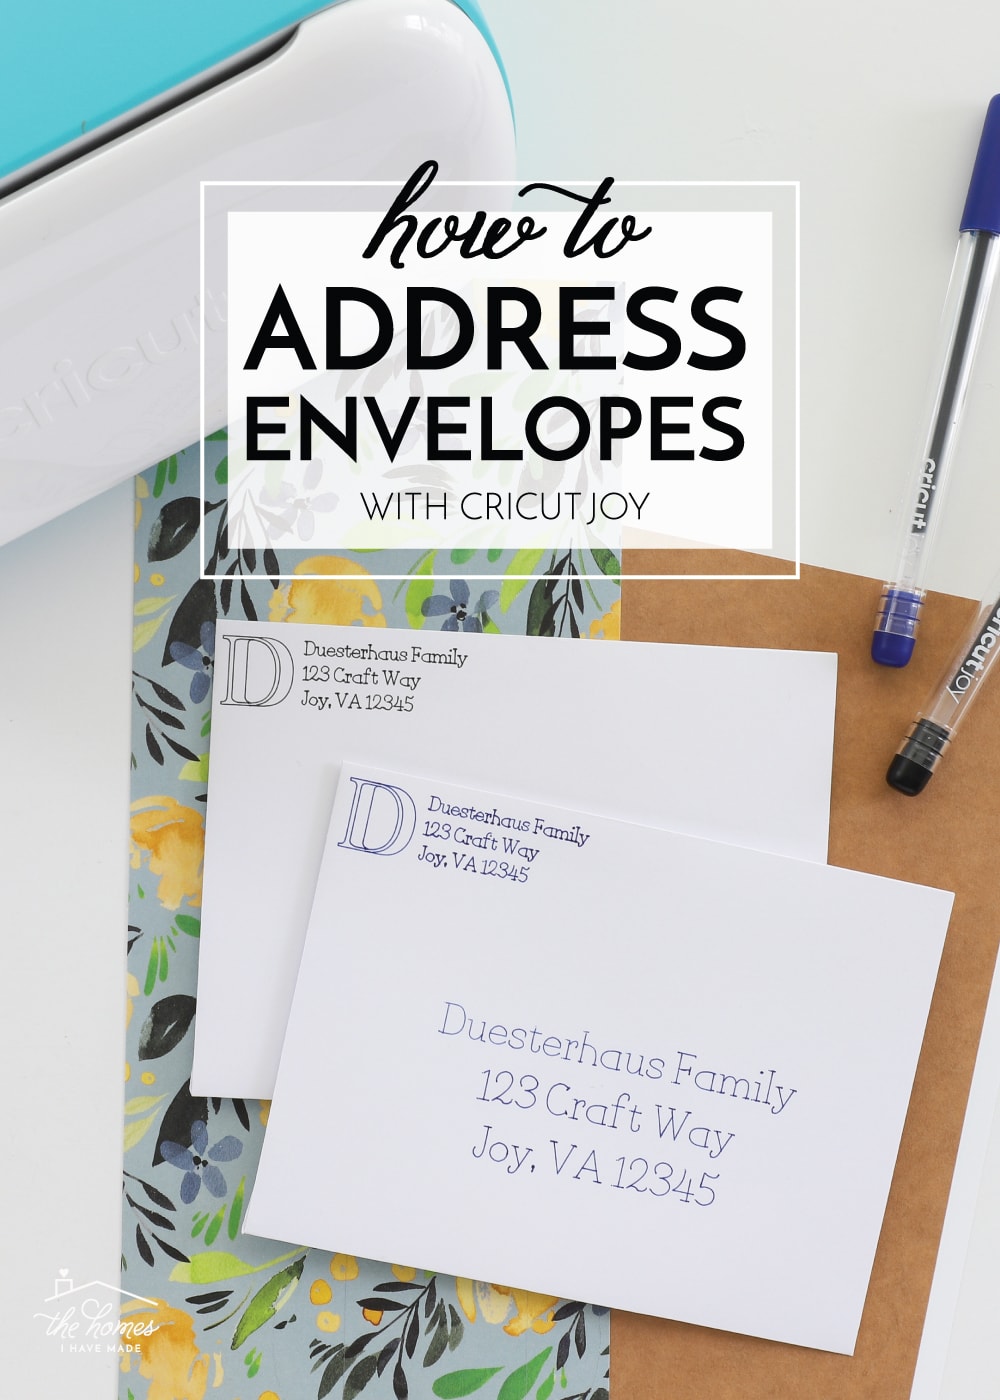
I wish I could take credit for this idea. My sister actually sent us an Easter card with the most gorgeous Cricut cursive font on the envelope, and I instantly knew I had to do a tutorial. While I was at it, I came up with a whole slew of fun stickers, medallions and return address labels using a bunch of the new papers and labels made for Cricut Joy. Get ready to use this little machine in lots of new and fabulous ways!
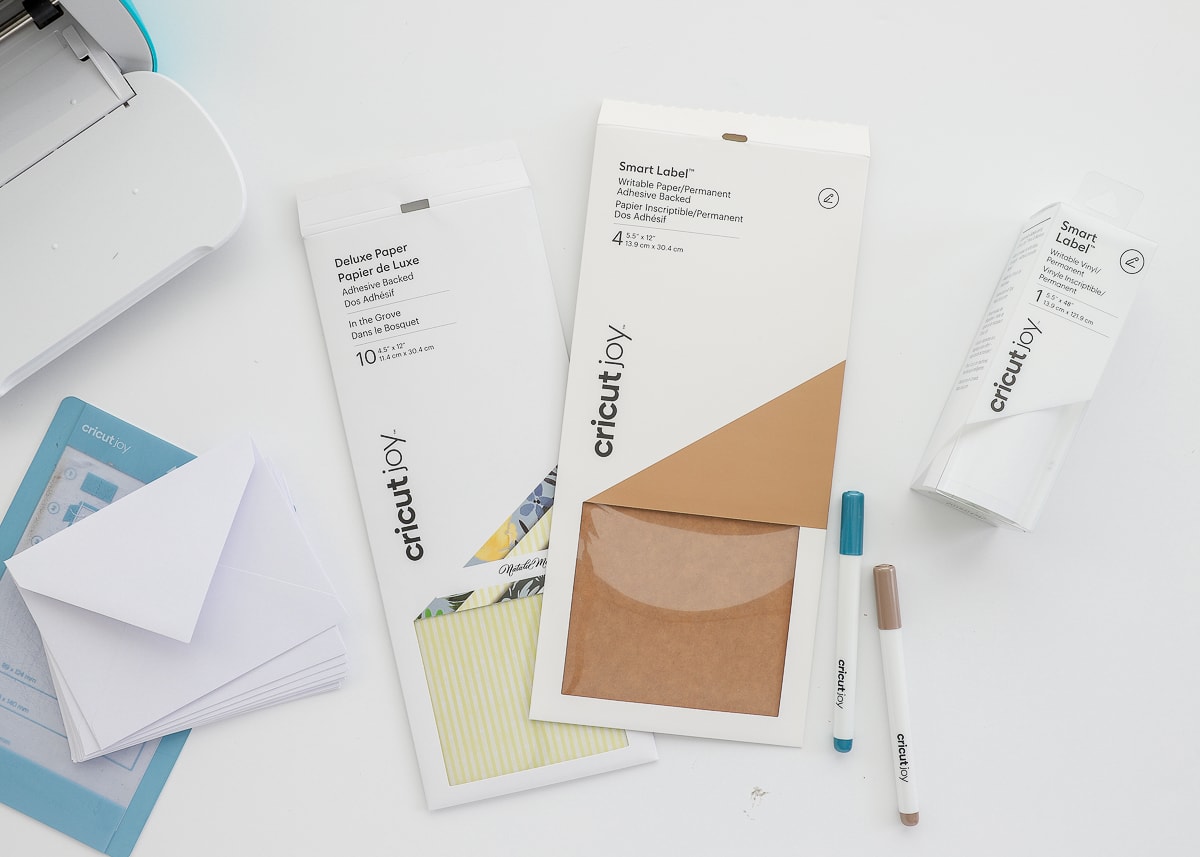
Supplies Needed
- Cricut Joy Machine
- Cricut Joy Card Mat
- Extra fine point Cricut Joy pens
- Cricut Joy Pens
- Cricut Joy Smart Label
- Smart Label Paper
- Cricut Joy Adhesive-backed Paper
- Cricut Joy Standard Grip Mat
How to Address Envelopes with Cricut Joy
Before we dive into stickers and labels, let me first show you how to address envelopes with your Cricut machine, more specirically, Cricut Joy.
The thing that makes addressing envelopes so quick and easy for Cricut Joy is the Card Mat. You can load the envelope right onto the Card Mat; and when your text is formatted correctly, Cricut Joy will write perfectly-placed addresses for you! Although it takes a bit of trial-and-error, once you get the spacing setup, you can save your Cricut Design Space file and use it over and over for quick addressing!
Format Your Text
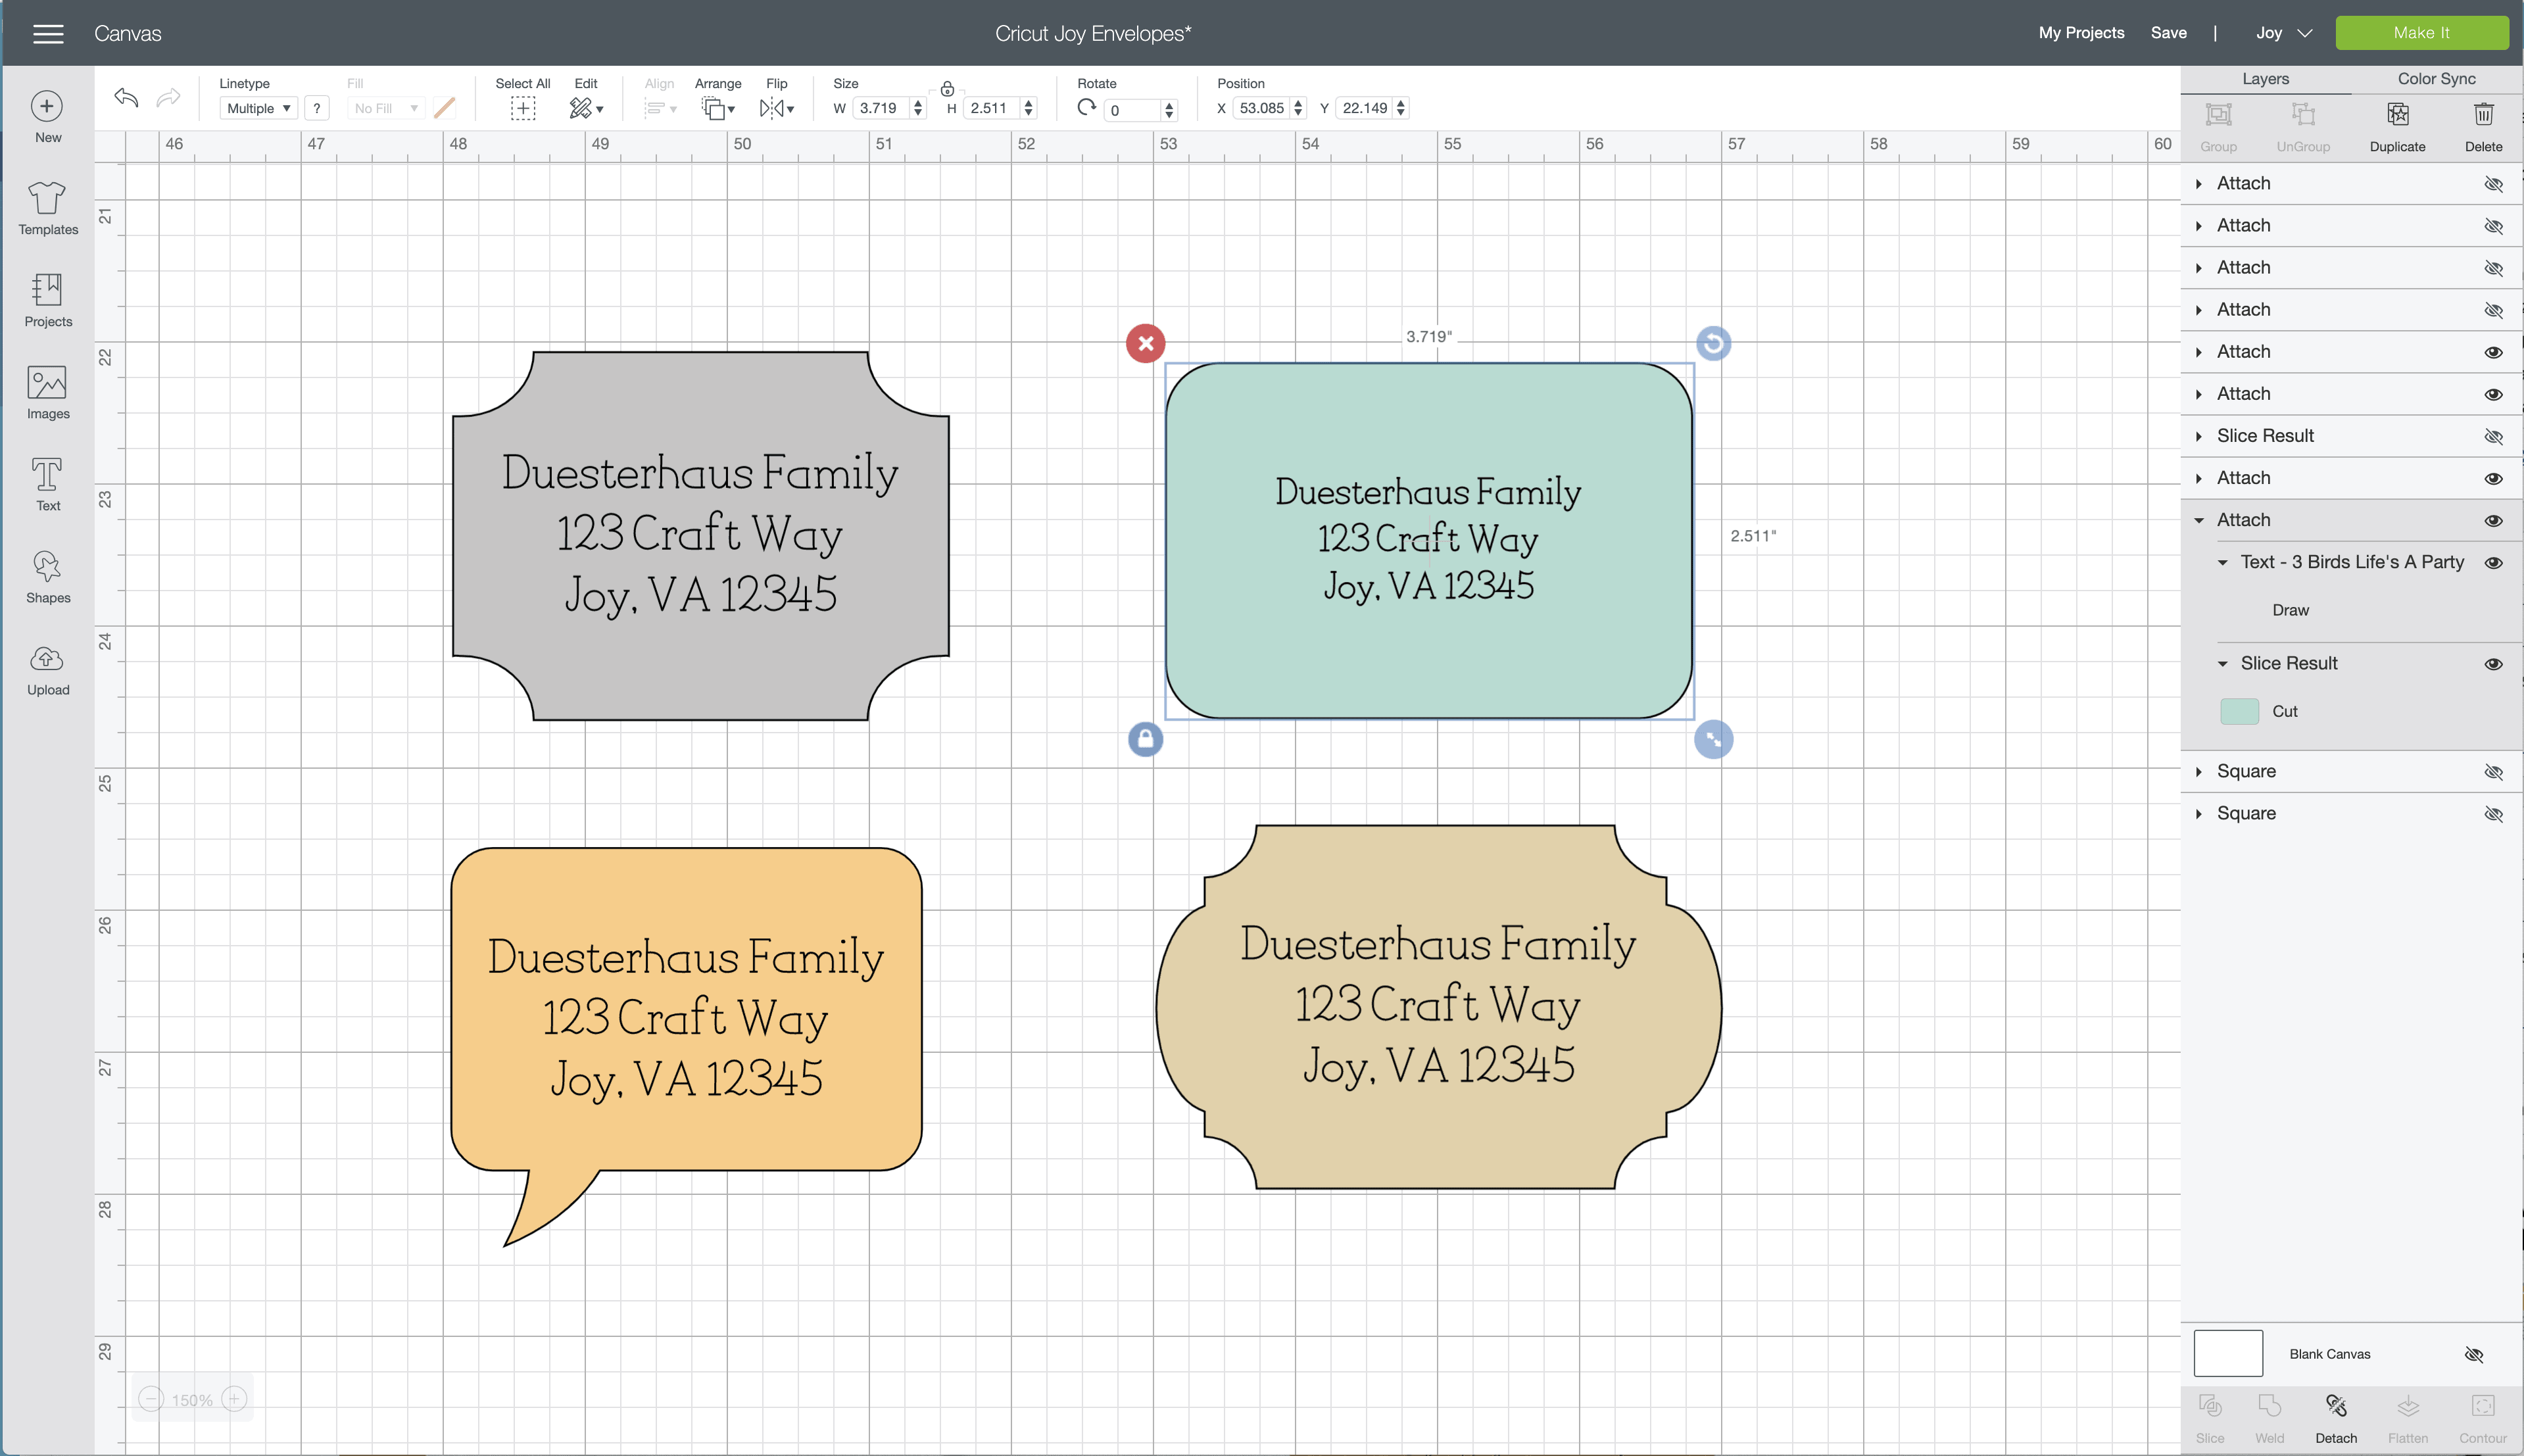
While I’ve got ready-to-use envelope templates, I’m going to map out how to figure out the spacing for your own envelope by placing three things on your Design Canvas:
- First, drop a square onto the canvas and size it to match your own envelope (standard A2 envelopes are 4.375″ x 5.75″). NOTE: You will delete/hide this rectangle before cutting, as it is intended to just be a reference/placeholder.
- Next, insert a text box and type out your recipient’s address. Be sure to change it to a “Writing” font you like.
- Then, locate the Insert Card Corners image set and select a set of corners. NOTE: It doesn’t matter which corners you pick, as they won’t be cut/drawn but are to help with placement.
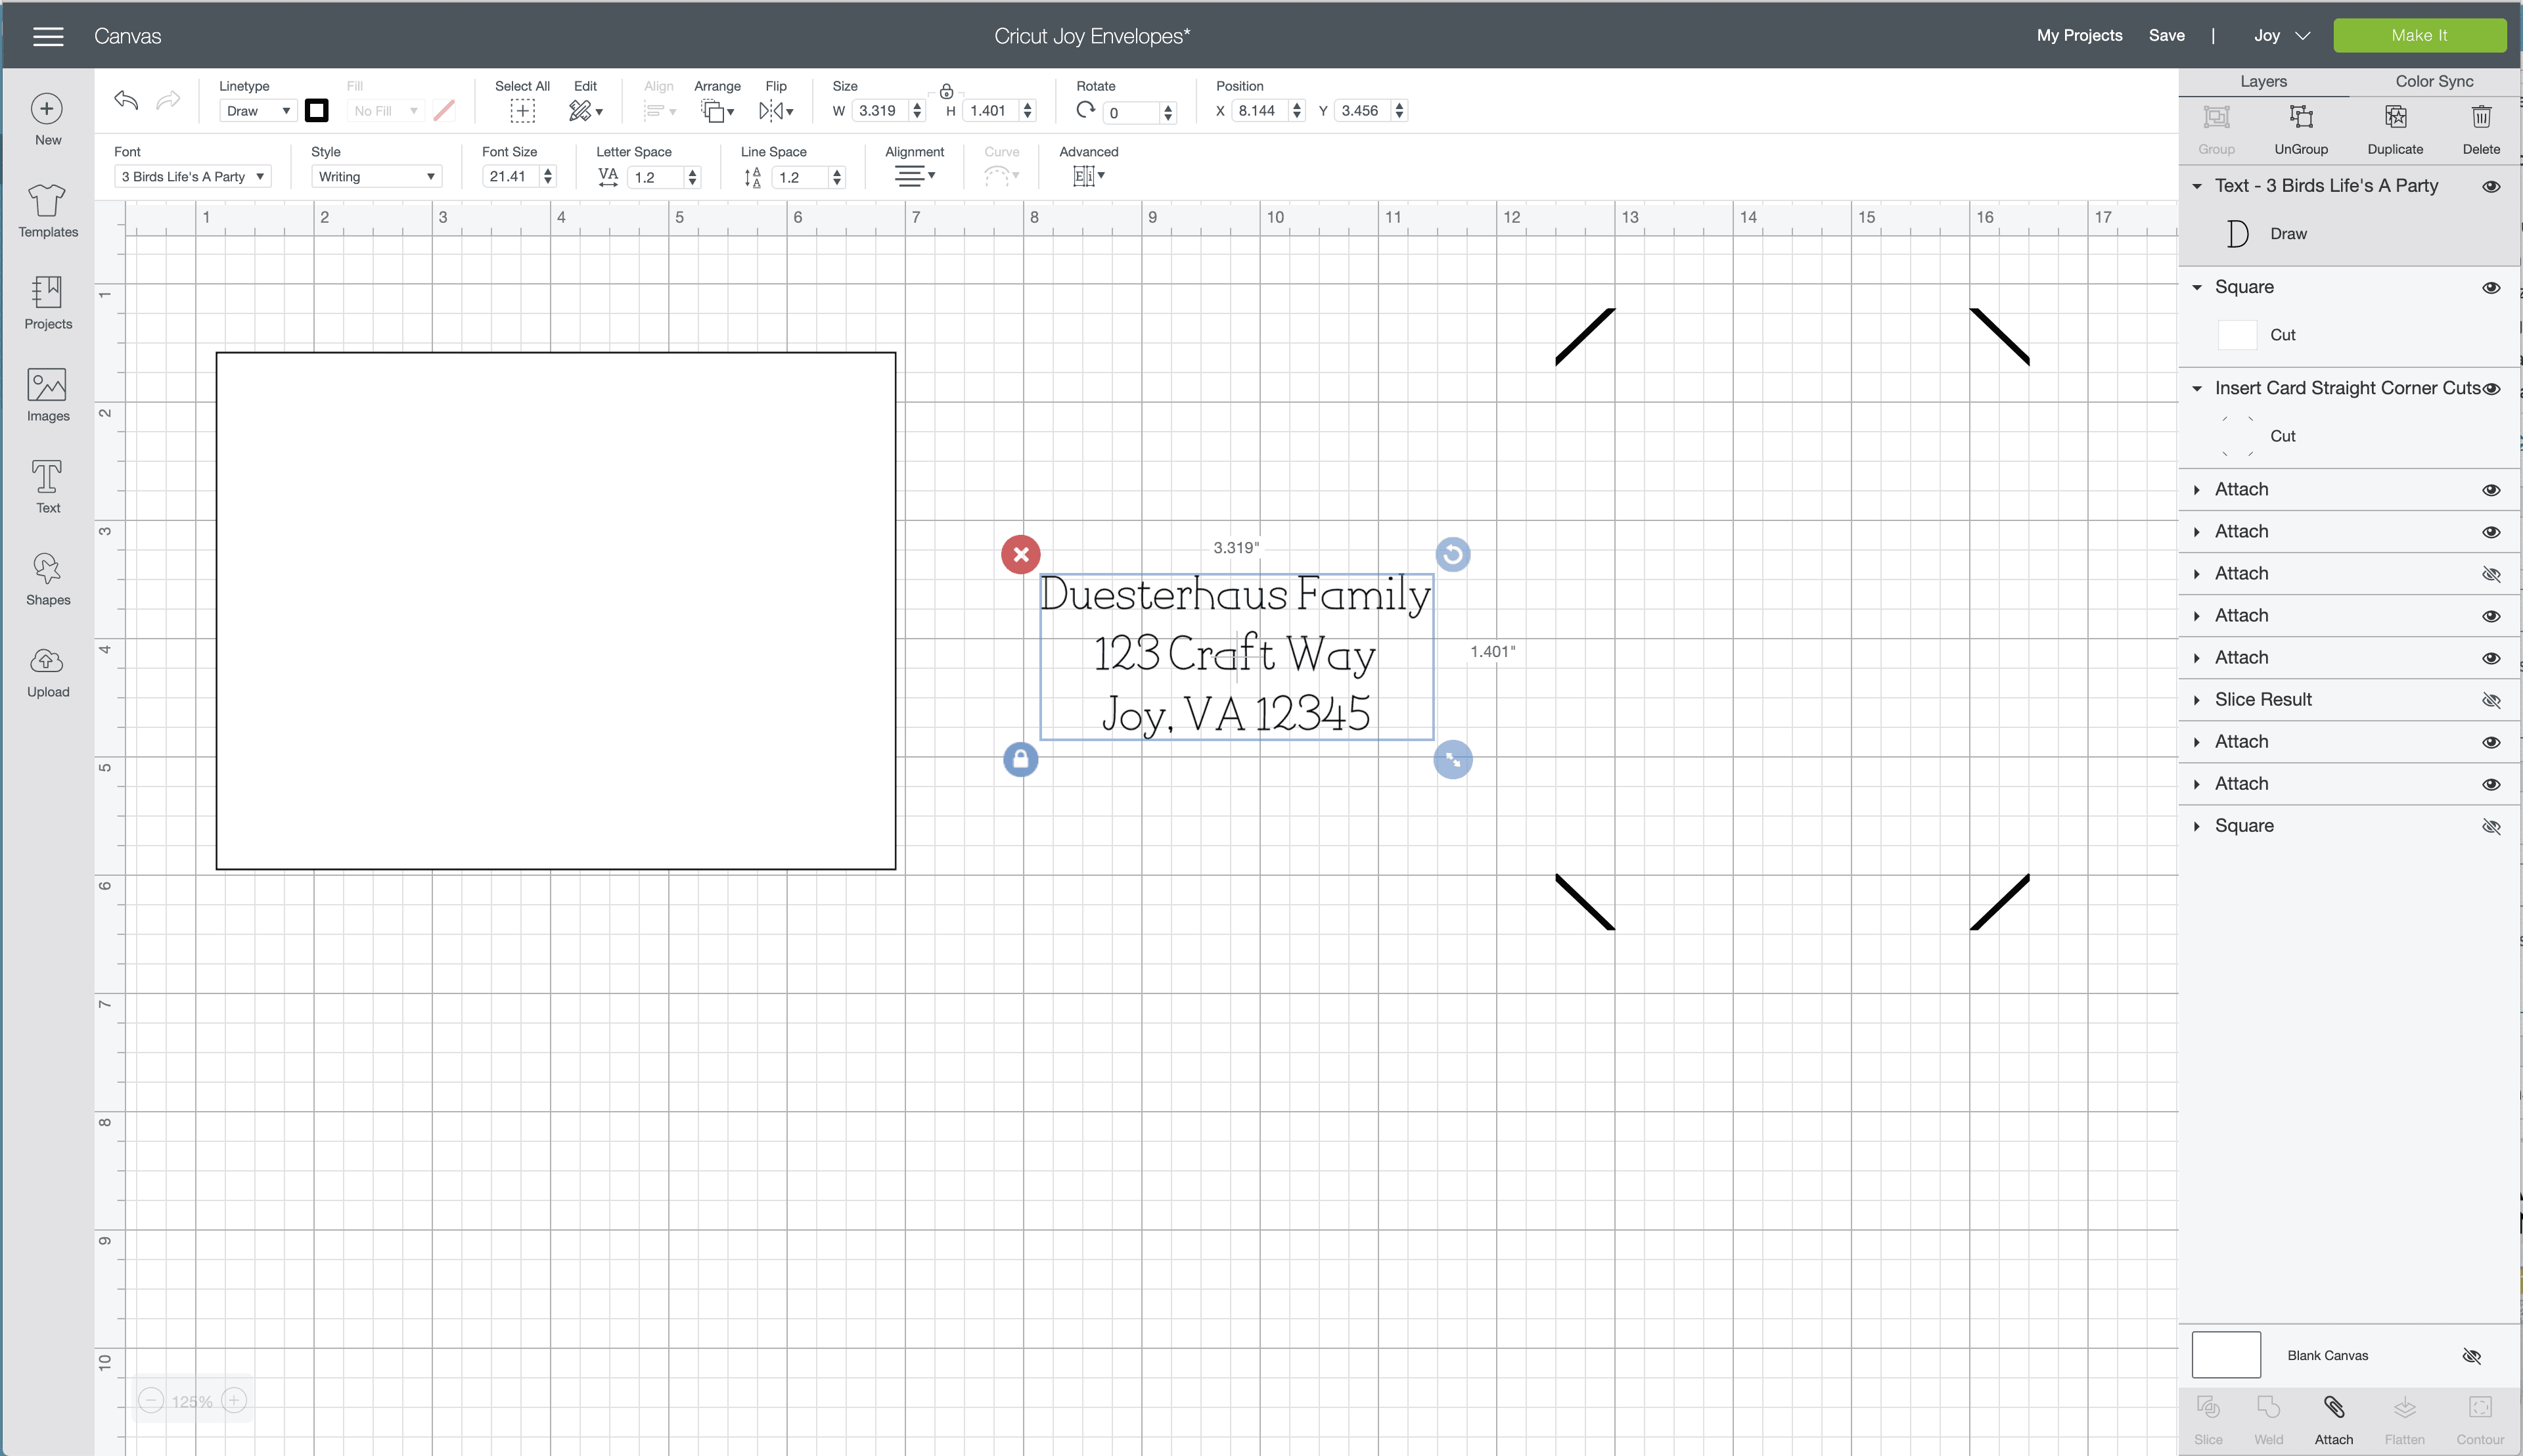
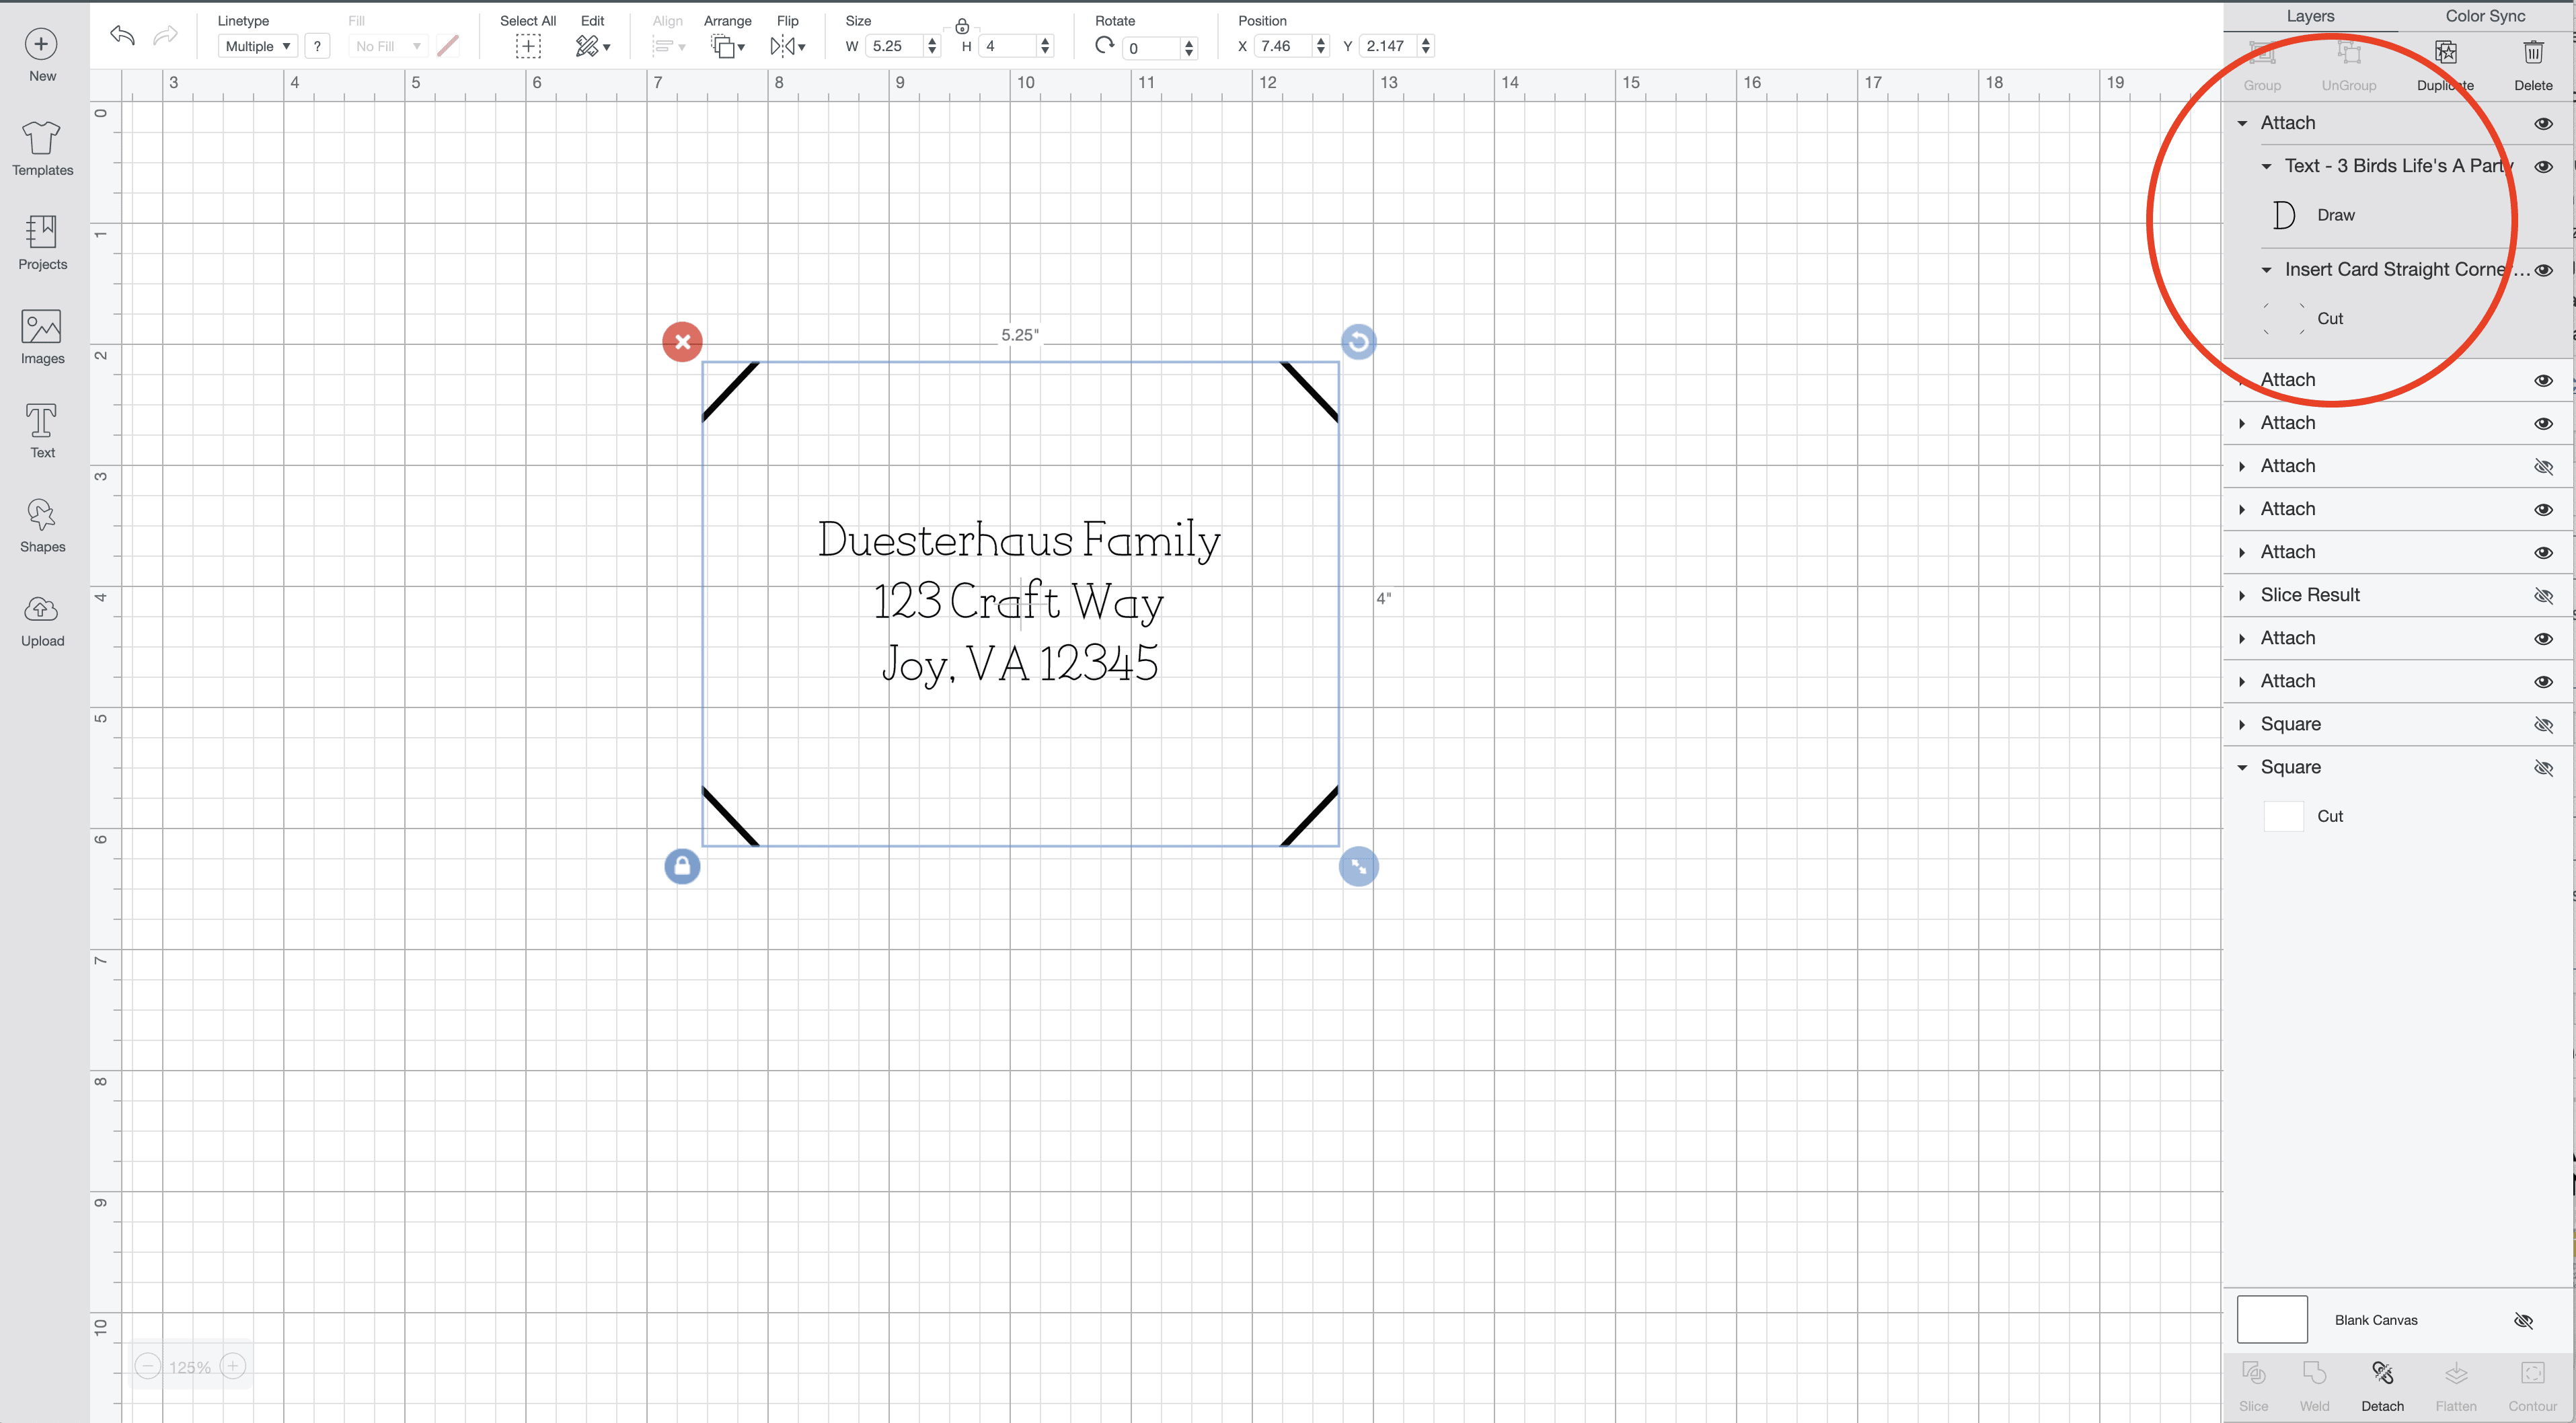
With these three elements on your canvas, set your alignment and Attach it together so it translates just right to the envelope:
- First, use the Center Alignment tool (top toolbar) to align the envelope placeholder and the corners cuts so they are perfectly centered (horizontally and vertically) on top of each other.
- Next, place the text block anywhere you want it. I like my text in the exact middle of the envelope. Use the envelope placeholder to help you visualize where the text should go and how it will look.
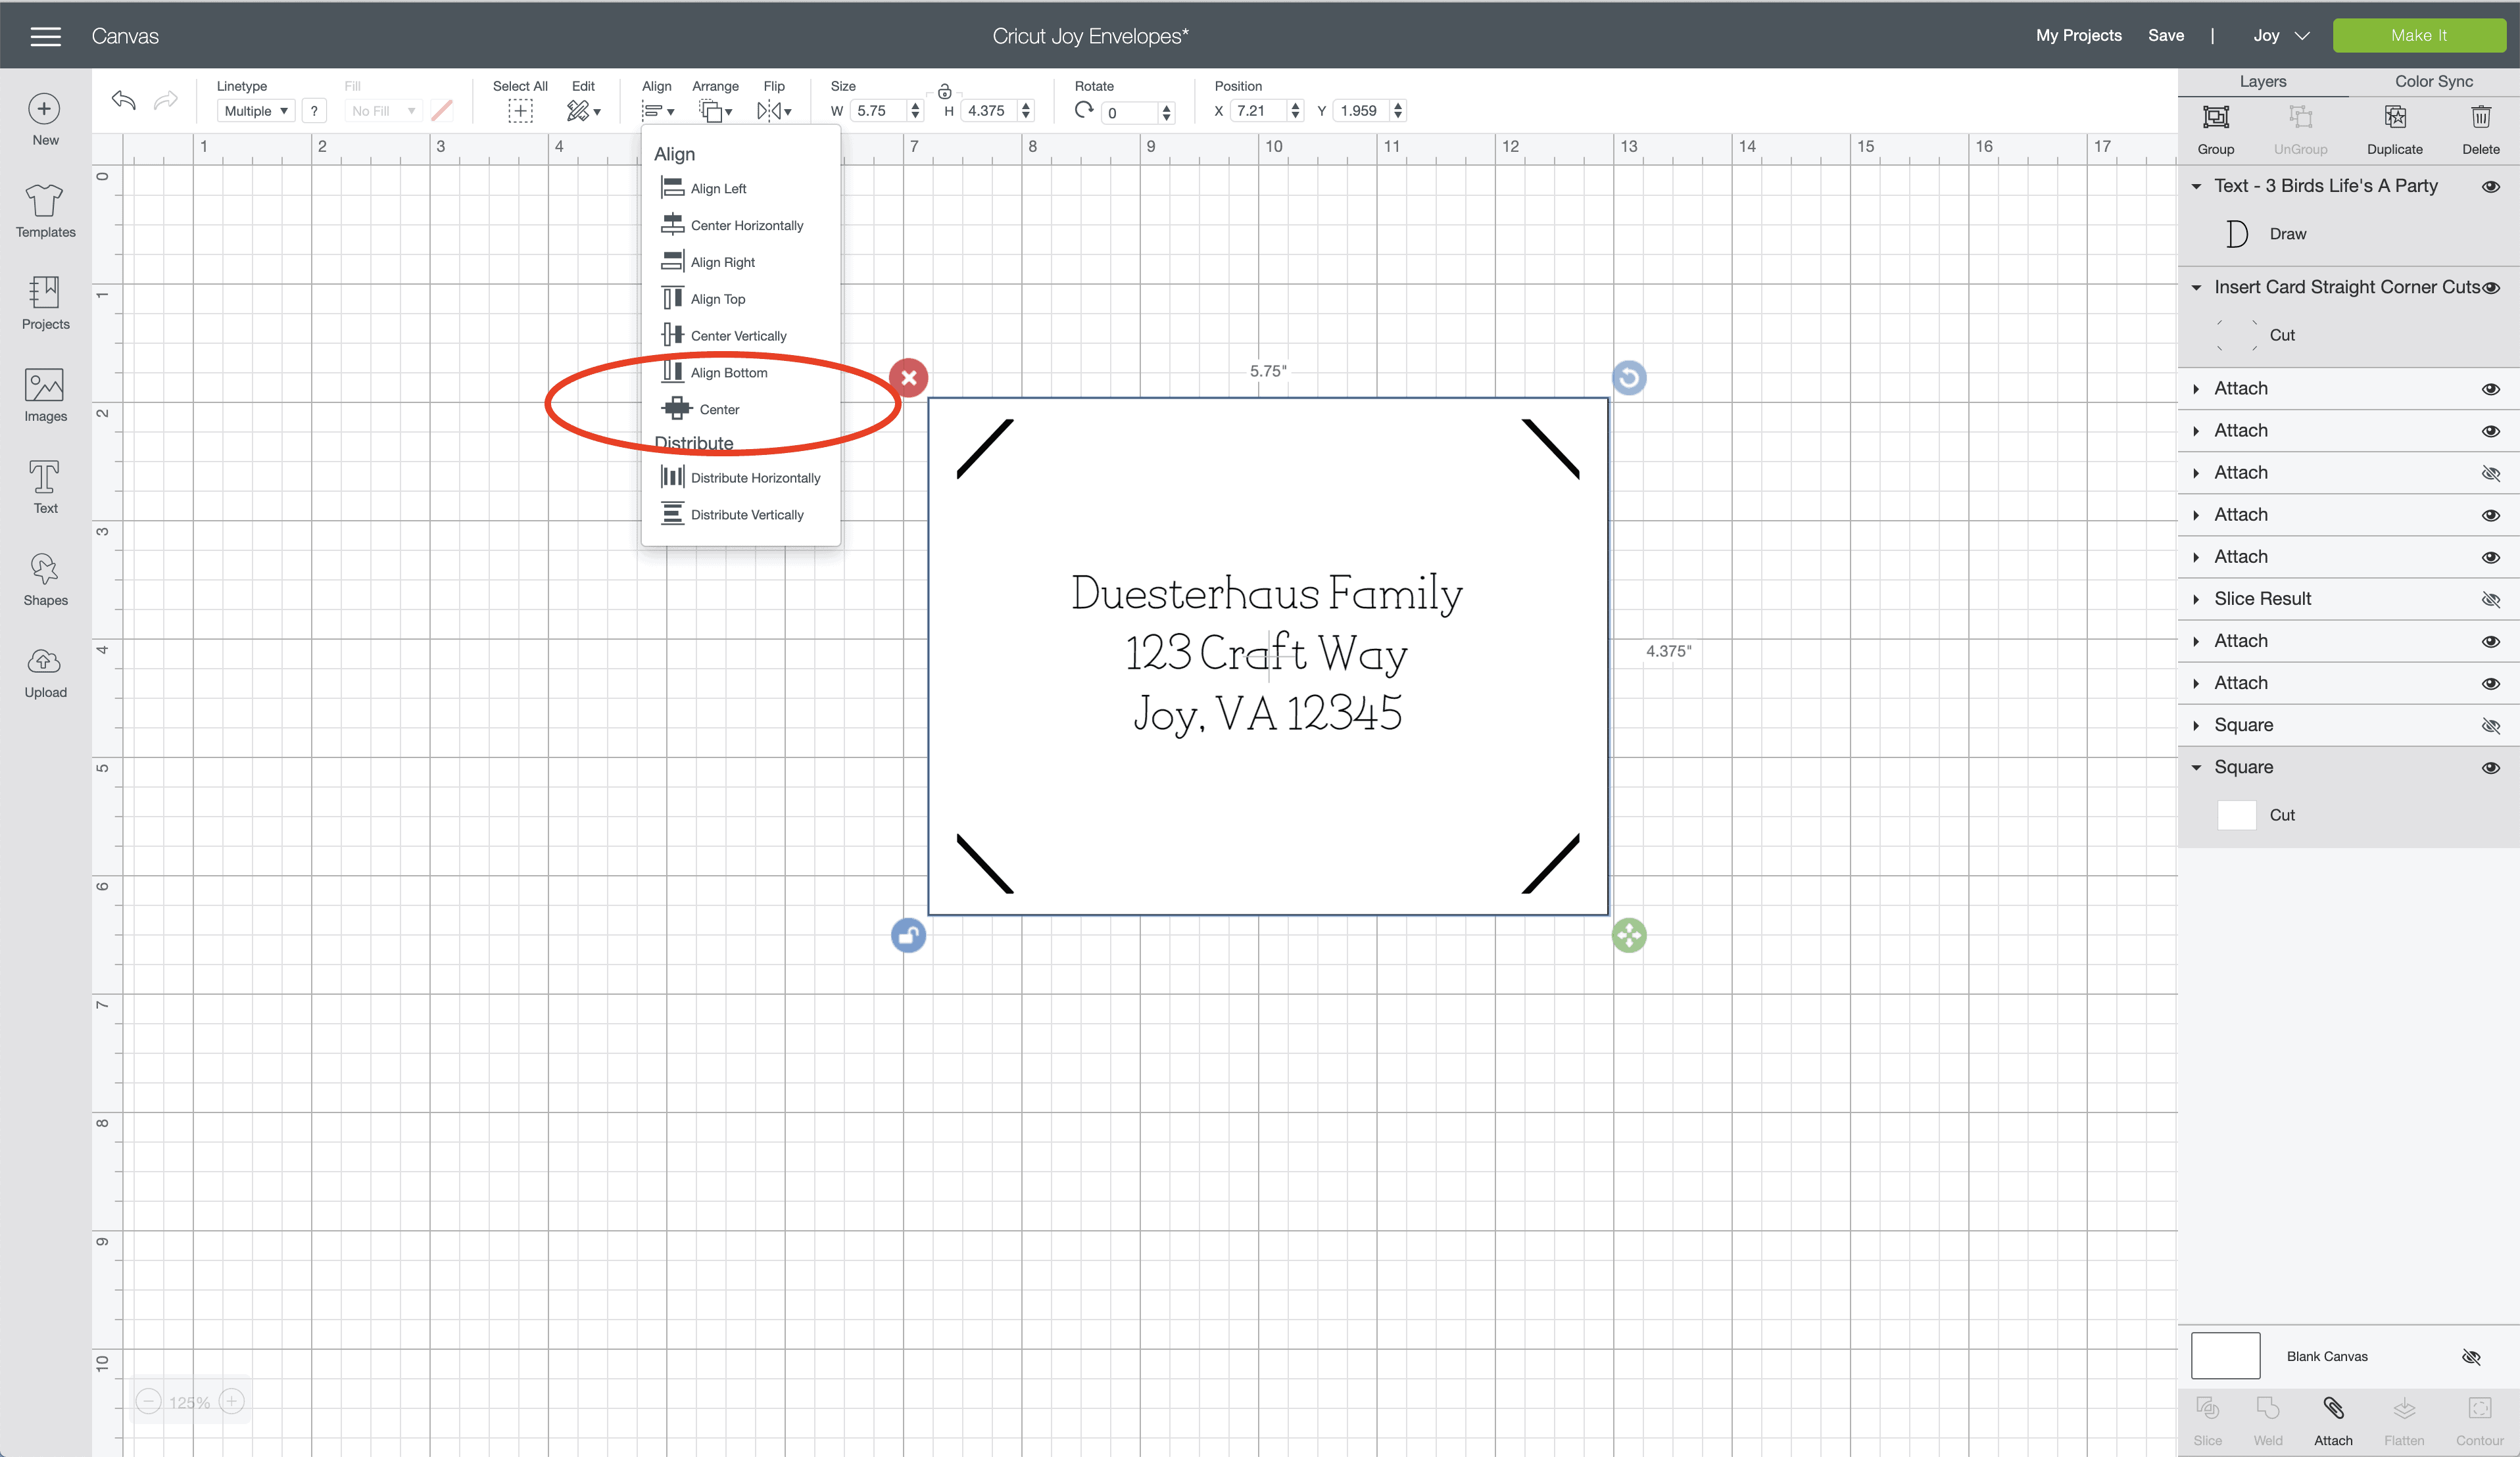
Once you have your text placement exactly where you want it, prep the design to run through your Cricut Joy:
- First, hide or delete the envelope placeholder so it won’t be cut.
- Next, make sure the text is set to “Draw” and the corners are set to “Cut”
- Finally, Attach the words and corners together so they maintain their spacing once you hit the green “Make It” button.
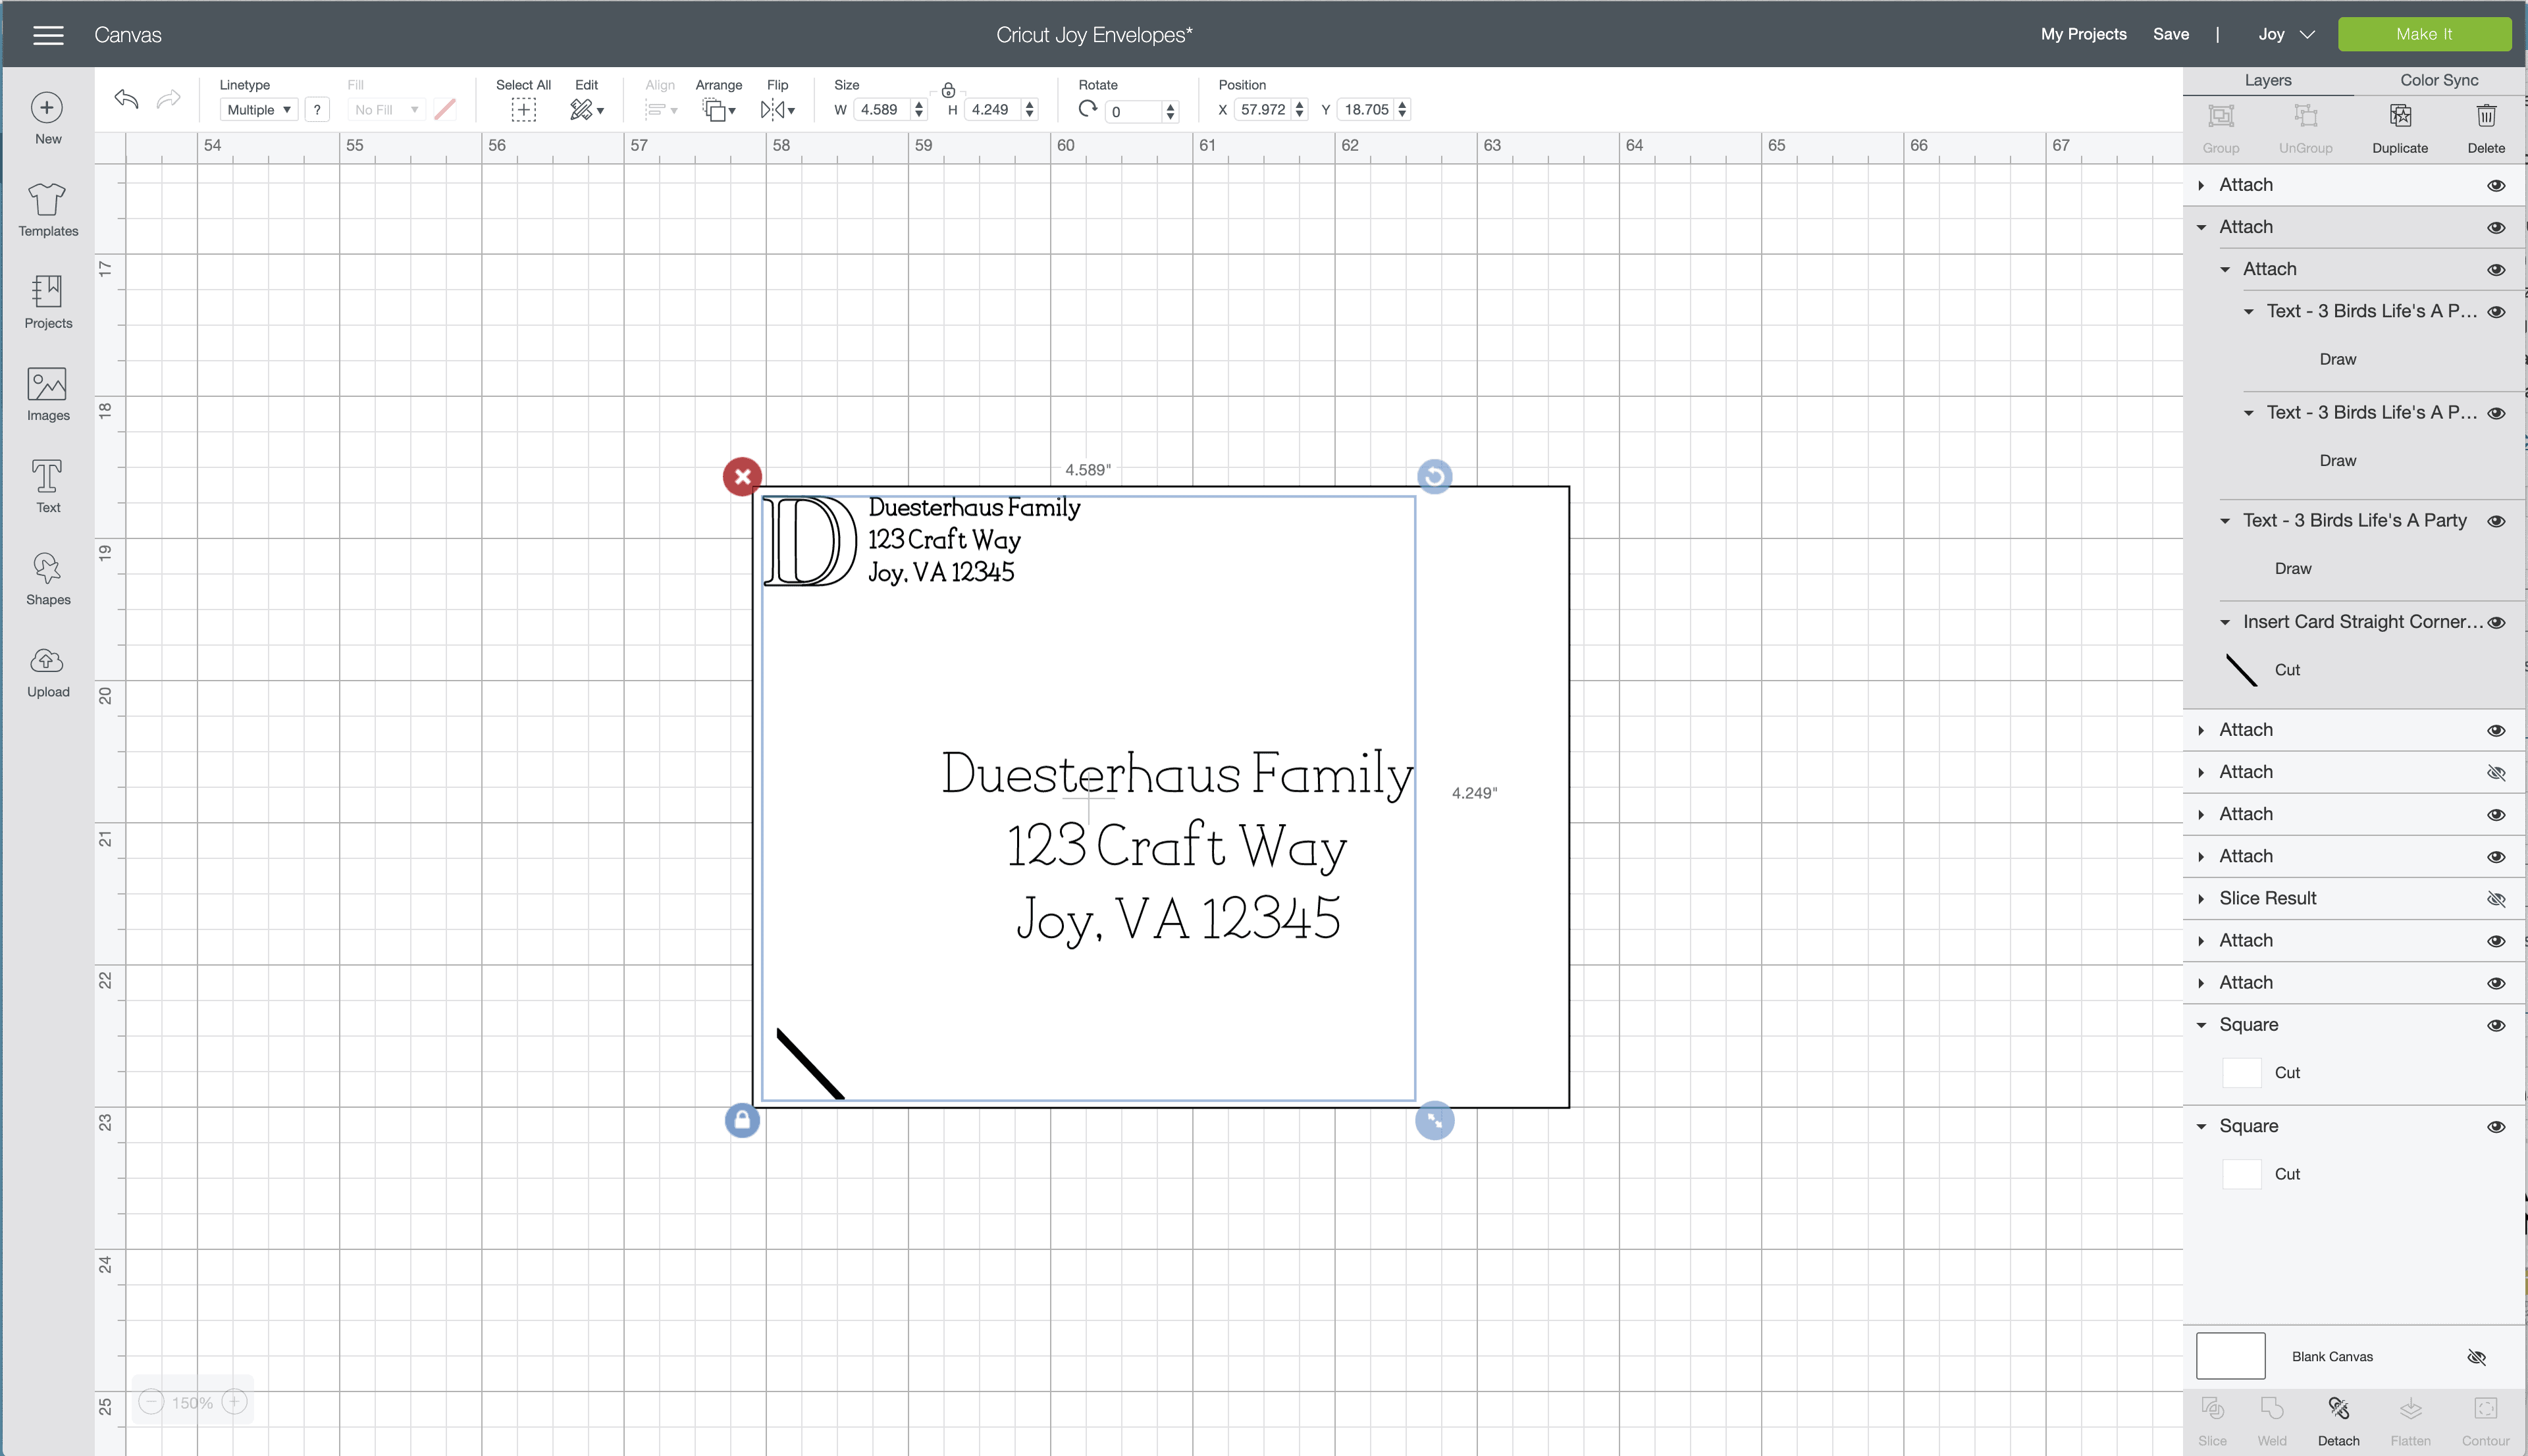
Add Additional Details
If you want to add additional drawn details (like frames, designs or a return address), you can format them in the same way:
- Use the envelope placeholder to get a sense for the spacing of various text boxes, embellishments and a set of corners.
- Hide the envelope placeholder.
- Attach all the text/corner elements together.
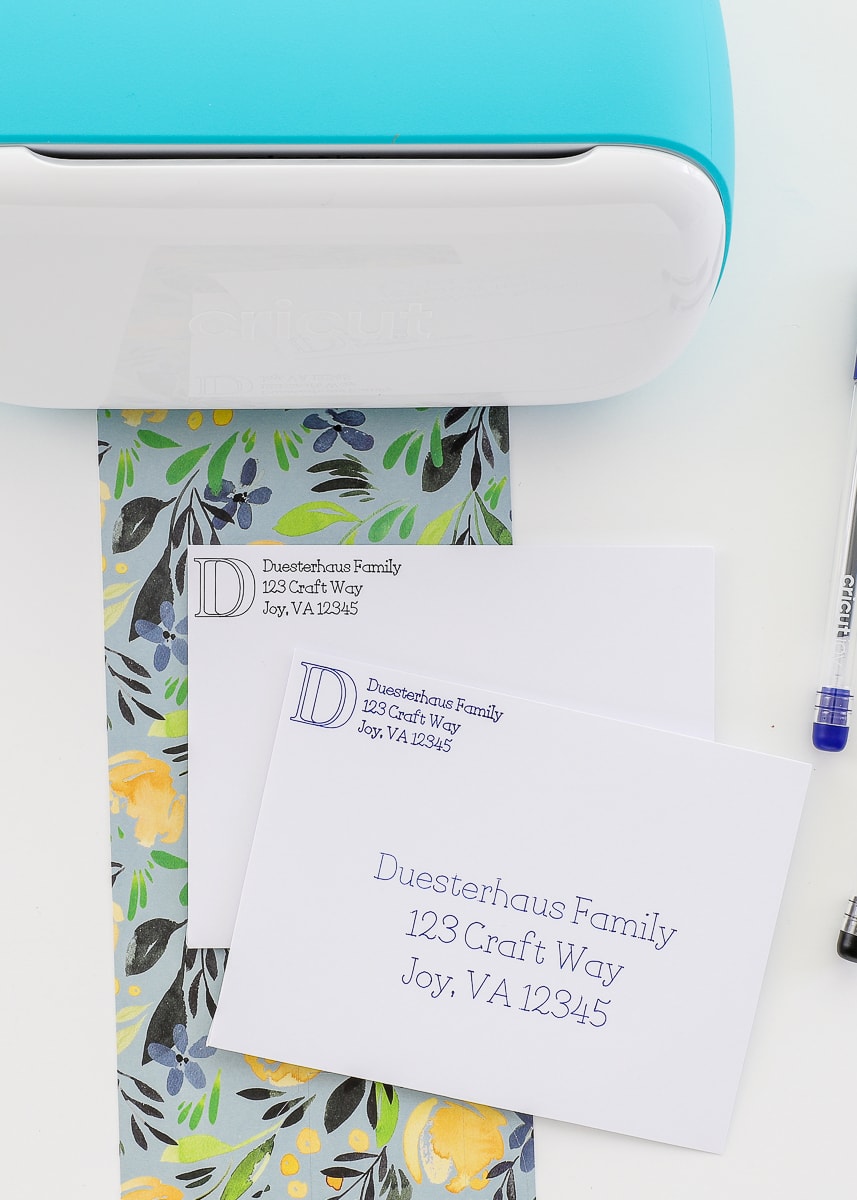
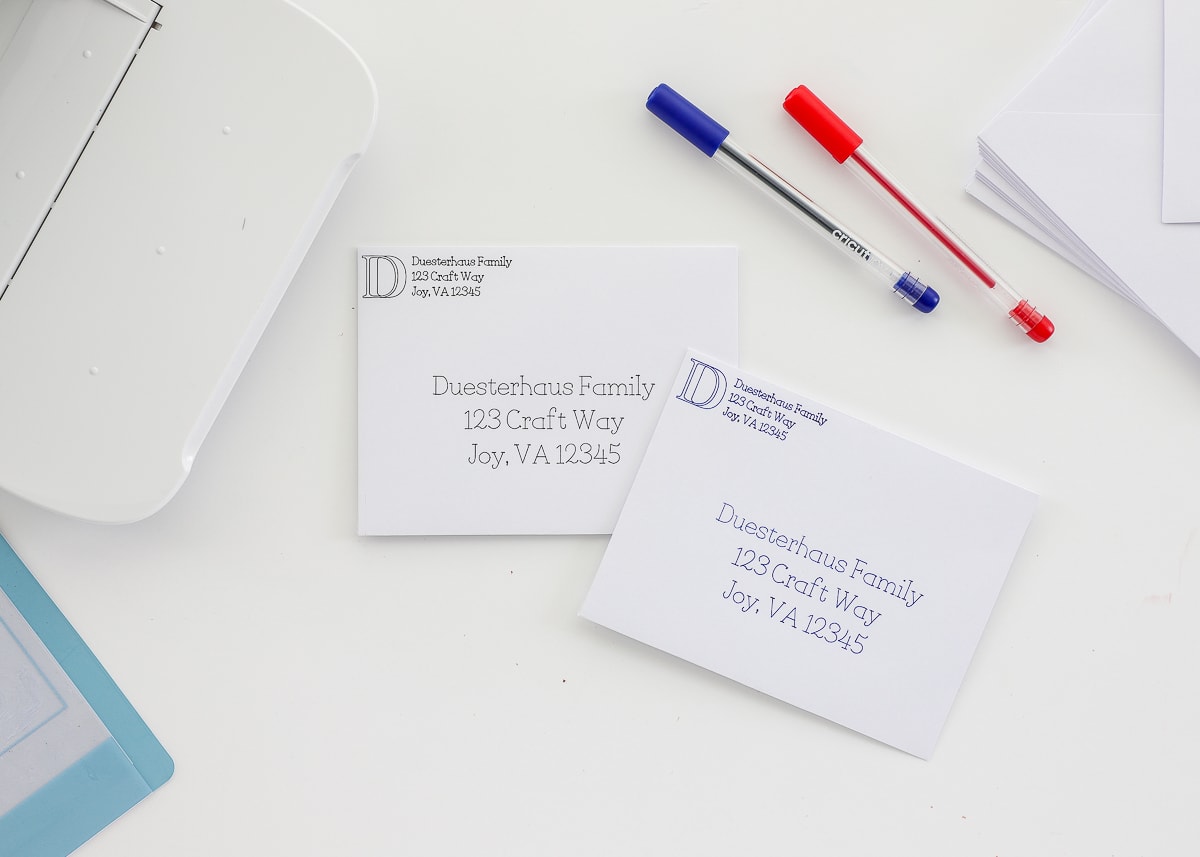
My envelope with the return address written directly on the envelope looks like this:
Perfect the Spacing
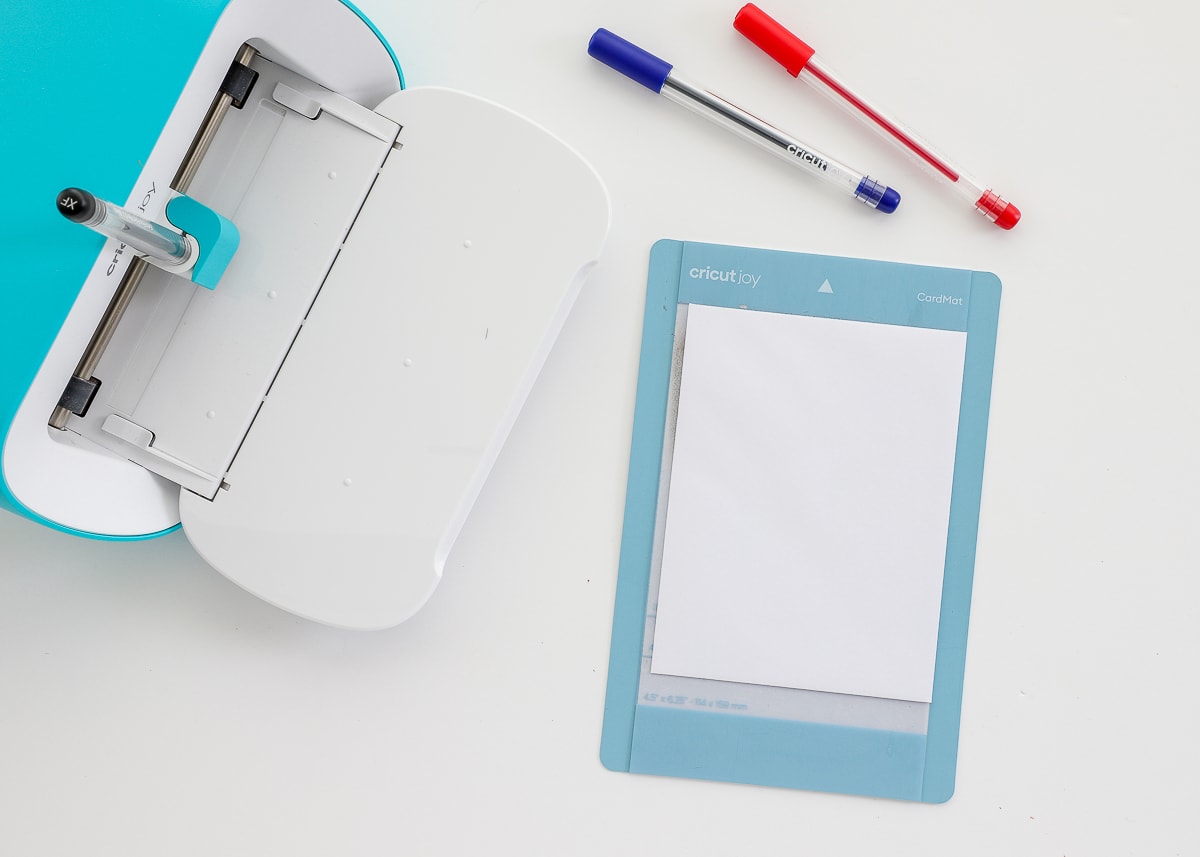
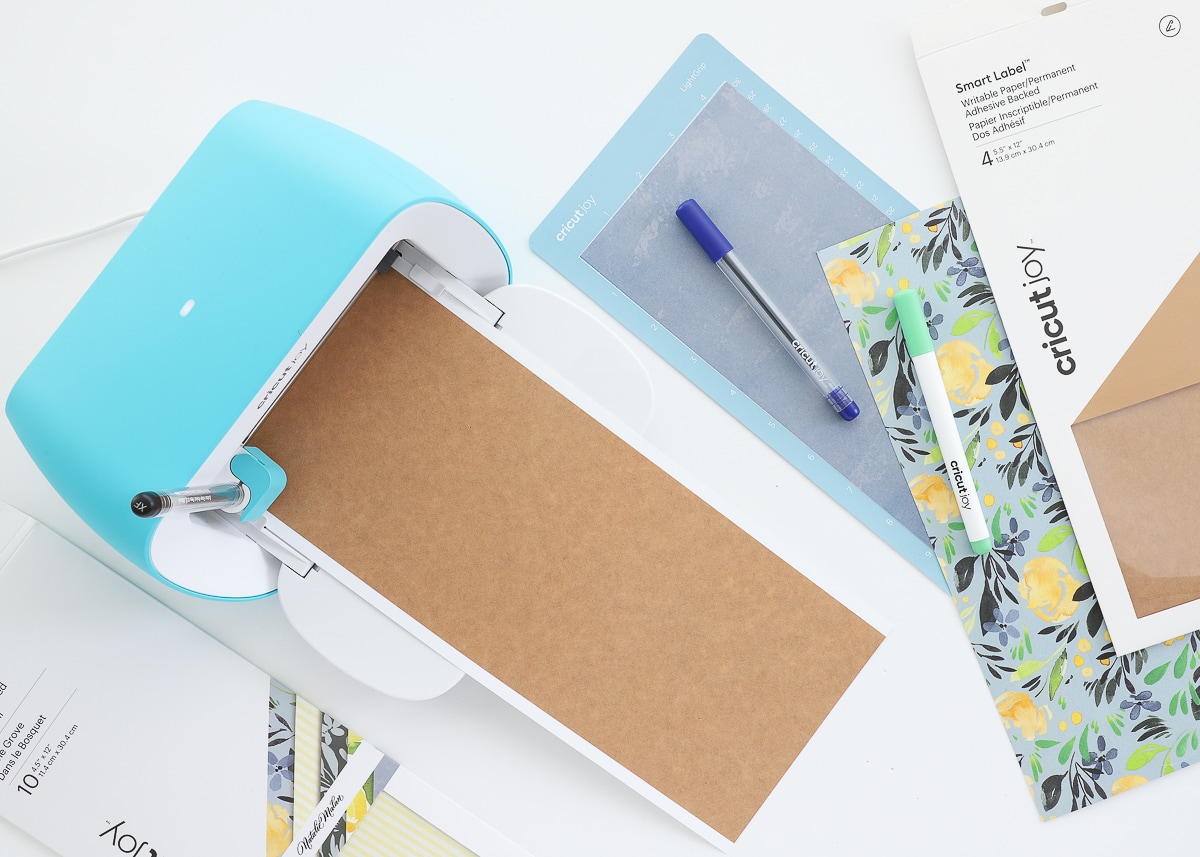
Getting the text spacing figured out is the “trickiest” part of this whole project. To make sure the spacing comes out just right, you will likely need to run an envelope or two through your Cricut Joy. All you have to do is click the green “Make It” button and get your Card Mat and envelopes ready to go. To use envelopes with the Card Mat, simply slide the flap under the clear layer on the Card Mat…
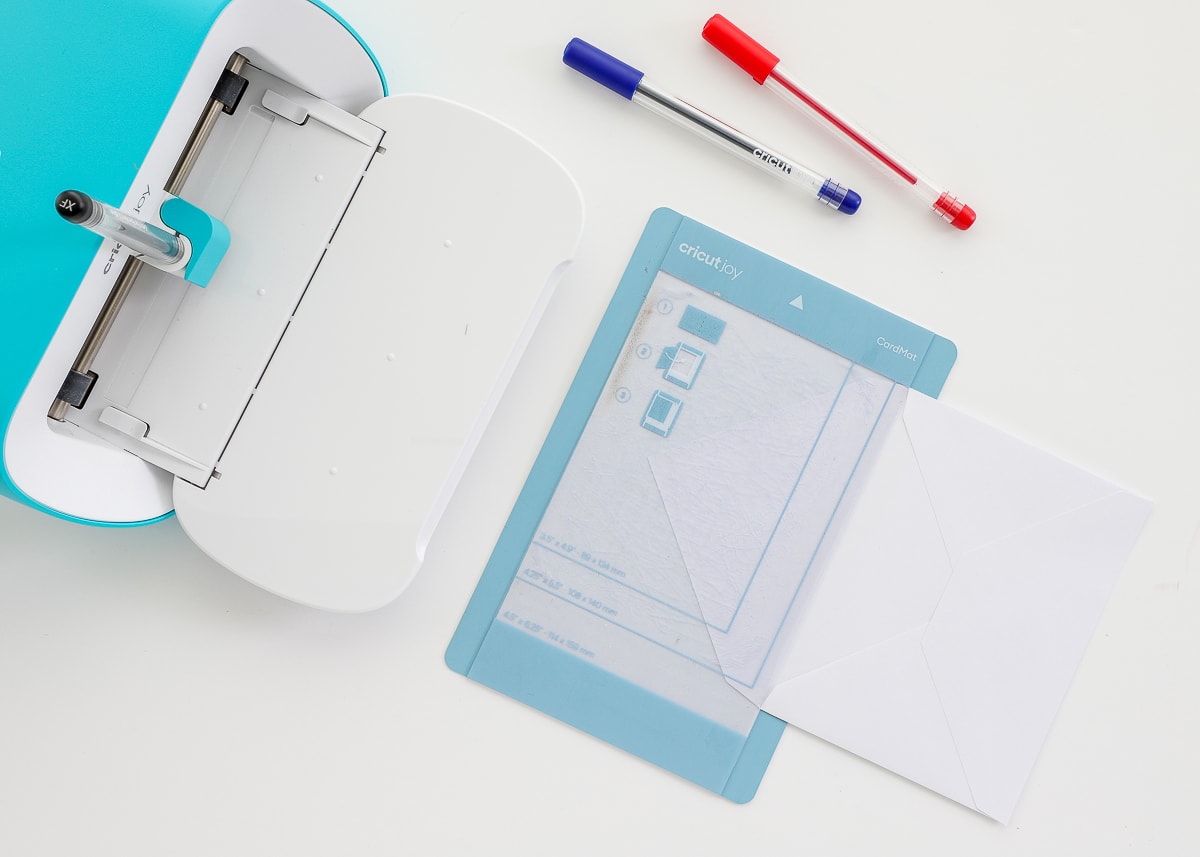
Then fold the envelope over the clear sticky layer and smooth it down so it’s nice and secure.
With your favorite pen loaded into Cricut Joy, load your mat and click the green “Go” button in Design Space.

I highly recommend using either Fine or Extra Fine Cricut pens compatible with your Circut Joy for addressing envelopes. That way, your text comes out nice and crisp. If you choose to use Markers, consider spacing out the letters so they don’t overlap due to the heavier line weight.
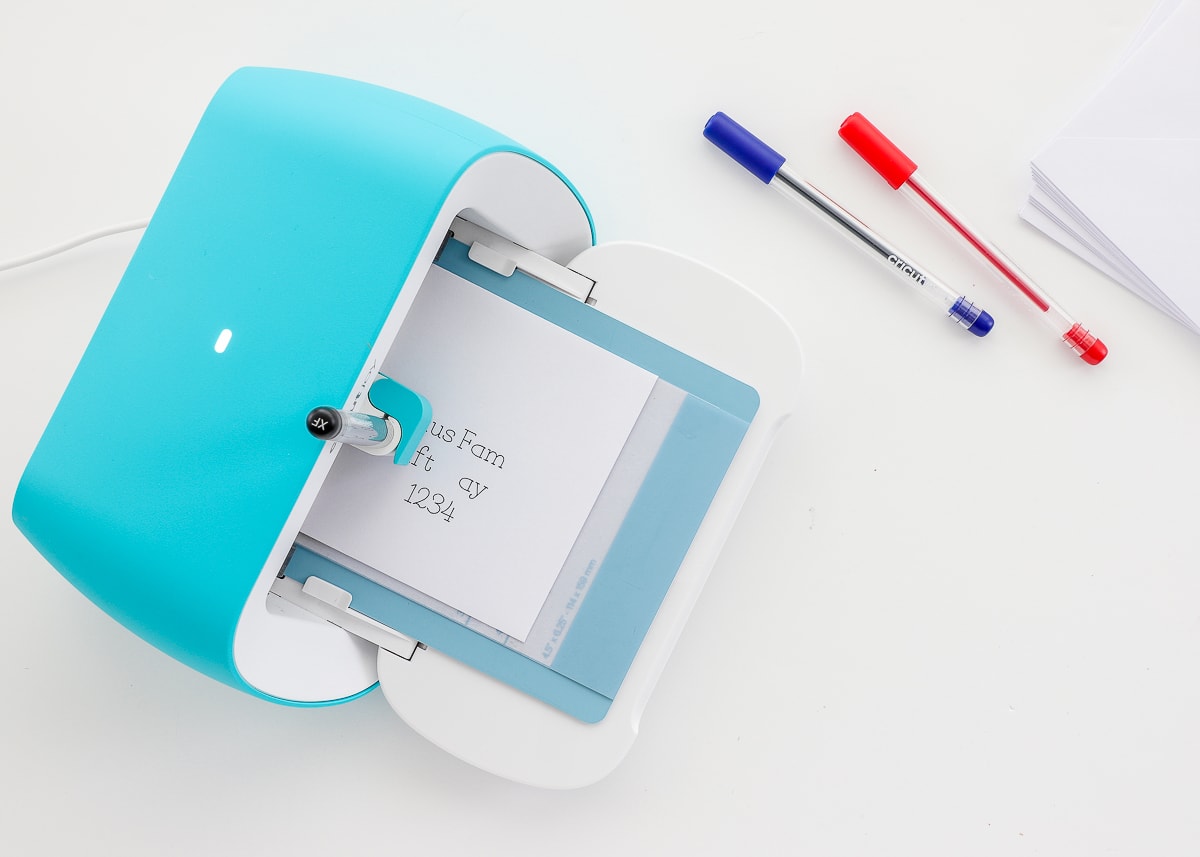

Important! Once the text part of the design is complete, Design Space will prompt you to load your Fine Point Blade in order to continue cutting the corner slits. Don’t do this! Just cancel the design and unload your envelope so that the only thing on your envelope is the pen writing,
Once done, you can load up another envelope to make as many as you need!
Want to save this post?
Don’t hesitate to Detach the elements, make adjustments, and re-Attach until the spacing ends up exactly as you want it. Finally, be sure to save your file so you can easily pull it up, swap the text, and use it over and over!
Using Labels to Address Envelopes
If you don’t have the patience or interest to fuss with the text placement on envelopes, there is an even easier way to address your envelopes with labels!
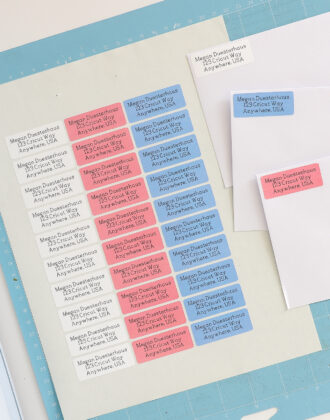
By cutting the label shape from regular sticker paper, Adhesive-Backed Deluxe Paper, or the new Smart Label Writable Paper, you can make pretty address labels to stick directly on the envelope…anywhere you want it!
You can make an address sticker just like any other label you’d make with a Cricut:
- Pick out a shape you love and make sure it is set to “Cut”
- Type out your recipient’s address and set it to “Draw” in your favorite font.
- Attach the shape and text together and click the green “Make It” button.
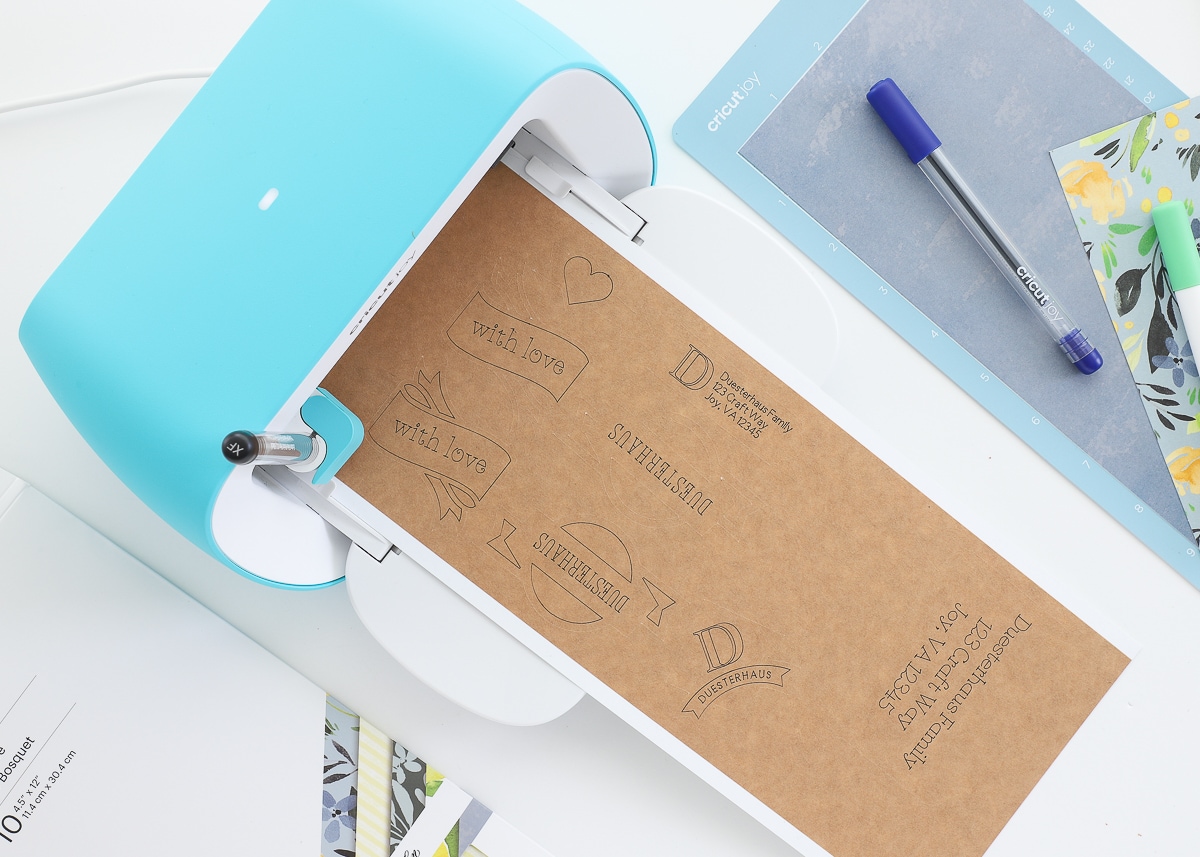
Write and cut the designs on any sticker-type paper you like. Loaded below is the Smart Label Writable Paper (no mat needed!)
Then just peel-and-stick your designs directly to your envelopes!
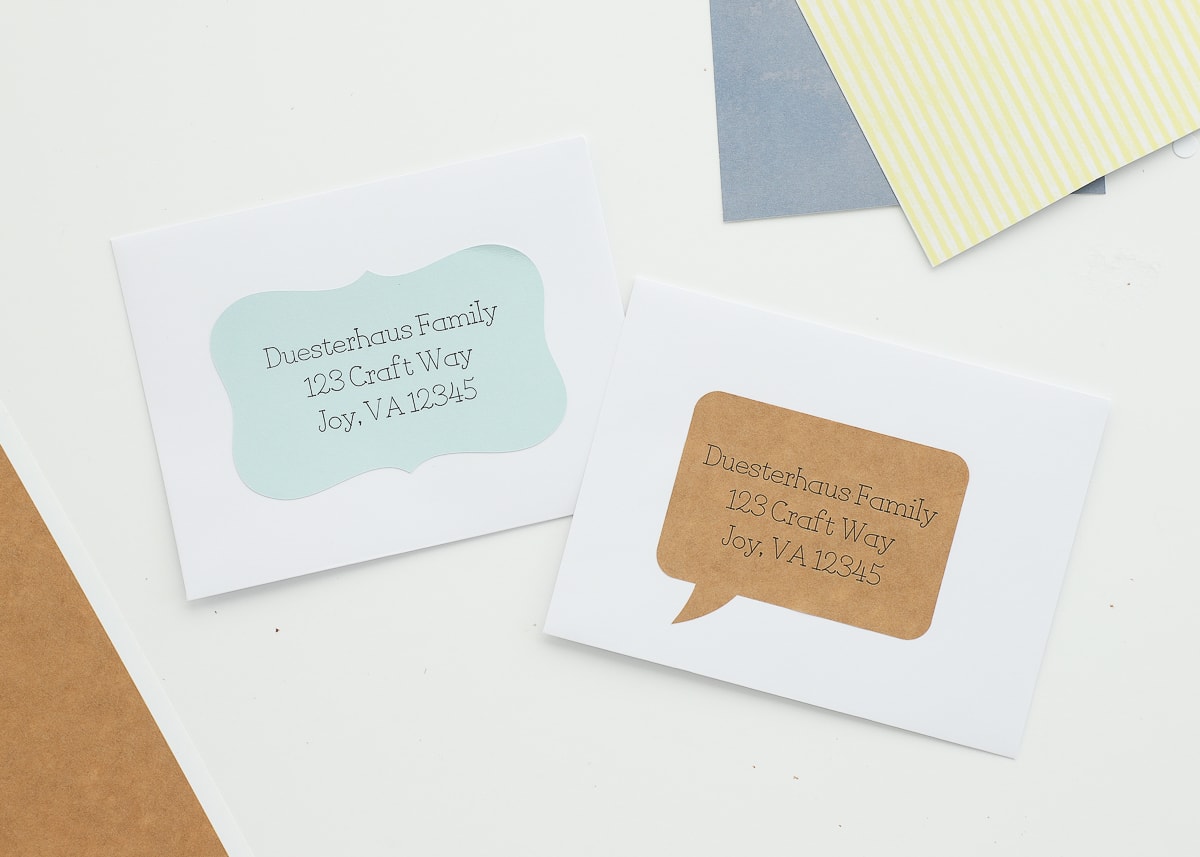
You can access my envelope labels here!
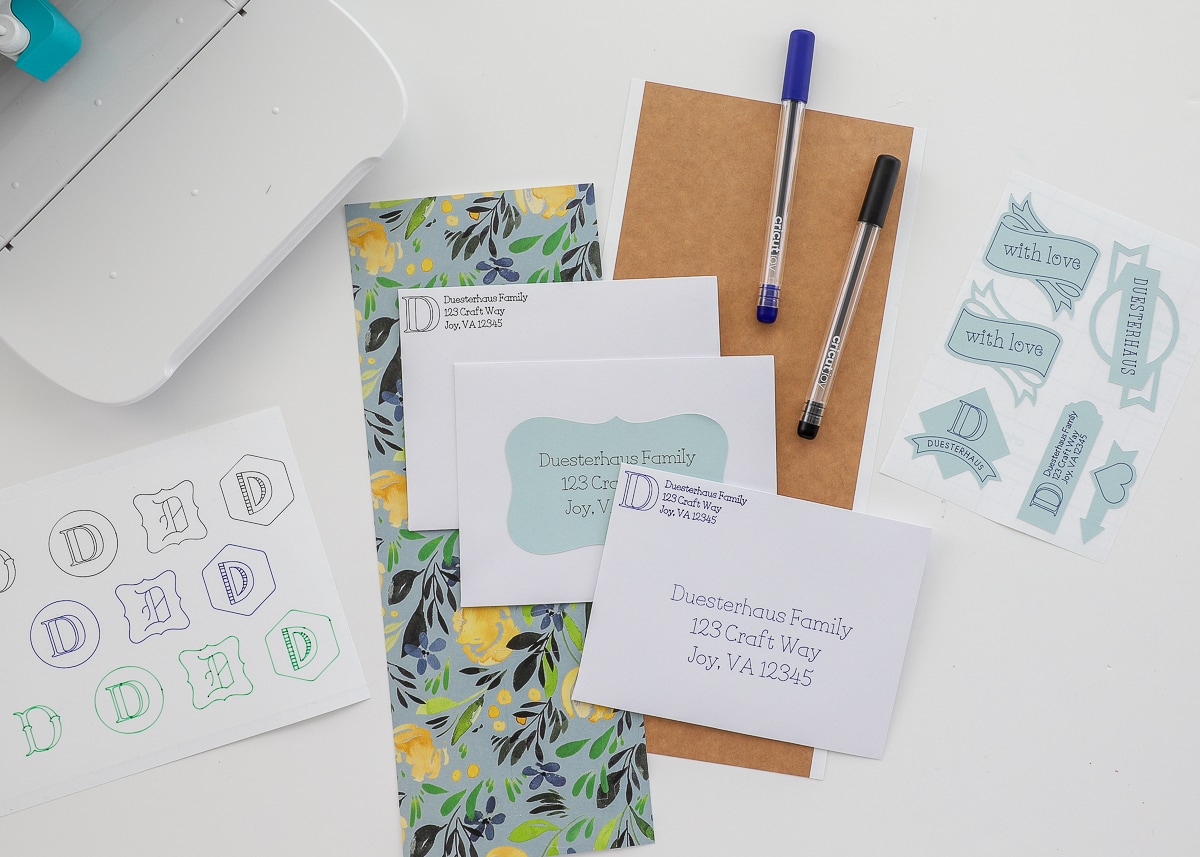
Dressing Up Your Mail With Stickers
Beyond just address labels, you can make return address labels, stickers and any other decoration you can think of!
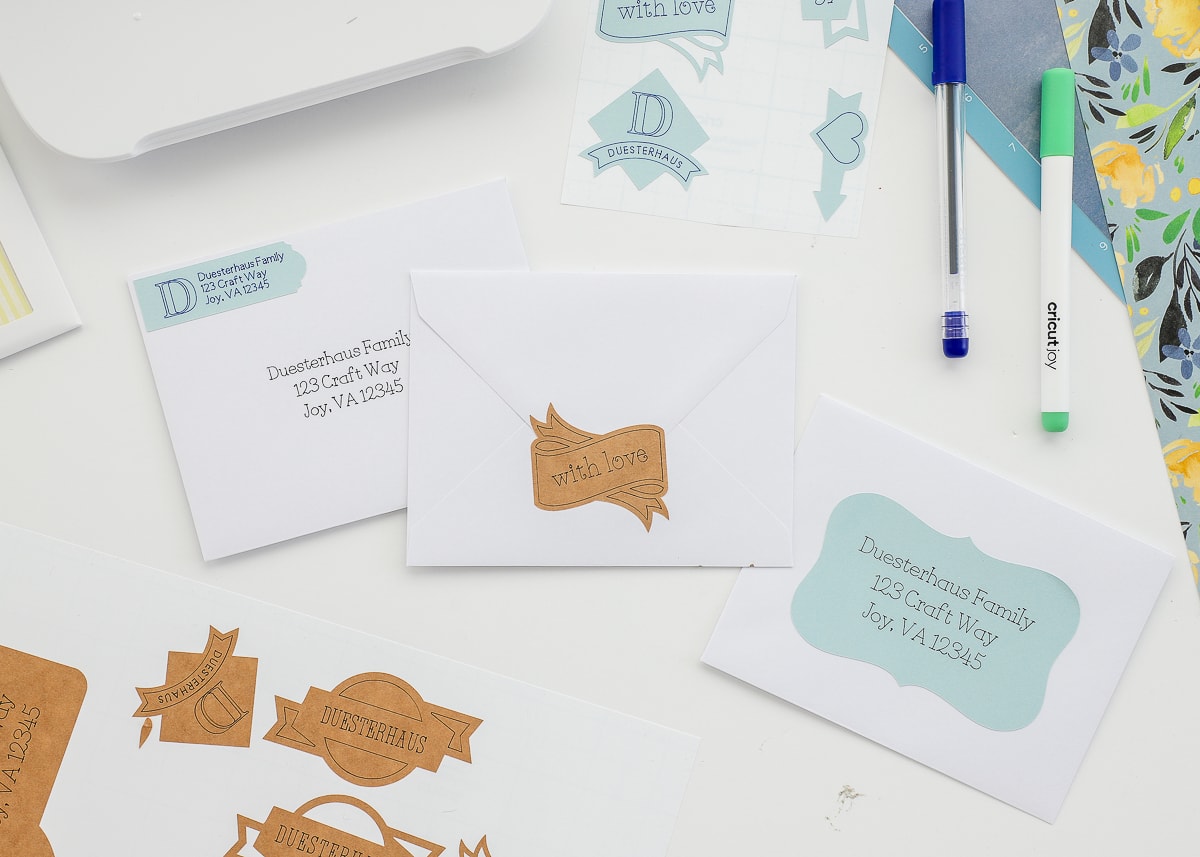
Return Address Labels
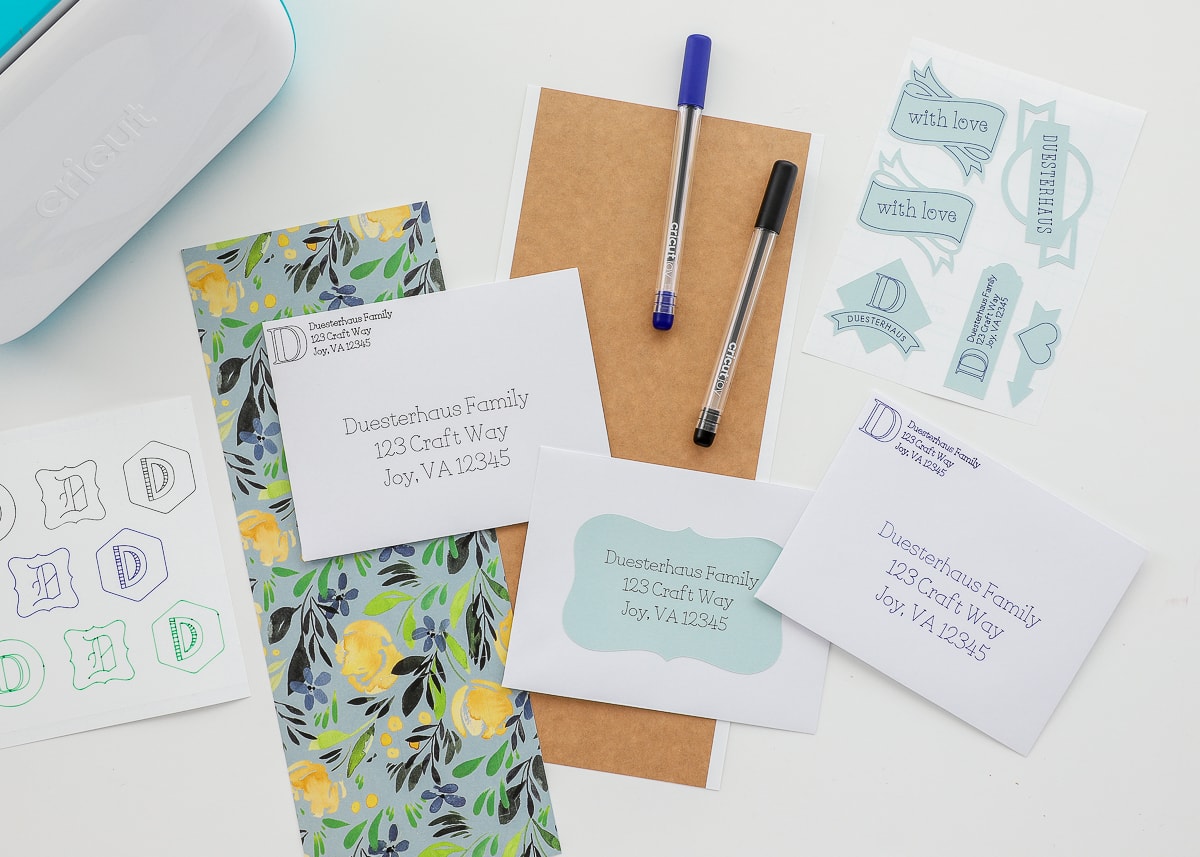
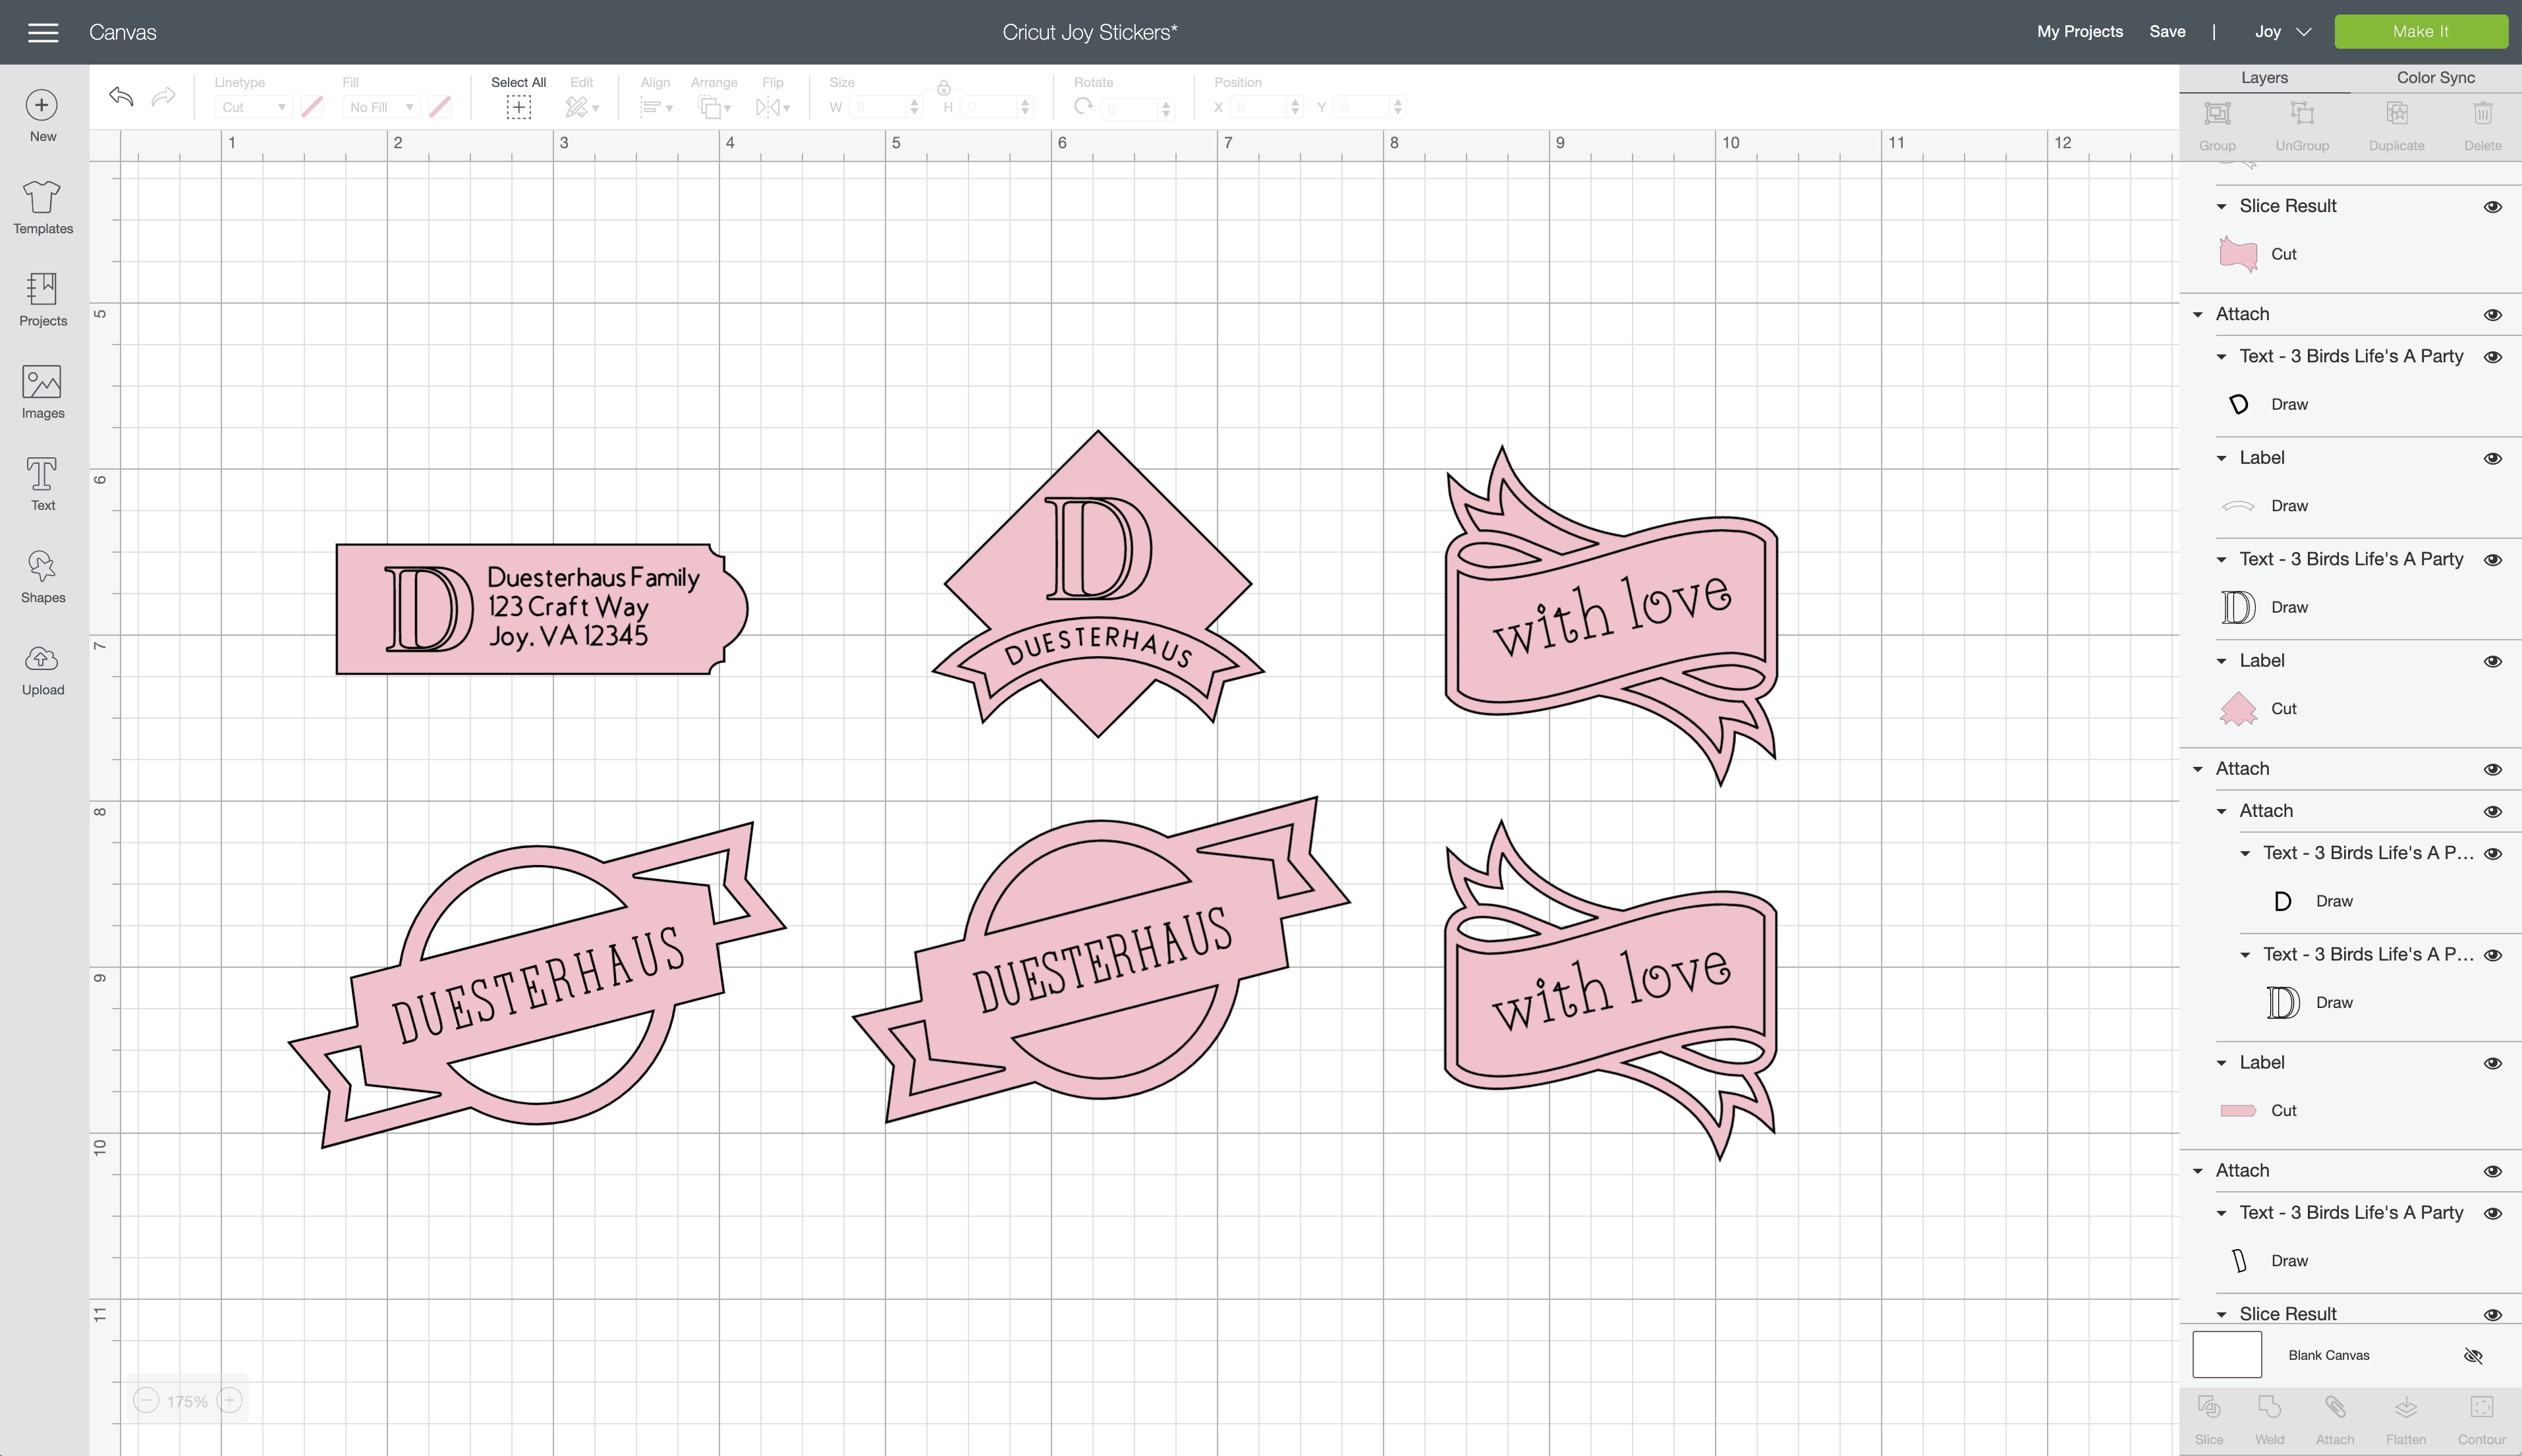
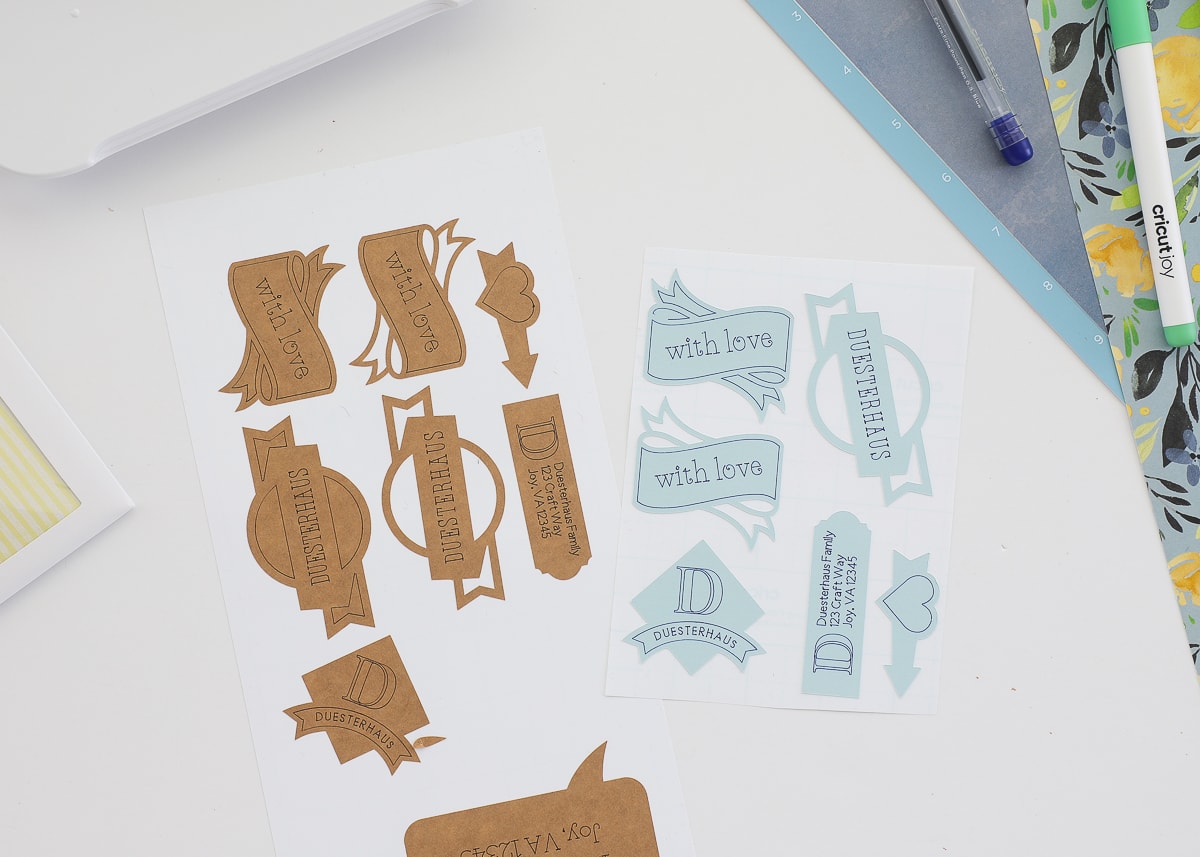
I had so much fun going through various image sets in the Design Space library, just picking out cute shapes that would make fun envelope stickers (most are from the Close to My Heart – Artistry set). After choosing a variety of banners and shapes, I just typed out words, names and monograms to fit each one. Ensuring the shape was set to “Cut” and the details/words were set to “Draw,” I Attached them to each other just as I did the labels above.
- For the Cricut Design Space file for these Return Address Labels, click HERE!
- For the full sticker tutorial: How to Make Stickers with Cricut Joy
- For the full return address labels tutorial: How to Make Return Address Labels with ANY Cricut Machine!
In mere minutes, I had adorable stickers written, cut and ready to go!
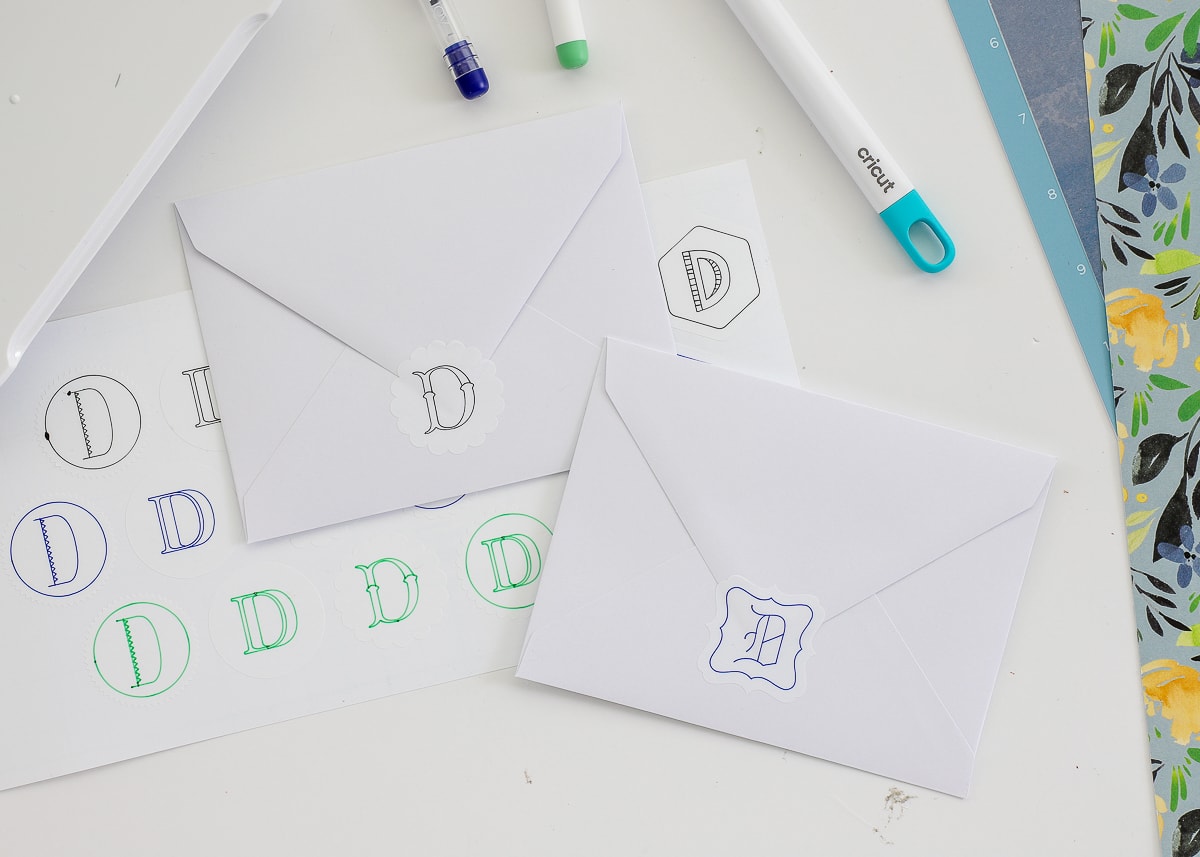
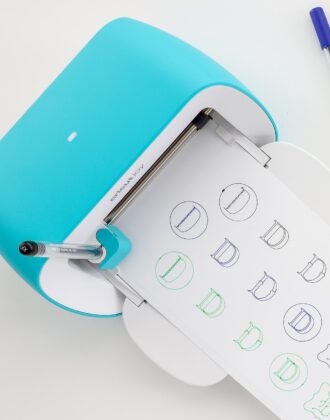
Monogram Stickers
I think my absolute favorite part of this whole “pretty mail” project is the monogram stickers. Each of these is just our last initial written in a different font and sized really big. When attached to various round shapes, they become super classy monogram stickers. By swapping the fonts, shapes and pen colors, you can give them so many different looks!
- For the Cricut Design Space file for these Monogram Decals, please click HERE!
- For the full sticker tutorial: How to Make Stickers with Cricut Joy
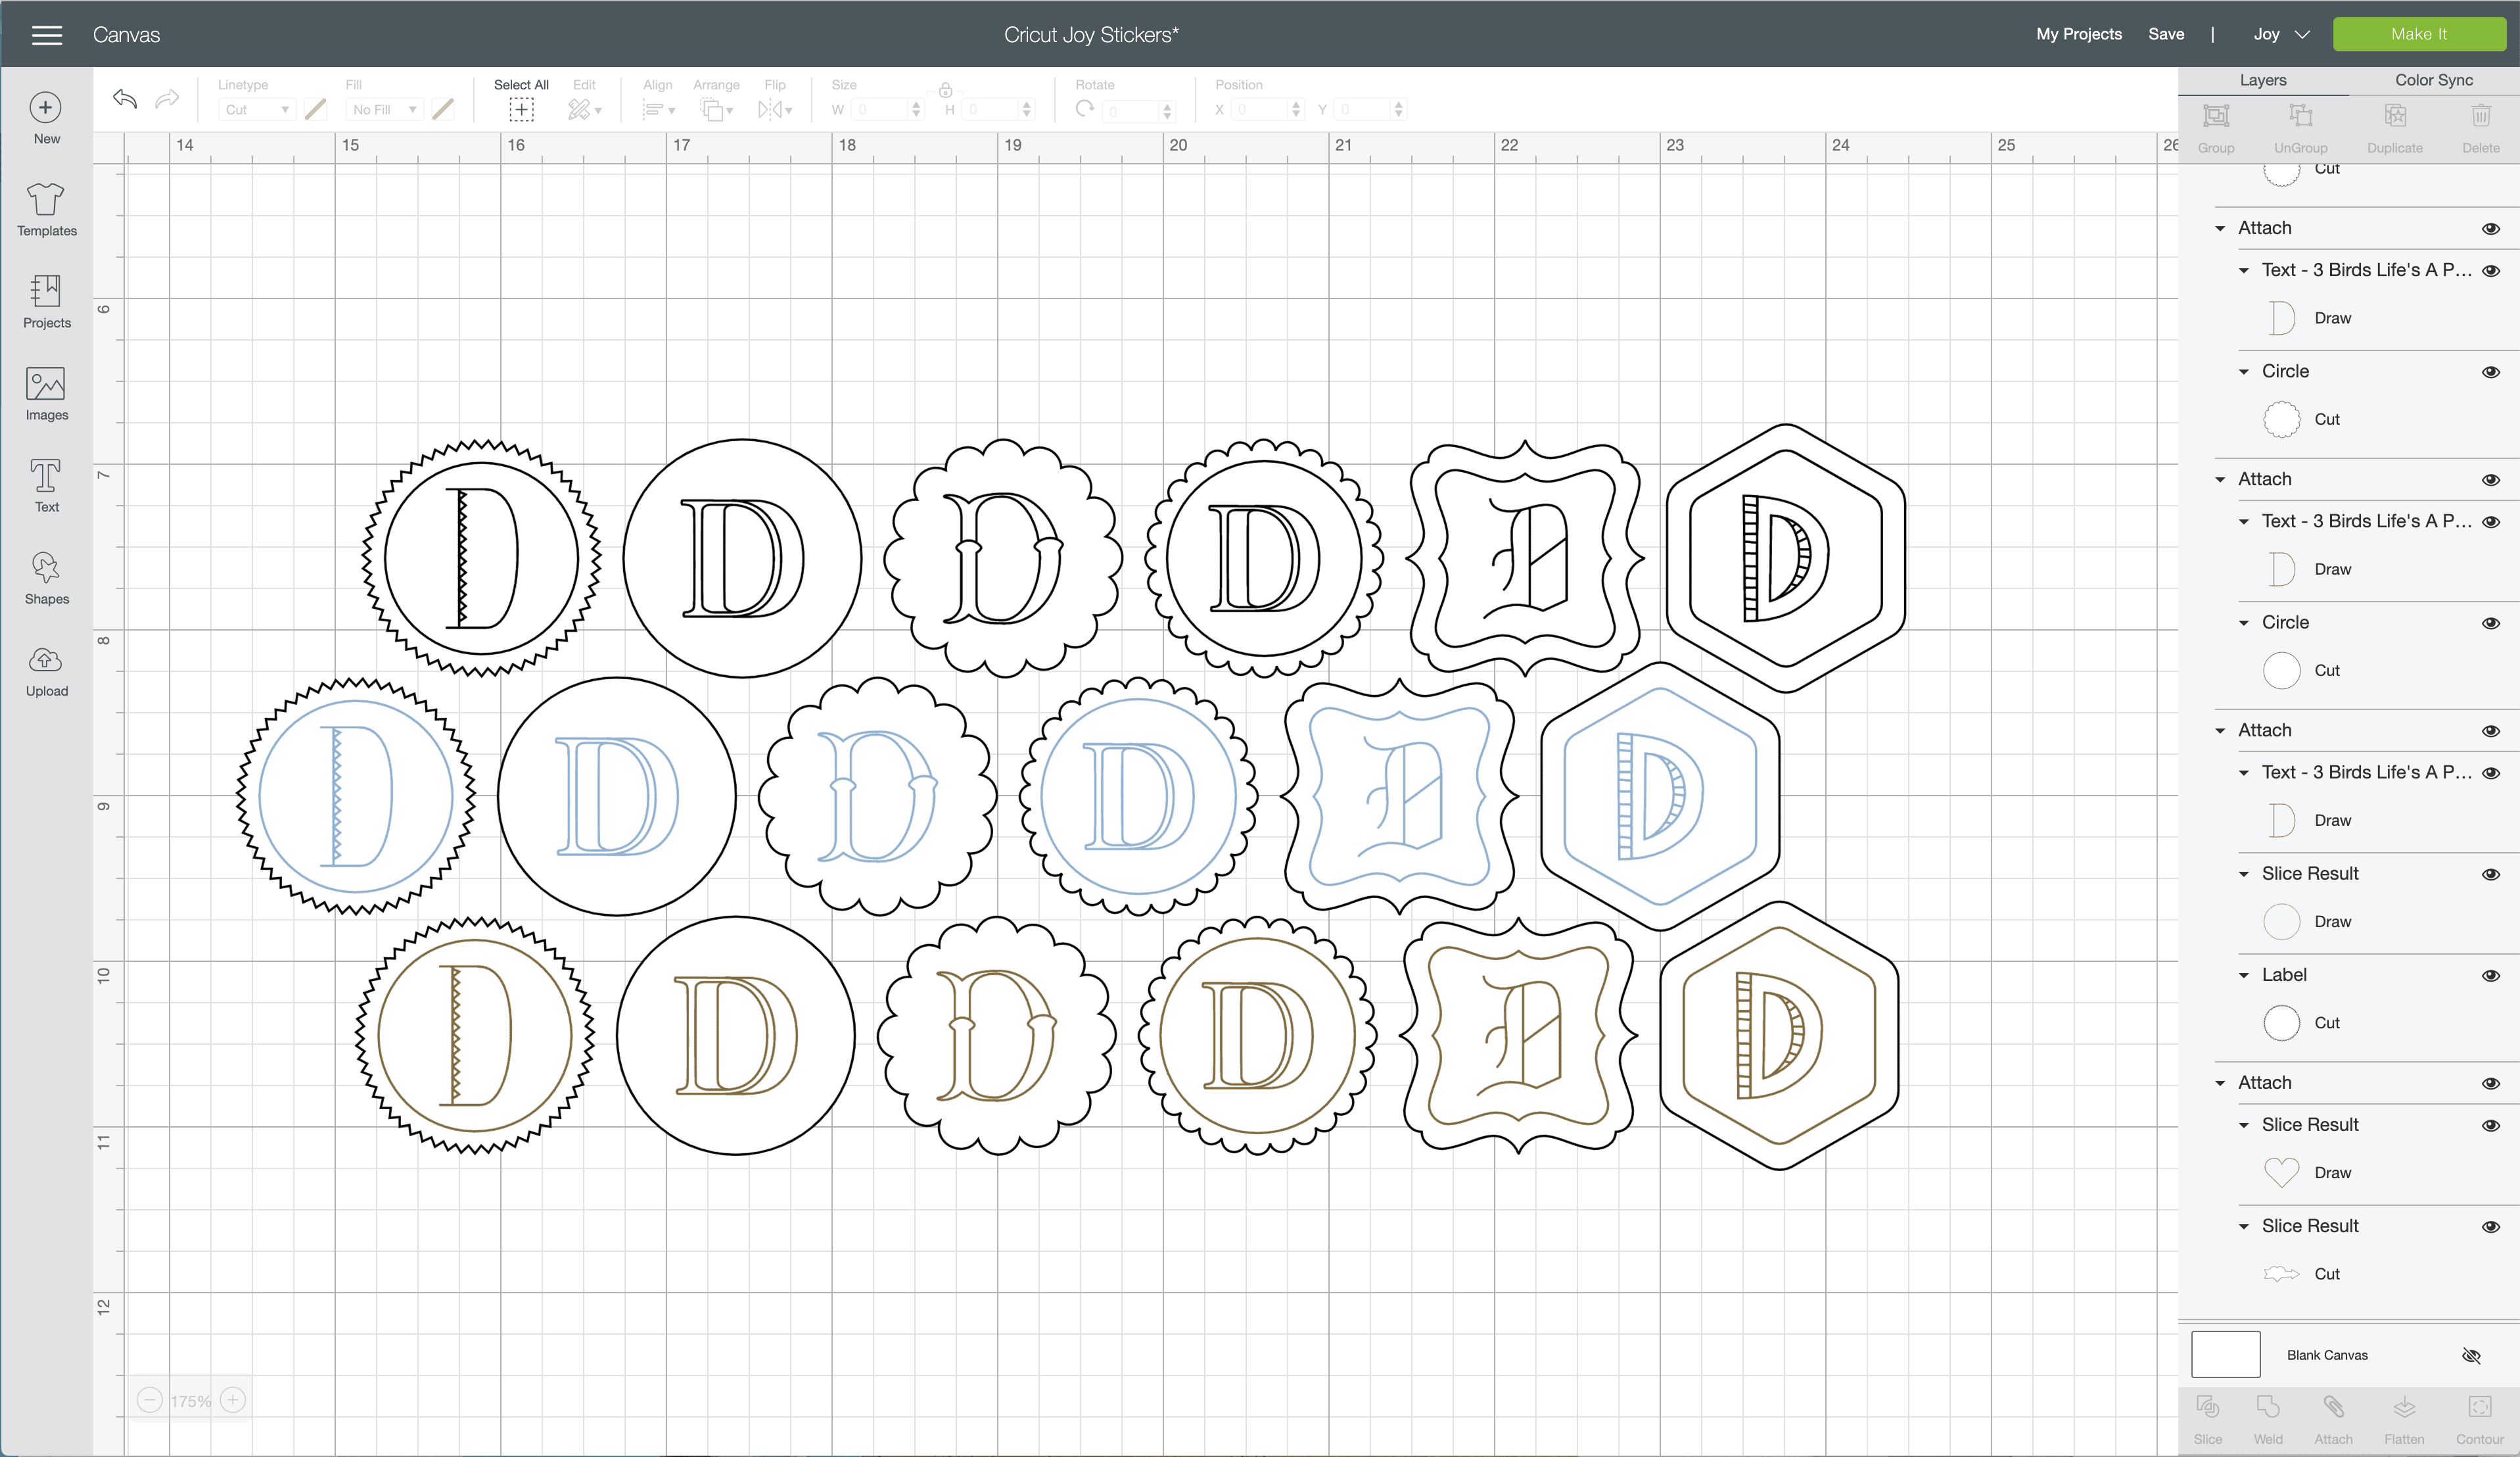
I sized and laid out these stickers to take advantage of every inch of the Smart Label Vinyl. If you need a bunch, you can cut all 48″ worth of label material at once!
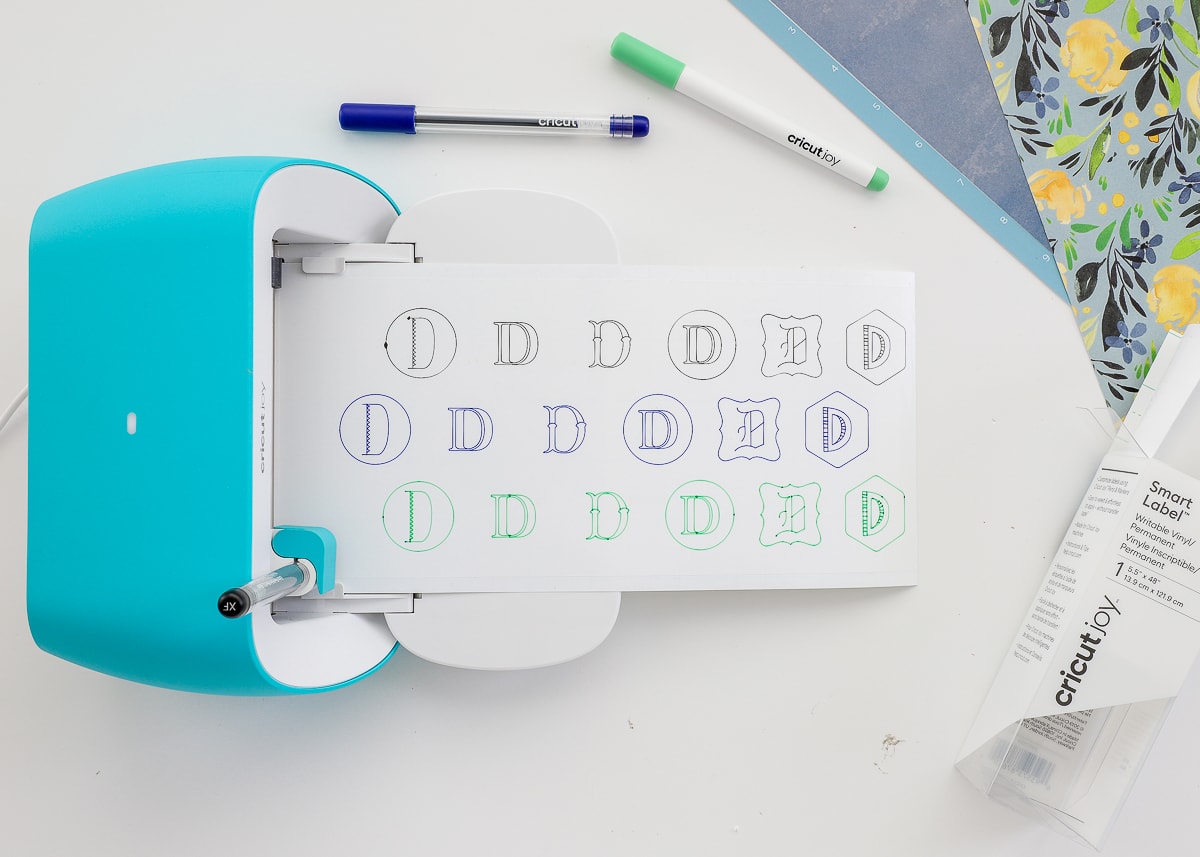
These labels were written with both Extra Fine and Fine pens onto Smart Label Vinyl, so I can literally peel them off just like stickers!
More Great Cricut Labeling Projects
Ready to label even more with your Cricut machine? Check out these other awesome projects:- Make Vinyl Labels with a Cricut
- Make Labels Using Cricut Pens
- Make Labels with Cricut Print Then Cut
- Make Waterproof Labels with a Cricut
- How to Label Fabric with Iron-On Vinyl
- Iron-On Clothing Labels with a Cricut
- Toy Bin Labels with a Cricut
- Pantry Labels with a Cricut
- Dresser Drawer Labels with a Cricut
- Luggage Tags with a Cricut
- Return Address Labels with a Cricut
- Fast Labels with the Cricut Joy App
- Make Easy Round Closet Dividers with Cricut Vinyl
- Label Drawstring Backpacks with Cricut Iron-On
- How to Make Vinyl+Wood Labels
Whether you’re addressing envelopes or just want to make some labels or stickers to dress up your mail, the Cricut Joy + pens give you so many fun options! Now that I have a bunch of templates and sticker designs all set up, writing/cutting new copies is as quick as pulling up the file and loading my machine. Since I pretty much hate my handwriting, I am so excited to have a way to easily create some gorgeous mail!

Megan
13 Comments on “How to Address Envelopes with Cricut Joy”
I love the envelope address, I dislike my handwriting too. I have zero experience with a Cricut, but I’ll keep this idea in mind.
This post was enough of a reason to convince me to get a Cricut Joy this Christmas!
Yay! You will love it!
(Just an FYI – you can address envelopes with other Cricut machines too…you just need to format it on a bigger mat!)
Have a great week!Megan
Just wondering how you got the blue labels. I only see the white and brown on Cricut website.
I have a cricut joy and every time i try to make the labels and set the type to draw it says it is incompatable. How do i fix that
Hi there!
Change the Pen Color to Black (or any color). For some reason, they have the defaul set to something the Joy won’t recognize. As soon as you change the color, you’ll be good to go!
Good luck!Megan
Can you print on different sized envelopes? I have had photo cards printed that are long, the dimensions are 4″x8″. Or am I better off just creating stickers?
Hi Patti!
You can certainly adapt the addressing process to other size envelopes. It will take some experimentation to get the placement right, but it will work.
For that size envelope, you won’t be able to use the Cricut Joy Card Mat, but you might be able to make it work on a standard mat.
I’m sorry I don’t have a super clear answer for you, but I do think it’s possible with some experimenting!Good luck!Megan
Me ayudó bastante., mil gracias.
You’re welcome!
When I press make it after putting card mat or regular mat the envelope and writing are on the screen horizontally rather than vertically…so frustrating. I cannot figure out what I am doing wrong.
What writing font did you use? And how did you keep the letter from being bubble?
I am looking for a cricut machine. Would this be a good one for making different cards? Including designs, writing inside and out. Thank you.