A Guide To Making Labels with Cricut Print Then Cut
When you think about making labels with your Cricut machine, your first thought it likely to use vinyl. After all, cutting vinyl into words, pictures, and shapes is a great way to make custom labels for a wide variety of surfaces around the home. However, another really great (and fast!) way to make labels with a Cricut machine is using the Print Then Cut feature. After designing your labels, you first print them out on your home printer (onto cardstock, sticker paper, etc) and then cut them out with your Cricut machine. While this labeling method opens up a whole new realm of creativity possibilities, it is often overlooked. So today, I want to break down everything (and I mean everything!) you need to know about making (amazing!) labels with Cricut Print Then Cut!
What Is Cricut Print Then Cut?
The Print Then Cut feature on Cricut machines is one of the toughest for non/new users to understand. But in actuality, this function is exactly what it says: Print…Then…Cut. No Cricut machine has a built-in printer; but using this function, you first print any design you make in Cricut Design Space on your own home printer and then use your Cricut machine to cut it out. (This cutting process still not clear? See my full Print Then Cut Beginner’s Guide)
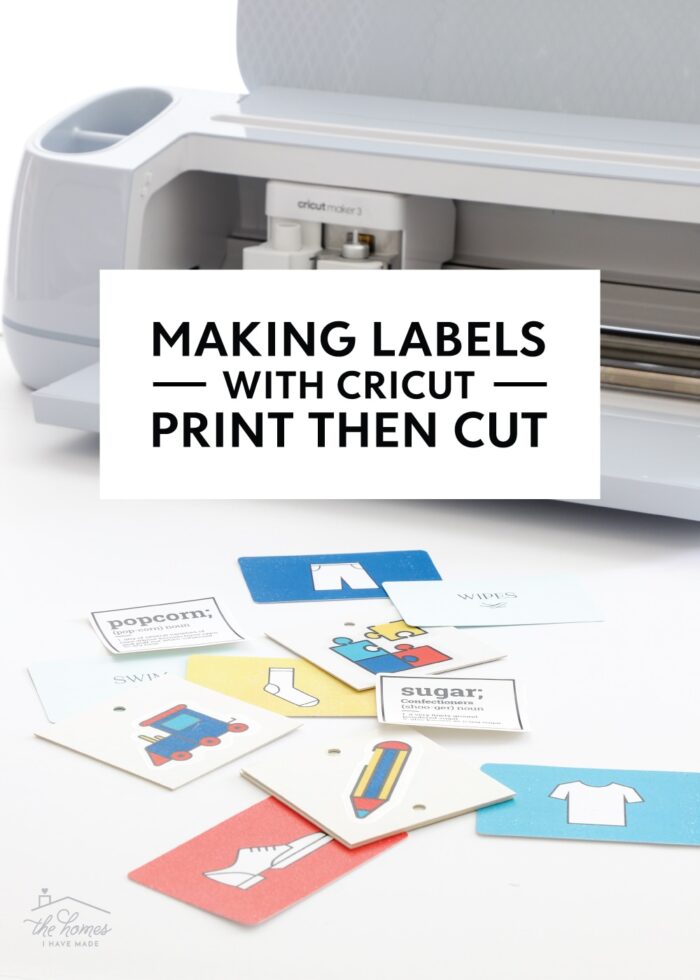
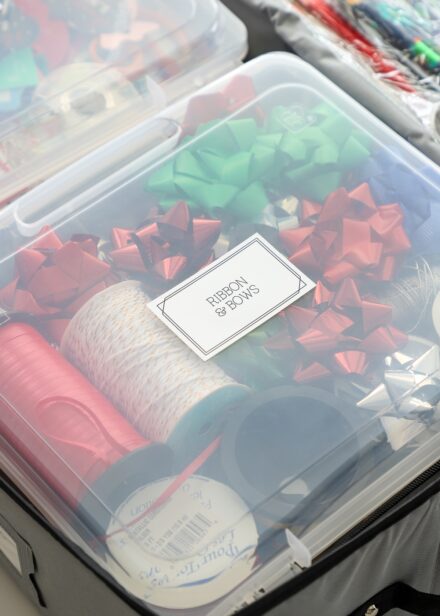
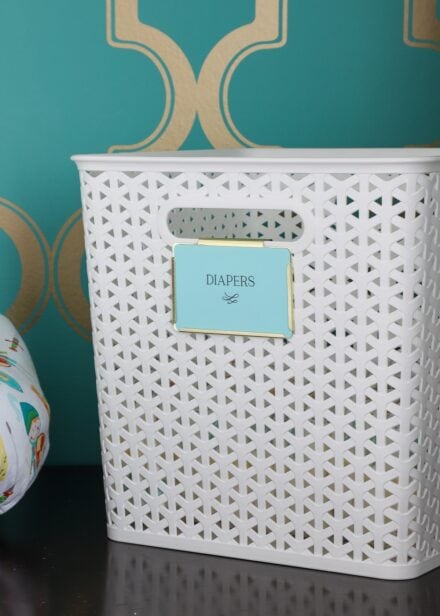
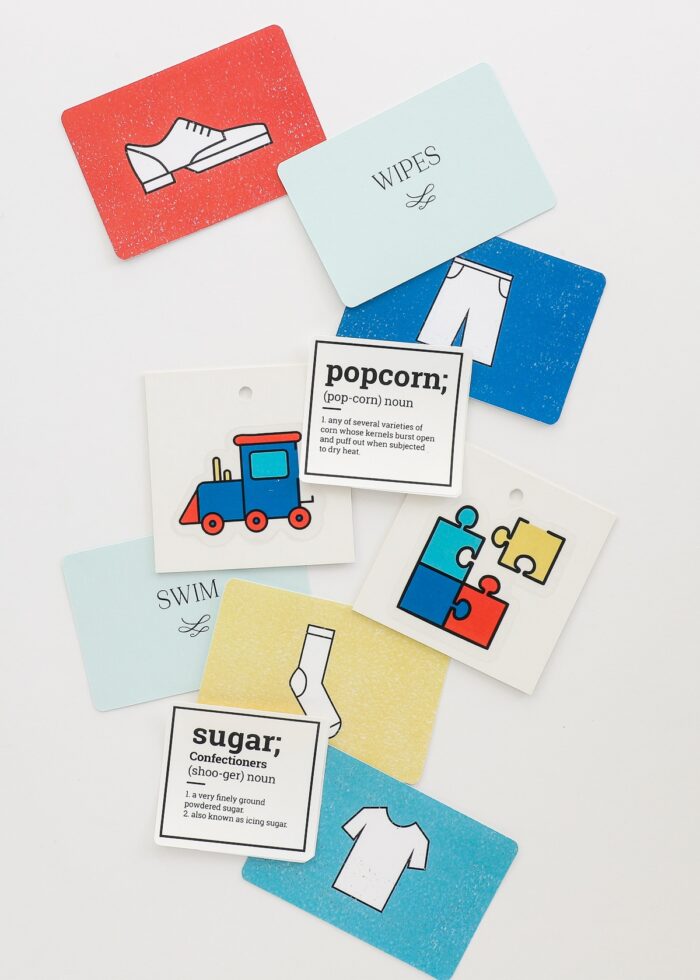
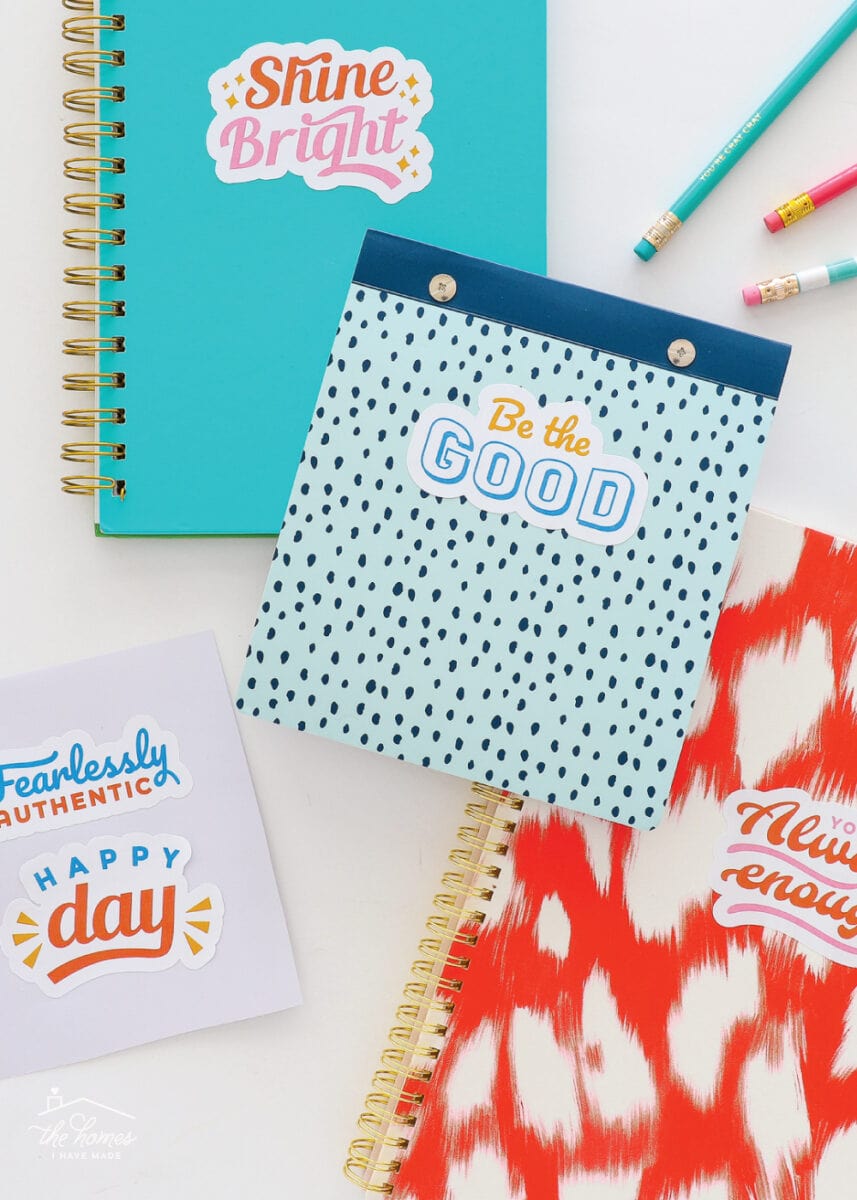
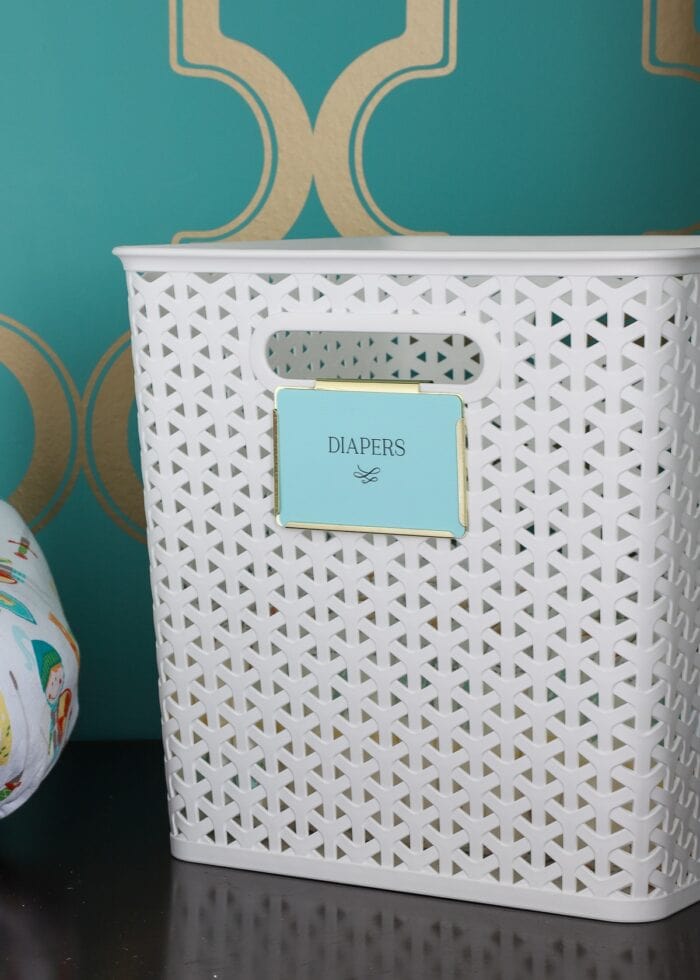
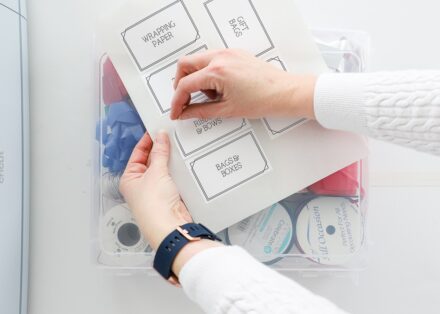
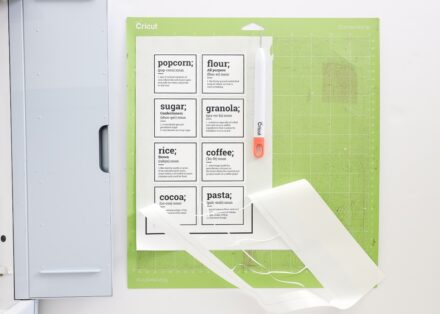
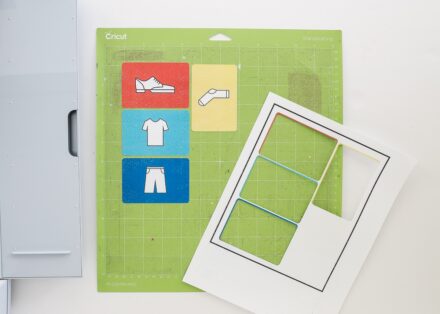
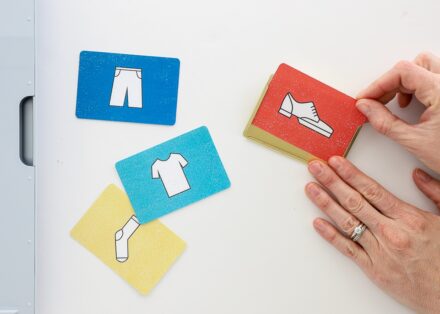
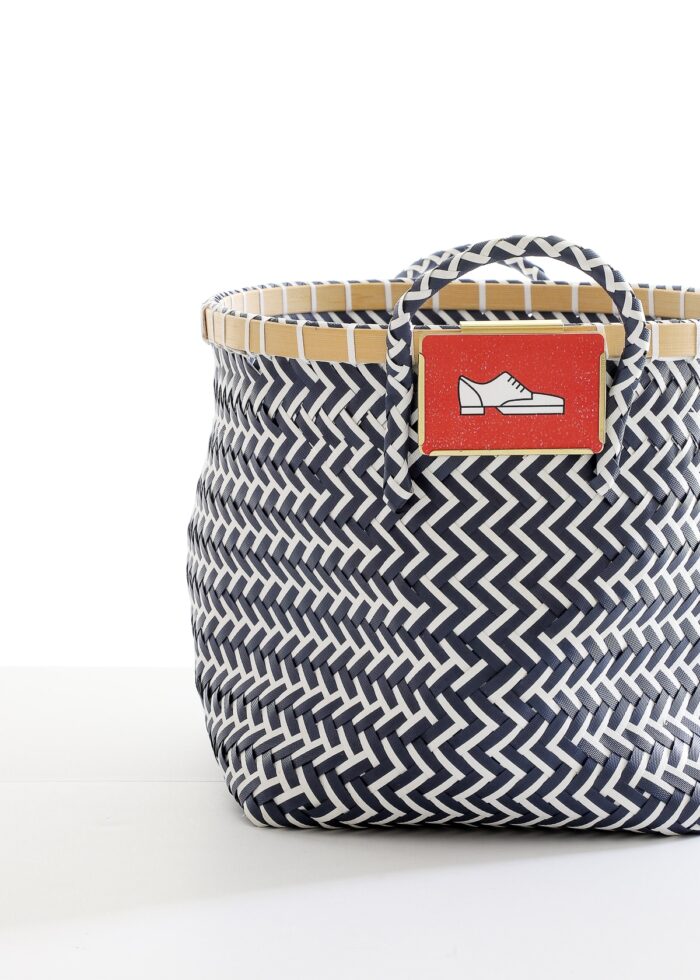
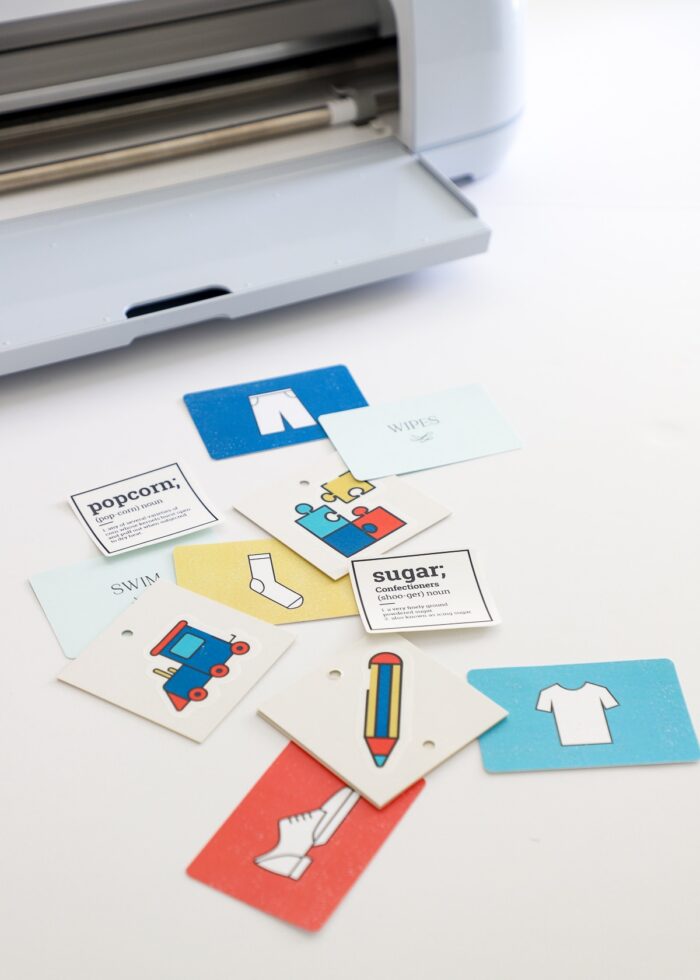
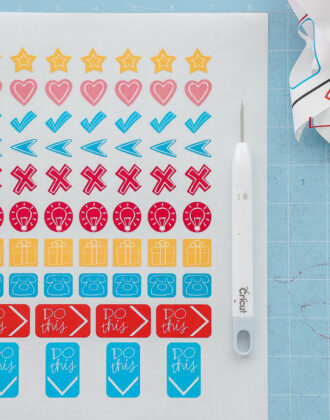
The most common Print Then Cut projects are to make your own planner stickers, water bottle decals, and party decor, but it’s also a great way to get professional-looking labels really fast! Just take a look at these label examples, all using the Print Then Cut feature!

Why Use Cricut Print Then Cut to Make Labels?
Ease & Speed
If I attempted to make any one of the above labels using vinyl or Cricut Pens, they would have taken forever. The weeding, layering, transferring, and writing can all be very time consuming (especially when done on a small scale and in multiples, which is usually the case for labels). Don’t get me wrong; there are times when I love a vinyl decal or “drawn” label. But by using my printer instead, I escape all of that work and can have a full set of custom labels done in mere minutes.
Design
Because you print your design with a printer, you can make labels as complex, colorful, and/or complicated as you want. There’s no need to worry about too many layers, too tiny text, not having the right color materials, or how long a design will take to weed, write, transfer, etc. You simply make a label design (in any size, shape, and design), print it out, and cut it all out at once. If there was ever the “ultimate custom label maker,” the Cricut Print Then Cut function is it!
Text Clarity
If you’ve used and been frustrated by the “clarity” of text created with Cricut Pens, then the Print Then Cut feature is an excellent alternative. Cricut Pens don’t create “smooth” lines and can sometimes look a little jagged or broken. However, when this same text is printed, it appears just like it does on your screen. In my experience, if you need really crystal clear text on labels, using Print Then Cut is a better bet.
When To Use Print Then Cut for Labels
If you’ve been around my blog for even a minute, you know that I make custom labels with Cricut vinyl and Cricut Pens all the time. So how do you know when to use Print Then Cut (versus other materials) for your labeling project? It mainly comes down to four main factors:
- Aesthetics. What do you want your labels to look like? Do you want them to look like shiny, glossy decals? Then you should use vinyl. Do you want them to have hand-written charm? Then Cricut Pens are the way to go. Do you want a printed image look? Print Then Cut is your best bet.
- Design. How complicated is your design? A single word or shape is quick and easy to cut from vinyl. Whereas a multi-color design or one with lots of little details will be easier to print rather than layer together with transfer tape.
- Speed. How much time do you want to spend on your labels? If you’re up for a project and don’t mind weeding and layering and transferring, vinyl labels are indeed fun to make. But if you need great-looking labels done now, Print Then Cut is about to be your new best friend!
- Durability. How durable do you need your labels? Will they frequently get splashed with water or exposed to the elements? In general, vinyl labels will be longer lasting and waterproof. However, there are now lots of great printable waterproof papers than can be used for labels too! See More: How to Make Waterproof Stickers with a Cricut
Supplies Needed
As you’ll soon see, there are lots of different ways to make labels using the Cricut Print Then Cut feature. Here are the supplies you will need, no matter what labeling project you’re undertaking:
- Cricut Maker or Cricut Explore (all models) – The Cricut Print Then Cut feature is NOT supported by Cricut Joy; you must have a Cricut Maker or Cricut Explore machine to use this function.
- Premium Fine-Point Blade – the one that comes with your machine
- StandardGrip Cutting Mat
- Home Printer – Inkjet printers and laser printers both work as long as you use compatible papers
- Printable Material – Labels can be printed onto any material you can feed through your printer, such as:
- Basic Printer Paper
- Photo Paper
- Cardstock – white or colored
- Scrapbook Paper – solid or patterned
- Printable Sticker Paper – clear, white, holographic, etc
- Printable Vinyl
- Printable Iron-On
- Weeding Tool – Helpful when working with sticker papers and printable vinyls
Designing Print Then Cut Labels in Cricut Design Space
The Flatten Tool
Anything…I’ll repeat….anything you design in Cricut Design Space can be made into a printable image via one simple button: the Flatten Tool (located in the bottom right-hand toolbar of the Cricut Design Space canvas).
This means you can use ANY image from the Design Space Image Library…ANY text you type out manually…ANY shape you like from the Shapes Menu (or even a combination of all three!) and make it into a printable image.
Here’s what I mean:
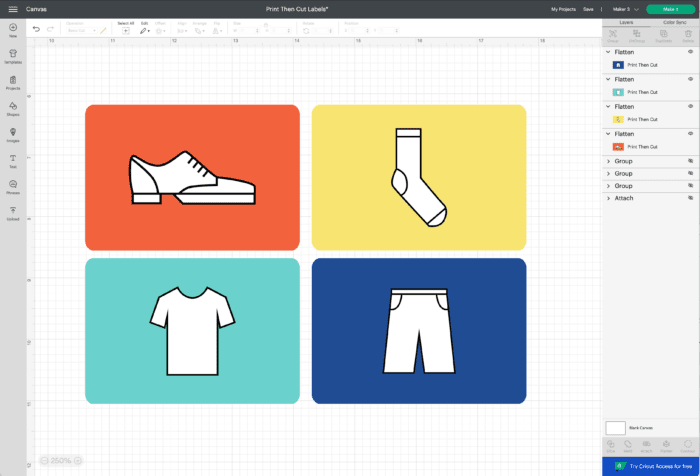
On my canvas, I placed 1) a rectangle from the Shapes menu; 2) a Swirl graphic from the Image Library; and 3) and a typed out word with the Text Tool.
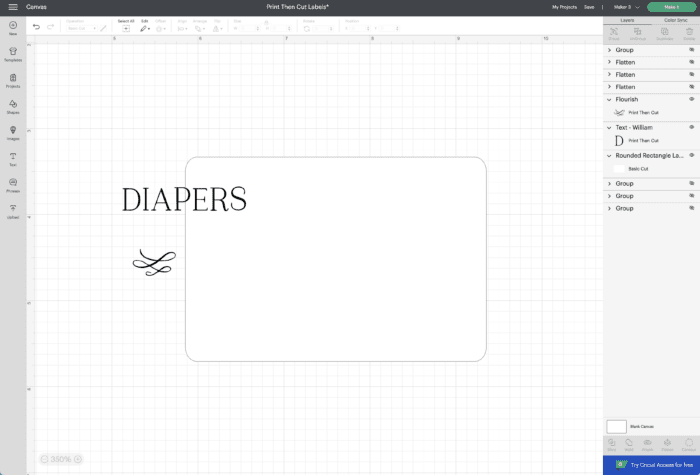
Once I got everything sized and spaced exactly as I wanted it, I selected ALL three elements together and clicked “Flatten” in the bottom right-hand toolbar.

My design is now a “Print Then Cut” image (as noted in the right-hand layers panel); which means the software will prompt me to first print the design out on my home printer, and then perfectly cut it out with my Cricut machine.
If you need more help understanding the Flatten Tool, see my full Print Then Cut Beginner’s Guide.
Creating Backgrounds For Your Labels
For most labels, you will not want to just type out a word or select an image, flatten it, and slap it right on your bins. In most instances, you will need to create a “cuttable” background (or label shape) for your text/image. This is typically done via either Shapes/Images or an Offset Layer.
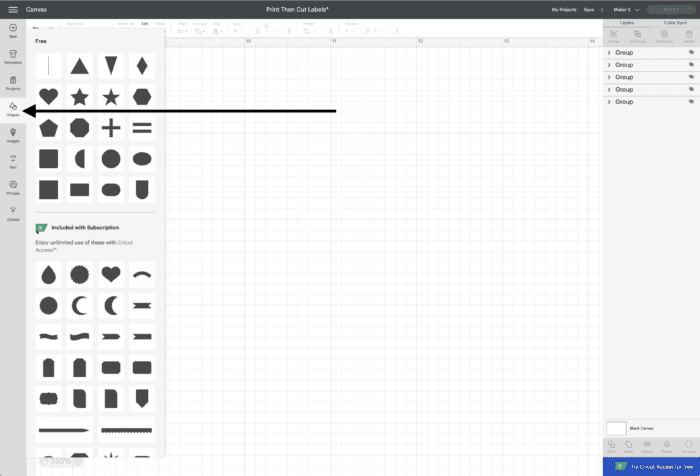
Shapes/Images
Cricut has recently expanded the (free) Shapes menu to include a wide variety of designs that would make nice labels. Additionally, you can use pretty much any image within Cricut Design Space as your “background layer.” Simple searches like tag, rectangle, label, banner, and circle will yield lots of great options.
Offset Layer
However, if you do just want a word or shape without a larger square/circle behind it, you can also use the Offset Tool to create a “cuttable” border around the image. For more detailed instructions on how to do this, click here: How to Use the Cricut Offset Tool or the Video Tutorial.
Understanding White Space On Your Labels
There is one more design note I want to highlight when creating labels with Cricut Print Then Cut: the role of white space. Our printers don’t print white, so anything that is white in your label design will take on the color of whatever paper you feed into your printer.
Obviously, if you use white materials, the white elements in your label design will be white. But if you use blue paper, white elements will be blue. If you use clear sticker paper, white elements will be clear. In this way, you don’t necessarily have to rely on your printer ink to create the color in your design. If you want blue labels, simply load blue paper into your printer!
How to Make Labels with Cricut Print Then Cut
Okay, that was a lot of prep and build-up, but now I am excited to show you exactly how this works so all those tips and tricks come into clearer focus for you. Here we go!
Step 1: Determine Your Needed Label Size
Before you can make custom labels, you need to know what size and shape you need them to be. Whether you’re applying your labels directly to a box or canister, sticking them to a pre-cut tag, or loading them into a label holder, use a tape measure to determine the height and width of your ultimate label design.
Step 2: Design Your Labels In Cricut Design Space
The sky is really the limit here (and I dive into lots of design “upgrades” further down this post), but let me walk you though a basic label design process.
Want to save this post?
Select A Label Shape
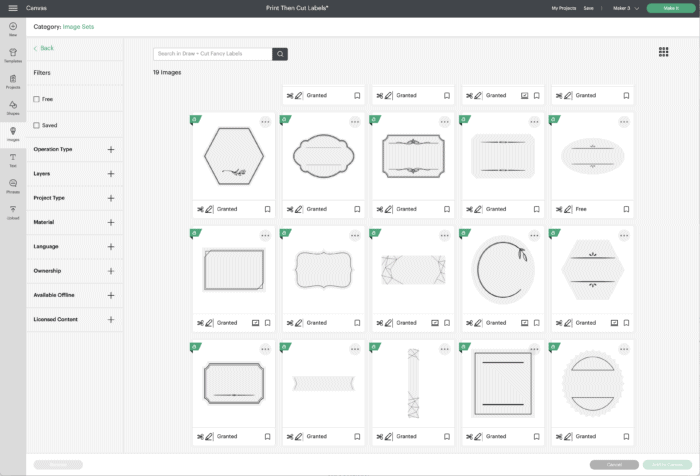
- On a brand new Cricut Design Space Canvas, open the Image Library (left-hand toolbar).
- Click “Image Sets” on the bottom of the left column.
- Type in “Fancy Labels” to bring up this set of basic label designs.
- Select a label design and place it on your canvas. Adjust the size to your needed dimensions; and then change the colors of the background and line details to your preference. (I went with basic black on white.)
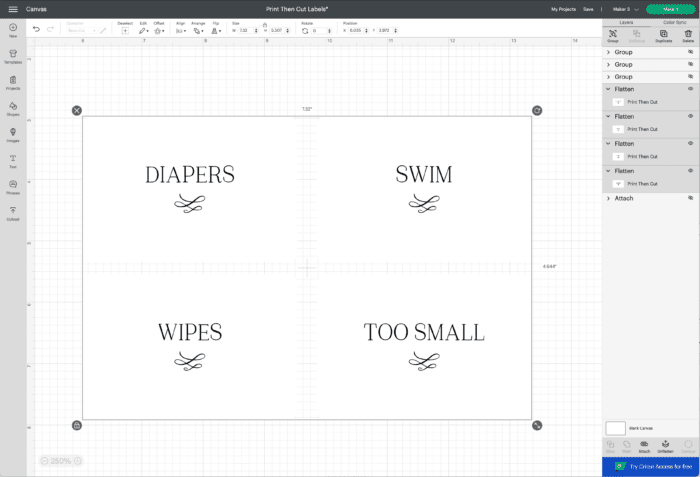
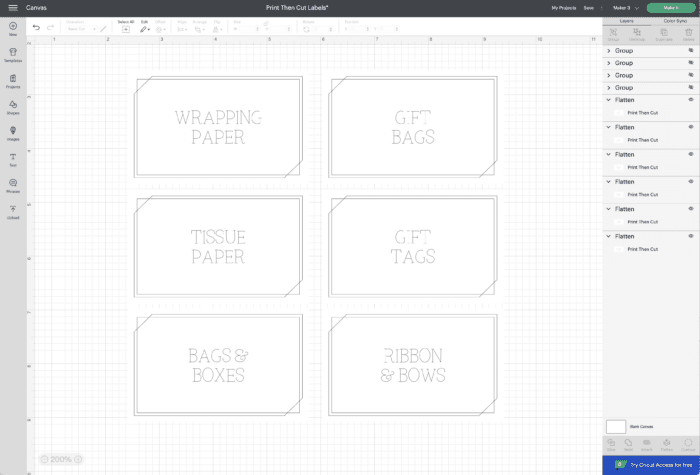
Add Label Text
- Next, add a text box using the Text Tool (left-hand toolbar) and adjust the font and size to your liking. Use the Align Tool (top toolbar) to center your text both vertically and horizontally on your label shape.
- Repeat making as many labels as you need for your organization project.
- Once you have your label(s) designed exactly as you want them, select all the layers of each individual label (background, border, text) and flatten them together via the Flatten Tool.
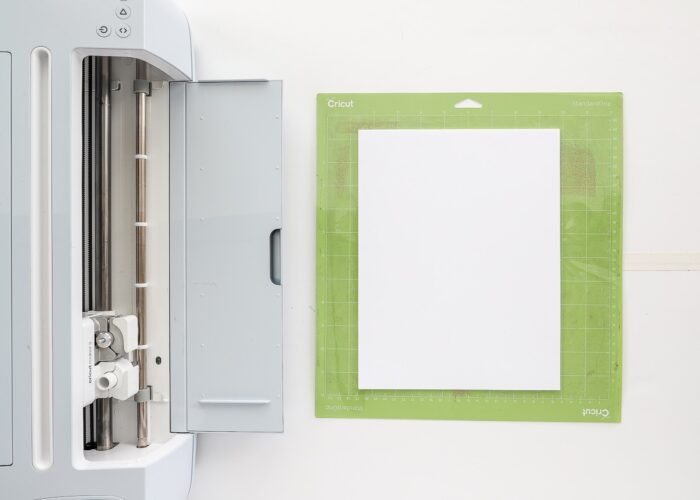
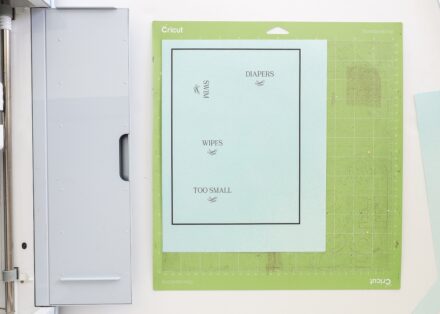
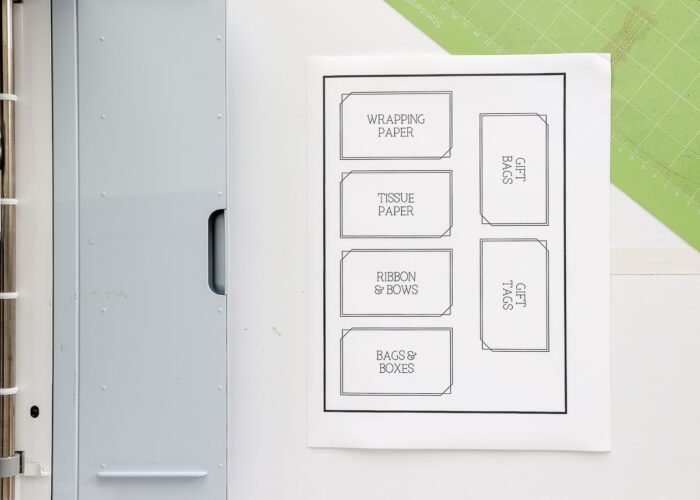
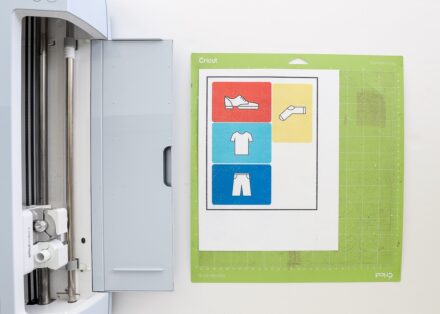
Step 3: Print Your Labels With Your Home Printer
Next, click the green “Make It” button. After confirming the layout, you will be prompted to send your design to your home printer. Load whatever paper you want your labels printed on according to your printer settings, and click “Print.” (I used a white sticker sheet for this set of labels.)
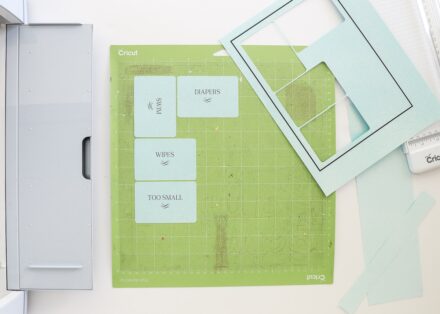
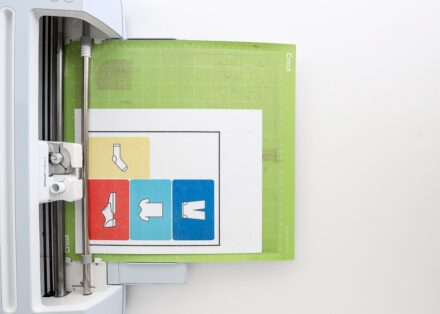
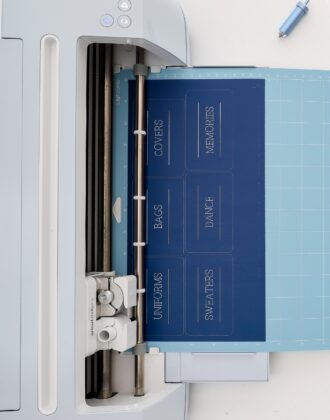
Step 4: Cut Out the Labels with Your Cricut Machine
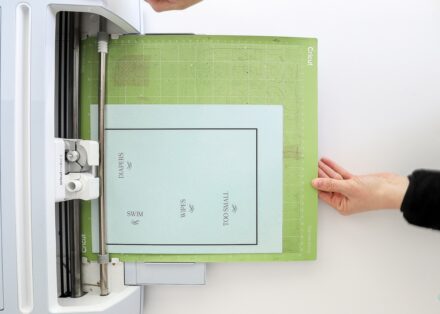
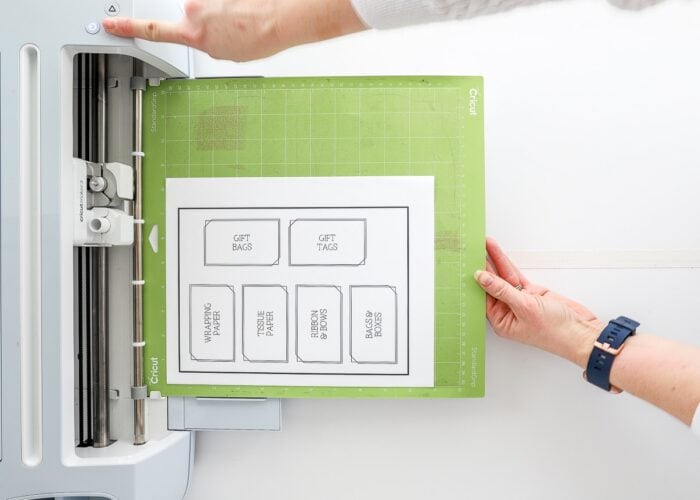
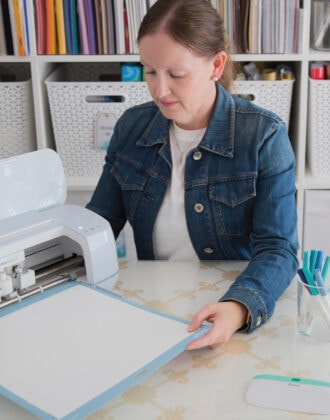
With your labels printed, load the paper onto a green StandardGrip cutting mat, aligning the top lefthand corner of the paper with the top lefthand corner of the mat’s grid.
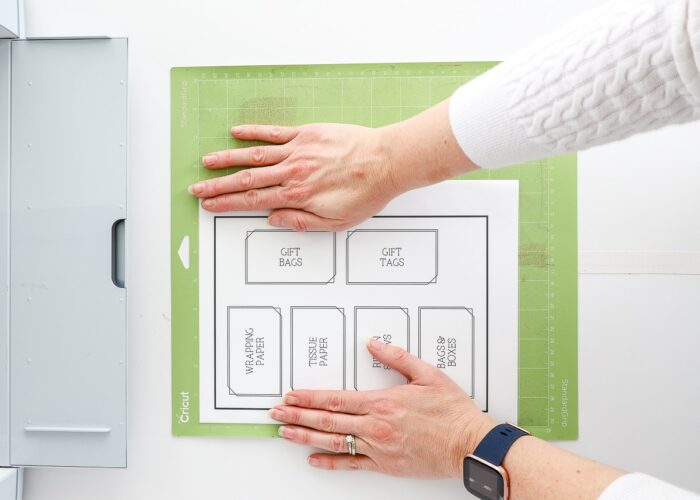
Load the mat into your Cricut machine and press the Go/Start button. Your Cricut machine will first scan the registration marks (the black rectangle) around your labels, and then cut out the shapes with precision!
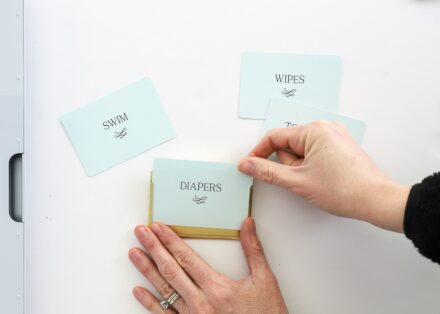
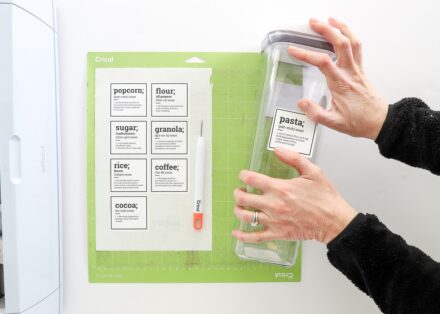
Step 5: Apply Your Labels
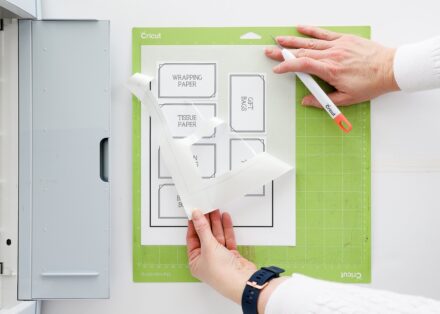
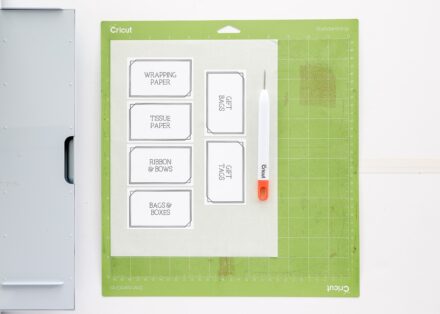
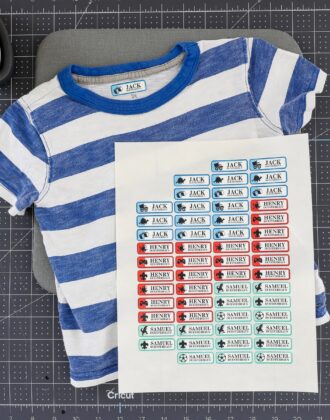
Once you remove the excess paper around your labels, you can simply peel them off the mat or paper backing (if using sticker paper) and place them wherever you need them!


Expanding Your Label Designs
Okay – that entire process seems easy enough, right?!? But let’s take your label designs up a notch. Remember, you can use anything within Cricut Design Space (or png/jpeg/svg files you upload yourself) to make labels. Here are some really fun and creative ways to make labels that are still just as easy but look amazingly professional too!
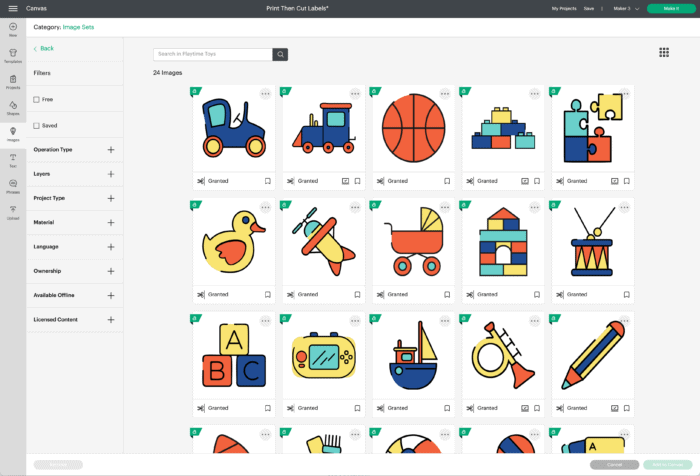
Pre-Made Label Sets In Cricut Design Space
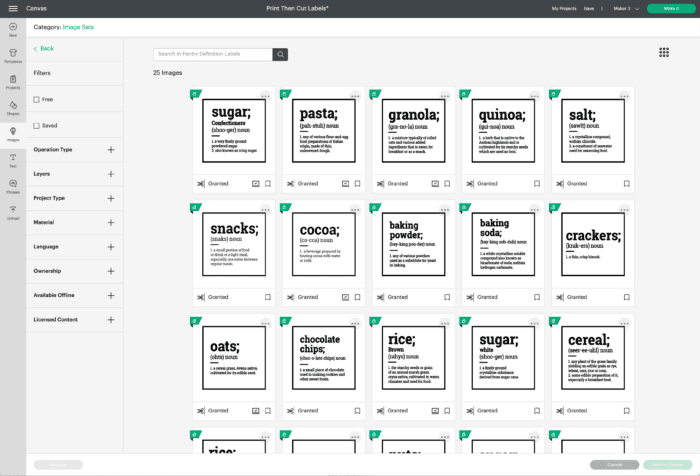
The folks over at Cricut know that we organizing junkies love using their products to make labels. So there are now TONS of pre-made label sets available in the Cricut Design Space Image Library! Simply use the search term “Labels” (in either the Image search or Image Sets search) to find some great designs all ready for you to Print Then Cut right away, including sets for the bathroom, medicine cabinet, laundry room, garage, pantry, spice cabinet, and more!
NOTE! Remember, a design doesn’t have to be designated as a “Print Then Cut Image” in order for it to be used on labels. ANY design can be made into a printable image via the Flatten Tool!
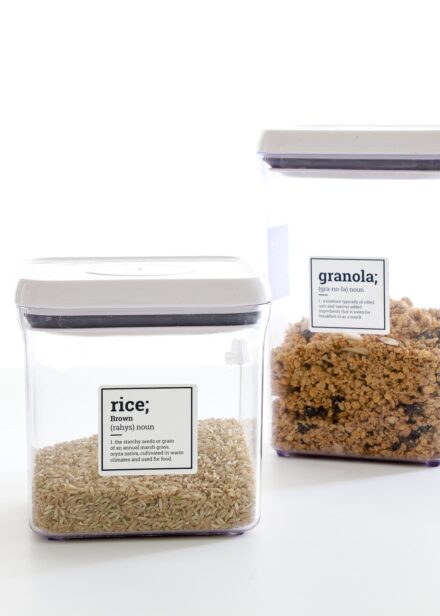
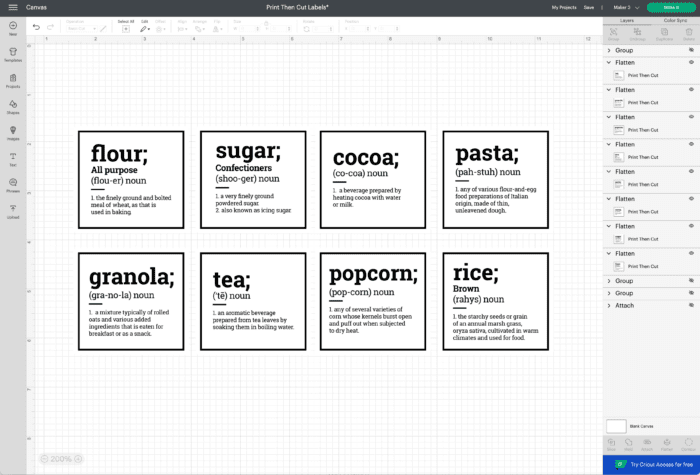
For a long time, I have loved these amazing Pantry Container Labels. But man…they have a ton of words to weed from vinyl or draw onto Smart Label Writable Vinyl, right? These are the perfect designs to use for Print Then Cut Labels!
For these specific images, I first added a white Offset Layer behind each label. I then flattened all the Pantry Labels into individual printable images:
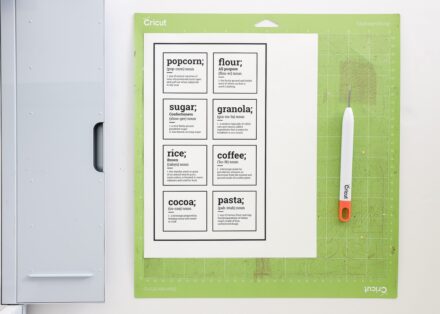
After printing them onto waterproof sticker paper, pantry organization is as quick as cut, peel, and stick!


Images from Cricut Design Space
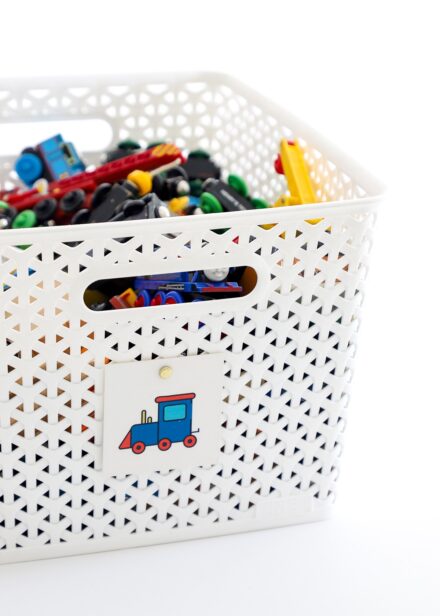
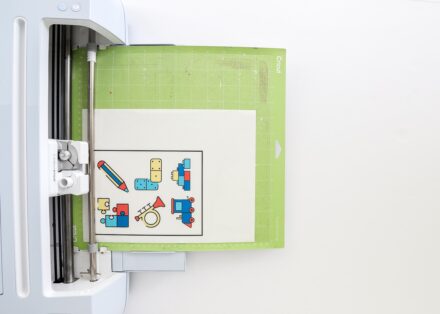
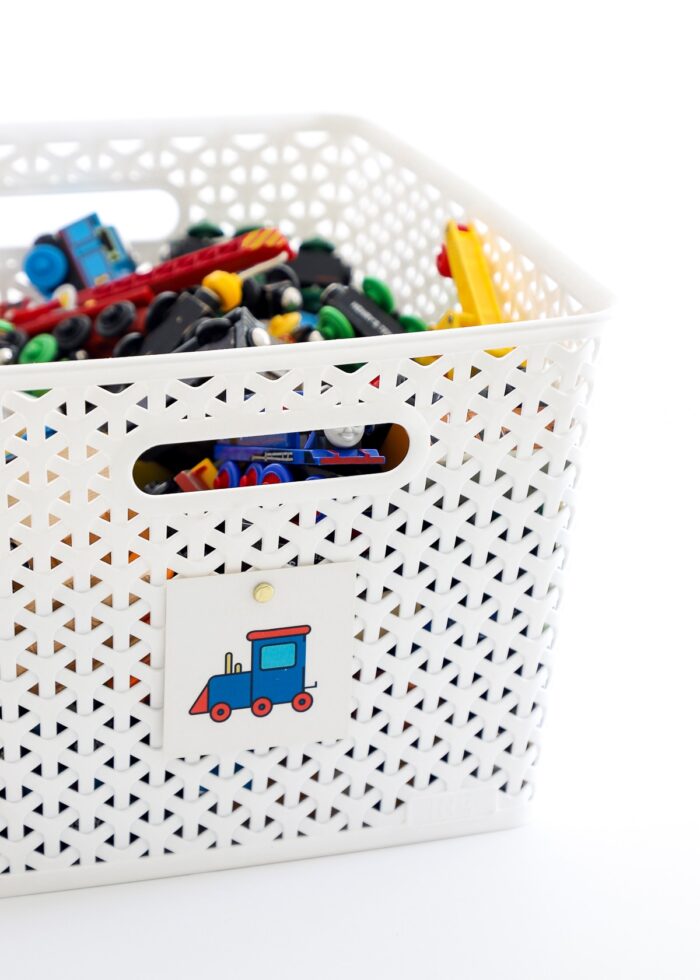
I will often use pictures on my labels, especially on things for my kiddos. Usually, I will cut basic images from a single color of vinyl, but how cute are these toy box images?
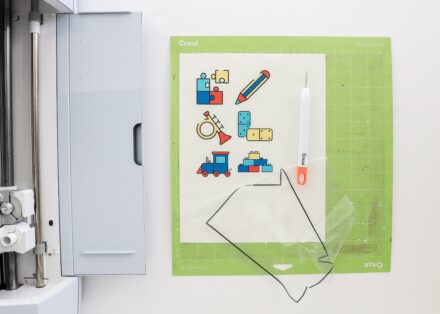
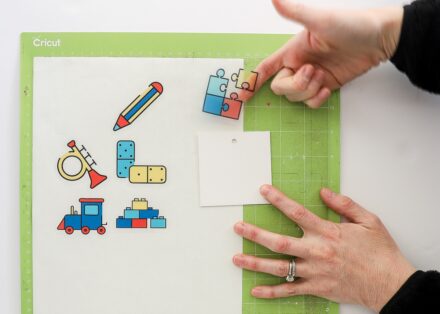
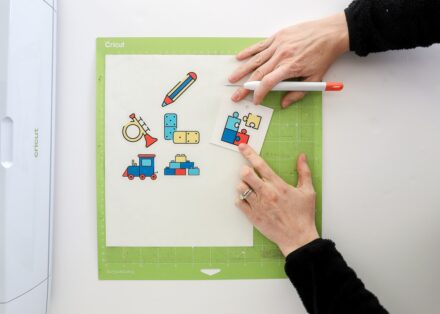
These designs are way too complicated to cut from vinyl; so instead, I gave each one a white Offset Layer behind it and flattened them into printable images.
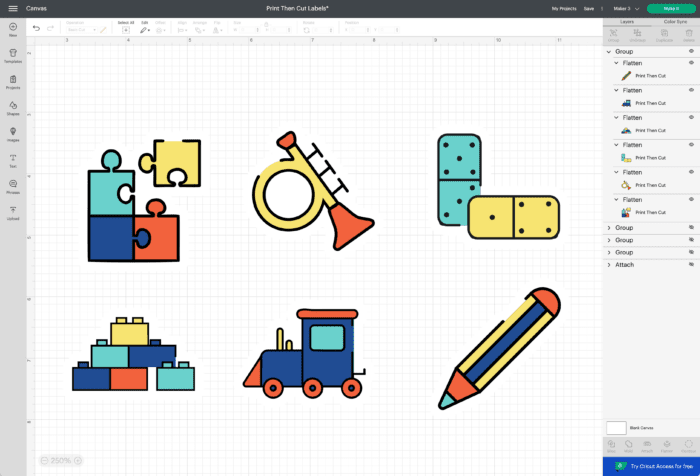
After printing them onto clear sticker paper and letting my Cricut cut around each one, I just had to peel-and-stick onto white tags for easy playroom labels!
Color Your Way
Finally, I want to quickly point out that anything you place on the Cricut Design Space canvas can be fully customized to your preferences. Certainly this includes sizes, images, and fonts but also colors too!
If you need labels in a very specific color or scheme, you can simply make those specifications right on the canvas and your printer will print accordingly. In this way, there’s no need to load multiple colors of paper into your machine or layer vinyl cuts over colored cardstock. Multiple colored labels can be made all at one time!
More Great Cricut Labeling Projects
Ready to label even more with your Cricut machine? Check out these other awesome projects:- Make Vinyl Labels with a Cricut
- Make Labels Using Cricut Pens
- Make Labels with Cricut Print Then Cut
- Make Waterproof Labels with a Cricut
- How to Label Fabric with Iron-On Vinyl
- Iron-On Clothing Labels with a Cricut
- Toy Bin Labels with a Cricut
- Pantry Labels with a Cricut
- Dresser Drawer Labels with a Cricut
- Luggage Tags with a Cricut
- Return Address Labels with a Cricut
- Fast Labels with the Cricut Joy App
- Make Easy Round Closet Dividers with Cricut Vinyl
- Label Drawstring Backpacks with Cricut Iron-On
- How to Make Vinyl+Wood Labels
I have been wanting to write this tutorial for ages. Because while I do indeed love making labels with vinyl, I actually turn to the Print Then Cut feature more often than not. Because not only can I create some pretty amazing labels, but I can do so very quickly! Although mastering the design techniques required for Print Then Cut can be a bit tricky; once you do, creating gorgeous custom labels is seriously as easy as print, cut, and stick.
I hope this post opens your eyes to yet another awesome way to use your Cricut cutting machine to organize your home and inspires you to get labeling all the things…without the vinyl, but with your printer!
Megan
4 Comments on “A Guide To Making Labels with Cricut Print Then Cut”
Brilliant explanation. As a relative newbie, you have removed the mystery of making labels…thank you so much!
Thank you so much! I was trying to cut the outline of thr label and it was trying to cut the words out. I tried thr flatten button and it worked great!
I’m trying to follow your tut—can’t find “image sets”—-I don’t have any option under images that states “image sets”. Please help!
Judy
Hi Megan! Thank you for this post, can you please provide the link for the white labels used for the toy bins? I’m looking for a solution to label perorated bins!