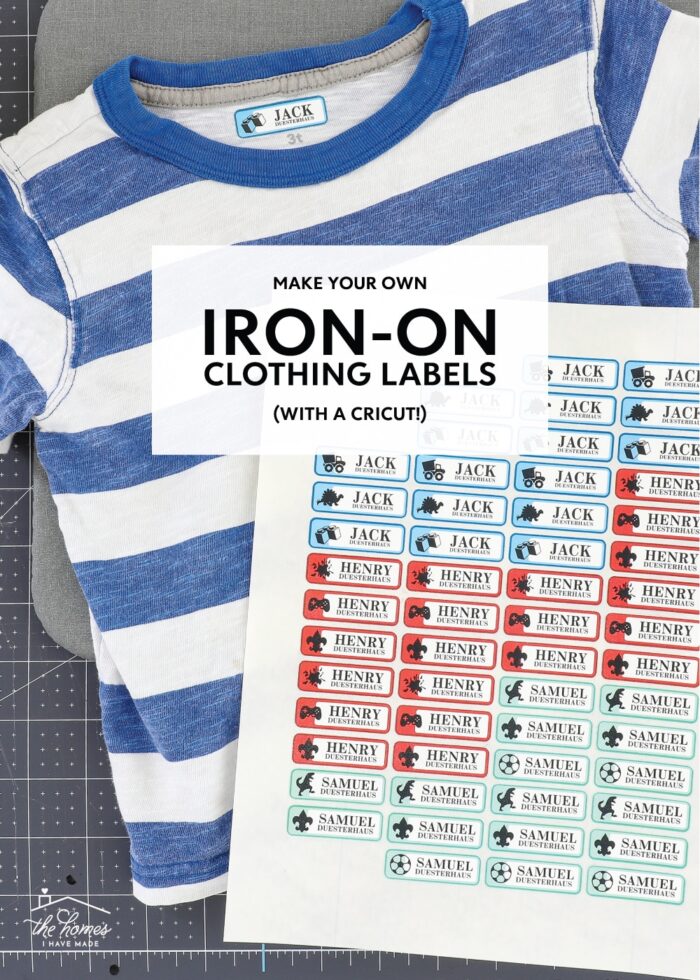
How to Make Your Own Iron On Labels for Clothes With a Cricut
Of all the things I’ve labeled with my Cricut machine, I’ve never made my own clothing labels. But when summer activities suddenly needed all the things labeled for our three boys, I figured this was the perfect time to try! Sure enough, within an hour, I had totally custom iron on labels for each of my kids so that no shirt, bag, pants, bathing suit, towel (and more!) goes missing. Whether you’re labeling for camp activities, daycare, or back-to-school, this is a great time- and cost-saving project!
Why Make Your Own Iron On Clothing Labels?
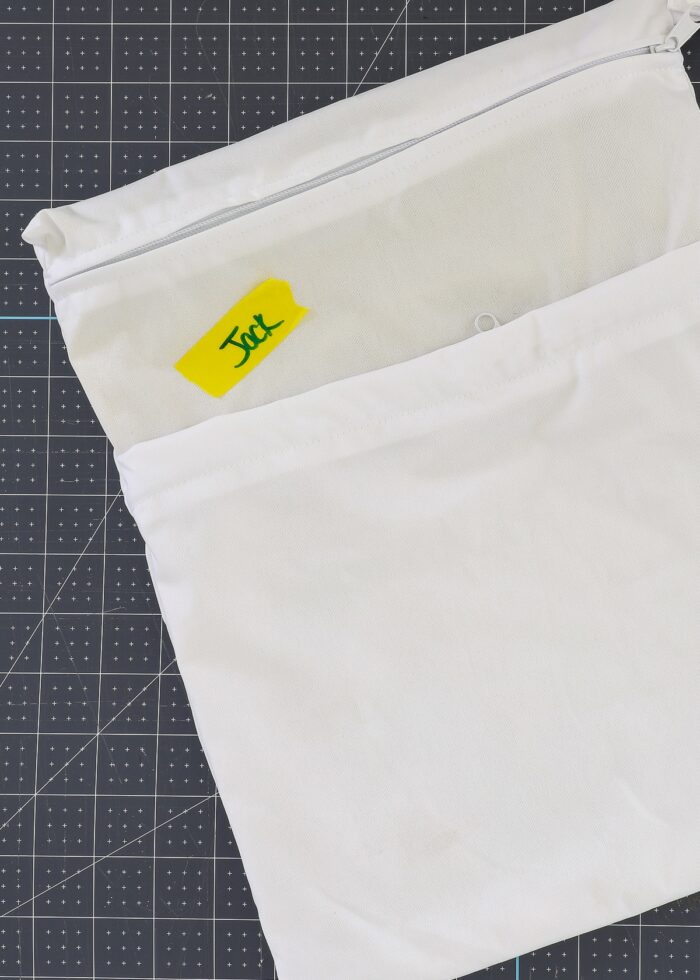
I was pretty proud of myself for getting our littlest guy off to “Splash Day” with everything he needed. But I was admittedly a bit embarrassed when everything came back home with yellow tape “name tags.” I guess I missed the instruction to clearly label everything – whoops!
Long ago, I ordered a bunch of commercial sticky labels (both machine washable and dishwasher safe), but they all had our oldest son’s name on them.
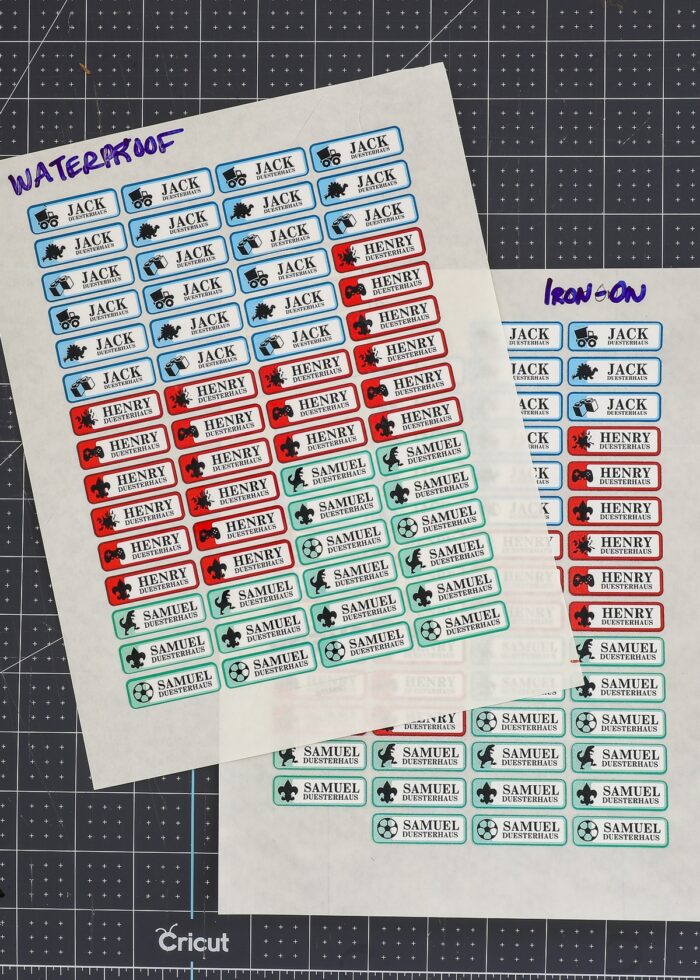
Time was a bit of the essence, so I decided to whip up a full sheet of custom iron-on labels using the Print Then Cut feature on my Cricut.
And while I was at it, I went ahead and made labels for ALL my kids, so that we have them at-the-ready whenever needed!
There are indeed lots of online retailers that you can order your own clothing labels from, but making your own can be a great alternative:
- You can make them right from home, in less than an hour. No rush order, no waiting, no delivery time.
- A single pack of printable iron on paper is cheaper than custom ordered labels.
- You get 100% control over the design, including size, shape, colors, and how many you make.
This labeling project was fun, easy, and had GREAT results. You better bet I’m filing this one under “wish I had done this sooner!”
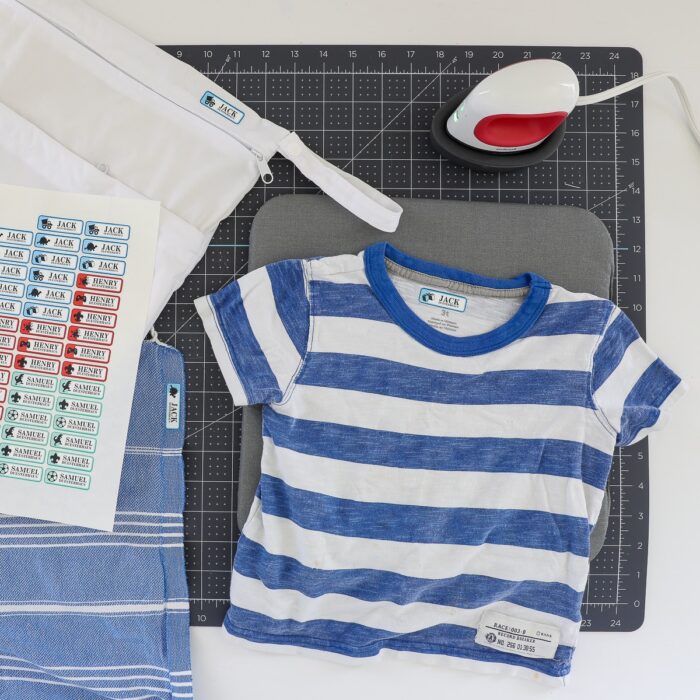
Supplies Needed
Here is what you need to make your own custom iron-on clothing labels!
- Cricut Machine – because this tutorial relies on the Print Then Cut feature, you will need either a Cricut Explore or Cricut Maker model machine.
- Premium Fine Point Blade – the one that comes in your machine
- StandardGrip Mat or LightGrip Mat
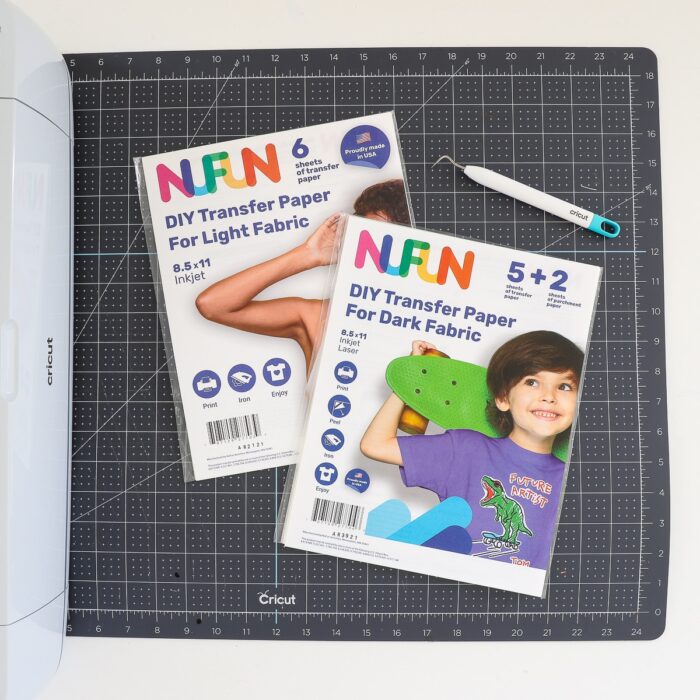
- Printable Fabric Transfer Paper – there are lots of options here, so be sure to pick one that is compatible with your printer (i.e., inkjet versus laser) and fabric color (see more below).
- Weeding Tool
- EasyPress Mini, Iron or other heat press, see my suggestions below.
- Heat-Safe Surface – EasyPress Mat or ironing board
- Home Printer
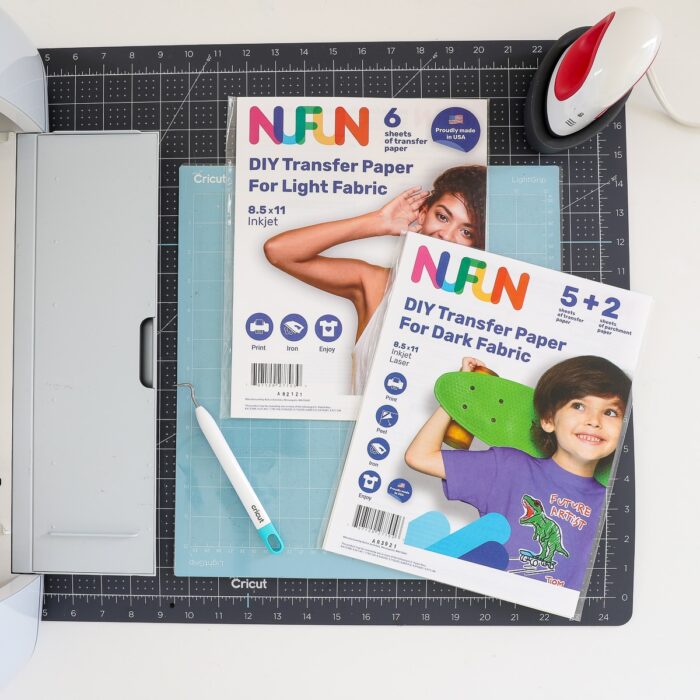
“Dark Fabric” Versus “Light Fabric” Transfer Paper
When shopping for fabric transfer paper, you will notice that there are different products for different fabric colors: light versus dark.
While I can’t speak for every single brand out there…in general, the papers differ as follows:
- Light Fabric Transfer Papers are for lighter fabrics only because the design is essentially “fused” into the fabric (printed side down). The process involves “mirroring” the design and “transferring” the image via heat, much like Infusible Ink. When you lift the printed paper away after heating, the image will be on the fabric and NOT the paper.
- Dark Fabric Transfer Papers are for darker fabrics especailly, but can really be used on ANY fabric color. Instead of placing the design down onto the fabric and transferring it over, you instead make iron-on decals that are placed right-side up (almost like stickers) and heat-fused into place.
In my opinion, I think printing onto Dark Transfer Paper, no matter what fabric color you are using, gives you a more “user-friendly” experience, especially if you have lots of things to label. As you’ll soon see, this method will create a sheet of iron on “decals” that you can peel up, place, and heat within seconds. That said, feel free to experiment with both to determine which method you like best!
What Heating Method Is Best?
Most printable iron on papers are compatible with a standard household iron or any heat press.
Because iron on clothing labels tend to be quite small, I do recommend using something on the smaller side such as an iron, handheld EasyPress, or the EasyPress Mini. Further, anything with a curved heat plate (like an iron or EasyPress Mini) will make it easier to heat along the edge of a collar, which is quite helpful when doing clothing labels.
All that to say: if you have an EasyPress Mini, this is the perfect use for it. If you don’t, an iron is your next best choice!
Before You Start | Print Then Cut Calibration
This labeling project will use the Print Then Cut method on your Cricut machine; and before you get started, I highly recommend running through the calibration protocol (even if you have done so recently).
Nothing is MORE frustrating than using your fancy paper, only to have the cuts not align perfectly (take a look at my first set of labels, shown below).
Calibration only takes a few minutes (find “Calibration” under the hamburger menu in Cricut Design Space), and it will ensure your first round of labels turns out perfect!

TIP! After you’ve calibrated your machine, but BEFORE you use your “real” paper, do a test cut on a sheet of white printer paper. Only when you are satisfied with how the labels cut out, should you proceed with your actual project paper. If you don’t like the results, calibrate again until you are satisfied.
Part 1 – Design Your Iron On Labels In Cricut Design Space
Like any project using a Cricut, your very first step (and the most tedious!) will be desinging your labels.
Step 1 – Design Your Label
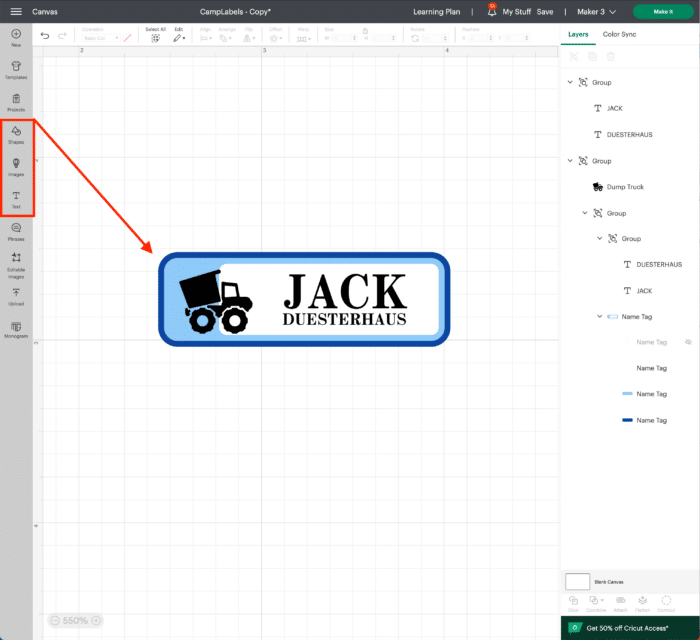
Start a “New Project” in Cricut Design Space. Then use a combination of Shapes, Images, and Text to create your labels.
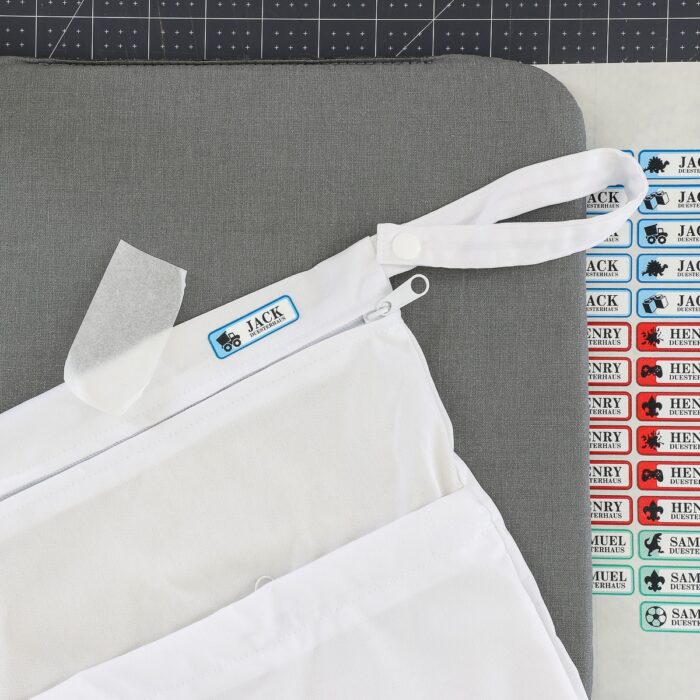
I started with the label design “Name Tag” #M47B29E46. I re-sized it to 1.6″ wide x 0.5″ tall, then added my own images, label colors, and text.
Don’t hesitate to make your labels any size, shape, color, or design based on your own aesthetic and what your kids are into. I used three different icons for each child to make them a little more fun and personalized.
TIP! I chose to only use first and last names in two different lines of text, but you could also add important information such as a phone number, allergy, your own logo, monogram etc.
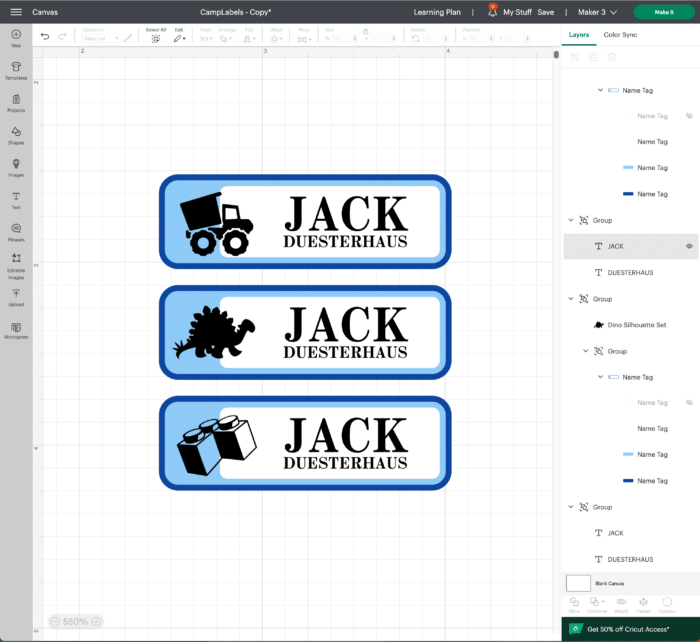
Also, while you’re making labels for one child, go ahead and make some for the whole family too! Whether you make a full sheet for each kiddo or a single page with some labels for each person, you get to control the ultimate design, color scheme, and quantity.
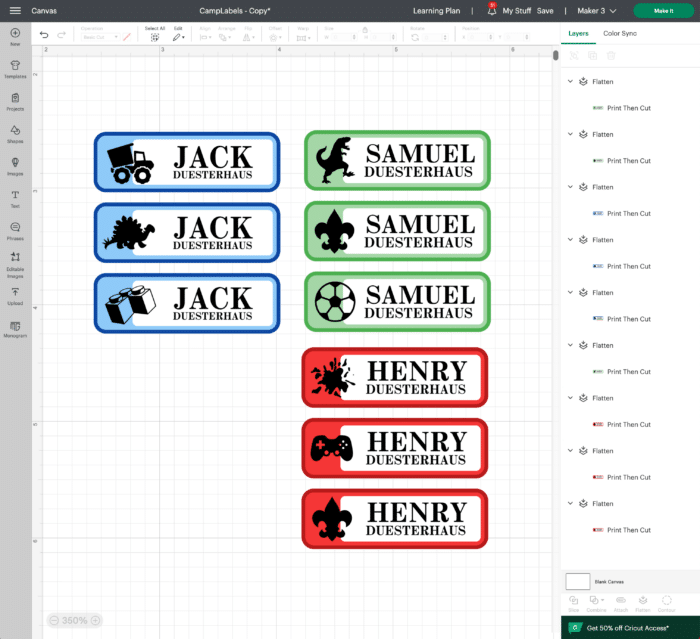
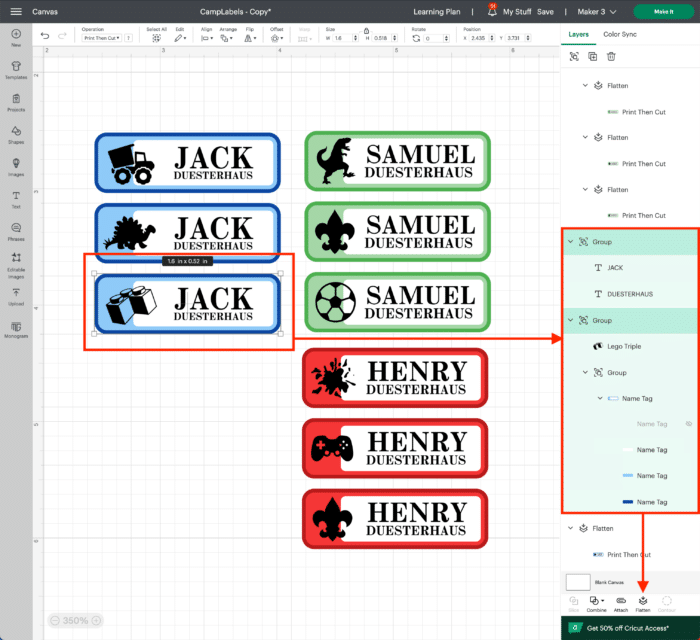
Step 2 – Flatten the Labels
In order to make your label designs “printable,” you need to flatten them via the Flatten Tool.
I recommend flattening each label (one at a time) by selecting the entire label (shape, text, image) and clicking “Flatten” in the bottom right-hand toolbar. You can confirm the label is ready for printing when all the various layers disappear and it says “Flatten” in the right-hand Layers Panel.
If you need more help with Print Then Cut, see here: A Guide To Making Labels with Cricut Print Then Cut
Step 3 – Send Labels to Printer & Cricut Machine
When your labels have all been flattened, you can send them to your Cricut machine by clicking the green “Make It” button.
TIP! If you want sets of labels to remain together, you will need to “Attach” them first. Learn more here: How (& Why!) to Use Attach In Cricut Design Space
On the first Prepare screen, you will see your labels mocked up on a piece of white printer paper.
Want to save this post?
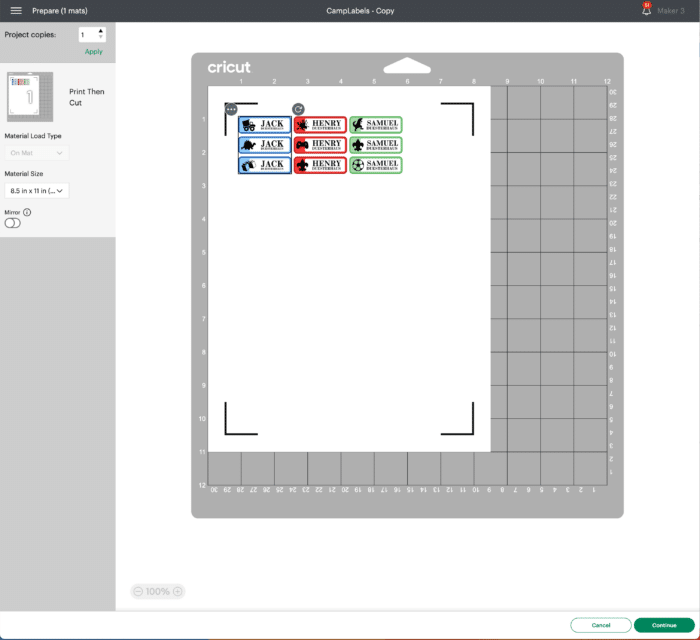
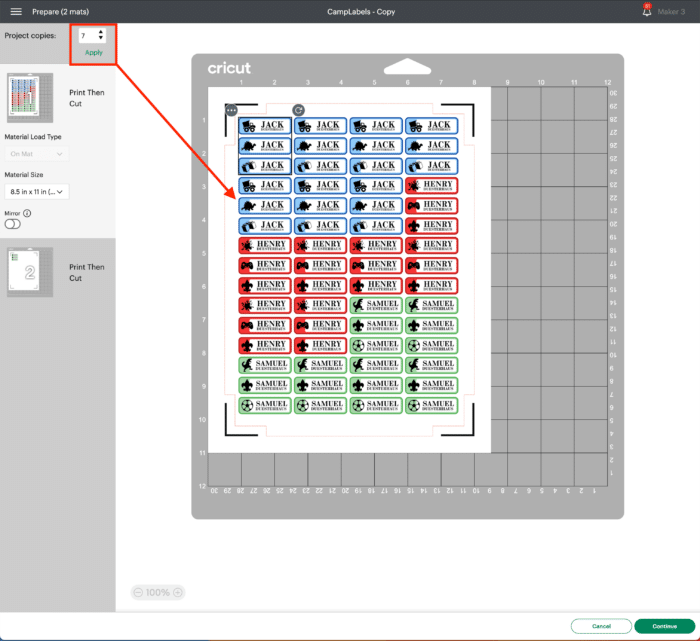
To fill the entire sheet with labels, increase the Project Copies in the lefthand toolbar.
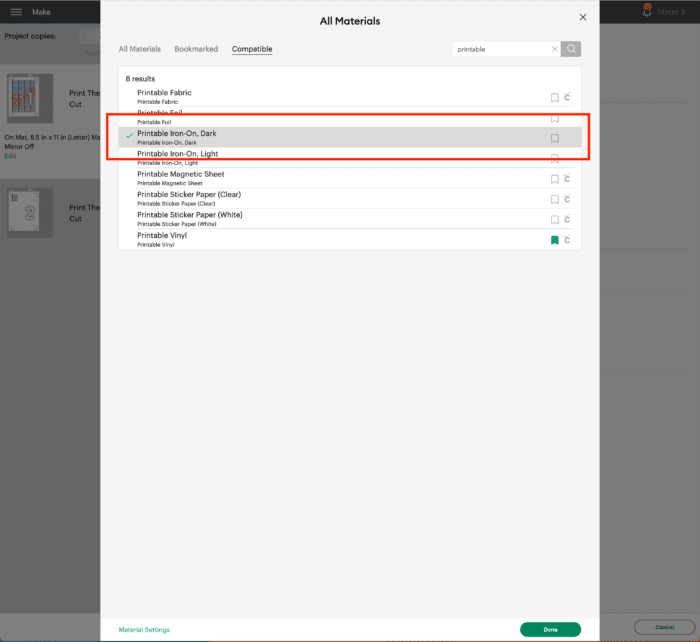
On the final “Make” screen, be sure to select the exact printable iron on paper you’ll be using for your project; this will ensure the perfect “kiss cut” for your iron on labels.
Part 2 – Printing & Cutting the Iron On Labels
Step 1 – Print Labels onto Fabric Transfer Paper
With all the settings made in Cricut Design Space, it’s finally time to bring your labels to life!
Load your printable heat transfer paper into your printer (according to its specifications) and print out the label page from Cricut Design Space.
Step 2 – Use Cricut Machine to Cut Out Labels
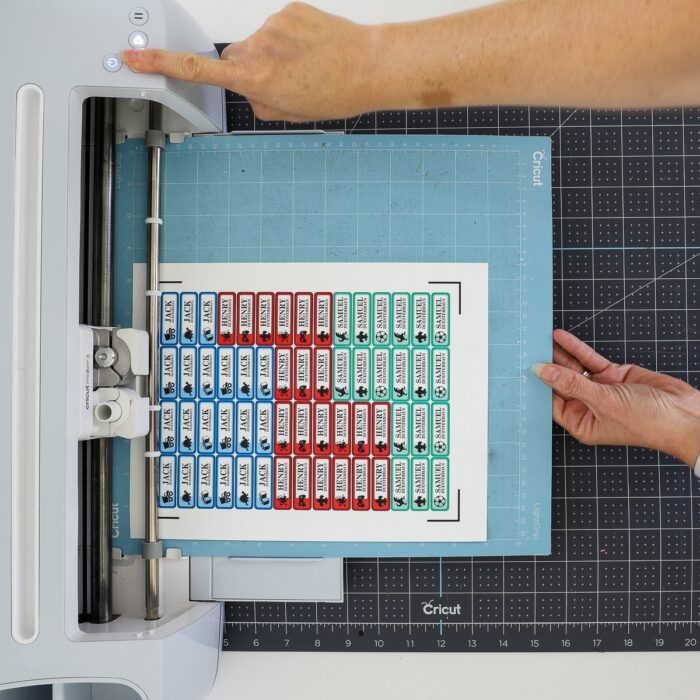
Next, load the printed sheet onto a Cricut cutting mat, lining up the upper lefthand corner of the page with the upper lefthand corner of the printed grid on the mat.
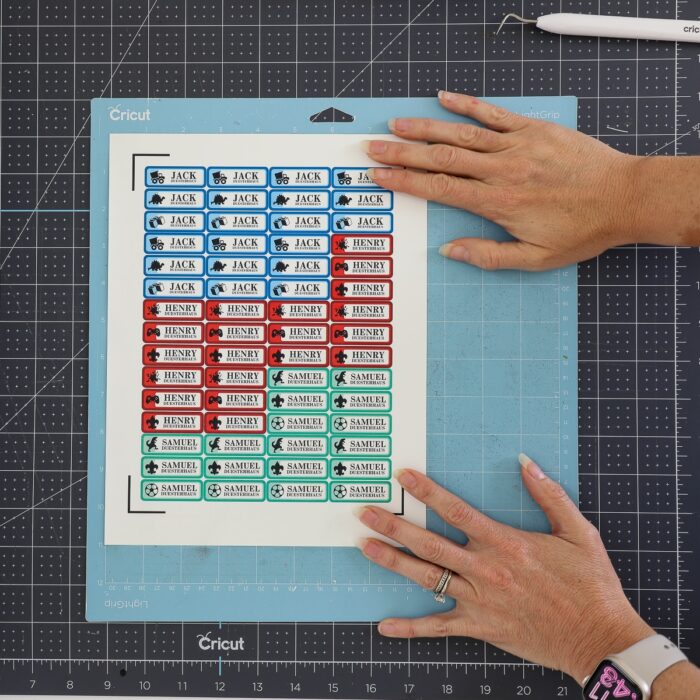
Feed the mat into your Cricut machine and start it cutting by pressing the flashing Go/Cricut button.
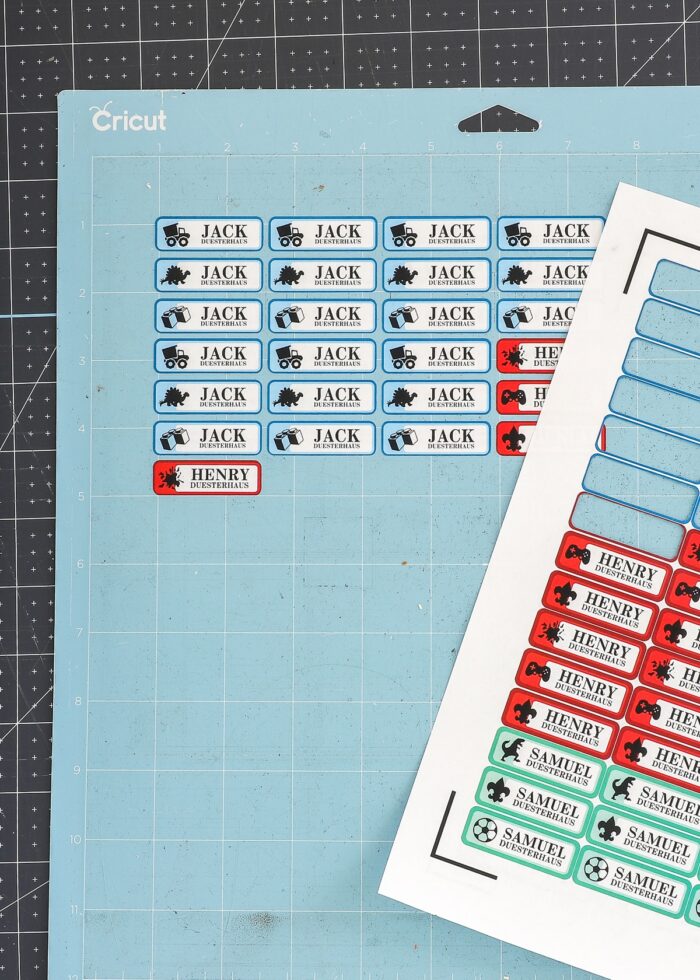
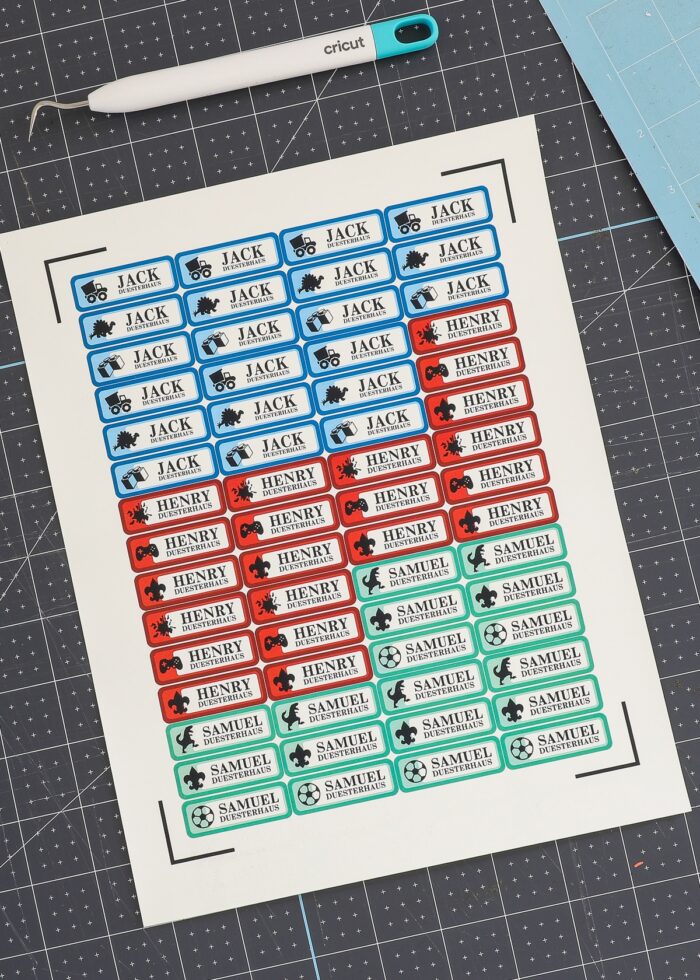
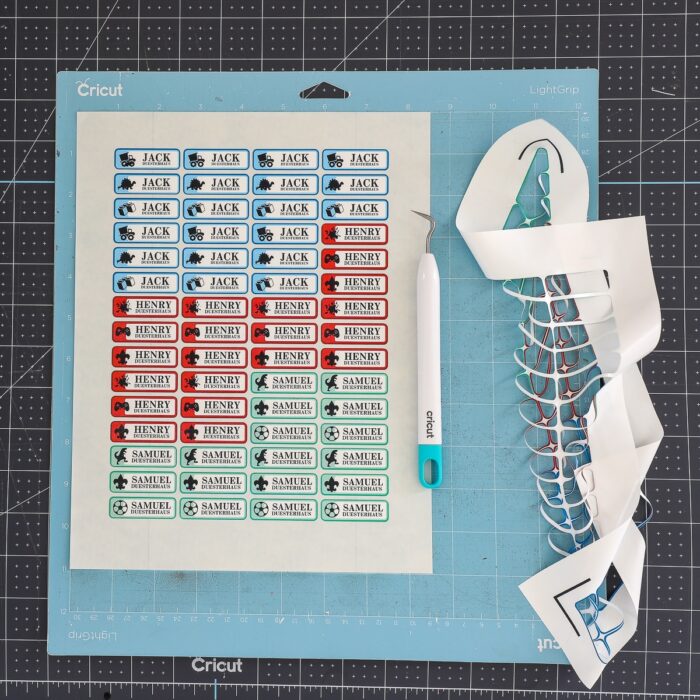
Step 3 – Preparing Labels for Application
Once the machine finishes cutting out the labels, use a weeding tool to remove the excess iron on material from around all the labels. If you used the correct Materials setting, the iron on should pull away effortlessly and leave you with a full page of iron on decals!
Part 3 – Applying Iron On Labels
Your labels are done and ready to be ironed onto your fabric items!
Step 1 – Consult Your Paper’s Directions
Although the application process will generally follow what I outline below, I recommend you consult the instructions that came with your particular heat transfer paper. Each paper brand may have slight variations, and you’ll want to follow them to ensure perfect results.

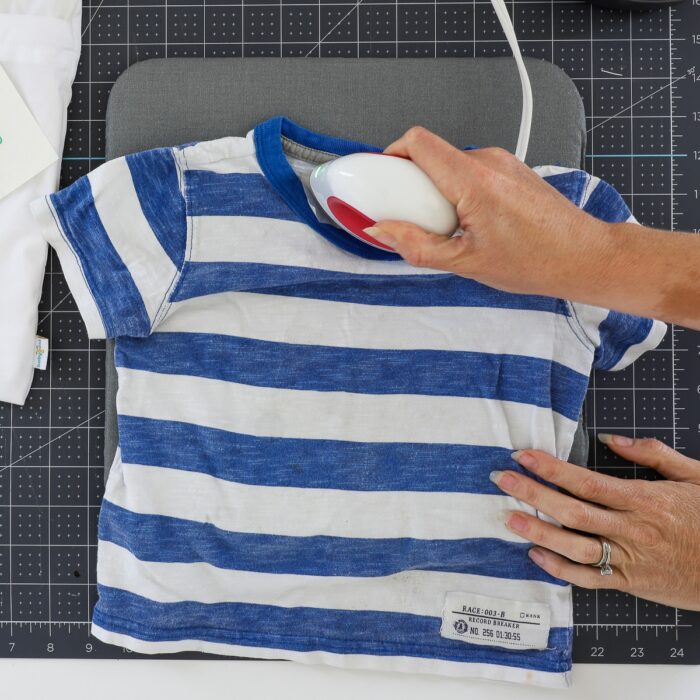
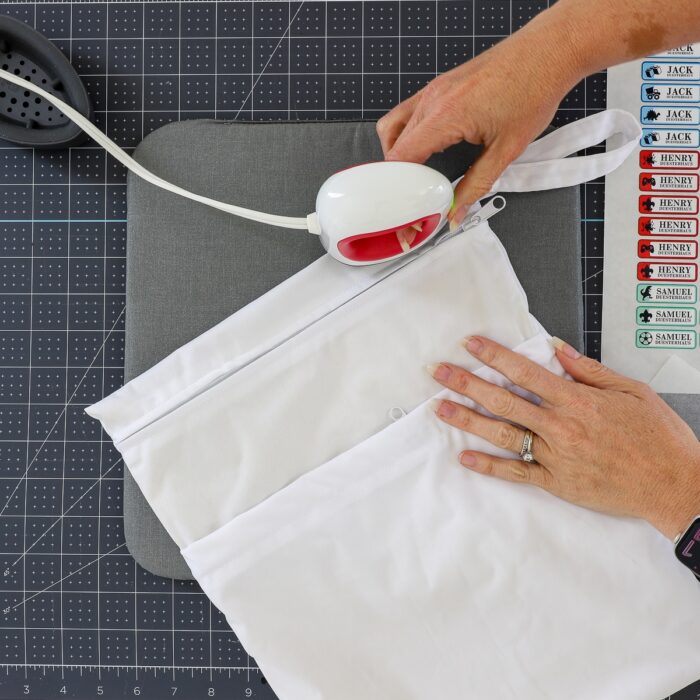
Step 2 – Iron Labels Onto Item(s)
Applying the iron on labels will generally follow these steps:
- Place your fabric item onto a heat-safe surface such as an EasyPress mat or ironing board.
- Pre-heat the label spot for 3-5 seconds to remove wrinkles.
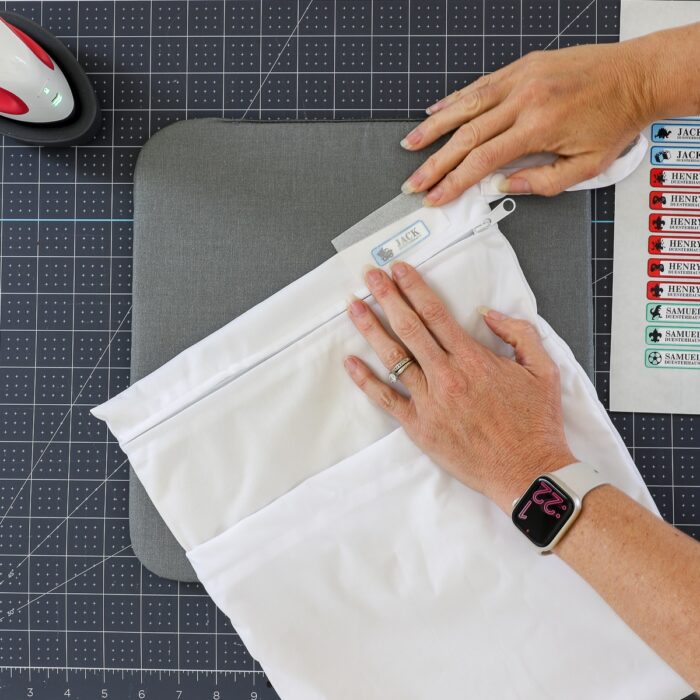
- Peel up the label from the white paper backing and place it onto the item, right-side up/adhesive side down.
- Cover the label with a small sheet of parchment paper (which usually comes with the heat transfer paper).
- Apply firm, steady pressure for 30ish seconds on top of the parchment paper.
- Allow to fully cool to the touch.

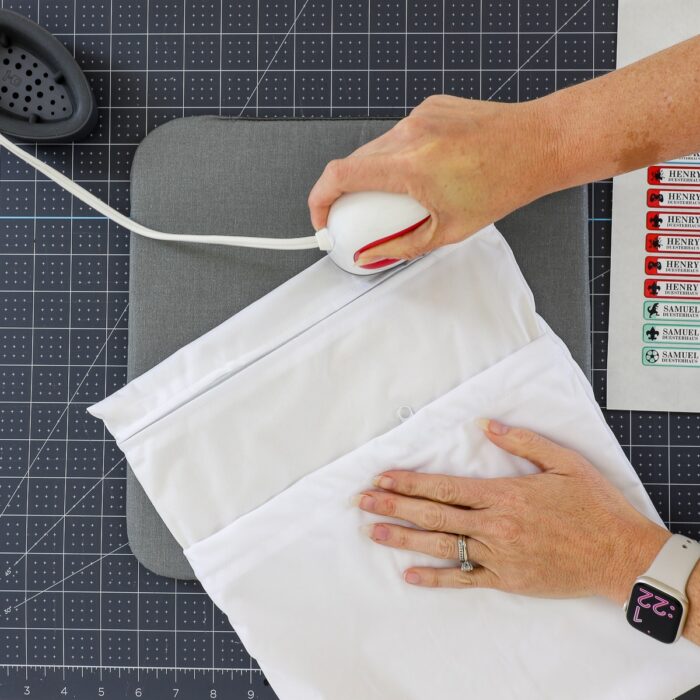
Once you remove the parchment paper, your iron on label will be fully adhered to your fabric item!
You can then proceed to peel up, place, cover, and heat label after label, as needed!
FAQ About Making Your Own Iron On Labels
What Materials Can You Put Iron On Labels On?
Iron on labels can be used on any materials that are compatible with an iron. Further, your heat transfer paper packaging will include additional specifications you may need to be aware of.
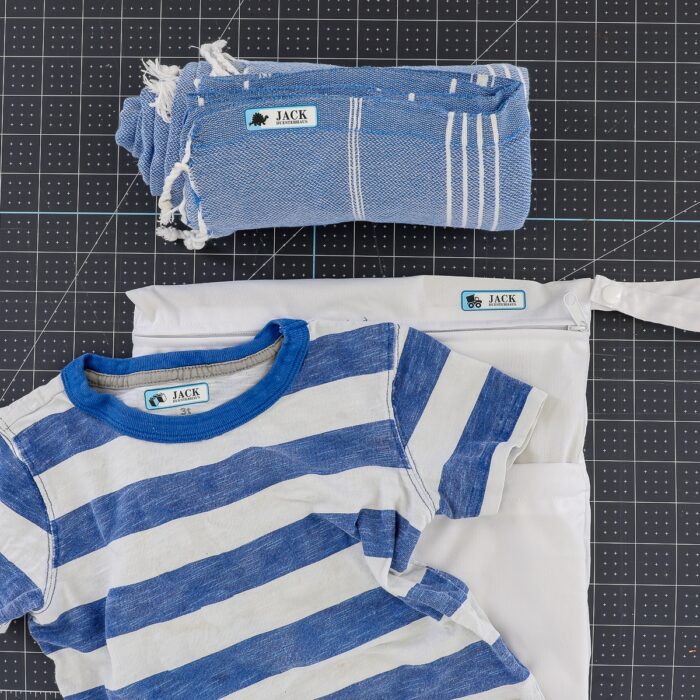
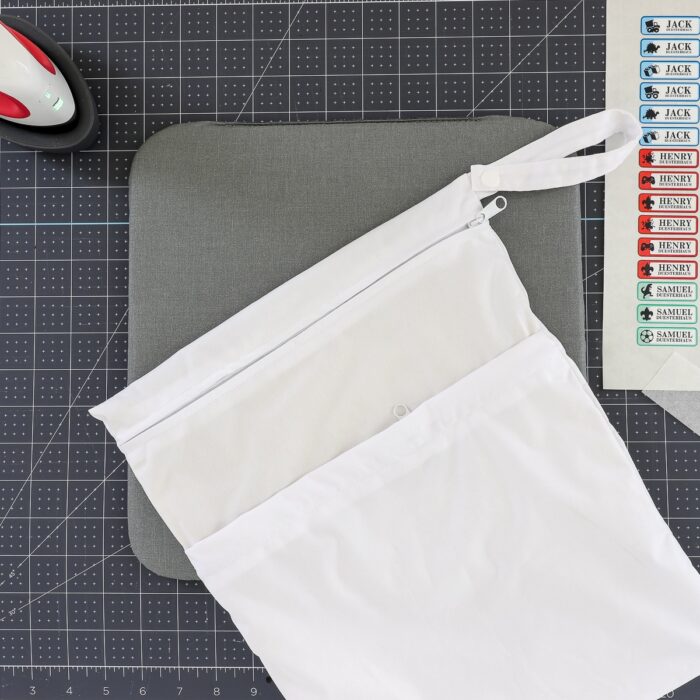
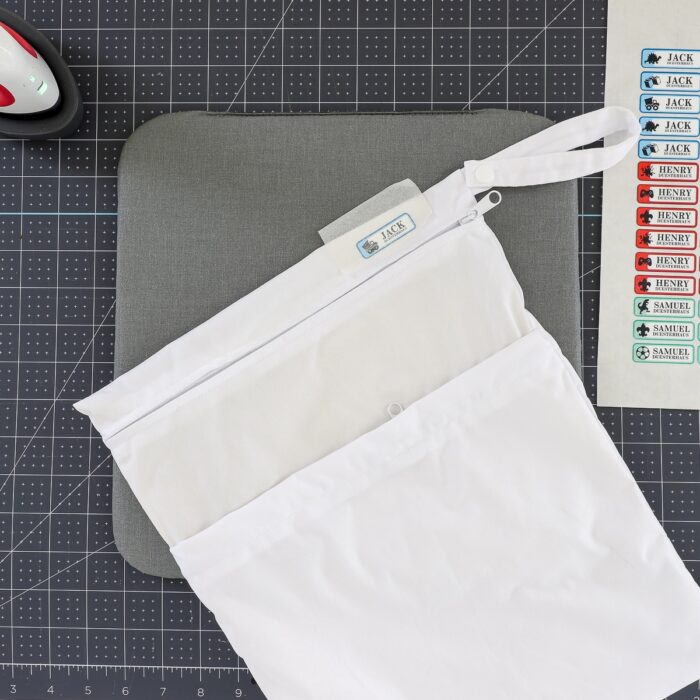
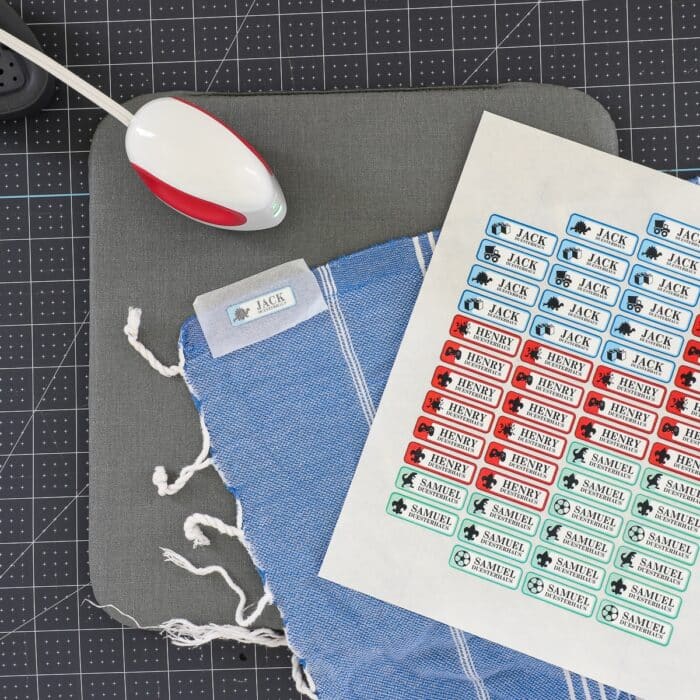
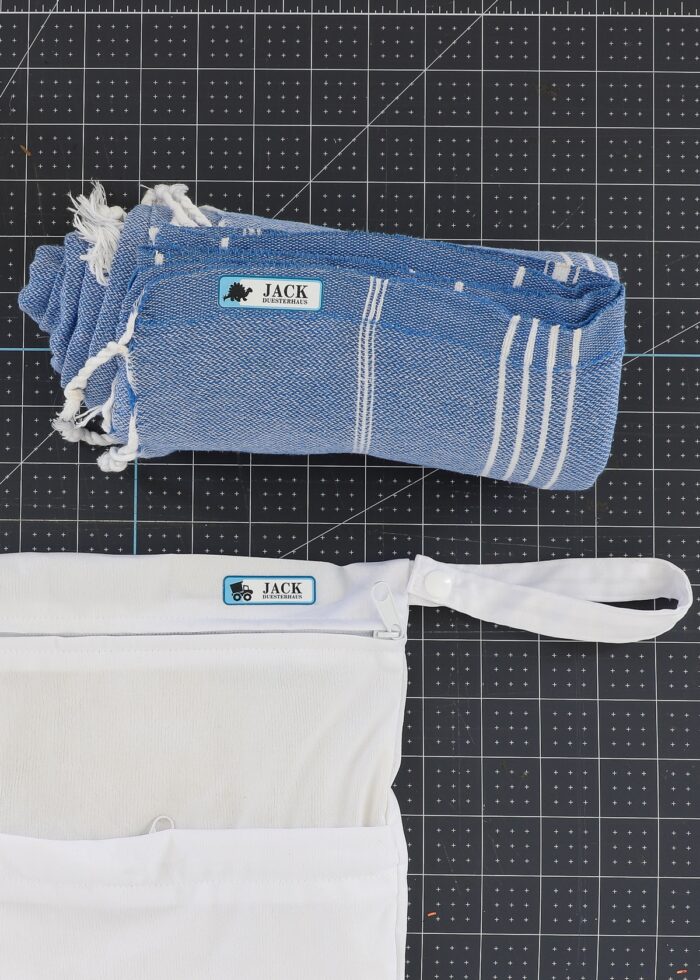
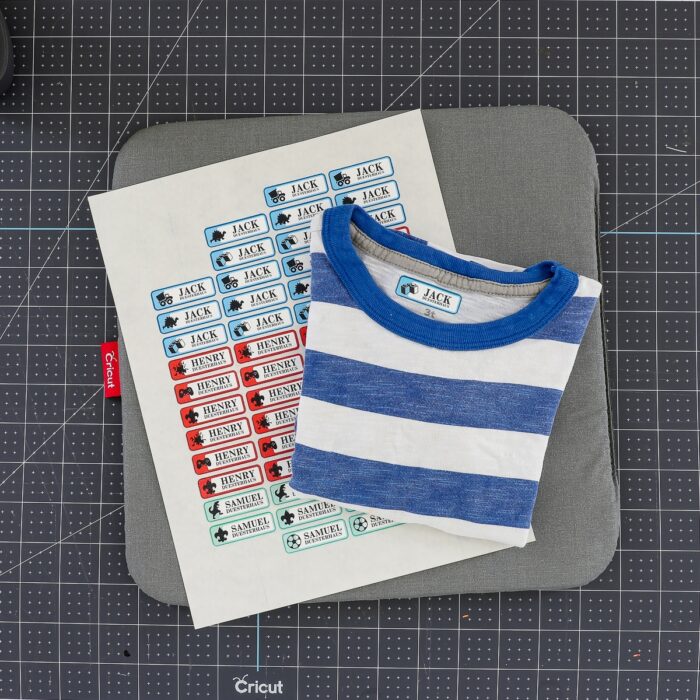
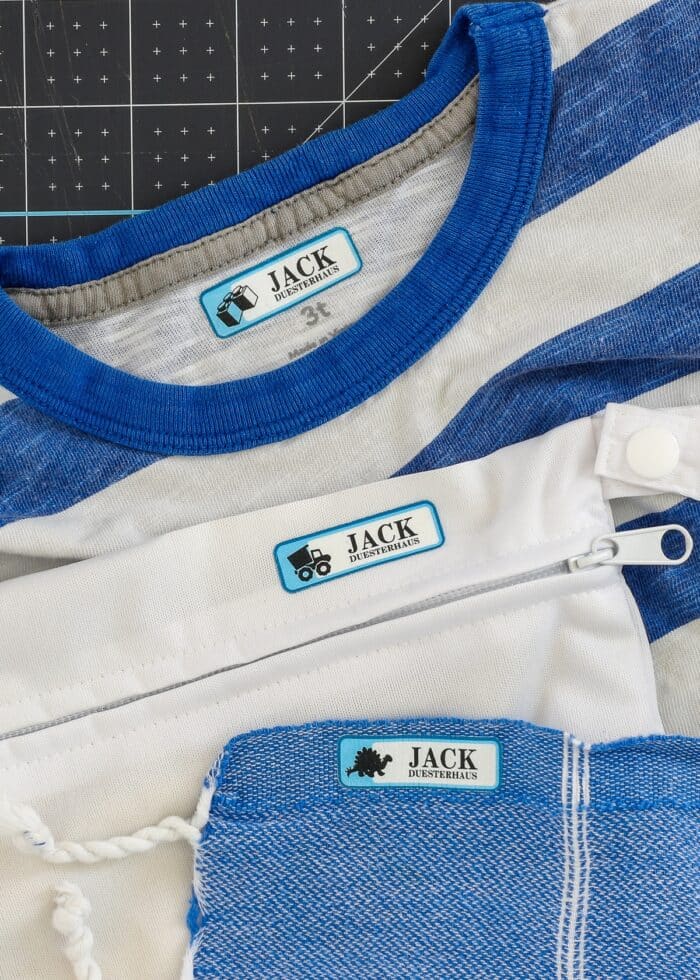
I successfully secured labels to a polyester wet bag, woven towel, cotton t-shirts, and other clothing items.
Does the Color Fade With Heating?
In my experience, not at all. The labels look identical pre-heating and post-heating, as least on the fabrics I tried.
What If I Need to Label Lots of Clothes?
We’ve used stick-on labels before, which are obviously super quick and easy to apply. So I was initially worried that applying iron-on name labels would be tedious. But it’s actually anything but!
With a full sheet of easy-to-peel labels, a scrap of parchment, and a hot iron, you can quickly move item-to-item and label a wide variety of things quite quickly!
How Do These Iron-On Labels Wash?
I was quite curious about this myself! So after I adhered all the labels, I tossed everything into the washing machine on normal settings, followed by the dryer.
I was VERY impressed with the results after the first wash. The labels are incredibly durable, and did not fade, shrink, bleed, or peel up AT ALL. The only perceptible difference is that the labels take on the texture of the material its adhered a bit (so the woven label looks a little more…woven).
The shot below is exactly how they came out of the dryer!
How to Remove Iron On Labels
Admittedly, removing iron on labels can be a little tricky; and I usually consider these a “permanent” application.
Your best bet for removing the labels is to re-heat it in order to soften the adhesive, then peel it up while still warm. Rubbing alcohol can help lift out any glue that remains on the fabric.
Before You Clean Up!
Last but not least, I have a great time-saving recommendation before you close up your Cricut machine and clean up!
Use the exact same file to make waterproof stickers for water bottles, lunch boxes, food canisters etc. Instead of using heat transfer paper, use printable waterproof paper and a laminating sheet before cutting them out.
To see my tried-and-true waterproof sticker method, see here: How to Make (Long-Lasting) Waterproof Stickers with a Cricut
With a single design, two different sheets of printable paper, and two runs through a Cricut machine…you’ll be ready to label pretty much anything and everything all summer long and into the new school year!
More Great Cricut Labeling Projects
Ready to label even more with your Cricut machine? Check out these other awesome projects:- Make Vinyl Labels with a Cricut
- Make Labels Using Cricut Pens
- Make Labels with Cricut Print Then Cut
- Make Waterproof Labels with a Cricut
- How to Label Fabric with Iron-On Vinyl
- Iron-On Clothing Labels with a Cricut
- Toy Bin Labels with a Cricut
- Pantry Labels with a Cricut
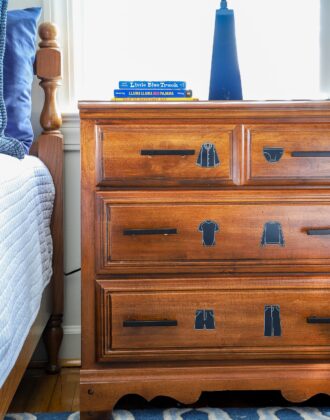
- Dresser Drawer Labels with a Cricut
- Luggage Tags with a Cricut
- Return Address Labels with a Cricut
- Fast Labels with the Cricut Joy App
- Make Easy Round Closet Dividers with Cricut Vinyl
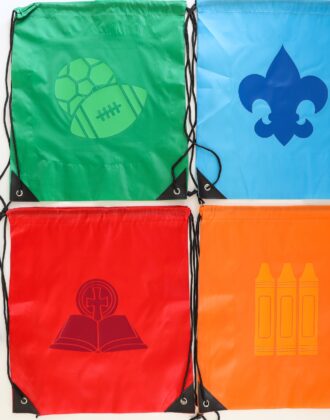
- Label Drawstring Backpacks with Cricut Iron-On
- How to Make Vinyl+Wood Labels
Making your own iron on labels is a quick, easy, and fun project that can save you time and money; and it certainly looks a lot better than using a permanent marker!
With a whole slew of labels printed, cut, and ready to go, you’ll be able to easily label anything your kids need to bring to any upcoming outing, event, or adventure!
Are you ready to give DIY iron-on clothing labels a try?!?
Megan
2 Comments on “How to Make Your Own Iron On Labels for Clothes With a Cricut”
What type of printer/ink do I need to use?
Hi Megan,
You are an exceptional young lady and I just love your tutorials. Your attention to detail is phenomenal and I don’t think you could do what you do differently; it’s what and who you are-articulate and eloquent, paying attention to every detail. I for one can’t thank you enough. We are getting the best tutorials where it seems you have trialled/tested everything the Cricut can do, where you have turned everything inside out, upside down, finding the pitfalls of doing things a certain way to then finding the answers to get the best results, to then pass on to us the best of your knowledge, saving us time so we don’t make those mistakes. Your time that you give up freely to help, support and advise others and willingly share with us all the shortcuts so that we may improve ourselves so that we too get the best results. In my opinion it makes you the best teacher out there. With you being such a perfectionist it helps us to understand the whys and wherefalls of the beginning of a project to the end, where we have been able to produce an end product with your help, making our lives easier and leaving us happy in the process. All this and a wife and mother of three boys! You truly are an inspiration and a remarkable, lovely person, a breath of fresh air and I can’t thank you enough. Stay humble for I am in awe of you. Kind regards. Kim (UK) xx