How to Cut Upholstery Foam | Easy & Precise
Cutting upholstery foam isn’t a super common DIY project, but it’s also one you may find yourself needing to do on occasion. So it’s worth learning the quickest and easiest way to do it right! Today, I’m breaking down my favorite way to cut upholstery foam…and it’s all about using something you probably already have in the kitchen!
Why Would You Need to Cut Upholstery Foam?
If you are a hardcore furniture transformer or dabble in reupholstering, cutting upholstery foam is a common part of the makeover process.
But even if you’re just a home decor lover (like myself!), it’s actually something you might find yourself needing to do more than you realize!
Why?
Well, for one: swapping out old, squished, and maybe even smelly cushions is one of the best ways to breath fresh life into old upholstered furniture or even extend the life of something you’re not quite ready to replace.
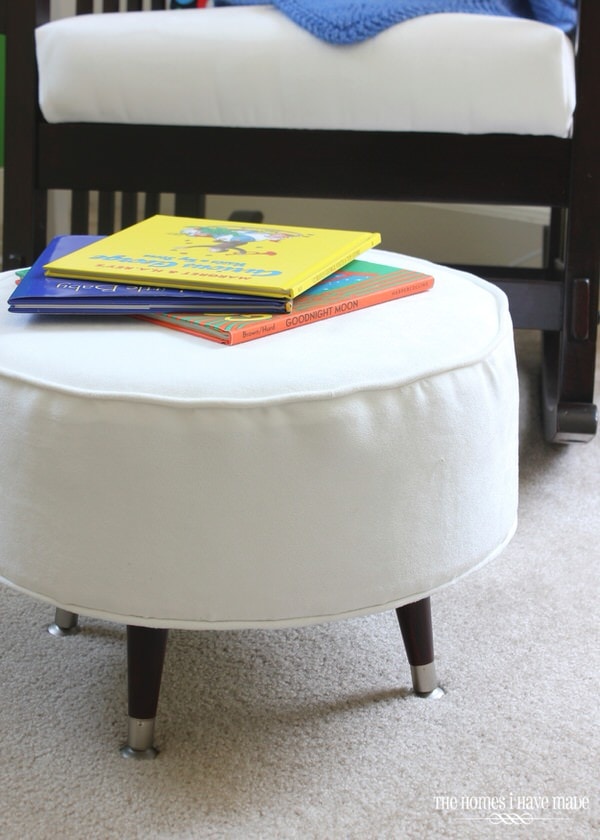
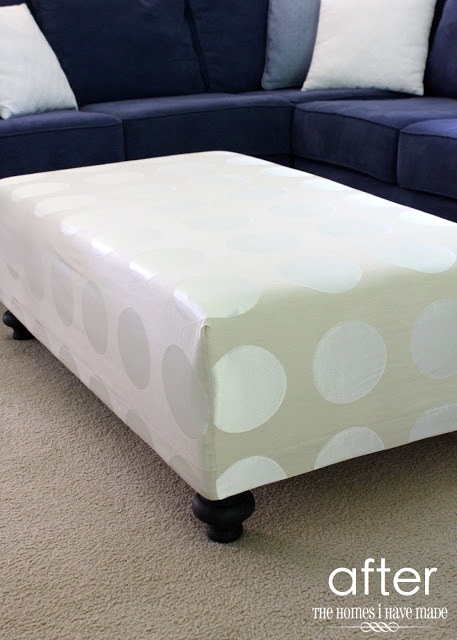
But also…foam is actually a really easy-to-use medium that allows you to make your very own items such as ottomans, benches, seats, stools, mattresses, and more.
So whether you’re updating something old or creating a brand new item, it’s valuable to learn how to cut foam…quickly and easily and with precise results!
(Because when you get it wrong…it can be unsightly to look at and expensive to fix!)
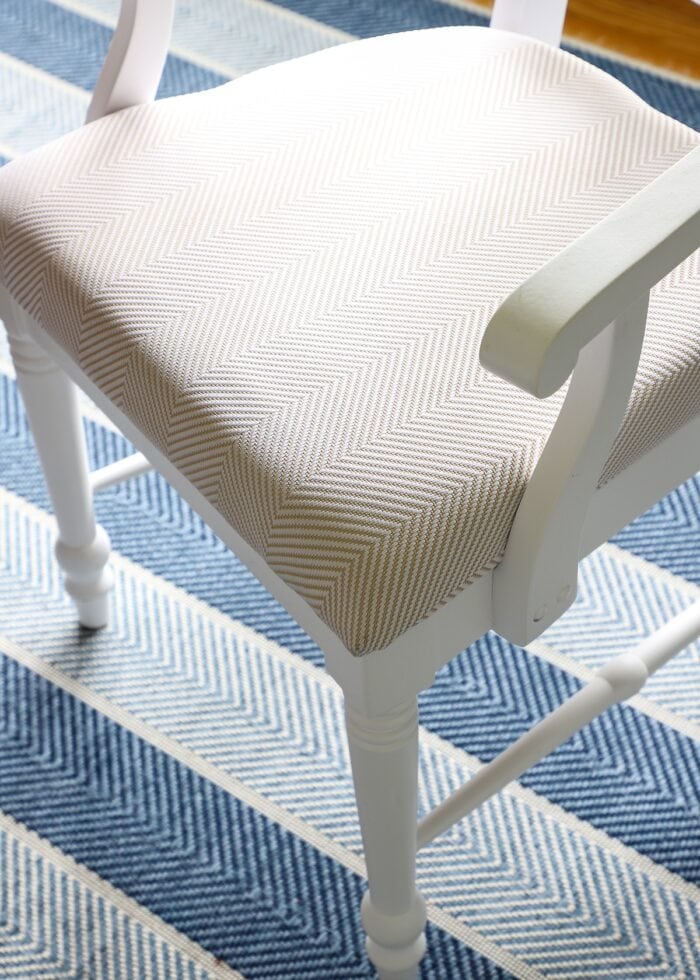

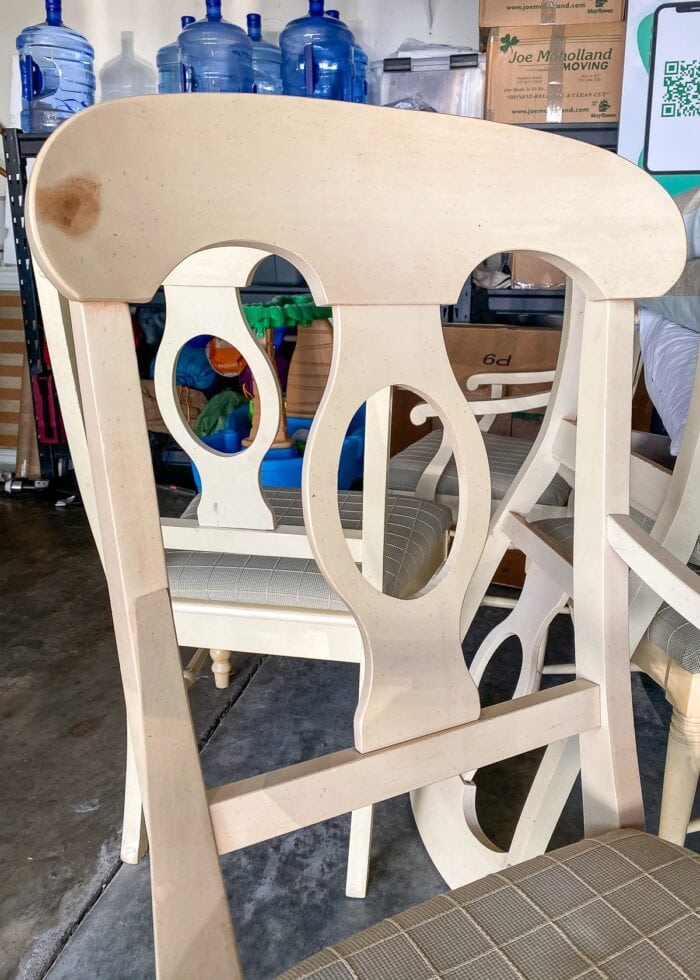
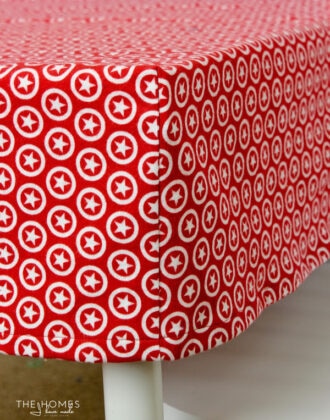
Our Dining Room Chair Cushions
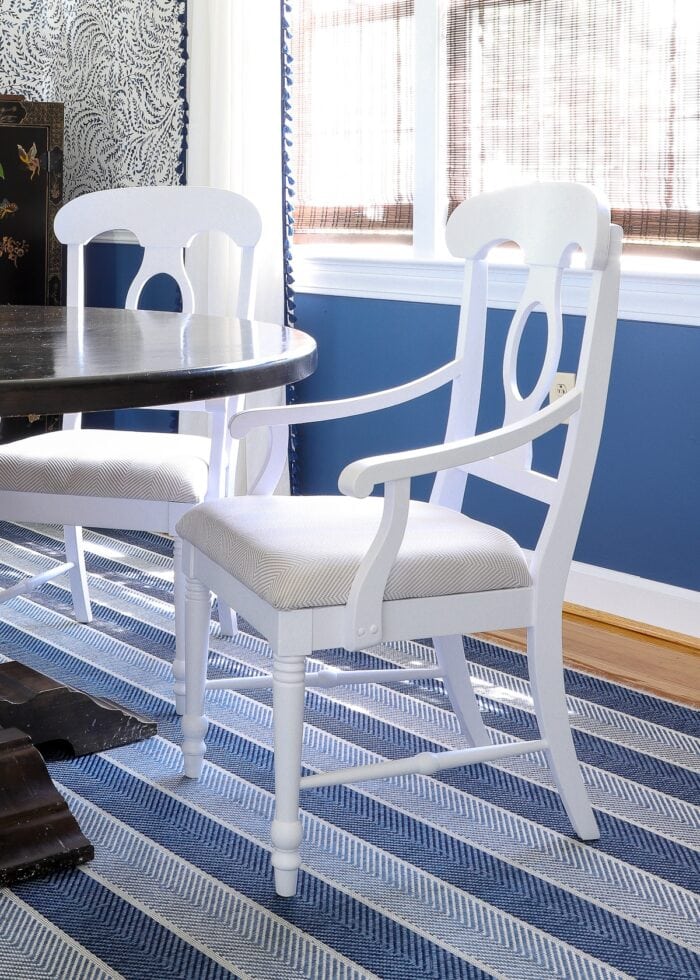
A little while back, I showed you our “new” dining room chairs.
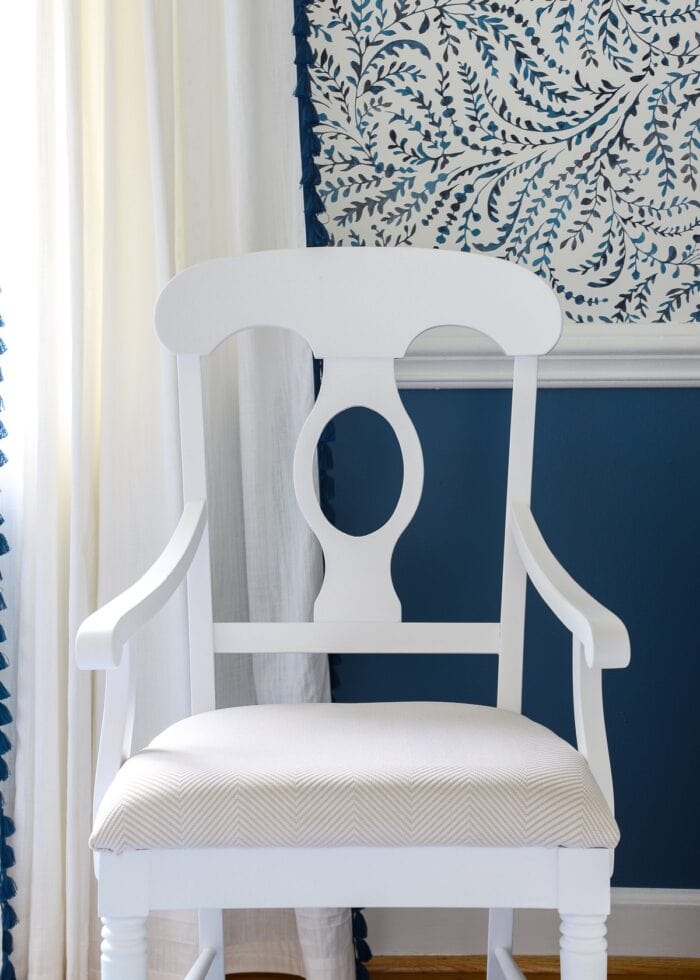
These were very inexpensive thrifted chairs that were a dated, dingy mess. And while I could most certainly see their potential, there was one very important feature that had me loading these chairs into the car almost immediately: they had cushioned seats.
My husband doesn’t make many home decor requests, but cushioned chairs was one of his more emphatic ones.
Cushioned dining chairs aren’t the easiest to find…especially ones that lean more modern in style. Since these seats were completely removable, I was confident swapping the original covers would be a fairly easy endevour.
But when we removed the exiting fabric, we discovered that the foam was significantly compressed, dingy, discolored and deformed.
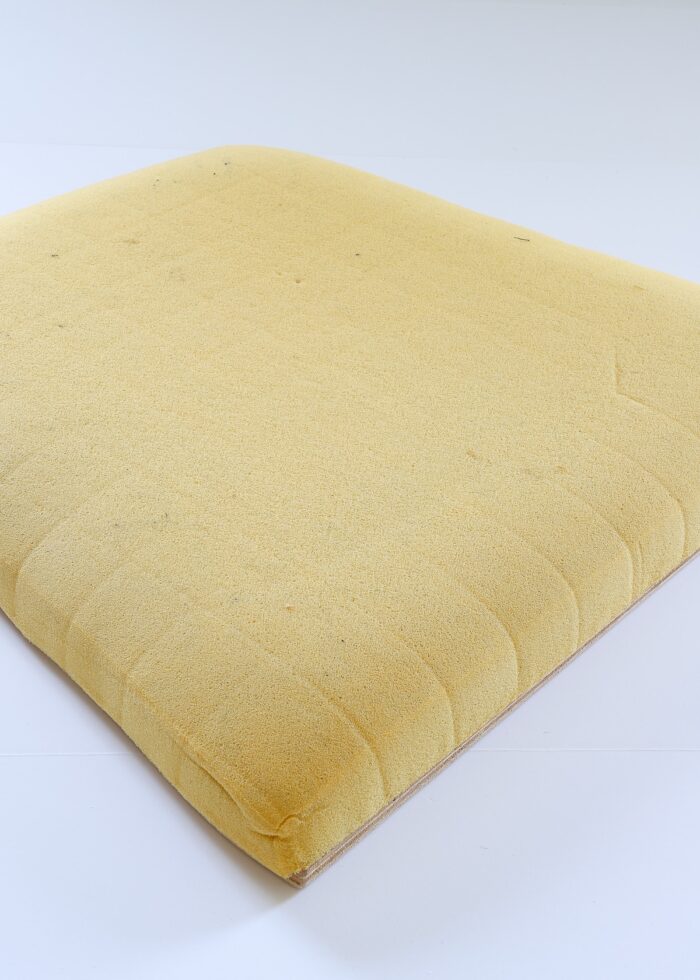
I instantly knew the foam on all 5 chairs should be swapped out. And although a bit unexpected, it was likely for the best.
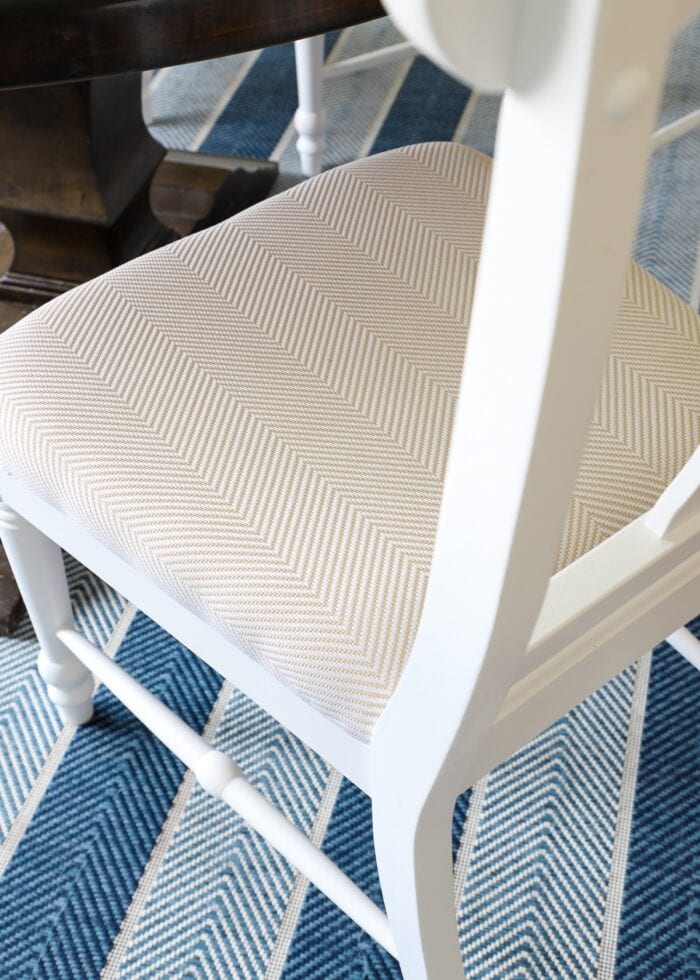
Not only would fresh foam give the chairs a more comfortable seating experience and freshen them up aesthetically; but thicker foam would also raise their (seated) height just a bit, which was actually better for our table height.
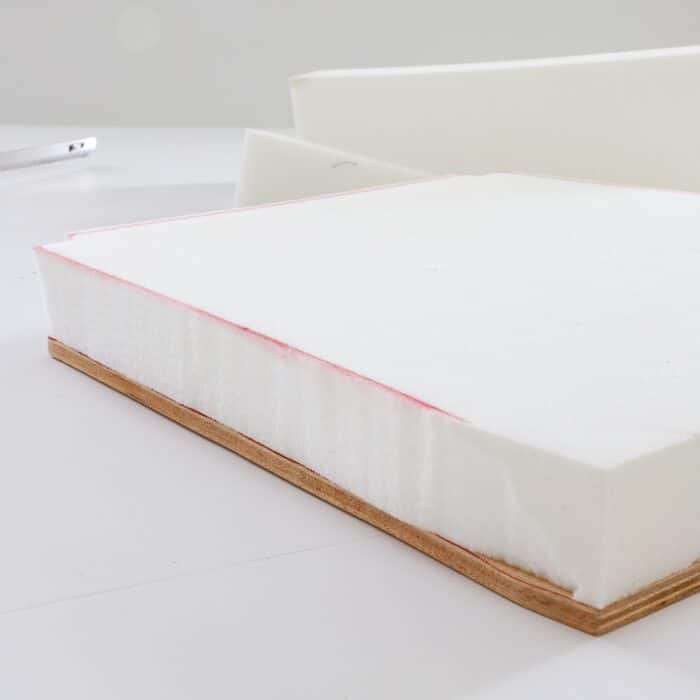
So we cut down a brand new sheet of 2″ foam to fit the existing seat shapes…
…and after wrapping in fresh batting and fabric, the seats are now fresh, firm, higher, and mighty comfy!
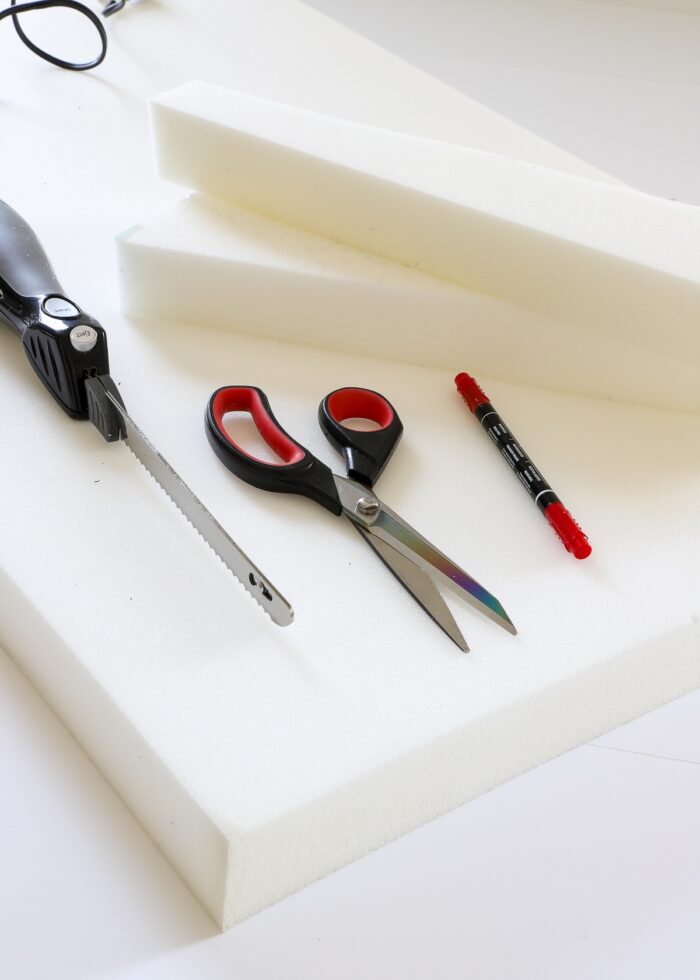
Supplies Needed
Here is what I recommend using when cutting your own upholstery foam:
- Upholstery Foam – see my recommendations below
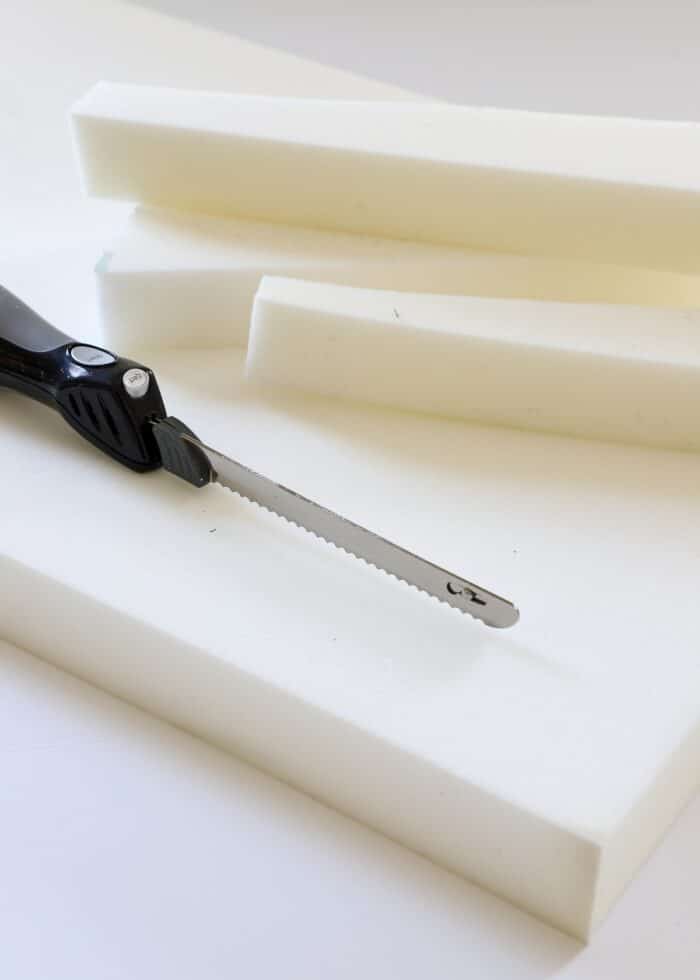
- Large Scissors and/or Electric Cutting Knife (preferred)
- Marker
- Ruler or Straightedge
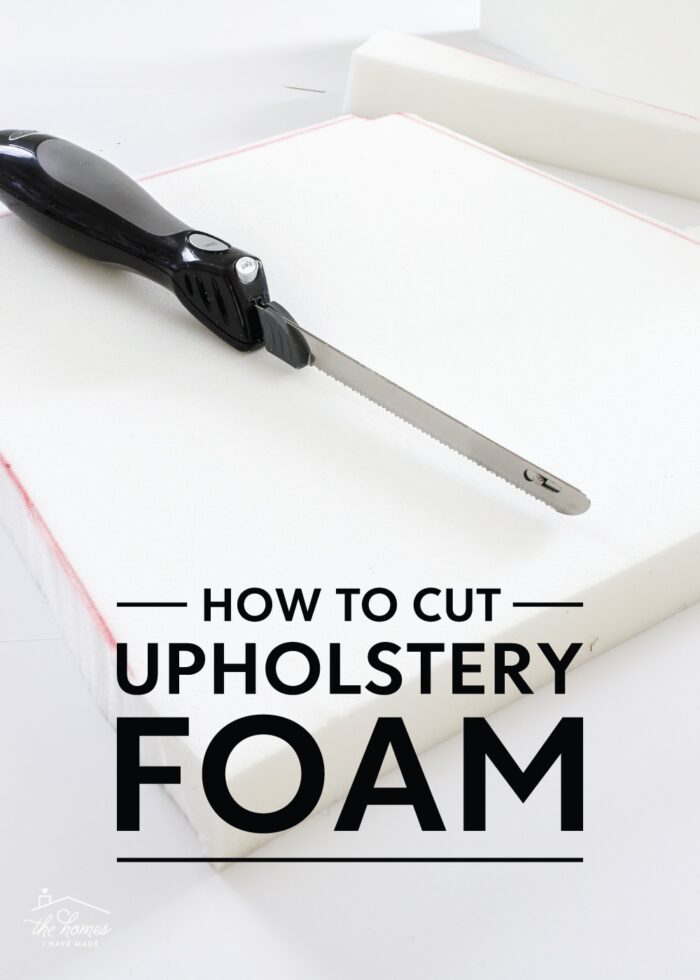
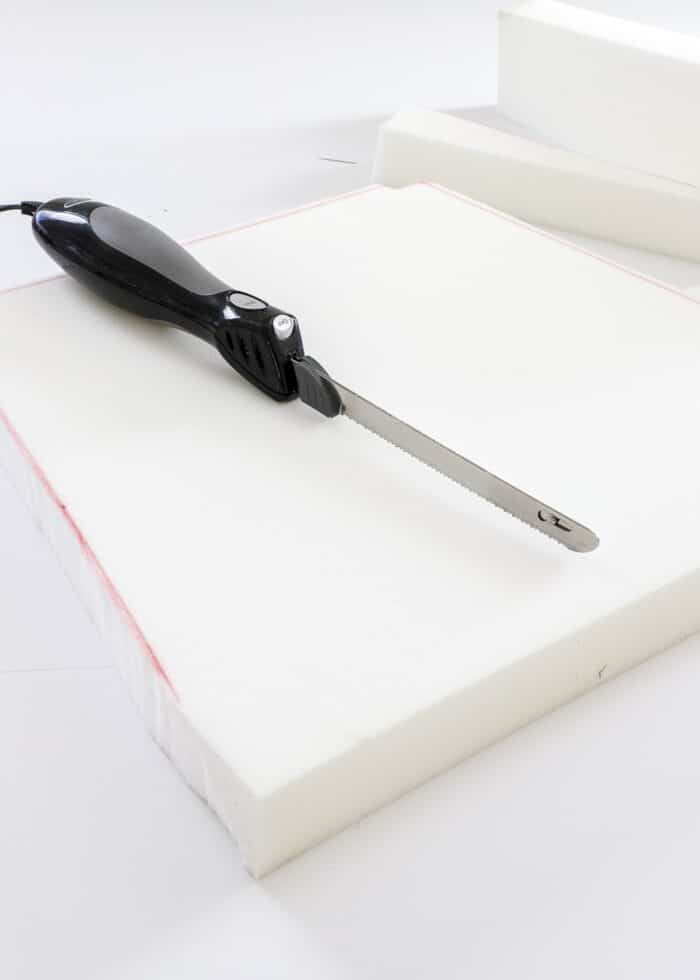
Why & When to Use an Electric Cutting Knife
Depending on the thickness, you can indeed successfully cut foam using a good, sharp, long-blade scissors. Despite its high density, foam is very easy to cut through; and when your foam is thin (less than 2″), you will likely be able to achieve clean cuts and straight lines.
However, using a scissors with foam gets harder the thicker it gets. As such, I recommend using an electric kitchen knife for any foam over 2″ for the most reliable cut. The cerated blade(s) is perfect for cutting through soft foam; and since you can keep the blades in constant motion, you won’t end up with the jagged edges that are common with scissors.
That said, using an electric cutting knife can feel a bit scary and fast. So if you are able to, build your confidence by practicing on scraps or un-needed edges/corners before starting on your actual project.
Want to save this post?
TIP! Yes…an “electric cutting knife” is exactly what you use on a turkey or ham. Mine stays in my craft room, and is used only for cutting foam. If you do a lot of furniture projects, it can be worth investing in one so you can be sure it’s always clean and ready for crafting!
Where to Buy Upholstery Foam at Reasonable Prices
Brand new upholstery foam can sometimes be the most expensive part of any furniture update. Especially for foam 2″+ thick and longer cuts for a bench, ottoman, patio furniture, headboard, sofas, or multiple chairs.
Below are my best recommendations for getting foam at a reasonable price:
- Local Upholstery Shops – Because they tend to stock in bulk, these shops often have a really wide selection at really great prices. And most often, you can purchase the foam without having to use the upholstery services.
- JoAnn Fabrics – JoAnn’s prices may be steeper than other retailers, but you CAN use a 50% coupon off your entire foam purchase. When stacked with holiday weekend sales (i.e., Memorial Day, July 4th, Labor Day, etc), you can really score a great deal. However, sometimes stock can be limited if you need a lot.
- Amazon – I was actually quite surprised at how much of a selection exists on Amazon. They carry pretty much every dimension and thickness; and the prices are super competitive if you’re willing to wait and buy sight unseen.
How to Cut Upholstery Foam
With your foam and electric knife in hand, it’s time to cut your foam down for your project!
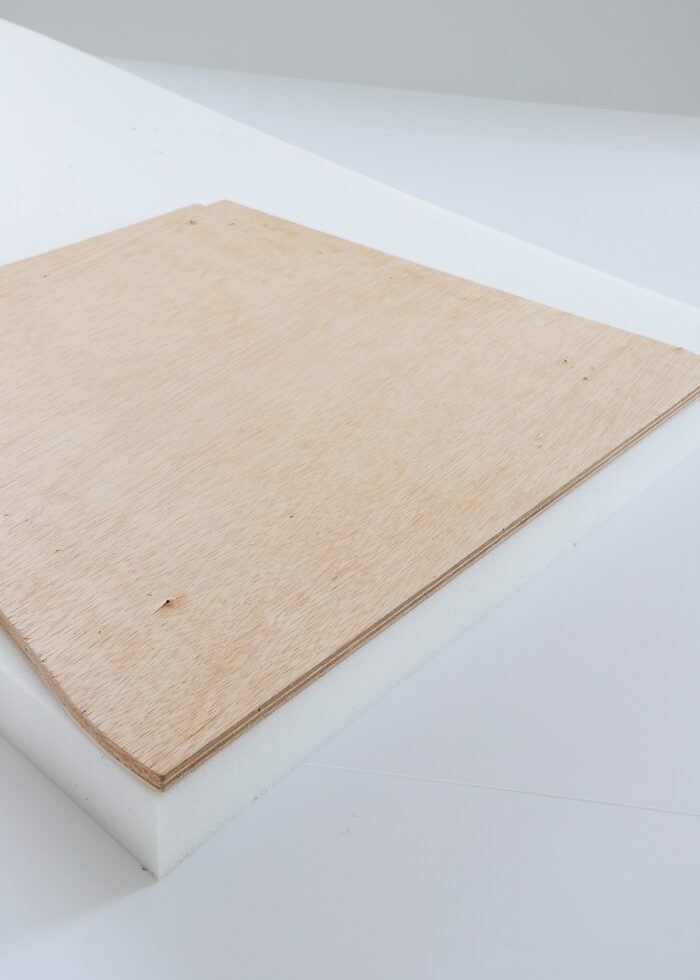
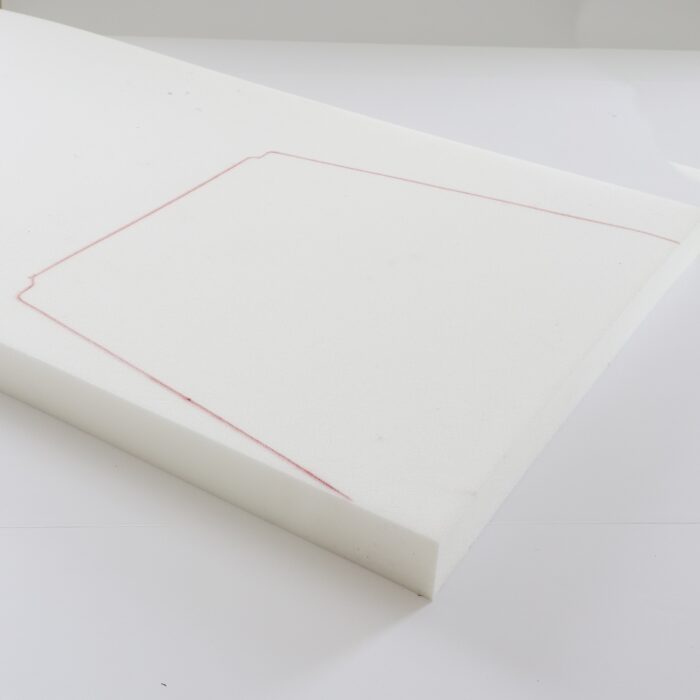
Step 1: Trace Shape or Measure Dimensions Onto Foam
In order to cut your foam cushion into the exact size and shape you need, you’ll want to create clear cut lines. Do not use an existing cushion since it can be squished and deformed.
Do this instead:
- If you have an existing (wood) platform (from a chair, bench, stool, etc), the easiest option is to trace it directly onto the foam.
- If you cannot trace a firm base, use a measuring tape to identify the correct dimensions from the furniture item itself; then translate the measurements to the foam with a ruler or straight edge.
You might be tempted to use a pencil or pen to mark the foam, but I’ve learned they don’t quite make a visible enough line. Instead, reach for a marker that will create a nice bright line to follow with your cutting tools.
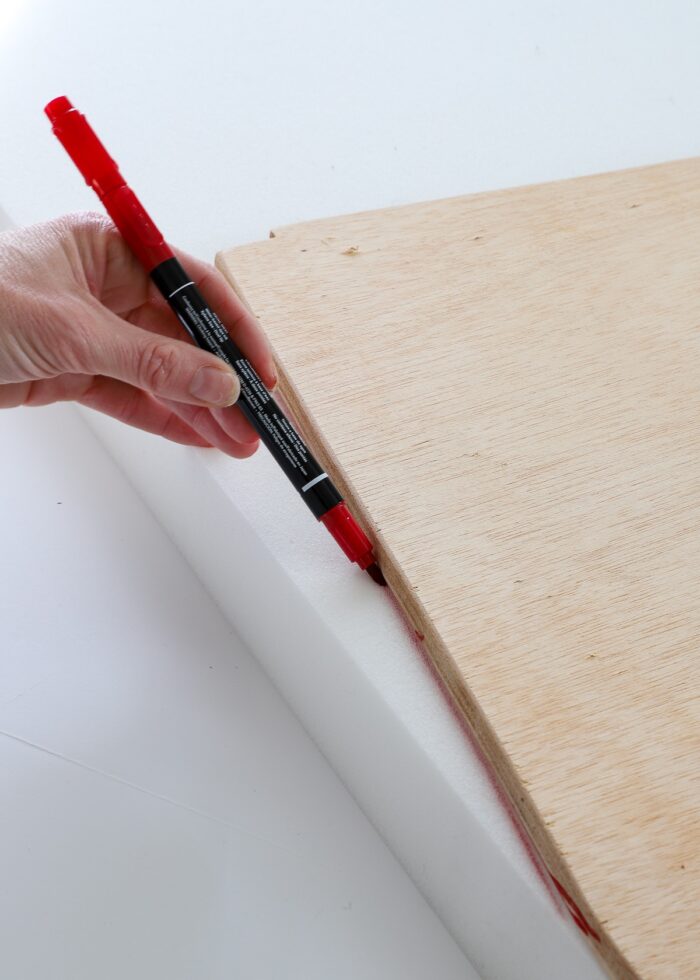
When deciding how and where to trace on the foam itself, I always recommend using the edge of the foam whenever possible. (See how my seat front runs along the edge of the foam?) This not only gives you one less edge to trim, but ensures the front-facing edge of your cushion is perfectly crisp, clean, and straight!
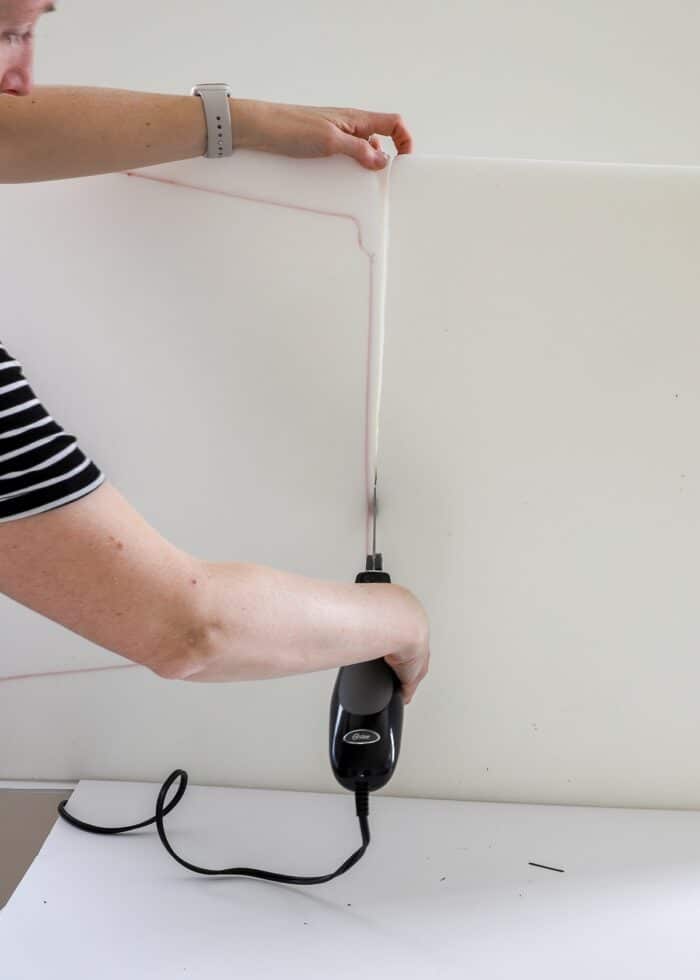
Step 2: Slice Away Large Sections In Straight Lines
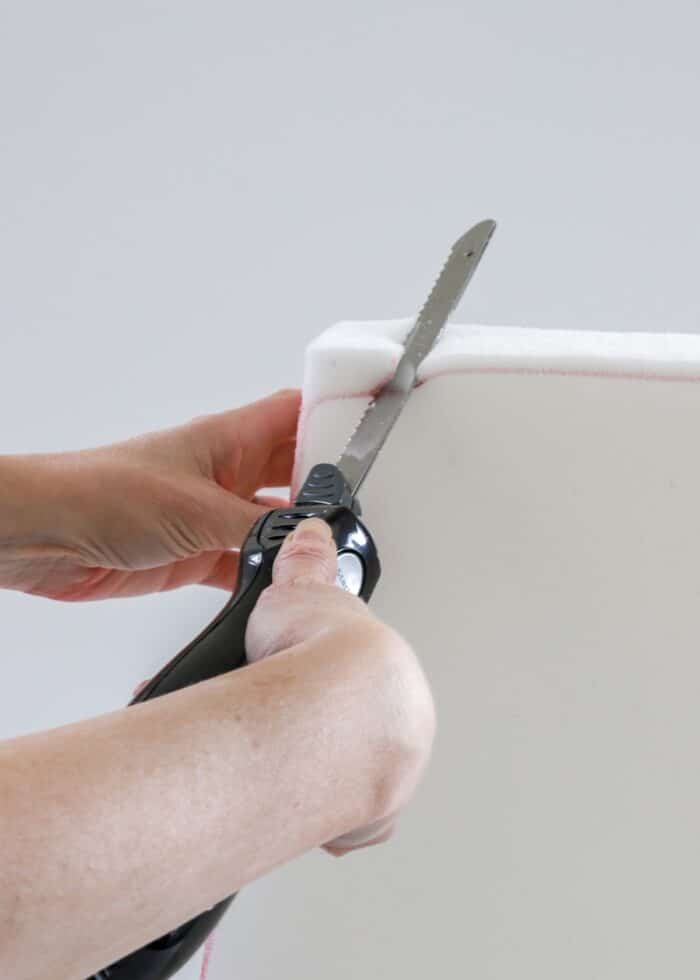
Next, use an electric cutting knife to slice the foam along your lines. Cutting off larger sections (2″+ inches) is much easier than making thin slivers, so do your best to get your cut right the first time through.
Sometimes, the pressure you exert on the foam (for the knife blade to cut through) can compress the foam and make it hard to see where you’re going. Create tension by using one hand to pull the foam upward (my left hand, below) as you press the knife downward (my right hand, below).
Step 3: Carve Out Notches & Details
With the larger sections cut away, use either the electric knife or a large-blade scissors to trim out notches, grooves, or other details. While I don’t love scissors for cutting long, straight lines, they are sometimes easier to manipulate for smaller details.
Don’t hesitate to shave or carve away at jagged edges and corners until you have the exact shape you need!
Step 4: Re-Cover with Batting & Fabric
With your foam cut down to size, you can then proceed with wrapping it in batting and fabric or even a custom-sewn cover. If you need help, here are some follow-on tutorials with more information:
- How to Recover a Chair or Bench Cushion | Video
- How to Sew Boxed Corners
- How to Make Piping
- Easy DIY Barstool Slipcovers
Cutting down high-density upholstery foam to update cushions, chairs, stools, ottomans, or even RV mattresses may feel complicated and intimidating, but I assure you it’s not! By taking your time and using a trusty electric carving knife, you can easily cut down foam into any size, shape, and dimensions you need.
So if there’s a cushion update project you’ve been needing to tackle, here’s your encouragement to finally do it. I promise you it’s not as hard as you think!
Megan


3 Comments on “How to Cut Upholstery Foam | Easy & Precise”
Any ideas on what to do with the leftover foam? This was a very helpful article – I did my dining room chairs, and it was quite a struggle with just scissors! Thanks, Tenney
Do not have a electric knife ,don’t know anyone with one how ,to cut hue .foam
I am making a 114″ X 69″ window seat cushion. I have a 4″ high piece of foam and I must cut off 1/2″ to have a 3 1/2″ high foam piece. I have cut alot of foam before. I will draw lines around the perimeter of the foam to know where to cut. Because the foam is so big it is impossible to see where the knife is going. I’m afraid the top of the foam will end up very jagged. Is there any technique that I can use for this?